

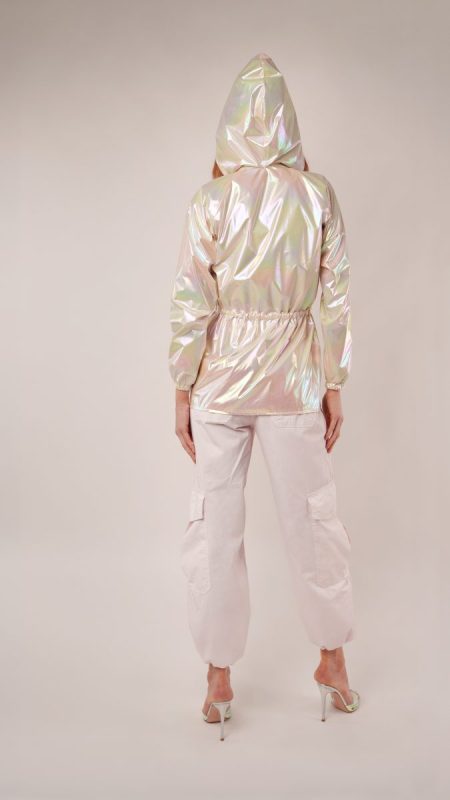
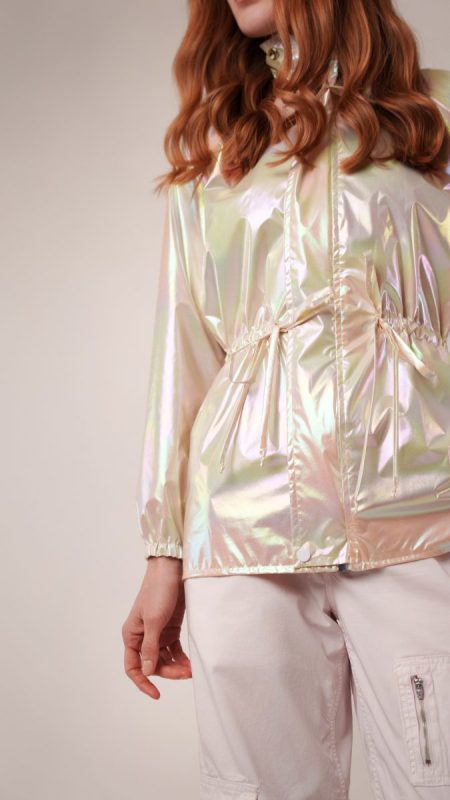
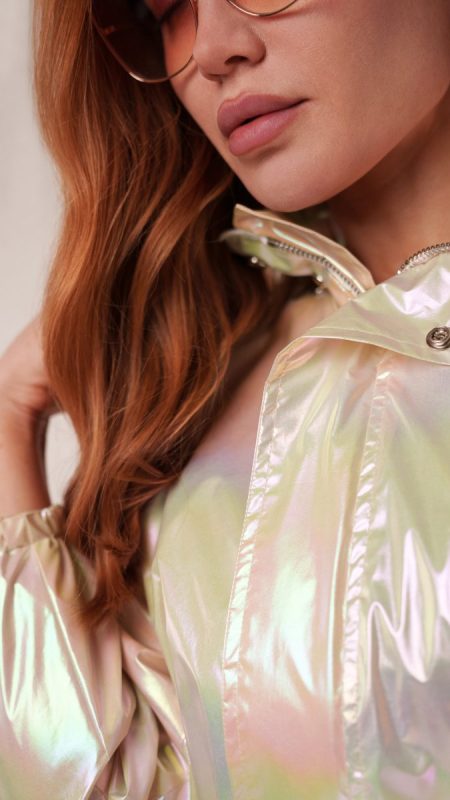
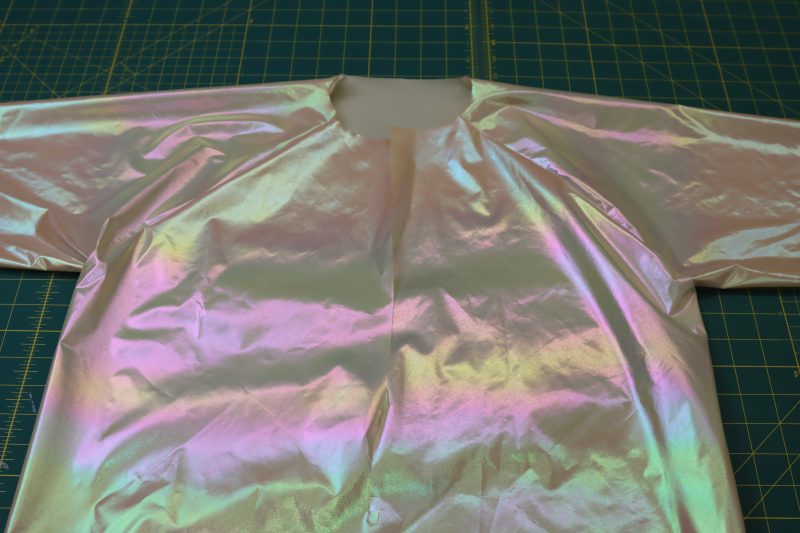
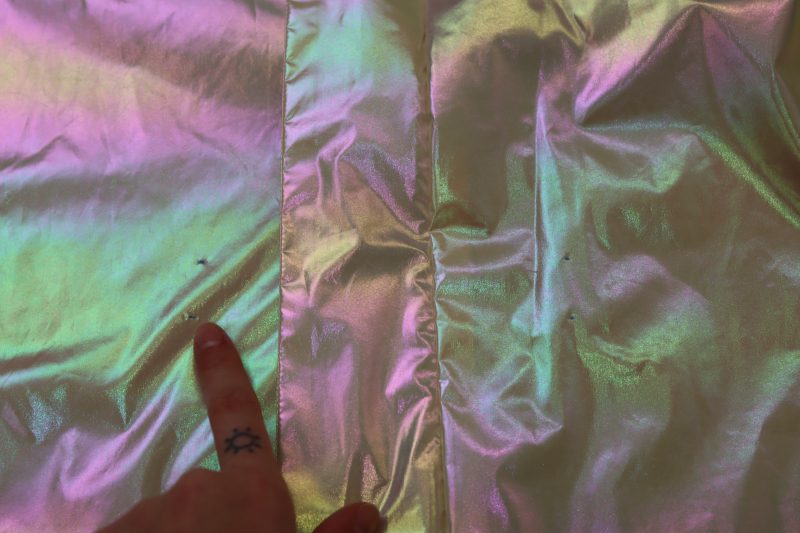
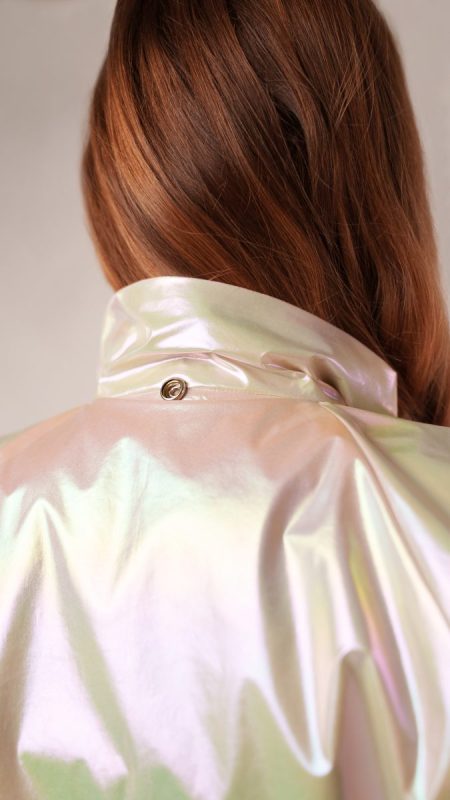
Some garments are made for blending in. The Ametrine Anorak was made for the exact opposite. With the luminous metallic finish and soft pearlescent glow of the lame jacketing, this rain jacket turns even the grayest forecast into something worth stepping outside for.
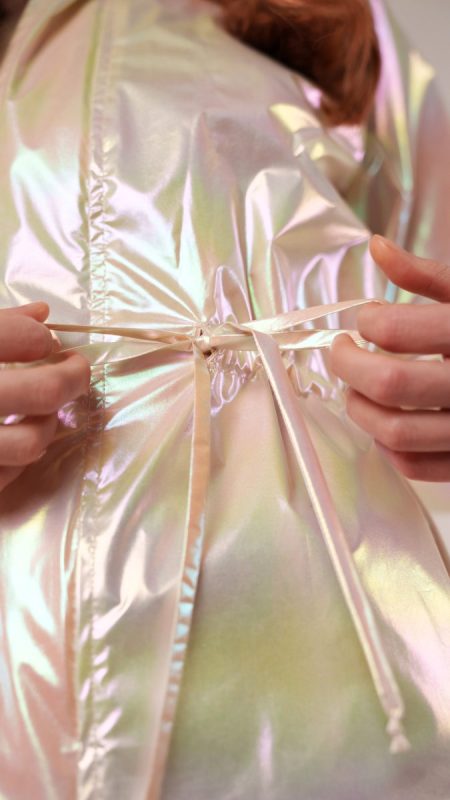
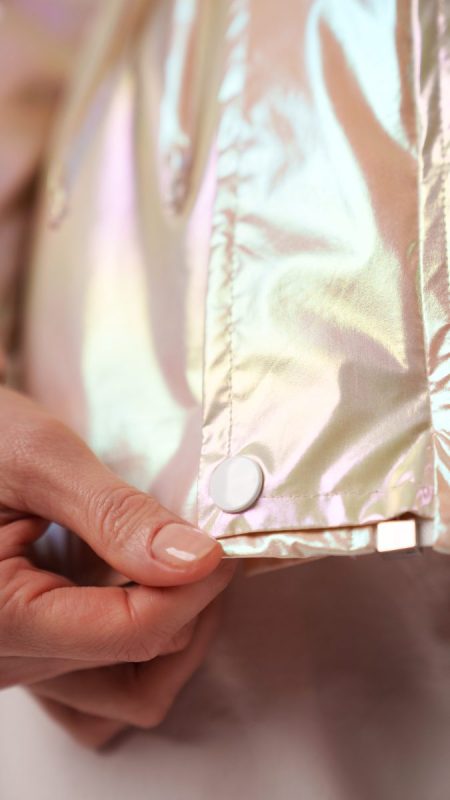
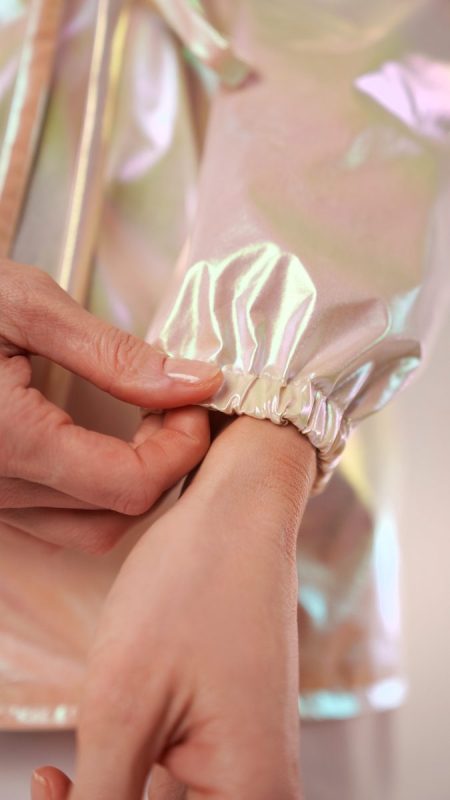
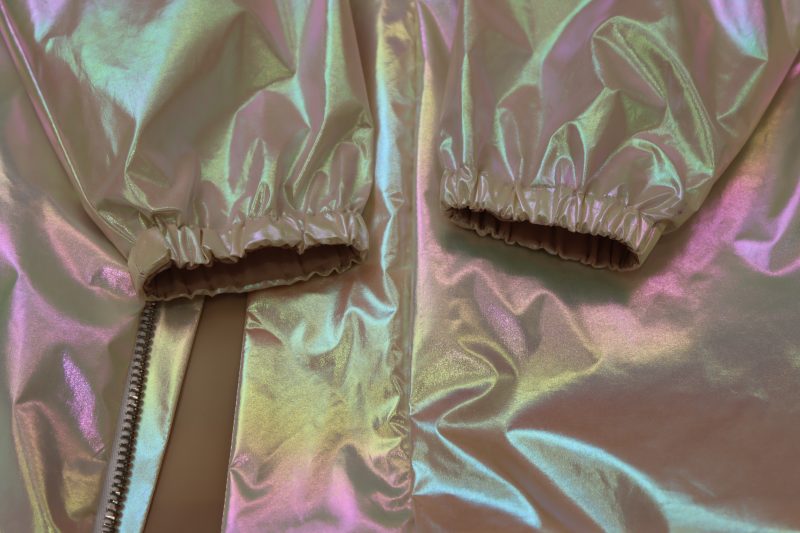
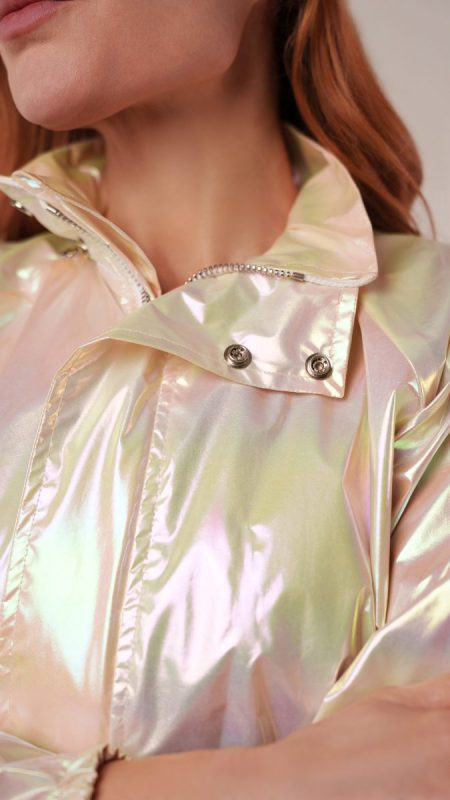
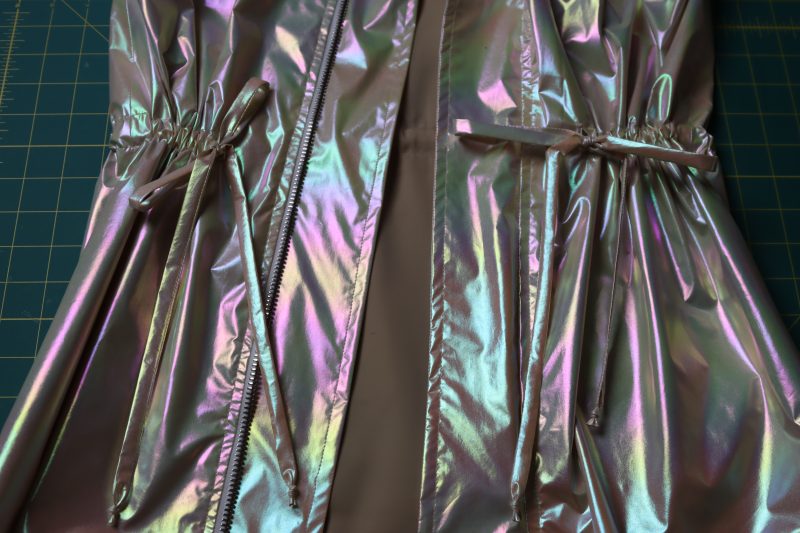
Designed with both style and practicality in mind, this anorak is full of thoughtful details that make it as functional as it is eye-catching. A drawstring waist allows you to adjust the shape to your liking, while elastic at the sleeve openings helps keep out wind and rain. Snaps layered over the front zipper add extra protection, and the high collar provides a cozy barrier against chilly spring showers. The detachable hood features a structured brim that helps shield your face from rain and bright sun alike.
The Ametrine Anorak is the kind of project that makes you look forward to unpredictable weather. Whether you are heading out for errands, exploring the city, or simply embracing a rainy afternoon, this jacket brings a little shimmer and a lot of personality to your handmade wardrobe.


Essential Materials & Sizing Guide for the Ametrine Anorak
Continue reading for a breakdown of what knowledge and materials you need for creating your very own anorak jacket! We’ve got you covered with the recommended materials we used—if you want to follow along exactly—as well as a curated list of alternative fabric type recommendations if you want to customize your own version. The Ametrine Anorak free sewing pattern download includes technical drawings for seam and silhouette visibility, plus a size chart to help you find your perfect fit!
Purchase Products Used Below:
Quantities indicated are for sewing a size small* anorak. Toggle the ‘SHOP THIS LOOK’ box to find quantity estimates for other sizes.
- 3 yards of Metallic Lame Jacketing – Pastel Rainbow Ombre Stripe on Light Yellow – Inez Collection
- 3 yards of Stretch Polyester Twill Lining – Beige – Josephine Collection
- 1 yard of Stiff White Non-Woven Interlining
- 1 yard of White Elastic – 0.5″
- 1 each of Dritz Heavy Duty Snap Fastener Kit with Tools – White – 7 Sets
- 1 each of Mood Exclusive Italian Off-White and Silver T8 Open End Metal Zipper – 27.5″
- 1 each of Mood Exclusive Italian Large Silver Rounded Edge Metal Zipper Pull
- 1 each of Gutermann Sew All Thread 250m – 30 Bone
- MDF512 – Ametrine Anorak Sewing Pattern (Free download below!)
Additional Products Used:
*Quick Tip! The ‘SHOP THIS LOOK’ box defaults to full-yard quantities. To order an exact half-yard quantity for any fabric, simply use the decrease quantity button (-) to subtract by the half yard. Then click “ADD TO CART” to add all materials to your cart. (Our system can only display full-yard quantities initially.)
Alternative Fabric Type Recommendations:
The Ametrine Anorak sewing pattern is best suited for medium weight fashion fabrics. Explore other fabric types or colors from our featured collections for your anorak jacket with the links below.
Fabric Collections Used in this Post:
Download Your Free Sewing Pattern
Submit your name and email in the form below to receive the download link for the Ametrine Anorak free sewing pattern directly in your inbox. Mood Sewciety Patterns will send your free download link via email with the subject line: ‘Your Free Download from Mood Sewciety – The Ametrine Anorak’ (in PDF format for A4 and letter-size printing).
© MoodFabrics.com / MoodSewciety.com – Mass production, resale, or distribution of this pattern in any form is strictly prohibited.
Find Your Perfect Fit
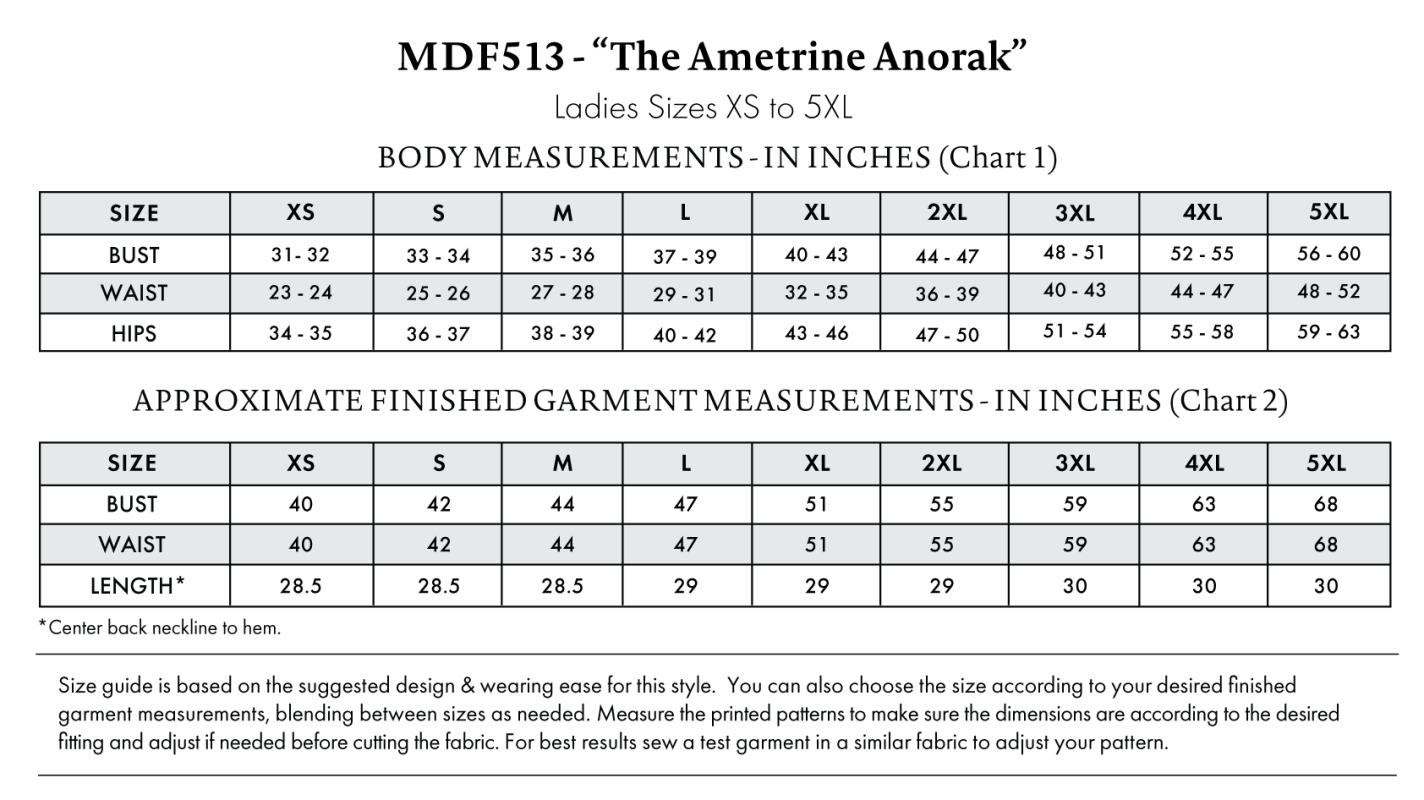
The Ametrine Anorak Sizing Guide is based on the suggested design & wearing ease for this style. You can also choose the size according to your desired finished garment measurements, blending between sizes as needed. Measure the printed patterns to make sure the dimensions are according to the desired fitting and adjust if needed before cutting the fabric. For best results, sew a test garment in a similar fabric to adjust your pattern.
Note: Always read all the instructions before cutting the fabric!
How to Sew The Ametrine Anorak
The instructions provided below are designed to guide you through sewing the Ametrine Anorak from start to finish.

3 Tips for Sewing with Lame
⇒ Despite how it looks, you CAN iron this fabric on low heat, and I recommend you do so between seams.
⇒ Use lots of pins, this fabric was really slippery while I was making this anorak.
⇒ Optionally, there are a lot of places in this jacket where you can use fusible interfacing other than just the brim of the hat. You can use it to structurally support the zipper or even put a layer in the flap that covers the zipper at the front of the jacket.

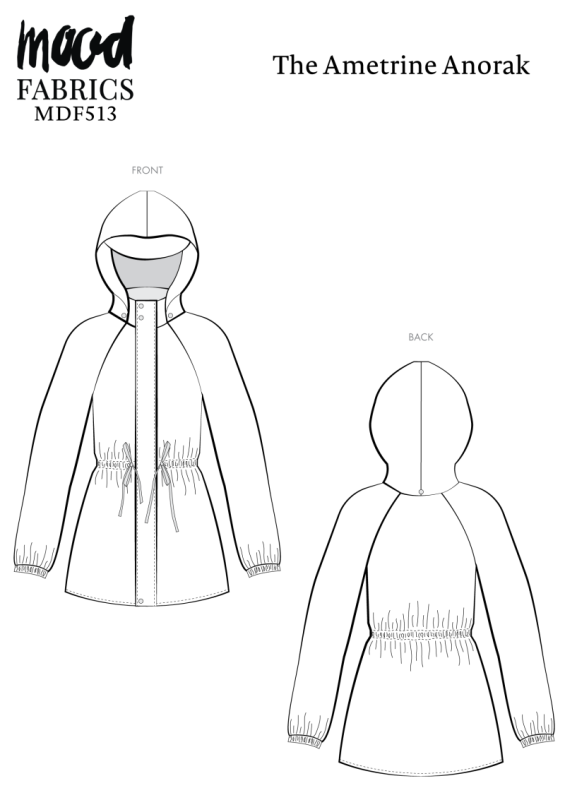
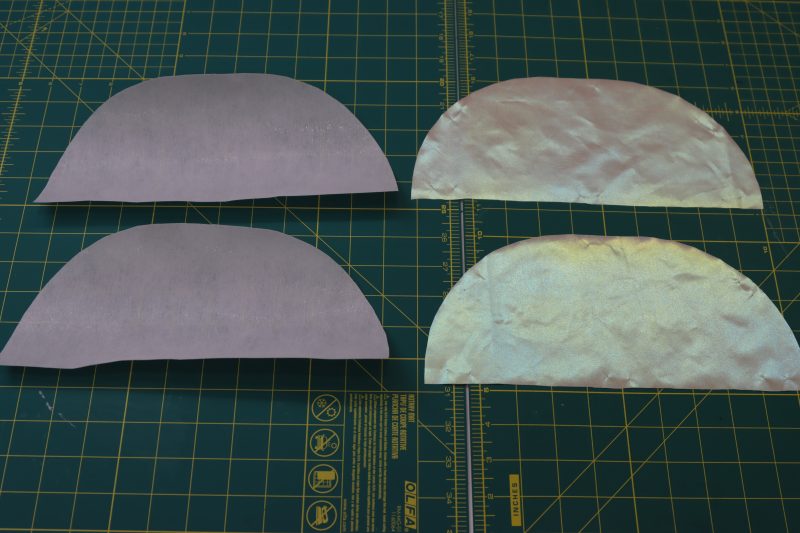
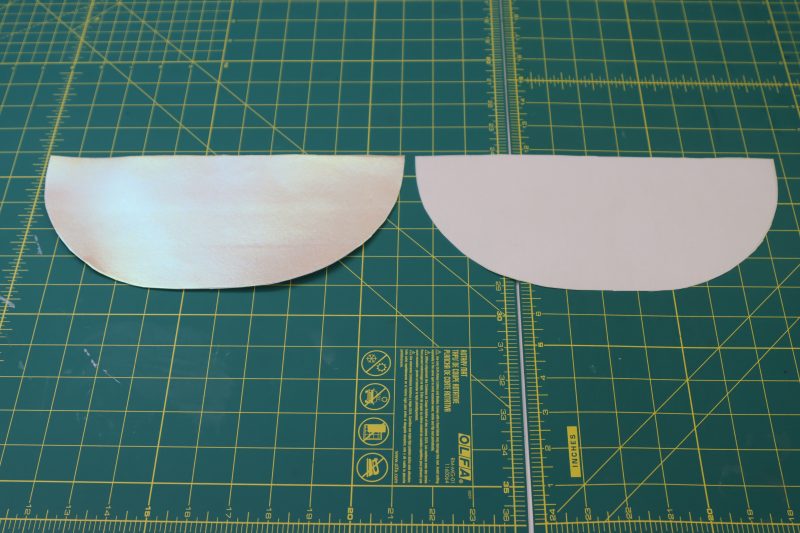
Pattern Pieces & Fabric Cuts Needed
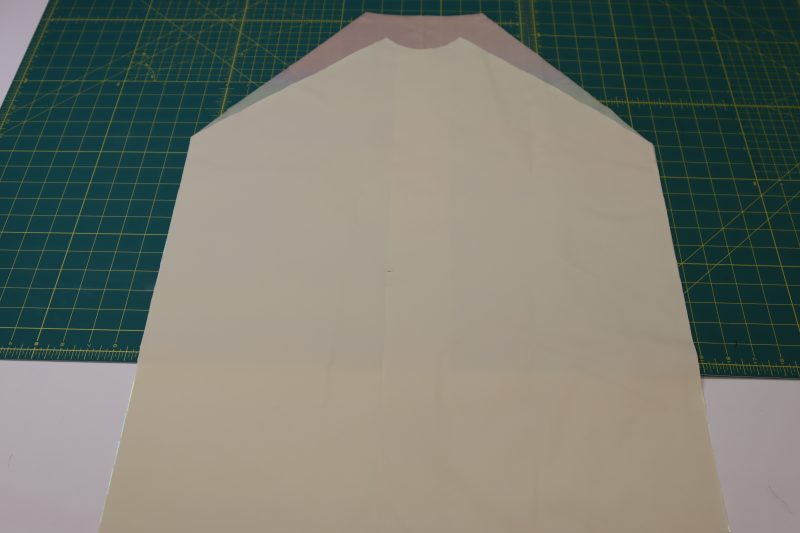
- (A) BACK
- Fabric – Cut 1 on Fold
- Lining – Cut 1 on Fold
- (B) FRONT
- Fabric – Cut 2 Mirrored
- Lining – Cut 2 Mirrored
- (C) FRONT PLACKET
- Fabric – Cut 4
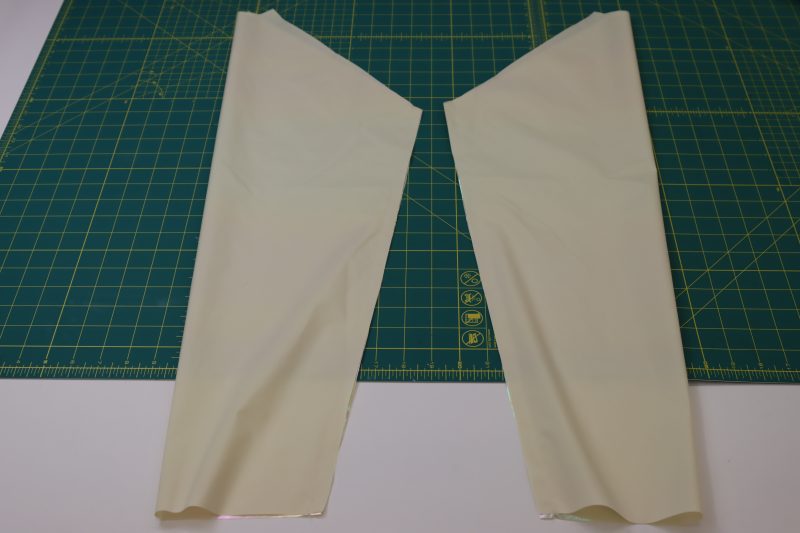
- (D) SLEEVES
- Fabric – Cut 2 Mirrored
- Lining – Cut 2 Mirrored
- (E) COLLAR
- Fabric – Cut 2 on Fold
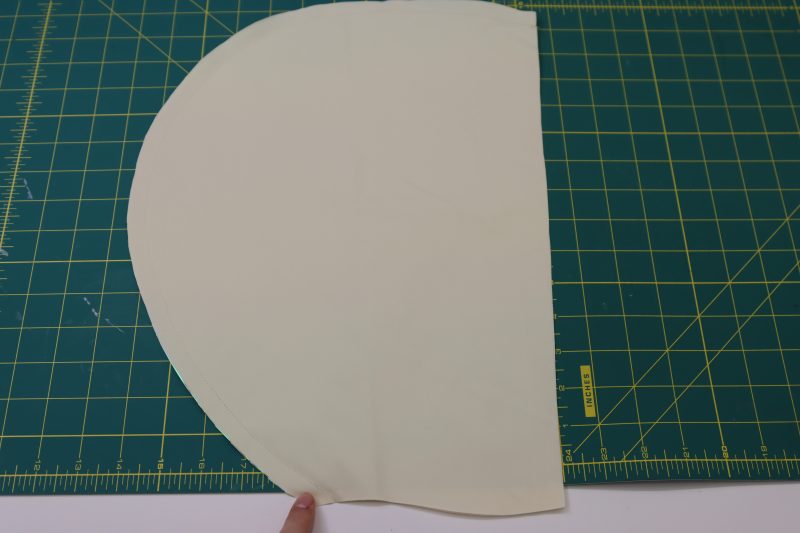
- (F) HOOD
- Fabric – Cut 2 Mirrored
- Lining – Cut 2 Mirrored
- (G) BILL
- Fabric – Cut 2

Sew with a 1/2″ seam allowance for all seams unless otherwise specified.

Step 1
SIDE SEAMS
- Place the front jacket pieces on top of the back jacket piece right sides together with the sides lined up.
- Pin and sew the front and back jacket pieces together at the side seams.
- Open your seams and press them flat.
- Repeat this step for both the main fabric and the lining.
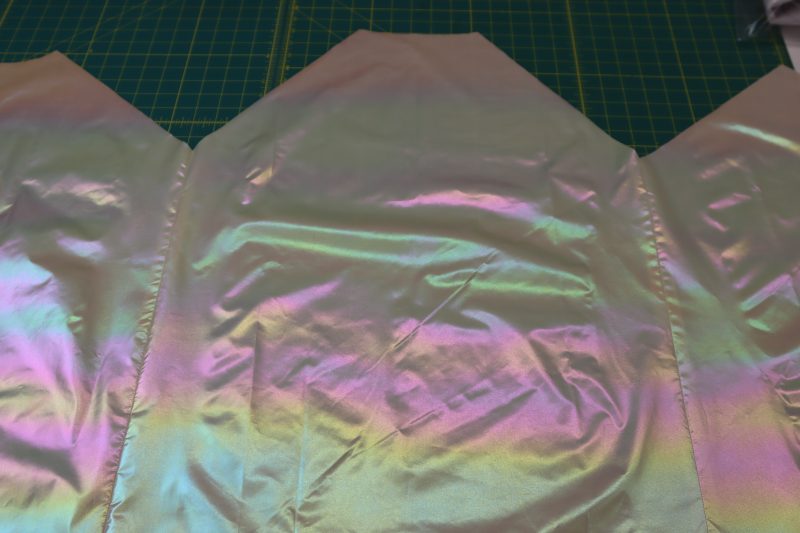
Step 2
SLEEVES
- Fold the sleeves right sides together with the sleeve inseams lined up.
- Pin and sew the sleeve inseams.
- Pin the sleeve to the raglan armscye, making sure the seams are lined up in the armpit.
- Sew the sleeves to the raglan armscye.
- Open your raglan seams and press them flat.
- Repeat this step for both the main fabric and the lining.
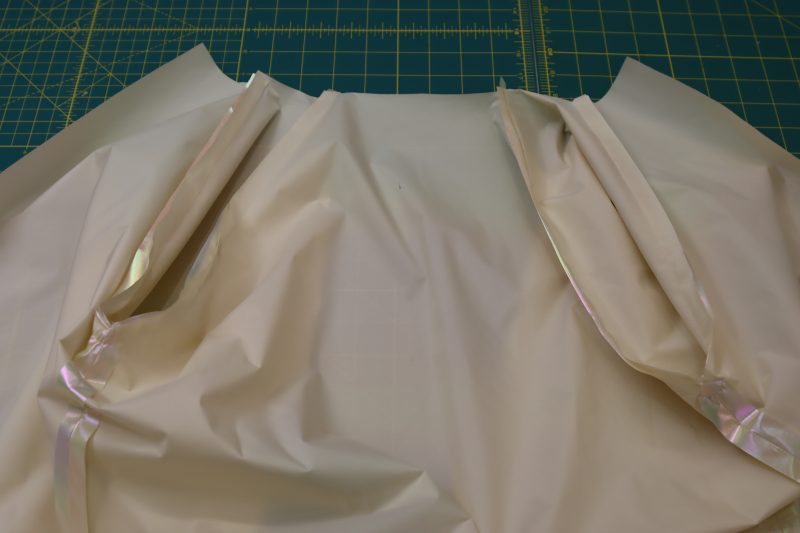
Step 3
PLACKETS
- Make two piles of zipper plackets where each pile has two plackets that are facing right sides together.
- Pin and sew the two short ends and one of the long ends.
- Clip the corners of the plackets.
- Flip the plackets right sides out.
Step 4
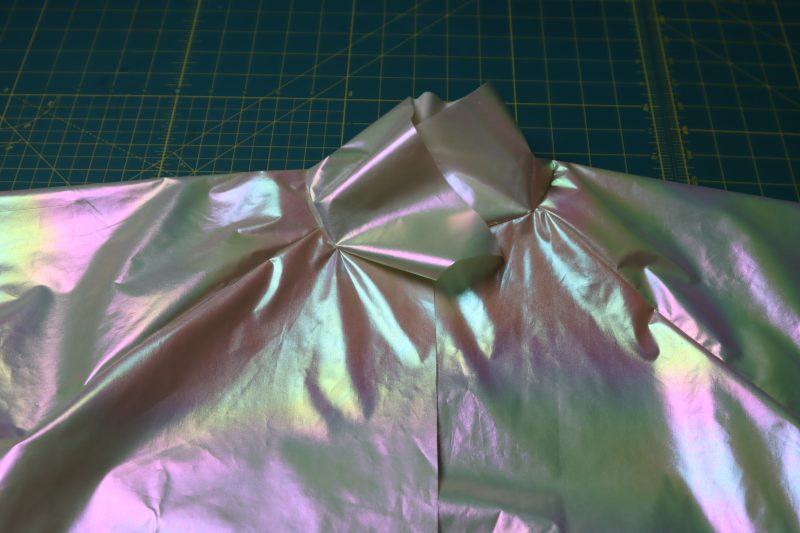
COLLAR
- Pin the collar to the neckline of the jacket.
- Sew the collar to the neckline.
- Flip the collar up.
- Repeat these steps for both the lining and the main fabric.
Step 5
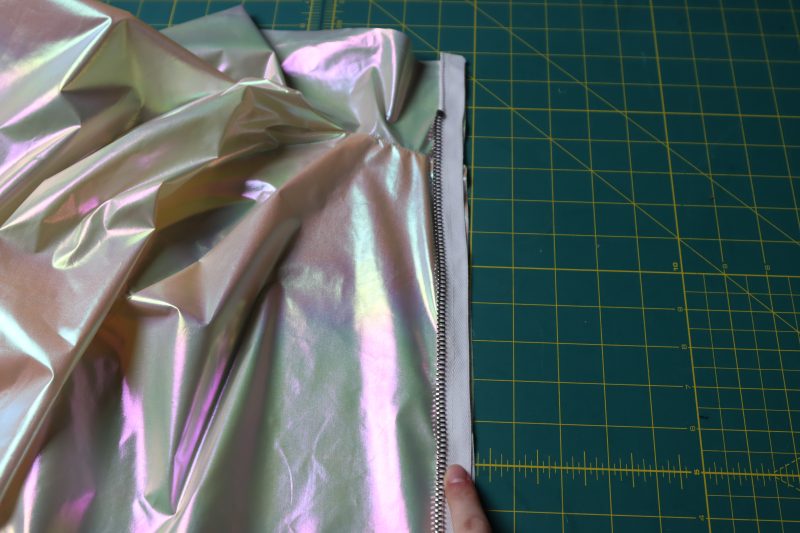
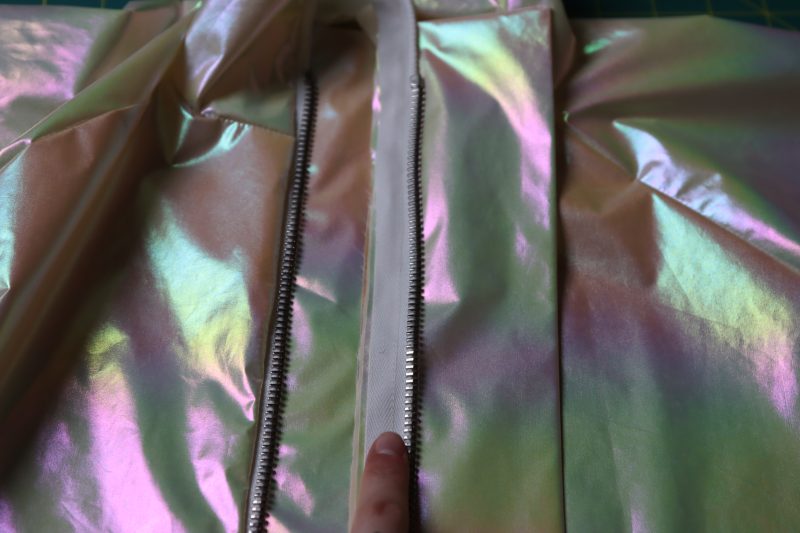
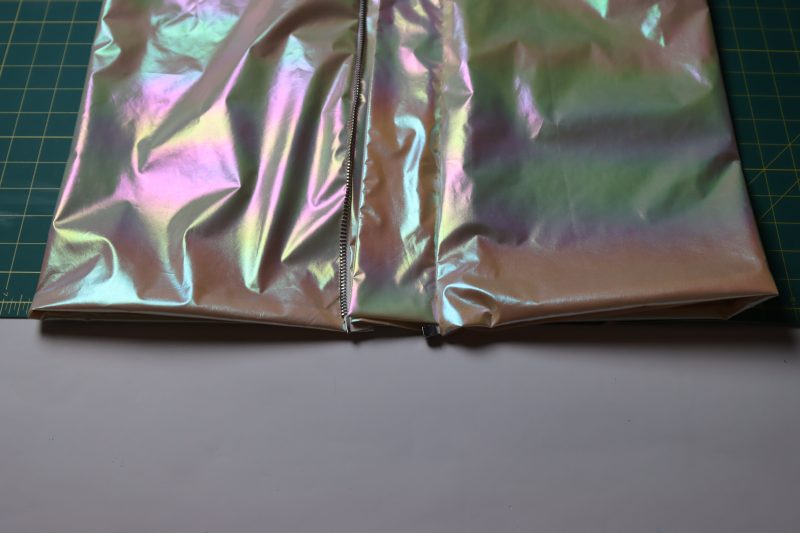
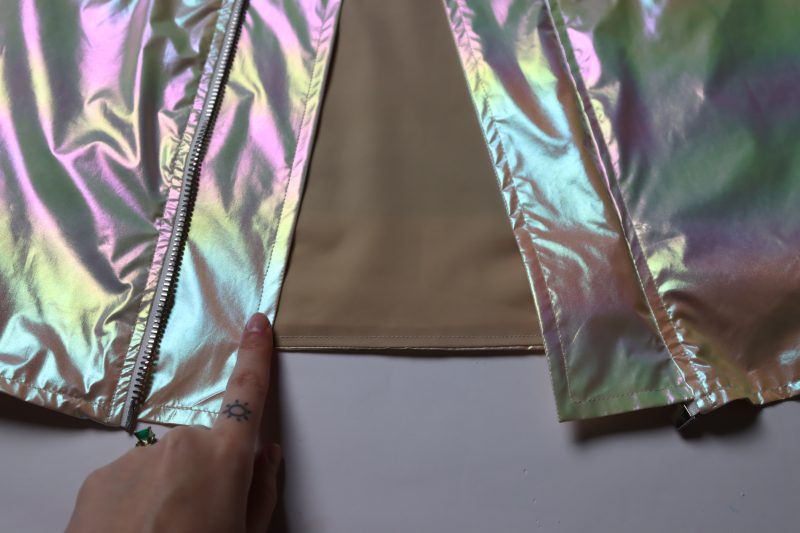
ZIPPER
- Place the zipper right sides together with the wearer’s right side of the center front opening.
- Sew the side of the zipper tape closest to the raw edge of the center front of the jacket.
- Pin one of the zipper plackets on top of the zipper then sew in place over the seam you just sewed. This just created the inner zipper placket.
- Unzip and separate the zipper.
- Pin the other zipper placket onto the wearer’s left side of the center front opening.
- Pin the other half of the zipper on top of the placket on the left side of the jacket, making sure the teeth are facing away from the raw edge of the jacket and the tape is face down on the placket.
- Sew the other side of the zipper and the outer placket in place.
- Press the seams on either side of the zipper.

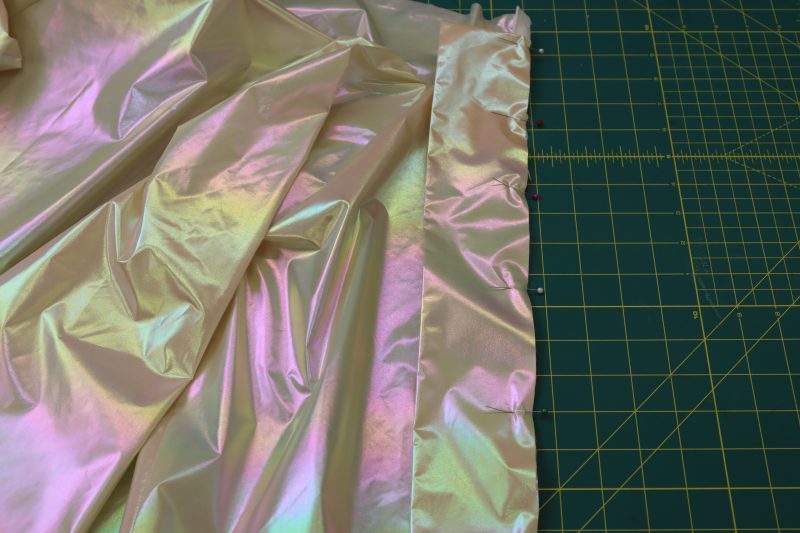
Step 6
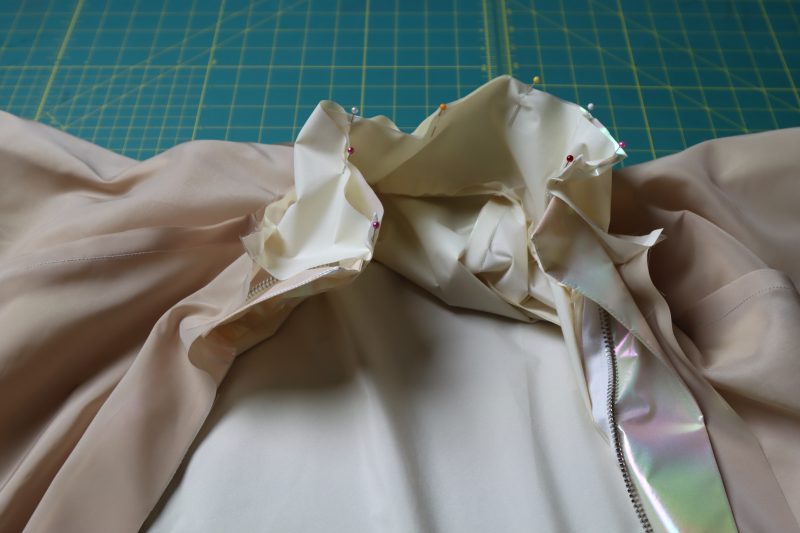
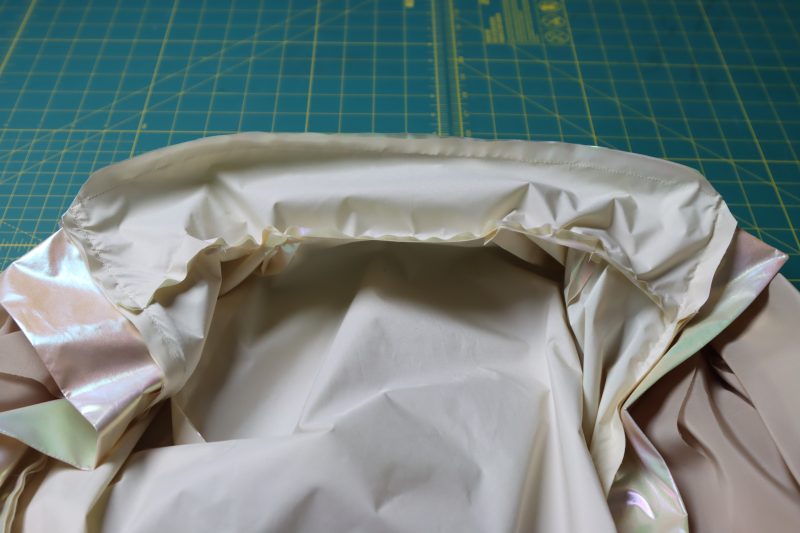
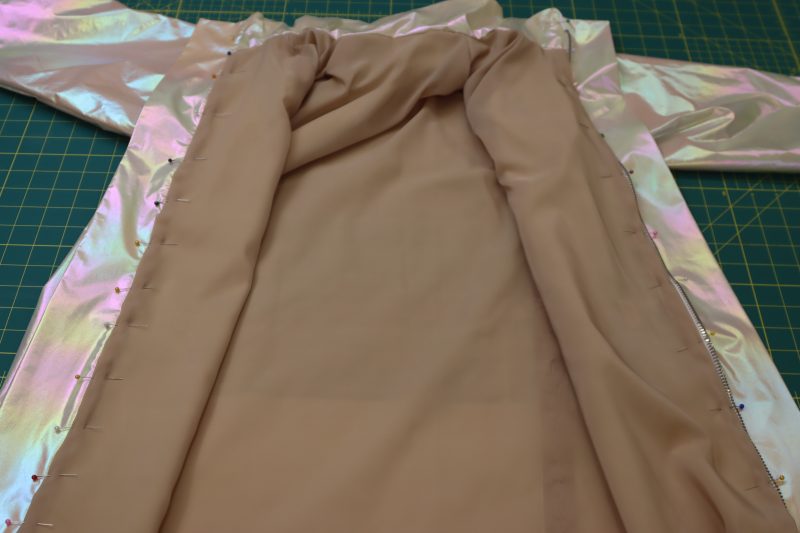
ATTACH LINING
- Place the main fabric jacket inside of the lining jacket, right sides together.
- Pin and sew the collars together at the top edge.
- Clip the corners of the collar.
- With the layers still facing right sides together, sew the lining to the shell at the bottom hem of the jacket.
- Flip the layers right sides out and press the bottom hem and collar.
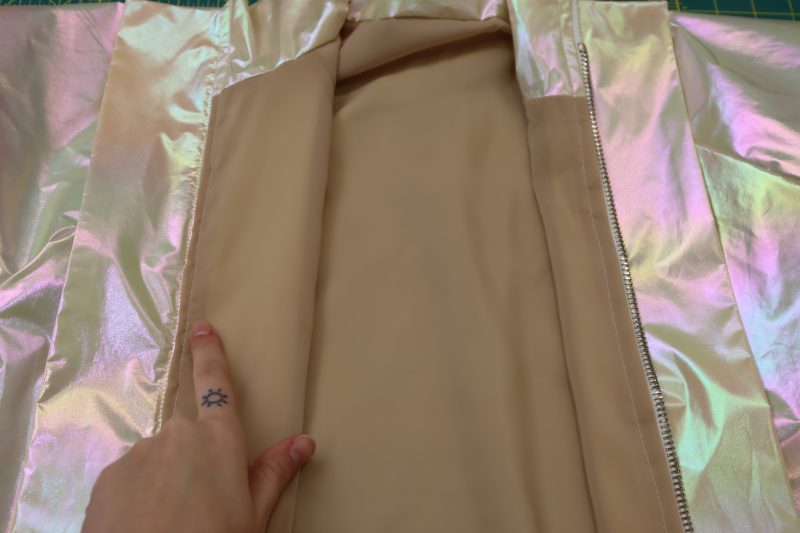
Step 7
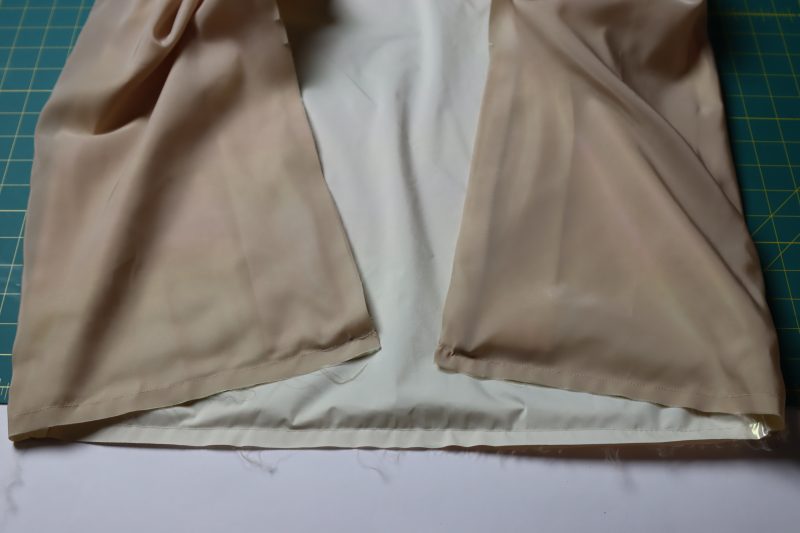
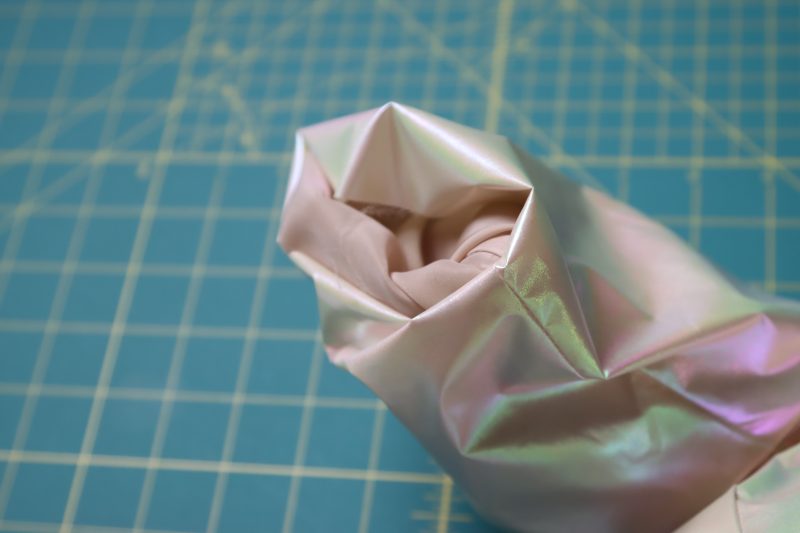
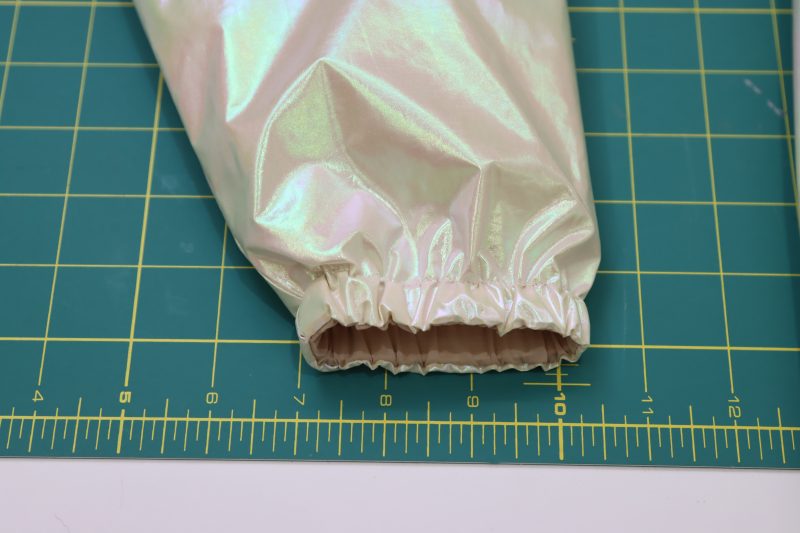
SLEEVE HEM
- Reach in between the lining and the shell at the center front opening.
- Reach into the sleeve between the two sleeve layers.
- Grab the ends of the sleeve and pinch them between your fingers, right sides together.
- Pull the ends of the sleeves through the center front opening and place a pin where your fingers were.
- Pin all the way around the sleeve opening, keeping the fabrics right sides together.
- Sew the sleeve opening.
- Flip the sleeve back out from between the lining.
- Press the seam at the ends of the sleeves.
- Repeat for both sleeves.
Step 8
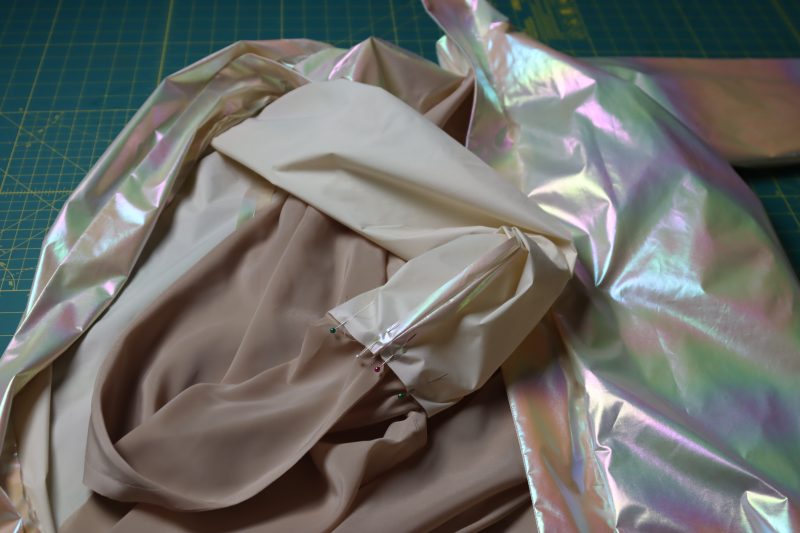
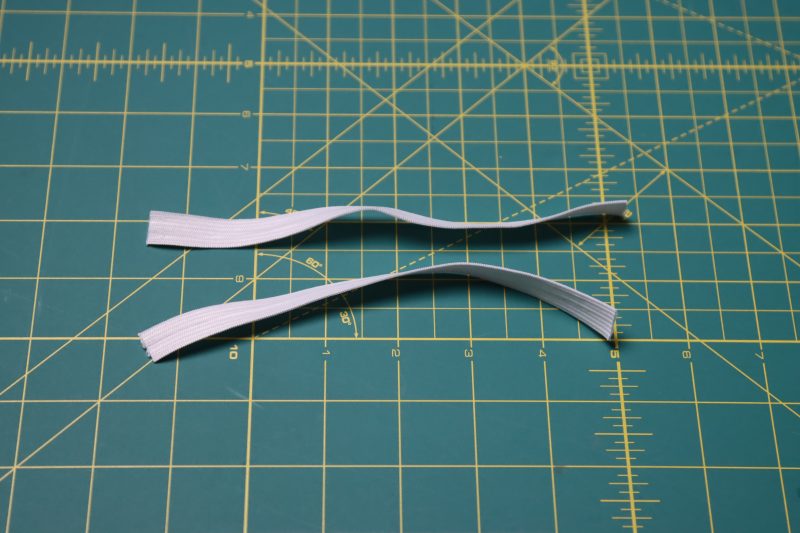
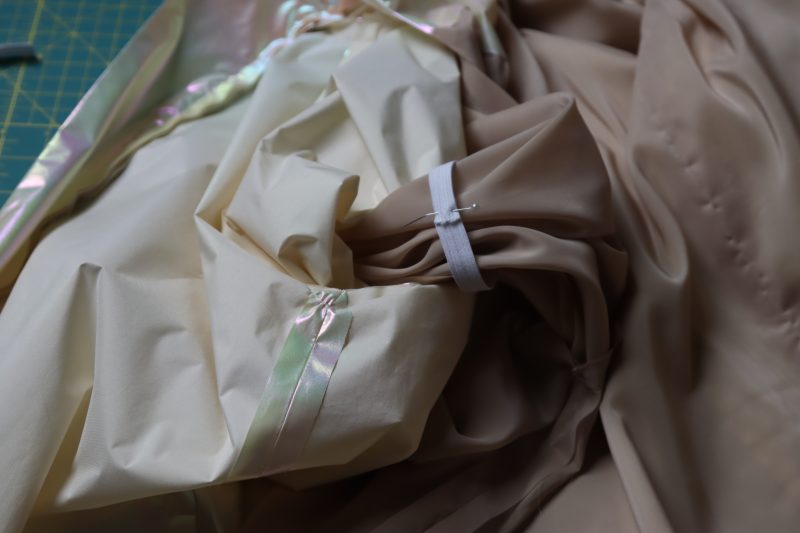
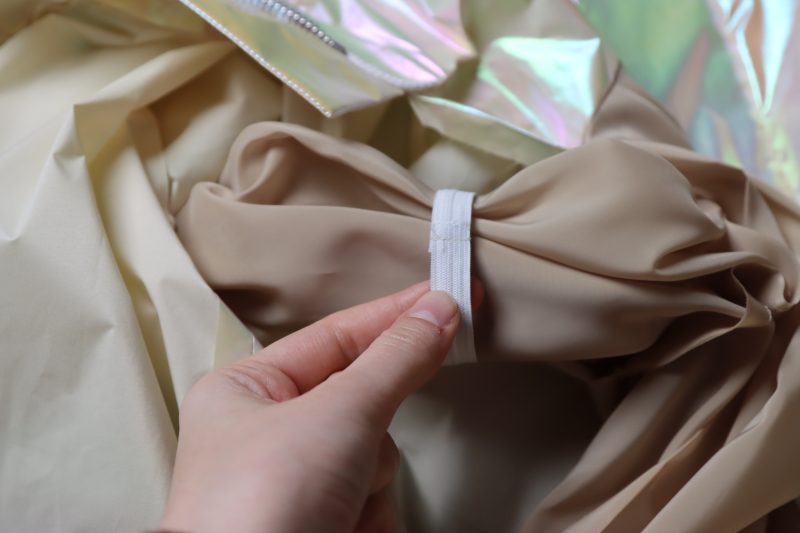
SLEEVE ELASTIC
- Cut two pieces of elastic that are the same length as the circumference of your wrist unstretched.
- Reach in between the lining and the shell at the center front opening.
- Grab the lining sleeve and wrap the elastic around it in a loop.
- Pin and sew the elastic into a loop.
- Push the elastic loop all the way down to the sleeve hem.
- Pin the elastic evenly around the sleeve hem.
- Sew just under the elastic to create a casing for it at the sleeve hem.
- Repeat for both sleeves.

Step 9
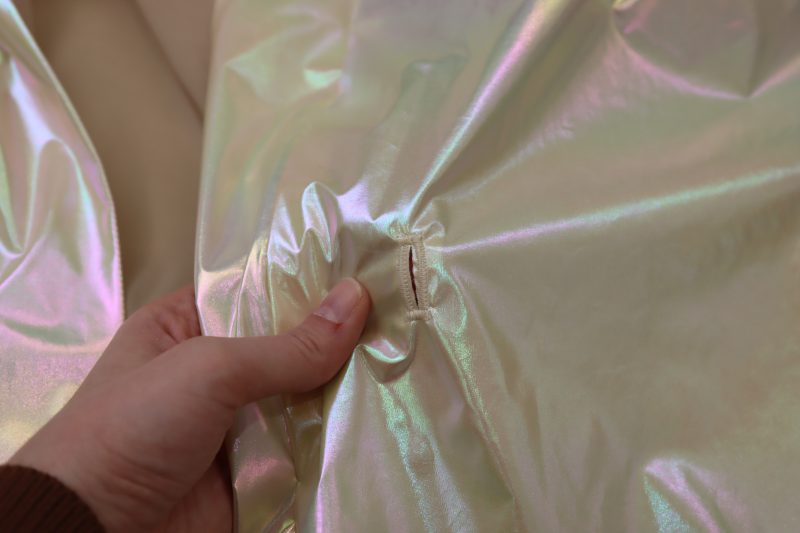
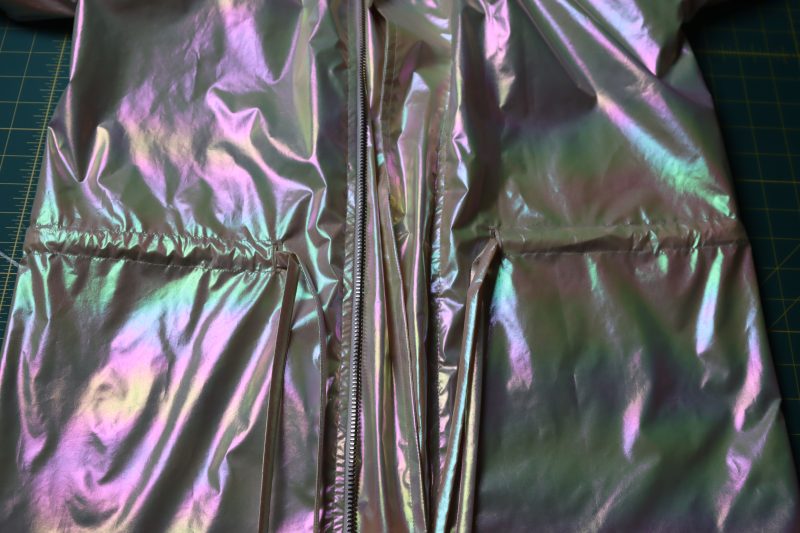
DRAWSTRING OPENING
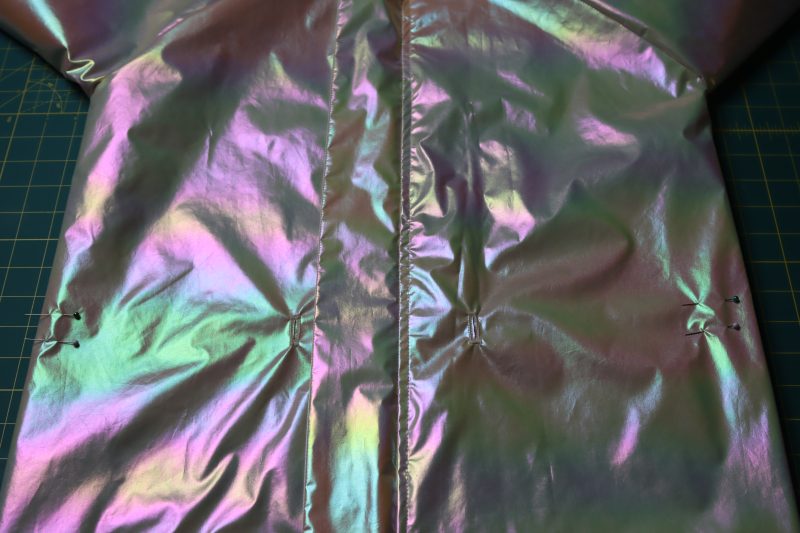
- Mark the openings of your drawstring casings with tailor’s chalk.
- Sew buttonholes on the markings (I also put an extra little layer of fabric behind the main fabric to give the buttonhole something to hang onto so that it was more secure). Note: ONLY sew the buttonholes through the main fabric on the outside of the jacket. DO NOT sew the buttonhole into the lining.

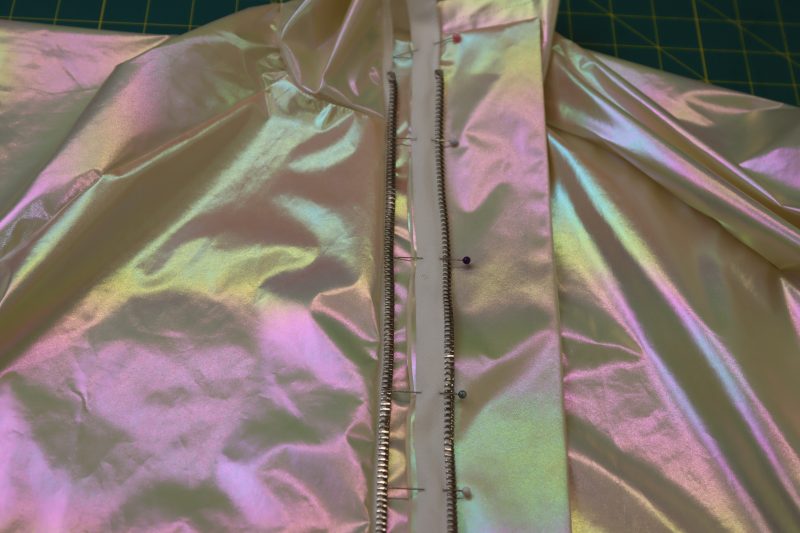
Step 10
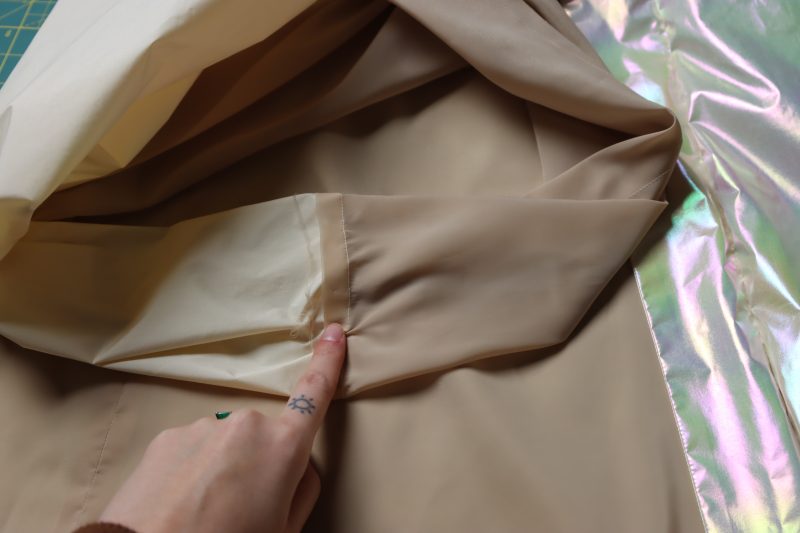
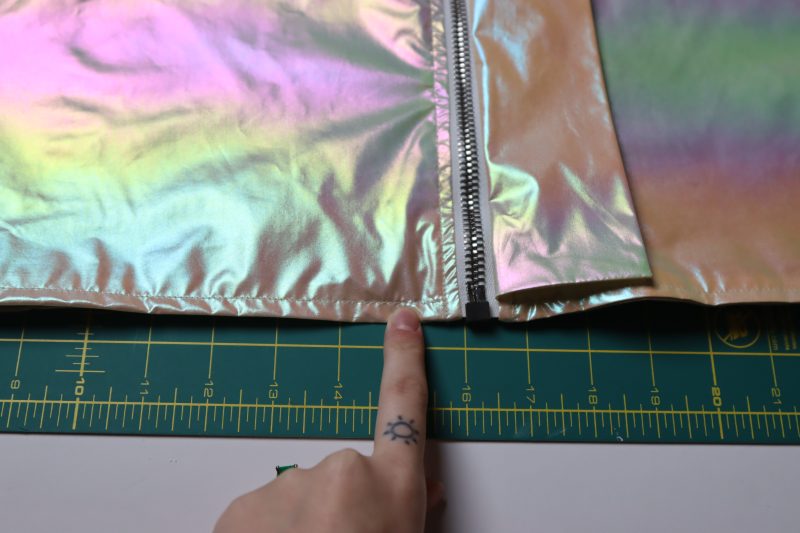
TOPSTITCH LINING
- Fold the center front lining by ½ inch toward the inside of the jacket and press the fold in place.
- Pin the folded edges to the wrong side of the zipper tape.
- Topstitch the lining to the zipper tape.
Step 11
TOPSTITCH HEM
- Topstitch the bottom hem of the jacket with a ¼ inch seam allowance.
Step 12
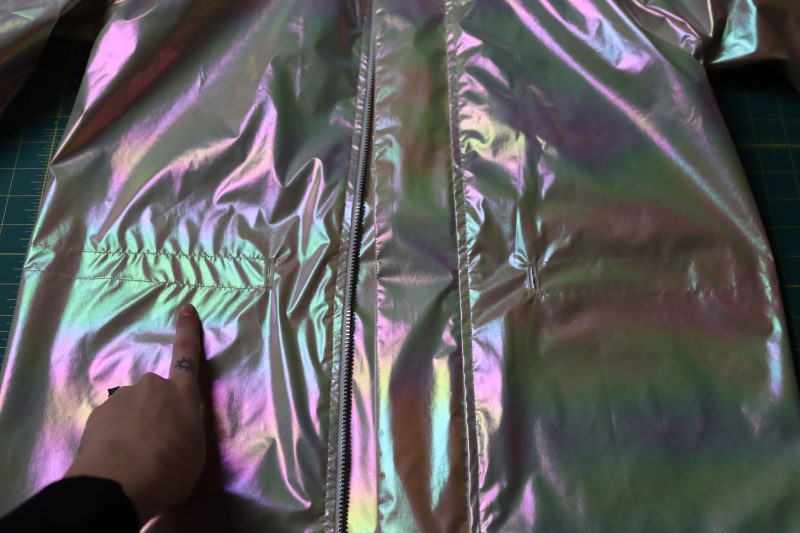
DRAWSTRING CASING
- Mark the top and bottom of the drawstring casing using pins, making sure the pins go through both the shell and the lining.
- Sew two parallel straight stitches starting at one of the buttonholes, sewing around the back of the jacket, and ending at the other buttonhole.
Step 13
TOPSTITCH PLACKETS
- Topstitch both the inner and outer zipper plackets using a ¼ inch seam allowance.
Step 14
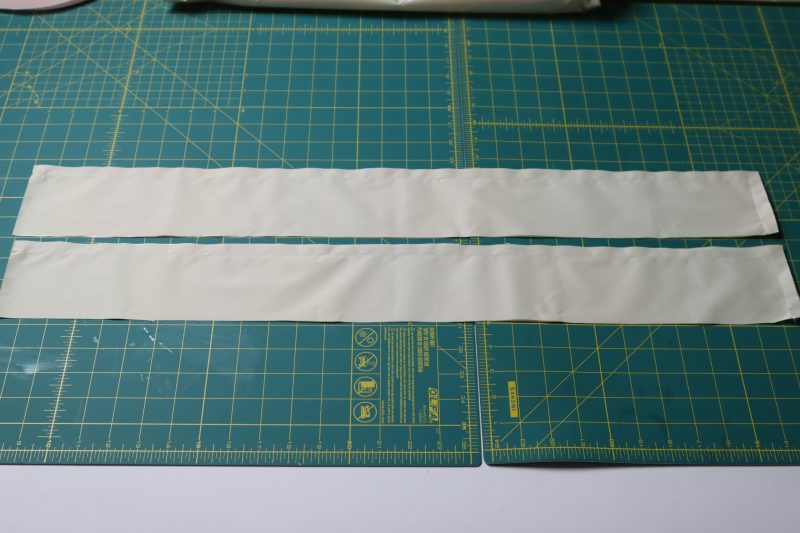
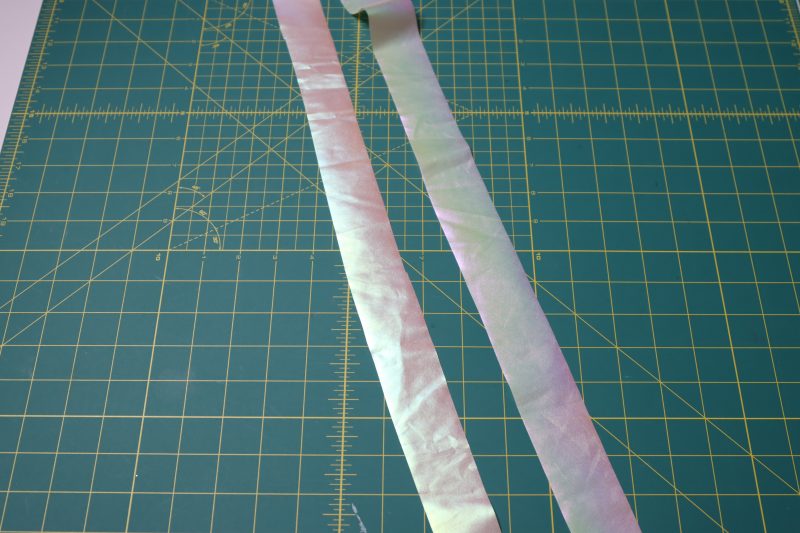
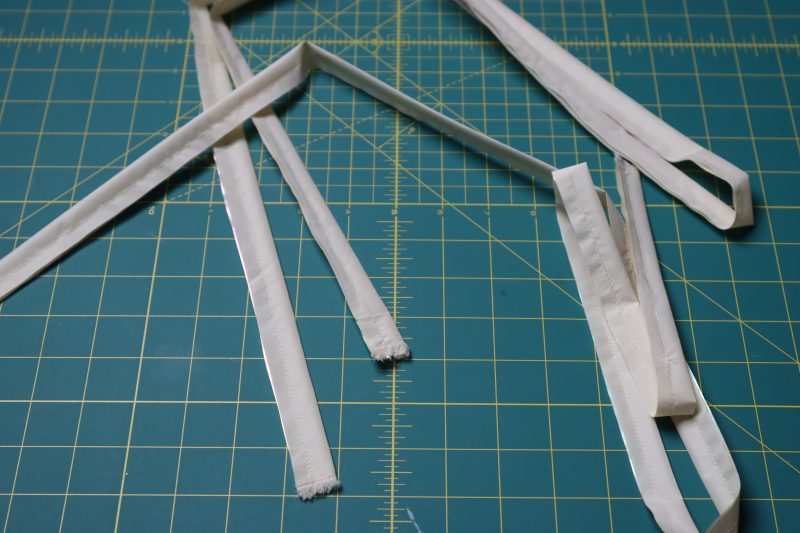
DRAWSTRINGS
- Cut two strips of the main fabric that are 1.5 inches wide and long enough to go around your waist twice (I ended up just using the full width of the fabric here).
- Fold the strips in half long ways and sew them into closed tubes with ¼ inch seam allowance..
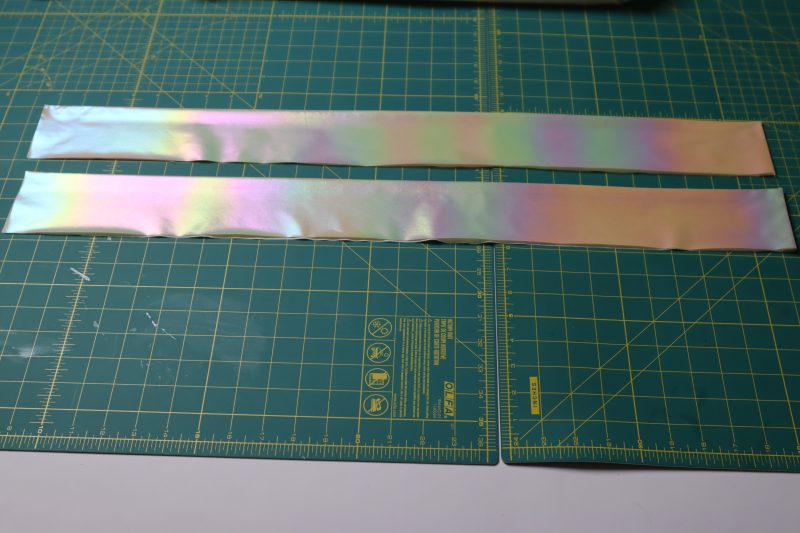
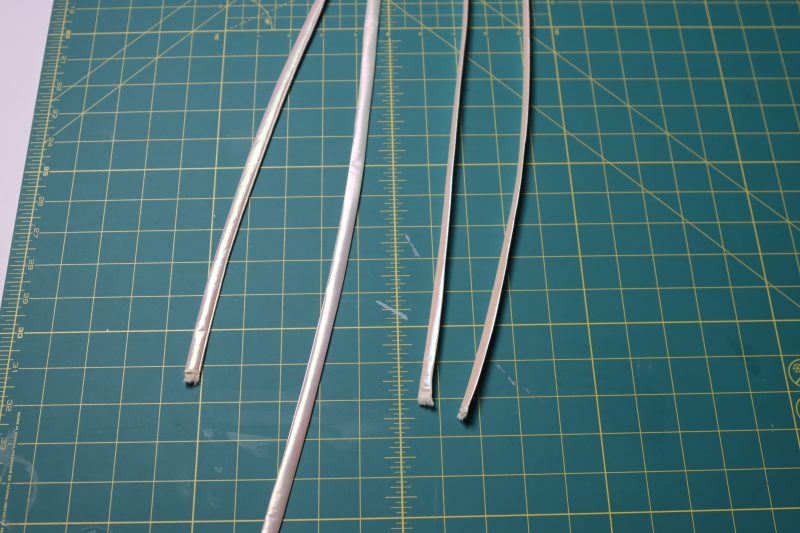
- Flip the tubes right sides out using a loop turner.
Step 15
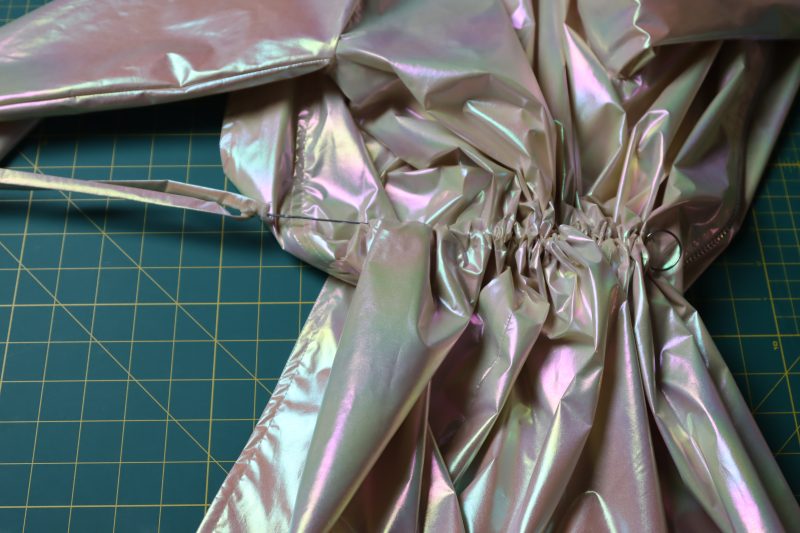
INSERT DRAWSTRINGS
- Insert the loop turner all the way through the drawstring casing on the jacket.
- Hook the loop turner onto the drawstrings to pull them through the casing.
- Make sure the drawstrings are evenly hanging out of the casing on each side.
- Pull the drawstrings to cinch the waist.
Step 16
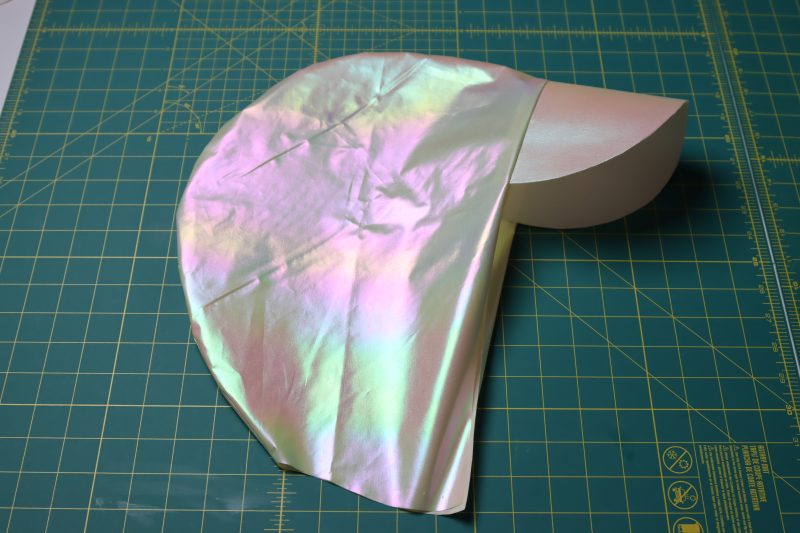
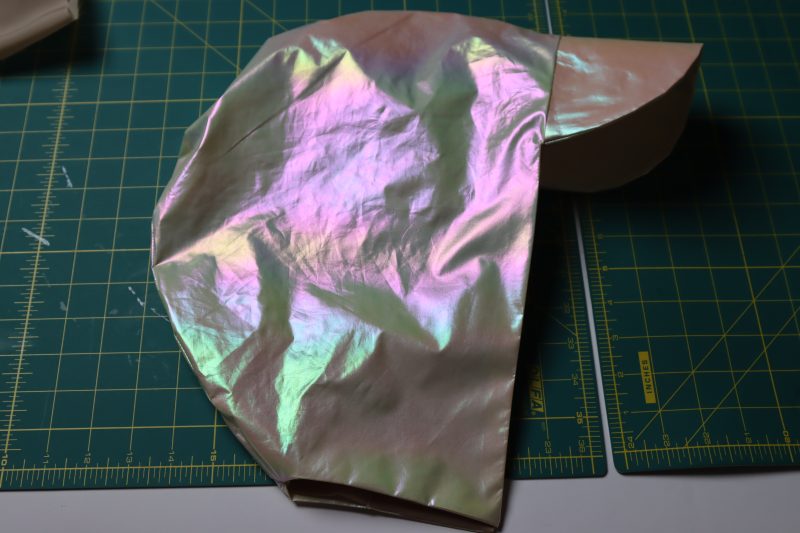
BRIM
- Cut out two pieces of stiff fusible interfacing that are the same size and shape as the brim of the hood.
- Iron the fusible interfacing to the wrong side of the brim.
Step 17
HOOD
- Place the two hood pieces right sides together.
- Pin and sew the long curved edge of the hood.
- Press the hood seam open and flat.
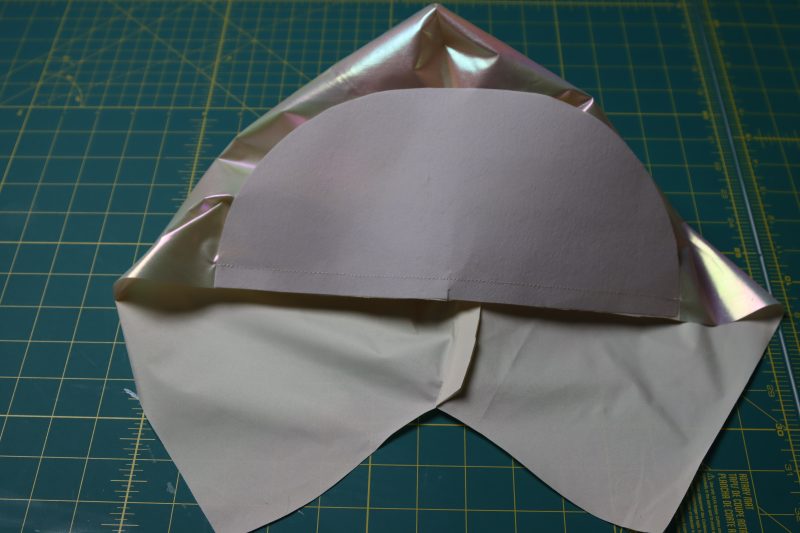
- Pin and sew the brim to the hood making sure the center of the brim lines up with the front center seam of the hood.
- Clip the corners of the hood where it meets the brim.
- Repeat for both the lining and the main fabric.
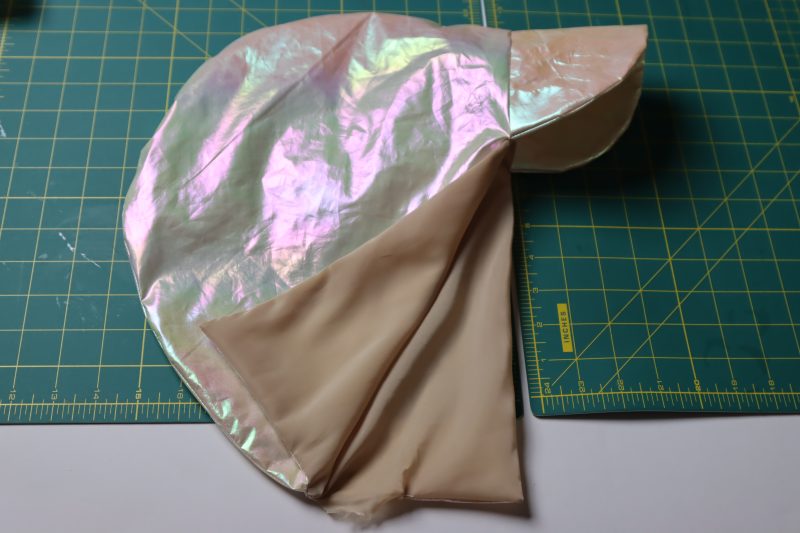
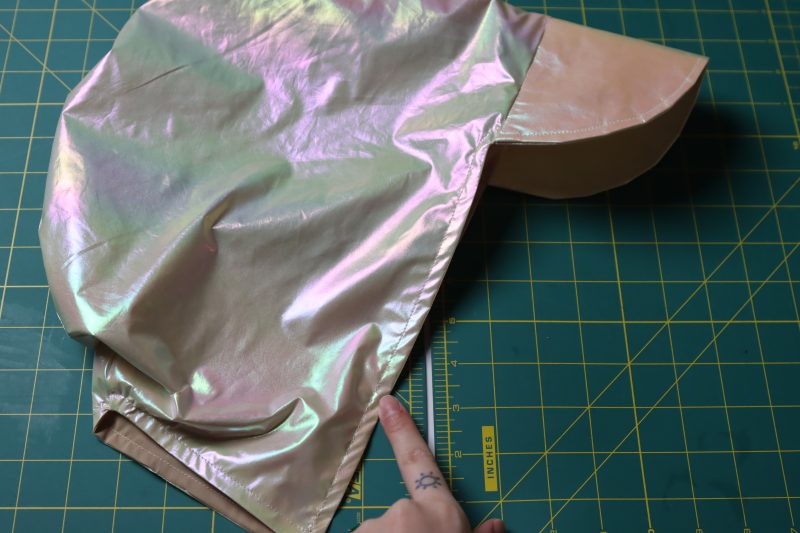
Step 18
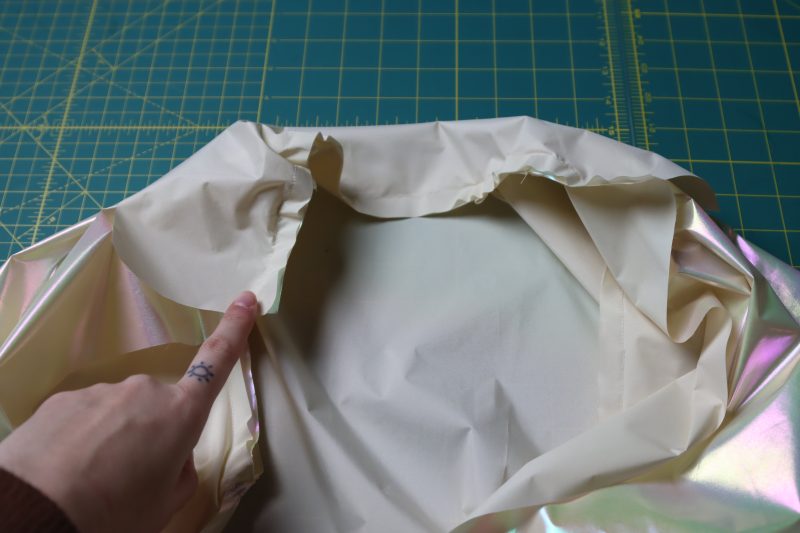
ATTACH HOOD LINING
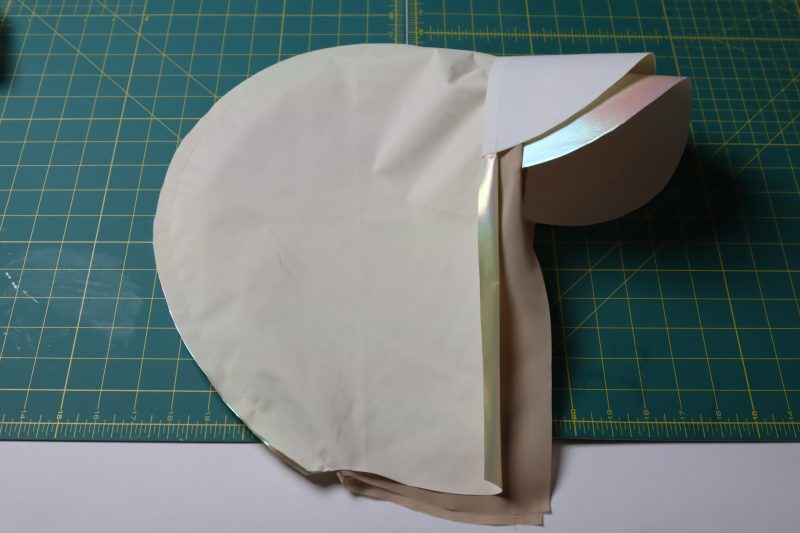
- Place the hood lining inside of the main fabric hood, right sides together.
- Pin and sew around the entire hood, including the brim and the back neckline, making sure to leave a 3 inch hole through which the hood can be turned right sides out.
- Clip notches into the rounded brim and corners where the brim meets the hood.
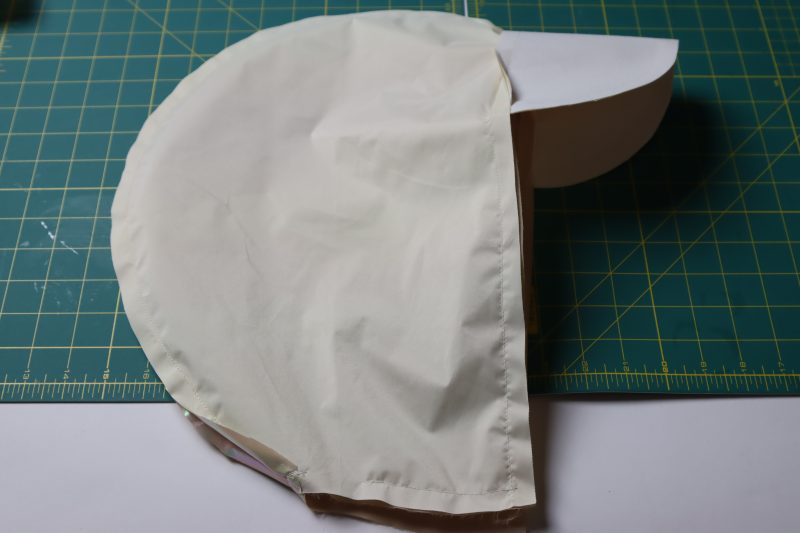
- Flip the hood right sides out through the hole you left.
- Press the seams flat.
- Topstitch around the entire hood to close the hole.

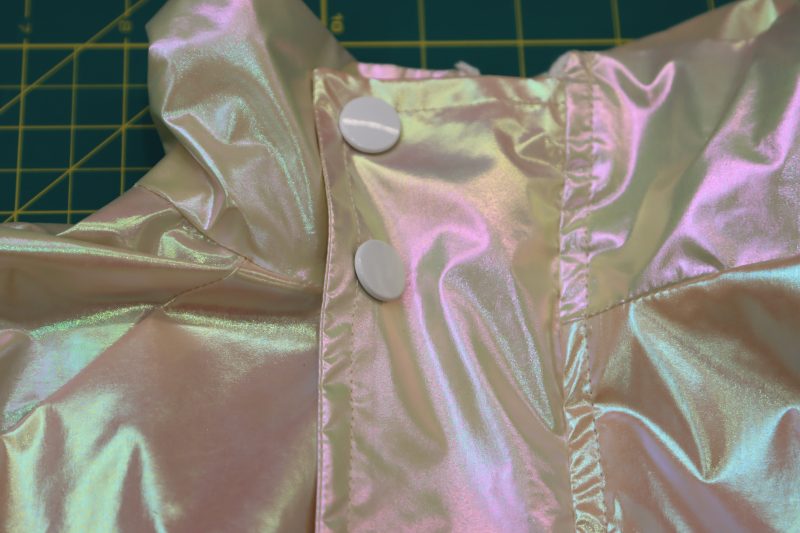
Step 19
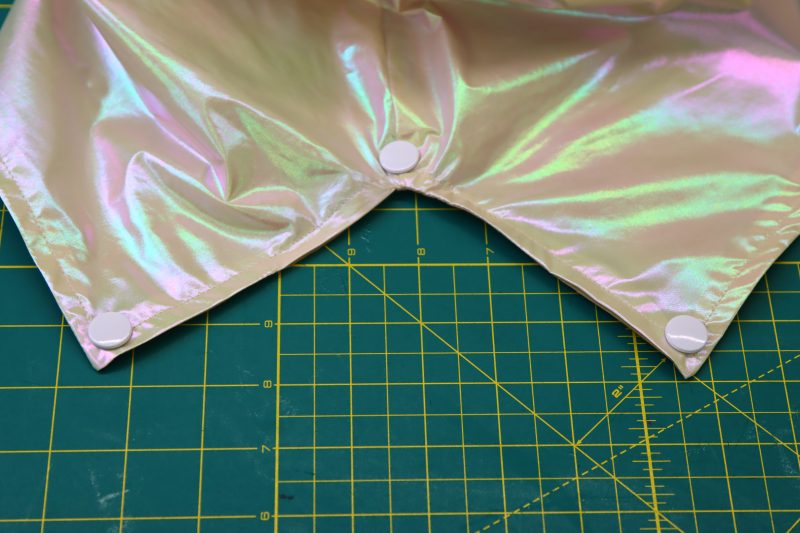
FRONT SNAPS
- Three snaps will be inserted into the outer zipper placket:
- One snap at the bottom hem.
- One snap at the very top edge of the collar.
- One snap at the seam where the collar is attached to the neckline.
- Find the “innie” and “outie” pieces of the snaps and match them up.
- Insert the “outie” pieces into the outer zipper placket.
- Insert the “innie” pieces into the wearer’s right side of the jacket right under the “outie” pieces.

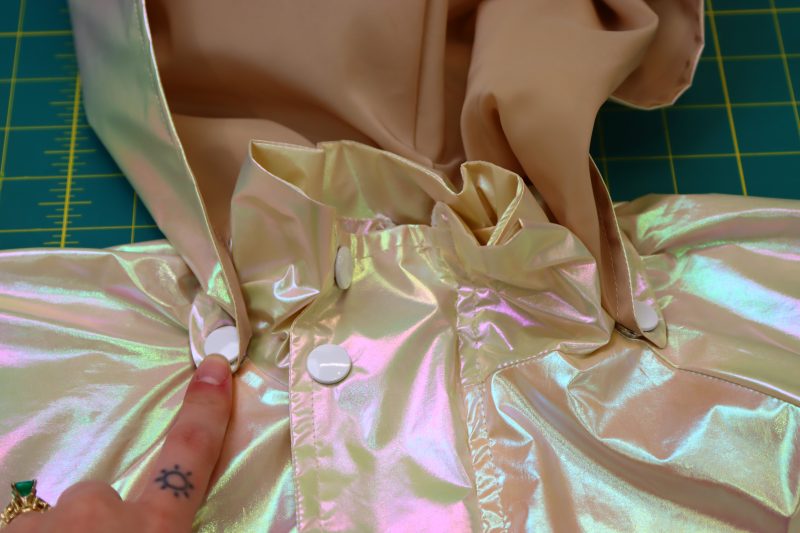
Step 20
HOOD SNAPS
- Three snaps are going to be inserted to make the hood detachable:
- One snap at the center back seam of the hood (which matches up at the center back of the jacket just under the collar).
- One snap on each front corner of the hood (which matches up at the front raglan seams of the jacket just under the collar).
- Insert the snaps as instructed in the previous step.
Sewing Success: The Finished Ametrine Anorak
Share this post with a friend (or two!), download the Ametrine Anorak free sewing pattern, and show us which fabrics and colors you choose, using the hashtags #MoodAmetrinePattern & #MadeWithMood—and don’t forget to tag us @MoodFabrics, too.


Free Sewing Pattern Inspiration for Your Next Project
With 500+ free sewing patterns and counting, your opportunities for sewing with Mood are endless!
We hope you had as much fun sewing this anorak jacket pattern as we did! As always, we want to hear from you—share your thoughts and comments below and let us know where you’ll be wearing the Ametrine Anorak free sewing pattern!
Can’t get enough sewing with Mood? Browse your next make with our latest free sewing patterns.
Will a pattern for the pants be released as well? They look amazing
Hey Lisette, these pants were purchased from a store and used to style with this jacket, but we have a few cargo pants patterns like the Turin Cargo Pants, the Clarkston Carpenter Pants, and the Adair Cargo pants, all of which could be turned into joggers like the ones in the photo by just making a casing for elastic on the bottom hem of the pants. Check out those patterns and let us know what you think!
Are you kidding me? A jacket with zero pockets? How useless is that?
Hi Juli! We chose not to add pockets to this jacket to keep the silhouette sleek, but you are more than welcome to add side seam pockets, patch pockets or even cargo pockets to the front of the jacket. We always encourage customizing our patterns to your liking. Here are some links to some of our other blog posts with pocket patterns and tutorials:
1. The Venice V Waist Dress has side seam pockets that you can steal the pattern for.
2. The Turin Cargo Pants have both patch pockets on the back of the pants and cargo pockets on the sides.
This is interesting in shiny fabric
Omg love it. Definitely making one, hope yo find the same fabric. Thank you
Can you please let me know if we need the same amount of lining as we do fabric? The Shop the Look button does not change the lining amount when I change the size. Thanks for any help!
Hey Sondy, yes you need the same quantity of both the lining and the main fabric.