
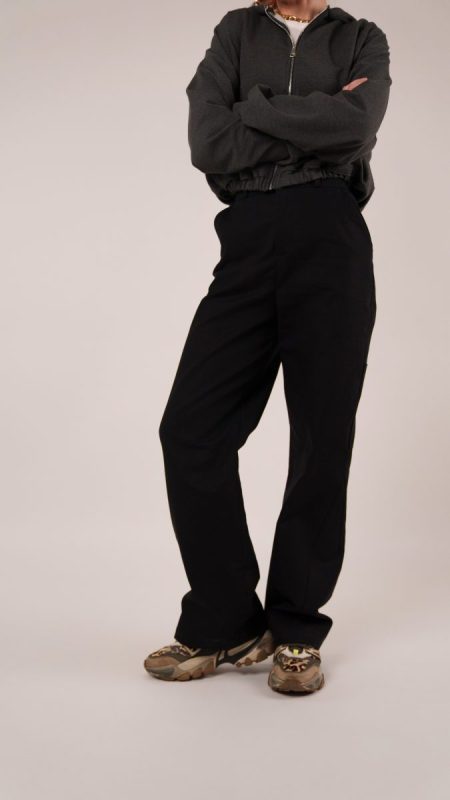
Meet the Clarkston and Colfax Carpenter Pants: two silhouettes cut from the same no-nonsense cloth, designed to blur the line between hard work and hard style.
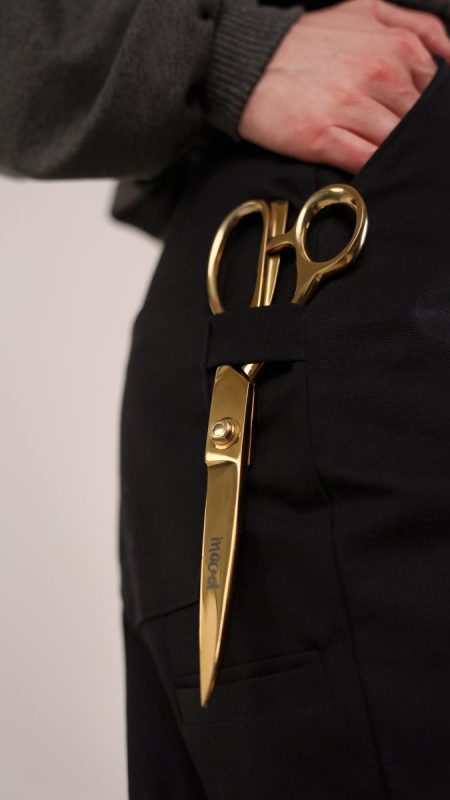
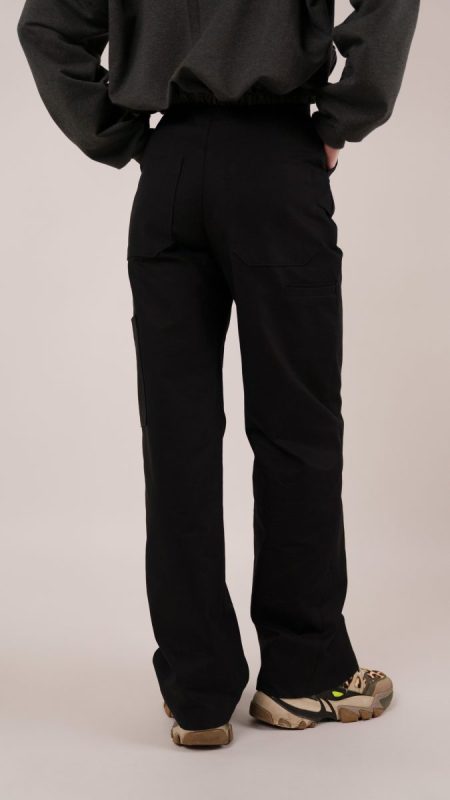
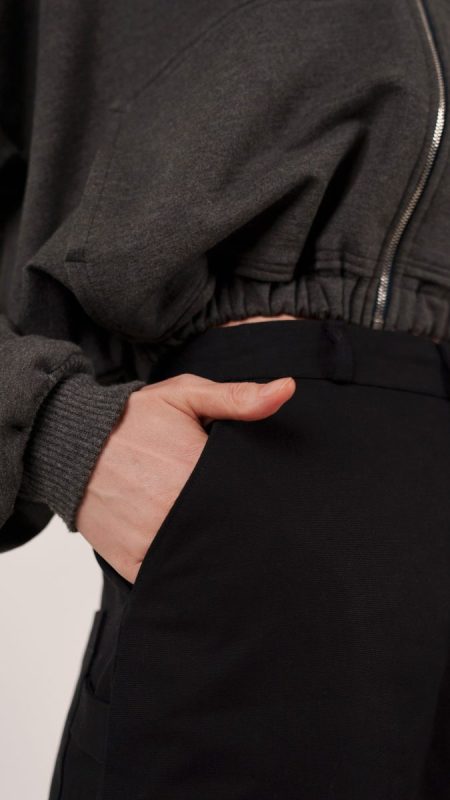
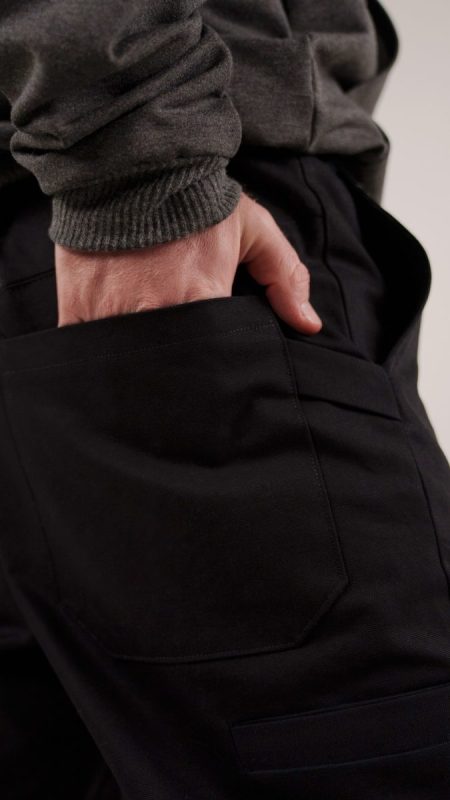
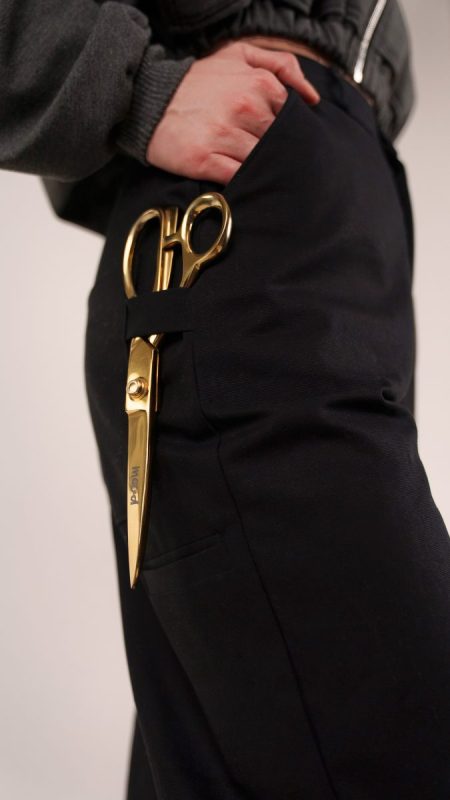
Both patterns are built from sturdy cotton canvas that holds its shape, takes wear seriously, and only gets better with time. These are pants that feel grounded and dependable, whether they’re navigating city sidewalks, studio floors, or an actual job site. Utility is fully embraced here, with four distinct pocket styles working together like a well-stocked toolbox: classic back patch pockets, a functional side patch pocket, a clean welt pocket, and envelope pockets at the front side for easy access and visual interest. A thick canvas strap adds a signature carpenter detail, perfect for clipping keys, tools, or simply letting the pants speak their workwear language. Functional belt loops and a structured back yoke anchor the design, giving the pants real stability and a fine finish that never feels flimsy.
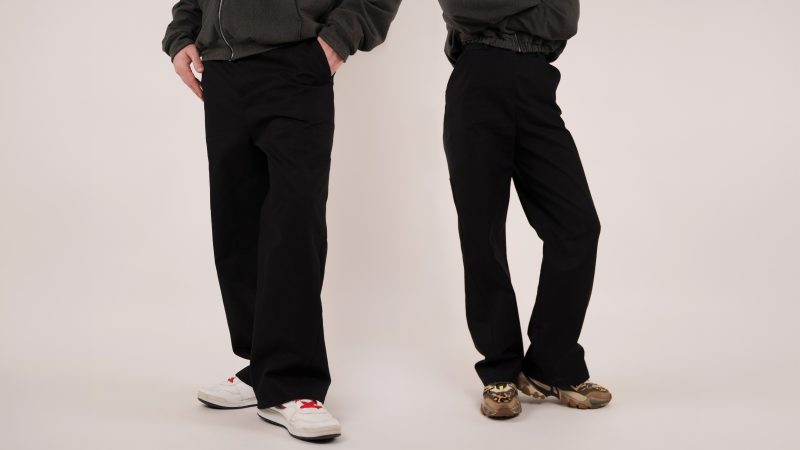
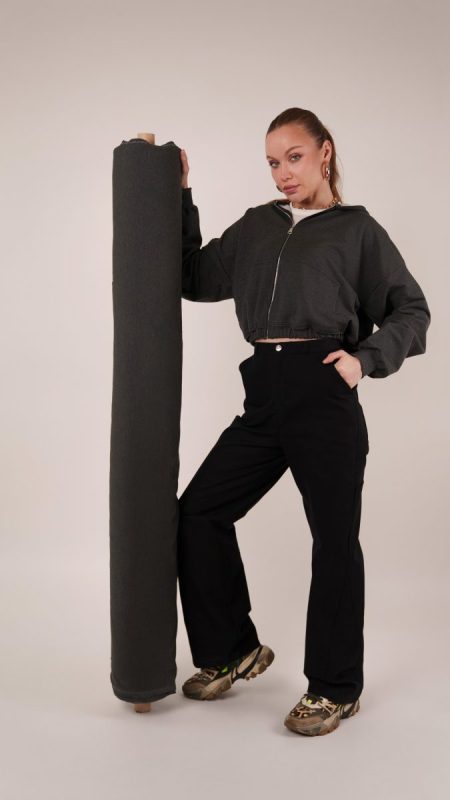
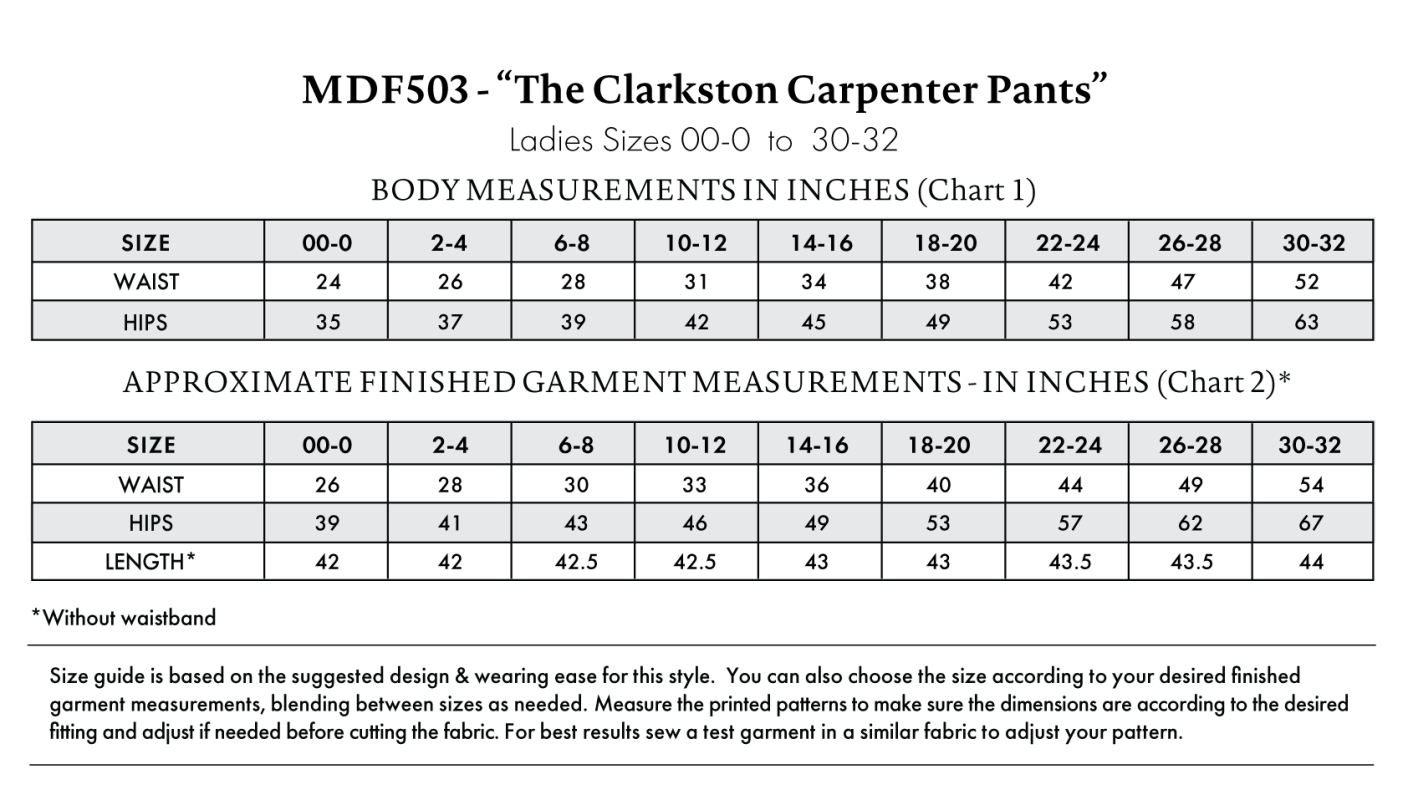
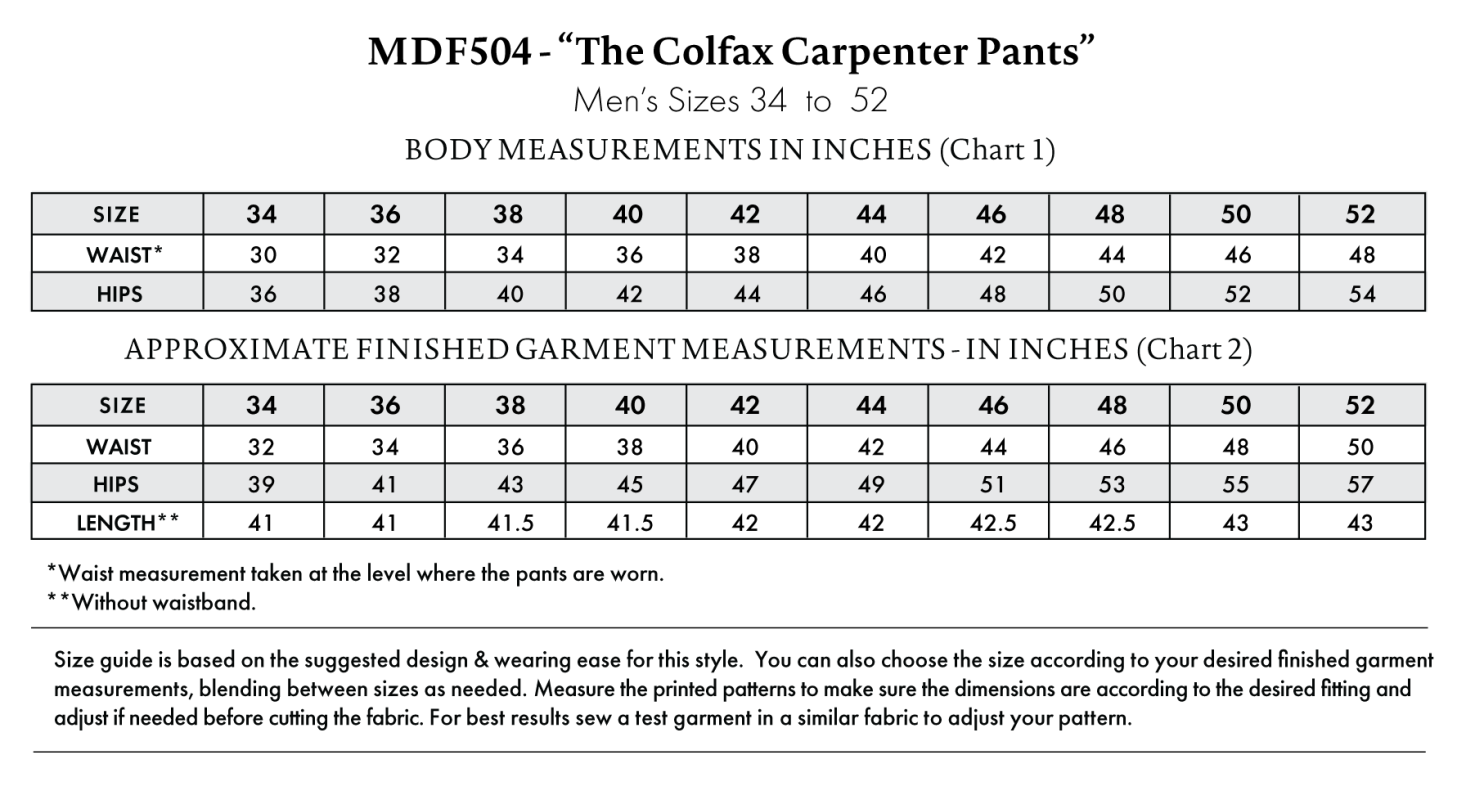
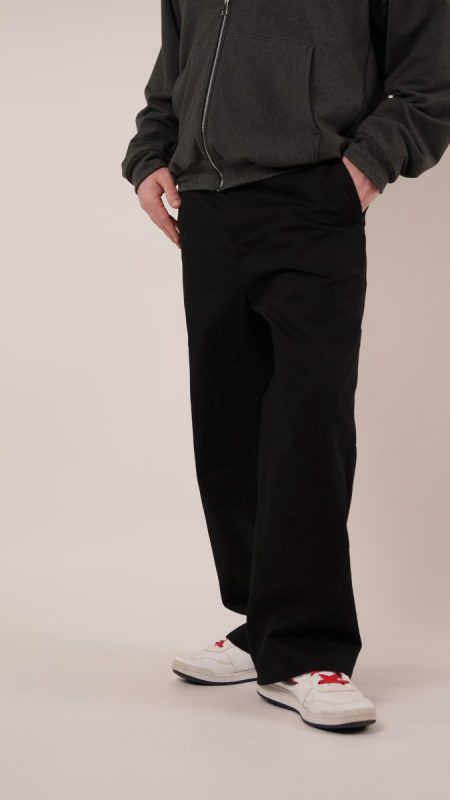
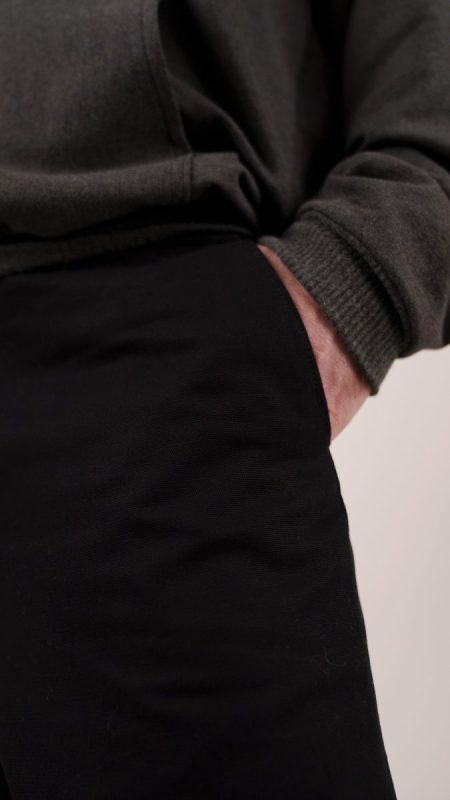
The Clarkston Carpenter Pants are designed in a women’s silhouette, sitting higher at the waist with a slightly slimmer fit through the hips to highlight shape while still keeping things relaxed and wearable. The Colfax Carpenter Pants, drafted in a unisex and men’s silhouette, sit lower on the hips and fall into a roomy, straight leg that reads classic and unfussy from waist to hem.
These patterns thrive on contrast. Pair them with the Spokane or Harrington Hoodies for an easy, head-to-toe casual uniform, or throw them on with a sheer, sparkly going-out top and let workwear crash the party. However you style them, the Clarkston and Colfax Carpenter Pants are designed to be lived in, worked in, and worn on repeat. They don’t chase trends. They build a foundation.


Essential Materials & Sizing Guide for the Clarkston and Colfax Carpenter Pants
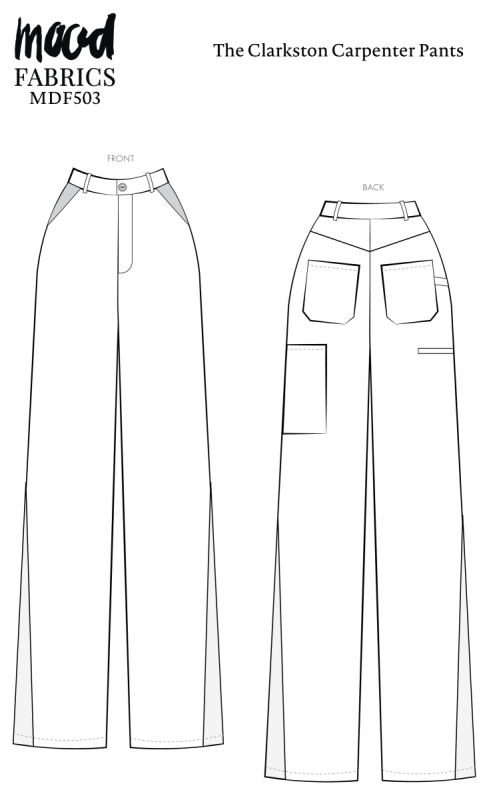
Continue reading for a breakdown of what knowledge and materials you need for creating your very own pair of carpenter pants! We’ve got you covered with the recommended materials we used—if you want to follow along exactly—as well as a curated list of alternative fabric type recommendations if you want to customize your own version. The Clarkston and Colfax Carpenter Pants free sewing pattern downloads include technical drawings for seam and silhouette visibility, plus a size chart to help you find your perfect fit!
Purchase Products Used Below:
Quantities indicated are for sewing a size small* pair of carpenter pants.* Toggle the ‘SHOP THIS LOOK’ box to find quantity estimates for other sizes.
- 2 yards of Cotton Canvas – Black – Hilma Collection
- 1 each of Dritz Silver Jean Buttons – 6 Ct
- 1 each of Regular Zipper 9″ by YKK – 580 Black
- 1 each of Gutermann Sew All Thread 1000m – 10 Black
- MDF503 – Clarkston Carpenter Pants Sewing Pattern (Free download below!)
- MDF504 – Colfax Carpenter Pants Sewing Pattern (Free download below!)
Additional Products Used:
*Quick Tip! The ‘SHOP THIS LOOK’ box defaults to full-yard quantities. To order an exact half-yard quantity for any fabric, simply use the decrease quantity button (-) to subtract by the half yard. Then click “ADD TO CART” to add all materials to your cart. (Our system can only display full-yard quantities initially.)
Alternative Fabric Type Recommendations:
The Clarkston and Colfax Carpenter Pants sewing patterns are best suited for medium to heavyweight fashion fabrics. Explore other fabric types or colors from our featured collections for your own pair of carpenter pants with the links below.
Fabric Collections Used in this Post:


Download Your Free Sewing Pattern
Submit your name and email in the form below to receive the download links for the Clarkston and Colfax Carpenter Pants free sewing patterns directly in your inbox. Mood Sewciety Patterns will send your free download links via email with the subject line: ‘Your Free Download from Mood Sewciety – The Clarkston Carpenter Pants’ or ‘Your Free Download from Mood Sewciety – The Colfax Carpenter Pants’ (in PDF format for A4 and letter-size printing).
© MoodFabrics.com / MoodSewciety.com – Mass production, resale, or distribution of this pattern in any form is strictly prohibited.
Find Your Perfect Fit
The Clarkston and Colfax Carpenter Pants Sizing Guides are based on the suggested design & wearing ease for these styles. You can also choose the size according to your desired finished garment measurements, blending between sizes as needed. Measure the printed patterns to make sure the dimensions are according to the desired fitting and adjust if needed before cutting the fabric. For best results, sew a test garment in a similar fabric to adjust your pattern.
Note: Always read all the instructions before cutting the fabric!
How to Sew The Clarkston and Colfax Carpenter Pants
The instructions provided below are designed to guide you through sewing the Clarkston Carpenter Pants and Colfax Carpenter Pants from start to finish.


2 Tips for Sewing with Cotton Canvas
⇒ I didn’t end up doing this in the tutorial, but if you want your carpenter pants to really last, even after you wash them, I highly recommend doing flat felled seams or using a serger to finish the raw edges on the inside. This woven canvas frays really easily so it’s smart to finish your raw edges.
⇒ Wash and dry your fabric before you cut out your pattern pieces. Cotton canvas shrinks. Your pants will be too small on you if you make them before washing and drying the fabric.
Pattern Pieces & Fabric Cuts Needed
Keep reading for a list-style breakdown of the pattern pieces needed for both the Clarkston Carpenter Pants and the Colfax Carpenter Pants.
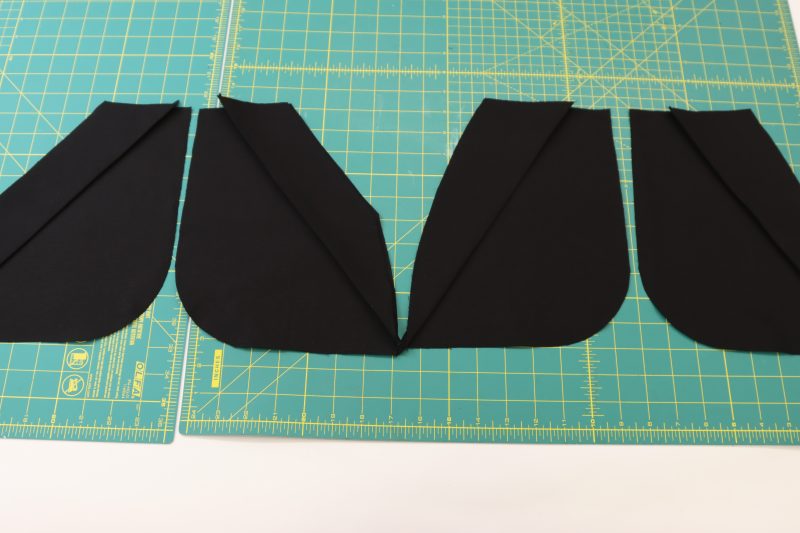
Clarkston Carpenter Pattern Pieces
- (A) FRONT
- Fabric – Cut 2 Mirrored
- (B) BACK
- Fabric – Cut 2 Mirrored
- (C) BACK YOKE
- Fabric – Cut 2 Mirrored
- (D) BOTTOM SIDE PIECE
- Fabric – Cut 2 Mirrored
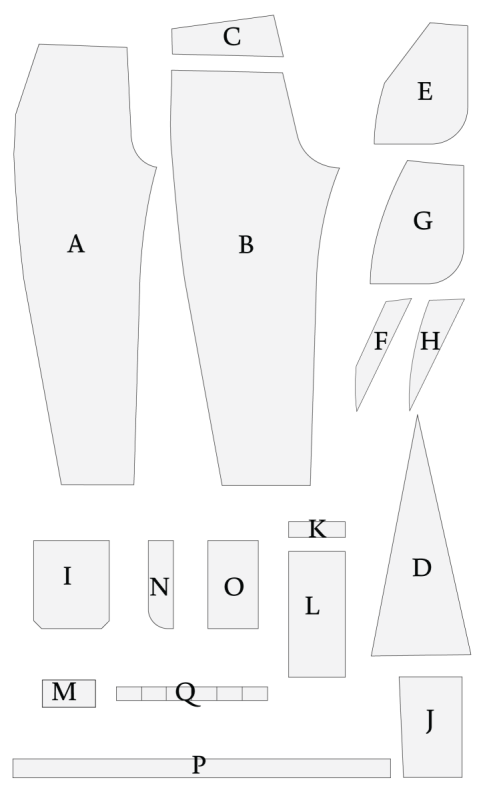
- (E) FRONT POCKETS (A)
- Lining – Cut 2 Mirrored
- (F) FRONT POCKETS (A) FACING
- Fabric – Cut 2 Mirrored
- (G) FRONT POCKETS (B)
- Lining – Cut 2 Mirrored
- (H) FRONT POCKETS (B) FACING
- Fabric – Cut 2 Mirrored
- (I) BACK POCKETS
- Fabric – Cut 2
- (J) BACK SIDE PATCH POCKET
- Fabric – Cut 1
- (K) WELT
- Fabric – Cut 1
- (L) WELT POCKET BAG
- Lining – Cut 1
- (M) BACK SIDE STRAP
- Fabric – Cut 1
- (N) FLY
- Fabric – Cut 2
- (O) FLY SHIELD
- Fabric – Cut 1
- (P) WAISTBAND
- Fabric – Cut 2
- (Q) BELT LOOPS
- Fabric – Cut 1 and divide into 6

Colfax Carpenter Pattern Pieces
- (A) FRONT
- Fabric – Cut 2 Mirrored
- (B) BACK
- Fabric – Cut 2 Mirrored
- (C) BACK YOKE
- Fabric – Cut 2 Mirrored
- (D) BOTTOM SIDE PIECE
- Fabric – Cut 2 Mirrored
- (E) FRONT POCKETS (A)
- Lining – Cut 2 Mirrored
- (F) FRONT POCKETS (A) FACING
- Fabric – Cut 2 Mirrored
- (G) FRONT POCKETS (B)
- Lining – Cut 2 Mirrored
- (H) FRONT POCKETS (B) FACING
- Fabric – Cut 2 Mirrored
- (I) BACK POCKETS
- Fabric – Cut 2
- (J) BACK SIDE PATCH POCKET
- Fabric – Cut 1
- (K) WELT
- Fabric – Cut 1
- (L) WELT POCKET BAG
- Lining – Cut 1
- (M) BACK SIDE STRAP
- Fabric – Cut 1
- (N) FLY
- Fabric – Cut 2
- (O) FLY SHIELD
- Fabric – Cut 1
- (P) WAISTBAND
- Fabric – Cut 2
- (Q) BELT LOOPS
- Fabric – Cut 1 and divide into 6
Sew with a 1/2″ seam allowance for all seams unless otherwise specified.
HOW TO SEW THE CLARKSTON CARPENTER PANTS (WOMEN’S SILHOUETTE)
Step 1
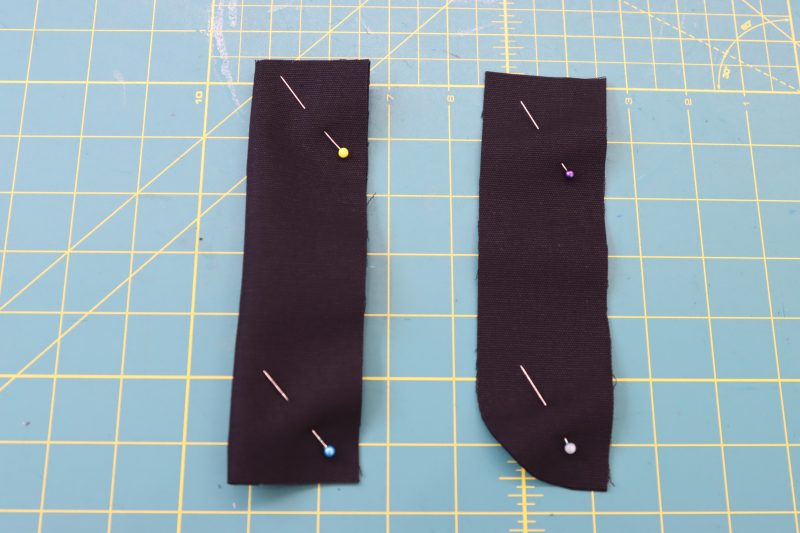
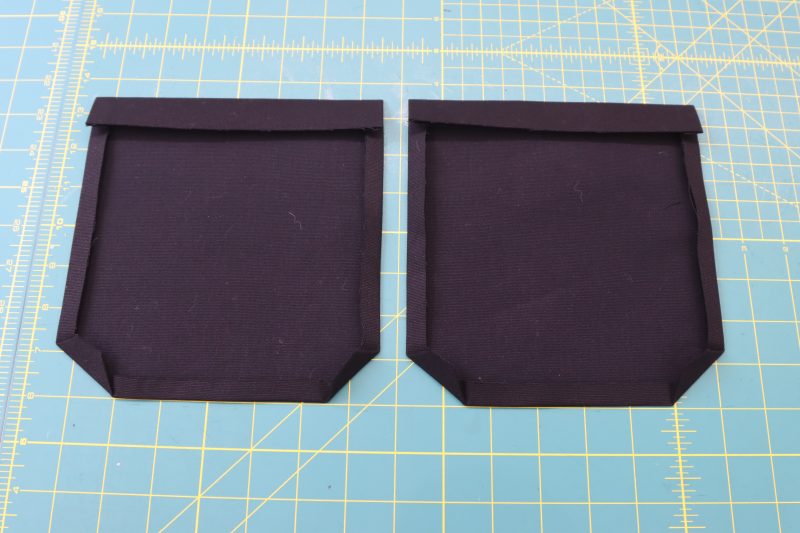
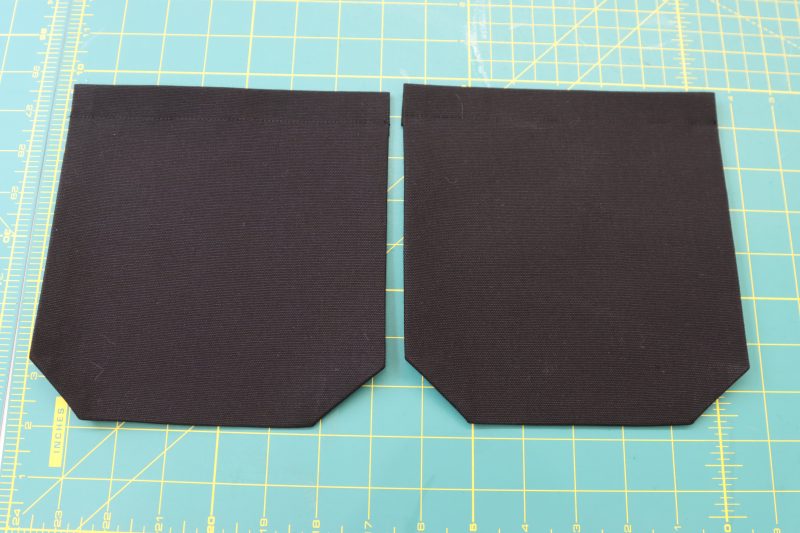
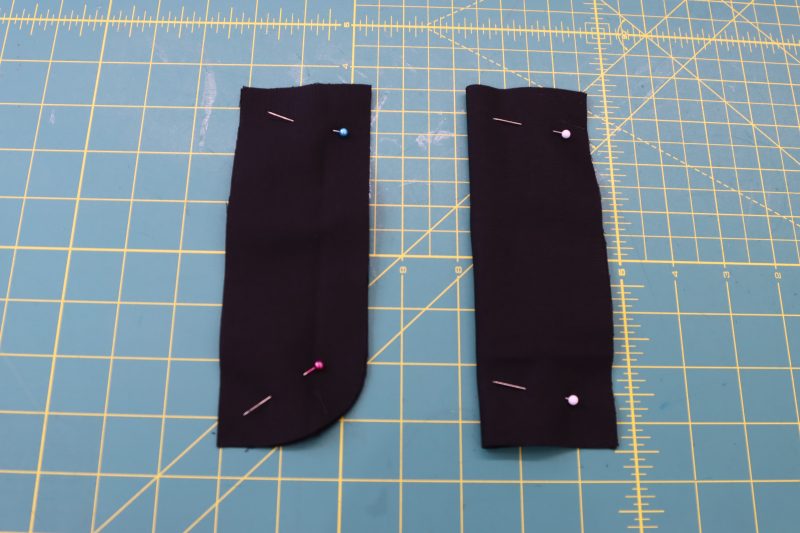
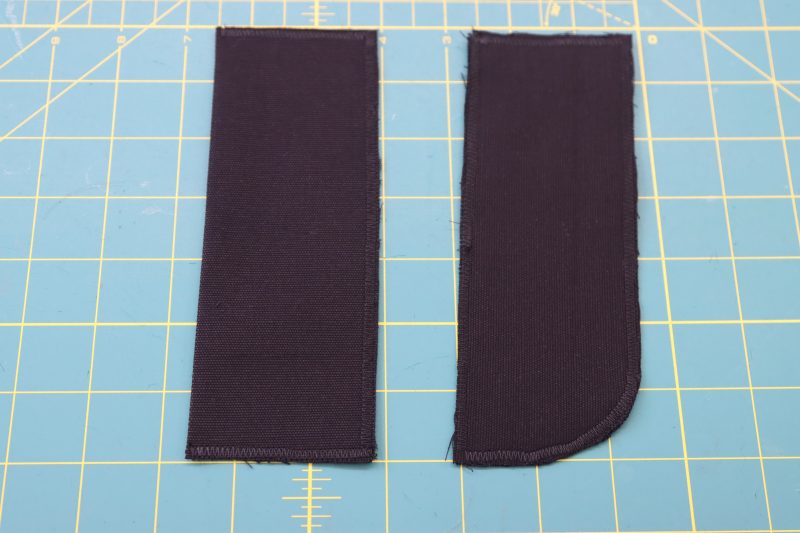
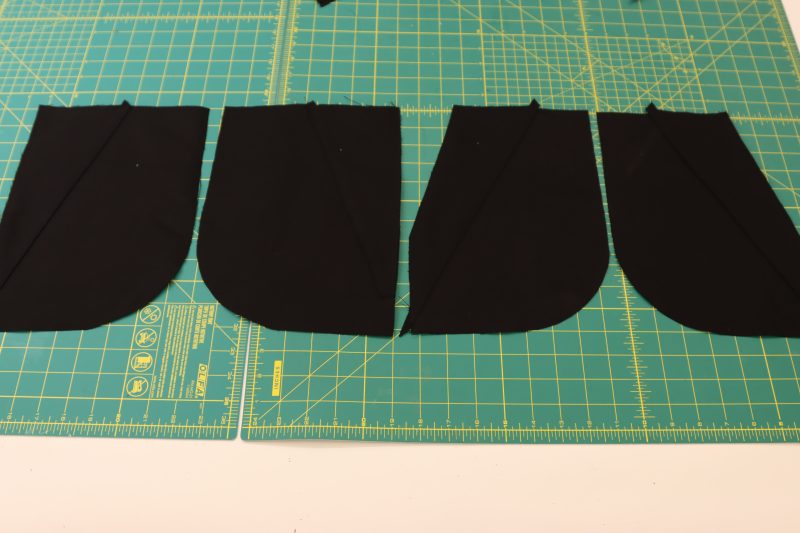
FRONT POCKETS
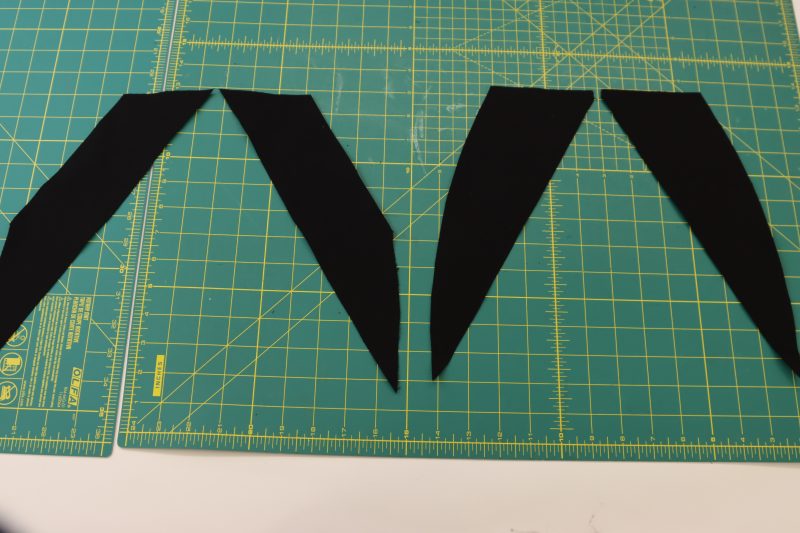
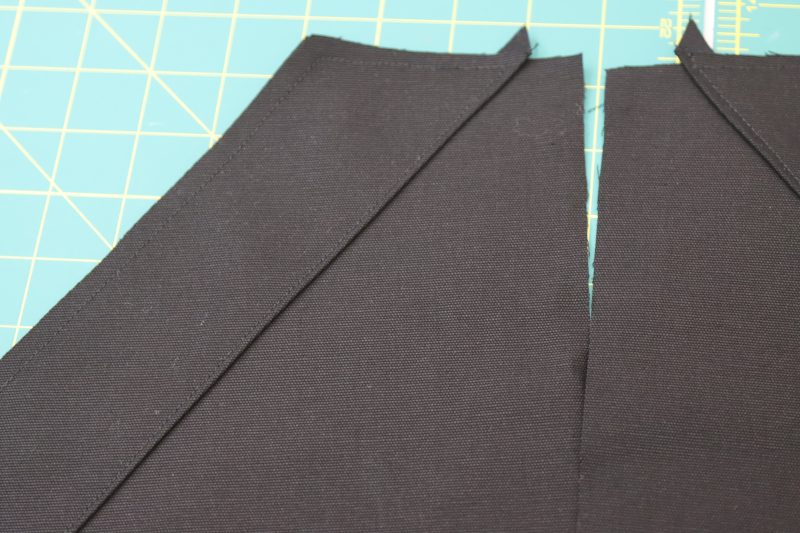
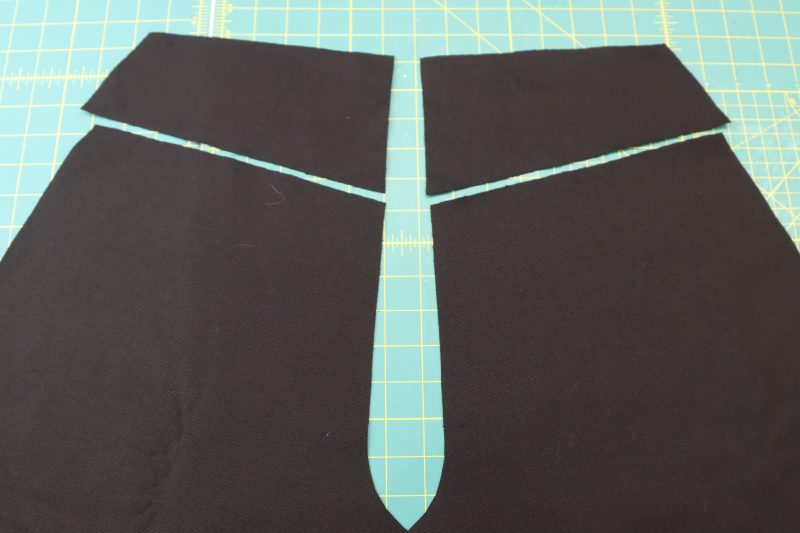
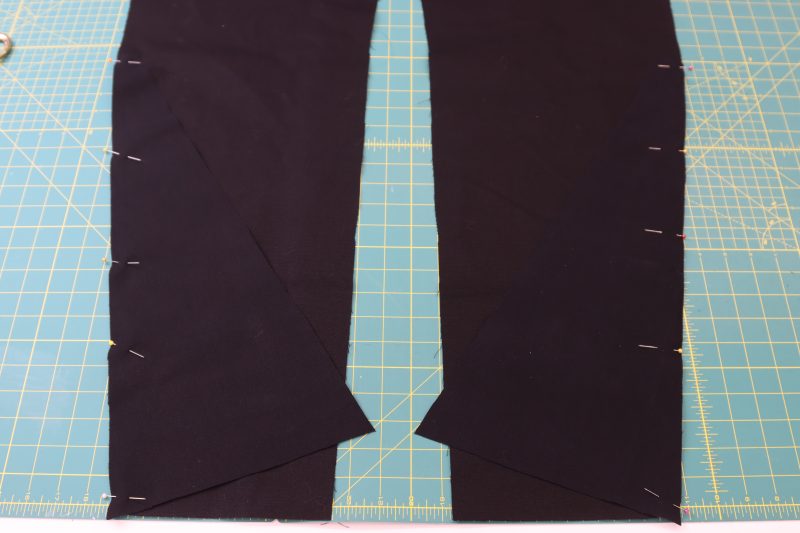
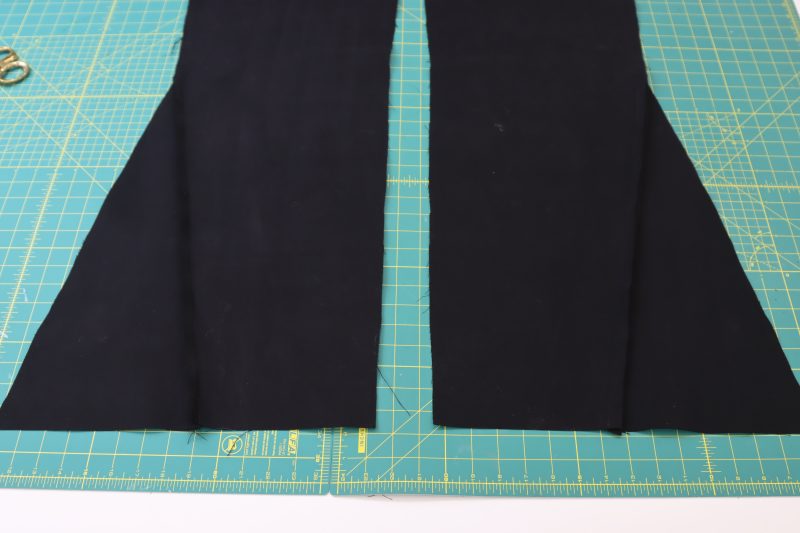
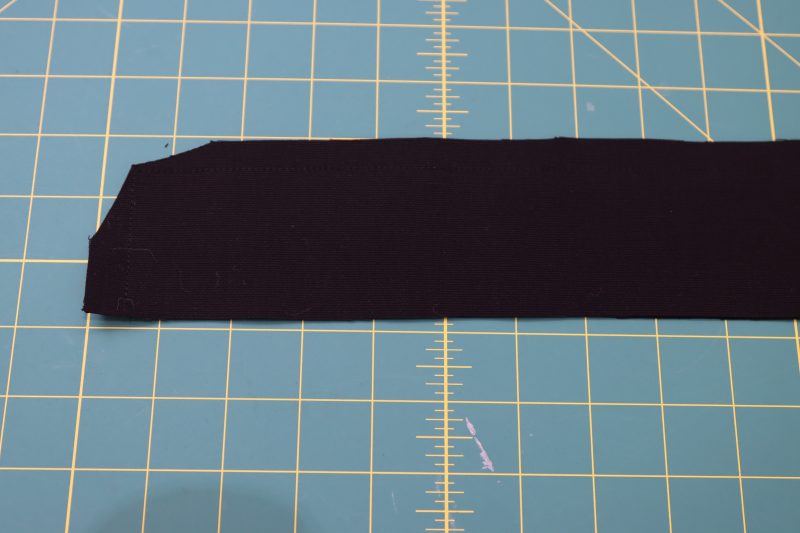
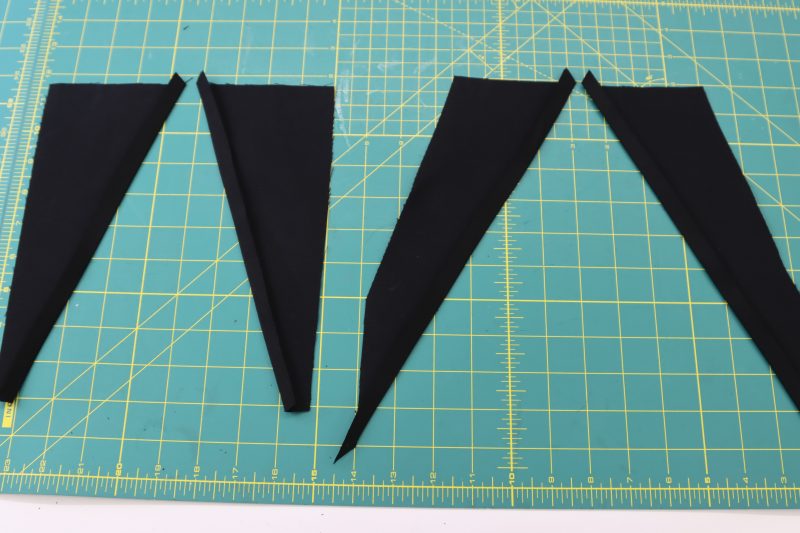
- Layout the pocket facing pieces next to each other as shown in the photo below.
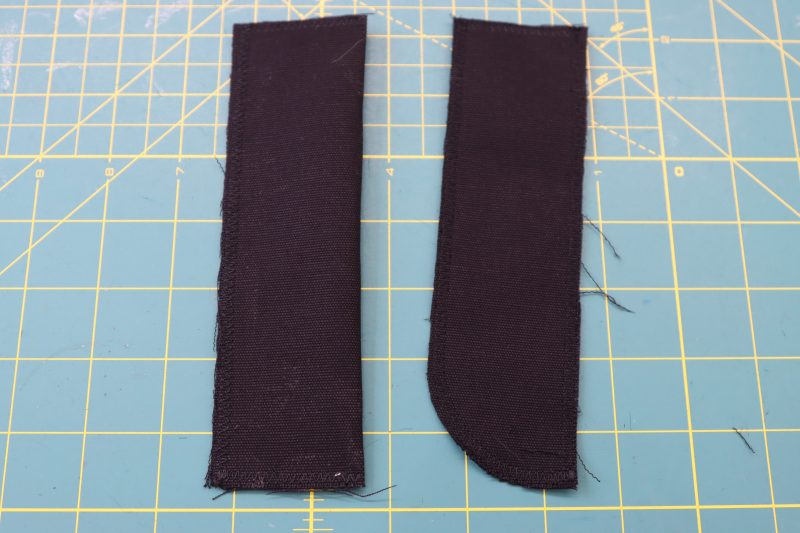
- Fold and press the longest diagonal edges of the pocket facing pieces toward the wrong side of the fabric. The fold should only be ½ inch wide.
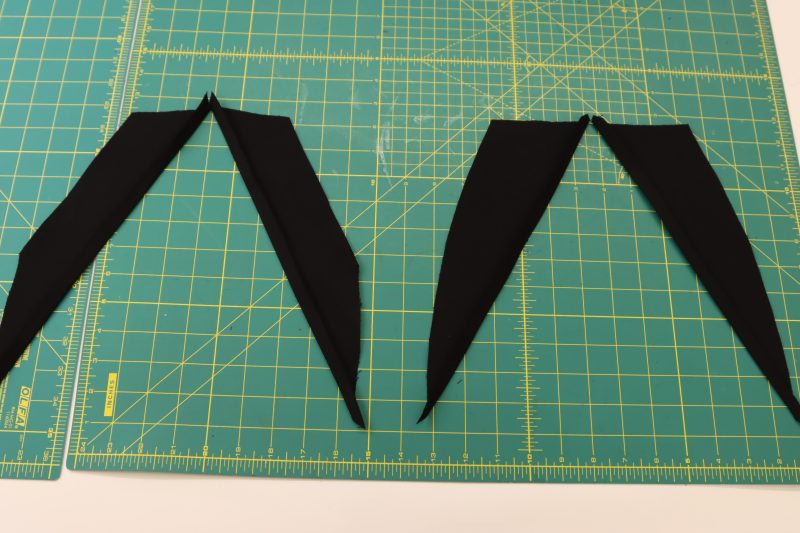
- Pin and sew the pocket facing pieces to their respective front pocket pieces.
Step 2
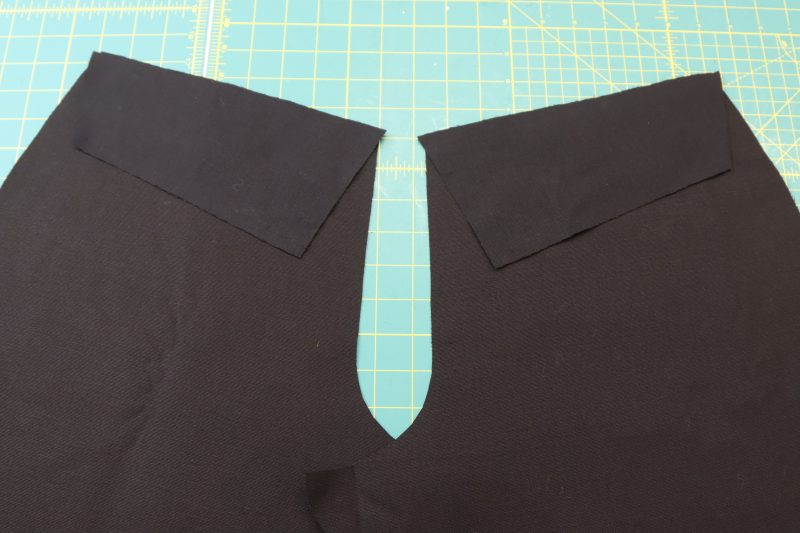
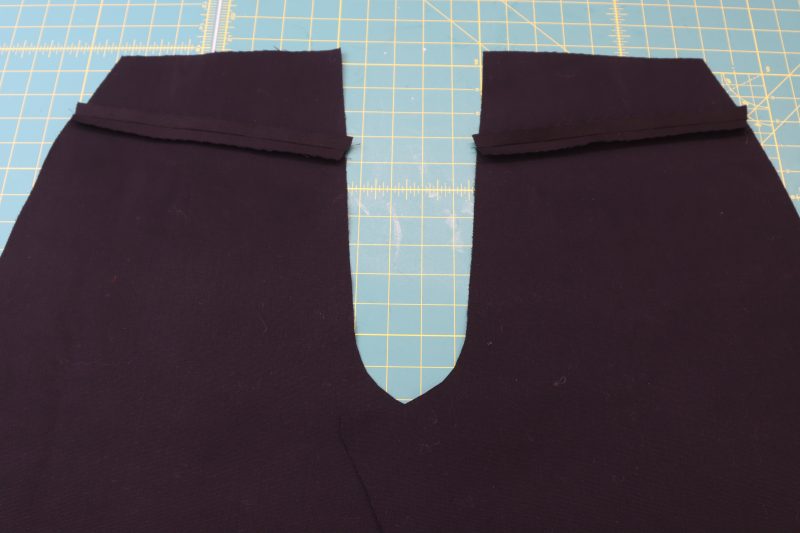
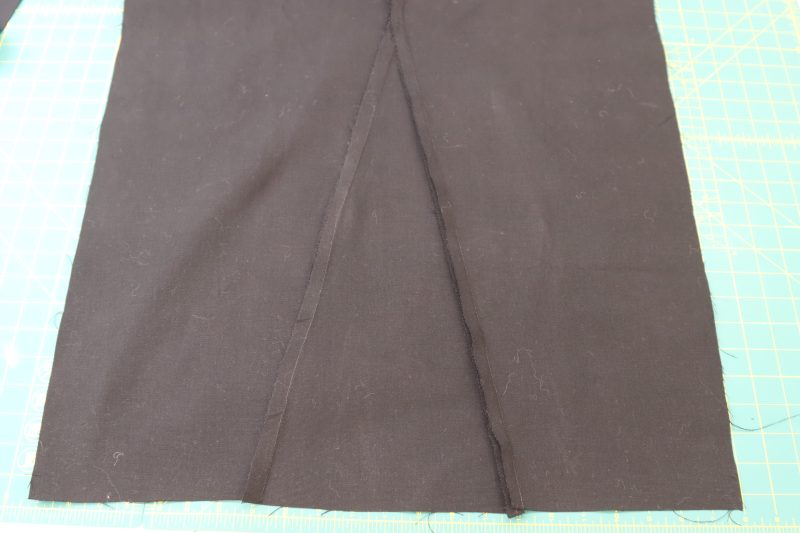
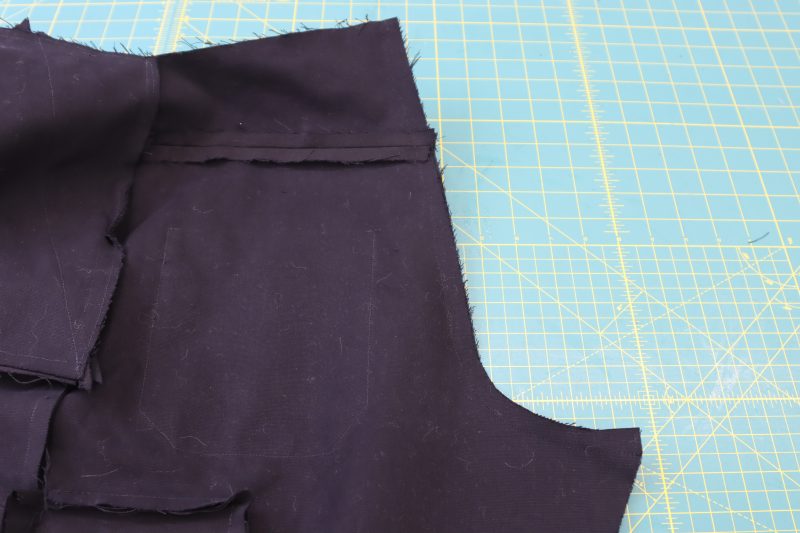
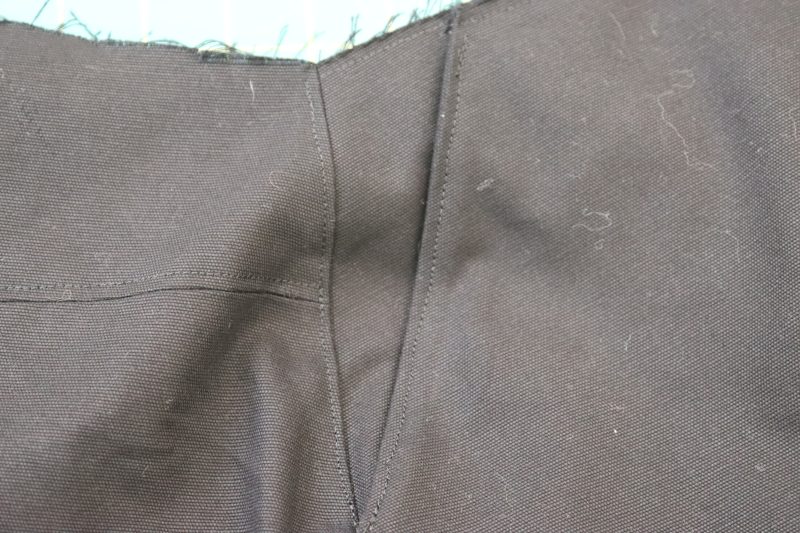
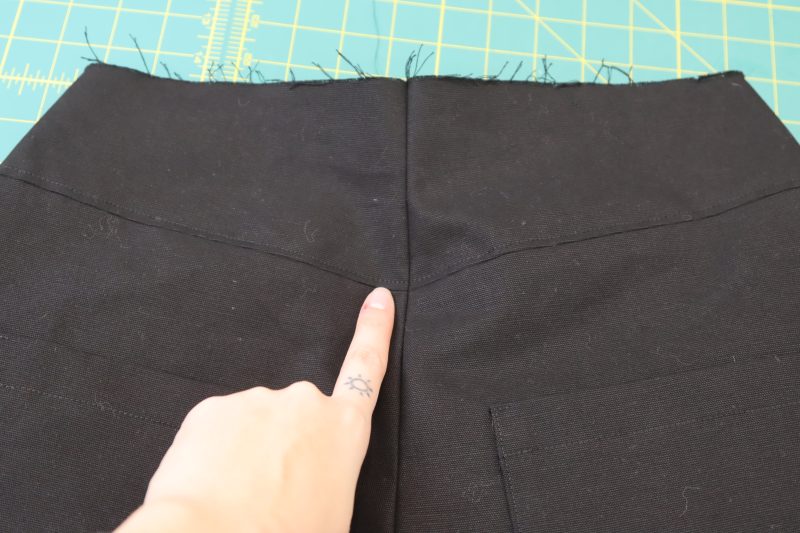
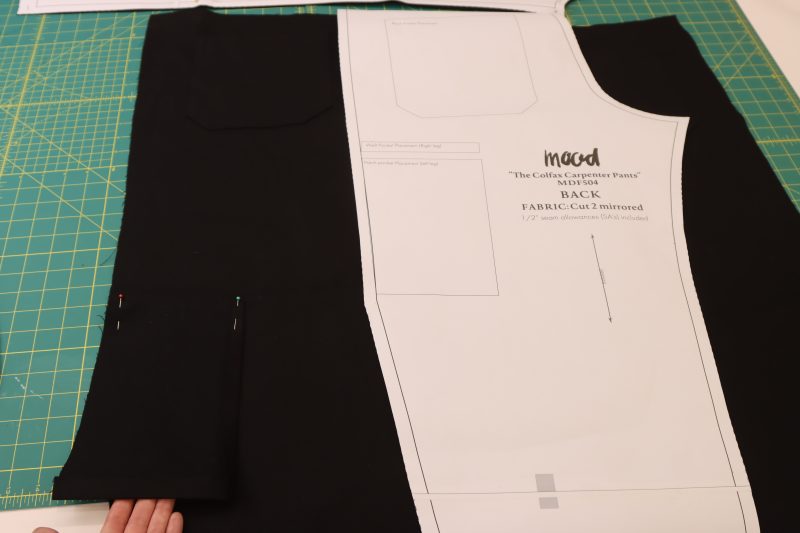
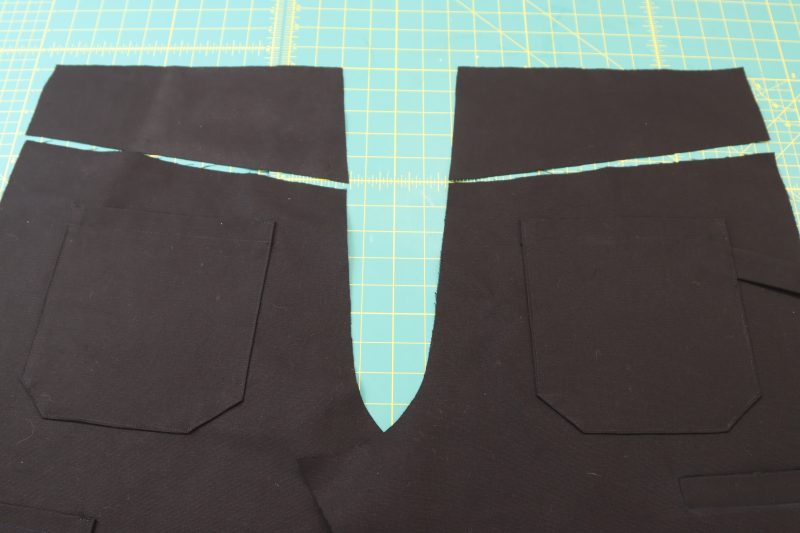
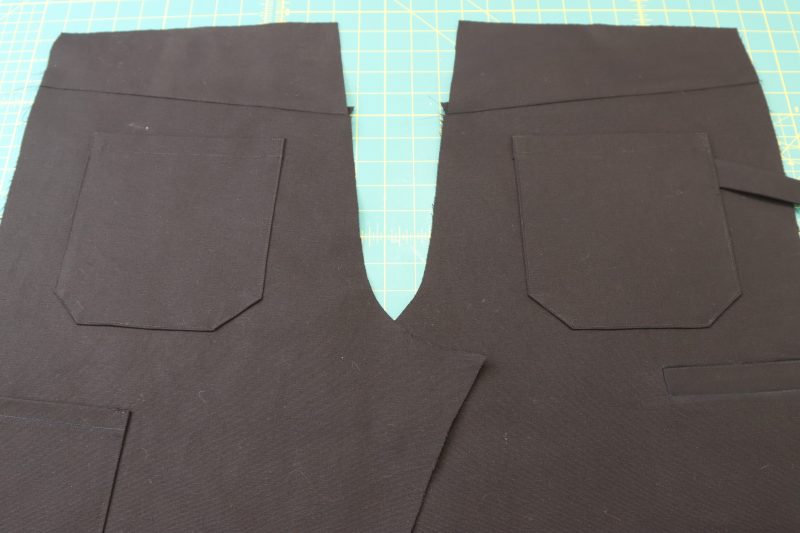
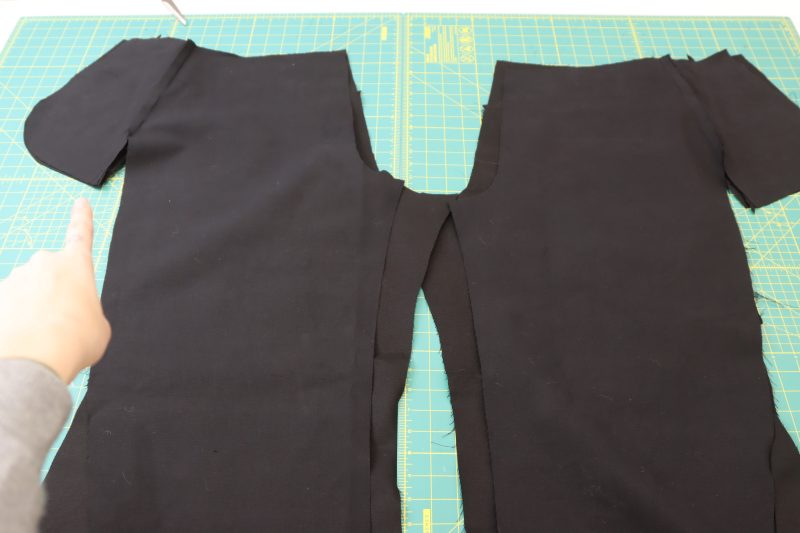
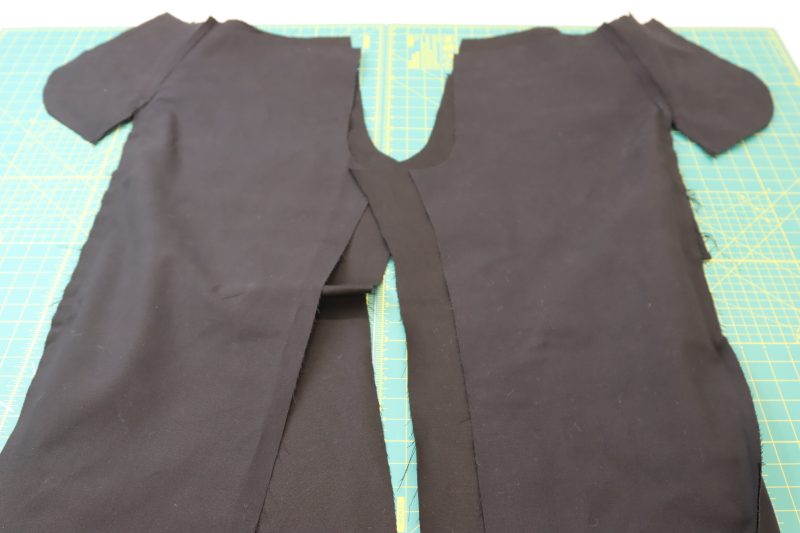
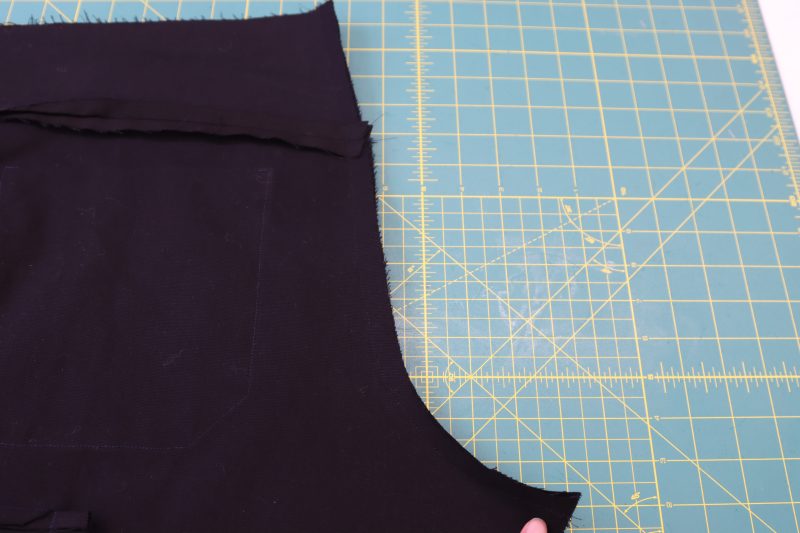
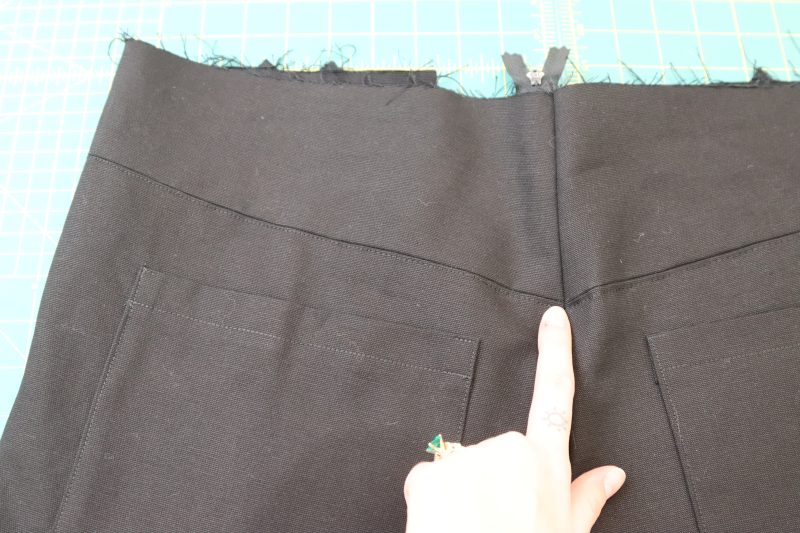
YOKE
- Layout the yoke pieces above the back pant pieces.
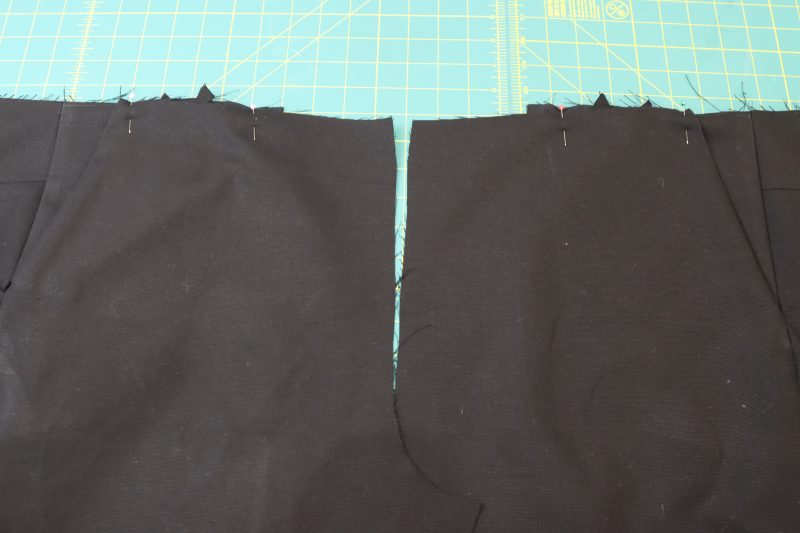
- Place the yokes right sides together with the top edge of the back pant pieces.
- Pin and sew the yokes to the back pant pieces.
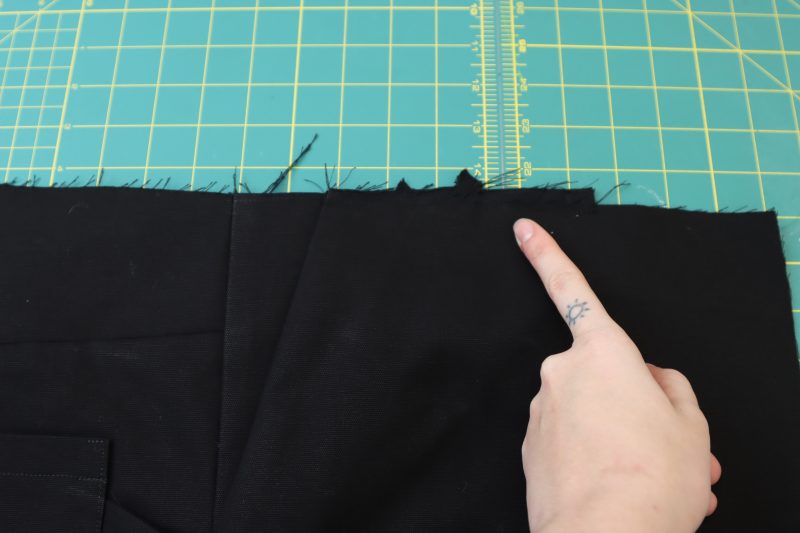
- Press the yoke seam open and flat.
Step 3
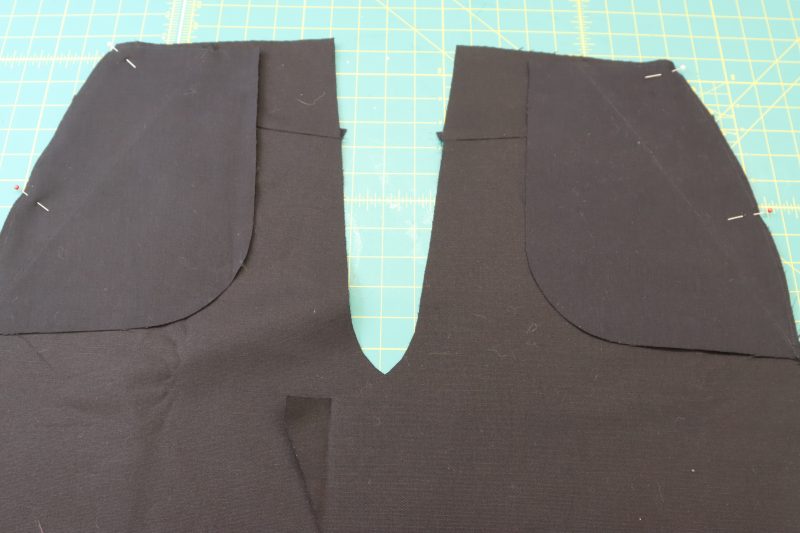
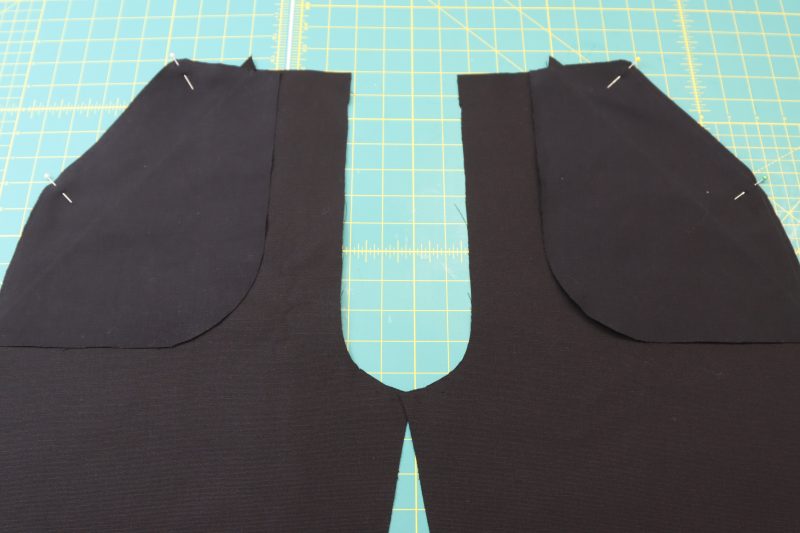
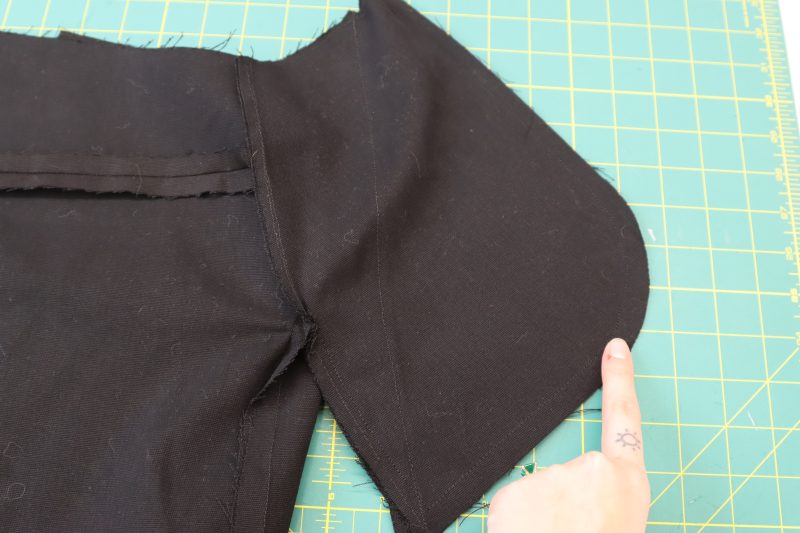
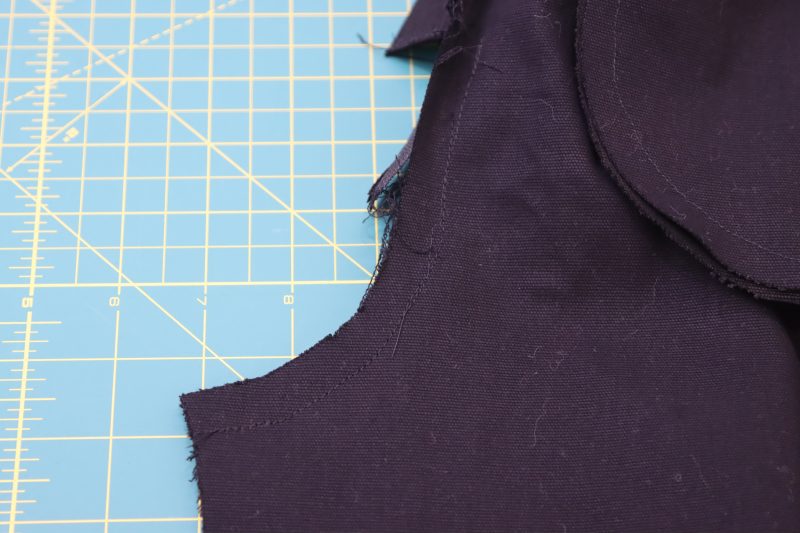
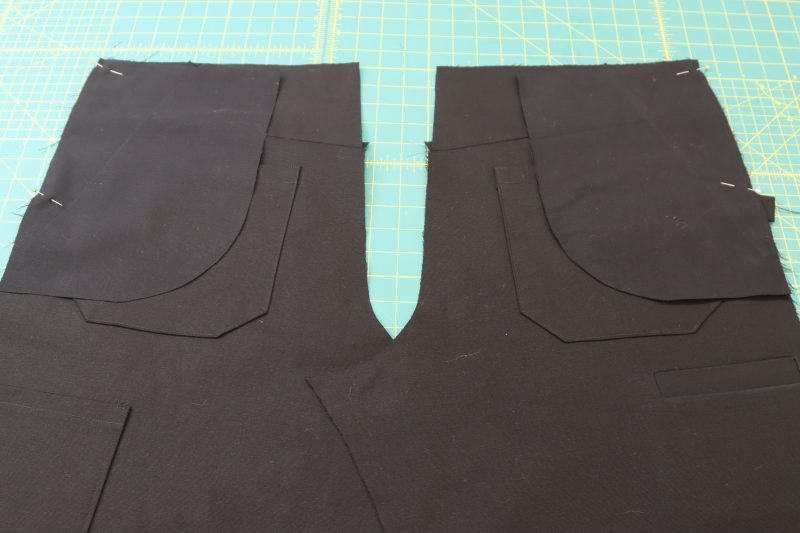
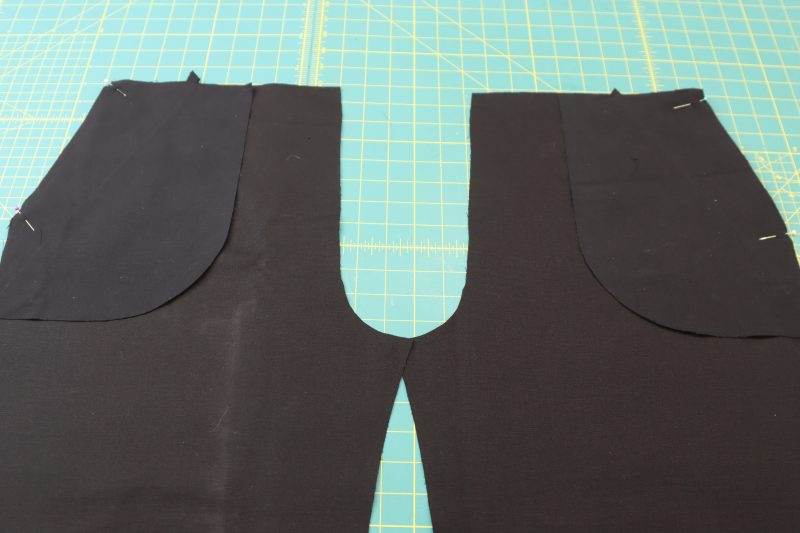
ATTACH FRONT POCKETS
- Place the B pockets right sides together with the sides of the back pants pieces.
- Pin and sew the B pockets to the sides of the back pants pieces, making sure to only sew the first 6 inches of the side of the pocket.
- Repeat the same steps with the A pockets and the front pants pieces.
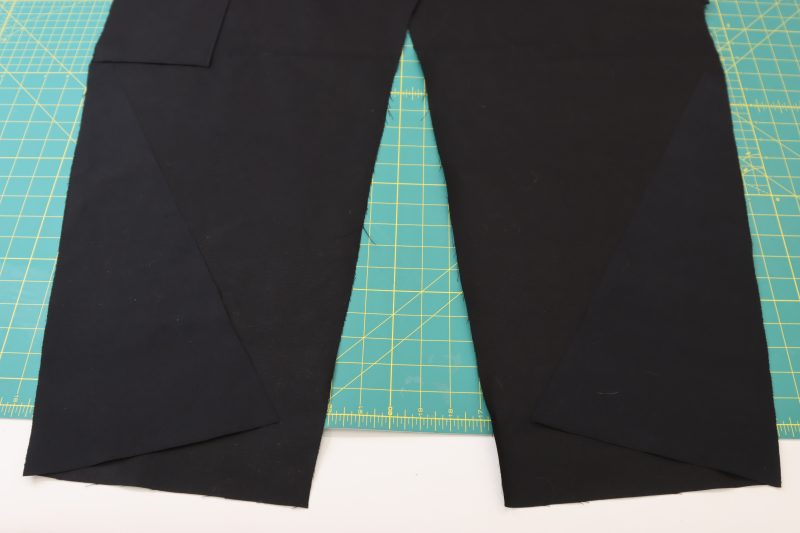
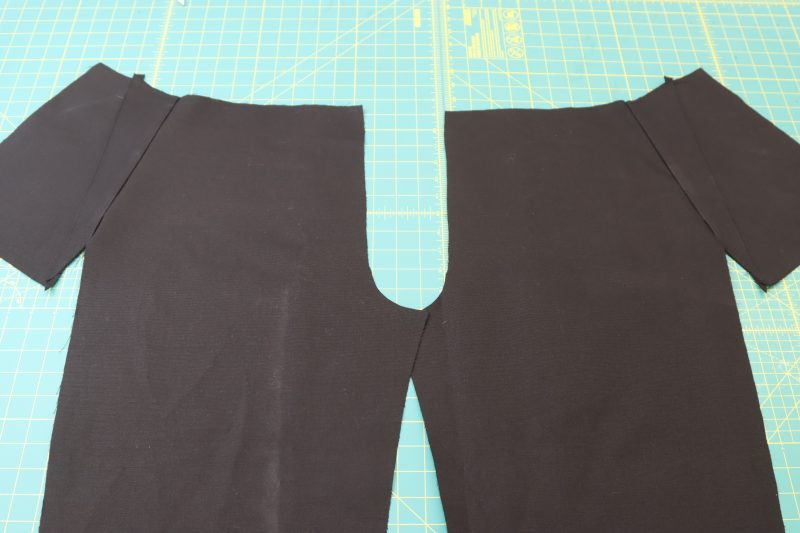
Step 4
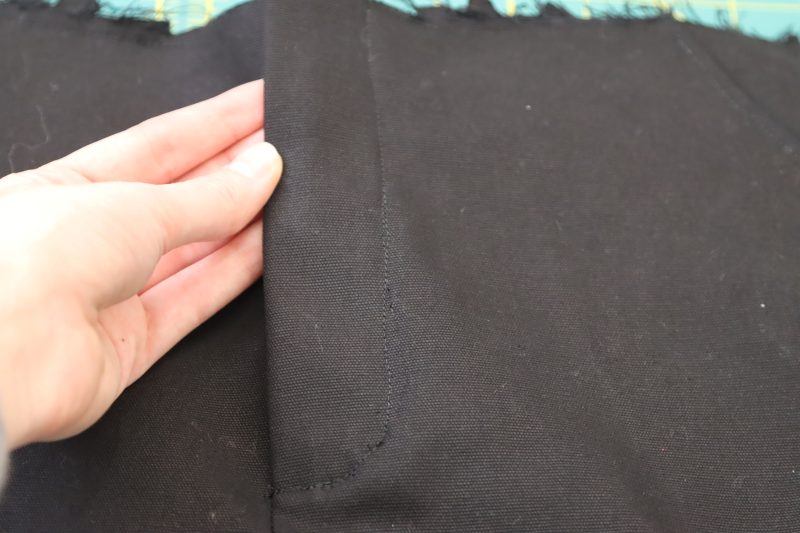
SIDE BOTTOM
- Place the front side of the side bottom pieces right sides together with the side seam of the back pants pieces.
- Pin and sew the side bottom pieces to the back pants pieces.
- Press the seams open and flat.
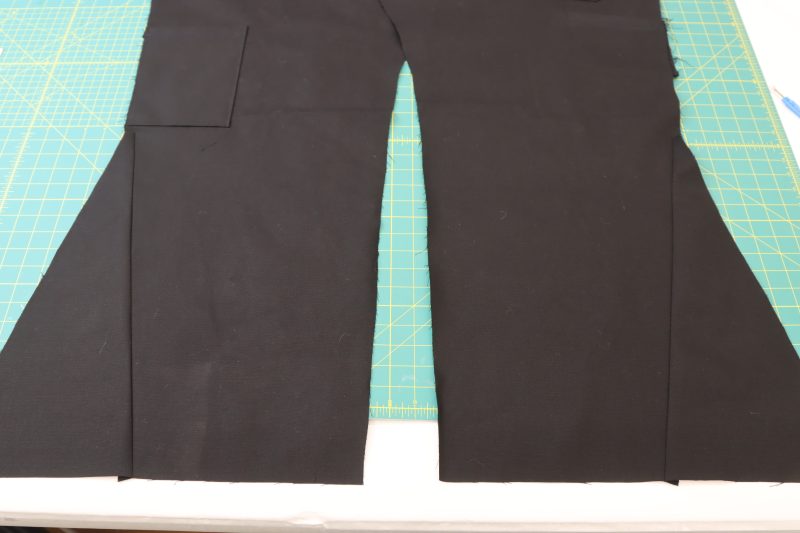
Step 5
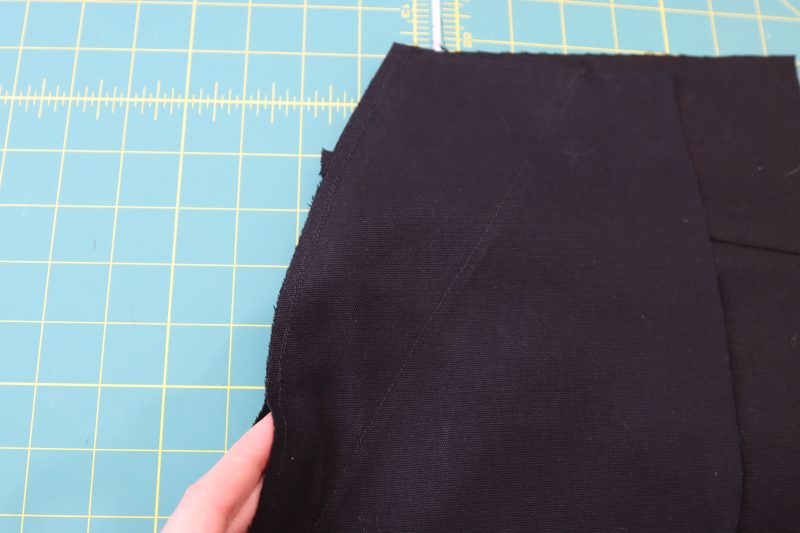
SIDE SEAMS
- Lay the front pants pieces right sides together with the back pants pieces, lining up the pockets and side seams.
- Pin and sew the front and back pants pieces together at the side seams, making sure the catch the front pants pieces onto the side bottom triangle pieces.
- Open the seams and press.
Step 6
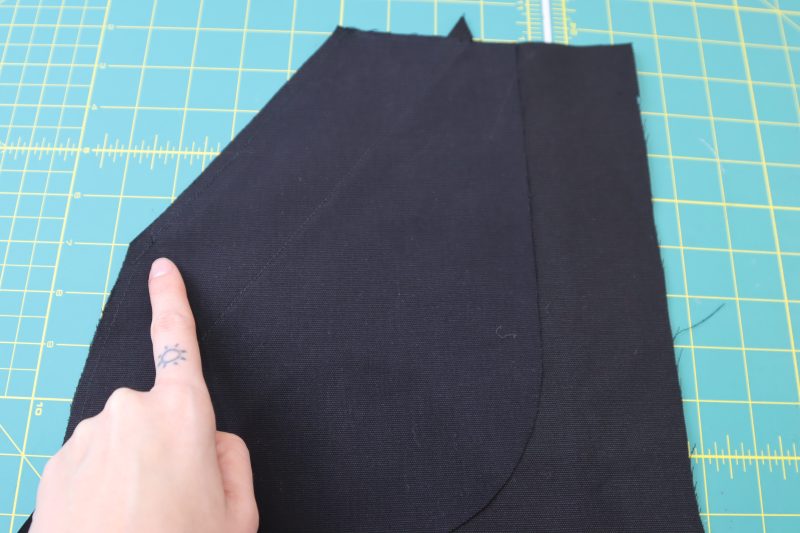
SECURE POCKETS
- Tuck the pockets into the side seams of the pants and press the seams flat.
- Pin the top of the pocket to the front waistline of the pants.
- Sew the pocket to the waistline with a ¼ inch seam allowance.
Step 7
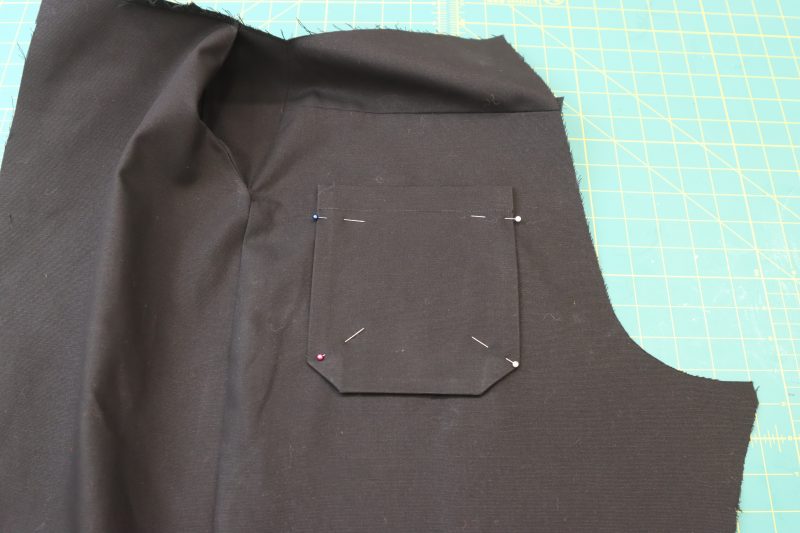
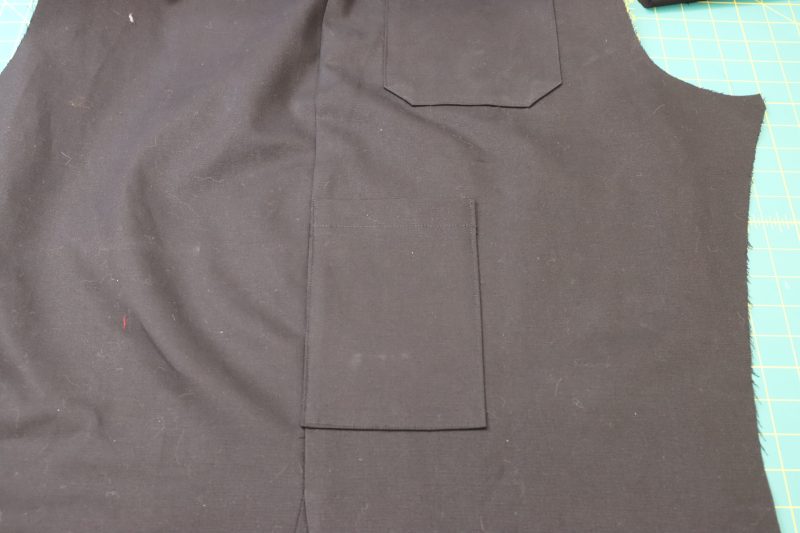
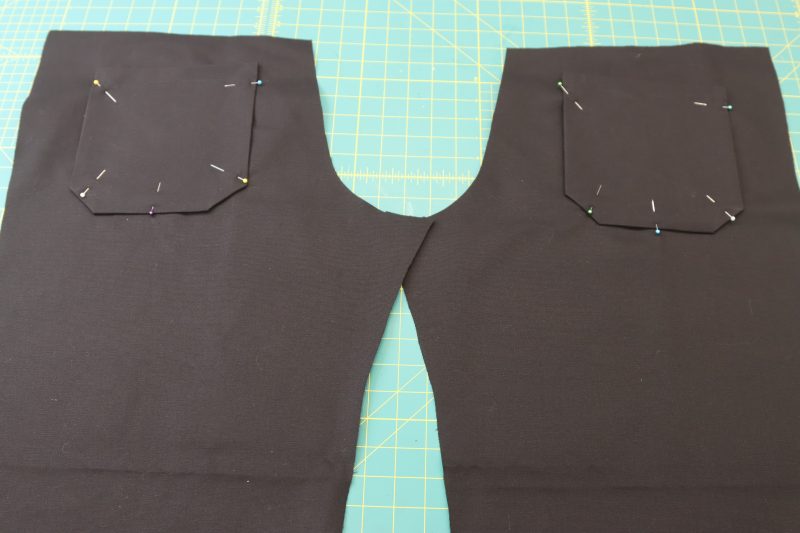
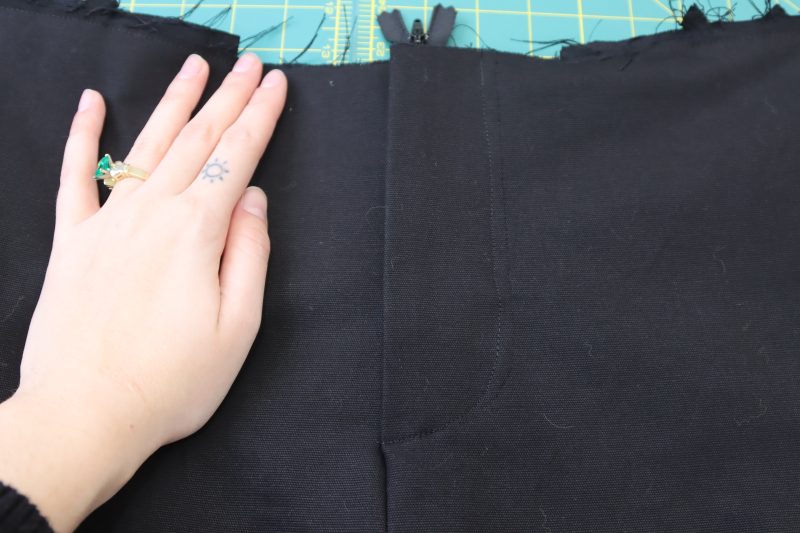
BACK POCKETS
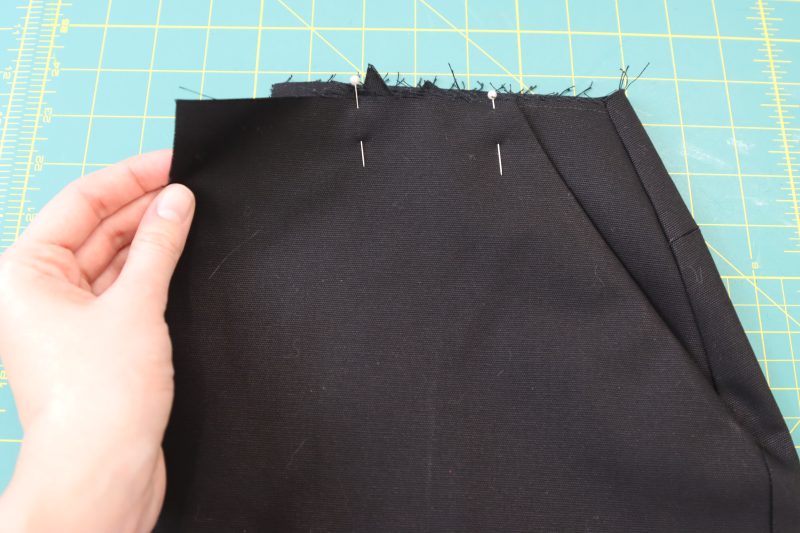
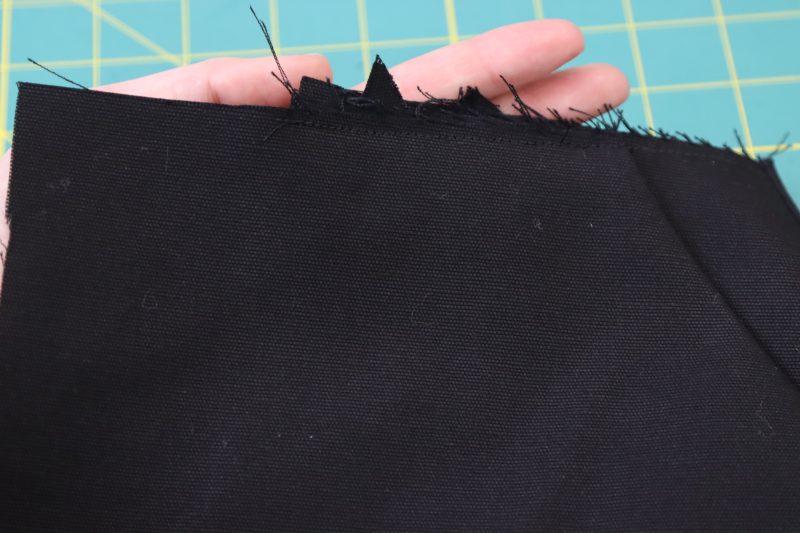
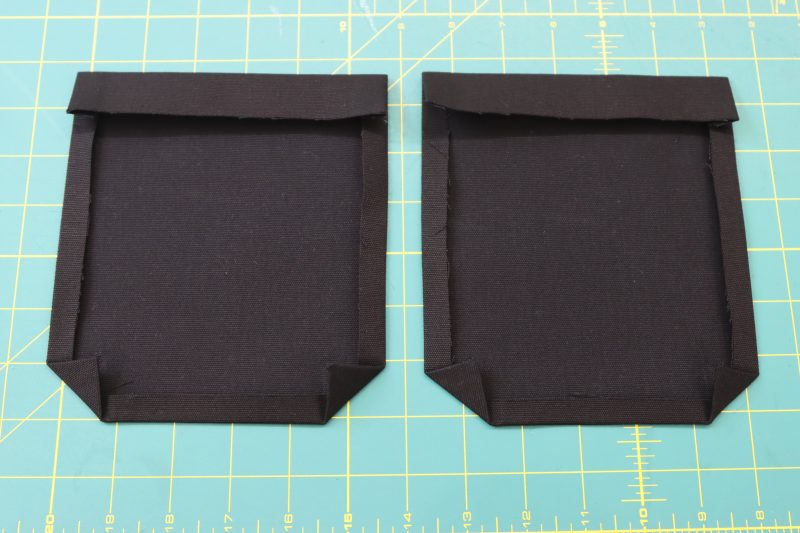
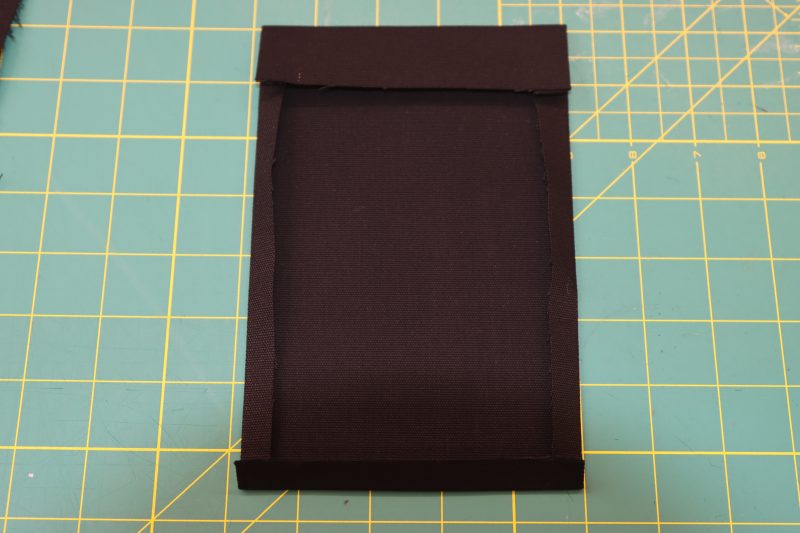
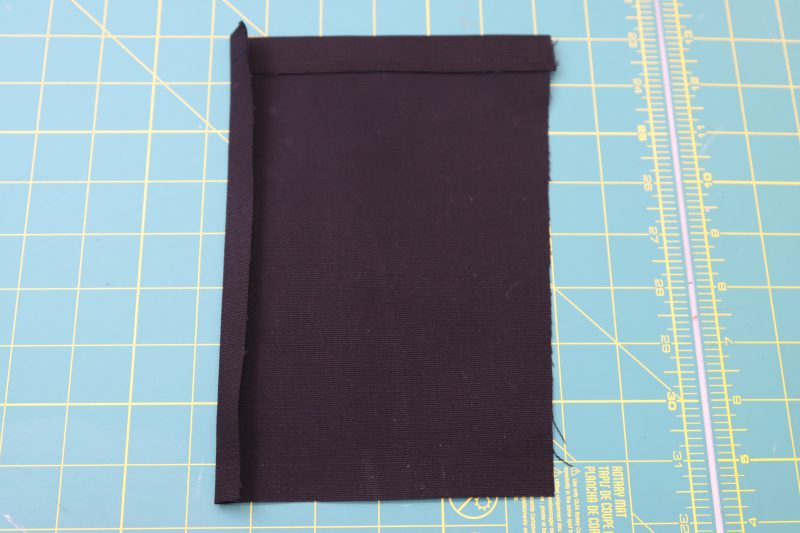
- Fold and press the side and bottom edges of the back pockets with ½ inch fold.
- Fold and press the top edges of the back pockets with a 1 inch fold.
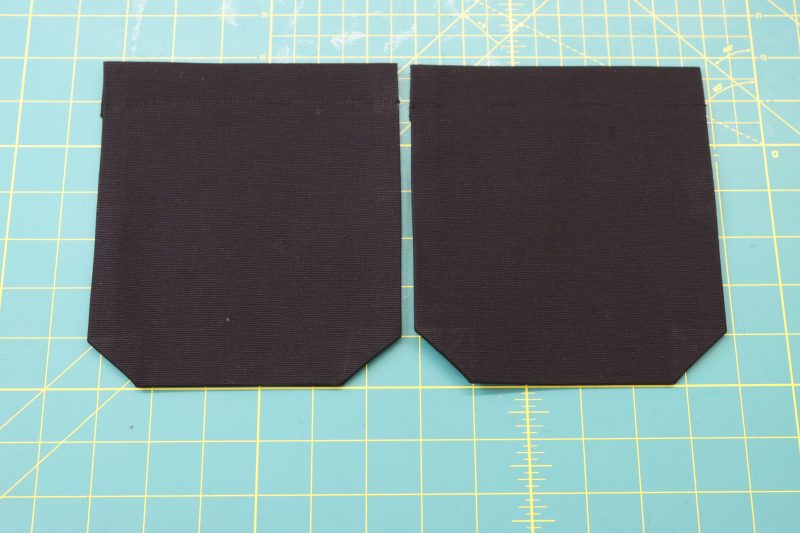
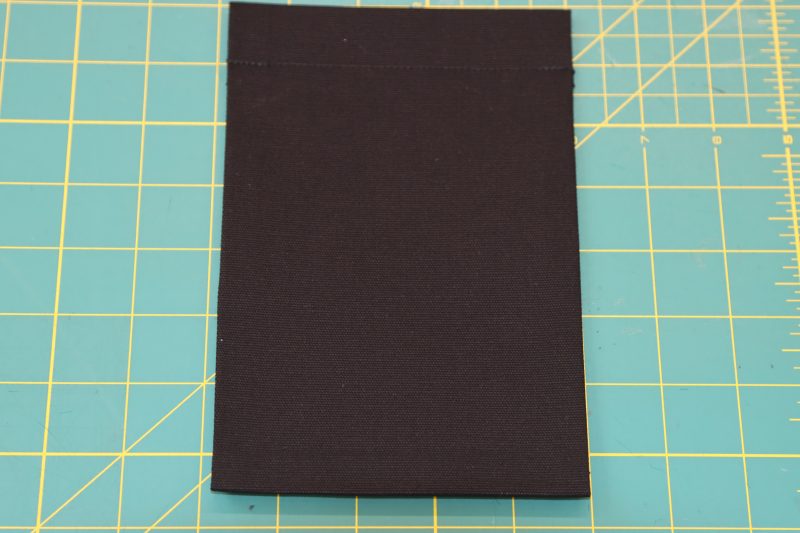
- Topstitch over the 1 inch fold at the top of the back pocket with ⅞ inch seam allowance.
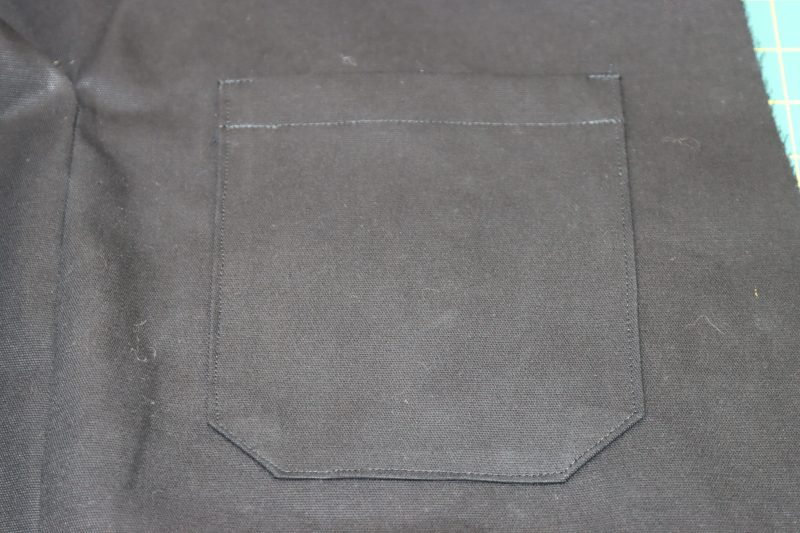
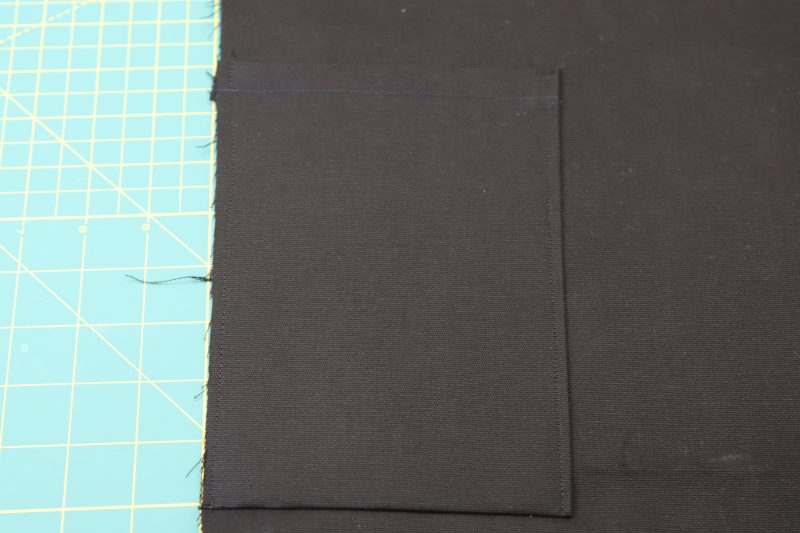
- Pin the back pockets to the back pants pieces as indicated in the paper pattern.
- Sew the sides and bottoms of the pockets to the backs of the pants.
Step 8
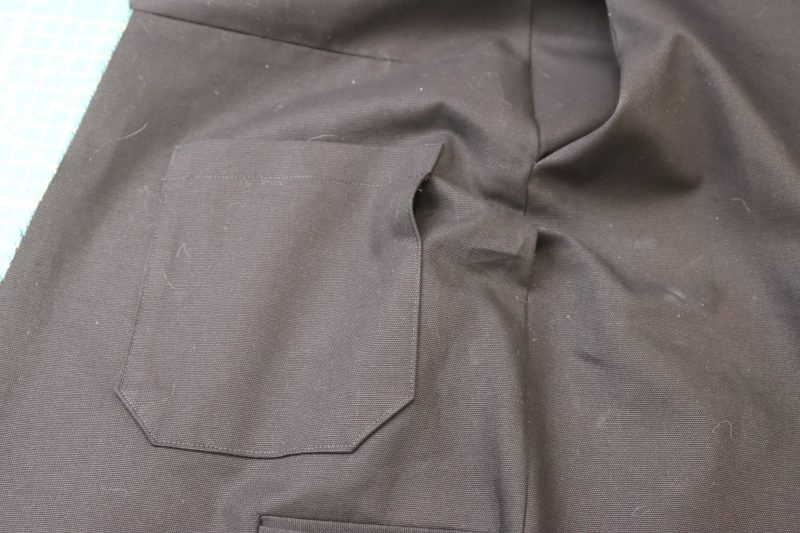
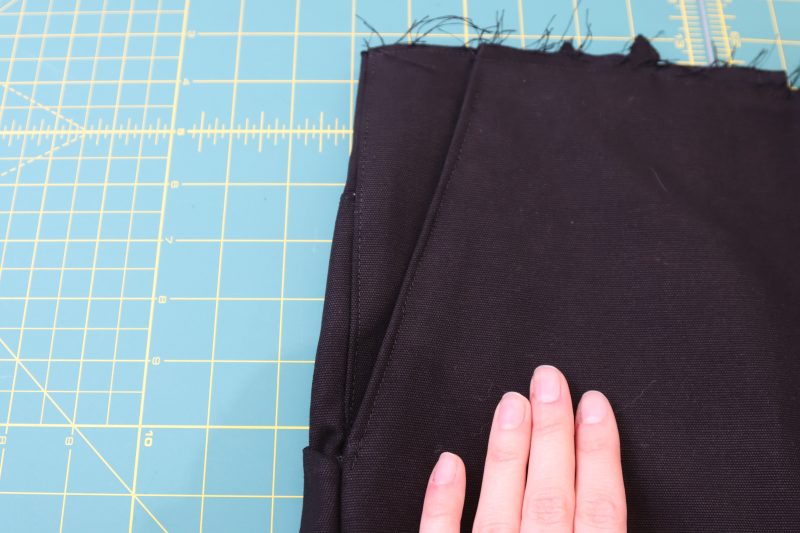
SIDE POCKET
Note: Please keep in mind that the side pocket was attached to the pants differently for the men’s pattern than the women’s. You can choose to attach it whichever way you decide, but if you want to check out the other method, check out step 24.
- Fold and press the side and bottom edges of the side pocket with ½ inch fold.
- Fold and press the top edges of the side pocket with a 1 inch fold.
- Topstitch over the 1 inch fold at the top of the side pocket with ⅞ inch seam allowance.
- Pin the side pocket to the back pants pieces as indicated in the paper pattern.
- Sew the sides and bottoms of the pocket to the back left pant piece.

Step 9
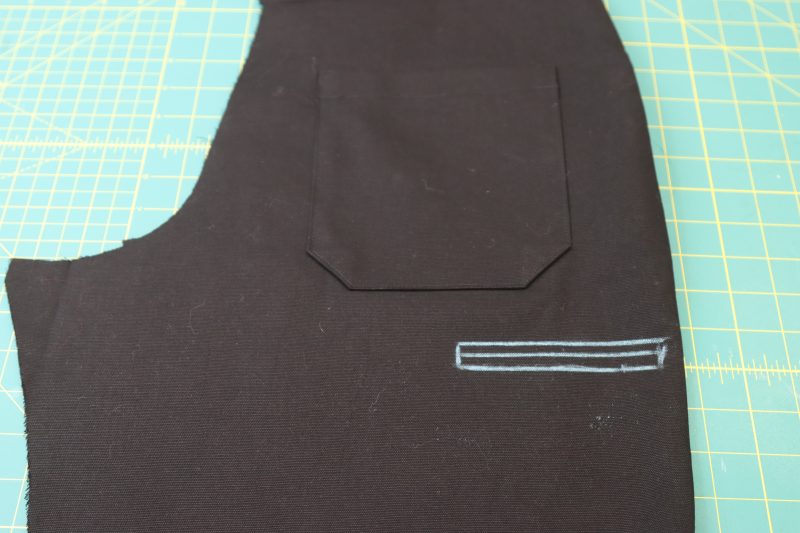
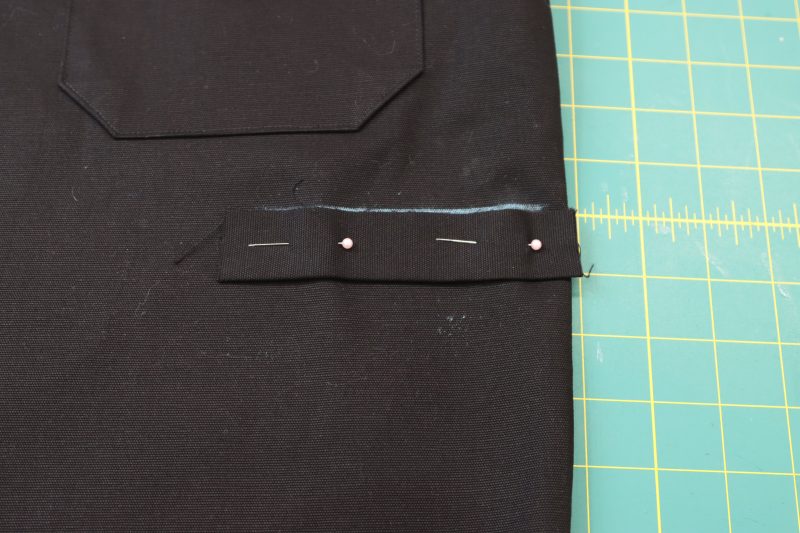
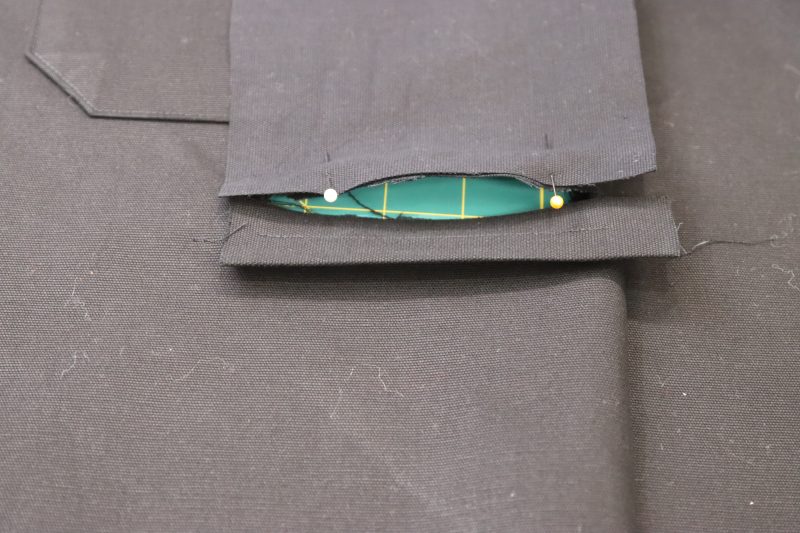
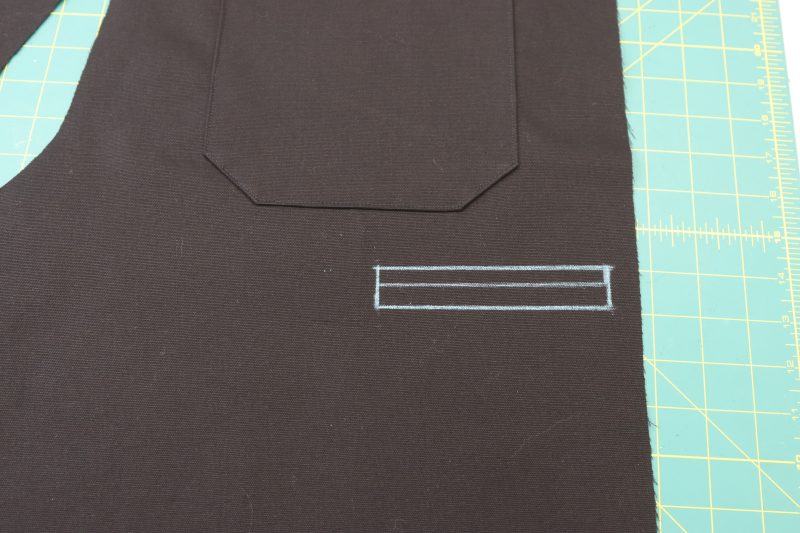
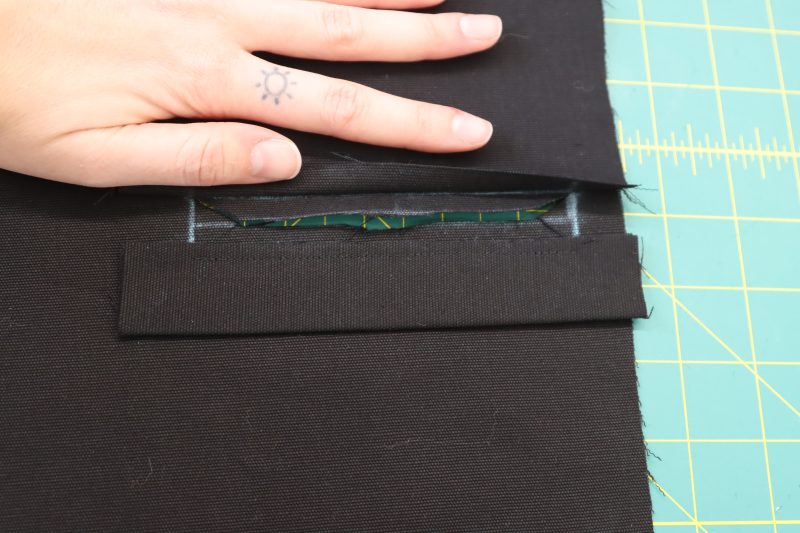
WELT POCKET
- Mark the location of the welt pocket according to the markings on the pattern using tailor’s chalk.
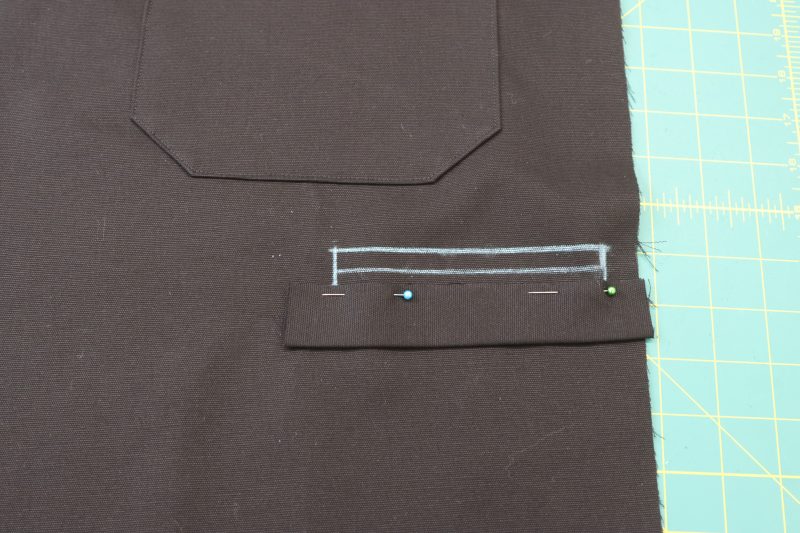
- Fold the welt piece in half long ways, wrong sides together, and press the fold.
- Pin the folded welt piece so that the distance between the bottom edge of the chalk mark and the folded edge of the welt is the same as the distance between the top and bottom chalk mark on the pants.
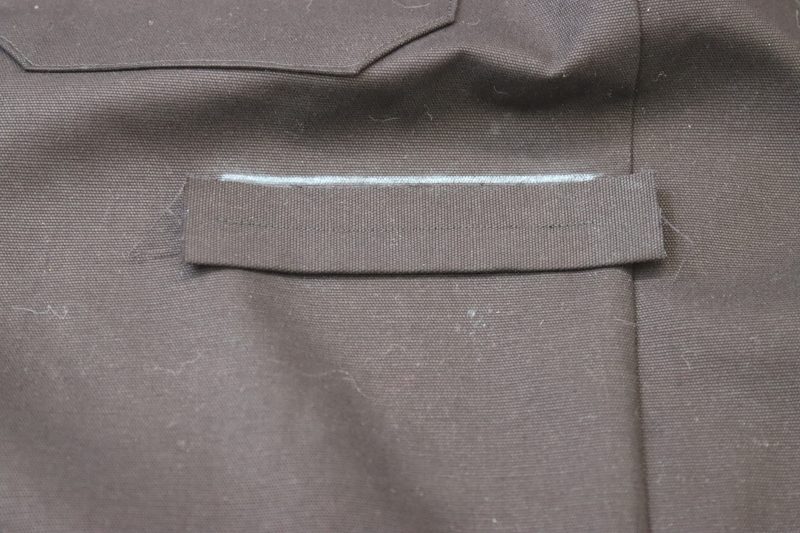
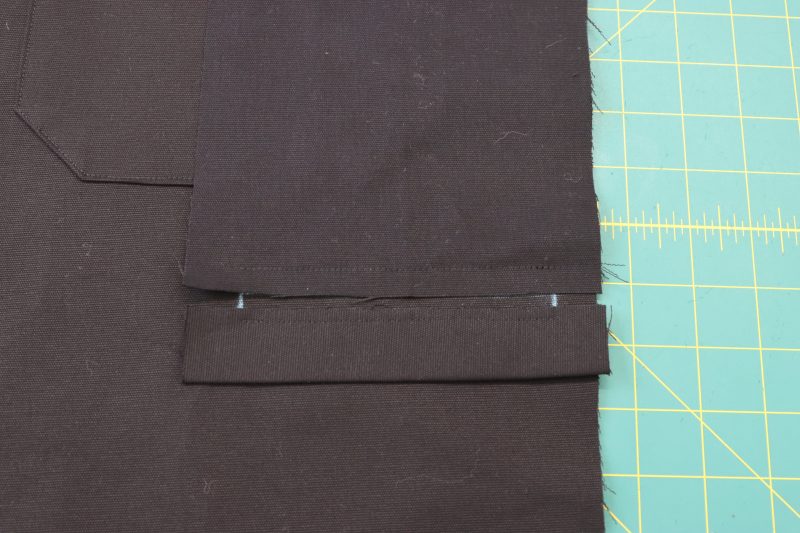
- Sew along the bottom chalk line to secure the welt.
- Clip the center and corners of the chalk lines to create the welt opening.
- Flip the welt toward the wrong side of the pants.
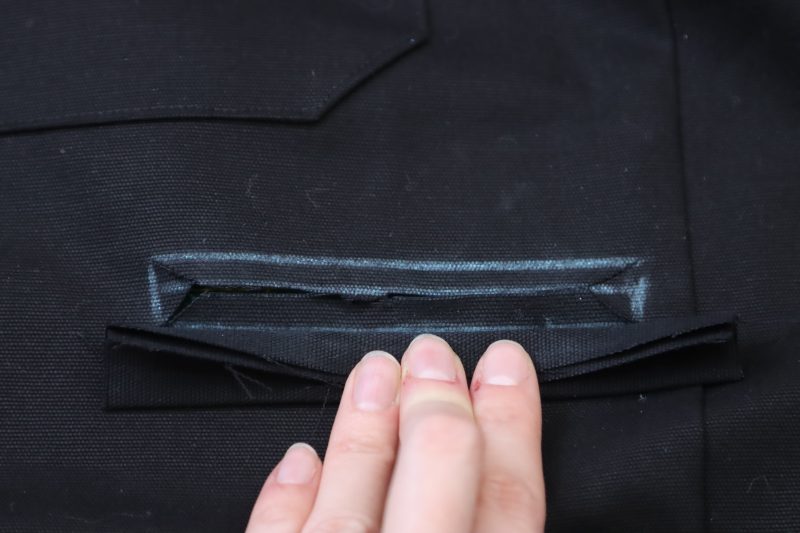
Step 10
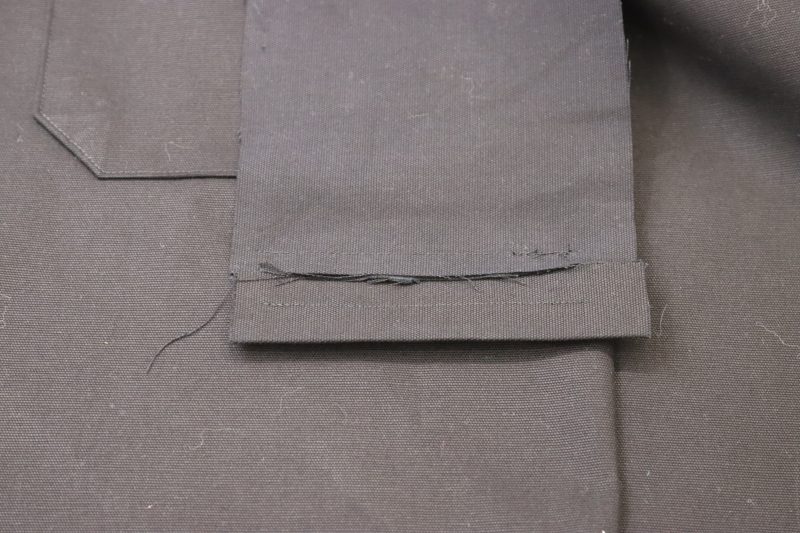
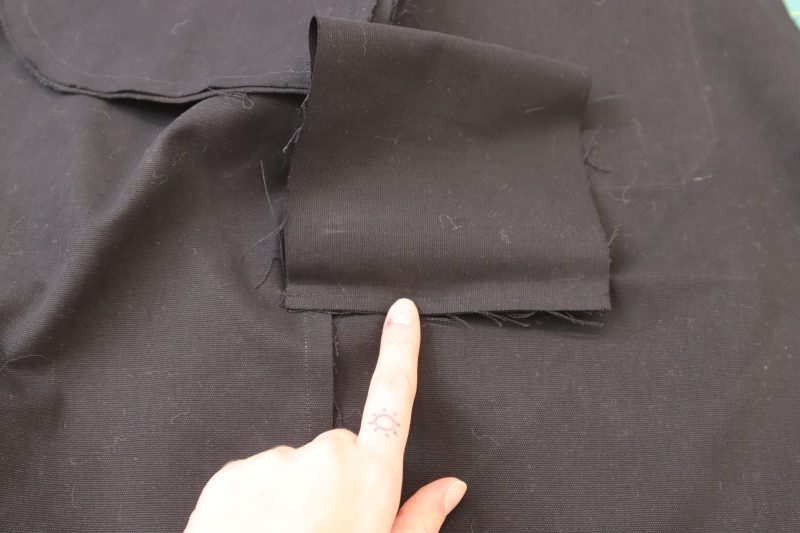
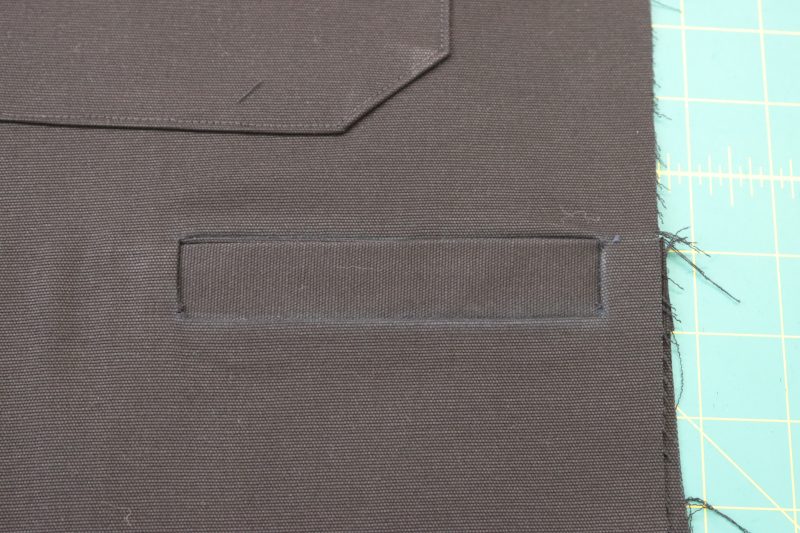
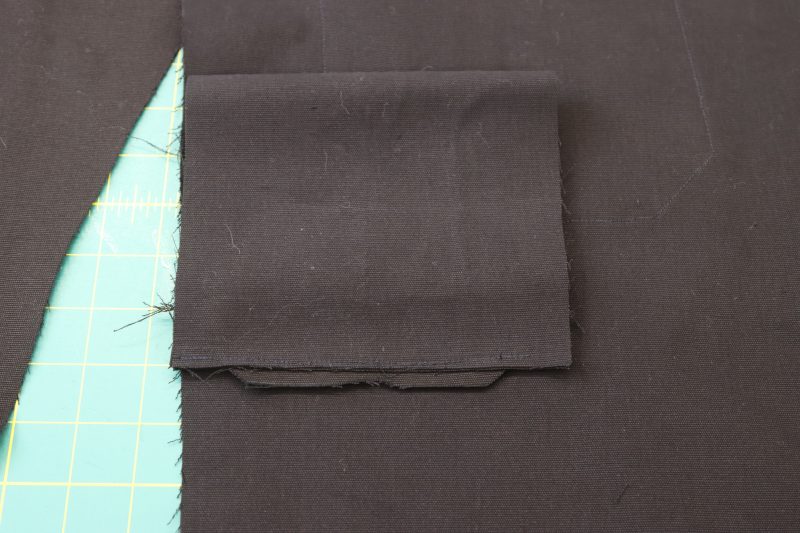
WELT POCKET LINING
- Pin and sew the welt pocket lining right sides together with the top chalk line.
- Flip the welt and the welt lining toward the wrong side of the pants.
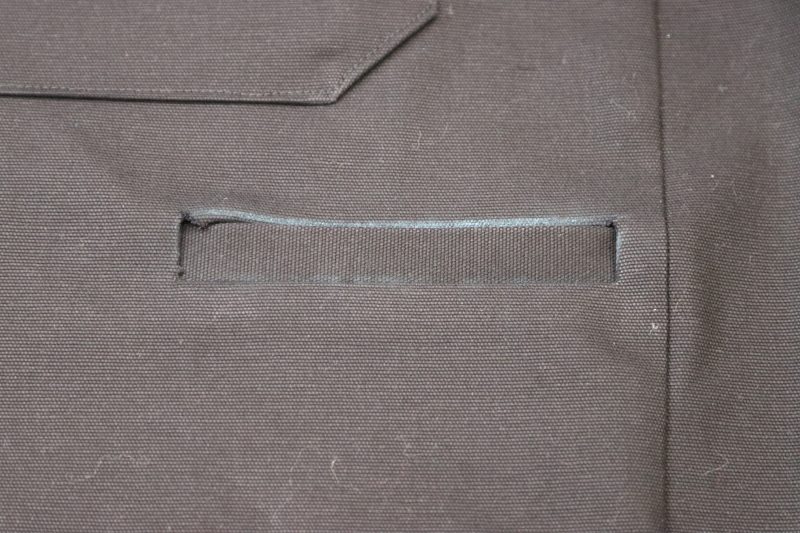
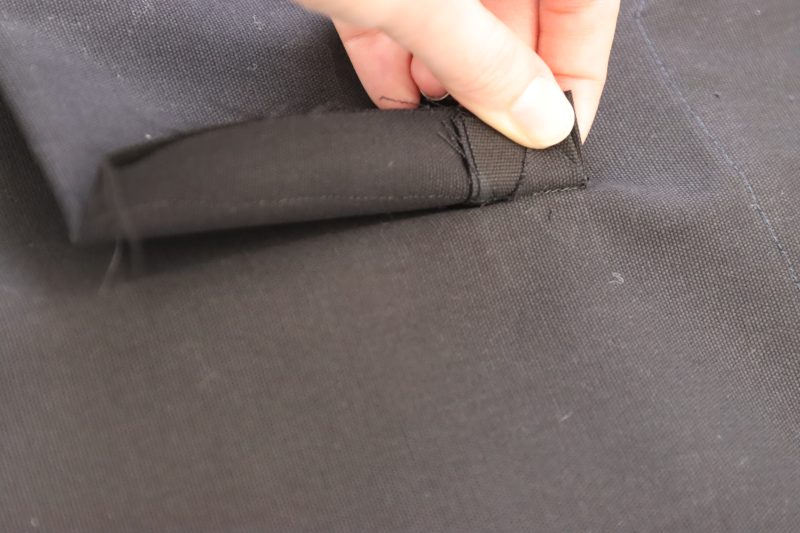
- Pin and sew the other end of the welt pocket lining to the raw edge at the bottom of the welt to secure the inside of the pocket lining.
- Pin and sew the sides of the pocket lining together as well as to the triangular cutout that extends out of the welt opening.
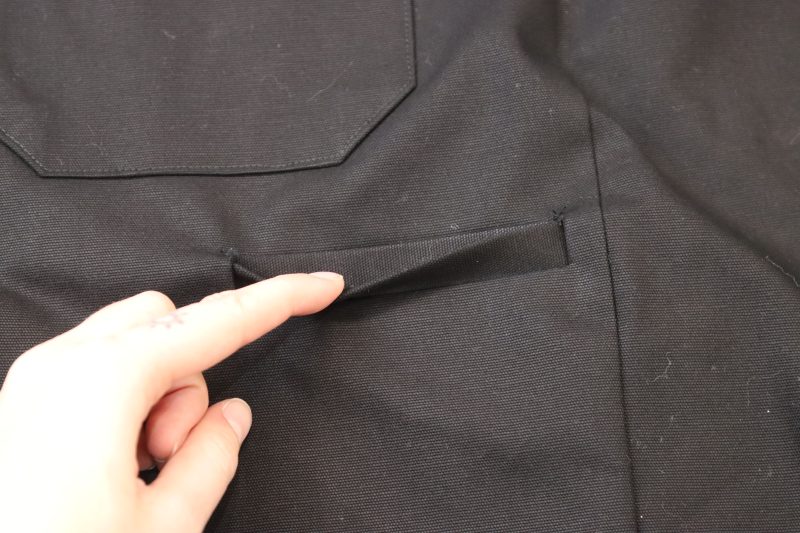
- Press the welt flat.
Step 11
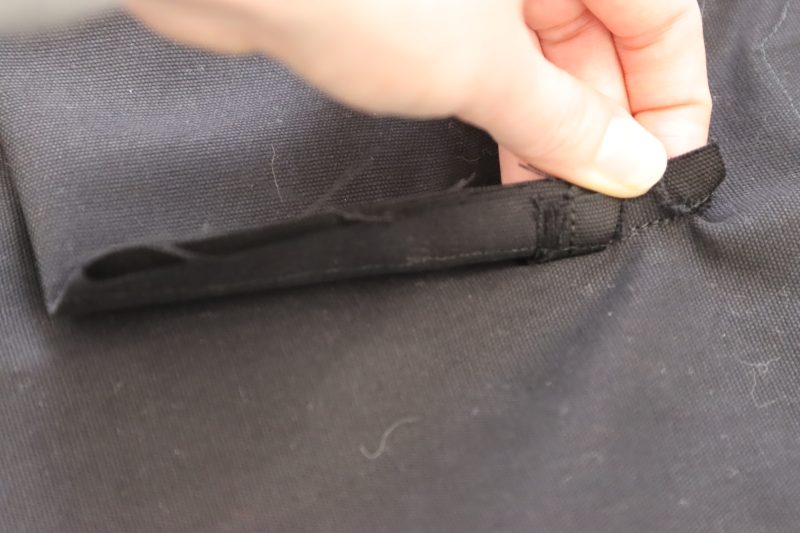
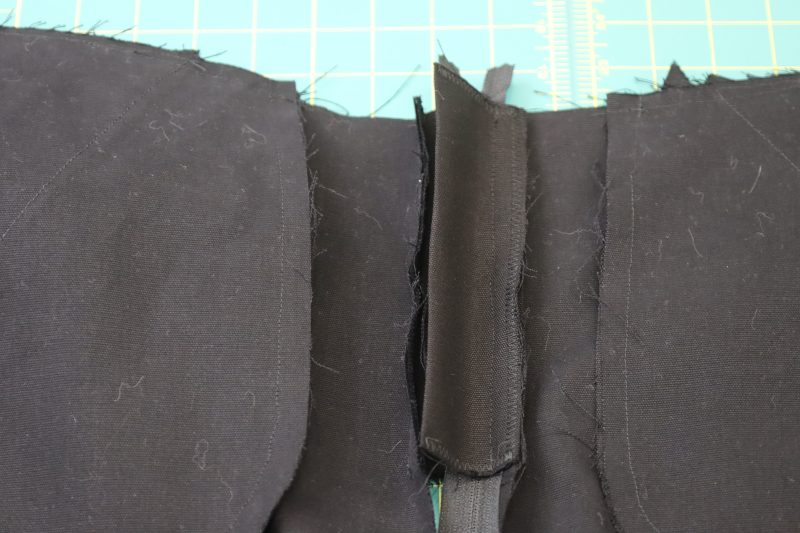
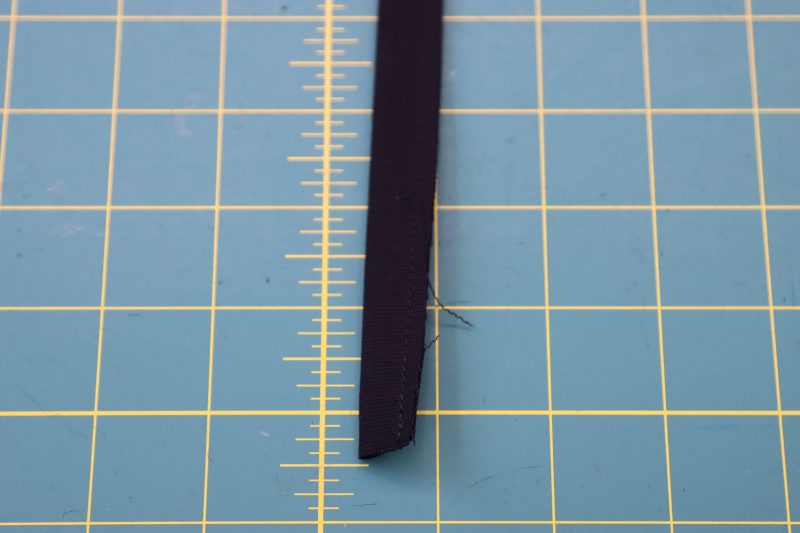
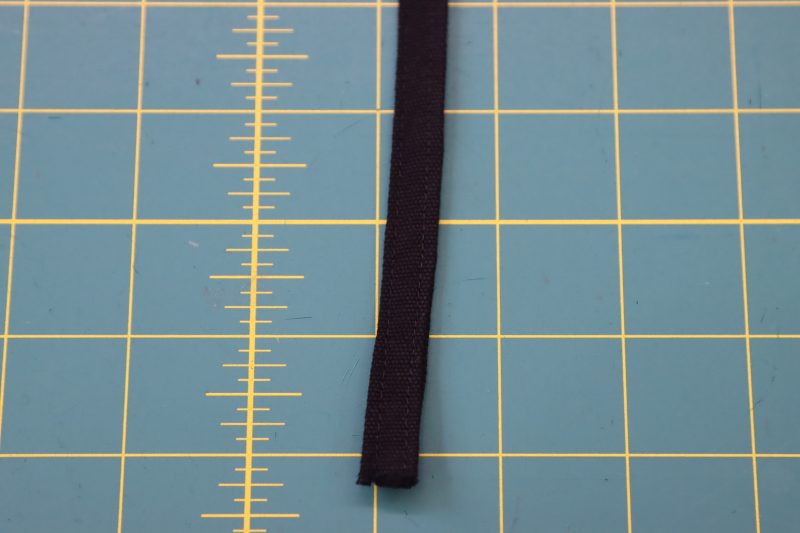
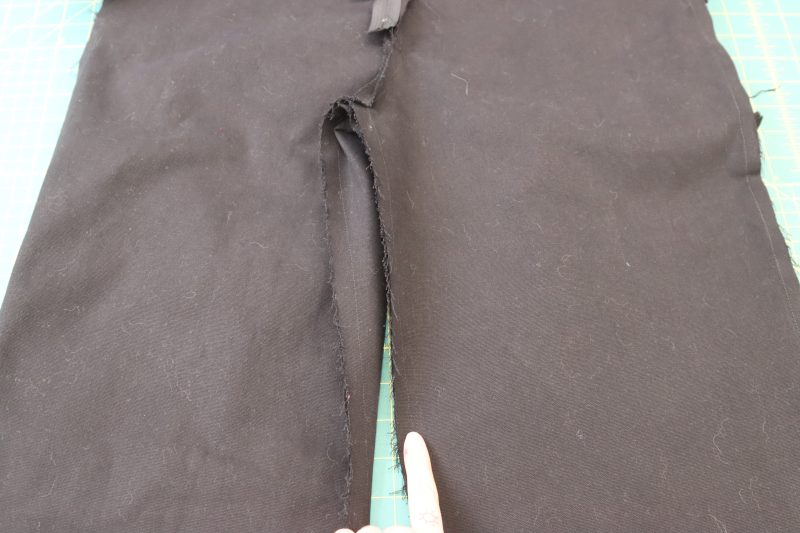
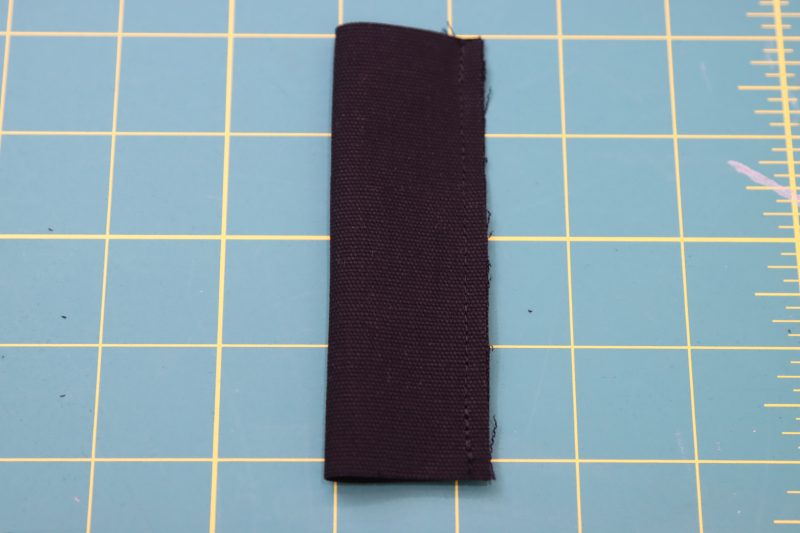
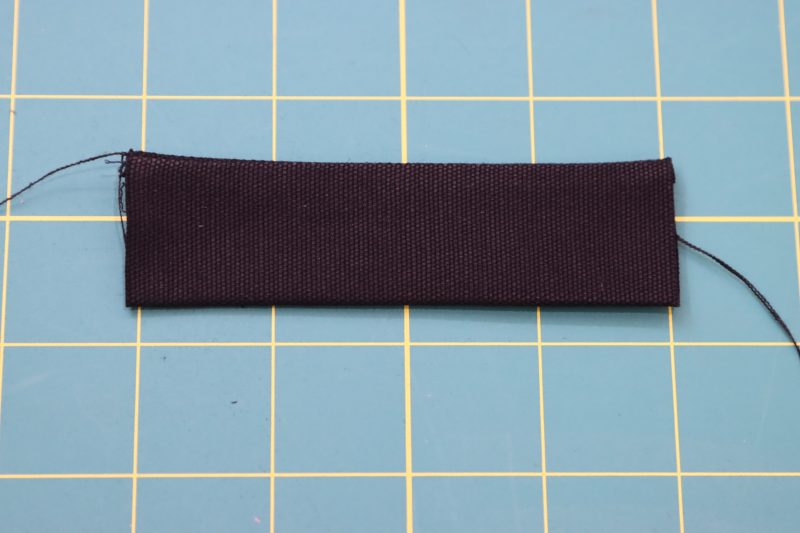
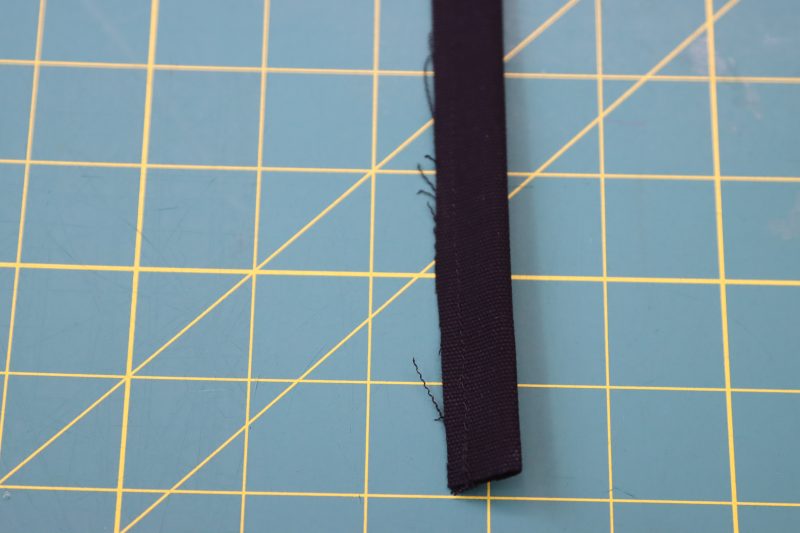
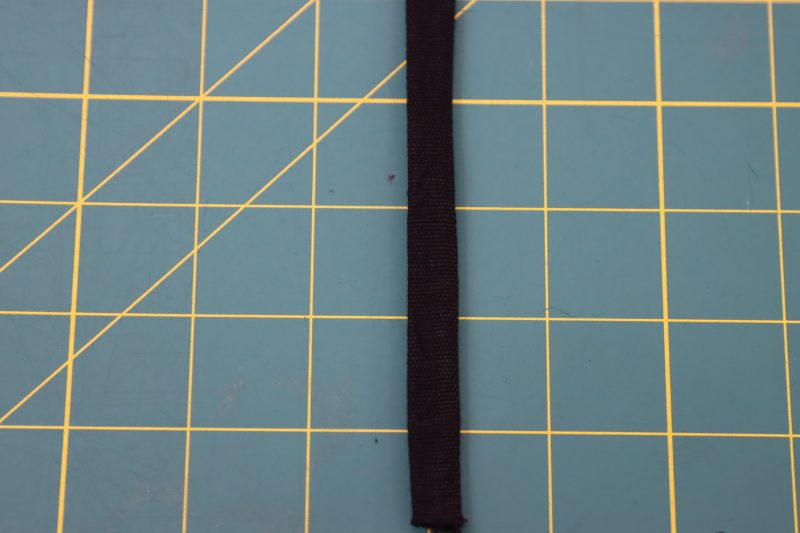
STRAP
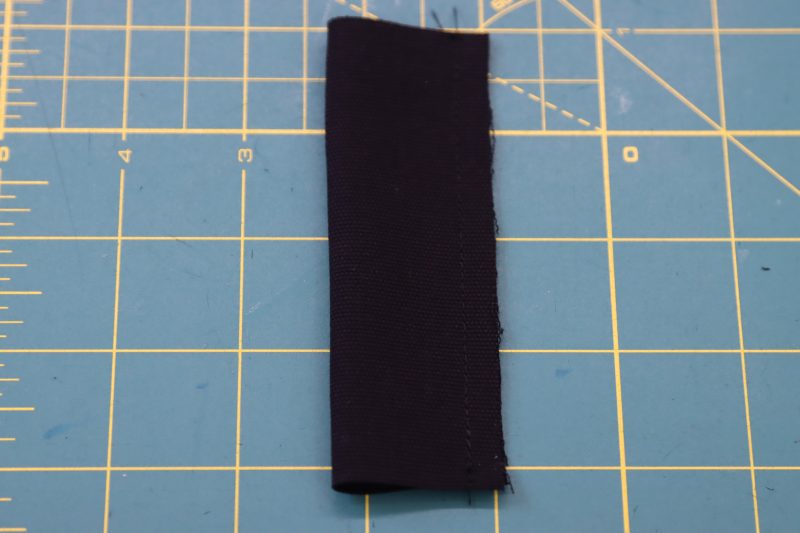
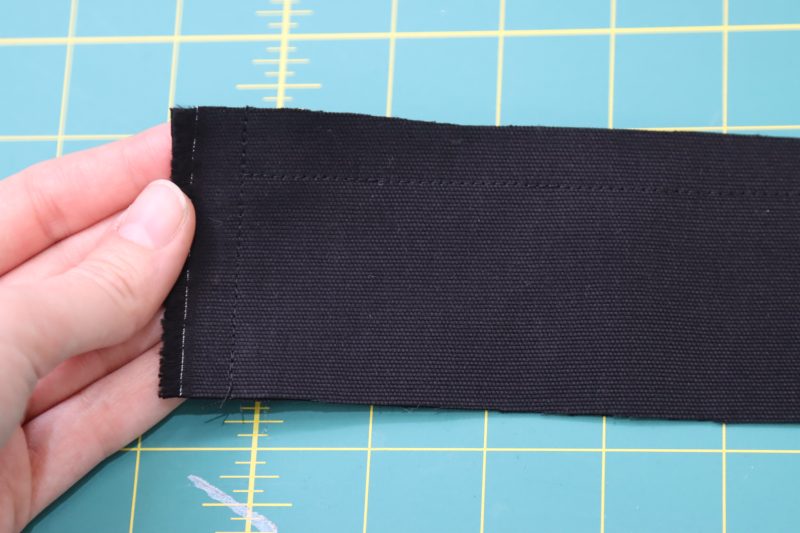
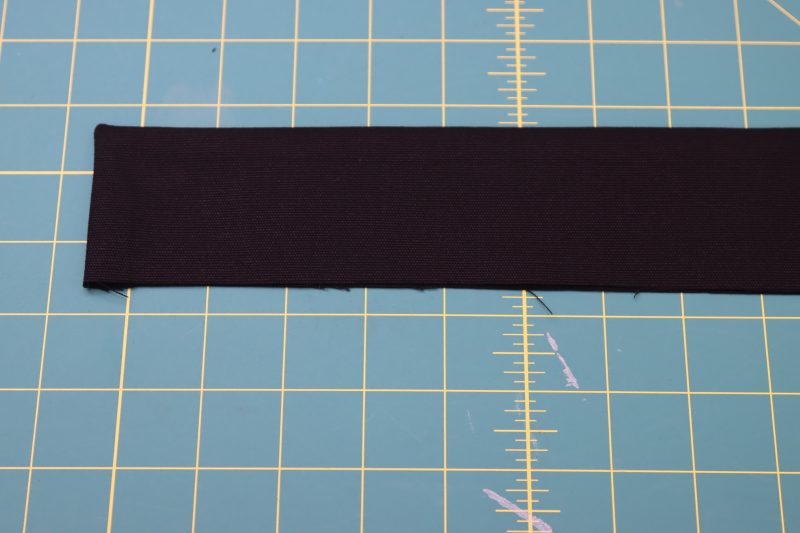
- Fold the strap in half long ways.
- Pin and sew the raw edges along the long side of the strap.
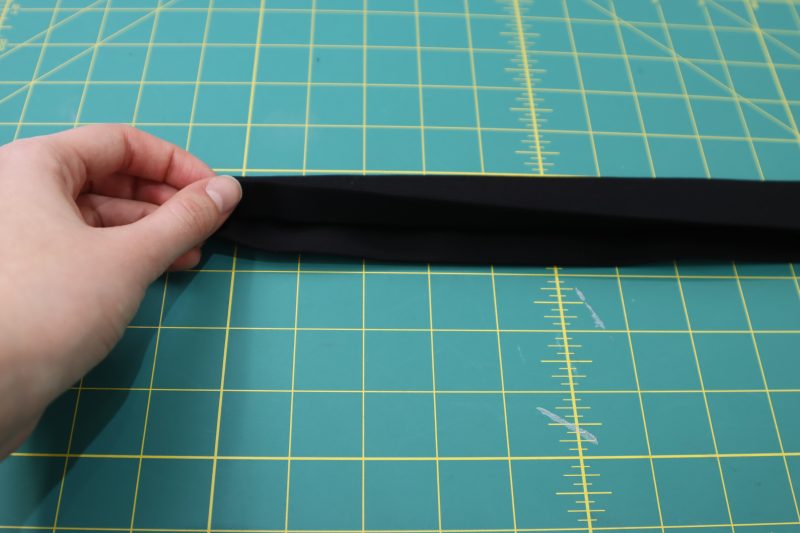
- Flip the strap right sides out using a loop turner.
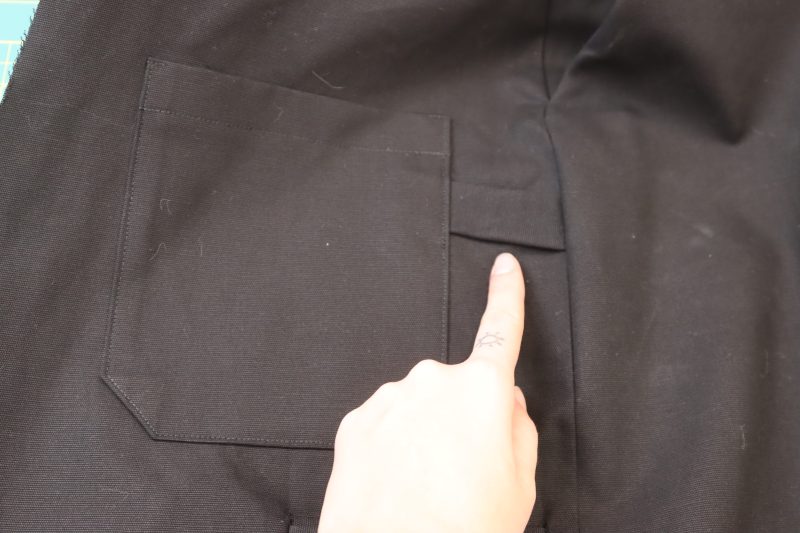
- Seam rip a gap big enough for the strap to fit through in the back pocket and the side seam of the back right pant leg (Note: If you have more foresight than I do, you’ll do this step BEFORE attach the back pockets and sewing up the side seams, but I did not do that and it still turned out fine).
- Insert the strap under the back pocket and into the side seam at a slight angle.
- Topstitch over the back pocket and re-sew the side seam, making sure the catch the strap in both seams.

Step 12
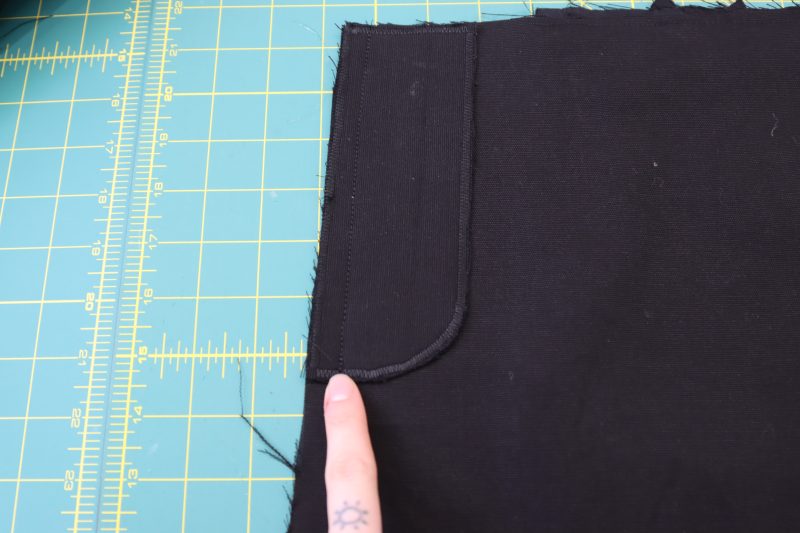
PREPARE FLY
- Pin the fly facing pieces wrong sides together.
- Fold the fly shield in half wrong sides together and pin.
- Zigzag stitch around the edges of both fly pieces.
Step 13
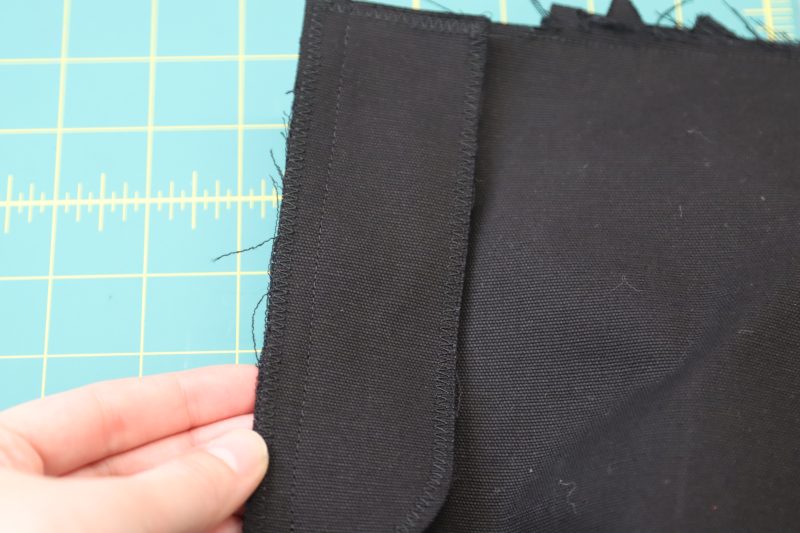
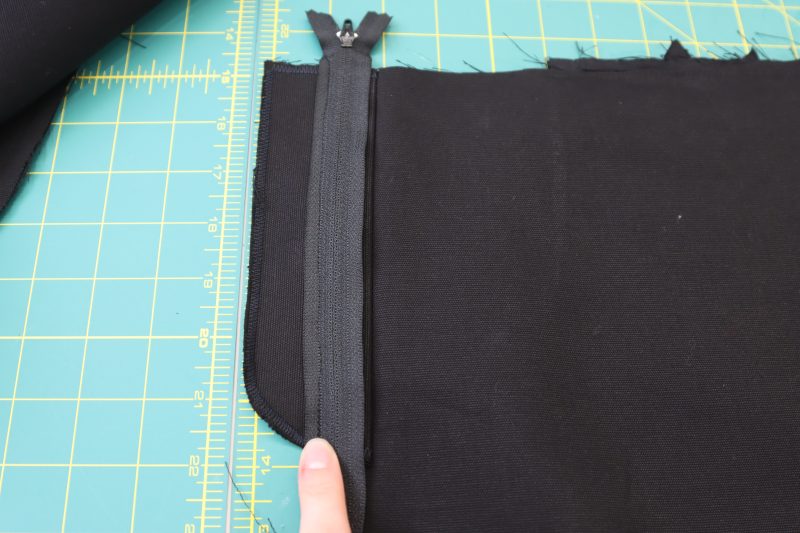
FLY FACING
- Pin and sew the fly facing piece to the front left pants piece at the front center crotch area.
- Open the fly facing and press the seam flat.
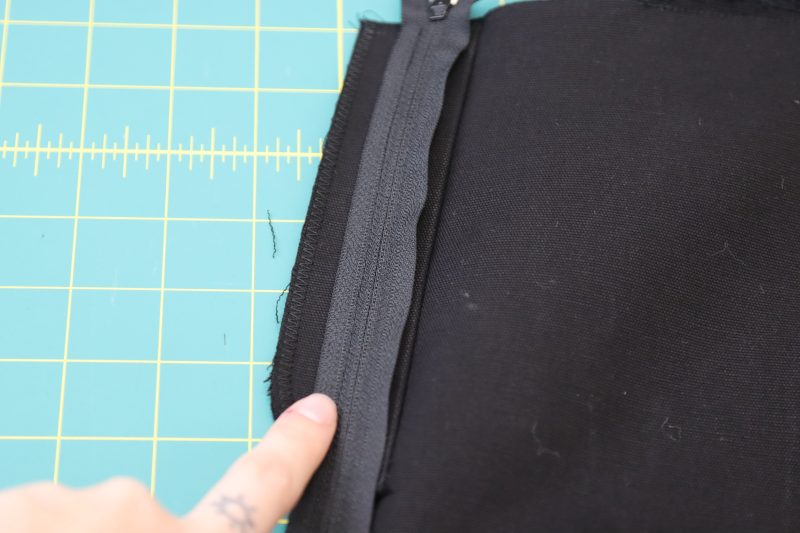
- Pin the zipper to the right side of the fly facing (the side opposite to the seam you just sewed).
- Sew the zipper tape furthest away from the seam you just sewed.
Step 14
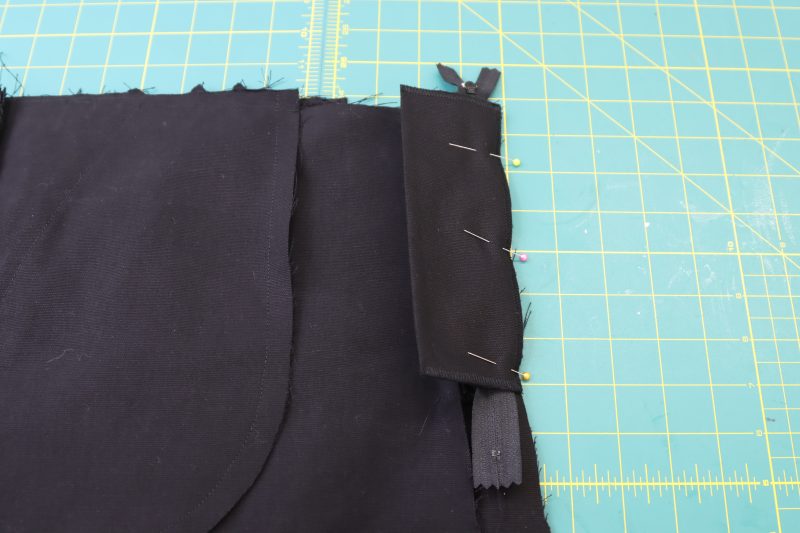
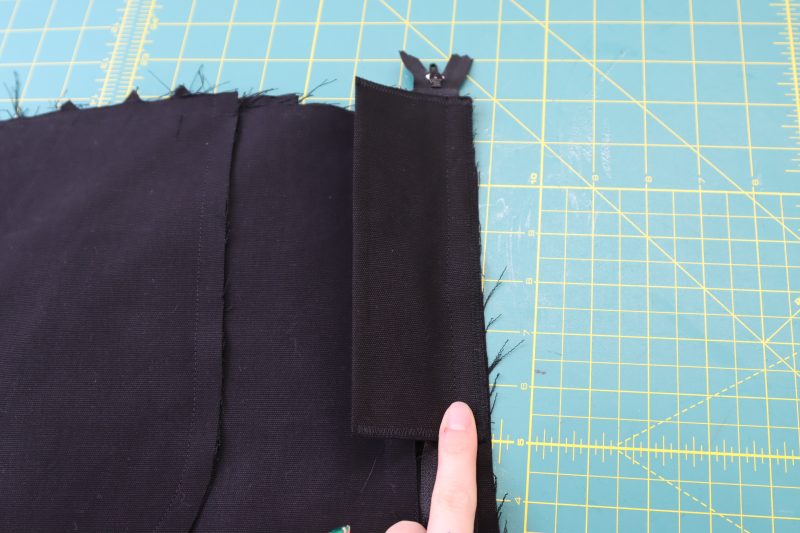
FLY SHIELD
- Place the zipper right sides together with the other front pants piece.
- Sandwich the zipper between the front pants piece and the fly shield.
- Pin and sew the zipper between the fly shield and the opposite side of the front of the pants.
Step 15
CROTCH SEAMS
- Pin and sew the front crotch seams right sides together under the zipper fly.
- Pin and sew the back crotch seam right sides together.
Step 16
TOPSTITCHING
- Topstitch over the fly facing to secure it in place.
- Topstitch over the front pockets.
- Topstitch over the yoke seams.
- There is a lot more topstitching you can do for decorative and functional purposes. You can topstitch the crotch seams, side seams, inseams, anything you want. The more topstitching you add, the more they look like storebought/commercially manufactured jeans.
Step 17
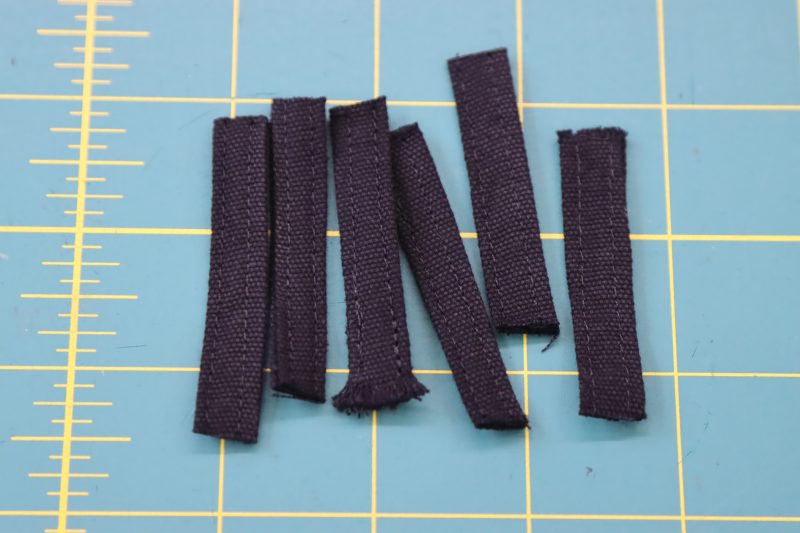
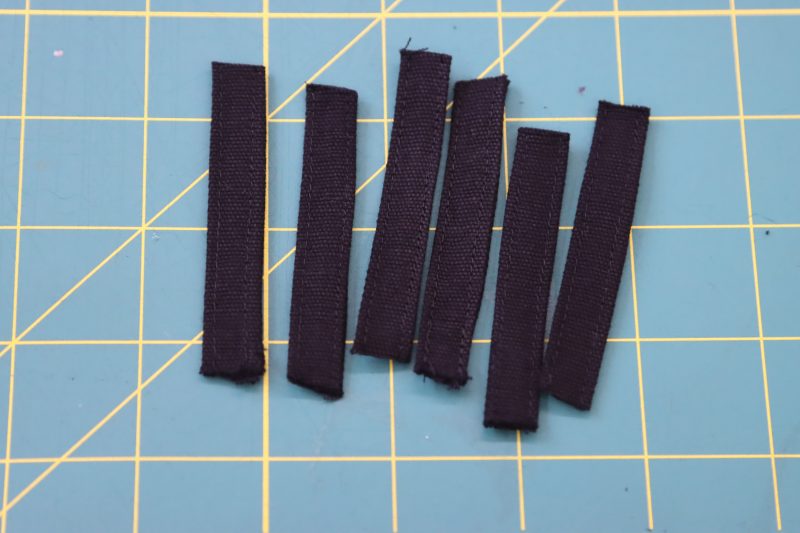
PREPARE BELT LOOPS
- Do not cut the belt loops into individual strips until AFTER you have sewn the long strip into a tunnel.
- Fold the belt loop strip right sides together.
- Sew the strip with ⅛ inch seam allowance.
- Flip the tube right sides out with a loop turner.
- Topstitch two parallel lines onto the belt loop strip.
- Cut the belt loop into 6 equally sized strips.
Step 18
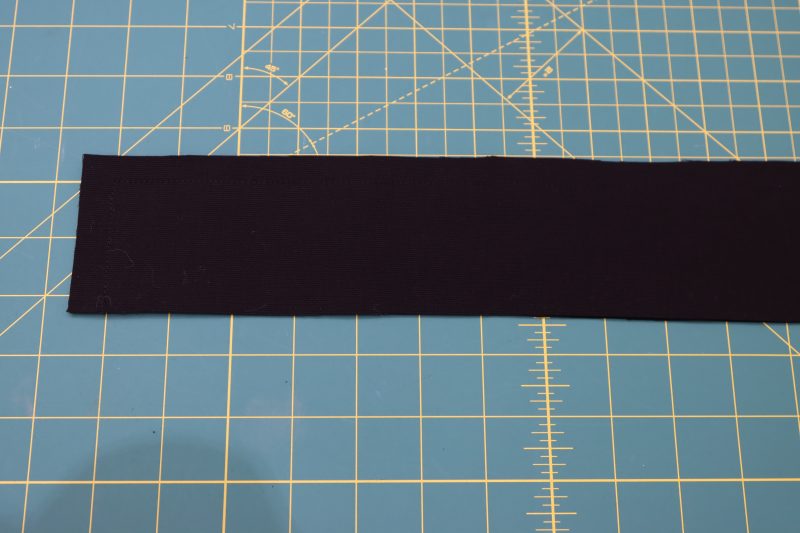
PREPARE WAISTBAND
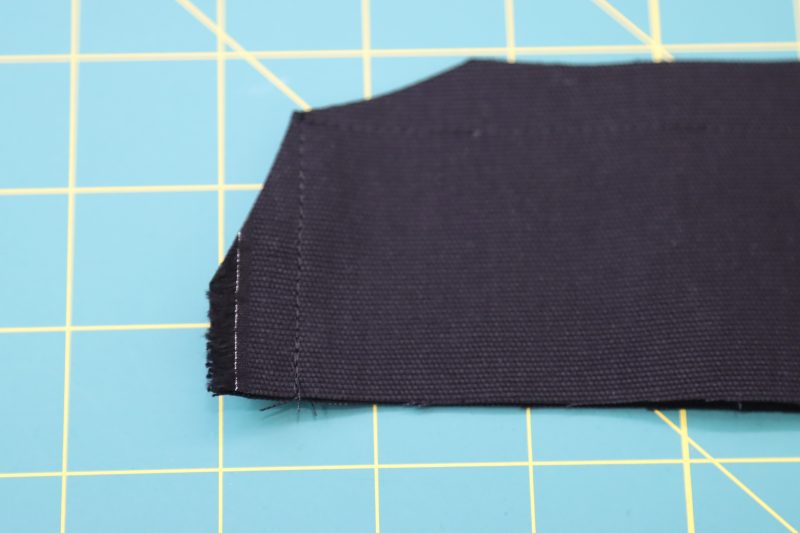
- Place the waistband pieces right sides together.
- Sew along the two short sides and one of the long sides of the waistband.
- Clip the corners of the waistband so that it lays flat when inverted.
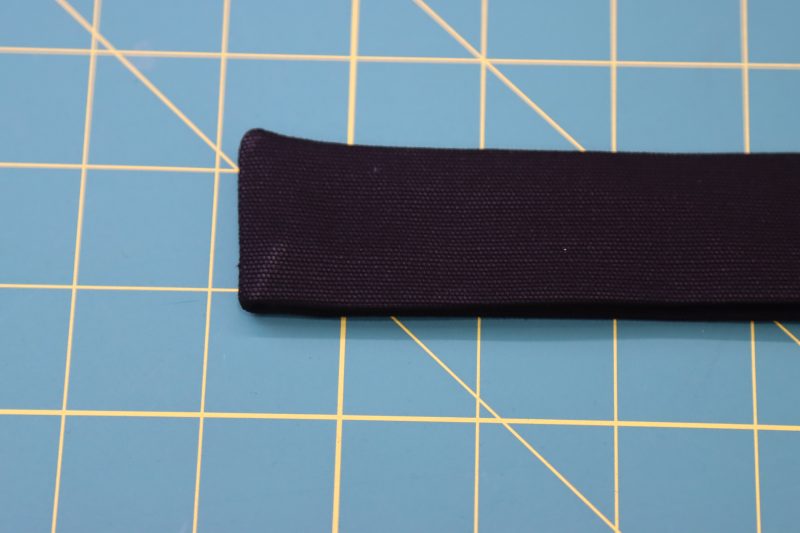
- Flip the waistband right sides out.
- Press the waistband seams flat.
- Fold the raw edges of the waistband toward the inside of the two pieces of fabric. Press the folds into place.
Step 19
INSEAM
- Fold the pants so that the front and back pieces are laying right sides together on top of each other.
- Pin and sew the inseam, making sure that the crotch seams are lined up in the middle.
Step 20
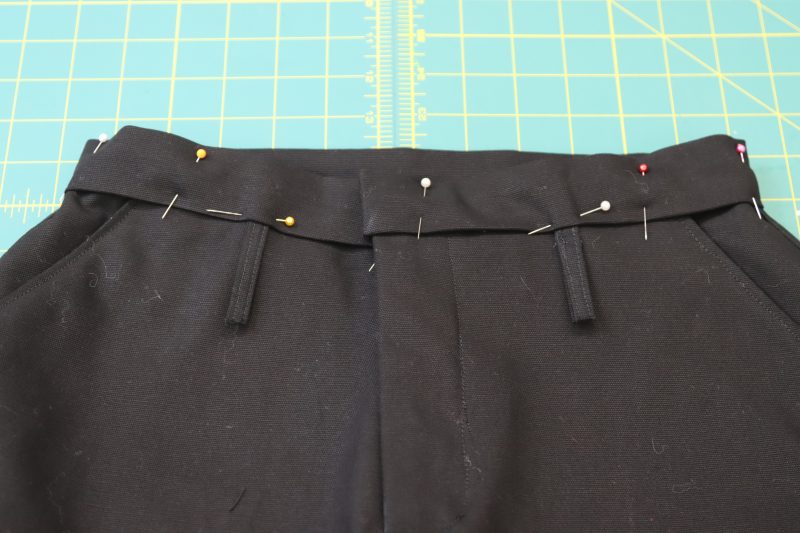
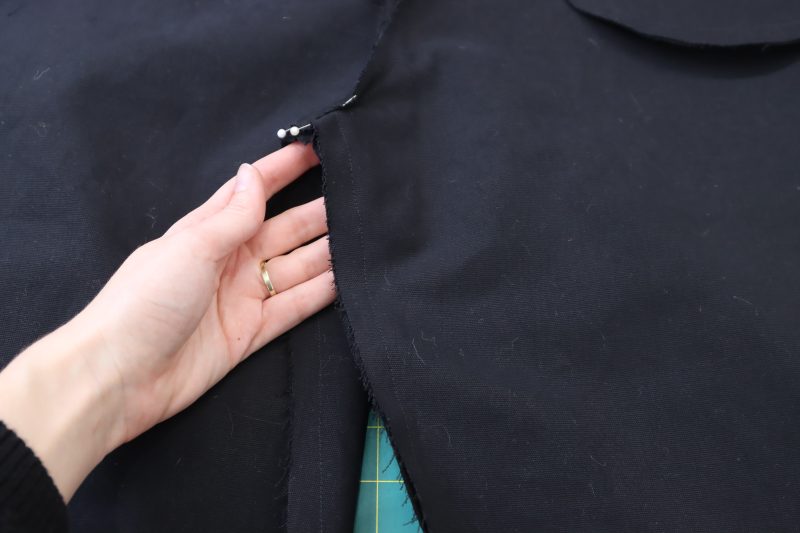
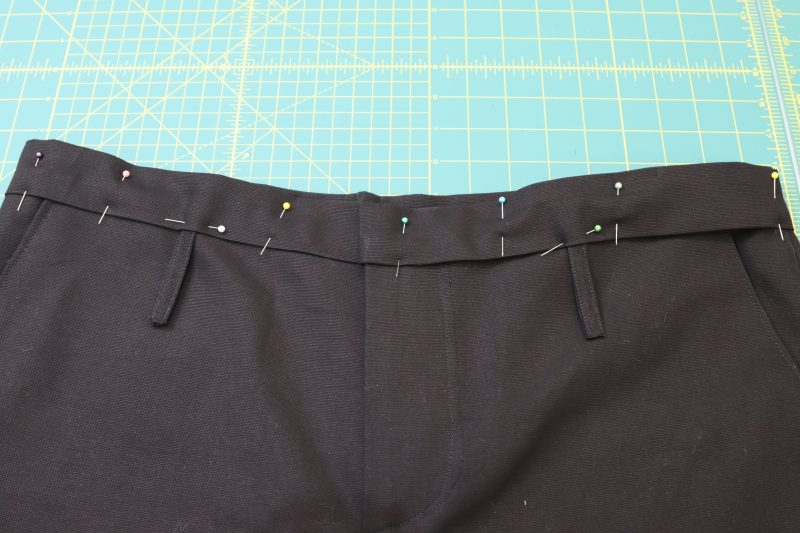
ATTACH WAISTBAND & BELT LOOPS
- Sandwich the waistline of the pants into the waistband opening.
- Pin the waistband evenly around the waistline of the pants.
- Before sewing, evenly space the 6 belt loops around the waistline of the pants by tucking them under the waistband and pinning in place.
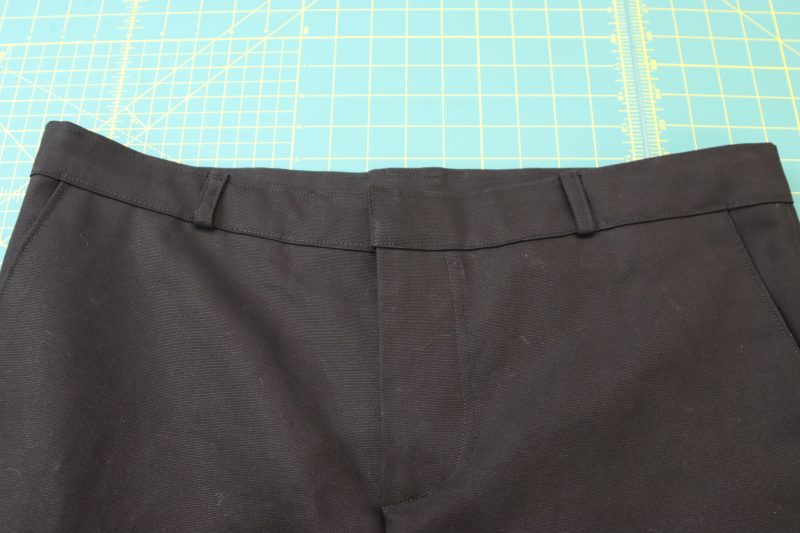
- Sew the bottom edge of the waistband, making sure to catch the outer piece, inner piece, and the belt loops.
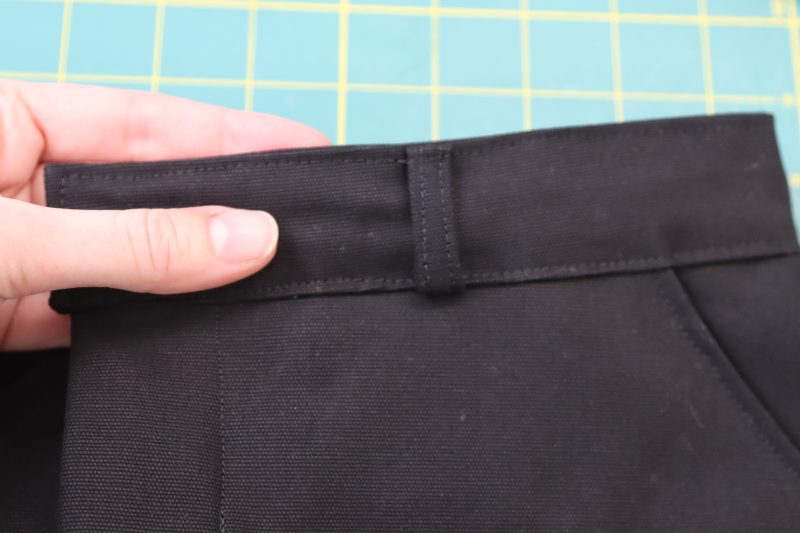
- After sewing the bottom edge of the waistband, flip the belt loops up, fold the raw edges to the back, and pin the folded end of the belt loops to the top edge of the waistband.
- Topstitch the top edge of the waistband, being sure the catch the tops of the belt loops in the seam.
Step 21
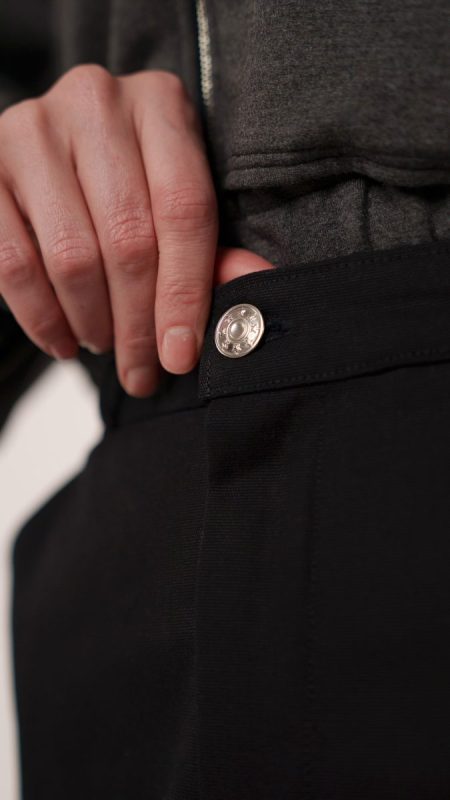
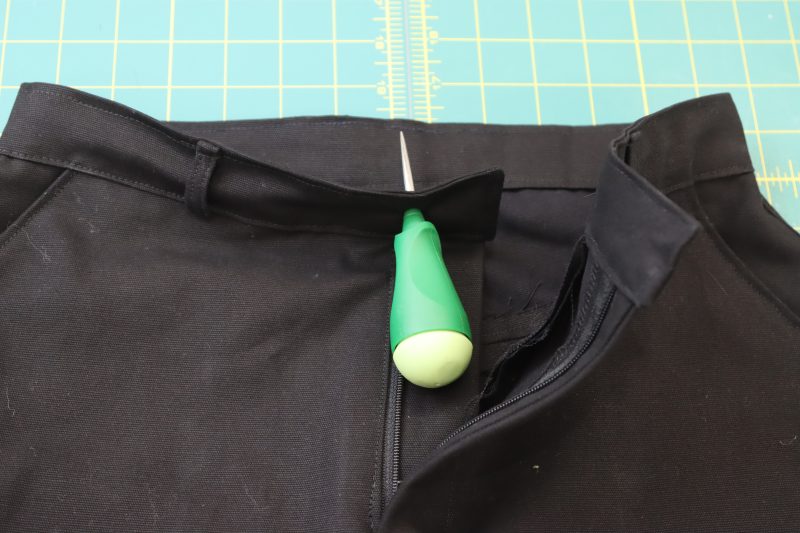
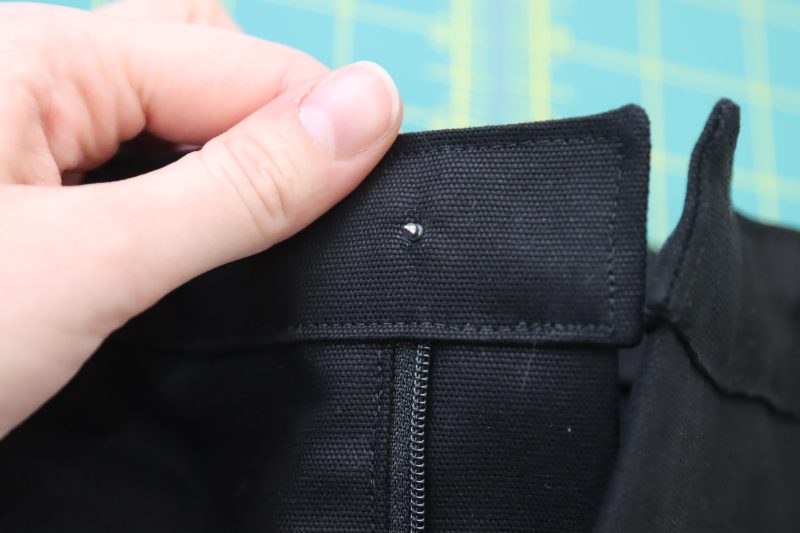
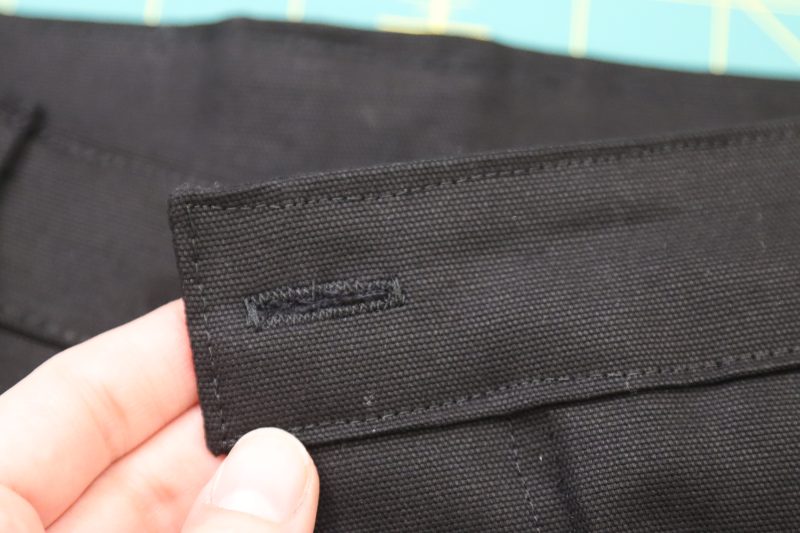
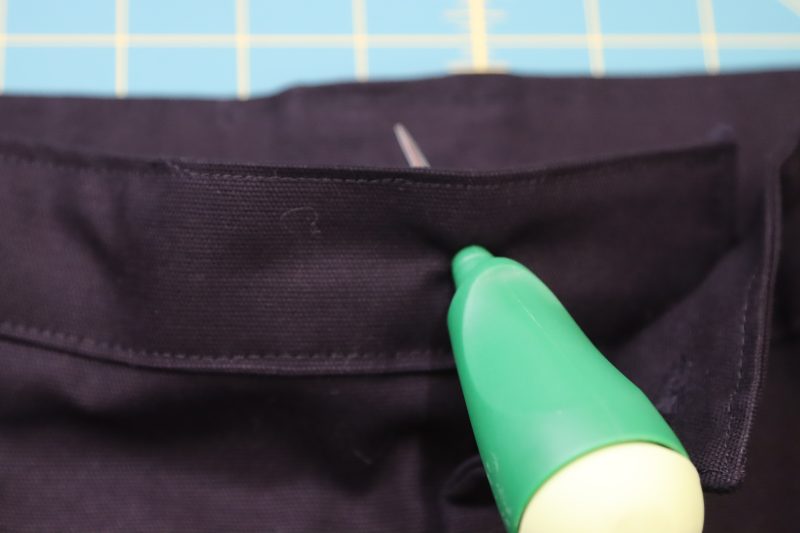
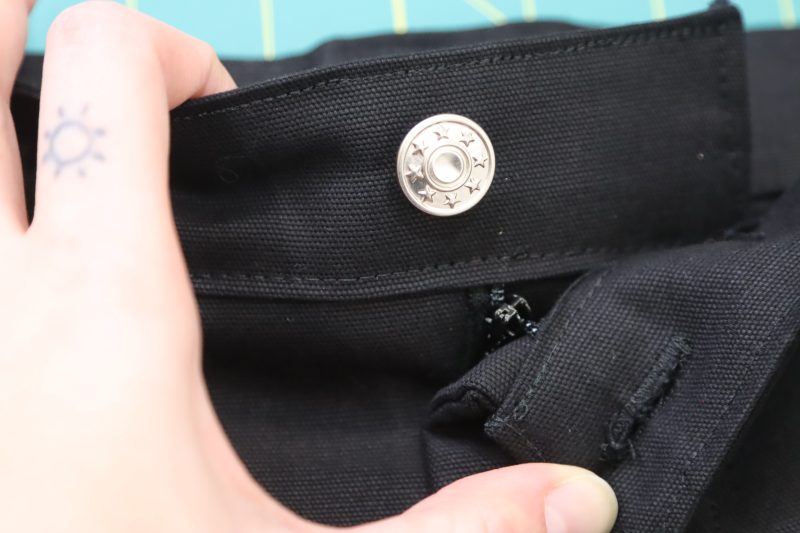
BUTTON & BUTTON HOLE
- Poke a hole through the under layer of the front closure right above where the zipper ends.
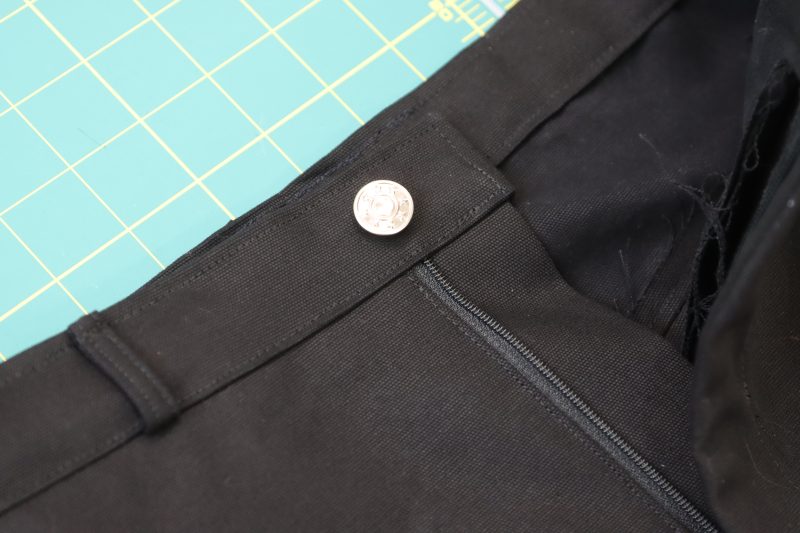
- Place the backing of the jeans button through the back of the hole.
- Place the button cap on top of the backing.
- Wack the button cap onto the backing with a hammer (or anything heavy, really) to secure the two pieces together.
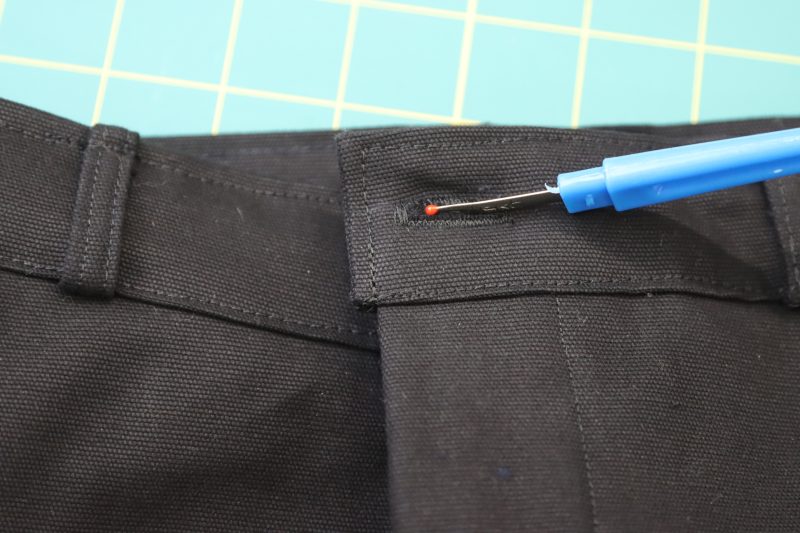
- On the outer layer of the front closure, use the buttonhole foot attachment on your sewing machine to sew a buttonhole on the opposite side of the jeans button.
- Open up the center of the buttonhole with a seam ripper.
Step 22
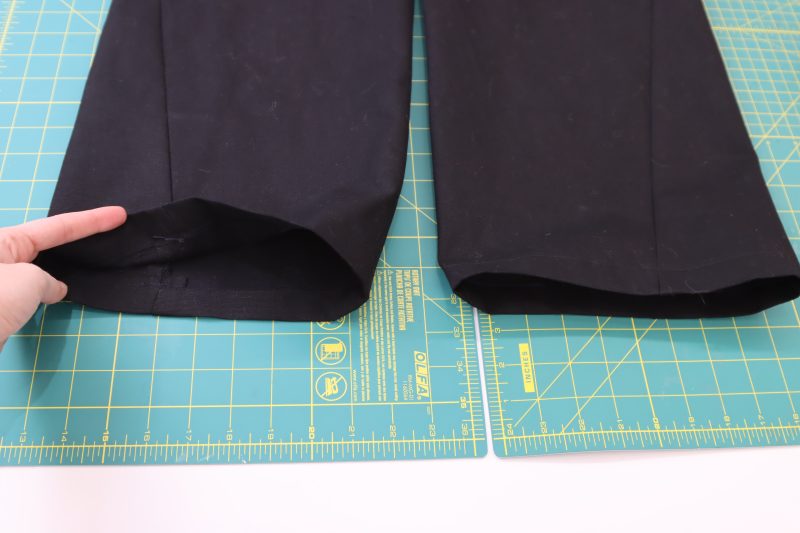
HEM
- Fold and press a 1 inch hem into the bottom of the pants (or a bigger or smaller hem if you’re shorter or taller).
- Sew the hem into place with ⅞ inch seam allowance.

HOW TO SEW THE COLFAX CARPENTER PANTS (MEN’S SILHOUETTE)
Step 23
BACK POCKETS
- Fold and press the side and bottom edges of the back pockets with ½ inch fold.
- Fold and press the top edges of the back pockets with a 1 inch fold.
- Topstitch over the 1 inch fold at the top of the back pocket with ⅞ inch seam allowance.
- Pin the back pockets to the back pants pieces as indicated in the paper pattern.
- Sew the sides and bottoms of the pockets to the backs of the pants.
Step 24
SIDE POCKETS
- Fold only the top and one of the sides of the side pocket toward the wrong side of the fabric. Press the folds into place.
- Line up the bottom edge of the side pocket with the bottom of the marking on the back pants pattern piece with the pocket right sides together with the back pants piece. Make sure that the side of the pocket with the raw edge is lined up with the raw edge of the side seam of the pants.
- Sew the bottom of the pocket to the back pants piece.
- Flip the pocket up so that the seam you just sewed is hidden inside of the pocket.
- Pin the other sides of the pocket to the pants.
- Topstitch over the two sides of the pocket to secure in place. The seam at the bottom of the pocket should be invisible from the outside.
Step 25
WELT POCKET
- Mark the location of the welt pocket according to the markings on the pattern using tailor’s chalk.
- Fold the welt piece in half long ways, wrong sides together, and press the fold.
- Pin the folded welt piece so that the distance between the bottom edge of the chalk mark and the folded edge of the welt is the same as the distance between the top and bottom chalk mark on the pants.
- Sew along the bottom chalk line to secure the welt.
- Clip the center and corners of the chalk lines to create the welt opening.
- Flip the welt toward the wrong side of the pants.
- Pin and sew the welt pocket lining right sides together with the top chalk line.
- Flip the welt and the welt lining toward the wrong side of the pants.
- Pin and sew the other end of the welt pocket lining to the raw edge at the bottom of the welt to secure the inside of the pocket lining.
- Pin and sew the sides of the pocket lining together as well as to the triangular cutout that extends out of the welt opening.
- Press the welt flat.

Step 26
STRAP
- Fold the strap right sides together and sew the long edges together with a ⅛ inch seam allowance.
- Flip the strap right sides out with a loop turner.
- Seam rip a small gap into the back pocket stitching to insert the strap.
- Topstitch over the strap and back pocket (Did you all see that? This is literally the second time I made this pair of pants and I STILL forgot to put the strap on before the back pocket).

Step 27
YOKES
- Layout the yokes above the back pants pieces.
- Pin the yokes right sides together with the tops of the back pants pieces.
- Sew the yokes to the backs of the pants.
- Open and press the yoke seams.
Step 28
SIDE BOTTOM
- Layout the side bottom triangles on top of the backs of the pants, right sides together.
- Pin and sew the back edges of side bottom triangles to the sides of the back pants pieces.
- Open the seam and press it flat.
Step 29
PREPARE FLY PIECES
- Pin the fly facing pieces wrong sides together.
- Fold the fly shield in half wrong sides together and pin.
- Zigzag stitch around the edges of both fly pieces.
Step 30
PREPARE BELT LOOPS
- Do not cut the belt loops into individual strips until AFTER you have sewn the long strip into a tunnel.
- Fold the belt loop strip right sides together.
- Sew the strip with ⅛ inch seam allowance.
- Flip the tube right sides out with a loop turner.
- Topstitch two parallel lines onto the belt loop strip.
- Cut the belt loop into 6 equally sized strips.
Step 31
PREPARE WAISTBAND
- Place the waistband pieces right sides together.
- Sew along the two short sides and one of the long sides of the waistband.
- Clip the corners of the waistband so that it lays flat when inverted.
- Flip the waistband right sides out.
- Press the waistband seams flat.
- Fold the raw edges of the waistband toward the inside of the two pieces of fabric. Press the folds into place.
Step 32
FRONT POCKETS
- Layout the pocket facing pieces next to each other as shown in the photo below.
- Fold and press the longest diagonal edges of the pocket facing pieces toward the wrong side of the fabric. The fold should only be ½ inch wide.
- Pin and sew the pocket facing pieces to their respective front pocket pieces.
- Place the B pockets right sides together with the sides of the back pants pieces.
- Pin and sew the B pockets to the sides of the back pants pieces, making sure to only sew the first 6 inches of the side of the pocket.
- Repeat the same steps with the A pockets and the front pants pieces.
Step 33
SIDE SEAMS
- Lay the front pants pieces right sides together with the back pants pieces, lining up the pockets and side seams.
- Pin and sew the front and back pants pieces together at the side seams, making sure the catch the front pants pieces onto the side bottom triangle pieces.
- Open the seams and press.

Step 34
SECURE FRONT POCKETS
- Tuck the pockets into the side seams of the pants and press the seams flat.
- Pin the top of the pocket to the front waistline of the pants.
- Sew the pocket to the waistline with a ¼ inch seam allowance.
Step 35
ZIPPER FLY
- Pin and sew the fly facing piece to the front left pants piece at the front center crotch area.
- Open the fly facing and press the seam flat.
- Pin the zipper to the right side of the fly facing (the side opposite to the seam you just sewed).
- Sew the zipper tape furthest away from the seam you just sewed.
- Place the zipper right sides together with the other front pants piece.
- Sandwich the zipper between the front pants piece and the fly shield.
- Pin and sew the zipper between the fly shield and the opposite side of the front of the pants.
Step 36
CROTCH SEAMS
- Pin and sew the front crotch seams right sides together under the zipper fly.
- Pin and sew the back crotch seam right sides together.

Step 37
TOPSTITCHING
- Topstitch over the fly facing to secure it in place.
- Topstitch over the front pockets.
- Topstitch over the yoke seams.
- There is a lot more topstitching you can do for decorative and functional purposes. You can topstitch the crotch seams, side seams, inseams, anything you want. The more topstitching you add, the more they look like storebought/commercially manufactured jeans.
Step 38
INSEAM
- Fold the pants so that the front and back pieces are laying right sides together on top of each other.
- Pin and sew the inseam, making sure that the crotch seams are lined up in the middle.
Step 39
ATTACH WAISTBAND & BELT LOOPS
- Sandwich the waistline of the pants into the waistband opening.
- Pin the waistband evenly around the waistline of the pants.
- Before sewing, evenly space the 6 belt loops around the waistline of the pants by tucking them under the waistband and pinning in place.
- Sew the bottom edge of the waistband, making sure to catch the outer piece, inner piece, and the belt loops.
- After sewing the bottom edge of the waistband, flip the belt loops up, fold the raw edges to the back, and pin the folded end of the belt loops to the top edge of the waistband.
- Topstitch the top edge of the waistband, being sure the catch the tops of the belt loops in the seam.
Step 40
BUTTON & BUTTON HOLE
- Poke a hole through the under layer of the front closure right above where the zipper ends.
- Place the backing of the jeans button through the back of the hole.
- Place the button cap on top of the backing.
- Whack the button cap onto the backing with a hammer (or anything heavy, really) to secure the two pieces together.
- On the outer layer of the front closure, use the buttonhole foot attachment on your sewing machine to sew a buttonhole the side of the jeans button.
- Open up the center of the buttonhole with a seam ripper.
Step 41
HEM
- Fold and press a 1 inch hem into the bottom of the pants (or a bigger or smaller hem if you’re shorter or taller).
- Sew the hem into place with ⅞ inch seam allowance.

Sewing Success: The Completed Clarkston and Colfax Carpenter Pants
Share this post with a friend (or two!), download the Clarkston and/or Colfax Carpenter Pants free sewing patterns, and show us which fabrics and colors you choose, using the hashtags #MoodClarkstonPattern, #MoodColfaxPattern & #MadeWithMood—and don’t forget to tag us @MoodFabrics, too.


Free Sewing Pattern Inspiration for Your Next Project
With 500+ free sewing patterns and counting, your opportunities for sewing with Mood are endless!
We hope you had as much fun sewing these carpenter pants patterns as we did! As always, we want to hear from you—share your thoughts and comments below and let us know where you’ll be wearing the Clarkston Carpenter Pants or Colfax Carpenter Pants free sewing pattern!
Can’t get enough of Mood’s free sewing patterns? Sew the Spokane and/or Harrington Hoodie free sewing patterns, also featured in this post.


Dearest darlingest most wonderful Mood Sewciety friends,
Please consider not doing anymore demo pieces in blacks. It is impossible to see the fit or a drape or literally ANY details when the model is just wearing a void. (also *really* miss the inclusive models but that’s a different diatribe) Blacks hide a multitude of sins, obviously, but shouldn’t this site and its creators be completing these pieces sinlessly anyway???
I’m begging you. Use a color that actually shows us the piece.
Sweet, precious Helen, thank you so much for this meaningful feedback. In the future we will consider using different colored fabric or editing the photos to have dotted lines where the fabric should be sewn.
Hello Marisha! I feel so lucky since I was looking for a pattern to sew some curdoroy pants! Thank you so much!
Just one quick question. I tried to check a bit the instructions, and since I don’t know much, in the very first step, (Pin and sew the pocket facing pieces to their respective front pocket pieces.), is it right sides together? I have never done this before so I cannot figure it out on my own. It would be a great help if you could enlighten me on this!
Hi Elena! I’m so glad you asked. The wrong side of the pocket facing should be touching the right side of the pocket bags. You can follow the same tutorial for the Amherst Palazzo Pants pattern for the pockets because they’re the exact same and the fabric is a little lighter so it’s easier to see which way everything is facing.
Wish you’d made it in a different color so you could actually see the fit and the details. It’s impossible with black
Thank you for this feedback Keznia! We will consider using different colors or editing the pictures so that the black thread and fabric are more visible.
Thank you. From Spain
Love this. Moodfabrics free patterns the best. You deserve every compliment.
Love these!! I have some cool black denim I’ve been waiting for the right pattern for and this might be it. I have some construction-orange leather that would be fun for the strap or other detailing.
The patch pockets on both styles would have so much more utility if they were bellows pockets with buttoned or snapped flaps, a la military-style cargo pants. Not a hard alteration to make: just add a box pleat to each patch pocket (slash and spread), surround each with a gusset cut on grain, and stitch down to the existing stitch lines. There are plenty of online tutorials, both video and text/diagram, some of which include attached gussets.
This is a great idea Kate! I was even thinking you could swap out some of the pocket pattern pieces from the Adair Cargo Pants and use them on these if you wanted a roomier pocket or a flap to close it.
thank you for all patterns, it is great!!! i am learning alot!!
video instrucyions would be great, hard to tell what is going on in just black
So excited to make these!
Came here to say the same thing, I’m always so surprised when pattern samples are made black. Ya can’t see anything 🙁 🙁 🙁 these are probably really cool?
Hey Bud! I’m so sorry to hear that the photos in the pattern are difficult to decipher. We’re going to start either using different colored fabric/thread, or we’re going to add seam lines with Illustrator to show where you’re supposed to sew on the black fabric. Thank you for pointing this out! We really appreciate feedback like this.
I just wanted to say that I made these and they turned out great! They are good enough to wear to work, despite my low skill. I owe gratitude to whoever created this pattern – nicely done, I hope you feel an amazing sense of accomplishment! If you are looking for some constructive feedback, the instructions themselves could use changes. Free is free and I obviously managed anyway, but they were pretty tough to follow, especially the fly part. But, teaching is a very different skill from making patterns, and you are getting experience in doing both and I am sure you will hone both of those skills with time. The fact that these pants are foolproof for an amateur like me speaks volumes about the great team at Mood. Thank you for your work!
I really dislike when these patterns are made in really dark fabrics, as they’re so hard to see on screen. I have adjusted the brightness every which way and cannot see what the finished garment looks like. They just look like plain black pants / blobs. I’d love to see it even with contrasting stitching or something. Because otherwise we just have to go on the flat technical line drawing and I find that often they’re not really accurate.
I couldn’t get a 9″ zip here in the uk haberdashery stores so I went for 10. I think I can make it work.
Close enough Simon! I bet it still turned out great.