

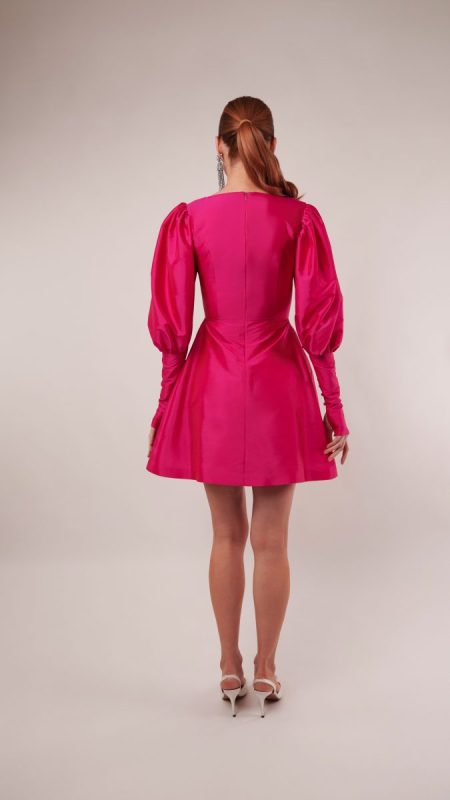
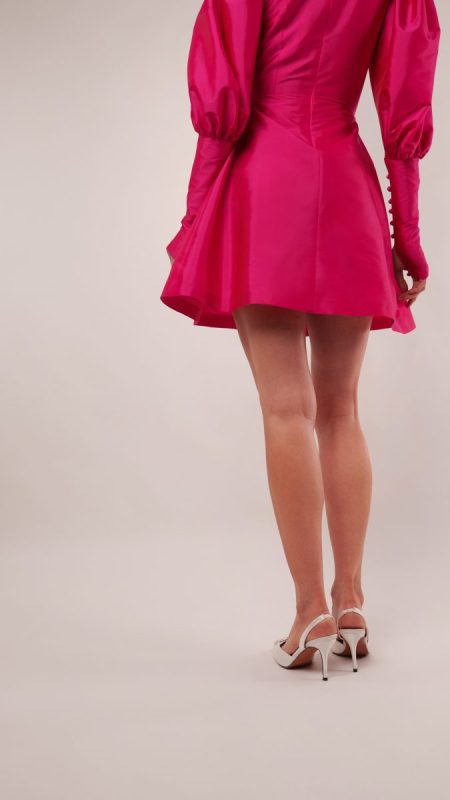
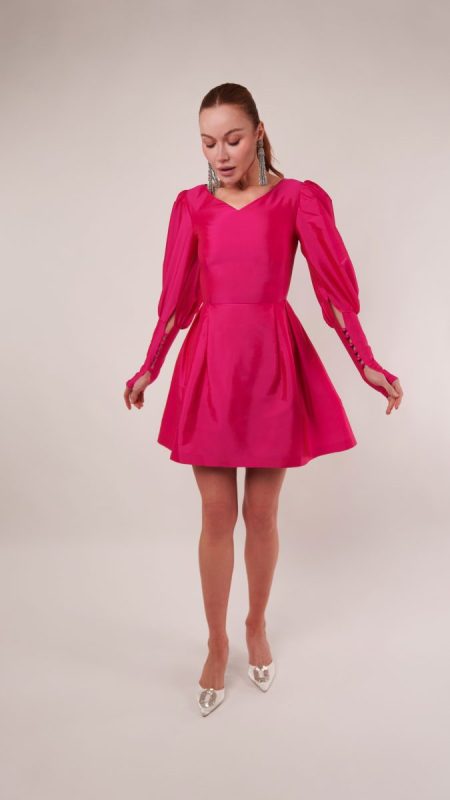
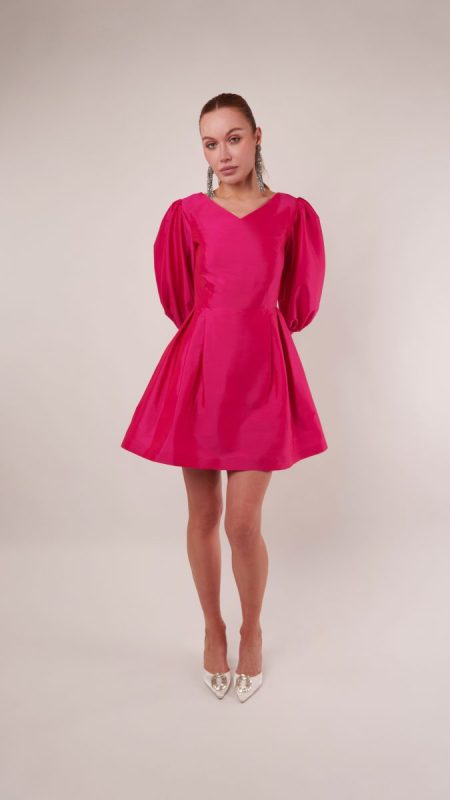
The Biella Fit and Flare Dress is the definition of modern romance with a touch of dramatic flair. Crafted from crisp polyester taffeta in a vibrant raspberry hue and finished with a silky satin lining, this design holds its shape beautifully while still feeling light and elegant. The structured fabric gives the skirt its signature volume, creating that timeless fit-and-flare silhouette that feels equal parts polished and playful.
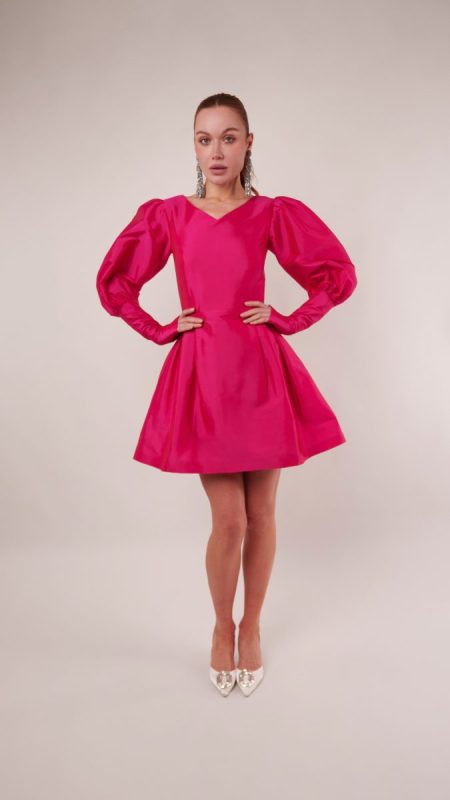
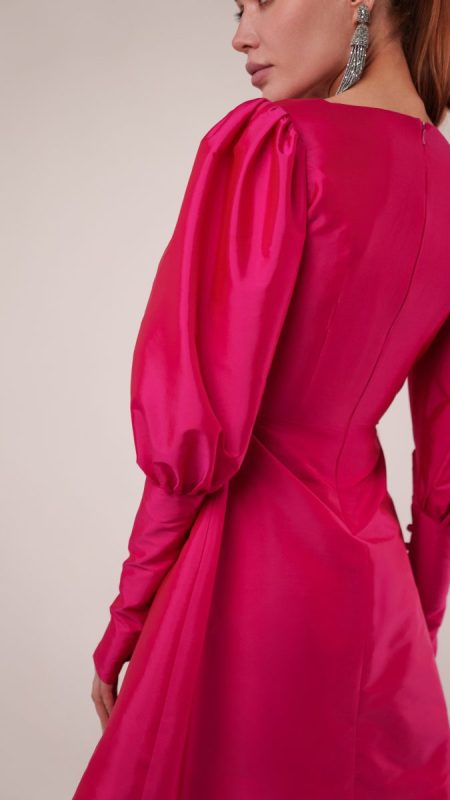
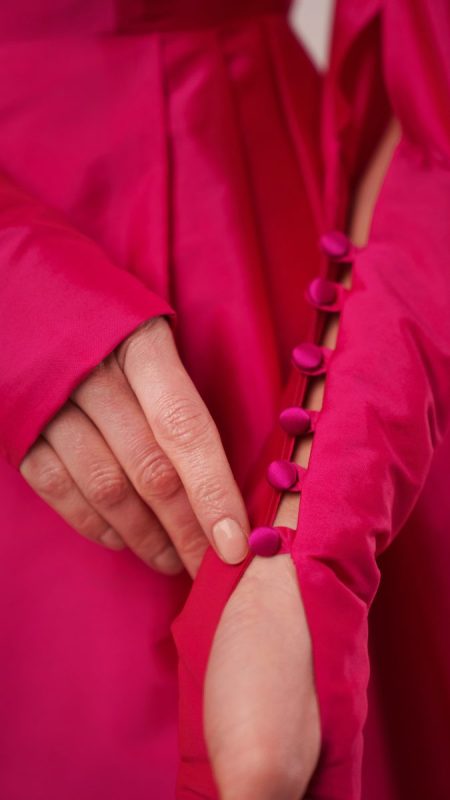
At the bodice, a graceful ballerina neckline frames the collarbones in the most flattering way, offering elegance without revealing too much. Carefully placed princess seams sculpt the front of the dress, creating a beautifully contoured shape that enhances the waist and elongates the figure. The statement leg-of-mutton sleeves add striking volume through the upper arm before tapering down to the forearm, where a row of chic buttoned cuffs delivers the perfect tailored finish.
Whether you’re heading to a festive holiday gathering, an important dinner, a first date, or simply looking for the ultimate party dress, the Biella Dress is designed to turn heads. Sophisticated, feminine, and just a little bit dramatic, it’s the kind of dress that feels right at home wherever there’s something worth celebrating.


Essential Materials & Sizing Guide for the Biella Fit and Flare Dress
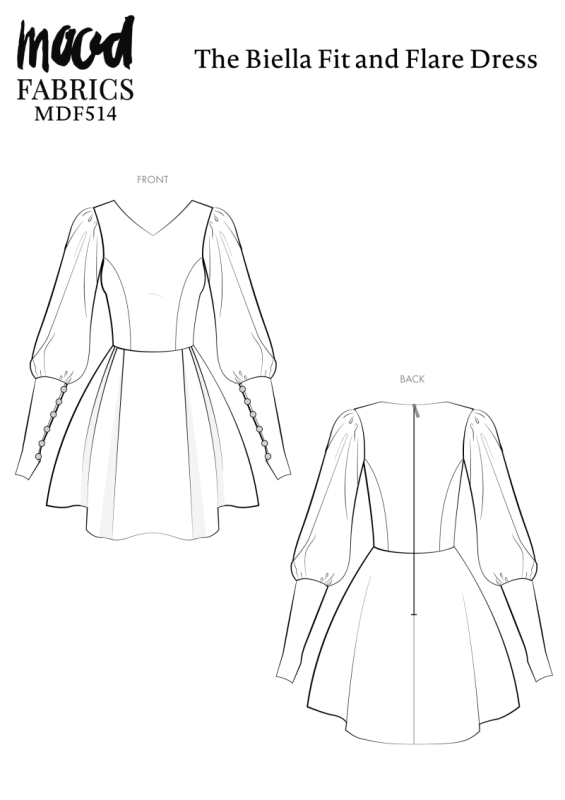
Continue reading for a breakdown of what knowledge and materials you need for creating your very own fit and flare dress! We’ve got you covered with the recommended materials we used—if you want to follow along exactly—as well as a curated list of alternative fabric type recommendations if you want to customize your own version. The Biella Fit and Flare Dress free sewing pattern download includes technical drawings for seam and silhouette visibility, plus a size chart to help you find your perfect fit!
Purchase Products Used Below:
Quantities indicated are for sewing a size small* fit and flare dress. Toggle the ‘SHOP THIS LOOK’ box to find quantity estimates for other sizes.
- 3.5 yards of Polyester Taffeta – Plain Dyed Fuchsia – Bellamy Collection
- 1 yard of Premium Polyester Satin – Magenta Haze – Gavia Collection by Mood
- 18 each of Mood Exclusive Magenta Haze Silk Covered Button – 16L/10mm
- 1 each of Invisible Zipper 24″ by YKK – 516 Fuchsia
- 1 each of Gutermann Sew All Thread 250m – 345 Raspberry
- MDF514 – Biella Fit and Flare Dress Sewing Pattern (Free download below!)
Additional Products Used:
*Quick Tip! The ‘SHOP THIS LOOK’ box defaults to full-yard quantities. To order an exact half-yard quantity for any fabric, simply use the decrease quantity button (-) to subtract by the half yard. Then click “ADD TO CART” to add all materials to your cart. (Our system can only display full-yard quantities initially.)
Alternative Fabric Type Recommendations:
The Biella Fit and Flare Dress sewing pattern is best suited for medium weight fashion fabrics. Explore other fabric types or colors from our featured collections for your fit and flare dress with the links below.
Fabric Collections Used in this Post:
Download Your Free Sewing Pattern
Submit your name and email in the form below to receive the download link for the Biella Fit and Flare Dress free sewing pattern directly in your inbox. Mood Sewciety Patterns will send your free download link via email with the subject line: ‘Your Free Download from Mood Sewciety – The Biella Fit and Flare Dress’ (in PDF format for A4 and letter-size printing).
© MoodFabrics.com / MoodSewciety.com – Mass production, resale, or distribution of this pattern in any form is strictly prohibited.
Find Your Perfect Fit
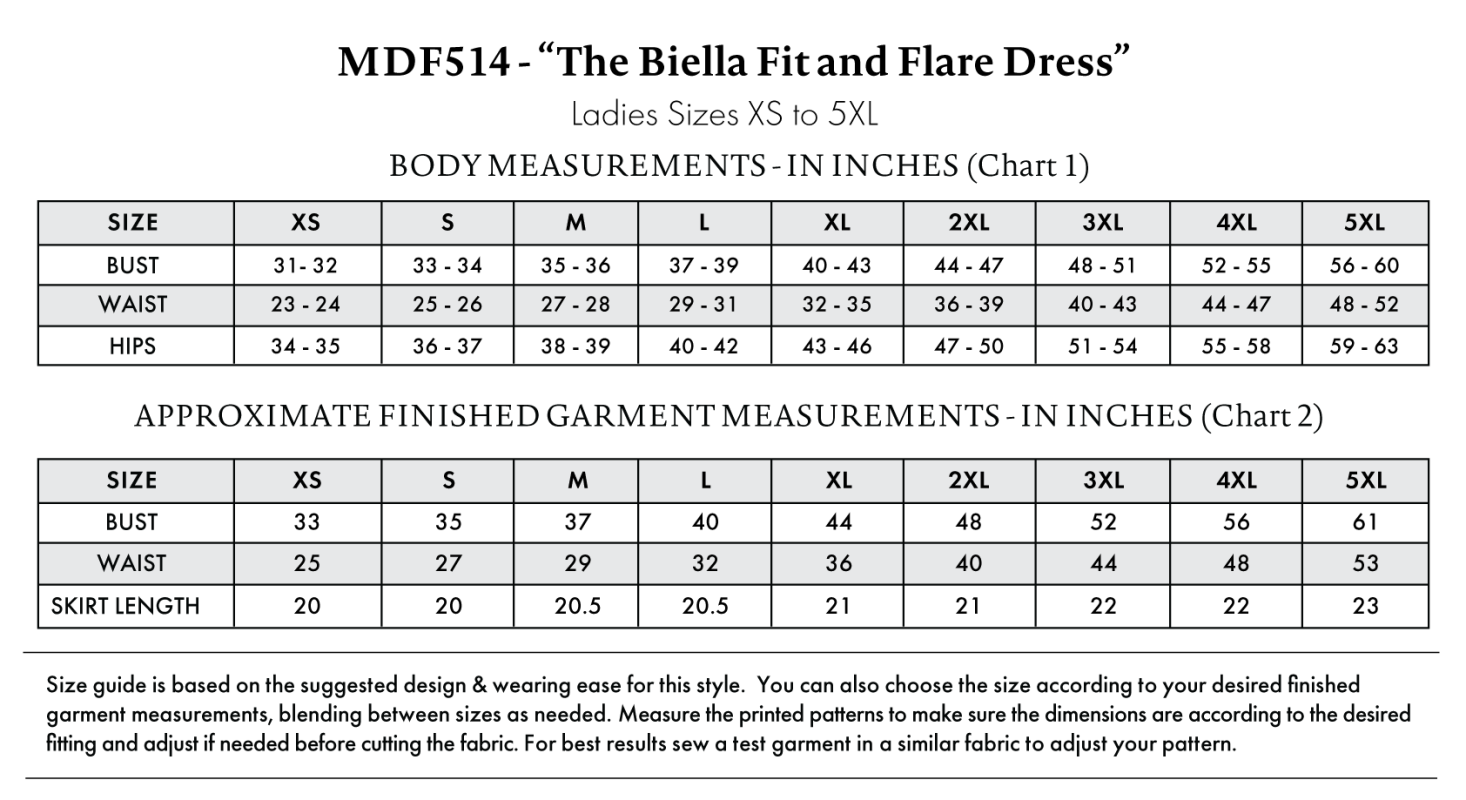
The Biella Fit and Flare Dress Sizing Guide is based on the suggested design & wearing ease for this style. You can also choose the size according to your desired finished garment measurements, blending between sizes as needed. Measure the printed patterns to make sure the dimensions are according to the desired fitting and adjust if needed before cutting the fabric. For best results, sew a test garment in a similar fabric to adjust your pattern.
Note: Always read all the instructions before cutting the fabric!
How to Sew The Biella Fit and Flare Dress
The instructions provided below are designed to guide you through sewing the Biella Fit and Flare Dress from start to finish.

3Tips for Sewing with Polyester Taffeta
⇒ Use a super sharp brand new needle. Taffeta has a tendency to pull and get stuck in your machine.
⇒ Use a lot of pins when you’re sewing because taffeta is slippery and might move after you start sewing it.
⇒ Always press your seams between steps. Additionally, you should be steaming gathers after you scrunch the fabric to get it to relax and make it easier to sew the gathered sleeve into the cuff and the armscye.

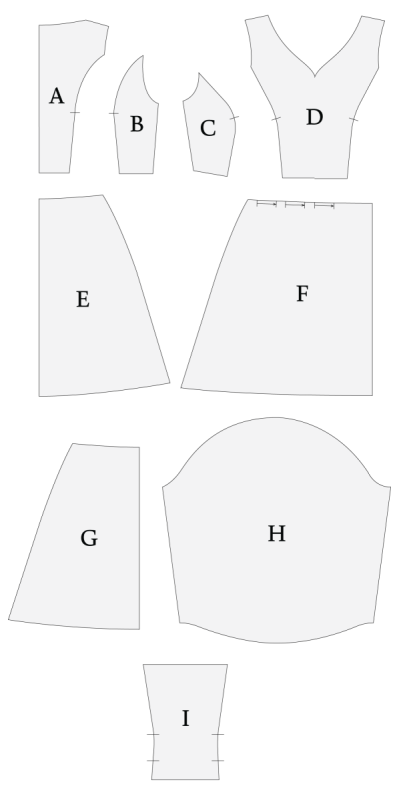
Pattern Pieces & Fabric Cuts Needed
- (A) TOP BACK CENTER
- Fabric – Cut 2 Mirrored
- Lining – Cut 2 Mirrored
- (B) TOP BACK SIDE
- Fabric – Cut 2 Mirrored
- Lining – Cut 2 Mirrored
- (C) TOP FRONT SIDE
- Fabric – Cut 2 Mirrored
- Lining – Cut 2 Mirrored
- (D) TOP FRONT CENTER
- Fabric – Cut 1
- Lining – Cut 1
- (E) SKIRT BACK
- Fabric – Cut 2 Mirrored
- Lining – Cut 2 Mirrored
- (F) SKIRT FRONT
- Fabric – Cut 1 on Fold
- Lining – Cut 1 on Fold
- (G) SKIRT FRONT LINING
- Lining – Cut 1 on Fold
- (H) SLEEVE
- Fabric – Cut 2 Mirrored
- (I) CUFFS
- Fabric – Cut 4
Sew with a 1/2″ seam allowance for all seams unless otherwise specified.
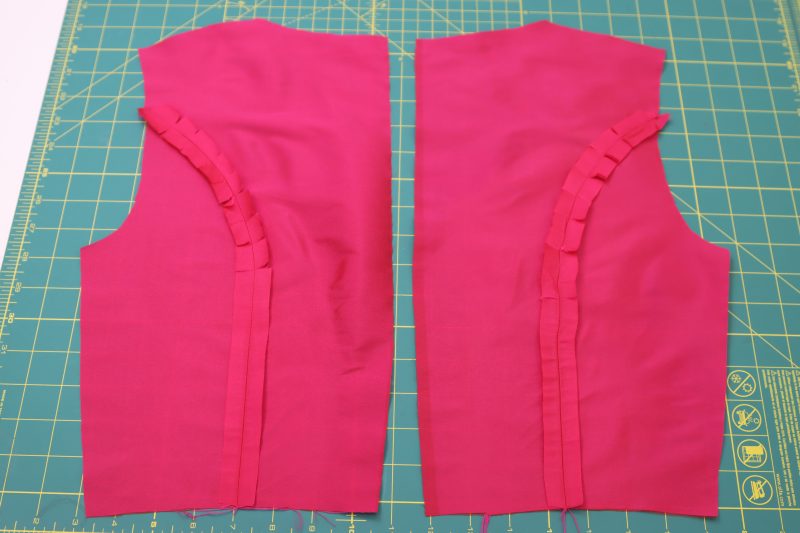
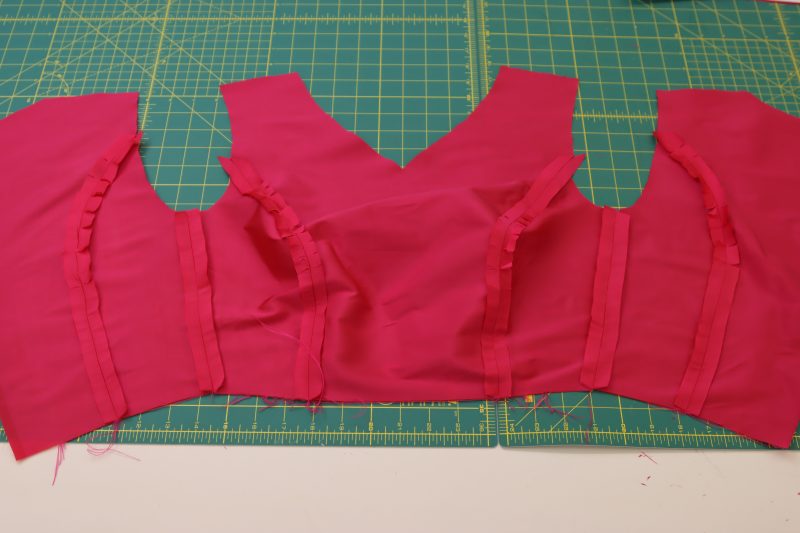
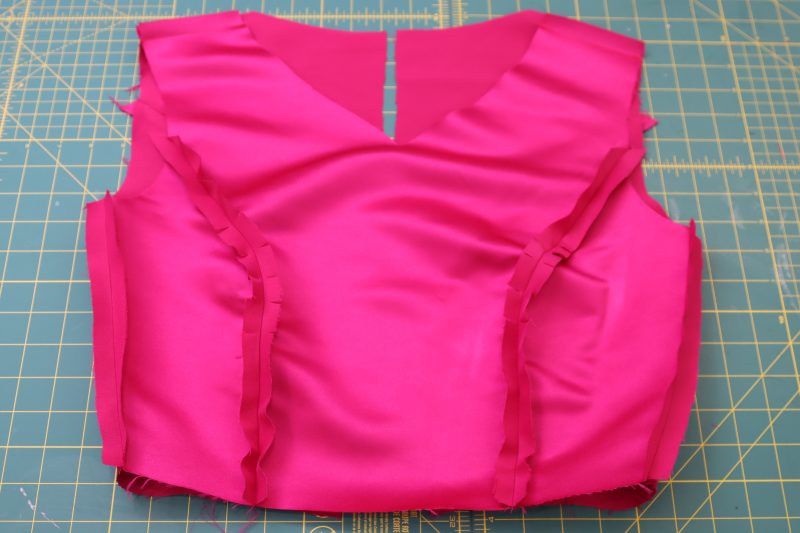
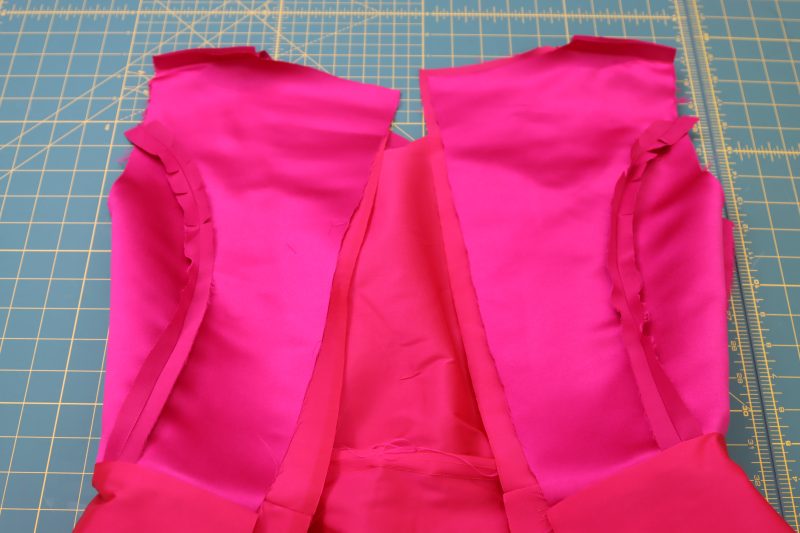
Step 1
FRONT TOP
- Layout the top front pieces with the center front piece in the middle and the side front pieces on either side of it.
- Pin and sew the front sides to the sides of the front center piece.
- Clip the curved parts of the seams.
- Press the seams open and flat.
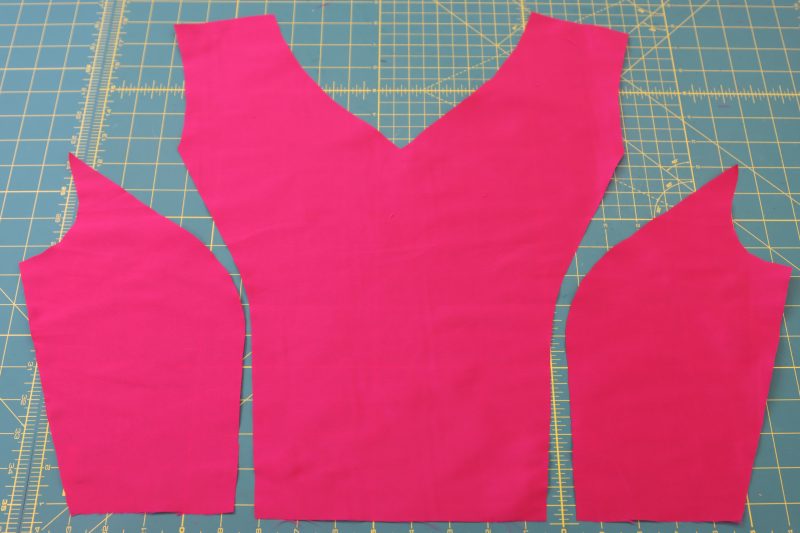
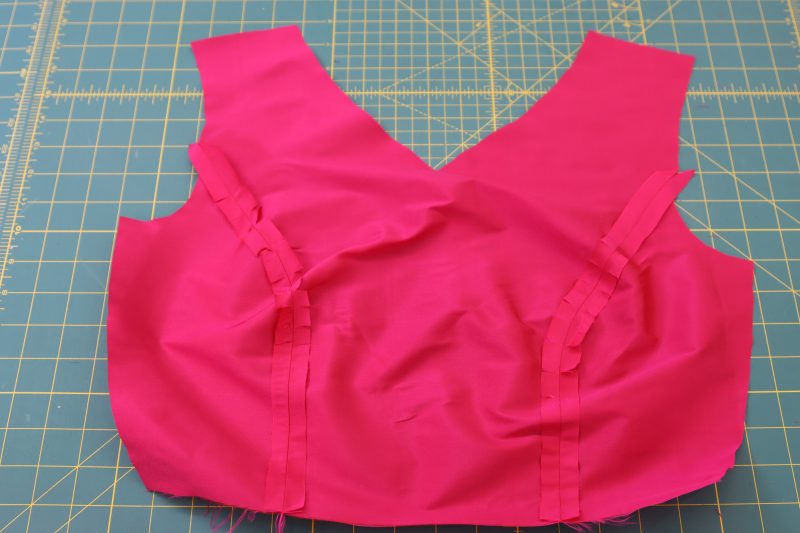
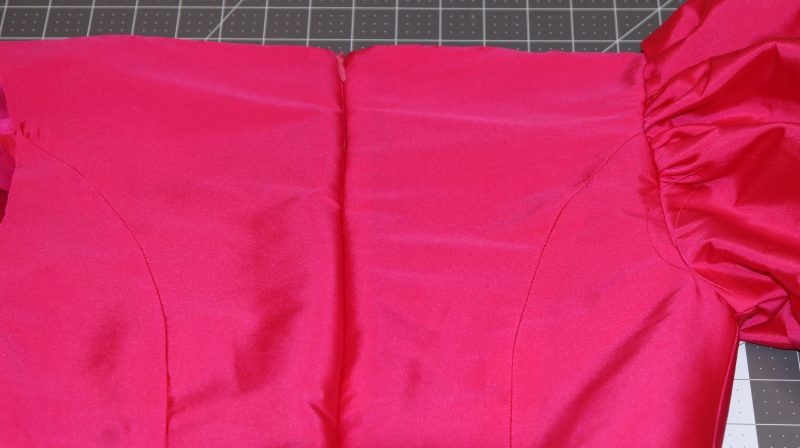
Step 2
BACK TOP
-
- Layout the back top pieces with the center back pieces mirrored in the middle and the side back pieces on either side of them.
- Pin and sew the back sides to the sides of the back center pieces.
- Clip the curved parts of the seams.
- Press the seams open and flat.

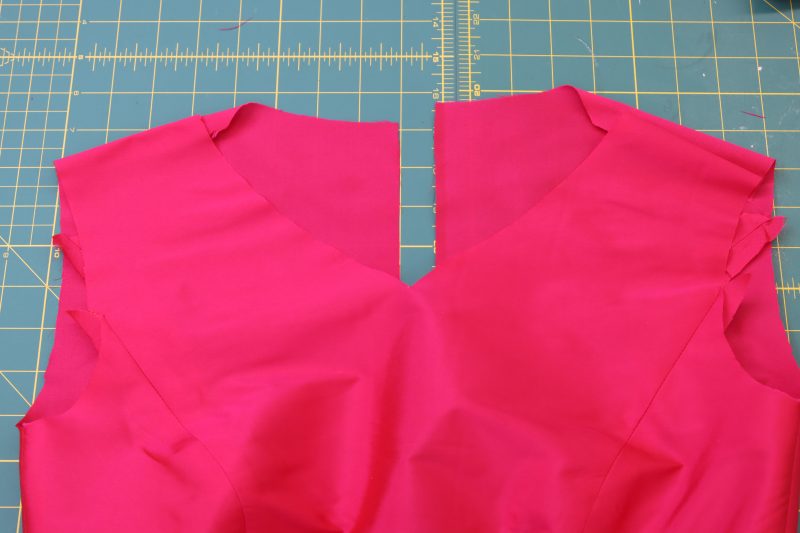
Step 3
TOP SIDES & SHOULDER
- Place the back pieces on top of the front piece right sides together with the sides lined up.
- Pin and sew the side seams of the bodice.
- Repeat the same steps with the shoulder seams.
- Press the side and shoulder seams open and flat.
Step 4
LINING
- Repeat the previous 3 steps but with the lining fabric. In this case, I used satin and I sewed it wrong sides together so that the wrong side of the satin will be touching the skin when the dress is worn.
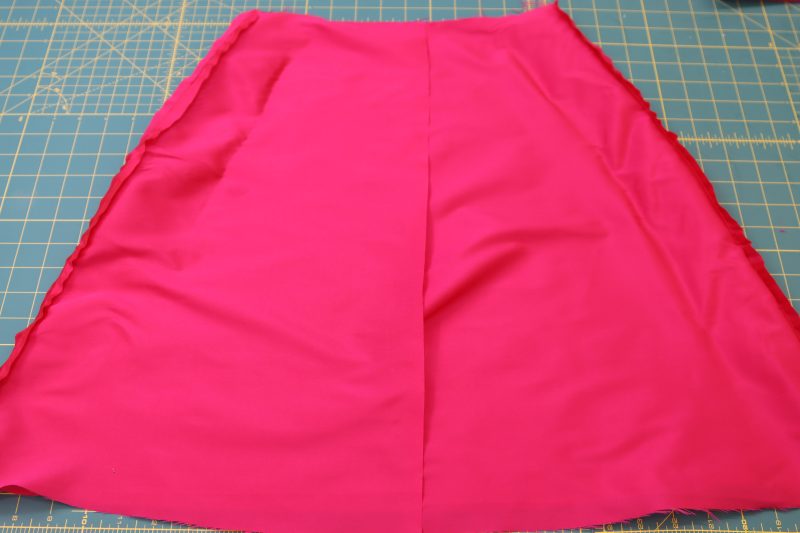
Step 5
LINING SKIRT
- Place the back skirt lining pieces right sides together with the front skirt lining piece.
- Line up the sides of all three pieces.
- Pin and sew the side seams of the skirt lining.
- Press the side seams open and flat.
- Pin and sew the waistline of the skirt lining right sides together with the waistline of the bodice lining.
- Press the waist seam open and flat (I also serged this seam because it was just fraying a lot and I didn’t want to deal with it anymore).
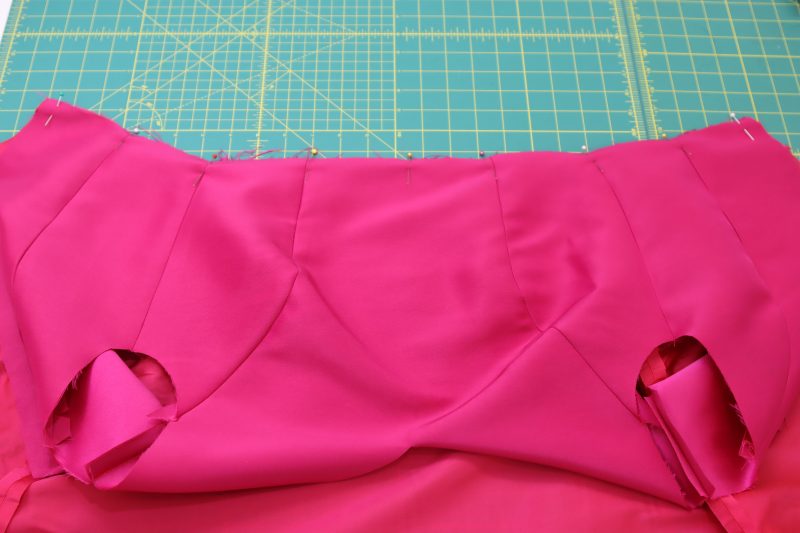
Step 6
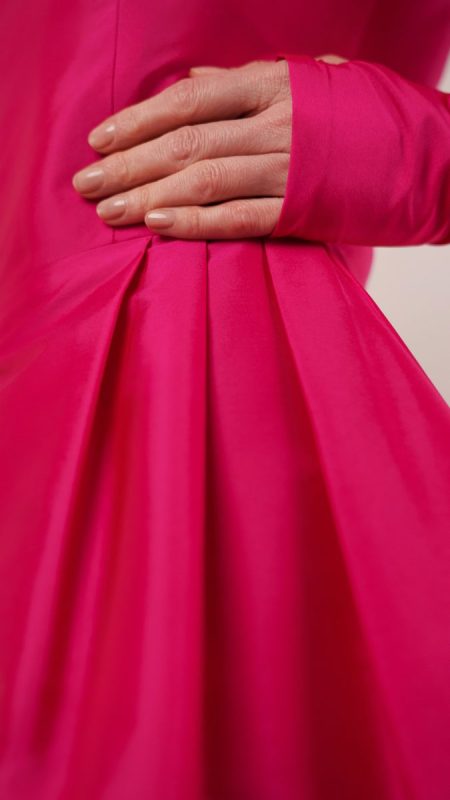
SKIRT PLEATS
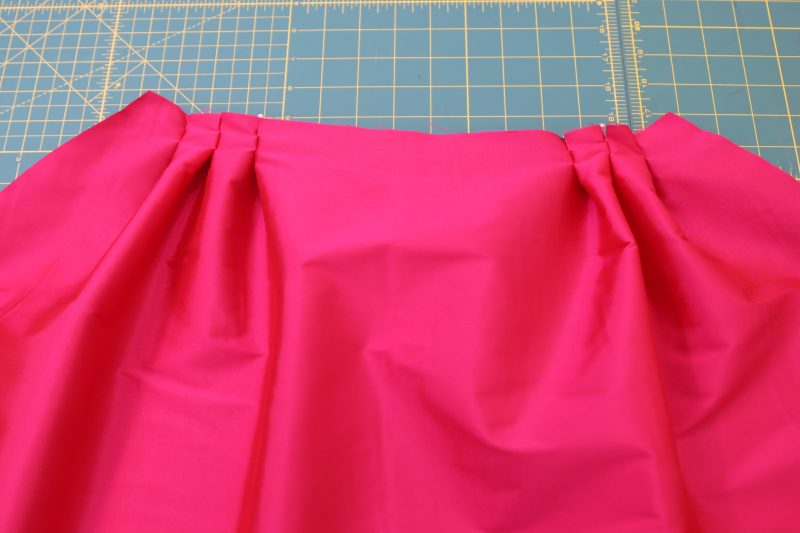
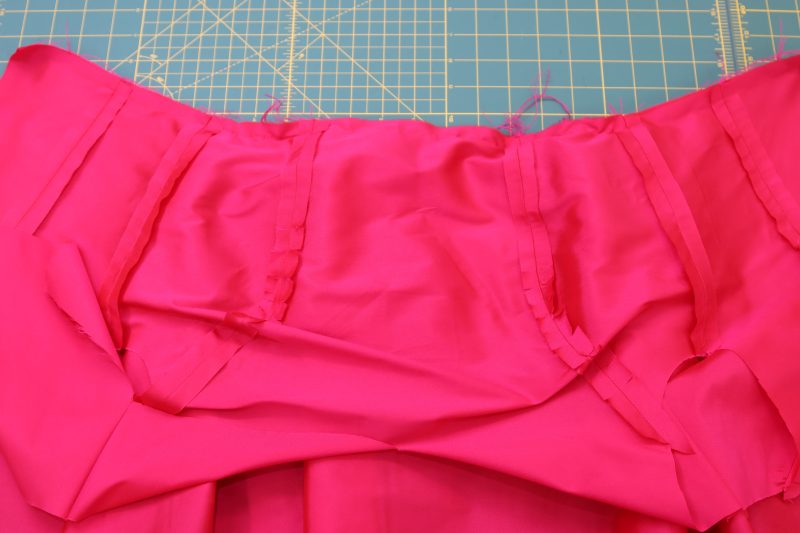
- Cut notches in the waistline of the outer skirt based on the markings on the paper pattern. These notches mark the locations of the pleats in the skirt.
- Bring together the notches that have the bigger space between them. Those notches mark your pleats, while the notches with the smaller spaces between them mark the space between each pleat.
- Pin the notches together.
- Sew the notches ½ inch down from the waistline for all 6 pleats.
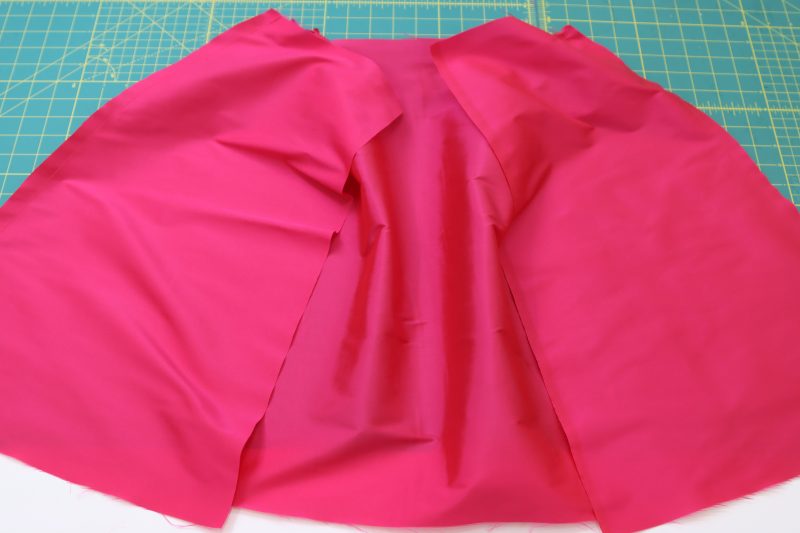
- Place the back outer skirt pieces right sides together on the front outer skirt piece with the sides lined up.
- Pin and sew the side seams of the outer skirt.
- Press the side seams open and flat.
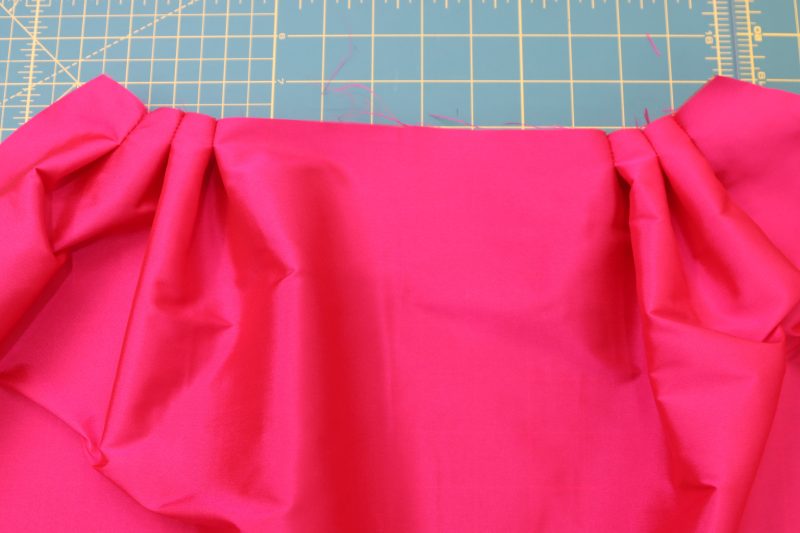
- The pleats in the front of the skirt are not all facing the same direction.
- For the two pleats toward the center front of the skirt, the bulk of the pleat should be folded toward the center front. For the pleats closest to the side seams, the bulk of the pleat should be folded toward the side seams.
- Press the pleats in the directions indicated in the previous step.
- Topstitch over the waistline of the skirt to hold the pleats in place. I used ¼ inch seam allowance for the topstitch.
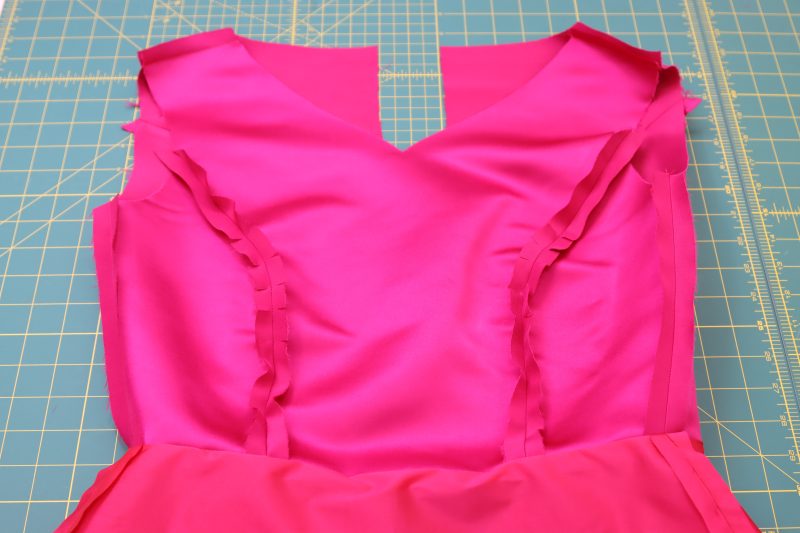
Step 7
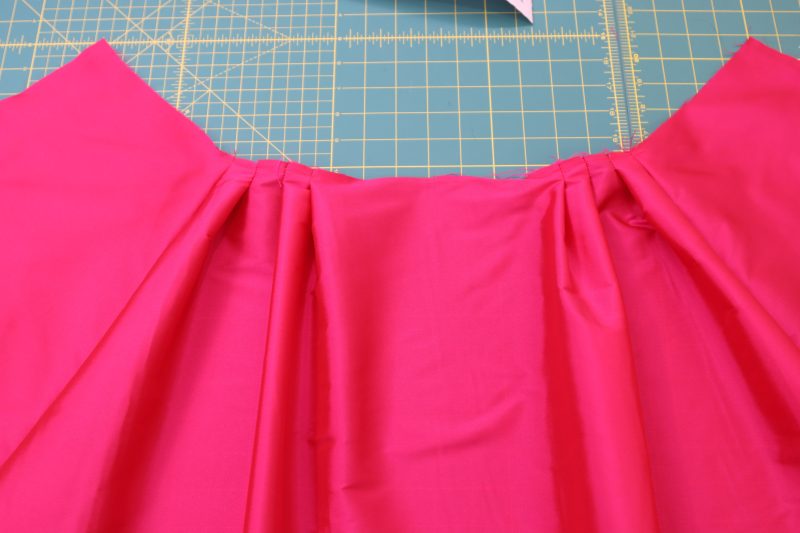
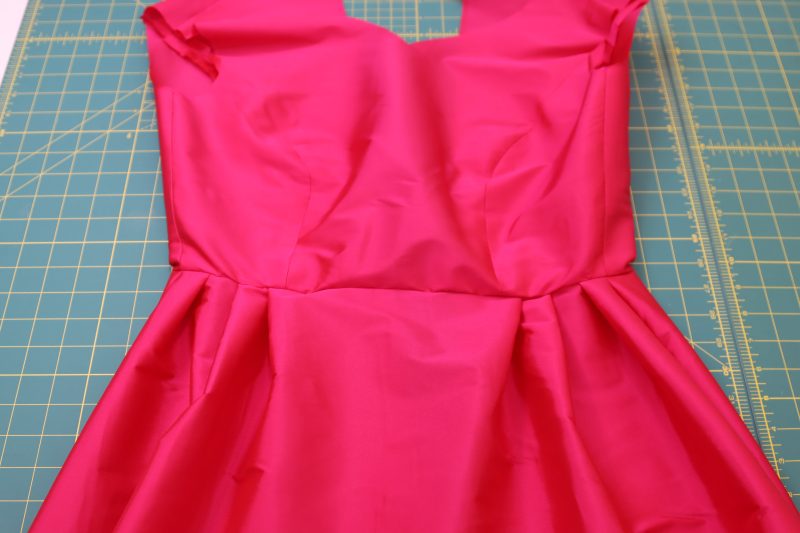
ATTACH SKIRT
- Place the outer skirt right sides together with the waistline of the outer bodice.
- Pin and sew the waistlines together.
Step 8
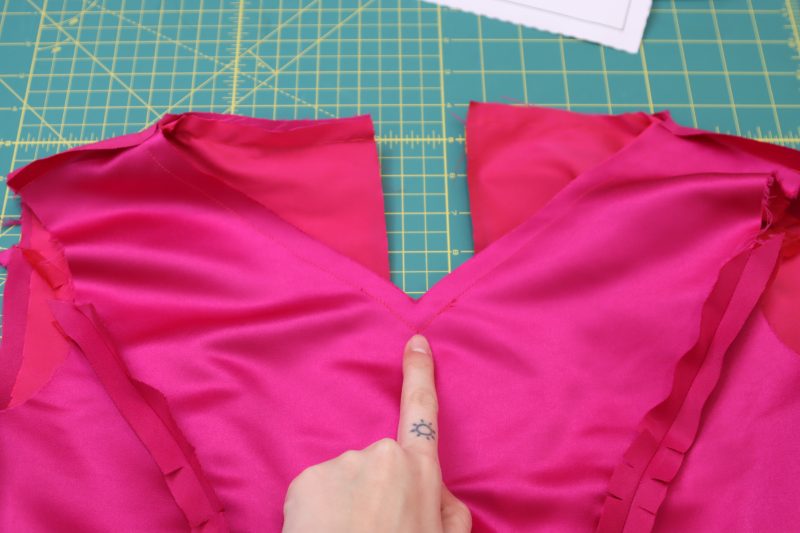
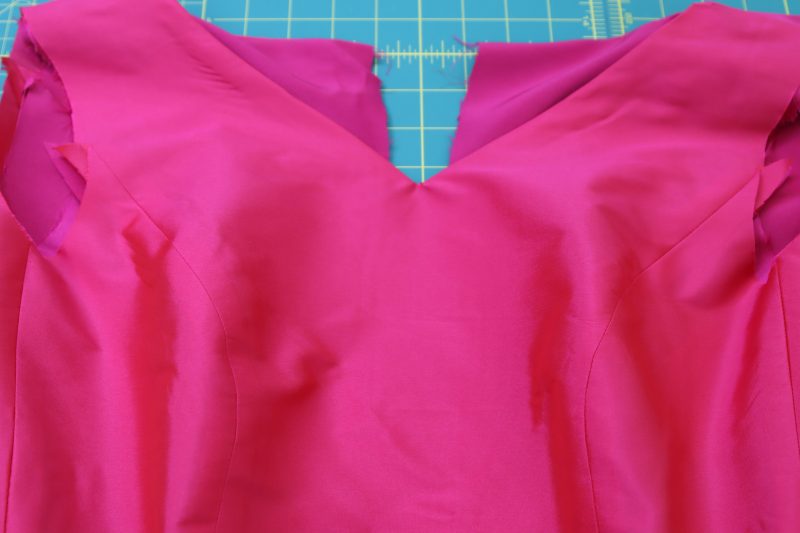
ATTACH NECKLINES
- Place the outer dress inside of the lining dress, right sides together.
- Line up the necklines of the two dresses and pin them together.
- Sew along the entire neckline of the two dresses, connecting them together.
- Clip the center front of the neckline so that the point can be turned right sides out without bulk.
- Flip the dress right sides out and poke out the center front neckline.
Step 9
SLEEVE INSEAMS
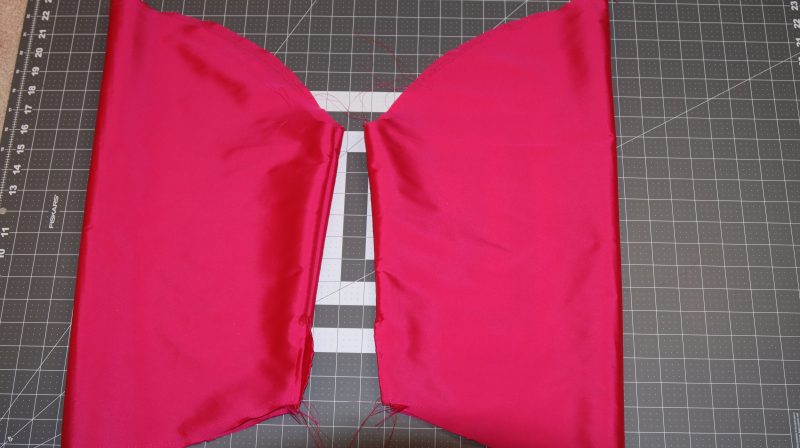
- Fold the sleeves in half right sides together.
- Pin the sleeve inseams except for a 3 inch gap at the bottom of the inseam.
- Sew the sleeve inseams, leaving the bottom of the inseam open.


Step 10
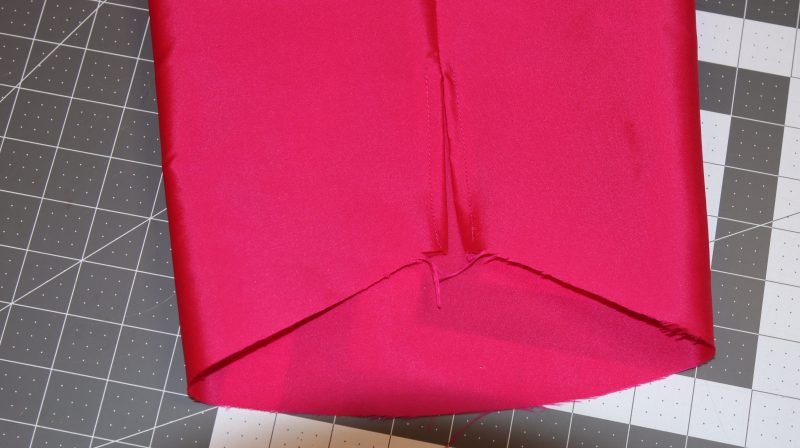
HEM SLIT
- Press the sleeve inseams open and flat.
- Topstitch over the seam allowance of the sleeve inseam at the slit to hide the raw edges of the seam allowance.
Step 11
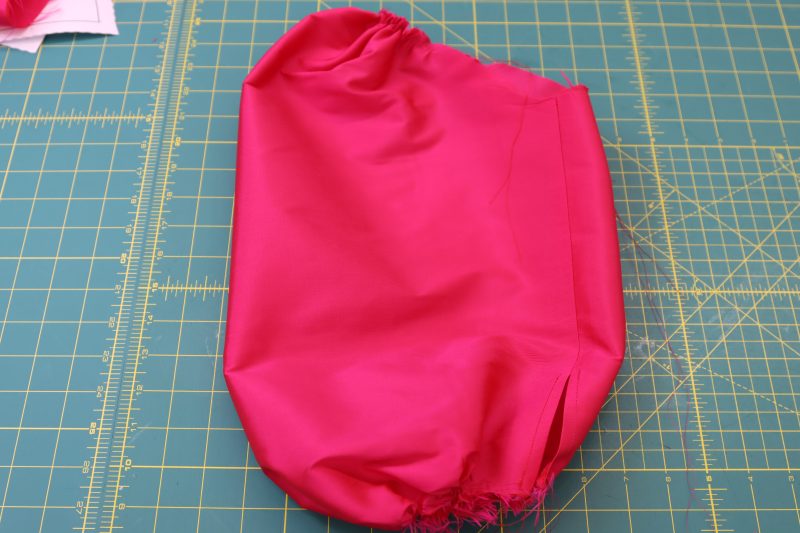
GATHER SLEEVES
- Sew two parallel straight stitches with a stitch length of 4 millimeters along both the top and bottom edges of the sleeves.
- Pull on the top threads on both the tops and bottoms of both sleeves to gather the sleeves.
- Gather the tops of the sleeves until they are roughly the same circumference as the armscyes on the dress.
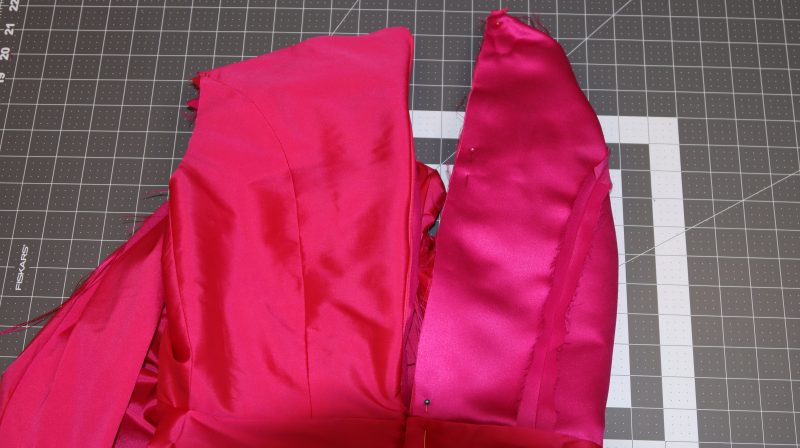
Step 12
INSERT ZIPPER
- Flip the dress so that the lining and the main fabric are both inside out (right sides together).
- Pin the zipper in between the two layers of the dress at the center back seam, making sure that the right side of the zipper is facing the right side of the outer dress.
- Sew that side of the zipper.
- Repeat the same process with the other side of the center back of the dress and the opposite side of the zipper.
- Once both sides of the zipper are sewn in, flip the whole dress right sides out and press the center back seam so that the fabric doesn’t get caught in the invisible zipper.
- Pin and sew the rest of the center back seam (both the lining and the outer fabric) under the zipper to close the back of the dress.
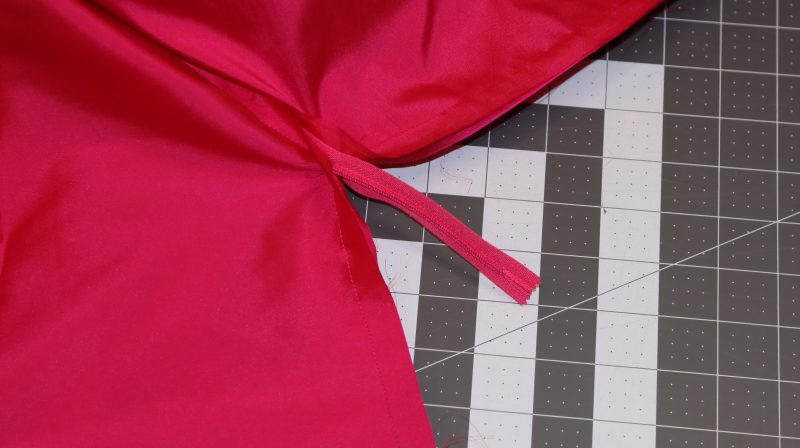

Step 13
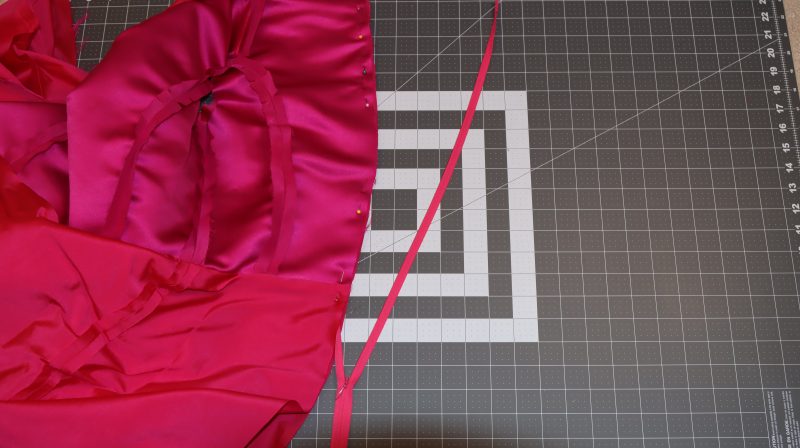
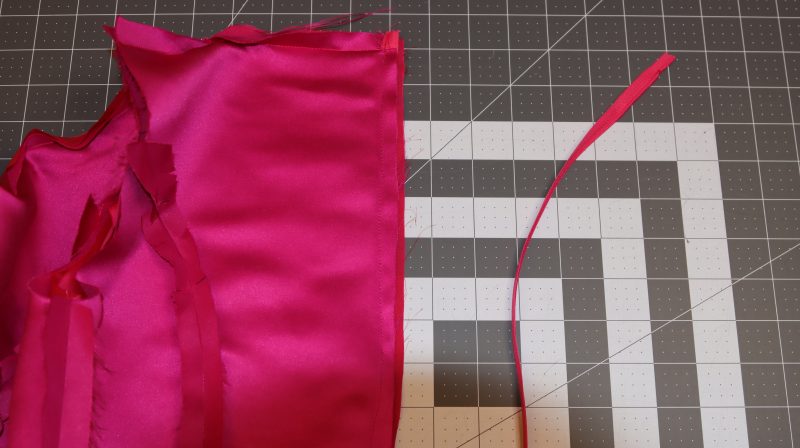
BUTTON LOOPS
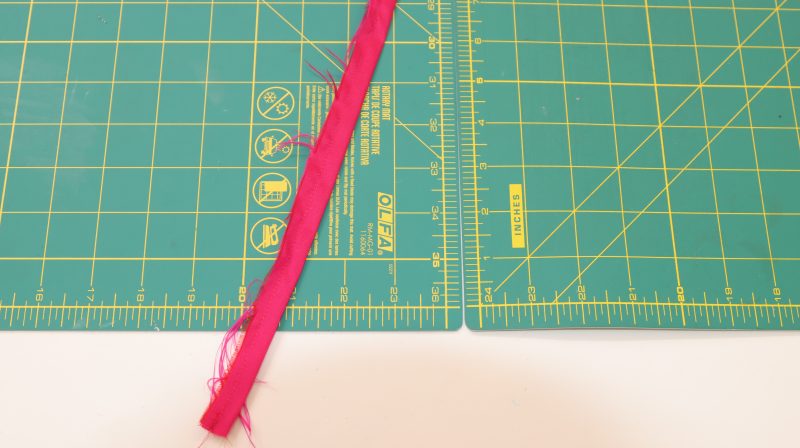
- Cut 2 strips of fabric that are 1.5 inches wide and at least 24 inches long.
- Fold those strips right sides together and sew them into tubes with ½ inch seam allowance.
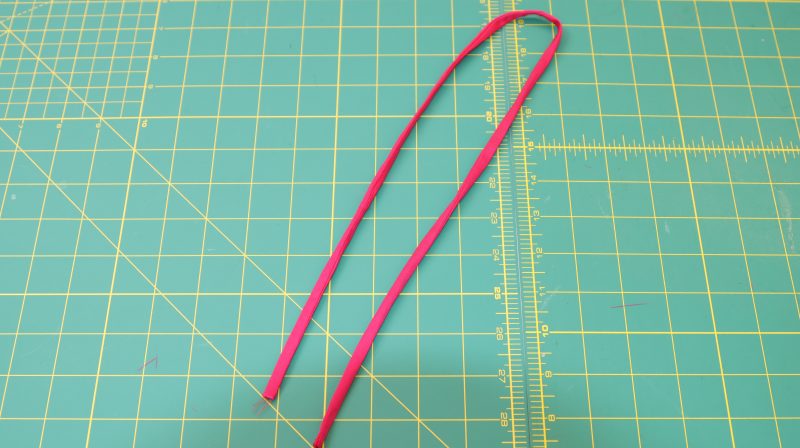
- Flip the tubes right sides out with a tube turner.
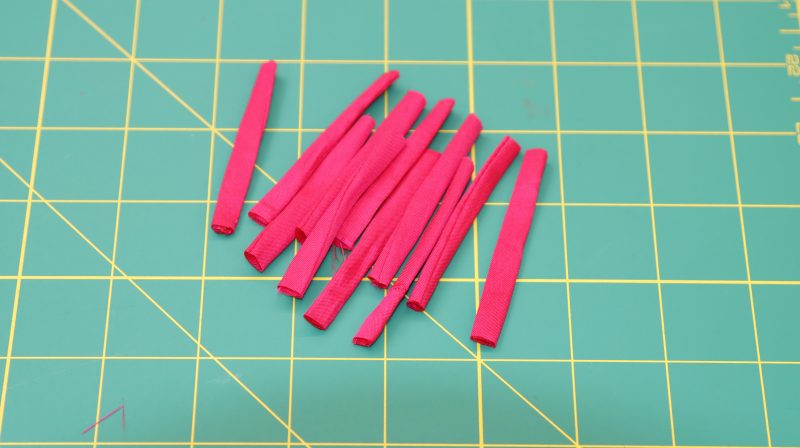
- Cut the tube into 2.5 inch long strips to create the button loops.
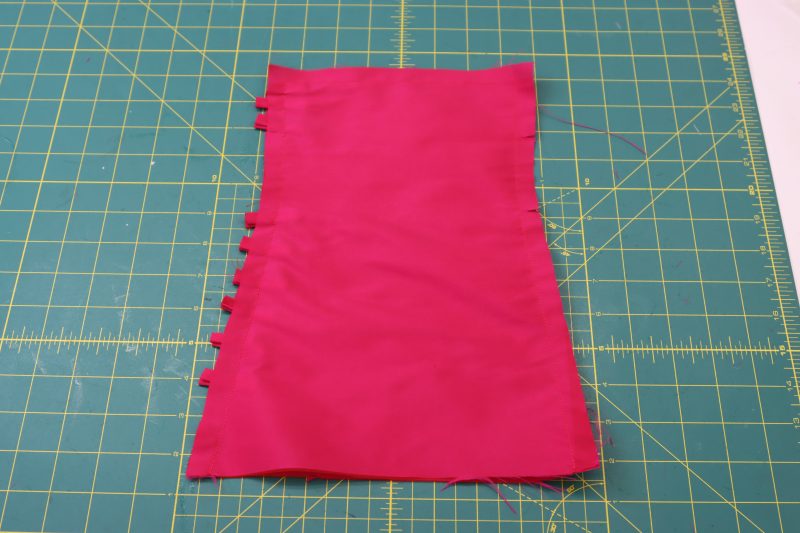
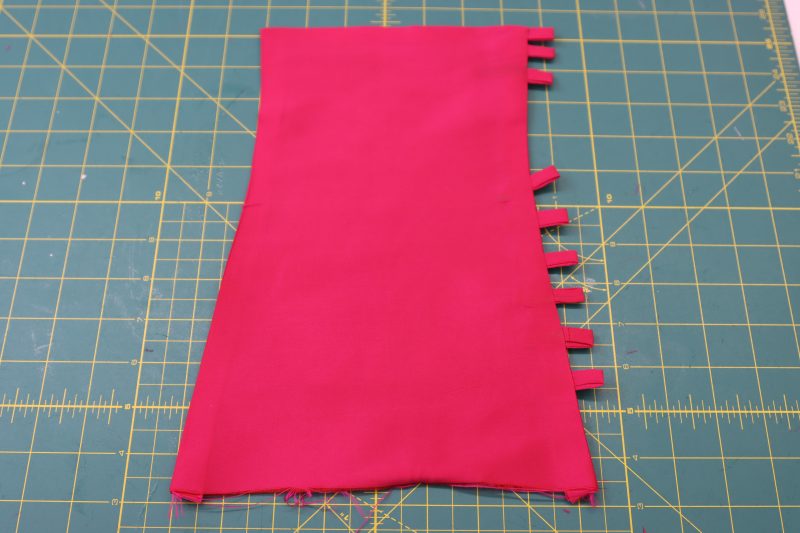
Step 14
SLEEVE CUFFS
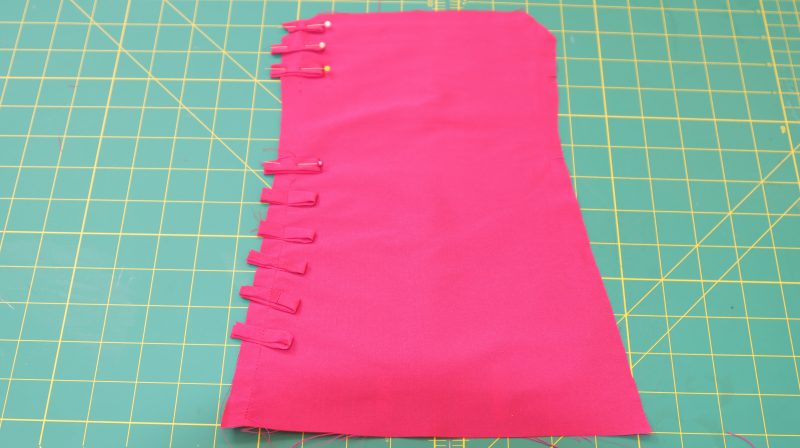
- Fold each 2.5 inch tube in half.
- Pin the folded tube to the right side of the sleeve cuff, evenly spaced out, making sure to skip the gap for the thumb hole.
- Topstitch over the button loops.
- Place the mirrored cuff piece right sides together on the cuff with the button loops.
- Sew the sides and top of the cuff right sides together, leaving the bottom open so that it can be flipped right sides out.
- Clip the corners of the cuff and flip it right sides out.
- Repeat all of step 14 for the other cuff, making sure the button loops are mirrored on the opposite side.

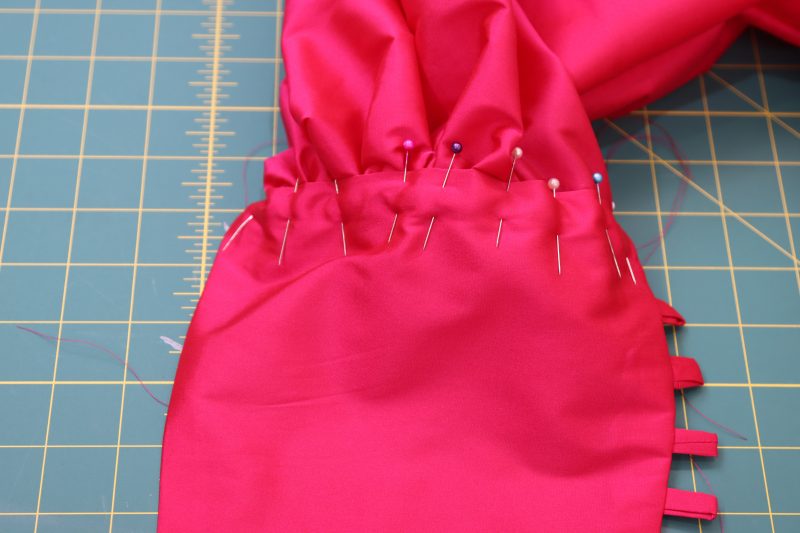
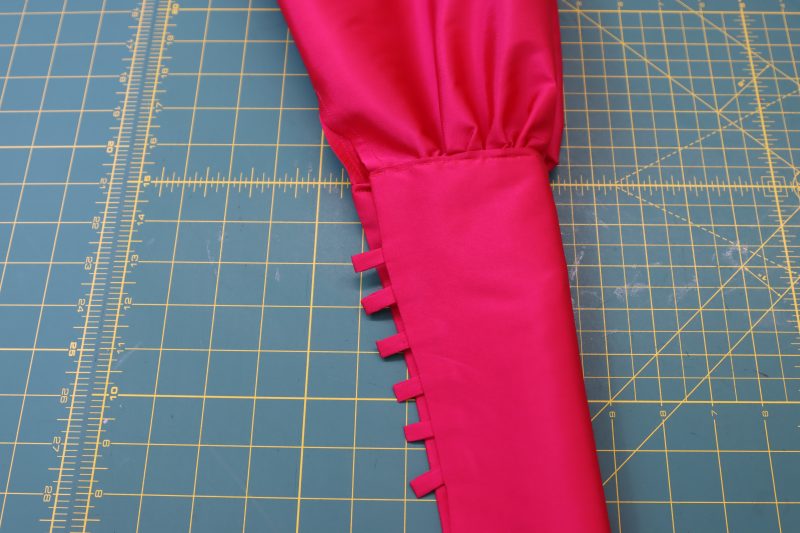
Step 15
ATTACH CUFFS
- Fold the raw edges of the cuff opening toward the inside of the cuff.
- Press a ½ inch fold into the raw edges of the opening of the cuff.
- Ensure that the bottom of the sleeves (the ends that have the slit) are gathered enough to fit the width of the cuff opening.
- Sandwich the gathered bottom edge of the sleeves into the cuff opening with the folded edge.
- Pin the sleeve into the cuff opening.
- Topstitch the cuff opening closed, securing the gathers in place.
Step 16
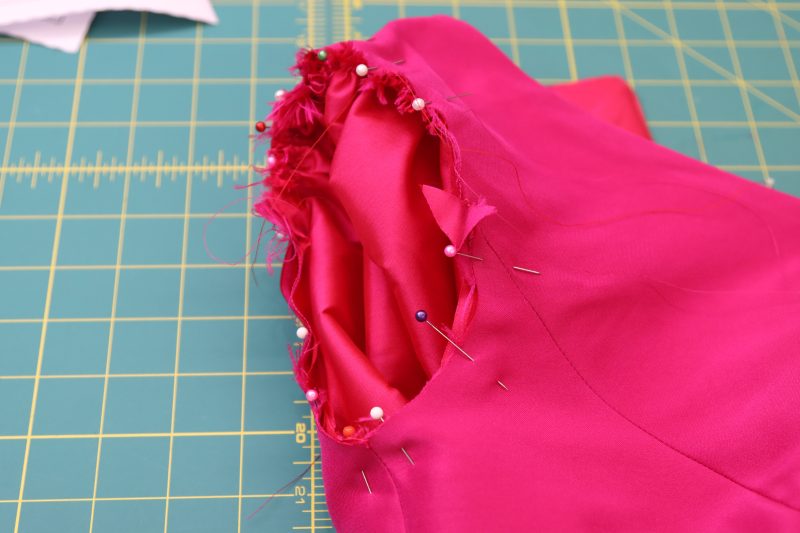
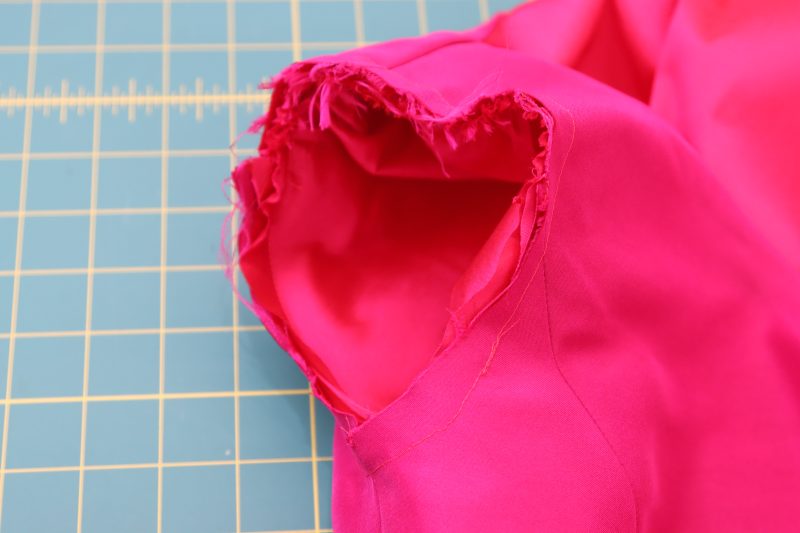
ATTACH SLEEVES
- Ensure the sleeve caps are gathered enough to fit in the armscyes of the dress.
- Insert the sleeve caps right sides together into both the lining and the main fabric armscyes.
- Pin the gathered sleeve caps into the armscyes.
- Sew along the pins.
- Pull the sleeves right sides out from the dress.
Step 17
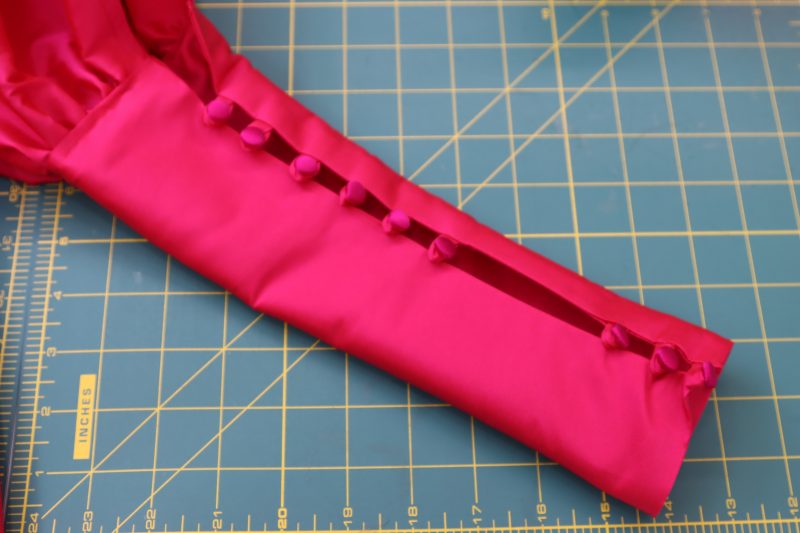
SEW BUTTONS
- Hand sew matching satin-covered buttons to the opposite side of the cuffs as the button loops, making sure to leave an empty space at the thumb hole.
Step 18
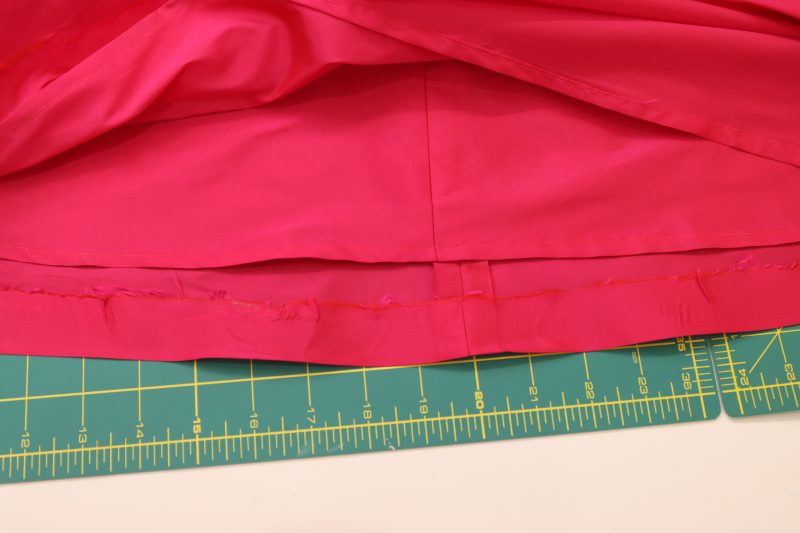
HEM SKIRTS
- Sew a double rolled baby hem on the lining skirt.
- Use fusible hem tape on the outer skirt hem for an invisible hem (you can use a blind hem or just a straight stitch on the bottom of the skirt if you want, but I wanted the hem to be completely invisible).
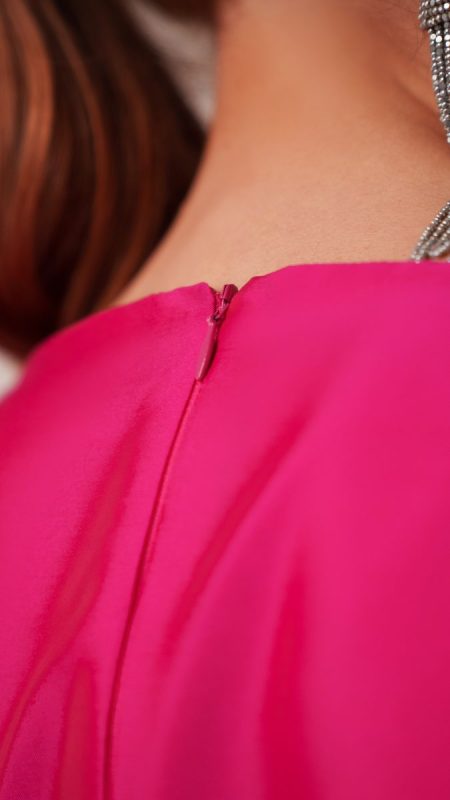
Sewing Success: The Finished Biella Fit and Flare Dress
Share this post with a friend (or two!), download the Biella Fit and Flare Dress free sewing pattern, and show us which fabrics and colors you choose, using the hashtags #MoodBiellaPattern & #MadeWithMood—and don’t forget to tag us @MoodFabrics, too.


Free Sewing Pattern Inspiration for Your Next Project
With 500+ free sewing patterns and counting, your opportunities for sewing with Mood are endless!
We hope you had as much fun sewing this fit and flare dress pattern as we did! As always, we want to hear from you—share your thoughts and comments below and let us know where you’ll be wearing the Biella Fit and Flare Dress free sewing pattern!
Can’t get enough sewing with Mood? Browse your next make with our latest free sewing patterns.
Those sleeves!!!
Excelente
Looks great