
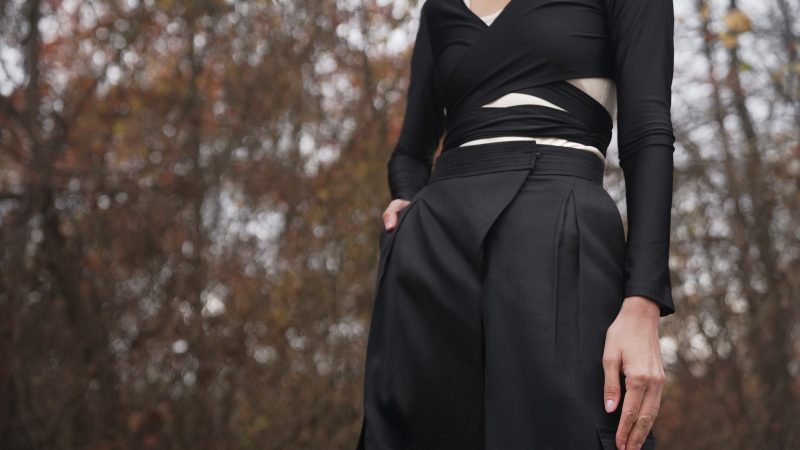
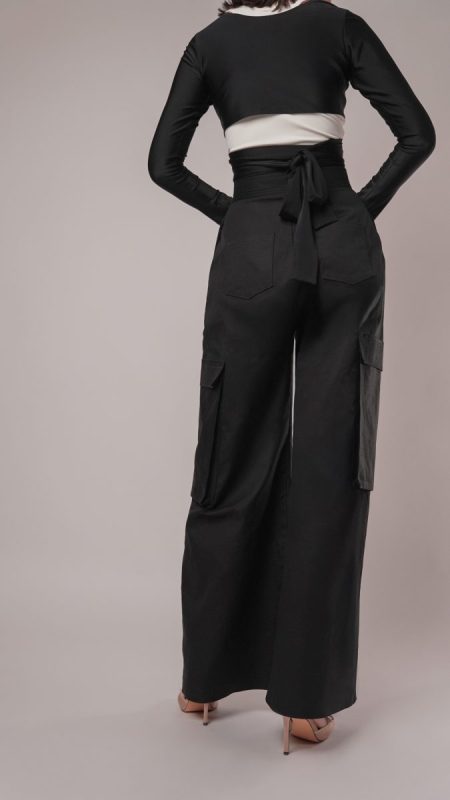
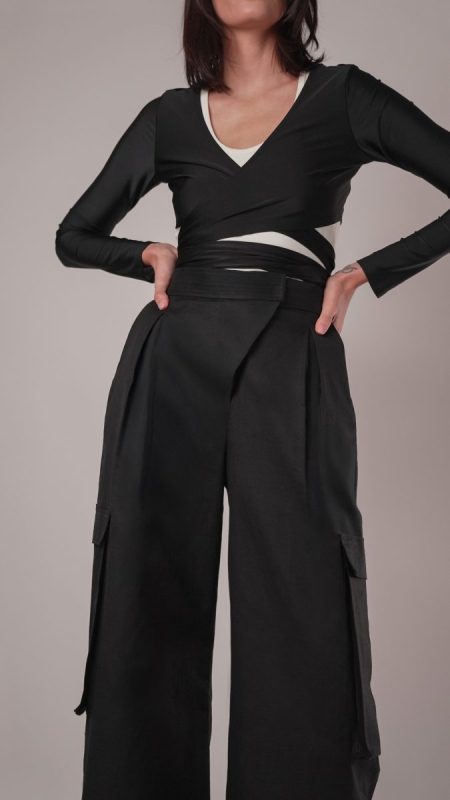
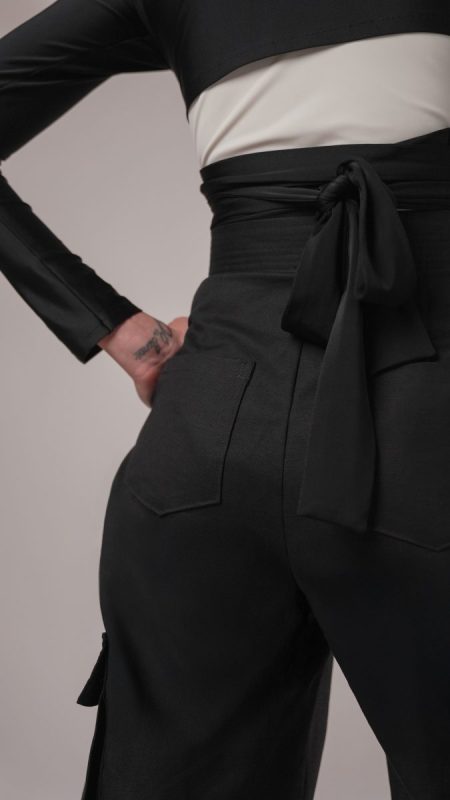
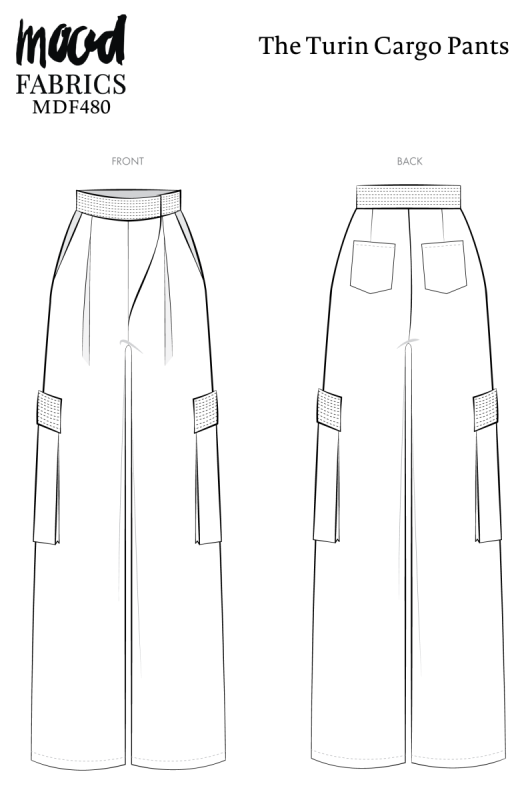
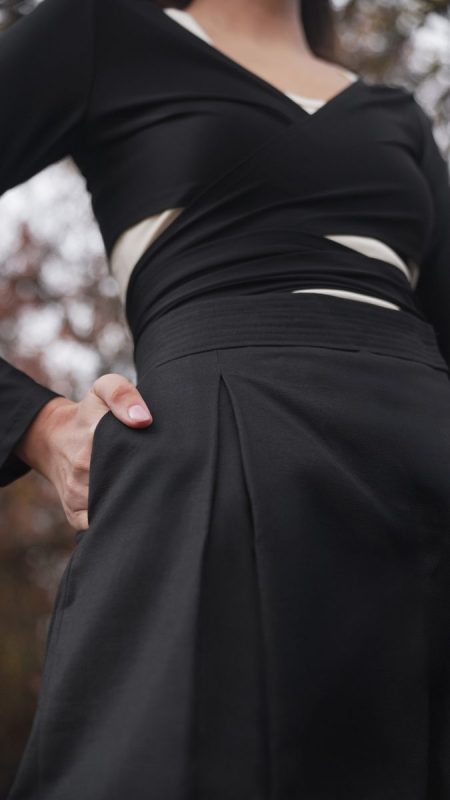
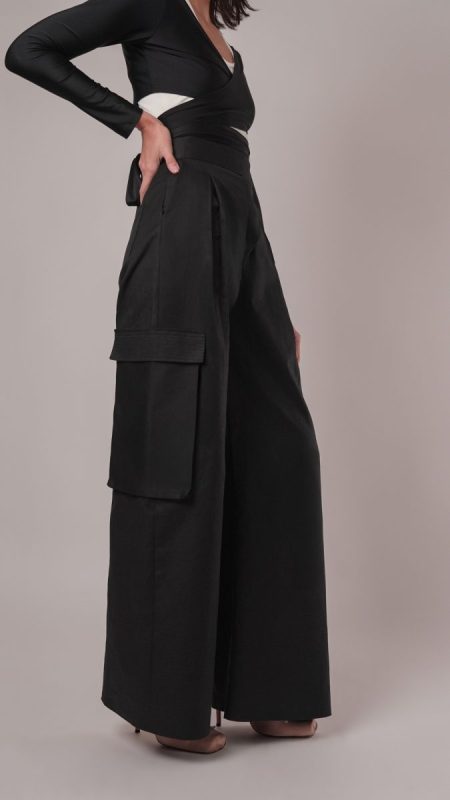
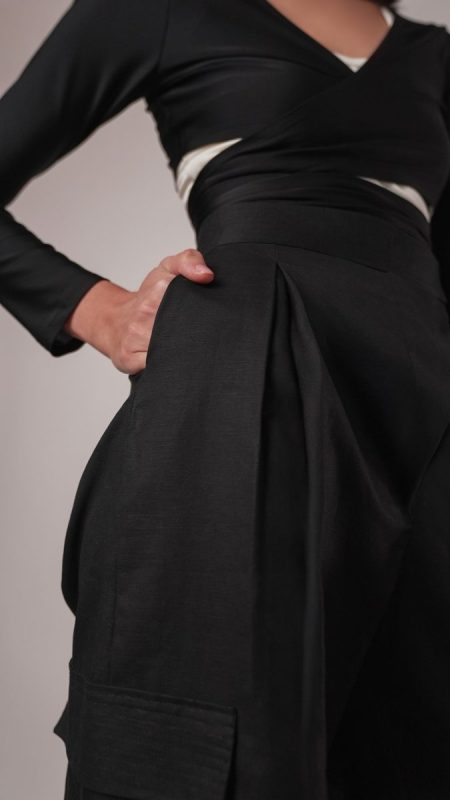
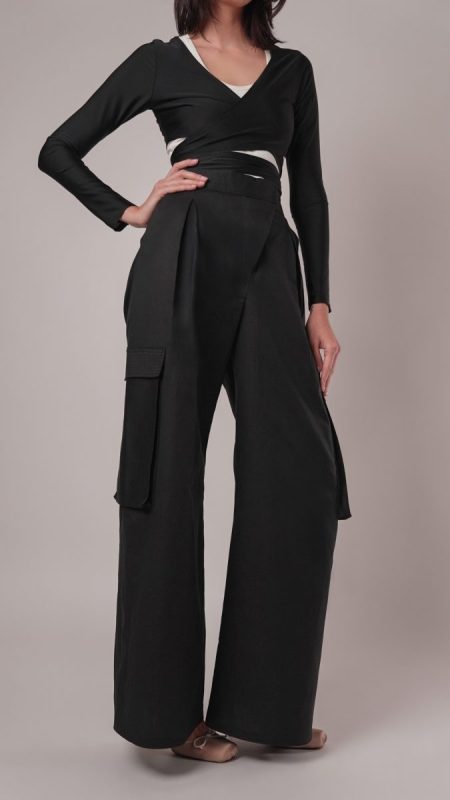
Meet the Turin Cargo Pants, a blend of clean lines, clever construction, and easy movement. Cut from a lightweight linen-cotton blend, they balance structure with breathability, giving the silhouette its crisp shape without ever feeling stiff. Oversized accordion pockets sit neatly at the side seams, while envelope hip pockets and sculpted back pockets add both function and subtle curve-flattering detail. Top-stitching ties everything together, appearing on the pocket flaps, waistband, and seams throughout the design, giving the pants a confident, sporty finish. Now you may be looking at the zipper fly extension and panicking a bit, but this subtle fly detail delivers that runway-ready punch while being far less intimidating to sew than it looks.
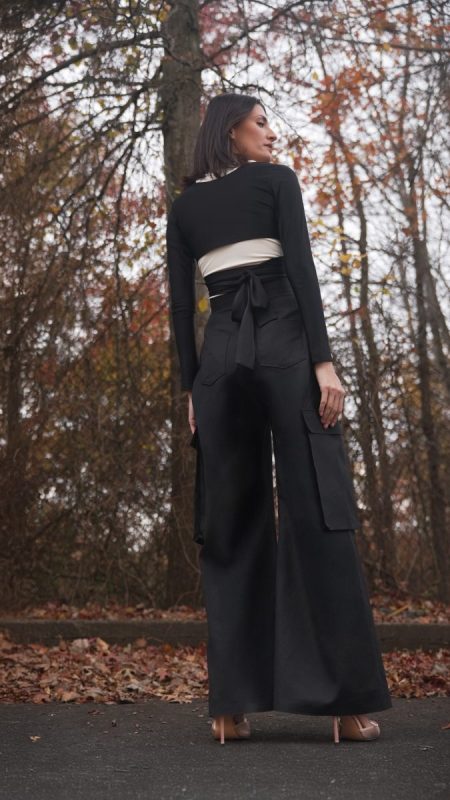
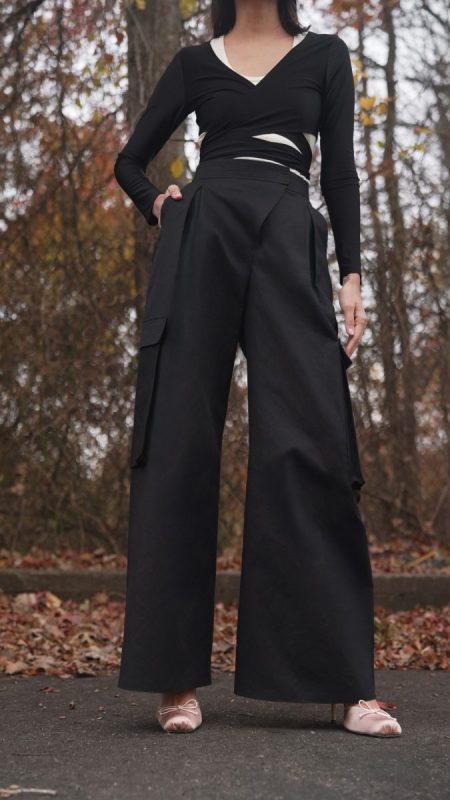
Pair the Turin Pants with the Clara Bodysuit and Adagio Wrap Top for a ballet-core Black Friday uniform. There’s a quiet determination to the look. When worn together, these pieces turn a look that is focused, poised, and just a little dramatic, like a dancer backstage, gathering breath before a performance. Except this time, the mission isn’t a grand jeté… it’s scoring an unbelievable sale with the calm precision of someone who trained for this moment.

Essential Materials & Sizing Guide for the Turin Cargo Pants
Continue reading for a breakdown of what knowledge and materials you need for creating your very own cargo pants! We’ve got you covered with the recommended materials we used—if you want to follow along exactly—as well as a curated list of alternative fabric type recommendations if you want to customize your own version. The Turin Cargo Pants free sewing pattern download includes technical drawings for seam and cargo pants visibility, plus a size chart to help you find your perfect fit!
Purchase Products Used Below:
Quantities indicated are for sewing a size small cargo pants. Toggle the ‘SHOP THIS LOOK’ box to find quantity estimates for other sizes.
- 3 yards of Medium Weight Linen and Cotton Woven – Black
- 1 each of Regular Zipper 9″ by YKK – 580 Black
- 1 each of Plastic 4-Hole Button – Matte Black Glossy Rim – 28L/18mm
- 1 each of Gutermann Sew All Thread 250m – 10 Black
- MDF480 – Turin Cargo Pants Sewing Pattern (Free download below!)
Alternative Fabric Type Recommendations:
The Turin Cargo Pants sewing pattern is best suited for medium weight fashion fabrics. Explore other fabric types or colors from our featured collections for your cargo pants with the links below.
Download Your Free Sewing Pattern
Submit your name and email in the form below to receive the download link for the Turin Cargo Pants free sewing pattern directly in your inbox. Mood Sewciety Patterns will send your free download link via email with the subject line: ‘Your Free Download from Mood Sewciety – The Turin Cargo Pants’ (in PDF format for A4 and letter-size printing).
© MoodFabrics.com / MoodSewciety.com – Mass production, resale, or distribution of this pattern in any form is strictly prohibited.
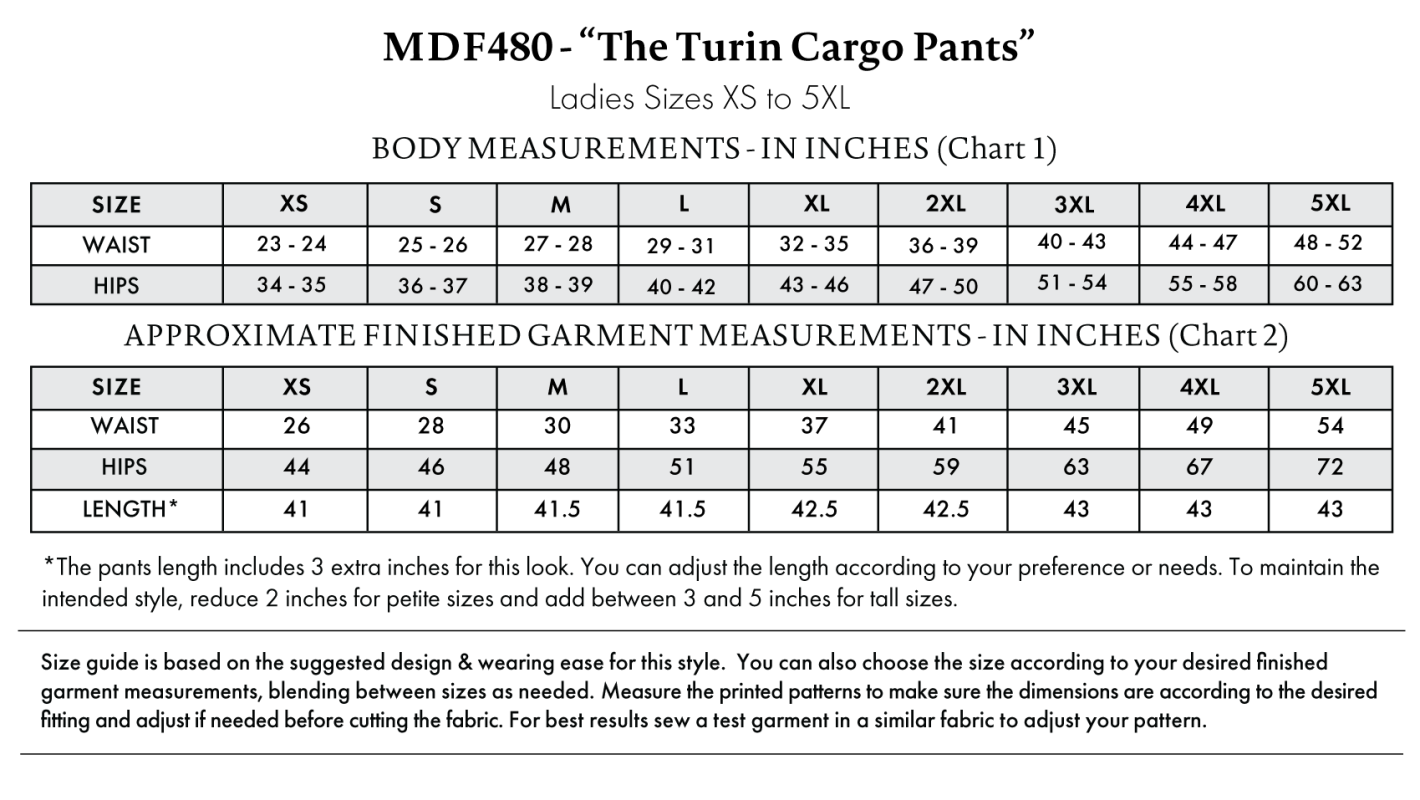
Find Your Perfect Fit
The Turin Cargo Pants Sizing Guide is based on the suggested design & wearing ease for this style. You can also choose the size according to your desired finished garment measurements, blending between sizes as needed. Measure the printed patterns to make sure the dimensions are according to the desired fitting and adjust if needed before cutting the fabric. For best results, sew a test garment in a similar fabric to adjust your pattern.
Note: Always read all the instructions before cutting the fabric!
How to Sew The Turin Cargo Pants
The instructions provided below are designed to guide you through sewing the Turin Cargo Pants from start to finish.

2 Tips for Sewing with Linen
⇒ Prewash your fabric. I cannot stress enough how important it is to prewash linen and put it through the laundry cycle that you will be using when your garment is done. You want to make sure your fabric is preshrunk before you cut out your pattern because it WILL shrink and your garment will not fit properly. If you don’t always follow sewing instructions and kind of make it up as you go along, let this be an exception. Please prewash your fabric.
⇒ Finish your raw edges with a serger or zigzag stitch (even though the below instructions don’t mention it) because woven linen has a tendency to fray a lot. Pinking shears are also a good option for finishing raw edges.
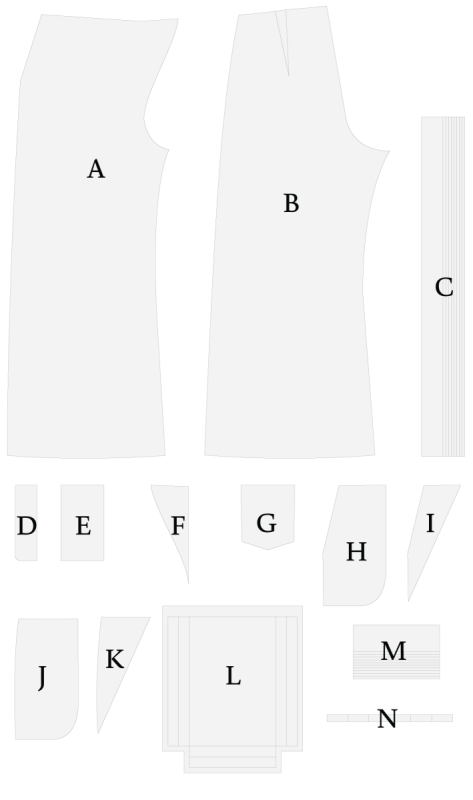
Pattern Pieces & Fabric Cuts Needed
(A) FRONT
-
FABRIC – CUT 2 MIRRORED
(B) BACK
-
FABRIC – CUT 2 MIRRORED
(C) WAISTBAND
-
FABRIC – CUT 1
(D) FLY
-
FABRIC – CUT 2
(E) FLY SHIELD
-
FABRIC – CUT 1
(F) FRONT FLAP FACING
-
FABRIC – CUT 1
(G) BACK POCKETS
-
FABRIC – CUT 2
(H) SIDE POCKETS A
-
LINING – CUT 2 MIRRORED
(I) SIDE POCKETS A FACING
-
FABRIC – CUT 2 MIRRORED
(J) SIDE POCKETS B
-
LINING – CUT 2 MIRRORED
(K) SIDE POCKETS B FACING
-
FABRIC – CUT 2 MIRRORED
(L) CARGO POCKETS
-
FABRIC – CUT 2
(M) CARGO POCKETS FLAP
-
FABRIC – CUT 2
(N) BELT LOOPS
-
-
FABRIC – CUT 1 (DIVIDE INTO 6)
-
Sew with a 1/2″ seam allowance for all seams unless otherwise specified.
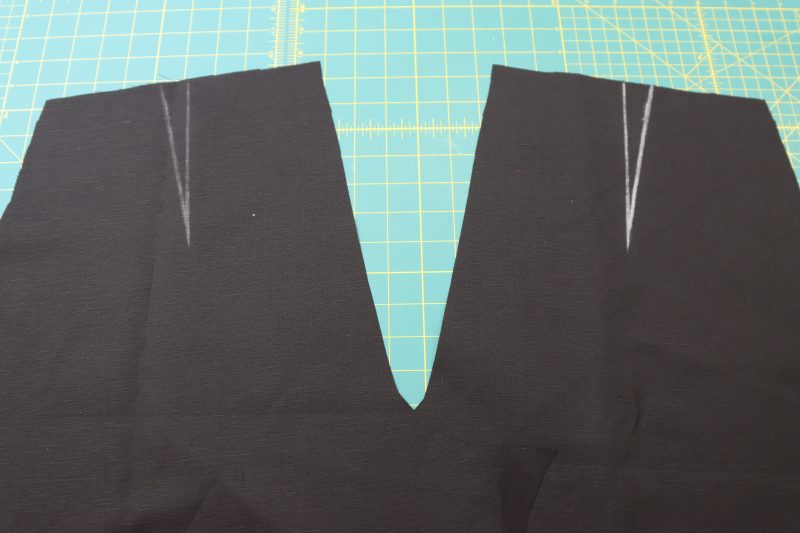
Step 1
DARTS
- Mark the darts on the back pants pieces using tailor’s chalk and the dart markings from the paper pattern.
- Fold the pants right sides together over the dart and pin the dart lines to each other.
- Sew over the dart lines.
- Press the dart seam open and flat with the bulk of the darts directed towards the back crotch seam.
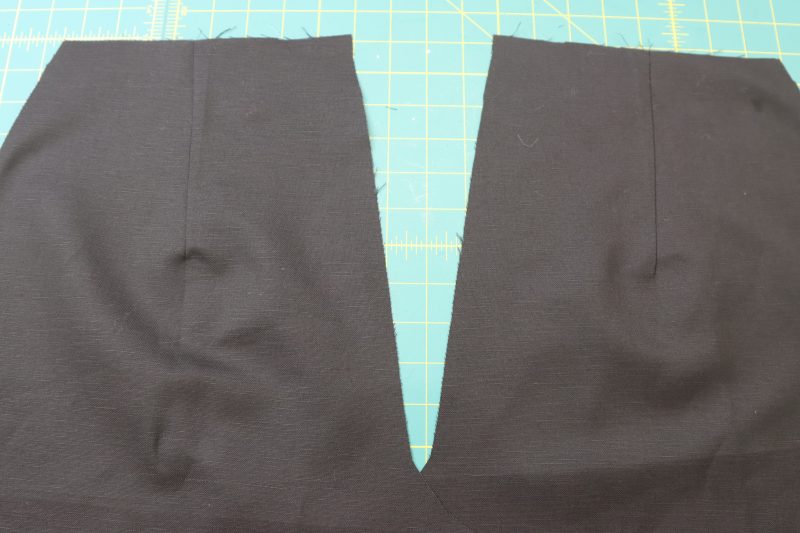
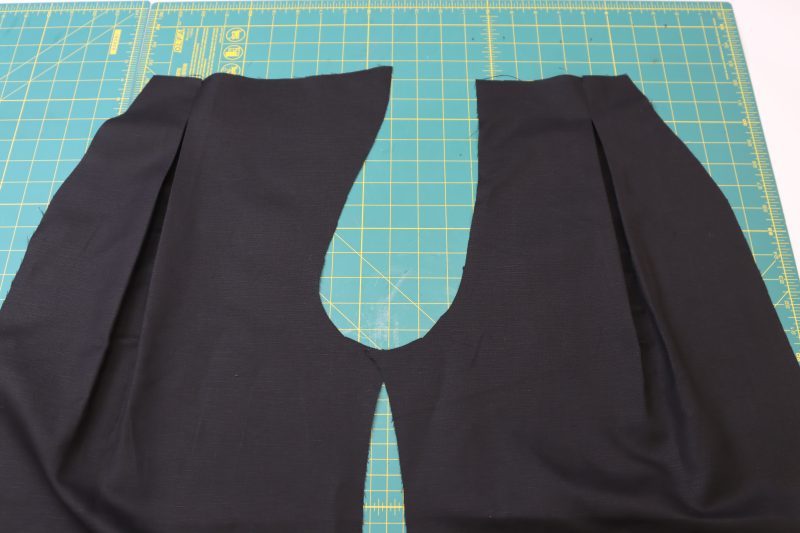
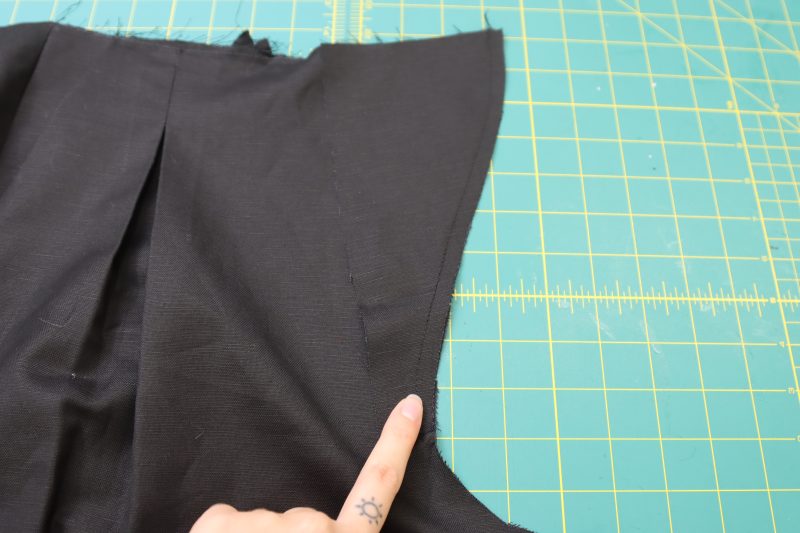
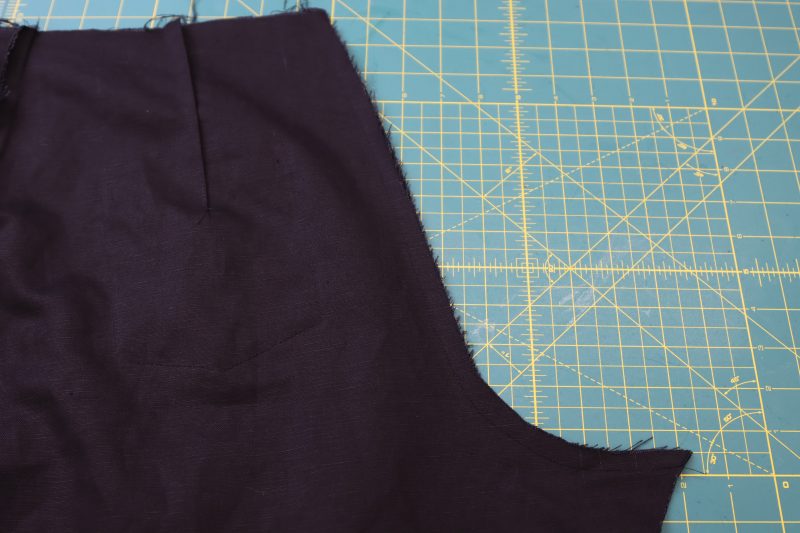
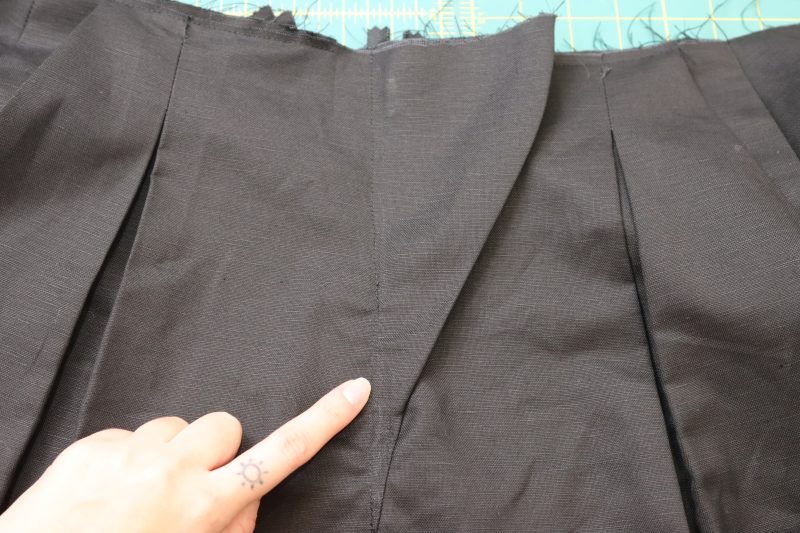
Step 2
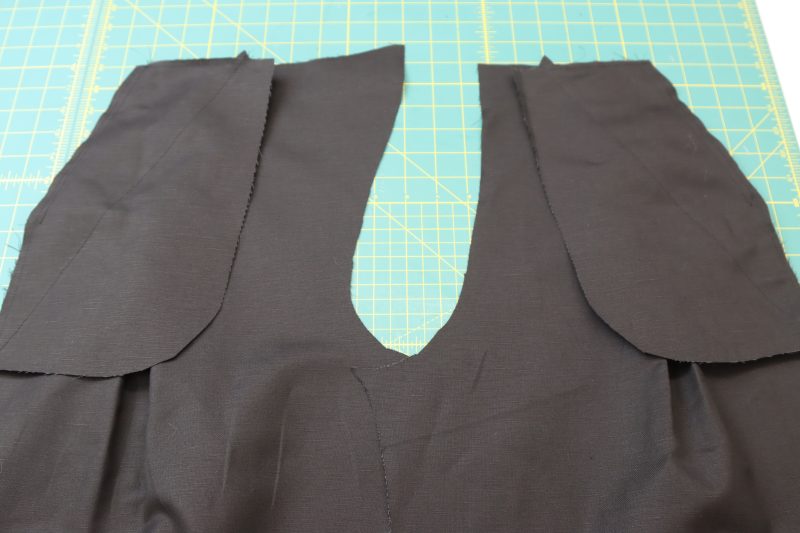
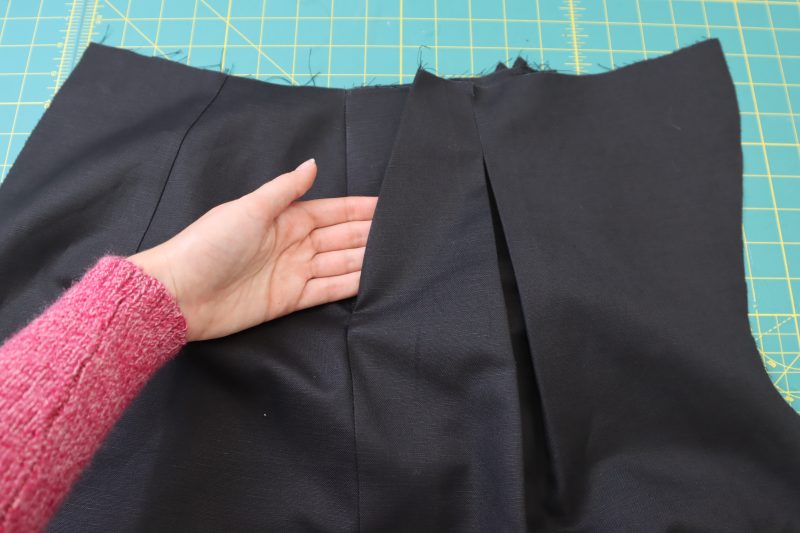
PLEATS
- Fold the front pant pieces right sides together to match up the notches for the darts.
- Place pins under the notches to hold them in place.
- Sew a straight stitch starting from the notches and ending 2 inches down from the notches.
- Open the front pants pieces.
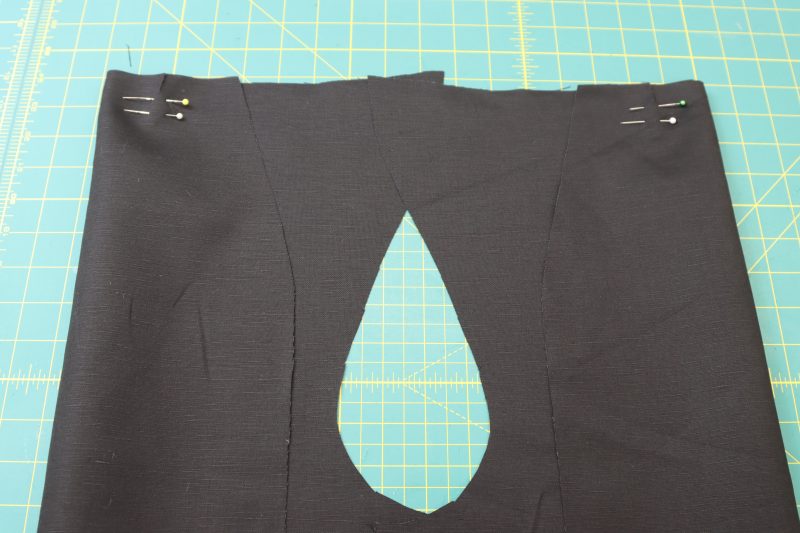
- Iron the pleats flat. This style of pleat is called a box pleat and is set into place by lining up the center of the pleat with the pleat seam and then pressing it flat so that the pleat has equally spaced folds on either side of the seam.
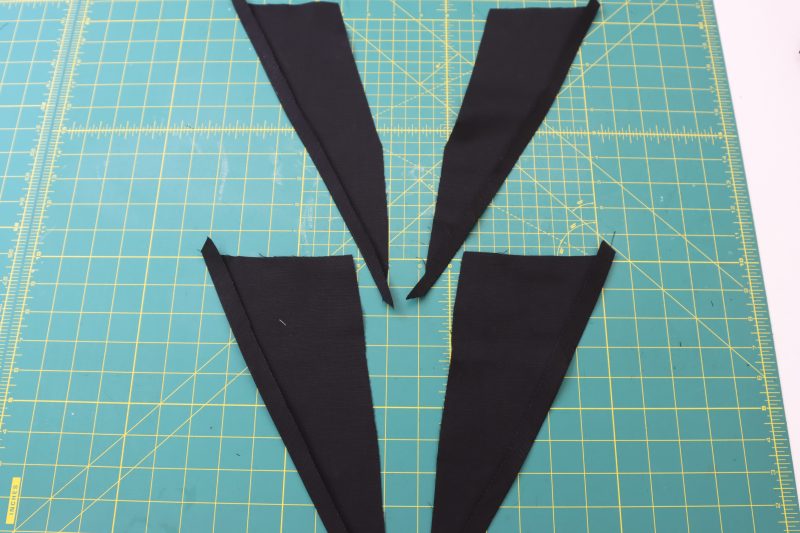
Step 3
POCKET FACINGS
- Fold the long diagonal edges of the pocket facing towards the wrong side of the fabric with a ½ inch fold.
- Iron the folds into place.
- Pin and sew the edges of side pocket facings A and B to their respective side pockets with ⅛ inch seam allowance.
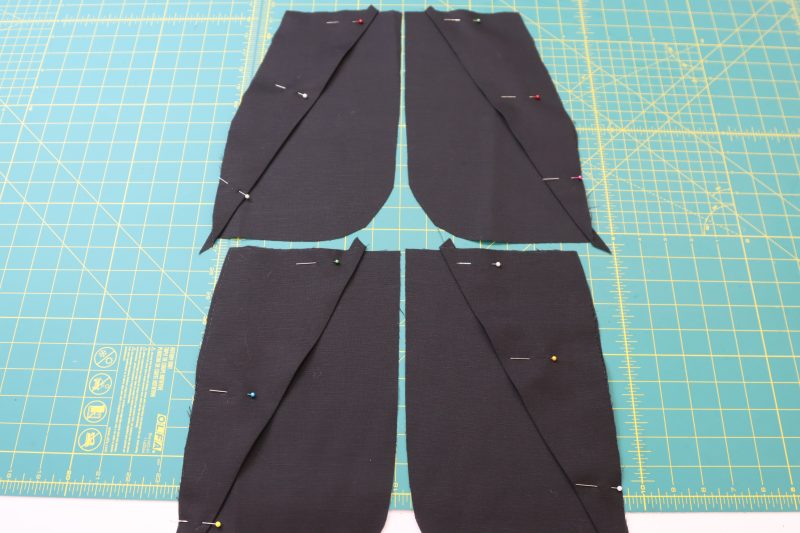
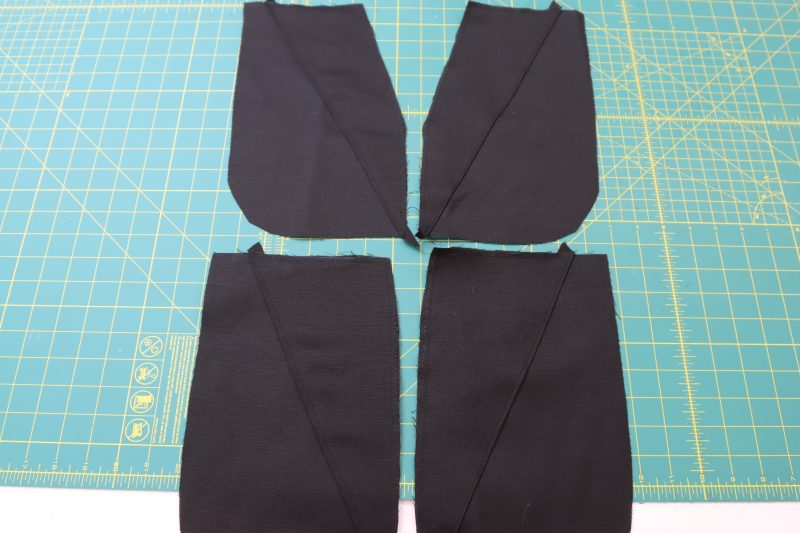
Step 4
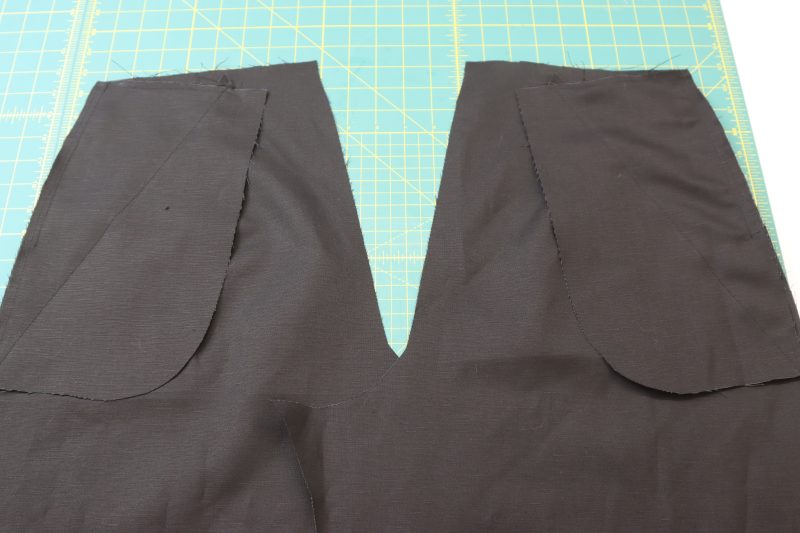
ATTACH POCKETS
- Pin the sides of the A pockets to the sides of the front pant legs.
- Pin the sides of the B pockets to the sides of the back pant legs.
- Sew the sides of the pockets to the sides of the pants, making sure to only sew half way down the pocket pieces and leaving the bottom halves free.
- Iron the pocket seam open and flat.
Step 5
SIDE SEAMS
- Place the front pants pieces on top of the back pant pieces, right sides together, with the pockets and side seams perfectly overlapping each other.
- Pin and sew the front and back side pockets around the perimeter, stopping at the seam that connects the pockets to the side seams of the pants to leave the opening for your hand.
- Pin and sew the side seams of the pants, starting at the bottom of the seam that connects the pockets to the pants and ending at the hem of the pants.
- Flip the pants right sides out.
- Iron the pockets so that they lay flat on the hip.
Step 6
CARGO POCKETS
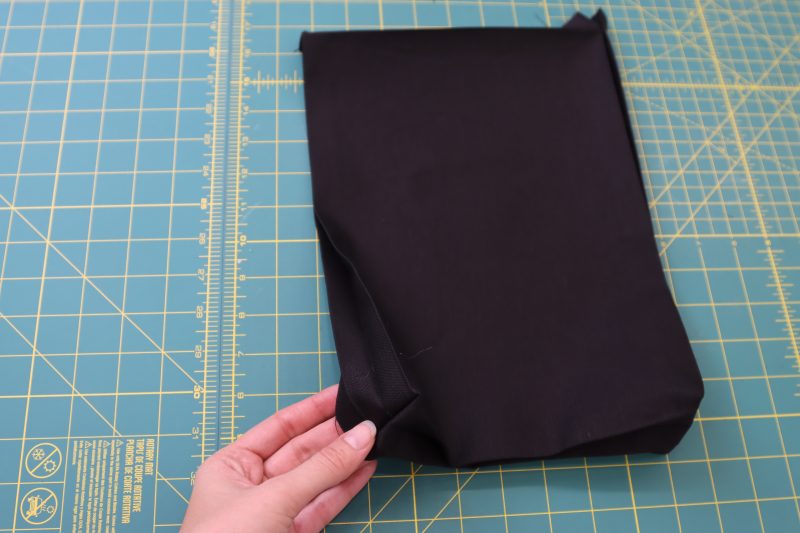
- Fold the accordion style folds into the sides and bottoms of the cargo pockets and iron them into place by following the fold lines on the paper pattern.
- Bring the bottom and side extensions of the cargo pockets right sides together and sew a seam with a ¼ inch seam allowance to connect them. This will create the boxy bottom corner of the pockets.
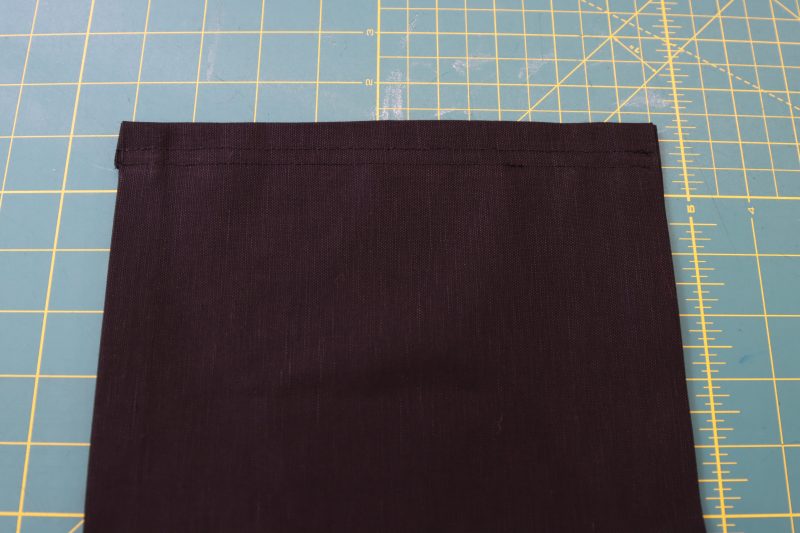
- Fold the top edge of the cargo pockets over by ½ inch and then another ½ inch to hide the raw edge.
- Topstitch two parallel seams along the top edge of the pocket.
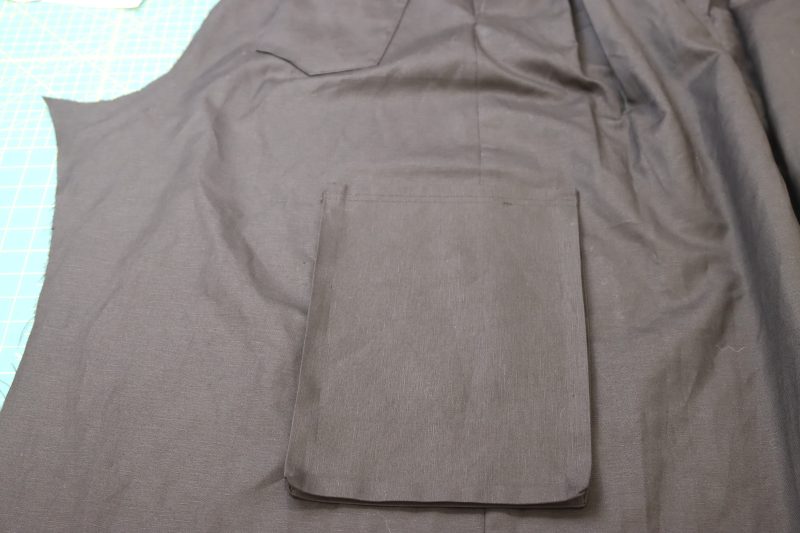
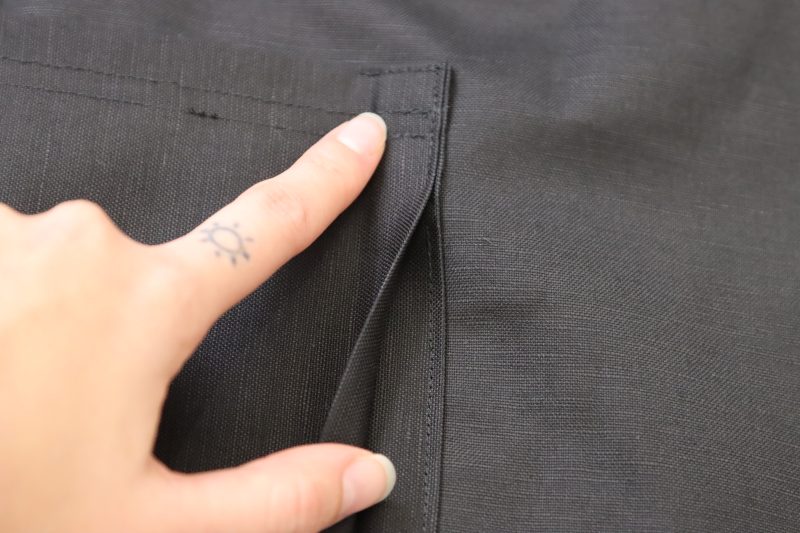
- Pin the back fold of the cargo pocket to the side seam of each side of the pants following the marking for the pocket on the paper pattern piece.
- Topstitch the back fold of the cargo pocket around the sides and bottom with ⅛ inch seam allowance, making sure to only sew down the back fold and leaving the accordion folds free.
- Top stitch an L shaped stitch onto the top opening and side of the pockets to secure it into place.
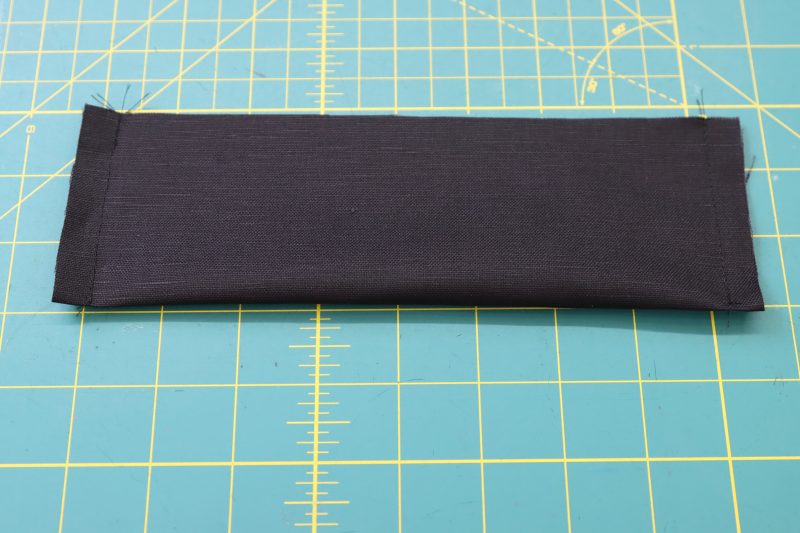
Step 7
POCKET FLAPS
- Fold the pocket flaps in half long side to long side, right sides together.
- Pin and sew the side seams of the pocket flaps.
- Clip the corners of the pocket flaps and turn them right sides out.
- Fold the raw edges of the pocket flaps to the inside of the flap and iron that fold.
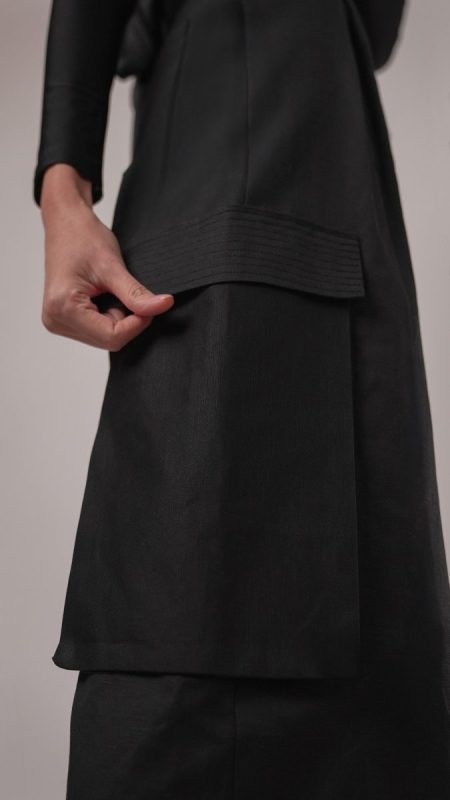
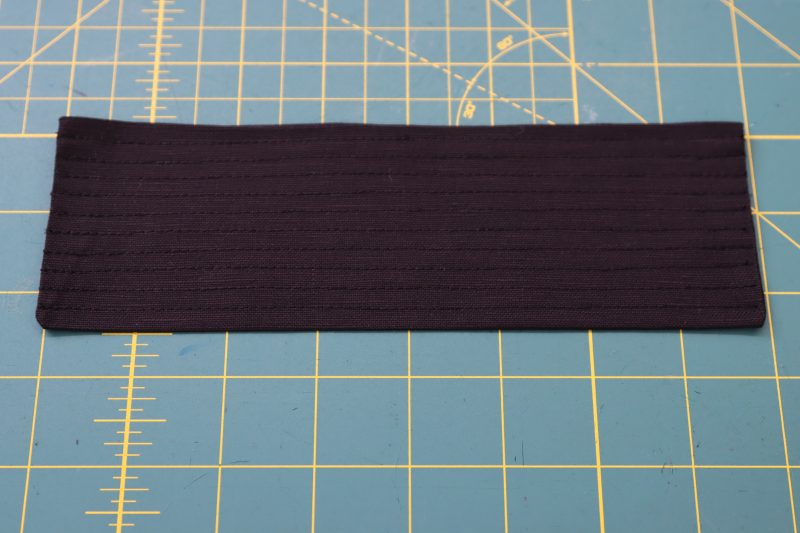
- Topstitch 10 equally spaced lines across the length of the pocket flaps, secure the open edge of the flap shut. The lines should be ¼ inch away from each other.
- After topstitching the decorative lines on the flap, topstitch the top edge of the pocket flap right above the top opening of the side cargo pocket.
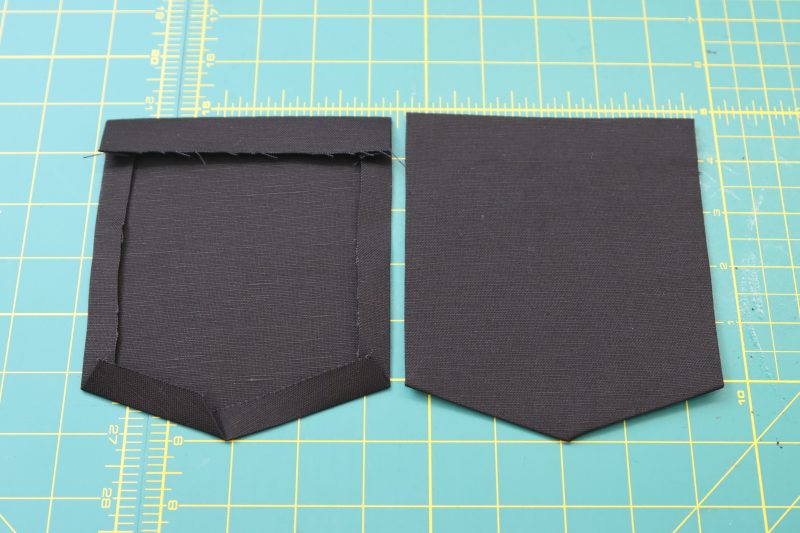
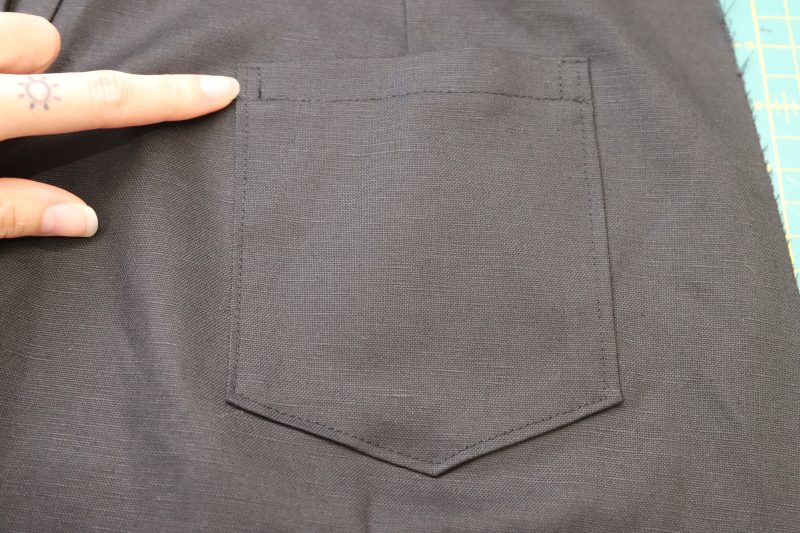
Step 8
BACK POCKETS
- Fold the sides and bottom of the pocket flap in towards the wrong side of the fabric by ½ inch and iron down.
- Fold the top edge of the pocket flap down last by ⅝ inch and iron down.
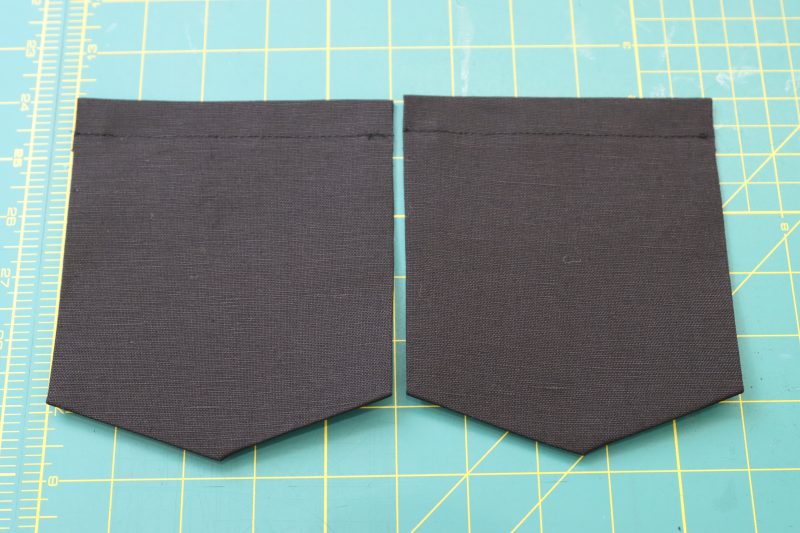
- Topstitch a straight stitch on the top pocket opening.
- Topstitch the sides and bottoms of the back pockets to the back pants pieces using the markings on the paper patterns. Follow the stitching details in the photo below.
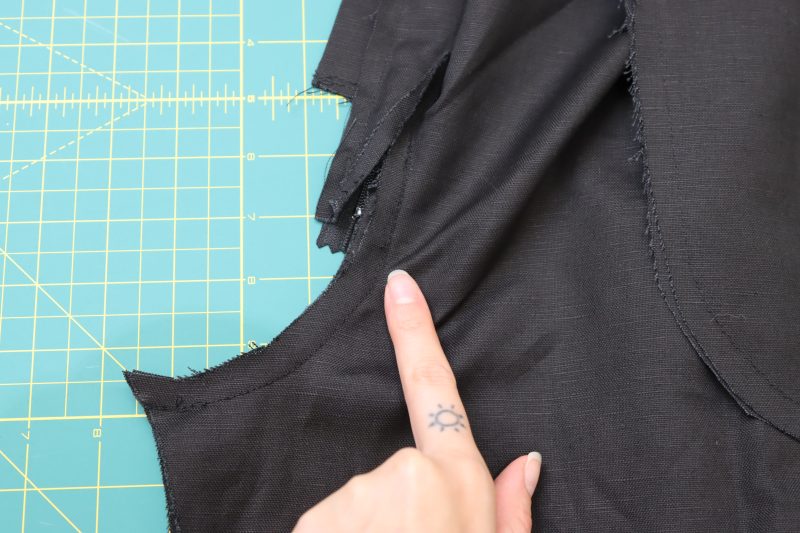
Step 9
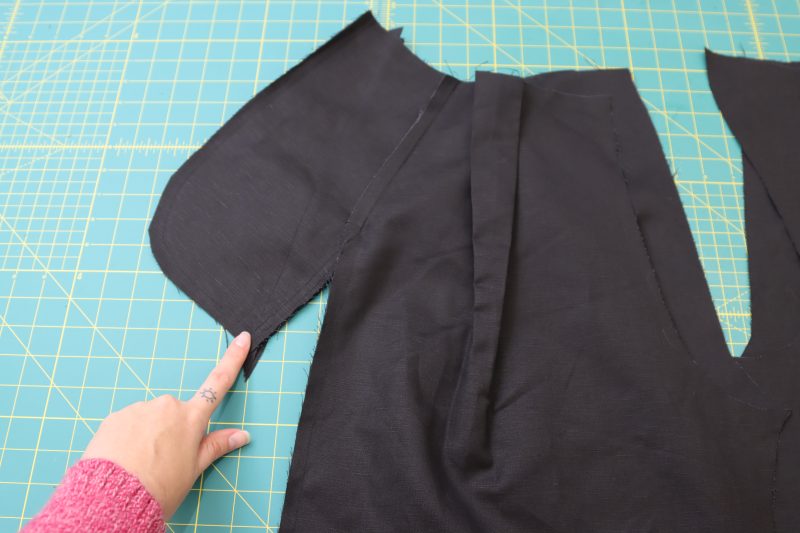
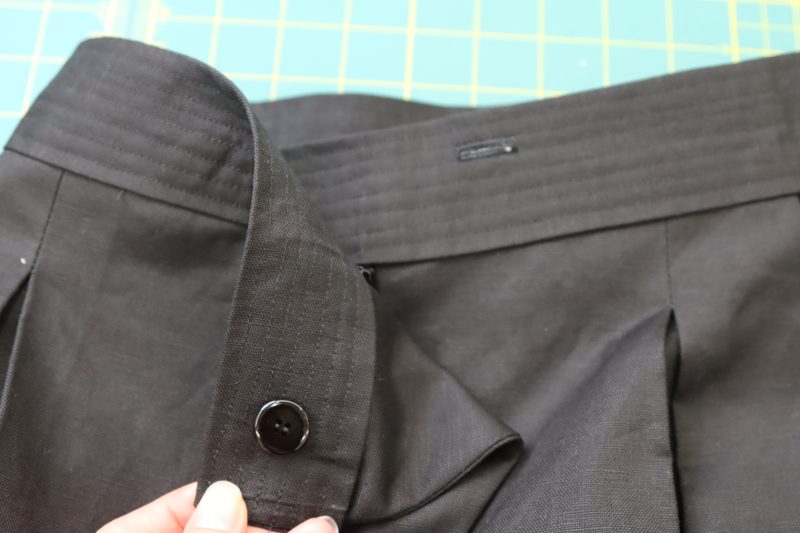
FRONT FLAP
- Place the front flap facing right sides together with the flap extension on the front right side of the pants.
- Pin and sew the curved edge of the front flap facing to the flap extension.
- Flip the flap facing towards the inside of the pants so that the raw edge is hidden.
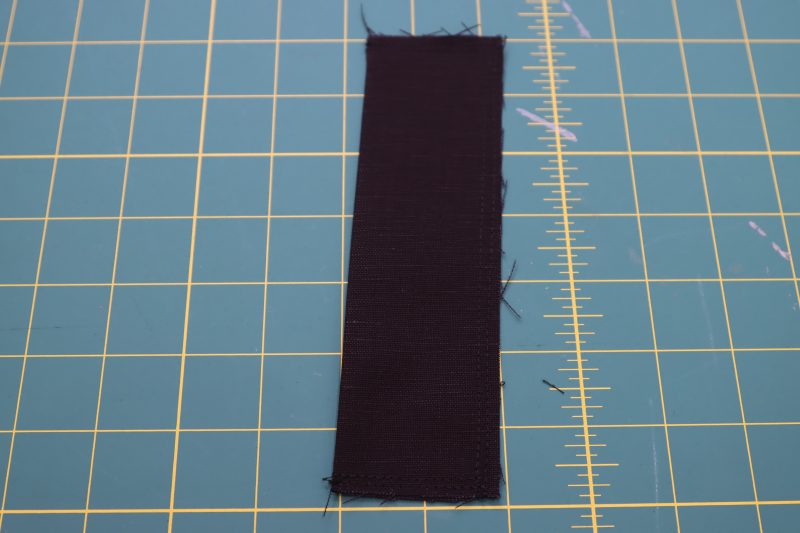
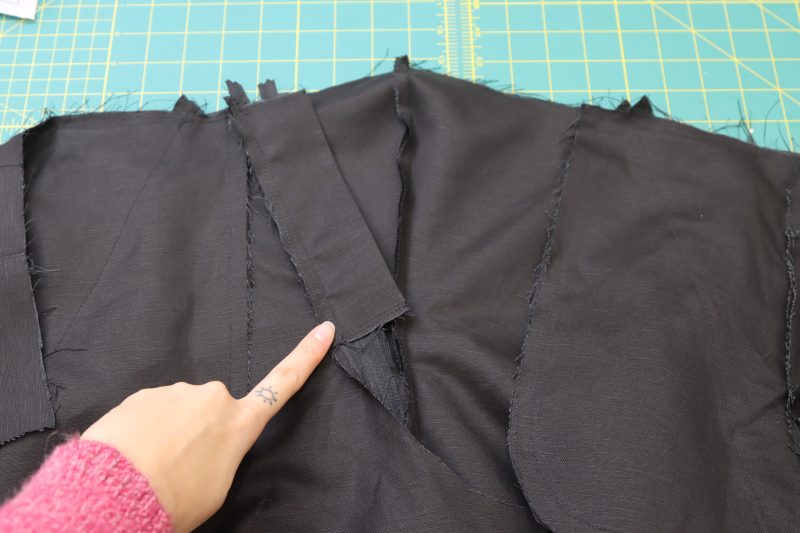
Step 10
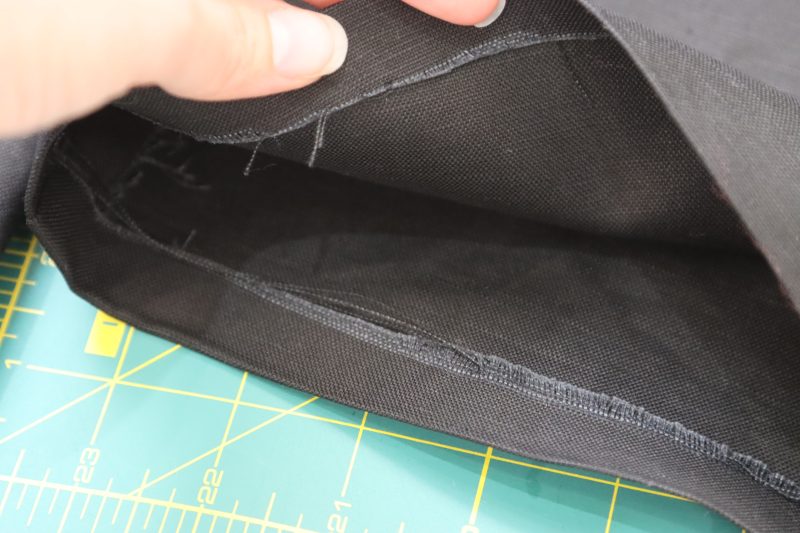
FLY FACINGS
- Fold the fly shield wrong sides together so that the long sides of the fly shield are touching each other.
- Sew or serge around the raw edges of the folded fly shield.
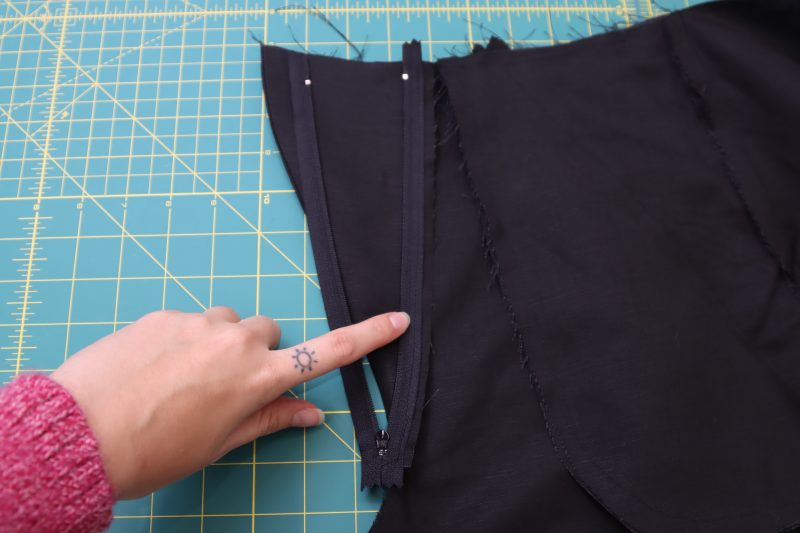
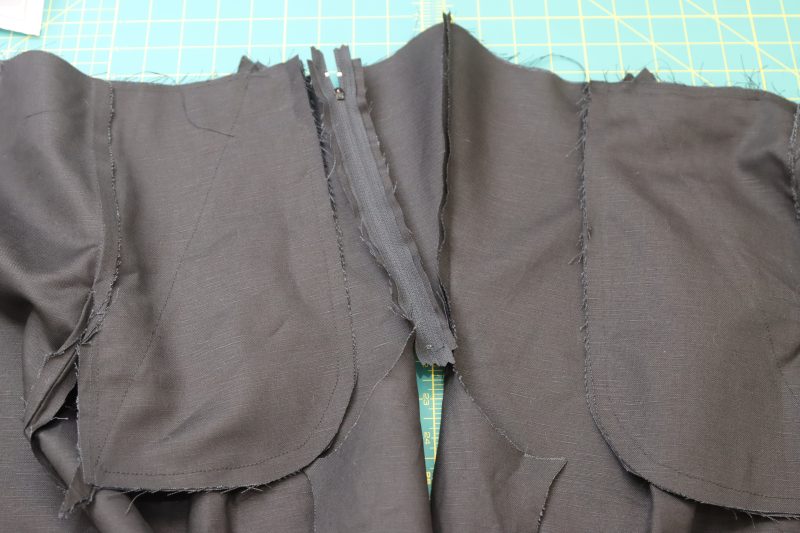
Step 11
ZIPPER FLY
- Place the zipper face down on the inside of the right pant leg with the outer edge of the zipper tape ¼ inch away from the raw edge of the front flap facing.
- Sew the right hand side of the zipper tape to the right hand side of the pants.
- Place the other side of the zipper face down on the left side of the pants so that it is lined up with the waistline and center crotch seam.
- Sew the left side of the zipper tape to the left crotch seam, right sides together.
- Place the fly shield on top of the seam you just sewed connecting the left side of the zipper to the left side of the pants.
- Pin and sew the fly shield directly on top of the zipper and left side of the pants, right sides together.
Step 12
CROTCH SEAMS
- With the pants inside out, place the pointed corners of the front crotch seam right sides together.
- Sew the two sides of the crotch seam together until reaching the zipper seam.
- Repeat the same process with the back crotch seam, except there is no zipper so you can sew the whole back crotch seam shut.
- Open the front of the pants flat and topstitch over both sides of the zipper so that everything is held in place.
Step 13
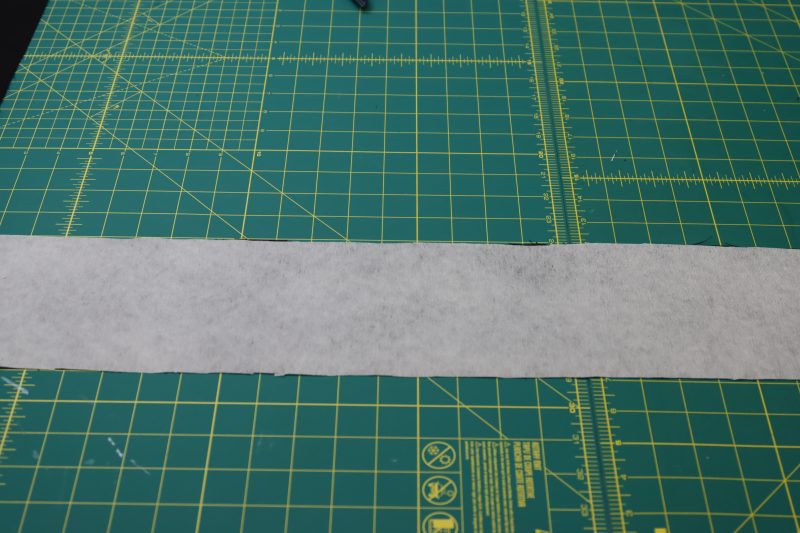
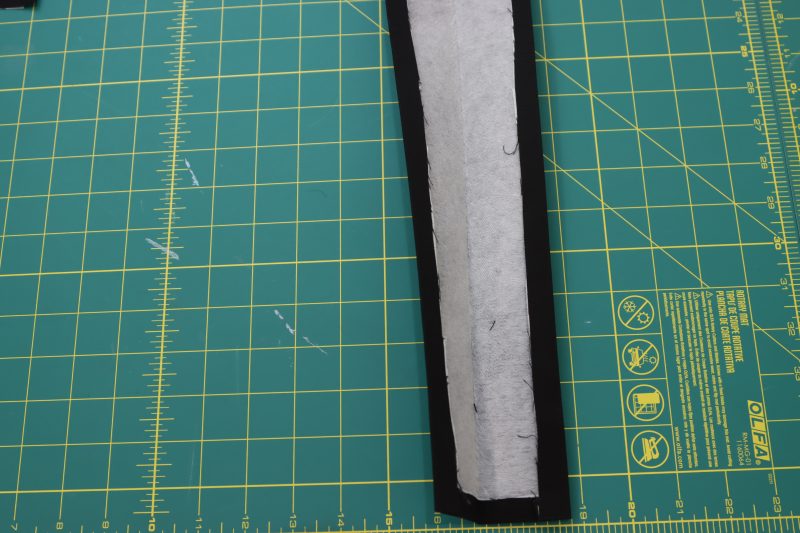
WAISTBAND
- Iron interfacing to the wrong side of the waistband.
- Fold the long sides of the waistband down by ½ inch and iron the fold into place.
- Fold the waistband strip in half long ways, wrong sides together with the folded edges tucked inside.
- Sew the ends of the waistband shut, encasing the raw edges.
- Sandwich the folded waistband around the waistline of the pants and pin in place.
- Sew the waistband to the waistline of the pants.
- The same way that the decorative parallel stitching was done on the pocket flaps, sew 7 parallel straight stitches around the waistband.

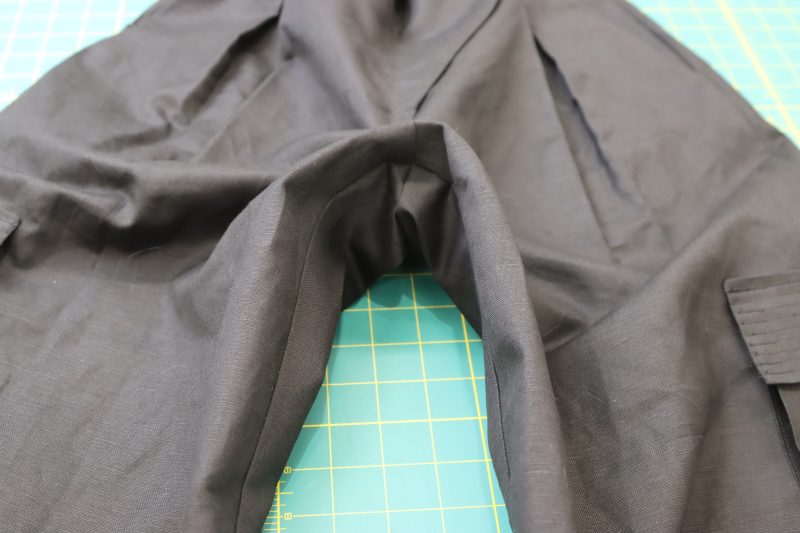
Step 14
INSEAM
- With the pants inside out, line of the front and back inseams of the pants with each other.
- Pin the front and back inseams together with the crotch seams lined up.
- Sew the inseam shut.
Step 15
WAISTBAND BUTTON
- Hand sew a button to the inside of the outer waistband right above the flap.
- Using the buttonhole foot attachment on your sewing machine, sew a buttonhole on the inner waistband directly across from the button. This will make it so that the button is hidden on the inside of the waistband and can’t be seen from the outside.
Step 16
PANTS HEM
- Fold the raw hem of the pants and much as you need to in order for the pants to be floor length.
- Iron the folded hem of the pants.
- Iron hem tape into the fold of the hem to create a blind hem.
Sewing Success: The Completed Turin Cargo Pants
Share this post with a friend (or two!), download the Turin Cargo Pants free sewing pattern, and show us which fabrics and colors you choose, using the hashtags #MoodTurinPattern & #MadeWithMood—and don’t forget to tag us @MoodFabrics, too.


Free Sewing Pattern Inspiration for Your Next Project
With 470+ free sewing patterns and counting, your opportunities for sewing with Mood are endless!
We hope you had as much fun sewing this cargo pants pattern as we did! As always, we want to hear from you—share your thoughts and comments below and let us know where you’ll be wearing the Turin Cargo Pants free sewing pattern!
I love all your patterns and textil
Impossible to download the pattern
It’s horrible
Hi there! You can download the pattern for free by entering your name and email address into the field under “Download Your Free Sewing Pattern”. Then, check your email inbox (and your spam, just in case) for an email from Mood Sewciety Patterns with the subject line “Your Free Download from Mood Sewciety”. Scroll down to the blue link under the title of the email and click on that. It will bring you to a web browser page where you have to scroll down and find the orange button that says “click here to download your free sewing pattern”. That button will redirect you to the webpage with the PDF of the pattern, which can be printed on 8.5×11 paper on your printer at home. Let me know if you need any additional help accessing the pattern!
Can you enable layers for the different sizes? This would allow individuals to print only the size they need. Thank you!
Unfortunately that is not a feature we offer at this time, but we’re considering offering it as a part of a paid subscription in the future. Stay tuned for future announcements and thank you so much for the feedback!
cant wait to try this!!
I need the pattern
Hi Djawida! You can download the pattern for free by entering your name and email address into the field under “Download Your Free Sewing Pattern”. Then, check your email inbox (and your spam, just in case) for an email from Mood Sewciety Patterns with the subject line “Your Free Download from Mood Sewciety”. Scroll down to the blue link under the title of the email and click on that. It will bring you to a web browser page with the PDF of the pattern, which can be printed on 8.5×11 paper on your printer at home. Let me know if you need any additional help accessing the pattern!
🙂
So happy these pants have pockets!!
Love it
These are stunning! I’ll need to add them to my project list and check my fabric stash for suitable fabrics.
Thank you ❤️
Hi 🙂 I check your new patterns every week and sew a lot of them. Can you also make some patterns of bags, hats, clothes for pets… ? have a nice day 🙂
Hey Veronika! We love feedback like this. We are working on producing and publishing more accessory patterns as I am typing this reply!
I love these pants and plan on starting soon! I noticed the ‘Shop This Look’ toggle is gone? I can’t find it on the site. Thank you for a great design
Hey Veronika, we were doing some website renovations a few days ago. It should be working now.
I really appreciate that the new Turin Pants pattern is being offered for free—thank you! I love the style, and I’ve already learned several new skills from it (pocket facings, box pleats, and accordion cargo pockets!).
I started a wearable muslin before Thanksgiving, but I’m having trouble understanding how to install the fly shield. The instructions feel a bit light, so more detailed steps or illustrations would be super helpful.
Has anyone completed these pants and might be able to offer some guidance on the fly shield construction?
Thank you so much for your generosity with all these amazing free patterns. Very much appreciated
What do you do with the fly piece (D)? I didn’t see it mentioned in the instructions anywhere.
This is actually a good catch. I didn’t end up using the fly piece. I only used the fly shield and the front flap facing (pieces E and F).
Thanks, that’s what I’ll do!
Hi, love the pants and I do really want to make them, but I always have trouble with the sizing. Can you please share what size was used for the model?
The model is wearing a size 4, thank you for asking!
I’m a bit confused on exactly where to sew the side pocket facings. is it on the diagonal, where the fold is? And are the pocket and pocket facing sewn right ides together? Also it would he very helpful for the stitch line to be marked in a contrasting color to make it easier to see. Black thread on back fabric is impossible to see even when zoomed in.
Hey Angela, sorry about the stitch lined. We will keep that in mind for future tutorials. For the pocket facings, check out the pattern tutorial for the Amherst Palazzo Pants. The pockets are the same and the fabric is not black so it’s easier to see each step.
I really wanna wear it.
download pattern
You can download the pattern for free by entering your name and email address into the field under “Download Your Free Sewing Pattern”. Then, check your email inbox (and your spam, just in case) for an email from Mood Sewciety Patterns with the subject line “Your Free Download from Mood Sewciety”. Scroll down to the blue link under the title of the email and click on that. It will bring you to a web browser page where you have to scroll down and find the orange button that says “click here to download your free sewing pattern”. That button will redirect you to the webpage with the PDF of the pattern, which can be printed on 8.5×11 paper on your printer at home. Let me know if you need any additional help accessing the pattern!
Similar to many here, I have entered my name and email multiple times and am not receiving the free download. It is not in my Spam folder. The name and address entry process does not work for multiple of the patterns posted on the site (also the adagio wrap cardigan).
Hi Deborah, I’ll email you the pattern directly.
Hello, are the pocket facings attached wrong sides together? It’s not very clear in the picture
Hey Ann, the wrong side of the pocket facings are sewn to the right side of the pockets. I hope this helps!
Also struggeling with the pockets here, maybe because it’s the first time I try making pants with pockets, but it seems an unsolvable puzzle to me *help*
Hey Kelly, which ones are you struggling with? If it’s the ones in the front on the hips, I recommend checking out the tutorial for the Amherst Palazzo Pants Set. The pockets in that pattern are the exact same as these, but the fabric used in that tutorial is blue instead of black and it’s easier to tell the right side from the wrong side of the fabric.
Thank you for the tip, this was indeed easier to follow!
Can I do these without adding the pockets?
Of course! You can just use this for the pants pattern.
I love this pant! Thank you! I made the moke up in a cotton duvet cover, in size 2xl and it fitted so perfectly I kept it as is. I intend to wear it intensely this summer! And I immediately made a second one in a dressy black crepe. I already see me doing multiple variations of this same pattern, with or without the pockets.
Thank you!
We’re happy to hear that, and your fabric choices sound beautiful, especially the black crepe version.
Making variations of the pattern, with and without pockets is a great idea!
I made the Turin pants in 100% linen and I love them! I did not use the pocket facings – I found them fussy and unnecessary. I had to watch a YouTube video to figure out the cargo pocket construction but they turned out great. I wish the tutorial used a two-sided fabric and contrasting thread. I found it difficult to see what was going on in the photos.
Can anyone help with step 11? I am confused on the second side of the zipper. It says,, ” sew the left side of zipper to left side of crotch seam, right sides together” I am not understanding that!
Hey Mel! “Right sides together” means the zipper should be face down on the fabric. So in step 11, when it says “sew the left side of the sipper to the left side of the crotch seam”, it means sew the zipper face down to the crotch seam, but make sure the pretty side of the fabric is touching the front of the zipper. I hope this clears up your confusion!
My comments are not being posted. Why? I bought fabric from Mood and would like help with this pattern!
Hey Mel! I just responded to your previous comment. Comments don’t get posted until they are reviewed and approved. I hope my last comment answered your question!