

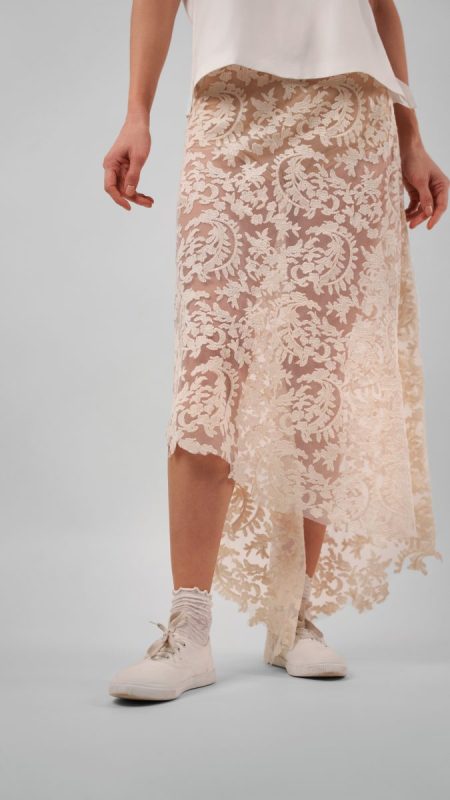
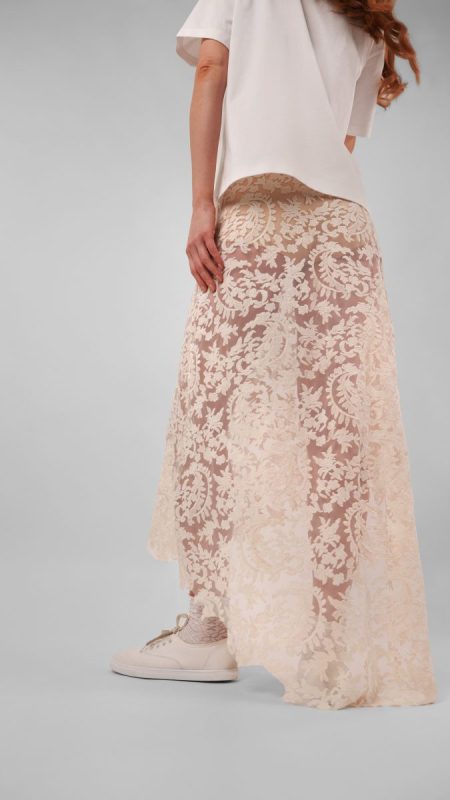
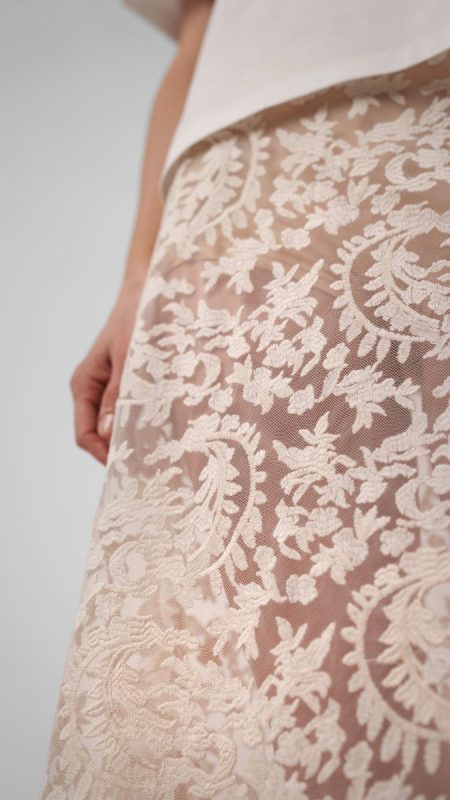
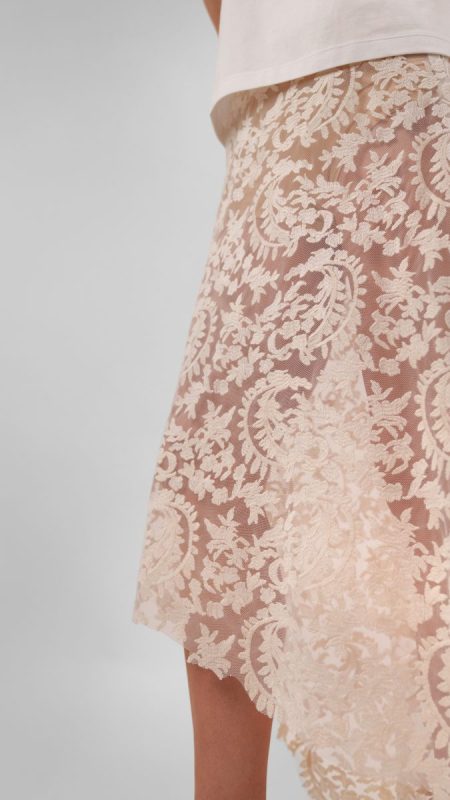
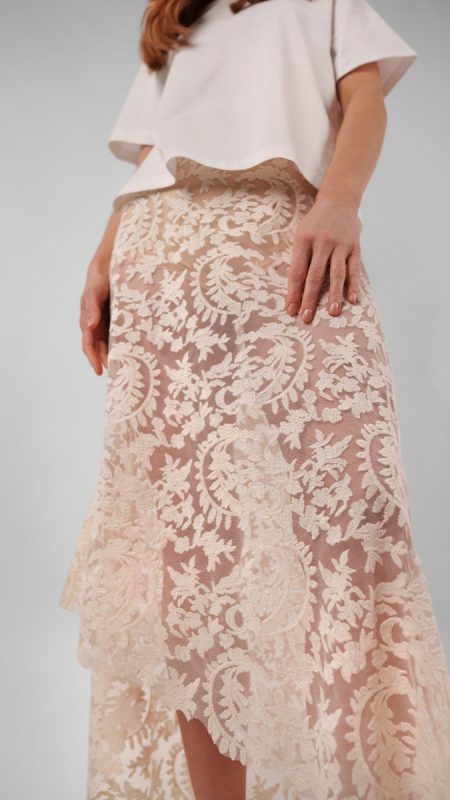
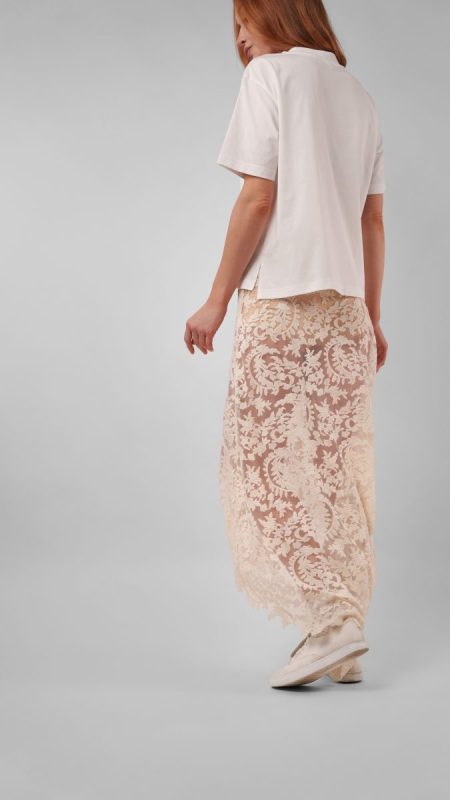
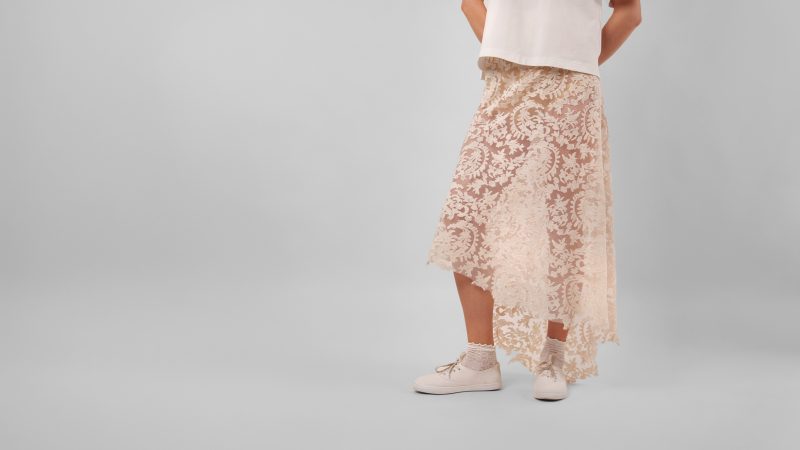
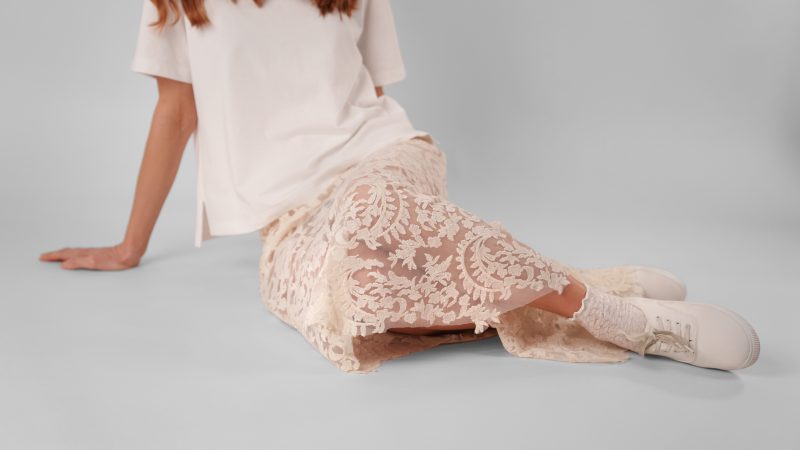
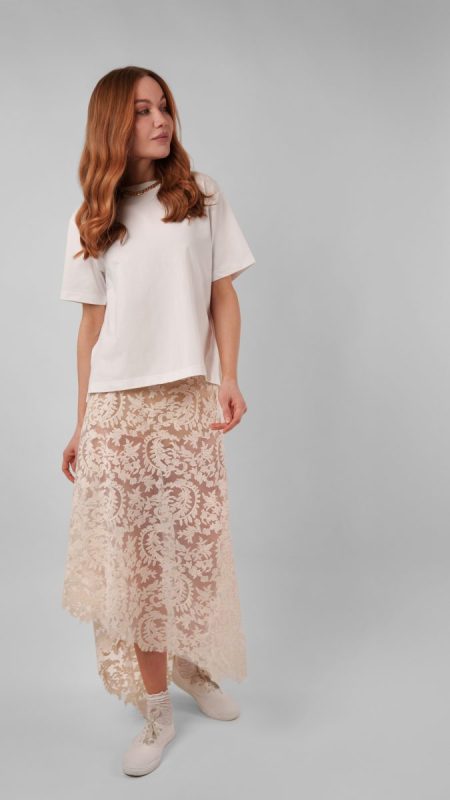
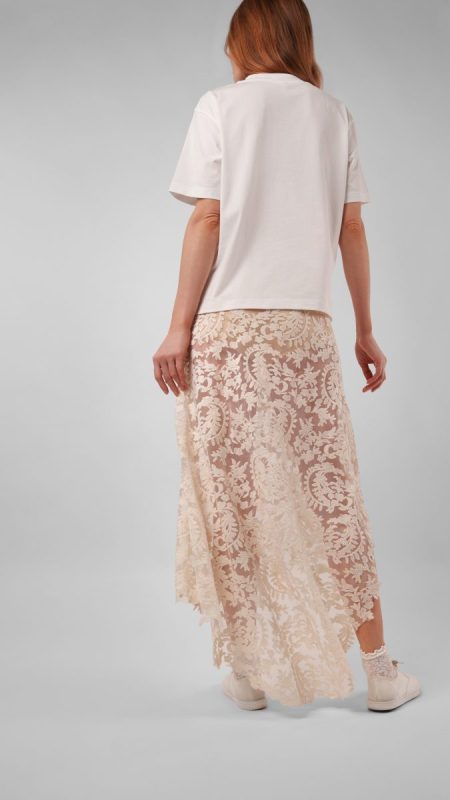
The Taiga Trapeze Skirt was designed to make an impression with minimal effort. Made from delicate embroidered lace in a soft ivory hue, it moves beautifully and lets the texture of the fabric take center stage.
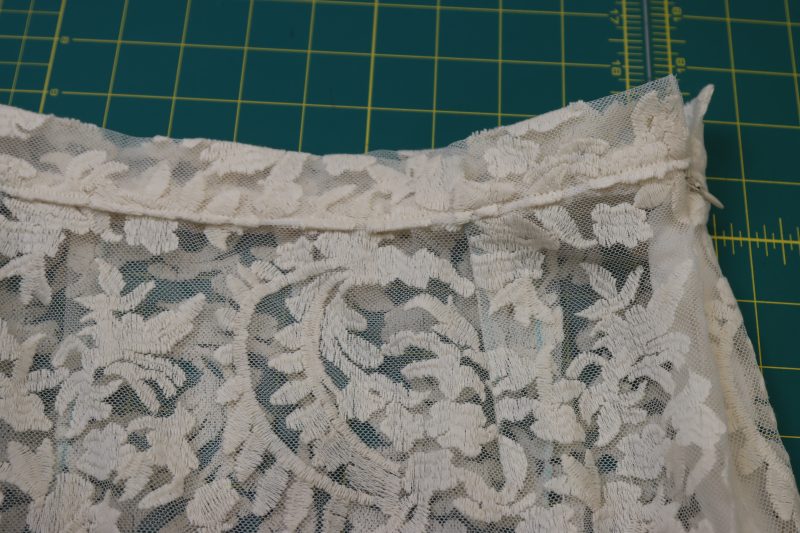
Instead of a traditional hem, the edge of the skirt follows the natural shape of the lace so the floral motifs remain intact. This creates an airy, organic finish that feels light and romantic with every step. Front and back darts add gentle shaping through the waist and hips, while a discreet side seam zipper keeps the silhouette clean. Though this skirt is made from sheer lace, it can just as easily be sewn with a matching or contrasting lining for a more modest look.
The Taiga Trapeze Skirt is the kind of piece that feels right at home on a warm afternoon. Pair it with a simple top for a picnic in the park, layer it over jeans or leggings for a Y2K moment, or dress it up for a sunset dinner on a tropical vacation. It is an elegant project that celebrates beautiful fabric and thoughtful details.

Essential Materials & Sizing Guide for the Taiga Trapeze Skirt
Continue reading for a breakdown of what knowledge and materials you need for creating your very own trapeze skirt! We’ve got you covered with the recommended materials we used—if you want to follow along exactly—as well as a curated list of alternative fabric type recommendations if you want to customize your own version. The Taiga Trapeze Skirt free sewing pattern download includes technical drawings for seam and silhouette visibility, plus a size chart to help you find your perfect fit!
Purchase Products Used Below:
Quantities indicated are for sewing a size small* trapeze skirt. Toggle the ‘SHOP THIS LOOK’ box to find quantity estimates for other sizes.
- 2 yards of Embroidered Lace – Ivory Floral Crescents – Deadstock
- 1 each of Invisible Zipper 9″ by YKK – 099 Off-White
- 1 each of Prym Hooks & Eyes – Silver Size 2 – 12 Sets
- 1 each of Gutermann Sew All Thread 250m – 30 Bone
- 0.5 yards of Super White Hot Rolling Nonwoven Fusible Interfacing
- MDF512 – Taiga Trapeze Skirt Sewing Pattern (Free download below!)
Additional Products Used:
*Quick Tip! The ‘SHOP THIS LOOK’ box defaults to full-yard quantities. To order an exact half-yard quantity for any fabric, simply use the decrease quantity button (-) to subtract by the half yard. Then click “ADD TO CART” to add all materials to your cart. (Our system can only display full-yard quantities initially.)
Alternative Fabric Type Recommendations:
The Taiga Trapeze Skirt sewing pattern is best suited for lightweight fashion fabrics. Explore other fabric types or colors from our featured collections for your trapeze skirt with the links below.
Download Your Free Sewing Pattern
Submit your name and email in the form below to receive the download link for the Taiga Trapeze Skirt free sewing pattern directly in your inbox. Mood Sewciety Patterns will send your free download link via email with the subject line: ‘Your Free Download from Mood Sewciety – The Taiga Trapeze Skirt’ (in PDF format for A4 and letter-size printing).
© MoodFabrics.com / MoodSewciety.com – Mass production, resale, or distribution of this pattern in any form is strictly prohibited.
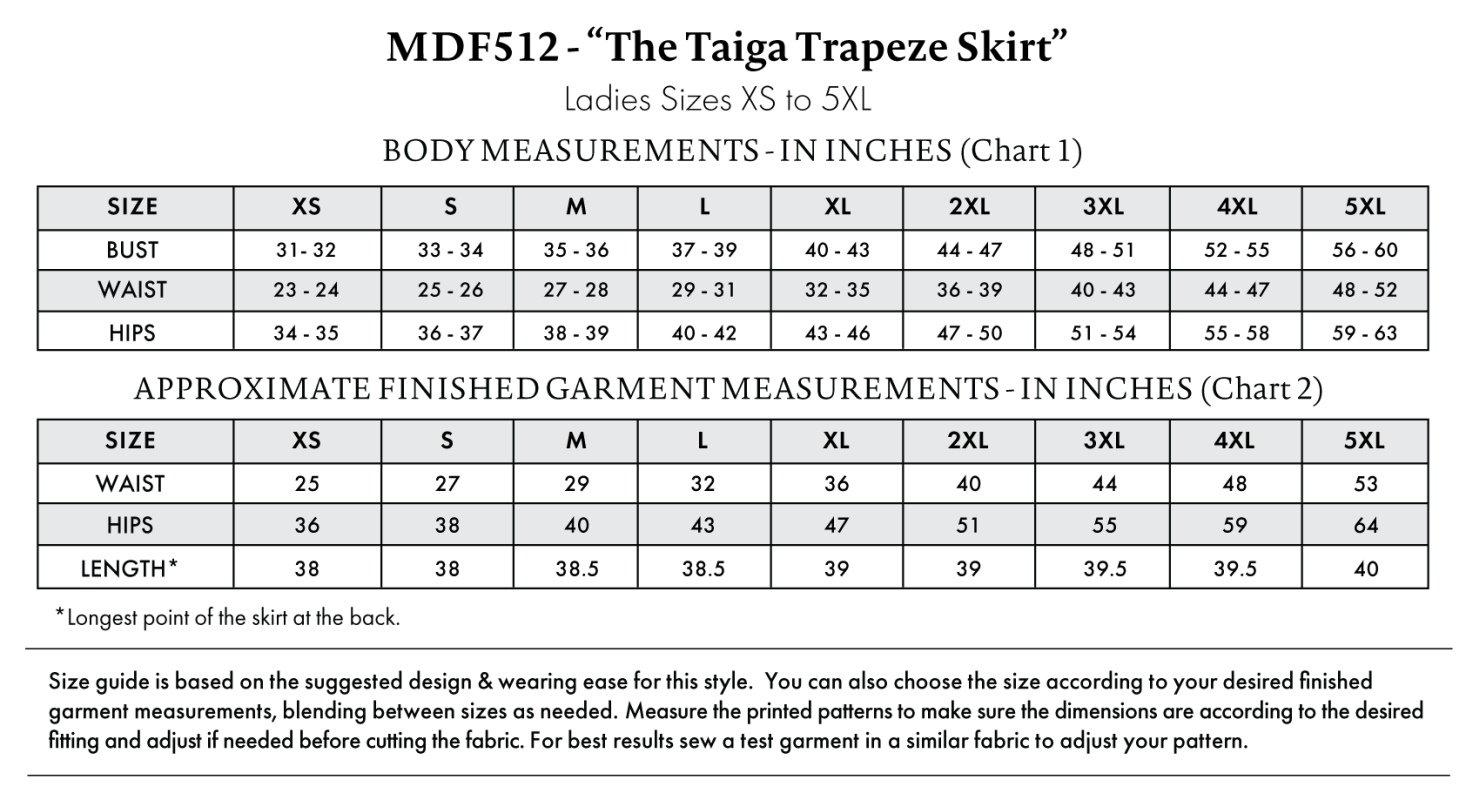
Find Your Perfect Fit
The Taiga Trapeze Skirt Sizing Guide is based on the suggested design & wearing ease for this style. You can also choose the size according to your desired finished garment measurements, blending between sizes as needed. Measure the printed patterns to make sure the dimensions are according to the desired fitting and adjust if needed before cutting the fabric. For best results, sew a test garment in a similar fabric to adjust your pattern.
Measurements may vary after adjustments. If using non-stretch fabrics, reference the approximate finished garment measurements chart to choose your size.
Note: Always read all the instructions before cutting the fabric!
How to Sew The Taiga Trapeze Skirt
The instructions provided below are designed to guide you through sewing the Taiga Trapeze Skirt from start to finish.

3 Tips for Sewing with Embroidered Lace
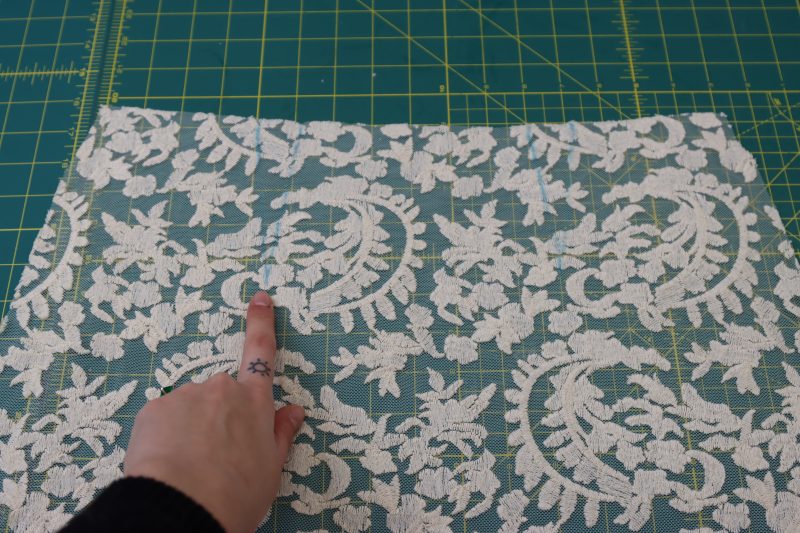
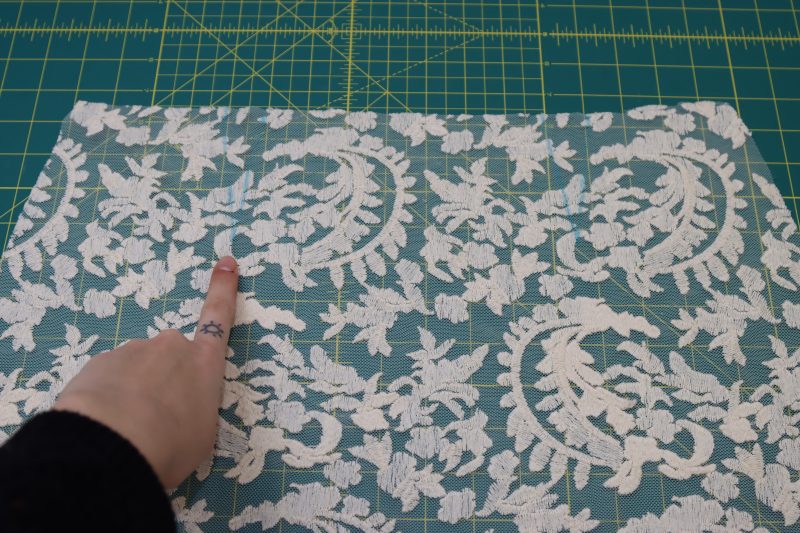
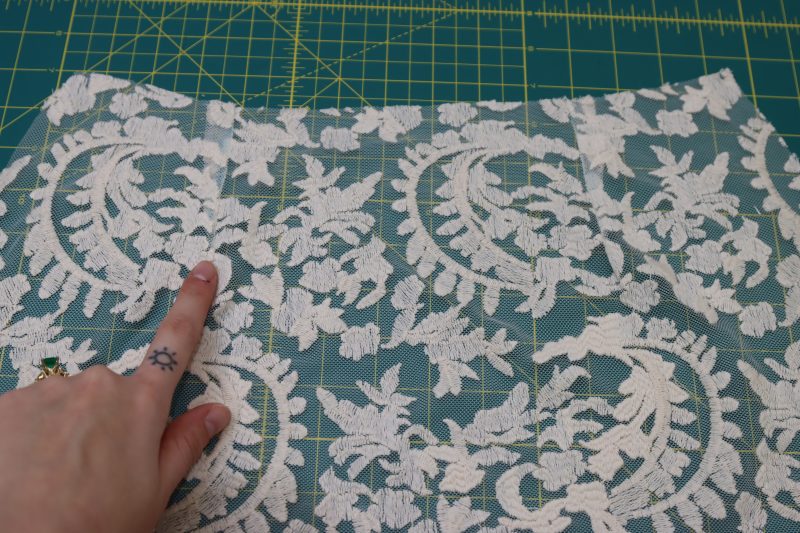
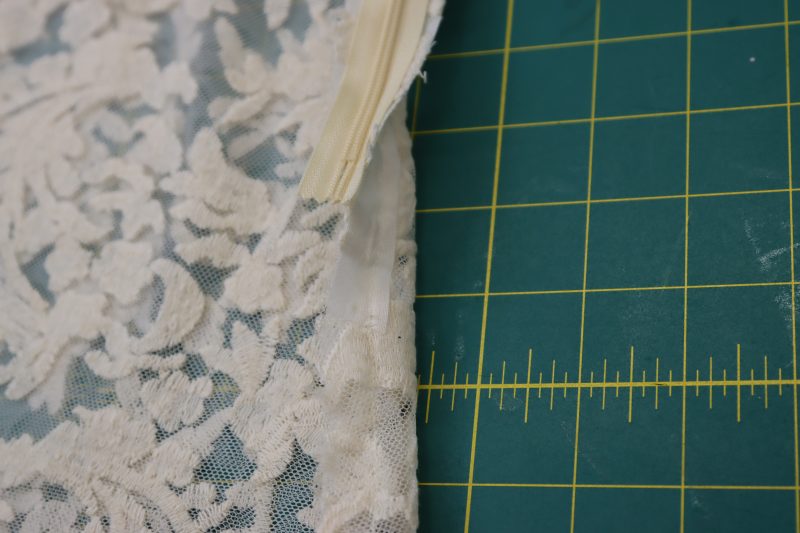
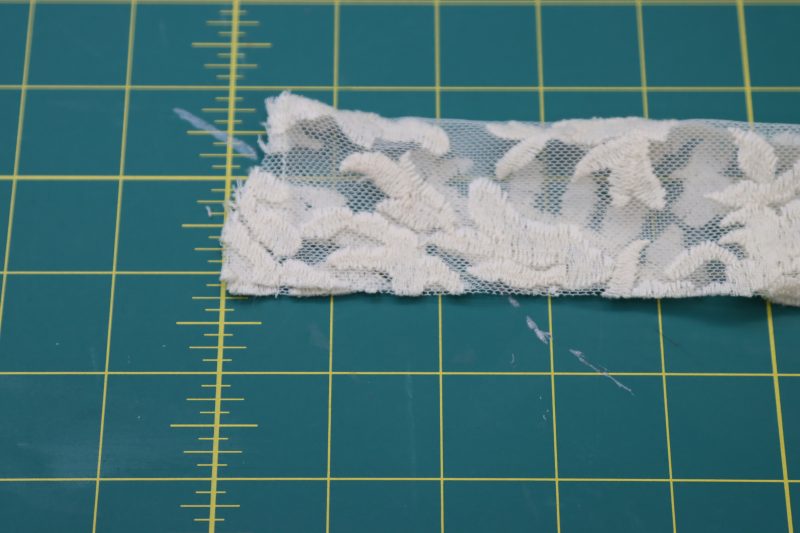
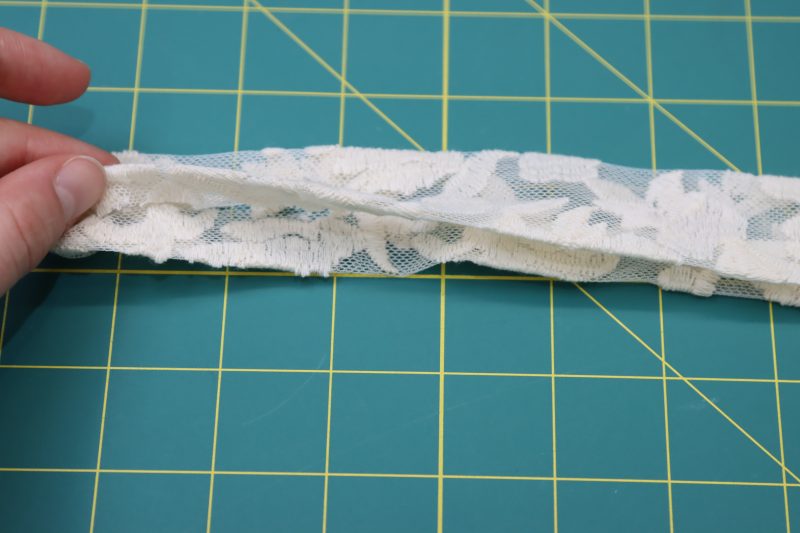
⇒ While you’re cutting out your pattern, keep in mind that the hem of the skirt will be left raw. Instead of cutting the bottom hem of the dress along the pattern line, use the pattern line as a guide for where you will need to cut AROUND the lace to keep the floral shapes.
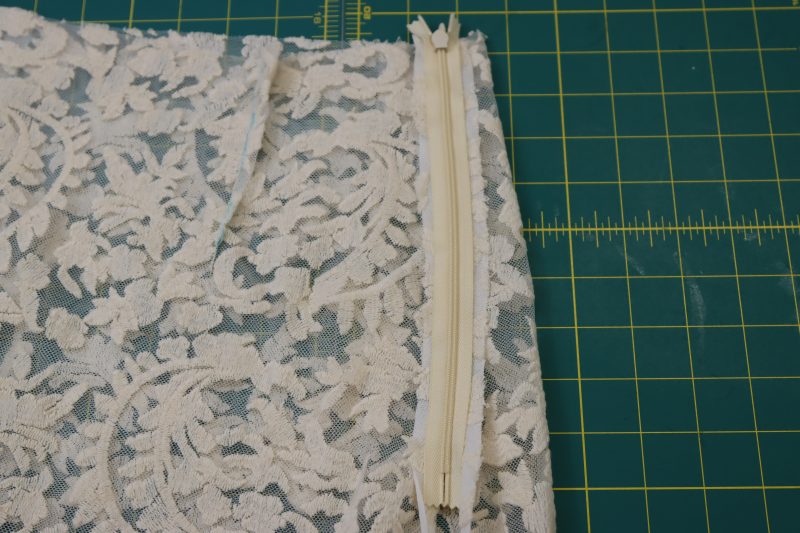
⇒ Use a tiny bit of interfacing around the zipper since this fabric is so thin and stretchy.
⇒ Use a stretch stitch (the one that looks like a lightning bolt) to connect all your seams.
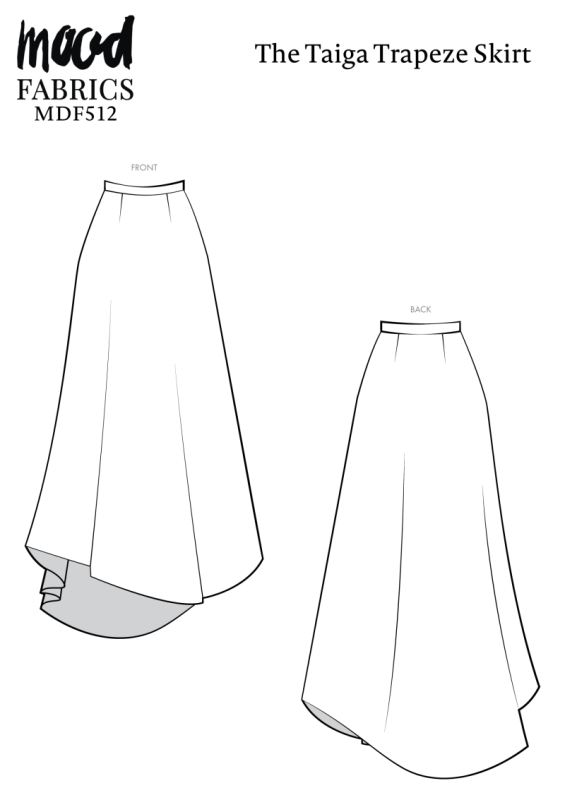
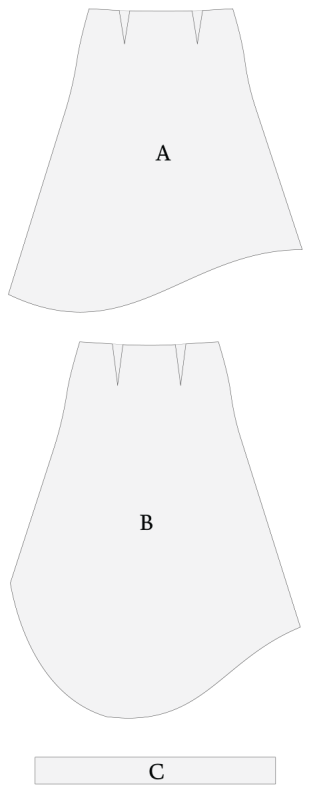
Pattern Pieces & Fabric Cuts Needed
- (A) FRONT
- Fabric – Cut 1
- (B) BACK
- Fabric – Cut 1
- (C) WAISTBAND
- Fabric – Cut 1
Sew with a 1/2″ seam allowance for all seams unless otherwise specified.
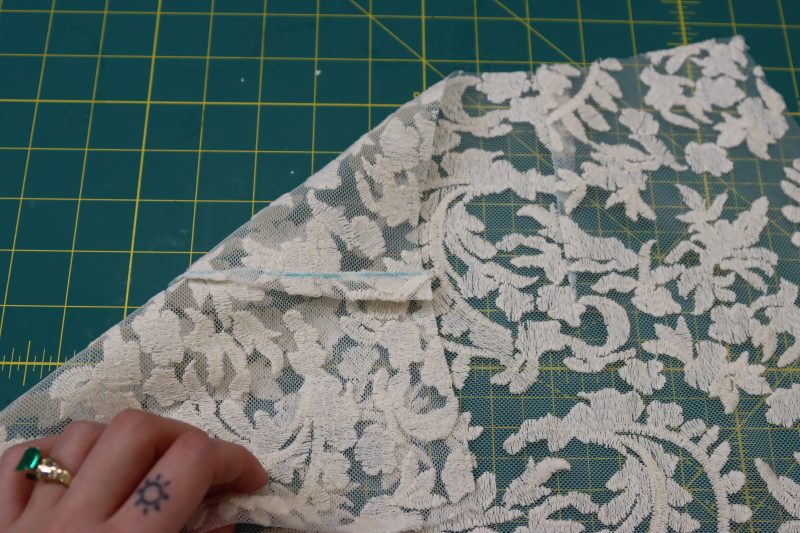
Step 1
DARTS
- Using tailor’s chalk, mark the darts on the wrong sides of the front and back skirt pieces.
- Fold each dart right sides together so that the lines are matched up.
- Pin the darts in half.
- Sew over the chalk lines.
- Unfold the darts and press them flat towards the side seams of the skirt.
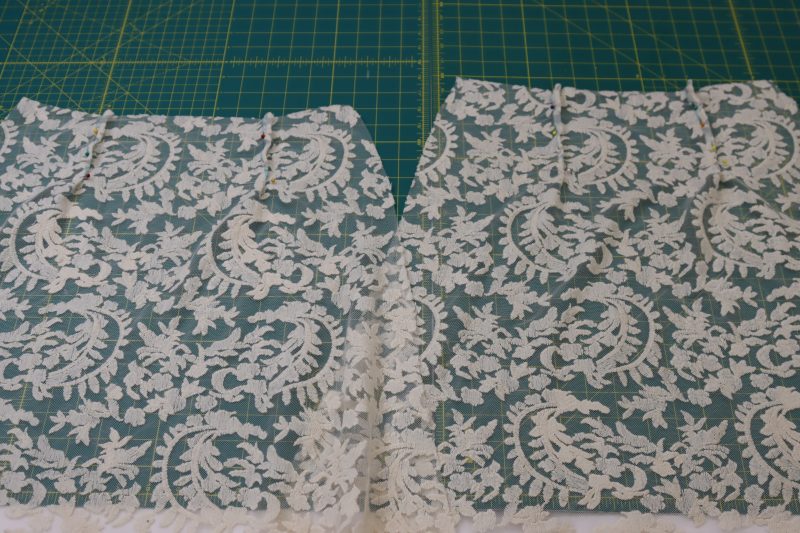
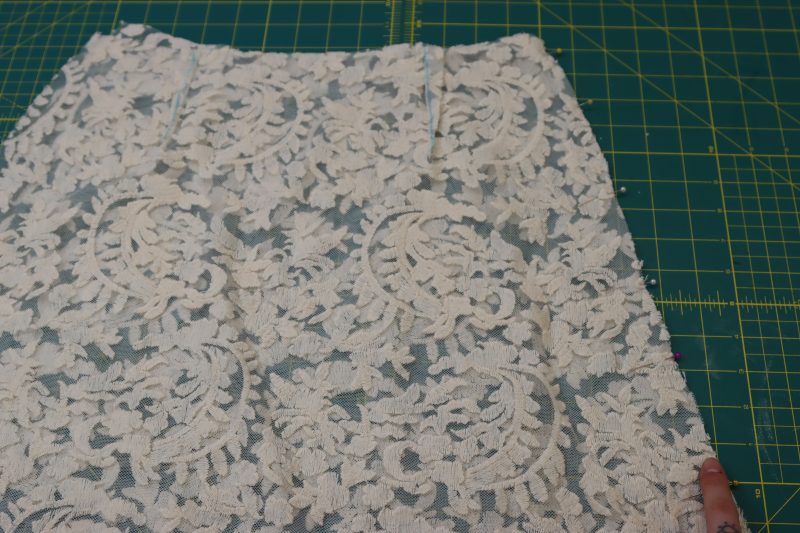
Step 2
SIDE SEAM
- Place the front and back skirt pieces right sides together with the sides lined up.
- Pin and sew one of the sides of the skirt, NOT both.
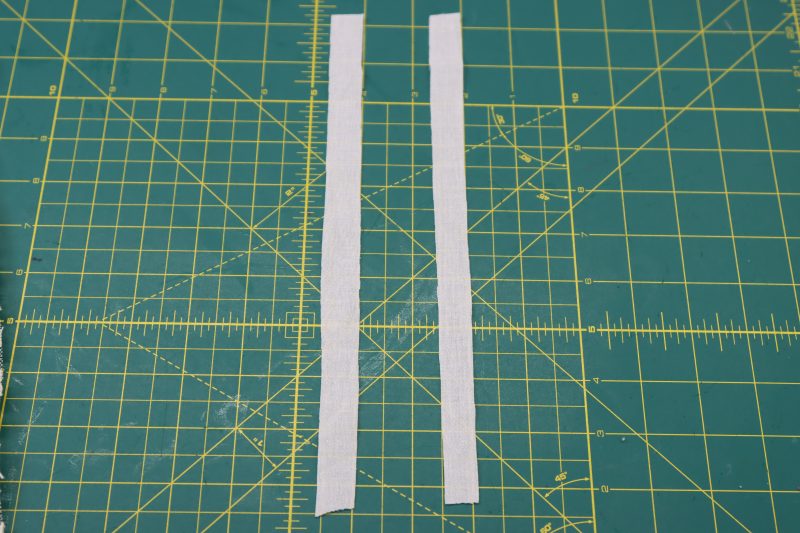
Step 3
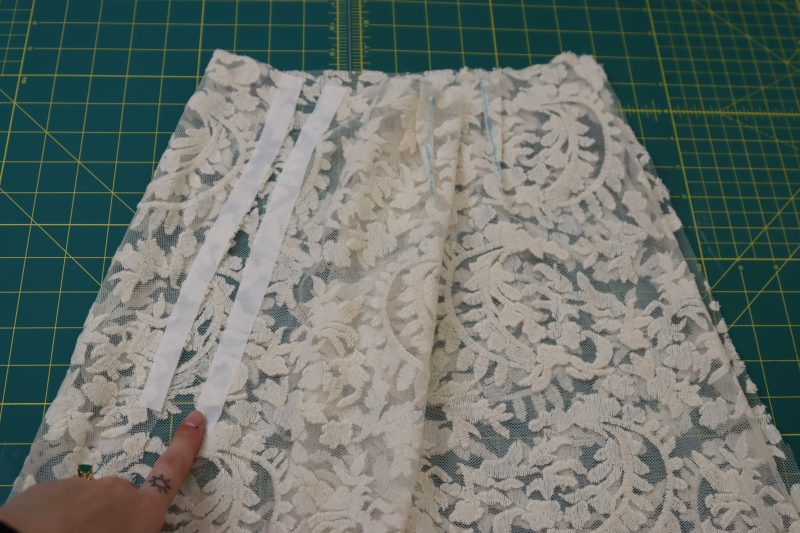
ZIPPER FACING
- Cut out two strips of fusible interfacing that are 1 inch wide and roughly 10 inches long (I cut mine 10 inches long because my zipper was 9 inches and I wanted a little extra.
- Iron the fusible interfacing to the wrong sides of the skirt at the open side seam.
Step 4
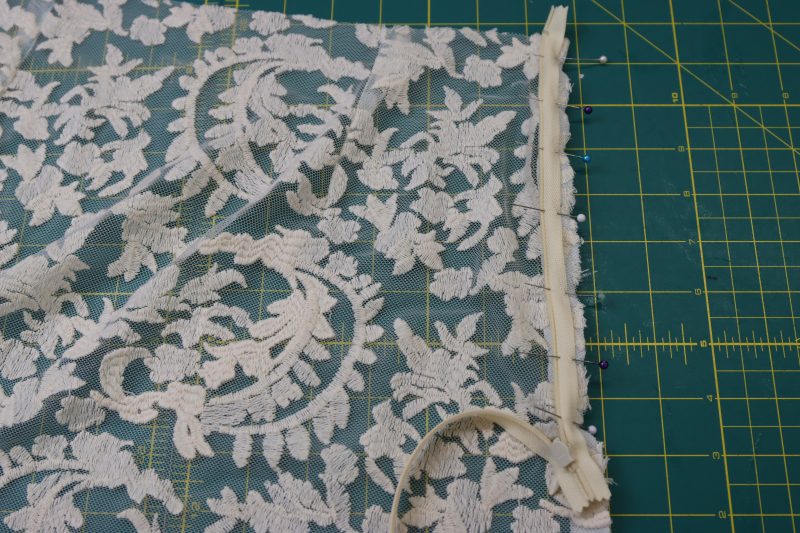
ZIPPER
- Place the zipper face down on the right side of the front skirt piece.
- Pin and sew the side of the zipper tape closest to the raw edge, staying close to the zipper teeth, but not ON them.
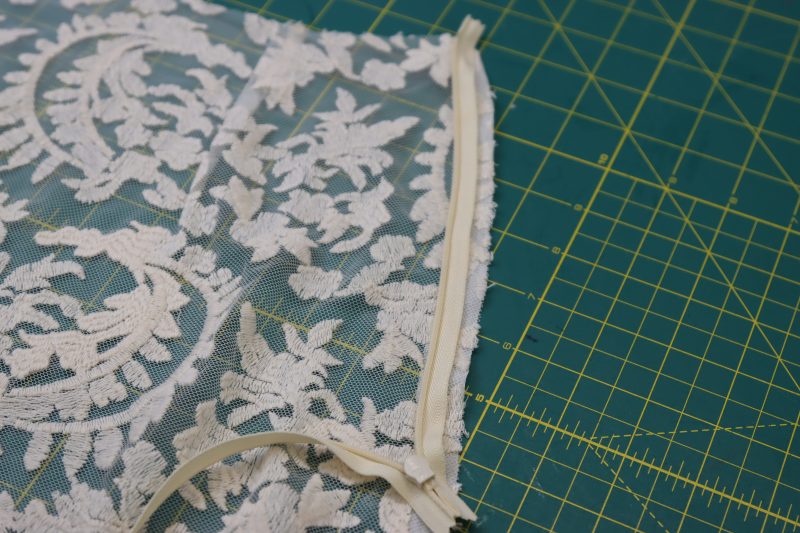
- Pin the other side of the zipper right sides together with the back side seam of the skirt.
- Sew the other side of the zipper tape.
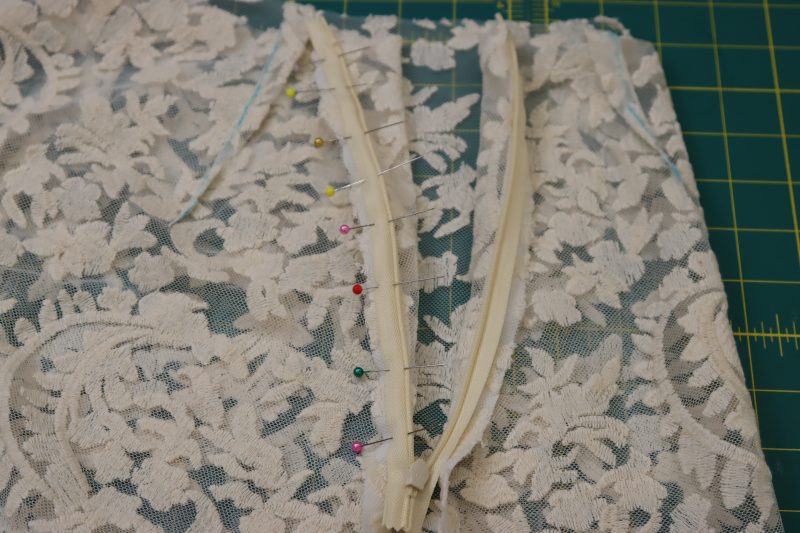
- Pin and sew the open side seam under the zipper.
- Press the side seams open and flat.
Step 5
WAISTBAND
- Fold the waistband in half long ways, right sides together.
- Sew the short ends of the waistband in half and then flip the sharp corner to eliminate bulk when flipping it right sides out.
- Flip the waistband right sides out.
- Fold the raw edges of the waistband into the inside of the waistband.
- Press the folds into place.
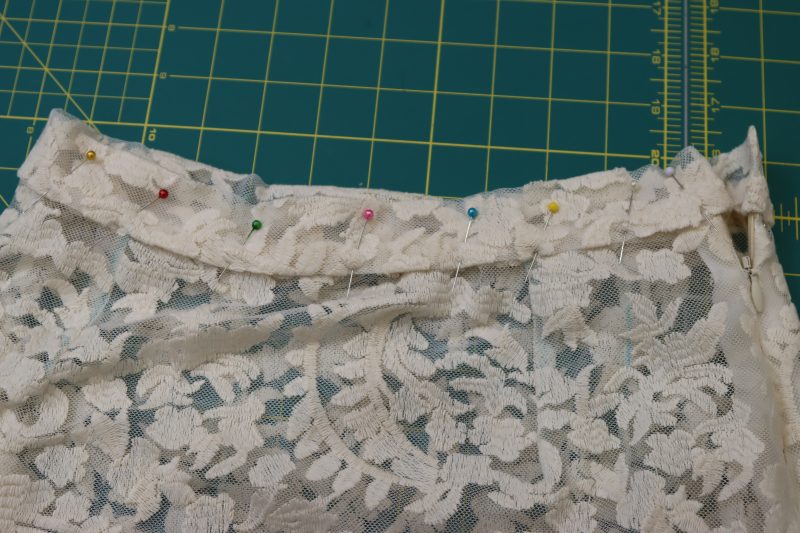
Step 6
ATTACH WAISTBAND
- Keeping the zipper OPEN, sandwich the waistline of the skirt into the waistband.
- Pin the waistband to the waistline of the skirt.
- Topstitch the waistband with ⅛ inch seam allowance from the bottom edge.
Step 7
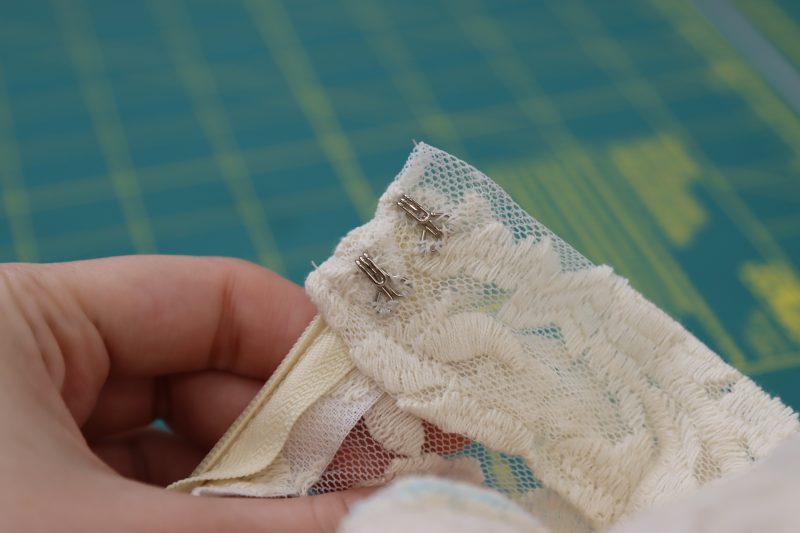
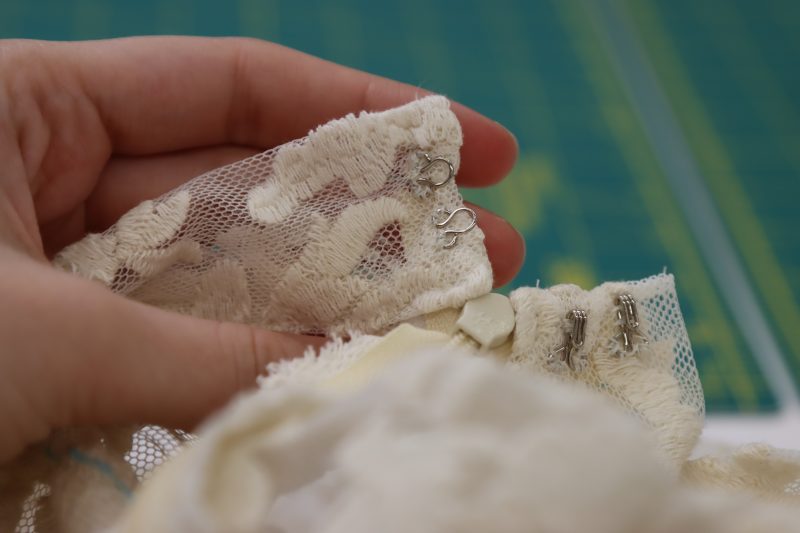
HOOKS AND EYES
- Sew hooks and eyes by hand to the inside of the skirt waistband to keep it closed when the skirt is zipped.
Sewing Success: The Completed Taiga Trapeze Skirt
Share this post with a friend (or two!), download the Taiga Trapeze Skirt free sewing pattern, and show us which fabrics and colors you choose, using the hashtags #MoodTaigaPattern & #MadeWithMood—and don’t forget to tag us @MoodFabrics, too.


Free Sewing Pattern Inspiration for Your Next Project
With 500+ free sewing patterns and counting, your opportunities for sewing with Mood are endless!
We hope you had as much fun sewing this trapeze skirt pattern as we did! As always, we want to hear from you—share your thoughts and comments below and let us know where you’ll be wearing the Taiga Trapeze Skirt free sewing pattern!
Can’t get enough sewing with Mood? Browse your next make with our latest free sewing patterns.
Really beautiful
Thank you
Love this skirt. I have the pattern together and my fabric waiting.
To achieve the look on the model, I need to add 5” to the length as I am 6 feet tall.
Suggestions on where to do that?
Hi Jane
Basically what you need to do is lower the entire bottom shape of the skirt using the slash-and-spread method. Draw a horizontal line anywhere on the lower part of the skirt. Cut along that line to separate the pattern into two pieces. Place both pieces on a new sheet of paper and move them apart by the amount you need to add to the skirt length. Tape them down, then redraw the side seams to smoothly connect the upper and lower sections. Do the same for both the front and the back pieces.
I also recommend measuring your waist-to-ankle length beforehand to confirm whether 5 inches is actually the amount you need to add.
Thank you so much. That’s what I was planning to do, I just didn’t know where the best place to do it is. I am guessing somewhere at the bottom of the hip. I have already measured and I do in fact need to add 5 inches if it’s gonna get to the length that is on the model. It’s so much fun being short wasted and long legged and trying to find clothes.
You can technically cut and spread the pattern almost anywhere along the length, but the place I usually recommend is around the middle of the piece. Adding the length there helps keep the proportions balanced, so the extra space is distributed more evenly above and below the adjustment line.
Yeah, Being short-waisted and long-legged can definitely make fitting a little trickier, but the good news is that adjustments like this are pretty straightforward once you know where to add the length. You’re definitely on the right track!
Happy Sewing!
What’s the best way to line this skirt? And is the interfacing still necessary?
Hey Andi! If you choose to line it, you don’t need to add the interfacing to the zipper. I just added it there because the lace was so thin and delicate. If you want to add a lining, just cut out the pattern pieces again out of the lining fabric and assemble as normal, except with two layers of fabric (lace layer and lining layer) instead of just one.
Hola! Cual es el patron de la camiseta que usa
Hola! Cual es el patron de la camiseta que usa
Hola Maria 🙂
Puedes usar uno de estos patrones:
The Brandoo Tee
The Lavender Tee
te recomiendo que antes de cortar la tela midas las dimensiones del patron y las compares con tus medidas de cuerpo y las medidas finales que deseas para tu camiseta.