

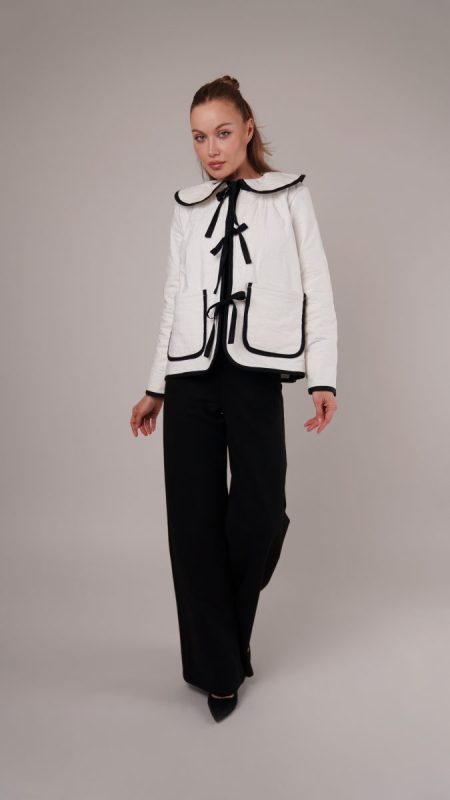
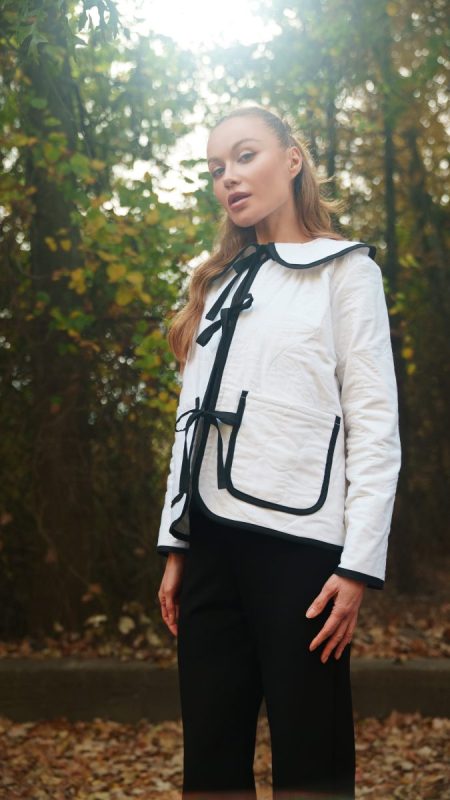
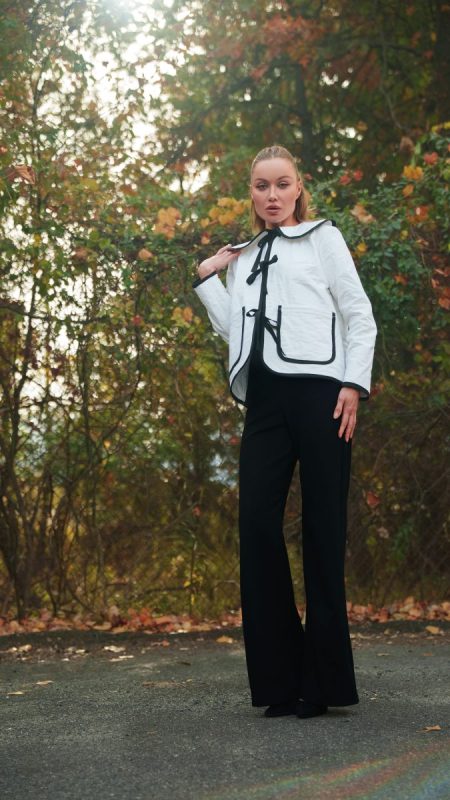
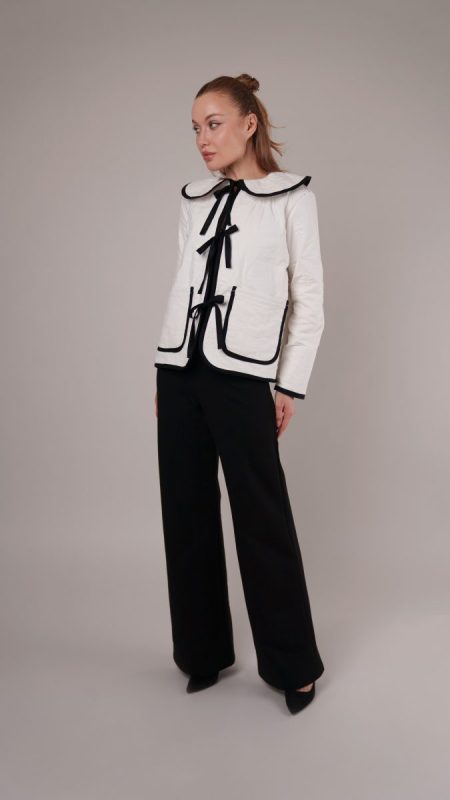
Meet the Coeur D’Alene Coat and the Ketchum Jumpsuit, a pairing that blends cozy sophistication with effortless versatility.
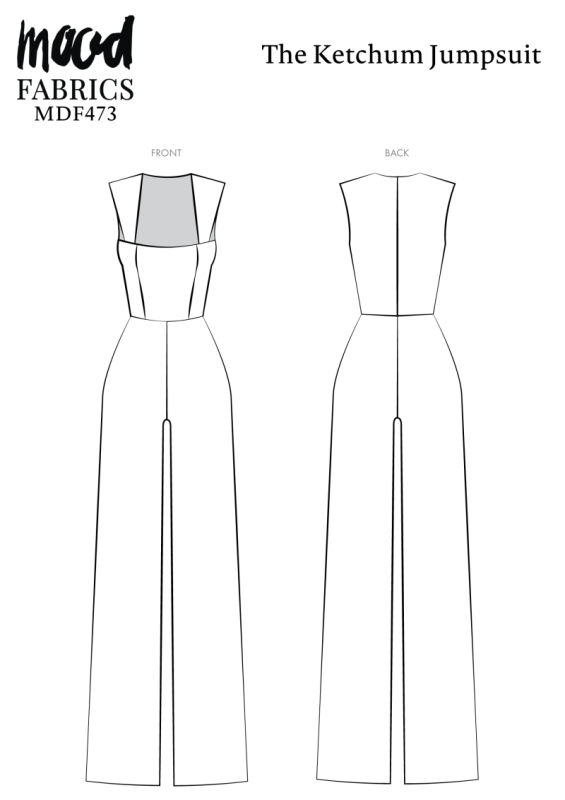
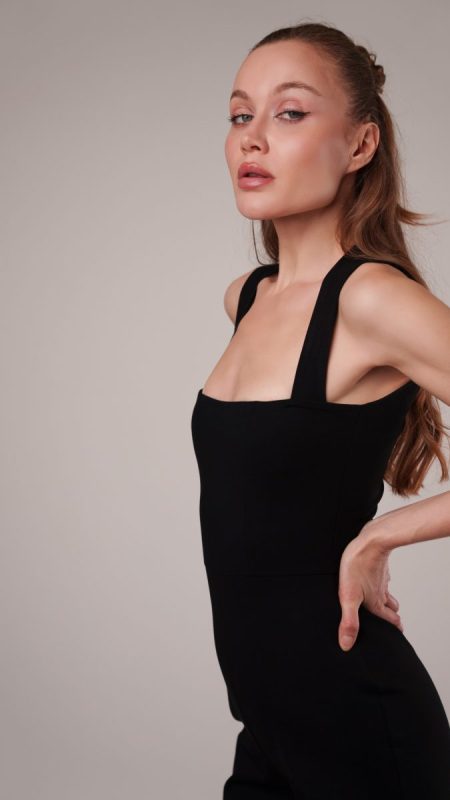
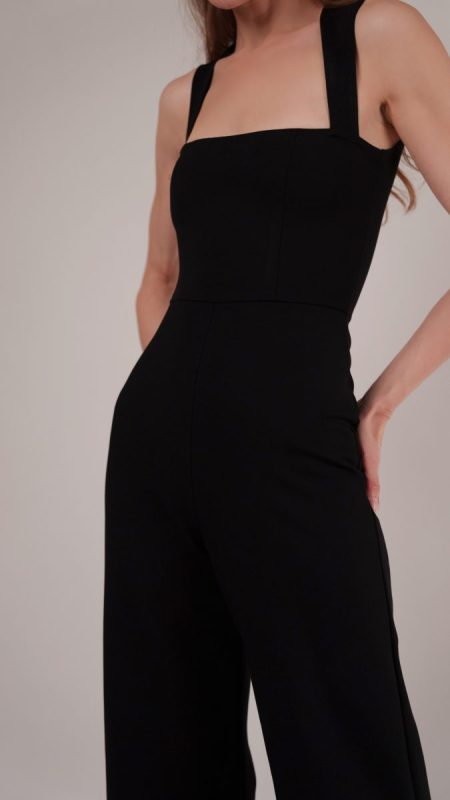
The Ketchum Jumpsuit is made from a stretchy knit ponte that hugs curves and moves with you, offering just the right amount of structure and comfort. It’s the piece you’ll reach for whether you’re heading to a yoga class, a night out, or simply lounging in style. Because the fabric has such great stretch, the zipper in the back is optional, making it a dream project for anyone who wants a sleek, easy-to-sew staple.
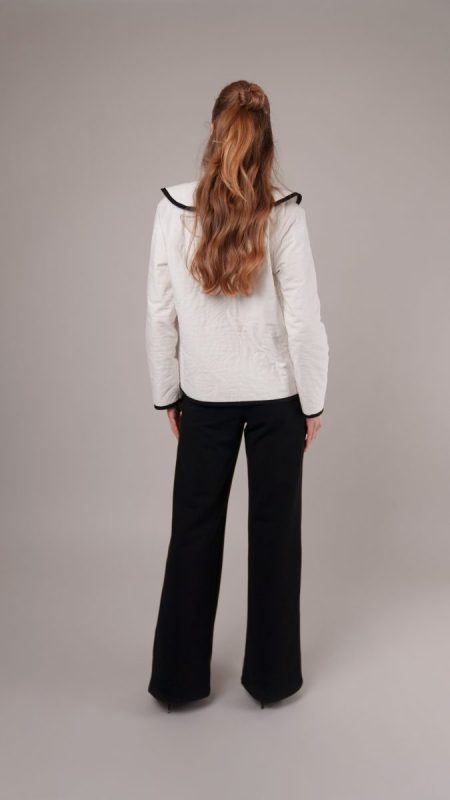
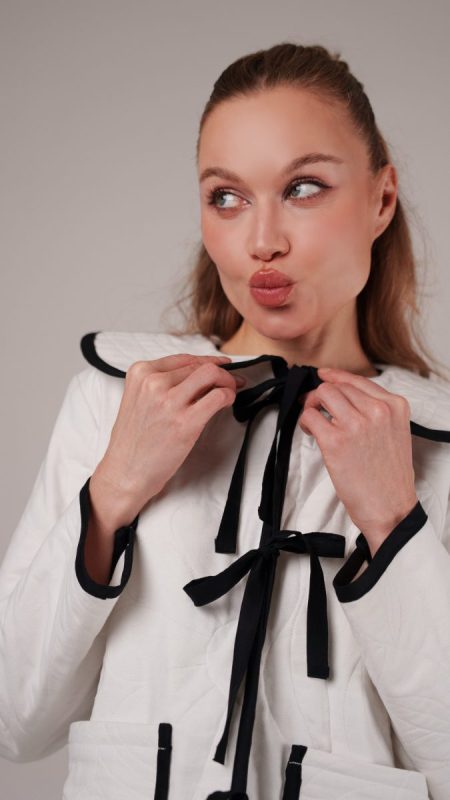
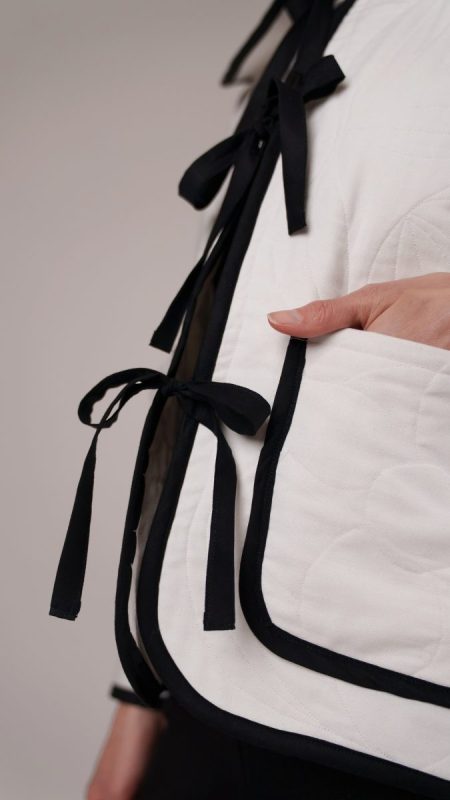
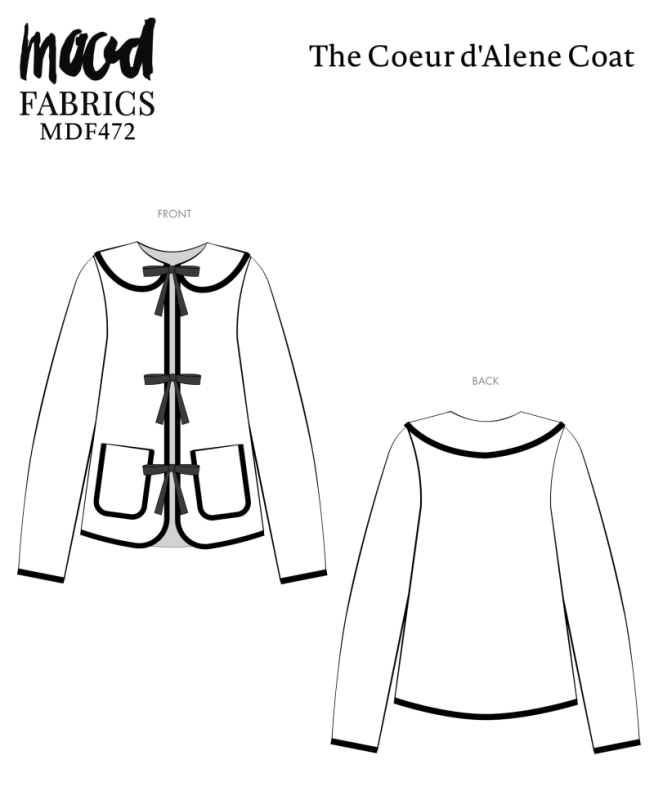
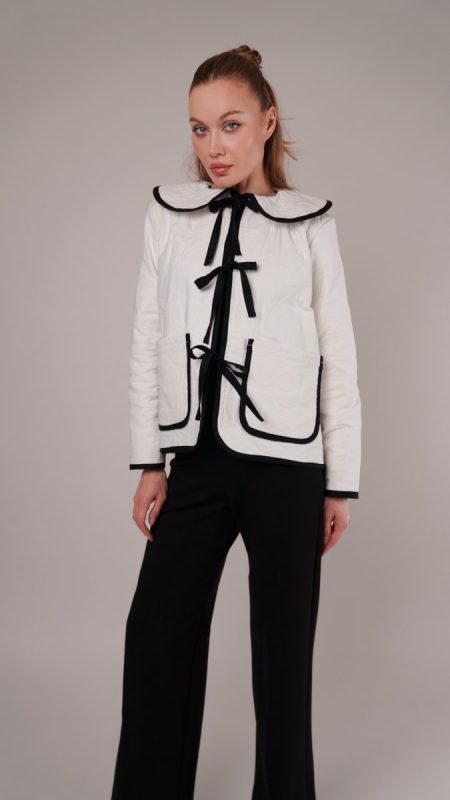
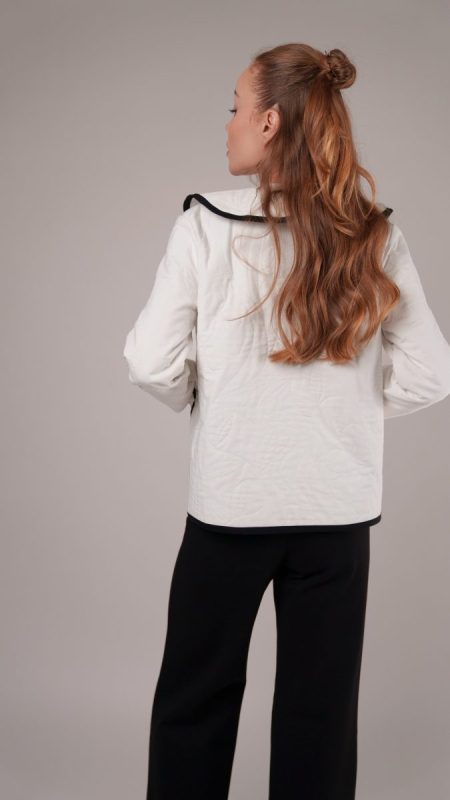
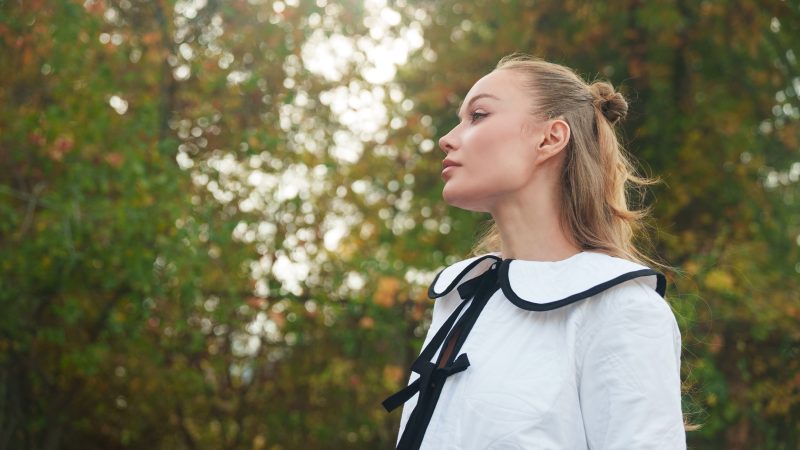
The Coeur D’Alene Coat is pure charm from collar to hem. Made from brushed cotton duvetyne with a layer of rayon batiste for extra warmth, it features an adorable Peter Pan collar, oversized front pockets, and sweet little bows to close it up. The quilted botanical top stitching gives every panel an artisanal, timeless look. You can even customize the look and function of your coat with endless fabric combinations. Make it into a rain-ready piece with water resistant twill, add batting for a cozy winter version, or line it in fleece for the softest finish imaginable.
Together, the coat and jumpsuit create an unforgettable fall ensemble that feels elevated yet completely wearable. The coat softens the sleekness of the jumpsuit, and the jumpsuit brings a chic contrast to the coat’s sweetness. You’ll test your skills with both knit and woven fabrics while creating a look that transitions effortlessly from morning errands to evenings out.
Essential Materials & Sizing Guide for the Coeur D’Alene Coat & Ketchum Jumpsuit
Continue reading for a breakdown of what knowledge and materials you need for creating your very own coat and jumpsuit! We’ve got you covered with the recommended materials we used—if you want to follow along exactly—as well as a curated list of alternative fabric type recommendations if you want to customize your own version. The Coeur D’Alene Coat & Ketchum Jumpsuit free sewing pattern download includes technical drawings for seam and silhouette visibility, plus a size chart to help you find your perfect fit!
Purchase Products Used For The Coat:
Quantities indicated are for sewing a size small coat. Toggle the ‘SHOP THIS LOOK’ box to find quantity estimates for other sizes.
- 5 yards of Brushed Cotton Duvetyne 9oz – White
- 2 yards of Medium-weight Rayon Batiste – White
- 1 yard of Mercerized Organic Egyptian Cotton Voile – Black
- 1 each of Gutermann Sew All Thread 1000m – 20 White
- MDF472 – Coeur D’Alene Coat Sewing Pattern (Free download below!)
Alternative Fabric Type Recommendations:
The Coeur D’Alene Coat sewing pattern is best suited for light or medium weight fashion fabrics.
Fabric Collections Used in this Post:
Purchase Products Used For The Jumpsuit:
Quantities indicated are for sewing a size small jumpsuit. Toggle the ‘SHOP THIS LOOK’ box to find quantity estimates for other sizes.
- 3 yards of Stretch Ponte Knit – Black – Papilio Collection
- 1 each of Invisible Zipper 24″ by YKK – 580 Black (Optional)
- 1 each of Gutermann Sew All Thread 1000m – 10 Black
- MDF473 – Ketchum Jumpsuit Sewing Pattern (Free download below!)
Alternative Fabric Type Recommendations:
The Ketchum Jumpsuit sewing pattern is best suited for medium weight stretch knit fashion fabrics. Explore other fabric types or colors from our featured collections for your jumpsuit with the links below.
Fabric Collections Used in this Post:
Download Your Free Sewing Pattern
Submit your name and email in the form below to receive the download link for the Coeur D’Alene Coat & Ketchum Jumpsuit free sewing patterns directly in your inbox. Mood Sewciety Patterns will send your free download link via email with the subject line: ‘Your Free Download from Mood Sewciety – The Coeur D’Alene Coat’ or ‘Your Free Download from Mood Sewciety – Ketchum Jumpsuit’ (in PDF format for A4 and letter-size printing).
© MoodFabrics.com / MoodSewciety.com – Mass production, resale, or distribution of this pattern in any form is strictly prohibited.
Find Your Perfect Fit
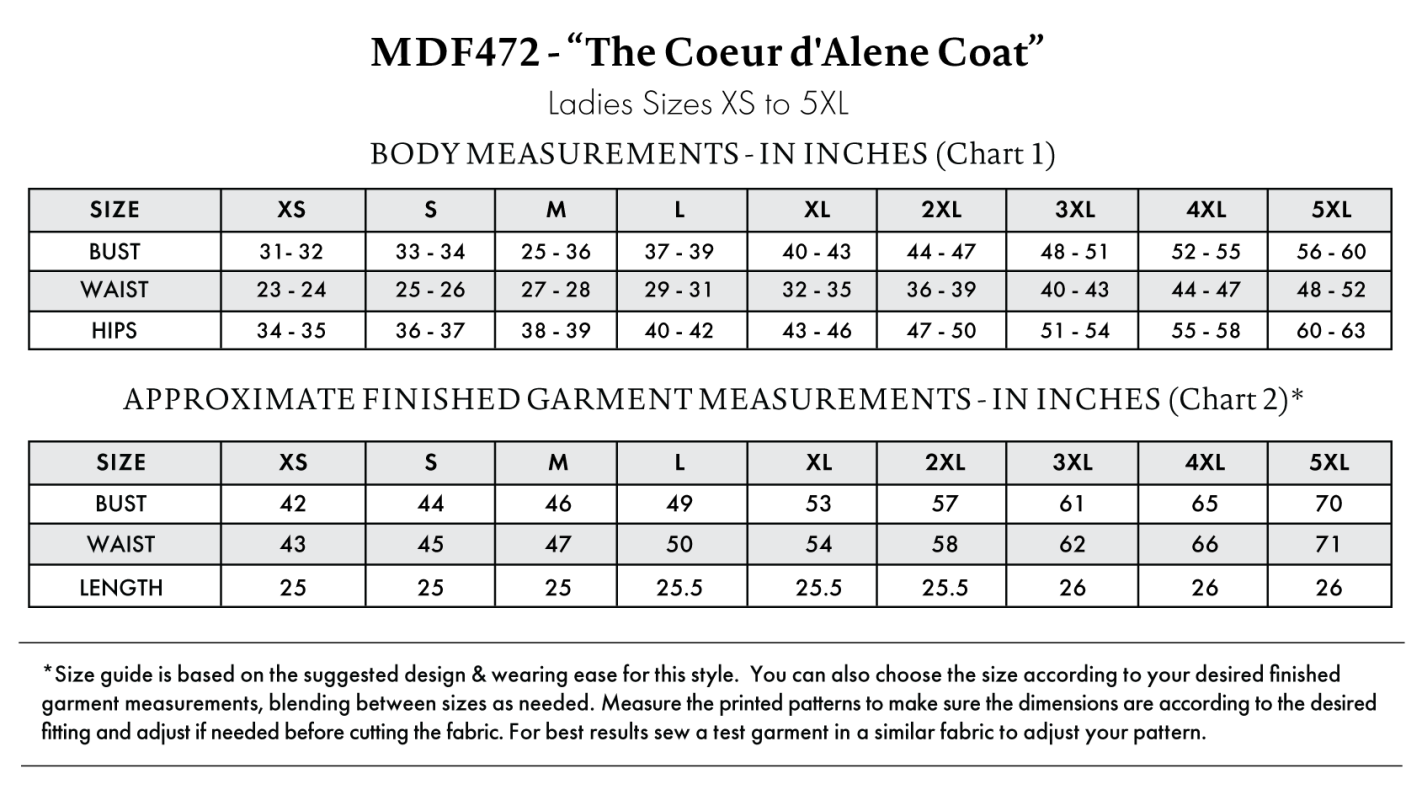
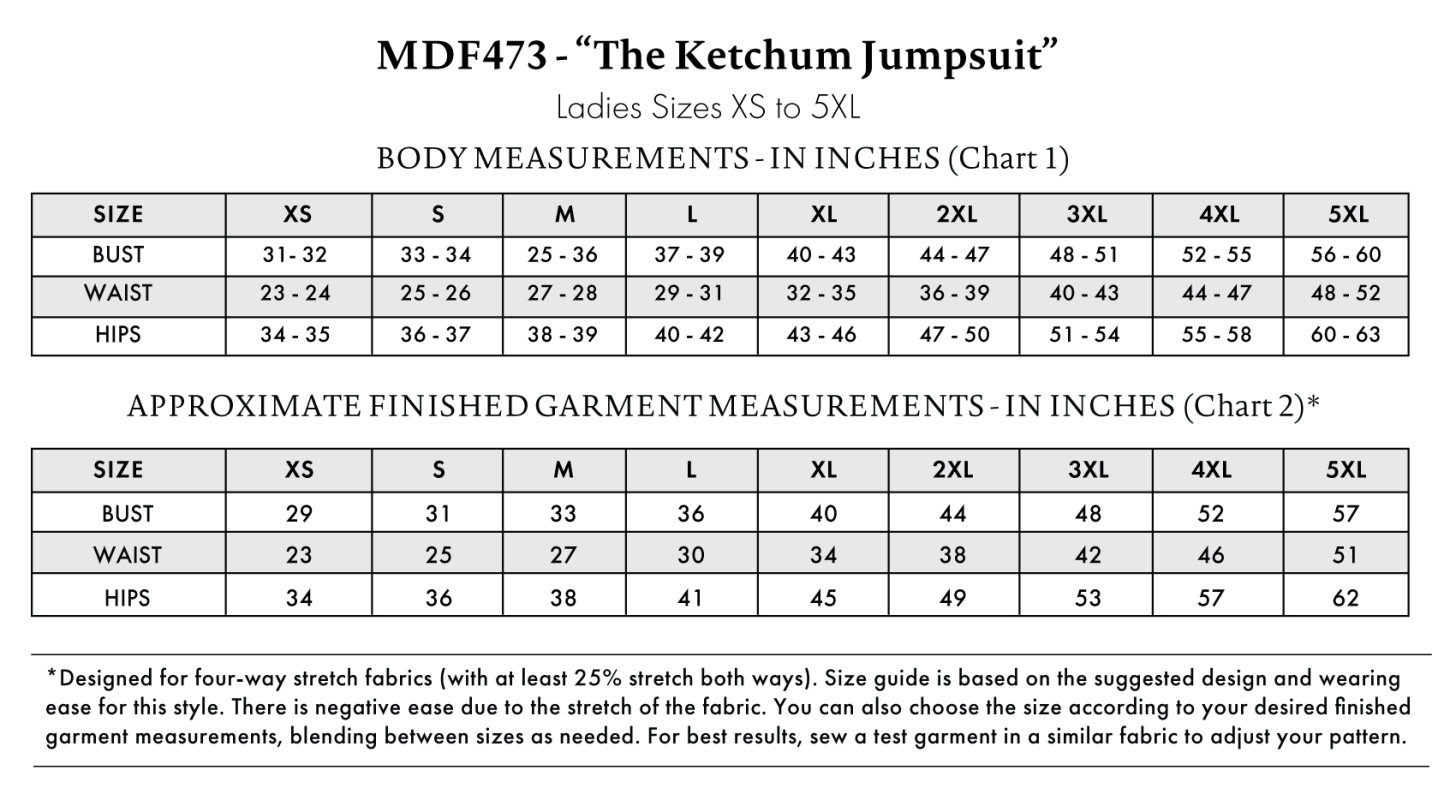
The Coeur D’Alene Coat & Ketchum Jumpsuit* Sizing Guides are based on the suggested design & wearing ease for each style. You can also choose the size according to your desired finished garment measurements, blending between sizes as needed. Measure the printed patterns to make sure the dimensions are according to the desired fitting and adjust if needed before cutting the fabric. For best results, sew a test garment in a similar fabric to adjust your pattern.
*Designed for four-way stretch fabrics (with at least 25% stretch both ways). There is negative ease due to the stretch of the ponte fabric.
Note: Always read all the instructions before cutting the fabric!
How to Sew The Coeur D’Alene Coat and Ketchum Jumpsuit
The instructions provided below are designed to guide you through sewing the Coeur D’Alene Coat & Ketchum Jumpsuit from start to finish.
2 Tips for Sewing the Quilted Design
⇒ Iron everything thoroughly before pinning and sewing. I know this is generally recommended for all projects, but it’s especially important when stitching through several of the same pattern piece to make one thick layer.
⇒ Use more pins than you think you need to to hold everything together when quilting each pattern piece. Don’t just pin around the perimeter of the pattern piece, put some pins right in the middle of it too.
⇒ When doing the floral topstitching over all the layers, lower your stitch length to 2mm. A shorter stitch length will make the lines look more natural and less jagged.


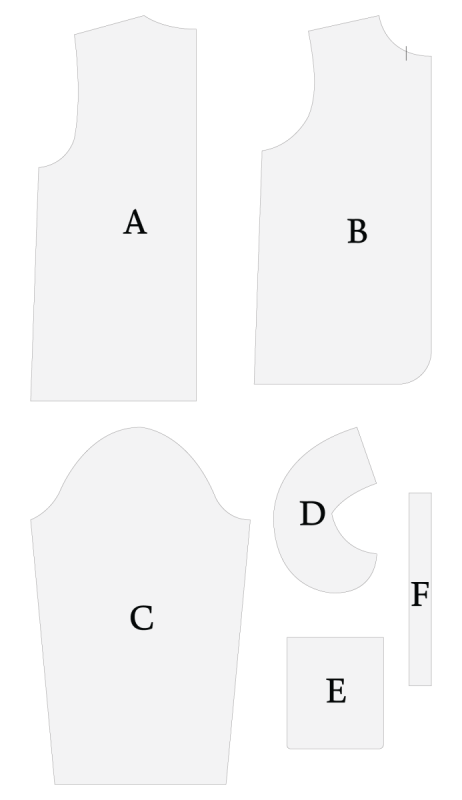
Pattern Pieces & Fabric Cuts Needed for the Coeur d’Alene Coat
- (A) BACK
- Fabric – Cut 1 on Fold
- Lining – Cut 1 on Fold
- Middle Layer – Cut 1 on Fold
- (B) FRONT
- Fabric – Cut 2 Mirrored
- Lining – Cut 2 Mirrored
- Middle Layer – Cut 2 Mirrored
- (C) SLEEVES
- Fabric – Cut 2 Mirrored
- Lining – Cut 2 Mirrored
- Middle Layer – Cut 2 Mirrored
- (D) COLLAR
- Fabric – Cut 2 on Fold
- Middle Layer – Cut 1 on Fold
- (E) POCKETS
- Fabric – Cut 2
- Lining – Cut 2
- Middle Layer – Cut 2
- (F) TIES
- Fabric – Cut 6
- BIAS BINDING
- Not pictured, or patterned; follow instructions below (Step 3).
We used the Brushed Cotton Duvetyne as the main fabric and as a self-lining; the Medium-weight Rayon Batiste was used as a middle layer; and the Mercerized Organic Egyptian Cotton Voile was used for the ties as well as the bias binding.
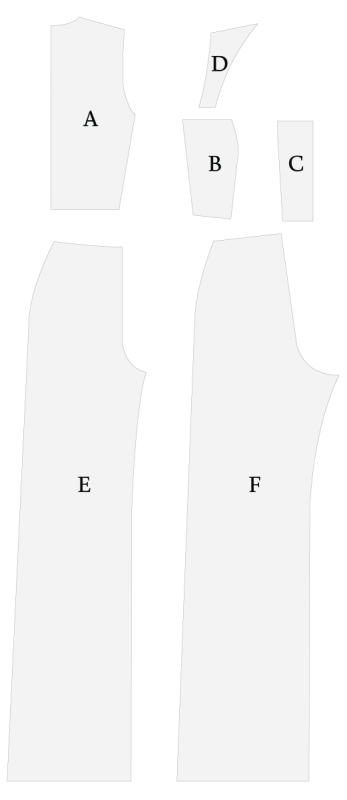
Pattern Pieces & Fabric Cuts Needed for the Ketchum Jumpsuit
- (A) TOP BACK
- Fabric – Cut 2 Mirrored
- (B) TOP FRONT SIDE
- Fabric – Cut 2 Mirrored
- (C) TOP FRONT CENTER
- Fabric – Cut 1 on Fold
- (D) SHOULDER STRAPS
- Fabric – Cut 2 Mirrored
- (F) PANTS FRONT
- Fabric – Cut 2 Mirrored
- (G) PANTS BACK
- Fabric – Cut 2 Mirrored
All pieces cut from the Stretch Ponte Knit.
Sew with a 1/2″ seam allowance for all seams unless otherwise specified.
HOW TO SEW THE COEUR D’ALENE COAT
Step 1
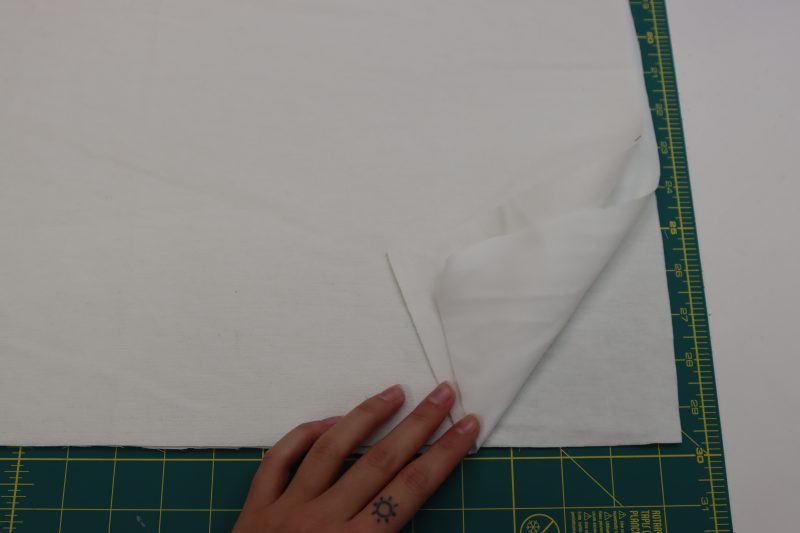
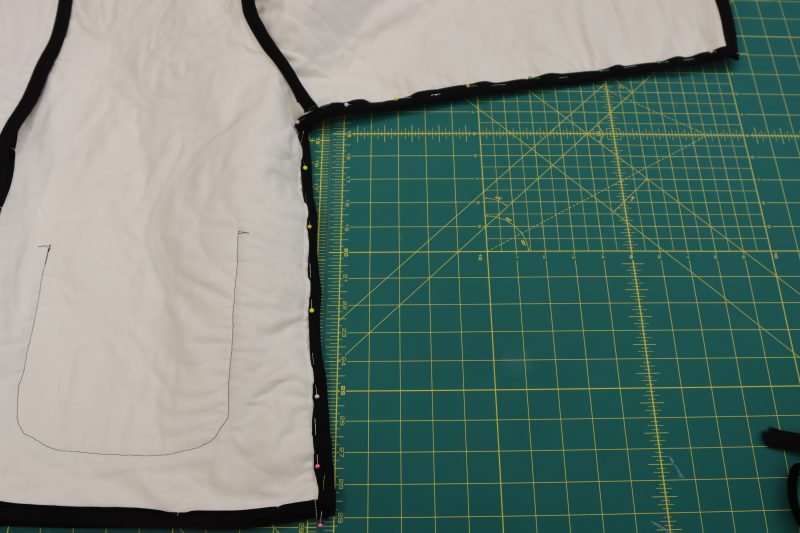
PIN LAYERS
- After cutting out the main fabric, lining, AND batting/stuffing/middle layer, lay your pieces out in groups so you have one of each fabric ready to be sandwiched together.
- Starting with the back pattern piece, make a sandwich with the main fabric on the bottom, wrong sides up, the batting (or in this case, cotton voile) laying on top of the main fabric, and the lining laying on top of the batting, right sides up.
- Place pins all along the perimeter and through the center of all three layers of fabric to securely keep them together and ensure they lay flat during the next step.
- Repeat this layering process for every pattern piece. In the end, you should have two layered sleeves, two layered front pieces, two layered pockets, one layered collar, and one layered back piece.
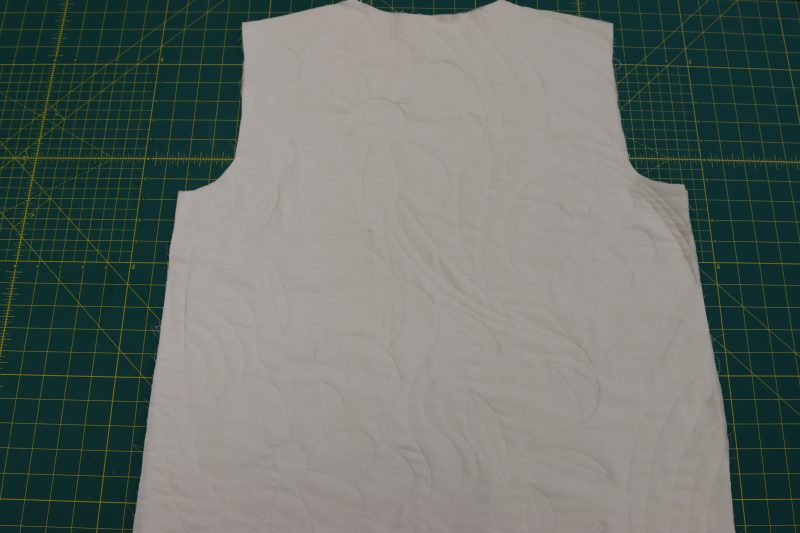
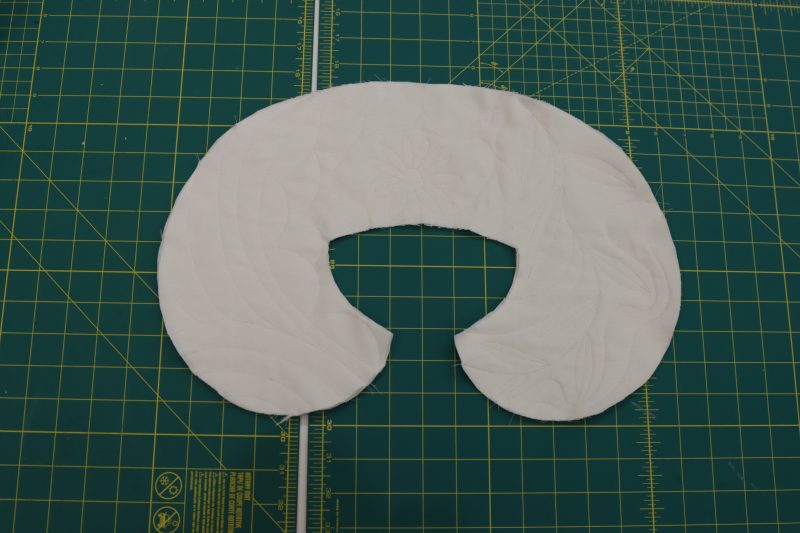
Step 2
DECORATIVE STITCHING
- Lower your stitch length to 2mm (a lower stitch length will make the topstitching lines look more fluid).
- Keeping all the pins in place until all three pieces are thoroughly attached, begin topstitching floral designs all over each pattern piece. In the end, you will have 8 pattern pieces in total with floral designs quilted into them.
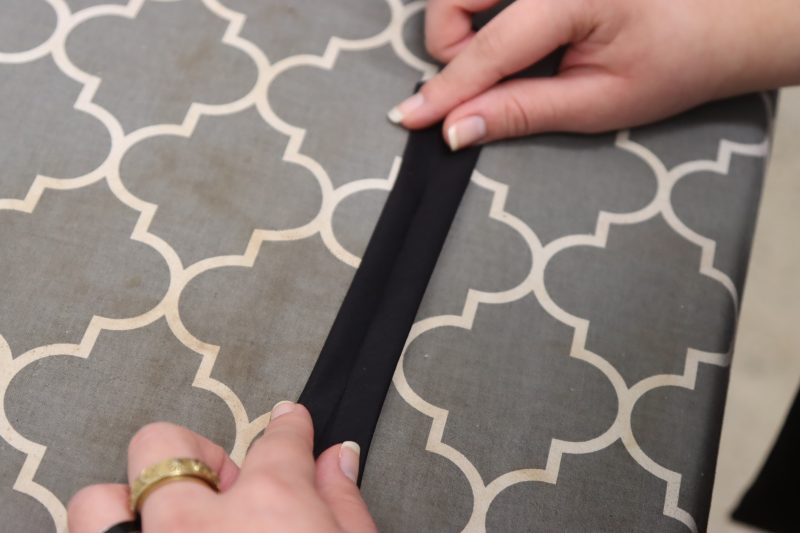
Step 3
BIAS TAPE
- Cut 2 inch wide strips of fabric on the bias out of the same fabric you’re using for the ties. You should cut out at least 2 yards of bias tape.
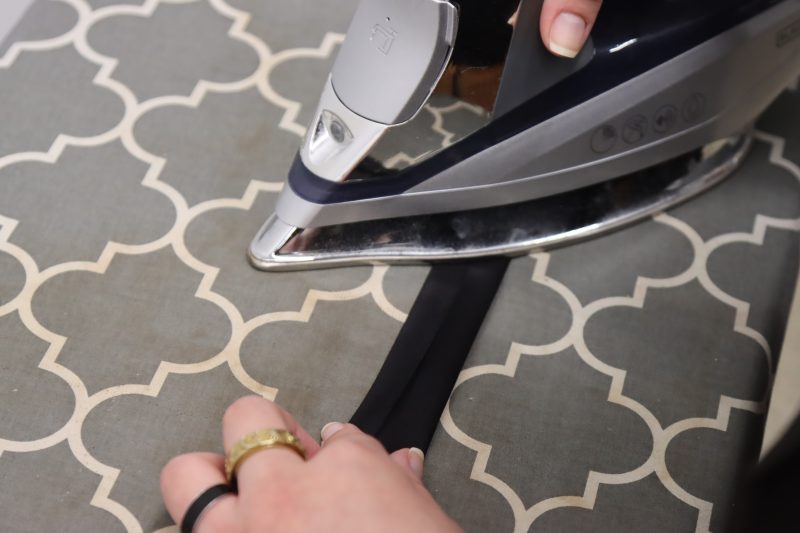
- Fold both long ends up the strip towards the center of the fabric.
- Iron the folds down, then fold the strip in half longways again to encase the raw edges.
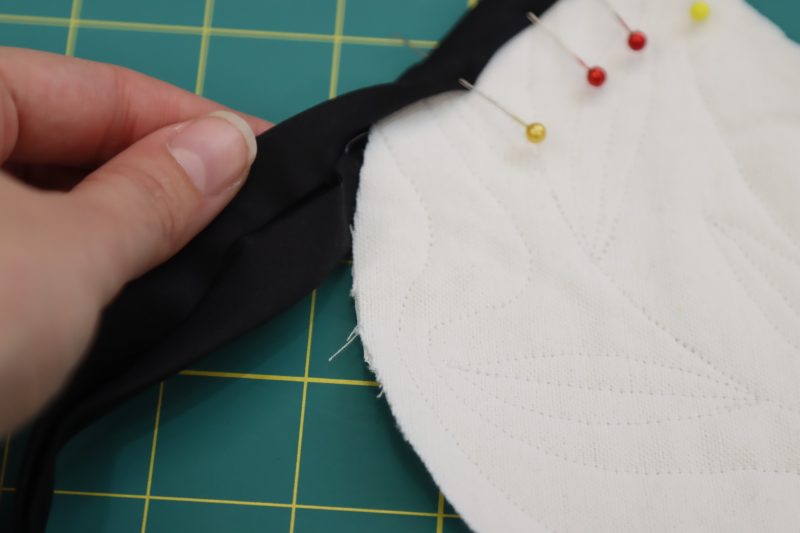
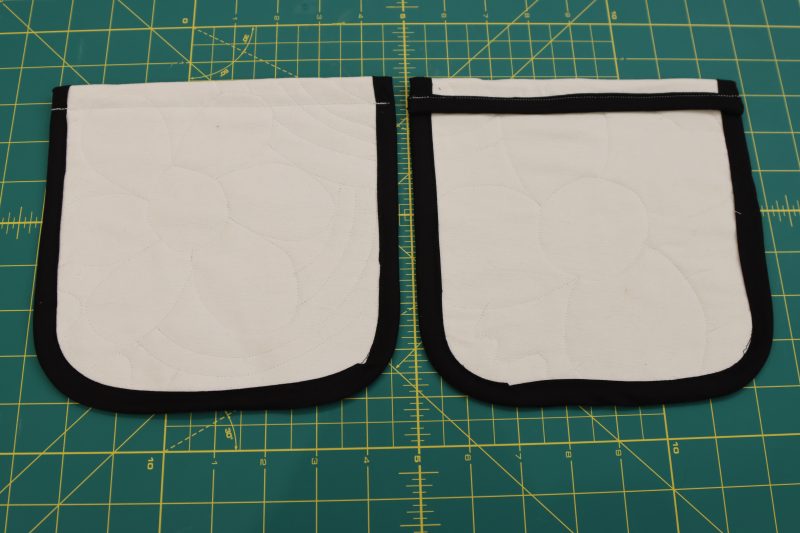
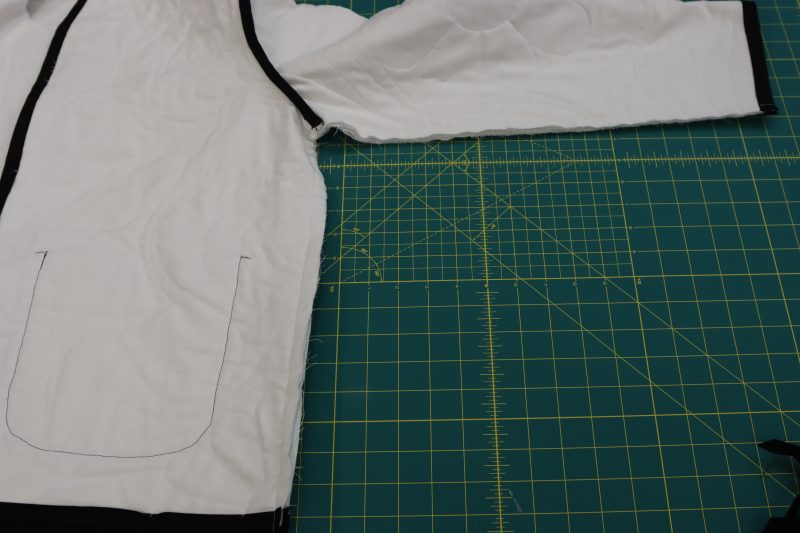
Step 4
POCKETS
- Open the bias tape and encase the raw edges of the pocket into the center fold of the tape.
- Pin the bias tape in place around the perimeter of the pockets.
- Sew the edges of the bias tape in place with ⅛ inch seam allowance. Make sure both sides of the bias tape are caught in the seam.
- Fold the top edge of the pocket by 1 inch towards the lining of the pocket.
- Sew the folded edge down to hide the bias binding on the inside of the pocket.
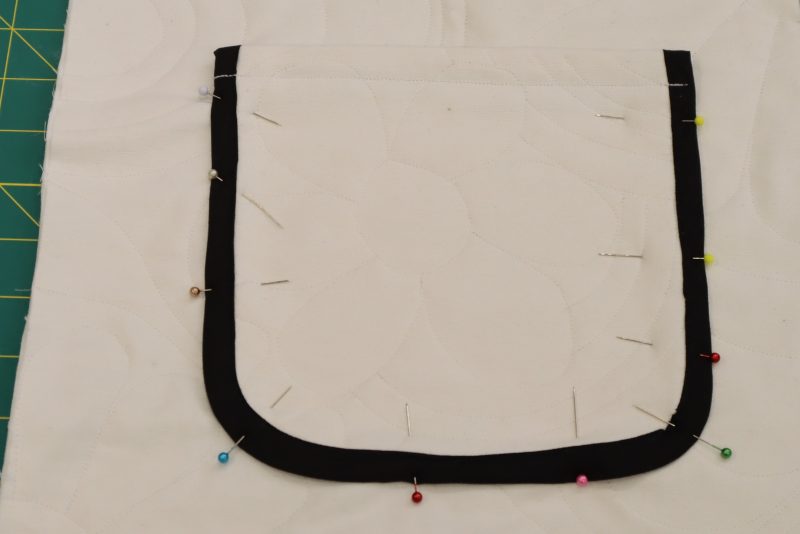
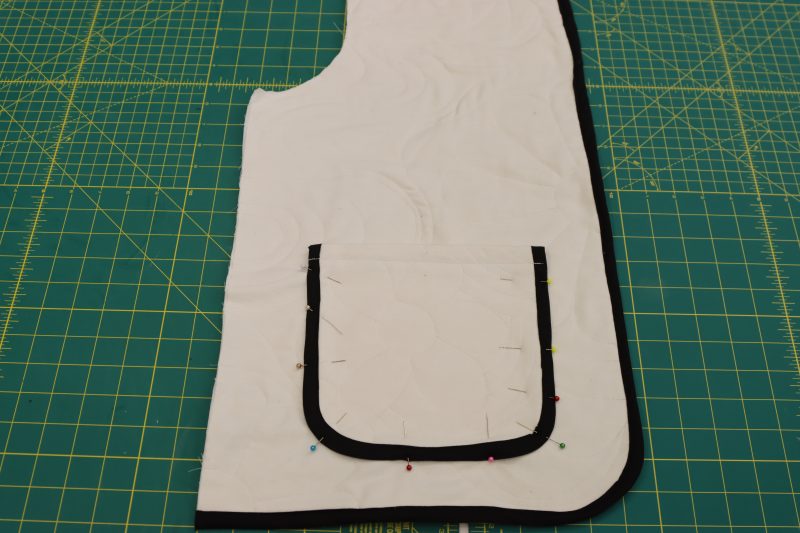
- Pin the pockets over the markings from the pattern on the front coat pieces.
- Top stitch the pockets onto the front coat pieces, leaving the top of the pocket open.
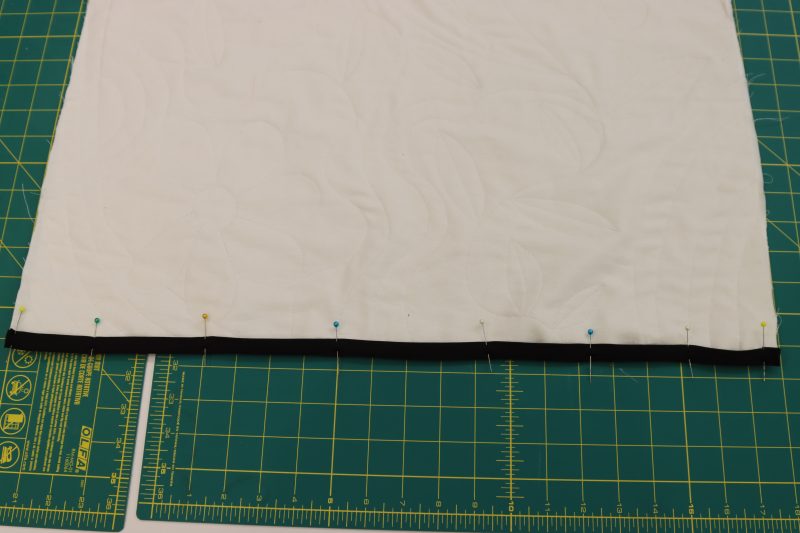
Step 5
HEMS
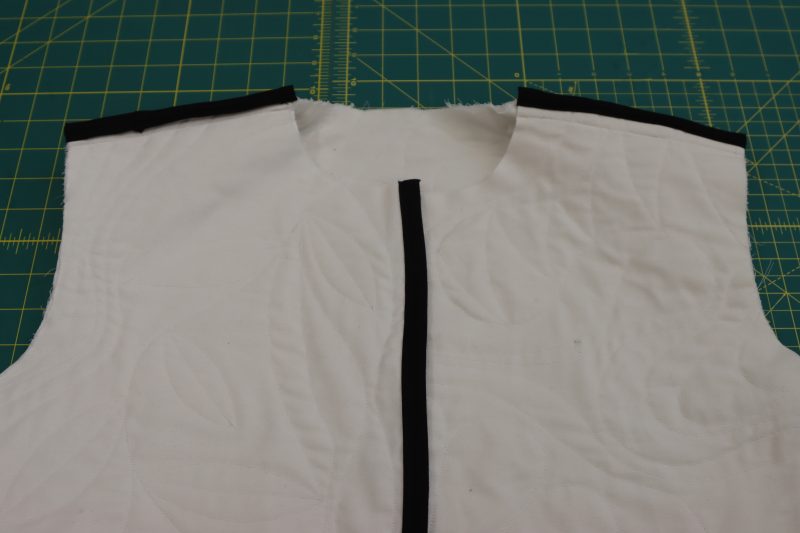
- Encase the bottom edge of the back coat piece with bias binding using the same process as step 4.
- Encase the bottom edge and front opening of the coat front pieces with bias binding.
Step 6
SHOULDERS
- Place the front coat pieces on top of the back coat piece, right sides together with the shoulders lined up.
- Pin and sew the shoulder seams together on both sides.
- Attach bias binding to the seam allowance of the shoulder seams.
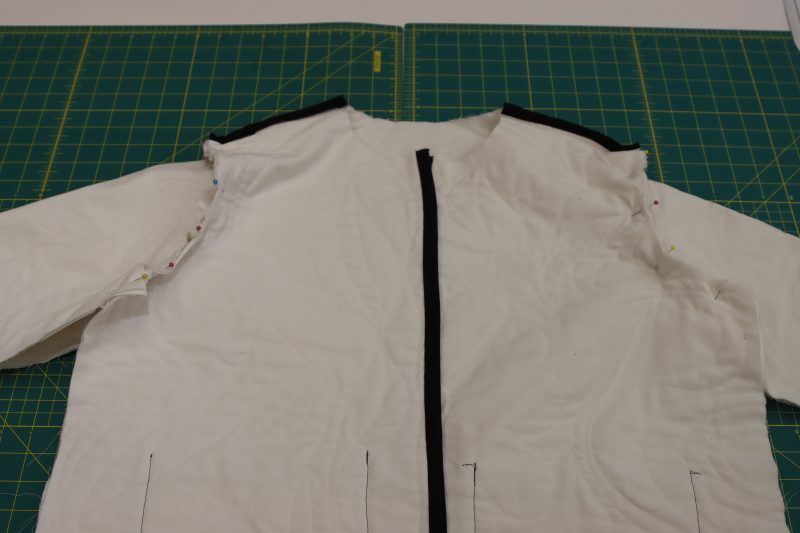
Step 7
SLEEVES
- Pin each sleeve to the open armcyes on both sides of the coat, making sure that the sleeves and coat are right sides together and the front sleeves are oriented towards the front of the coat.
- Sew the sleeve caps to the armscyes.
- Attach bias binding to the seam allowance of the armscyes.
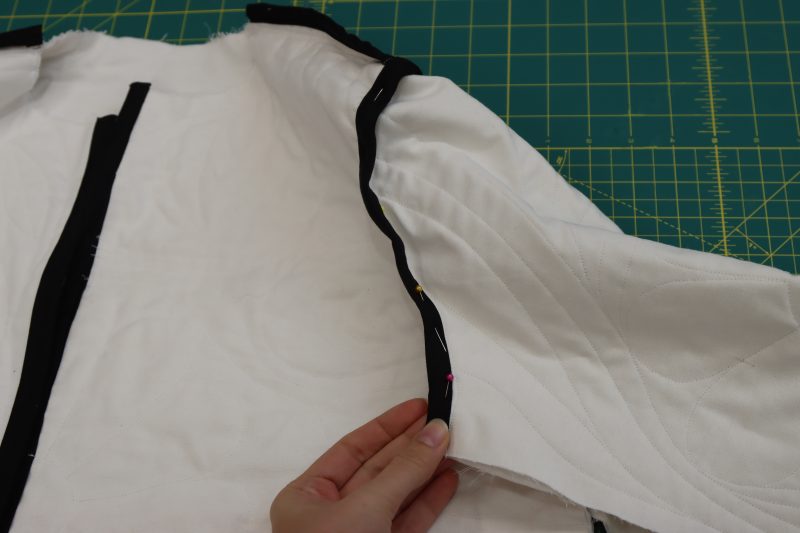
- Pin and sew the front and back of the jacket right sides together at the sleeves and side seams.
- Attach bias binding to the seam allowance for the side and sleeve seams.
Step 8
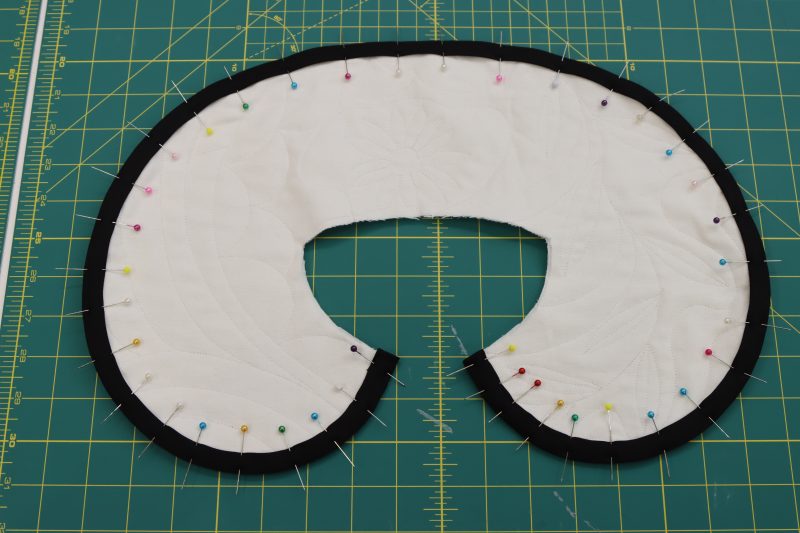
COLLAR
- Attach bias binding to the raw outer edge of the collar piece.
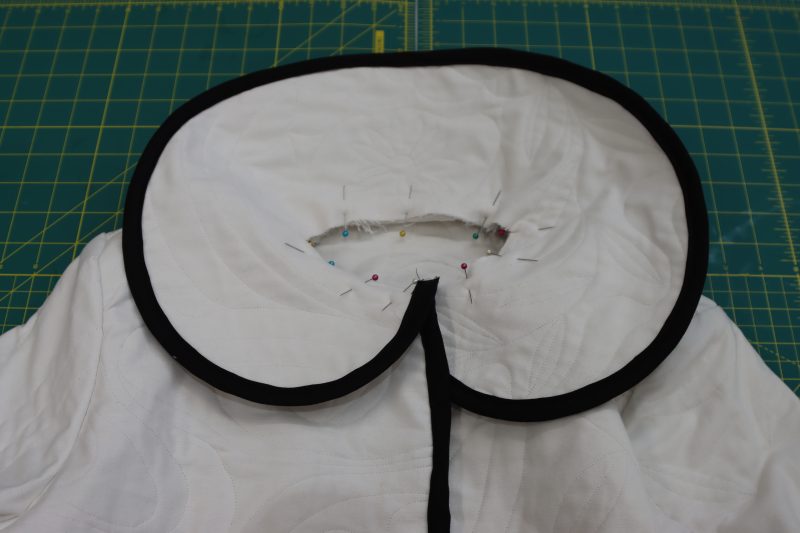
- Pin the inner edge of the collar to the neckline of the coat.
- Sew the pinned edge of the collar to the coat.
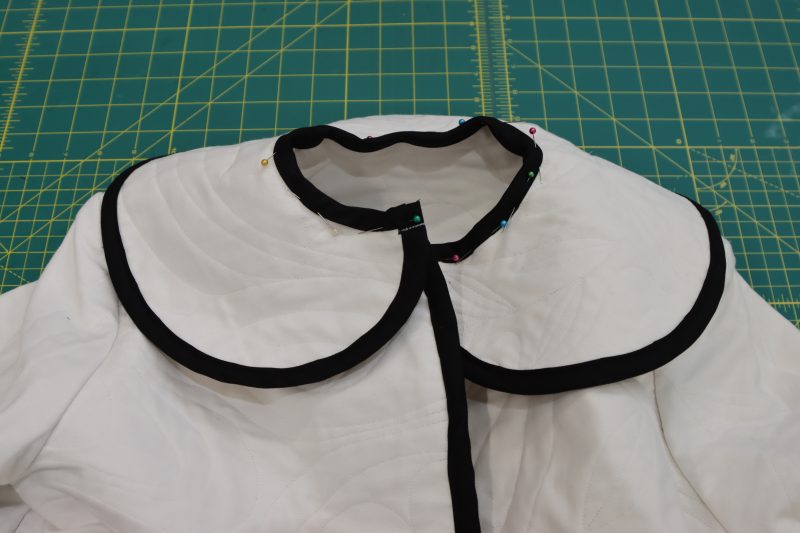
- Attach bias binding to the seam allowance between the collar and the coat neckline.
- Fold the bias binding down into the coat and topstitch the seam allowance of the collar down (this step is important because it helps the collar stand up).
Step 9
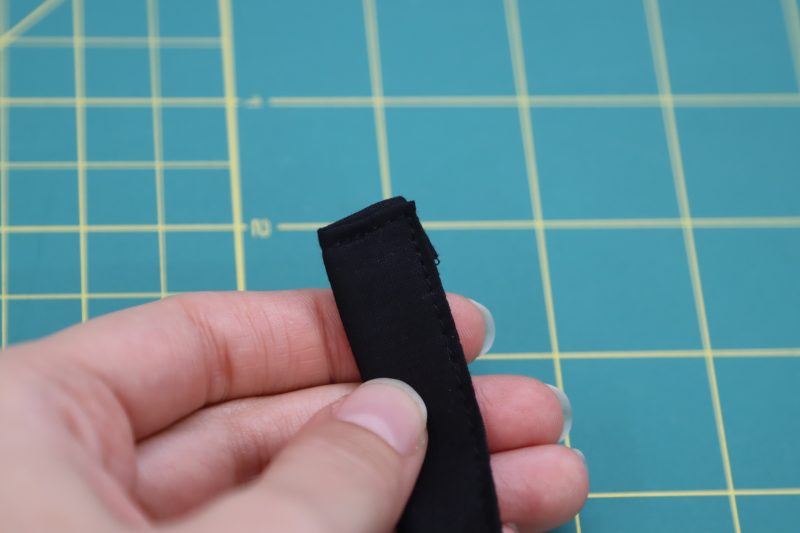
TIES
- Fold the 6 ties the same way that the bias tape was folded.
- Fold the short edges of the ties in by ¼ inch to hide the raw edges.
- Sew the open edges of the ties with ⅛ inch seam allowance to topstitch the ties shut.
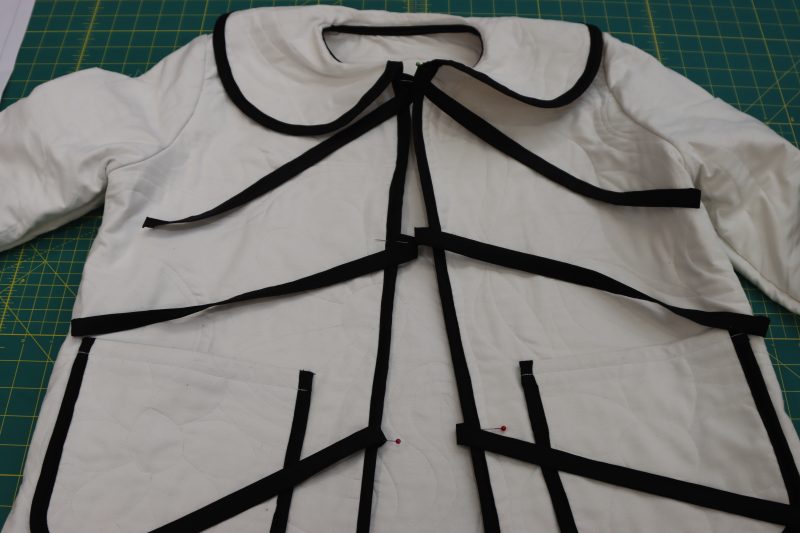
- Pin the ties evenly spaced from each other on both sides of the center front of the coat.
- Sew the ties into place with a straight stitch running parallel with the front opening.
HOW TO SEW THE KETCHUM JUMPSUIT


Step 10
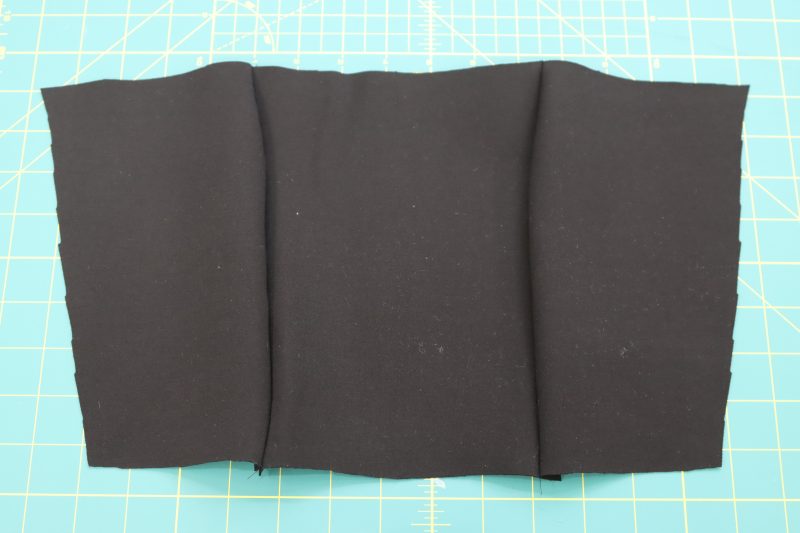
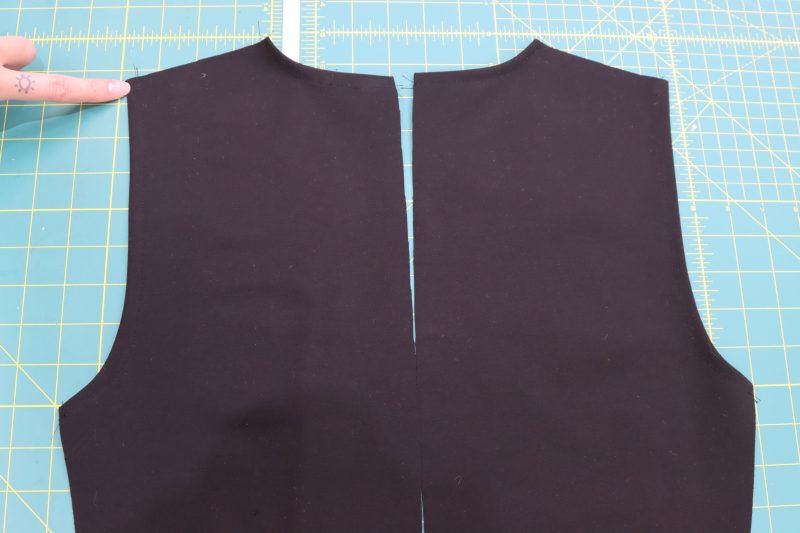
FRONT BUST
- Lay the curved edges of the top front side pieces right sides together with the top front center piece.
- Pin and sew the top front pieces together.
- Open the seams and iron them flat.
- Fold the top edge of the front pieces over by ½ inch.
- Pin and sew the folded edge with ⅜ inch seam allowance.
Step 11
FINISH NECKLINE & ARMHOLES
- Fold the necklines and armholes towards the wrong side of the fabric by ½ inch.
- Pin and sew the necklines and armholes with ⅜ inch seam allowance to hide the raw edge of the fabric.
Step 12
SIDE SEAMS
- Lay the back pieces right sides up right next to each other.
- Lay the front piece on top of the back pieces, right sides together with the sides lined up.
- Pin and sew the side seams together.
Step 13
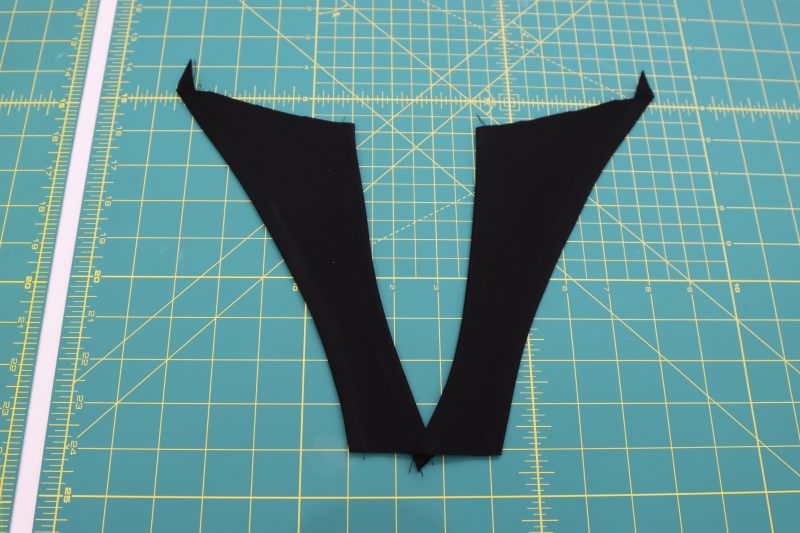
STRAPS
- Fold a ½ inch hem on the two long sides of each strap piece.
- Pin and sew a ⅜ inch seam along the two folded sides of each strap.
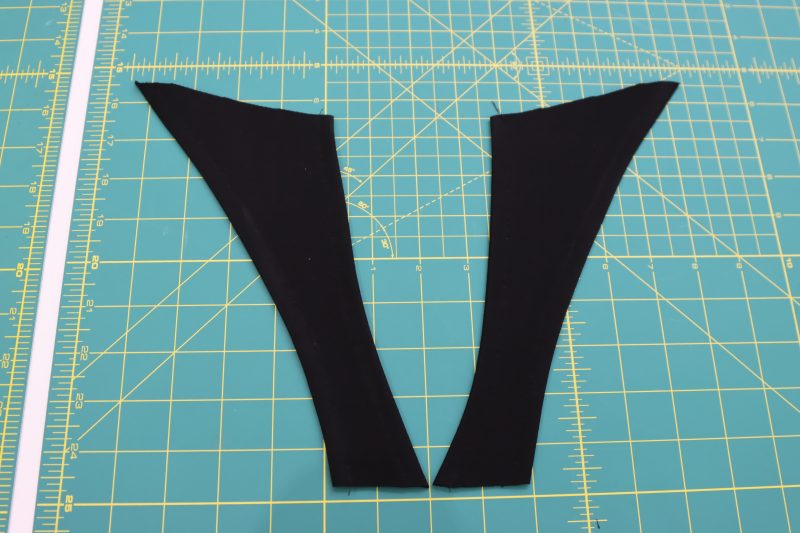
- Trim the pointy edges of the strap pieces so that they’re not sticking out.
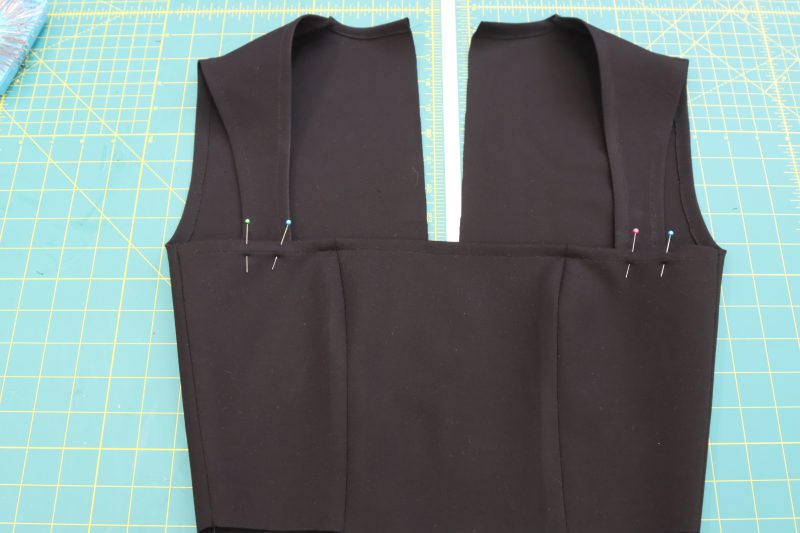
- Pin the wider of the short edges of the straps right sides together with the back shoulder seams, making sure that the strap orientation matches the third picture below.
- Sew the straps to the back shoulders, then topstitch the seam allowance down towards the back of the top.
- Pin the other side of the straps to the wrong side of the top front, directly in between the side seams and the side front seams.
- Topstitch the straps into place.

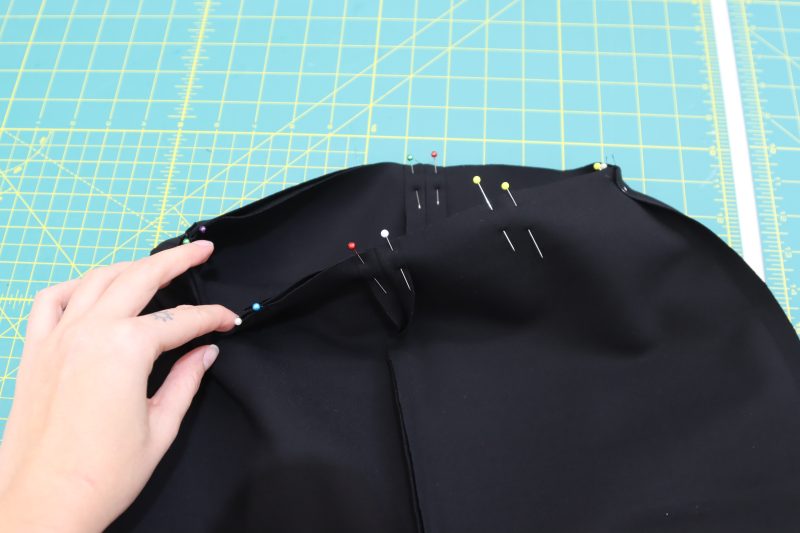
Step 14
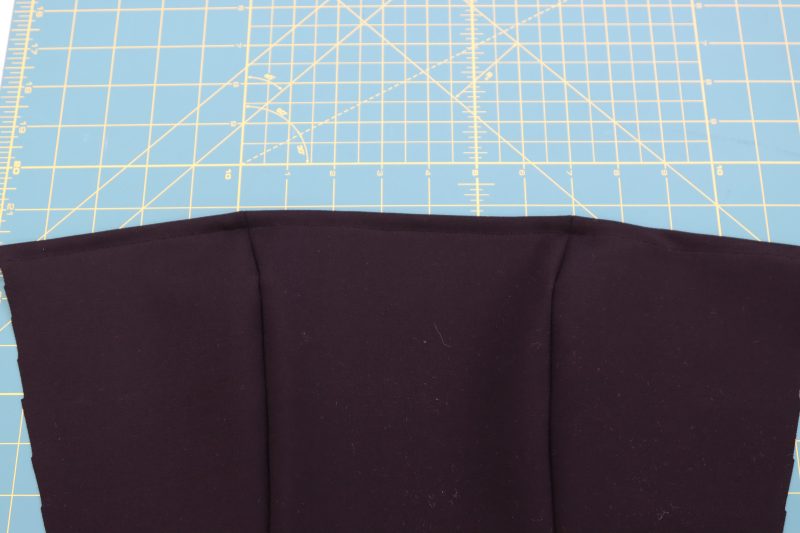
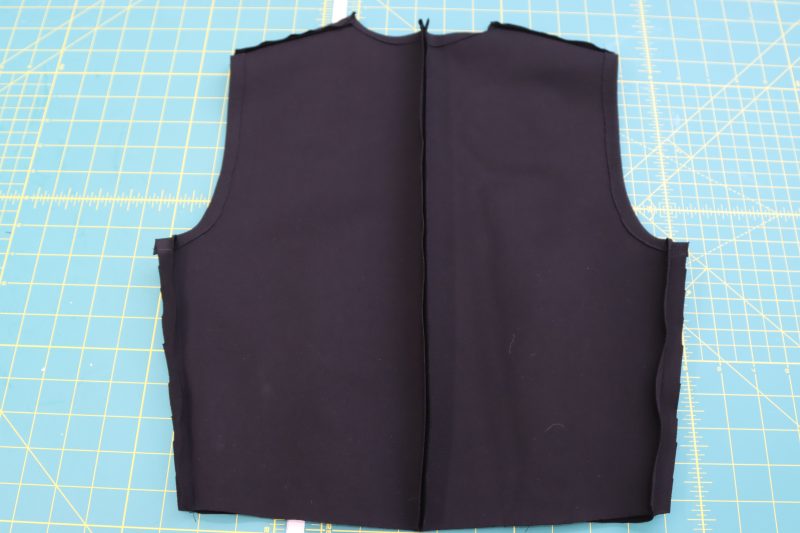
CENTER BACK
- Skip this step if you’re planning to add a zipper to your jumpsuit.
- Pin and sew the back seam shut, right sides together, as shown in the photo below.
Step 15
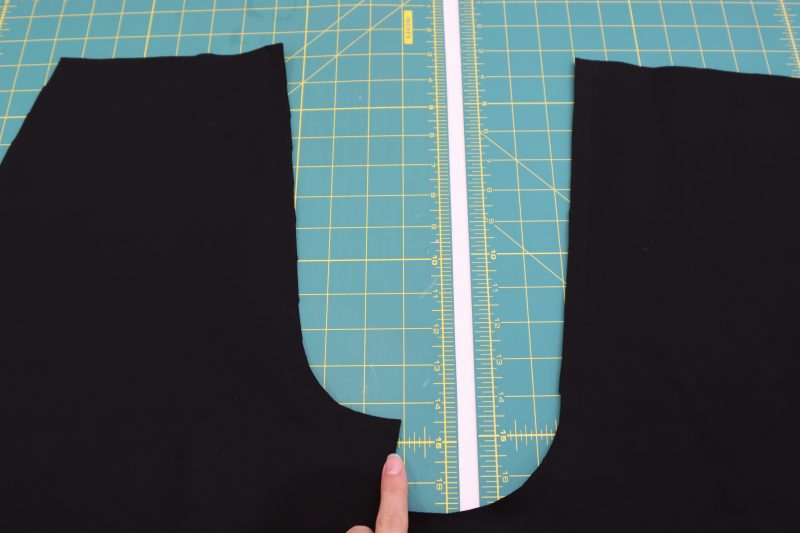
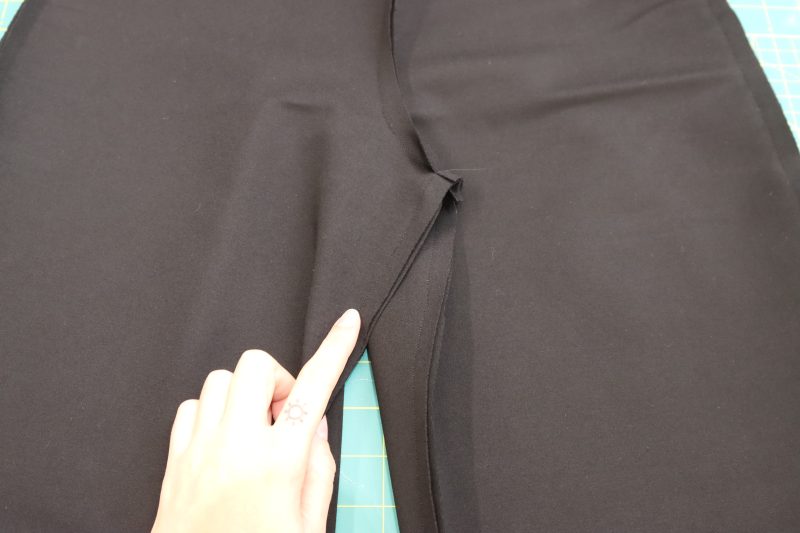
CROTCH SEAMS
- Place the front pants pieces right sides together and pin the crotch seam.
- Sew the front crotch seam shut.
- Place the back pants pieces right sides together and pin the crotch seam (Note: If you are planning to add a zipper, leave 6 inches of the top back crotch seam unsewn so that the zipper can be inserted later).
- Sew the back crotch seam.
Step 16
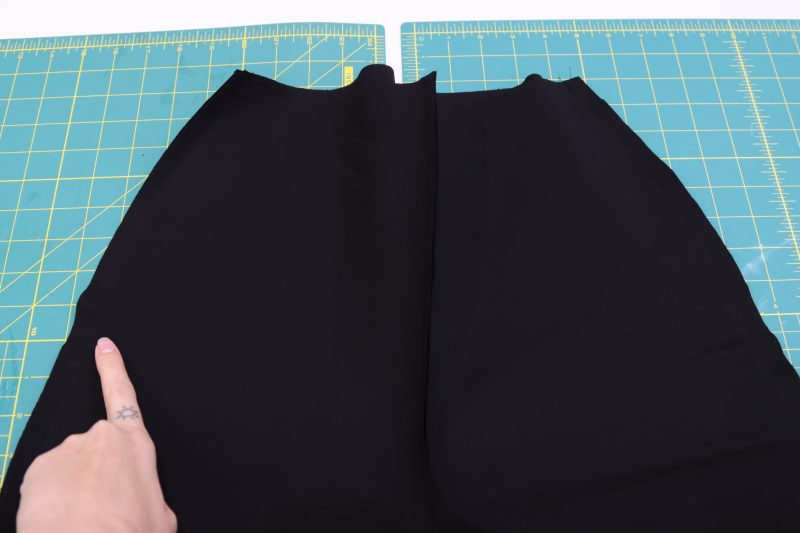
SIDE SEAMS
- Place the front pants piece on top of the back pants piece, right sides together.
- Pin and sew the side seams together.
Step 17
INSEAM
- Line of the front and back crotch seams of the pants and place a pin to connect the seams.
- Place pins along both sides of the inseam.
- Sew the inseam shut, making sure that the crotch seams are lined up.
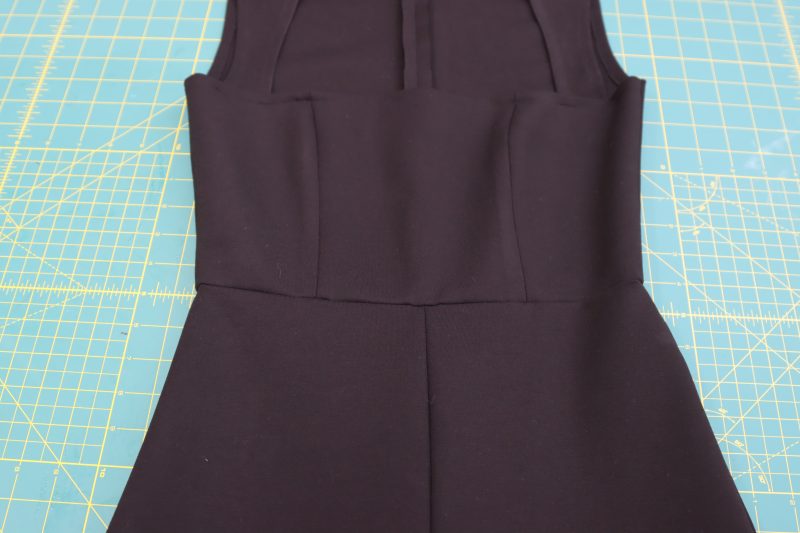
Step 18
WAIST SEAM
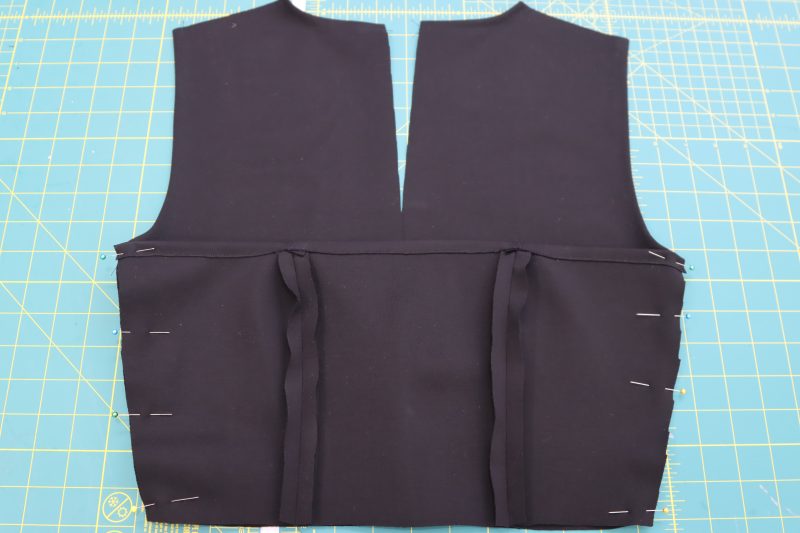
- Make sure the pants are inside out and the top is right sides out.
- Place the top upside down inside the pants and line up the top and pant waist seams with each other.
- Pin the waistline of the top to the waistline of the pants, lining up the back and side seams.
- Sew the top to the pants over the pinned edge.
- Flip the whole garment right sides out.
Step 19
(OPTIONAL) ZIPPER
- If you chose to use a fabric that is not as stretchy as the ponte used in this sample and want to add a zipper in the back, this is when you would add it.
- After connecting the waistline of the top to the waistline of the bottom, there should still be an opening in the back of the jumpsuit that goes all the way from the back of the neck to 6 inches down the back crotch seam.
- Insert a regular or invisible 24 inch zipper into the opening the way zippers are normally inserted.
- If you’re struggling to insert a zipper, check out the instructions in the Nob Hill Draped Midi Dress pattern or the Glinda Gown pattern.

Sewing Success: The Completed Coeur D’Alene Coat & Ketchum Jumpsuit
Share this post with a friend (or two!), download the Coeur D’Alene Coat & Ketchum Jumpsuit free sewing pattern, and show us which fabrics and colors you choose, using the hashtags #MoodCoeurDAlenePattern, #MoodKetchumPattern, & #MadeWithMood—and don’t forget to tag us @MoodFabrics, too.


Free Sewing Pattern Inspiration for Your Next Project
With 450+ free sewing patterns and counting, your opportunities for sewing with Mood are endless!
We hope you had as much fun sewing these coat and jumpsuit patterns as we did! As always, we want to hear from you—share your thoughts and comments below and let us know where you’ll be wearing the Coeur d’Alene Coat and Ketchum Jumpsuit free sewing patterns!
It looks in the photos as though the peter pan collar is not laying totally flat, can you tell me what I can do when I make this up to help improve the drape of the collar? These types of things are notoriously tricky and sometimes it is the shape of the pattern piece and other times a tailoring technique during construction is needed to cause the piece to drape properly. I am too much of a beginer to know what the issue is with this particular one just from looking at the pieces and the photo. Thank you for this incredibly cute pattern, the pantsuit and the jacket look adorable together and will be useful separately as well!
You’re always welcome to add a collar stand to support the collar. Many of our collared shirt pattern have a collar stand if you want to steal a pattern piece from one of those.
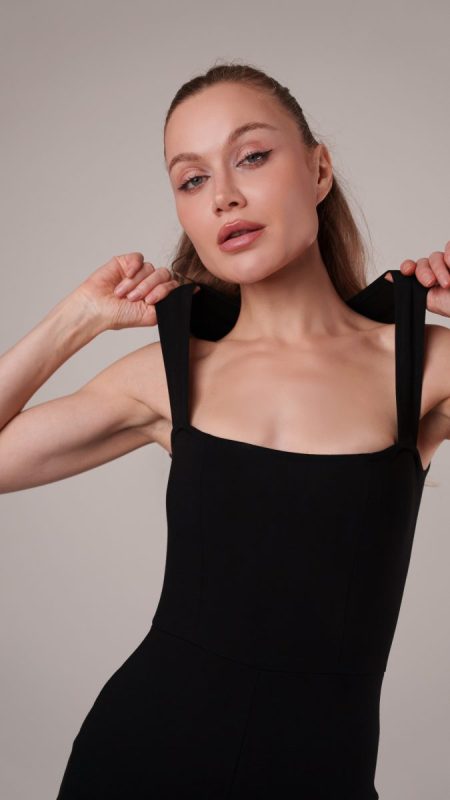
Hello! This looks like a really fun and stylish make. However, I’m a little concerned that there isn’t a pic of the jumpsuit without the coat, even on a mannequin. This looks a little low cut, and knowing if I have to modify the pattern before I make it so that it’s work appropriate would be nice. Thank you so much for all the creative free patterns that you provide us!
Hello! If you’re worried about the jumpsuit being too low cut, I recommend adding an extra inch to the top of each pattern piece for the front of the top. This will mean you also have to shorten the straps (or at least sew them deeper into the front of the top).
I was shook seeing names of Idaho cities lol. They look great, though! As an Idahoan, I may need to make them for the novelty alone!
I was today years old when I realized these were named of Idaho cities and not just some creative names my boss came up with.
Why aren’t there any pictures without the jacket so we can see the jumpsuit? I might only want to make that!! If they are somewhere that ok missed, let me know, please!
Hey Jaime! Some pictures of the jumpsuit have been added!
Merci
J’adore
thank you
Thank you