

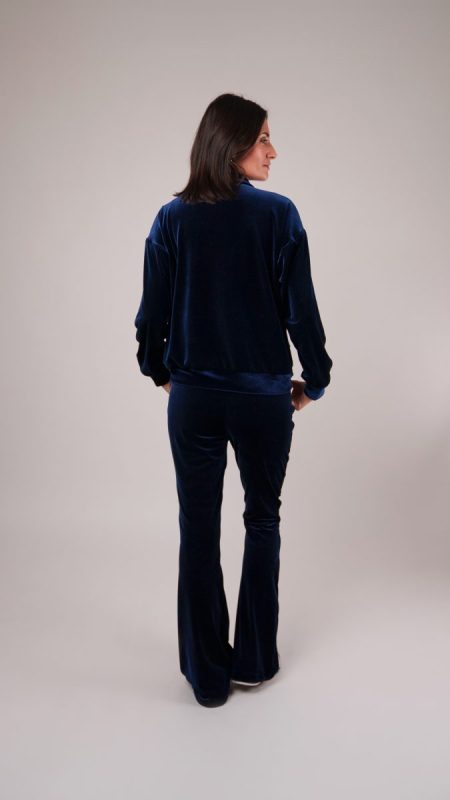
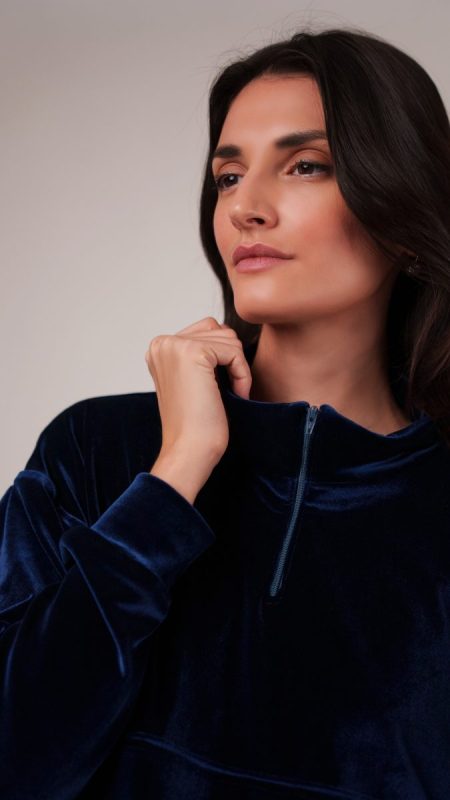
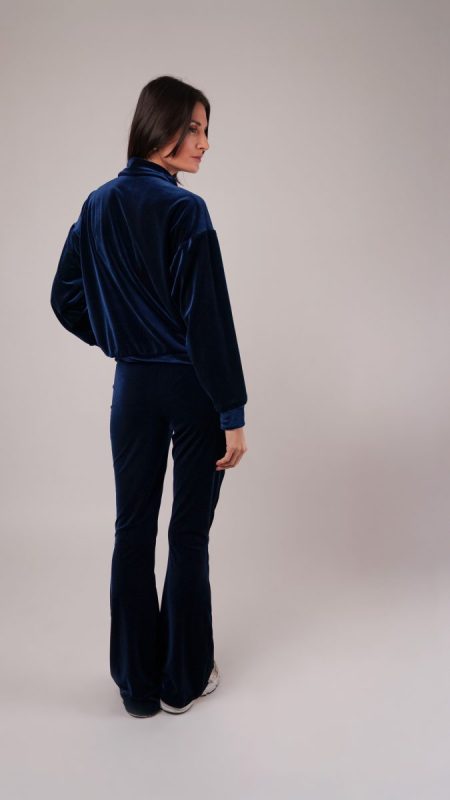
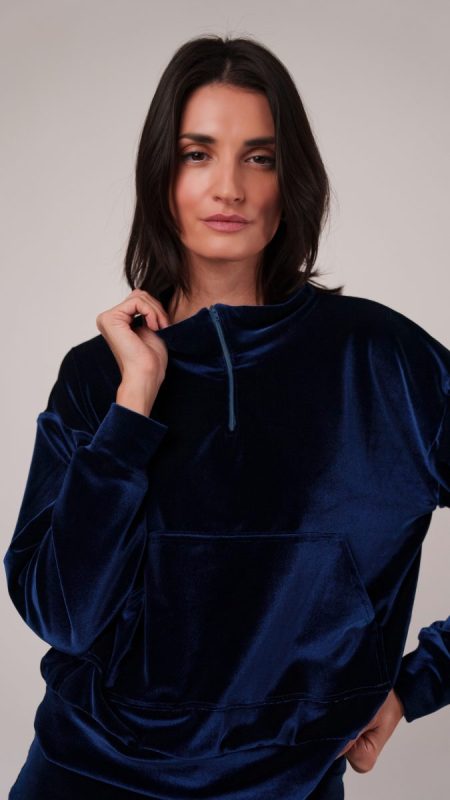
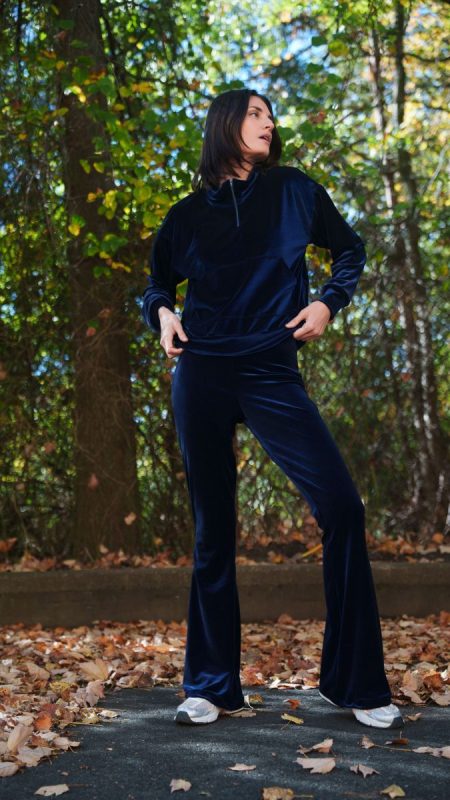
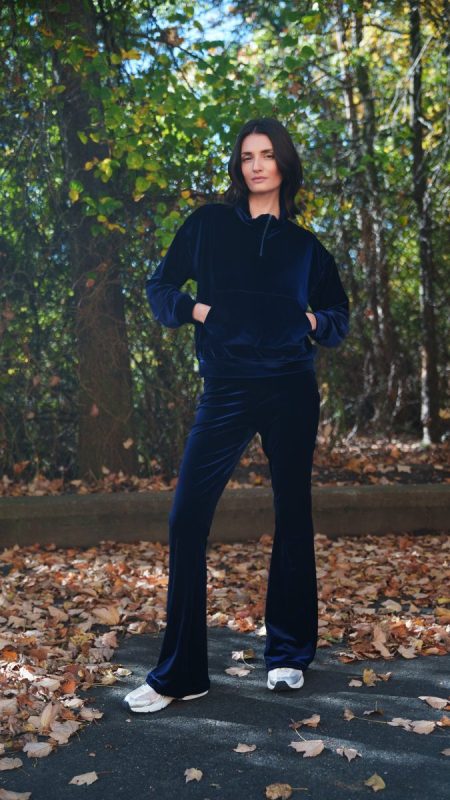
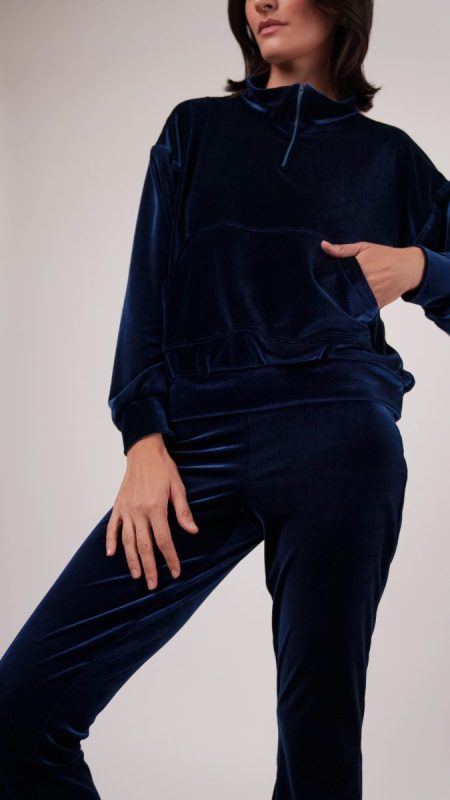
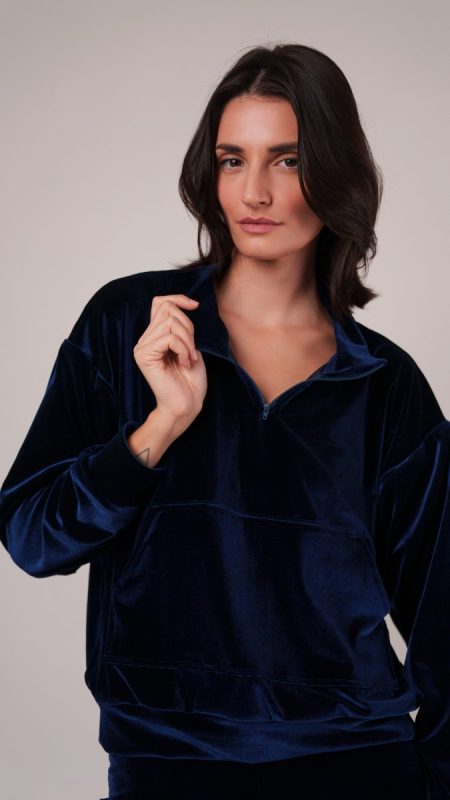
Bring a little early 2000s nostalgia into your wardrobe with the Tarrytown Tracksuit, a sleek and irresistibly soft set that feels as good as it looks. Made from a luxurious stretch velour, this outfit offers that signature luster and fluid drape that made velour a classic, now revived for the modern day. The relaxed pullover top pairs effortlessly with flared pants that elongate your silhouette, creating a look that moves with you and catches the light in all the right ways.
If you ever dreamed of owning that perfect velour tracksuit back in the day, now is your moment. With this pattern, you can create your own tracksuit in any color using the Persica Velour Collection from Mood. Whether you love deep jewel tones, rich neutrals, or soft pastels, there is a shade that will make this look uniquely yours. It is perfect for a light workout, lounging around the house, or being the best dressed on your quick trip to the supermarket.
Best of all, the Tarrytown Tracksuit is simple to sew, making it a great choice for beginners or anyone looking for a quick, confidence-boosting project. Once you slip it on, you will understand why velour has made a comeback. It is cozy, chic, and just the right amount of glamorous.


Essential Materials & Sizing Guide for the Tarrytown Tracksuit
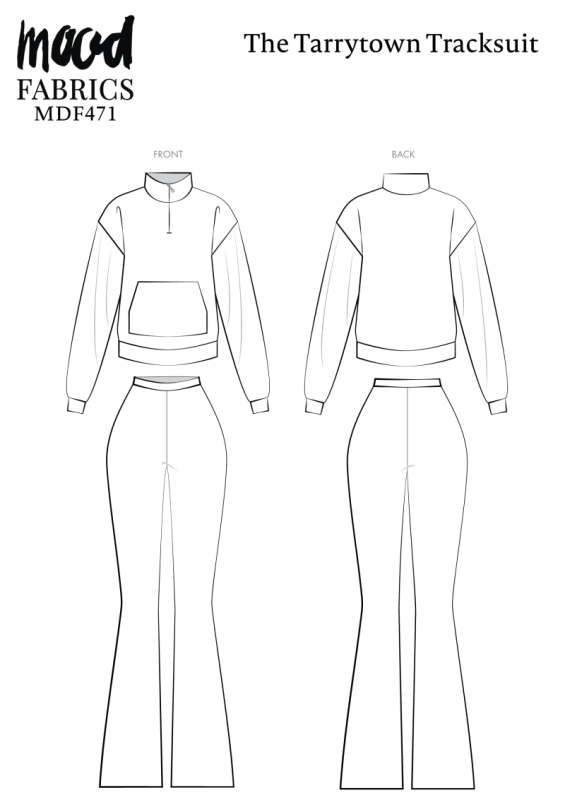
Continue reading for a breakdown of what knowledge and materials you need for creating your very own tracksuit! We’ve got you covered with the recommended materials we used—if you want to follow along exactly—as well as a curated list of alternative fabric type recommendations if you want to customize your own version. The Tarrytown Tracksuit free sewing pattern download includes technical drawings for seam and silhouette visibility, plus a size chart to help you find your perfect fit!
Purchase Products Used Below:
Quantities indicated are for sewing a size small tracksuit. Toggle the ‘SHOP THIS LOOK’ box to find quantity estimates for other sizes.
-
- 4 yards of Stretch Velour – Navy – Persica Collection
- 4 each of Maxi-Lock Serger Thread 3000yds – Navy
- 1 each of Gutermann Sew All Thread 250m – 272 Navy
- 1 each of Regular Zipper 9″ by YKK – 560 Deep Navy
- MDF471 – The Tarrytown Tracksuit Sewing Pattern (Free download below!)
Alternative Fabric Type Recommendations:
The Tarrytown Tracksuit sewing pattern is best suited for medium weight stretch knit fashion fabrics. Explore other fabric types or colors from our featured collections for your tracksuit with the links below.
Fabric Collections Used in this Post:
Download Your Free Sewing Pattern
Submit your name and email in the form below to receive the download link for the Tarrytown Tracksuit free sewing pattern directly in your inbox. Mood Sewciety Patterns will send your free download link via email with the subject line: ‘Your Free Download from Mood Sewciety – The Tarrytown Tracksuit’ (in PDF format for A4 and letter-size printing).
© MoodFabrics.com / MoodSewciety.com – Mass production, resale, or distribution of this pattern in any form is strictly prohibited.
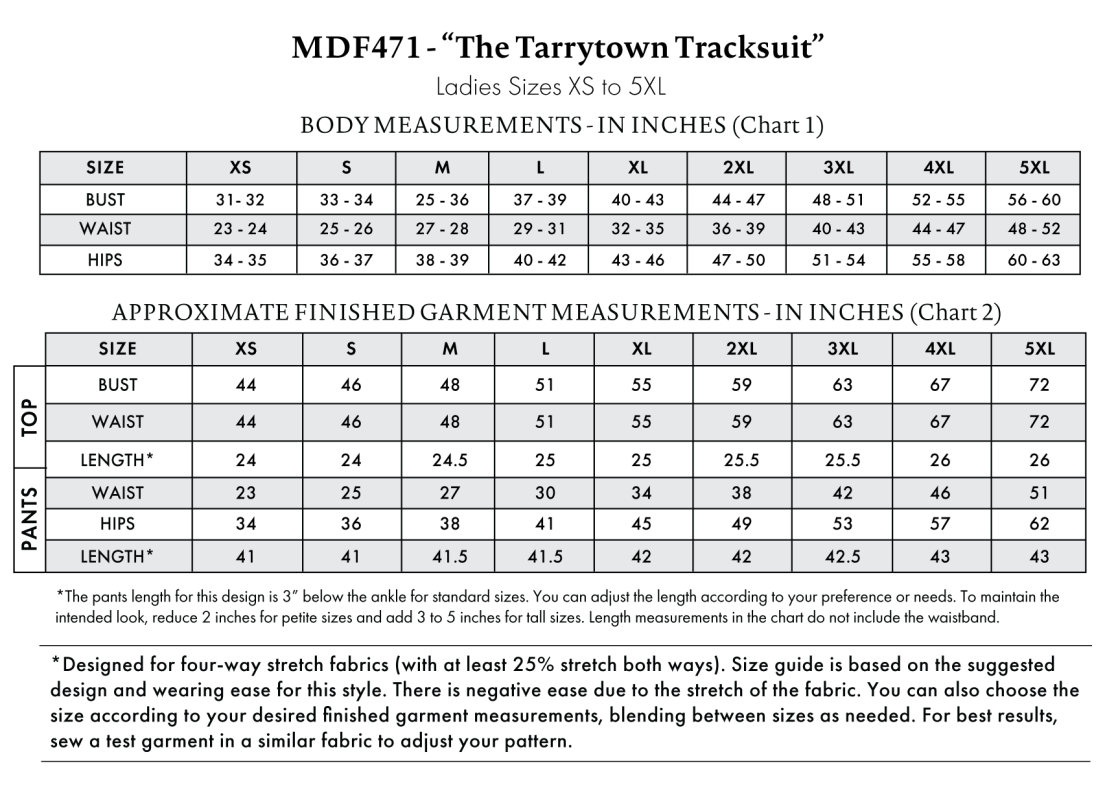
Find Your Perfect Fit
The Tarrytown Tracksuit Sizing Guide is based on the suggested design & wearing ease for this style. You can also choose the size according to your desired finished garment measurements, blending between sizes as needed. Measure the printed patterns to make sure the dimensions are according to the desired fitting and adjust if needed before cutting the fabric. For best results, sew a test garment in a similar fabric to adjust your pattern.
Note: Always read all the instructions before cutting the fabric!
How to Sew The Tarrytown Tracksuit
The instructions provided below are designed to guide you through sewing the Tarrytown Tracksuit from start to finish.

2 Tips for Sewing with Stretch Velour
⇒ I highly recommend serging the seam allowances on the entire tracksuit because even though velour doesn’t fray too much, it DOES shed.
⇒ You don’t necessarily need to use a stretch stitch to sew velour, even though it’s stretchy. For this set, I used a straight stitch with 1.5 inch stitch length and slightly stretched the fabric as I was sewing. This allows the fabric to still stretch quite a bit without being restricted by the straight stitch.

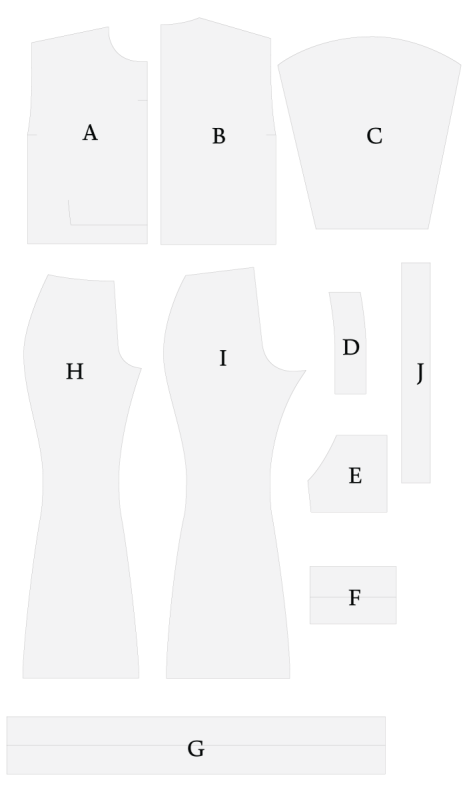
Pattern Pieces & Fabric Cuts Needed
- (A) TOP FRONT
- FABRIC – CUT 1 ON FOLD
- (B) TOP BACK
- FABRIC – CUT 1 ON FOLD
- (C) SLEEVES
- FABRIC – CUT 2 MIRRORED
- (D) COLLAR
- FABRIC – CUT 2 ON FOLD
- (E) POCKET
- FABRIC – CUT 1 ON FOLD
- (F) SLEEVE CUFFS
- FABRIC – CUT 2
- (G) TOP WAISTBAND
- FABRIC – CUT 1
- (H) PANTS FRONT
- FABRIC – CUT 2 MIRRORED
- (I) PANTS BACK
- FABRIC – CUT 2 MIRRORED
- (J) PANTS WAISTBAND
- FABRIC – CUT 1
Sew with a 1/2″ seam allowance for all seams unless otherwise specified.
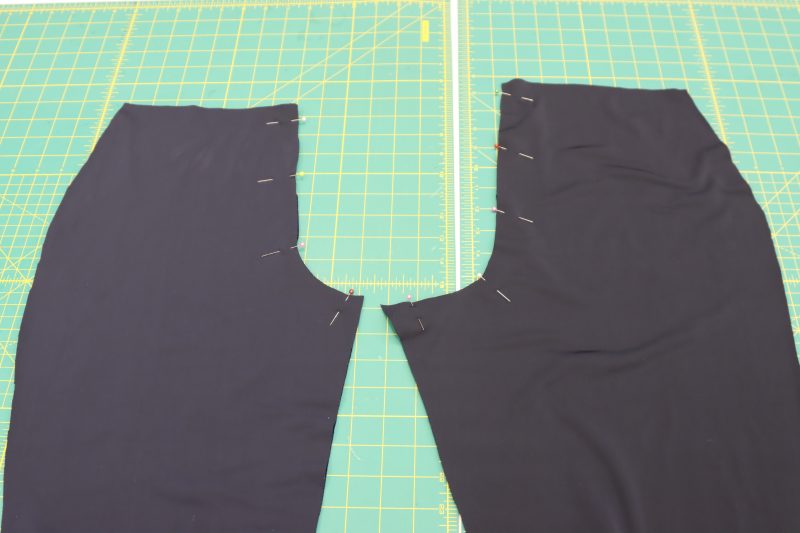
Step 1
CROTCH SEAMS
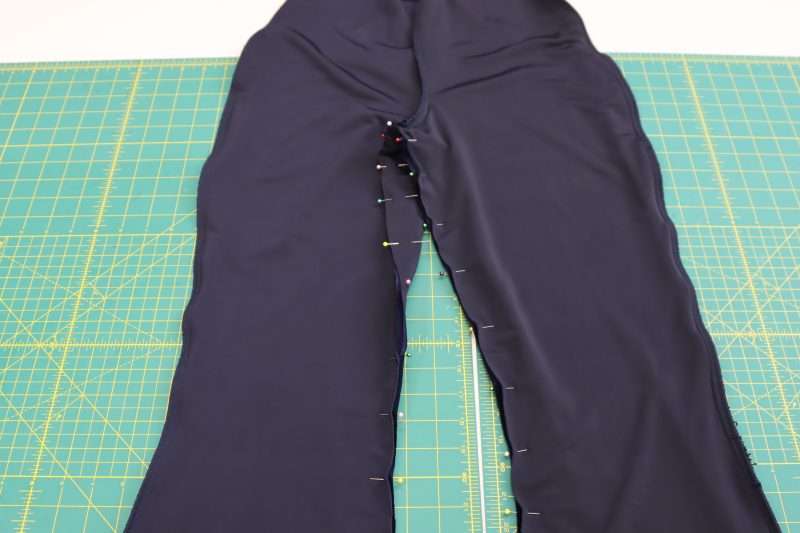
- Place the front pants pieces right sides together and pin the crotch seam.
- Repeat the same step for the back pants pieces.
- Sew the two crotch seams along the pinned curves.
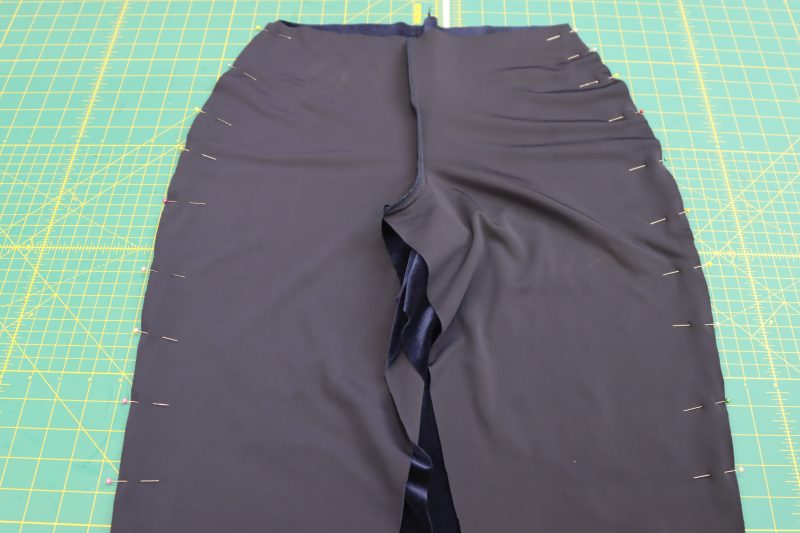
Step 2
SIDE SEAMS
- Open the front and back pants pieces along the crotch seam and lay them right sides together.
- Line up and pin the side seams of the front and back pants pieces.
- Sew both side seams.
Step 3
INSEAM
- Line up the front and back crotch seams right sides together and place a pin.
- Place pins down both inseams, connecting the front and back inseams together.
- Sew the entire inseam.
Step 4
WAISTBAND
- Fold the waistband shortways, right sides together, and pin the side seam.
- Fold the waistband in half longways, wrong sides together, so that the seam allowance is inside the folded waistband.
- Pin and sew the waistband to the waistline of the pants, right sides together.
- Flip the waistband up so that the folded edge of the waistband is sticking out at the top of the pants.


Step 5
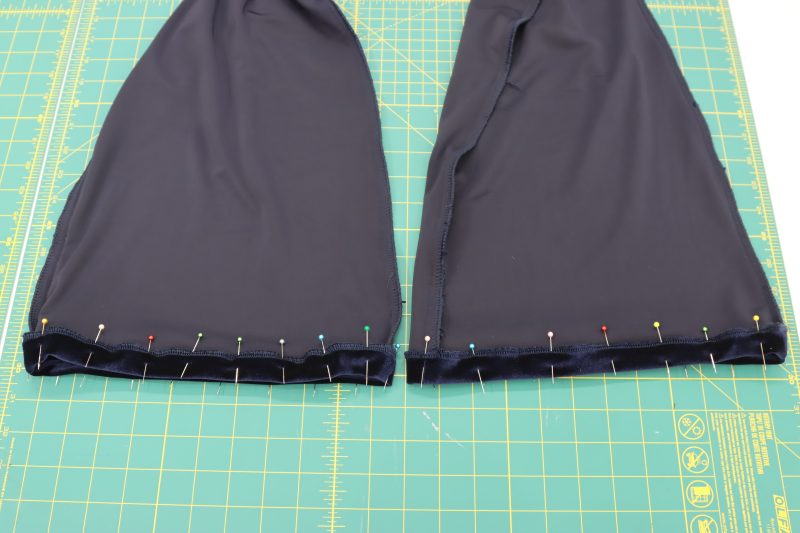
PANTS HEM
- Fold the hem of the pants up by ¾ inch and sew a seam to secure the hem with a ⅝ inch seam allowance.
Step 6
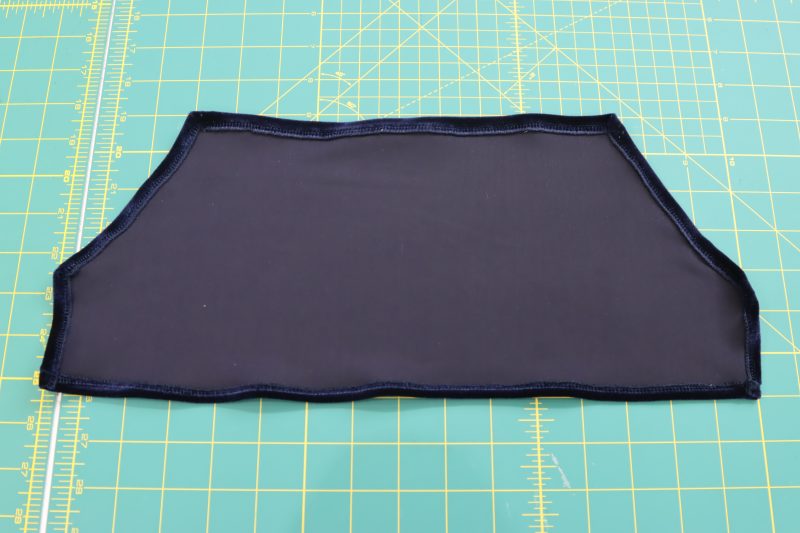
POCKET POUCH
- Serge the raw edges of the pocket pouch.
- Fold the serged edges of the pouch towards the wrong side of the fabric and sew them down so that the serged edge is hidden and hemmed.
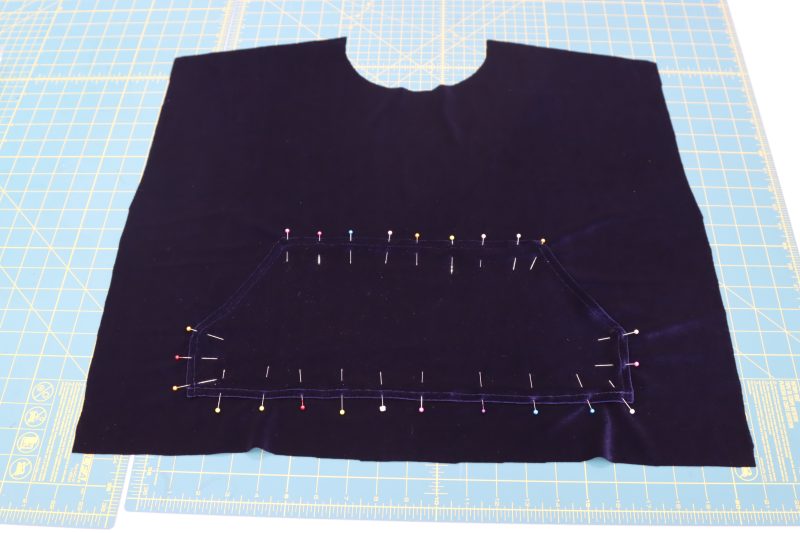
- Pin the pocket pouch to the front of the tracksuit jacket, aligning it with the markings on the pattern, and leaving the diagonal lines on the side of the pocket pouch unsewn so that you have somewhere to put your hands.

Step 7
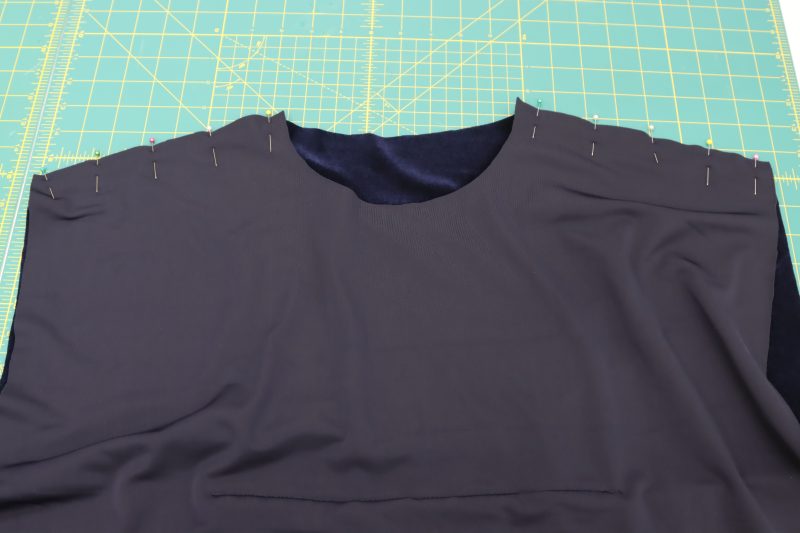
SHOULDER SEAMS
- Place the front and back top pieces right sides together with the shoulders lined up.
- Pin and sew the shoulder seams together.
Step 8
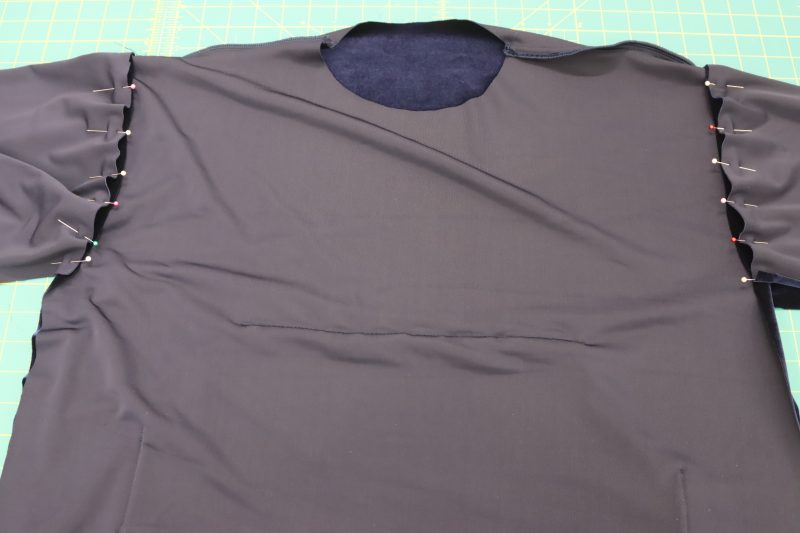
SLEEVES
- Open the shoulder seams and lay the top piece flat with the right sides of the fabric facing up.
- Pin and sew the rounded edge of the sleeve right sides together with along the markings on the top pattern, making sure that the part of the sleeve marked “front sleeve” is pinned to the marking on the front of the pattern.
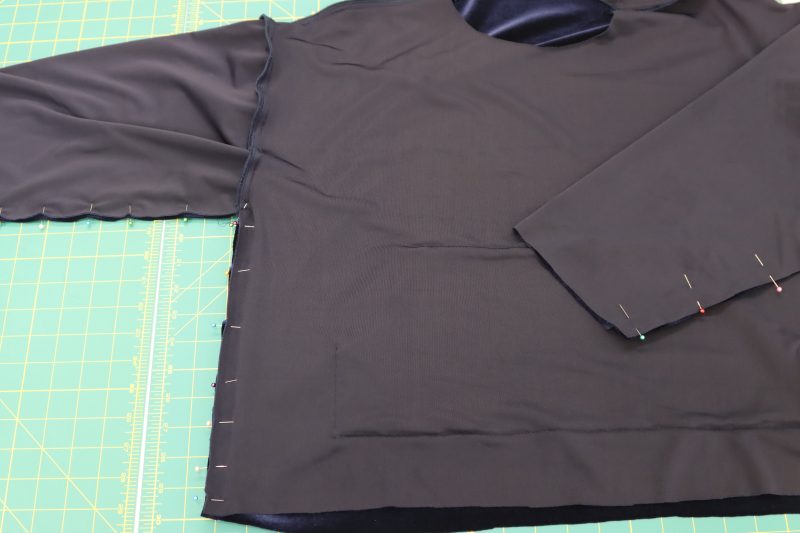
- Fold the top at the shoulder seams again, right sides together.
- Line up the seams under the armpits and place a pin.
- Pin from the wrist to the hem to connect the sleeves and side seams.
- Sew from the wrist to the armpit to the hem of the top.
Step 9
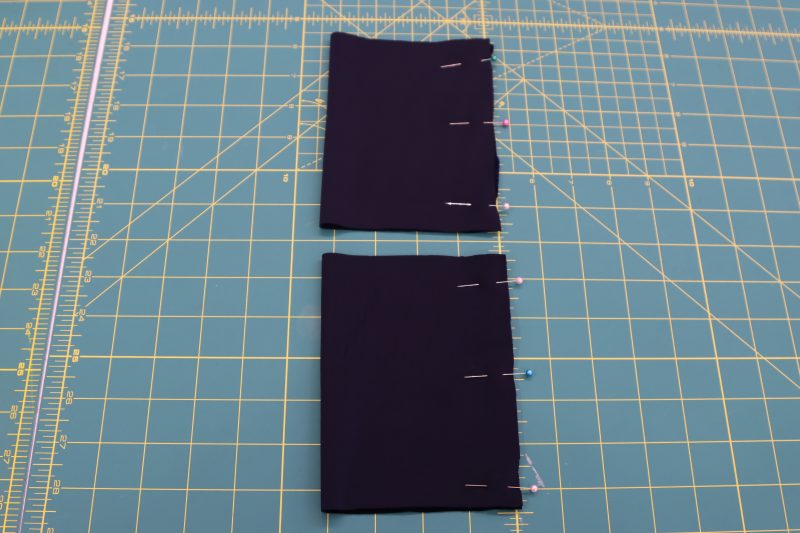
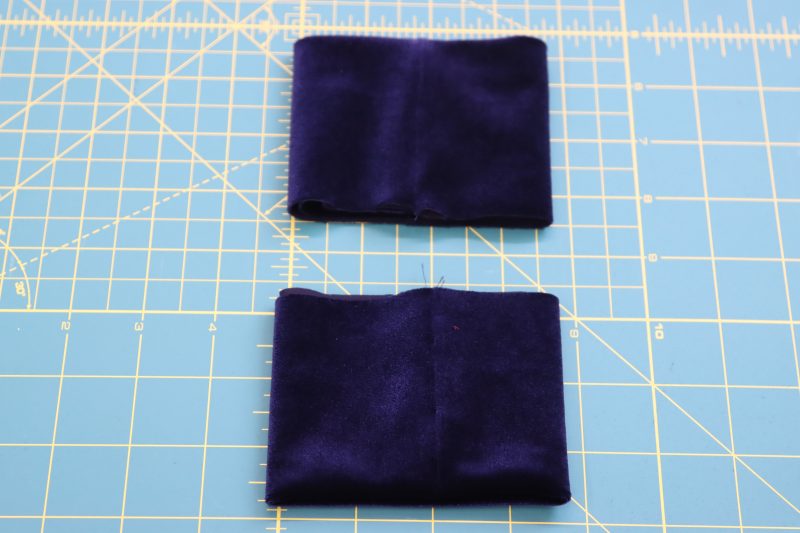
SLEEVE CUFFS
- Pin and sew the sleeve cuffs in half shortways, right sides together.
- Fold the sleeve cuffs in half longways so that the cuff seam is on the inside.
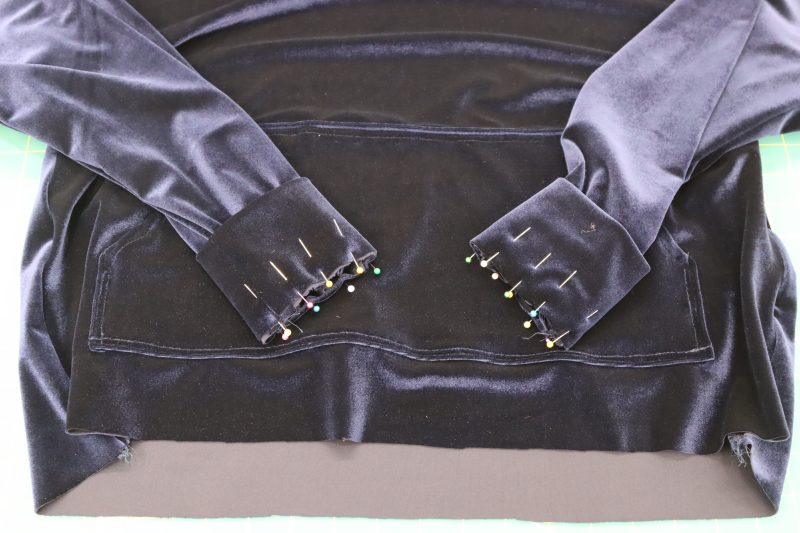
- Pin the folded cuffs evenly around the wrists of the top, slightly stretching the cuffs to be able to fit around the wrist opening.
- Sew the cuffs to the wrist openings, right sides together, then flip the cuffs out so that the folded edge is sticking out of the sleeves of the top.
Step 10
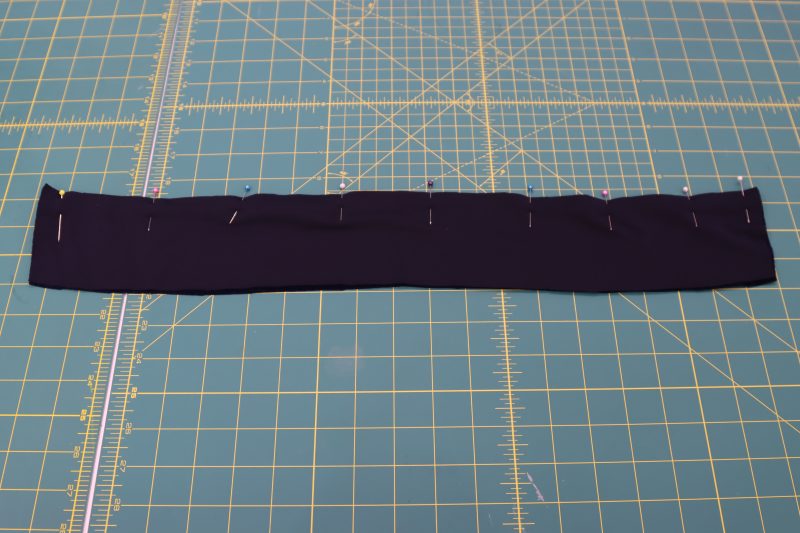
WAISTBAND
- Fold the waistband of the top shortways and sew a straight stitch along the short edge to create a closed loop.
- Fold the waistband of the top wrong sides together so that the seam allowance is hidden inside of the waistband.
- Pin and sew the waistband to the hem of the top, slightly stretching the waistband as you pin so that it is evenly stretched around the hem.

Step 11
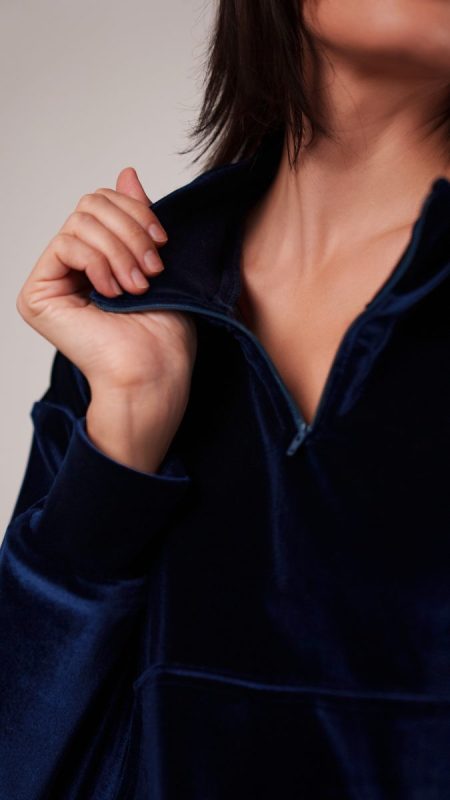
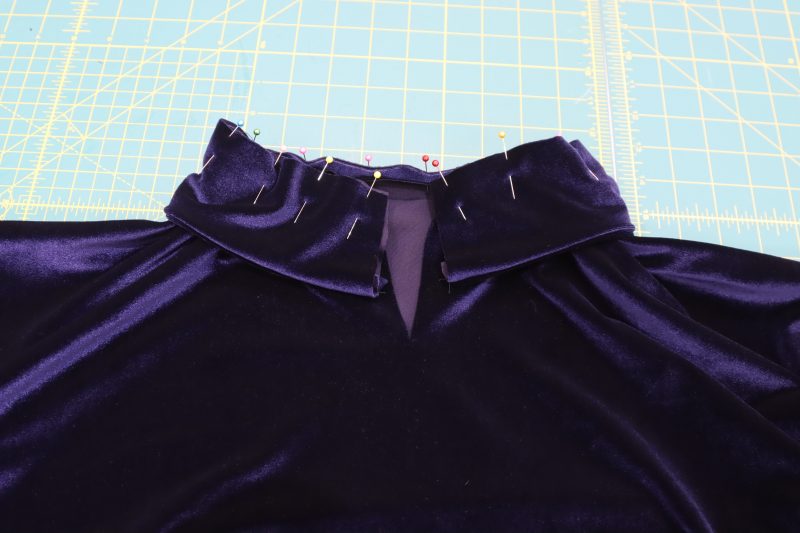
COLLAR
- Place the collar pieces right sides together.
- Pin and sew one long edge of the collar pieces.
- Flip the collar right sides out.
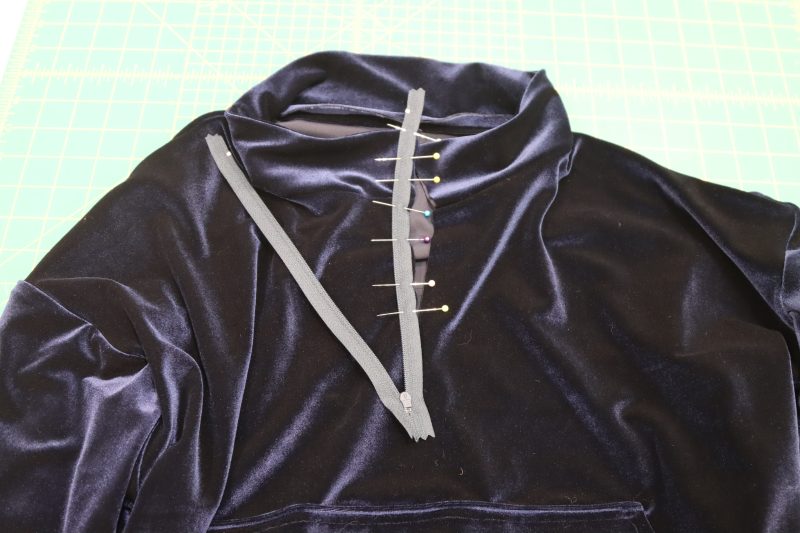
- Pin the raw edge of the collar to the neckline of the top, making sure the ends of the collar line up with the slit for the zipper in the front of the top.
- Sew the collar to the neckline of the top, right sides together, being sure to leave 1 inch of fabric unsewn on both ends of the collar by the slit for the zipper (to help you picture this in your head, we’re leaving this gap so that we can tuck the zipper tape into the folded edge of the collar.
Step 12
ZIPPER
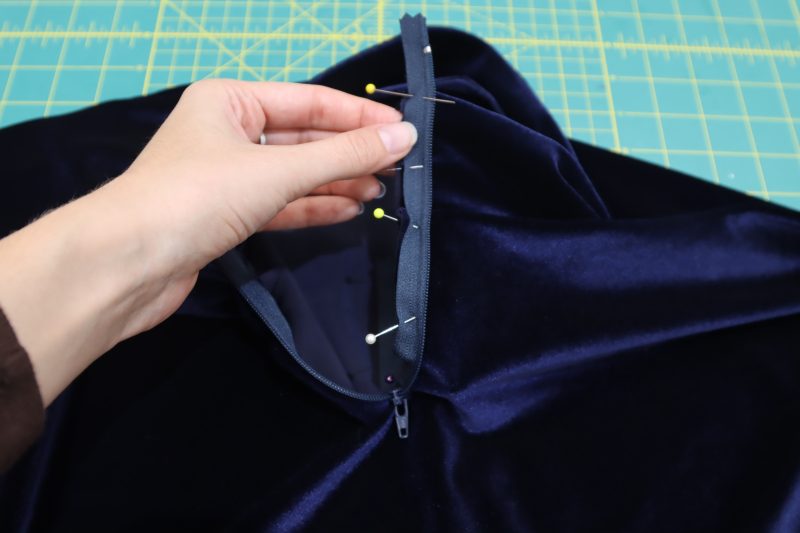
- Place the right hand side of the zipper against the right hand side of the slit, right sides together, and pin.
- Hint: be sure that the top of the zipper is ONLY pinned to the FRONT layer of the collar. We are not sewing the zipper to both layers of the collar, just the front. Trust me, it will make sense in a second.
- Sew the right hand side of the zipper down.
- Pin the left hand side of the zipper to the left hand side of the slit, making sure the zipper pull will be facing the outside of the top.
- Sew the left hand side of the zipper to only the FRONT layer of the collar.
- Fold and pin the back layer of the collar so that the raw edge is encased on the inside of the collar piece.
- Topstitch around the entire zipper to close the ends of the collar and hold the zipper flat.
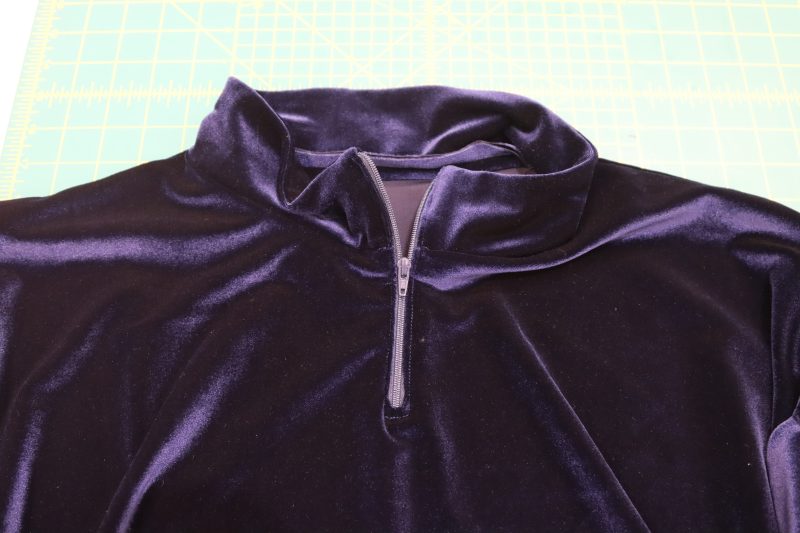
Sewing Success: The Finished Tarrytown Tracksuit
Share this post with a friend (or two!), download the Tarrytown Tracksuit free sewing pattern, and show us which fabrics and colors you choose, using the hashtags #MoodTarrytownPattern & #MadeWithMood—and don’t forget to tag us @MoodFabrics, too.


Free Sewing Pattern Inspiration for Your Next Project
With 450+ free sewing patterns and counting, your opportunities for sewing with Mood are endless!
We hope you had as much fun sewing this tracksuit pattern as we did! As always, we want to hear from you—share your thoughts and comments below and let us know where you’ll be wearing the Tarrytown Tracksuit free sewing pattern!
Tip toed in on 1st pattern I just had to have after buying fabric over the years from MOOD. Then I noticed the Emilia top. Needed a smidgen of help & reply & follow up was Flash Gordon fast! Super pleased with customer care!
Is there a seam allowance in the patterns?
All patterns include 1/2 inch seam allowance.
what if I want to make the pants low-mid rise? do I just shorten the top, taking my hip width into consideration?
That’s correct! All you have to do is shorten the top of the pants and make the waistband a bit wider to fit around the wider part of your hips.
Hermoso
The pattern is great, exactly what I wanted. My only concern is the collar construction. In the examples the fabric appears too drapey to support the zipper of the pullover, so the zipper stands up while the rest of the collar collapses instead of holding a nice shape. Is there a way to prevent this or improve the structure of the collar?
You can always use knit interfacing on the wrong side of the collar (knit interfacing stretches a little bit with the fabric, unlike woven interfacing).
Hi. Do you offer this pattern or other patterns as projector files?
Unfortunately we only offer 8.5×11 print format with the layered pattern sizes, but we really appreciate feedback like this to help us prioritize new additions to the blog in the future. This is definitely something we’re talking about and planning.
I didn’t see a step in the directions for the slit for the zipper. What is the length of the slit that needs to be cut?
Hey Gretchen! There is a marking on the paper pattern that says how low the slit for the zipper is supposed to be cut after you cut the front of the sweatshirt on the fold.
What height are the pants drafted for and if we need to add/remove length where should it be done?
I believe our patterns are drafted with a standard 28 inch inseam. The sample that the model is wearing has a longer inseam because she’s taller. If you’re taller or petite, you can always extend or shorten the hem.