
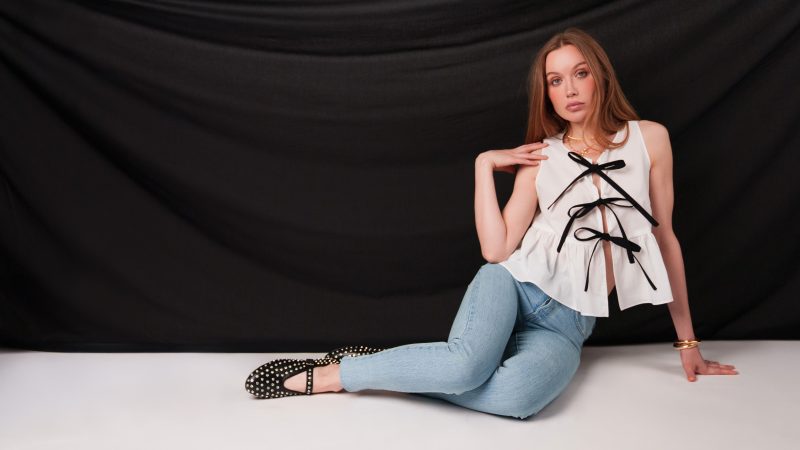
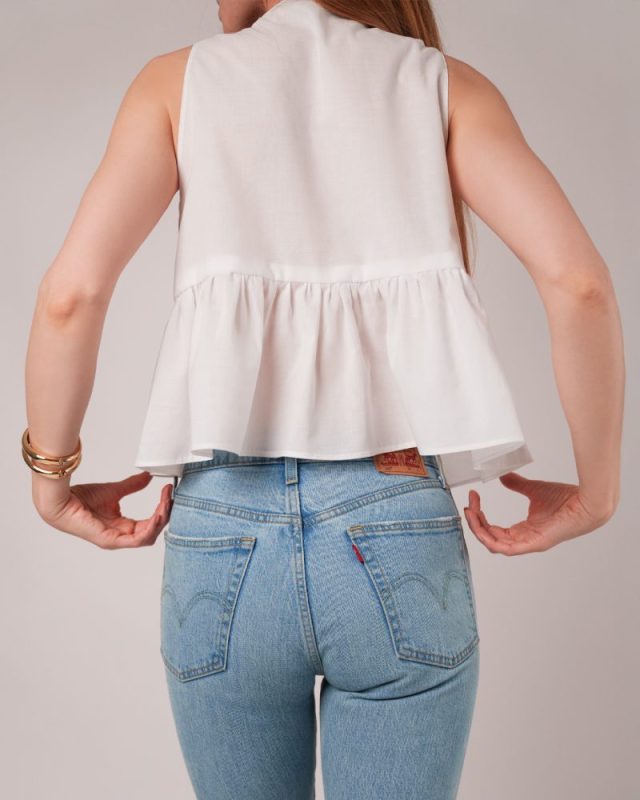
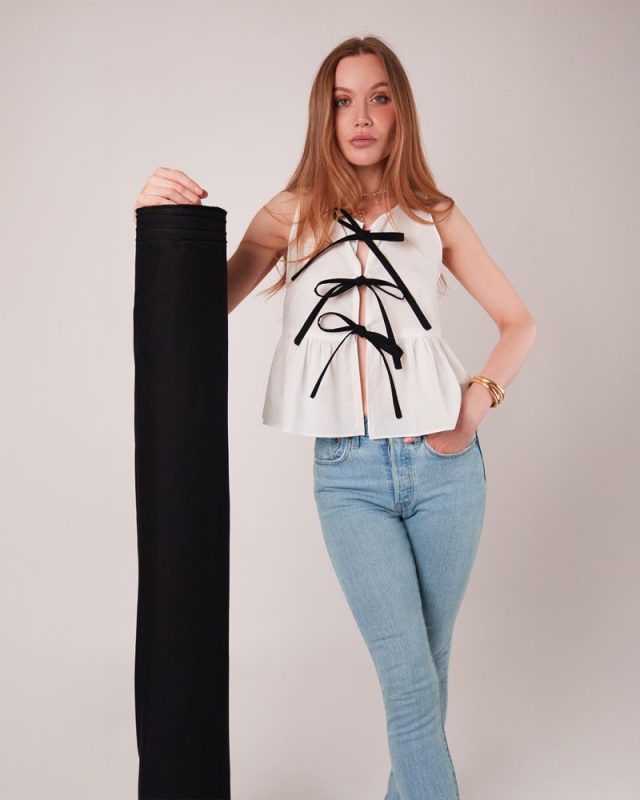
Capture your coquette dreams with every stitch of the Rosette Tie Front Top free sewing pattern, a chic free sewing pattern that’s as fun to wear as it is to make. This peplum top blends delicate details with a flattering silhouette, making it a versatile staple for warm-weather days, garden parties, and spontaneous outings.
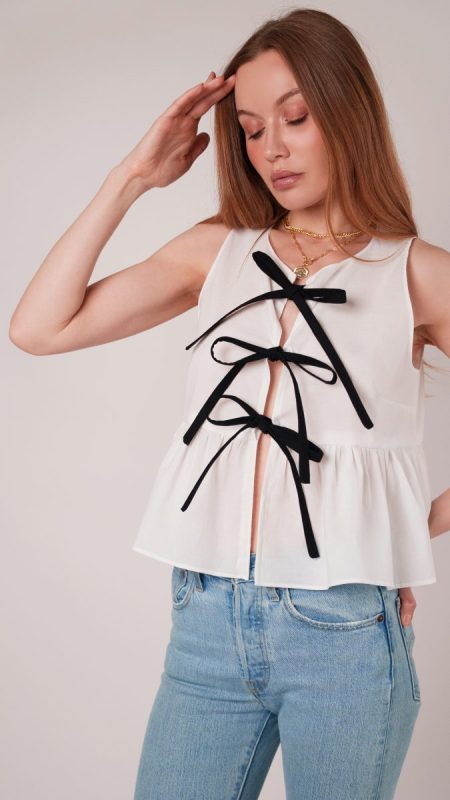
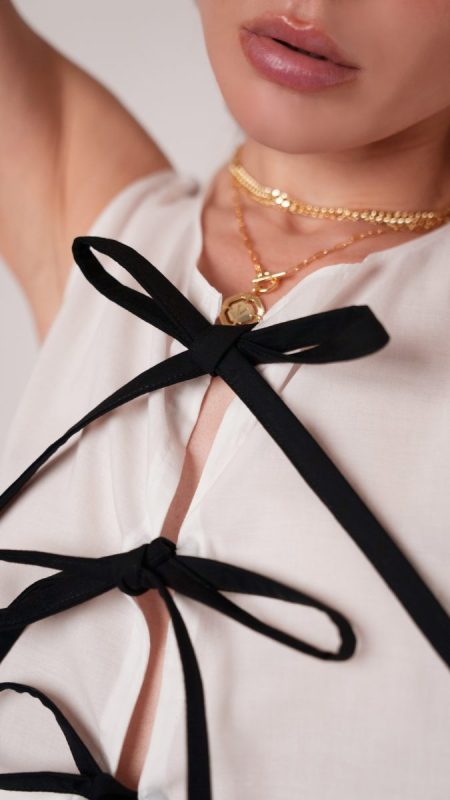
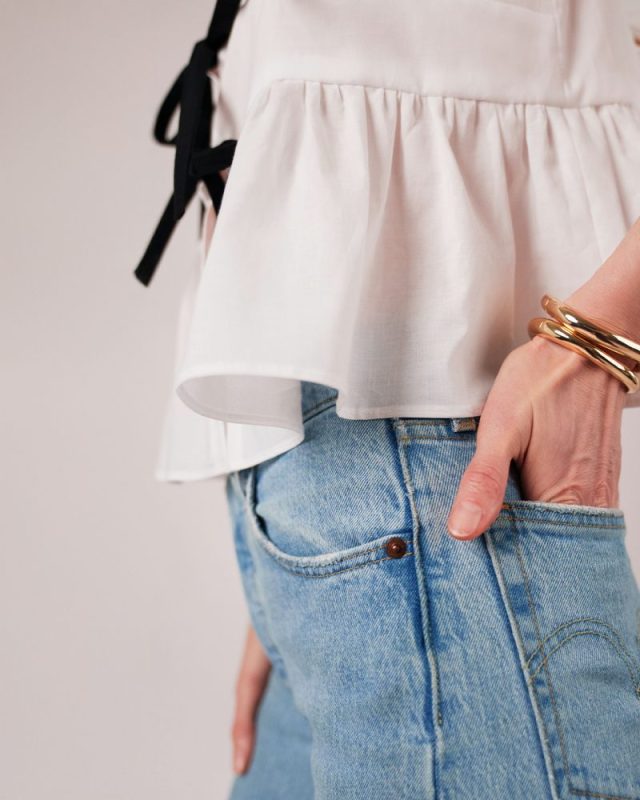
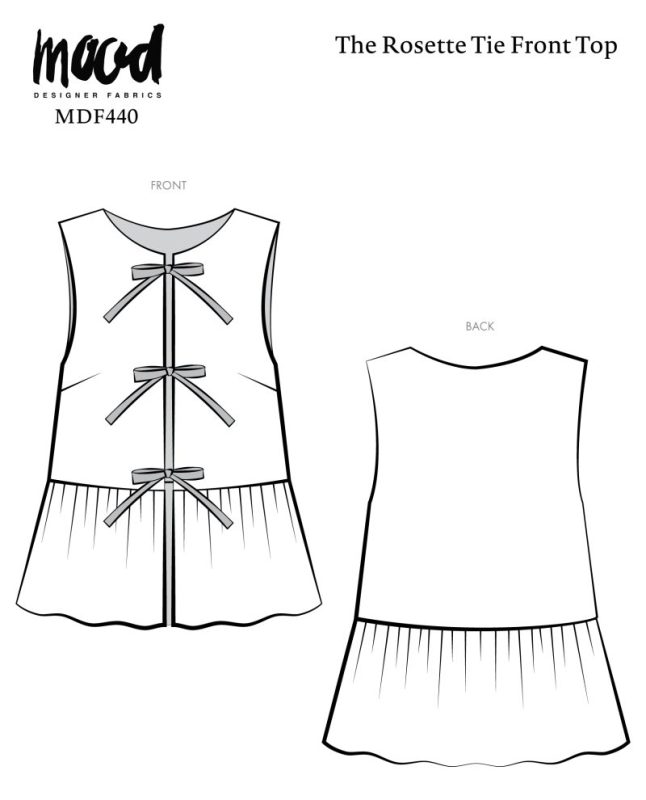
The sleeveless top stands out with the whimsical focal point of its bow-tied front closure, offering an adjustable fit and creating the sweetest bow ties right at the center front. A gathered peplum adds graceful volume and movement, while the open neckline and bare shoulders offer the perfect balance of romance and refinement.
Crafted from airy cotton voile, this fabric feels whisper-light on the skin and flows beautifully with every step. Cotton voile’s breathability and natural softness make it an ideal choice for this design, keeping you cool and comfortable on sun-soaking days while offering enough structure to maintain the top’s signature shape. It’s easy to sew, easy to wear, and endlessly wearable.
From soft solids to subtle prints, the Rosette Tie Front Top invites you to create your own look. Keep it minimalist in a neutral tone, or experiment with vibrant patterns to make it your own. Pair it with high-waisted jeans, linen trousers, or your favorite skirt for a look that transitions seamlessly from daytime adventures to evening gatherings. However you style it, this design is sure to become a favorite for sunny days and relaxed moments.
Ready to tie your look together? Our step-by-step sewing tutorial guides you through every detail, from precise peplum gathers to perfectly finished straps. Browse our collection of lightweight cotton fabrics and sewing notions to get started—because every handmade favorite begins with the right materials. Sew the Rosette Tie Front Top and let your style bloom!
Essential Materials & Sizing Guide for the Rosette Tie Front Top
Here is the breakdown of what knowledge and materials you need for creating your very own tie front top! We’ve got you covered with the recommended materials we used—if you want to follow along exactly—as well as a curated list of alternative fabric recommendations if you want to customize your own version. The Rosette Tie Front Top free sewing pattern download includes technical drawings for seam and silhouette visibility, plus a size chart to help you find your perfect fit!
Purchase Products Used Below:
Quantities indicated are for sewing a size small. Toggle the ‘SHOP THIS LOOK’ box to find quantities for other sizes.
- 1.5 yards of Cotton Voile – White – Mood Exclusive Farley Collection
- 0.5 yards of Cotton Voile – Black – Mood Exclusive Farley Collection
- 0.5 yard of Black Hot Rolling Non-woven interlining and fusible
- 1 spool of Gutermann Sew All Thread 250m – 20 White
- 1 spool of Gutermann Sew All Thread 100m – 10 Black
- MDF440 – Rosette Tie Front Top Sewing Pattern (Free download below!)
Alternative Fabric Recommendations:
The Rosette Tie Front Top is best suited for lightweight fashion fabrics.
Download Your Free Sewing Pattern
Submit your name and email in the form below to receive the Rosette Tie Front Top free sewing pattern directly in your inbox. Mood Sewciety Patterns will send your free download via email with the subject line: ‘Your Free Download from Mood Sewciety’ (in PDF format for A4 and letter-size printing).
Find Your Perfect Fit
The size guide below is based on the suggested design & wearing ease for this style. You can choose the size according to your desired finished garment measurements, blending between sizes as needed. Measure the printed patterns to make sure the dimensions are according to the desired fitting and adjust—if needed—before cutting the fabric. For best results, sew a test garment in a similar fabric to adjust your pattern.
Note: Measurements may vary after adjustments. If using non-stretch fabrics, reference the approximate finished garment measurements chart to choose your size.

How To Sew The Rosette Tie Front Top
Sew with a 1/2″ seam allowance for all seams unless otherwise specified.
Step 1
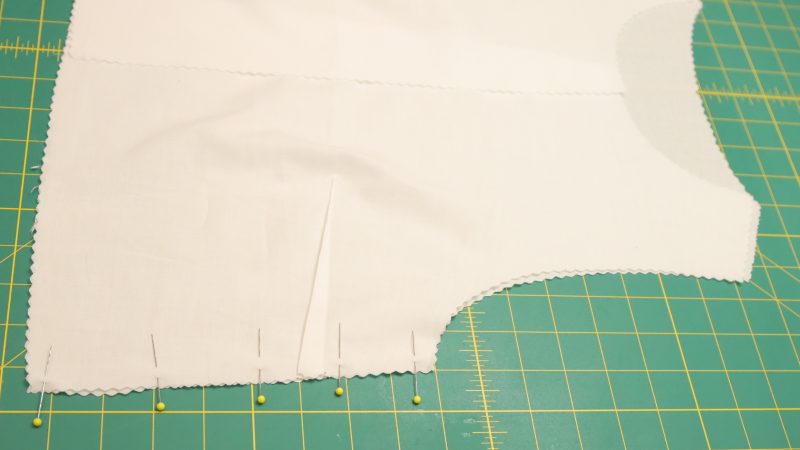
FRONT DARTS
Sew the darts on each side of the front.
Step 2
SIDE SEAMS
Sew the front & back together at the side seams.
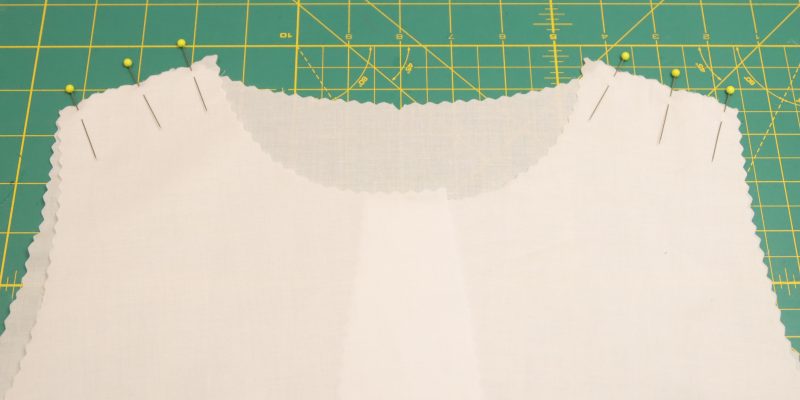
Step 3
SHOULDER SEAMS
Sew the front & back together at the shoulder seams.
Step 4
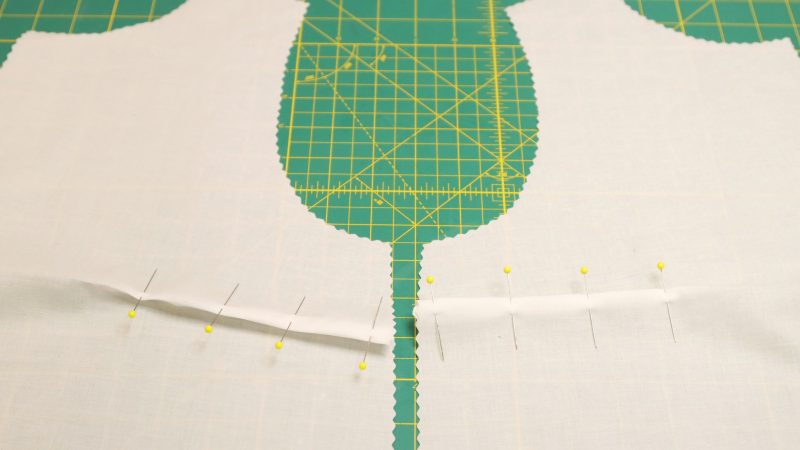
PEPLUM
Sew the front & back pieces of the peplum together at the side seams.
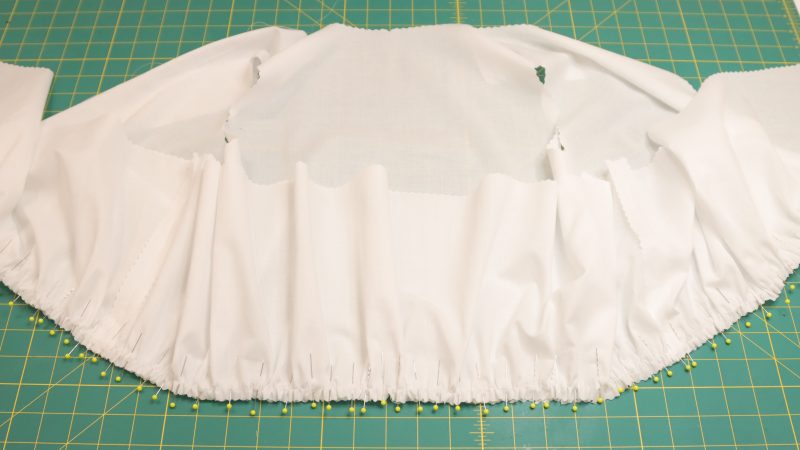
Step 5
ATTACH PEPLUM
Join the gathered peplum to the top
- Create gathers at the top of the peplum with a basting stitch.
- Align the peplum side seams with the side seams on the top.
- Pin & sew the peplum to the top.
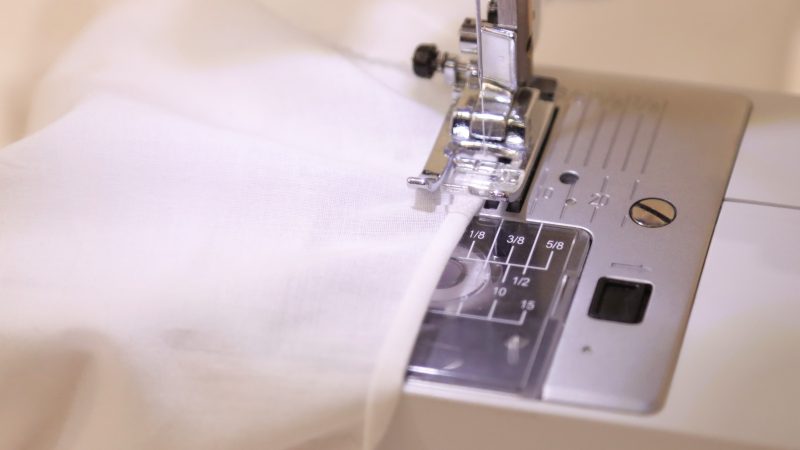
Step 6
HEM PEPLUM & NECKLINE
Finish the edges of the neckline & the bottom of the peplum with a 1/4″ double folded hem.
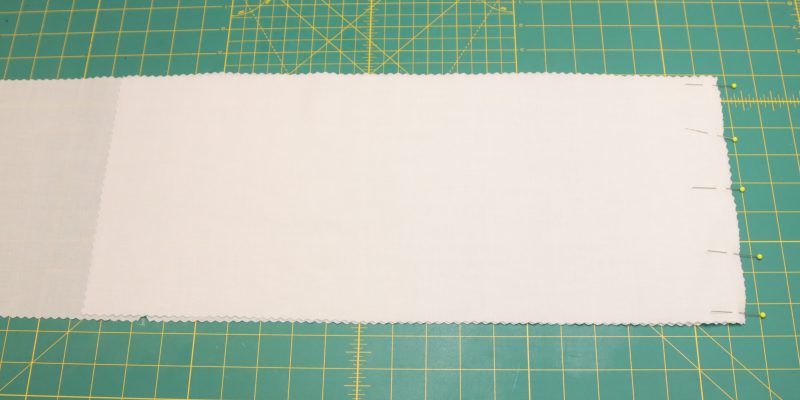
Step 7
FRONT FACING
Press the seam allowance on all sides.
Sew a 1/4″ doubled-folded hem at the top & the bottom of the front facing.
Step 8
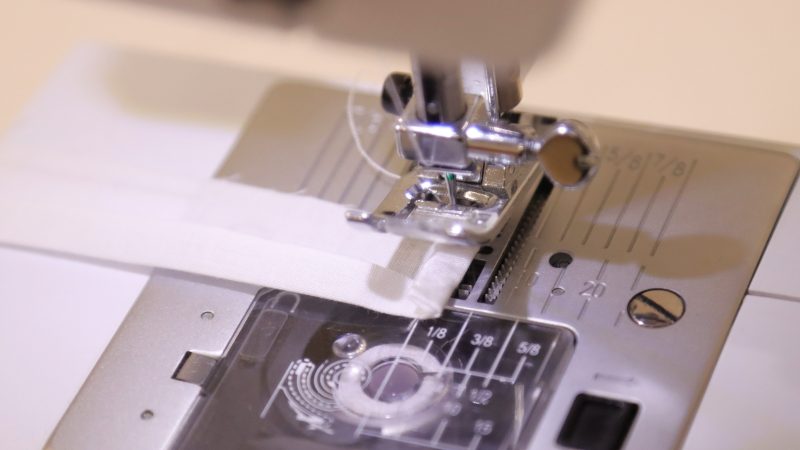
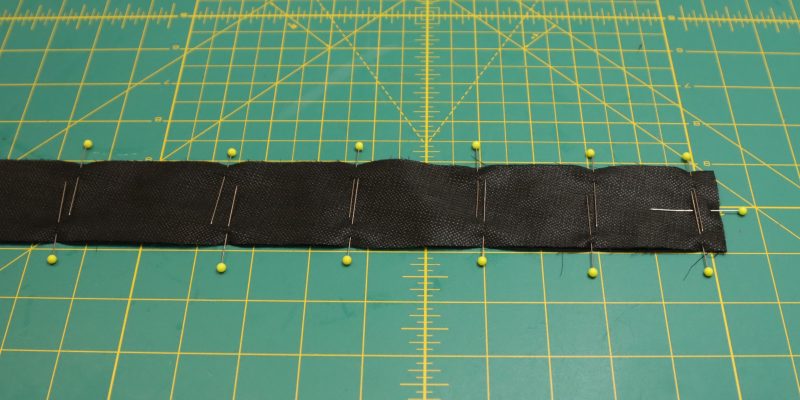
TIE STRAPS
Create 6 doubled-sided straps for the tie front closure.
- Interface one side of the strap for every pair. (6 out of 12)
- Sew 1/4″ around each side leaving one end open.
- Turn the strap right side out & press.
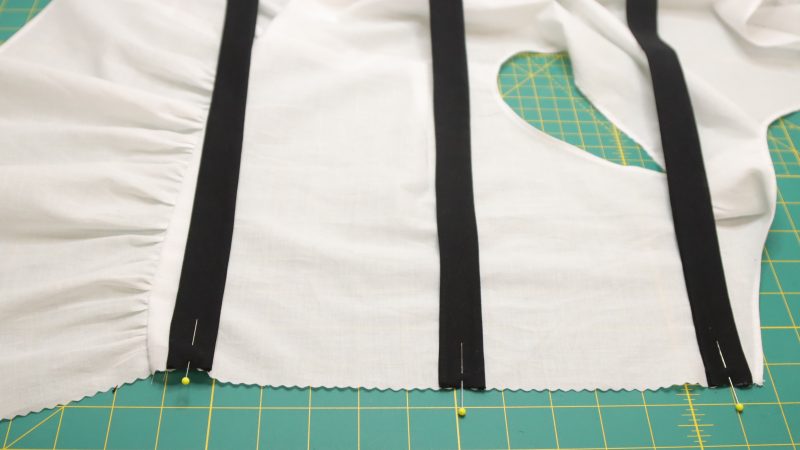
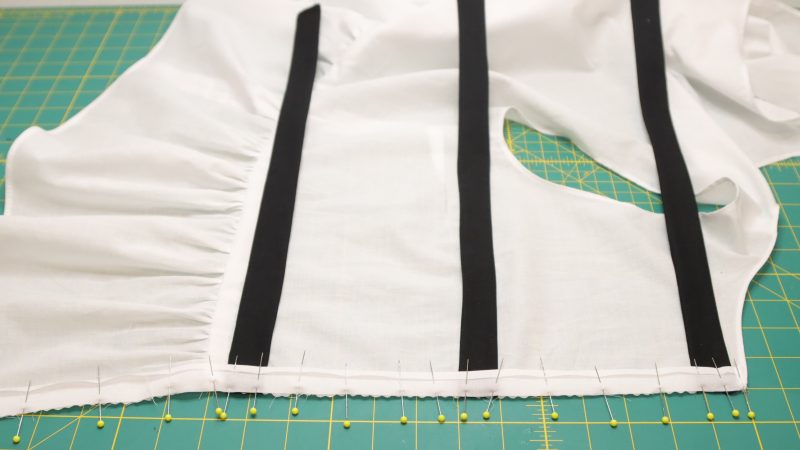
Step 9
ATTACH TIE STRAPS
Pin & sew the tie straps to the front with 1/8″ basting stitch.
(Repeat this step for the other side)
Step 10
ATTACH FRONT FACING
Pin & sew the front facing 1/4″ over the tie straps.
Step 11
FINISH FRONT FACING
Pin the other edge to the inside of the front & top stitch.

Step 12
FINISH ARMOLE EDGES
Sew 1/4″ double-folded hem around the armholes.
Sewing Success: The Finished Rosette Tie Front Top
We can’t wait to see your version of the Rosette Tie Front Top! Whether you choose cotton voile or poplin, or a shirting fabric, this pattern is ideal for beginners and a fun way to master new sewing skills!
Share this post with a friend (or two!), download the Rosette Tie Front Top free sewing pattern, and show us which fabrics and colors you choose, using the hashtags #MoodRosettePattern & #MadeWithMood.
I love this pattern! I am not able to leave the front open. I was thinking adding hooks and eyes may do the trick? Does anyone have any suggestions?
Thank you! The hooks and eyes would be a great addition to your project in order to secure the closure.
Beautiful! Thank you for the pattern
Thank you! You are very welcome. 🙂
I can’t wait to make this! Would it be possible to add sleeves?
Yes, you can simply download a sleeve pattern from one of our other free sewing patterns that contain sleeves, then sew add them tot he tie front top by sewing them around the armholes!
Omg finally a tie top! Now can we have the sleeves? Lol… i’m doing this one ASAP!
Yes! You can easily download a sleeve pattern from another free sewing pattern & add it to your tie front top!`
Looks like a fun project … Thanks!!!
Thank you, we hope you enjoy and have fun with this project!
Espectacular gracias por compartir el patron
De nada, es un placer!
For the mesurements. My bust is 40 but i dont know if to choose the finished garment messurement or go for body messurements. what should i choose.
Hi Luz,
I recommend going with the size associated with your body measurements. This blouse is meant to be loose fitting, so the finished garment measurement will be much bigger than your body measurement, which is intentional.
The front shoulder and the back shoulder are not the same size. Is that right?
I’m referring to size XS.
Thanks a lot.
Hey Nina, they might be off by 1/2 inch or so, but I recommend that when lining up the shoulder seam to sew, make sure that the part of the fabric where you’re going to sew your seam (1/2 inch away from the actual raw edge of the shoulder) lines up on the sides. It is more important that this part lines up than the actual raw edges, because those will be hidden so it’s okay if there is a little overhang.
One idea would be to include a sleeve in the pattern.
Great idea! As an alternative, please feel free to download just the sleeve pattern that you prefer from another one of our free sewing patterns. You can cut the sleeve out in the same fabric and sew it onto the Rosette Tie Front Top!
Is there any possibility of Mood Sewciety offering layered pdf pattern in the future?
Hi! Thank you for your interest! At the moment, our patterns are only available in A4/Letter size, but we’ve noted your request for a layered format as we’re always exploring updates. Can’t wait to see what you create! ✨
I made this top this weekend and I love how beautiful and breezy it is. I used a cotton voile and some decorative ribbon I had on hand. I followed the directions and it was incredibly beginner friendly. I do recommend that those of us that know how to pattern to make their own facings for the neck and armholes. The rolled hem, that is suggested, is an easier finish but in my experience I had trouble with it lying flat and twisting. For those that cannot pattern, I recommend bias tape for an easier flat finish. My suggestions aren’t necessary but it is what I will do for myself when I make another.
Thank you Mike for sharing this great summer top! I can’t wait to wear it!
You are very welcome! And thank you, we appreciate your suggestions as there are different methods to get a cleaner finish like a facing or a bias tape!
thanks
You’re very welcome!
This was such a cute, quick pattern to make as my first attempt with printing a pattern, and my first time doing French seams.
I used cotton with a bow pattern, and bias tape for the bows (because Im lazy and it matched the bows on the fabric perfectly).
My daughter is in love with her new shirt (I used the hashtags on my fb post).
Thank you so much, that is so great to hear! We hope you continue to enjoy from our free sewing patterns! 🙂
Hi, what height is your model? I’m under 5 feet and would like to know how much I have to adjust the pattern.
Thanks.
Hi Alyssa
Thank you for your comment. She’s 5’10”, her front bodice length (from shoulder to waist) is about 18″, and she’s wearing a size S.
Muy bien explicado, excelente diseño me encanta muchas gracias!!
I’m going to make this but add a modesty facing between openings so I can wear without under shirt love this but wish it had sleeve options!
Great idea! Tag us on social media with #MadeWithMood when you finish your garment. We would love to see!
I made this top twice, once to test the sizing and once for real. The test version is wearable, also. I was afraid this would run small, but it is true to size. It is an easy pattern. I lined both versions, which is just as quick as facings and cleaner (my opinion). Here is a picture of the final version. The pants are the Louise pants, also a free pattern and a very good one, quick and excellent fit.
I made the Rosette top twice. It was fun to make and relatively easy. The pattern fit me at my regular size. I have a few pictures of the top along with the Mood pattern, Louise pants. Where can I post these pictures?
Hi Deborah!
Feel free to tag us on social media with #MadeWithMood so we can see your creation!
Hi, I love the pattern so far! I am struggling to understand step 7 though. Any help would be greatly appreciated.
Thank you!
Hi Amelie! This step is just saying to finish the raw edges of the front facing pieces.
Hi, I’m a bit confused about the front facing. It doesn’t seem like the picture matches what the instructions say 🙁 Could you direct me to more information on how to do this? Ty!
Hi Alexa! The the front opening of the blouse should be a sandwich with the blouse front on the bottom (right sides up), the ties in the middle (with the long tails of the ties laying on top of the blouse front, not sticking out), and the tie facing on the top (right sides down). You will sew the sandwiched pieces with a 1/2 inch seam allowance from the front opening and then open the sandwich up and iron the tie facing towards the inside of the blouse so that its hidden. Let me know if this explanation helps!
Hi!
The back piece pattern says “cut two mirrored” … Do we need two or is that an error?
Good catch Kaitlin. If you look at page 3 of the printed pattern, it says (B) BACK, CUT ON FOLD, but this does not match the instructions on the actual pattern piece. The back pattern piece should be cut on fold. Happy sewing!
Fun pattern and pretty easy to make! I sized up which wasn’t necessary as it has a loose fit. If I made it again, I would follow the measurements for my usual size, and take some of the length off – I’m short so the pattern as written looks long on me. The only confusing part was the facings – I ended up guessing on how to put them together and it ended up fine. Finally, I used bias tape for the ties because I was too lazy to make and turn ones. Thank you!
great pattern! is it possible to use a velvet fabric? I wish I can use this this winter!
Yeah you could use velvet for this! I just recommend using a non-stretch velvet.
Can’t wait to try this
Thanks
Thanks for the free pattern
Thanks for the pattern
Thanks for this pattern
I love your patterns…
Thanks for the easy patterns
I live the patterns and want to try them
Retired
Have wanted to learn sewing
Thank you
I’m a beginner
Thanksss
Thanks I appreciate it
I cannot wait to make this!
I will like to get the pattern.
I really wanna get into this top
Thanks for the pattern
I’m teaching my granddaughter how to sew and she liked this pattern, very demure. 😉 Directions very beginner friendly.
I would love to get this pattern. Can’t wait to get started!!
Hi Sharon! You can download the pattern for free by entering your name and email address into the field under “Download Your Free Sewing Pattern”. Then, check your email inbox (and your spam, just in case) for an email from Mood Sewciety Patterns with the subject line “Your Free Download from Mood Sewciety”. Scroll down to the blue link under the title of the email and click on that. That button will redirect you to the webpage with the PDF of the pattern, which can be printed on 8.5×11 paper on your printer at home. Let me know if you need any additional help accessing the pattern!
Im excited to try this pattern
How would you add a modesty panel to this?
I can’t wait to try this one!
I just finished making this top today. It’s so easy! I ended up shortening the ruffled section as I have a shorter torso and changed the ties to ribbon. I’ll definitely wear it again and again! The fabric and ribbon I used was thrifted so I think the top cost about $5. I’ve put it on my insta @ruby.g.artist.
Thanks