
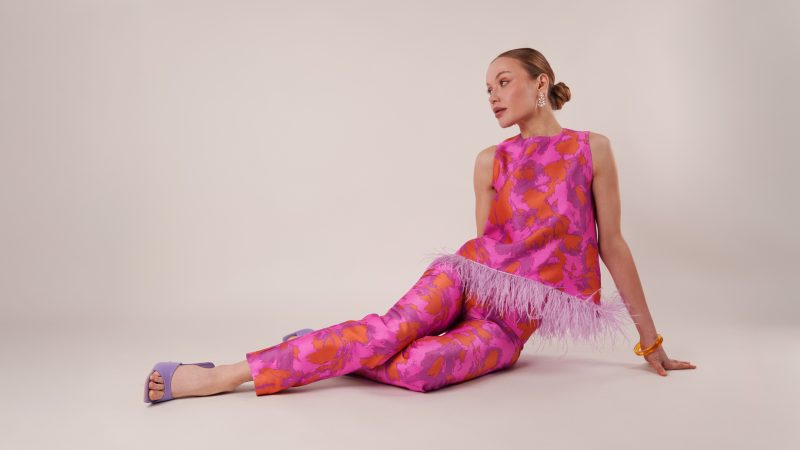
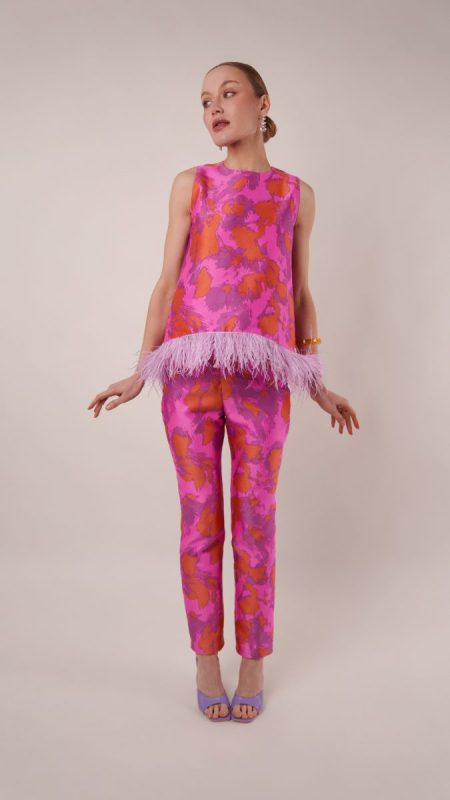
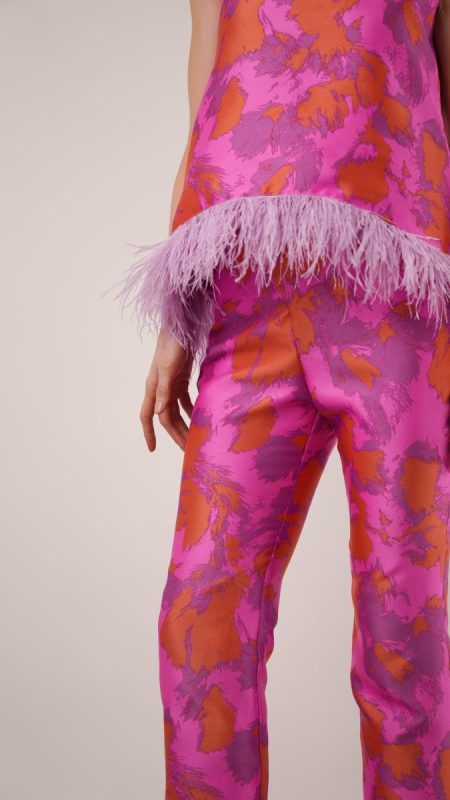
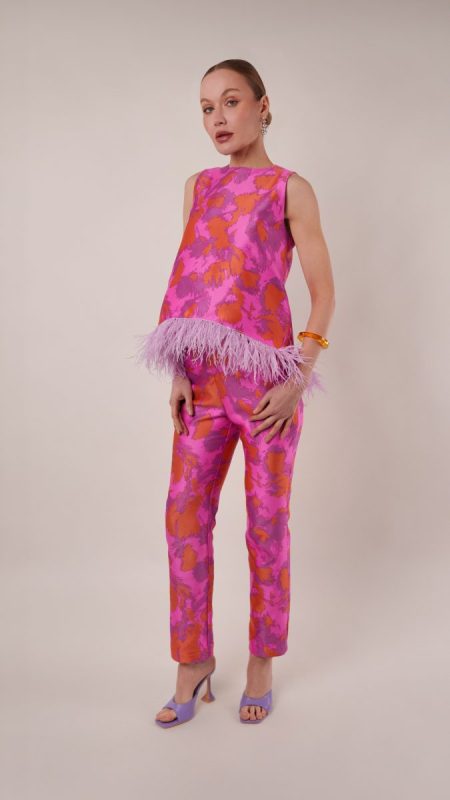
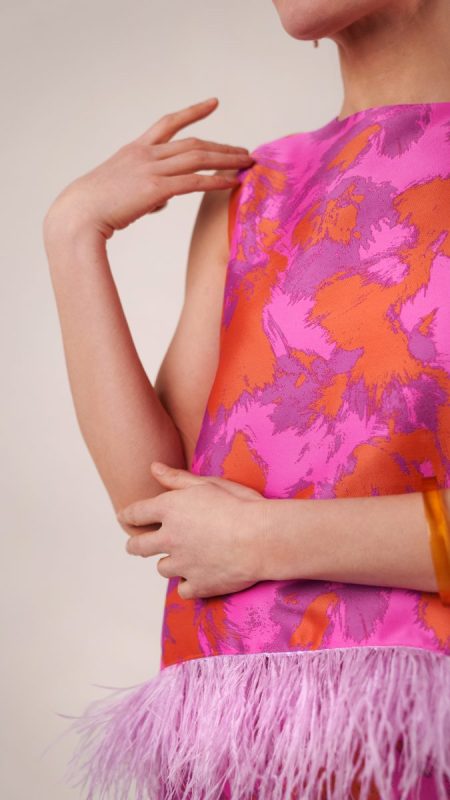
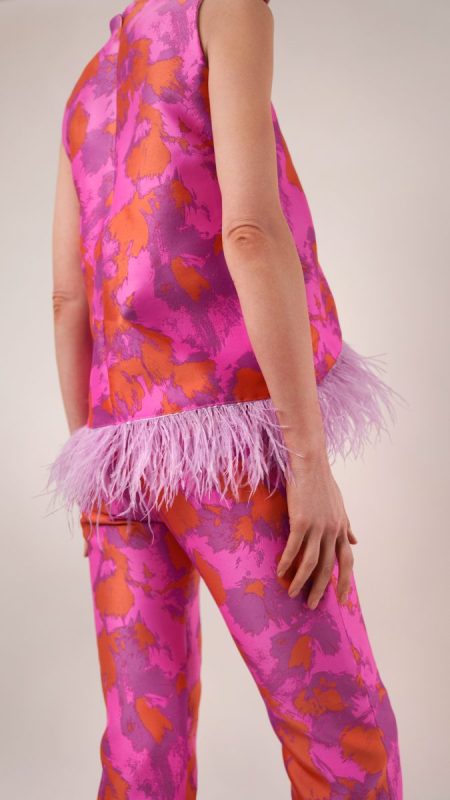
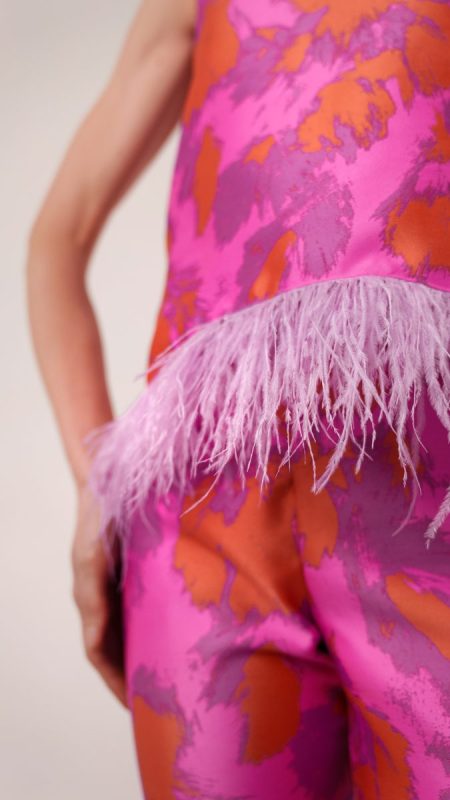
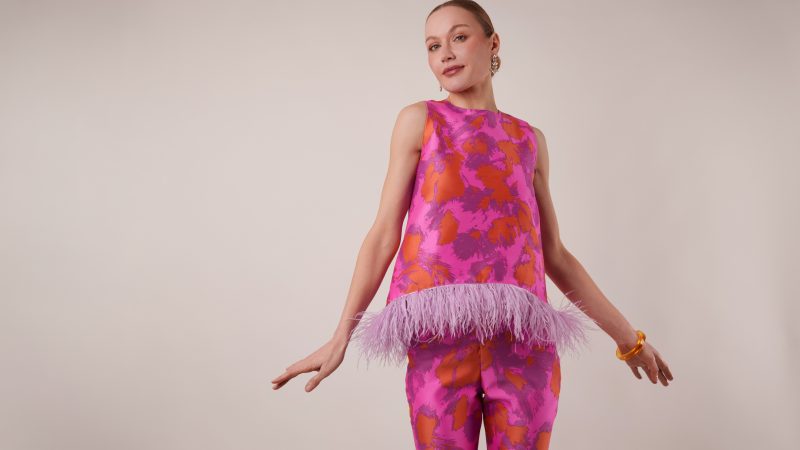
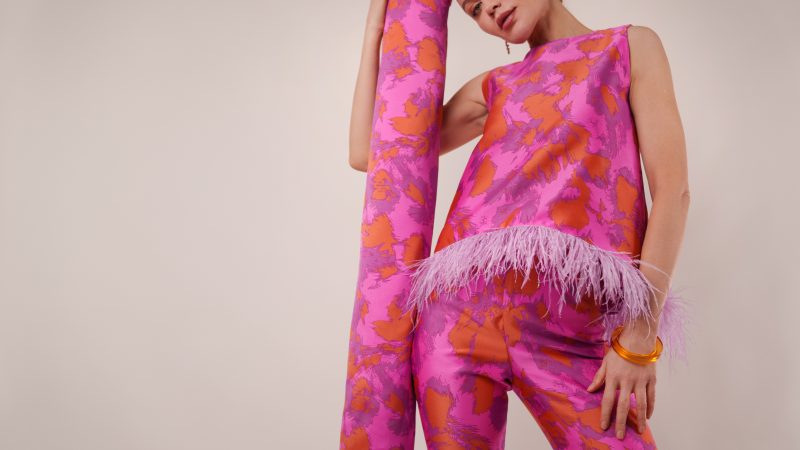
Bold, vibrant, and totally glam, the Chelsea Brocade Cigarette Set is your invitation to step fully into maximalism. Crafted from one of the many richly woven, color-saturated brocades available at Mood, this set celebrates texture, structure, and statement-making style in equal measure. Finished with a delightfully dramatic, color-coordinated ostrich feather trim, it’s exactly what you need in the back of your closet for your most glamorous fashion moments.
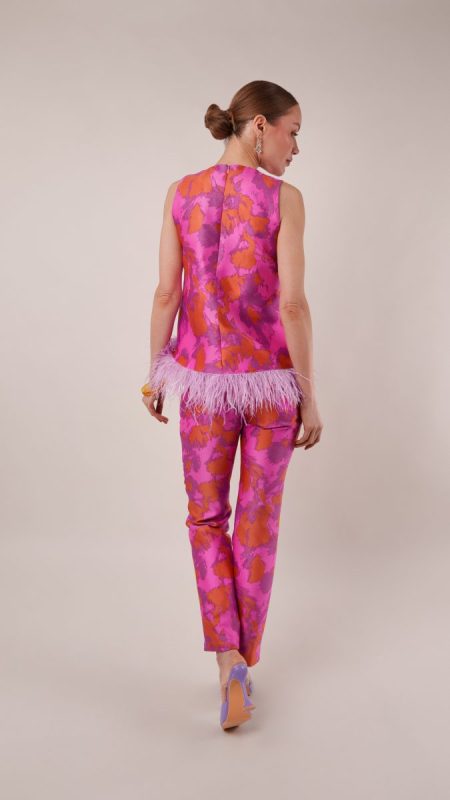
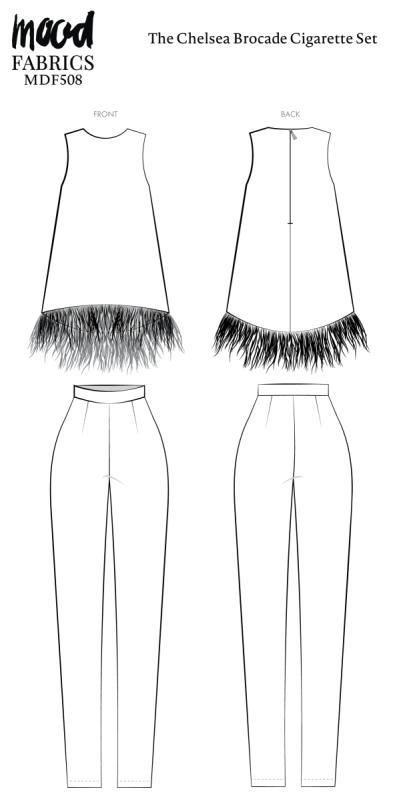
The sleeveless top features a clean, sculpted silhouette with a zipper closure at the center back neckline for a polished finish. Fully lined for comfort, it keeps the brocade smooth against the skin while maintaining its crisp, architectural shape. The feather trim adds movement and playful contrast, creating a striking balance between tailored refinement and exuberant flair.
The coordinating cigarette pants are cut in a perfectly slim, cropped silhouette—sharp enough to feel modern, yet understated enough to let the texture and trim do the talking. Designed to hit just above the ankle, they’re ideal for showing off an equally colorful pump.
Perfect for any spring occasion that calls for a little extra drama, the Chelsea Brocade Cigarette Set is made to be styled boldly. Pair it with chunky statement jewelry, saturated heels, and a fearless attitude. After all, when you’re wearing brocade and feathers, subtlety is simply not the point.
Essential Materials & Sizing Guide for the Chelsea Brocade Cigarette Set
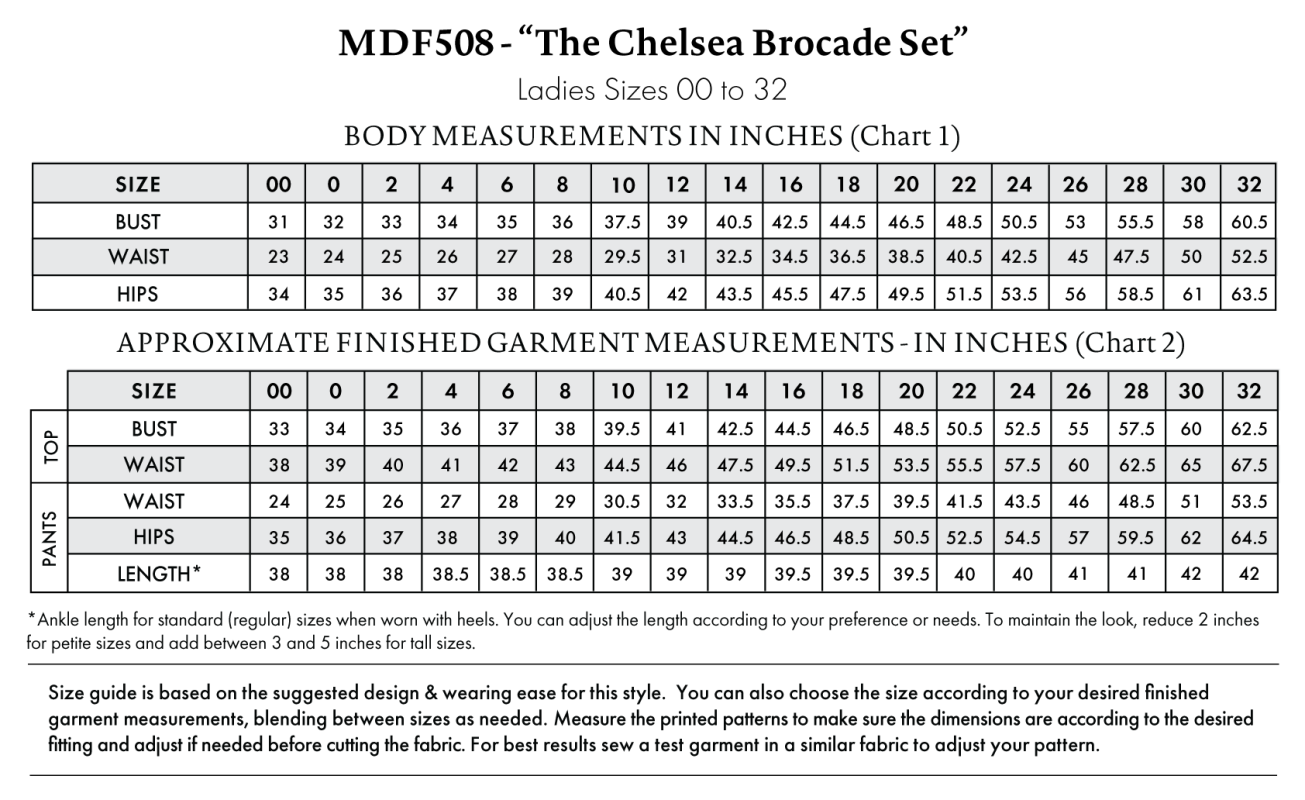
Continue reading for a breakdown of what knowledge and materials you need for creating your very own cigarette set! We’ve got you covered with the recommended materials we used—if you want to follow along exactly—as well as a curated list of alternative fabric type recommendations if you want to customize your own version. The Chelsea Brocade Cigarette Set free sewing pattern download includes technical drawings for seam and cigarette set visibility, plus a size chart to help you find your perfect fit!
Purchase Products Used Below:
Quantities indicated are for sewing a size small cigarette set.* Toggle the ‘SHOP THIS LOOK’ box to find quantity estimates for other sizes.
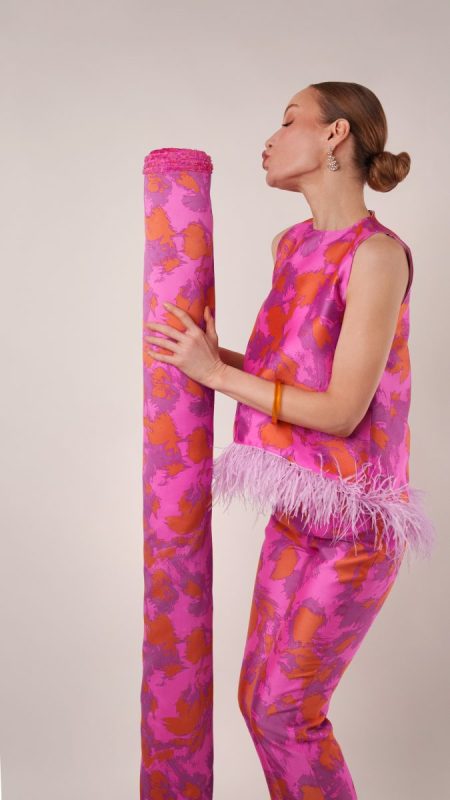
- 3 yards of Luxury Polyester Brocade – Orange, Pink and Orchid Purple Abstract Brushstrokes
- 3 yards of Stretch Polyester Twill Lining – Bridal Pink – Josephine Collection
- 3 yards of Ostrich Feather Fringe Trim 5″ Single Ply – Lilac – Aviana Collection
- 1 each of Transparent and Hot Pink Swirl 4-Hole Low Convex Button – 28L/18mm
- 1 each of Invisible Zipper 24″ by YKK – 042 Purple Pink
- 1 each of Regular Zipper 9″ by YKK – 042 Purple Pink
- 1 each of Gutermann Sew All Thread 250m – 913 Pink
- MDF508 – Chelsea Brocade Cigarette Set Sewing Pattern (Free download below!)
Additional Products Used:
*Quick Tip! The ‘SHOP THIS LOOK’ box defaults to full-yard quantities. To order an exact half-yard quantity for any fabric, simply use the decrease quantity button (-) to subtract by the half yard. Then click “ADD TO CART” to add all materials to your cart.
(Our system can only display full-yard quantities initially.)
Alternative Fabric Type Recommendations:
The Chelsea Brocade Cigarette Set sewing pattern is best suited for medium weight fashion fabrics. Explore other fabric types or colors from our featured collections for your cigarette set with the links below.
Fabric Collections Used in this Post:
Download Your Free Sewing Pattern
Submit your name and email in the form below to receive the download link for the Chelsea Brocade Cigarette Set free sewing pattern directly in your inbox. Mood Sewciety Patterns will send your free download link via email with the subject line: ‘Your Free Download from Mood Sewciety – The Chelsea Brocade Cigarette Set’ (in PDF format for A4 and letter-size printing).
© MoodFabrics.com / MoodSewciety.com – Mass production, resale, or distribution of this pattern in any form is strictly prohibited.
Find Your Perfect Fit
The Chelsea Brocade Cigarette Set Sizing Guide is based on the suggested design & wearing ease for this style. You can also choose the size according to your desired finished garment measurements, blending between sizes as needed. Measure the printed patterns to make sure the dimensions are according to the desired fitting and adjust if needed before cutting the fabric. For best results, sew a test garment in a similar fabric to adjust your pattern.
Note: Always read all the instructions before cutting the fabric!
How to Sew The Chelsea Brocade Cigarette Set
The instructions provided below are designed to guide you through sewing the Chelsea Brocade Cigarette Set from start to finish.
3 Tips for Sewing with Brocades
⇒ Any raw edges that are going to be exposed to your skin or to the elements should really be finished with a zigzag stitch or a serger because brocade is known to fray like crazy.
⇒ I highly recommend lining these pants if you’re going to use brocade (like I did in the tutorial below), but if you’re using another material, you can decide whether or not they need to be lined.
⇒ If your brocade has a repeated pattern, be careful of that pattern placement when you’re cutting out your pieces.
Pattern Pieces & Fabric Cuts Needed
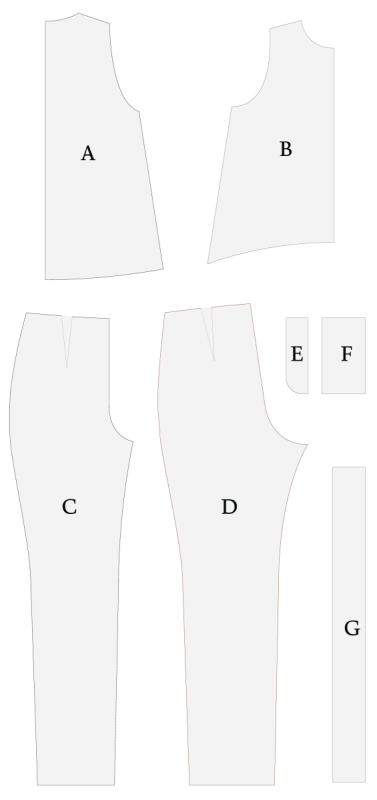
- (A) TOP BACK
- Fabric – Cut 2 Mirrored
- Lining – Cut 2 Mirrored
- (B) TOP FRONT
- Fabric – Cut 2 Mirrored
- Lining – Cut 2 Mirrored
- (C) PANTS FRONT
- Fabric – Cut 2 Mirrored
- Lining – Cut 2 Mirrored
- (D) PANTS BACK
- Fabric – Cut 2 Mirrored
- Lining – Cut 2 Mirrored
- (E) FLY
- Fabric – Cut 2
- (F) FLY SHIELD
- Fabric – Cut 1
- (G) PANTS WAISTBAND
- Fabric – Cut 1
Sew with a 1/2″ seam allowance for all seams unless otherwise specified.
HOW TO SEW THE CROPPED CIGARETTE PANTS
Step 1
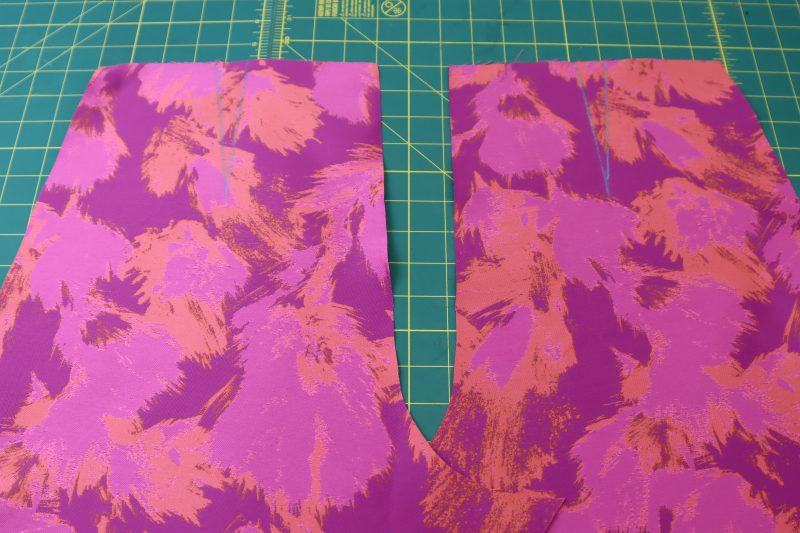
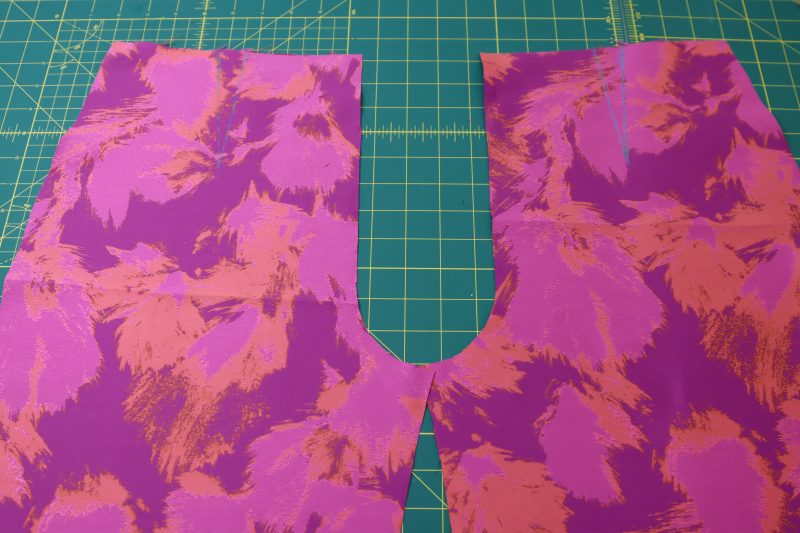
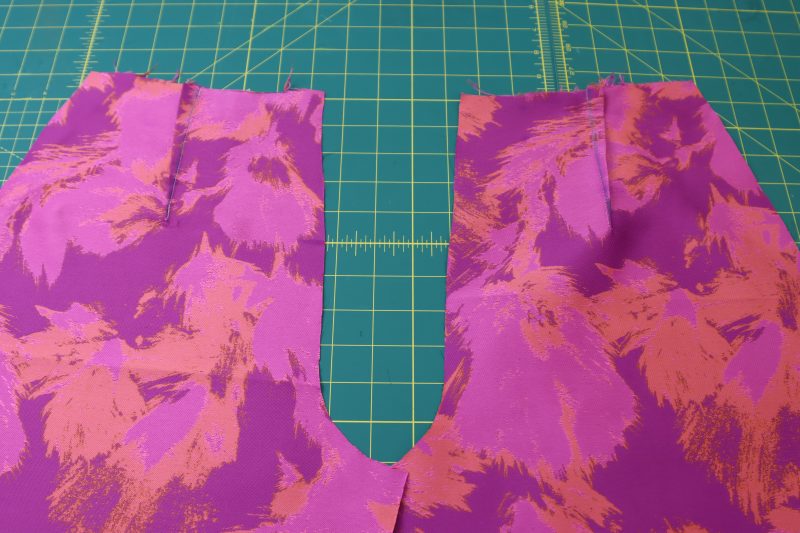
MARK DARTS
- Mark the darts on the wrong sides of the front and back pants pieces using tailor’s chalk.
Step 2
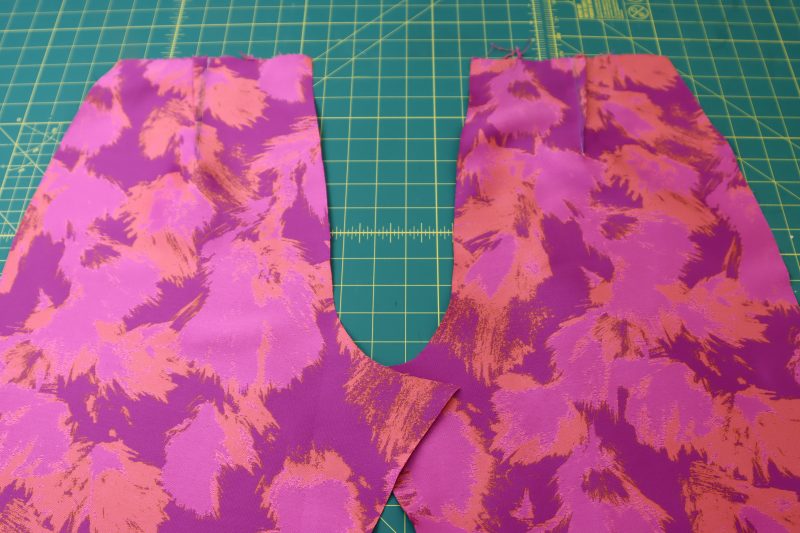
SEW DARTS
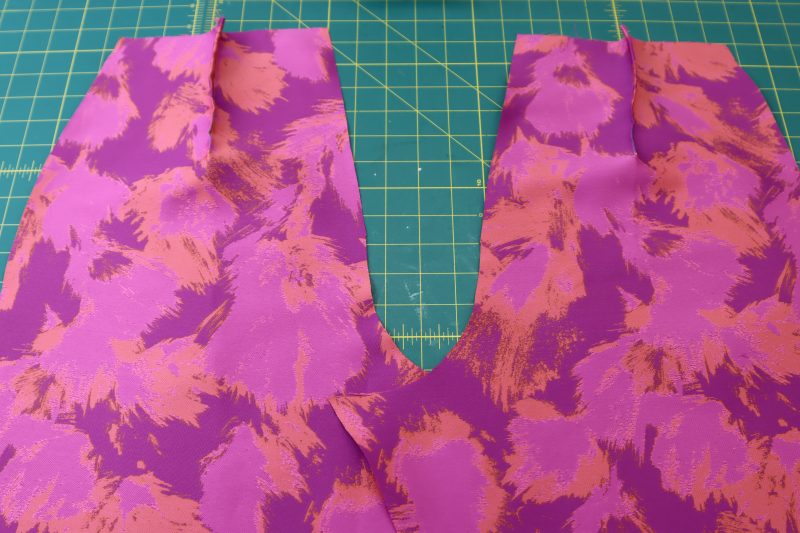
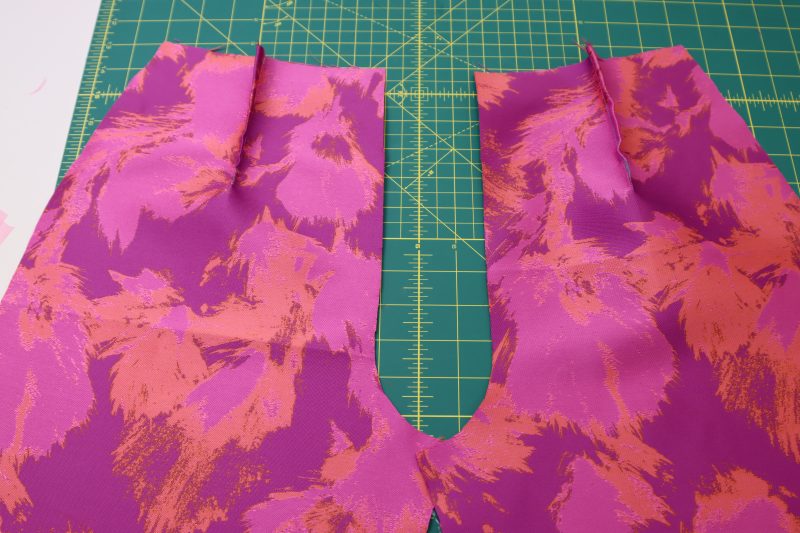
- Fold the fabric at the waistline right sides together to match up the chalk lines of the darts.
- Pin and sew along the chalk lines.
- Unfold both the front and back darts and press them flat toward the sides of the pant legs
Step 3
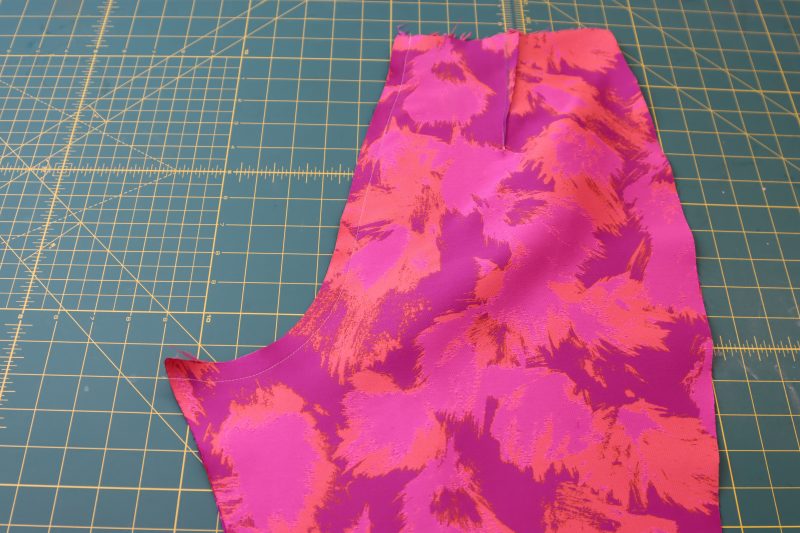
BACK CROTCH SEAM
- Place the two back pants pieces right sides together.
- Line of the back crotch lines.
- Pin and sew the back crotch seam.
Step 4
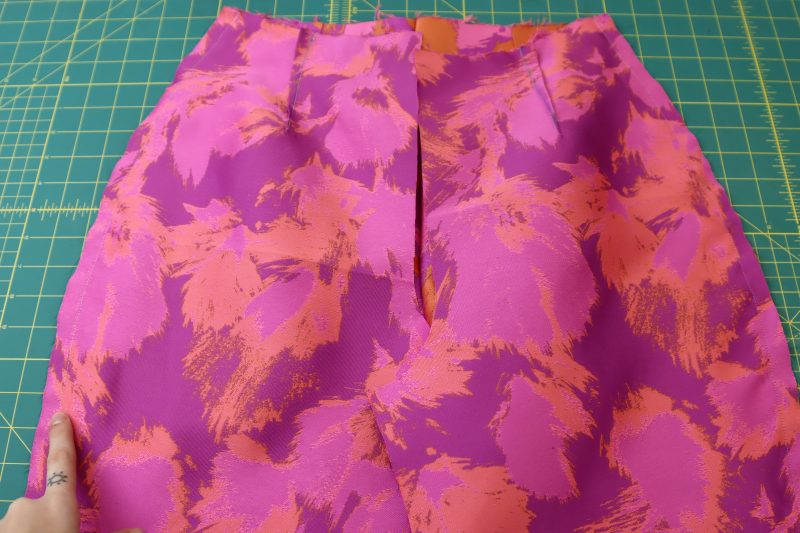
SIDE SEAMS
- Place the front pants on top of the back pants right sides together with the sides lined up.
- Pin and sew the front and back pants pieces together at the side seams.
Step 5
LINING
- Repeat the previous 4 steps but with the lining fabric.
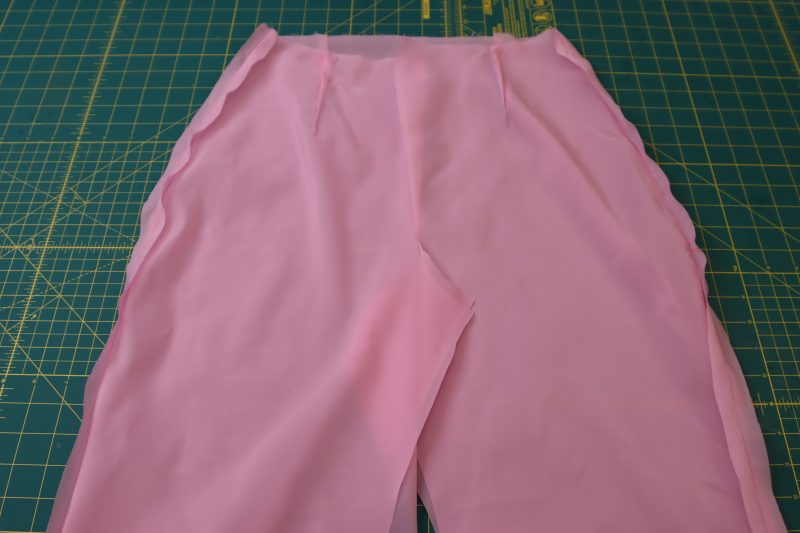
Step 6
WAISTLINE
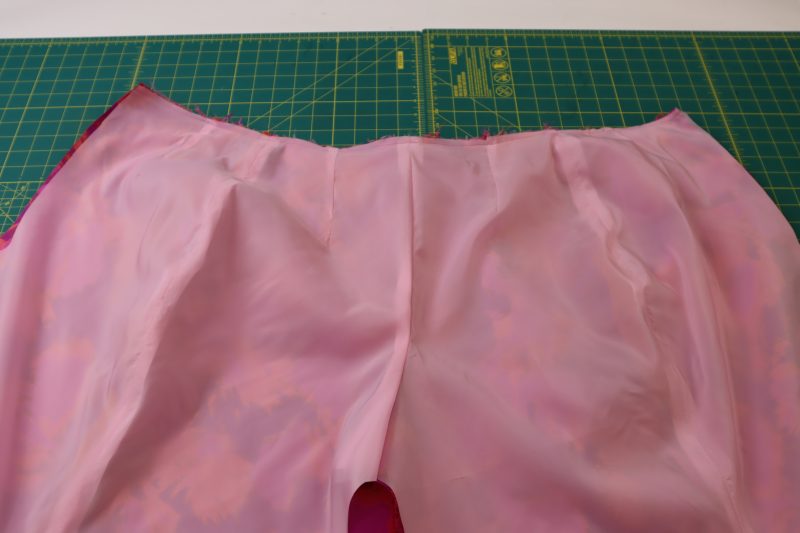
- Place the lining pants and the brocade pants wrong sides together with their waistlines lined up.
- Pin and sew the waistlines of the pants together.
Step 7
PREPARE FLY
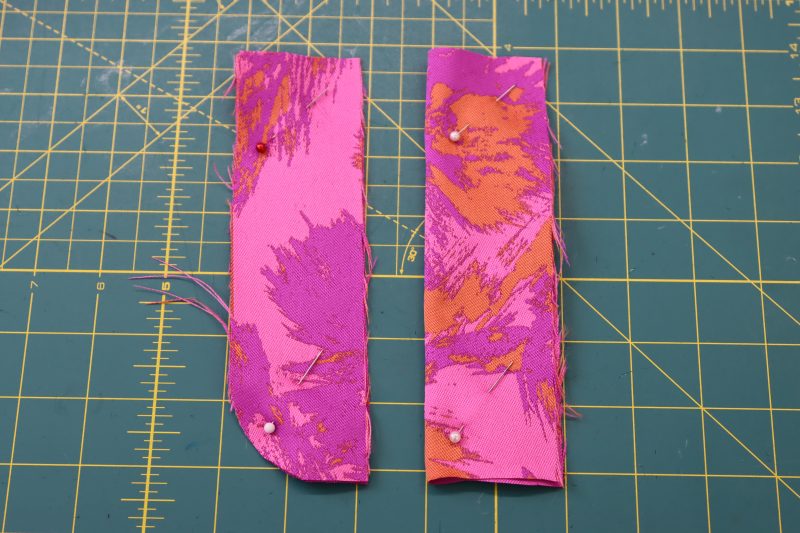
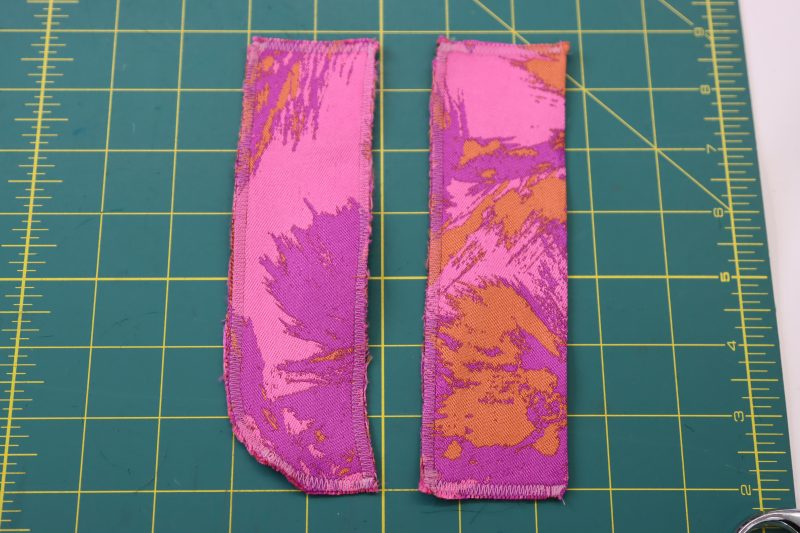
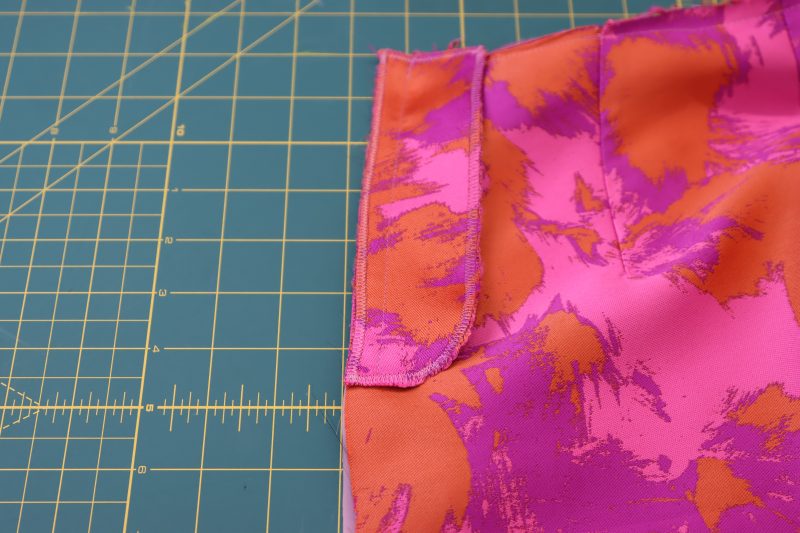
- Pin the fly facing pieces right sides together and fold the fly shield in half right sides together.
- Zigzag stitch around the raw edges of both fly pieces.
Step 8
ZIPPER FLY
- Place the flat side of the fly facing right sides together with the wearer’s left side of the center front of the pants.
- Make sure when you pin the fly facing that you pin it to both the shell and the lining.
- Sew the fly facing to the center front shell and lining.
- Open the seam and press it flat.
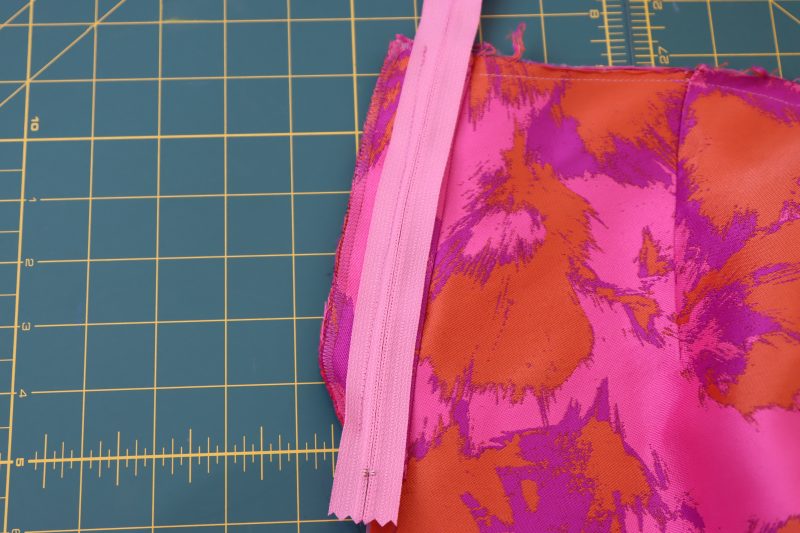
- Place the zipper face down on the fly facing.
- Line up the right hand side of the zipper tape with the seam you just sewed and pin the zipper down.
- Sew the left hand side of the zipper tape to the fly facing.
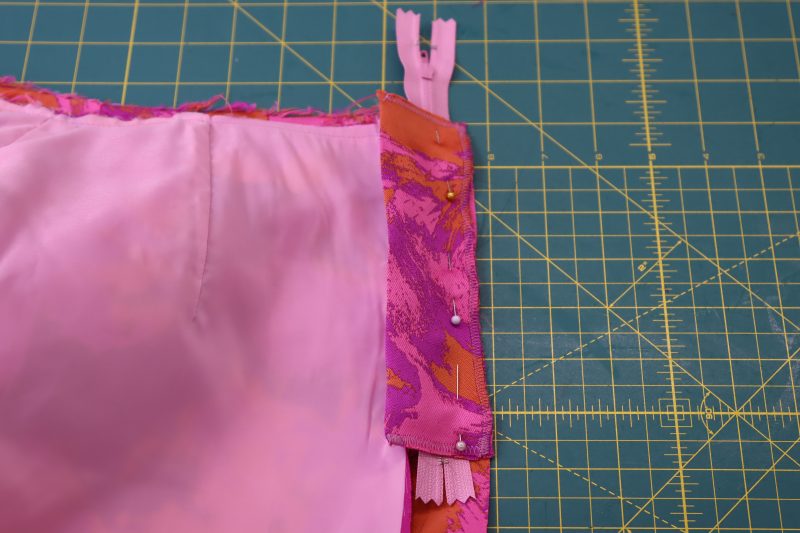
- Unfold the zipper from the fly facing and lay it right sides together with the other side of the center front opening of the pants. Make sure when you pin the zipper to the pants, you also pin it to the lining at this point.
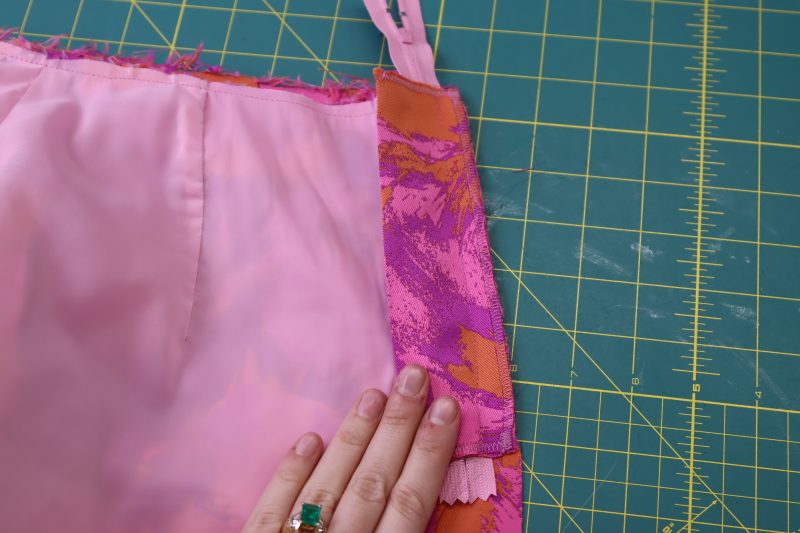
- Place the fly shield on top of the zipper.
- Pin the zipper sandwiched between the fly shield and the opposite side of the center front pants opening.
- Sew the zipper, fly shield, and center front of the pants together.
Step 9
FRONT CROTCH
- Lay the fronts of the pants right sides together and line up the front crotch lines.
- Pin and sew the front crotch together under the zipper.
- Repeat for the lining front crotch seam.
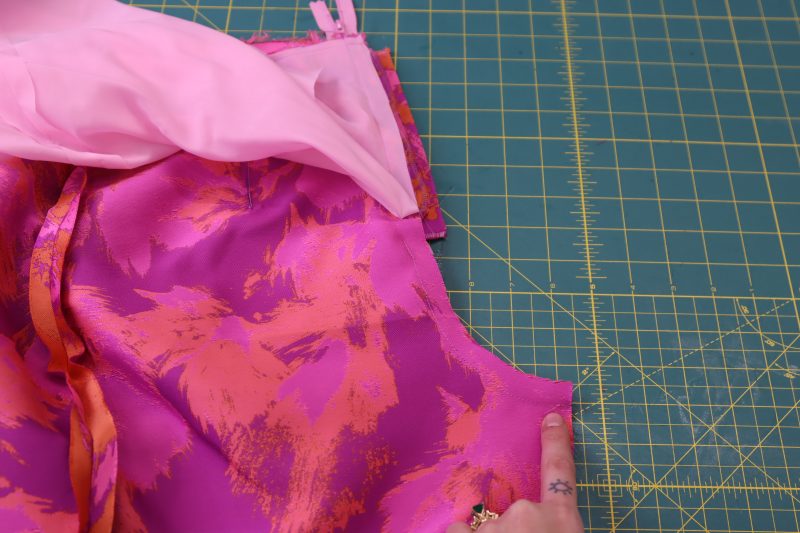
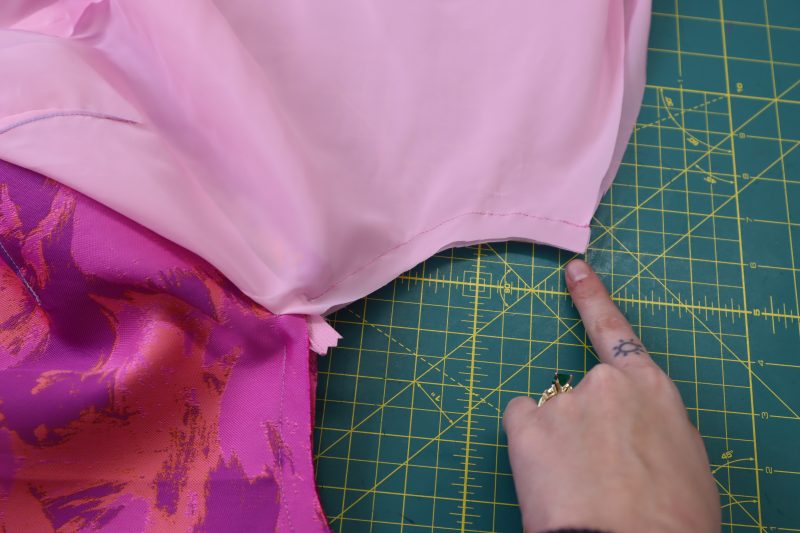
Step 10
TOPSTITCH FLY
- Topstitch over the fly facing and on the wearer’s right-hand side of the zipper.
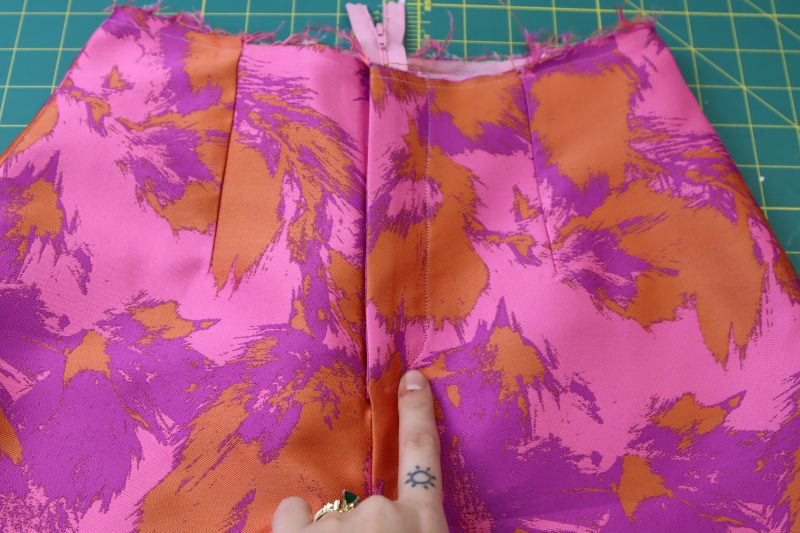
Step 11
INSEAMS
- Lay the pants with the front and back pants pieces right sides together.
- Line of the front and back crotch seams and place a pin.
- Pin the inseams of both legs.
- Sew the inseams of both the brocade and the lining fabric.
- Flip the pants right sides out through the pant legs.
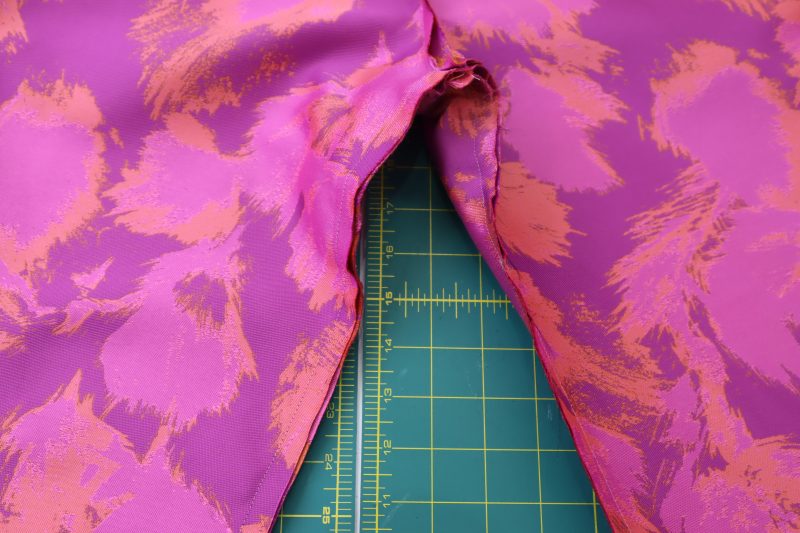
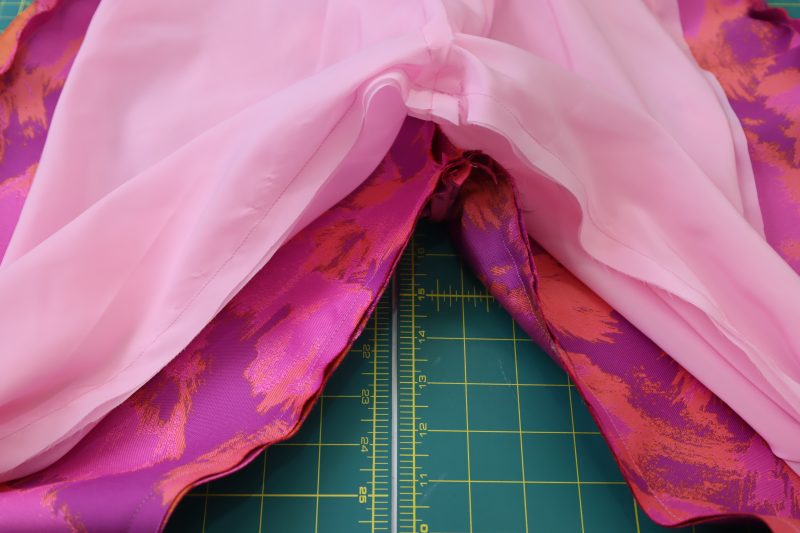
Step 12
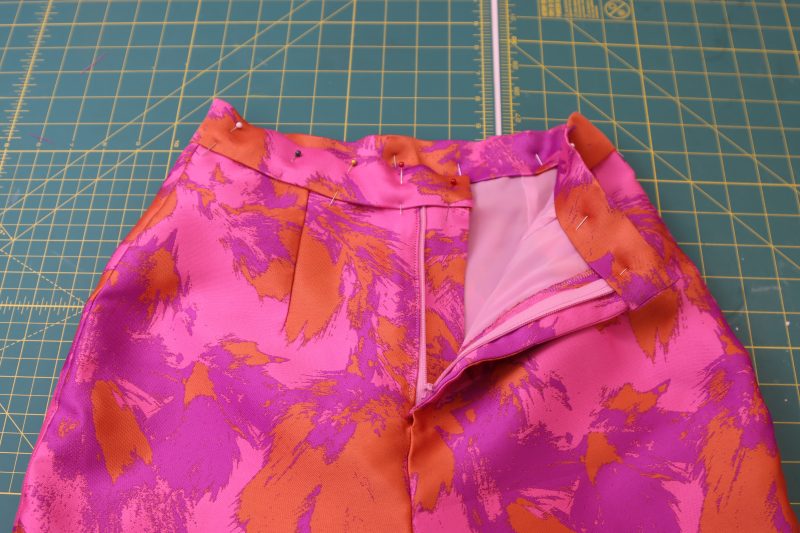
WAISTBAND
- Fold the waistband longways right sides together.
- Sew the short ends of the waistband in half as shown in the first photo below.
- Clip the inner corners of the waistband.
- Flip the waistband right sides out and press the seams.
- Fold the raw edges of the waistband by ½ inch into the inside of the waistband and press into place.
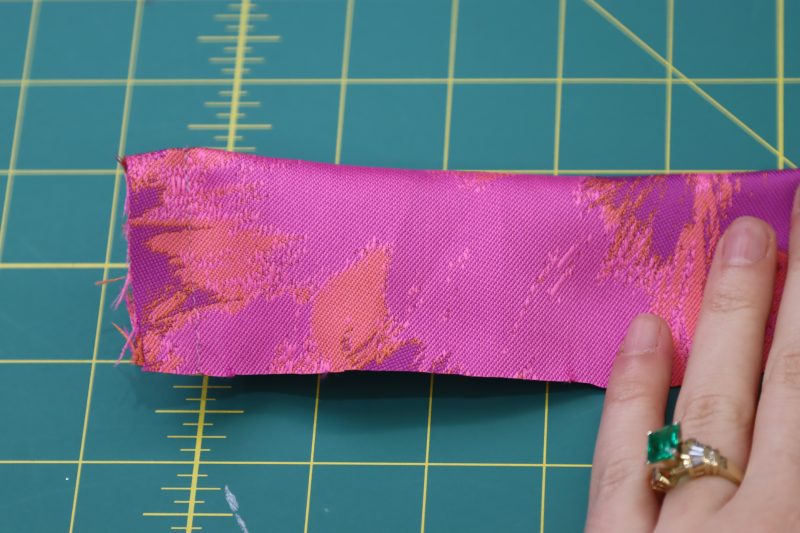
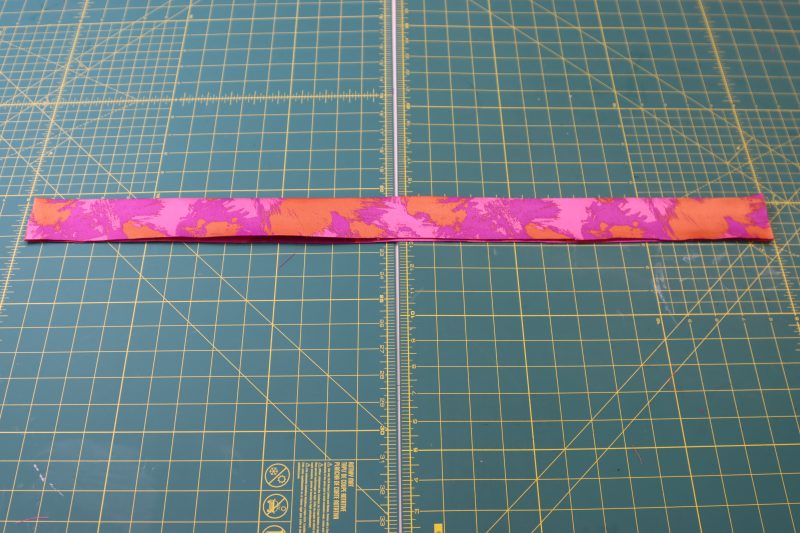
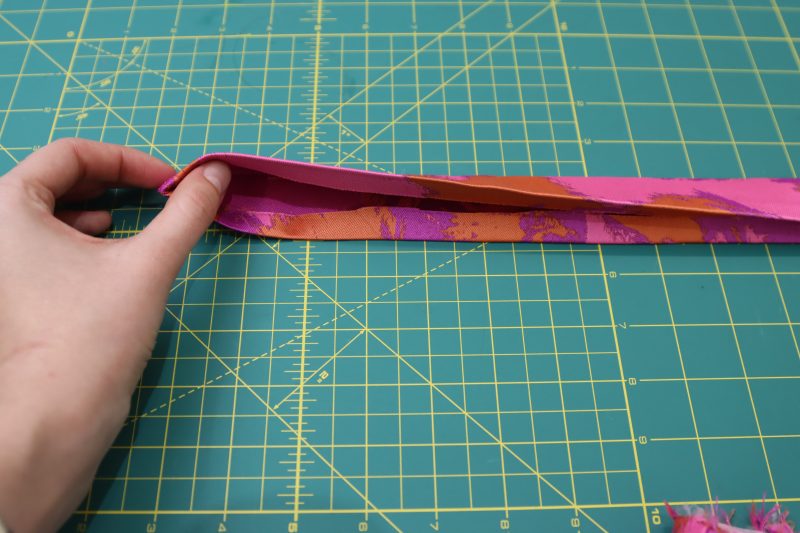
Step 13
ATTACH WAISTBAND
- Sandwich the waistline of the pants in between the front and back layers of the waistband.
- Topstitch the bottom edge of the waistband to the waistline of the pants.
Step 14
BUTTON CLOSURE
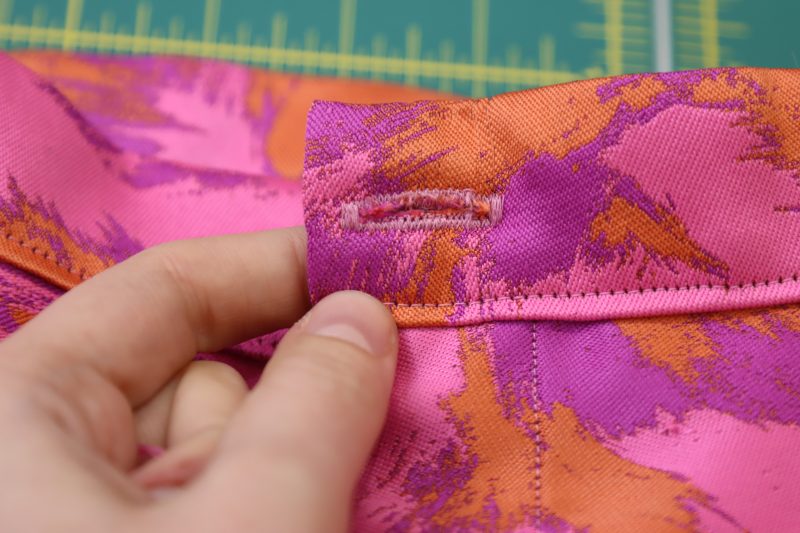
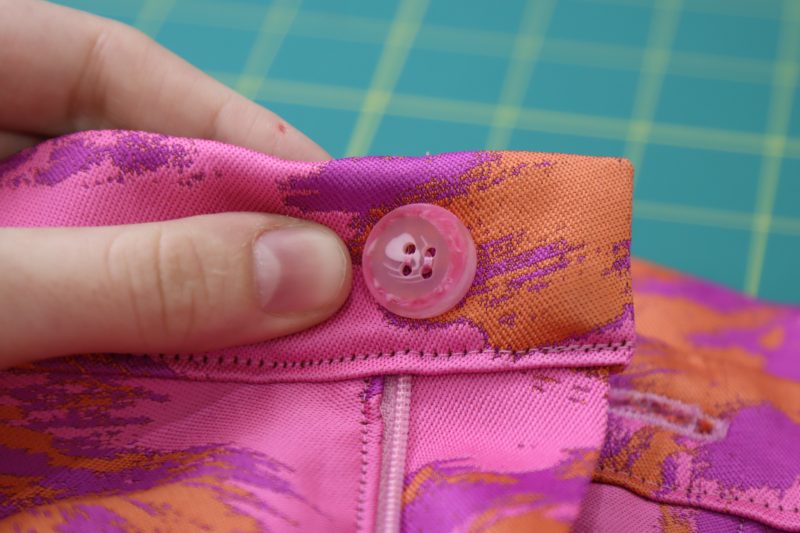
- Use the buttonhole foot on your sewing machine to sew a button to the front overlapping part of the waistband centered above the fly facing.
- Hand sew a button directly behind the buttonhole centered over the side of the zipper that is attached to that part of the waistband.
Step 15
HEMS
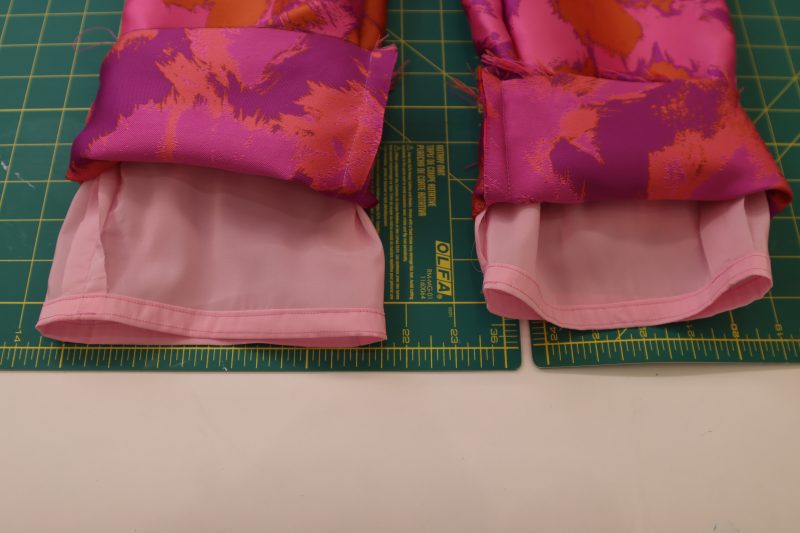
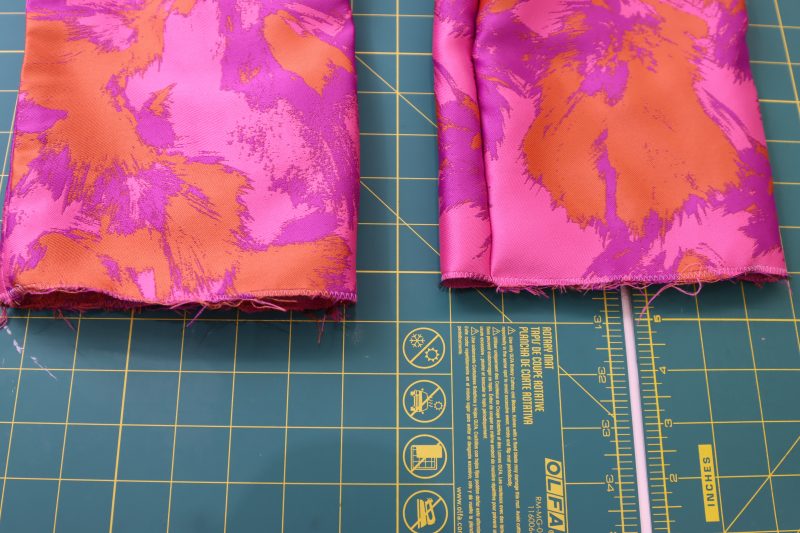
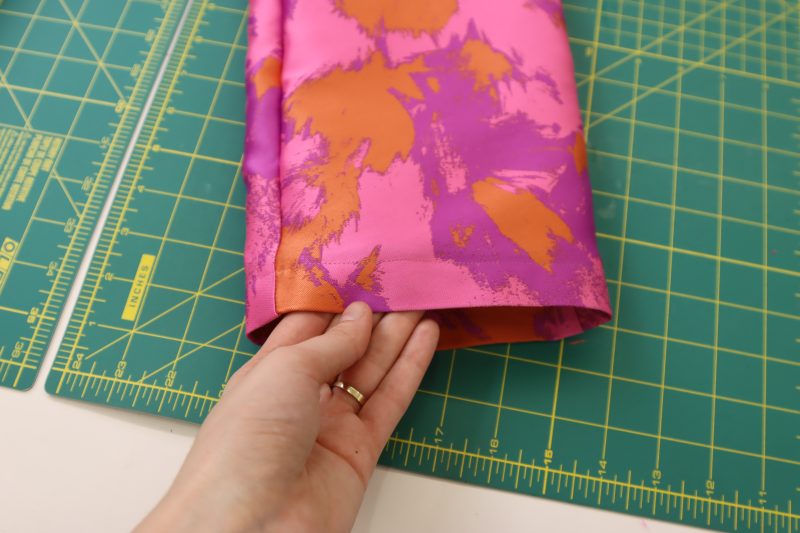
- Roll up the hem of the brocade pants to access the hem of the lining.
- Sew a ½ inch rolled hem along the bottom edge of the lining pants.
- Unfold the brocade hem.
- Zigzag or serge the raw edges of the brocade hem.
- Fold the brocade hem up by 1 inch and press.
- Sew the fold in place with ⅞ inch seam allowance.
HOW TO SEW THE OSTRICH FEATHER TRIM TOP
Step 16
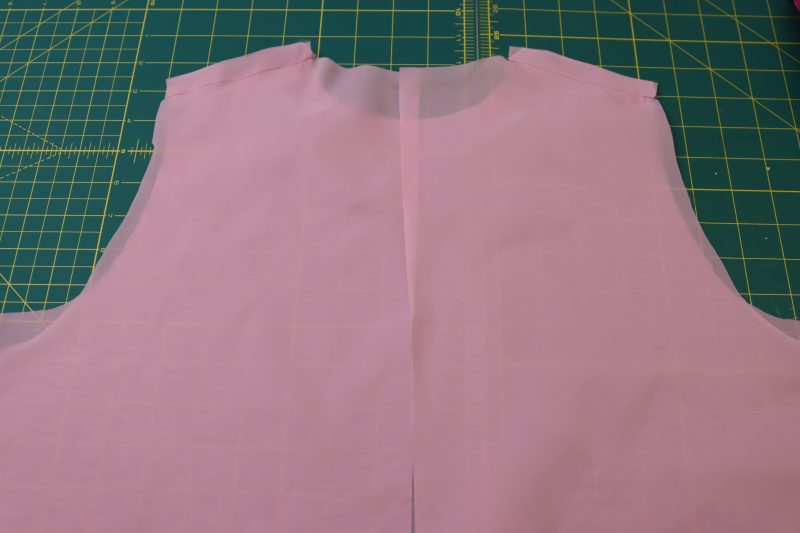
SHOULDER SEAMS
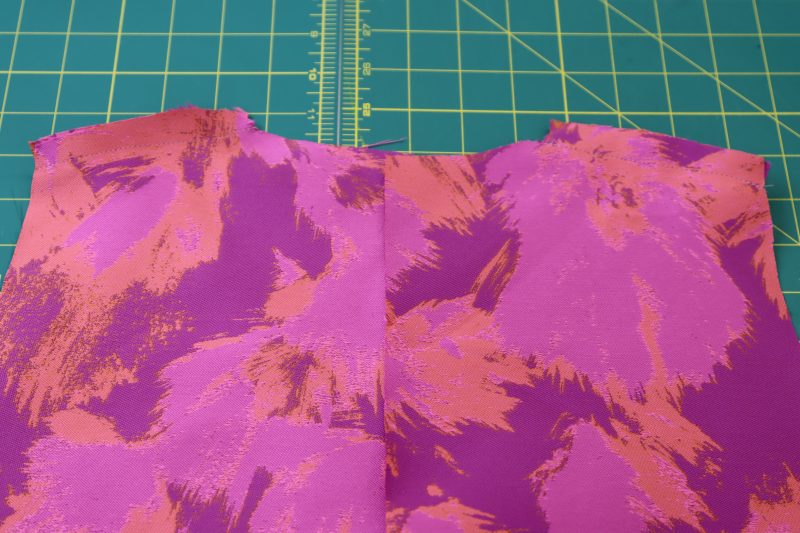
- Place the front top pieces on top of the back top pieces right sides together with the shoulders lined up.
- Pin and sew the front and back top pieces together at the shoulder seams.
- Repeat for the lining fabric.
Step 17
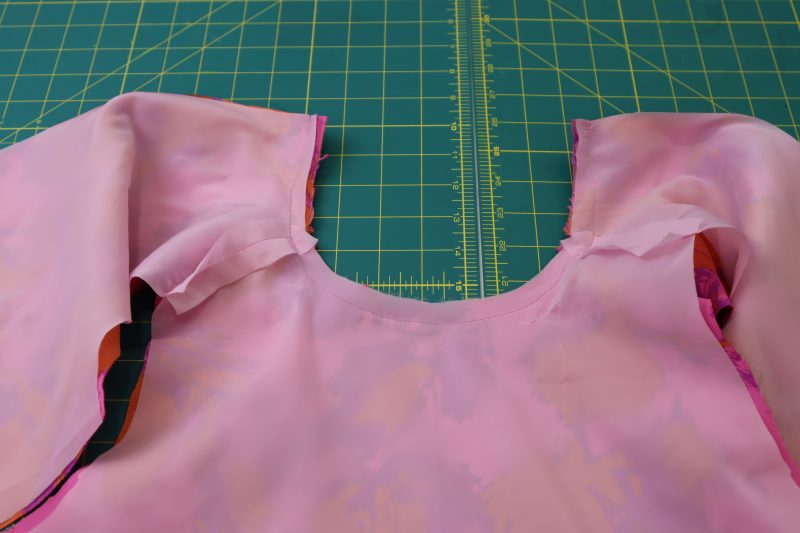
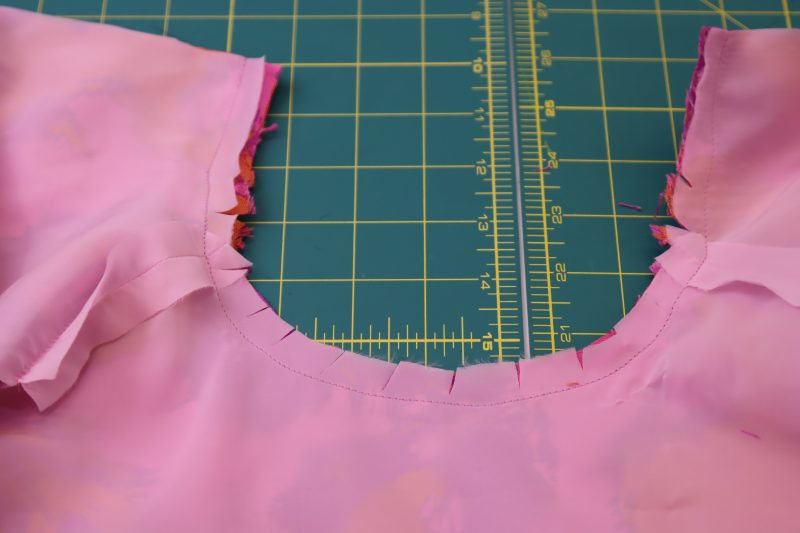
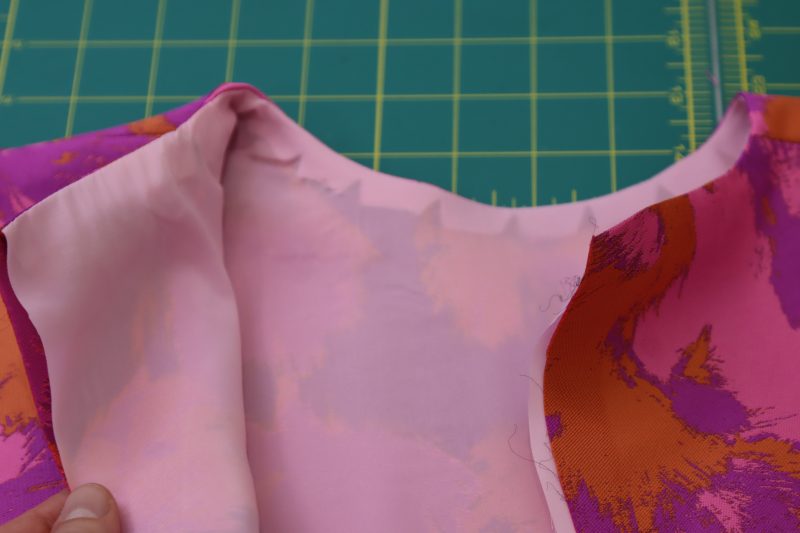
NECKLINE
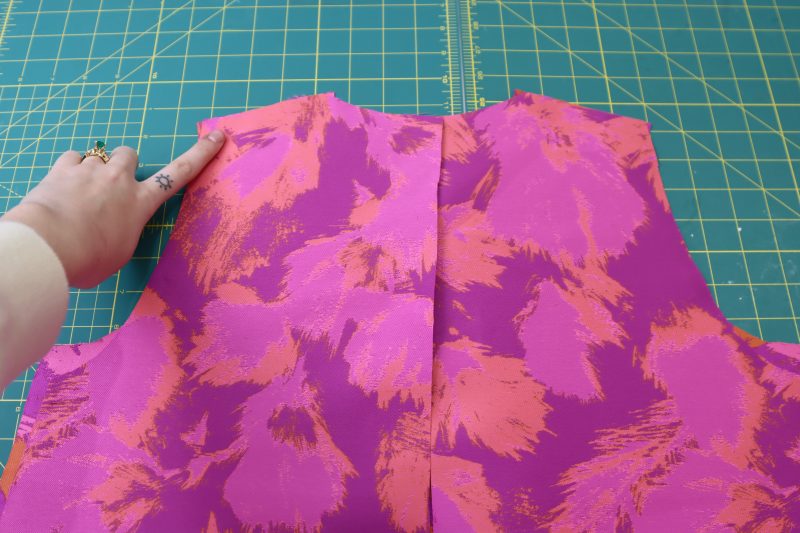
- Press the shoulder seams open and flat for both the lining and the brocade.
- Place the lining and the brocade right sides together with their necklines lined up.
- Pin and sew around the neckline, making sure that the shoulder seams of the lining match up with those of the brocade.
- Clip notches into the neckline to help flip the top right sides out.
- Flip the top right sides out and press the neckline so that the lining is not sticking out of the brocade.
Step 18
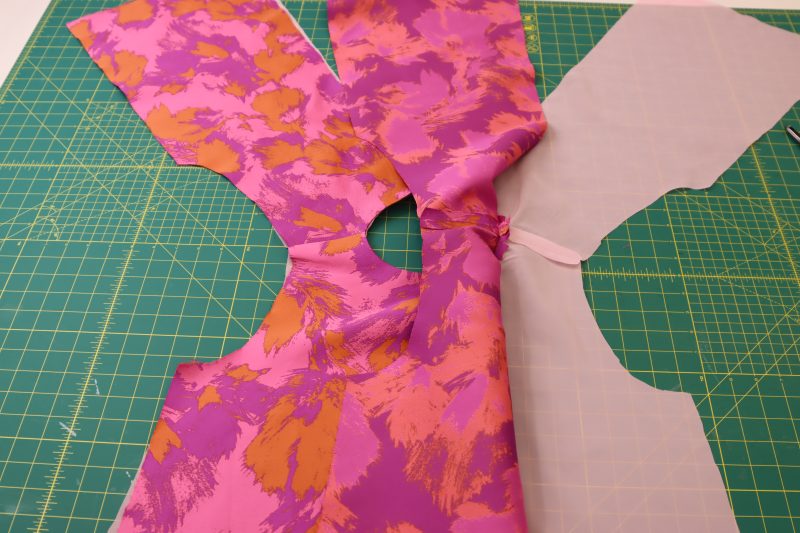
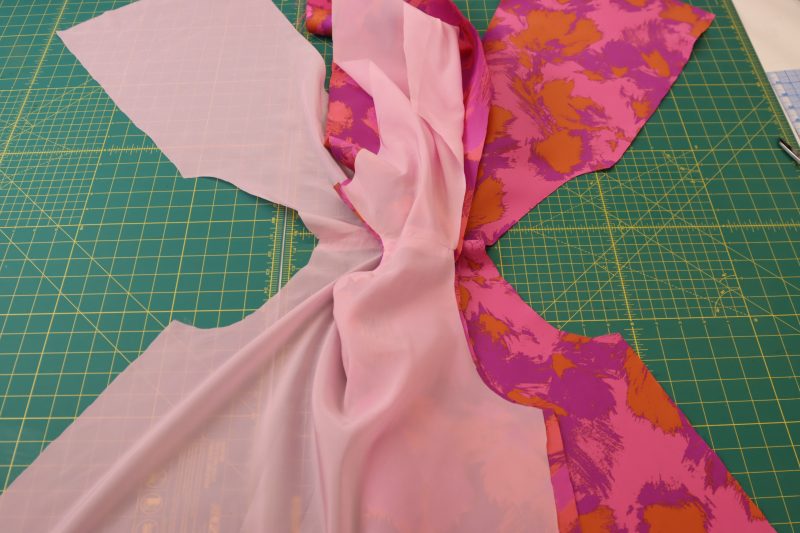
ARMSCYES
- Lay the top completely flat on your work surface with the wrong side of the brocade facing down.
- Separate the lining from the brocade on the wearer’s left side of the blouse.
- Flip the lining and shell so that they are facing right sides together at the armscye.
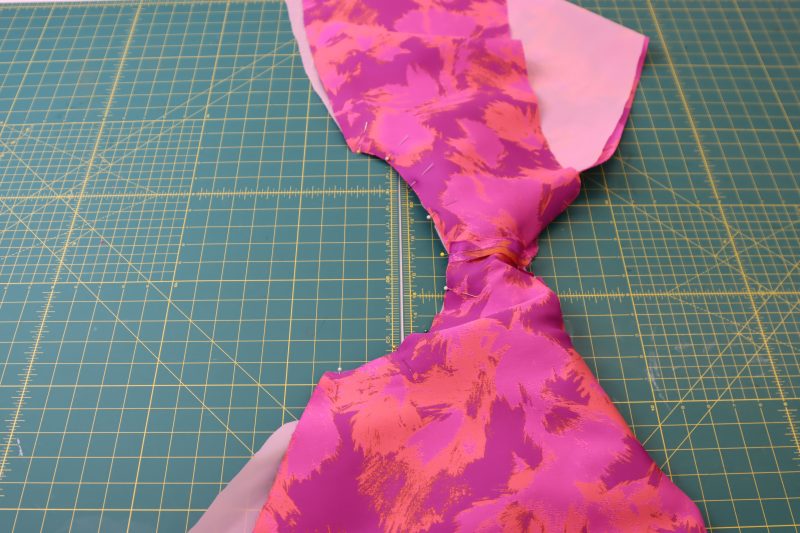
- Stuff the other half of the top in between the lining and shell so that the armscye can be pinned together.
- Pin the brocade armscye to the lining armscye.
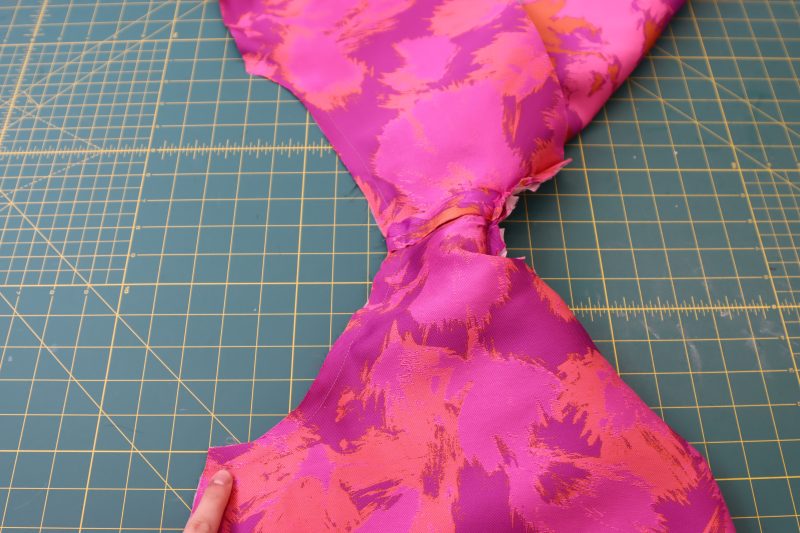
- Sew along the pins around the armscye.
- Clip the seam allowance of the armscyes so that they lay flat when flipped right sides out.
- Flip the top right sides out again and press the armscye flat.
- Repeat all the steps in step 18 but for the other armscye.
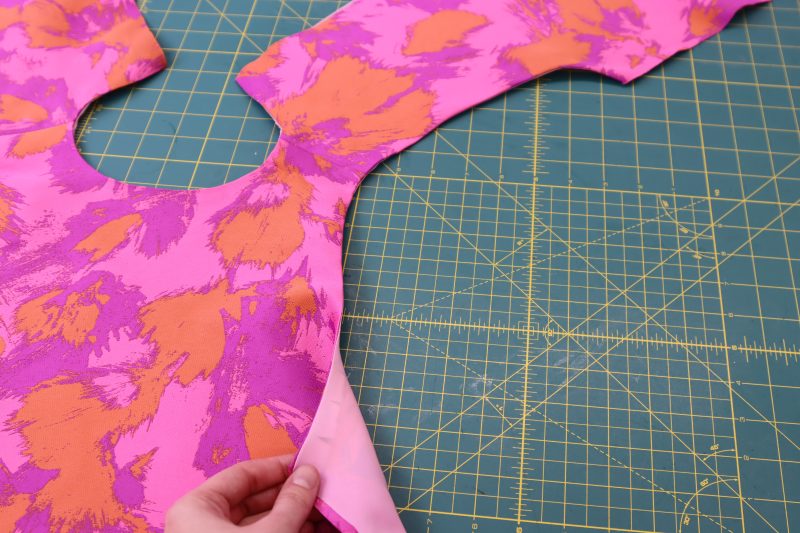
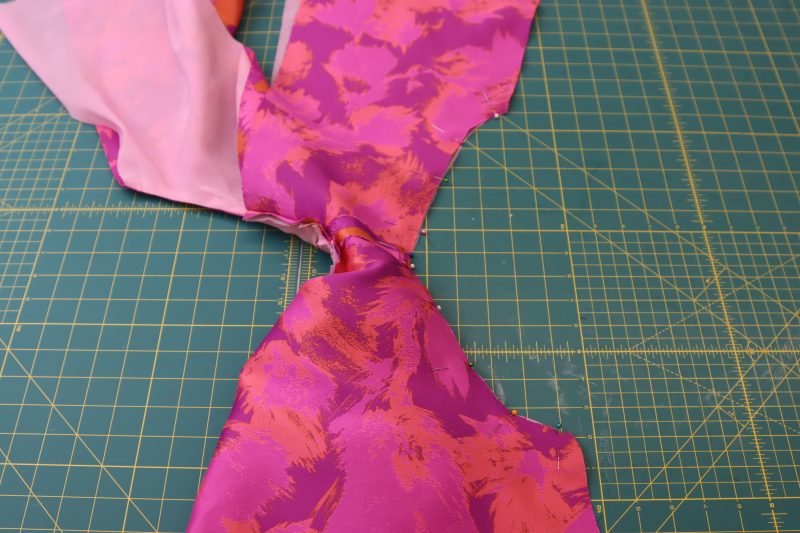
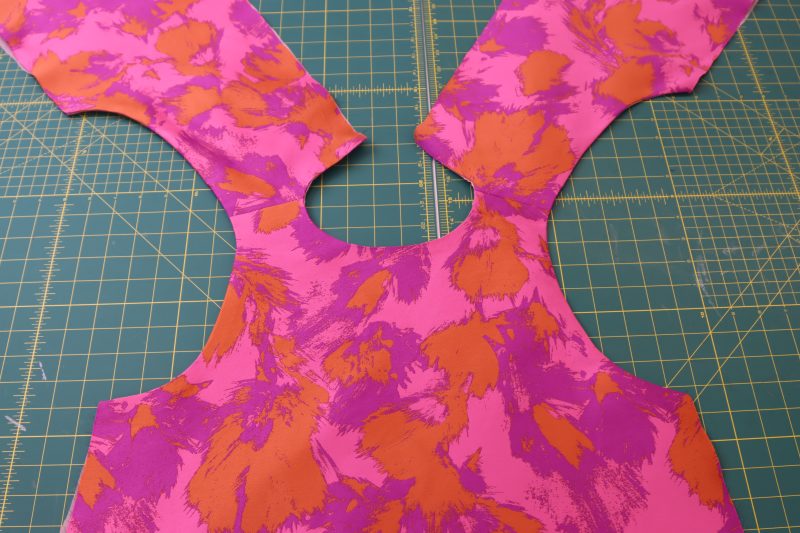
Step 19
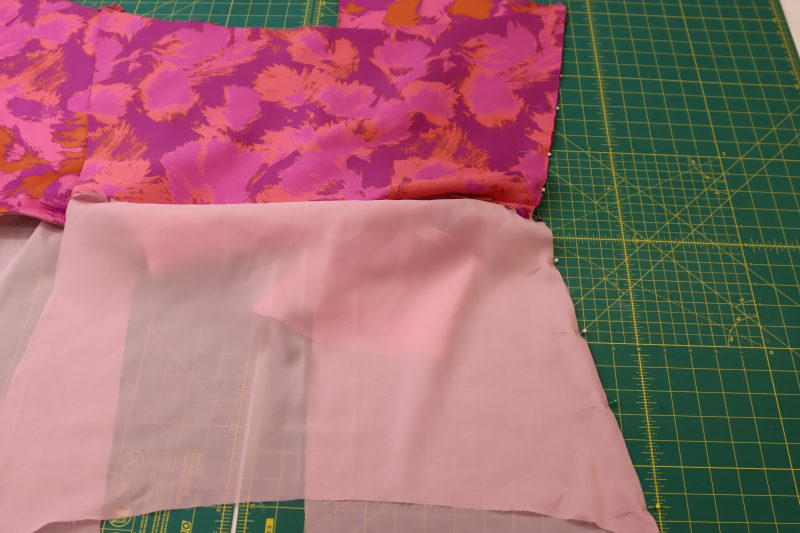
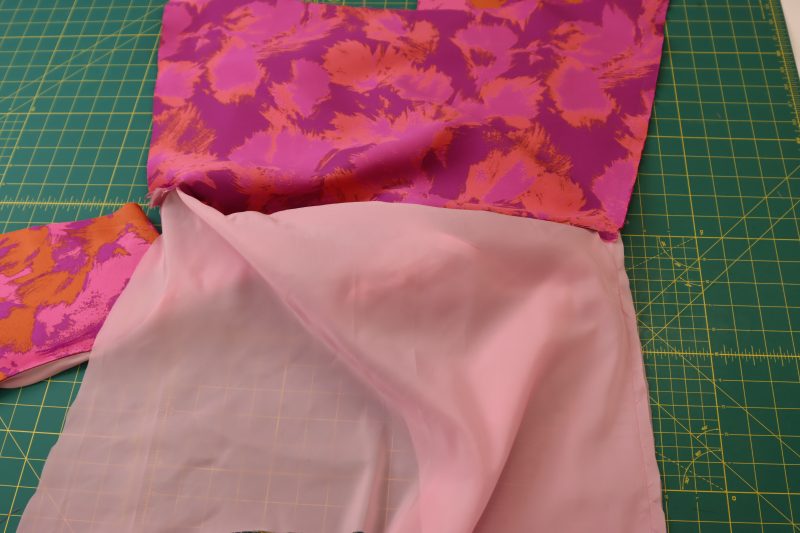
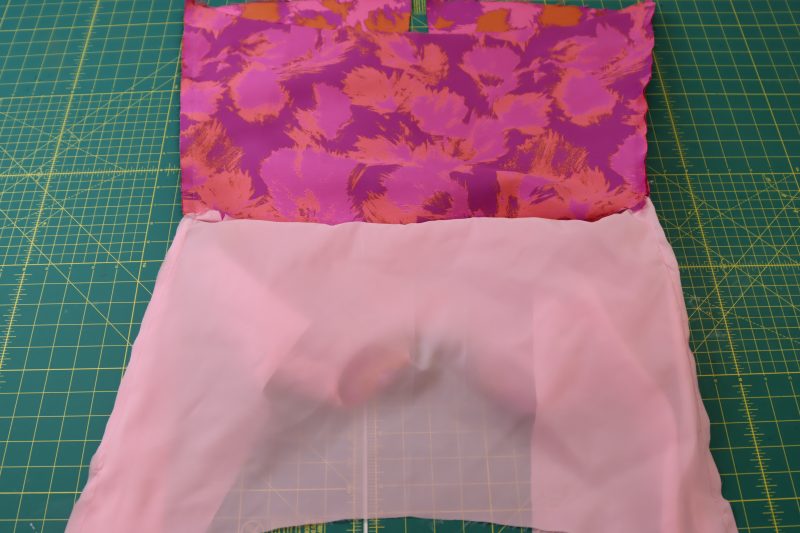
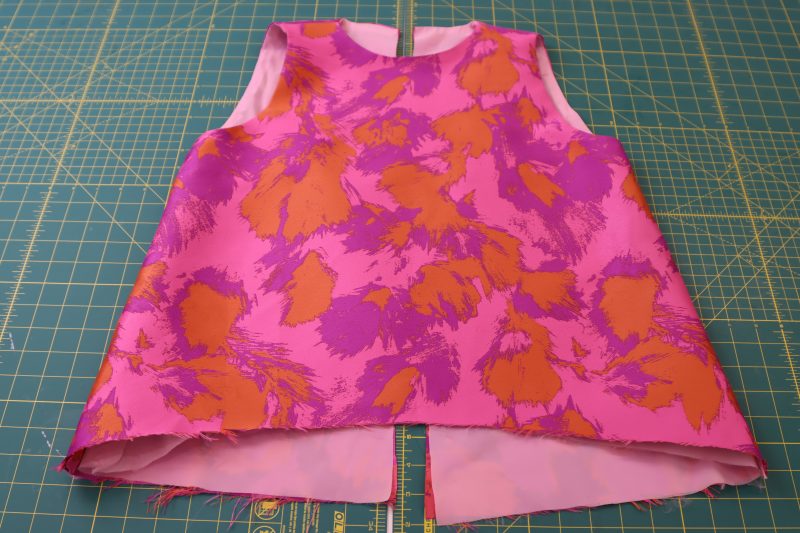
SIDE SEAMS
- Fold the top wrong sides together at the shoulders (this means the top should be right sides out laying flat as if it was already sewn together at the side seams).
- Flip just the brocade layers up and separate them from the lining pieces, as shown in the second photo below.
- Pin and sew the brocade side seams to each other and the lining side seams to each other (do not sew the brocade to the lining here. They should only be attached at the armpit).
- Repeat for both sides of the top.
- Press the side seams open and flat.
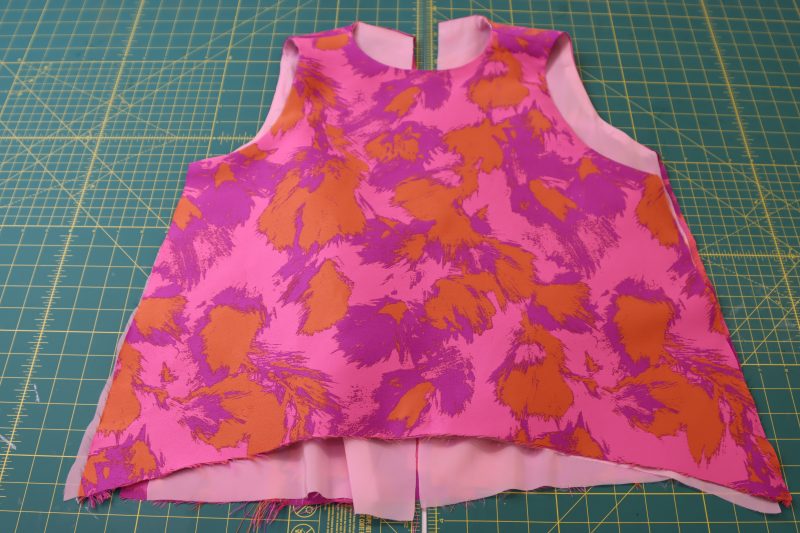
Step 20
ZIPPER
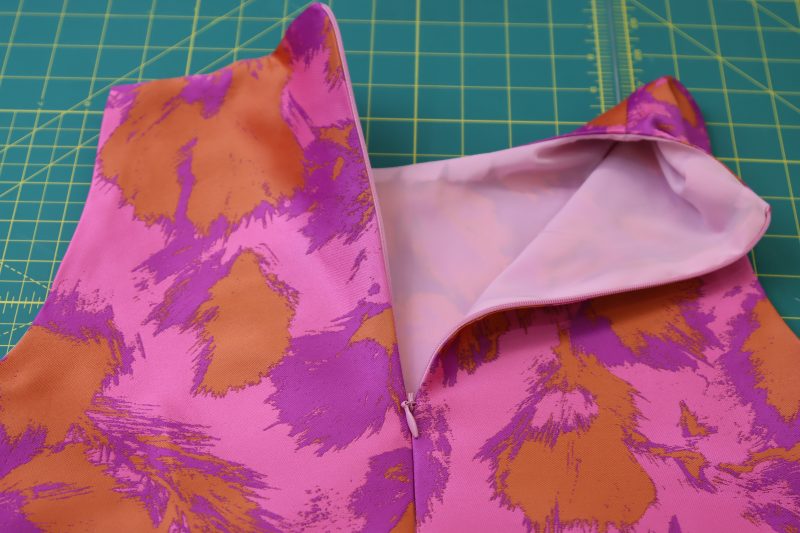
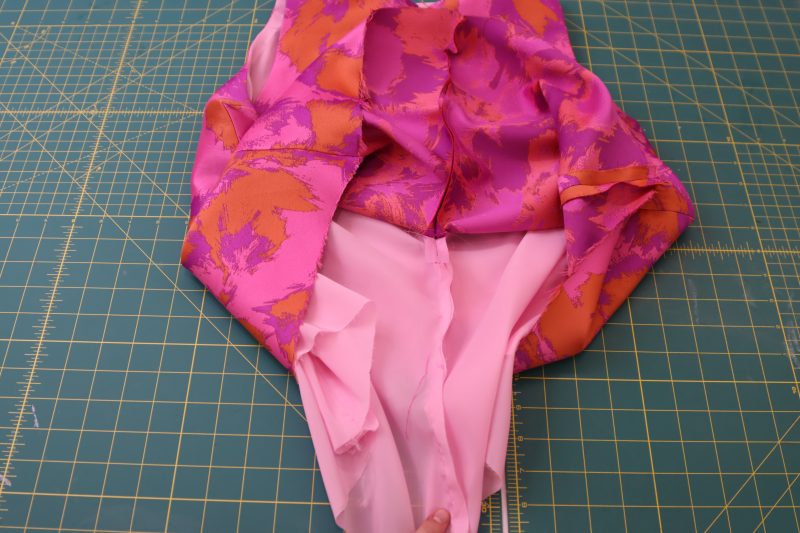
- Insert an invisible zipper in between the shell and the lining at the center back of the top.
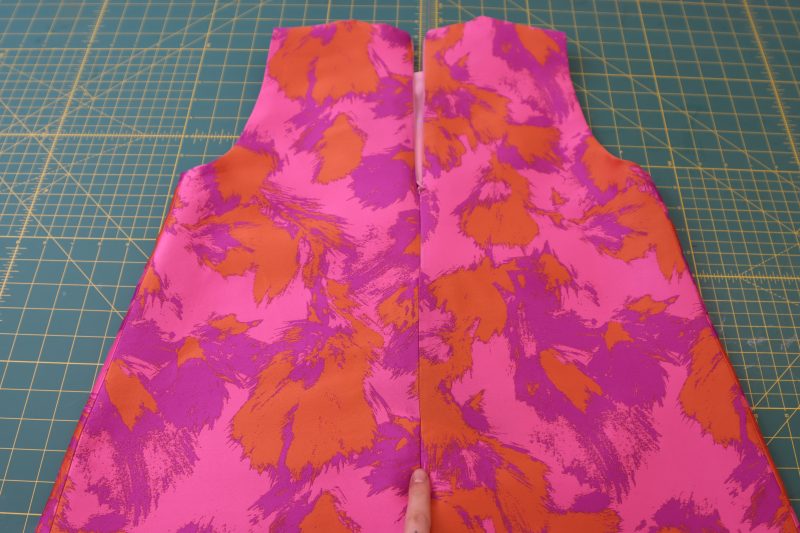
- Pin and sew the brocade right sides together at the center back seam under the zipper.
- Pin and sew the lining under the zipper the same way as the brocade.
- Press the center back seam open and flat.
Step 21
LINING HEM
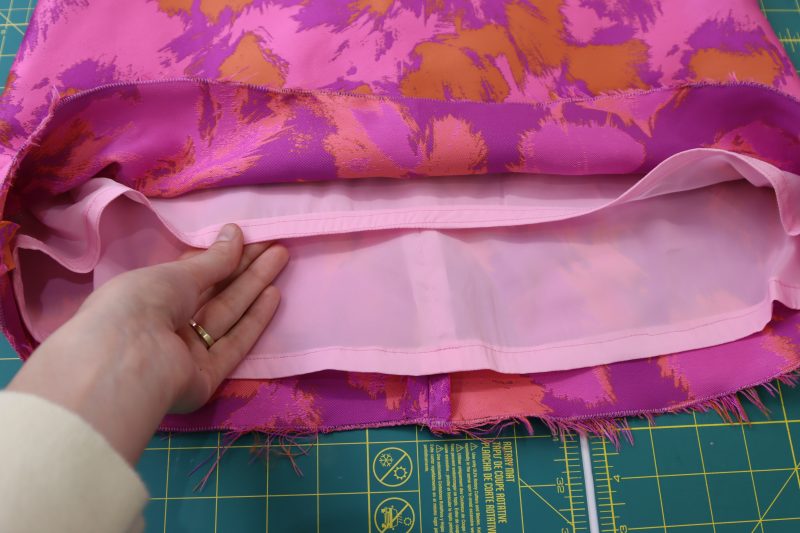
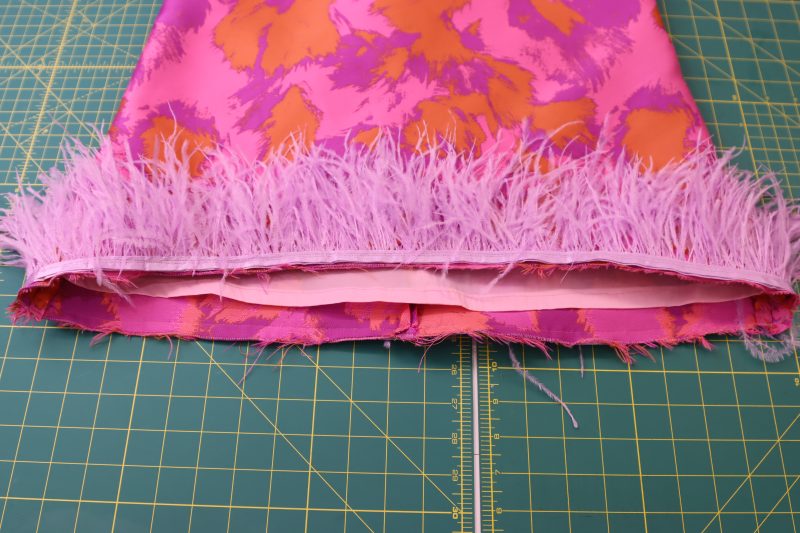
- Sew a ½ inch rolled hem on the bottom of the lining (we’re hemming the lining more than the brocade here because we don’t want it to stick out and be visible behind the feathers).
- Sew a zigzag stitch or serge the raw edge of the brocade hem.
Step 22
OSTRICH FEATHER TRIM
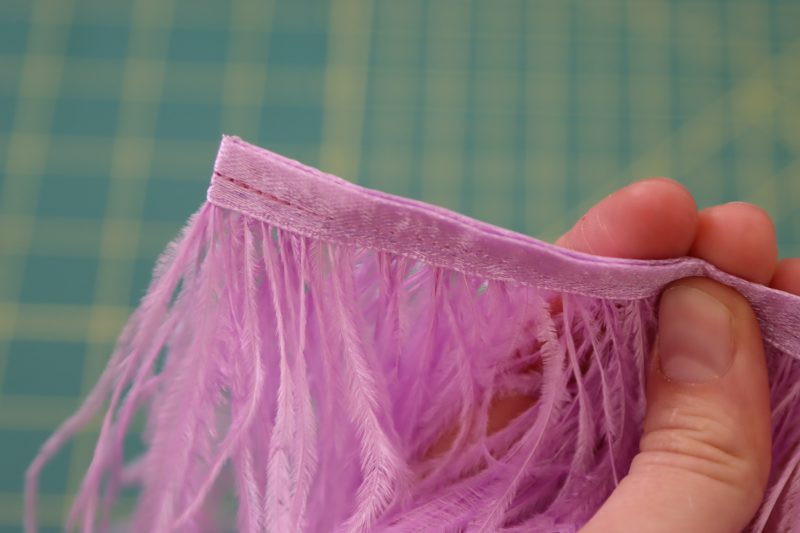
- I wanted my feather trim to be really voluminous so I folded the trim in half and sewed the two trim tapes together to make the feathers doubly thick.
- Place the edge of the trim tape right sides together with the bottom hem of the top.
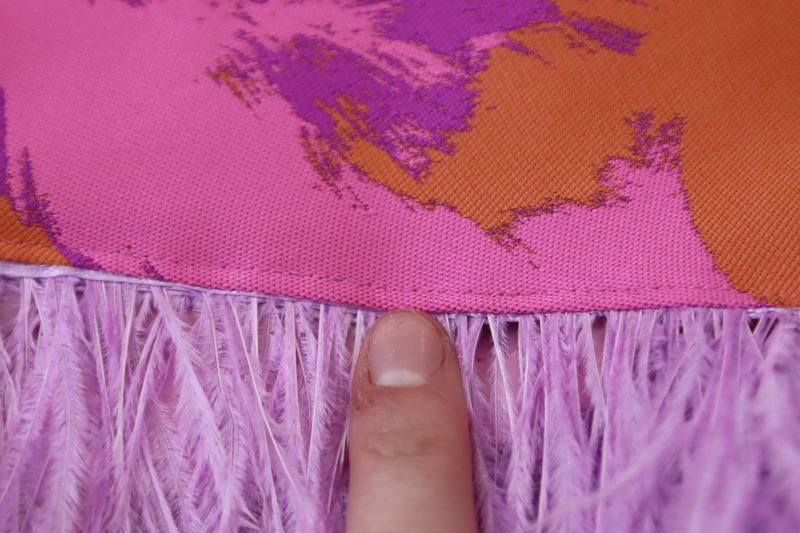
- Pin and sew the feather trim to the hem of the brocade top.
- Flip the feathers down to hide the seam allowance.
- Topstitch the seam allowance to keep the feathers laying down flat.
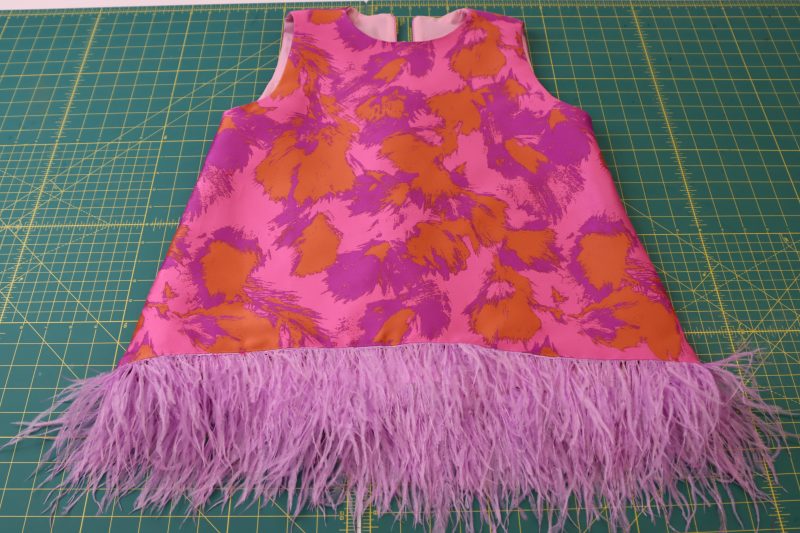
Sewing Success: The Finished Chelsea Brocade Cigarette Set
Share this post with a friend (or two!), download the Chelsea Brocade Cigarette Set free sewing pattern, and show us which fabrics and colors you choose, using the hashtags #MoodChelseaPattern & #MadeWithMood—and don’t forget to tag us @MoodFabrics, too.

Free Sewing Pattern Inspiration for Your Next Project
With 500+ free sewing patterns and counting, your opportunities for sewing with Mood are endless!
We hope you had as much fun sewing this cigarette set pattern as we did! As always, we want to hear from you—share your thoughts and comments below and let us know where you’ll be wearing the Chelsea Brocade Cigarette Set free sewing pattern!
Can’t get enough sewing with Mood? Browse your next make with our latest free sewing patterns.

Hi, The how to instructions and photos are GREAT. I am beginner to intermediate and appreciate the help…………….Love the fabric.
Jan, Indpls., IN
Love this set!
I have one question:
– If I want to add inseam pockets, how do I go about that with the shell and the lining?
Thanks!!!
Hey Belen, great question! To add side seam pockets, you would just add them onto the sides of the brocade (or outside fabric) before attaching the lining at the waistband. So before sewing the side seams of the pants, add pockets, then sew the side seams, then attach the lining. The pocket bags will be in between the lining and the shell, which is what we want.
Me parece ideal!!!!
This is so fun and I’m eager to make this! I’m actually making a few of them in a colorful fun variety to wear while roller skating! I rediscovered my love of roller skating and I have fun with the whole look!
Hi there! How could we make these pants low/mid waisted?
Yes you can! Just shorten the waistline on the front and back pants pieces and then make the waistband wider so that it fits around the new waistline.
I wish I read these comments before finishing…would have loved to add side pockets. I can offer this — I used little stick on velcro dots to attach the feathers so that I could take them off if needed to clean. I put them every 4 inches and it seems to be holding on well.
Been looking for exactly this!!!