
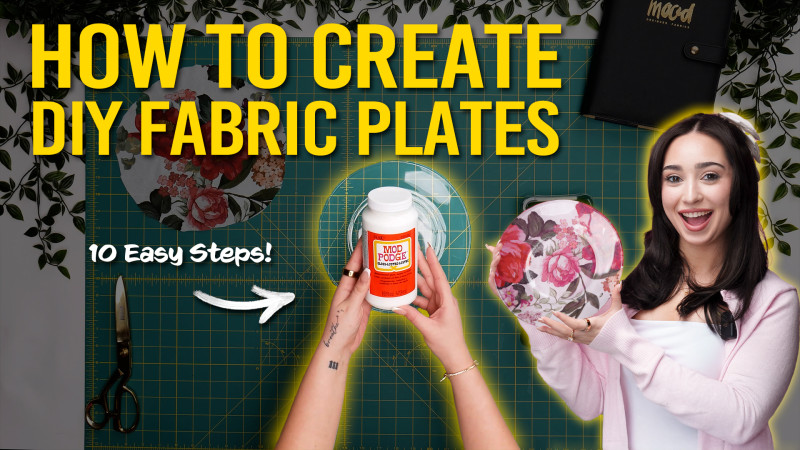
Hey crafty friends! Ever look at your plain glass plates and think, “These need a serious makeover!”? Well, you’re in luck! Today, I’m going to show you how to turn those ordinary plates into stunning, personalized pieces that’ll have your guests asking, “Where did you get those?”
We’re diving into the world of DIY Fabric Plates, and trust me, it’s easier (and more fun) than you think! Let’s get started, shall we?
First things first, what kind of fabrics are you dreaming of using? Floral? Geometric? Let me know in the comments!
Essentials Materials for Creating DIY Fabric Plates
Here is the breakdown of what knowledge and materials you need for creating your very own DIY Fabric Plates! We’ve got you covered with the recommended materials we used—if you want to follow along exactly—as well as a curated list of alternative fabric recommendations if you want to customize your own version.

Purchase Products Used Below:
Quantities indicated are for sewing two glass fabric plates.
- 0.5 yard (or half a yard) of Mood Exclusive Rouge Realized Cotton Voile
- 1 pair of Metallic Gold 9″ Knife-Edge Dressmaker’s Shears by Mood
- 1 each of Standard Craft Knife – Fiskars (Optional, for precise trimming)
- 1 each of Dritz Fabric Marking Pencil or Tailor’s Chalk – Fabric Marking Tools
Other Products Used in this Tutorial:
- 2 Clear Glass Plates
- Mod Podge (Dishwasher Safe Recommended!)
- Sponges/Brushes
- Isopropyl Alcohol
Alternative Fabric Recommendations:
Here are alternative fabric options best suited for creating DIY Fabric Plates.
How to Create DIY Fabric Plates
The instructions provided are designed to guide you through creating fabric-covered plates using Mod Podge and your chosen fabric.
Use a generous amount of Mod Podge for all steps unless otherwise specified.
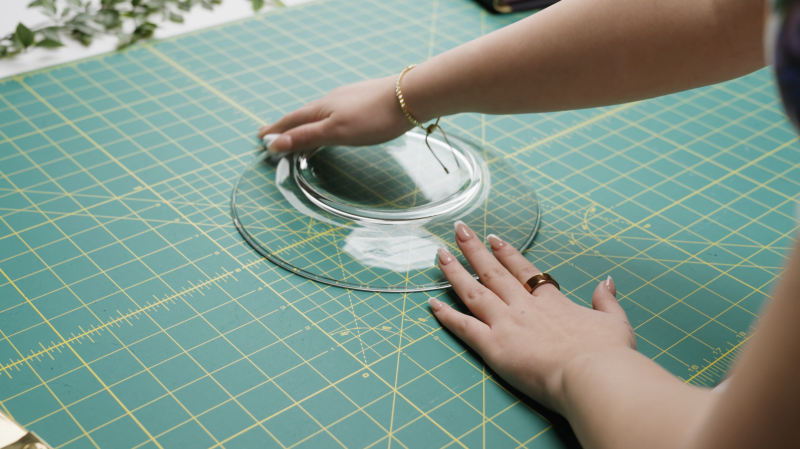
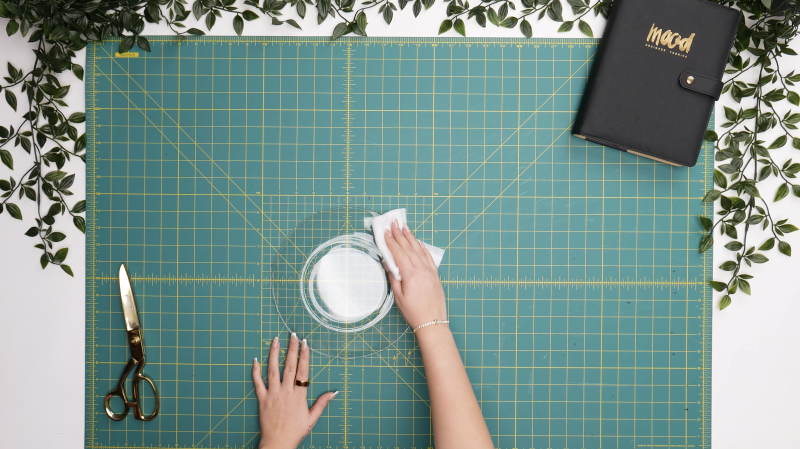
Step 1
CLEAN PLATES
Before we get started, we need a clean canvas. Peel off any stickers and use isopropyl alcohol to remove any residues. This step is crucial for a smooth finish!
Step 2
PLATE PLACEMENT
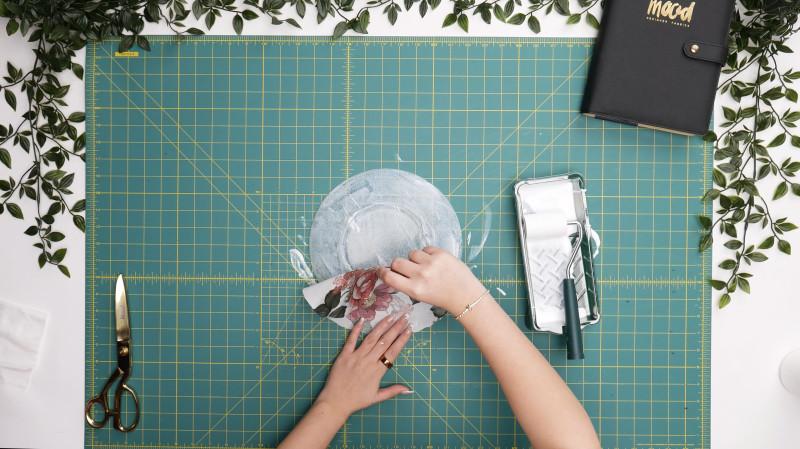
Now, lay your chosen fabric flat and place your clean glass plate face down on it. This is where the magic begins!

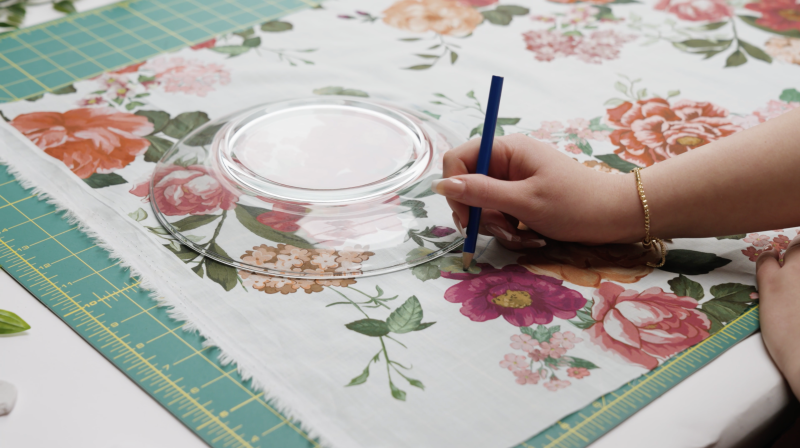
Step 3
TRACE THE PLATE
Grab a pencil or tailor’s chalk and trace around the plate. Don’t forget to add about an inch of extra fabric around the outside to account for the curved shape of the plate!
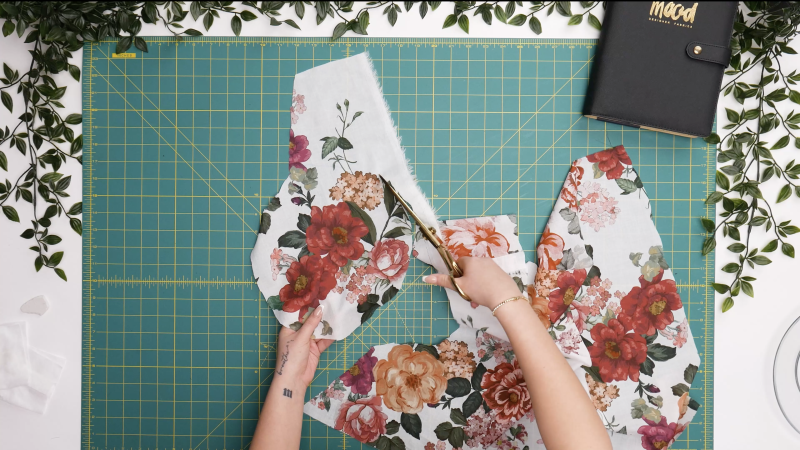
Step 4
CUT THE FABRIC
Time to cut! Carefully cut along the traced line. You’re one step closer to your fabulous fabric plates!
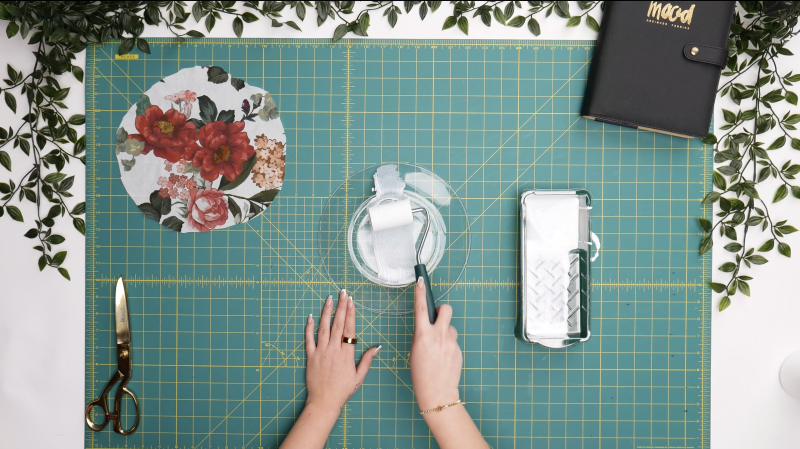
Step 5
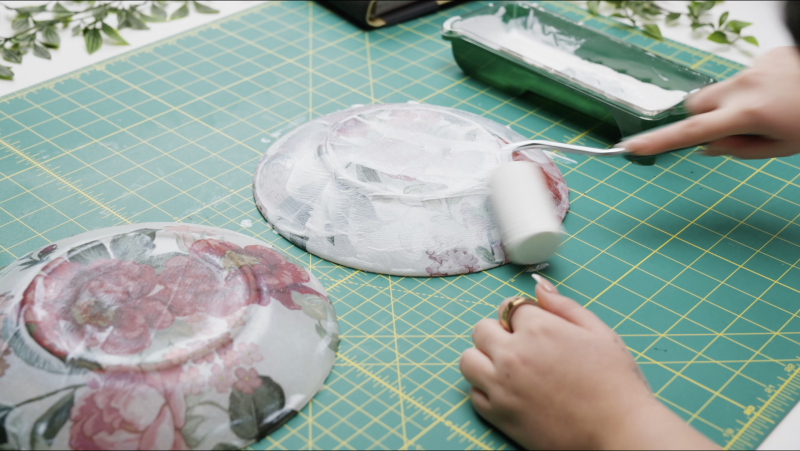
APPLY MOD PODGE
Now for the sticky part! Apply a generous, even layer of Mod Podge to the back of the plate. Make sure you cover the entire surface – this will ensure your fabric adheres perfectly.
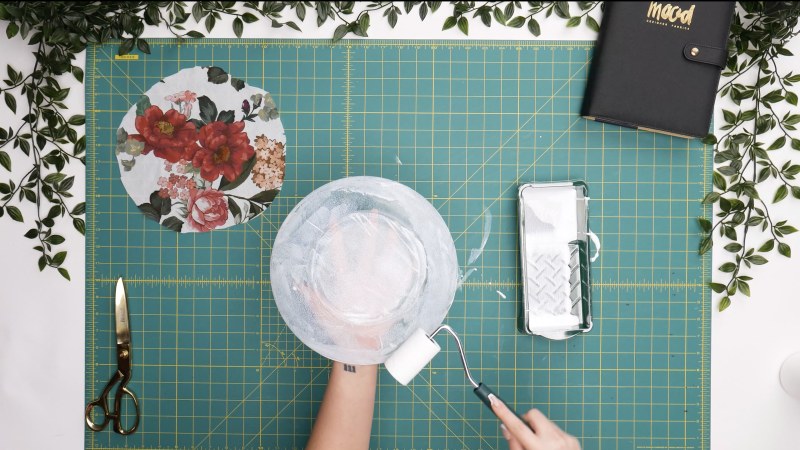
Step 6
PLACE FABRIC ON PLATE
Carefully place your cut fabric, pattern side down, onto the Mod Podge-covered plate. Gently smooth out any wrinkles or air bubbles. We want a flawless finish, right?
Step 7
APPLY SECOND MOD PODGE LAYER
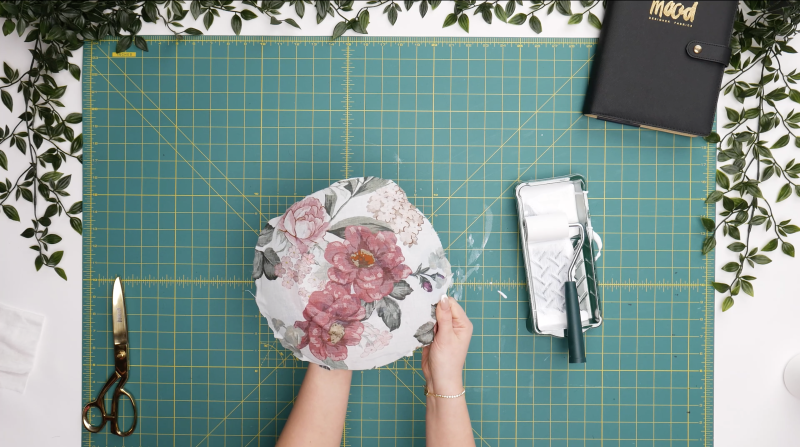
Apply another generous layer of Mod Podge over the back of the fabric, ensuring all edges are sealed. This will give your plates extra durability.
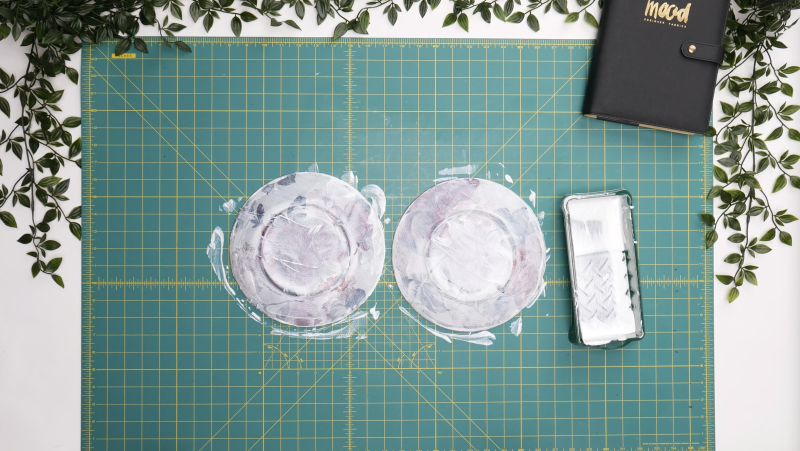
Step 8
TRIM EXCESS FABRIC
Carefully trim any excess fabric from around the edges of the plate.
ALLOW THE PLATE TO DRY FOR AN HOUR!
Step 9
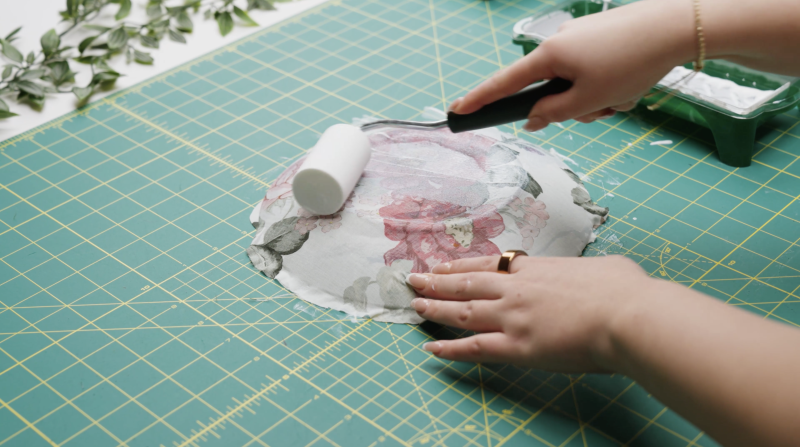
FINAL MOD PODGE LAYER AND CURE OVERNIGHT
For added durability, apply a final, even coat of Mod Podge.
Now, the hardest part: waiting! Allow the plate to cure overnight (24 hours is even better).
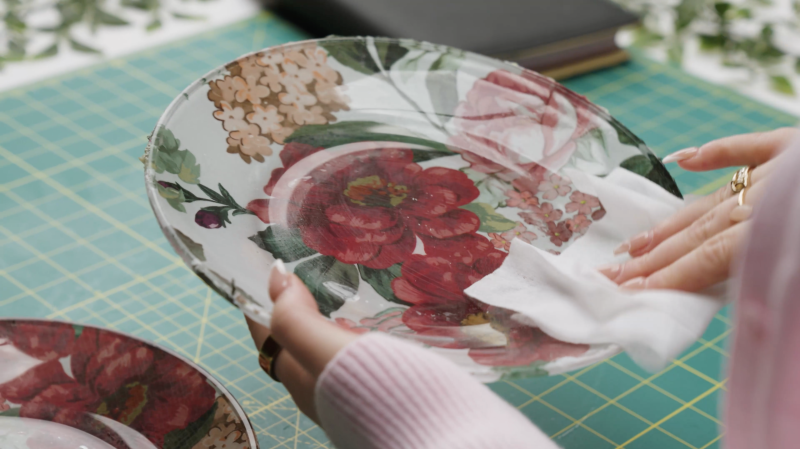
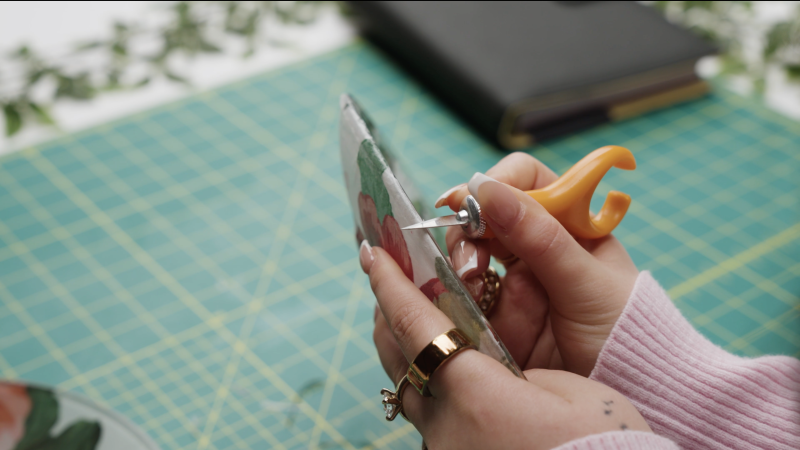
Step 10
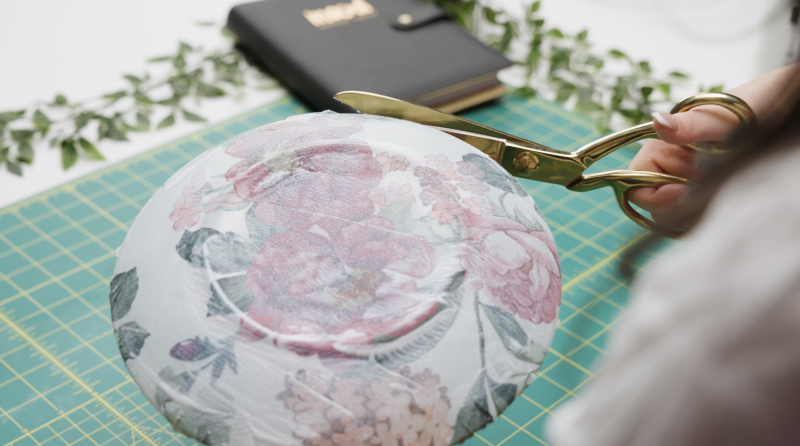
CLEAN EXCESS MOD PODGE AND CAREFUL TRIMMING
Take isopropyl alcohol and remove any excess Mod Podge from the front of the plate, to make sure the front of the plate is perfectly clean.
Be extremely careful using a precision craft knife and make sure to cut away from your body. Trim any excess fabric from the edges of the plate for a seamless finish.
The Completed DIY Fabric Plates by Mood Fabrics
We can’t wait to see your version of the DIY Fabric Plates. Whether you choose Cotton Shirting, Rayon Challis, or Lightweight Linen, this project is the perfect canvas for your creativity.
Share this post with a friend (or two!), and show us which fabrics and colors you choose, using the hashtags #MoodDIYPattern & #MadeWithMood.
Love this idea!! But curious how they hold up to washing? Even if washing by hand, the back of the plate will be getting wet and I’m not sure how mod podge does with soap/water? I know you mention a special mod podge but I’m wondering about the regular stuff. P.S. I’ve always called it MOD Podge. ♀️
I would definitely try to avoid getting it soaking wet and hand wash the plates.
How do you wash these plates once they’ve been used for serving?
Hi Ruth! I definitely recommend hand washing them if you’re going to serve food on them. Try not to get the backs of the plates too exposed to water. The plates may be best for decoration like in a centerpiece for a table setting.
Hi, loving the plates. They have that vintage/retro look about them.
I have 1 question; Might you have to seal the cut edge of the fabric/edge of plate? I just thought that if you cut close to the plate rim you are leaving yourself open to water etc getting under the fabric/mod podge if you have even the slightest ‘gap’.
I definitely would recommend sealing the edge of the fabric at the rim of the plate with an extra layer of Mod Podge. I also would recommend hand washing these and trying not to get the backs of them too wet. Probably best for decoration or centerpieces rather than serving a plate of spaghetti.
Nice work, I’ll try it, sometime soon.