

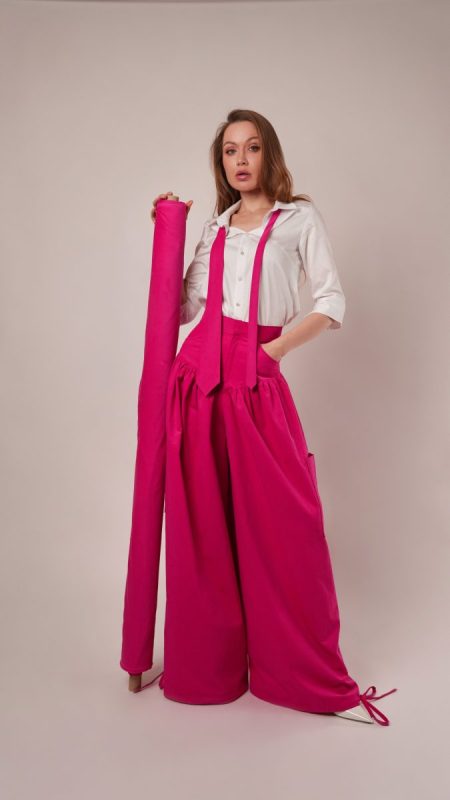
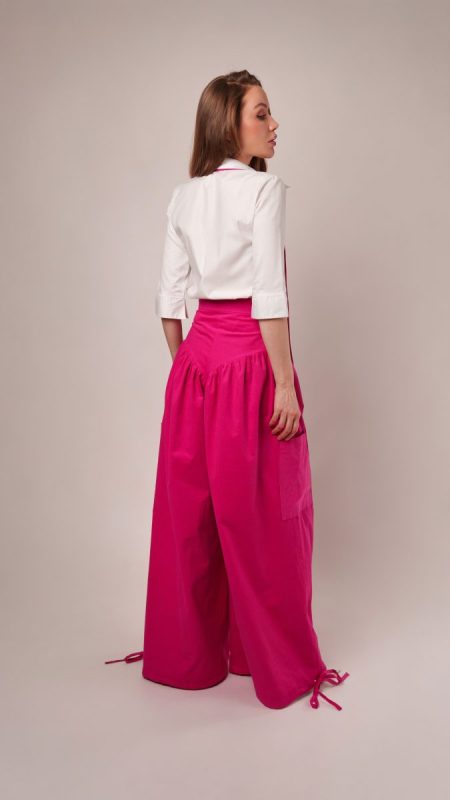
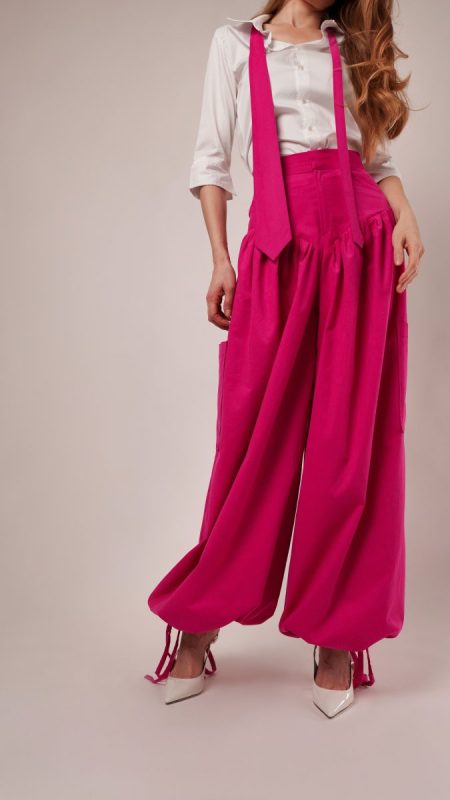
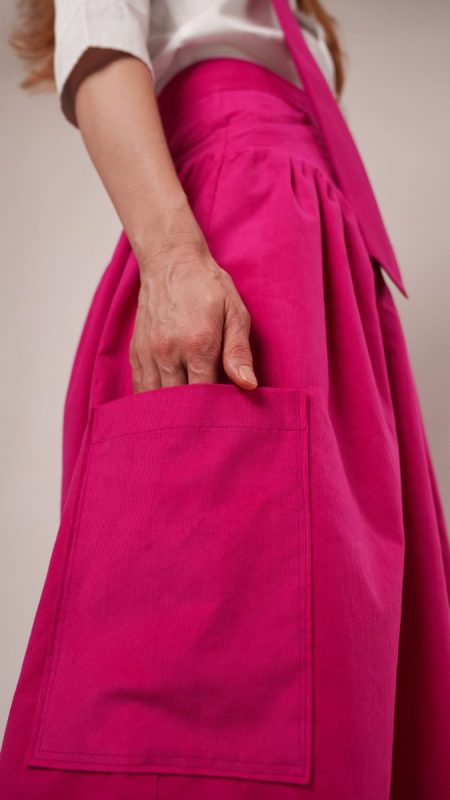
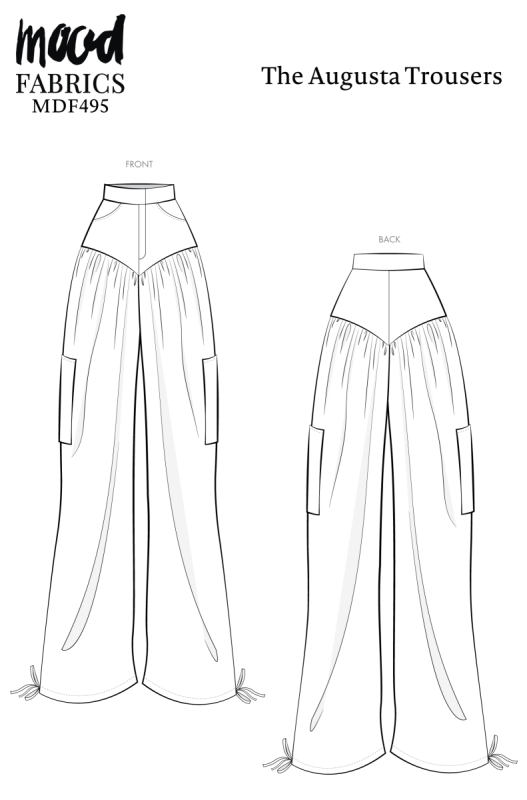
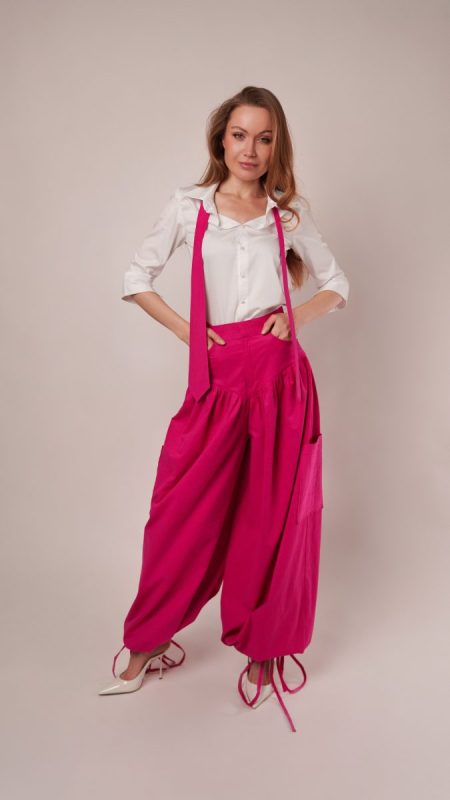
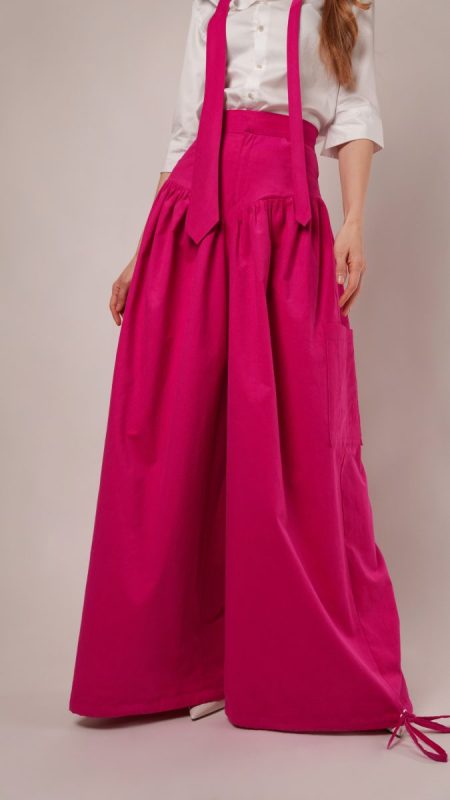
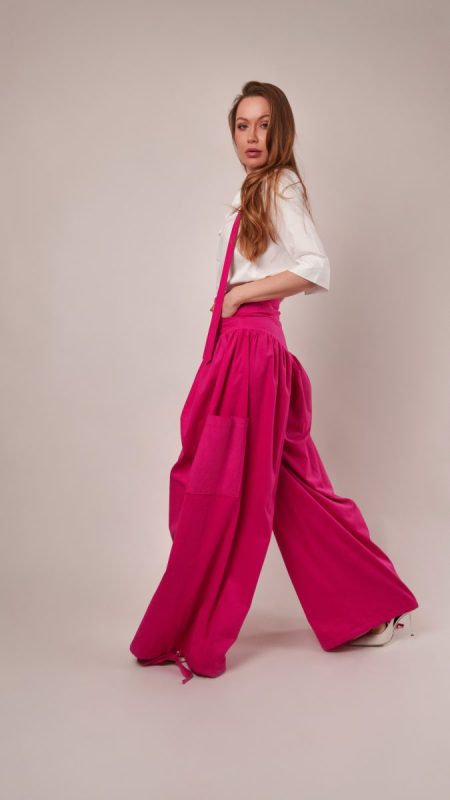
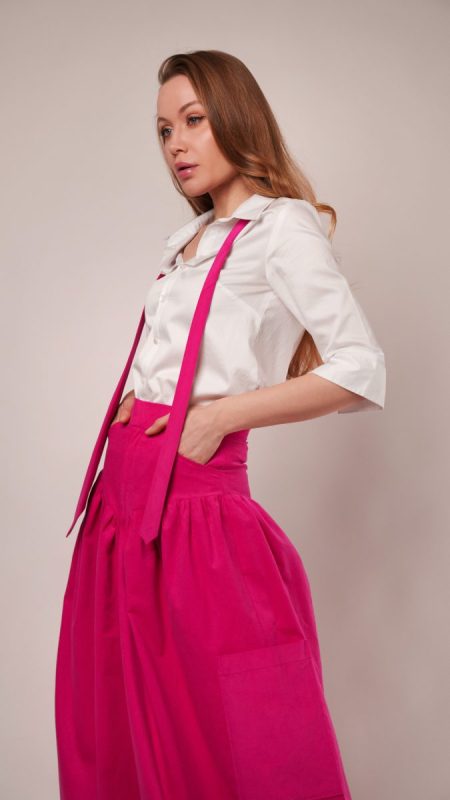
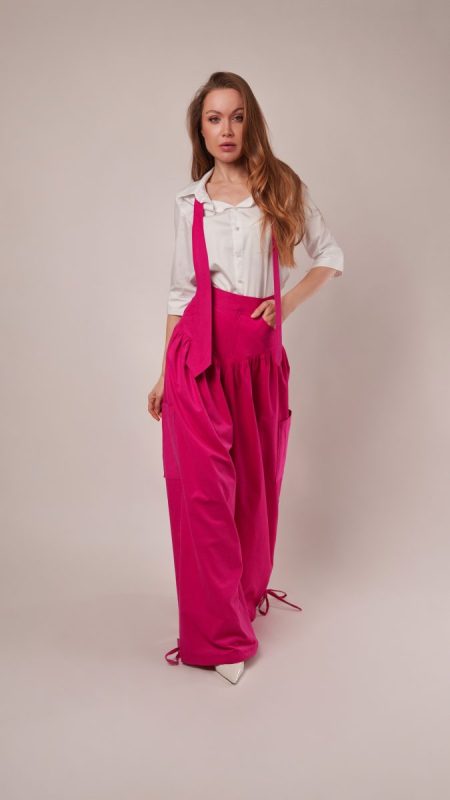
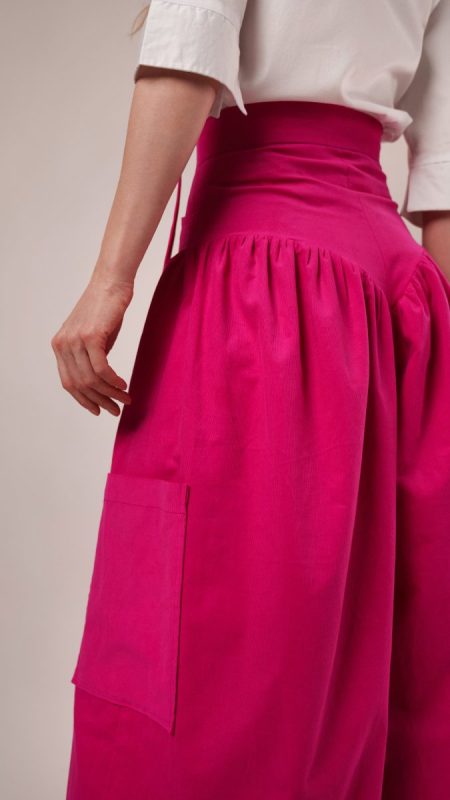
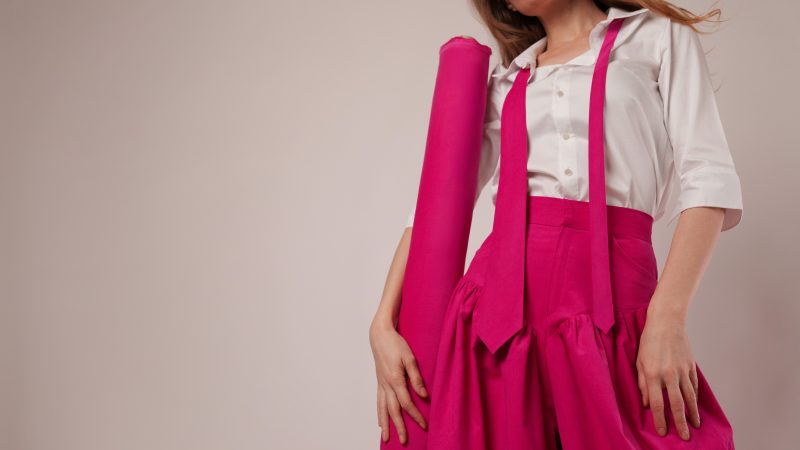
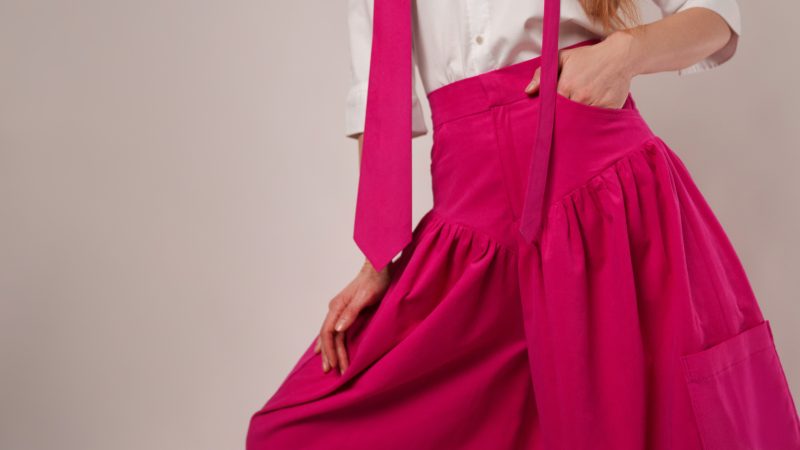
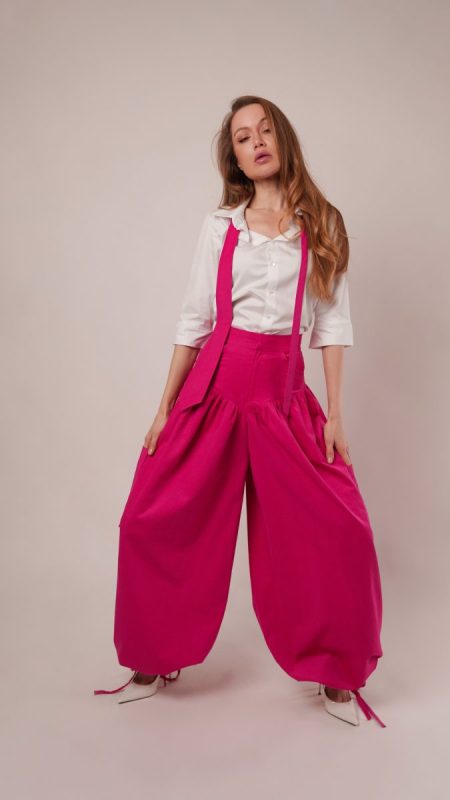
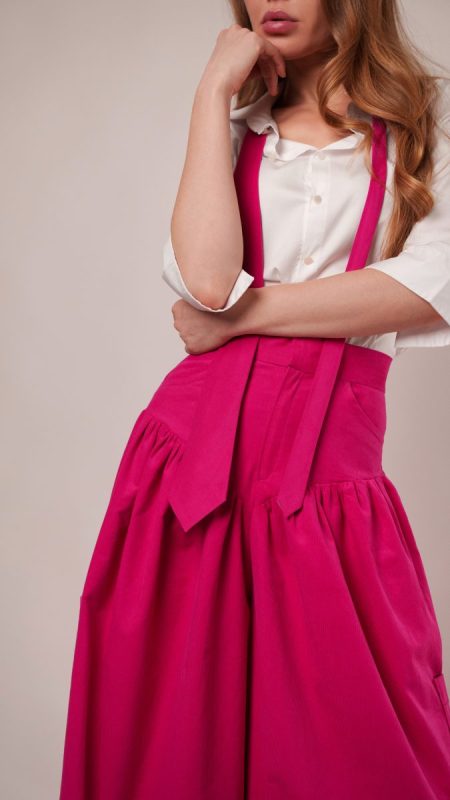
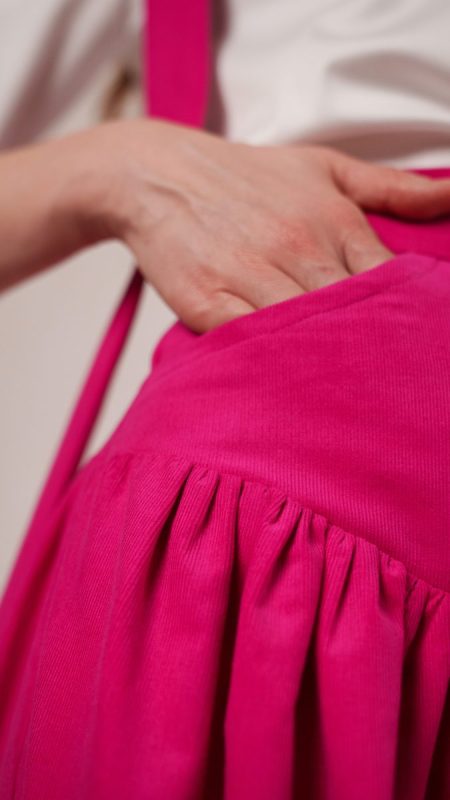
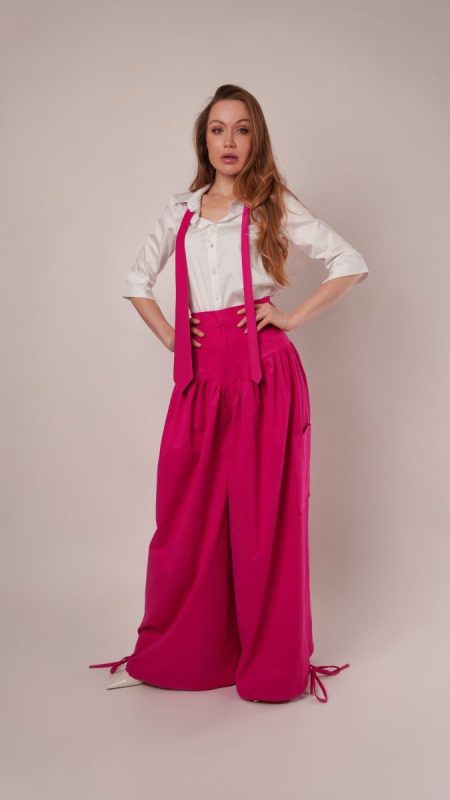
Meet the Augusta Trousers, where structure and softness strike a stylish truce. Crafted in a medium weight featherwale cotton corduroy, these trousers hold their exaggerated shape while feeling wonderfully cozy and spacious. Classic jeans-style pockets anchor the front waist, while generous cargo pockets along the side seams add both utility and attitude.
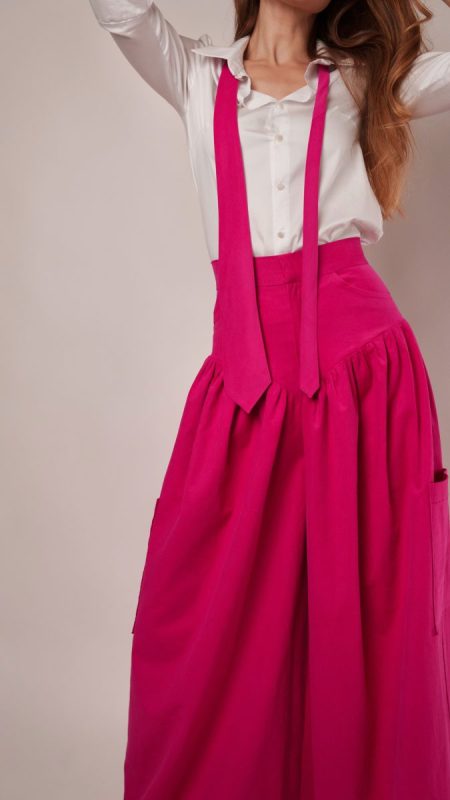
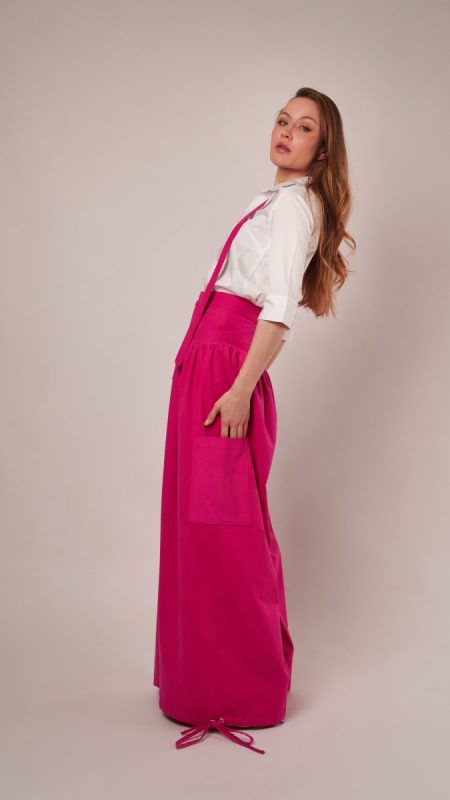
The wide legs are finished with adjustable drawstrings at the hem, allowing you to cinch them into an oversized jogger or harem-inspired silhouette. At the waist, a sleek hook and eye closure keeps the look polished, while the V-shaped yoke hugs the body just enough to create a flattering contrast against the voluminous, gathered legs.
Designed for all seasons and all occasions, the Augusta Trousers are a true styling chameleon. Sew them in corduroy for everyday warmth, twill for a workwear edge, or something unexpected to make them your own. We paired the Augusta Trousers with our newly released Bayport Blouse free sewing pattern, learn how to sew the clown-core inspired blouse and see how we styled it with the Augusta Trousers. However you wear them, this is a piece that earns its place in your wardrobe.
Essential Materials & Sizing Guide for the Augusta Trousers
Continue reading for a breakdown of what knowledge and materials you need for creating your very own shirred, drawstring hem trousers! We’ve got you covered with the recommended materials we used—if you want to follow along exactly—as well as a curated list of alternative fabric type recommendations if you want to customize your own version. The Augusta Trousers free sewing pattern download includes technical drawings for seam and silhouette visibility, plus a size chart to help you find your perfect fit!
Purchase Products Used Below:
Quantities indicated are for sewing a size small pair of trousers.* Toggle the ‘SHOP THIS LOOK’ box to find quantity estimates for other sizes.
- 3.5 yards of Featherwale Cotton Corduroy – Candy Pink – Dawn Collection
- 0.5 yards of Premium Rainbow Checks Cotton Shirting
- 1 each of Dritz Black and Nickel Sew-On Skirt Hook & Eye Closures – 4ct
- 1 each of Regular Zipper 9″ by YKK – 516 Fuchsia
- 2 each of Gutermann Sew All Thread 100m – 318 Fuchsia
- 1 each of Dritz Nickel Grommets Size 3/8″ – 8ct
- 0.5 yards of Super White Hot Rolling Nonwoven Fusible Interfacing
- MDF495 – Augusta Trousers Sewing Pattern (Free download below!)
*Quick Tip! The ‘SHOP THIS LOOK’ box defaults to full-yard quantities. To order an exact half-yard quantity for any fabric, simply use the decrease quantity button (-) to subtract by the half yard. Then click “ADD TO CART” to add all materials to your cart.
(Our system can only display full-yard quantities initially.)
Alternative Fabric Type Recommendations:
The Augusta Trousers sewing pattern is best suited for medium weight non-stretch fashion fabrics. Explore other fabric types or colors from our featured collections for your fun-styled trousers with the links below.
Download Your Free Sewing Pattern
Submit your name and email in the form below to receive the download link for the Augusta Trousers free sewing pattern directly in your inbox. Mood Sewciety Patterns will send your free download link via email with the subject line: ‘Your Free Download from Mood Sewciety – The Augusta Trousers’ (in PDF format for A4 and letter-size printing).
© MoodFabrics.com / MoodSewciety.com – Mass production, resale, or distribution of this pattern in any form is strictly prohibited.
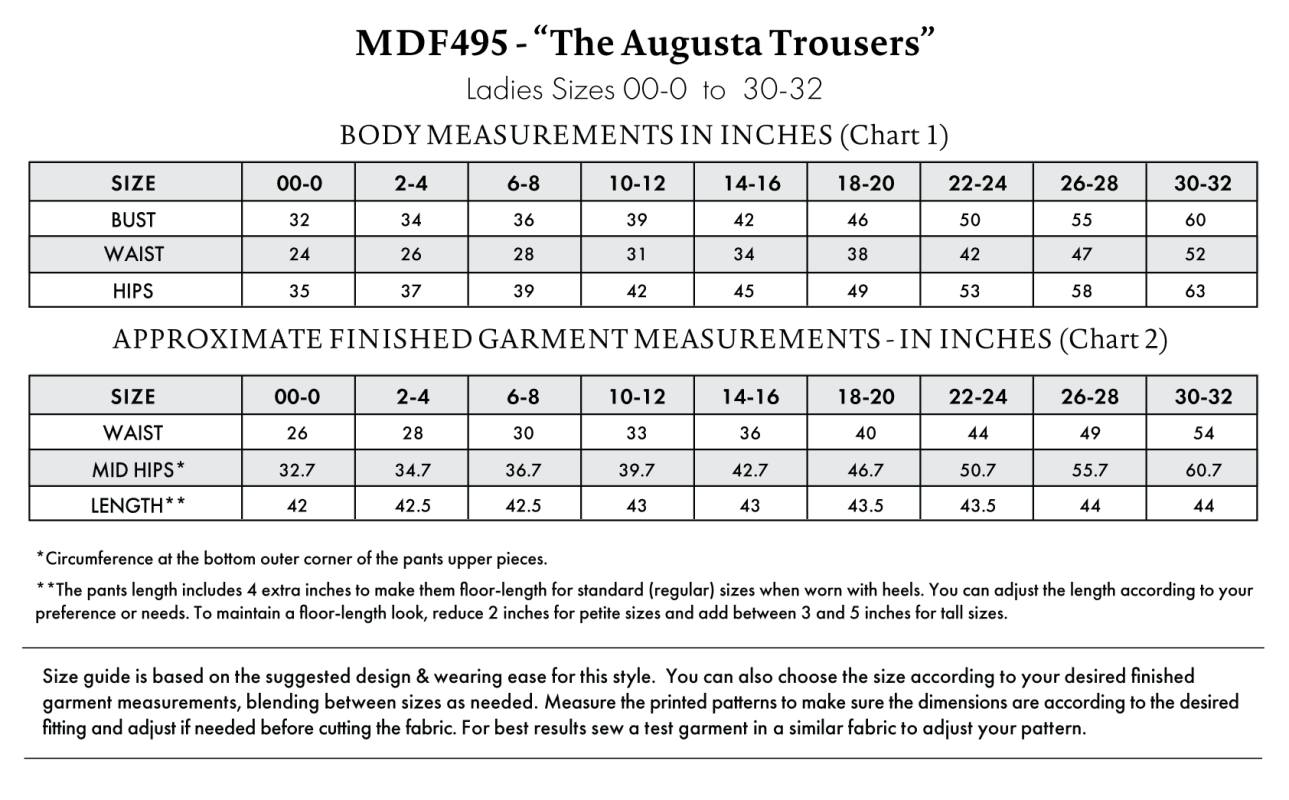
Find Your Perfect Fit
The Augusta Trousers Sizing Guide is based on the suggested design & wearing ease for this style. You can also choose the size according to your desired finished garment measurements, blending between sizes as needed. Measure the printed patterns to make sure the dimensions are according to the desired fitting and adjust if needed before cutting the fabric. For best results, sew a test garment in a similar fabric to adjust your pattern.
Note: Always read all the instructions before cutting the fabric!
How to Sew The Augusta Trousers
The instructions provided below are designed to guide you through sewing the Augusta Trousers from start to finish.
2 Tips for Sewing with Corduroy
⇒ Make sure all your wales are facing in the same direction as the grainline of your pattern pieces so that all the lines match up at the end.
⇒ Iron all your seams open and flat. Corduroy is cotton, so it will hold a press.
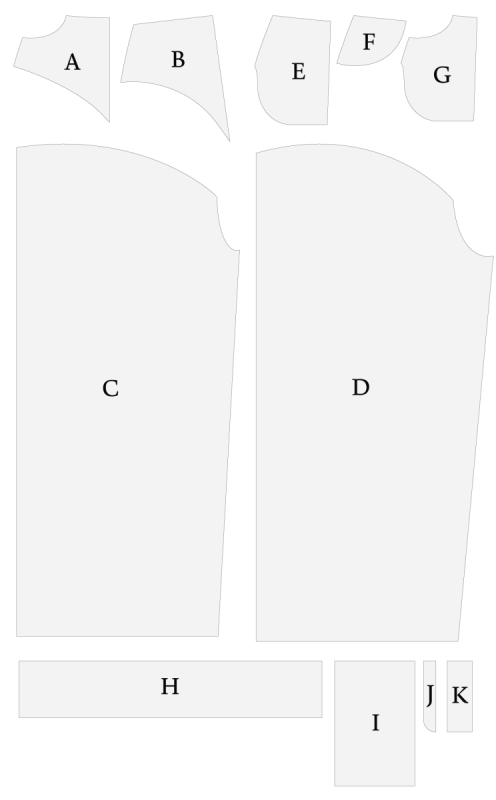
Pattern Pieces & Fabric Cuts Needed
- (A) FRONT UPPER
- FABRIC – CUT 2 MIRRORED
- (B) BACK UPPER
- FABRIC – CUT 2 MIRRORED
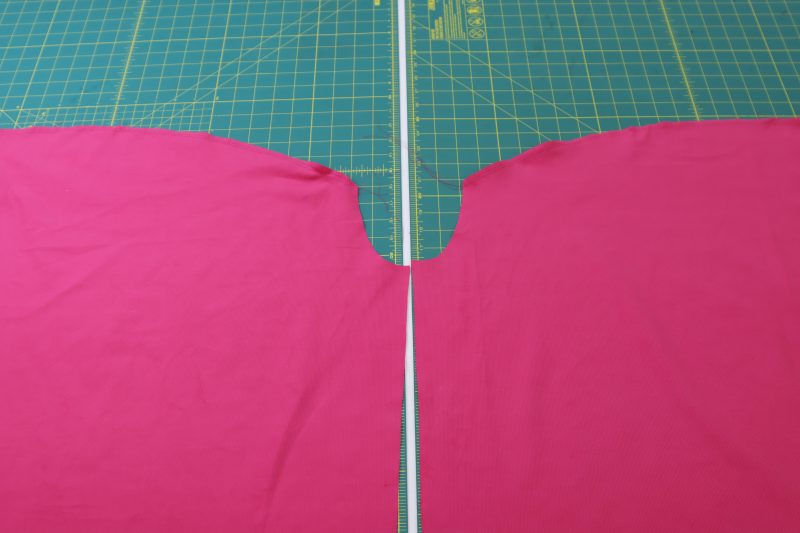
- (C) FRONT LOWER
- FABRIC – CUT 2 MIRRORED
- (D) BACK LOWER
- FABRIC – CUT 2 MIRRORED
- (E) FRONT POCKETS (A)
- LINING – CUT 2 MIRRORED
- (F) FRONT POCKETS (A) FACING
- FABRIC – CUT 2 MIRRORED
- (G) FRONT POCKETS (B)
- LINING – CUT 2 MIRRORED
- (H) WAISTBAND
- FABRIC – CUT 1
- (I) CARGO POCKET
- FABRIC – CUT 2
- (J) FLY
- FABRIC – CUT 2
- (K) FLY SHIELD
- FABRIC – CUT 1
Sew with a 1/2″ seam allowance for all seams unless otherwise specified.
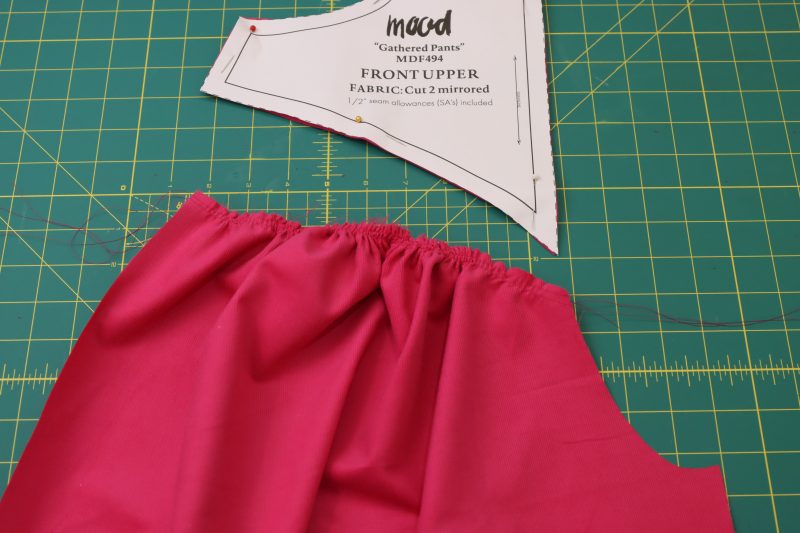
Step 1
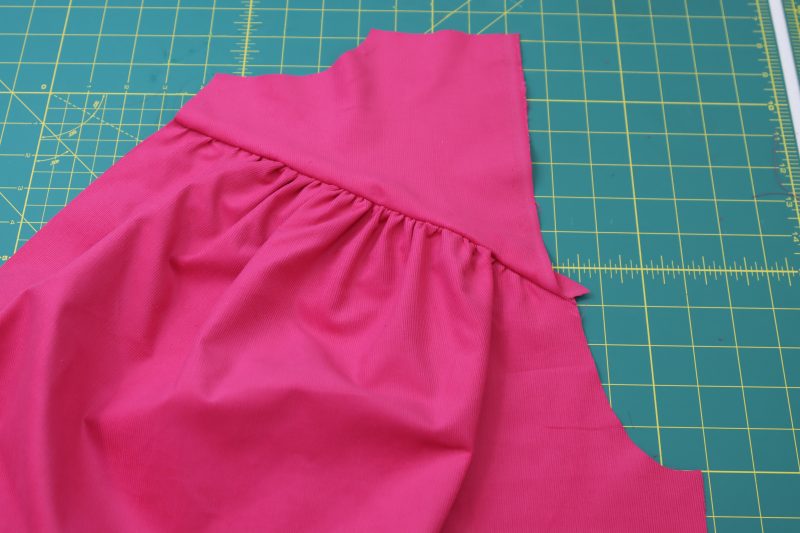
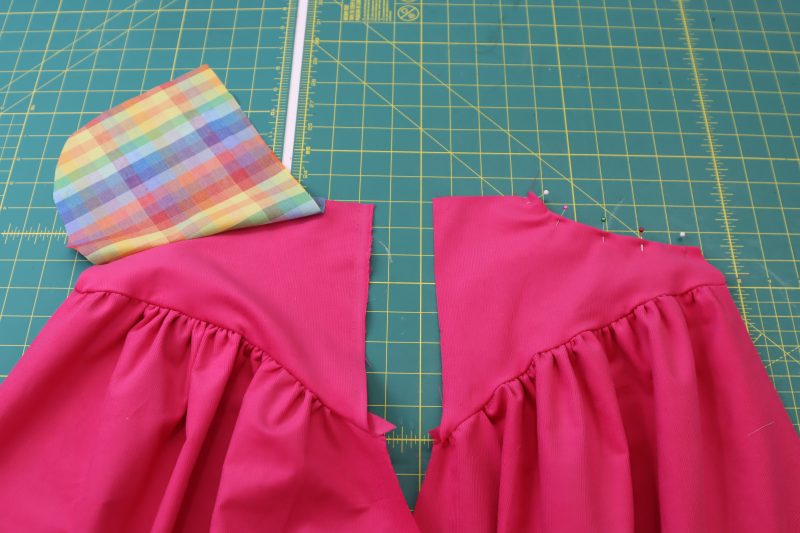
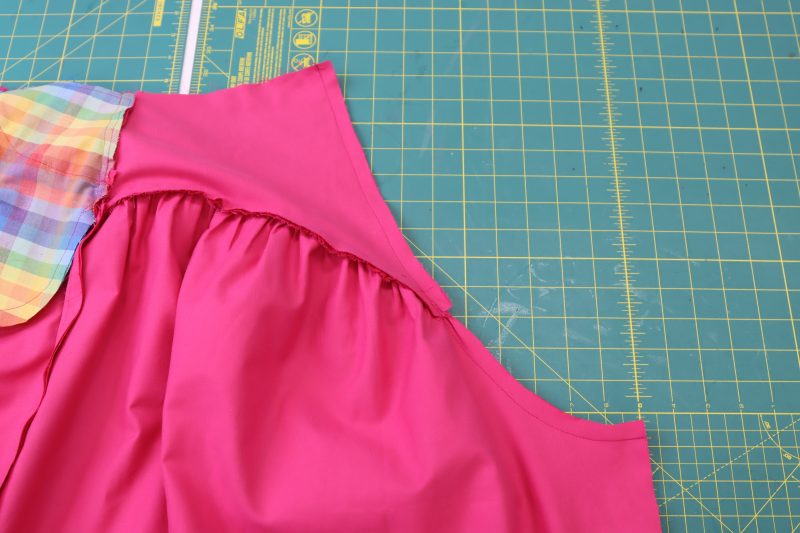
GATHER PANT LEGS
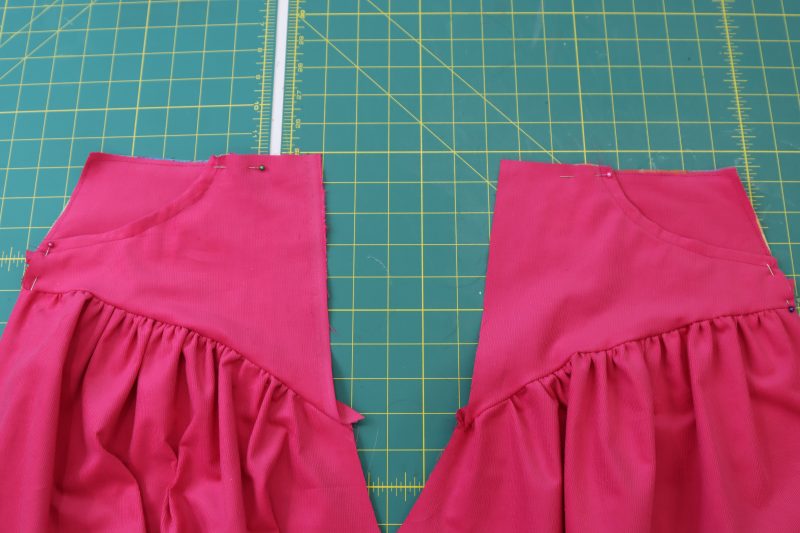
- Sew two parallel straight stitches with a stitch length of 3.5 millimeters along the top curved edges of each of the lower pants pieces (front and back).
- Gather the tops of the lower pants pieces until they are the same length as the bottom edge of the upper pants pieces.
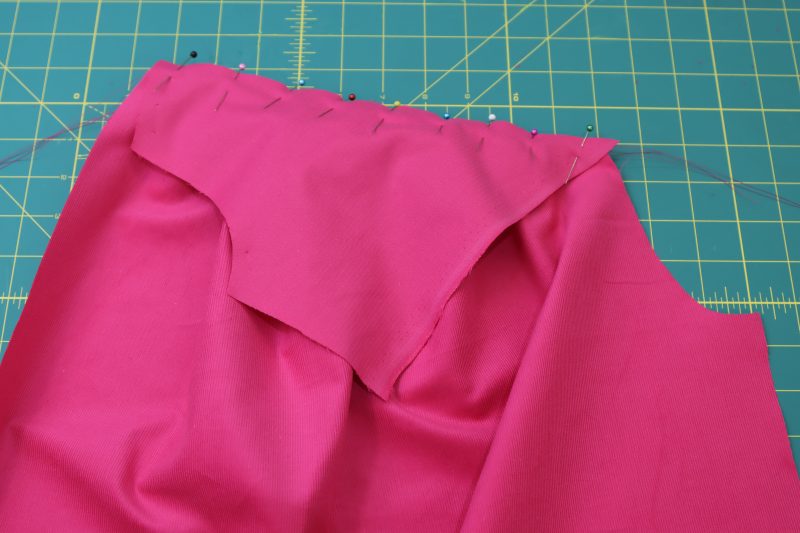
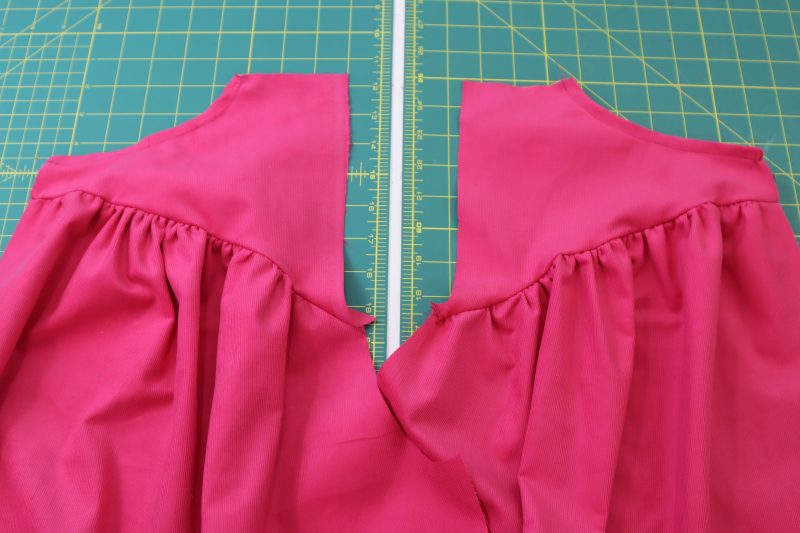
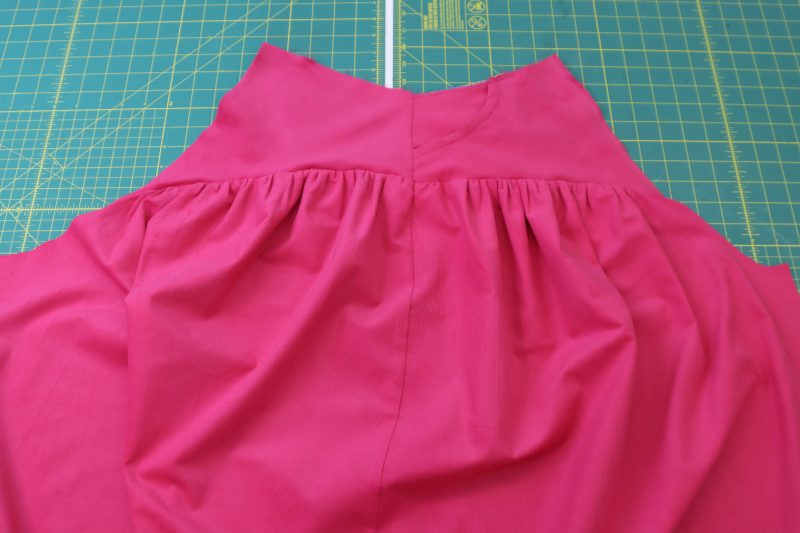
Step 2
CONSTRUCT PANT LEGS
- Place the bottom edge of each lower pants piece along the gathered edge, right sides together.
- Pin and sew the lower pants pieces to the upper pants pieces.
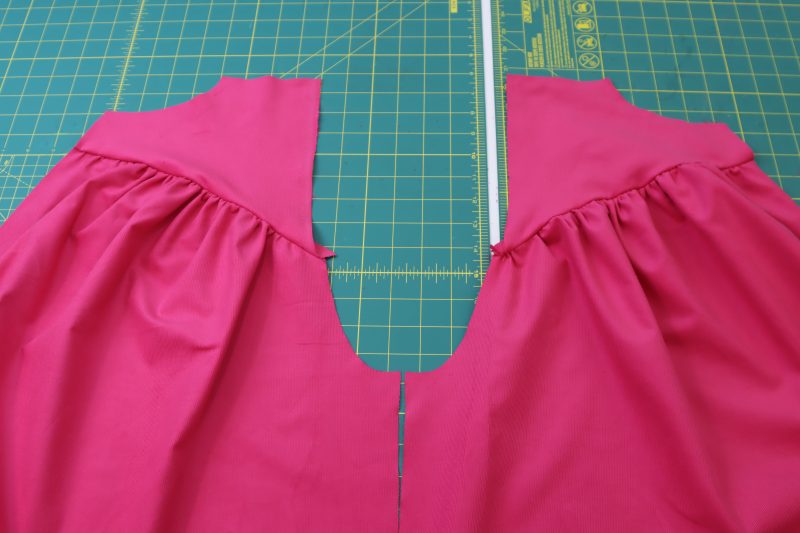
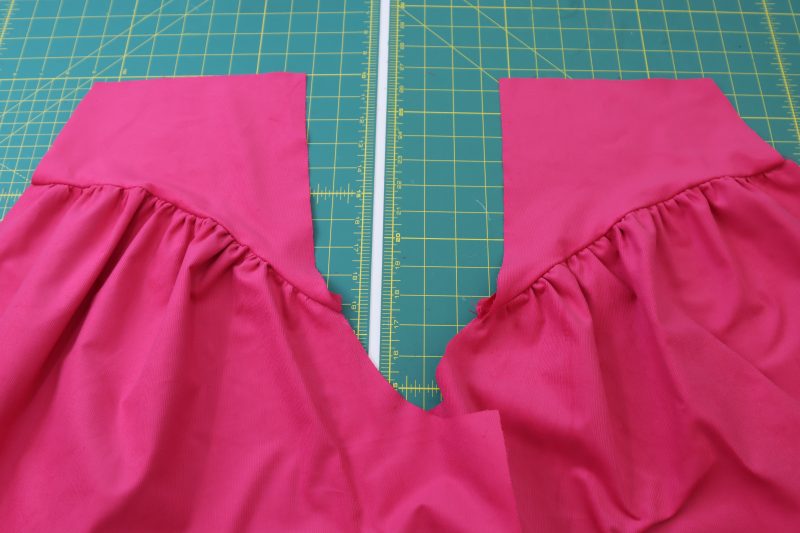
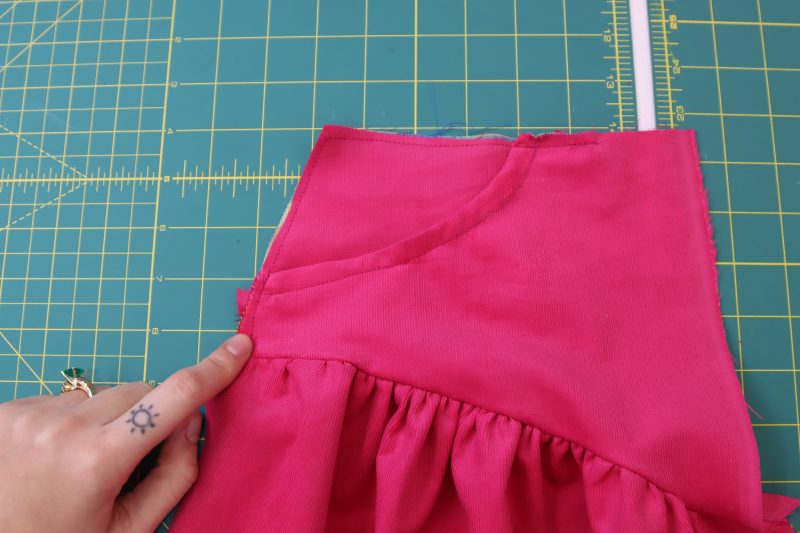
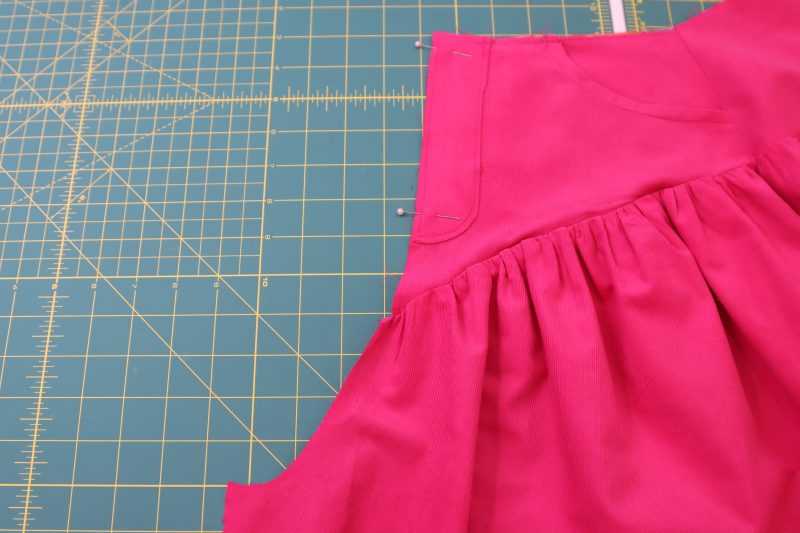
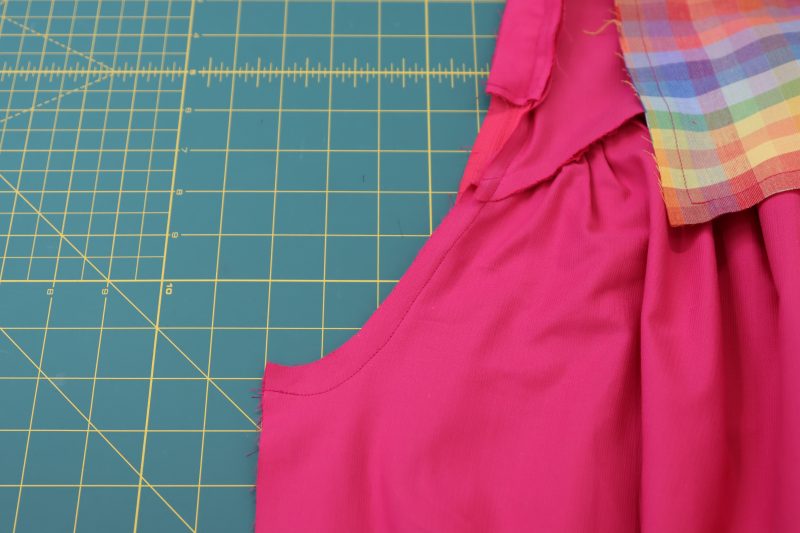
Step 3
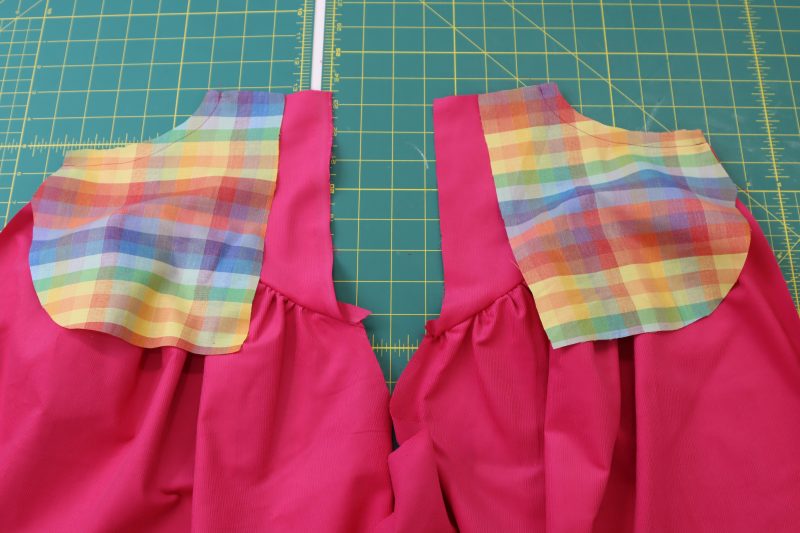
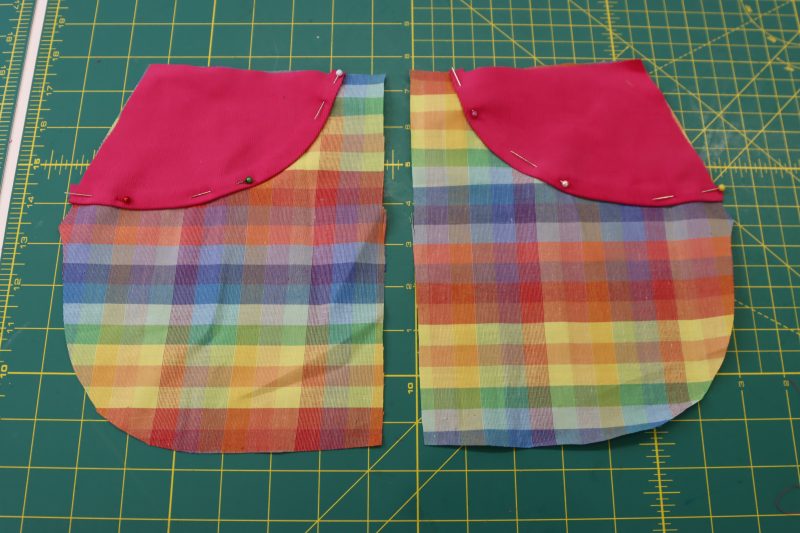
FRONT POCKETS
- Place front pockets B along the curved edge of each front upper pants piece.
- Pin the curved edge of pockets B to the curved edge of the front upper pants pieces.
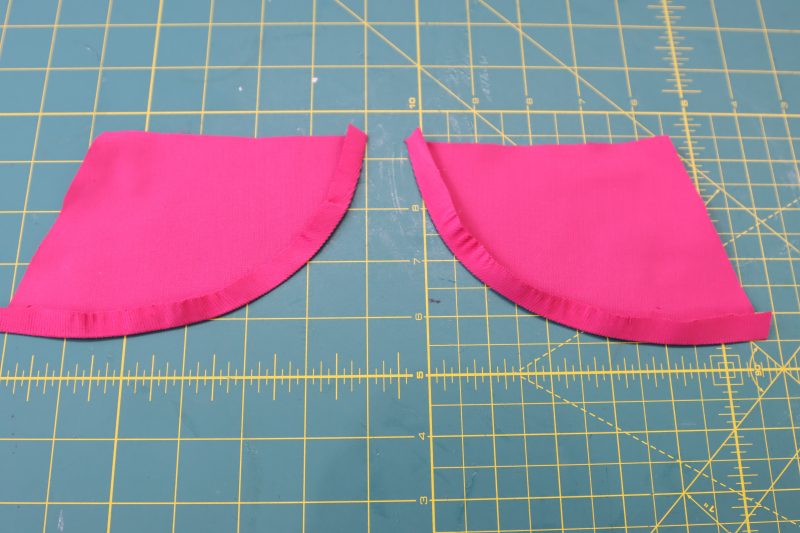
- Sew the curved edge.
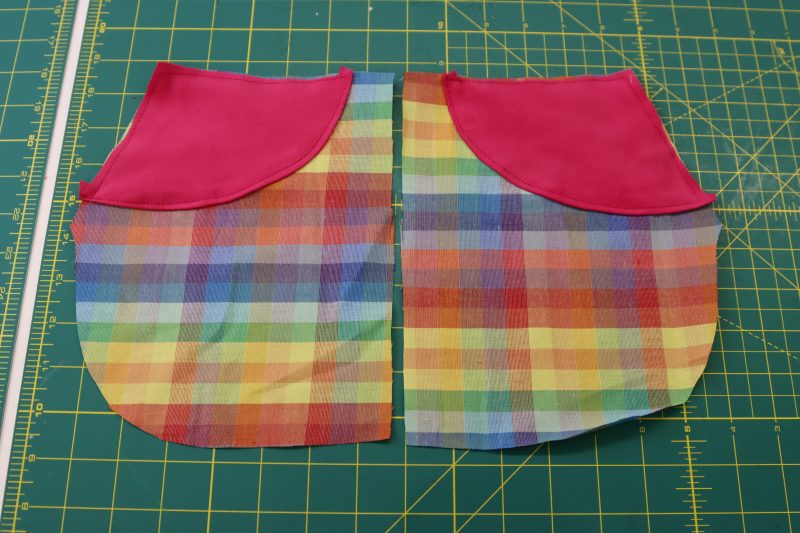
- Flip the pocket so that it is wrong sides together with the front upper pants piece, hiding the seam allowance.
- Iron the pocket so that it is completed tucked behind the front upper pants pieces.
- Topstitch over the curved edge of the pocket.
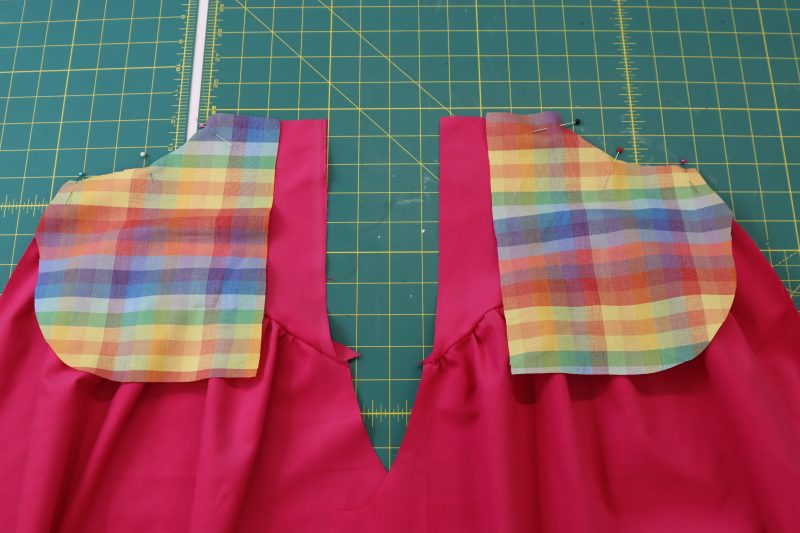
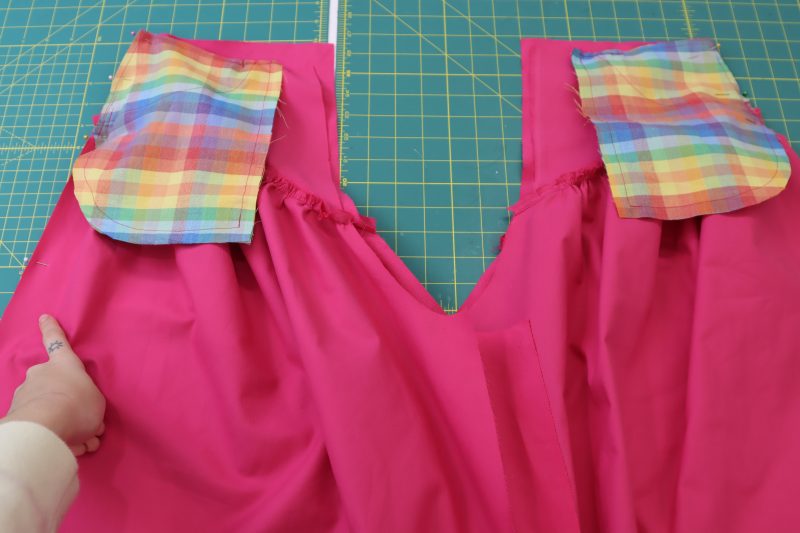
Step 4
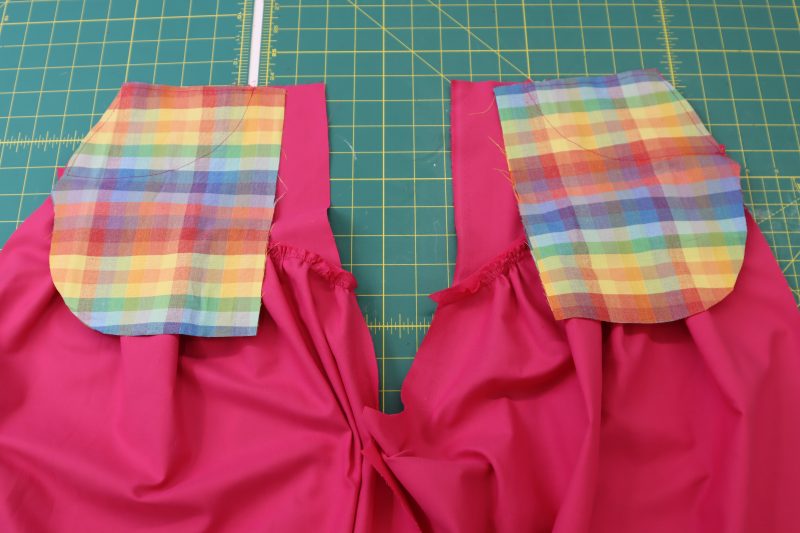
FRONT POCKETS FACING
- Fold and press the rounded edge of the pocket facings so that they have a ½ inch seam allowance.
- Pin the folded and pressed pocket facings to the corners of the A pocket pieces.
- Sew the pocket facings to pockets A.
Step 5
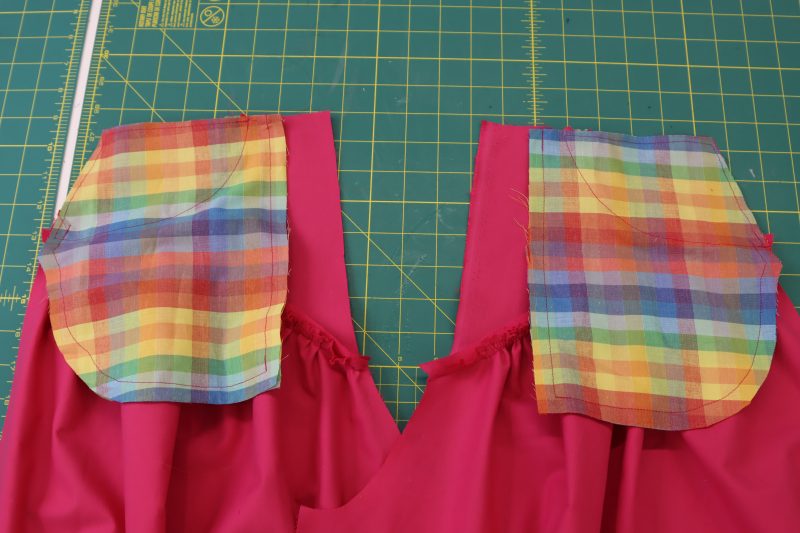
CONSTRUCT POCKET BAG
- Place pockets A on top of pockets B from the inside of the pants.
- Pin and sew around the sides of the two pockets to create a pocket bag on each side of the pants.
- Pin and sew stay stitches or tacks at the top and side of the pockets to connect them to the pants.
Step 6
SIDE SEAMS
- Place the front and back pants pieces right sides together with the sides lined up.
- Pin and sew the side seam of the pants on both sides.
- Open the side seam and press it flat.
Step 7
CARGO POCKETS
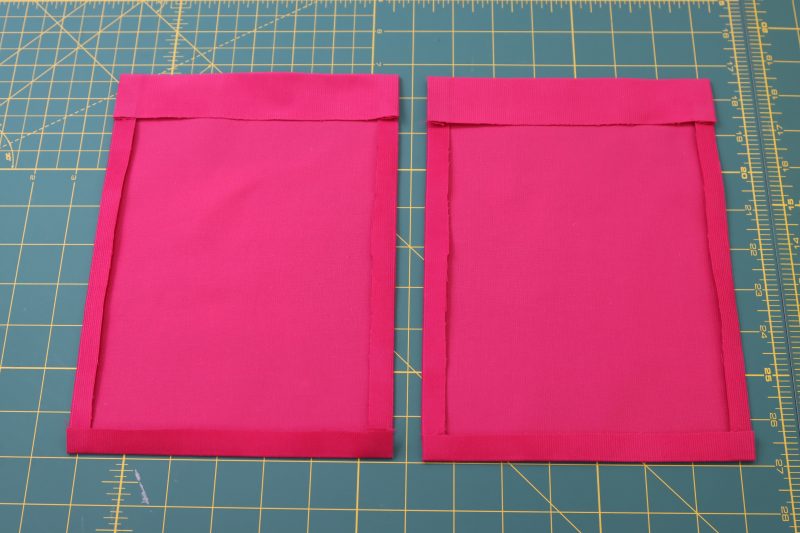
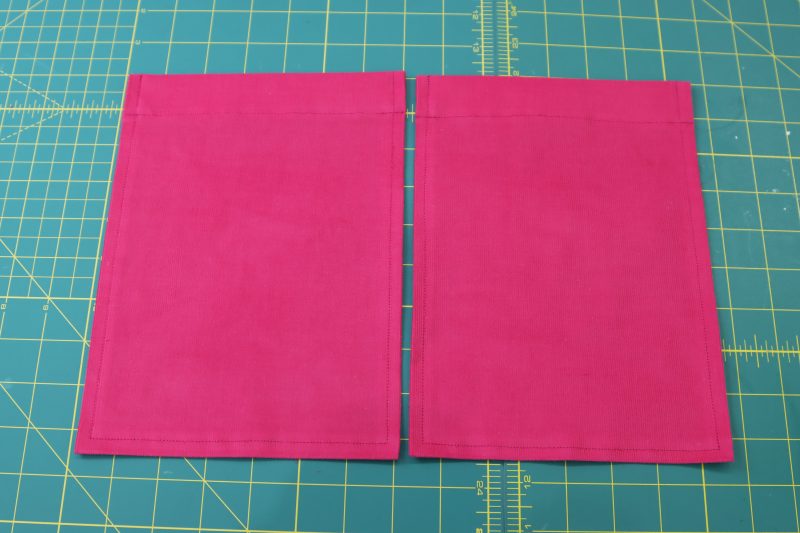
- Fold the two long edges and one of the short edges of each cargo pocket towards the wrong side of the fabric with ½ inch seam allowance and press into place.
- Fold the top edge of the cargo pockets down by 1.25 inches and press into place.
- Topstitch over the folded edges.
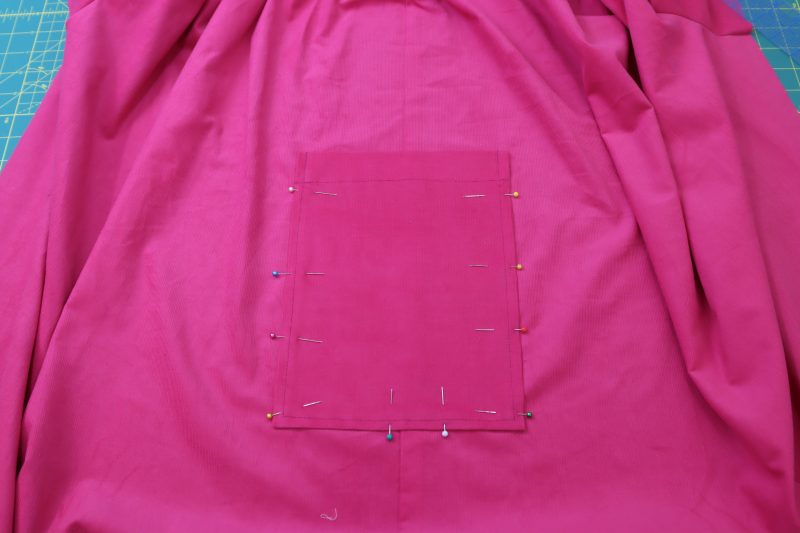
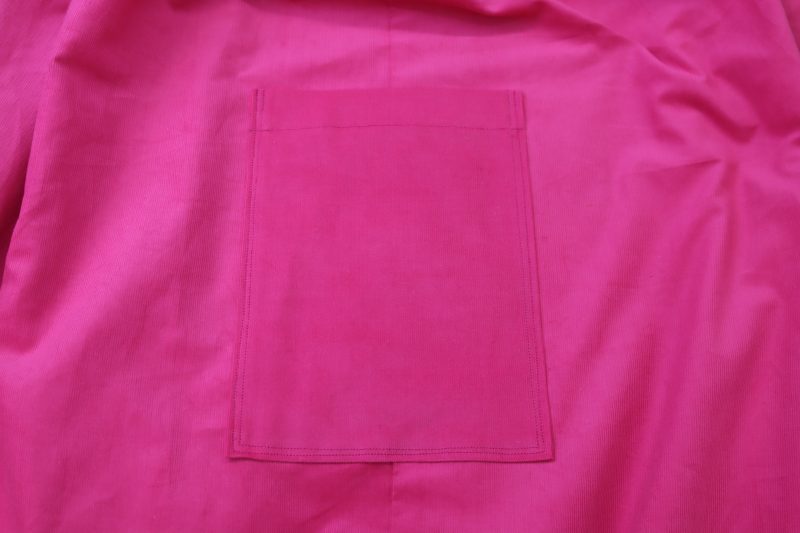
- Pin the cargo pockets to the side seams of the cargo pants (I put mine 10 inches down from the seam where the upper pants are connected to the lower pants).
- Sew the sides and bottoms of the cargo pockets to the sides of the pant legs.
Step 8
PREPARE FLY
- Fold the fly shield wrong sides together and pin in place.
- Place the two fly facing pieces wrong sides together and pin in place.
- Sew around the edges of the fly pieces with ¼ inch seam allowance.

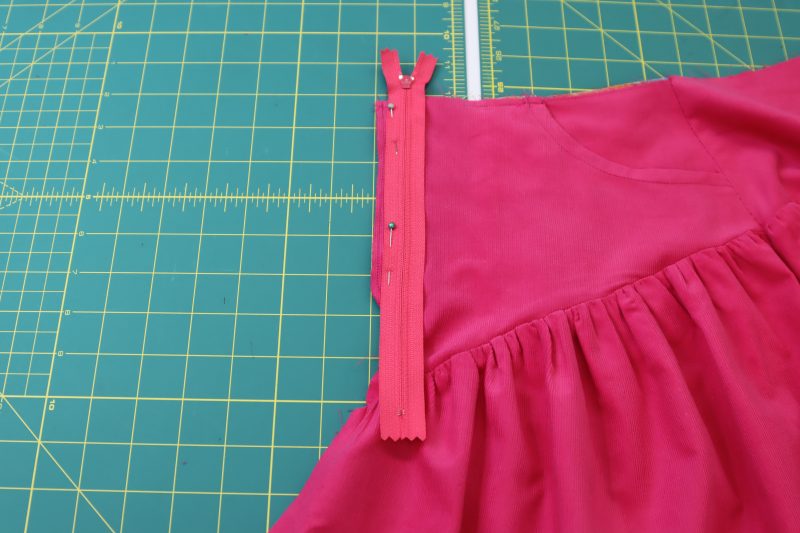
Step 9
FLY FACING
- Pin the fly facing to the front center of the front upper pants piece, right sides together.
- Sew the fly facing to the pants.
- Open the fly facing and press flat.
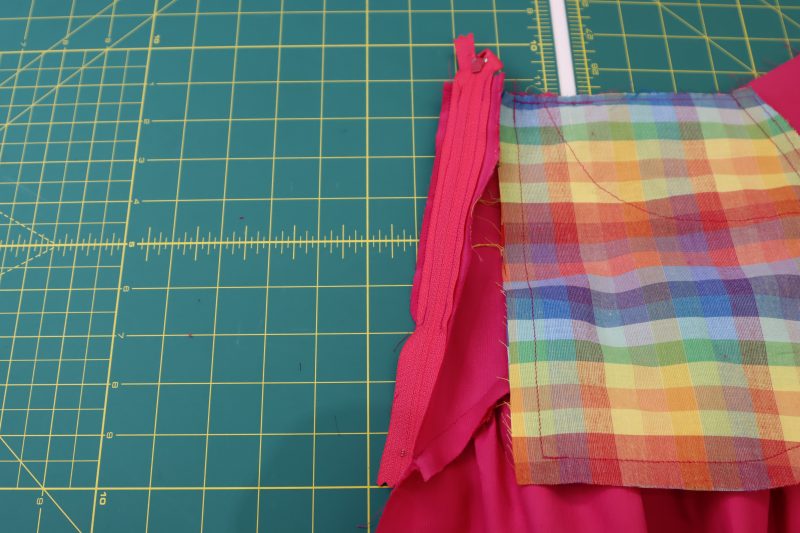
- Place the zipper right sides together with the opened fly facing.
- Pin and sew the zipper to the fly facing as shown in the photo below.

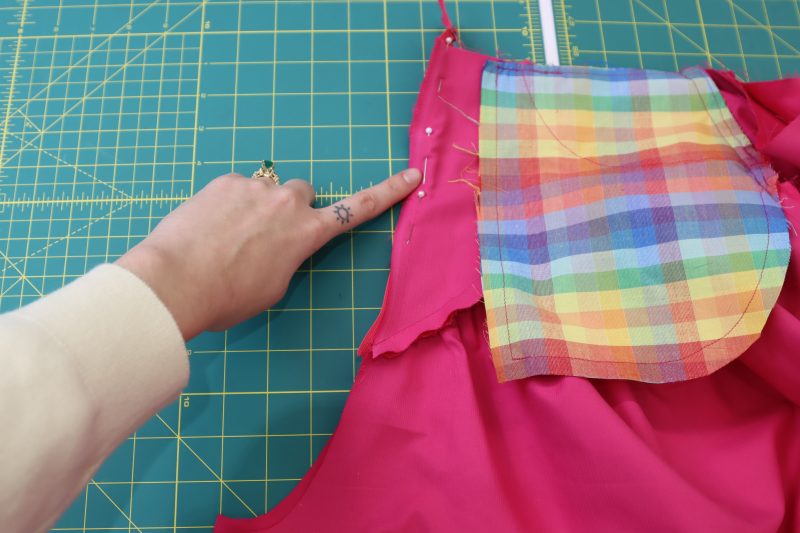
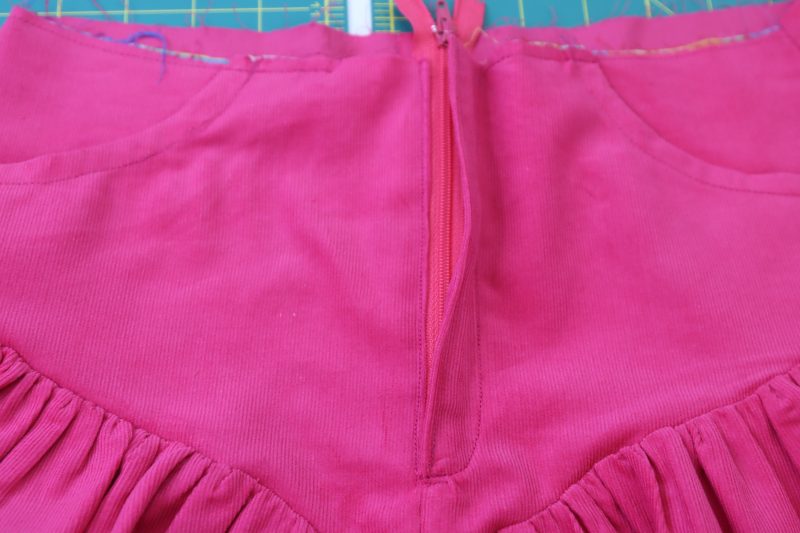
Step 10
FLY SHIELD
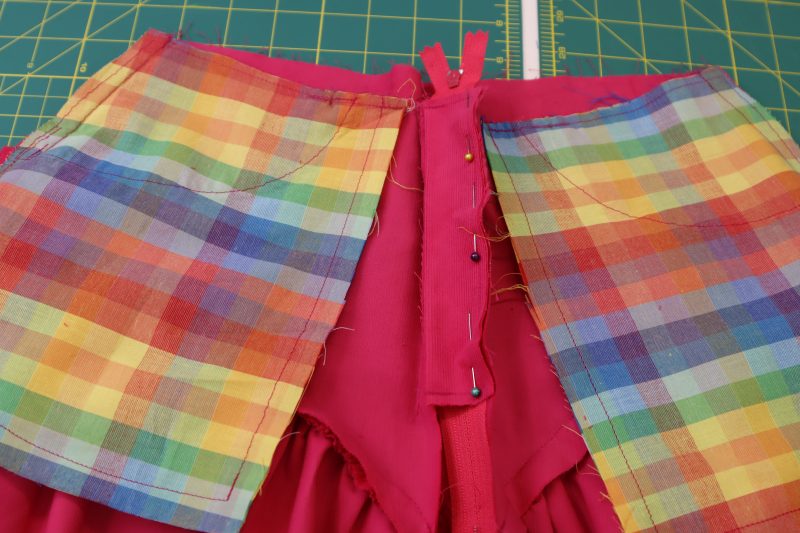
- Pin the opposite side of the zipper to the opposite front upper pants piece.
- Sew the zipper to the other side of the pants.
- Pin the fly shield to the zipper right on top of the seam you just sewed.
- Sew the fly shield in place.
Step 11
CROTCH SEAMS
- Fold the pants so that the two front crotch edges are lined up and the pant legs are right sides together.
- Sew the front crotch seam until you reach the bottom of the zipper.
- Pin and sew the back crotch seam.
Step 12
TOPSTITCH FLY
- Topstitch the fly facing and shield next to the zipper tape.
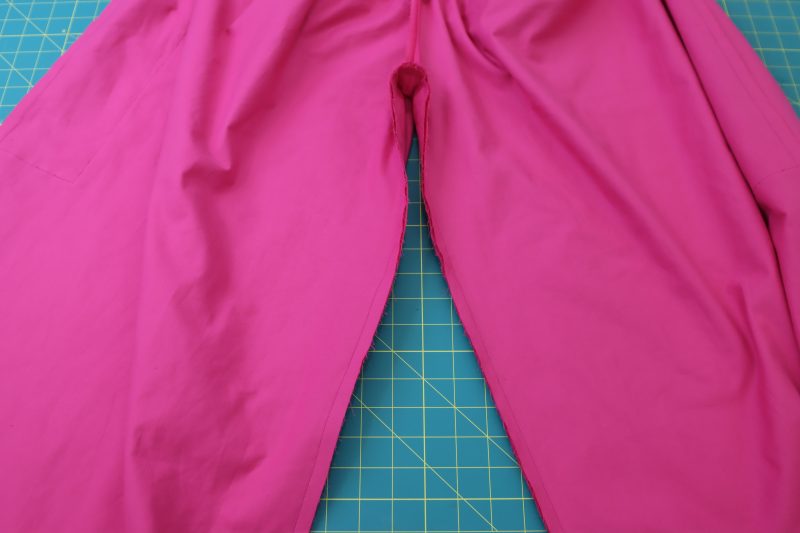
Step 13
INSEAM
- Fold the pants so that the front and back inseams are lined up right sides together.
- Pin and sew the inseam.
Step 14
WAISTBAND
- I forgot to put fusible interfacing on my waistband, but I highly recommend using it if you want your waistband to hold its shape.
- Fold the waistband right sides together so that the two long edges are touching each other.
- Sew the two short edges of the waistband.
- Flip the waistband right sides out.
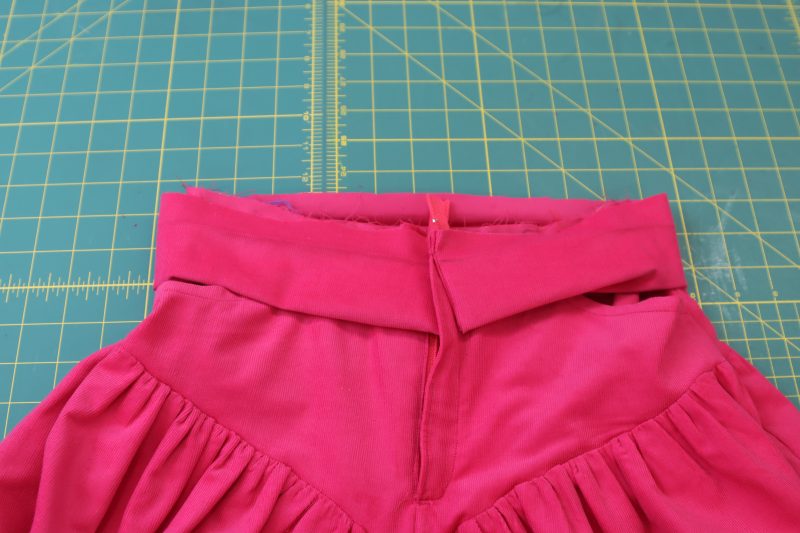
- Pin and sew only one of the raw edges of the waistband to the waistline of the pants, right sides together.
- Flip the waistband up so that the folded edge is at the top of the jeans.
- Fold the other raw edge of the waistband that has not been sewn yet so that the raw edge is hidden inside of the waistband.
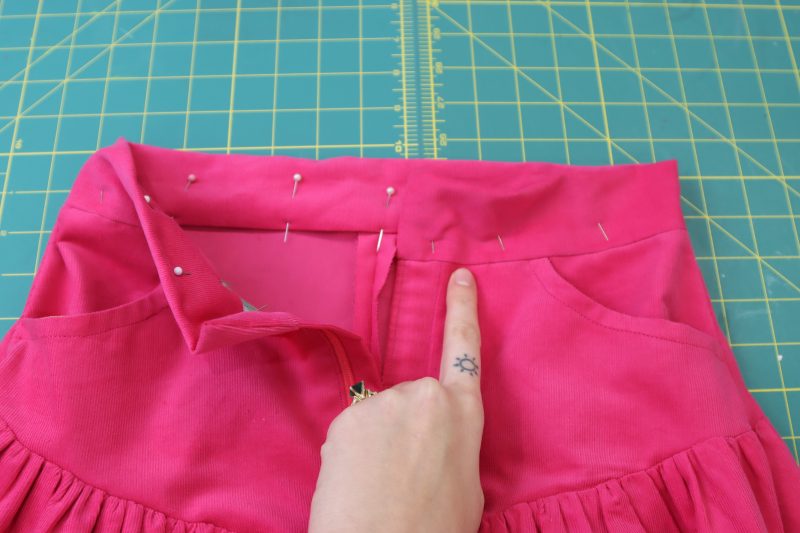
- Pin the folded edge of the waistband to the inside of the pants, making sure that the fold is lined up with the seam you sewed earlier in the step.
- Sew a stitch in the ditch of the first seam you sewed to connect the waistband to the waistline of the pants.
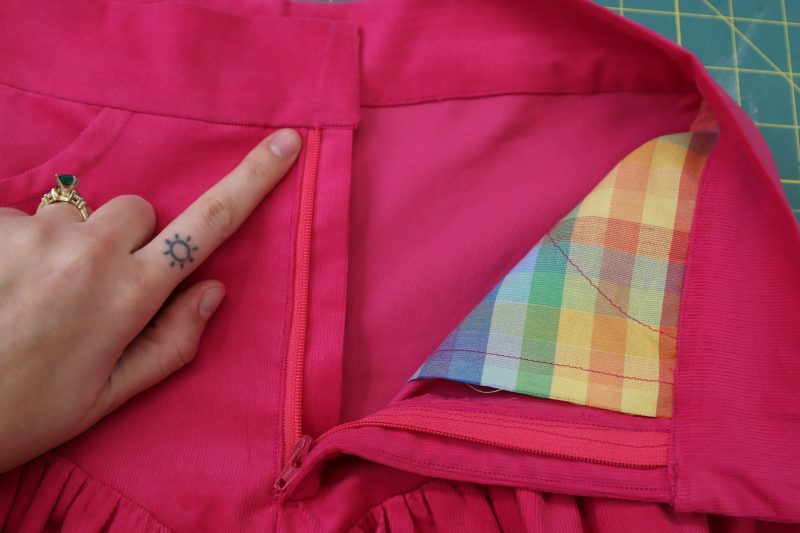
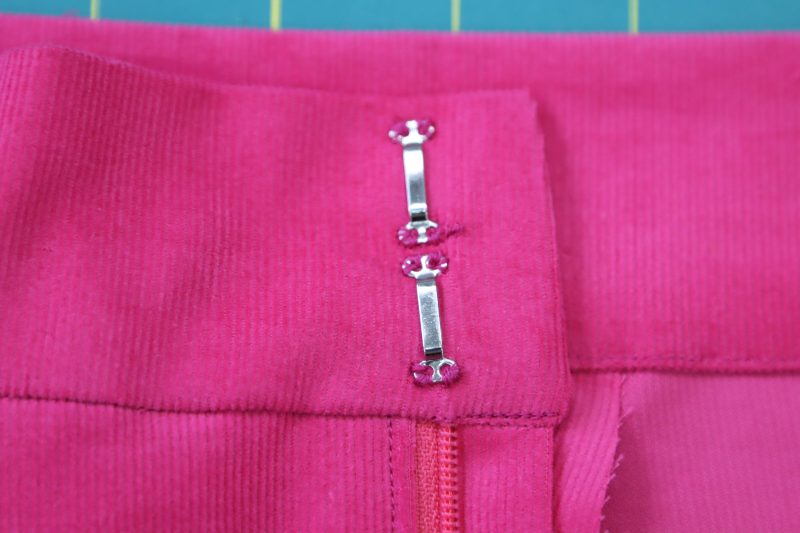
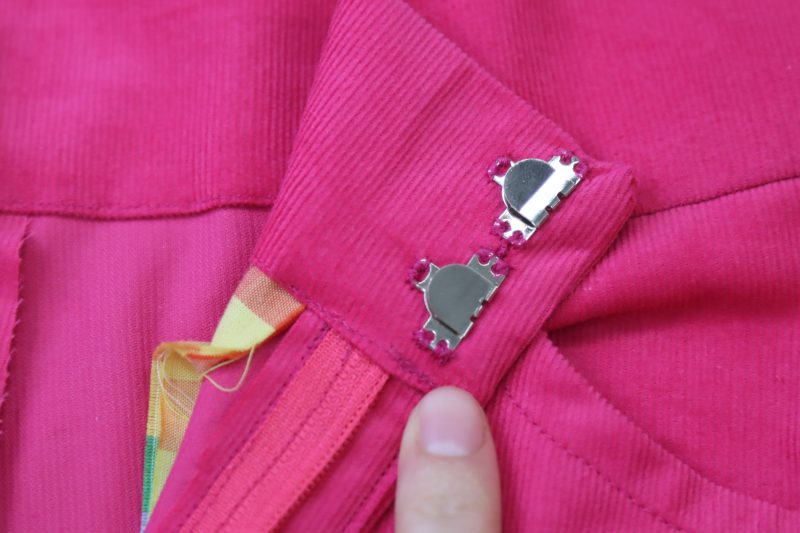
Step 15
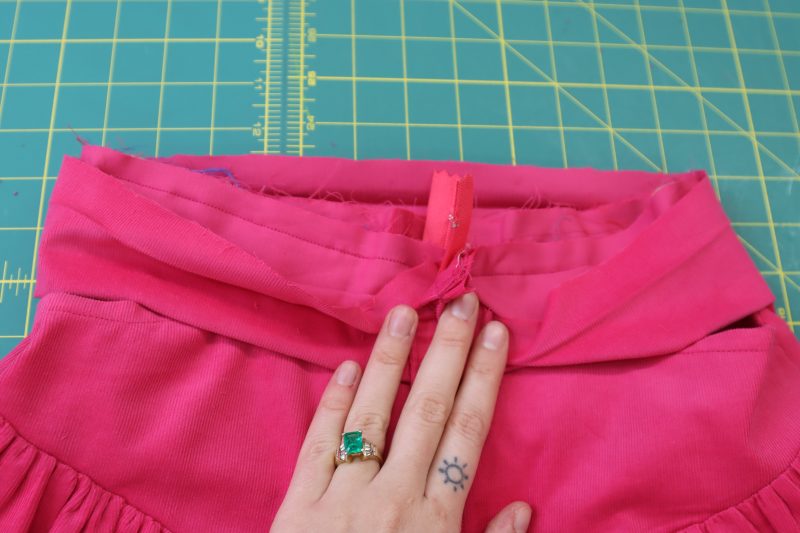
SKIRT HOOKS
- Hand sew the “loop” part of the hook and loop sets to the part of the waistband that is overlapped by the other side.
- Hand sew the “hook” part of the hook and loops sets to the inside of the overlapping waistband directly above the loops.
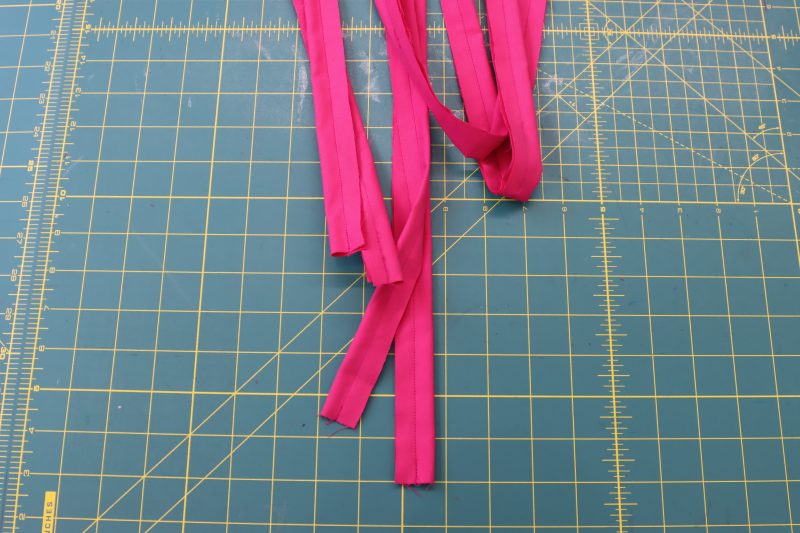
Step 16
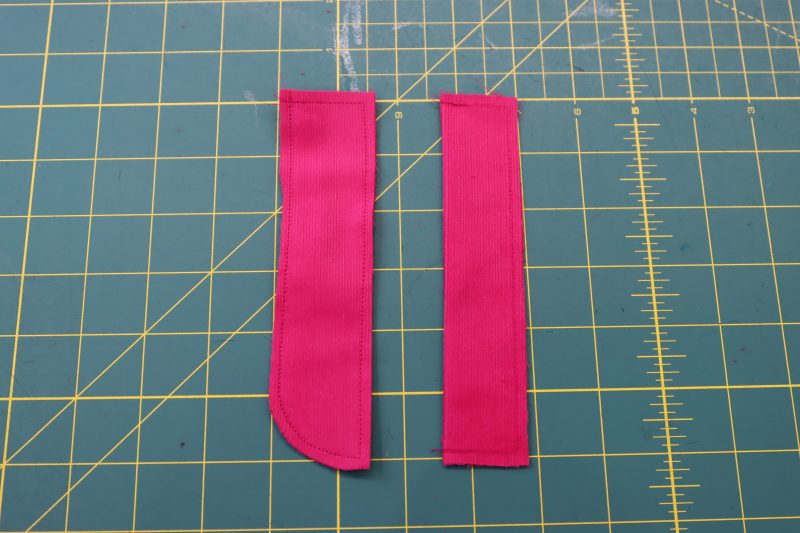
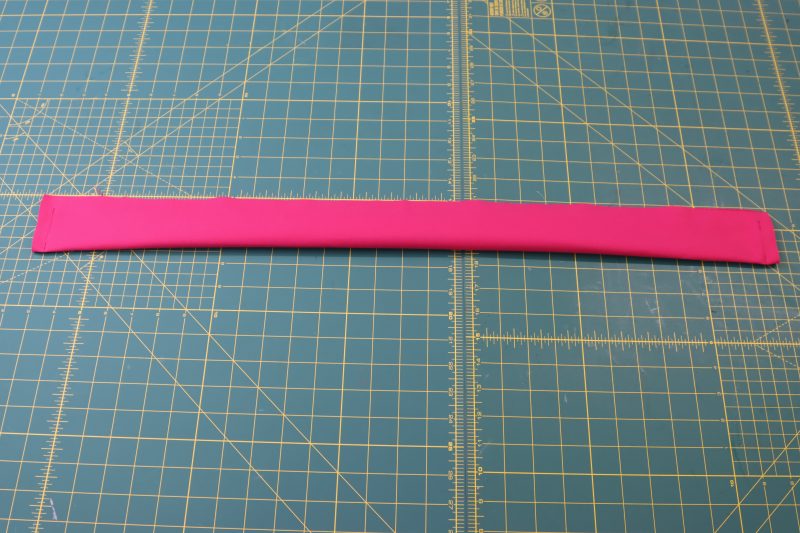
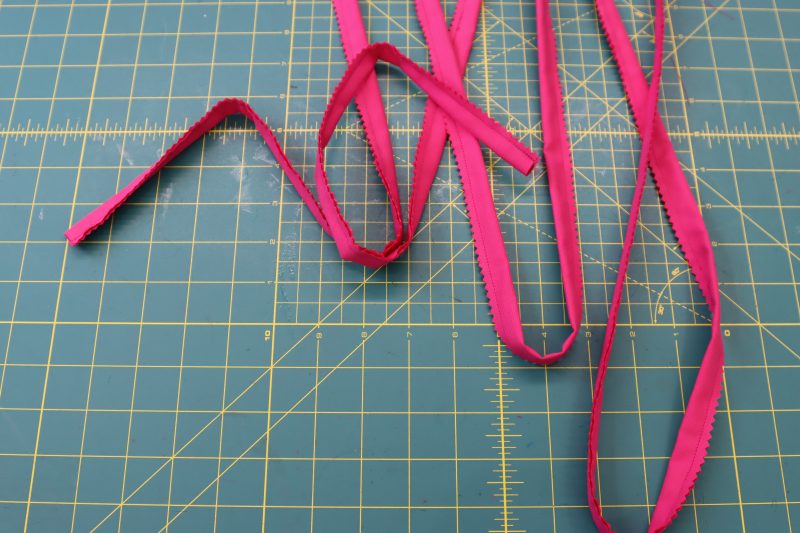
DRAWSTRINGS
- Cut long strips of fabric that are at least as long as the opening of the pant legs and 1.5 inches wide.
- Fold the strips in half right sides together and sew with 3/8 inch seam allowance.
- Trim the seam allowance with pinking shears.
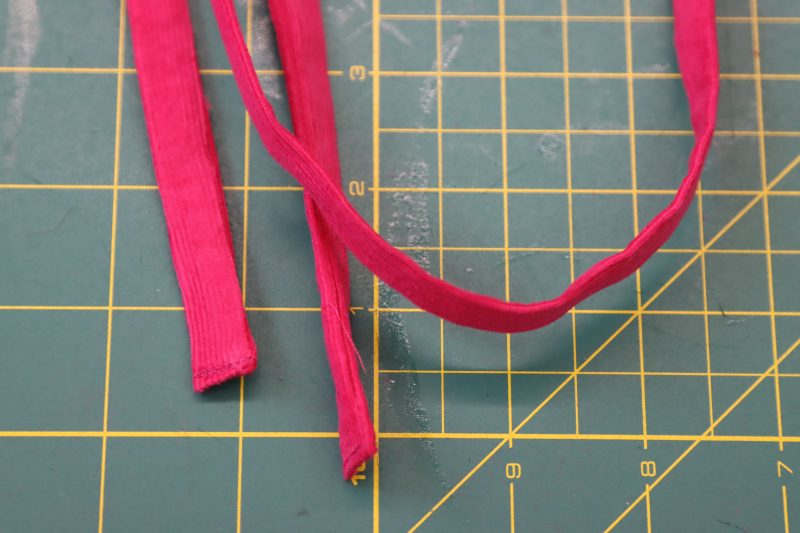
- Flip the tube right sides out with a tube turner.
- Tuck the raw edges of the strips into the tube and topstitch over them.
Step 17
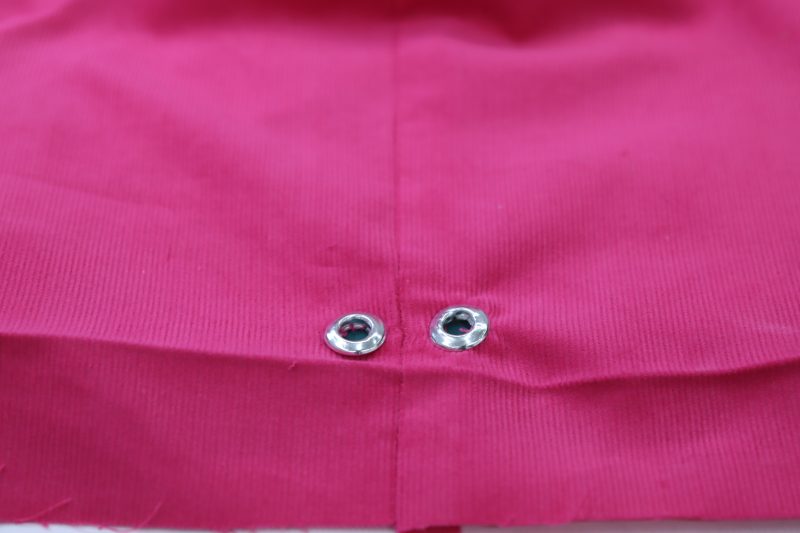
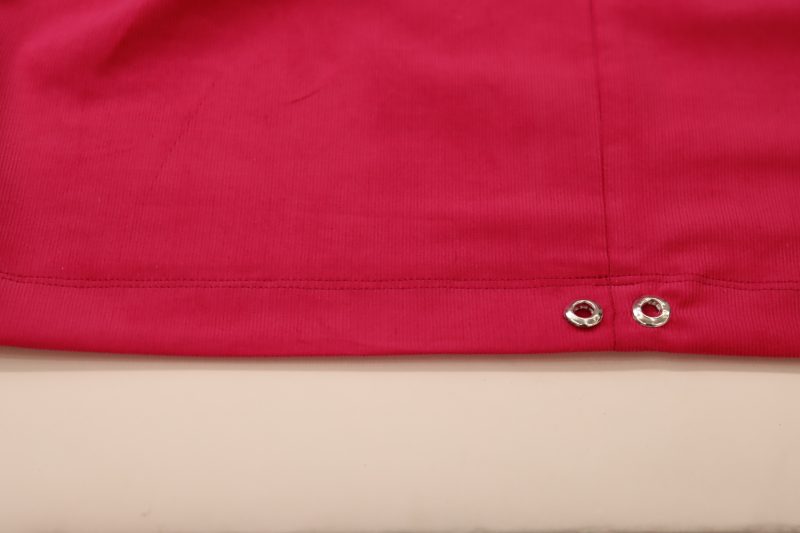
GROMMETS
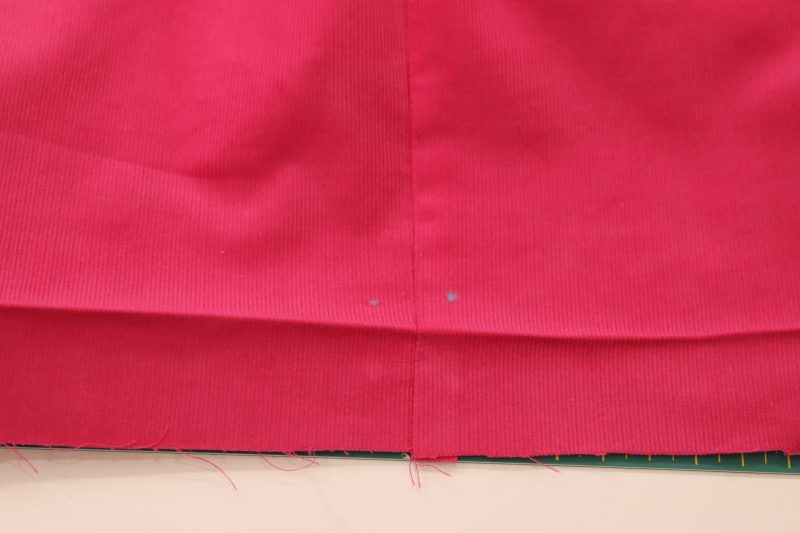
- Iron a 2 inch wide hem into the bottom of the pants.
- Unfold what you just pressed.
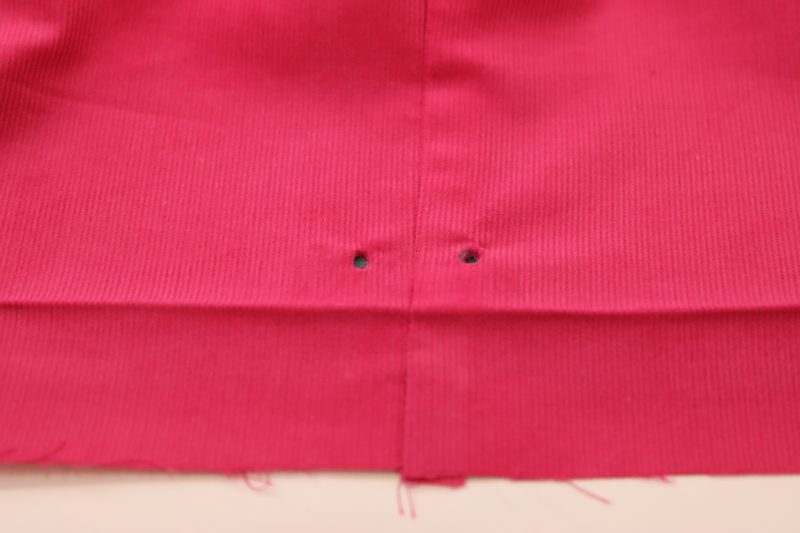
- Mark where you want your grommets to go for the drawstring at the bottom of the pants (I marked on either side of the side seam of the pants at the bottom of the hem).
- Poke holes into the marks you made with an awl.
- Put the front and back grommet pieces through the holes and secure them with a hammer.
Step 18
HEM
- Fold the ironed hem you made in step 17.
- Sew the hem into place with two parallel stitches.
Step 19
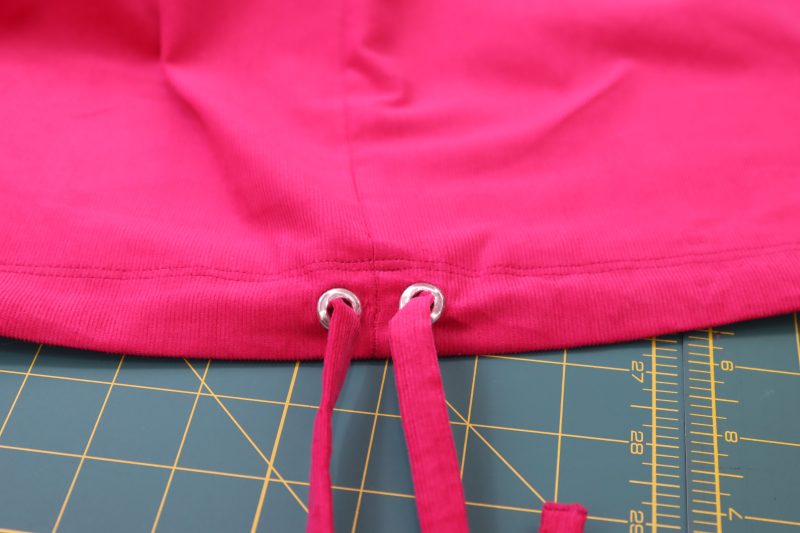
INSERT DRAWSTRING
- Insert the drawstring into one of the grommets.
- Feed it around the pants hem until you get to the other grommet.
- Pull the drawstring out the other grommet and pull until both sides of the string are even.
- Tie the drawstring in a bow.
Sewing Success: The Complete Augusta Trousers
Share this post with a friend (or two!), download the Augusta Trousers free sewing pattern, and show us which fabrics and colors you choose, using the hashtags #MoodAugustaPattern & #MadeWithMood—and don’t forget to tag us @MoodFabrics, too.

Free Sewing Pattern Inspiration for Your Next Project
With 490+ free sewing patterns and counting, your opportunities for sewing with Mood are endless!
We hope you had as much fun sewing this nuanced trousers pattern as we did! As always, we want to hear from you—share your thoughts and comments below and let us know where you’ll be wearing the Augusta Trousers free sewing pattern!
im so in love with these pants cant wait to sit down and make them
I love this unusual pattern as well! I’d like to make it as a lightweight skirt for spring and summer. I do love the wide leg trousers but as a 70 year old, I think I’d prefer a skirt in a beautiful pattern or lightweight denim.
Hey Teresa! Check out the tutorial for the Cunilla Skirt pattern. It’s a really similar silhouette to these pants, except its a skirt!
Es definitivamente un reto personal!!, pero fascinada de la comodidad que representa
Love it
I can’t wait to make these!
Thank you
Love the pattern, but, those ties on the pant legs are an accident waiting to happen while wearing high heels!
You’re also welcome to put elastic in the bottoms of the hems! That way there is nothing to trip on.
I love these pants! I’m wondering if instead of the fly zipper we could do an invisible zipper in the back??
Hey Sabrina! Yes, you could totally do an invisible zipper in the back. If you do, just omit all the fly pieces in the front and sew the front crotch seam all the way together. Then just leave the back crotch seam open to add the zipper.
Love these pants. I made them in linen and now in baby wale corduroy. I left off cargo pocket and drawstring. They turned out great!
how come no one has done a you tube tutorial?????!!! I am a new to sewing.. I am finishing up sewing 102. I am an amazon (short-tall woman, with long legs, long arms, long feet) and I love high waist wide leg pants and high waist long and medium length skirts. I think that I can sew these pants! I am going to practice on some muslin after I have the pattern printed. I am so excited. If this works, I am going to have these in every color possible for the summer.
Is there a place on here for special requests?
If anyone is listening, I also love jumpsuits but they are always to crotch high, like the torso part of the jumper is not long enough. Can someone recommend a jumper pattern that has a longer torso portion?
I am so excited to sew this pattern..
Lovely!
Please make an augusta skirt!