
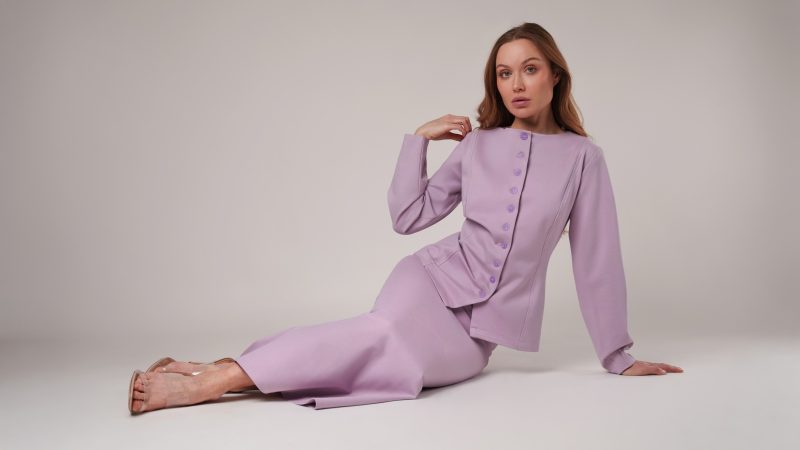
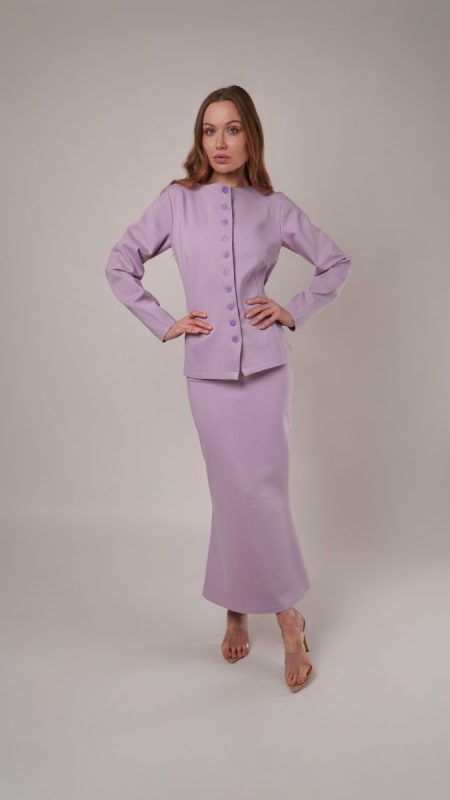
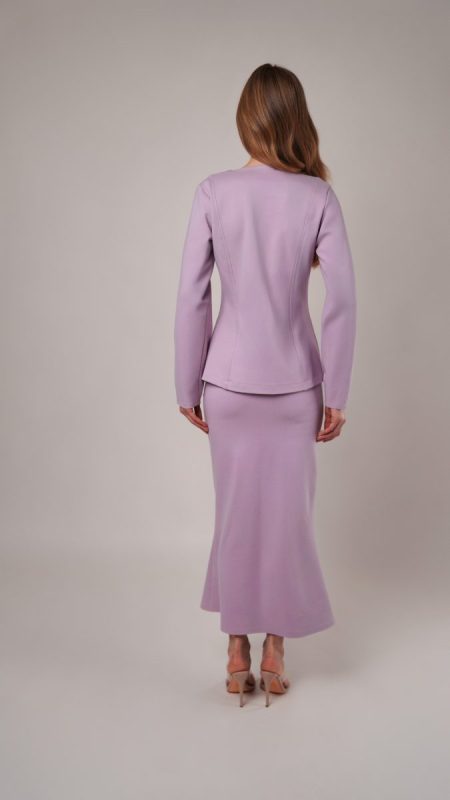
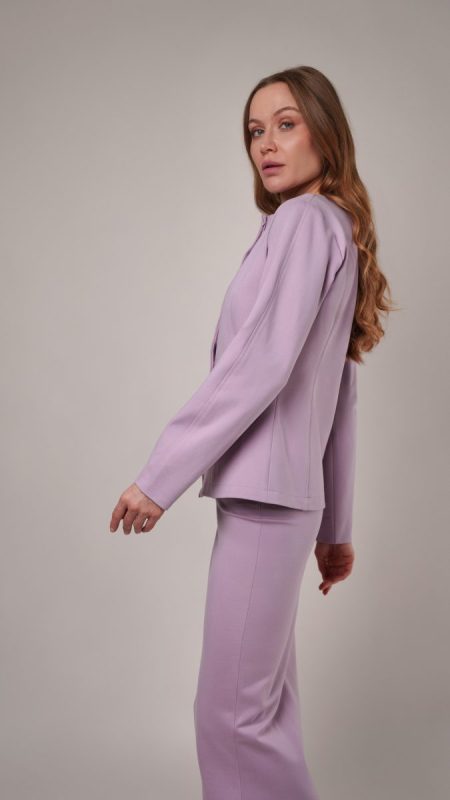
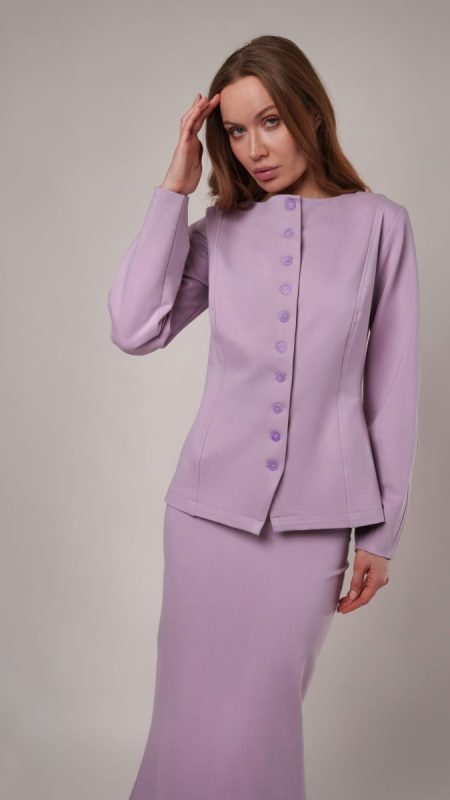
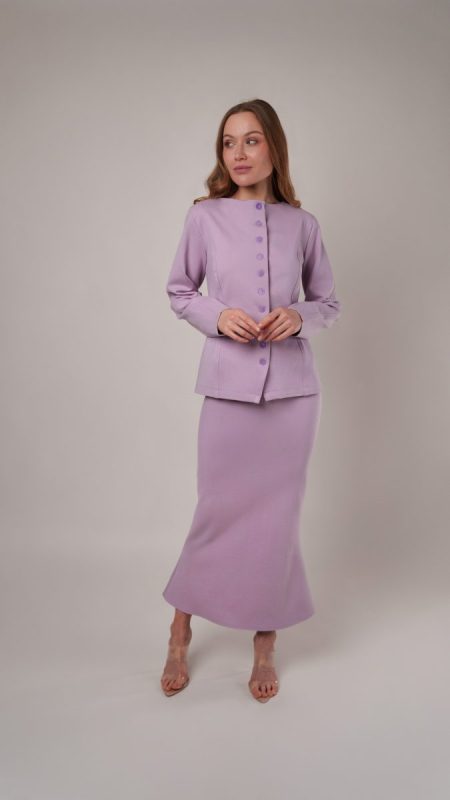
Meet the Camarillo Cardigan and Magdalene Midi Skirt, a modern knit set designed for days that blur the line between polished and comfortable, when your calendar is full but you still want to feel at ease.
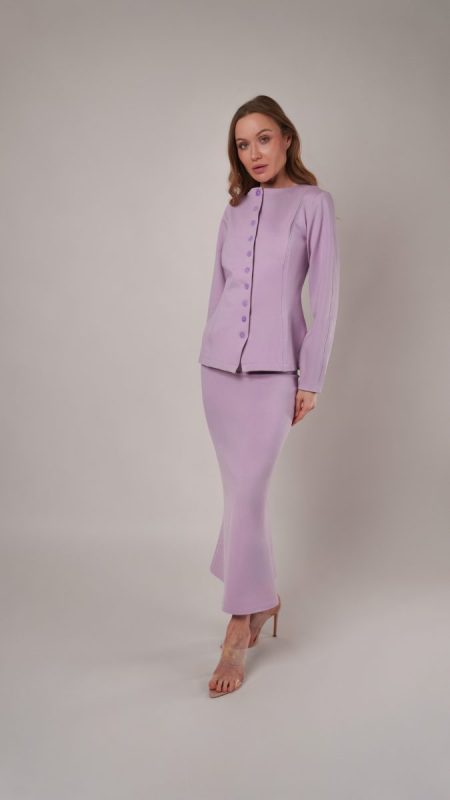
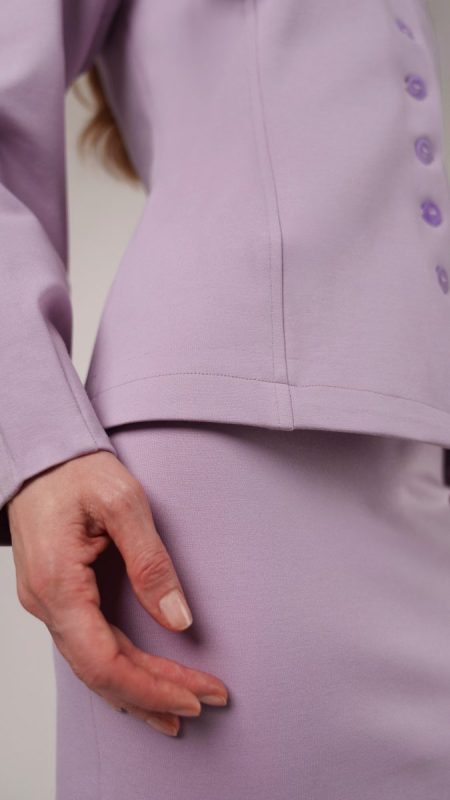
Sewn in a luxurious lavender knit ponte with nearly 50 percent four-way stretch, this set delivers structure without stiffness and softness without sacrifice. The fabric has a beautiful, tailored hand that holds its shape through wear, sculpting clean lines and a flattering trumpet silhouette, while remaining so comfortable it feels closer to loungewear than office attire. Best of all, the ponte is fully opaque, making a lining completely optional and keeping construction streamlined and approachable.
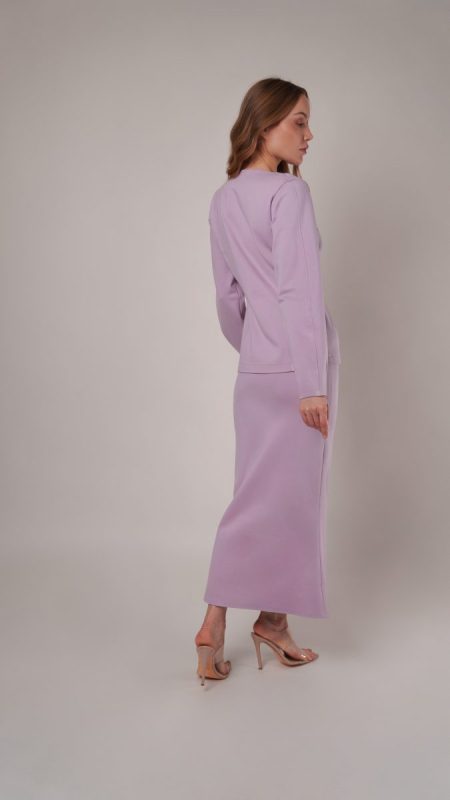
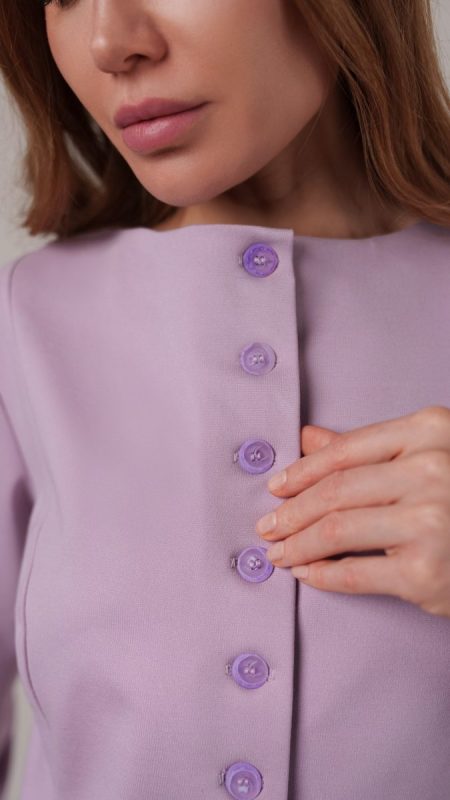
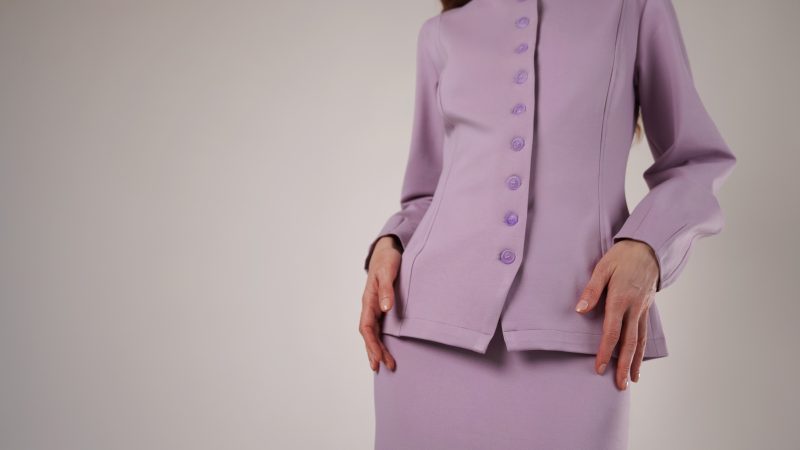
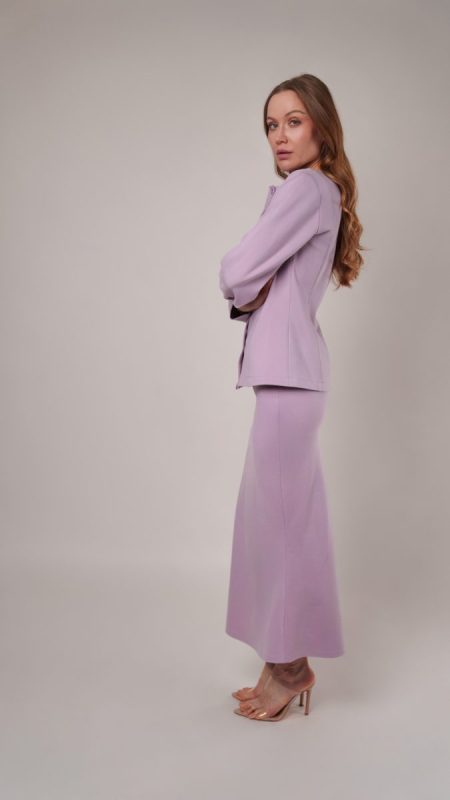
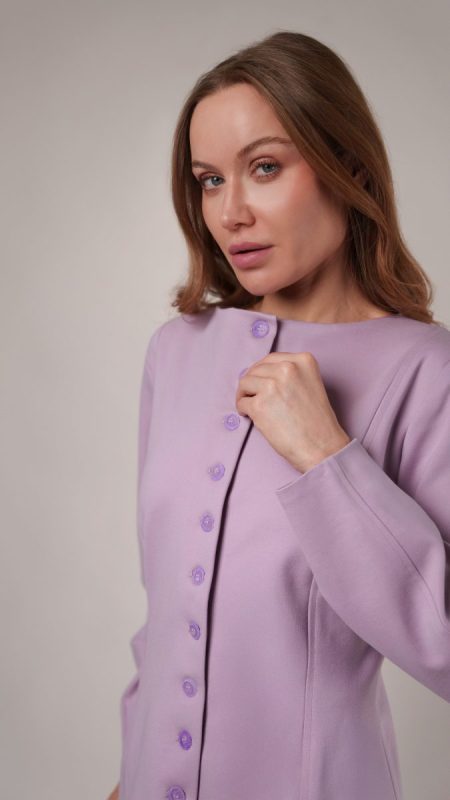
The Camarillo Cardigan was created as a true wardrobe anchor. Its sleek, refined silhouette is elevated by pronounced princess seams that contour the body and create a clean, elongated line. Designed to layer effortlessly, it is the kind of piece you keep draped over the back of your chair, ready to throw on when the office air turns crisp or when you want to instantly look more put together without changing your entire outfit.
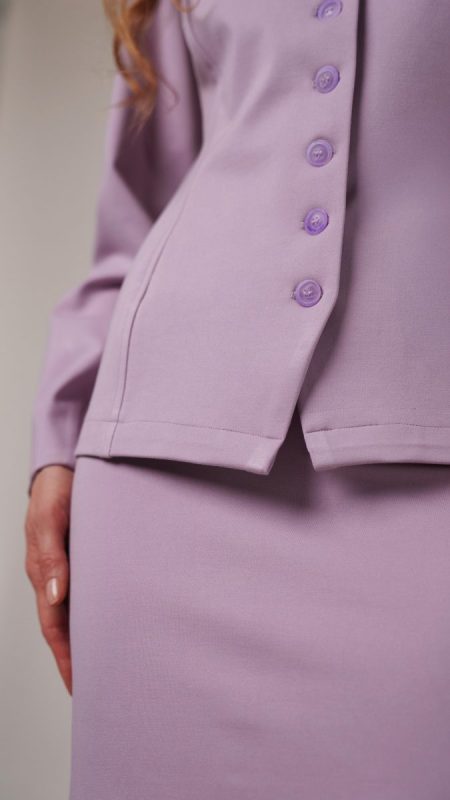
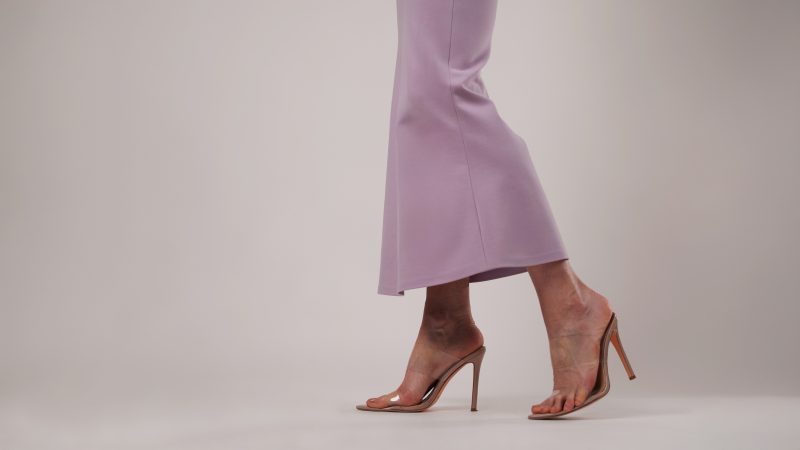
The Magdalene Midi Skirt brings quiet drama through its elegant trumpet shape, skimming the hips before gently flaring at the hem. It is thoughtfully designed for transitional seasons, when styling flexibility matters most. In cooler months, pair it with boots and a cozy sweater for a refined winter look. As spring approaches, style it with platform sandals and a tank top sewn in the same ponte for a sleek, coordinated set that feels effortless yet intentional.
Together, the Camarillo Cardigan and Magdalene Midi Skirt form a versatile knit ensemble that moves seamlessly from work to weekends, from structured mornings to relaxed evenings. It is a pattern set made for real life, where comfort, confidence, and timeless style deserve equal space in your wardrobe.
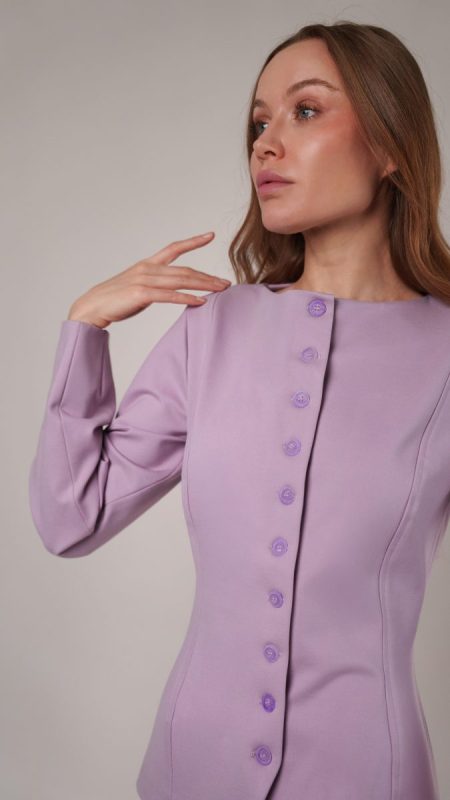
Essential Materials & Sizing Guide for the Camarillo Cardigan and Magdalene Midi Skirt
Continue reading for a breakdown of what knowledge and materials you need for creating your very own cardigan and midi skirt! We’ve got you covered with the recommended materials we used—if you want to follow along exactly—as well as a curated list of alternative fabric type recommendations if you want to customize your own version. The Camarillo Cardigan and Magdalene Midi Skirt free sewing pattern download includes technical drawings for seam and silhouette visibility, plus a size chart to help you find your perfect fit!
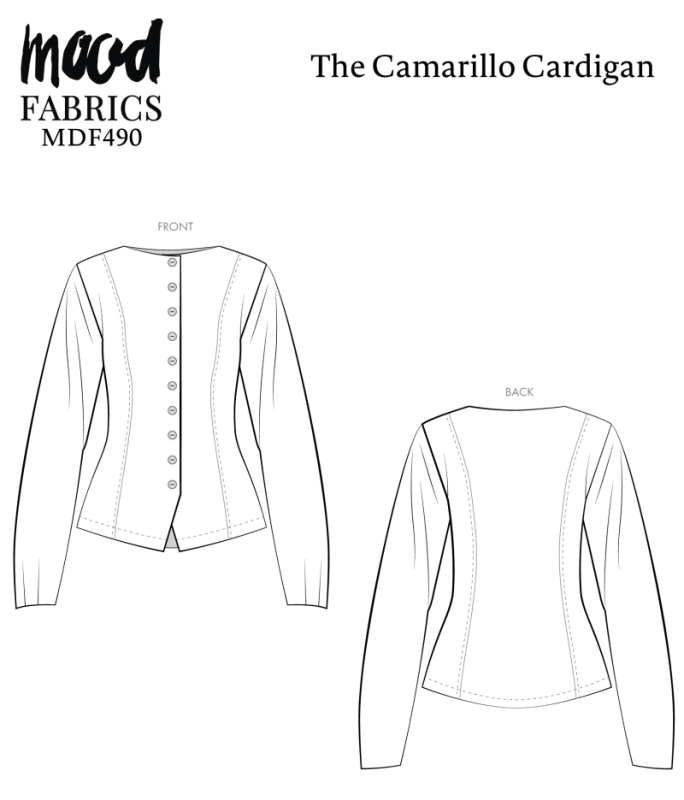
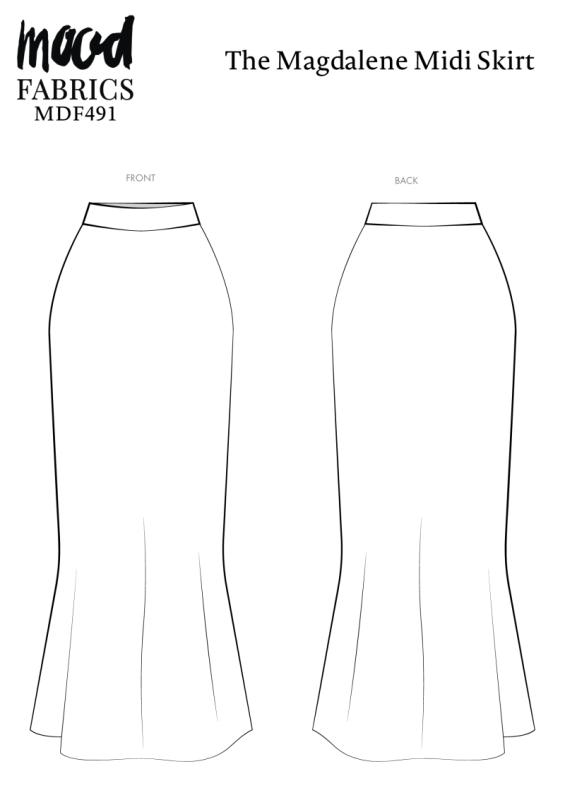
Purchase Products Used Below:
Quantities indicated are for sewing a size small cardigan and midi skirt. Toggle the ‘SHOP THIS LOOK’ box to find quantity estimates for other sizes.
- 3.5 yards of Stretch Ponte Knit – Lavender – Papilio Collection
- 10 each of Transparent and Lilac Swirl 4-Hole Low Convex Top Button – 28L/18mm
- 2 each of Gutermann Sew All Thread 100m – 909 Light Lilac
- MDF490 – Camarillo Cardigan and Magdalene Midi Skirt Sewing Pattern (Free download below!)
Additional Products Used:
*Quick Tip! The ‘SHOP THIS LOOK’ box defaults to full-yard quantities. To order an exact half-yard quantity for any fabric, simply use the decrease quantity button (-) to subtract by the half yard. Then click “ADD TO CART” to add all materials to your cart.
(Our system can only display full-yard quantities initially.)
Alternative Fabric Type Recommendations:
The Camarillo Cardigan and Magdalene Midi Skirt sewing pattern is best suited for medium weight knit fashion fabrics. Explore other fabric types or colors from our featured collections for your silhouette with the links below.
Download Your Free Sewing Pattern
Submit your name and email in the form below to receive the download link for the Camarillo Cardigan and Magdalene Midi Skirt free sewing pattern directly in your inbox. Mood Sewciety Patterns will send your free download link via email with the subject line: ‘Your Free Download from Mood Sewciety – The Camarillo Cardigan and Magdalene Midi Skirt’ (in PDF format for A4 and letter-size printing).
© MoodFabrics.com / MoodSewciety.com – Mass production, resale, or distribution of this pattern in any form is strictly prohibited.
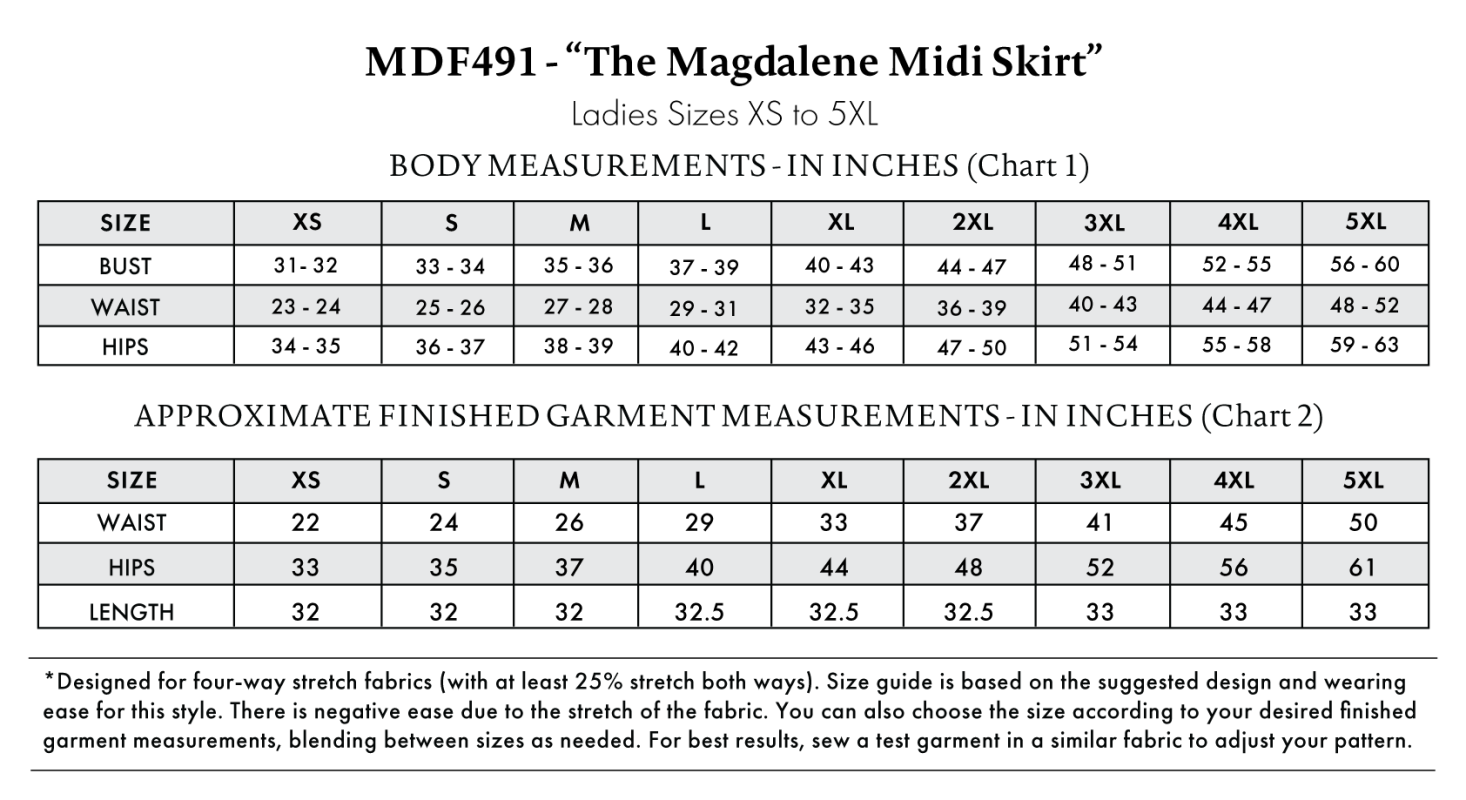
Find Your Perfect Fit
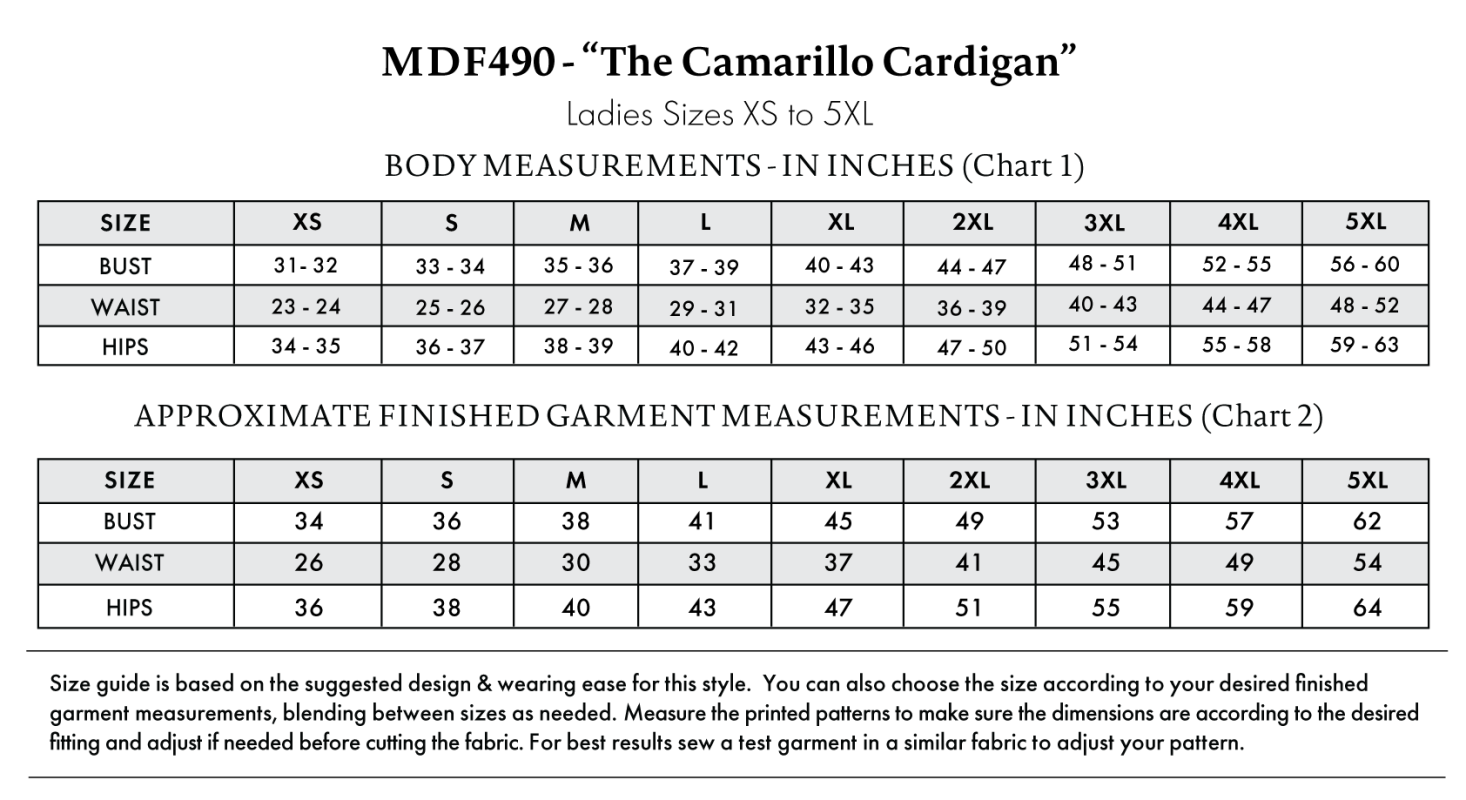
The Camarillo Cardigan and Magdalene Midi Skirt Sizing Guide is based on the suggested design & wearing ease for this style. You can also choose the size according to your desired finished garment measurements, blending between sizes as needed. Measure the printed patterns to make sure the dimensions are according to the desired fitting and adjust if needed before cutting the fabric. For best results, sew a test garment in a similar fabric to adjust your pattern.
Note: Measurements may vary after adjustments. If using non-stretch fabrics, reference the approximate finished garment measurements chart to choose your size.
Note: Always read all the instructions before cutting the fabric!
How to Sew The Camarillo Cardigan and Magdalene Midi Skirt
The instructions provided below are designed to guide you through sewing the Camarillo Cardigan and Magdalene Midi Skirt from start to finish.
3 Tips for Sewing with Ponte
⇒ Ponte has such a tightly knit structure that you can get away with sewing it with a straight stitch with a short stitch length (I did 2 millimeters throughout the garment).
⇒ Ponte can hold a press when you iron it, so make sure you’re ironing all your seams open on medium heat between steps.
⇒ If you end up using a fabric that is thinner than ponte, you may want to use fusible interfacing on the facings along the neckline and button placket. To add interfacing, just cut out the facing pieces in fusible interfacing and assemble as instructed below.
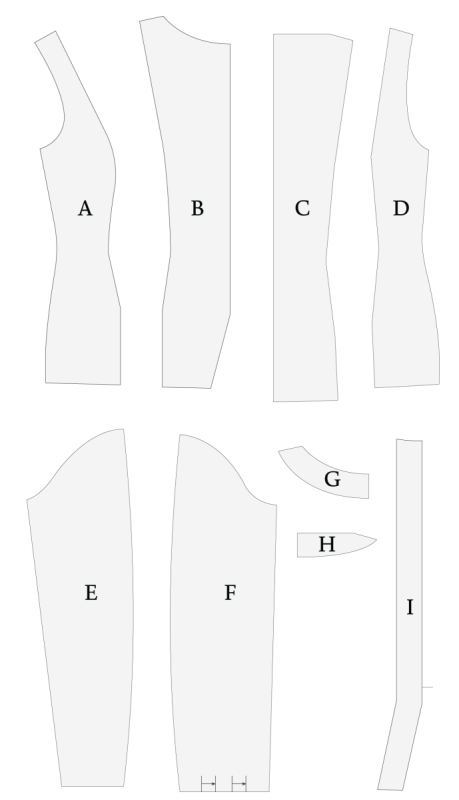
Pattern Pieces & Fabric Cuts Needed
- (A) FRONT SIDE
- FABRIC – CUT 2 MIRRORED
- (B) FRONT CENTER
- FABRIC – CUT 2 MIRRORED
- (C) BACK CENTER
- FABRIC – CUT 1 ON FOLD
- (D) BACK SIDE
- FABRIC – CUT 2 MIRRORED
- (E) SLEEVE BACK
- FABRIC – CUT 2 MIRRORED
- (F) SLEEVES FRONT
- FABRIC – CUT 2 MIRRORED
- (G) FRONT FACING
- FABRIC – CUT 2 MIRRORED
- (H) BACK FACING
- FABRIC – CUT 1 ON FOLD
- (I) FRONT OPENING FACING
- FABRIC – CUT 2 MIRRORED
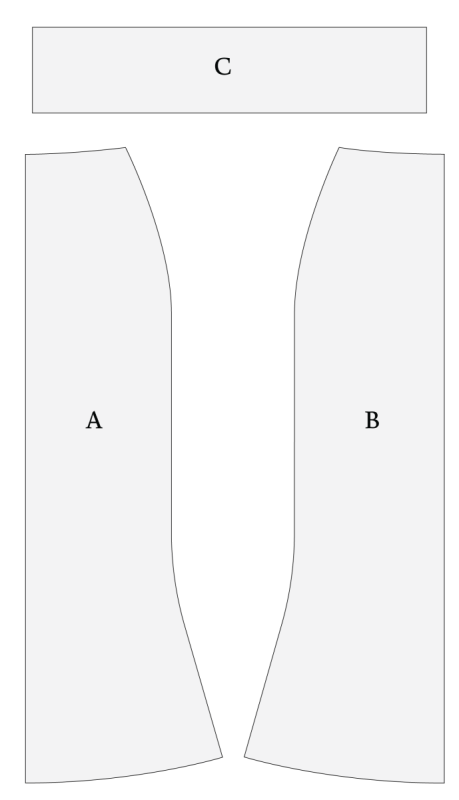
Pattern Pieces & Fabric Cuts Needed
- (A) BACK
- FABRIC – CUT 1 ON FOLD
- (B) FRONT
- FABRIC – CUT 1 ON FOLD
- (C) WAISTBAND
- FABRIC – CUT 1
Sew with a 1/2″ seam allowance for all seams unless otherwise specified.
HOW TO SEW THE BUTTON UP CARDIGAN
Step 1
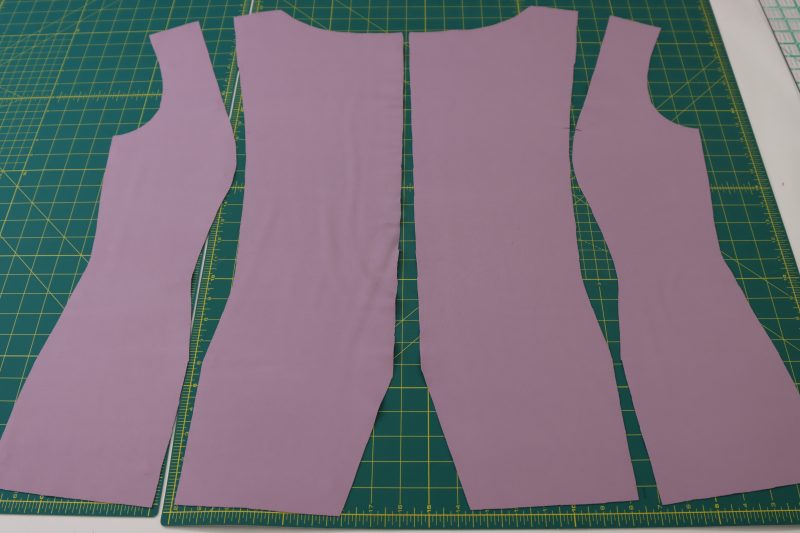
CARDIGAN FRONT
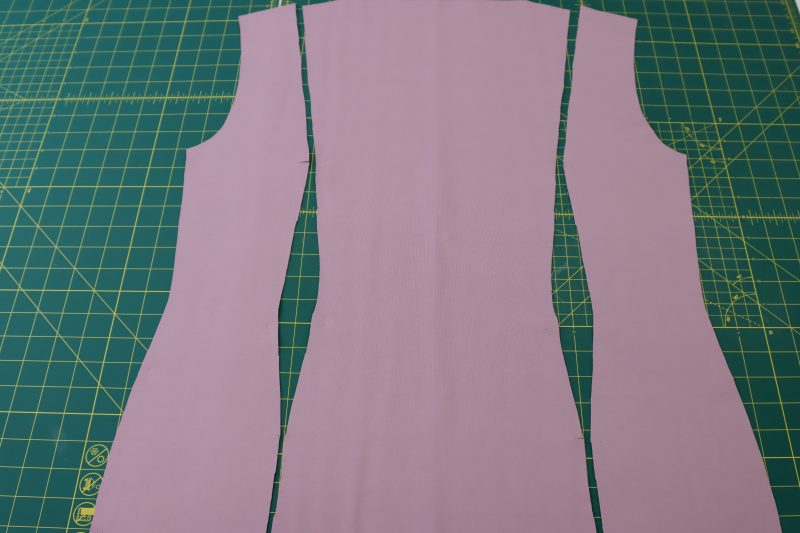
- Lay out the front center and front side pieces next to each other.
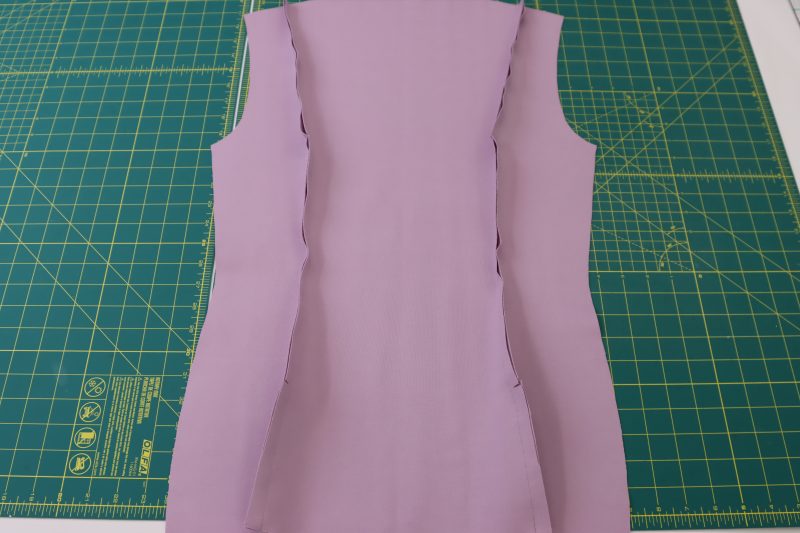
- Place the front side pieces on top of the front center pieces right sides together with the notches lined up.
- Pin the front side pieces to the front center pieces.
- Sew the front seams.
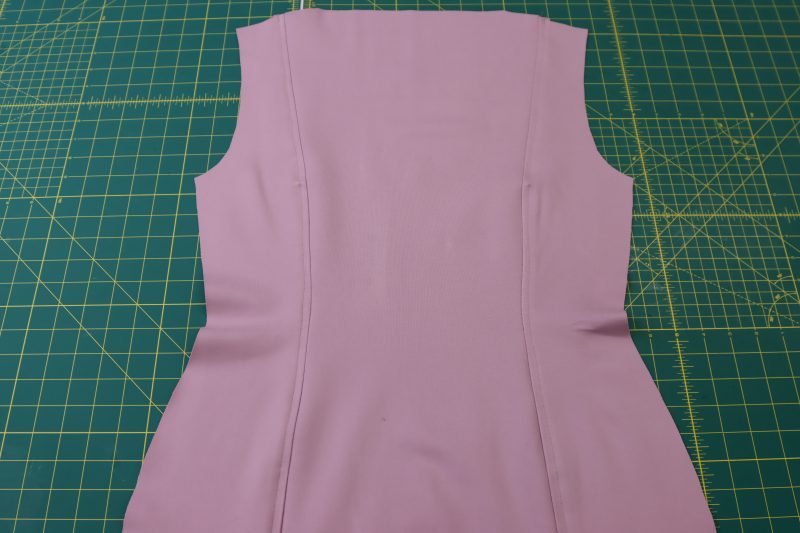
- Open the seams and iron the seam allowance towards the side seams.
- Topstitch over the seam allowance from the right side of the cardigan with ¼ inch seam allowance.
Step 2
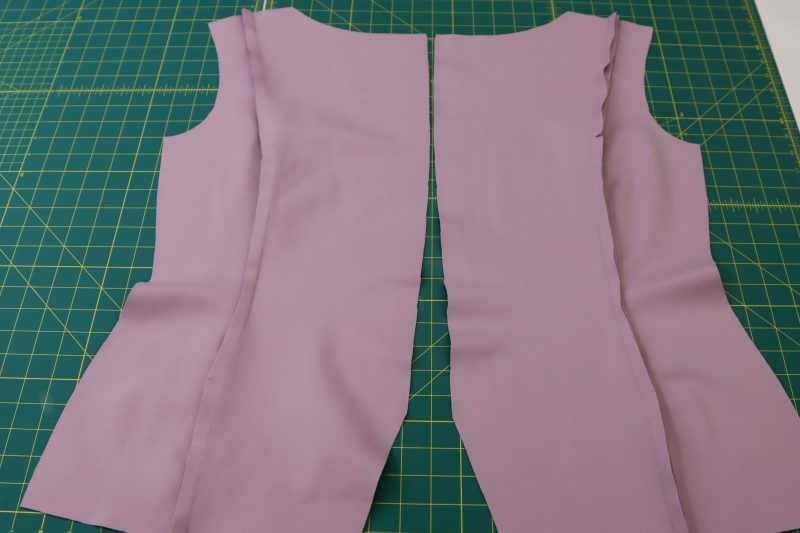
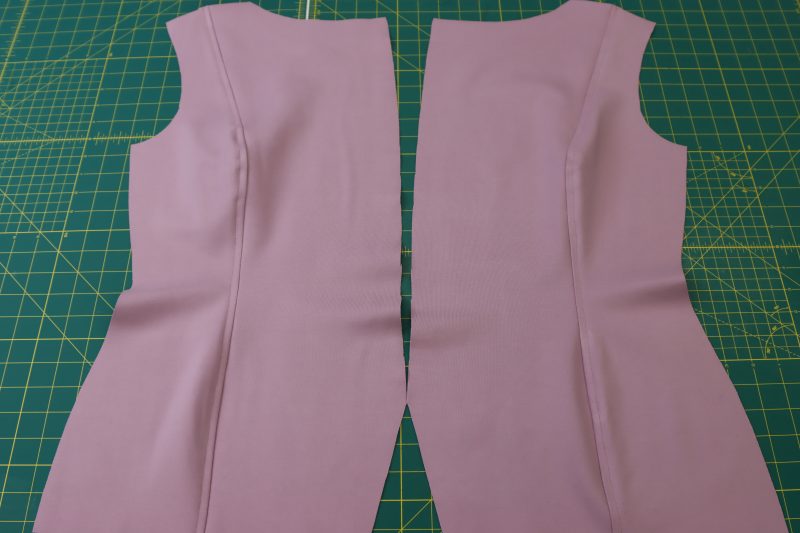
CARDIGAN BACK
- Lay out the back center and back side pieces next to each other.
- Place the back side pieces on top of the back center piece right sides together with the notches lined up.
- Pin the back side pieces to the back center piece.
- Sew the back seams.
- Open the seams and iron the seam allowance towards the side seams.
- Topstitch over the seam allowance from the right side of the cardigan with ¼ inch seam allowance.
Step 3
SHOULDER SEAMS
- Place the front and back cardigan pieces right sides together with the shoulders lined up.
- Pin and sew the shoulder seams together.
- Press the shoulder seams open and flat.
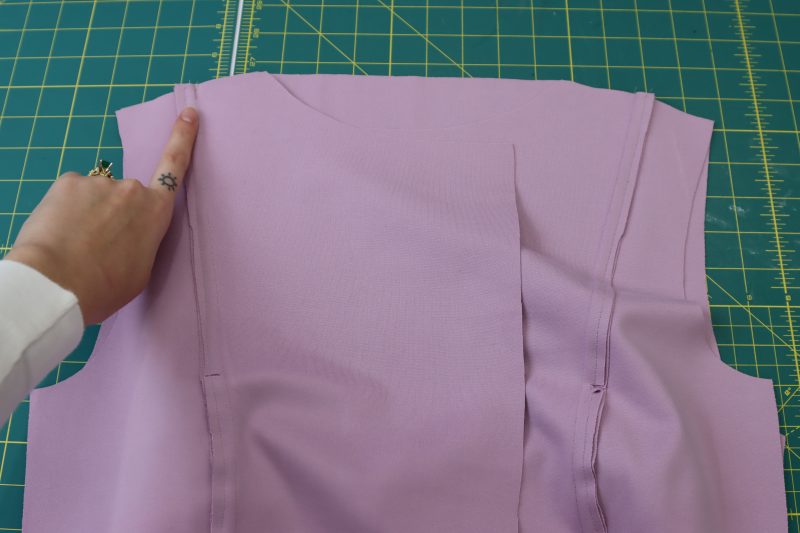
Step 4
NECKLINE FACING
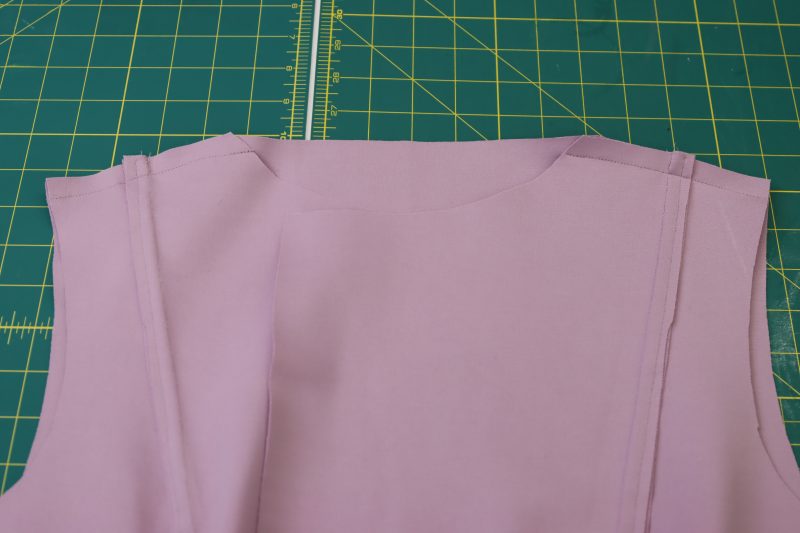
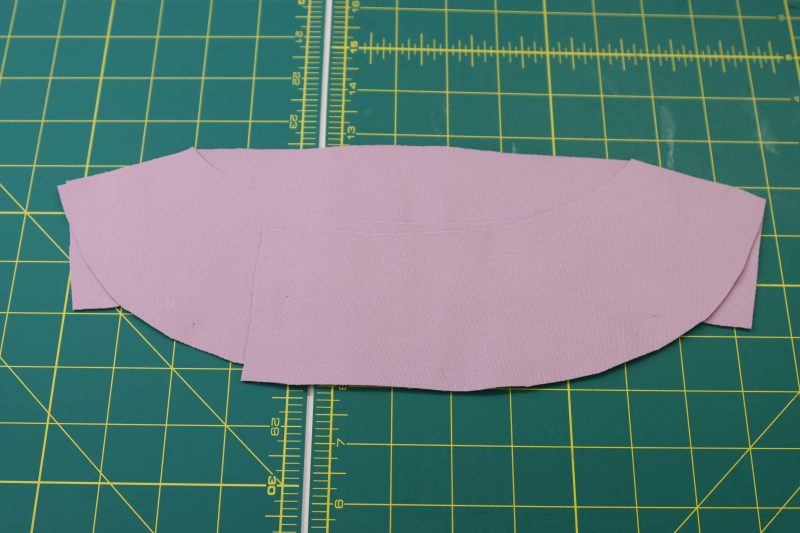
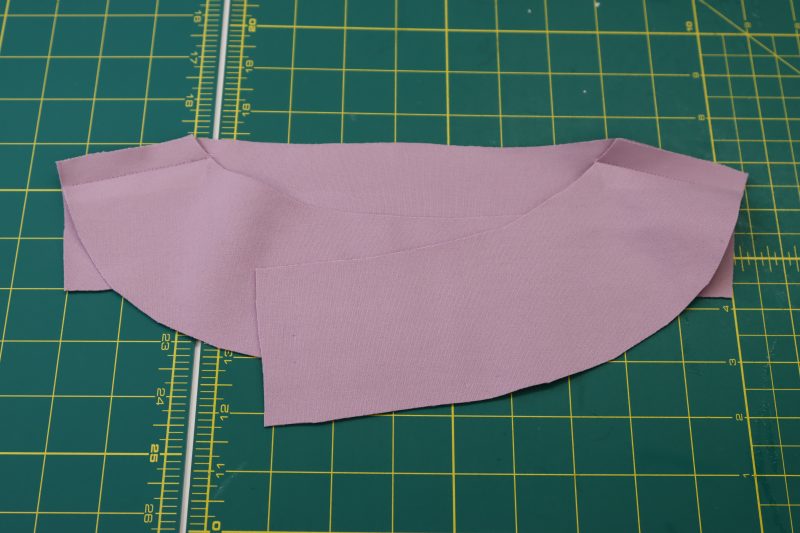
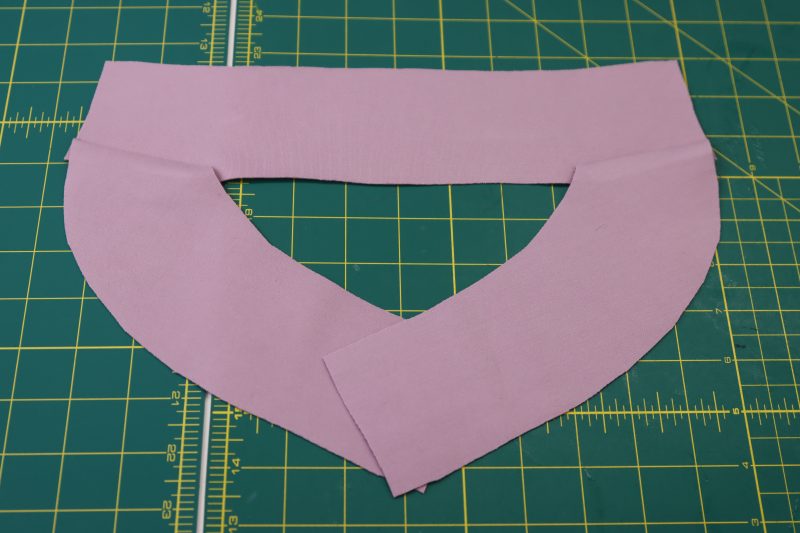
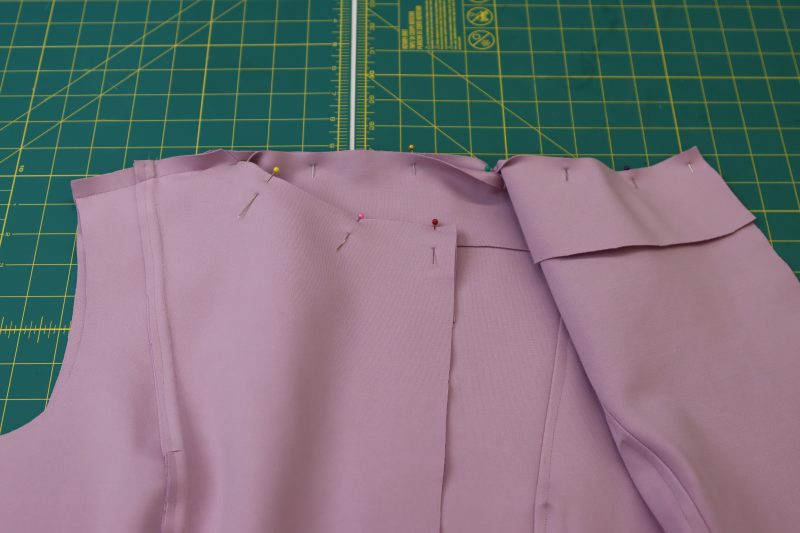
- Place the front neckline facing pieces right sides together with the back neckline facing piece as shown in the photo below.
- Pin and sew the neckline facing pieces together at the shoulder seam.
- Open the neckline facing and iron the seams open and flat.
- Pin the neckline facing around the neckline of the cardigan with the shoulder seams and center fronts lined up.
- Sew the neckline facing to the neckline of the cardigan.
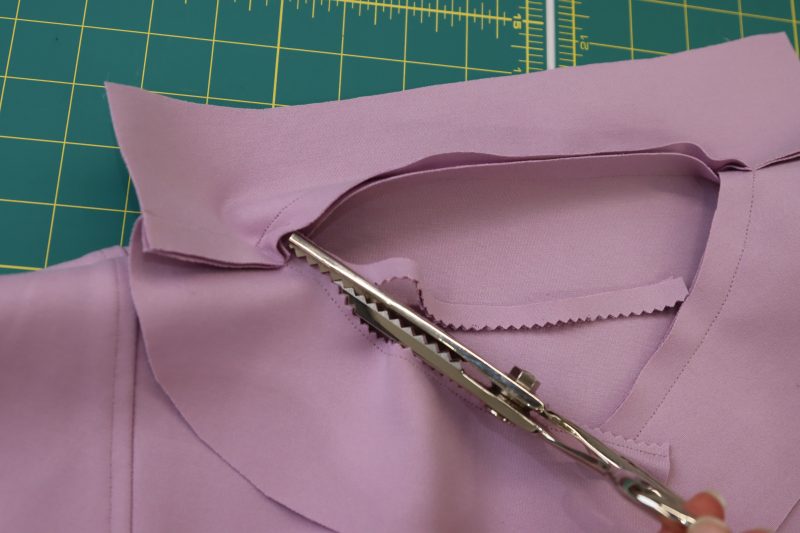
- Trim the seam allowance between the facing and the neckline with pinking shears to reduce bulk.
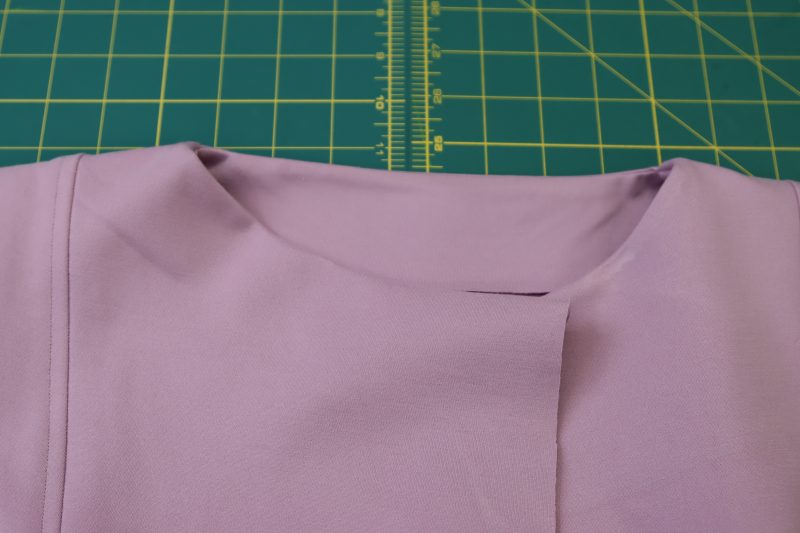
- Iron the neckline facing towards the inside of the cardigan.
Step 5
SIDE SEAMS
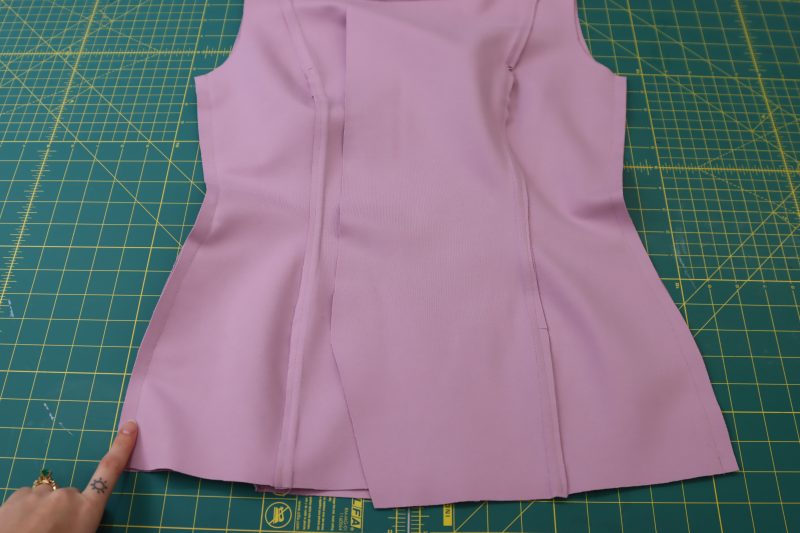
- Line up the front and back cardigan pieces at the side seams.
- Pin and sew the side seams of the cardigan.
Step 6
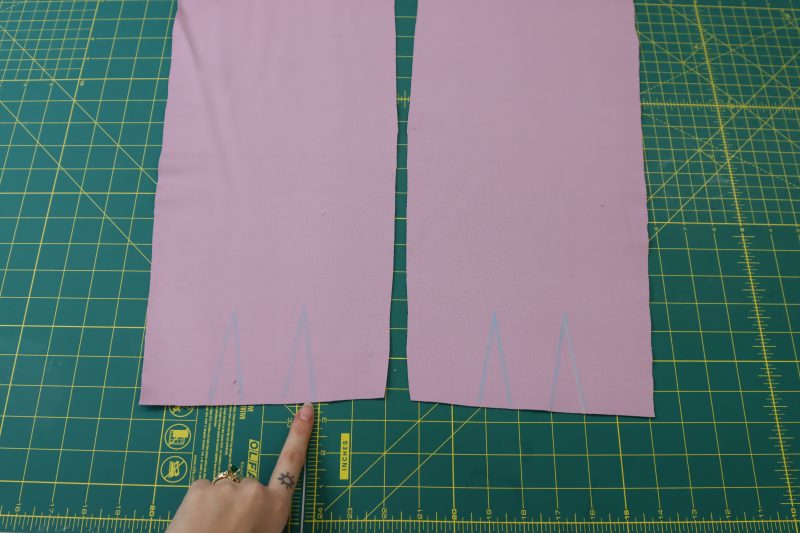
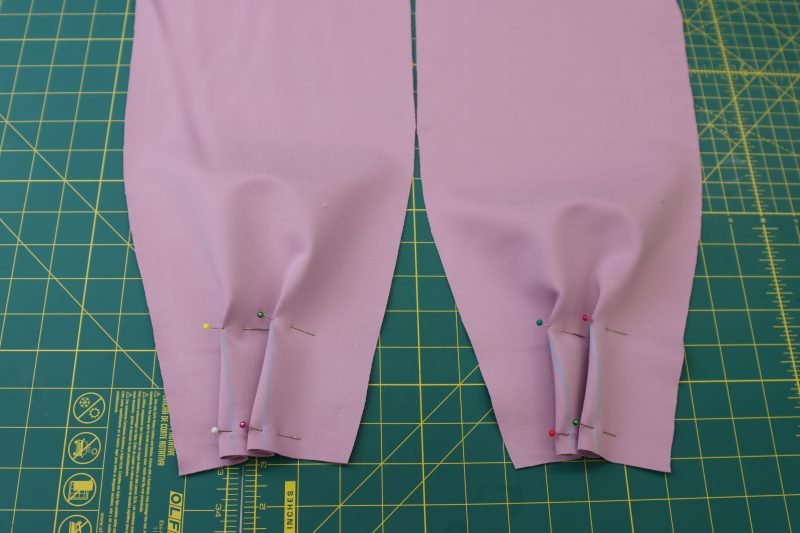
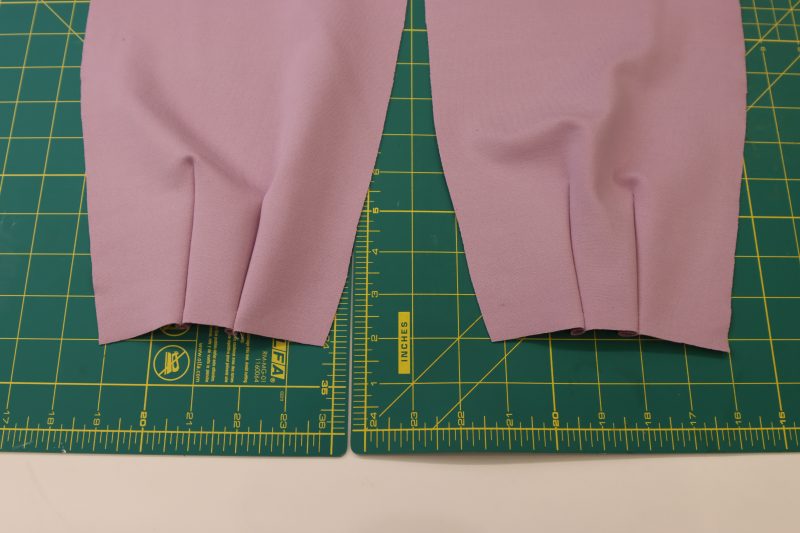
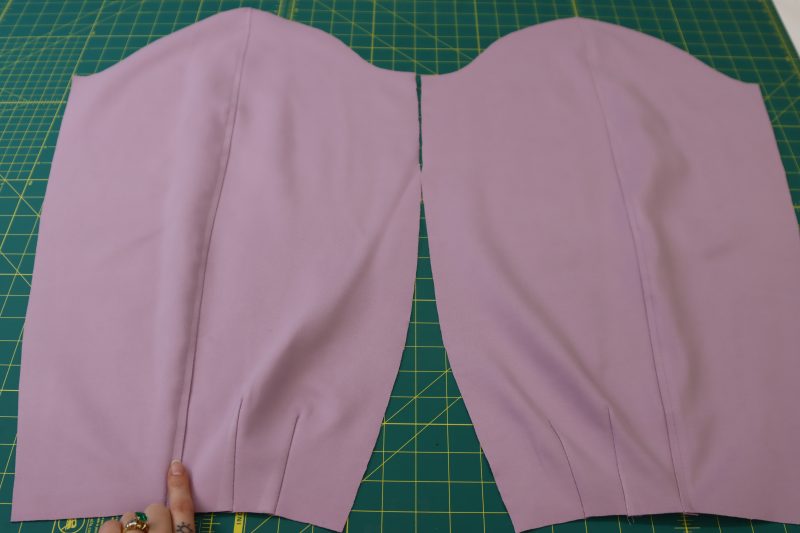
SLEEVE DARTS
- Mark the sleeve darts using tailor’s chalk following the markings on the pattern pieces.
- Fold the sleeves right sides together with the fold centered over the dart.
- Pin the darts so that the lines on both sides of the triangle are lined up with each other.
- Sew over the chalk lines.
- Open and iron the sleeve darts.
Step 7
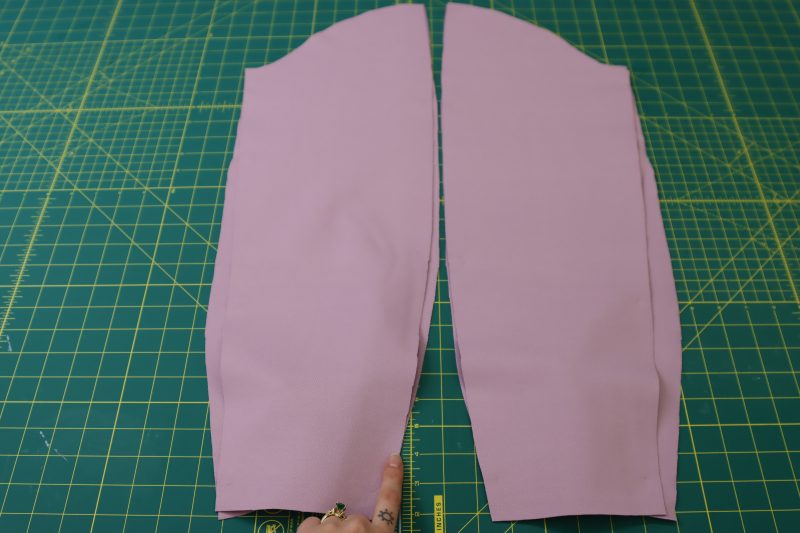
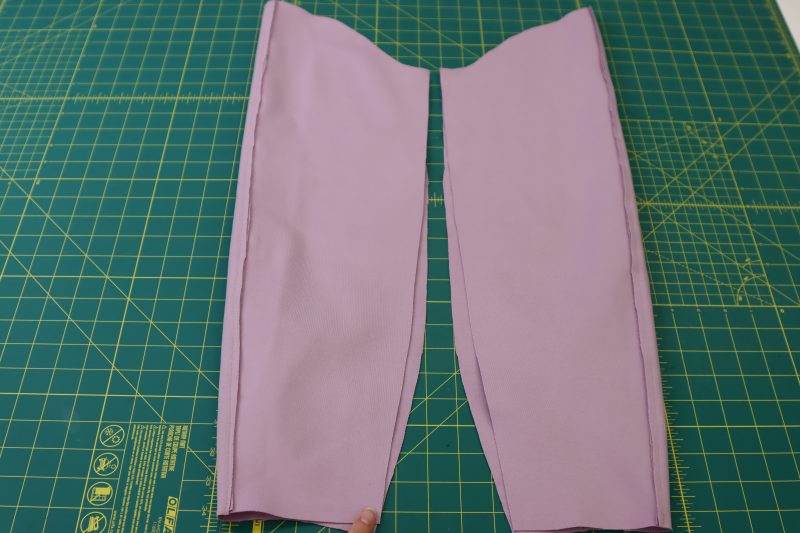
SLEEVE SEAMS
- Place the front and back sleeve pieces right sides together with the outer seam lined up with each other.
- Pin and sew the outer sleeve seam.
- Topstitch over the outer sleeve seam.
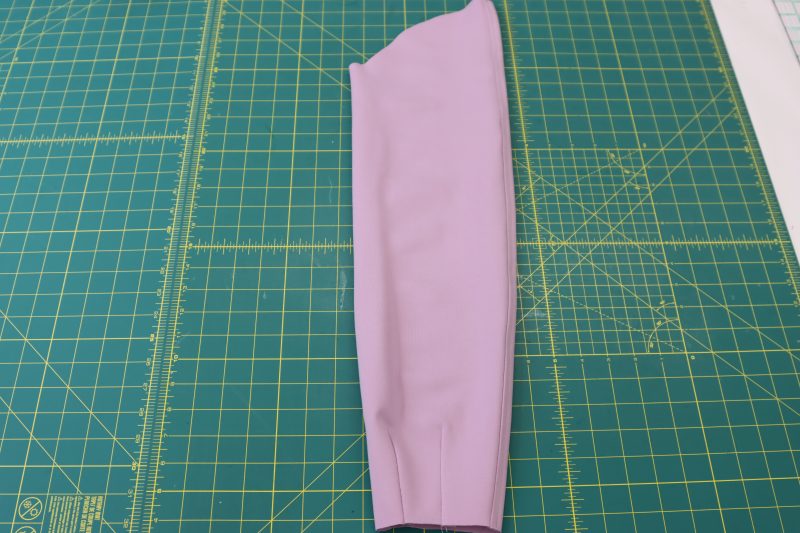
- Fold the sleeves right sides together to line up the sleeve inseams.
- Pin and sew the sleeve inseams.
Step 8
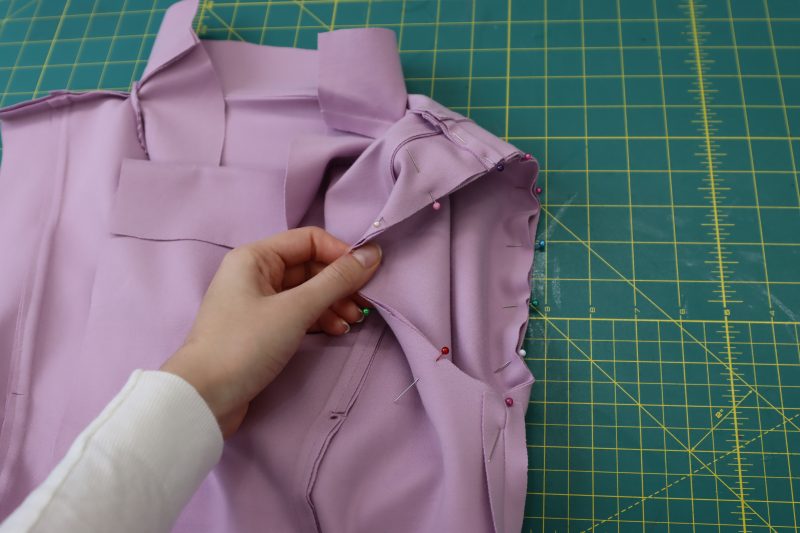
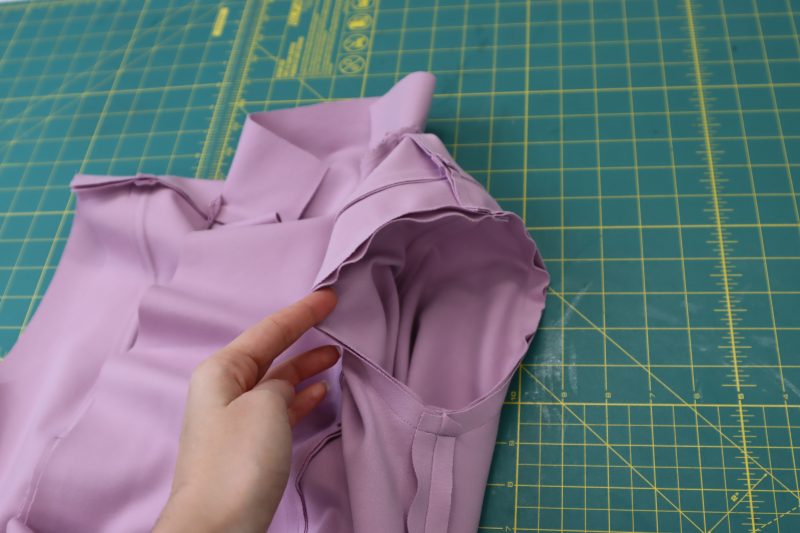
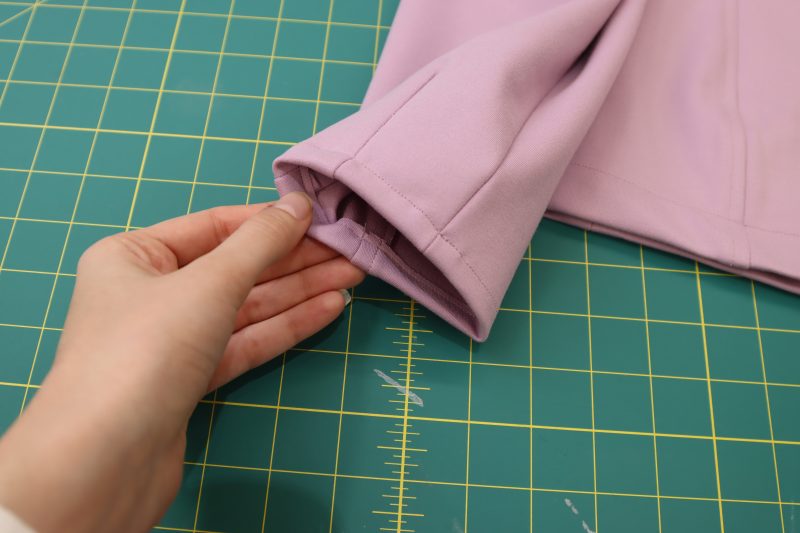
ATTACH SLEEVES
- Place the sleeve right sides together with the armscye of the cardigan, making sure that the front of the sleeve is matched up with the front of the cardigan.
- Pin and sew the sleeves to the armscye.
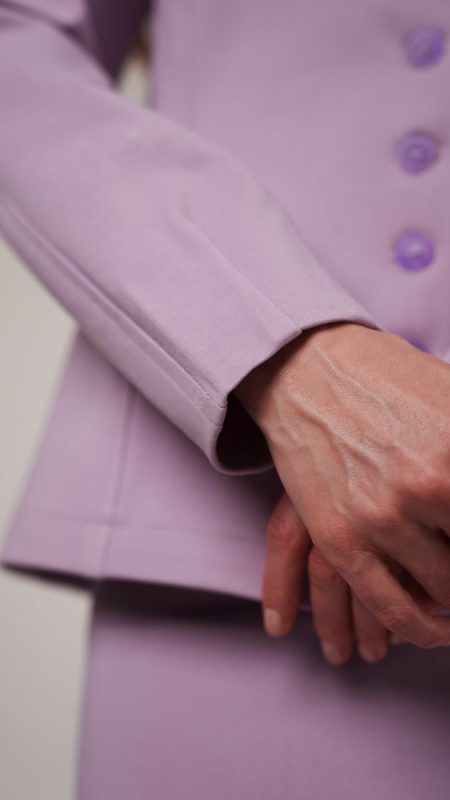
- Hem the sleeve opening (you can either use a straight stitch or you can use stitch witchery hem tape. I sewed it at first but then picked out the seam because I wanted the hem to be invisible).
Step 9
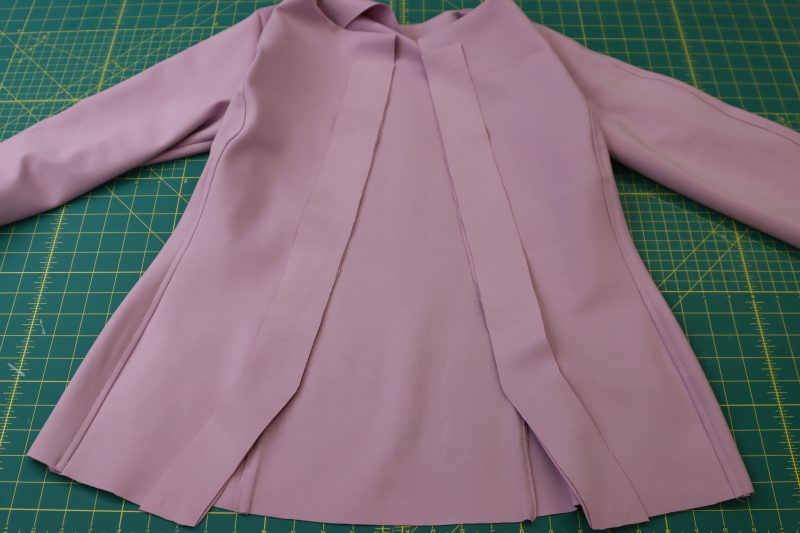
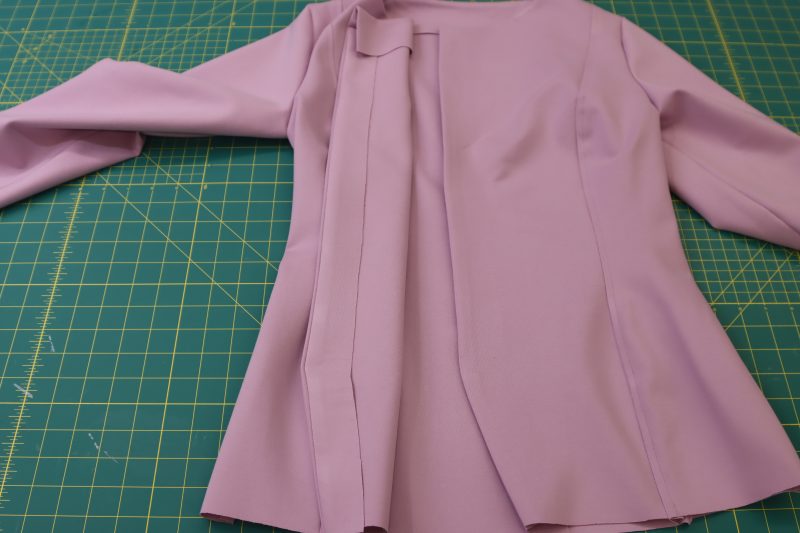
BUTTON PLACKET FACING
- Place the button placket facings right sides together with the center front openings of the cardigan.
- Pin and sew the outer edge of the button placket facing to the front opening of the cardigan.
- Open the seam and fold the facing towards the inside of the cardigan.
- Iron the facing so that it cannot be seen from the outside of the cardigan.
Step 10
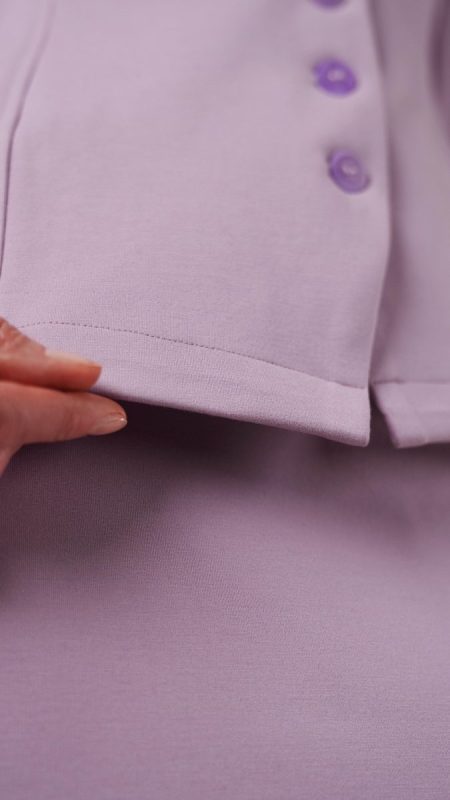
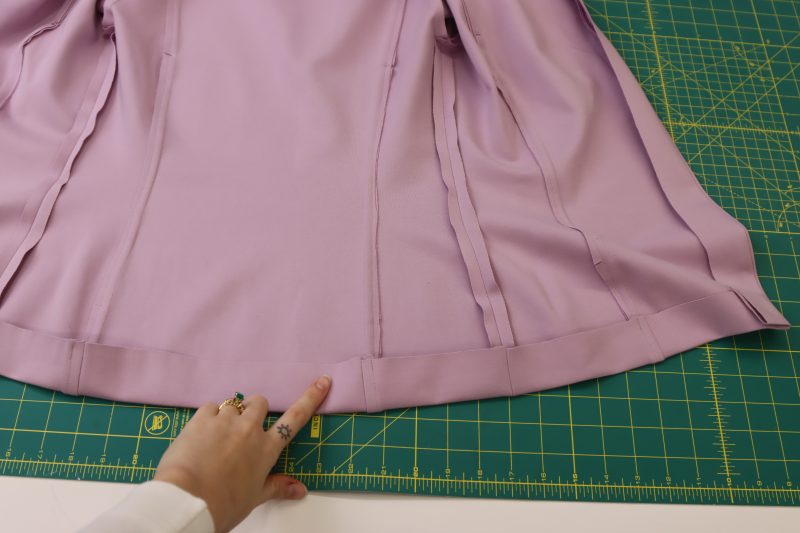
CARDIGAN HEM
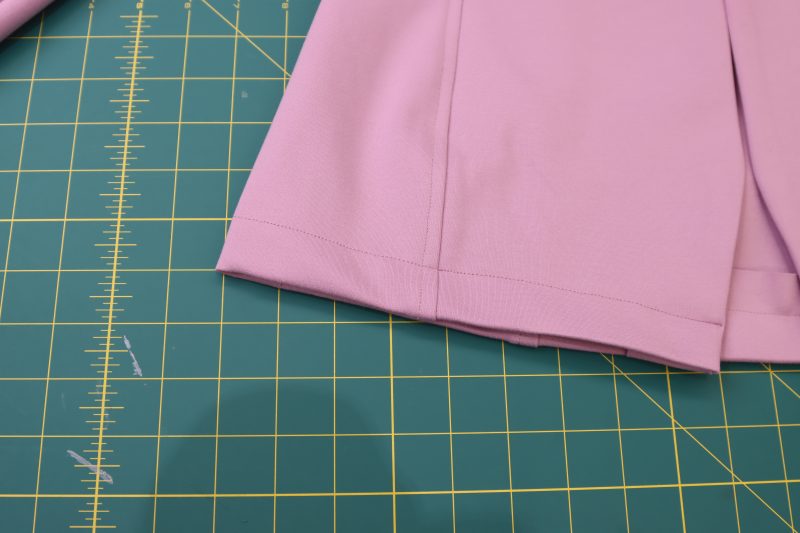
- Fold and iron the bottom hem of the cardigan.
- Sew the bottom hem of the cardigan with a 1 inch seam allowance, making sure the button placket facings are also sewn down and tucked neatly inside of the cardigan.
Step 11
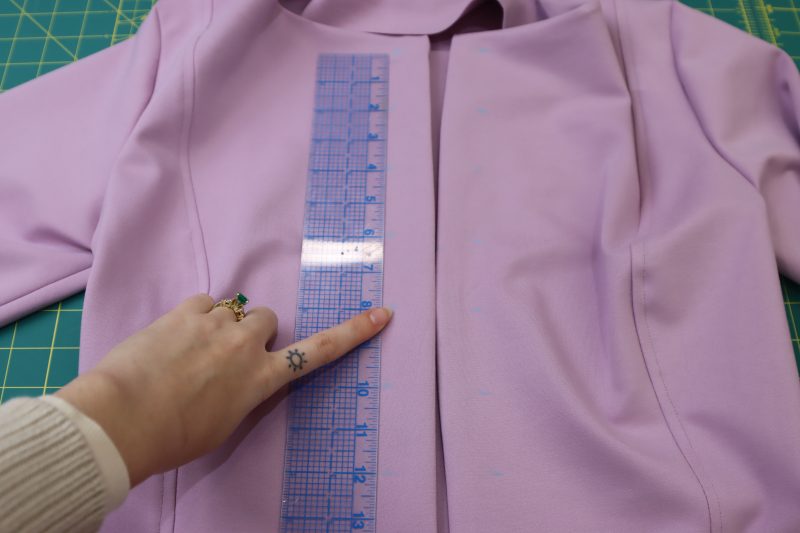
BUTTONHOLES
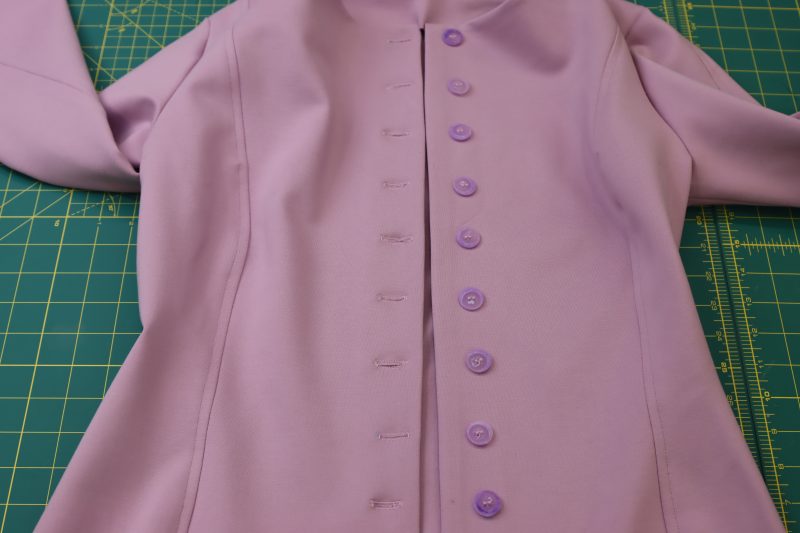
- Mark 10 evenly spaced dots along both sides of the front center opening of the cardigan. The dots should be ½ inch away from the center front seam, starting ½ inch from the neckline.
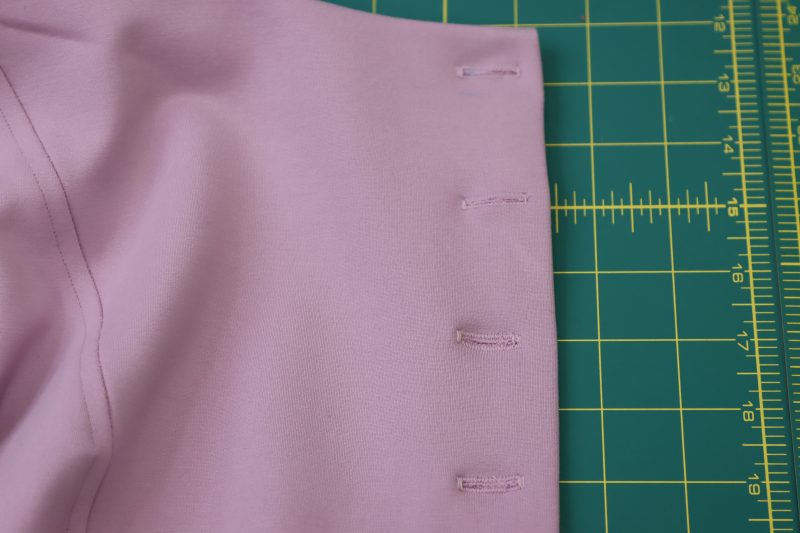
- Using the buttonhole foot attachment on your sewing machine, make a buttonhole on each of the 10 markings on one side of the cardigan opening. The buttonholes should be ½ inch away from the center front opening.
- Open the buttonholes with a seam ripper, being careful not to rip through the tack at the end of the buttonhole.
Step 12
BUTTONS
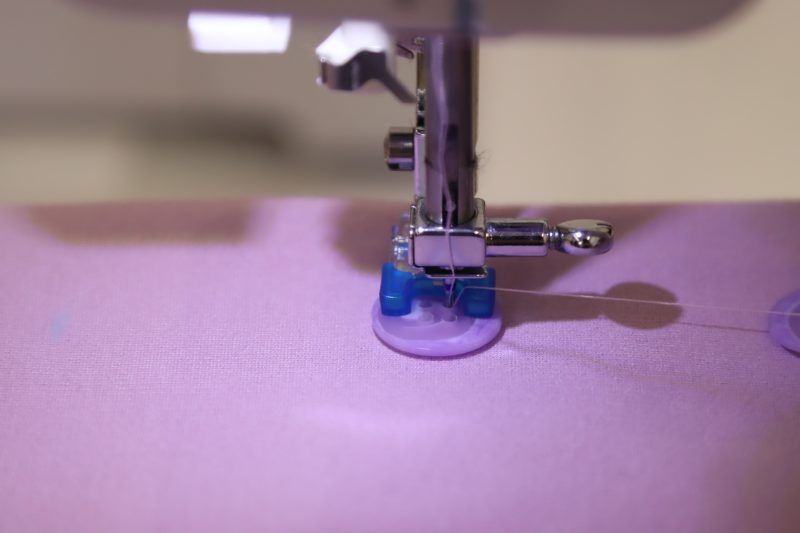
- You can sew the buttons by hand, but I’m going to show you how to do it with the sewing machine.
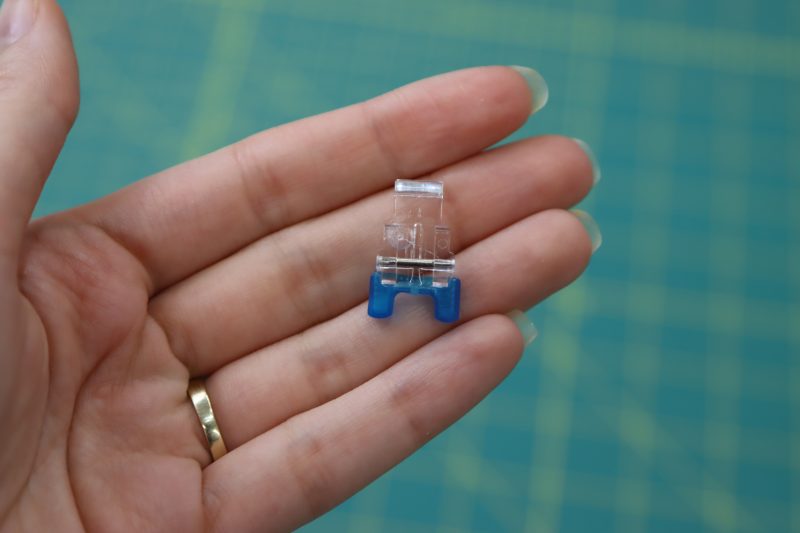
- Attach your button presser foot to your sewing machine.
- Put your feed dogs in the down position on the sewing machine.
- Set the machine to a zigzag stitch with a stitch width that is equal to the distance between the holes on the buttons in millimeters.
- Place the button and your cardigan under the button foot and line up the needle with the holes.
- Turn the hand wheel on the machine to make sure the needle isn’t going to smash into the button.
- Sew 6-10 stitches into each set of holes on the button.
- Repeat for all buttons and trim the excess thread.
HOW TO SEW THE MIDI LENGTH TRUMPET SKIRT
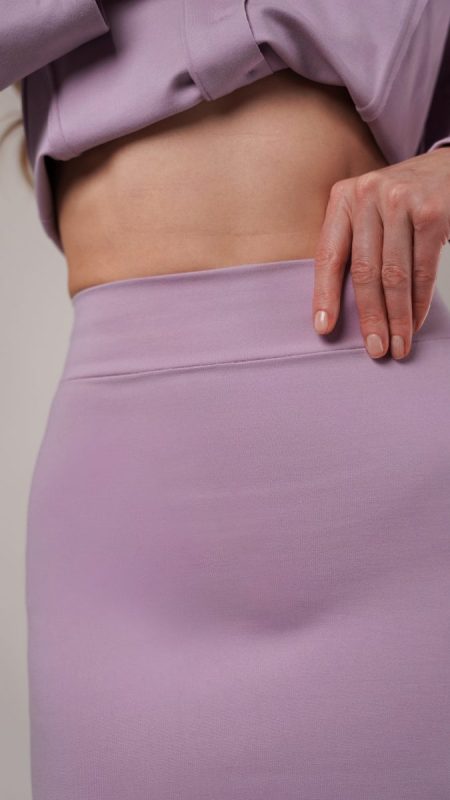
Step 13
SKIRT SIDE SEAMS
- Lay the front and back skirt pieces right sides together with the sides lined up.
- Pin and sew the side seams together.
- Iron the side seams open and flat.
- Flip the skirt right sides out.
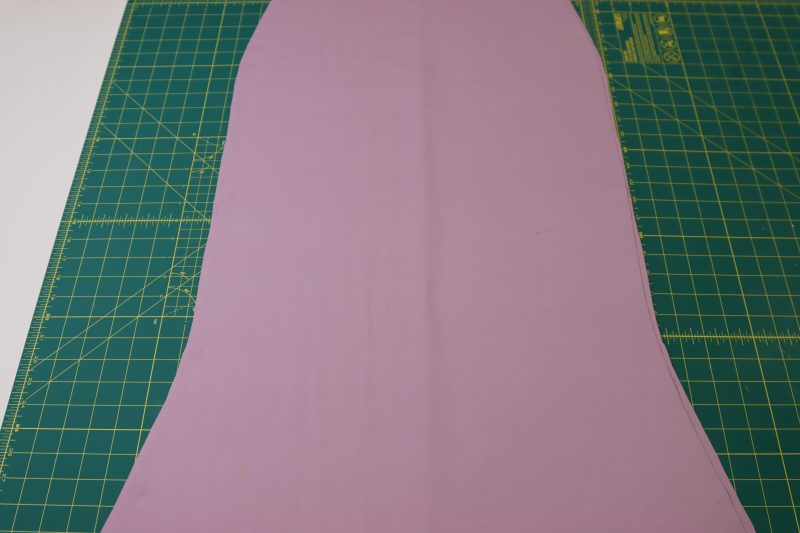
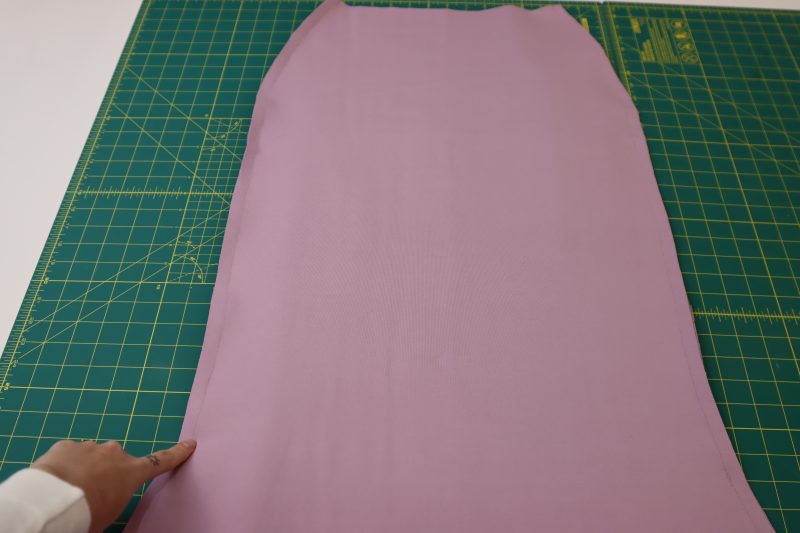
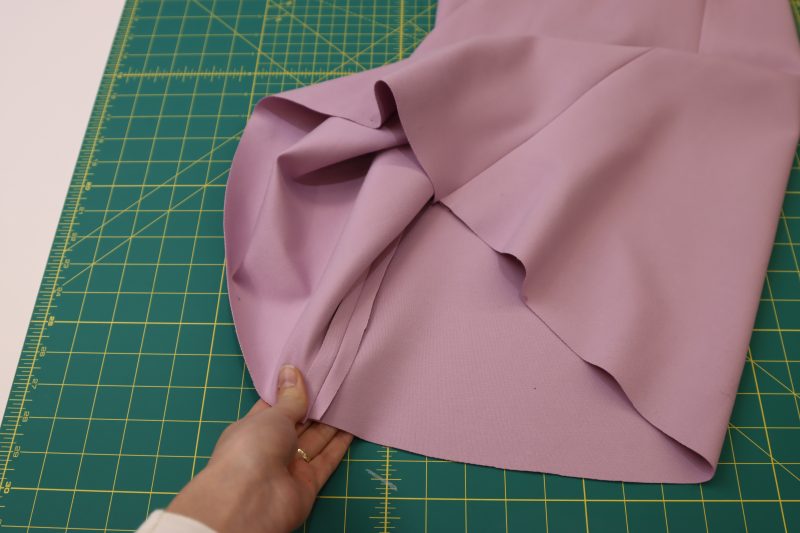
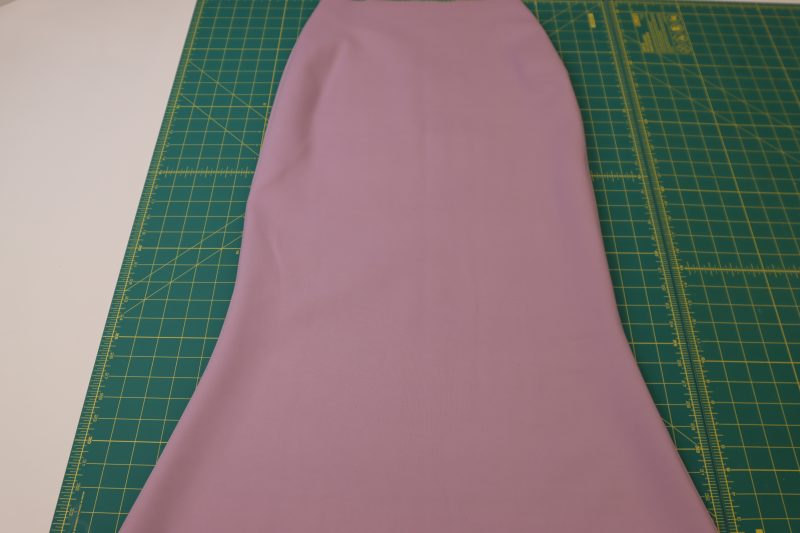
Step 14
SKIRT SIDE SEAMS
- Lay the front and back skirt pieces right sides together with the sides lined up.
- Pin and sew the side seams together.
- Iron the side seams open and flat.
- Flip the skirt right sides out.
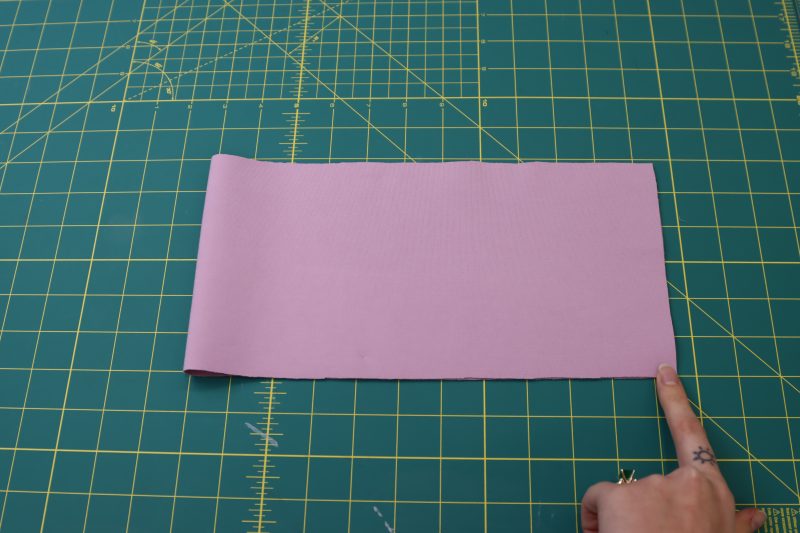
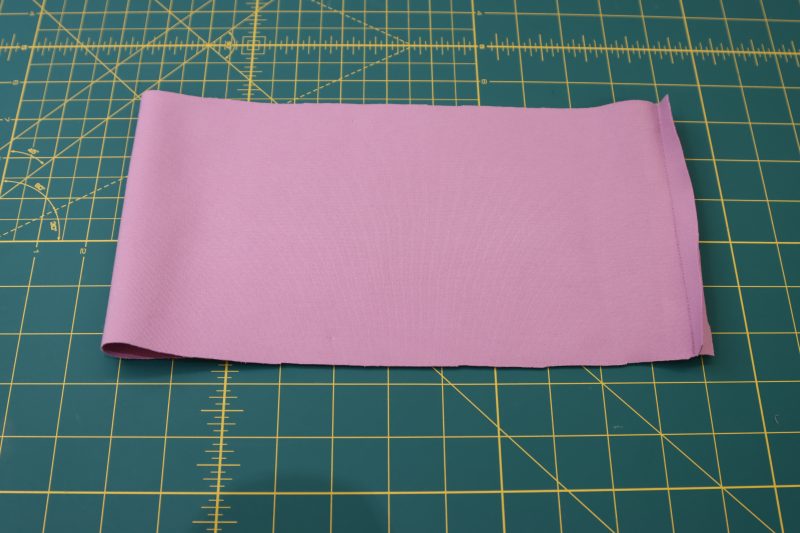
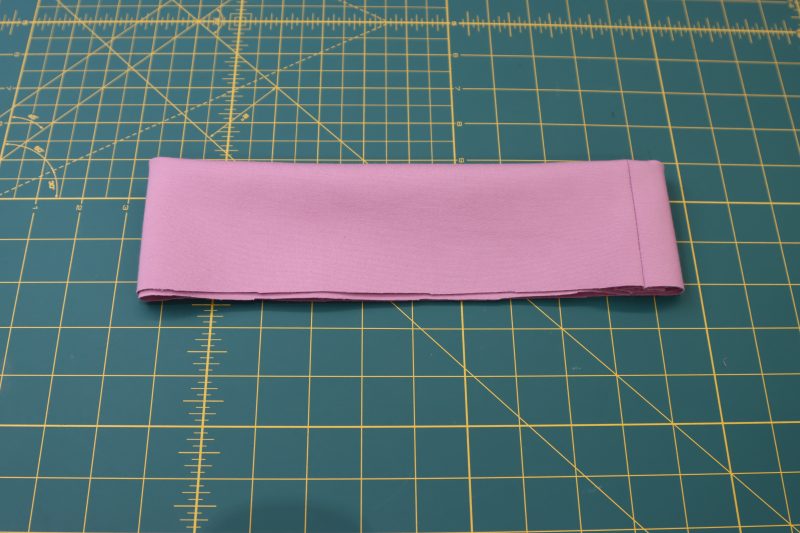
Step 15
ATTACH WAISTBAND
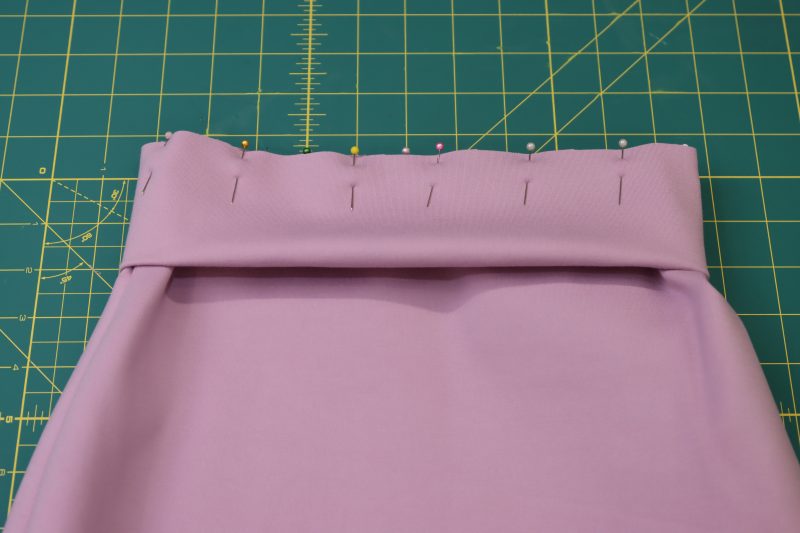
- Pin the waistband evenly around the waistline of the skirt.
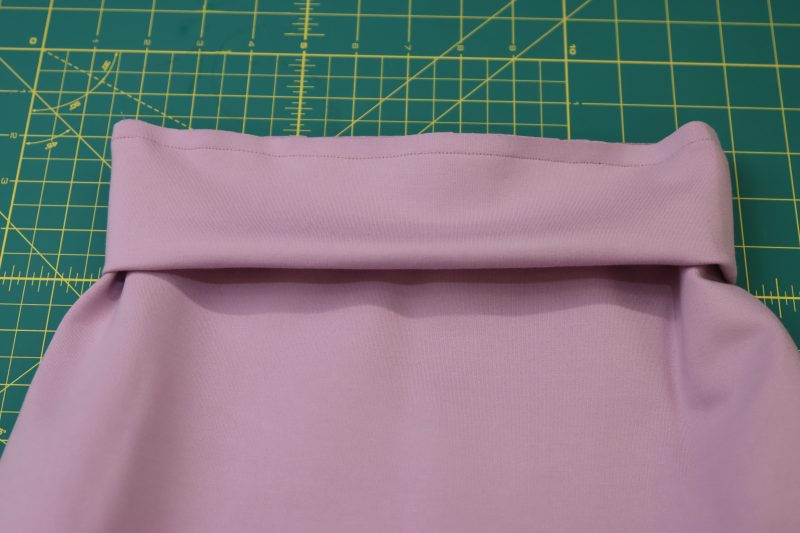
- Sew the waistband to the waistline of the skirt.
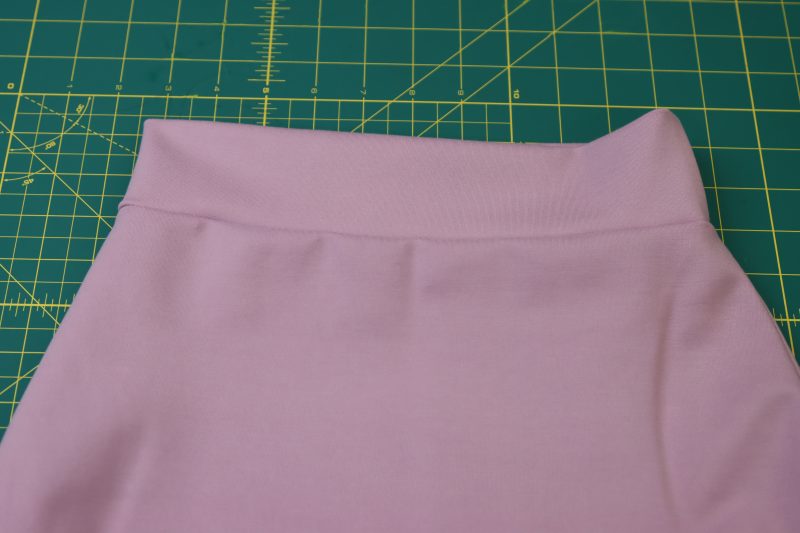
- Flip the waistband up to hide the seam allowance.
Step 16
SKIRT HEM
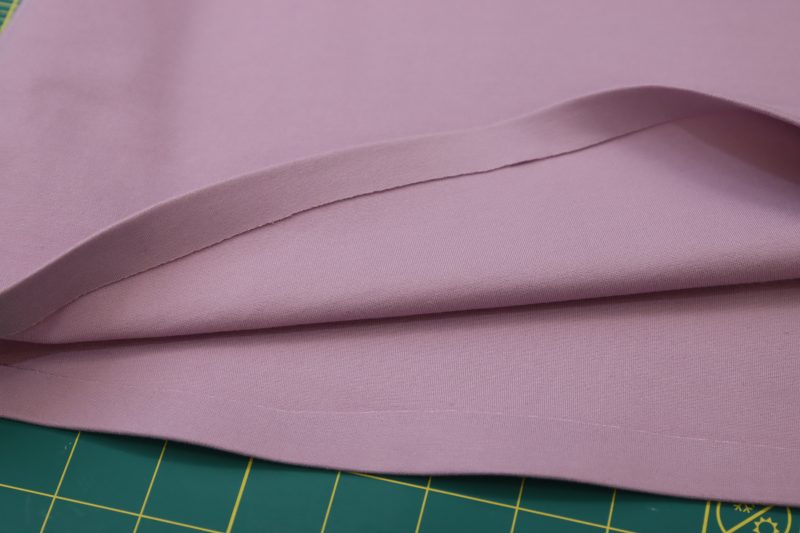
- Iron a fold into the bottom hem of the skirt (mine was ½ inch).
- Place the stitch witchery hem tape inside the fold.
- Iron the stitch witchery into the fold for a seamless hem.
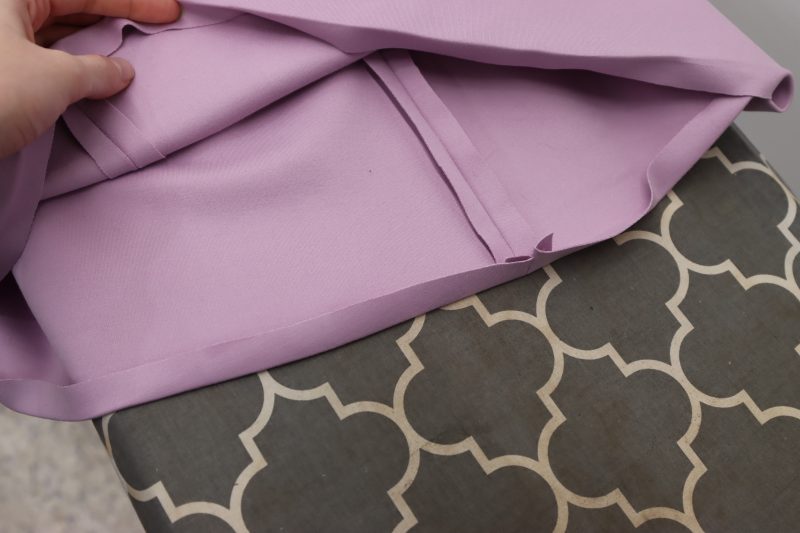
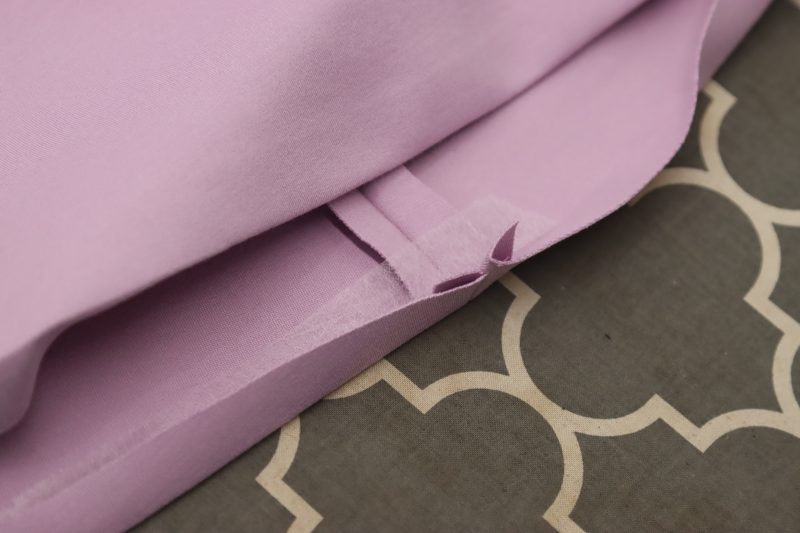
Sewing Success: The Finished Camarillo Cardigan and Magdalene Midi Skirt
Share this post with a friend (or two!), download the Camarillo Cardigan and Magdalene Midi Skirt free sewing patternS, and show us which fabrics and colors you choose, using the hashtags #MoodCamarilloPattern, #MoodMagdalenePattern & #MadeWithMood—and don’t forget to tag us @MoodFabrics, too.
Free Sewing Pattern Inspiration for Your Next Project
With 490+ free sewing patterns and counting, your opportunities for sewing with Mood are endless!
We hope you had as much fun sewing this cardigan and midi skirt pattern as we did! As always, we want to hear from you—share your thoughts and comments below and let us know where you’ll be wearing the Camarillo Cardigan and Magdalene Midi Skirt free sewing patterns!

Hello! I wanted to know if the pattern of the cardigan would work with non strechy fabrics?
Keep going, your work is amazing!
Thank you for much for your kind comment Morgane! I love what I do with my team here at Mood.
To answer your question, yes, you can sew the cardigan with nonstretch fabric. I wouldn’t recommend sewing the skirt with non-stretch fabric because the top is a bit loose fitting and the skirt is TIGHT.
OMGosh! This is beautiful! Perfection Especially this gorgeous girl. It makes me want to live in the city again, have a career again. Wear dress everyday. Time goes too quickly guys, All too soon those days are gone you find yourself in many stages of life, and then as you see everyone start to leave this world, around you, there is important goodbyes. Have fun now! 🙂
Is the akirt having any zipper at the s8des?
Hi Maria,
This skirt doesn’t have a zipper. It’s made out of stretchy fabric that slides over the hips. If you make it with no stretch fabric, you’ll have to use a zipper.
I love this cardigan pattern! I would like to make it in a woven fabric and add pockets so I can wear it as a scrub jacket. Would you recommend adjusting the size for that modification? Thank you so much.
Hi Mimi, if you want to make this in a non-stretch material, you can get away with making the cardigan in your same size. However, you’ll want to make the skirt 1 or 2 sizes bigger and add a zipper to the side seam.
Elegance. Classy. Thank you. Can this be made out of woven?
Yes you can totally make this out of a woven material! I just recommend choosing the size that has finished garment measurements that are a tiny bit bigger than your body measurements so that there is enough ease. You might also have to put a zipper in the skirt.
Could I add pockets to the side seam of the skirt? Or will I need to size up so the pockets aren’t too bulky under the knit?
Yeah if you add side seam pockets I would size up because otherwise you’ll see the pocket bag under the skirt.
I want to make this pattern in a non-stretchy material. I would normally be a size S/M, but have trouble figuring out on what sizing to cut out the pattern? Any tips?
For the cardigan, you can probably get away with making it in your regular size, even with non-stretch fabric, because it’s a bit loose fitting. For the skirt, I recommend cutting out a medium or large, and possibly making a muslin mockup first. The skirt is meant to be really skin tight and doesn’t leave room for a zipper.
The jacket is very flattering! I used an ivory cotton crepe with some stretch lined with the same and brown horn buttons. So cute and comfortable. The seam down the sleeves with the pleats are lovely touch.
Are you using a straight stitch to connect the waistband to the skirt? Will it break when it goes over my hips since the fabric is stretchy but the thread isn’t? I’m trying to find a solution because I want to sew with the same fabric and the same type of pattern (sleek super simple flared design with a waistband) but I’m trying to avoid using a zipper or elastic. I could fold the waistband in half and put the skirt and waistband right sides together and see down the three layers with the zigzag stitch on the inside but I fear that would create too much bulk.
Any help is appreciated!
Hey Emily, try a narrow and short zigzag stitch, a lightning stitch, or a straight stretch stitch on your sewing machine for attaching the waistline to the waistband.
I have a question: are seam allowances included in the patterns?
In other words, the patterns already include the seam allowance, which according to the note is 1/2″ unless otherwise indicated.
All of the creations are gorgeus!
Hey there! Yes, all of our patterns come with 1/2 inch seam allowance included.
I have a question: are the seam allowances (in this case 1/2″) already included in the patterns?
Your creations are gorgeusl!
Hi Garbine! All of our patterns come with a 1/2 inch seam allowance included!
I’m making the cardigan and both the sleeves and bodice length ended up being too long on me. The size guide did not include length so I braced myself and just went ahead lol. Would be great if the length for the cardigan can be included as well 🙂
Hey Jan! This is great feedback, thank you! We also really appreciate when different people with different heights and body shapes share how the pattern fits the “average” woman, because it helps other sewists figure out what alterations they might need to make to the pattern to fit themselves.
this is my first time using pattern from here and this is my review as someone with a short torso.
the bodice is a bit long on me and the waist line is also a tad bit low. but i loooove love the construction of this piece and currently considering making another one using a thicker material. (i’m using cotton linen for my current project). much love xx
Thank you so much for this feedback Jan! We would love to see pictures of your finished garment when you’re done. Tag us on social media with the hashtag #MadeWithMood to be featured on our page!
Can I use jersey knit fabric on the skirt?
Yes! This would be a great project for a jersey knit. Just make sure to use a knit lining if it’s thin or sheer.
Hi, I love this pattern! I just wondered, if I were to attach a lining, how would you suggest creating the lining pieces using this pattern (e.g. adding centre back pleats, making bodice pieces larger or smaller)?
Hey Maddie, to create a lining, you literally just cut out all the same pieces you cut out of the main fabric but with lining fabric. I do recommend choosing a thinner fabric for the lining if you still plan on using the ponte on the outside because ponte is thick and stiff and it might be bulky if you line it with ponte.