

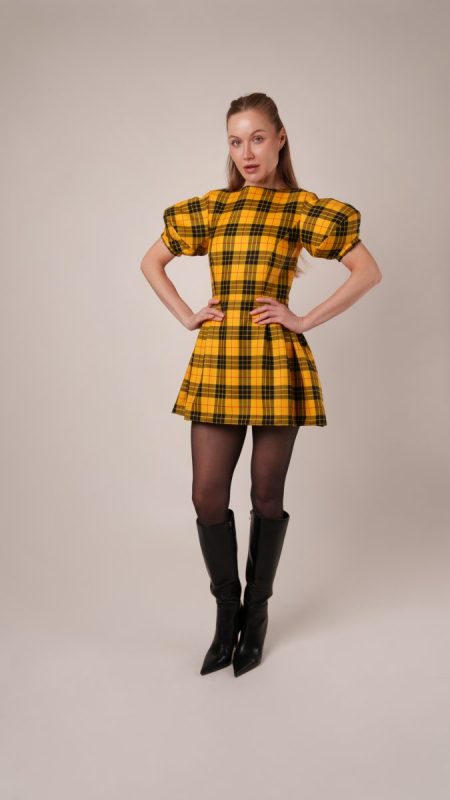
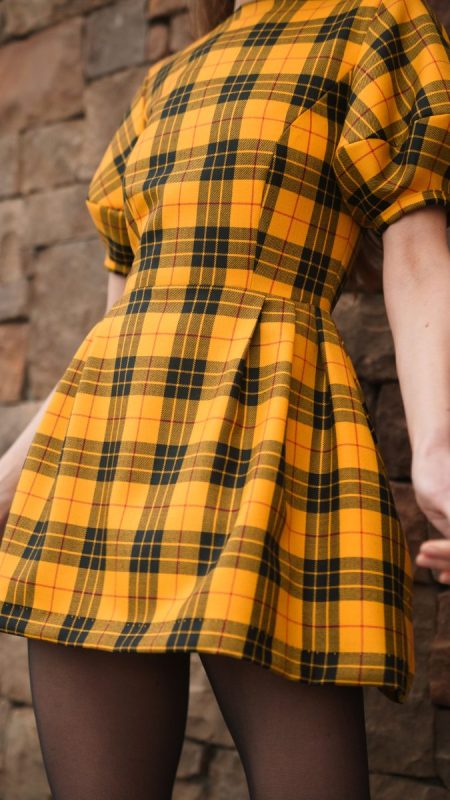
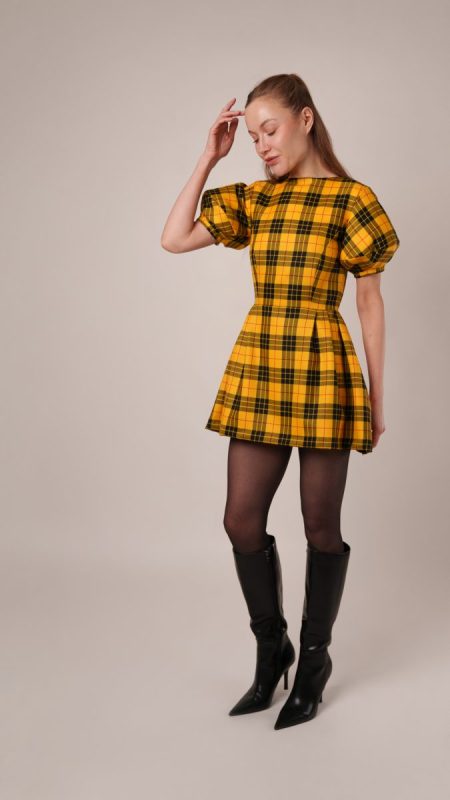
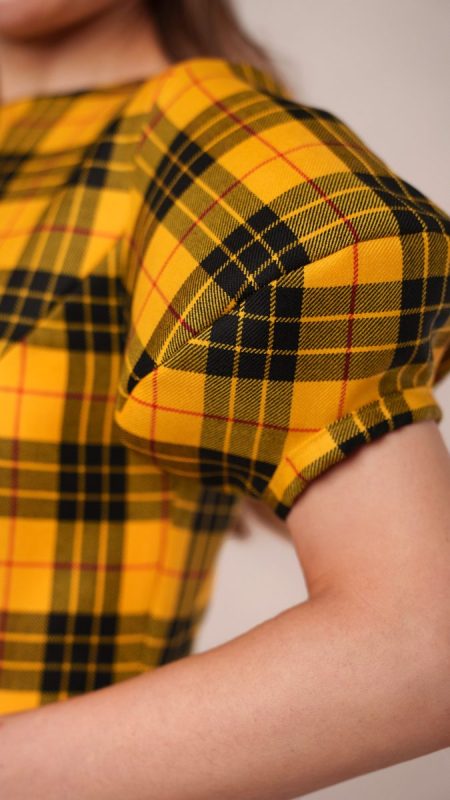
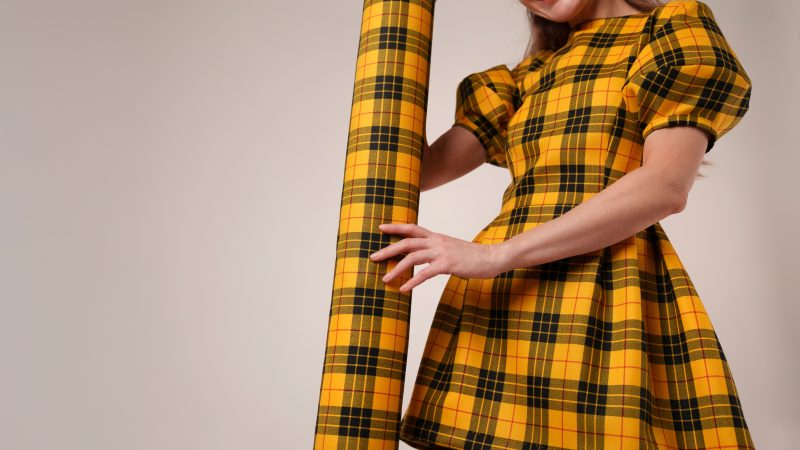
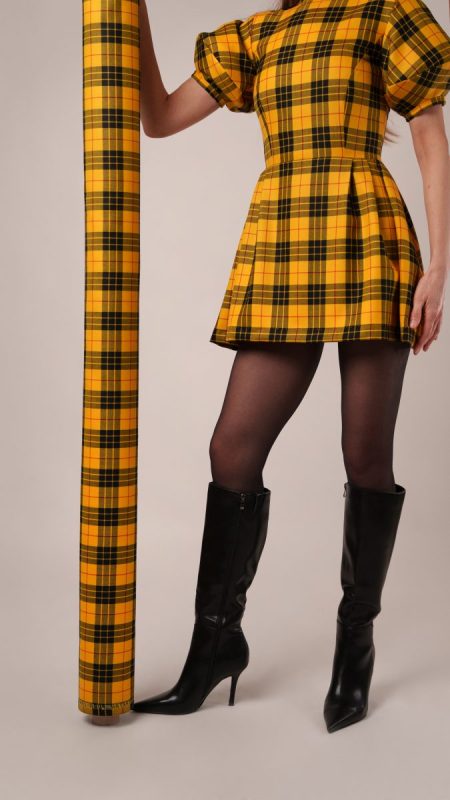
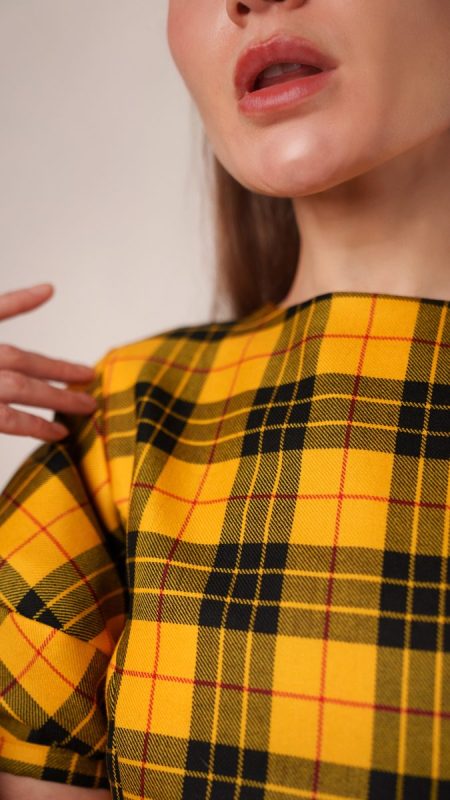
Chase your posh and preppy dreams in the Silverstone Mini Dress, a polished statement piece that feels as rich and sophisticated as it looks. Made from luxurious Italian Virgin Wool Twill, this mini dress channels classic tailoring with a modern edge.
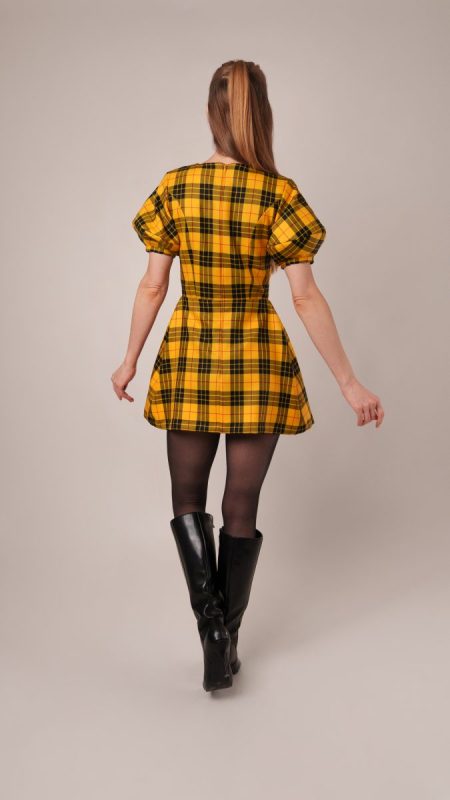
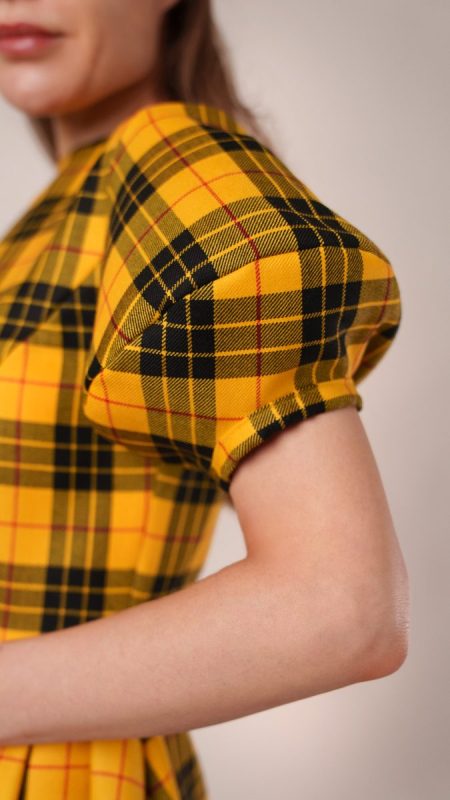
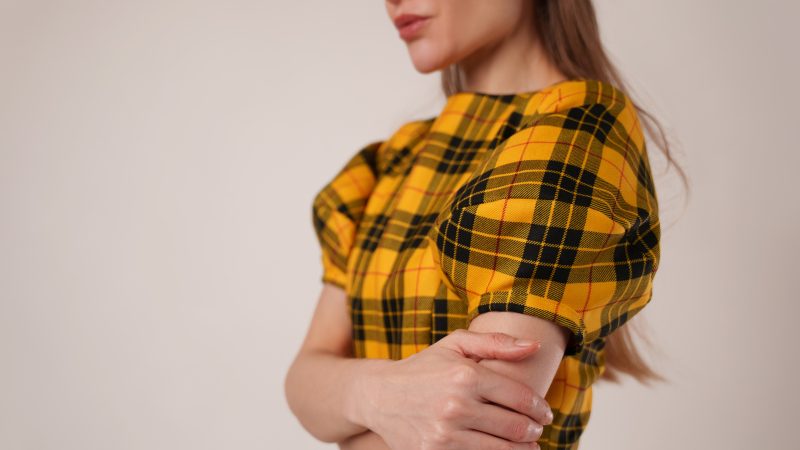
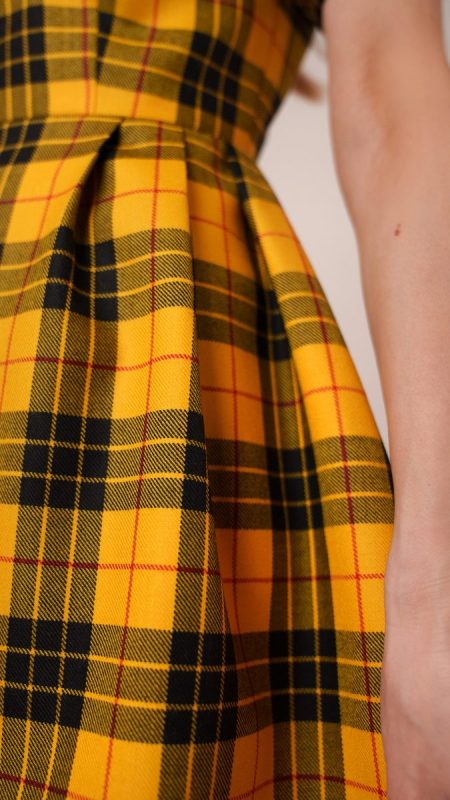
Mini dresses may be a wardrobe staple, but this mini dress stands apart with details you will not find on the rack. The skirt features thoughtfully placed pleats concentrated at the hips, designed to accentuate your figure and create a flattering A-line shape. A clean boat neckline offers a refined counterpoint to the short, flirty hemline, striking the perfect balance between modest and playful. Finally, the unique lantern sleeve brings sculptural volume, giving you the drama of a puff sleeve with added structure and symmetry for a look that feels architecturally chic.
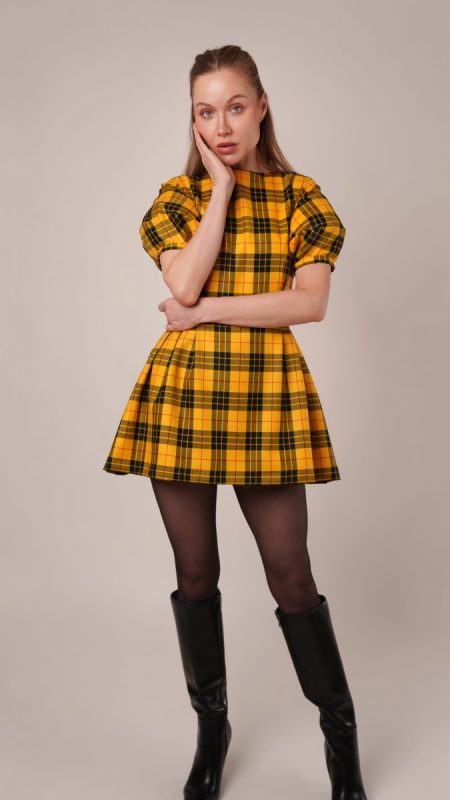
Picture yourself strutting through your city in your classy new mini dress with glossy patent leather pumps, an itty bitty clutch, and a coordinating wool coat. From crisp daytime outings to candlelit evenings, this dress is made to make you look and feel iconic.
If dandelion yellow isn’t your favorite color or it’s still too chilly for mini dresses, open your mind to a midi-hemline and a more neutral wool or linen for even more wearability.

Essential Materials & Sizing Guide for the Silverstone Mini Dress
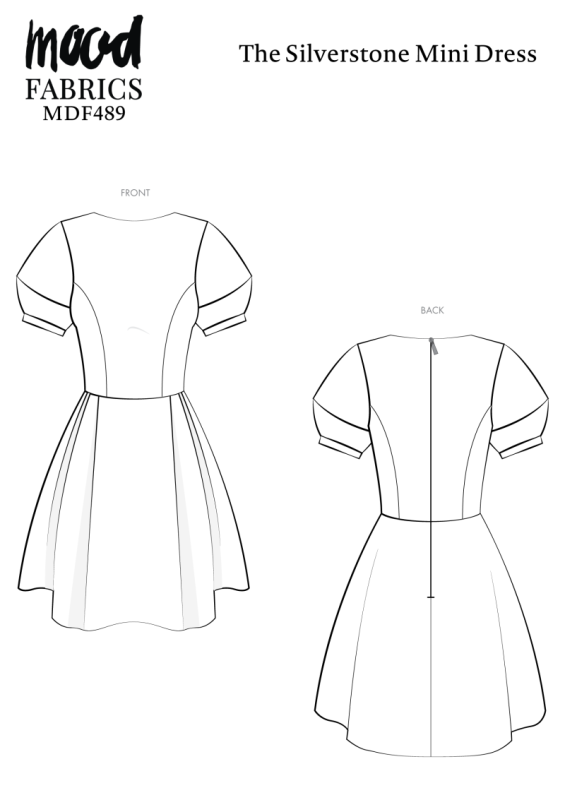
Continue reading for a breakdown of what knowledge and materials you need for creating your very own mini dress! We’ve got you covered with the recommended materials we used—if you want to follow along exactly—as well as a curated list of alternative fabric type recommendations if you want to customize your own version. The Silverstone Mini Dress free sewing pattern download includes technical drawings for seam and silhouette visibility, plus a size chart to help you find your perfect fit!
Purchase Products Used Below:
Quantities indicated are for sewing a size small mini dress .* Toggle the ‘SHOP THIS LOOK’ box to find quantity estimates for other sizes.
-
- 2 yards of Virgin Wool Twill Made in Italy – Yellow, Black and Red Plaid
- 2 yards of Bemberg Lining – Dandelion Yellow – Lucidum Collection
- 1 each of Invisible Zipper 24″ by YKK – 506 Sunshine
- 1 each of Gutermann Sew All Thread 250m – 850 Bright Sunshine
- MDF489 – Silverstone Mini Dress Sewing Pattern (Free download below!
*Quick Tip! The ‘SHOP THIS LOOK’ box defaults to full-yard quantities. To order an exact half-yard quantity for any fabric, simply use the decrease quantity button (-) to subtract by the half yard. Then click “ADD TO CART” to add all materials to your cart.
(Our system can only display full-yard quantities initially.)
Alternative Fabric Type Recommendations:
The Silverstone Mini Dress sewing pattern is best suited for medium weight, non-stretch fashion fabrics. Explore other fabric types or colors from our featured collections for your mini dress with the links below.
Download Your Free Sewing Pattern
Submit your name and email in the form below to receive the download link for the Silverstone Mini Dress free sewing pattern directly in your inbox. Mood Sewciety Patterns will send your free download link via email with the subject line: ‘Your Free Download from Mood Sewciety – The Silverstone Mini Dress’ (in PDF format for A4 and letter-size printing).
© MoodFabrics.com / MoodSewciety.com – Mass production, resale, or distribution of this pattern in any form is strictly prohibited.
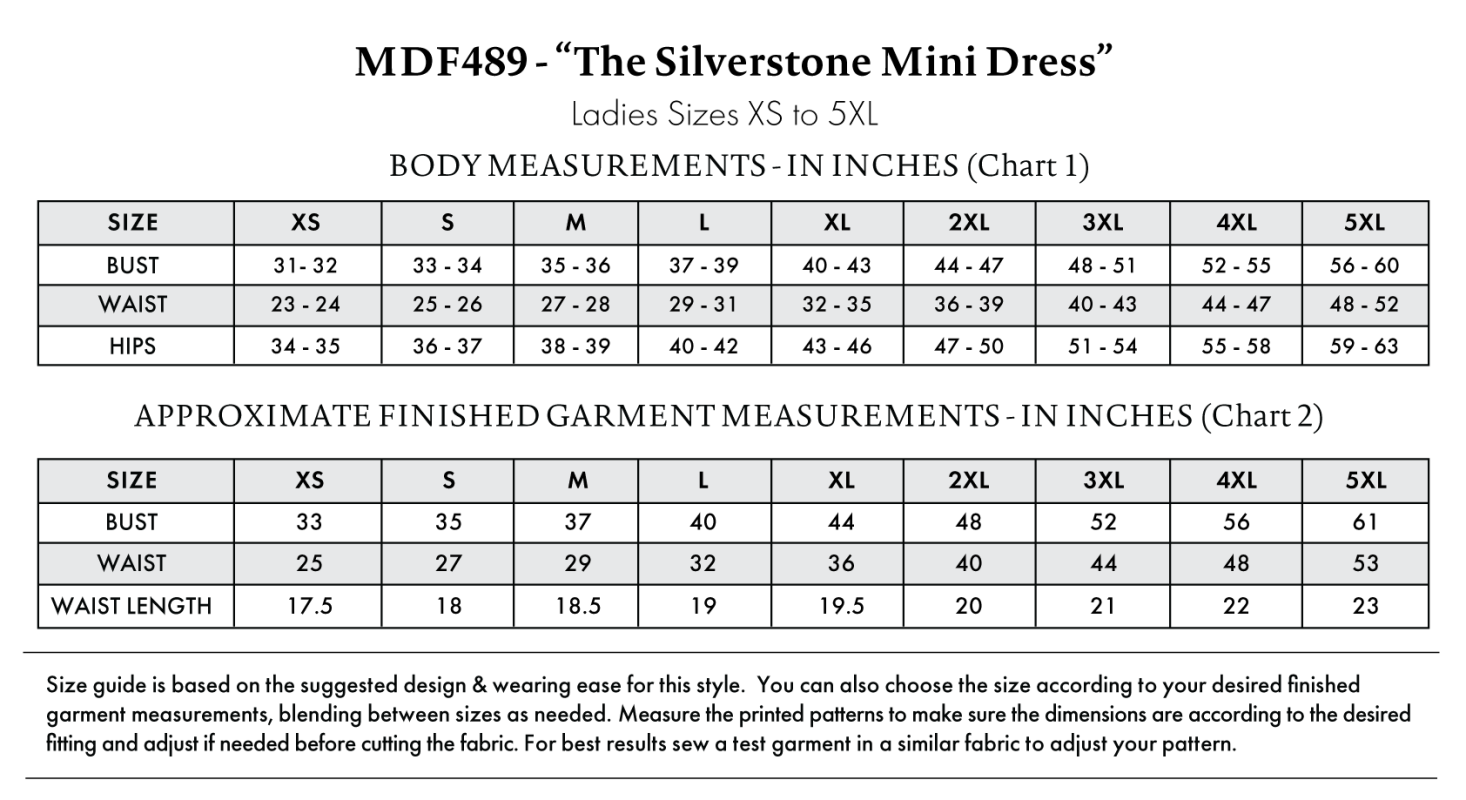
Find Your Perfect Fit
The Silverstone Mini Dress Sizing Guide is based on the suggested design & wearing ease for this style. You can also choose the size according to your desired finished garment measurements, blending between sizes as needed. Measure the printed patterns to make sure the dimensions are according to the desired fitting and adjust if needed before cutting the fabric. For best results, sew a test garment in a similar fabric to adjust your pattern.
Note: Always read all the instructions before cutting the fabric!
How to Sew The Silverstone Mini Dress
The instructions provided below are designed to guide you through sewing the Silverstone Mini Dress from start to finish.

2 Tips for Sewing with Virgin Wool Twill
⇒ You’re allowed to iron it, but just use medium heat instead of high so you don’t warp the fabric.
⇒ Do not skip the lining in this dress. The wool is a little itchy, especially in places where the dress is fitted, like under the arms.

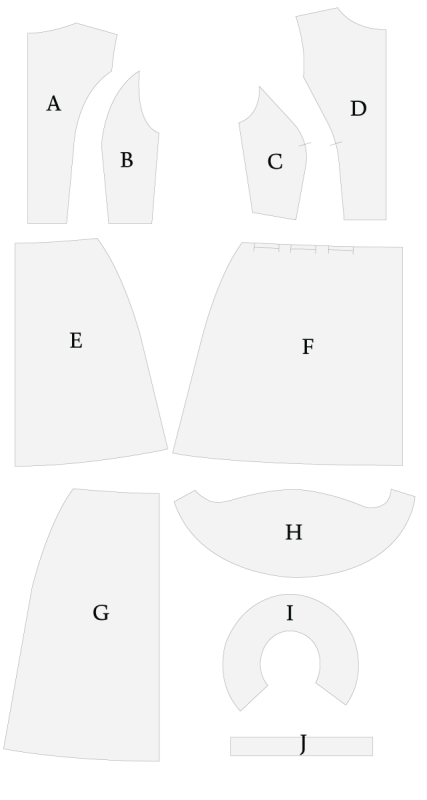
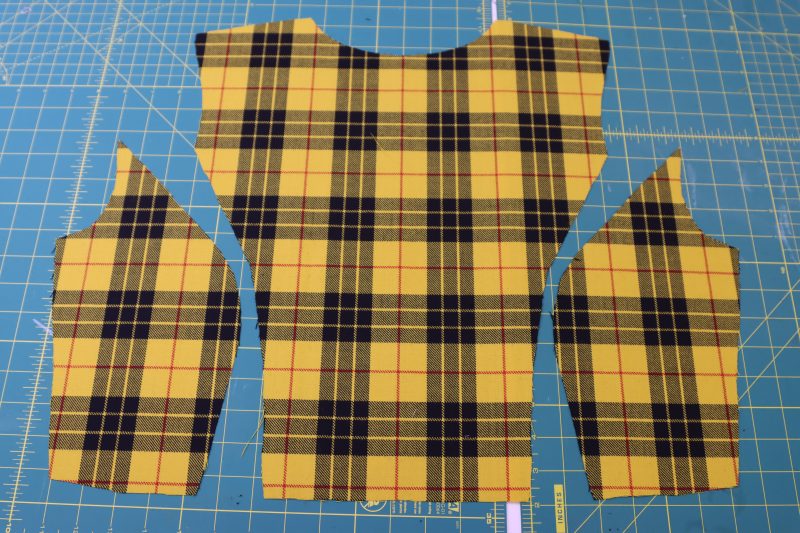
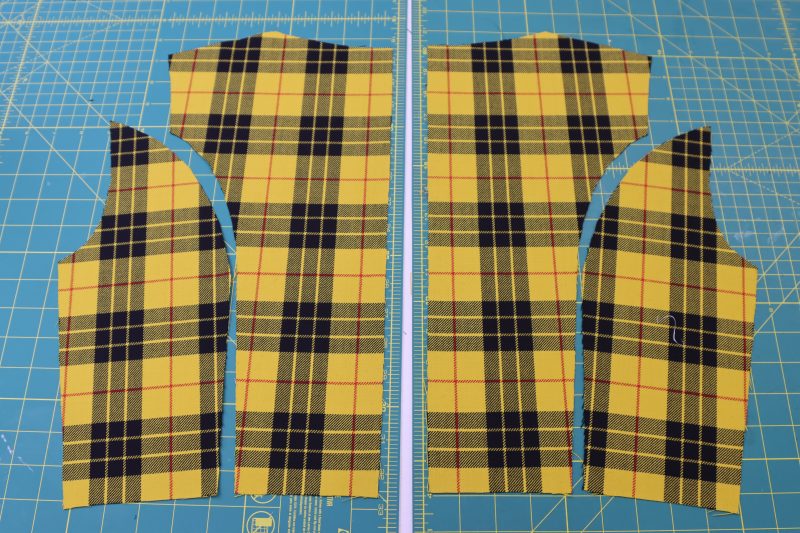
Pattern Pieces & Fabric Cuts Needed
- (A) TOP BACK CENTER
- FABRIC – CUT 2 MIRRORED
- LINING – CUT 2 MIRRORED
- (B) TOP BACK SIDE
- FABRIC – CUT 2 MIRRORED
- LINING – CUT 2 MIRRORED
- (C) TOP FRONT SIDE
- FABRIC – CUT 2 MIRRORED
- LINING – CUT 2 MIRRORED
- (D) TOP FRONT CENTER
- FABRIC – CUT 1 ON FOLD
- LINING – CUT 1 ON FOLD
- (E) SKIRT BACK
- FABRIC – CUT 2 MIRRORED
- LINING – CUT 2 MIRRORED
- (F) SKIRT FRONT
- FABRIC – CUT 1 ON FOLD
- LINING – CUT 1 ON FOLD
- (G) SKIRT FRONT LINING
- LINING – CUT 1 ON FOLD
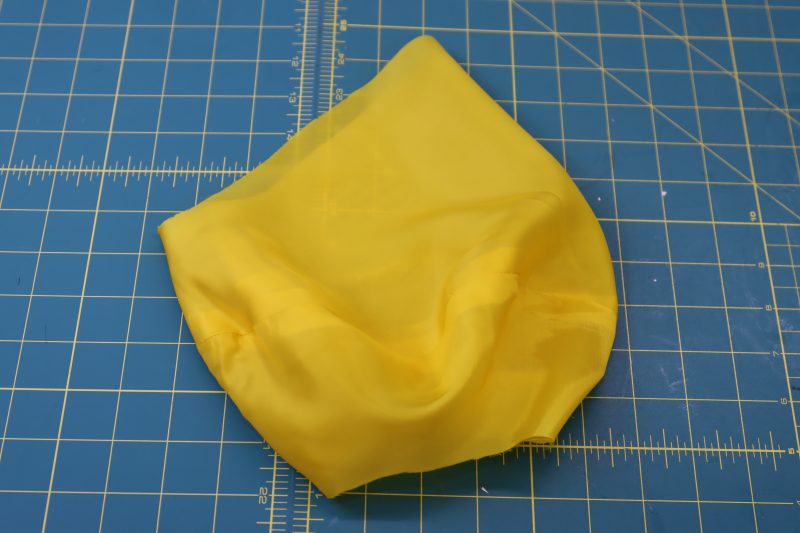
- (H) SLEEVE UPPER
- FABRIC – CUT 2 MIRRORED
- LINING – CUT 2 MIRRORED
- (I) SLEEVE LOWER
- FABRIC – CUT 2 MIRRORED
- LINING – CUT 2 MIRRORED
- (J) SLEEVE CUFFS
- FABRIC – CUT 2
Sew with a 1/2″ seam allowance for all seams unless otherwise specified.
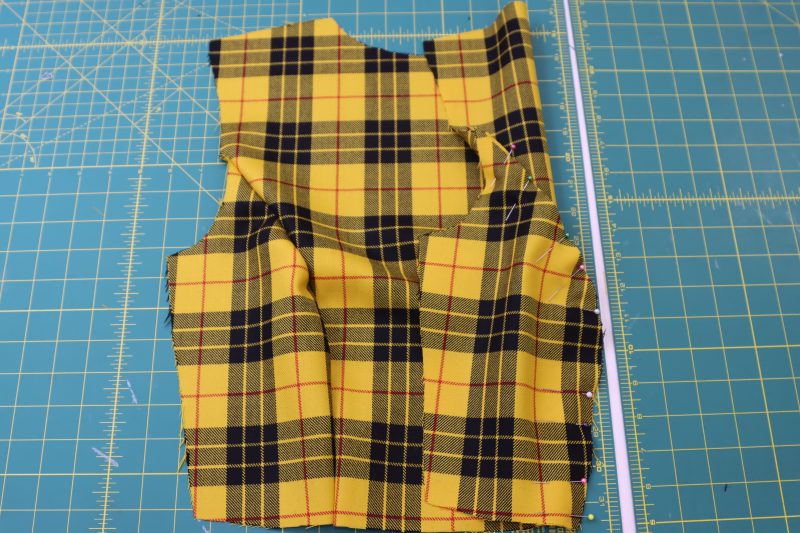
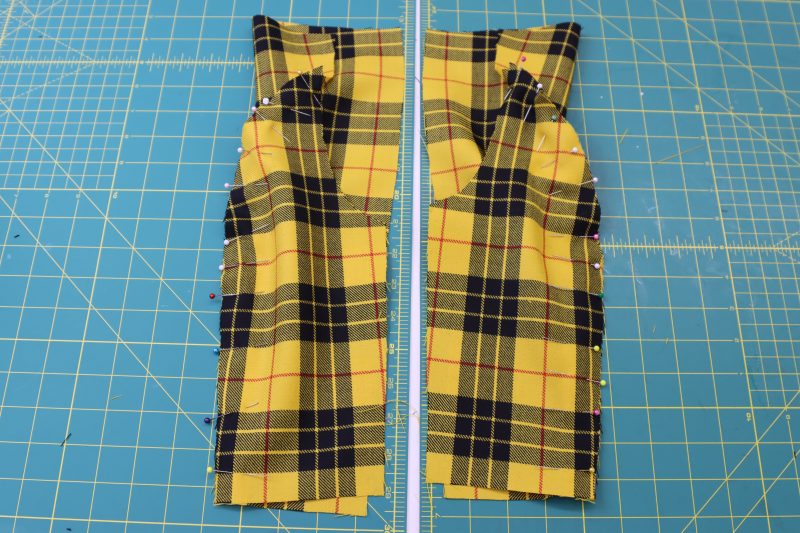
Step 1
TOP FRONT
- Lay out the top front pieces next to one another with the notches lined up.
- Place the top front side pieces right sides together with the top front center piece.
- Pin and sew the top front side pieces to the top front center.
- Open the seams and press them flat with medium heat.
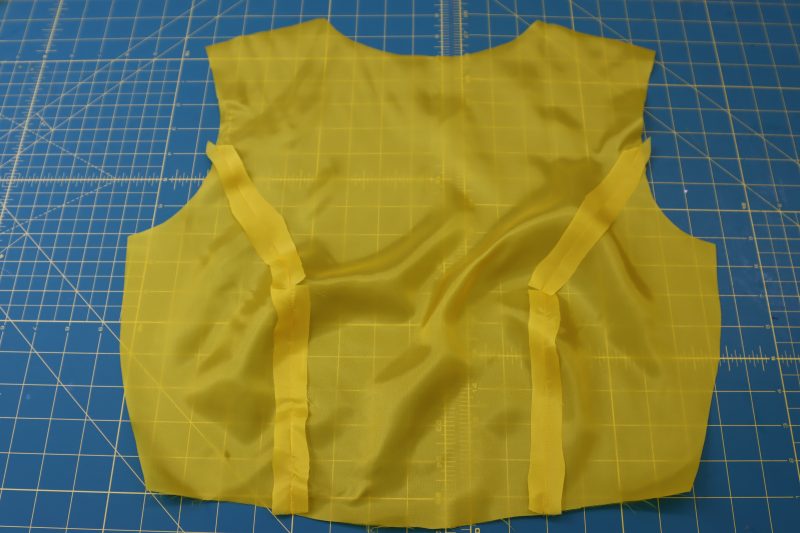
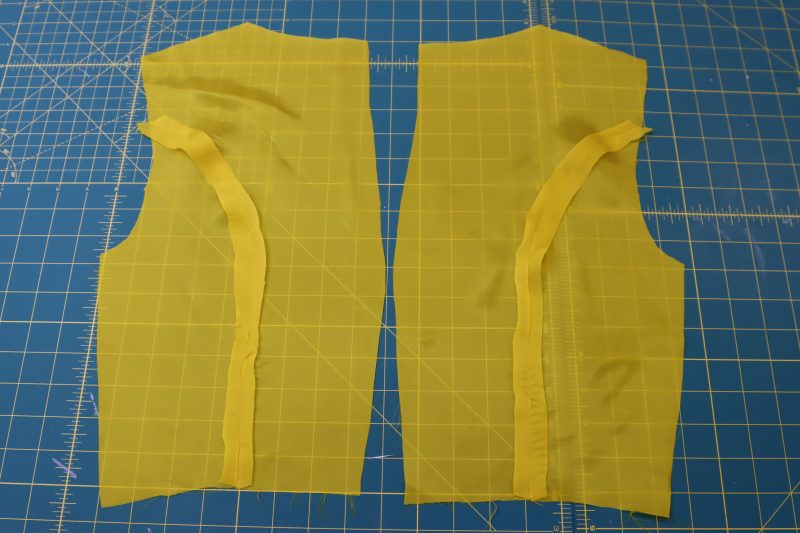
Step 2
TOP FRONT LINING
- Repeat the process in step 1 for the top front lining piece.
Step 3
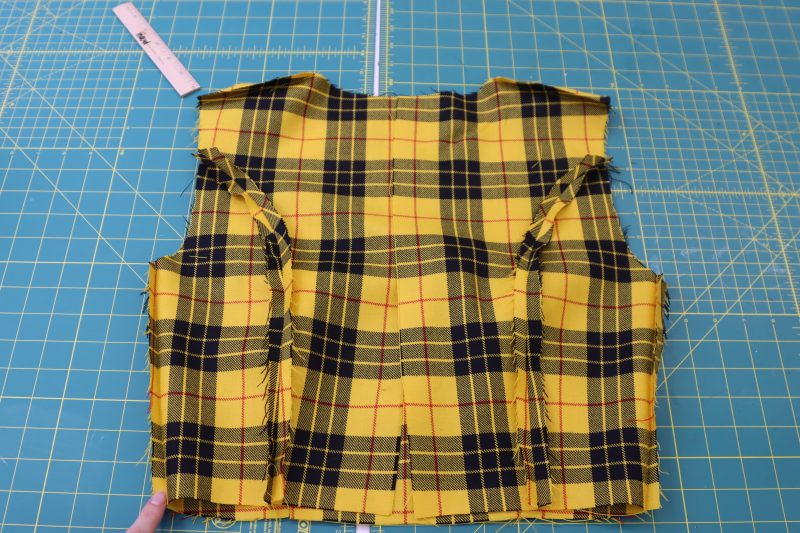
TOP BACK
- Lay out the top back pieces next to one another with the notches lined up.
- Place the top back side pieces right sides together with the top back center pieces.
- Pin and sew the top back side pieces to the top back center.
- Open the seams and press them flat with medium heat.
Step 4
TOP BACK LINING
- Repeat the process from step 3 for the back lining pieces.
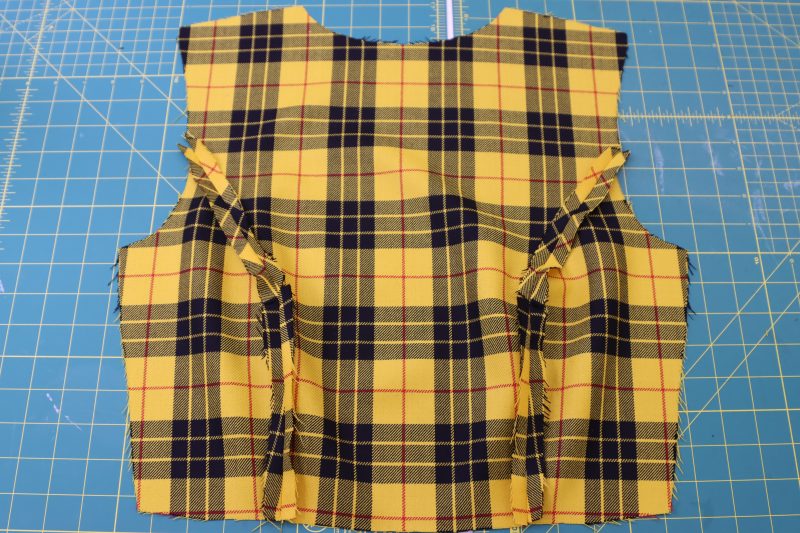
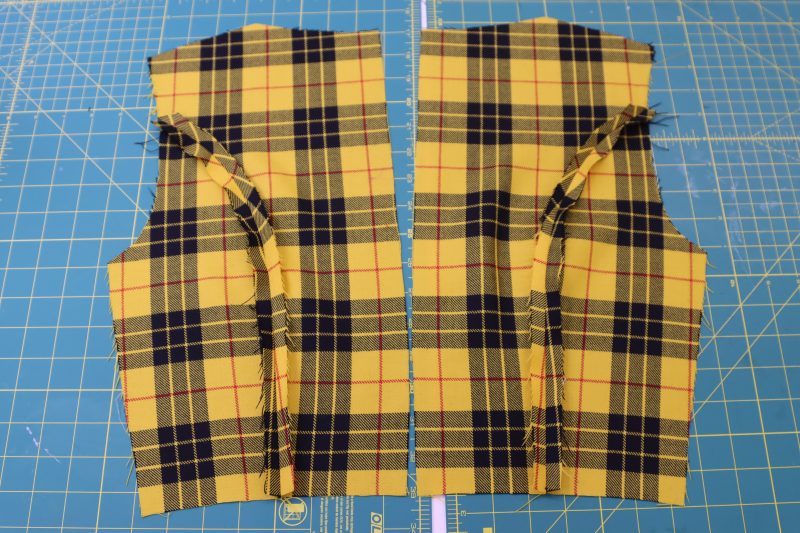
Step 5
SHOULDERS & SIDE SEAMS
- Place the top front and the top back piece right sides together with the shoulders and side seams lined up.
- Pin and sew the front and back shoulders and side seams together.
- Repeat the same steps for the lining.
Step 6
SLEEVES
- Pin the outside edge of the lower sleeve to the bottom edge of the upper sleeve, right sides together (they are both curved opposite to each other, so this part requires a lot of pins).
- Sew the pinned edge.
- Open the seam and press it flat.
- Place the side seams of the sleeve right sides together and sew shut.
- Open the seam and press it flat.
- Repeat for both sleeves, then repeat for the sleeve lining.
Step 7
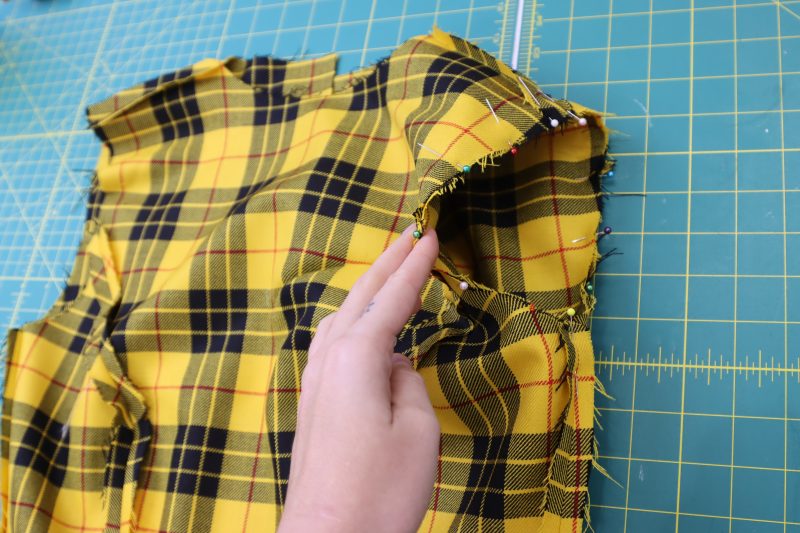
SET IN SLEEVES
- Pin the sleeve caps to the armscyes right sides together, making sure that the front of the sleeve is aligned with the front of the dress.
- Sew around the armscye.
- Repeat these steps for both the sleeves and the lining.
Step 8
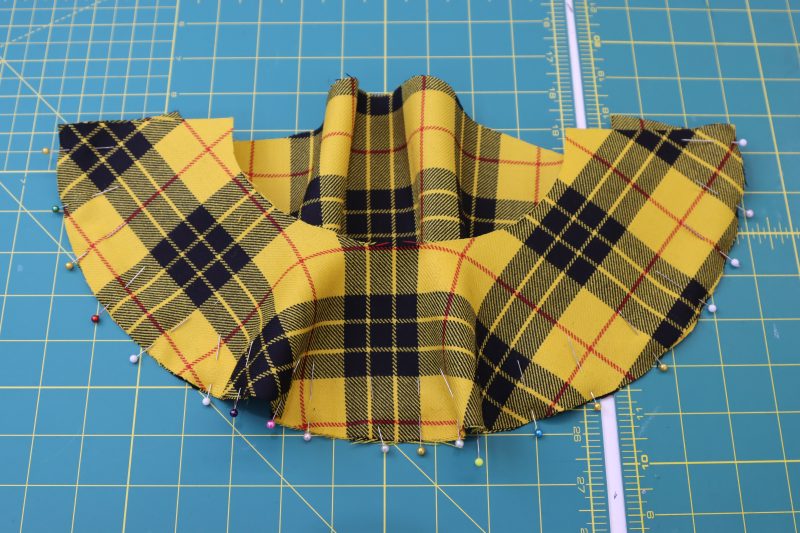
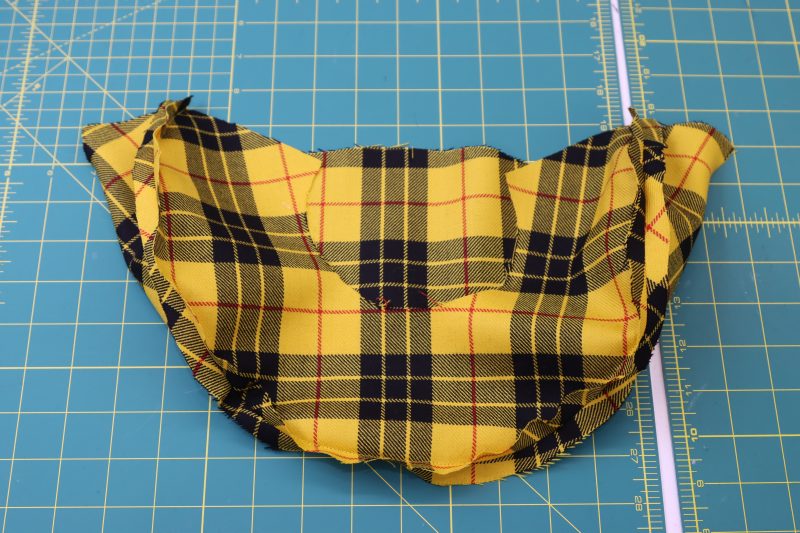
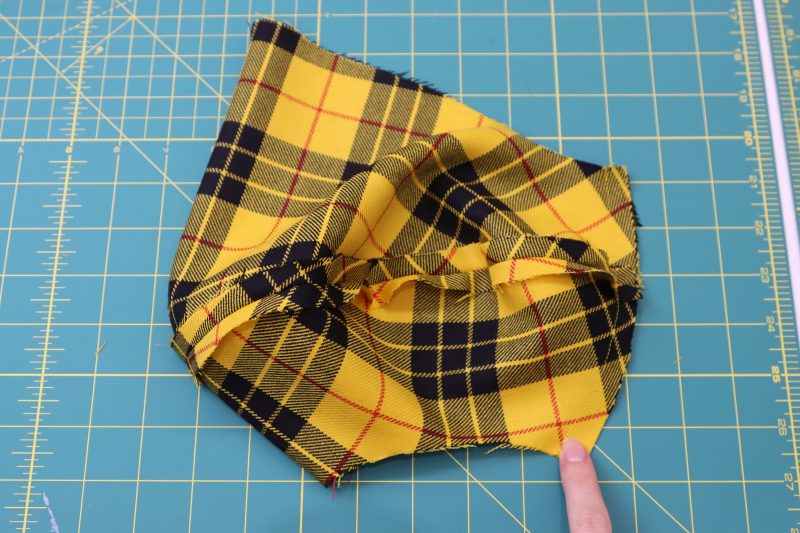
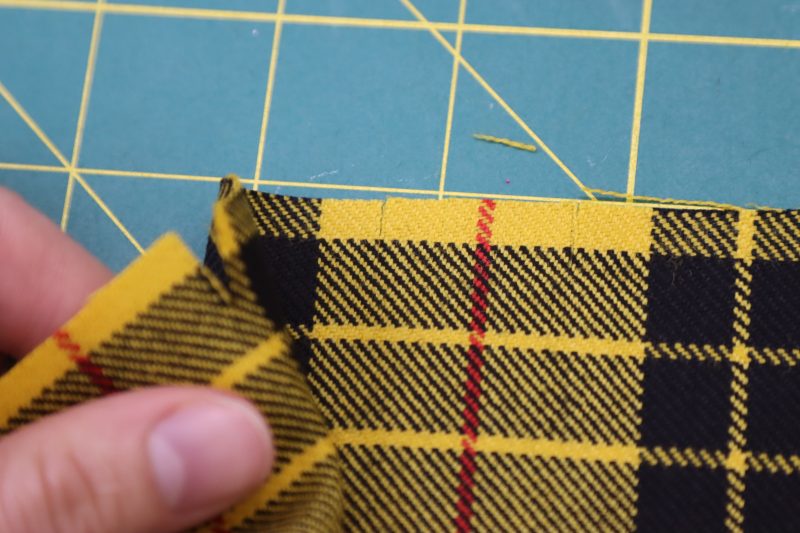
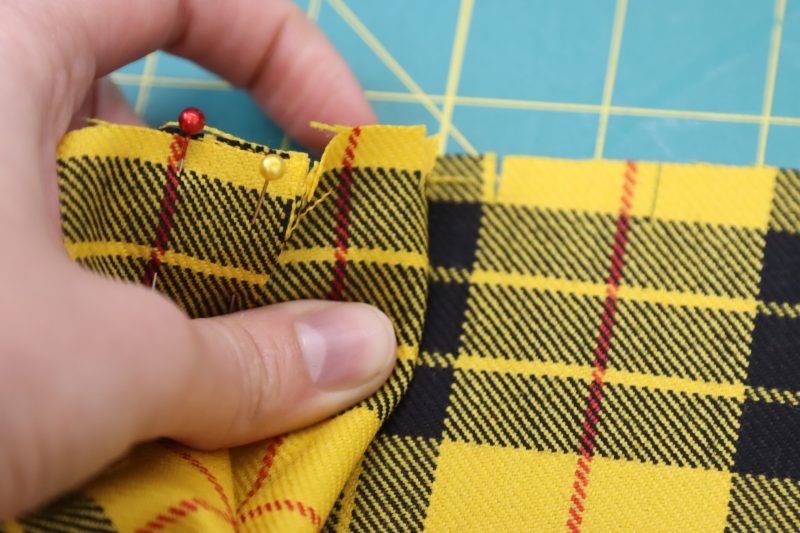
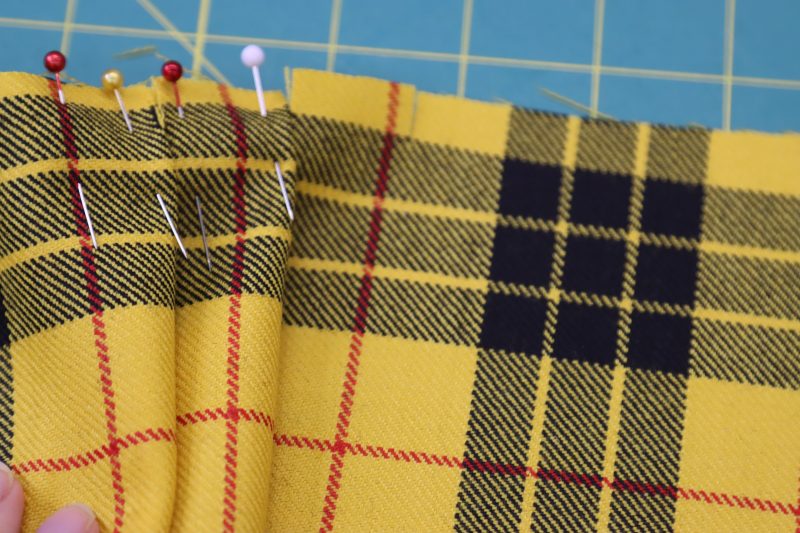
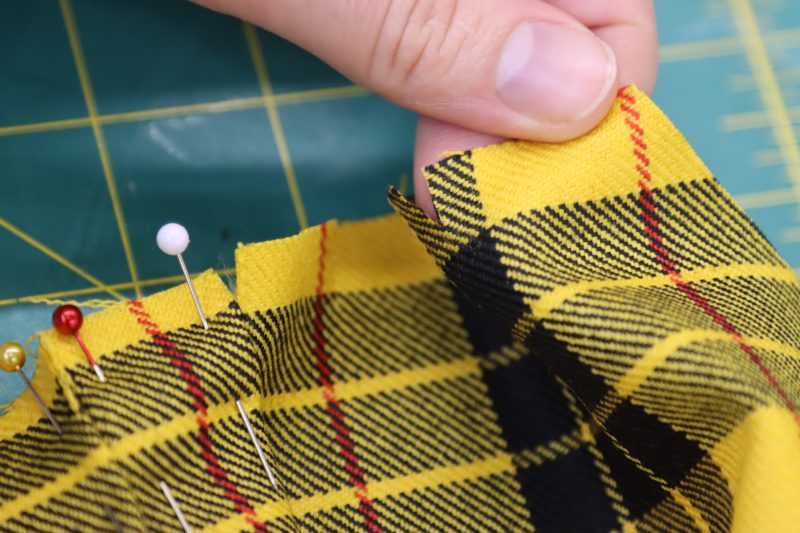
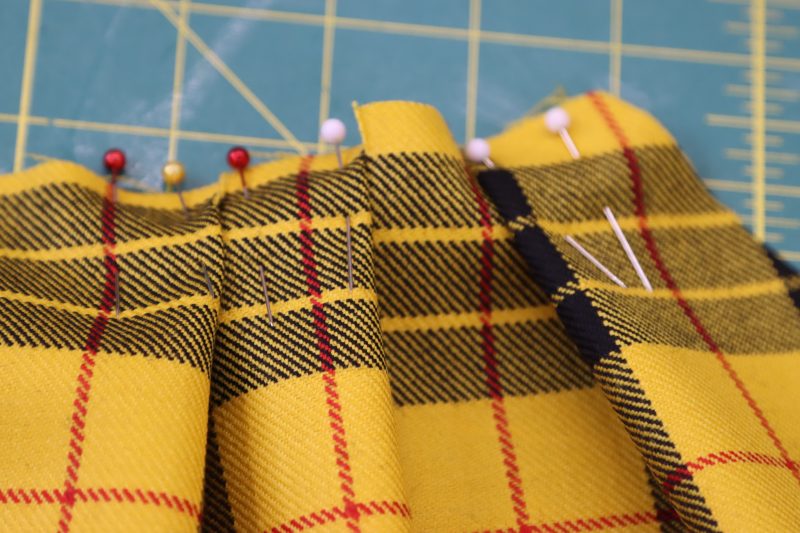
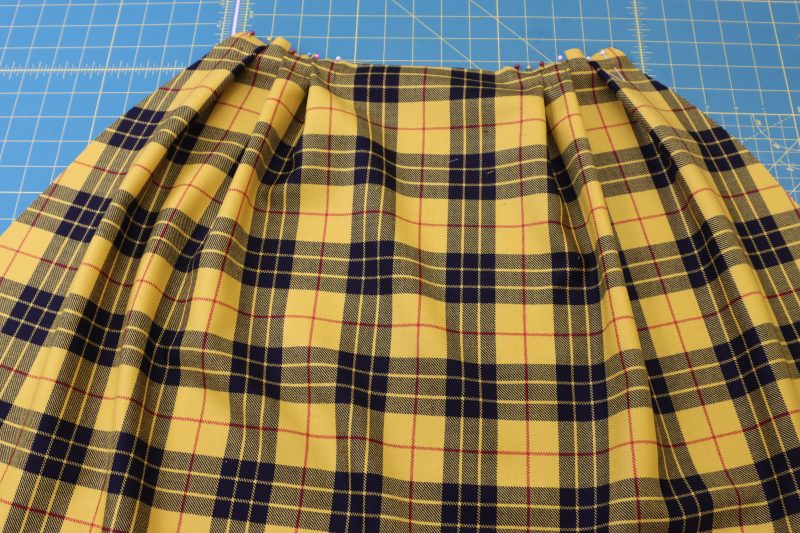
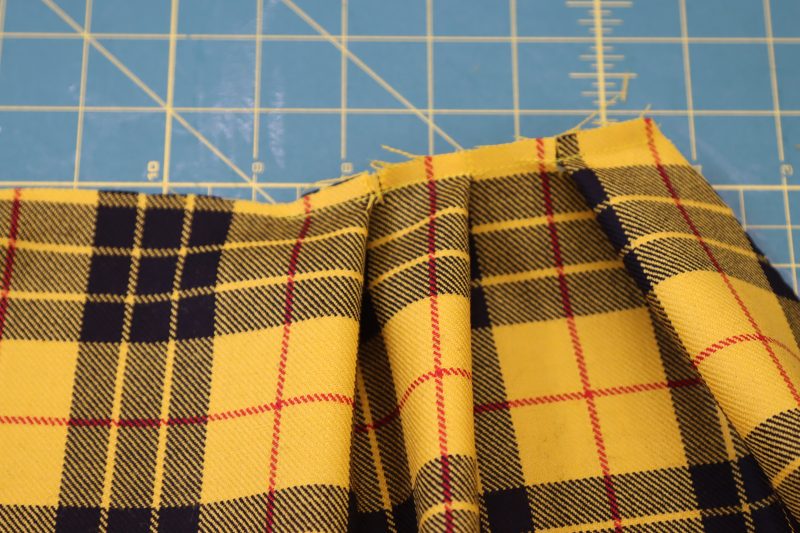
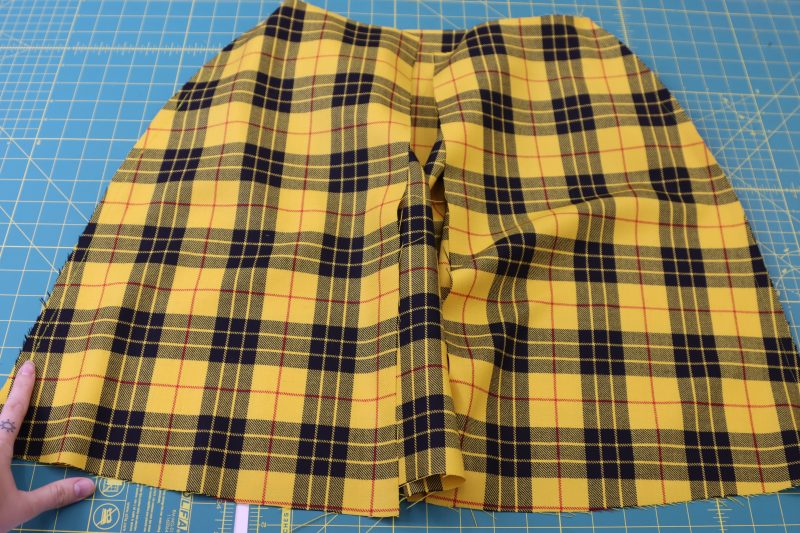
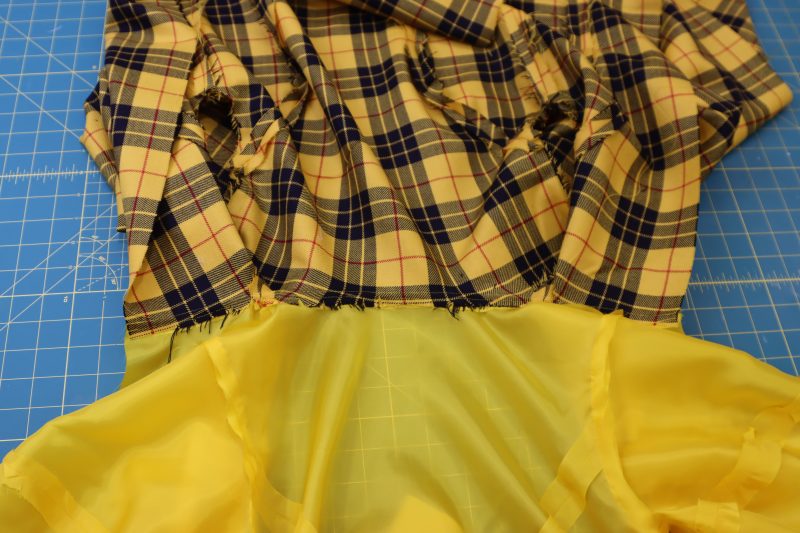
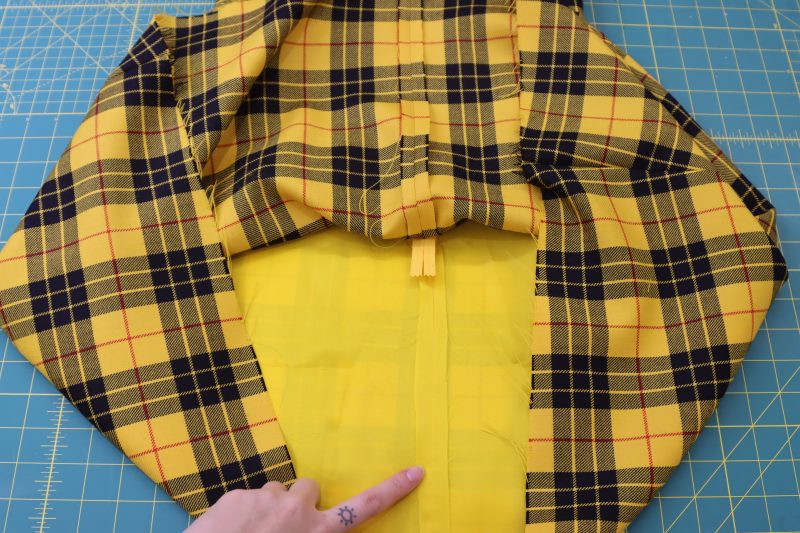
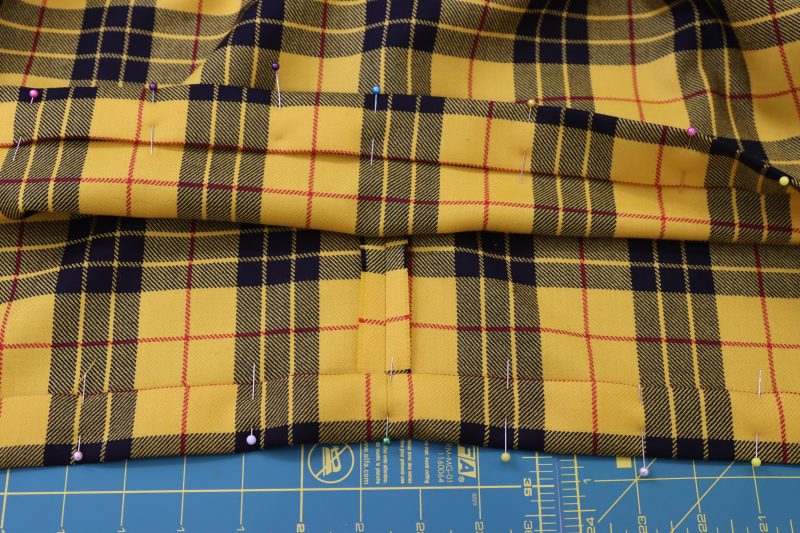
SKIRT PLEATS
- Lay the front of the skirt right side up.
- Find the innermost notches on the skirt (towards the front center).
- Fold the space between the innermost notch and the notch directly next to it, making sure the notches line up with each other and the inner fold is towards the center front of the skirt.
- Pin that pleat in place.
- For the next pleat, you’re going to repeat the exact same thing, except you’re going to use the next set of notches (on the same side of the skirt still, we’re only doing one side at a time).
- For the last set of notches, you’re going to fold the pleat the same way as the first two, except the folded part of the pleat will be towards the side seam of the skirt (see photos below).
- Repeat this pleating process, except mirrored, on the opposite side of the skirt.
Step 9
SKIRT SIDE SEAMS
- Lay the front skirt and the back skirt right sides together with the side seams lined up.
- Pin and sew the skirt side seams, making sure to line up the plaid pattern to the best of your ability.
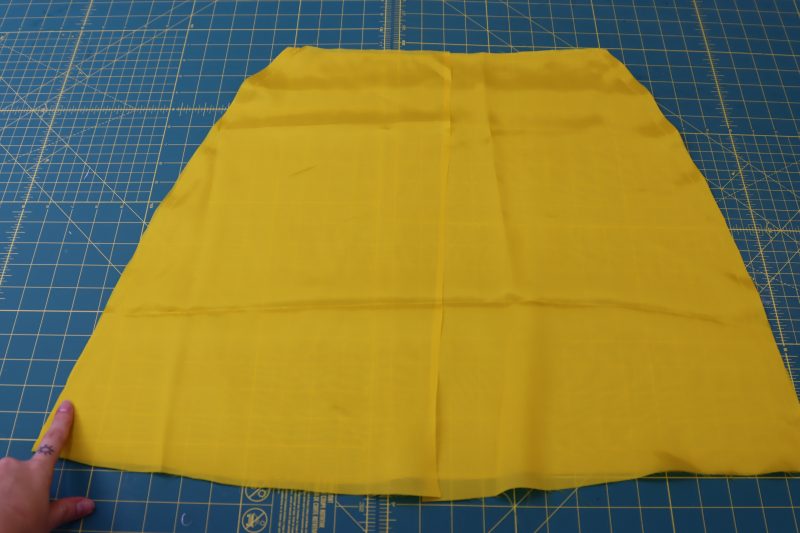
Step 10
LINING SIDE SEAMS
- Lay the front skirt lining and the back skirt lining right sides together with the side seams lined up.
- Pin and sew the lining skirt side seams, making sure to line up the plaid pattern to the best of your ability.
Step 11
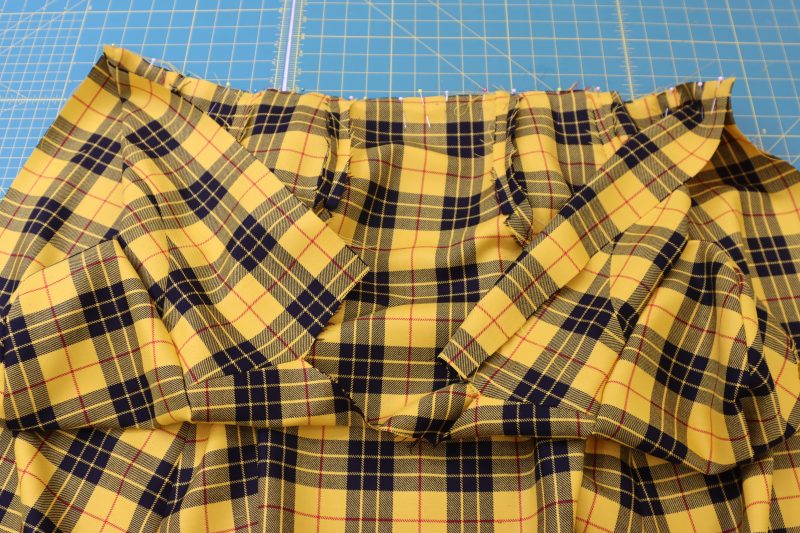
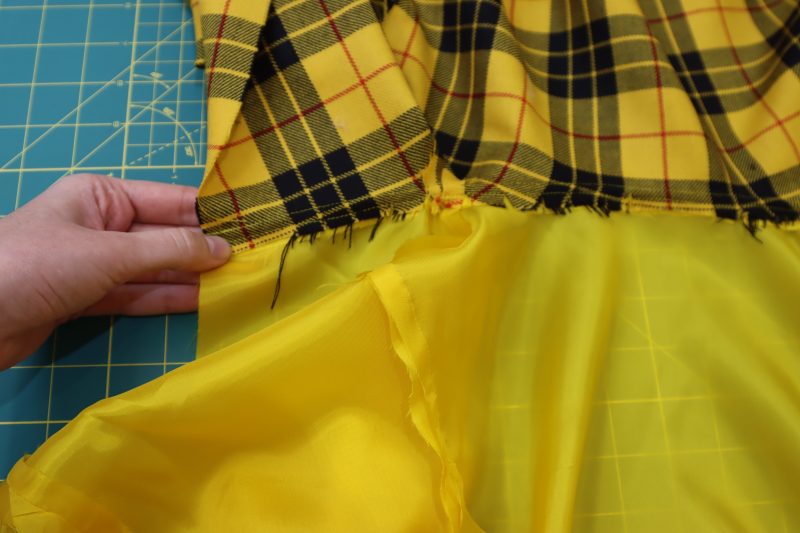
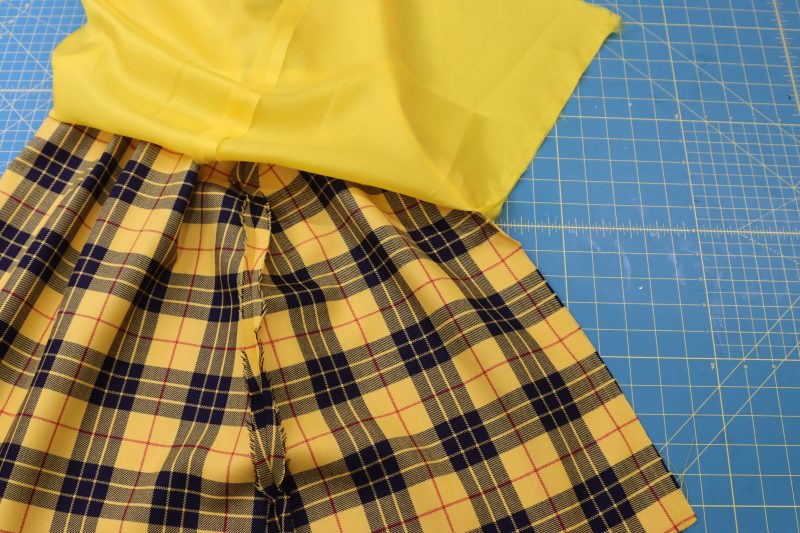
SKIRT WAISTLINE
- Place the top waistline up against the skirt waistline, right sides together with raw edges lined up.
- Pin and sew the dress top to the dress skirt.
- Open the seams and iron them flat.
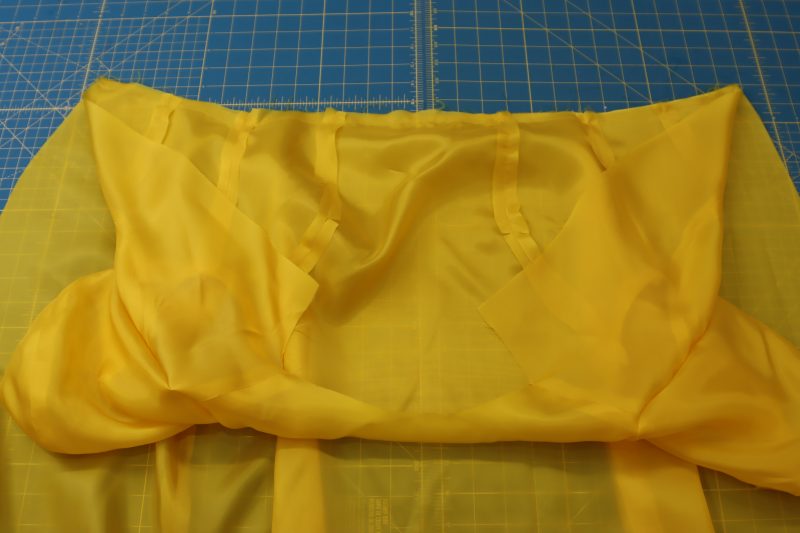
Step 12
LINING WAISTLINE
- Repeat the process from step 11 for the lining dress.
Step 13
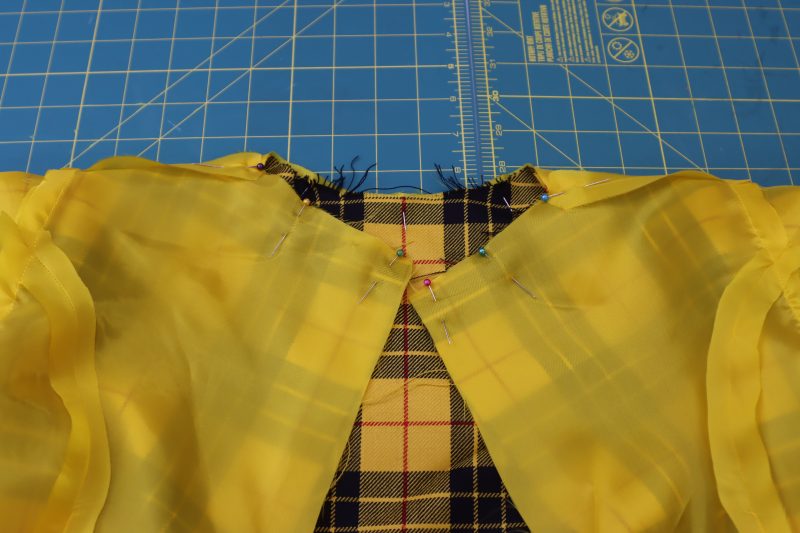
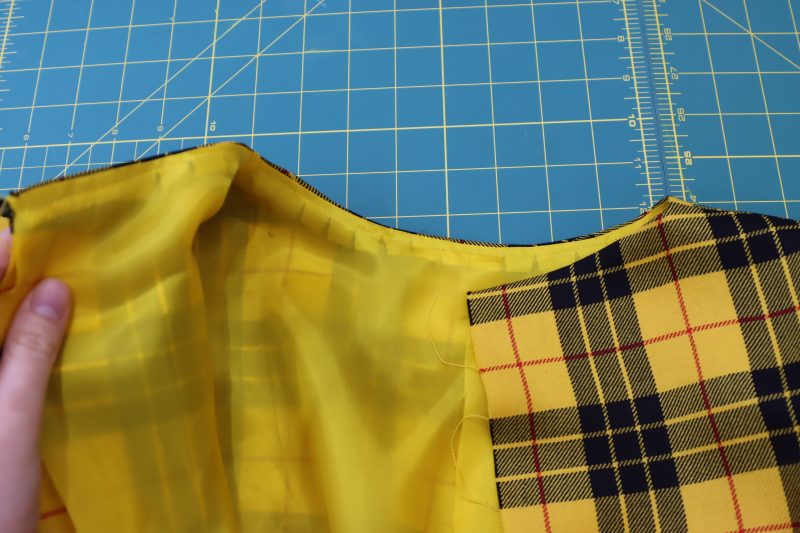
NECKLINE
- Place the main fabric dress inside of the lining dress right sides together.
- Line up the necklines of both dresses.
- Pin and sew around the neckline to attach the lining to the main fabric.
- Clip notches into the rounded parts of the neckline.
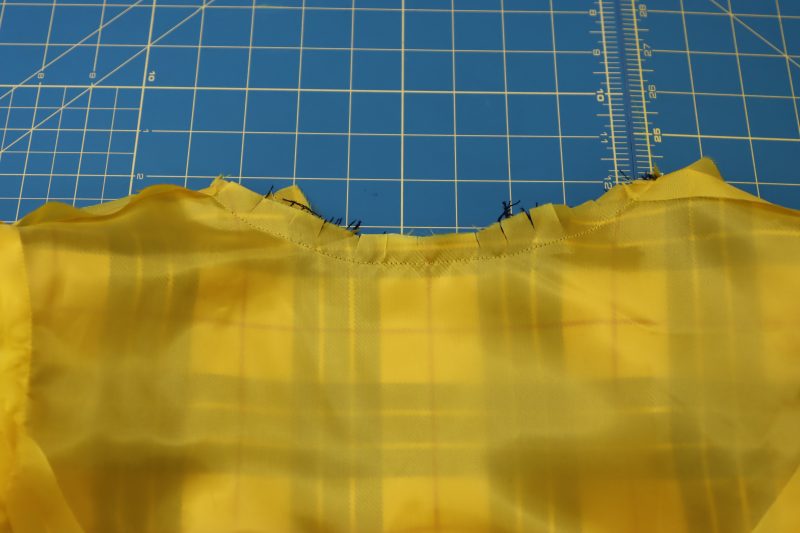
- With the right sides of BOTH the lining and the shell facing down, iron the seam allowance of the neckline towards the lining fabric.
- Understitch the seam allowance to the lining with ¼ inch seam allowance.
- Flip the dress so that the lining and main fabric are now wrong sides together.
- Press the neckline so that the lining is hidden behind the main fabric.

Step 14
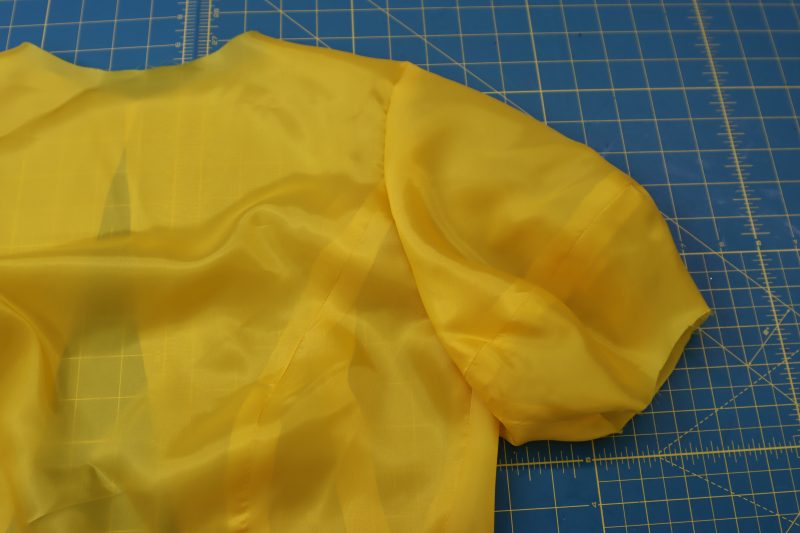
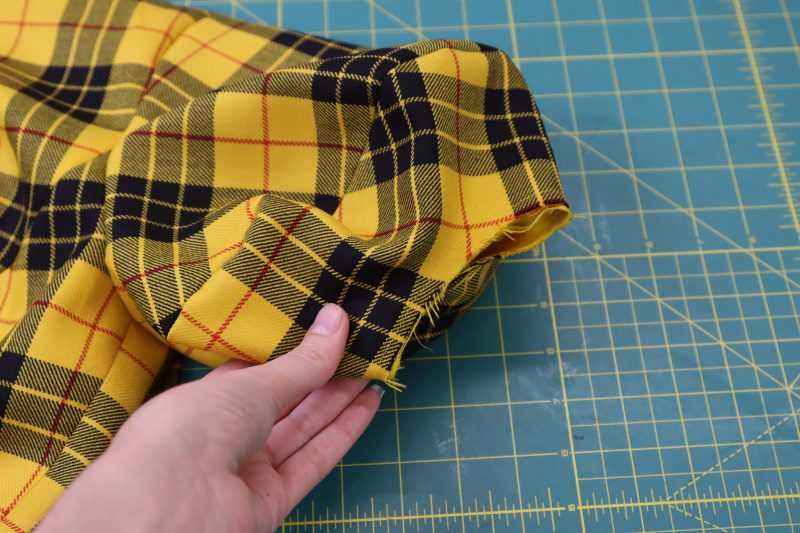
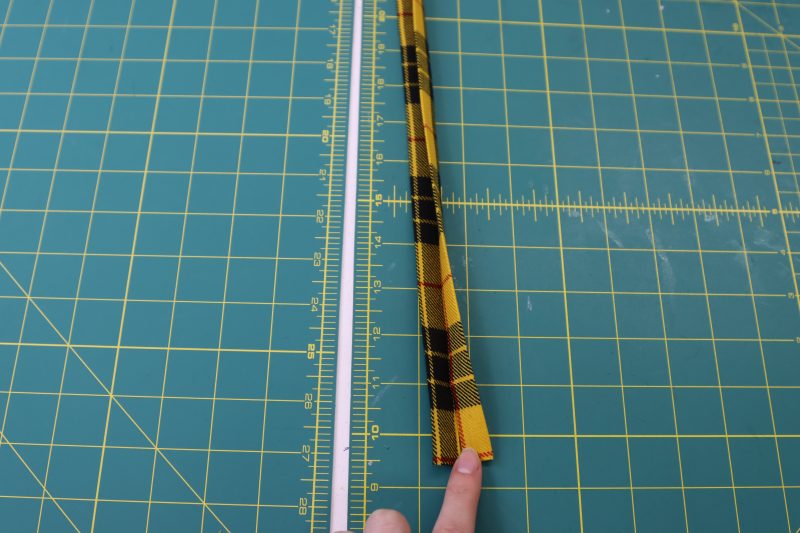
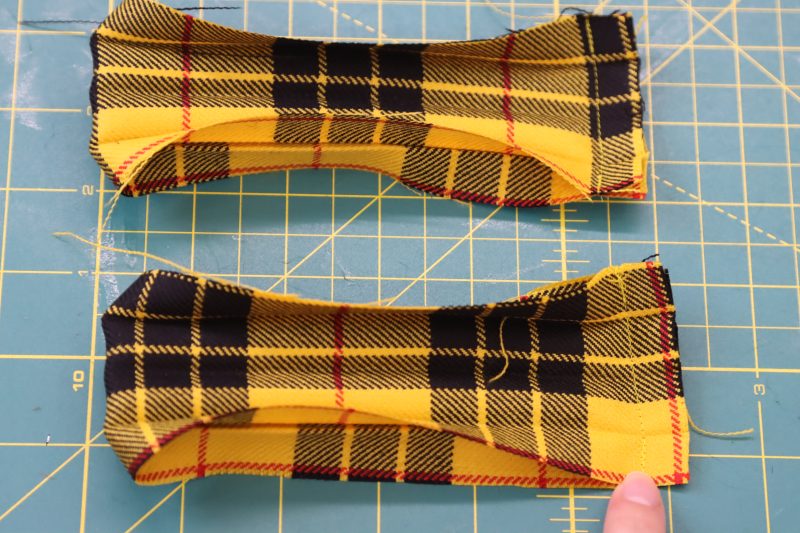
SLEEVE CUFF
- With the dress flipped right sides out, grab the openings of both of the sleeves.
- Pin and sew around the arm opening of both of the sleeves with a ¼ inch stay stitch, holding the lining and main fabric together.
- Fold and press the sleeve cuffs as shown in the second photo below.
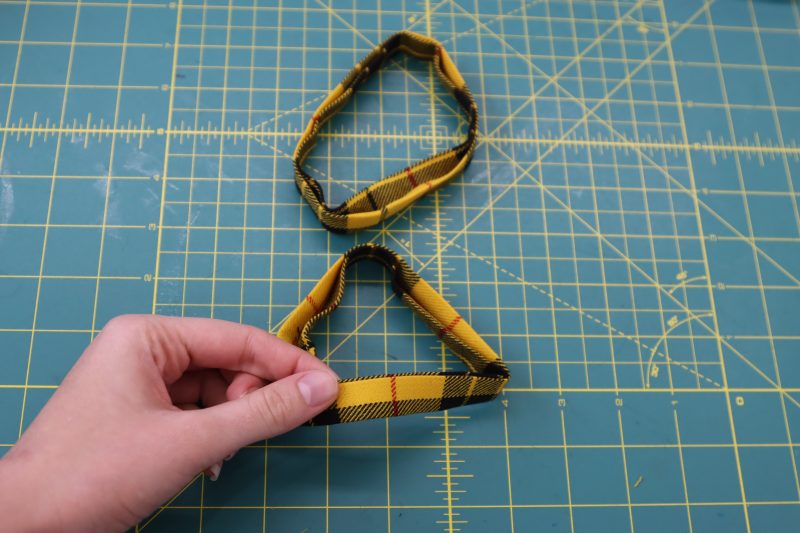
- Fold and stitch the sleeve cuffs right sides together to make a closed loop, as shown in the third photo below.
- Fold the sleeve cuffs back into their shape after making the closed loop.
- Sandwich the sleeve opening into the folded edge of the sleeve cuff.
- Pin around the edge of the sleeve cuff, attaching it to the sleeve opening.
- Sew the sleeve cuff to the opening with ⅛ inch seam allowance.
Step 15
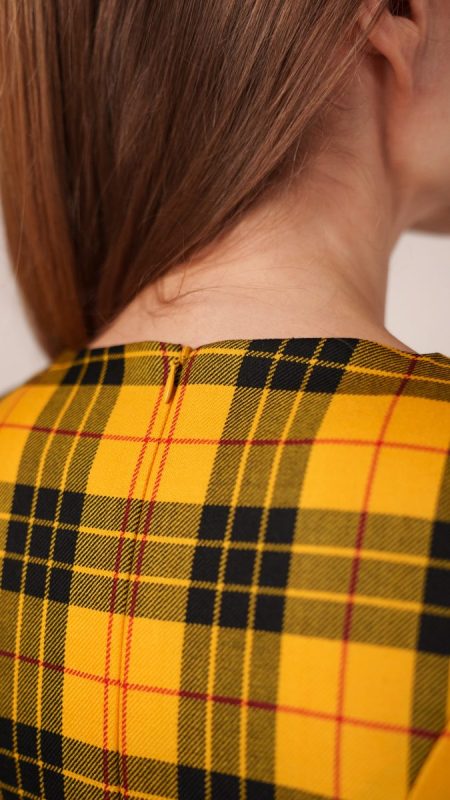
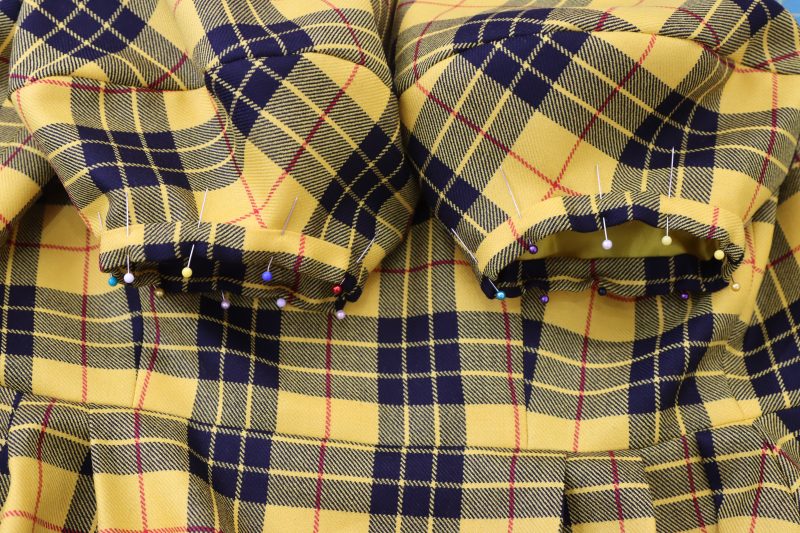
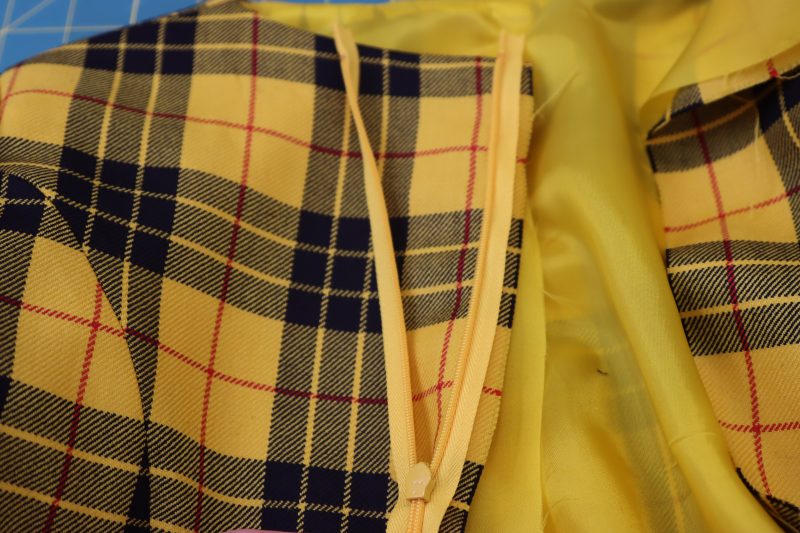
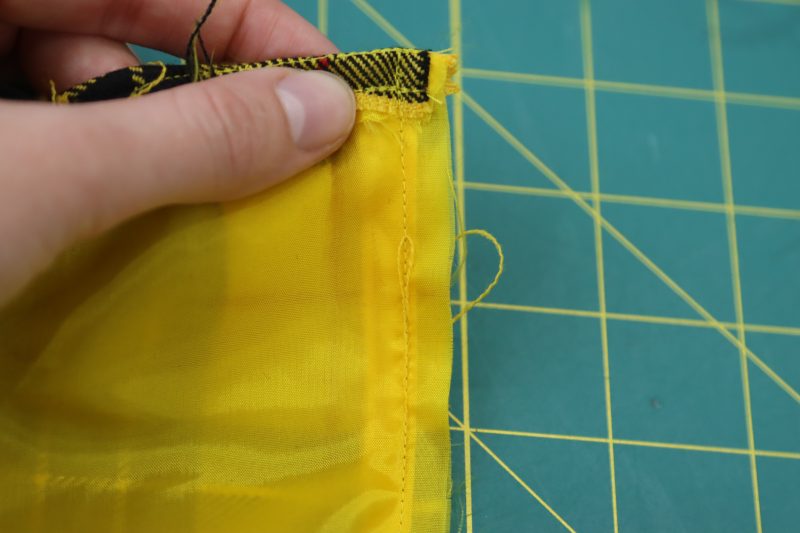
ZIPPER
- With the zipper closed, pin it right sides together with one side of the center back of the dress. Be sure to ONLY pin the zipper to the main fabric, not the lining. Also make sure that there is a little bit of zipper tape handing over the neckline at the center back of the dress, because we’re going to tuck that in later.
- With the zipper open, sew the zipper to the main fabric, right sides together.
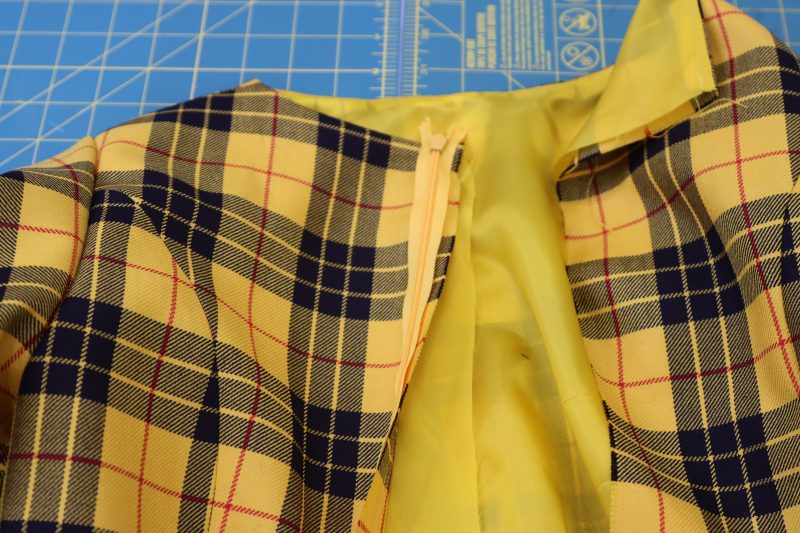
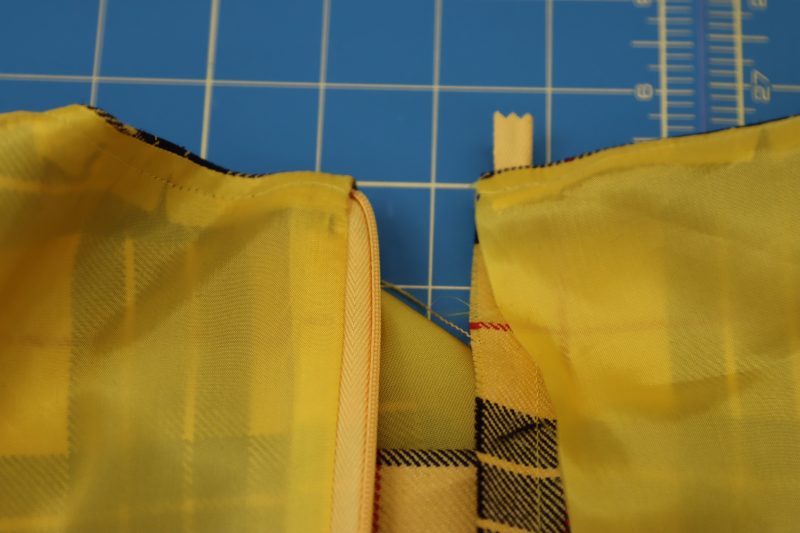
- Close the zipper and line it up with the opposite side of the center back of the dress. Make sure you place a million pins so that the plaid pattern is lined up in the back.
- Open the zipper back up, then sew the other side of the zipper to the opposite side of the dress. Again, only sew the zipper to the main fabric, not the lining, and make sure you have some zipper tape overhanging on the top.
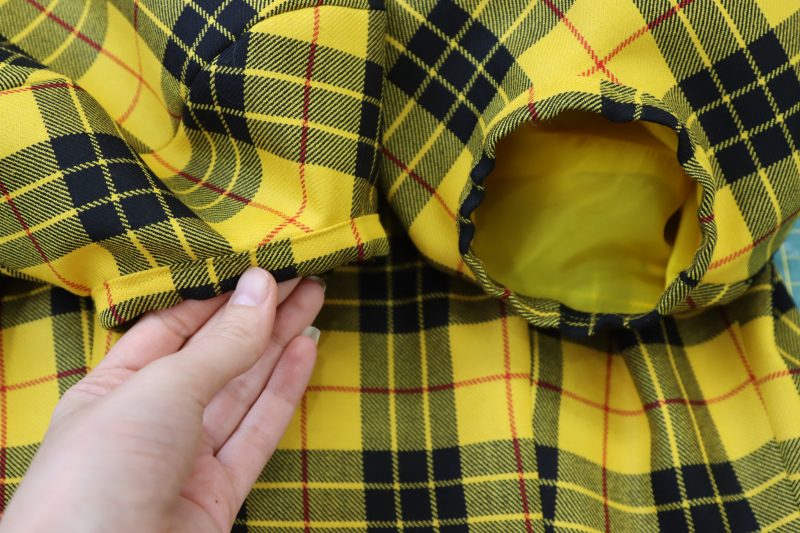
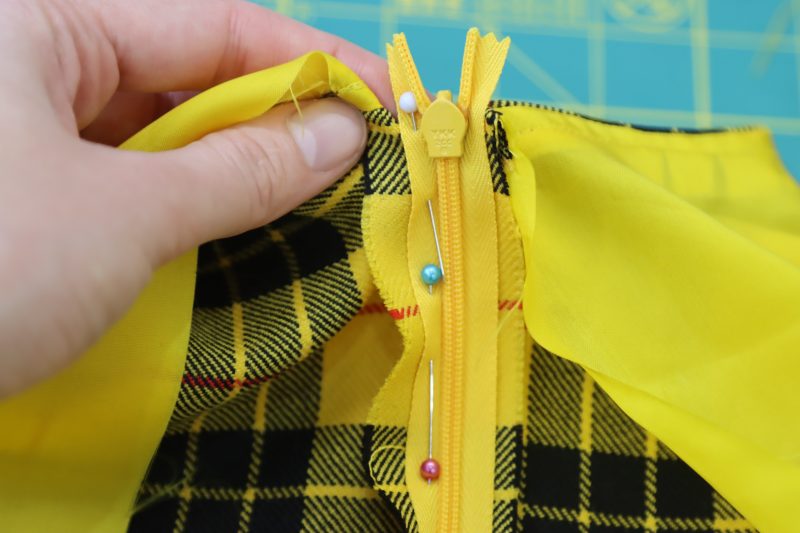
- Flip the dress so that the wrong sides of both the main fabric and the lining are facing outwards (as shown in the 5th picture below).
- Orient the neckline of the dress so that the zipper tape hanging over the neckline is tucked between the main fabric and the lining (as shown in the 7th picture below).
- Sew the lining to the main fabric and the zipper while they’re both facing right sides together.
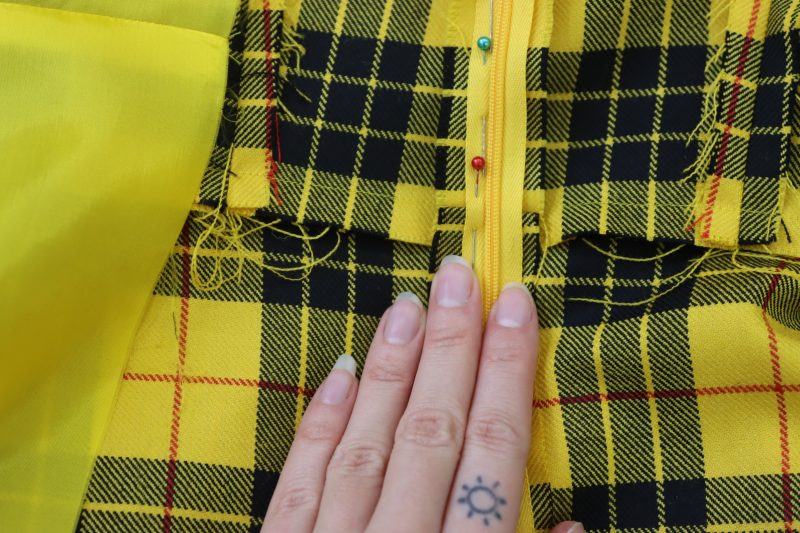
- Flip the whole dress right sides out.
- Repeat sections 5-8 for both sides of the center back to make sure the lining is fully finished at the center back seam.


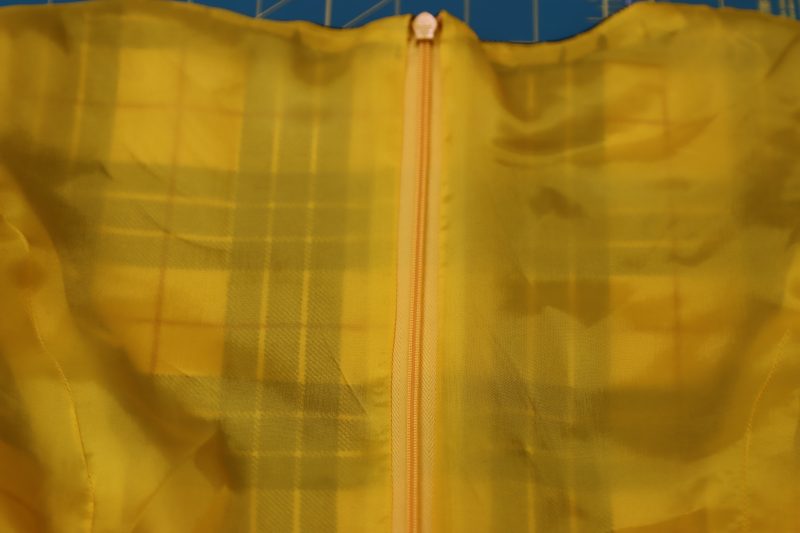
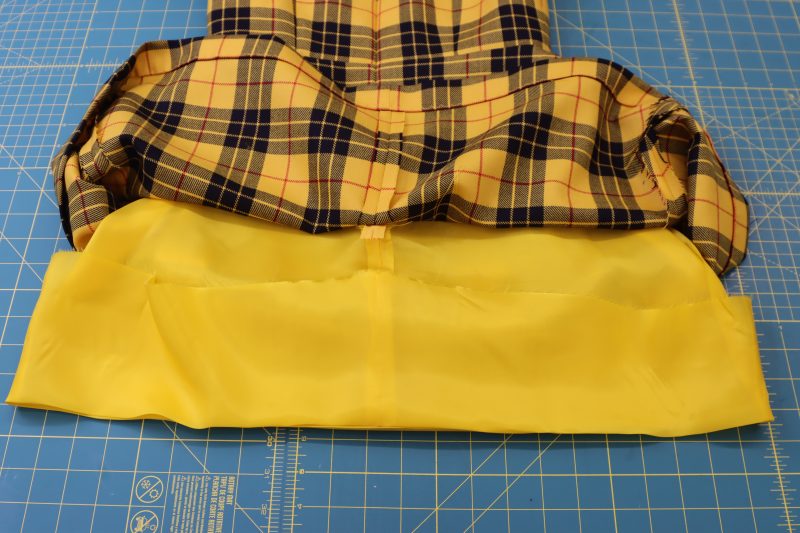
Step 16
CENTER BACK SEAM
- Place the center back skirt pieces of the main fabric right sides together.
- Pin and sew the center seam under the zipper to close the back of the dress.
- Iron that seam open and flat.
- Repeat the same steps with the lining at the center back of the dress.
Step 17
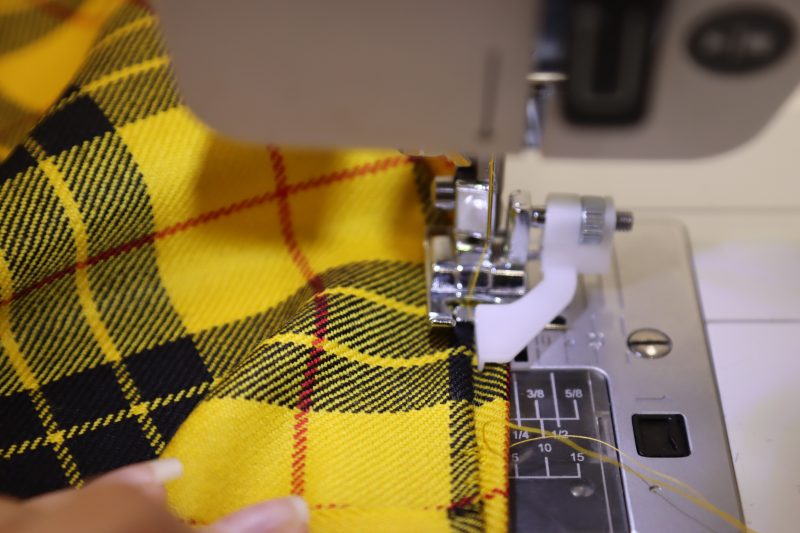
BLIND HEM
- Iron a 1 inch hem around the entire bottom edge of the main fabric.
- Fold that hem up by another inch then iron again.
- Pin the hem in place then use the blind hem foot and stitch on your sewing machine to make a nearly invisible hem.
Step 16
LINING HEM
- Fold the lining wrong sides together to start the hem.
- Iron the hem in place so that the lining is short enough that it doesn’t fall past the main fabric.
- Pin the ironed hem in place.
- Sew the hem with ¼ inch seam allowance.
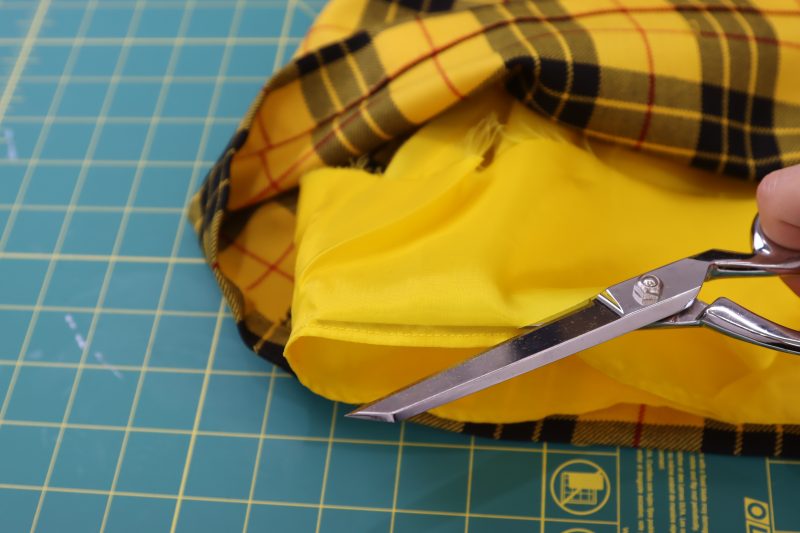
- Trim the long leftover seam allowance from the hem getting as close to the seam as possible without cutting it.
- Fold the tiny baby hem up one more time and sew in place again.
- Press the hem flat.
Sewing Success: The Finished Silverstone Mini Dress
Share this post with a friend (or two!), download the Silverstone Mini Dress free sewing pattern, and show us which fabrics and colors you choose, using the hashtags #MoodSilverstonePattern & #MadeWithMood—and don’t forget to tag us @MoodFabrics, too.


Free Sewing Pattern Inspiration for Your Next Project
With 480+ free sewing patterns and counting, your opportunities for sewing with Mood are endless!
We hope you had as much fun sewing this mini dress pattern as we did! As always, we want to hear from you—share your thoughts and comments below and let us know where you’ll be wearing the Silverstone Mini Dress free sewing pattern!
Could this item be made without a zipper and instead use stretch fabric?
Hi Mandie! If you used fabric that was stretchy enough, it might work, but the waist is really fitted so it would have to be stretchy enough that the waist could either fit over your shoulders or slide up past your hips.
This is gorgeous. Is wool twill thick? I live perpetually in summertime weather. Any other recommendations for fabric?
Hi Naomi! Thanks for asking. This wool is not particularly thick. I thought it was very breathable and flowy. It might not be great for a hot day in July, but it’s not a thick fabric.
Divino
Great pattern. Just wanted to point out that there’s still a placeholder section between the zipper and blind hem steps. I believe this is to finish the center back seam.
Hi Emily! Great catch! Thank you so much. I just added the instructions for step 16 into the placeholder section. Thanks for being so thorough.
Going to make this for my daughter! Thank you for making this available.
Thanks for the lovely pattern. I especially like the shape of the skirt.
Step 16 currently says just “Placeholder”. Is something missing or should step 16 just be deleted?
Hey Mona! Thanks for pointing this out. The placeholder text was just fixed.
Hello et thanks
A crear ésta hermosura ☺️
thank you
Would you suggest lining even if you are not using the wool for the dress? I am considering a cotton sateen.
If you’re using something soft and opaque, you don’t need to line it. You’ll just have to finish the neckline without the lining either with a rolled hem or bias tape.
Would this work with an Ankara cotton?
Yes! This would be so cute in an Ankara print!
Thank you
this pattern is adorable. However, I was considering making it a longer late. Do you think that would work?
Hi Ester! You can absolutely make this have a longer hem or longer sleeves. Just extend the pattern pieces for the skirt or the sleeve cuffs and you can make it longer.
This is such a fun dress to sew and wear! I used a wacky old heavy cotton crepe, a mandala pattern in bold Carnival colors against black, with a very light weight cotton poplin lining. The kinda of project you can’t put down until it’s done.
And, the sleeves! Chef kiss. Laissez les bons temps rouler!
Now that I have sewn the sleeves and I am ready to attach to the bodice, I can’t tell if they are interchangeable, or if they are designed to each fit only one side. I know I had to cut mirrored fabric pieces, but they look the exact same now that they are sewn together. Please let me know. Thanks!
Hey KP, the pattern says which side of the sleeve is the front and which is the back. You can also tell because the back part of the sleeve has a steeper slope and the front part of the sleeve has more of a deep curve.
Thank you for the free pattern.
Love the dress as is but I’m not a fan of mini length or sleeves for myself. So I would like to extend it to below the knee. Could you wager a guess on how much more fabric I would need if I opt out on the sleeves but add length to the skirt? I am plus-sized but short at only 5.2. Thanks for the dress pattern (and all others btw) and thanks in advance for the answer!
Hi Leen! I would recommend at least another 2 yards of fabric if you plan on making it midi lenth.
I am preparing to make this dress and was wondering if I could use a serger instead of a straight stitch. Will this alter the final product? I prefer a more clean and polished finish for inside seams
Hey Kedra, You can absolutely use a serger instead of a straight stitch, just make sure that you’re still sewing with a 1/2 inch seam allowance.
I was wondering if this could work with denim pieces, Without a lining? Do you think that is a possibility?
Hey Shayla! Yes, this dress would be super cute in a lightweight denim. Lining it also optional, but you would have to finish the neckline by rolling it and topstitching it or by adding a facing if you’re not using the lining.
Hi! So I’m a little confused.
I have the (G) SKIRT FRONT LINING and the (F) SKIRT FRONT. Why do I need both? I’m at step 10 and don’t understand why I have 2 front linings cut out. I was already wondering while cutting but still can’t find the step where I use that.
Sophia this is such a great question. The reason the skirt front and skirt front lining are two different pattern pieces is because the skirt front has pleats and the skirt lining does not. This is to eliminate bulk under the skirt and also save lining fabric so that you don’t have to use as much. However, if you want the skirt to be poofier, you can cut out the lining out of the skirt front pattern piece so that your lining is pleated too.
can you make just the skirt on its own?
Of course! I recommend topstitching vertically 1 or 1.5 inches along the waist area of the pleats to keep them in place if you’re not using a waistband. If you are using a waistband, this step isn’t really necessary.
Can I use duntell fabric with sequins?..its not strich..
Yes! I would just recommend using an opaque lining under the dantelle. This pattern doesn’t call for stretch material so you’re good.
Can I do it duntell sequined?
Surely! I would just make sure your lining is opaque if you’re gonna use dantel fabric, since it’s sheer/has holes in it.