

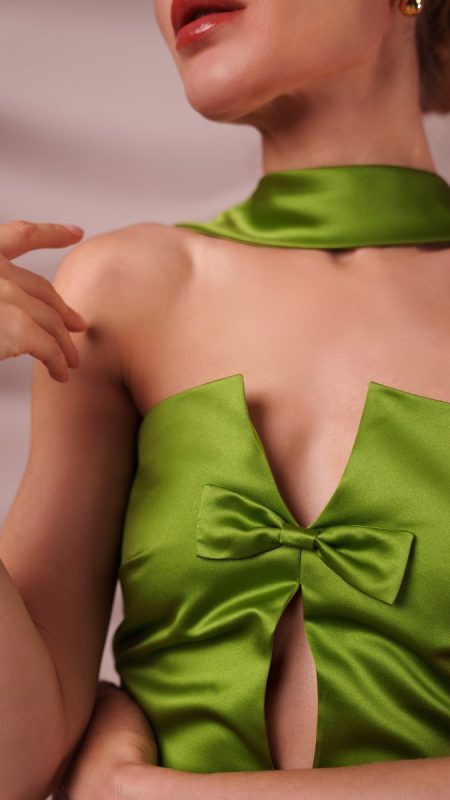
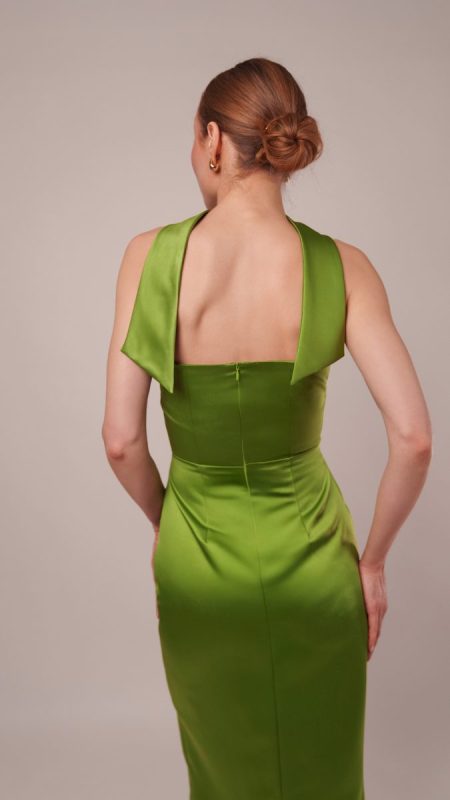
Introducing the Verona Sheath Dress, a love letter to old Hollywood elegance with a modern, flirty twist. This stunning column style silhouette glides along the body with effortless grace, while the structured square neckline, delicate bow detail, and dramatic neck sash nod to the glamour of 1950s red carpet dressing. Subtle cutouts add just the right amount of cheeky sophistication, giving this timeless shape a fresh, contemporary allure.
Although the Verona is rated intermediate due to delicacy of the poly satin body and full garment lining, its clean lines make it surprisingly approachable and even a quick sew when you are in a pinch. If you suddenly find yourself invited to a winter wedding or a formal event with nothing to wear, this dress has you covered.
Looking for something more casual? Shorten the hem to above the knee and pair it with tights for a more playful and flirty version of this classic style. Whether worn long or short, the Verona Sheath Dress pattern is just what you need for all your holiday celebrations.


Essential Materials & Sizing Guide for the Verona Sheath Dress
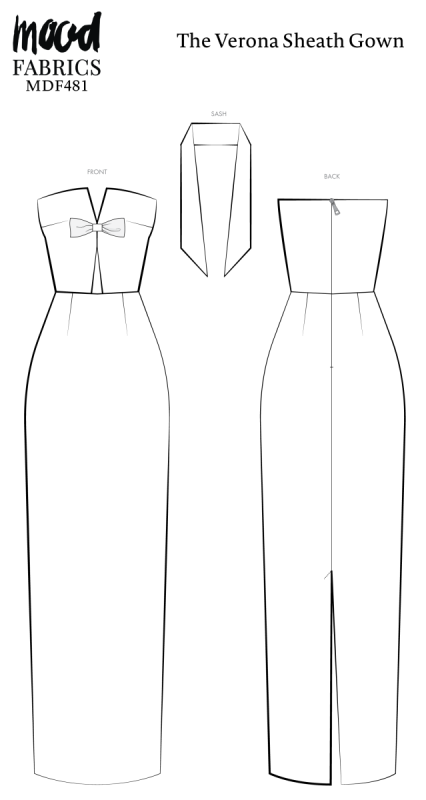
Continue reading for a breakdown of what knowledge and materials you need for creating your very own sheath dress! We’ve got you covered with the recommended materials we used—if you want to follow along exactly—as well as a curated list of alternative fabric type recommendations if you want to customize your own version. The Verona Sheath Dress free sewing pattern download includes technical drawings for seam and silhouette visibility, plus a size chart to help you find your perfect fit!
Purchase Products Used Below:
Quantities indicated are for sewing a size small sheath dress. Toggle the ‘SHOP THIS LOOK’ box to find quantity estimates for other sizes.
- 4 yards of Polyester Satin – Oxford Olive – Reverie Collection
- 1 yard of Polyester Double Georgette – Peridot Green – Mimosa Collection by Mood
- 1 each of Invisible Zipper 24″ by YKK – 827 Macaw Green
- 2 each of Gutermann Sew All Thread 100m – 716 Spring Green
- MDF481 – Verona Sheath Dress Sewing Pattern (Free download below!)
Alternative Fabric Type Recommendations:
The Verona Sheath Dress sewing pattern is best suited for lightweight fashion fabrics. Explore other fabric types or colors from our featured collections for your silhouette with the links below.
Download Your Free Sewing Pattern
Submit your name and email in the form below to receive the download link for the Verona Sheath Dress free sewing pattern directly in your inbox. Mood Sewciety Patterns will send your free download link via email with the subject line: ‘Your Free Download from Mood Sewciety – The Verona Sheath Dress’ (in PDF format for A4 and letter-size printing).
© MoodFabrics.com / MoodSewciety.com – Mass production, resale, or distribution of this pattern in any form is strictly prohibited.
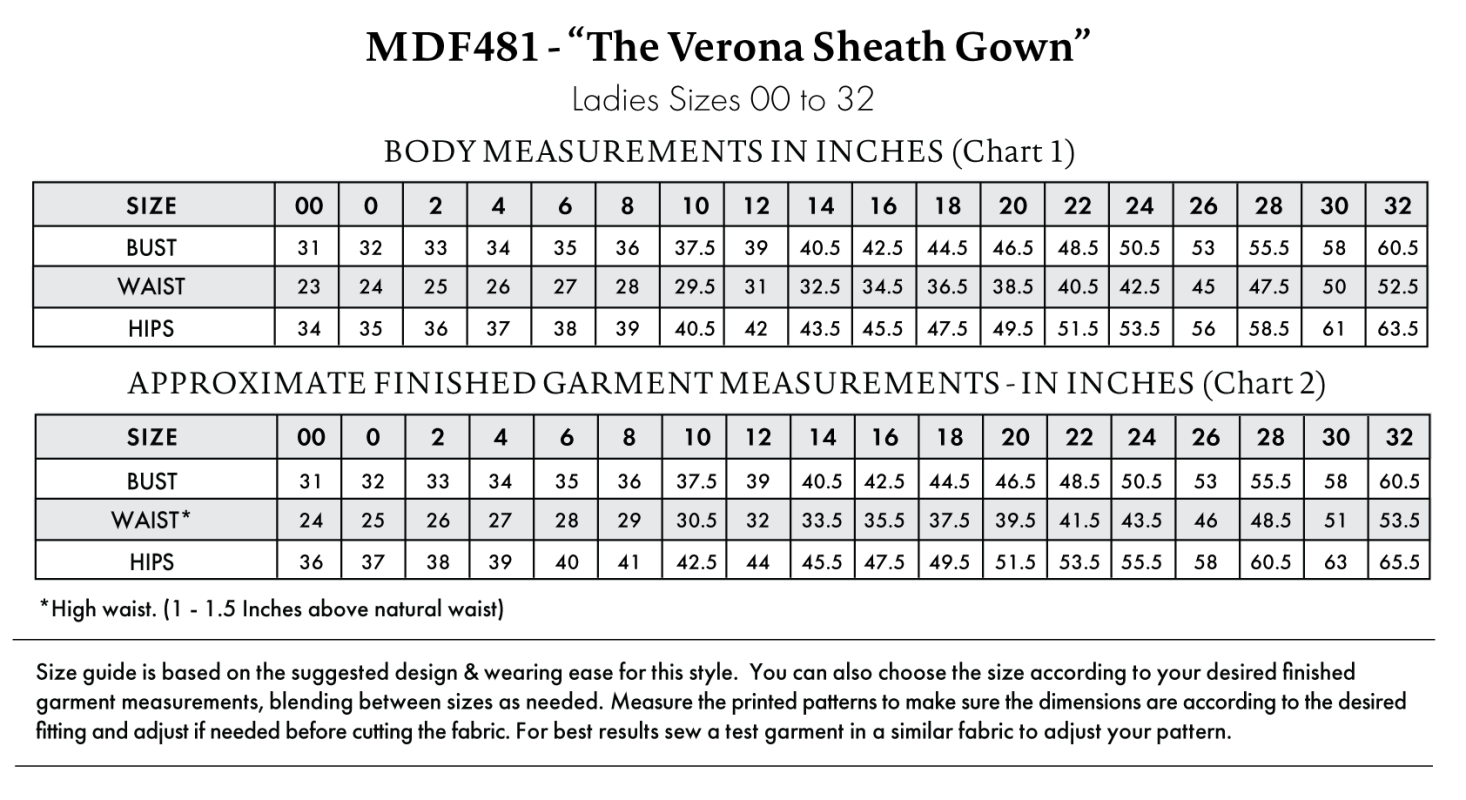
Find Your Perfect Fit
The Verona Sheath Dress Sizing Guide is based on the suggested design & wearing ease for this style. You can also choose the size according to your desired finished garment measurements, blending between sizes as needed. Measure the printed patterns to make sure the dimensions are according to the desired fitting and adjust if needed before cutting the fabric. For best results, sew a test garment in a similar fabric to adjust your pattern.
High waist (1-1.5 inches above natural waist).
Note: Always read all the instructions before cutting the fabric!
How to Sew The Verona Sheath Dress
The instructions provided below are designed to guide you through sewing the Verona Sheath Dress from start to finish.

2 Tips for Sewing with Polyester Satin
⇒ Use a sharp, skinny, brand new needle on your machine when sewing with satin. If you have a little nick in your needle and it pulls on the thread, it is pretty visible and difficult to hide because the fabric is so shiny and reflective.
⇒ Because satin is so reflective, every wrinkle and crease will show on the garment. Make sure you’re really ironing your seams between steps to ensure a clean and smooth finish.


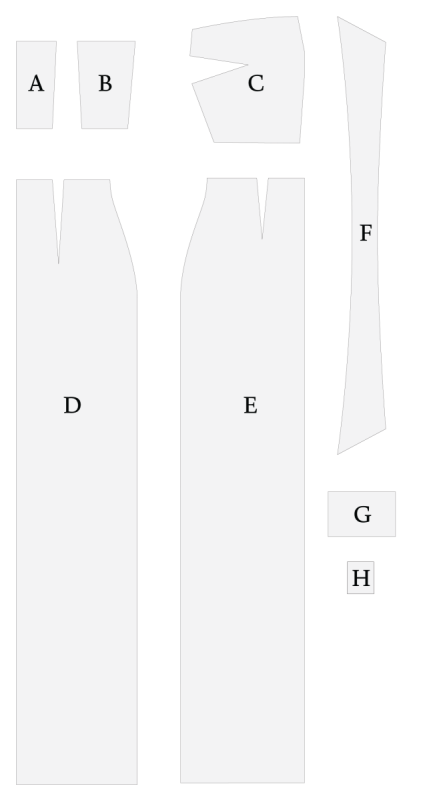
Pattern Pieces & Fabric Cuts Needed
(A) TOP BACK CENTER
-
FABRIC – CUT 2 MIRRORED
-
LINING – CUT 2 MIRRORED
(B) TOP BACK SIDE
-
FABRIC – CUT 2 MIRRORED
-
LINING – CUT 2 MIRRORED
(C) TOP FRONT
-
FABRIC – CUT 2 MIRRORED
-
LINING – CUT 2 MIRRORED
(D) SKIRT BACK
-
FABRIC – CUT 2 MIRRORED
-
LINING – CUT 2 MIRRORED
(E) SKIRT FRONT
-
FABRIC – CUT 1 ON FOLD
-
LINING – CUT 1 ON FOLD
(F) SASH
-
FABRIC – CUT 2
(G) BOW
-
FABRIC – CUT 1
(H) BOW CENTER
-
-
FABRIC – CUT 1
-
Sew with a 1/2″ seam allowance for all seams unless otherwise specified.
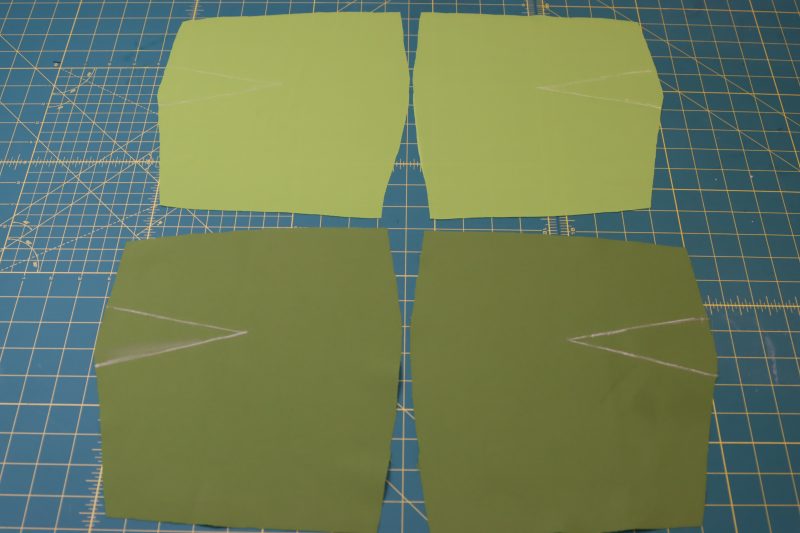
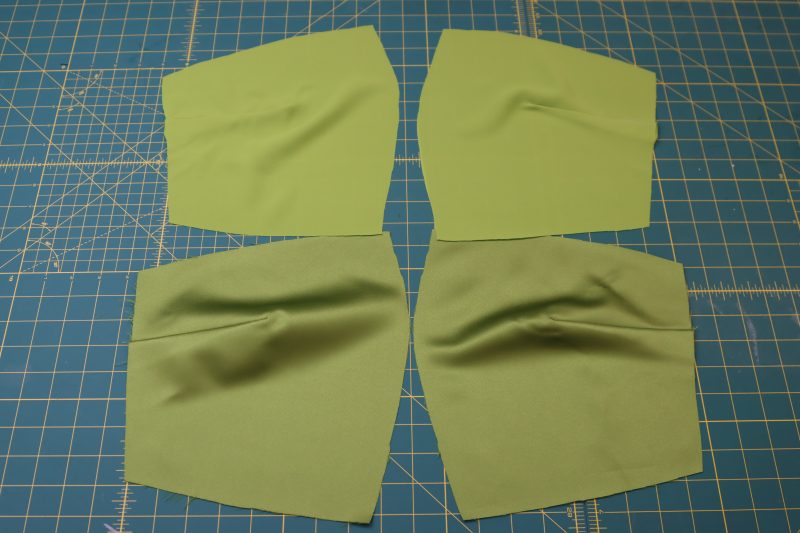
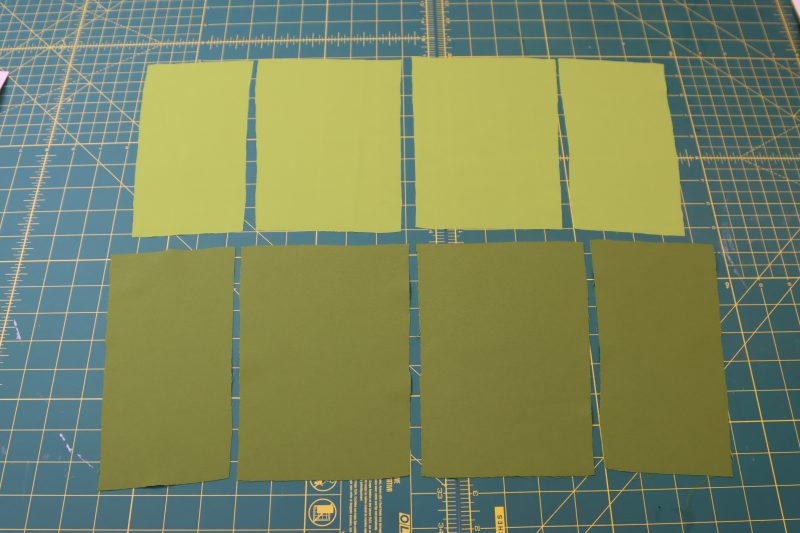
Step 1
BUST DARTS
- Mark the darts on the wrong sides of the top front pieces using tailor’s chalk.
- Fold the top front pieces right sides together over the center of the dart and pin them in place.
- Sew over the chalk lines to make the dart.
- Iron the darts open and flat, with the bulk of the dart laying down towards the waistline.
- Repeat these steps for both the lining and the main fabric.
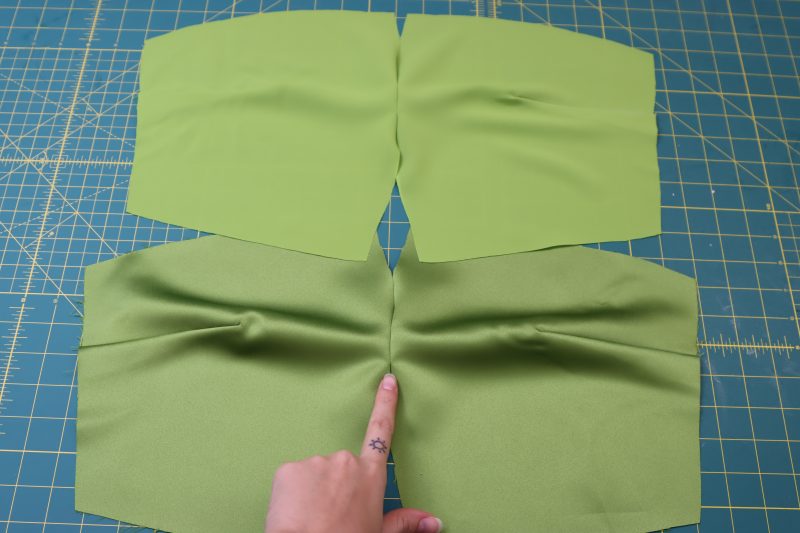
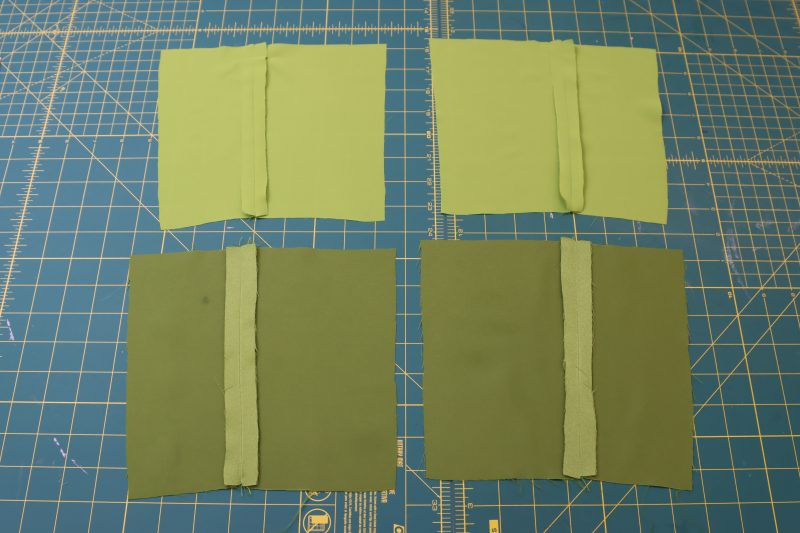
Step 2
TOP CENTER
- Place the two top front pieces right sides together.
- Pin and sew the two top front pieces together at the center between the notches.
- Open the top front piece and iron the center seam open and flat.
- Repeat these steps for both the lining and the main fabric.
Step 3
TOP BACK
- Lay out the top back center and top back side pieces right sides facing down.
- Pin and sew the top back sides to the top back center pieces.
- Iron the back seams open and flat.
- Repeat these steps for both the lining and the main fabric.
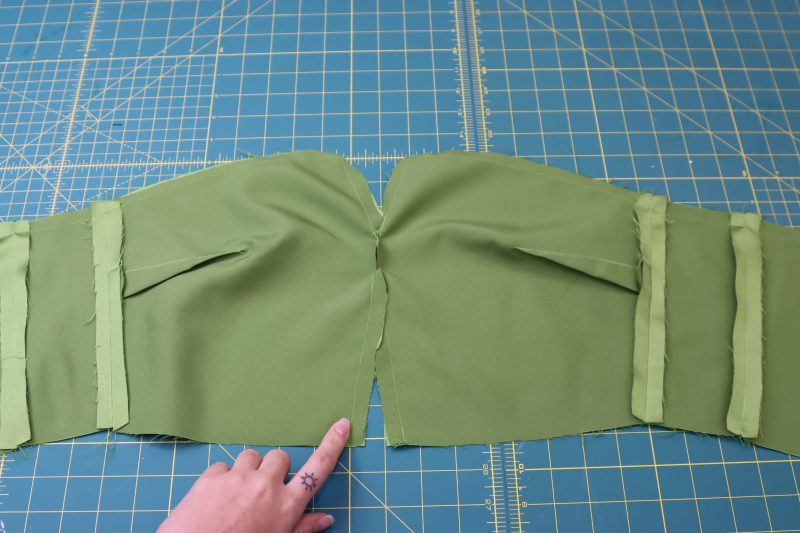
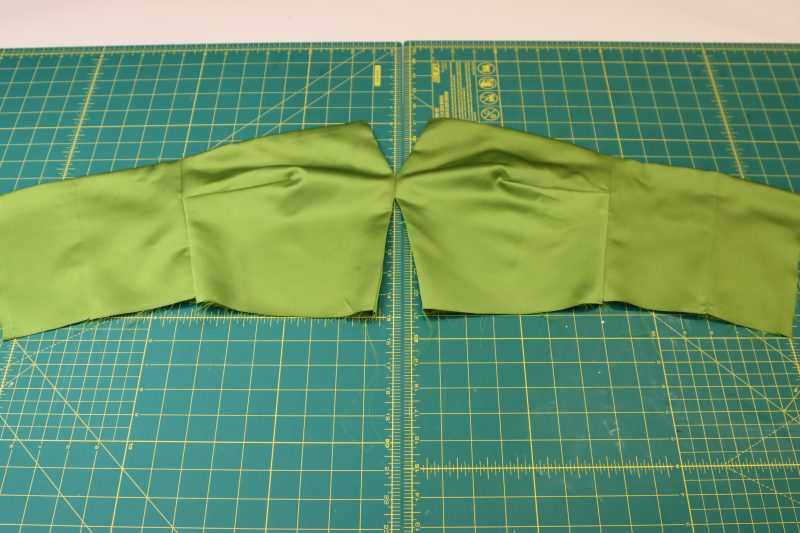
Step 4
TOP CUTOUTS
- Sew the top back sides to the top front at the side seams.
- Place the constructed top lining right sides together with the constructed top outer fabric.
- Pin and sew the neckline of the top, including the V-shaped cutout at the center of the bust.
- Pin and sew the V-shaped cutout at the bottom of the top front.
- Flip the top right sides out carefully by pulling the entire top through the gap in the center.
- Iron the neckline to hide the lining behind the main fabric.
Step 5
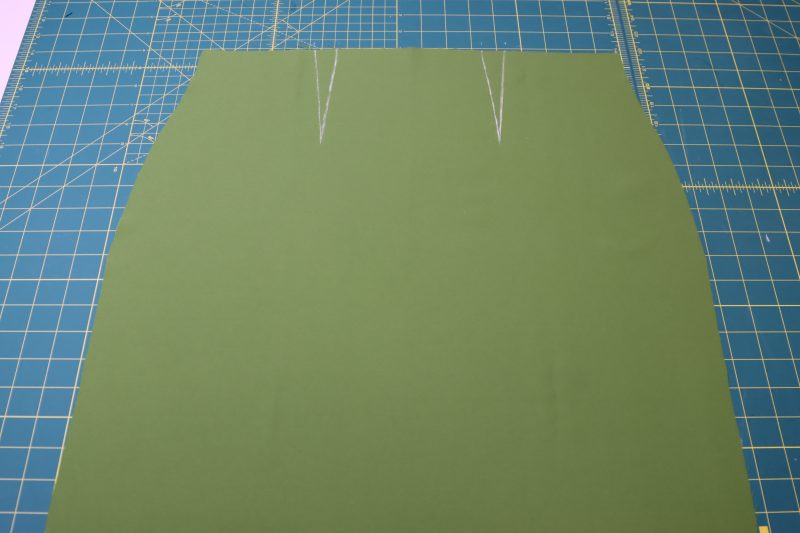
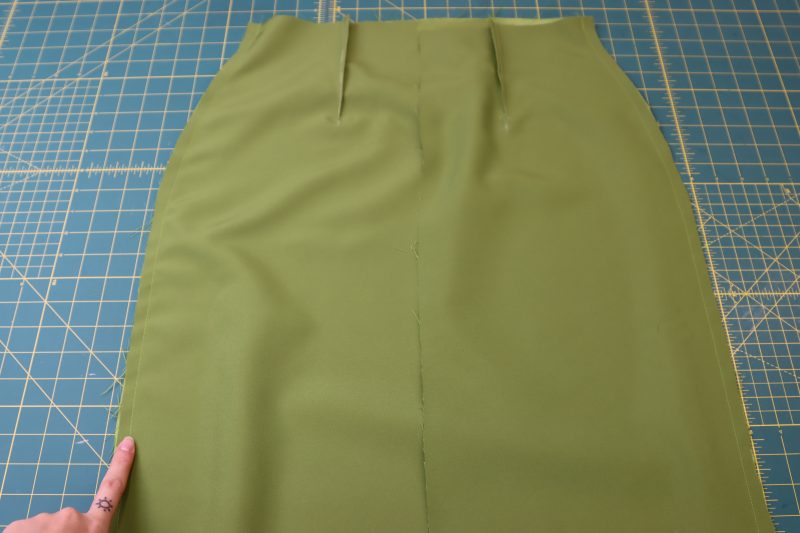
SKIRT DARTS
- Mark the skirt darts on the wrong side of the skirt front.
- Fold the skirt front piece right sides together over the centers of the dart and pin them in place.
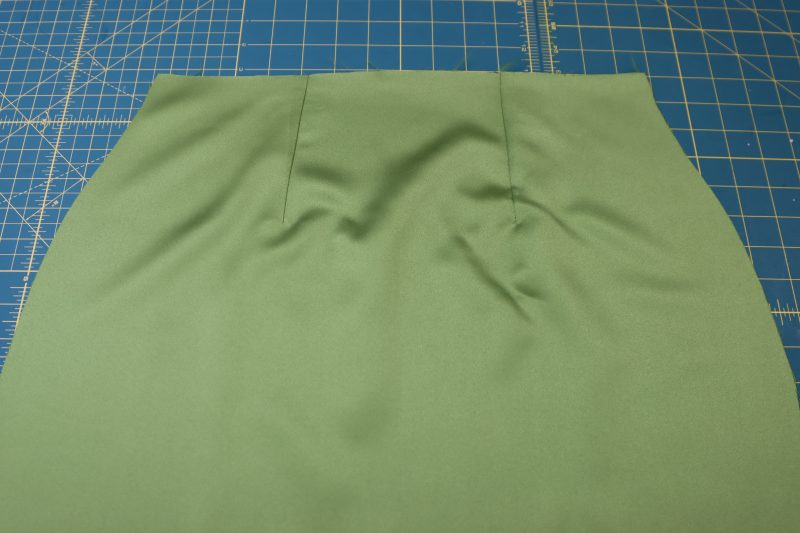
- Sew over the chalk lines to make the darts.
- Iron the darts open and flat, with the bulk of the dart laying towards the side seams.
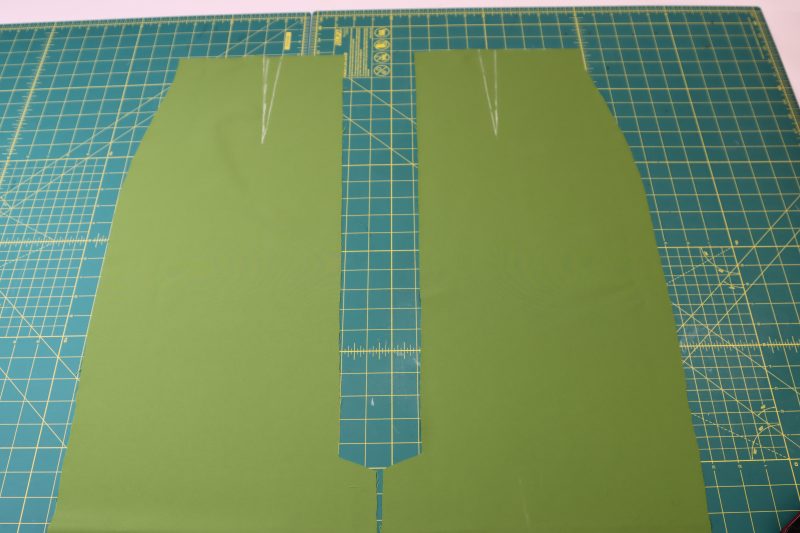
- Repeat the exact same steps but with the back darts on both the main fabric and the lining skirt.
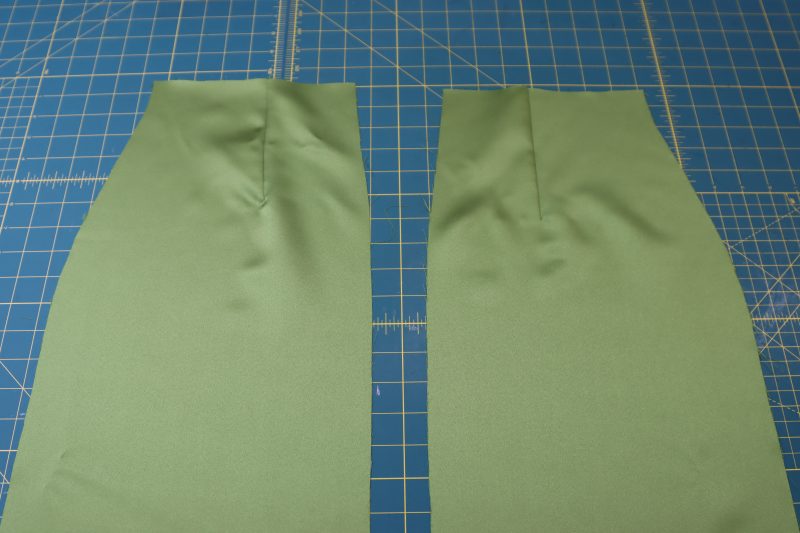
- Place the backs of the skirt right sides together on the front of the skirt with the side seams lined up.
- Pin and sew the side seams together.
Step 6
ATTACH SKIRT
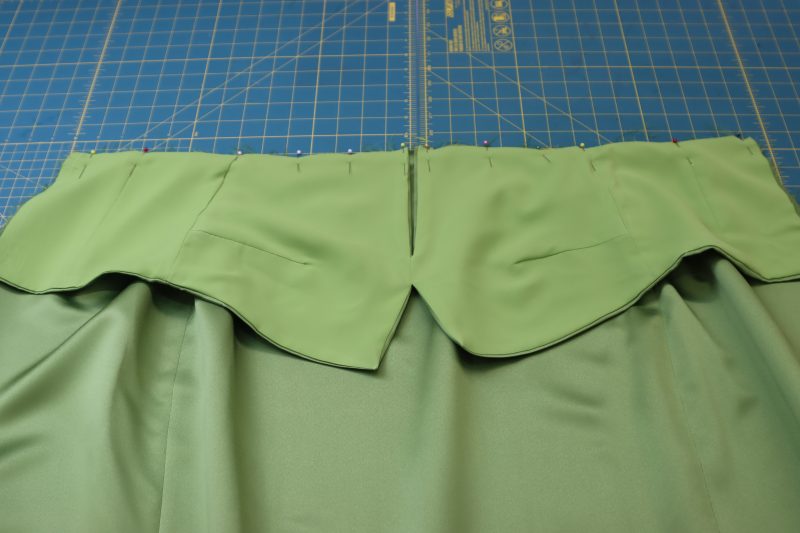
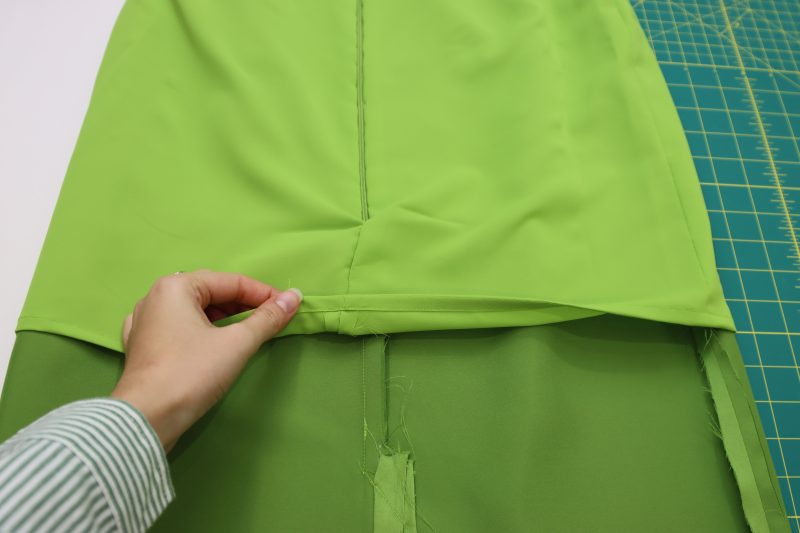
- Place the top right sides together with the waistline of the main fabric skirt.
- Pin and sew the top to the skirt, leaving 1 inch on each side of the center back opening unsewn.
- Lay the skirt lining on top of the top lining, right sides together.
- Pin and sew the skirt lining in the same place where the main skirt was just sewn, making a sandwich with the top in between the main skirt and the lining skirt.
Step 7
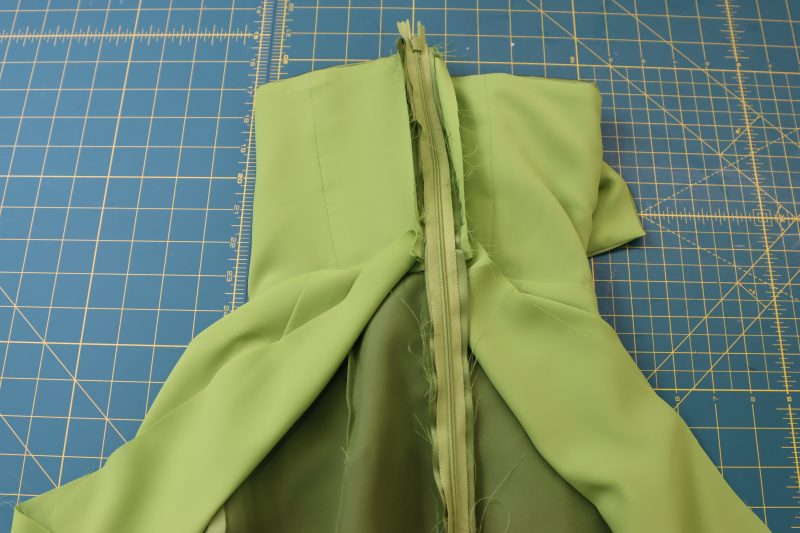
ZIPPER
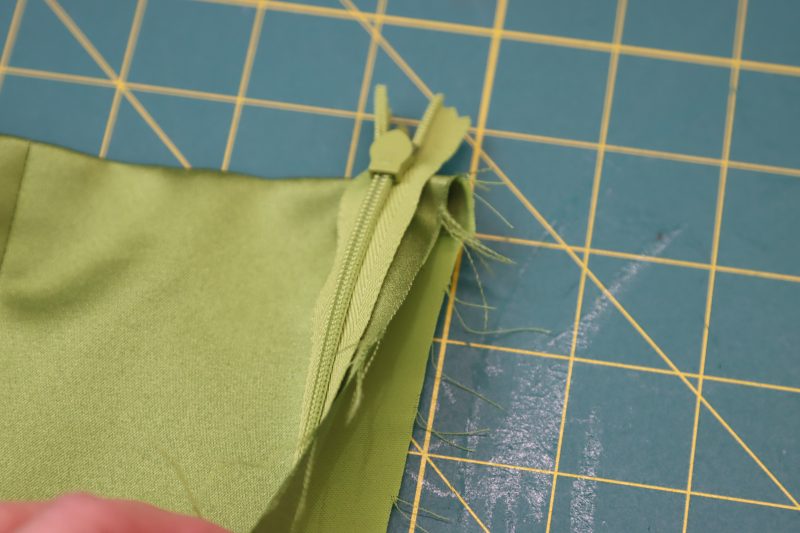
- Place the zipper right sides together with one of the sides of the center back of the dress.
- Pin and sew the side of the zipper tape closest to the raw edge of the center back to the right side of the main fabric (we’re not sewing it to the lining yet because we’re going to hand sew the lining to the zipper to hide the raw edge).
- Pin and sew the other side of the zipper to the other side of the center back of the dress, right sides together again.
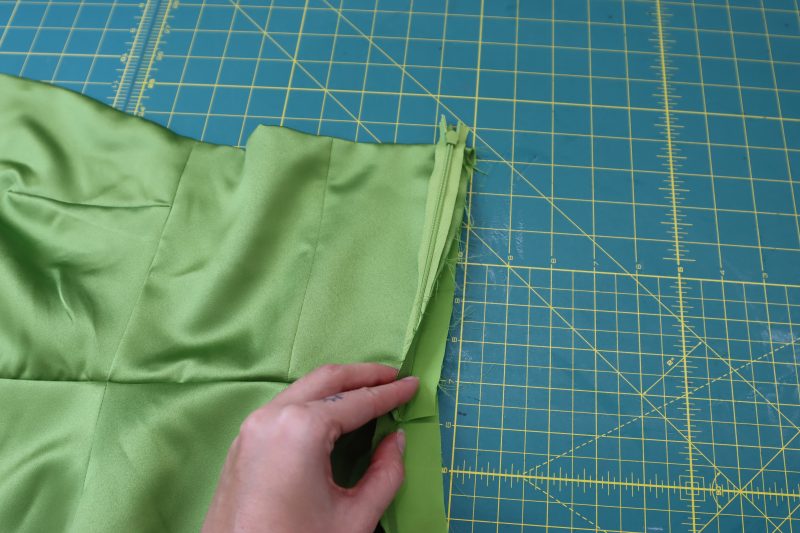
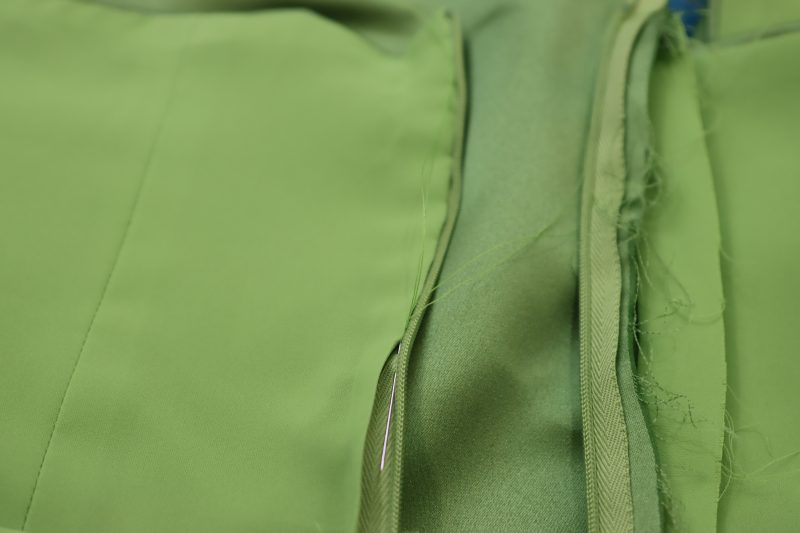
- Flip the dress inside out.
- Tuck the top of the zipper tape in between the main fabric and the lining.
- Tuck the raw edge of the lining at the center back of the dress inside by ½ inch and iron the fold.
- Hand sew the folded edge of the lining to the inside of the zipper tape, concealing the raw edge of the lining and encasing the zipper tape.
Step 8
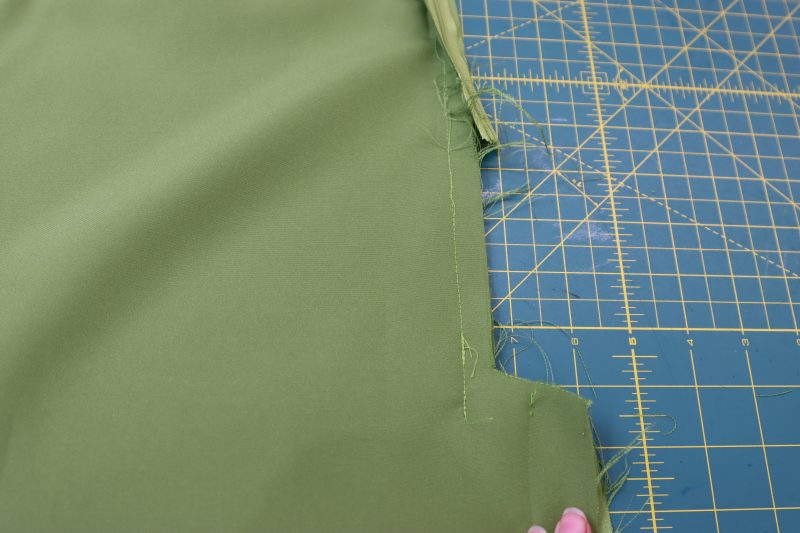
CENTER BACK SEAM
- Sew the center back seam of the lining below the zipper right sides together.
- Sew the center back seam of the main fabric below the zipper right sides together, stopping at the top of the vent.
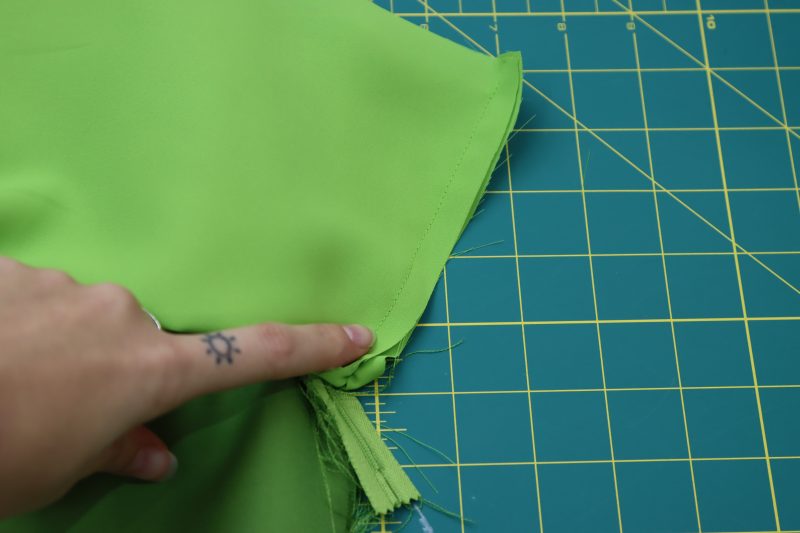
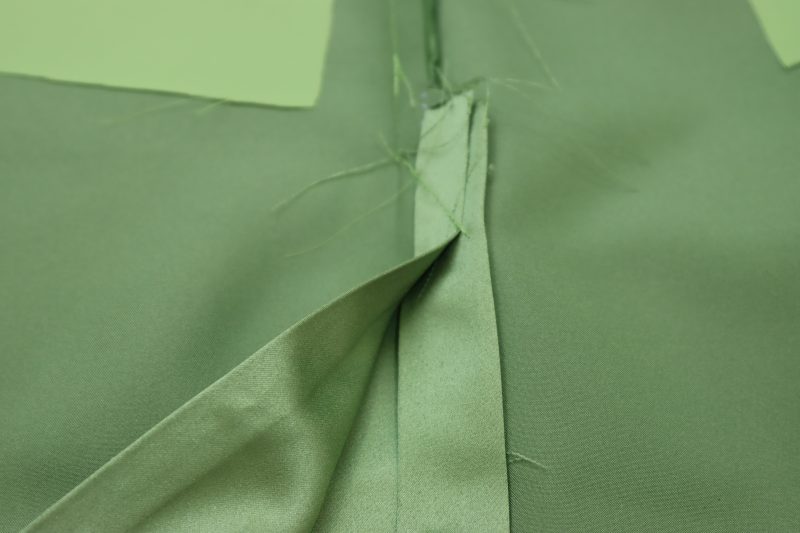
Step 9
VENT
- Iron one side of the vent so that the fold is perfectly lined up with the center back seam of the dress.
- Iron the other side of the vent so that it lays under the top of the vent and is overlapped by 1 inch.
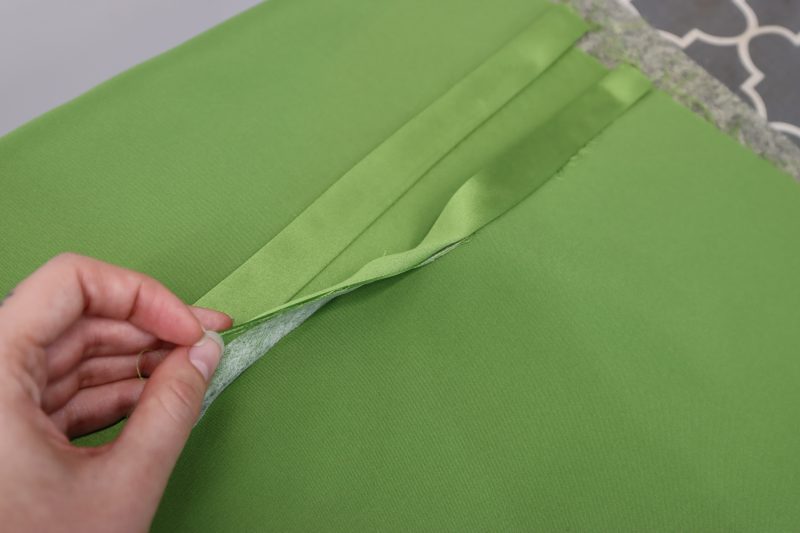
- Iron hem tape into the folded edges of the vent on both sides, making a seamless hem.
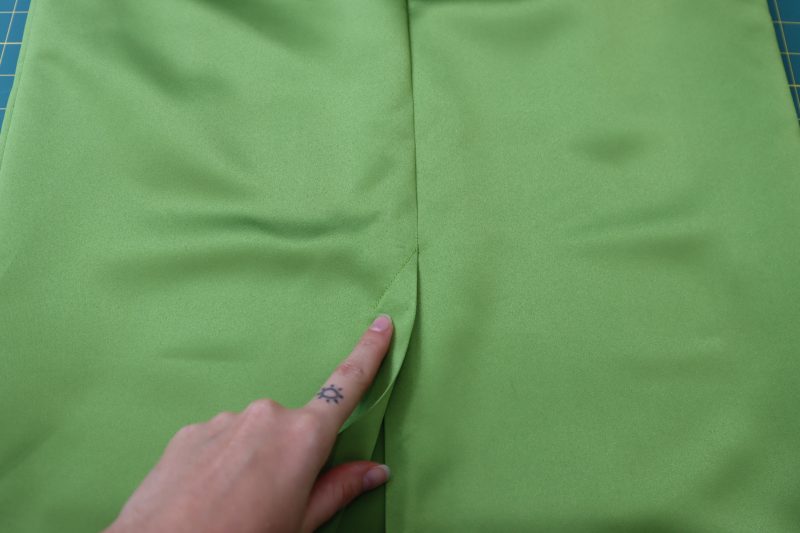
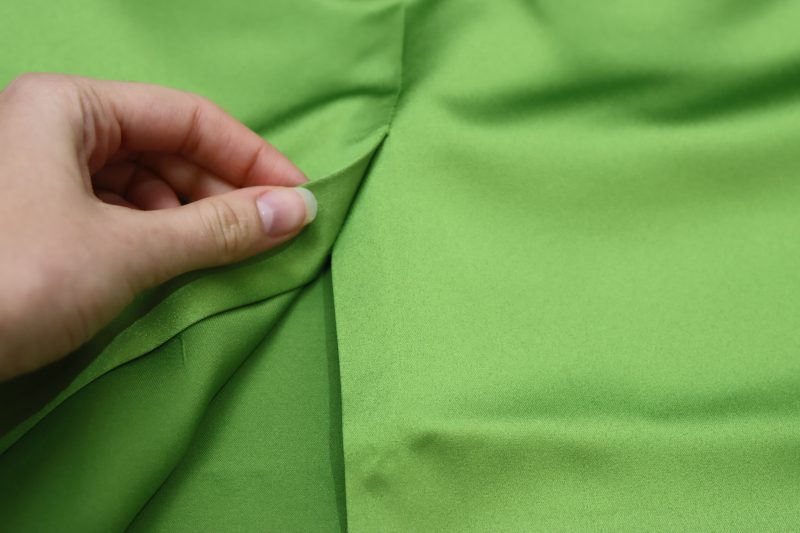
- Topstitch a diagonal line from the center back seam of the dress over both the inside and outside of the overlapping vent pieces to hold everything in place.
Step 10
BOW
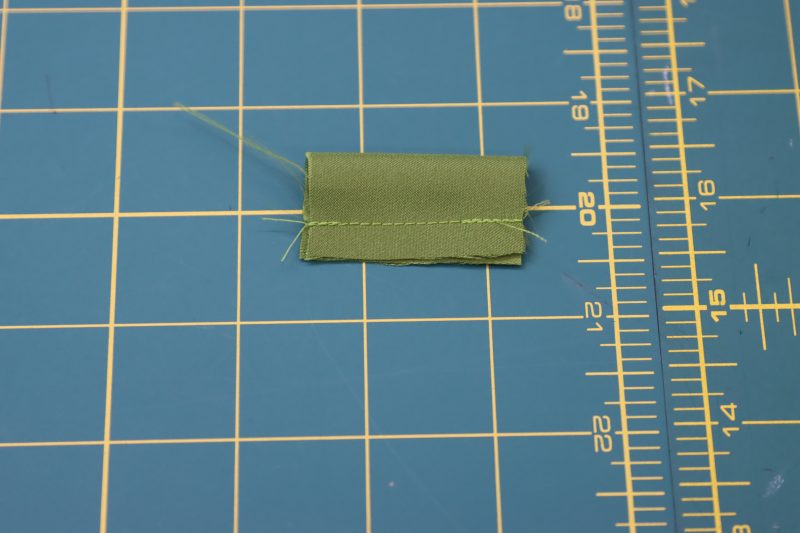
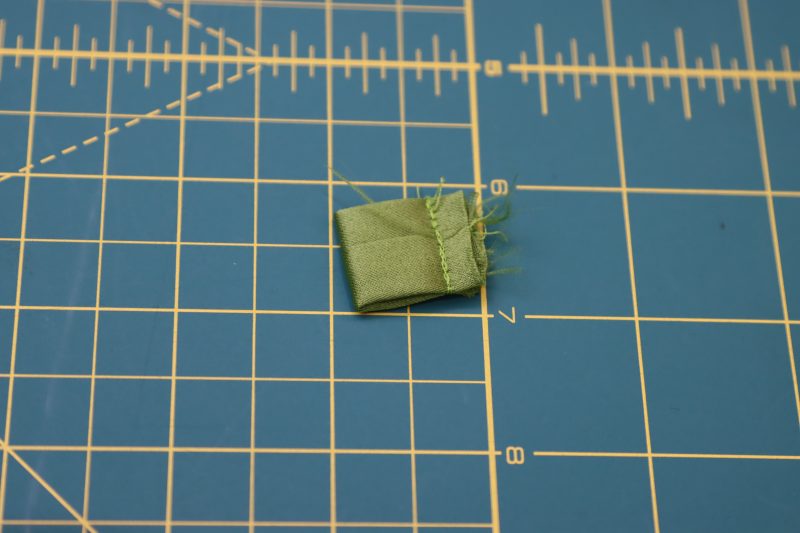
- Fold the bow center right sides together and sew the long sides together.
- Flip the bow center right sides out.
- Fold the bow center in half again and sew it into a closed loop.
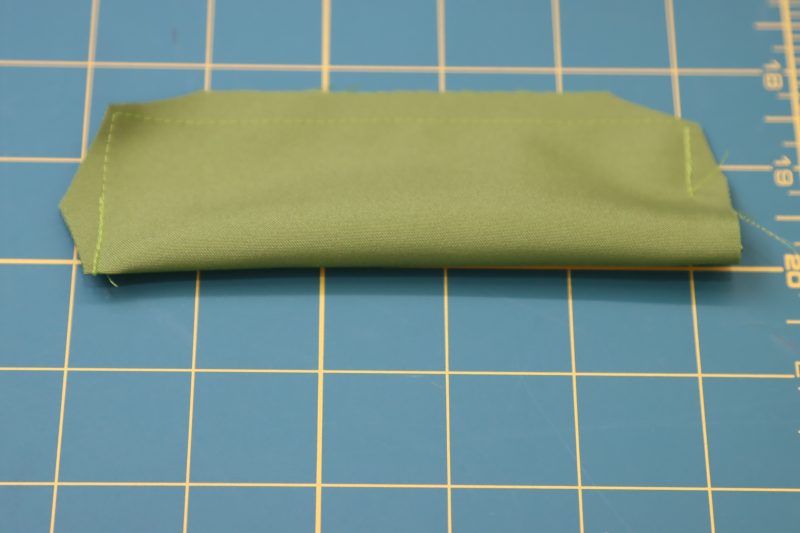
- Fold the bow right sides together with the long sides lining up with each other.
- Sew all three raw edges of the bow except for a small gap to flip it right sides out.
- Clip the corners of the bow and turn it right sides out.
- Iron the seams around the edge of the bow flat.
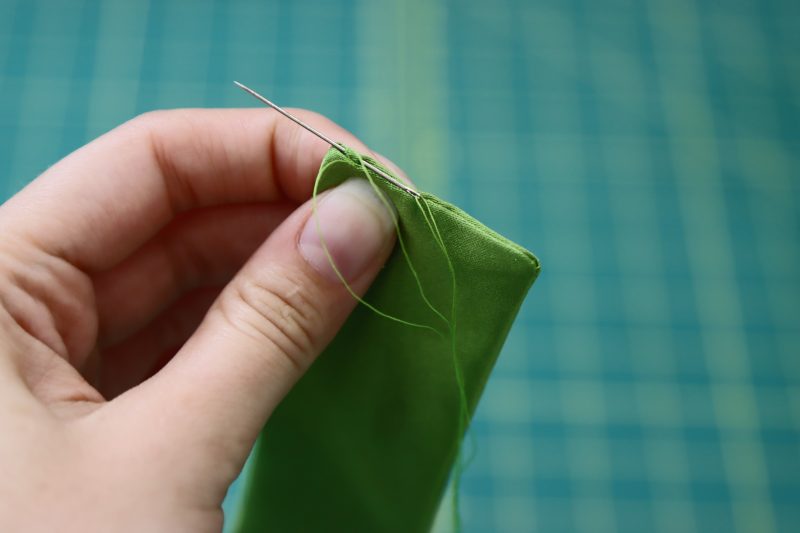
- Hand sew the bow shut with a ladder stitch.
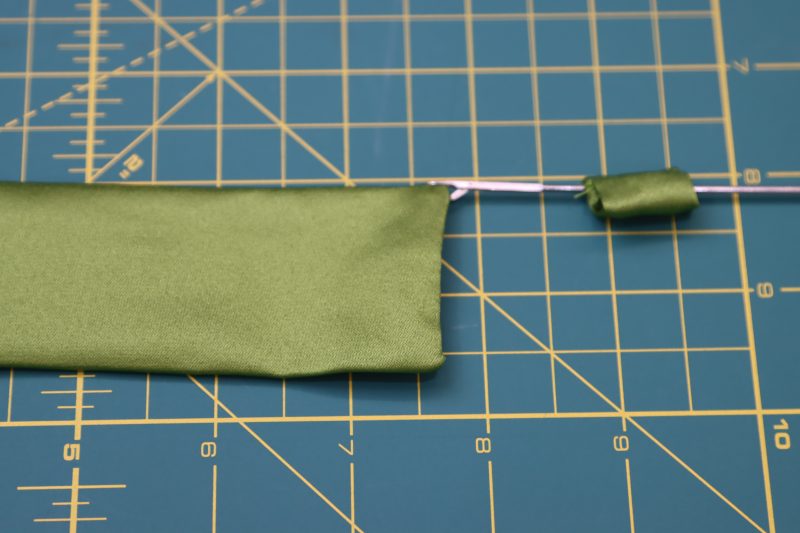
- Use a tube turner to pull the bow through the bow center.
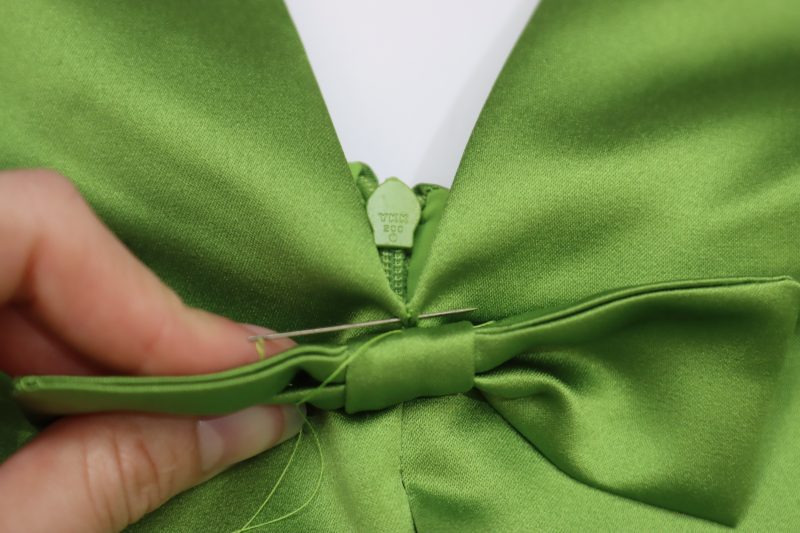
- Hand sew the back of the bow center to the front center of the top right under the V neck.
Step 11
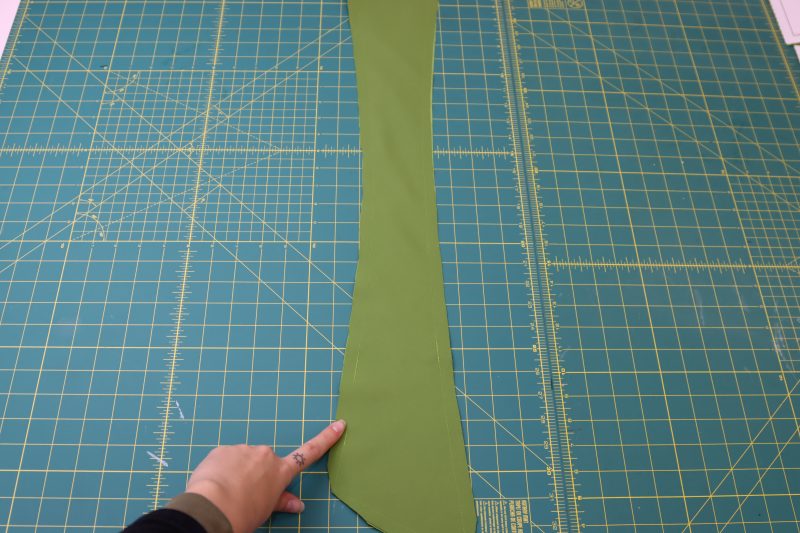
SASH
- Place the two pieces of the sash right sides together.
- Pin and sew the perimeter of the sash on all 4 sides, leaving a small gap to turn the sash right sides out.
- Clip the pointy corners of the sash.
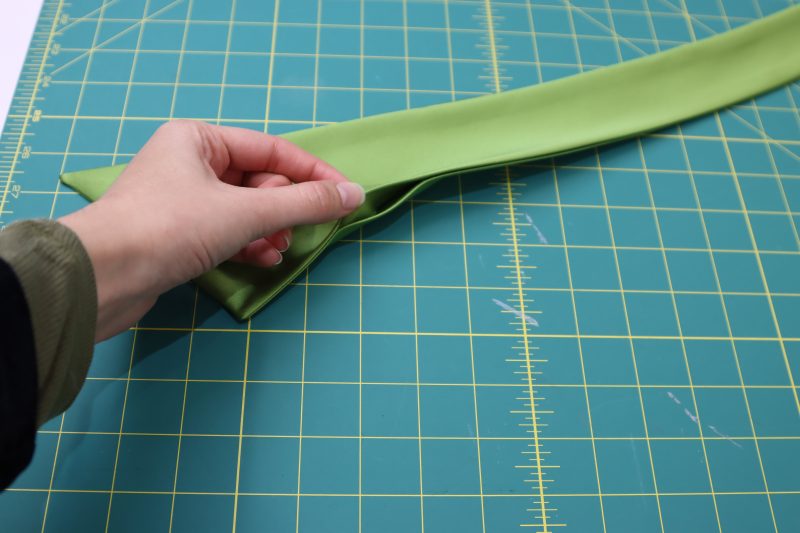
- Flip the sash right sides out and poke out the corners.
- Iron the edges of the sash to make them lay flat.
- Hand sew the gap closed with a ladder stitch.
Step 12
HEM
- Iron a 3/8 inch fold into the skirt lining.
- Sew the hem with a ¼ inch seam allowance.
- Fold the hem again and stitch over the fold to hide the raw edge of the lining.
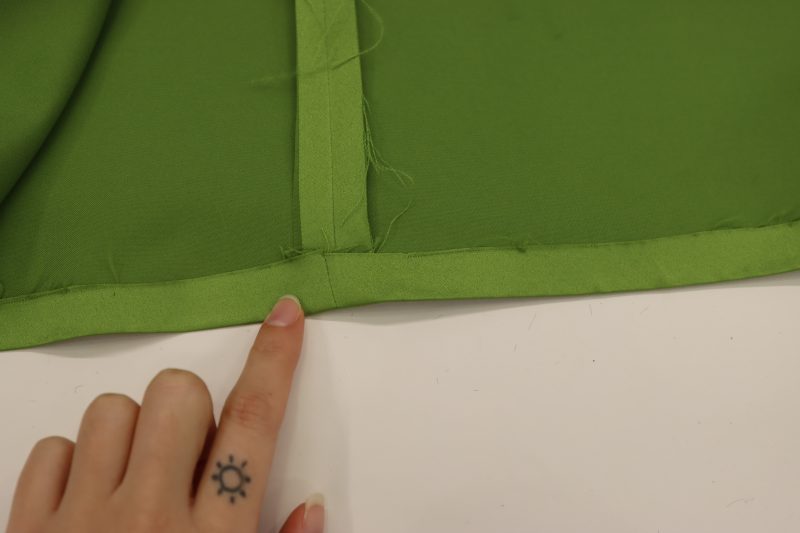
- Fold a ½ inch hem into the bottom of the main skirt and iron into place.
- Iron hem tape into the fold at the skirt hem to make a completely invisible blind hem.
Sewing Success: The Finished Verona Sheath Gown
Share this post with a friend (or two!), download the Verona Sheath Gown free sewing pattern, and show us which fabrics and colors you choose, using the hashtags #MoodVeronaPattern & #MadeWithMood—and don’t forget to tag us @MoodFabrics, too.


Free Sewing Pattern Inspiration for Your Next Project
With 470+ free sewing patterns and counting, your opportunities for sewing with Mood are endless!
We hope you had as much fun sewing this silhouette pattern as we did! As always, we want to hear from you—share your thoughts and comments below and let us know where you’ll be wearing the Verona Sheath Dress free sewing pattern!
How is this strapless dressgoing to stay up? No boning, no underlining.
You are more than welcome to add boning channels or interfacing in this dress, but you don’t have to!
Fashion Tape depending on how much bust you have but boning could easily be added to the lining.
but where as there are no real seams in the front to add boning…..
If I were to add boning, I would do it in the side seams and both sides of the front center seam so that it holds up the pointed corners in the front. You can also add them into the lining so that they don’t show from the outside.
Beautiful, Thank you ☀️
The top front and the top back side seams aren’t lining up after I add the top darts. Is this normal? Is there a fix?
Hey Shar, I think I know where your mistake is because I made the same mistake the first time I made this. Make sure you look at the labels for each pattern piece. Piece A is the top back center, and goes in the middle of the back where the zipper attaches. Piece B is the top back side. Those attach to the side seams of the dress. When you sew them together this way, it should line up with the darts on the skirt, but if you have them opposite, the darts won’t line up.
I did make that mistake initially. Then, when I realized and corrected it, Piece B is still an inch shorter than Piece C (I’m making a size 8 top). I feel like the dart might be too small?
Hmmmmm, the darts should line up with the seams, but there might be a mistake in the pattern for that size. If you haven’t trimmed the excess fabric from your darts, you could always pick them out and move them over so that they match up with the seams on the top. Up to you though.
Hi Shar, Hi Marisa
I just checked the pattern and back and front line up for all sizes. I see where the confusion may be coming from. The sewing line should be placed 1/2″ away from the lines marked on the pattern, since those lines show the added 1/2″ seam allowance.
I’ll update the pattern to include the sewing lines to avoid any future confusion.
Thank you!
Me encantan todos los patrón nes me gustaría empezar a ver si me salen
Do I need to cut on the bias for this project?
Nope! You cut the patterns out on grain.
Hi again! I was looking at the pattern where the notches are for the top center but looks like once printed, most of the lines got blended together. Are you able to help clarify?
Hey Leah! I know it can be tricky with all the lines to tell which one is your size on the pattern, especially for the darts or notches. Something I usually do when I’m marking the pattern darts is I will count how many lines from the smallest size I need to cut in order to get my size. For example, the smallest dress size is a 00. If I’m a size 8, then I need to count 6 lines from the smallest size and that will be the one I cut out. So I recommend finding the smallest set of notches and counting over until you get to the line with your size.
Is it possible to get an A0 digital version of this pattern? My printer just died.
Hey Kira, this isn’t something we offer YET but we plan on providing different print format options in the future. Please sign up for our email list to stay tuned!