

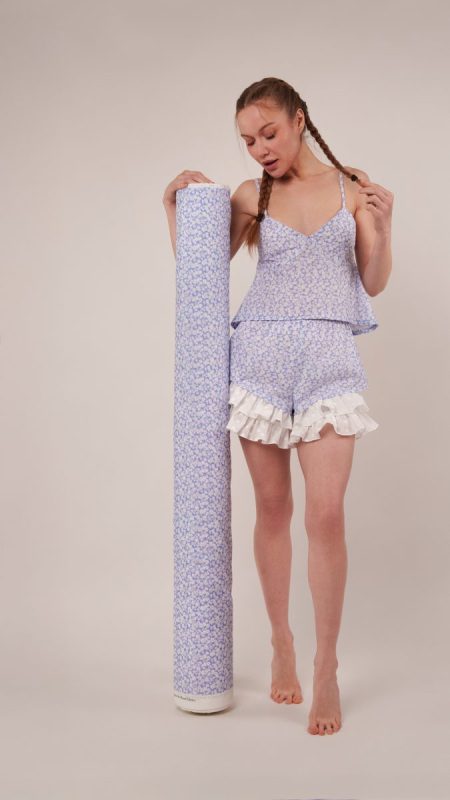
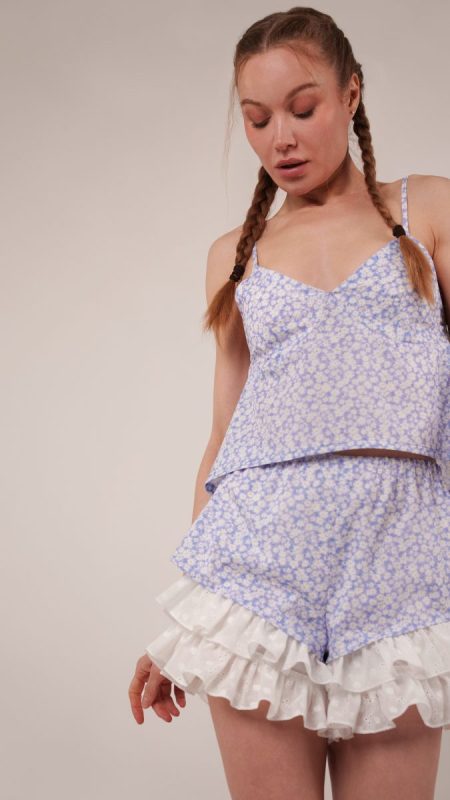
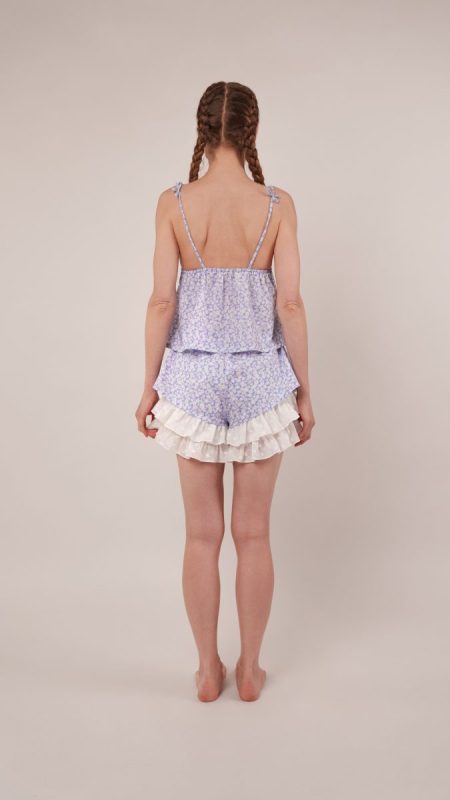
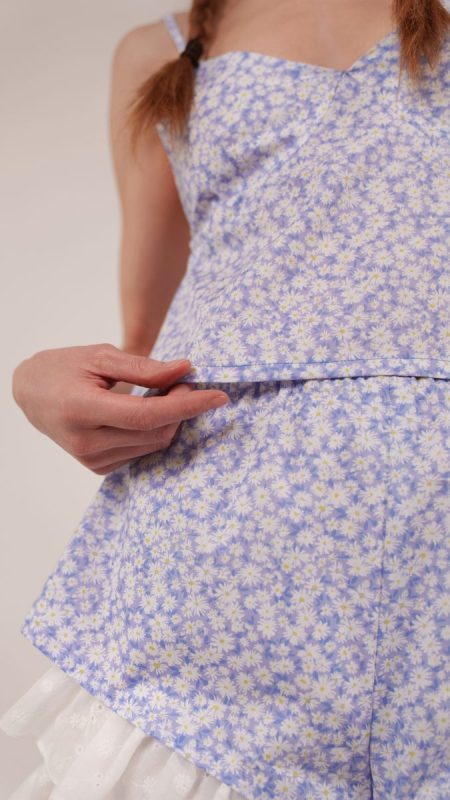
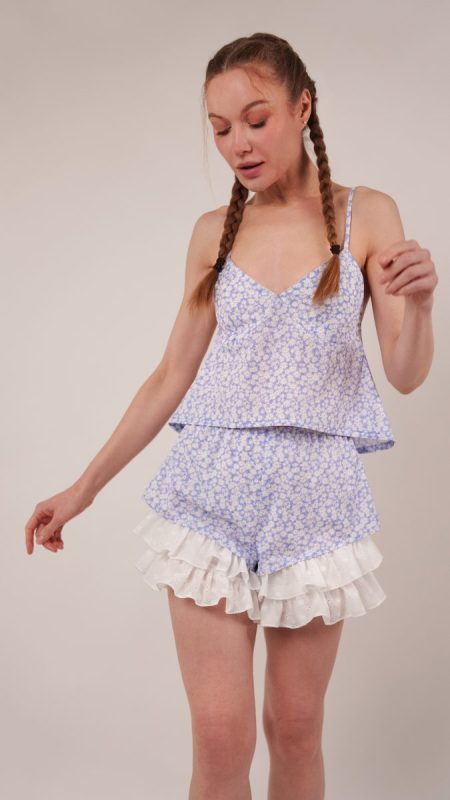
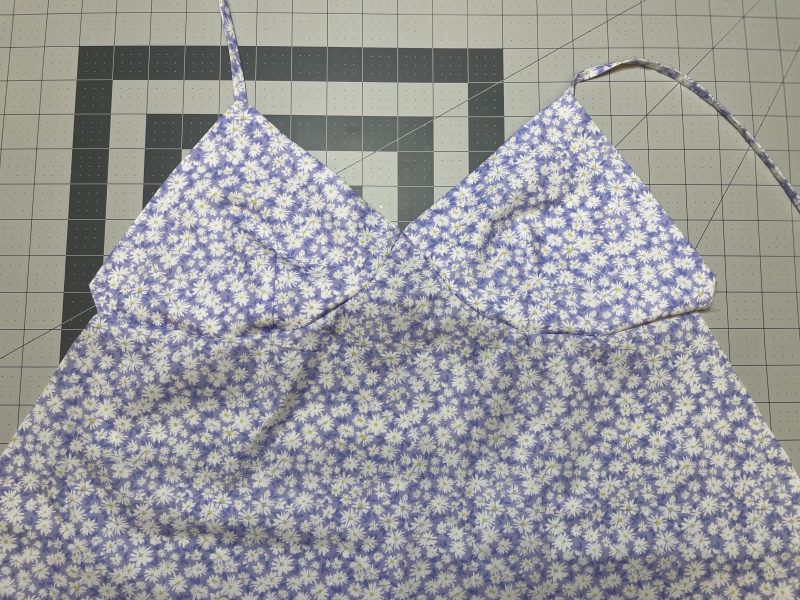
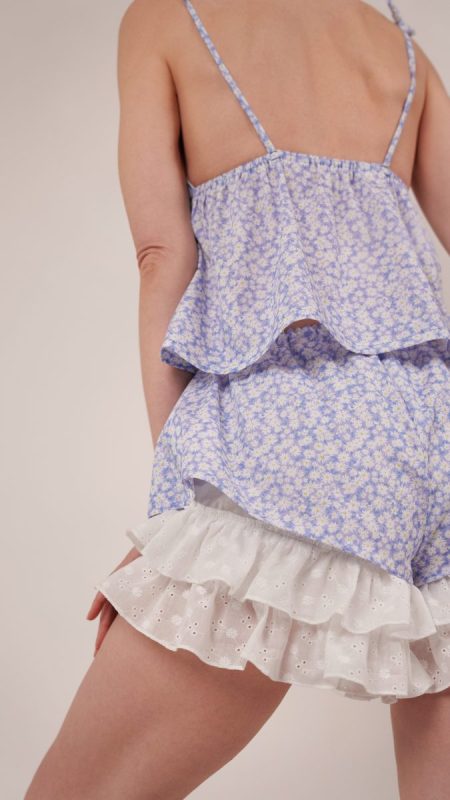
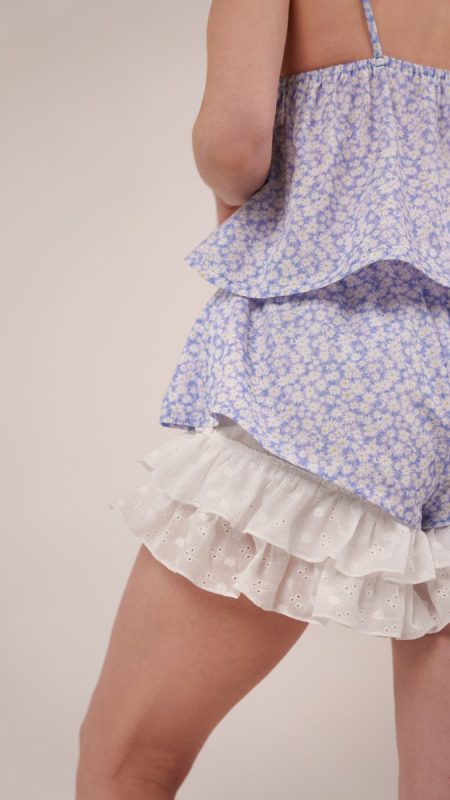
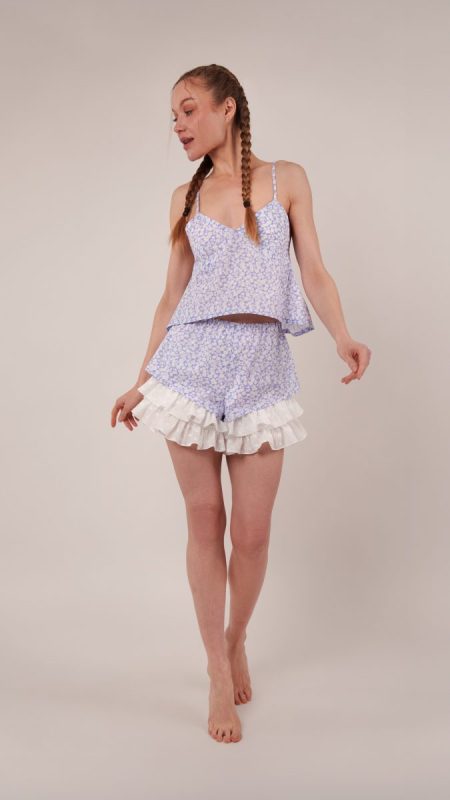
The Naomi Sleep Set is just the kind of handmade piece that makes getting ready for bed feel a little bit magical.
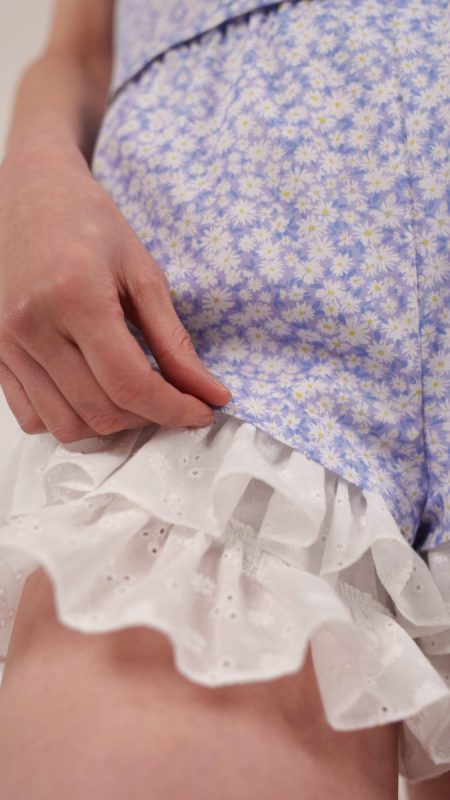
Designed with comfort and charm in mind, The Naomi Sleep Set is made for slow evenings, lazy mornings, and everything in between. The pattern shines in breathable floral cotton voile, crisp Egyptian cotton shirting, and the most darling eyelet lace–woven cotton, but it’s just as dreamy imagined in pink or red silk for a Valentine’s Day moment.
With soft ruffles, delicate spaghetti straps, and gentle bra cups for light support, this set feels cozy without ever sacrificing cuteness. It’s the kind of flirty, sweet, effortless garment you throw on “just for yourself,” even if no one else sees it.
This pattern is also a forgiving, unintimidating beginner project , perfect if you’re easing into garment sewing or want a satisfying, confidence-boosting make. Comfortable yet romantic, this is a sleep set you’ll reach for again and again, because you deserve to feel lovely even at bedtime.

Essential Materials & Sizing Guide for the Naomi Sleep Set
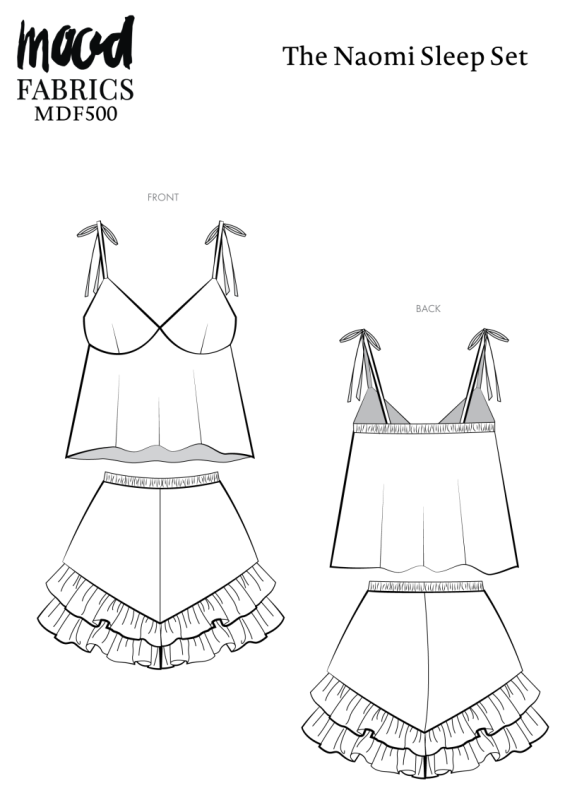
Continue reading for a breakdown of what knowledge and materials you need for creating your very own sleep set! We’ve got you covered with the recommended materials we used—if you want to follow along exactly—as well as a curated list of alternative fabric type recommendations if you want to customize your own version. The Naomi Sleep Set free sewing pattern download includes technical drawings for seam and sleep set visibility, plus a size chart to help you find your perfect fit!
Purchase Products Used Below:
Quantities indicated are for sewing a size small sleep set. Toggle the ‘SHOP THIS LOOK’ box to find quantity estimates for other sizes.
- 1 yard of Cotton Poplin – Periwinkle and White Floral – Sunday in the Park Print
- 1 yard of Mercerized Organic Egyptian Cotton Voile – White – Toulouse Collection
- 1 yard of Embroidered Eyelet Cotton Voile – White Little Flowers on Vines – Naomi Collection
- 1 yard of White Elastic – 0.25″
- 1 each of Gutermann Sew All Thread 100m – 933 Copenhagen
- 1 each of Gutermann Sew All Thread 100m – 20 White
- MDF500 – Naomi Sleep Set Sewing Pattern (Free download below!)
Additional Products Used:
*Quick Tip! The ‘SHOP THIS LOOK’ box defaults to full-yard quantities. To order an exact half-yard quantity for any fabric, simply use the decrease quantity button (-) to subtract by the half yard. Then click “ADD TO CART” to add all materials to your cart.
Alternative Fabric Type Recommendations:
The Naomi Sleep Set sewing pattern is best suited for lightweight fashion fabrics. Explore other fabric types or colors from our featured collections for your sleep set with the links below.
Download Your Free Sewing Pattern
Submit your name and email in the form below to receive the download link for the Naomi Sleep Set free sewing pattern directly in your inbox. Mood Sewciety Patterns will send your free download link via email with the subject line: ‘Your Free Download from Mood Sewciety – The Naomi Sleep Set’ (in PDF format for A4 and letter-size printing).
© MoodFabrics.com / MoodSewciety.com – Mass production, resale, or distribution of this pattern in any form is strictly prohibited.
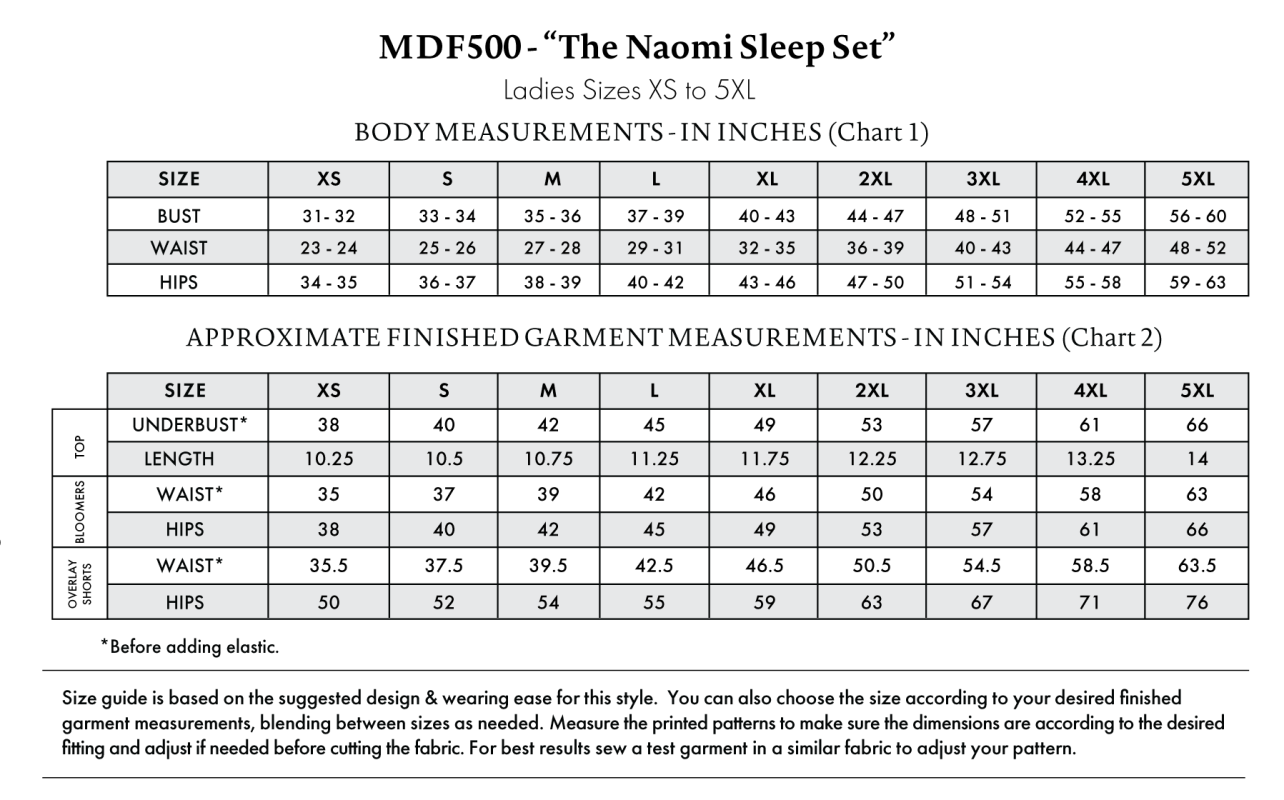
Find Your Perfect Fit
The Naomi Sleep Set Sizing Guide is based on the suggested design & wearing ease for this style. You can also choose the size according to your desired finished garment measurements, blending between sizes as needed. Measure the printed patterns to make sure the dimensions are according to the desired fitting and adjust if needed before cutting the fabric. For best results, sew a test garment in a similar fabric to adjust your pattern.
Note: Always read all the instructions before cutting the fabric!
How to Sew The Naomi Sleep Set
The instructions provided below are designed to guide you through sewing the Naomi Sleep Set from start to finish.
2 Tips for Sewing with Cotton Poplin
⇒ Wash your fabric before you cut out your patterns. Cotton will almost always shrink in the wash, even if you use cold water and dry it on low heat. Just do yourself a favor and trust me so that you don’t accidentally shrink your sleep set to the point of it being unwearable.
⇒ Iron your fabric before cutting out your pattern. In addition to shrinking, cotton is also known to get easily wrinkled. A big wrinkle in your fabric could make your pattern cutting uneven.

Pattern Pieces & Fabric Cuts
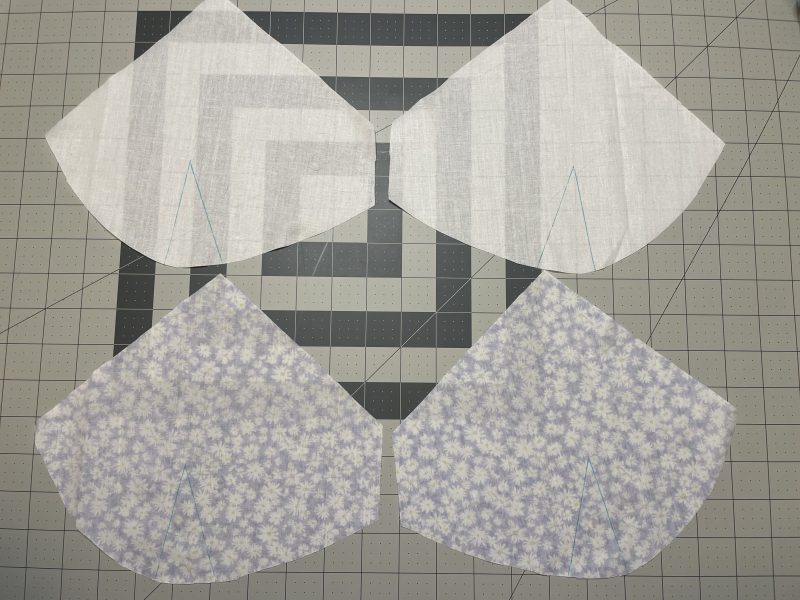
- (A) CUPS
- Fabric – Cut 2 Mirrored
- Lining – Cut 2 Mirrored
- (B) TOP FRONT
- Fabric – Cut 1 On Fold
- (C) TOP BACK
- Fabric – Cut 1 On Fold
- (D) SHOULDER STRAPS
- Fabric – Cut 4
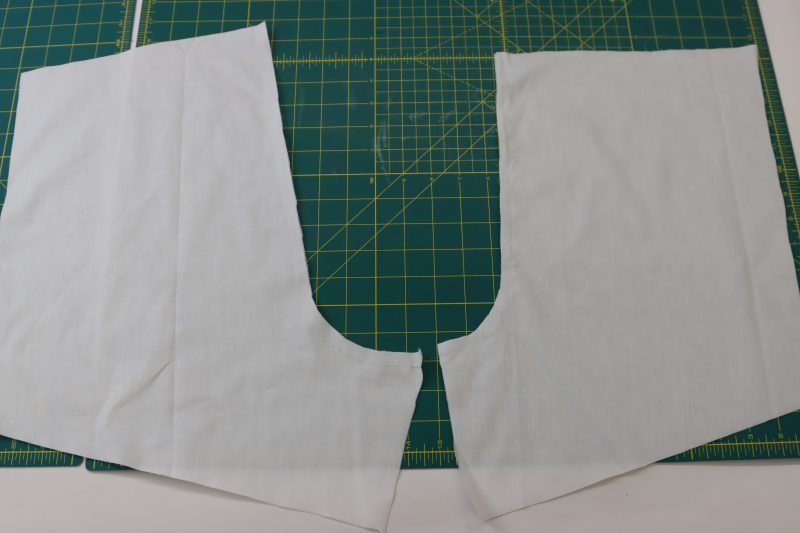
- (E) BLOOMERS BACK
- Lining – Cut 2 Mirrored
- (F) BLOOMERS FRONT
- Lining – Cut 2 Mirrored
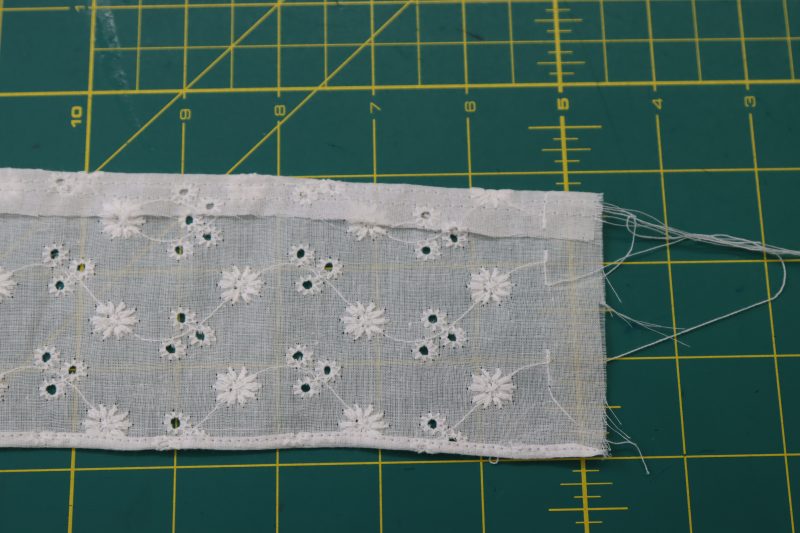
- (G) BLOMMERS RUFFLES
- Eyelet Fabric – Cut 4
- (H) OVERLAY SHORTS BACK
- Fabric – Cut 2 Mirrored
- (I) OVERLAY SHORTS FRONT
- Fabric – Cut 2 Mirrored
For “fabric” pieces we used the periwinkle floral printed fabric; for “lining” pieces, we used the white cotton voile; and for the “eyelet fabric” we used the embroidered cotton eyelet.
Sew with a 1/2″ seam allowance for all seams unless otherwise specified.
Step 1
DARTS
- Mark the darts on the main fabric and lining fabric cup pieces using tailor’s chalk.
- Pin and sew the darts right sides together.
- Open the darts and press then flat towards the sides of the bra cups.

Step 2
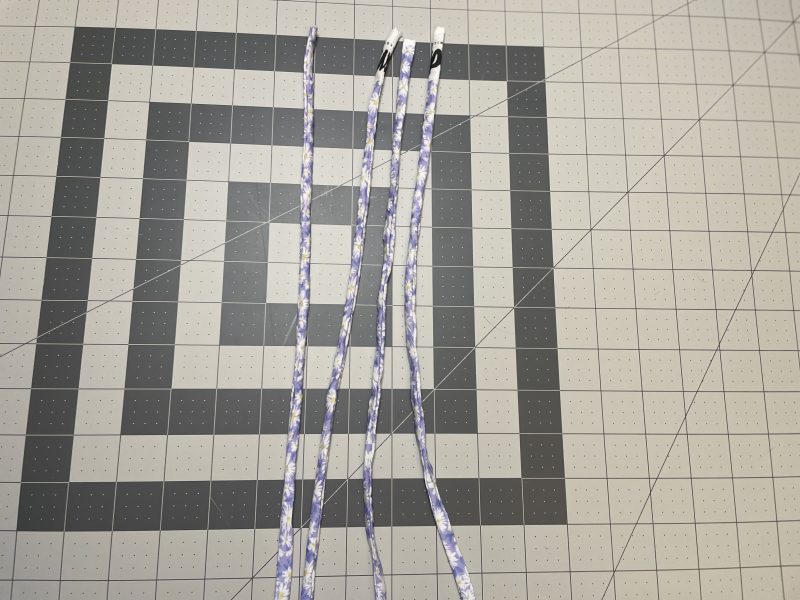
STRAPS
- Fold the strips of fabric for the straps in half long ways, right sides together.
- Sew them with a ⅛ inch seam allowance.
- Flip the straps right sides out with a loop turner.

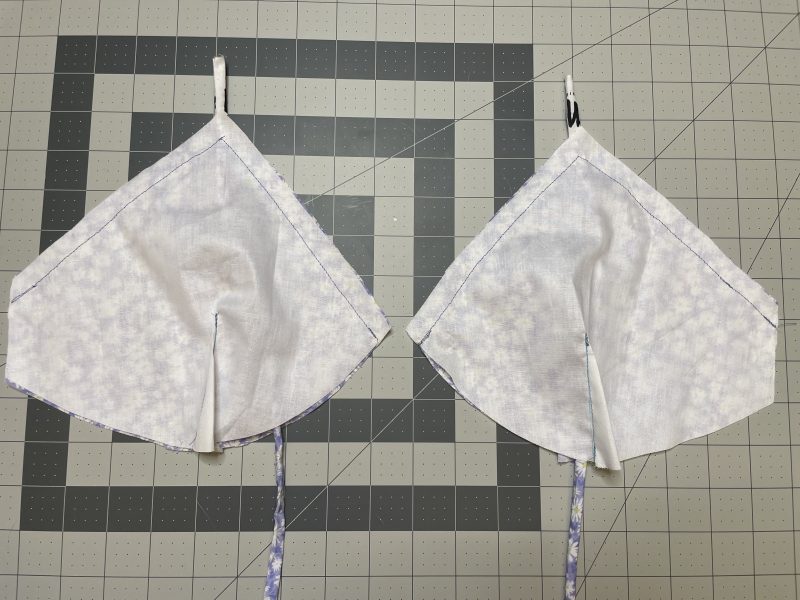
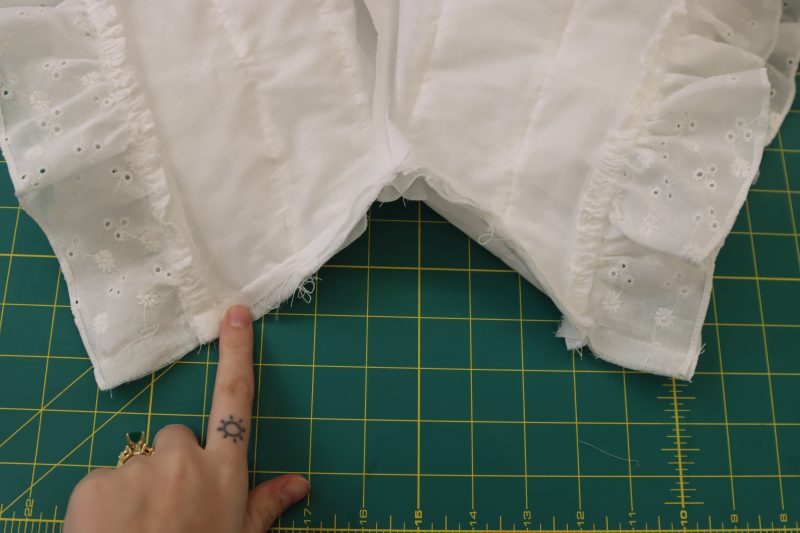
Step 3
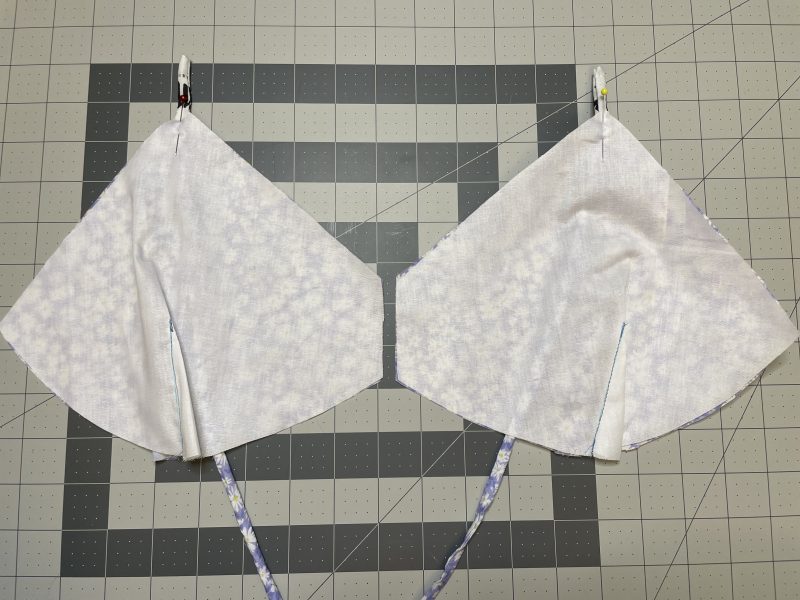
INSERT STRAPS
- Place the lining bra cups right sides together with the main fabric bra cup.
- Place two of the straps in between the two layers as shown in the first photo below.
- Pin the straps to the bra cups at the top point of the cups.
- Sew the top edge of the bra cups, being sure to catch the strap in the seam.
- Clip the corners at the tops of the bra cups to eliminate bulk.
- Flip the bra cups right sides out and press.
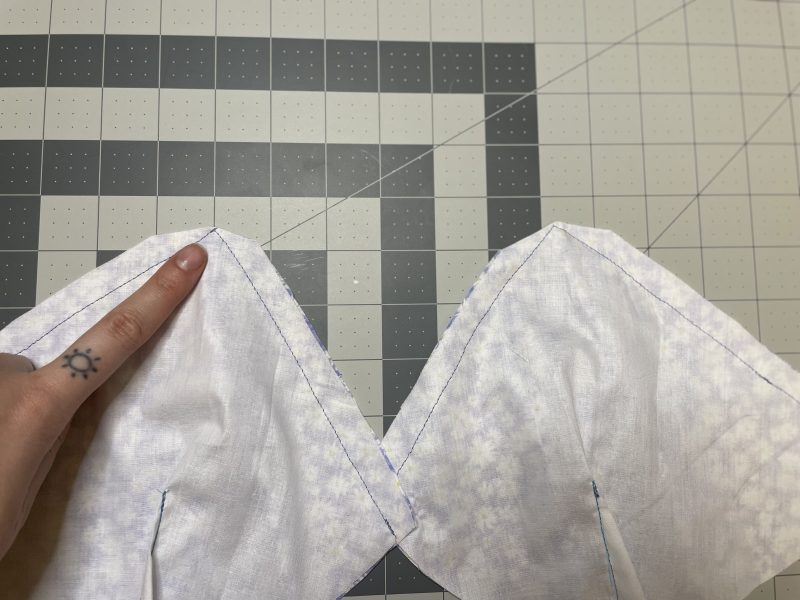
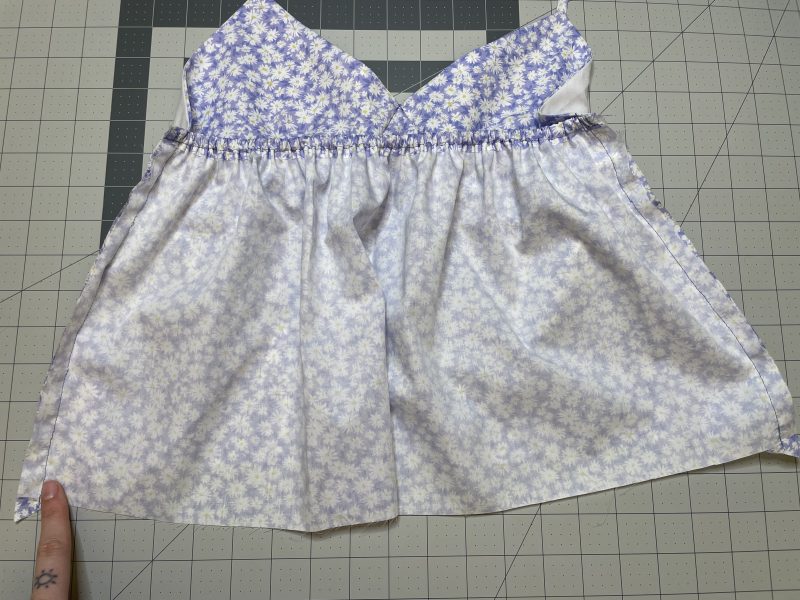
Step 4
TOP FRONT
- Pin the unfinished bottom edge of the bra cups to the top front pattern piece, making sure that the pointed corner of the top front is between the two bra cups.
- Sew the bra cups to the top front.
Step 5
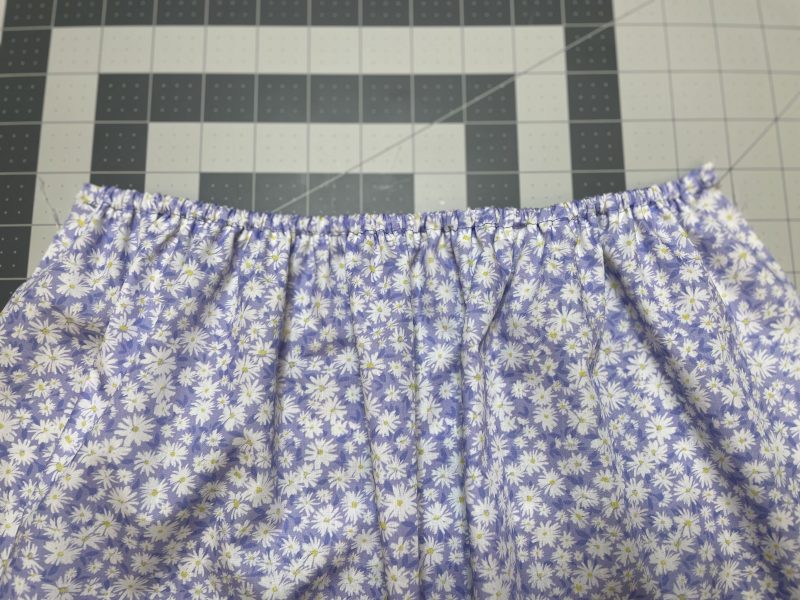
TOP BACK
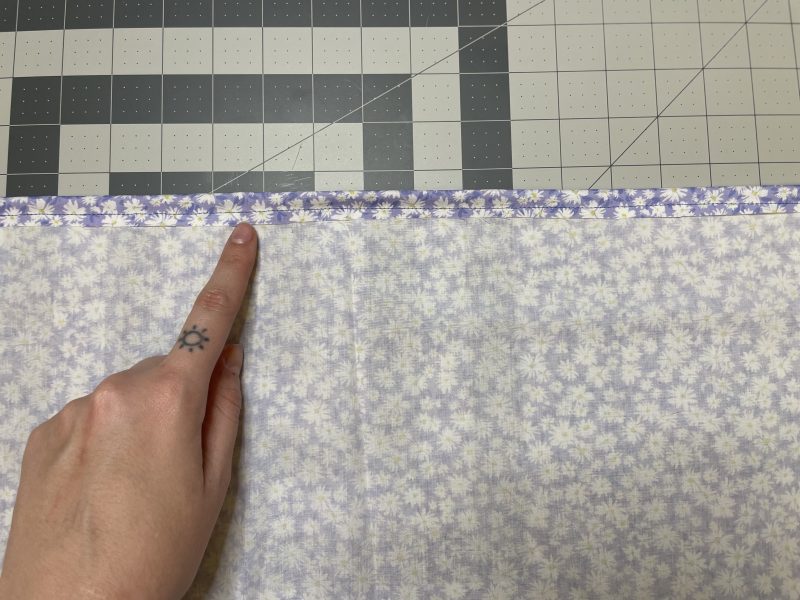
- Fold the top edge of the top back down towards the wrong side of the fabric with a ½ inch fold.
- Press the fold into place.
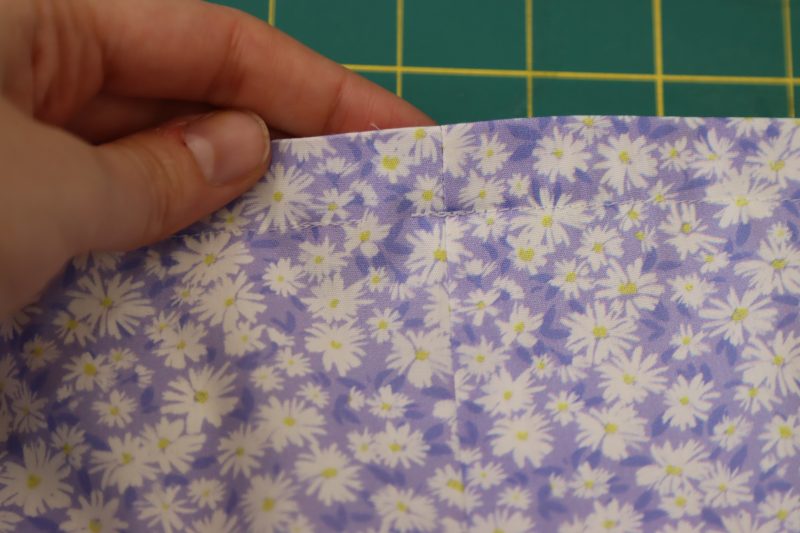
- Sew over the fold with 3/8 inch seam allowance, creating a tunnel that is ⅜ inches wide.
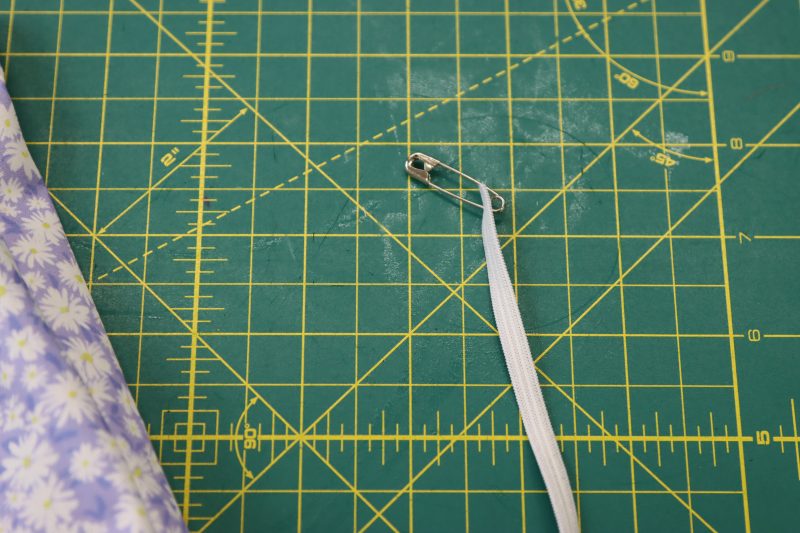
- Insert elastic into that tunnel using a safety pin.
- Secure the elastic on both ends of the tunnel with a straight stitch.
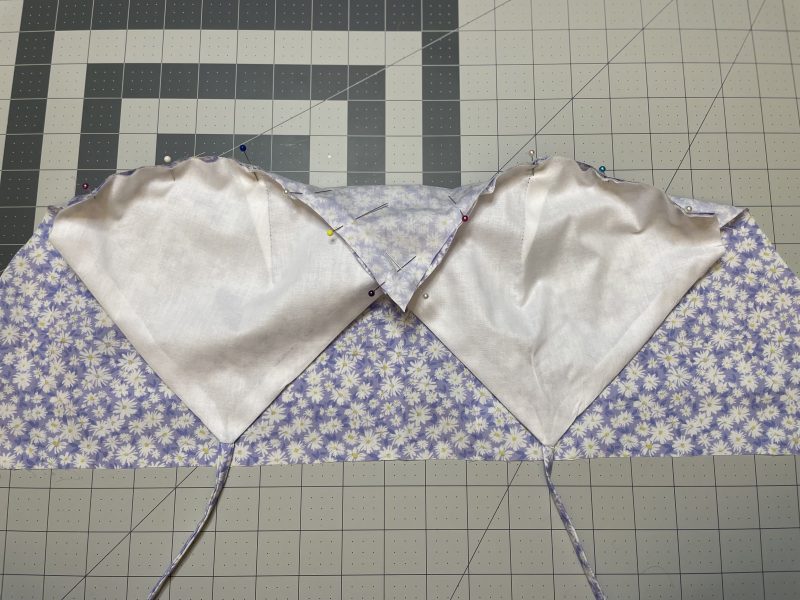
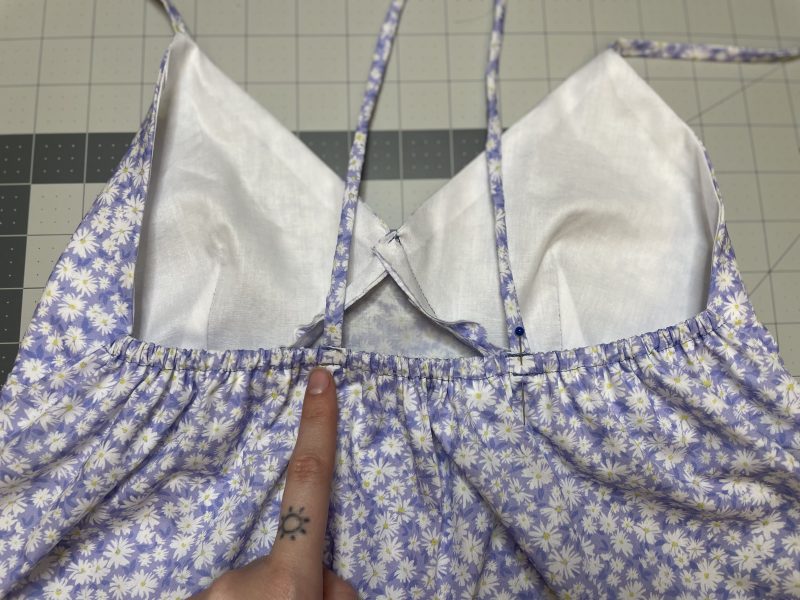
Step 6
TOP SIDES
- Place the top back right sides together with the top front.
- Pin and sew the side seams of the top.
Step 7
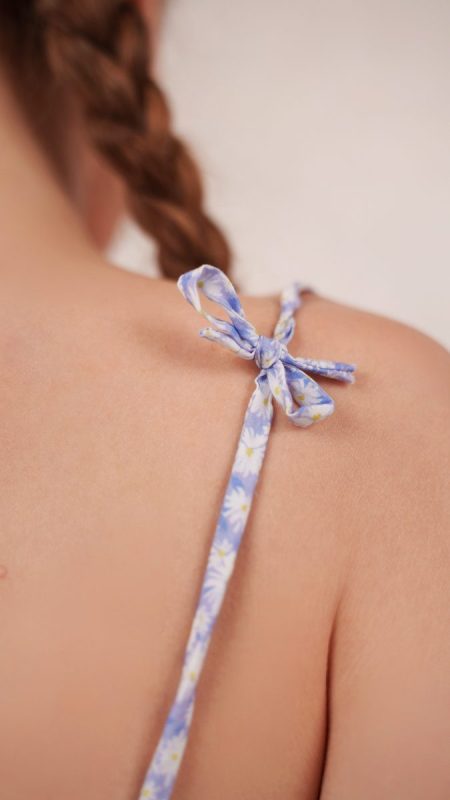
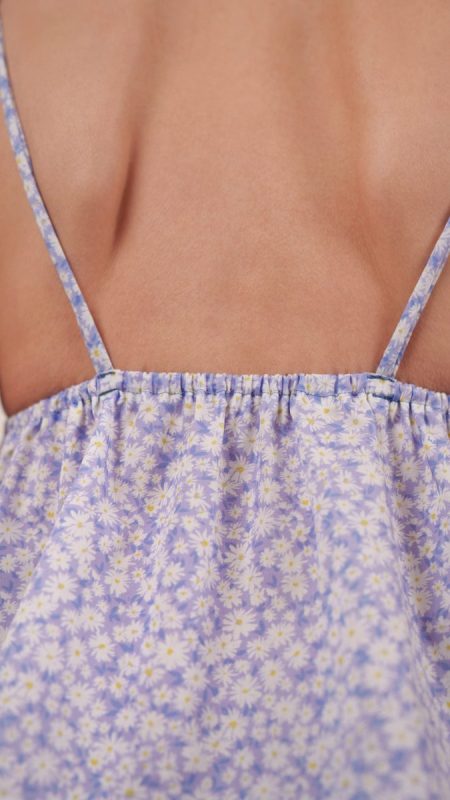
BACK STRAPS
- Sew the back straps to the top back at the seam that makes the elastic tunnel.
Step 8
HEM TOP
- Hem the top with a baby hem.
Step 9
CROTCH SEAMS
- Place the back shorts pieces right sides together for both the bloomers land the overlay shorts.
- Place the front shorts pieces right sides together for both the bloomers and the overlay shorts.
- Sew the curved crotch seam on all sets of bloomers pieces and overlay shorts.
-
- (F) Bloomers Front pieces
- (E) Bloomers Back pieces
- (I) Overlay Shorts Front pieces
- (H) Overlay Shorts Back pieces
Step 10
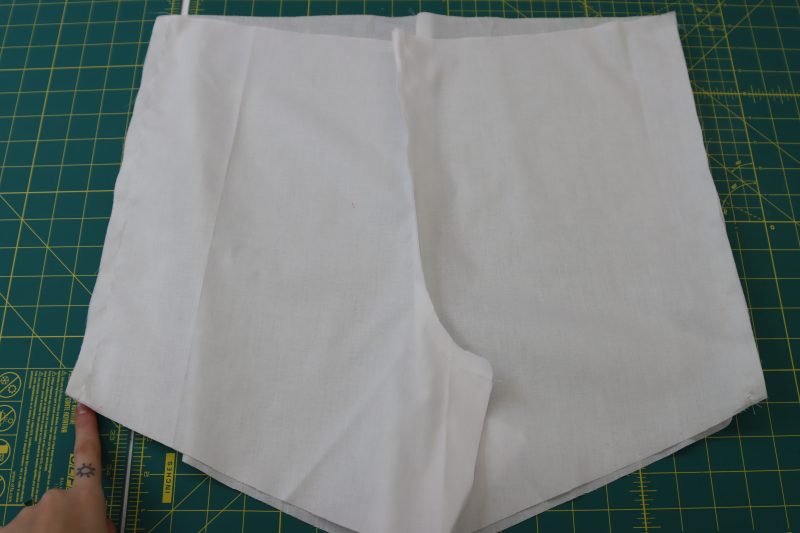
SIDE SEAMS
- Unfold the crotch seam and place the front overlay shorts right sides together on top of the back overlay shorts.
- Unfold the crotch seam and place the front bloomers right sides together on top of the back bloomers.
- Pin and sew the side seams of both the bloomers and the overlay shorts.
Step 11
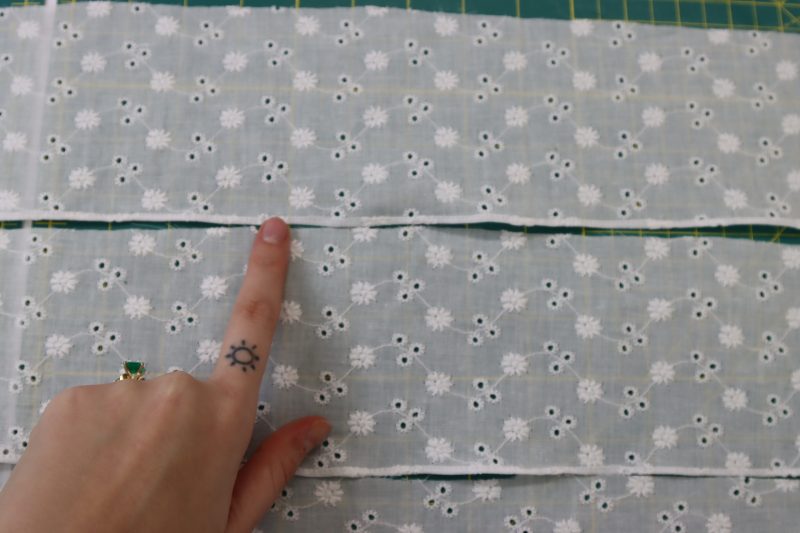
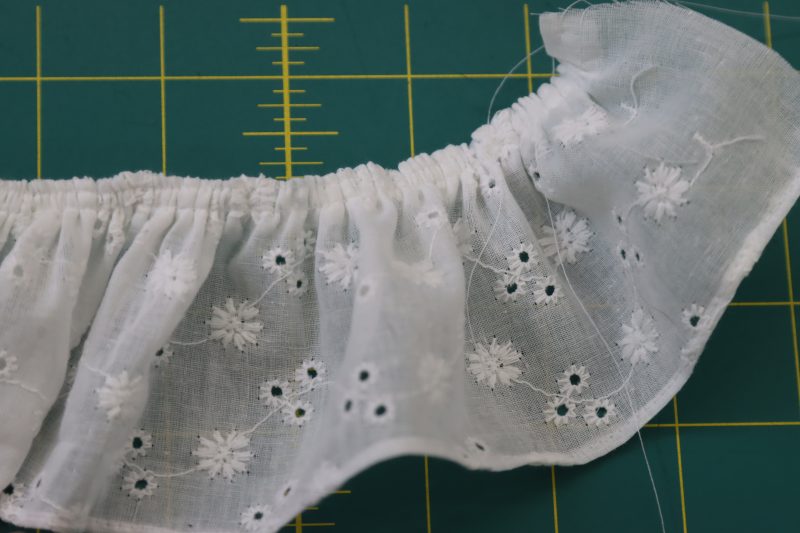
RUFFLES
- Sew baby hems on one of the long sides of each of the ruffle pieces.
- On the other long side of each ruffle piece, sew gathering stitches.
- Pull on the gathering stitches to ruffle the fabric.
Step 12
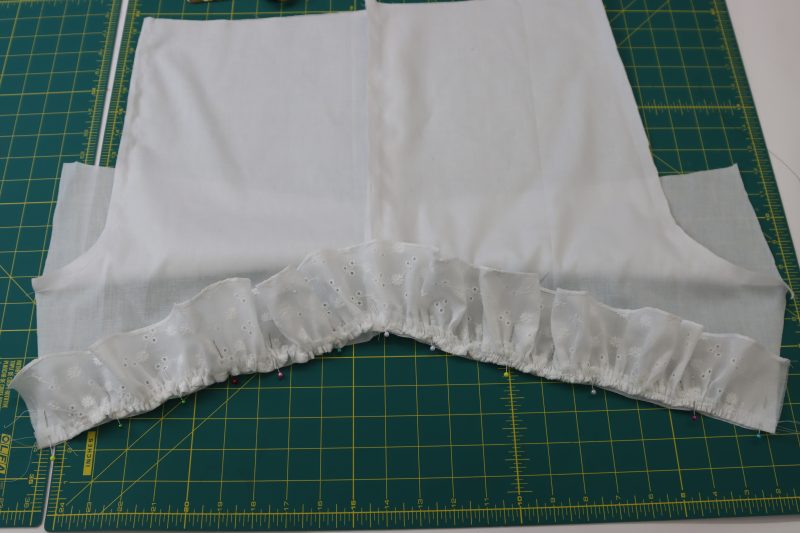
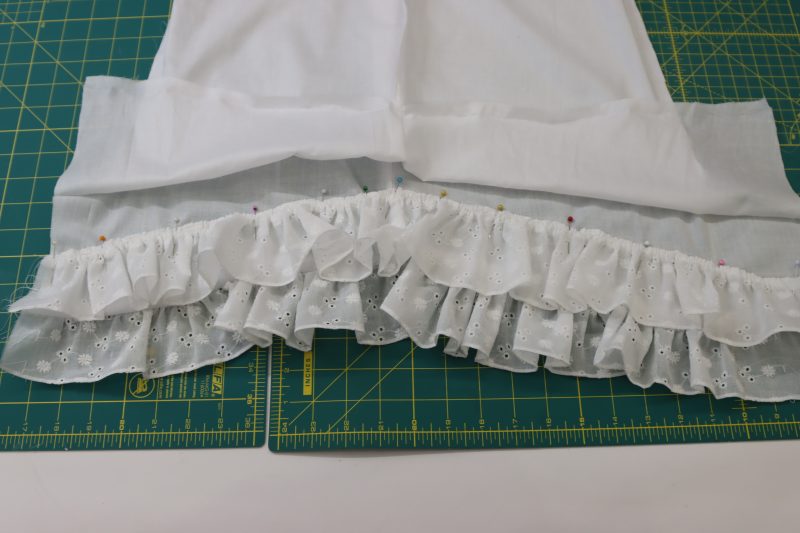
ATTACH RUFFLES
- For the first ruffles, place them right sides together with the bottom hem of the bloomers.
- Pin and sew the bottom ruffle to the raw edges of the bloomers.
- For the second ruffles, place the wrong side of the ruffle against the right side of the bloomers, a few inches above the hem where the ruffle locations are marked on the pattern.
- Pin the second ruffle to the bloomers.
- Topstitch over the second ruffle to secure it to the bloomers.
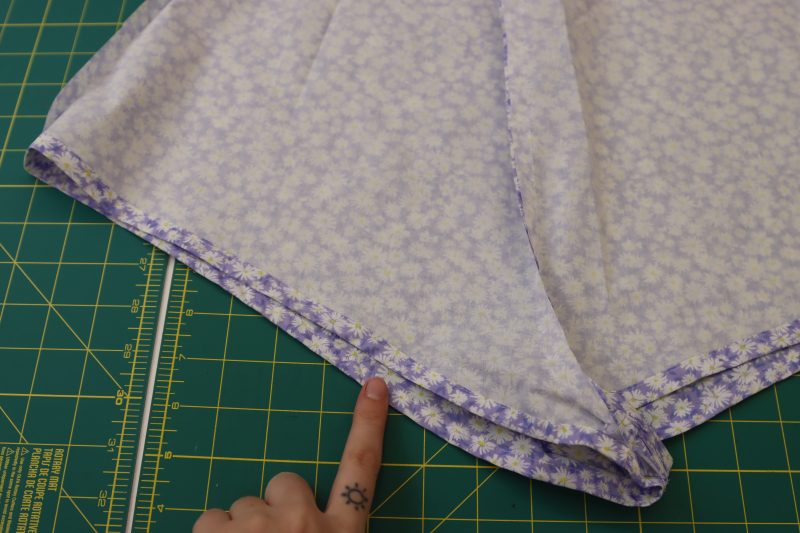
Step 13
INSEAMS
- Fold the bloomers so that the front and back pieces are right sides together.
- Line up the inseam of the shorts (do this for both the bloomers and the overlay shorts).
- Pin and sew the inseams.
Step 14
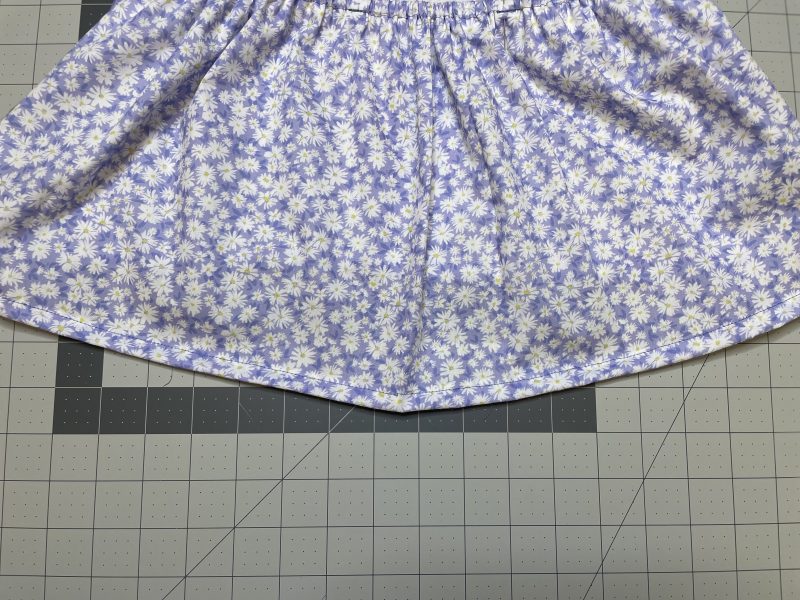
SHORTS HEM
- Sew a baby hem along the bottom of the overlay shorts.
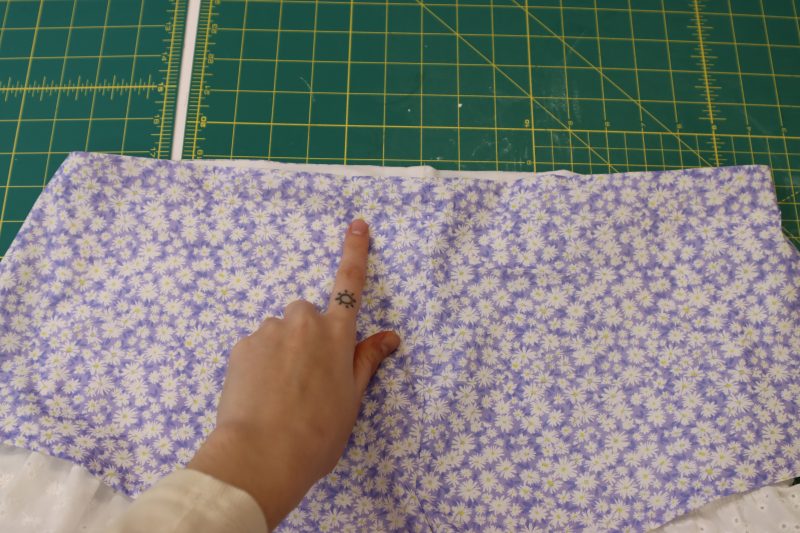
Step 15
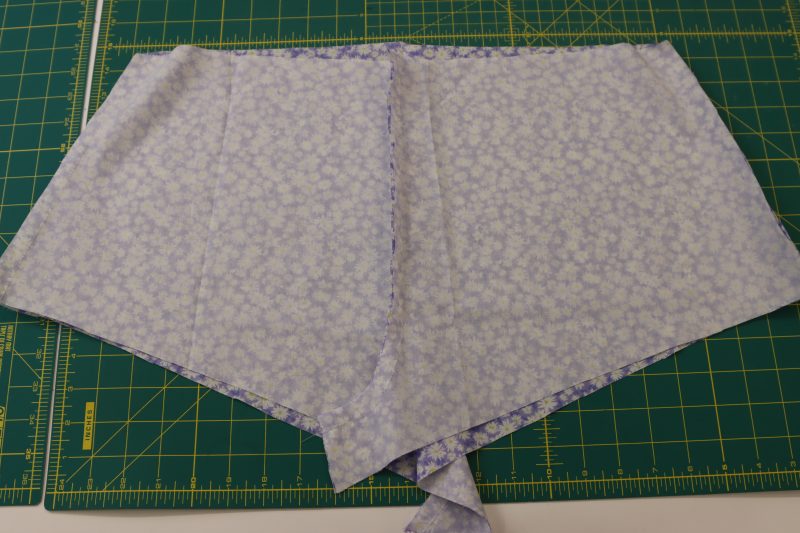
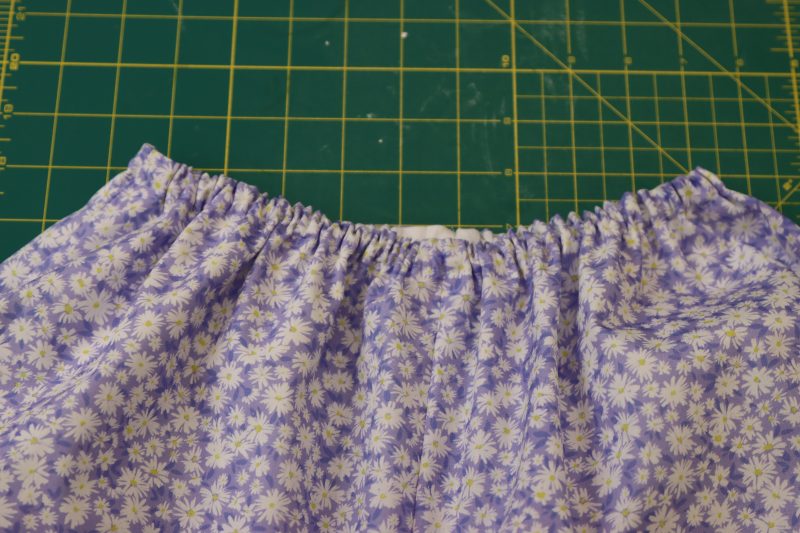
WAISTLINE
- Place the bloomers inside of the overlay shorts so that the right side of the overlay shorts is touching the wrong side of the bloomers.
- Pin and sew around the entire waistline.
- Flip the shorts right sides out so that the overlay shorts are sitting on the outside of the bloomers.
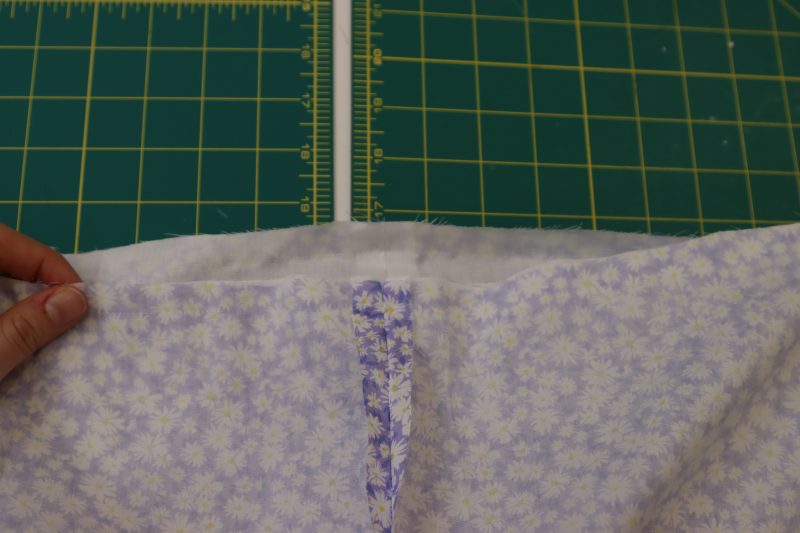
Step 16
ELASTIC CASING
- Press the waistline flat with an iron.
- Sew around the entire waistline with ½ inch seam allowance, leaving a small gap at the back of the shorts where the elastic can be inserted.
- Insert elastic into the tunnel you just sewed with a safety pin.
- Sew the elastic to itself to make a closed loop.
Sewing Success: The Finished Naomi Sleep Set
Share this post with a friend (or two!), download the Naomi Sleep Set free sewing pattern, and show us which fabrics and colors you choose, using the hashtags #MoodNaomiPattern & #MadeWithMood—and don’t forget to tag us @MoodFabrics, too.


Free Sewing Pattern Inspiration for Your Next Project
With 500+ free sewing patterns and counting, your opportunities for sewing with Mood are endless!
We hope you had as much fun sewing this sleep set pattern as we did! As always, we want to hear from you—share your thoughts and comments below and let us know where you’ll be wearing the Naomi Sleep Set free sewing pattern!
Me encanto el modelo de esta pijama
Me gustaría el.molde porq se ve coquette y lindo con sus vuelos
Hola Marisel
Puedes descargarlo, en la parte del post donde dice: “Download the Naomi Sleep Set” justo antes de las tablas de tallas, solo escribe tu nombre y correo electrónico, da clic en el botón de “subscribe and download” y el patrón te llega a tu correo en los siguientes minutos 🙂
Thank you so much
Looks so cute and comfy! Can’t wait to make this set.
Uds los mejores ♥️
Uds los mejores mood
Love!
Thank you
Soooo cute! I love!
Thanku you so múch
Thanku you so much fór your work
I love the free patterns, but how do I download the instructions?
Hey Deborah! Unfortunately the instructions can only be accessed by logging into the blog website. The instructions can’t be downloaded or printed unless you just print the whole webpage.
Beautiful
This is such a cute set! Just went to the top of my project list. Thank you for the pattern!
Can’t wait
This set is so cute! How do you calculate what size elastic to cut for the top back panel and the shorts waistline? Thank you
Hey Amelia! Honestly, I just stretch the elastic around my body until it’s long enough that it’s not digging into your skin but tight enough that its stretched a little bit and scrunches the fabric.
The pattern is cute but it does not make any sense. The top piece does not look like its shown on the photos when cut on fold, and the cups dont fit because of it.
Hey Sanja, I just want to check and make sure you cut out and sewed the pattern right. Did you line up the correct edge of the top front pattern piece with the folded fabric? I used the same pattern in a size 4 when I made this top. Same with the cups. The darts can be tricky if you cut the fabric on the dart lines instead of sewing it on the dart lines. I hope that any of this can help you finish this project!
Me encanta
I just just finished the set today and the cus didn’t fit right even though my bust and measurements were the exact size for a large, and would it be better with padding to help the lack of support?
Hey Alexandria! Yes, I would say that if you’re feeling unsupported in the top then a thin padding (like the ones that go in bikini tops) will definitely help stiffen the cups.
Almost done making these for my teen daughter she is so excited and for them to be done.
So cute
Tank you