
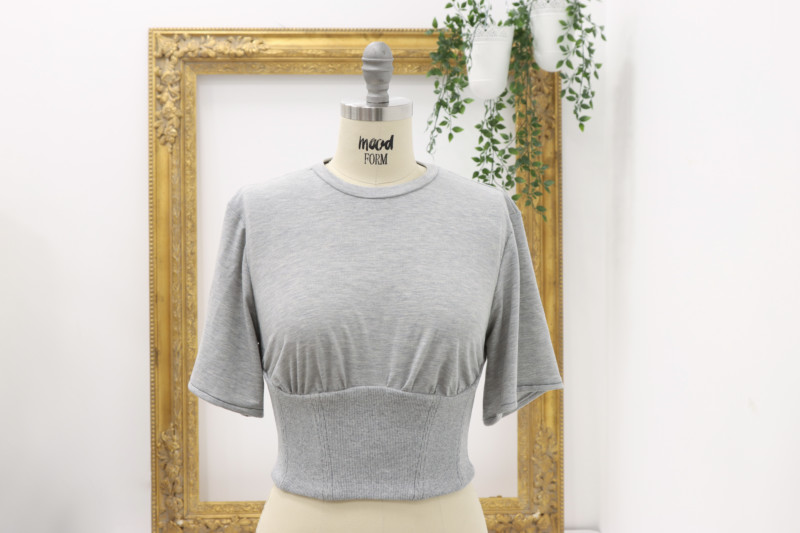
Do you like the look of a corset, but don’t want to be totally exposed? The Briar Top, Mood’s newest free sewing pattern, is the perfect piece to add to your fall wardrobe. It’s a combination of a comfy t-shirt and an on-trend corset all in one! This look is great for utilizing Mood’s premium selection of rib knit fabrics.
Purchase Materials Used Below:
- 1 yard Light Gray Bamboo and Merino Wool Jersey
- 1 yard Heathered Gray Tubular Cotton 1×1 Rib Knit
- 2-3 yards Black Rigilene – 12mm/0.5″
- 1 pkg Dritz Nickel Grommets Size 3/8″ – 8ct
- MDF274 – The Briar Top Sewing Pattern (free download below!)
Alternative Recommended Fabrics:
Step 1
Print, tape, and cut out your pattern.
Step 2
Mark all notches.
Step 3
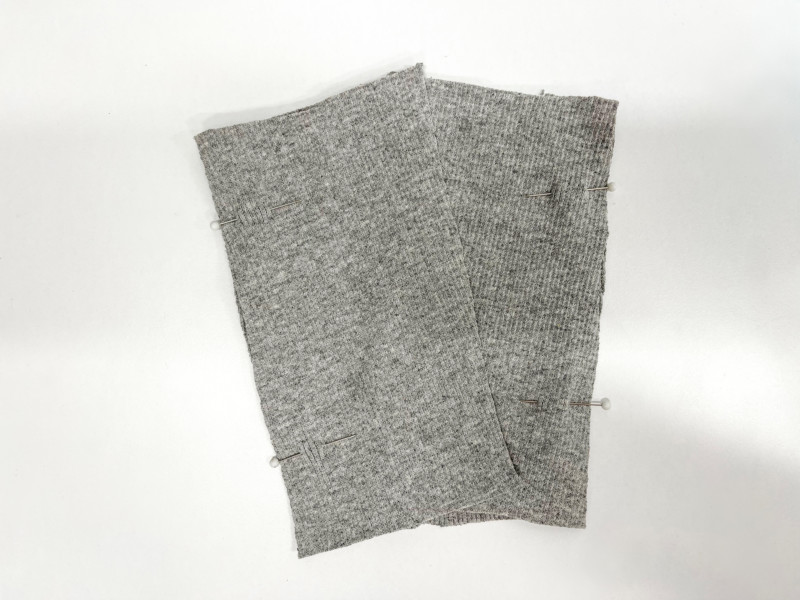
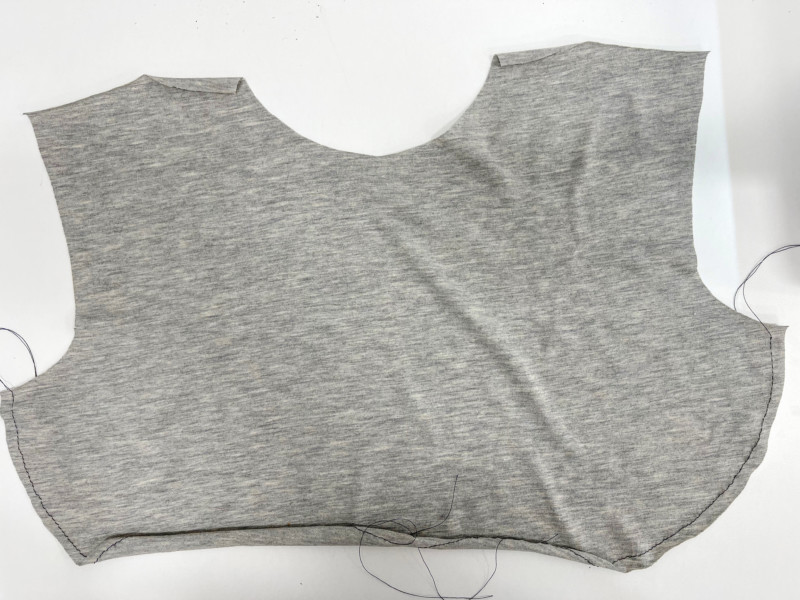
Starting with your lining layer, take your center front piece and lay it out flat. Add your middle front pieces, face-to-face, matching notches.
Step 4
Now, attach the side front to the middle front, matching the notches.
Step 5
Similarly, attach your side back to your side front, matching notches.
Step 6
Finally attach your back pieces to your side back, matching notches.

Step 7
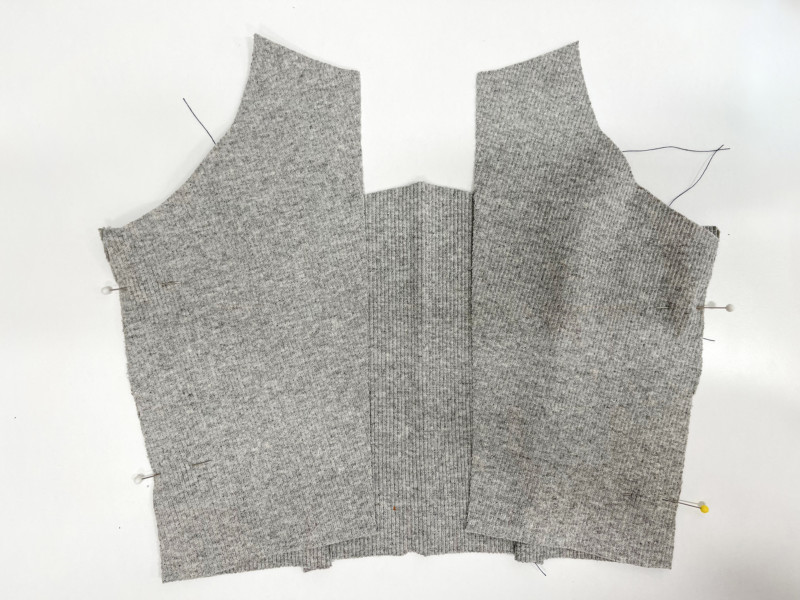
Press seams open nice and flat. I would suggest doing a test fit here, making sure you have the right amount of space in the back that you want.
Note: At this step, you have finished the lining and will do the exact same on the outside bodice, skipping boning section to follow.
Step 8
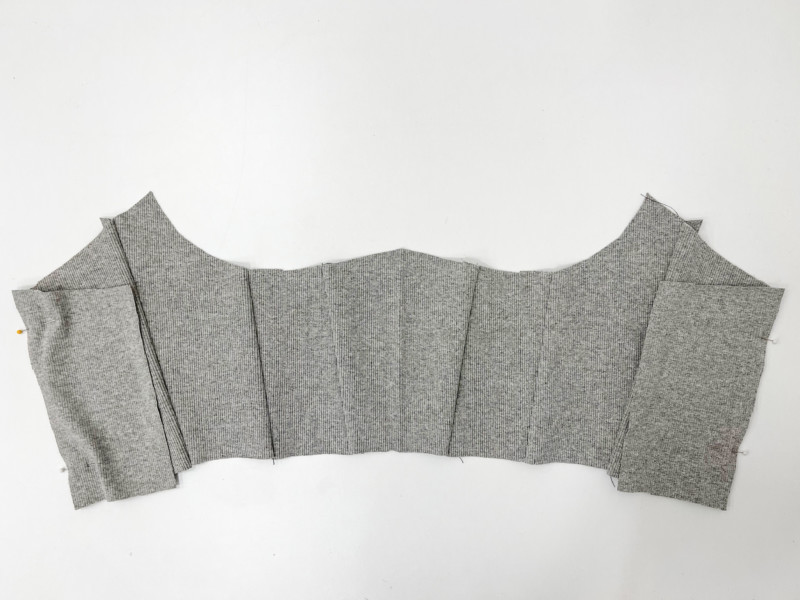
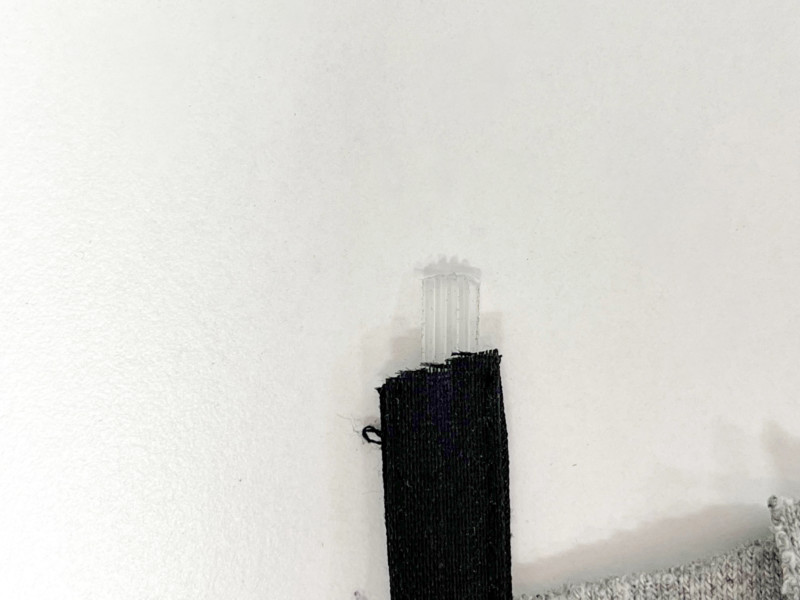
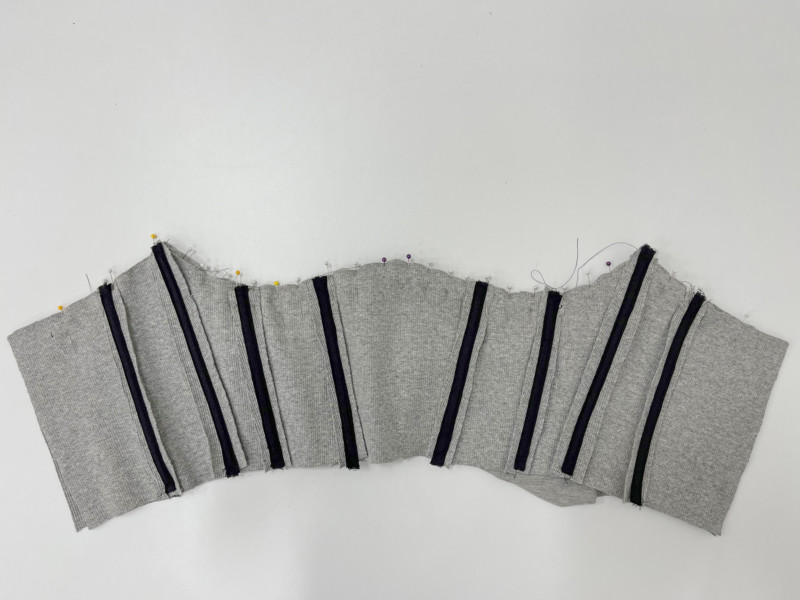
Start cutting your pieces out of the boning. Make sure you cut all the way to the top of each seam. You will be cutting the boning to adjust to the seam allowance on the top and bottom. I suggest doing one set at a time so you don’t get confused and switch them up. Keep in mind that the boning comes wrapped around in a circle and curl at the edges. The solution to making them flat is to use an iron and a press cloth on a low temperature. See the example below:


Step 9
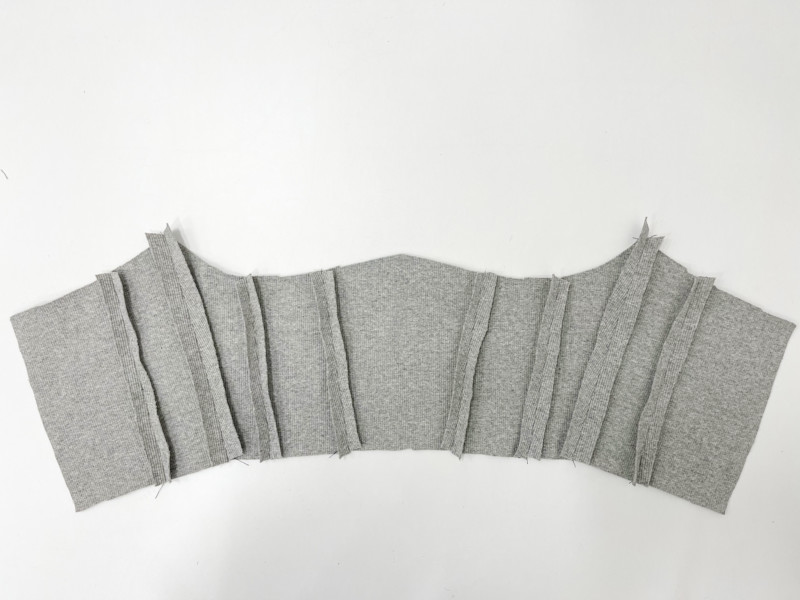
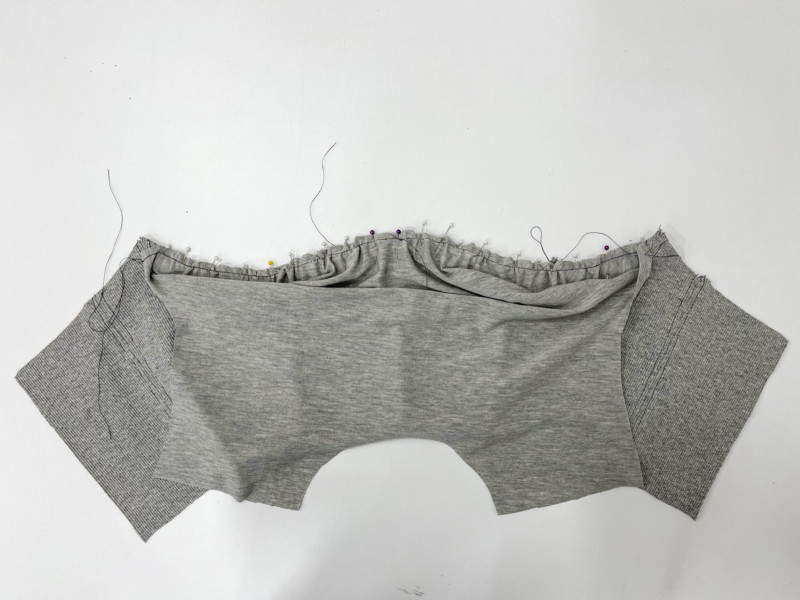
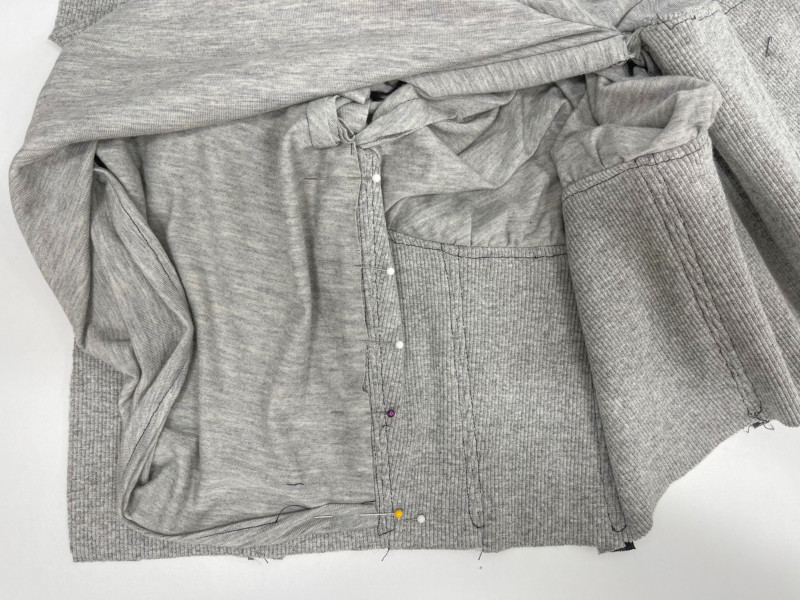
Place the boning on one of the seams. Cut off 1/2″ on both sides, leaving a round tip using your non-fabric scissors. Now pin the boning to the lining of your bodice and stitch on both sides. Leave the top and bottom open, just in case you have to trim again as you go along.
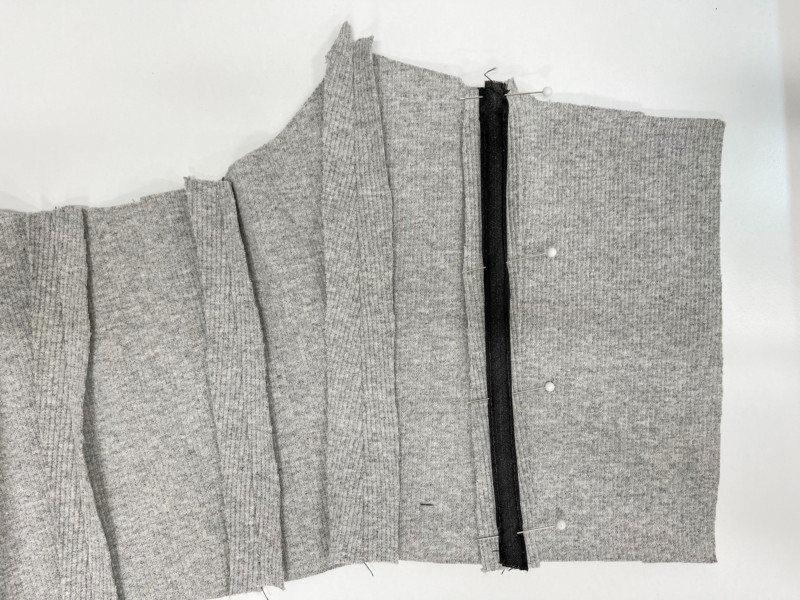
Step 10
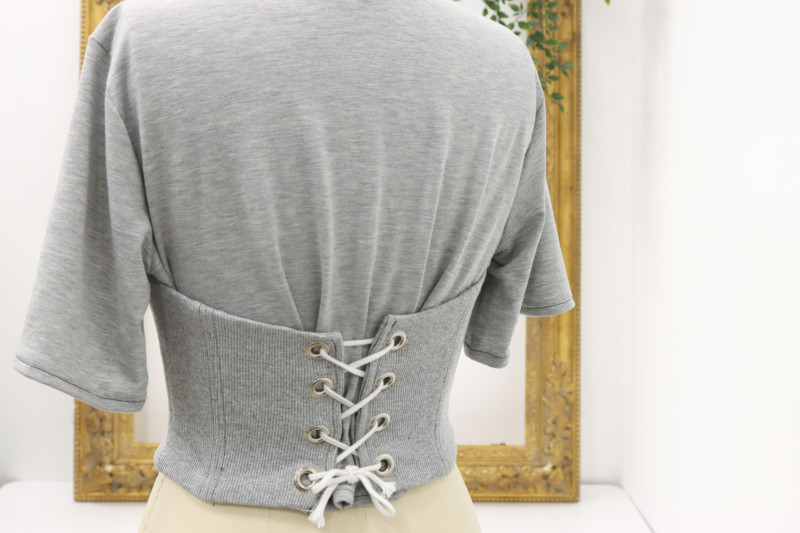
Repeat Step 9, until the lining resembles the image below. Note: when you sew the boning to the center back, or ends as seen below, leave the seam allowance free.
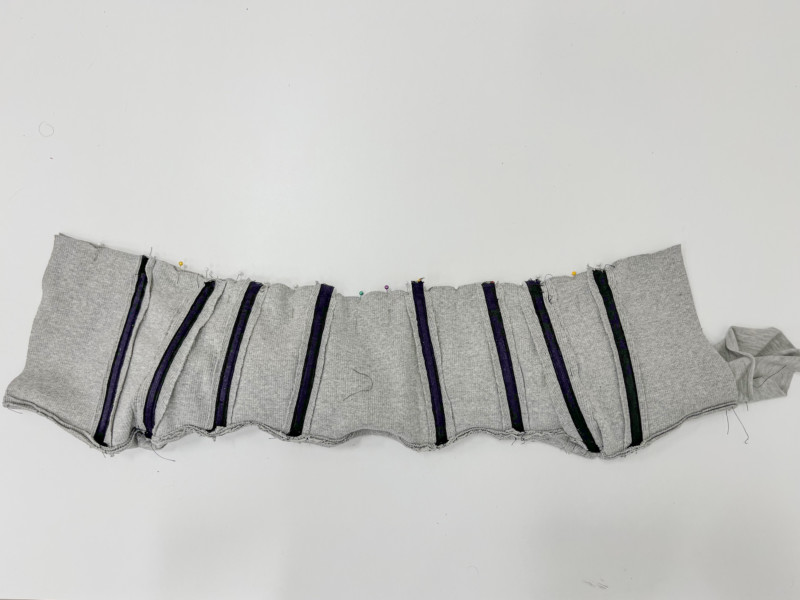
Step 11
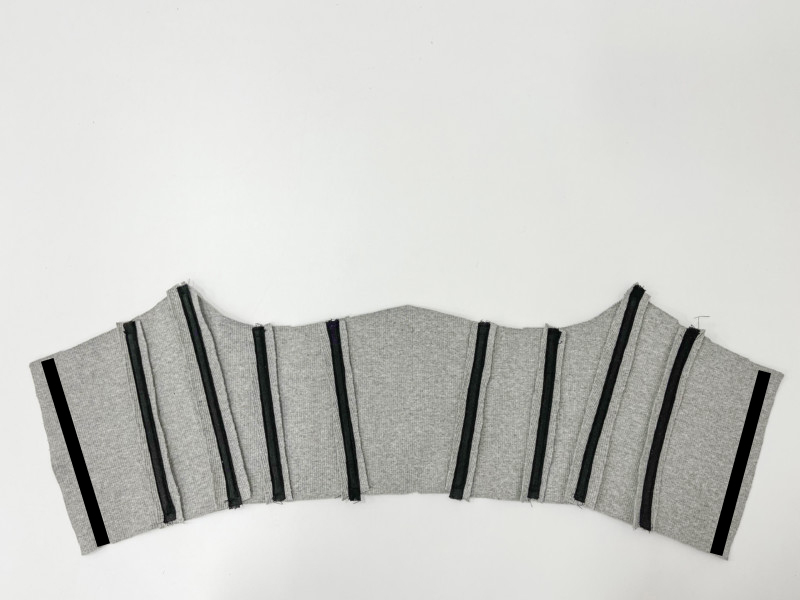
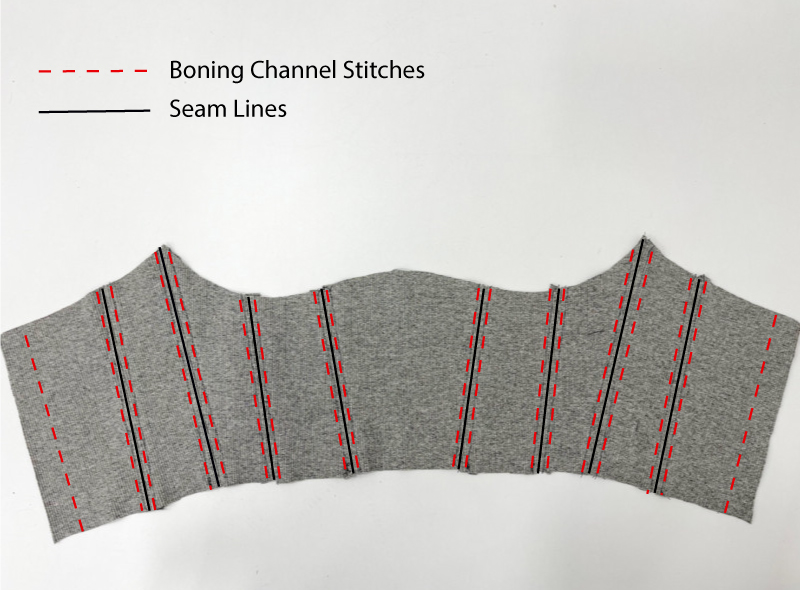
The boning channels should now be complete, except for the two at the center back. From the right side, your lining should now resemble the image below.
Step 12
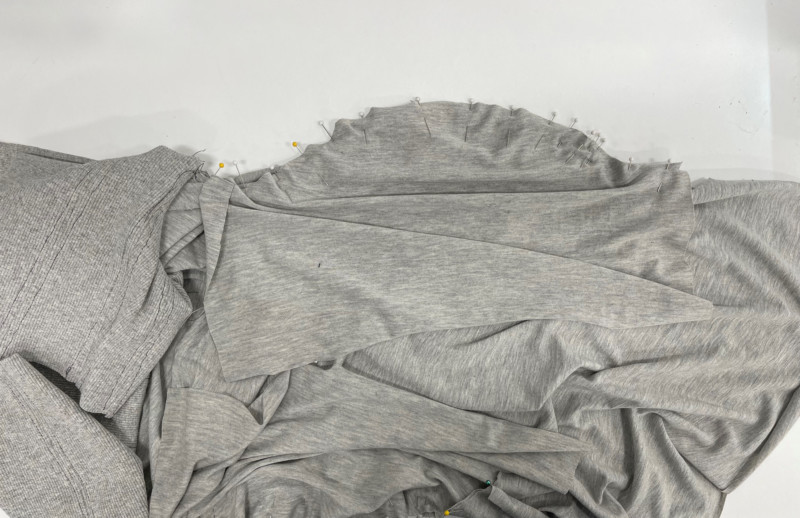
Baste the bottom of the front bodice.
Step 13
Gather front bodice to lower bodice, making sure the center front and side seams are matched on each piece.
Step 14
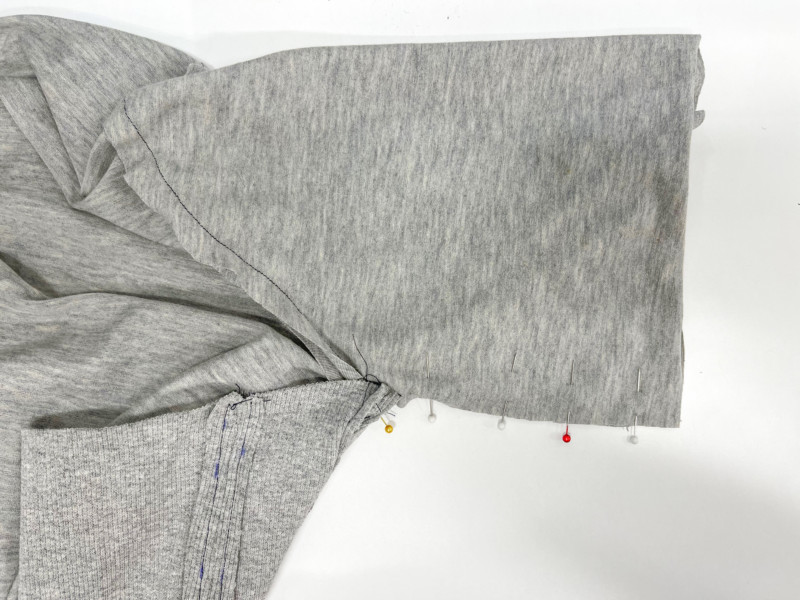
Pin front bodice to the right side of the outer ribbed bodice, (not the boned bodice) matching center fronts together. Using those same pins, pin the lining bodice matching each seam, and sandwiching the bodice between both ribbed layers. Sew in between the two points.
Step 15
With right sides together, attach the back bodice to the front bodice at shoulder seams.
Step 16
Now that the bodice is attached at the shoulder seams, pin the sleeves into the armscye, matching the notches, and stitch.
Step 17
Now fold the sleeve over so the inseams lay face-to-face, pin, and stitch. You are just sewing the sleeve inseam part, nothing else in this step.
Step 18
Fold/pin the sleeve back to sew the rest of the bottom bodice shut.

Step 19
Trim the corners and understitch to the lining. Since the rib knit is doubled, use a longer stitch length so it will be easier to sew. After you understitch, give it a nice press and make sure everything matches nicely.
Step 20
Sew the neckband at the center back using a 3/8″ seam allowance.
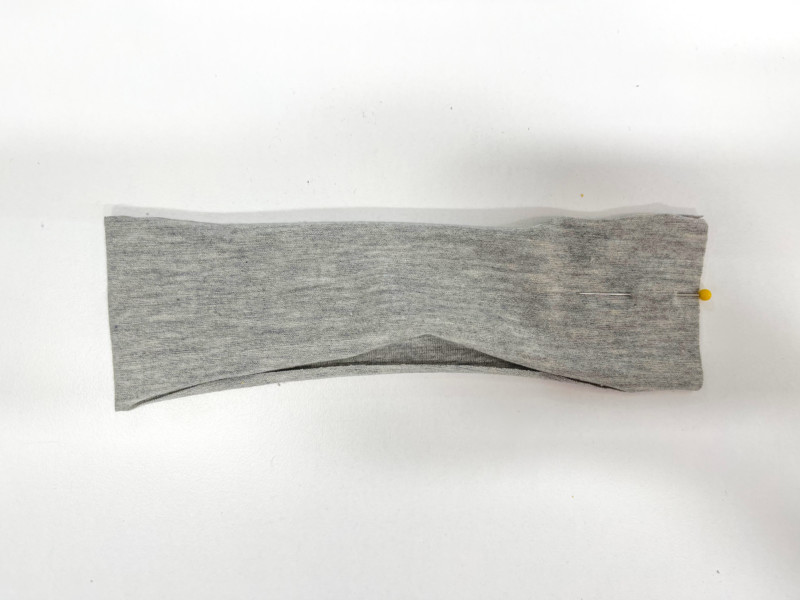
Step 21
Fold the neckband downward in half, wrong sides together, and pin. Match the center back seam to the center back of the shirt and pin. Using your stretch stitch, sew the neckband along the neckline.
Note: Make sure to stretch as evenly as possible so your neckline doesn’t bunch or gather.
Step 22
Next, hem the back of the shirt 1″, folding over a ½” and then another ½” to create a clean finish. Pin and stitch.
Keep in mind, the rib knit bodice is going to lose a 1/2 in so make sure you hem according to that length where they’ll meet at the side seams.
Step 23
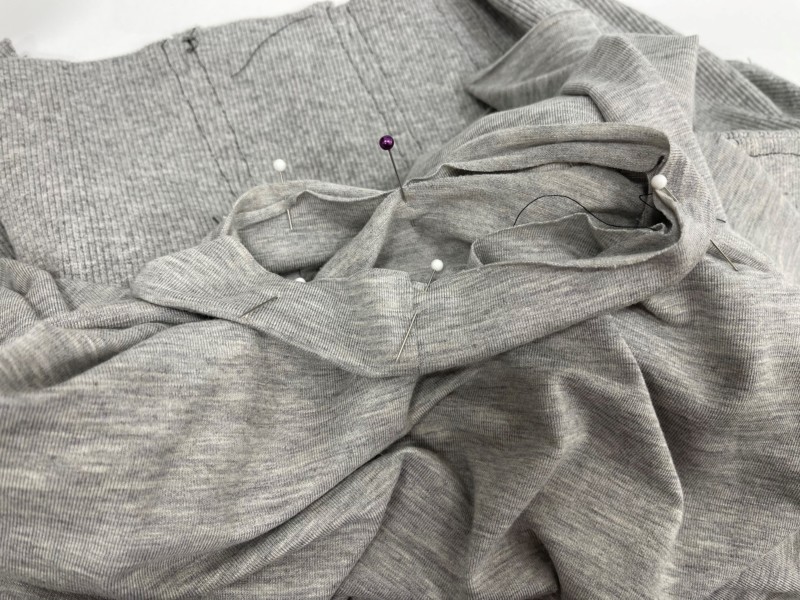
Take your back piece and pin the right side of the back to the lining at the side seam. Then stitch straight down.
Step 24
Using the burrito method, push the top in and place a pin at each princess seam. Stitch across, leaving the sides open.
Note: Double-check that the boning does not extend into the allotted 1/2″ hem allowance. If it does, you need to trim some off before you sew.
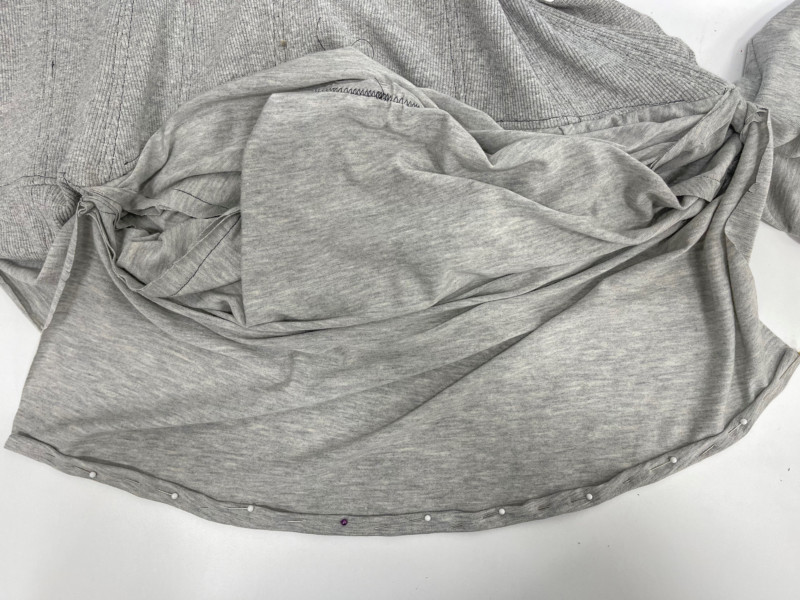
Step 25
Flip right side out and press the bottom nice and flat.
Step 26
Now, hem your sleeves using the same method you did for your back piece. If you want to, you can also keep the sleeve unhemmed and let the knit roll up to form a natural hem.
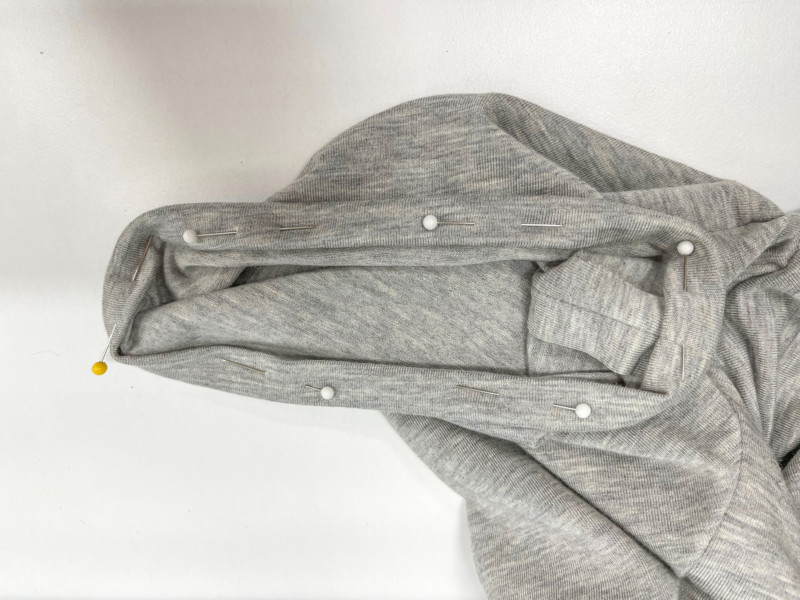
Step 27
With your top right side out, locate the seam allowance on the center back, on both the outer and lining. Turn the seam allowances inward, towards their wrong sides (between the two layers. The fold on the lining should now hug the edge of the boning at the center back. Use an invisible hand stitch to sew both folded edges together, enclosing each end of the bodice.
Step 28
Mark the placement of your grommets, and install them. If needed, use the instructions provided on your grommet tool kit.
This is absolutely gorgeous!
I adore corsets and this is so unusual and original. Thank you so much! I cannot wait to try this pattern
Hi, it seems like some of the instructions are missing. How do I finish the corset section? Your pattern doesn’t have any guide for the grommets, how the back is closed, etc.
Hello! Unfortunately, it looks like the instructions on this post cut off before it’s completed.
Regardless, I can’t wait to make this!
Hi, may someone from Mood confirm that the tutorial was completed, please? The instructions appear to be cut off. I’d like to replicate this.
Hi Chi! The instructions have been updated. 🙂
Like this pattern but instructions are very vague and difficult to follow…
Hi Divae, if you have any specific questions I am happy to help. 🙂
j’adore ce model, malheureusement il n’y a pas le tuto jusqu’au bout!
est-il possible d’obtenir le tuto complet?
Bonjour! Les instructions ont été mises à jour 🙂
How much boning should I purchase?
Hi Meghan, we’re sorry for the delay in responding to your question! We get dozens of comments and questions each day, and so many questions get buried and, unfortunately, unanswered. We are now focusing user support on patterns 2 years and newer. We hope this will prevent questions on our more current patterns from going unanswered. Although this is late, we wanted to respond in case anyone else has the same question: we recommend 2-3 yards of the Black Rigilene boning
1/4″ to 1/2″ wide Zip-Ties work as well, it’s what I’m using
This pattern is absolutely not for beginners!! The instructions are not clear and there is a mistake in the explanations!! Otherwise the pattern is right, I recommend taking a size smaller because it runs large. But if you know how to manage alone with just the pattern without any instructions you will succeed but otherwise don’t adventure in this you will have a catastrophic result, be careful!!
Hello!
Thank you for your feedback. Most of the instructions on our 350+ patterns, especially these older ones, do reflect their no-cost nature. But we understand your frustration!
Unfortunately we can’t update the instructions on every pattern in our archive, especially if they are over 2 years old, however, if there are errors we will correct them! We encourage you to take a look at the improved in newer patterns, offering more thorough guidance! We appreciate your engagement and invite you to explore these updated options for a better sewing experience!
Hi!
I’m having a little confusion when applying the recommended yards of fabric to the pattern. Curios to know if there had been any other recommendations for a cotton fabric?
SO pretty!