

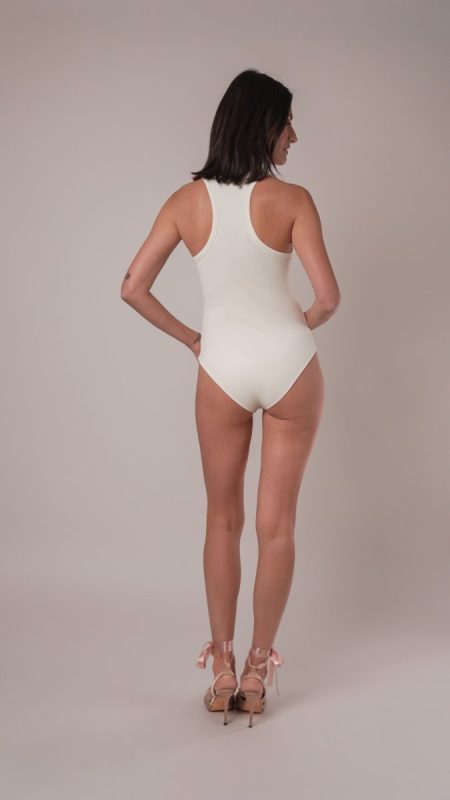
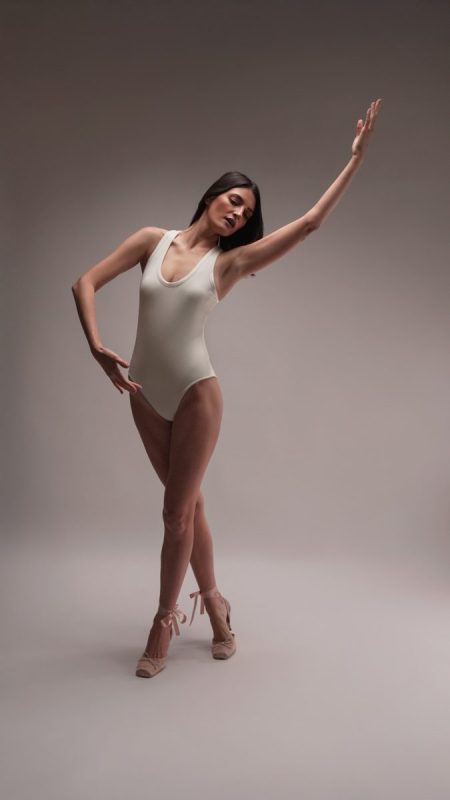
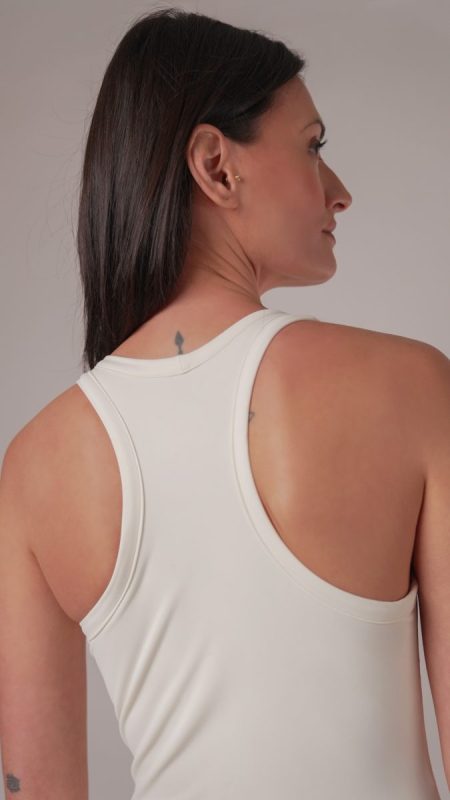
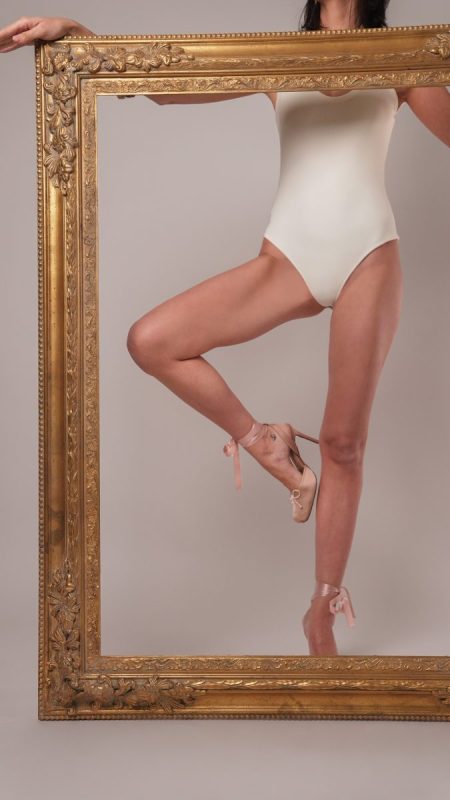
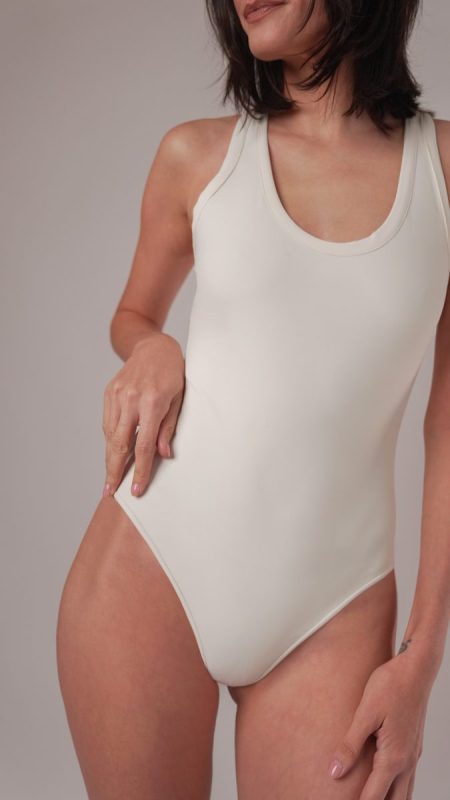
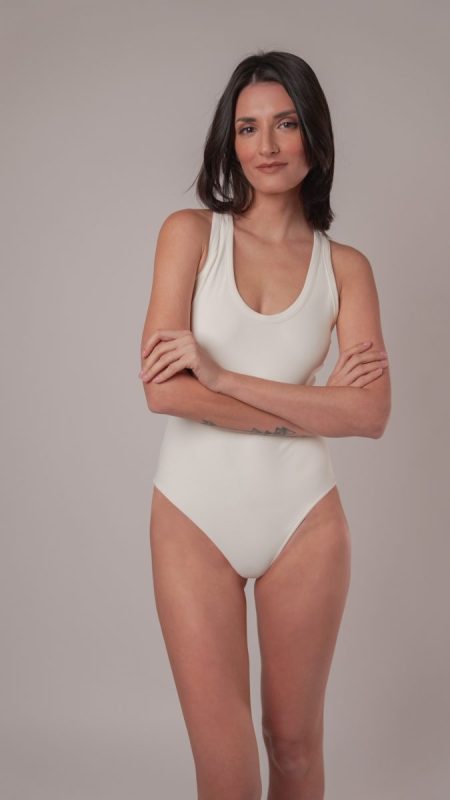
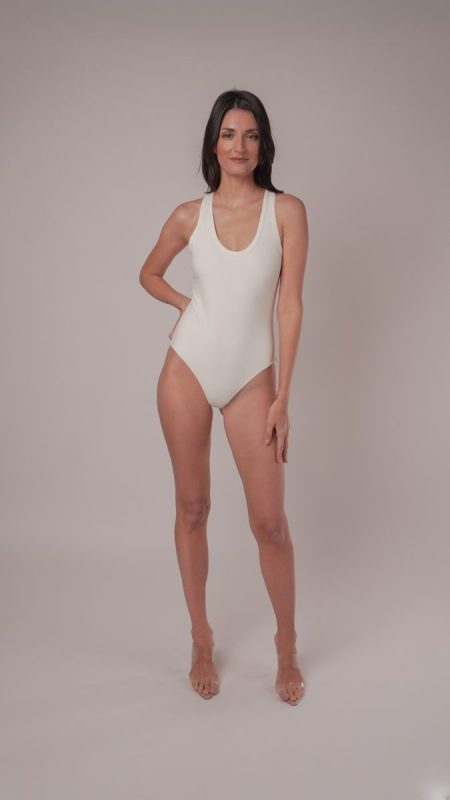
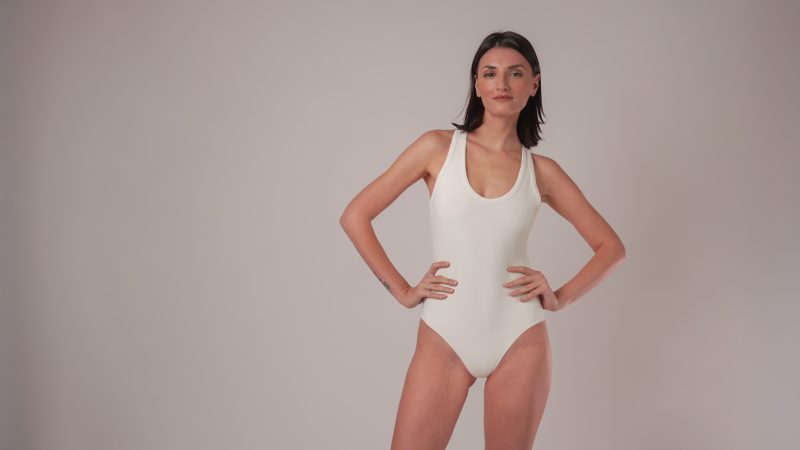
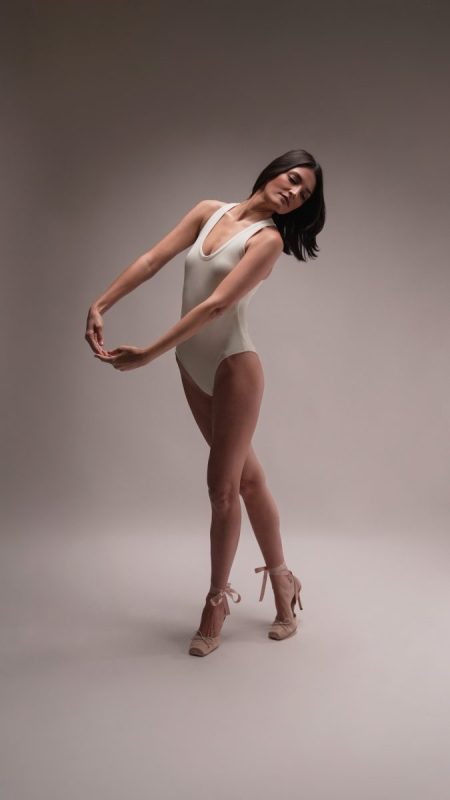
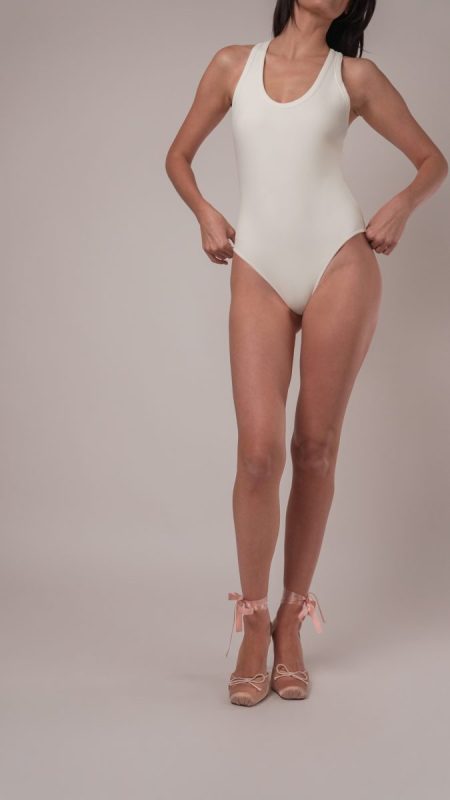
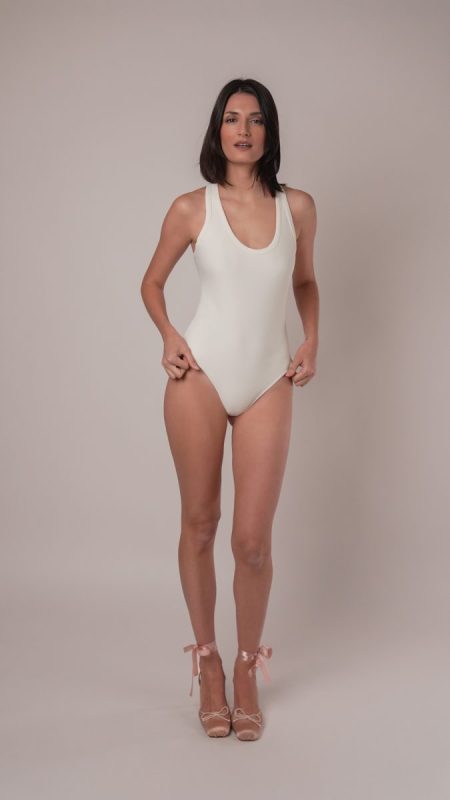
Meet the Clara Bodysuit, your new go-to foundation piece for days when comfort matters just as much as looking put together. Crafted from recycled tricot, this bodysuit skims the body with a soft, sculpting feel that stretches and rebounds with every step, reach, or twist of your day. Its clean lines and scoop neckline echo the simplicity of a classic ballerina leotard, making it a classic staple for fall layering.
But you don’t have to have a background in ballet to appreciate a wardrobe that keeps up with your schedule. Whether you are dashing out the door with a last minute Thanksgiving dessert or slipping out after dinner to get a head start on Black Friday deals, the Clara Bodysuit is the kind of piece you can reliably pull on without thinking.
For a full ballet inspired look, pair the Clara Bodysuit with the Adagio Wrap Top pattern. The combination gives you an added layer of warmth, subtle elegance, and the same flexible ease, wrapping you in a head to toe ballet core aesthetic that feels both intentional and entirely wearable.
Slip it on, layer it up, and let the Clara Bodysuit move with you through whatever your day brings.

Essential Materials & Sizing Guide for the Clara Bodysuit
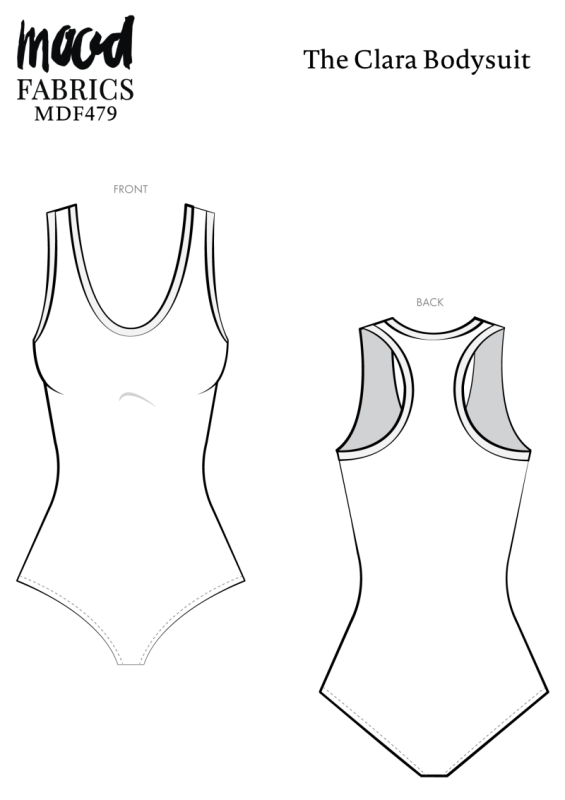
Continue reading for a breakdown of what knowledge and materials you need for creating your very own bodysuit! We’ve got you covered with the recommended materials we used—if you want to follow along exactly—as well as a curated list of alternative fabric type recommendations if you want to customize your own version. The Clara Bodysuit free sewing pattern download includes technical drawings for seam and bodysuit visibility, plus a size chart to help you find your perfect fit!
Purchase Products Used Below:
Quantities indicated are for sewing a size small bodysuit. Toggle the ‘SHOP THIS LOOK’ box to find quantity estimates for other sizes.
- 1.5 yards of Recycled Swimwear Tricot, UV Protective – Ivory – Santorini Plus Collection
- 1 each of Dritz Sew-On Snaps – Nickel – Size 2/0, 10 Sets
- 1 each of Gutermann Sew All Thread 500m – 800 Champagne
- MDF478 – The Clara Bodysuit Sewing Pattern (Free download below!)
Alternative Fabric Type Recommendations:
The Clara Bodysuit sewing pattern is best suited for light or medium weight stretch/knit fashion fabrics. Explore other fabric types or colors from our featured collections for your bodysuit with the links below.
Download Your Free Sewing Pattern
Submit your name and email in the form below to receive the download link for the Clara Bodysuit free sewing pattern directly in your inbox. Mood Sewciety Patterns will send your free download link via email with the subject line: ‘Your Free Download from Mood Sewciety – The Clara Bodysuit’ (in PDF format for A4 and letter-size printing).
© MoodFabrics.com / MoodSewciety.com – Mass production, resale, or distribution of this pattern in any form is strictly prohibited.
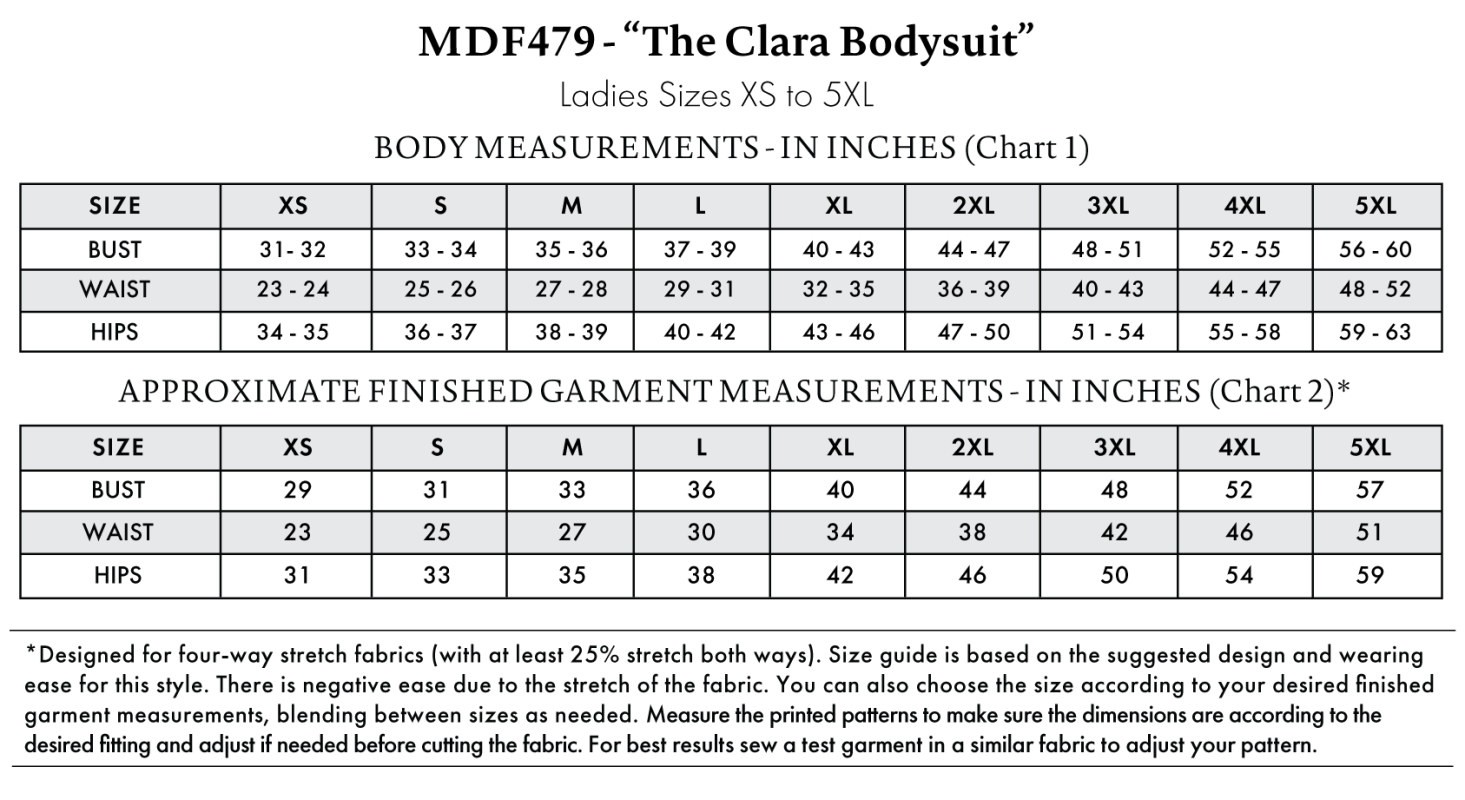
Find Your Perfect Fit
The Clara Bodysuit Sizing Guide is based on the suggested design & wearing ease for this style. You can also choose the size according to your desired finished garment measurements, blending between sizes as needed. Measure the printed patterns to make sure the dimensions are according to the desired fitting and adjust if needed before cutting the fabric. For best results, sew a test garment in a similar fabric to adjust your pattern.
*Designed for four-way stretch fabrics (with at least 25% stretch both ways). Size guide is based on the suggested design and wearing ease for this style. There is negative ease due to the stretch of the fabric. You can also choose the size according to your desired finished garment measurements, blending between sizes as needed. Measure the printed patterns to make sure the dimensions are according to the desired fitting and adjust if needed before cutting the fabric. For best results sew a test garment in a similar fabric to adjust your pattern.
Note: Measurements may vary after adjustments. If using non-stretch fabrics, reference the approximate finished garment measurements chart to choose your size.
Note: Always read all the instructions before cutting the fabric!
How to Sew The Clara Bodysuit
The instructions provided below are designed to guide you through sewing the Clara Bodysuit from start to finish.
3 Tips for Sewing with Tricot
⇒ There are multiple stitches you can choose from to sew stretch fabric like this. Some options are a zigzag stitch, a straight stretch stitch, or a regular straight stitch with a 1.5 millimeter stitch length. If you have a serger, you’re also welcome to construct the bodysuit with that!
⇒Use more pins than you think you need to if you want to prevent the fabric from shifting and stretching under the presserfoot.
⇒ Stretch fabric is harder to seam rip than woven fabric. If you’re not sure about a stitch, maybe double or triple check before sewing to avoid potentially punching a hole in the fabric with the seam ripper.
Pattern Pieces & Fabric Cuts Needed
- (A) FRONT
- FABRIC – CUT 2 ON FOLD
- (B) BACK
- FABRIC – CUT 2 ON FOLD
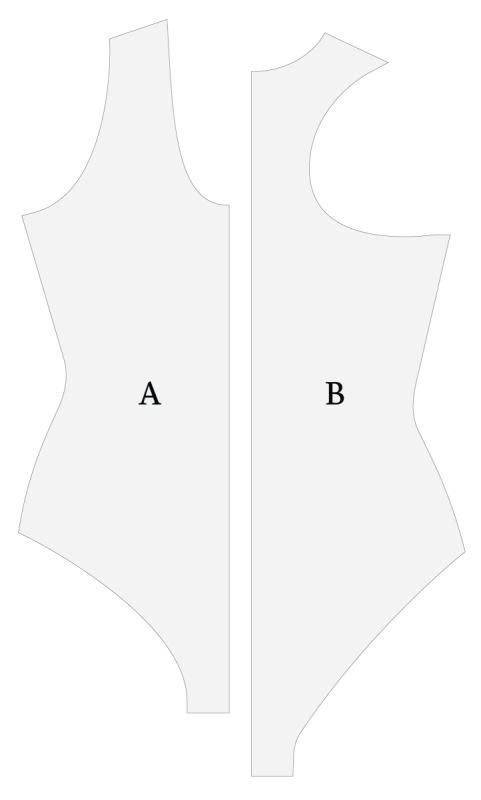
Sew with a 1/2″ seam allowance for all seams unless otherwise specified.
Step 1
CONSTRUCT LAYERS
- Place the front and back bodysuit pieces right sides together with the shoulders and sides lined up.
- Pin and sew the shoulders and side seams for both the lining layer and the outer layer (note: a lining is not entirely necessary if your fabric is opaque or if you don’t mind your bodysuit being a bit sheer).
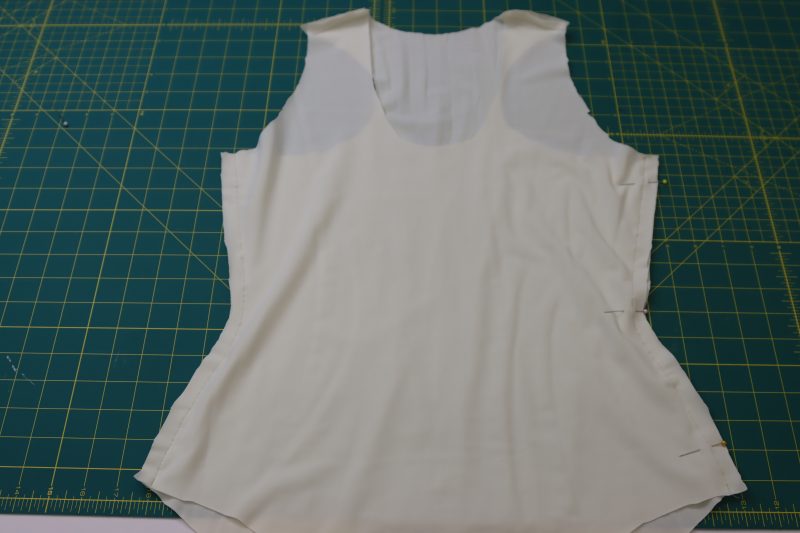
Step 2
CONNECT LAYERS
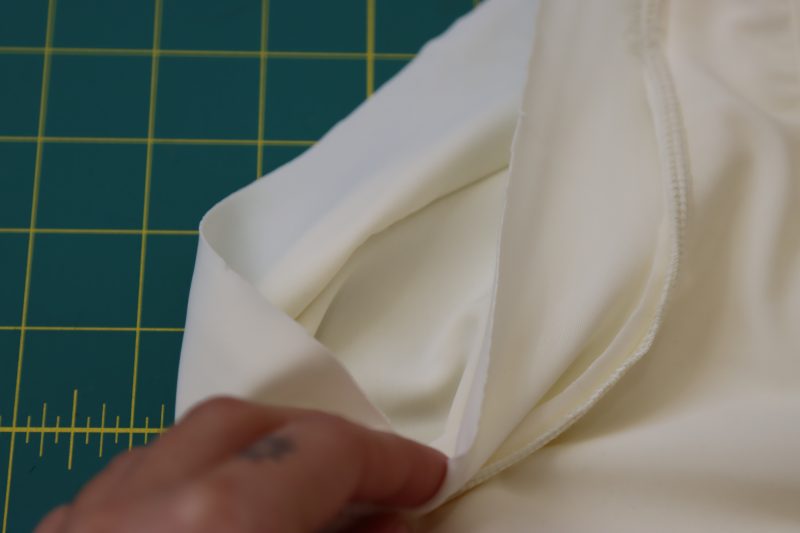
- Place the lining bodysuit inside of the outer bodysuit, wrong sides together.
- Pin the necklines and armholes of the lining layer to the outer layer.
- Sew the necklines and armholes together using a zigzag stitch with a ¼ inch seam allowance (alternately, you can use a straight stitch with a very short stitch length to connect the two layers).
- DO NOT connect the leg holes yet.
Step 3
LEG HOLES
- Reach between the lining layer and the outer layer of the bodysuit and grab one of the legholes at the side seam.
- Orient the fabric so that the side seams are pinched right sides together between your fingers.
- Place a pin to hold the side seam right sides together at that spot.
- Pin the rest of that leghole right sides together.
- Carefully sew that leghole right sides together, twisting and pulling the fabric to access the entire opening.
- Flip that leg hole right sides out.
- Repeat the above steps for the other side of the leg hole (note: make sure that you don’t close off the crotch seam. You want to leave it unfinished so that you can turn the bodysuit out through it.
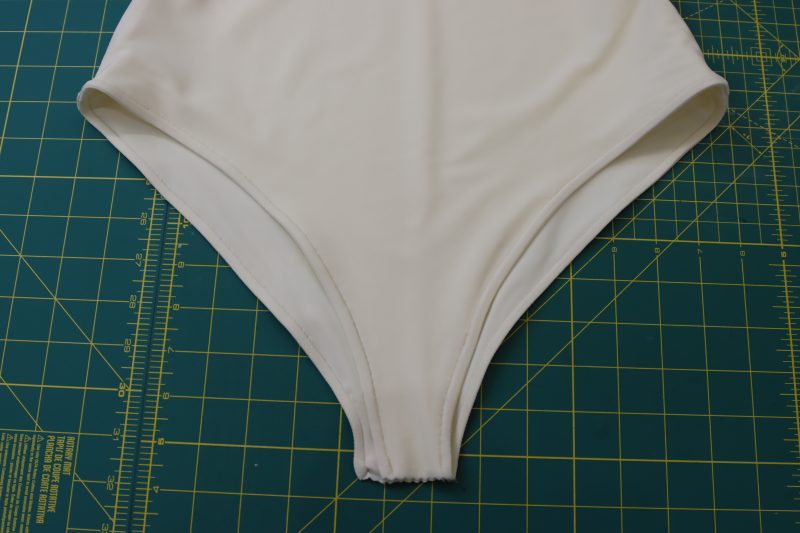
- Once both legholes are finished, topstitch over both of them with a ¼ inch seam allowance.
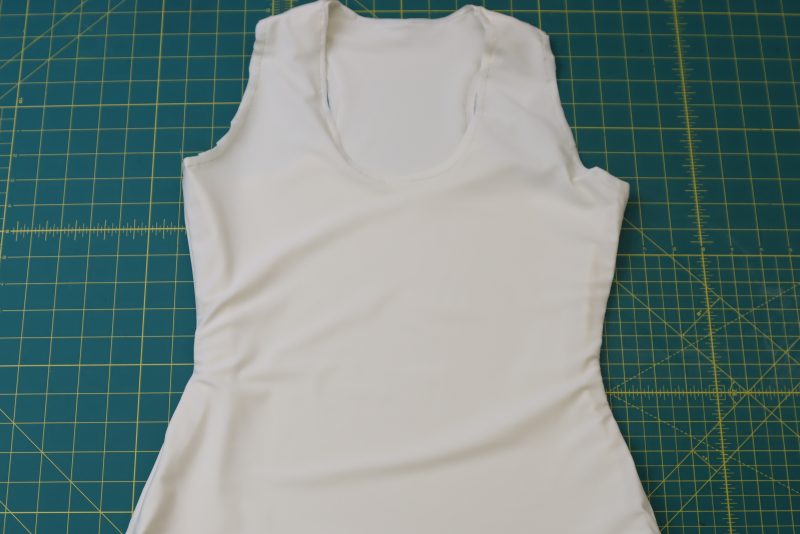
Step 4
BINDING
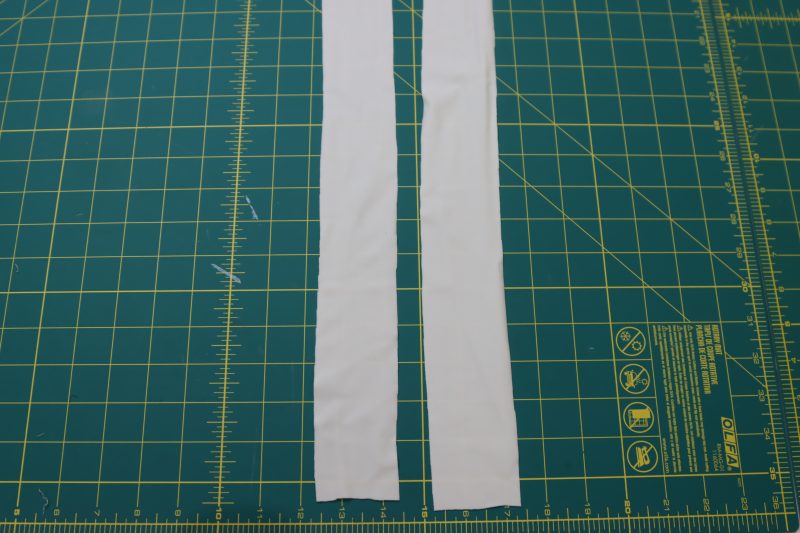
- Cut strips of 2 inch wide fabric on the bias that are 1 inch shorter than the openings for the armholes and necklines.
- Sew or serge each strip into a closed loop (like a headband, not like a tunnel).
- Pin each closed loop to the neckline and arm holes of the bodysuit with the right side of the loop touching the wrong side of the bodysuit. Sew with ½ inch seam allowance.
- Flip the binding to the right side of the fabric and fold it over itself so that the raw edge of the binding is tucked inside of itself.
- Pin the folding binding to the right side of the bodysuit.
- Topstitch the binding to the right side of the bodysuit with ⅛ inch seam allowance.
- Repeat these steps for both armholes and the neckline.
Step 5
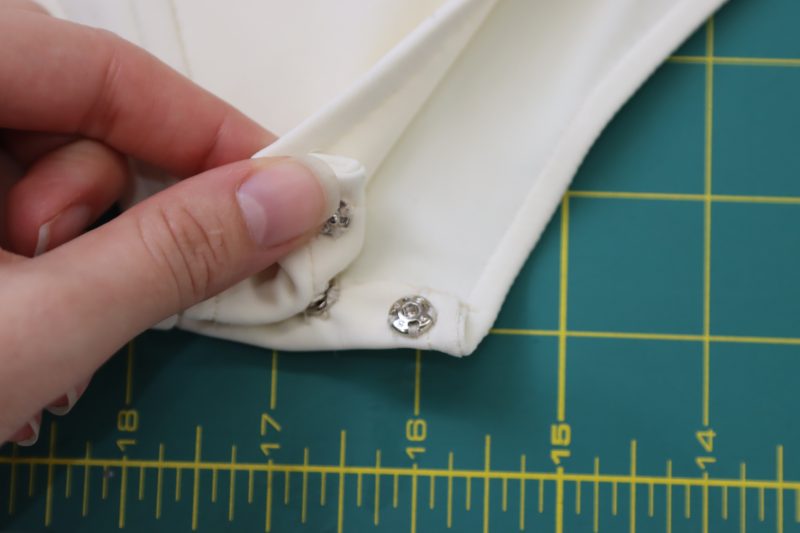
SNAP CLOSURE
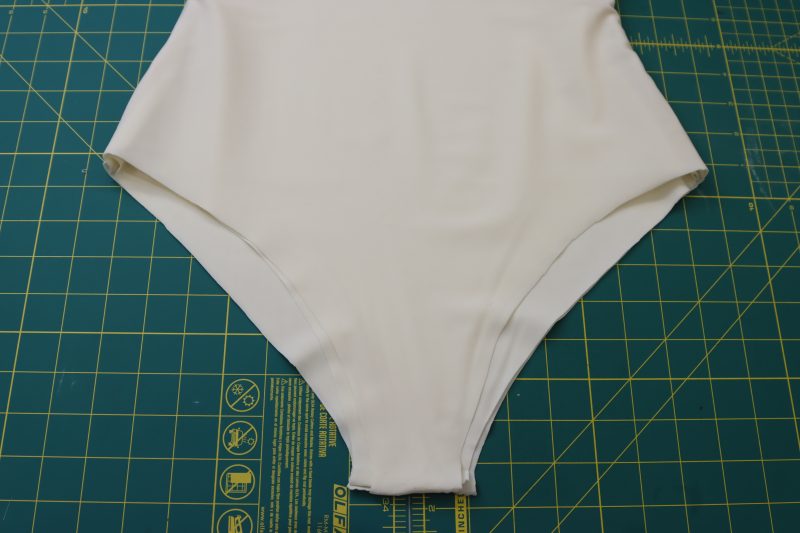
- Fold the raw edges of the crotch seam in towards the wrong side of the bodysuit.
- Sew the raw edges of the crotch seam to create a placket for the snaps to be sewn into.
- Hand sew the socket ends of 3 snaps into the wrong side of the back crotch opening.
- Hand sew the stud ends of the snaps into the right side of the front crotch opening.
Sewing Success: The Completed Clara Bodysuit
Share this post with a friend (or two!), download the Clara Bodysuit free sewing pattern, and show us which fabrics and colors you choose, using the hashtags #MoodClaraPattern & #MadeWithMood—and don’t forget to tag us @MoodFabrics, too.

Free Sewing Pattern Inspiration for Your Next Project
With 470+ free sewing patterns and counting, your opportunities for sewing with Mood are endless!
We hope you had as much fun sewing this bodysuit pattern as we did! As always, we want to hear from you—share your thoughts and comments below and let us know where you’ll be wearing the Clara Bodysuit free sewing pattern!
I am so anxious to make this for my daughter
I thank you much for this free pattern.
I’ve been looking for this for a long time, as I have very wide hips and a large butt, and store brands don’t fit me. I only have two questions: 1. How could I add sleeves? 2. Where should I cut to add snaps at the crotch? I hope you can help me. Thank you.
To add sleeves, you could steal the sleeve pattern from the Avens Bodysuit. It should fit nicely with this one. For the snaps at the crotch, I didn’t cut anything from the crotch length, I just folded the fabric in by 1/2 inch. However, if you feel like the crotch length is too long and you’re getting a wedgie, you can always trim the crotch length to your desired fit.
Hi, what height is pattern draughted for? Thanks
Hi,
The model is 5’10”. You can adjust the length according to your own measurements if needed.
How do you know how big to print the pattern
Hey Jacqui, you just have to scale the pattern to fit the printable area of an 8.5 x 11 piece of printer paper.
Can you stitch up a pattern in a full size sheet ?
Hey Adriana! Yes you can absolutely us recycled fabric like bedsheets or tablecloths to make your clothes. I do it all the time. However, I wouldn’t recommend making this pattern in particular with a bedsheet unless it is stretchy fabric, because this bodysuit kind of needs to be stretchy.
I’m wanting to create this but instead of snaps at the bottom I want to create/add a zipper on the front top half of the bodysuit, how do u suggest I go about doing that?
Hi Maria
Wow, that sounds really interesting, having a front zipper!
What you need to do is trim 3/8″ off the crotch on each piece and simply sew them together to create a seam there instead of using snaps.
Then, for the zipper, add 1/2″ of seam allowance to the center front line of the pattern and cut two mirrored pieces instead of one on the fold. Sew the zipper first by joining those two front pieces, then attach them to the back piece and finish the garment.
Happy Sewing!