

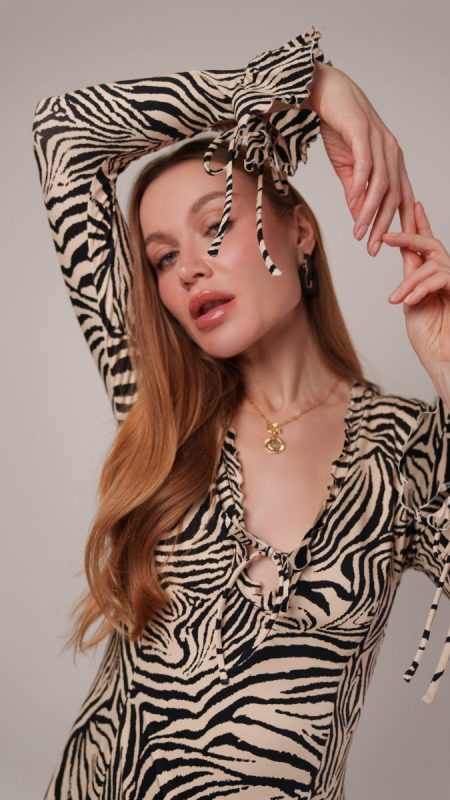
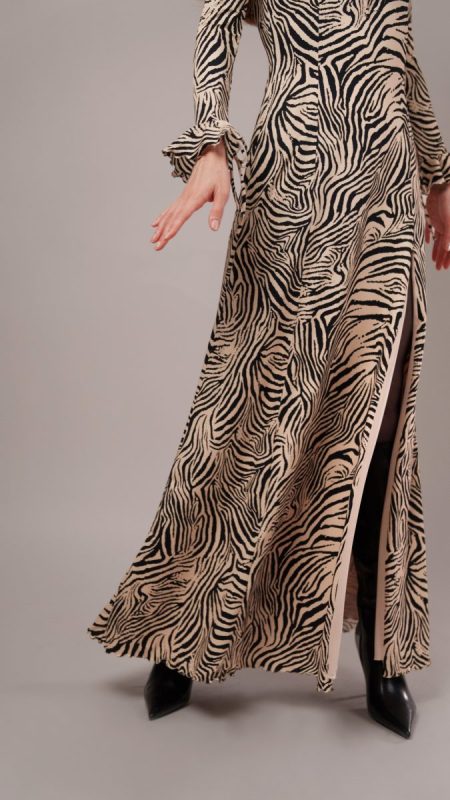
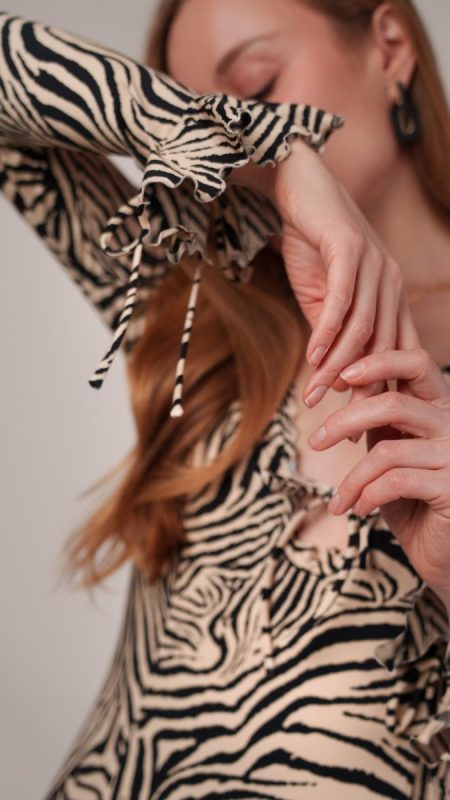
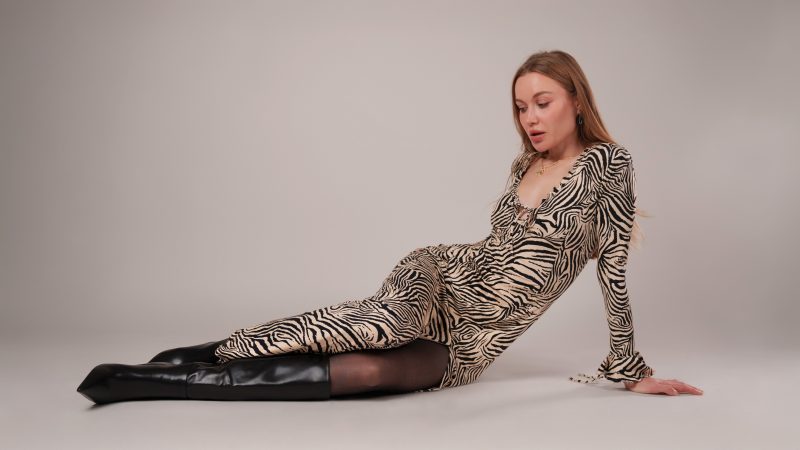
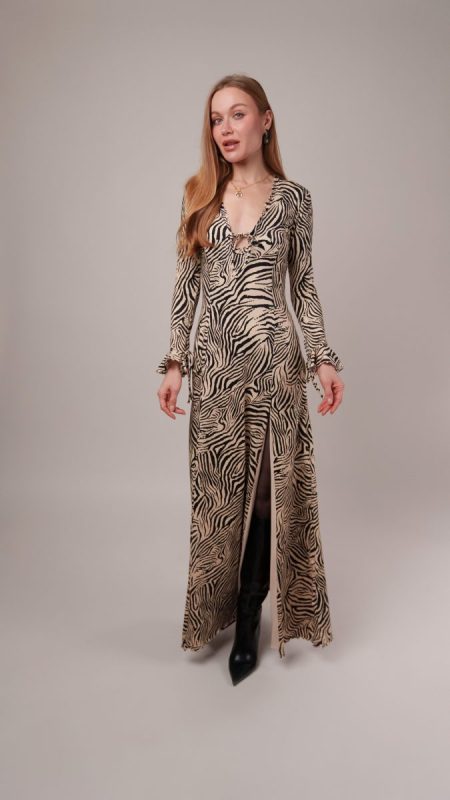
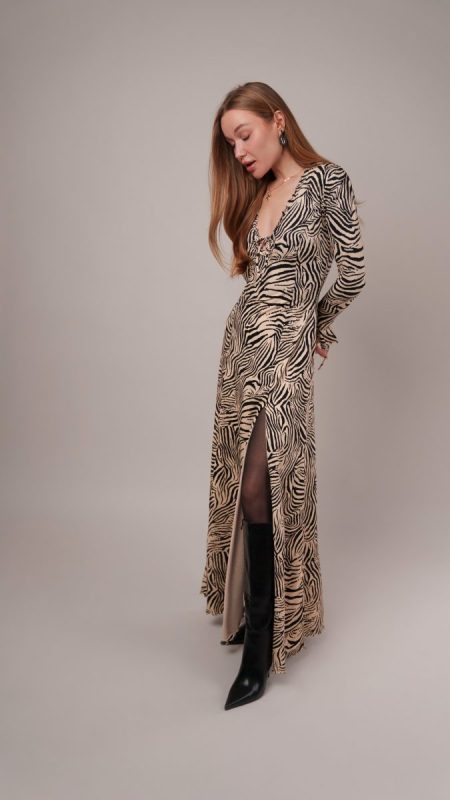
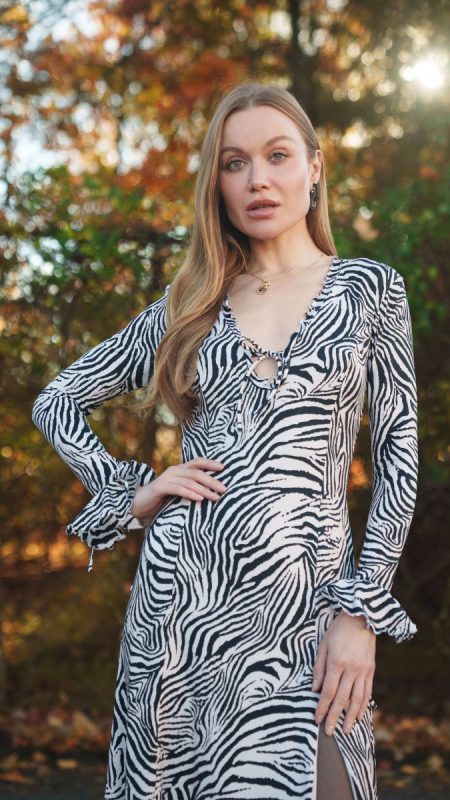
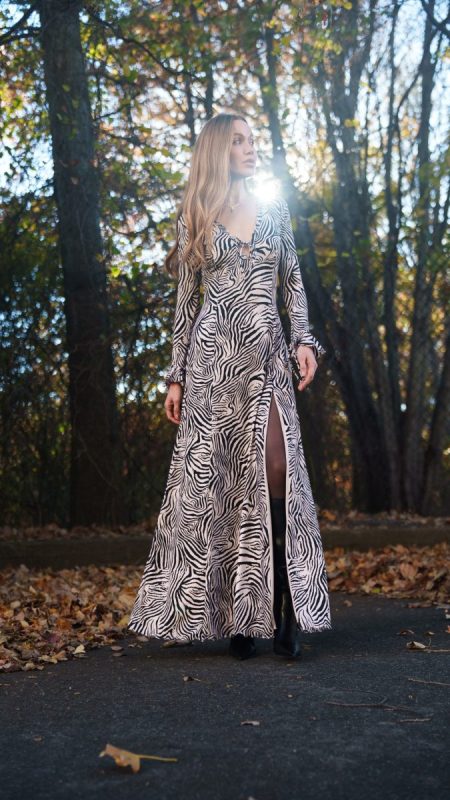
The Soho Maxi Slip Dress captures the spirit of an evening in motion, where the city hums and every streetlight feels like part of the adventure. This dress is made for the moments that start with dinner and laughter and somehow turn into dancing long after midnight. Crafted from a stretch nylon interlock knit in a striking zebra print, it moves fluidly with you, hugging and draping in all the right places. Inside, a soft and slinky crepe knit lining keeps the fit smooth and comfortable against the skin, giving this staple slip dress a luxurious feel.
Lettuce leaf ruffles frame the neckline, the sleeve cuffs, and the hem, giving the entire silhouette a soft flutter that trails you as you move. The plunging neckline gathers with a flirty bow that adds a playful touch, echoed at the wrists where matching ties bring the look together. The floor length skirt offers a graceful sweep with an optional front slit that allows you to decide how dramatic and romantic your dress will feel.
This is an intermediate pattern, since stretch knit can take a bit of patience and practice, but the design itself is forgiving and straightforward. It is an excellent choice for a beginner who wants to grow their skills while creating something that looks polished and ready for a night out. The Soho Maxi Slip Dress is proof that sewing your own wardrobe does not have to mean sacrificing glamour or comfort.
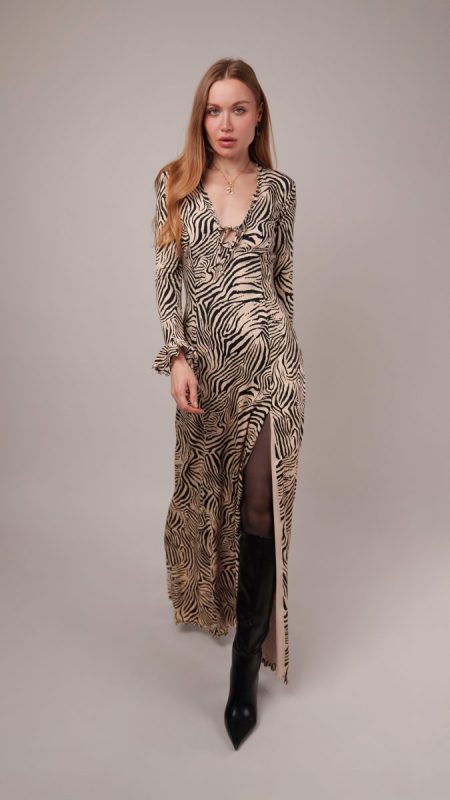
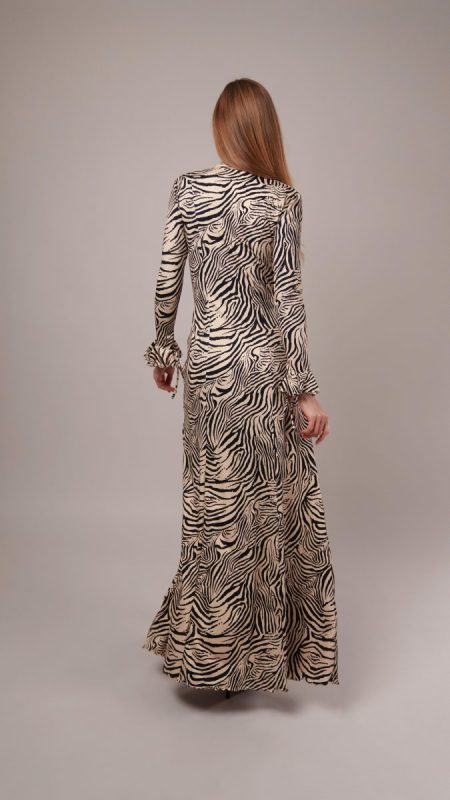
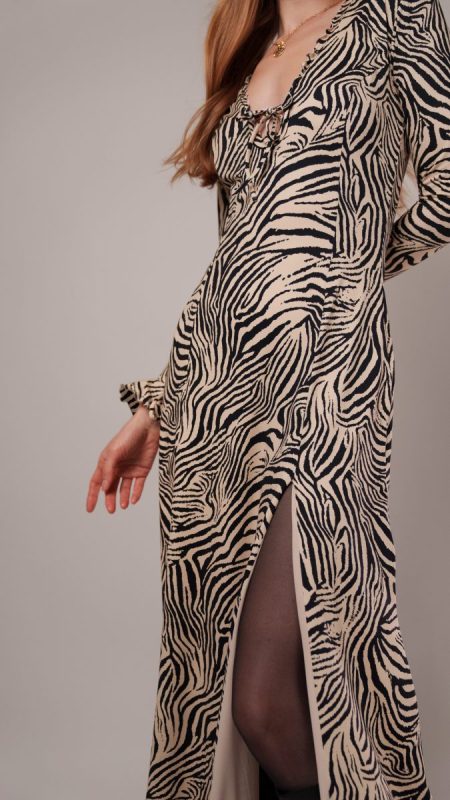
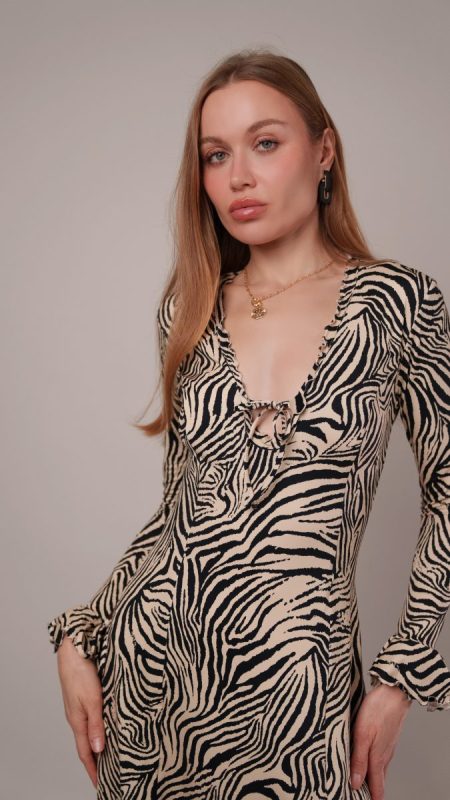
Essential Materials & Sizing Guide for the Soho Maxi Slip Dress
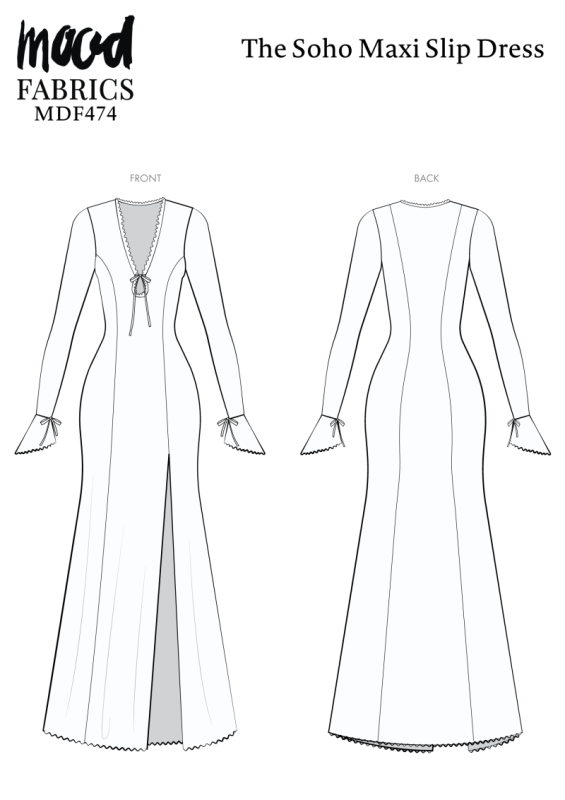
Continue reading for a breakdown of what knowledge and materials you need for creating your very own maxi slip dress! We’ve got you covered with the recommended materials we used—if you want to follow along exactly—as well as a curated list of alternative fabric type recommendations if you want to customize your own version. The Soho Maxi Slip Dress free sewing pattern download includes technical drawings for seam and silhouette visibility, plus a size chart to help you find your perfect fit!
Purchase Products Used Below:
Quantities indicated are for sewing a size small maxi slip dress. Toggle the ‘SHOP THIS LOOK’ box to find quantity estimates for other sizes.
- 4 yards of Stretch Nylon Interlock Knit – Beige and Black Zebra Stripes
- 4 yards of Stretch Polyester Crepe Knit – Nude – Arabesque Collection
- 1 each of Gutermann Sew All Thread 250m – 503 Khaki
- 4 each of Maxi-Lock Serger Thread 3000yds – Mother Goose
- MDF474 – Soho Maxi Slip Dress Sewing Pattern (Free download below!)
Additional Products Used:
Alternative Fabric Type Recommendations:
The Soho Maxi Slip Dress sewing pattern is best suited for light or medium weight stretch knit fashion fabrics. Explore other fabric types or colors from our featured collections for your maxi slip dress with the links below.
Download Your Free Sewing Pattern
Submit your name and email in the form below to receive the download link for the Soho Maxi Slip Dress free sewing pattern directly in your inbox. Mood Sewciety Patterns will send your free download link via email with the subject line: ‘Your Free Download from Mood Sewciety – The Soho Maxi Slip Dress’ (in PDF format for A4 and letter-size printing).
© MoodFabrics.com / MoodSewciety.com – Mass production, resale, or distribution of this pattern in any form is strictly prohibited.
Find Your Perfect Fit
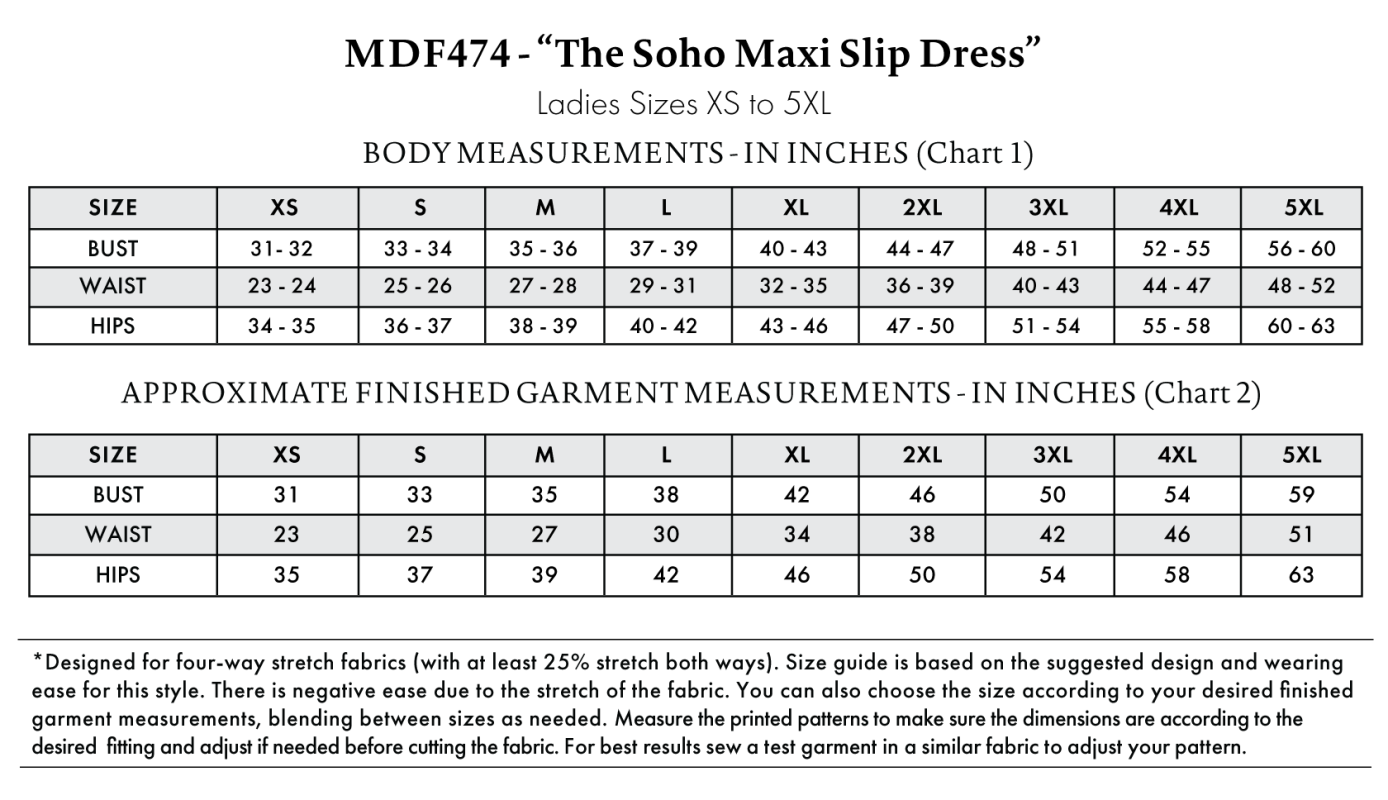
The Soho Maxi Slip Dress Sizing Guide is based on the suggested design & wearing ease for this style*. You can also choose the size according to your desired finished garment measurements, blending between sizes as needed. Measure the printed patterns to make sure the dimensions are according to the desired fitting and adjust if needed before cutting the fabric. For best results, sew a test garment in a similar fabric to adjust your pattern.
*Designed for four-way stretch fabrics (with at least 25% stretch both ways).
Note: Always read all the instructions before cutting the fabric!
How to Sew The Soho Maxi Slip Dress
The instructions provided below are designed to guide you through sewing the Soho Maxi Slip Dress from start to finish.

3 Tips for Sewing with Stretch Nylon
⇒ This dress should be able to stretch in pretty much every direction. With that in mind, make sure you’re securing your seams with a stitch that can stretch. This means you can use a straight stretch stitch (if your machine has one), a serger, or even a zigzag stitch with a short stitch length.
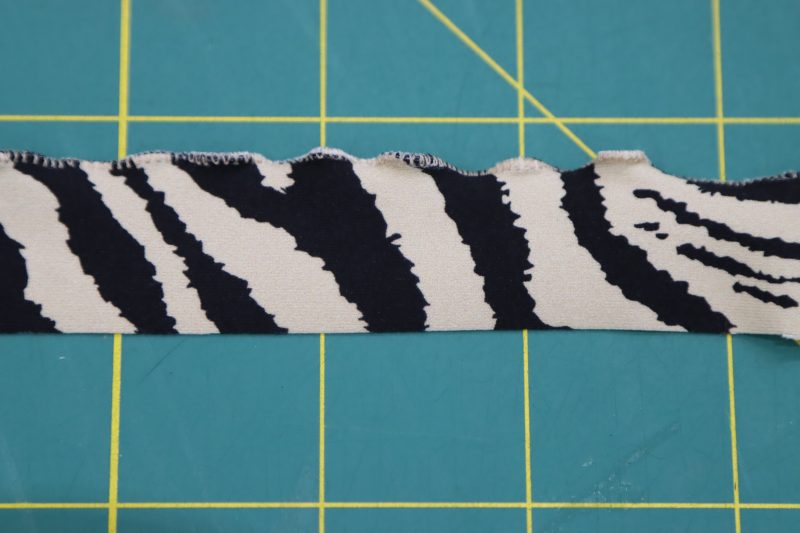
⇒ For the lettuce leaf hems, you’ll want to sew a zigzag stitch with a very short stitch length over the very edge of the hems that you want to be ruffled. Also, make sure that you really stretch the fabric as it’s going under the presser foot to make the hem extra ruffled.
⇒ If you’re using a serger to attach your seams, make sure that the seam allowance is still ½ inch throughout the dress. This means that if the serge stitch is ¼ inch wide, you would chop off ¼ inch with the blade of the serger while connecting the seams.
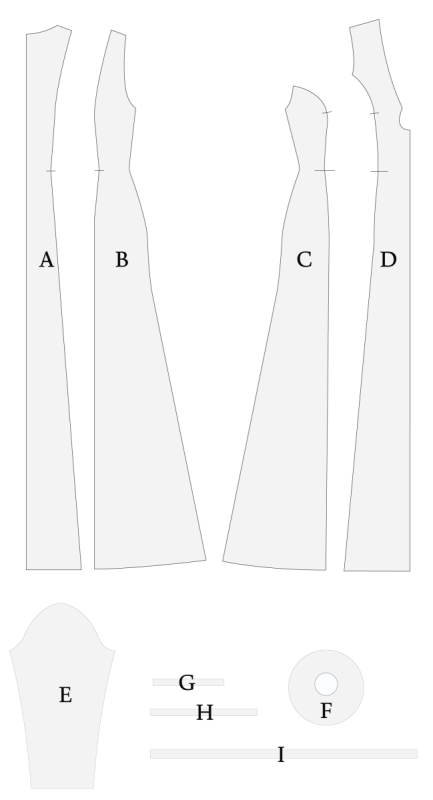
Pattern Pieces & Fabric Cuts Needed
- (A) BACK CENTER
- FABRIC – CUT 1 ON FOLD
- LINING – CUT 1 ON FOLD
- (B) BACK SIDE
- FABRIC – CUT 2 MIRRORED
- LINING – CUT 2 MIRRORED
- (C) FRONT SIDE
- FABRIC – CUT 2 MIRRORED
- LINING – CUT 2 MIRRORED
- (D) FRONT CENTER
- FABRIC – CUT 1 ON FOLD
- LINING – CUT 1 ON FOLD
- (E) SLEEVES
- FABRIC – CUT 2 MIRRORED
- (F) SLEEVE RUFFLE
- FABRIC – CUT 2 MIRRORED
- (G) SLEEVE TIES
- FABRIC – CUT 4
- (H) FRONT NECKLINE TIES
- FABRIC – CUT 2
- (I) NECKLINE RUFFLES
- FABRIC – CUT 1
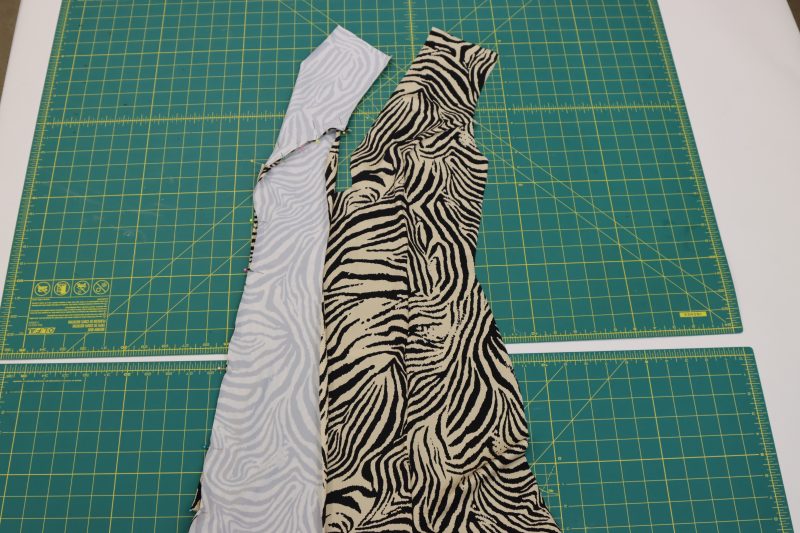
Sew with a 1/2″ seam allowance for all seams unless otherwise specified.
Step 1
FRONT SEAMS
- Lay the front side pieces right sides together with the front center piece.
- Pin the two curved edges of the front side and front center pieces together.
- Serge the front sides to the front center piece along the princess seams, being sure NOT to sew over the section of fabric that is meant to be left open for the slit.
- Repeat this step for both the main fabric pieces and the lining pieces.
- Make sure that the slit of the lining piece is on the opposite side of the garment as the slit on the main fabric, since they will be facing each other wrong sides together.
Step 2
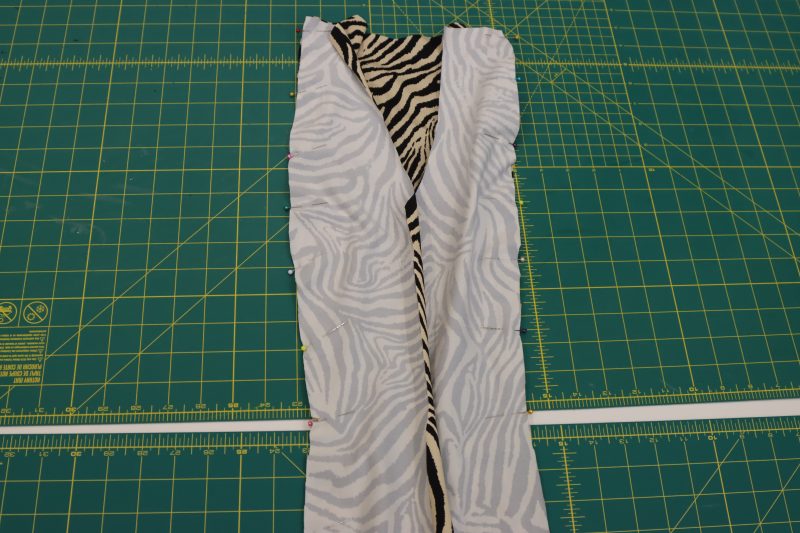
BACK SEAMS
- Lay the back side pieces right sides together with the back center piece.
- Pin the curved edges of the back side pieces to the sides of the back center piece.
- Serge the curved seams on the back pieces.
- Repeat these steps for both the main fabric and the lining fabric.
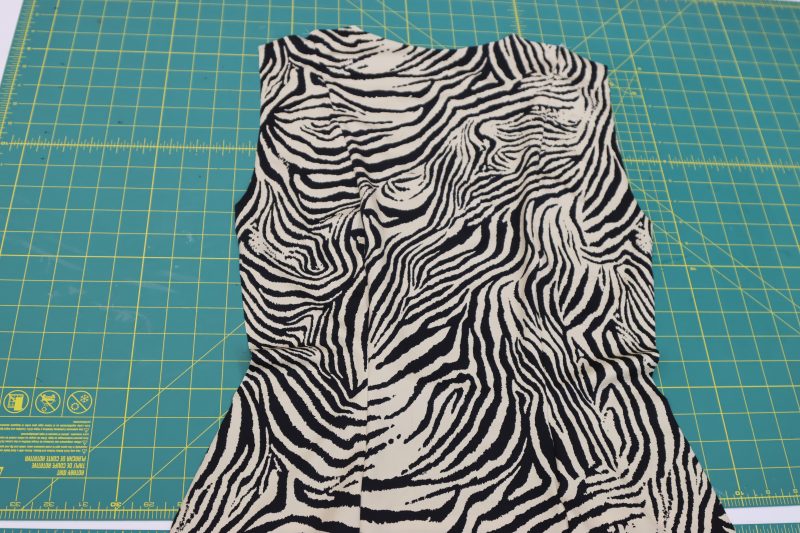
Step 3
SHOULDER SEAMS
- Lay the front dress piece on top of the back dress piece, right sides together.
- Pin the front and back dress pieces together along the shoulder seams.
- Serge the shoulder seams together.
- Repeat these steps for both the lining and the main fabric.
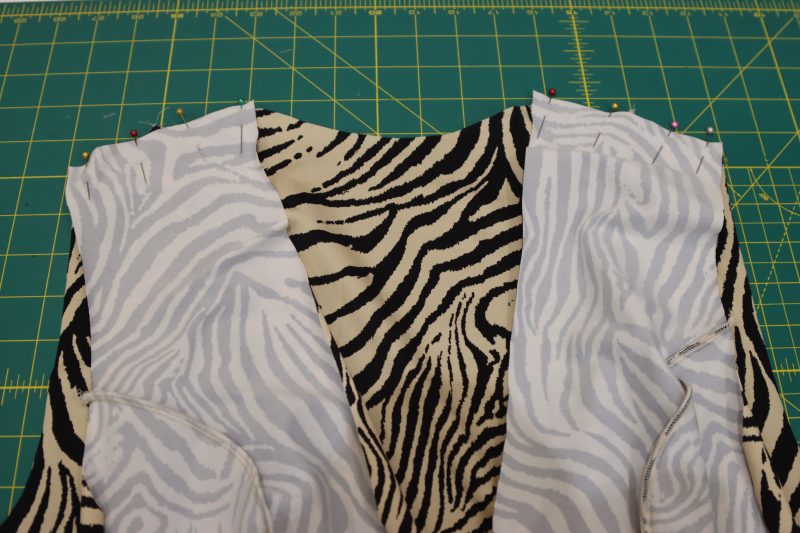
Step 4
SIDE SEAMS
- Pin the side seams of the front and back pieces of the dress together.
- Serge the dress together at both side seams, leaving the arm holes open.
- Repeat these steps for both the lining and the main fabric.
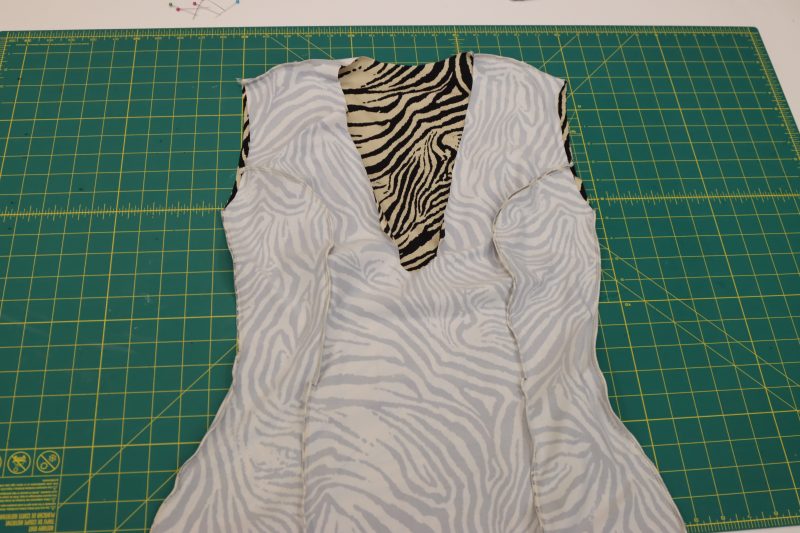
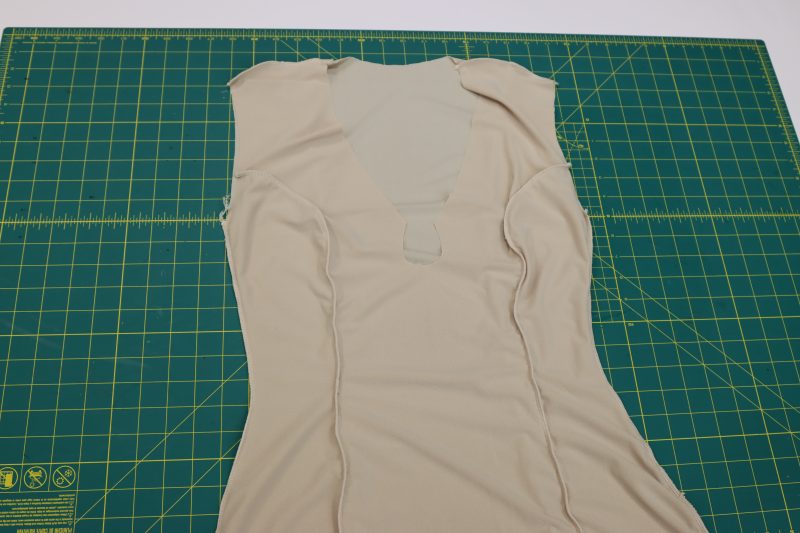
Step 5
NECKLINE RUFFLE
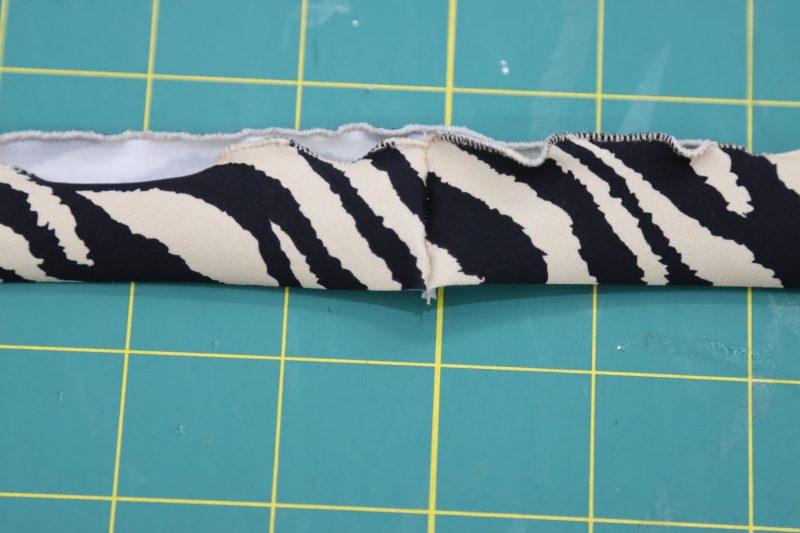
- Sew a zigzag stitch with a stitch width of 4 millimeters and a stitch length of 0.5 millimeters along the edge of the neckline ruffle, being sure to stretch the strip of fabric as far as it can be stretched while you’re sewing over the edge of it.
- Serge the two open ends of the strip right sides together to sew a closed loop.
Step 6
TIES
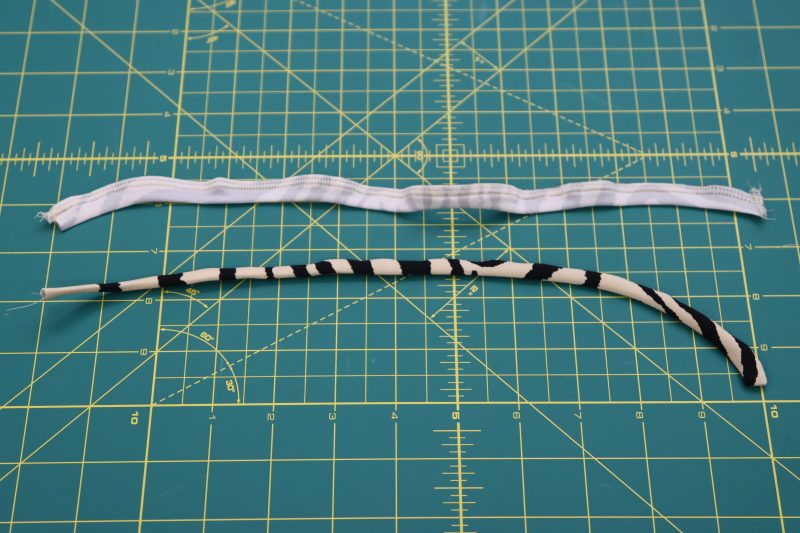
- Fold the neck and wrist ties longways, right sides together.
- Serge the open edge of the ties to create a long skinny tube.
- Invert the tube so that it is right side out and the serged edge is hidden on the inside of the tube.
- Repeat these steps so that you have 6 ties in total (2 for the neckline and 2 for each wrist).
Step 7
NECKLINE CLOSURE
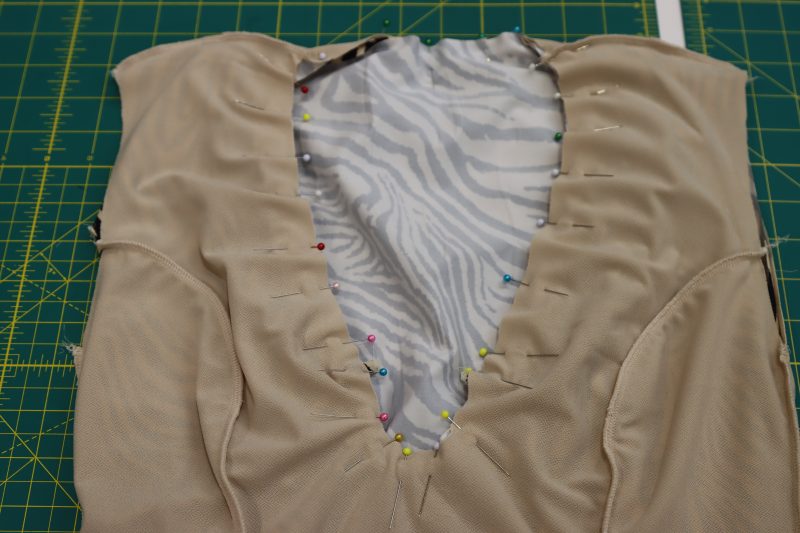
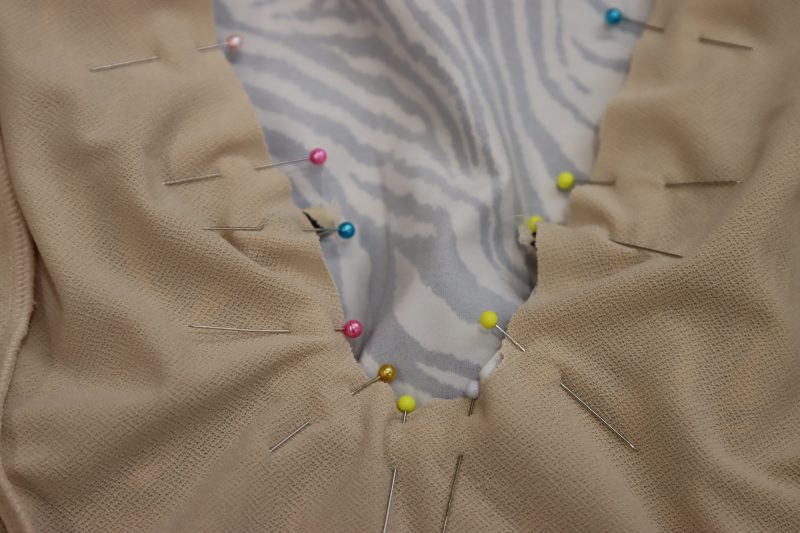
- Place the main fabric dress inside of the lining dress so that they are right sides together.
- Sandwich the neckline ruffle between the main fabric and the lining fabric around the neckline, making sure the neckline ruffle and main fabric are facing right sides together.
- Pin around the entire neckline to connect the lining, main fabric, and ruffle all together.
- Place the neckline ties in between the lining fabric and the neckline ruffle at the pointed corners of the plunge neckline with the length of the ties sandwiched inside of the dress so that the ties will be sticking out of the dress once it is turned right sides out.
- Serge around the entire edge of the neckline, removing the pins as you go.
Step 8
SLEEVES
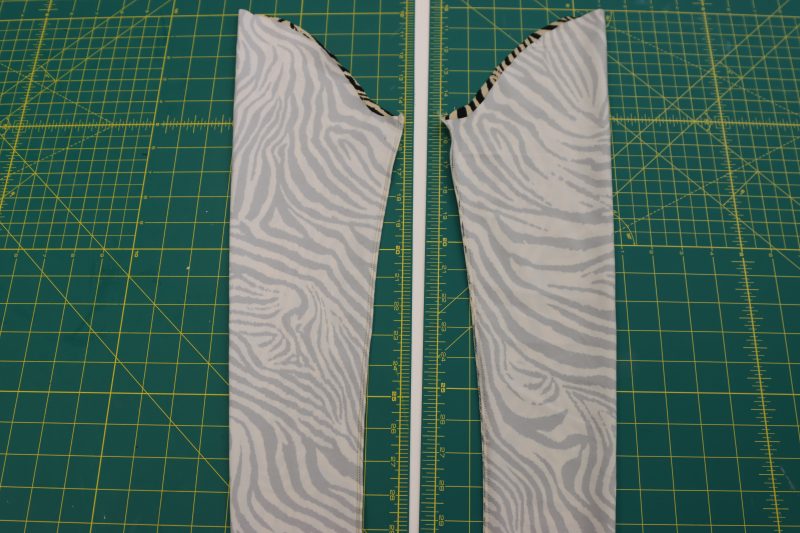
- Fold the sleeves right sides together with the straight edges lined up with one another (Note: The sleeves are only made of the main fabric, there is no lining in the sleeves).
- Pin the sleeve seams together.
- Serge the sleeve seams, making sure to leave a 4 inch gap at the wrist of the sleeve to leave room for the wrist ties and slit opening.
Step 9
SLEEVE RUFFLES
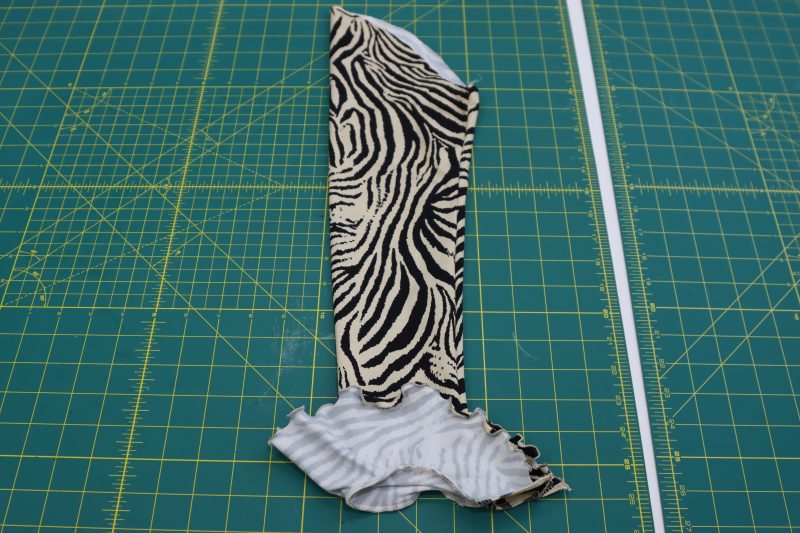
- Using the same technique as in step 3, ruffle the outer edge of the sleeve cuffs with a zigzag stitch.
- Pin the inner edge of the sleeve cuff to the wrist of the sleeve, making sure to line up the open edges of the cuff and the wrist.
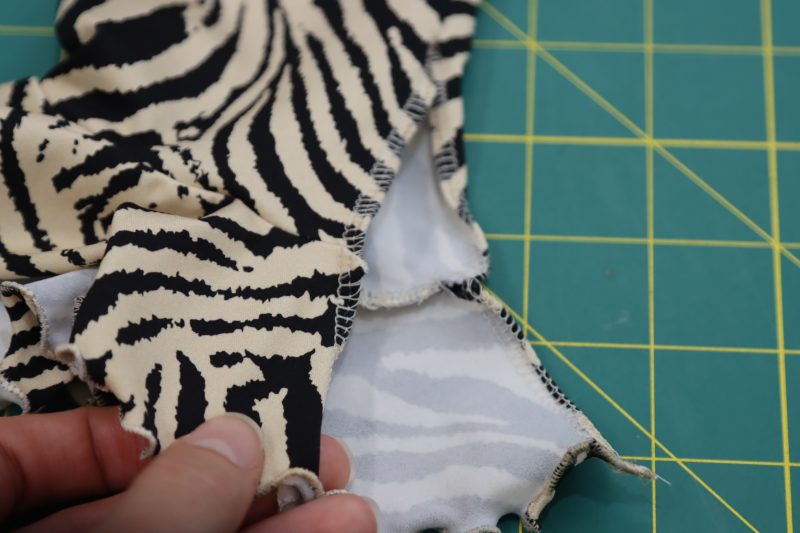
- Serge the ruffled cuff to the end of the sleeve, leaving the opening for the ties later on.
- Serge the slit opening of the sleeve to finish the raw edges.
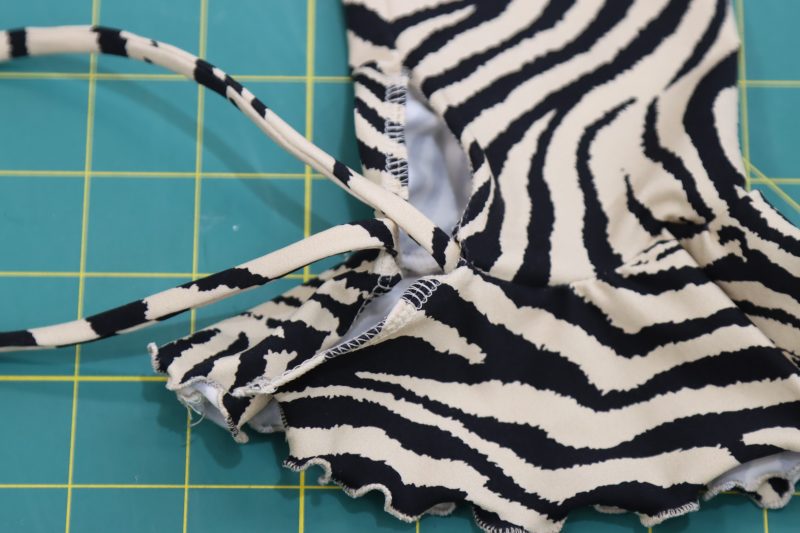
- Pin and sew the ties to the sleeves at the seam between the wrist and the ruffled cuff.
Step 10
ATTACH SLEEVES
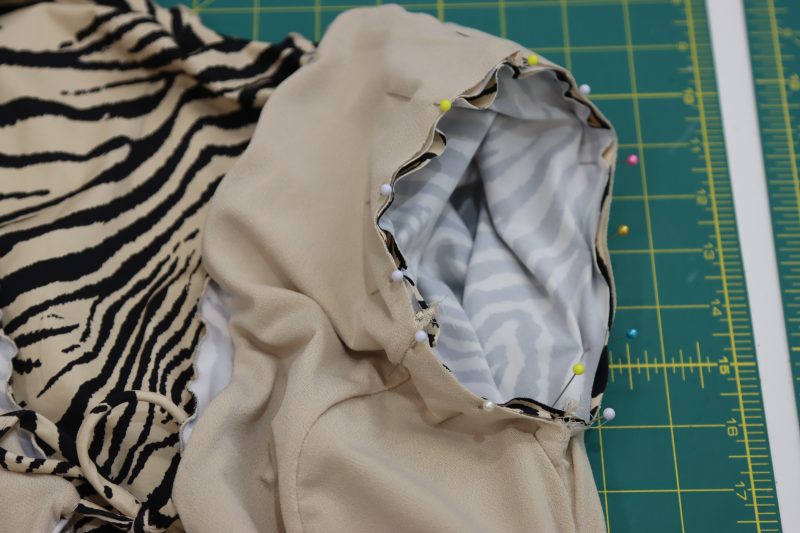
- Place the sleeves right sides together with the armscyes of both the main fabric and the lining., making sure that the front and back of the sleeve are aligned with the front and back of the armscye.
- Pin and serge the sleeves to the armscyes.
- Flip the dress right sides out.
Step 11
RUFFLED HEM
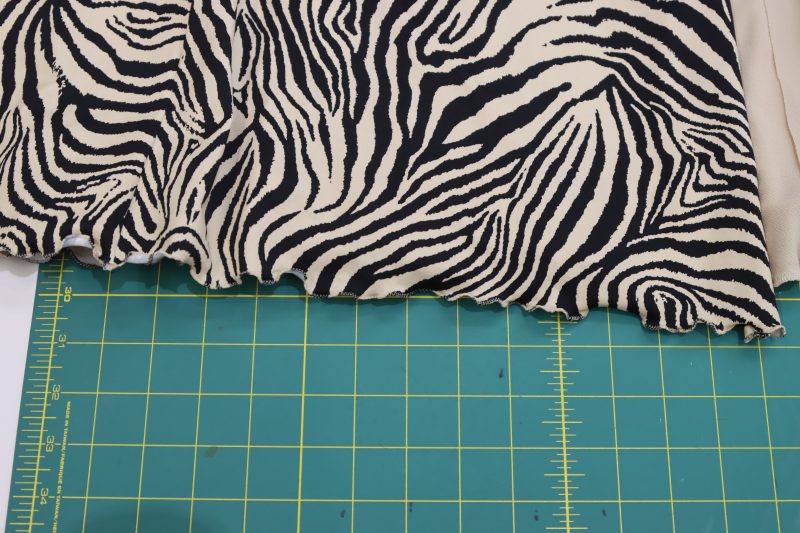
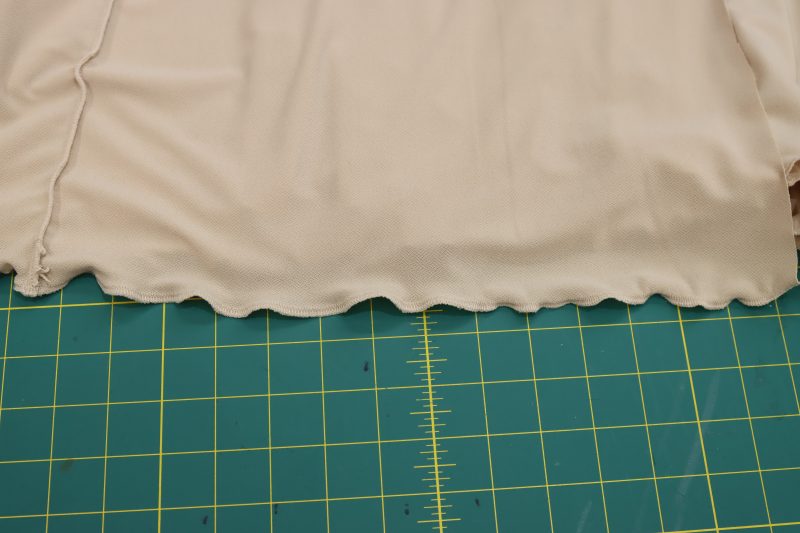
- Using the seam technique as in step 3, create a ruffled lettuce leaf hem on the bottom edge of both the main dress and the lining dress (Note: Before completing this step, you may want to trim the lining of your dress by an inch or so to make sure that the lining doesn’t stick out of the bottom of the dress).
Step 12
SLIT CLOSURE
- Reach through the bottom of the dress in between the lining and the main fabric to grab one side of the slit.
- Pinch the raw edges of the main fabric and the lining fabric in between your fingers and orient them so that they are right sides together.
- Place a pin to hold the edges of the slit right sides together.
- Repeat these steps up the entire length of the slit on both sides.
- Flip the dress inside out and straighten out the pins along the edges of the slit to make sure they’re straight.
- Serge the sides of the slit right sides together, removing the pins as you sew, and ensuring not to fully connect the slit at the top where the two sides of the slit meet (Note: The reason for not attaching the lining to the main fabric at the top of the slit is because this helps the dress lay flat and smooth down the front).
- Flip the dress right sides out.
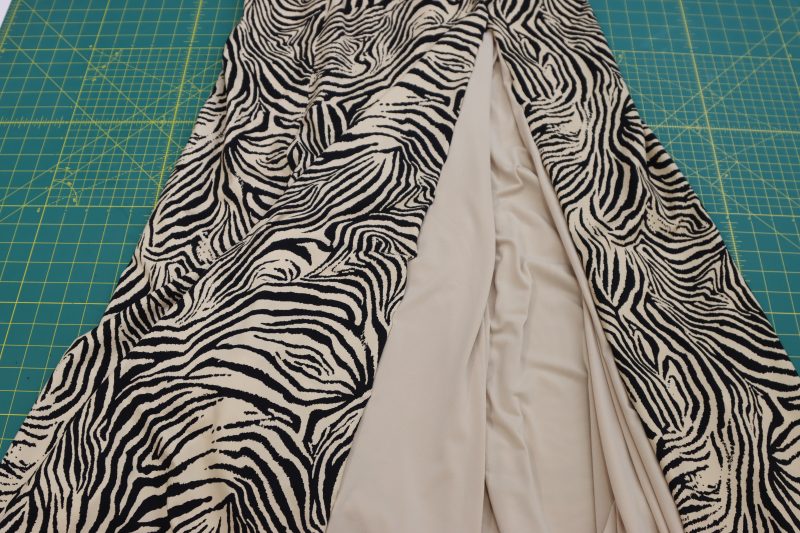
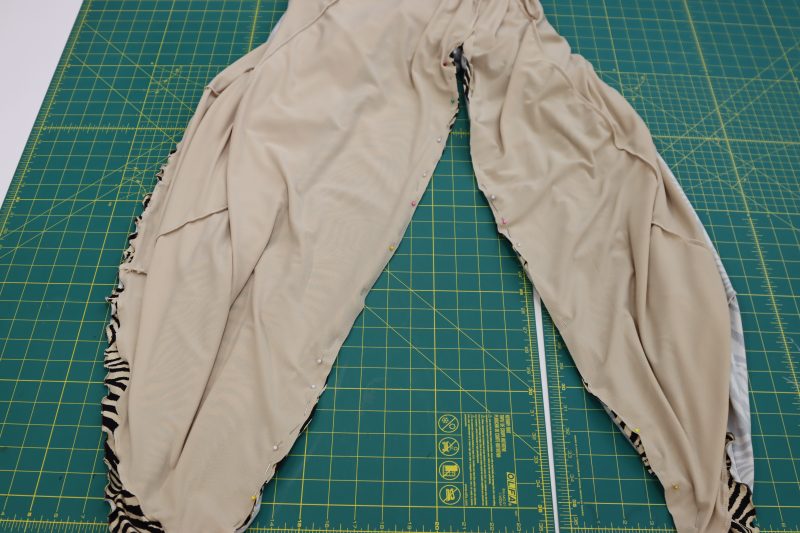
Sewing Success: The Completed Soho Maxi Slip Dress
Share this post with a friend (or two!), download the Soho Maxi Slip Dress free sewing pattern, and show us which fabrics and colors you choose, using the hashtags #MoodSohoPattern & #MadeWithMood—and don’t forget to tag us @MoodFabrics, too.
Free Sewing Pattern Inspiration for Your Next Project
With 470+ free sewing patterns and counting, your opportunities for sewing with Mood are endless!
We hope you had as much fun sewing this maxi slip dress pattern as we did! As always, we want to hear from you—share your thoughts and comments below and let us know where you’ll be wearing the Soho Maxi Slip Dress free sewing pattern!
Can’t wait to start your next sewing project? If you haven’t already, download the Anne Waistcoat Ensemble free sewing pattern—a Mood Sewciety fan favorite—and start your next project today!

Wow isn’t this beautiful! And with sleeves, sleeves seem to be a second thought in fashion sometimes. I’m so glad you lined your knit!! knits are so pretty lined. The model? She’s gorgeous Thankyou, Thankyou for creating. I’m an old boho lady and for me the neckline will be a little higher, the slit a little lower, but a beautiful dress!❤️
I can’t wait to make this! Just ordered all the materials.
Hi, thanks for this beautiful pattern. Can i please get some advice on how i could change this if i wanted to turn it into a maternity dress?
Hi Allyssa! I have a few recommendations to make this a maternity dress.
1. Do you see how on the two front pattern pieces of the dress, there are two notches? And do you see how the waist is slightly cinched on the lower of the two notches? Blend that line out so that it’s more straight instead of curving inward.
2. You can do basically the same thing with the side seams. They are really cinched at the waist, and blending out that line will leave a little room for a belly.
3. Make sure you sew the slit a little lower than the pattern markings. I anticipate that a pregnant belly might make the slit ride up super high and risk a wardrobe malfunction.
I hope these tips help!
I love everything about this dress. The zebra print, especially. And I can just imagine it clinging to my bod in all the right places. I’m going to try it in a velour first and then a milliskin with power mesh under it.
But one question. How can I print out the direction without all of the ads showing?
Unfortunately I don’t think there’s really a way to print the webpage without the ads, but I did notice that the ads are mostly on the first and last pages of the pattern. That being said, you can always just choose which pages you want to print and which pages you don’t so that you don’t have a big stack of paper that’s half internet ads.
¡Es hermoso!
Could you use a woven, maybe cut on the bias for more stretch?
This isn’t a bad idea! I would just recommend picking the size whose finished garment measurements match your body measurements, which may mean sizing up a size or two so that it fits. It also might not hurt to put a zipper in it if you’re comfortable inserting an invisible zipper.
This is a beautiful dress. Any chance it can be made in a 2-way stretch knit? I have been looking for a pattern for a specific fabric I have and it is hard to find an elegant maxi dress for knits. This is perfect but seen the note about the 4-way stretch,
Yes, of course! You can absolutely make it with 2-way stretch fabric. Just make sure the stretch runs across the width of the fabric, so your pieces stay on grain and stretch horizontally. Since your dress won’t stretch vertically, I’d also suggest increasing the armhole a bit, and adjusting the upper sleeve curve accordingly.
Hi! This is gorgeous! However i dont have a serger and my zig zag stitch is not working anymore in my machine..any way I could do the ruffles with straight stitch instead ? Or maybe completely skip it ? Sorry if I am bothering you with nonsense, but i really like it and want to try making it..
You can absolutely just sew the neckline right sides together without adding the lettuce leaf ruffle between the layers. Alternately, I was thinking you could cut the strip twice as long for the ruffle and gather it with a straight stitch instead of zigzagging the raw edge. Let me know which option you choose! I would love to see your dress.
doubling the ruffle is such a great idea! Thank you so much for replying! I will try that and let you know!
Hello Marisa! I am in the middle of cutting my paper pattern and i realised there are some double lines ( not parallel to each other) on some pieces (like B and C). I am new on sewing and cant find any explanation online. Could you please tell me where to cut or explain what is the purpose of those lines? The second straight lines are too short and stop unexpectedly. I am confused.. thank you in advance for your help !
Hi Elena
I just checked the pattern and I don’t see any double lines for any specific size, nor any lines that stop unexpectedly (Maybe these are the notches). But you can send me an image pointing out the lines you’re unsure about so we can rule out any printing issues, and I can help you in a better way. You can reach me at this email: sandy@moodfabrics.com
Hey
Thank you so much for this pattern, it’s so beautiful and I’m so excited to make it. I got stretch velour for this project. Could I use the velour as the lining or could I go without a lining?
Thank you for your help
You can definitely just make it without the lining if you’re using velour as the main fabric. It’s definitely thick enough that it won’t be sheer. That was the only reason we added the option to put a lining because the zebra print fabric we used was sheer.
Hi! Can this drees be made with a non-strech fábric?, because i only have cotton popeline
Yes! But make sure you cut out the size with the finished garment measurements that match your body measurements so that the dress fits you perfectly. You may also need to add a side seam zipper.
Love this pattern! How would I go about making the neckline higher?
Hi Monique! When cutting out the pattern piece for the front of the dress, you can raise the neckline by cutting a more shallow angle out of the V shape and moving the tie-front higher. Just make sure you leave the shoulders where they’re at and use them as a guide for where to cut the neckline more modestly.
Can this be made to be a swim cover-up with chiffon fabric?
That would honestly be so cute, I can totally imagine this in a sheer fabric. Just make sure that if you make it in a nonstretch fabric that you choose your size based on the finished garment measurements instead of the actual dress size.
Cant wait to sew this dress