

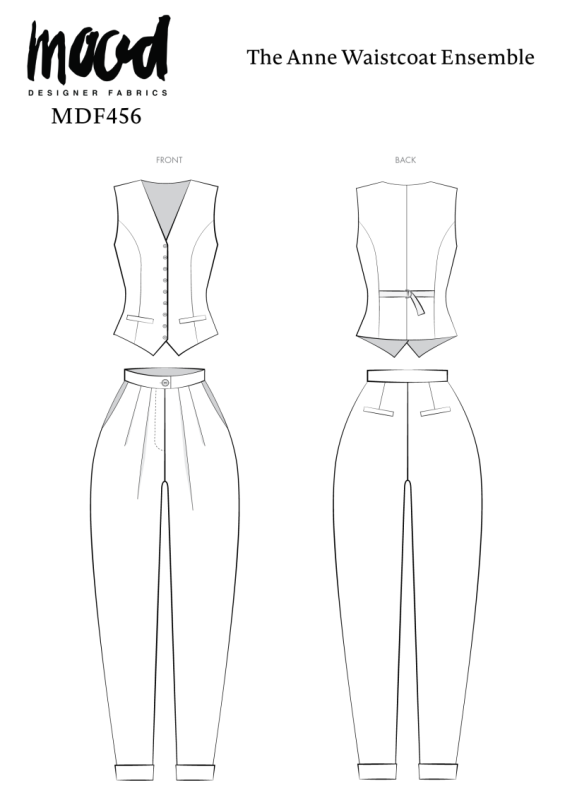
Inspired by the hustle and bustle of New York City, the Anne Waistcoat Ensemble free sewing pattern is the ultimate marriage of classic tailoring and modern style. You know that feeling when you’re rushing to get ready for the day, but you still want to look effortlessly chic? That’s the energy we channeled when designing this two-piece set! It’s perfect for the person who needs to get dressed in minutes but refuses to compromise on looking polished.
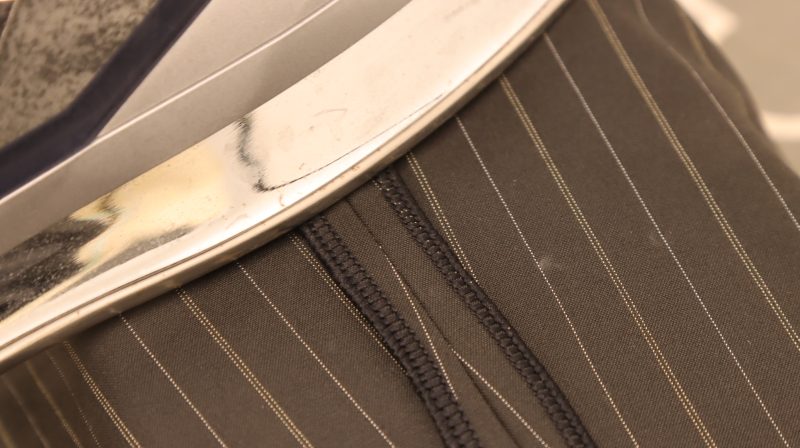
Picture yourself hailing a cab on a crisp morning, the black pinstriped suiting fabric catching the light as you rush to the office. The nine-button waistcoat accentuates your professional style, beautifully juxtaposed by the playful nature of the cuffed balloon pants.
Whether you’re heading uptown for a shopping spree on your lunch break or dashing downtown for drinks, the Anne Waistcoat Ensemble moves with you. Just throw on your favorite heels or boots, grab your tote, and you’re ready for anything the city throws your way.
While our version is crafted from a sleek 190 GSM suiting fabric, the pattern is incredibly versatile. Experiment with a bold tweed from our Newcastle Chenille Tweed Collection for a fun, bold look, or choose one of our vibrant Mood Exclusive Cotton Sateen fabrics to create something truly unique.
No matter what you choose, the Anne Waistcoat Ensemble is a timeless piece that will keep you looking sophisticated and on-trend, no matter where your day takes you.


Essential Materials & Sizing Guide for the Anne Waistcoat Ensemble
Continue reading for a breakdown of what knowledge and materials you need for creating your very own waistcoat! We’ve got you covered with the recommended materials we used—if you want to follow along exactly—as well as a curated list of alternative fabric type recommendations if you want to customize your own version. The Anne Waistcoat Ensemble free sewing pattern download includes technical drawings for seam and silhouette visibility, plus a size chart to help you find your perfect fit!
Purchase Products Used Below:
Quantities indicated are for sewing a size small waistcoat ensemble. Toggle the ‘SHOP THIS LOOK’ box to find quantity estimates for other sizes.
- 4 yards of Jet Black and Beige Pinstriped Stretch Polyester Suiting
- 2 yards of Black Knit Fusible Interlining, Single Sided by Theory
- 3 yards of Bemberg Lining – Black – Lucidum Collection
- 9 each of Black Leather Blazer Buttons – 24L/15mm
- 1 each of Black Leather Blazer Buttons – 32L/20mm
- 1 each of Regular Zipper 9″ by YKK – 580 Black
- 1 each of Gutermann Sew All Thread 250m – 10 Black
- 4 each of Maxi-Lock Serger Thread 3000yds – Black
- 2 each of Carbon Cast Metal Rounded D-Rings – 15mm
- 1 each of Dritz Black Stitch Witchery – 1 in x 13 yd Spool
- MDF456 – Anne Waistcoat Ensemble Sewing Pattern (Free download below!)
Additional Products Used:
- 1 each of Dritz Tailor’s Chalk
- 1 each of Gutermann Heavy Duty Top Stitch Thread 30m – 010 Black
- 1 each of Lance Center Finding Tailoring Ruler – 24″
- 1 each of 9″ Knife-Edge Dressmaker’s Shears by Mood – Metallic Gold
Alternative Fabric Type Recommendations:
The Anne Waistcoat Ensemble sewing pattern is best suited for medium weight fashion fabrics. Explore other fabric types or colors from our featured collections for your waistcoat ensemble with the links below.
Fabric Collections Used in this Post:
Download Your Free Sewing Pattern
Submit your name and email in the form below to receive the download link for the Anne Waistcoat Ensemble free sewing pattern directly in your inbox. Mood Sewciety Patterns will send your free download link via email with the subject line: ‘Your Free Download from Mood Sewciety – The Anne Waistcoat Ensemble’ (in PDF format for A4 and letter-size printing).
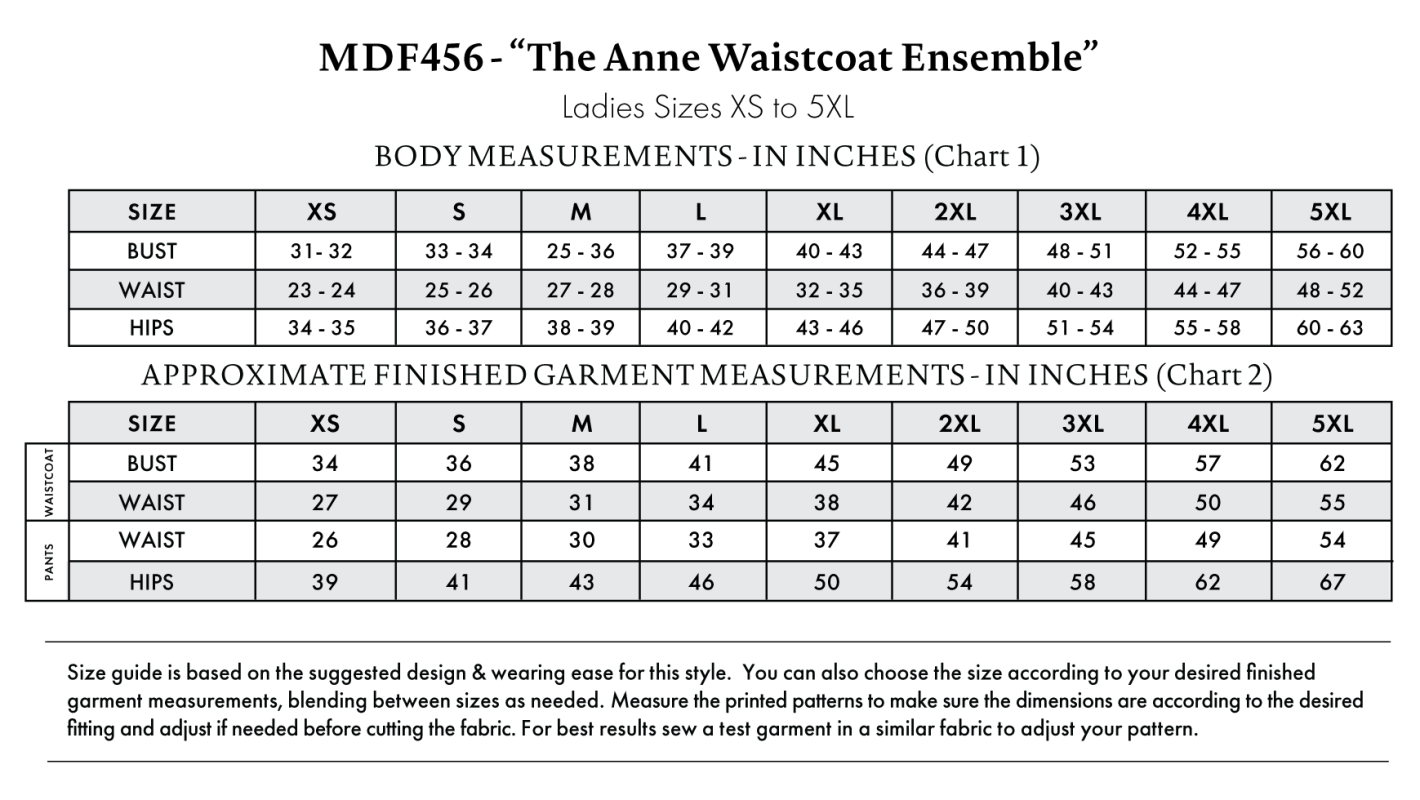
Find Your Perfect Fit
The Anne Waistcoat Ensemble Sizing Guide is based on the suggested design & wearing ease for this style. You can also choose the size according to your desired finished garment measurements, blending between sizes as needed. Measure the printed patterns to make sure the dimensions are according to the desired fitting and adjust if needed before cutting the fabric. For best results, sew a test garment in a similar fabric to adjust your pattern.
Important: Always read all the instructions before cutting the fabric!
How to Sew The Anne Waistcoat Ensemble
The instructions provided below are designed to guide you through sewing the Anne Waistcoat Ensemble from start to finish.

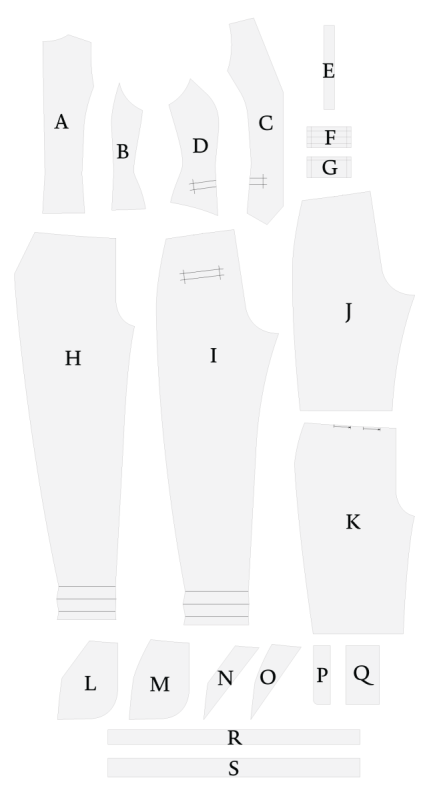
Pattern Pieces & Fabric Cuts Needed
- (A) WAISTCOAT BACK CENTER
- Fabric – Cut 2 Mirrored
- Lining – Cut 2 Mirrored
- (B) WAISTCOAT BACK SIDE
- Fabric – Cut 2 Mirrored
- Lining – Cut 2 Mirrored
- (C) WAISTCOAT FRONT CENTER
- Fabric – Cut 2 Mirrored
- Lining – Cut 2 Mirrored
- (D) WAISTCOAT FRONT SIDE
- Fabric – Cut 2 Mirrored
- Lining – Cut 2 Mirrored
- (E) WAISTCOAT BACK STRAPS
- Lining – Cut 2*
- (F) FAUX WELT POCKETS A
- Fabric – Cut 4**
- (G) FAUX WELT POCKETS B
- Fabric – Cut 4**
- (H) PANTS FRONT
- Fabric – Cut 2 Mirrored
- (I) PANTS BACK
- Fabric – Cut 2 Mirrored
- (J) PANTS LINING BACK
- Lining – Cut 2 Mirrored
- (K) PANTS LINING FRONT
- Lining – Cut 2 Mirrored
- (L) PANTS SIDE POCKETS A
- Lining – Cut 2 Mirrored
- (M) PANTS SIDE POCKETS B
- Lining – Cut 2 Mirrored
- (N) PANTS SIDE POCKETS A FACING
- Fabric – Cut 2 Mirrored
- (O) PANTS SIDE POCKETS B FACING
- Fabric – Cut 2 Mirrored
- (P) FLY)
- Fabric – Cut 1
- (Q) FLY SHIELD
- Fabric – Cut 1
- (R) WAISTBAND
- Fabric – Cut 1
- (R) WAISTBAND LINING
- Lining – Cut 2
*For the right strap, use the pattern as it is. For the left strap, shorten it by cutting off 4 inches.
**Use the same faux pocket pattern pieces A and B for both the waistcoat and the pants.
Sew with a 1/2″ seam allowance for all seams unless otherwise specified.
HOW TO SEW A WAISTCOAT
Step 1
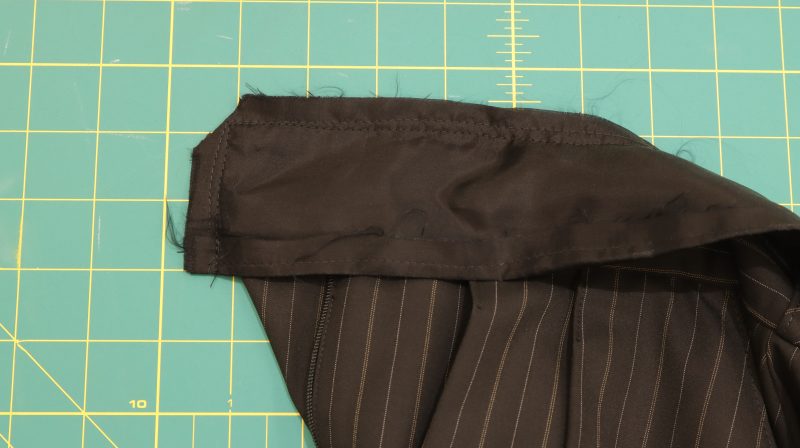
BACK WAIST STRAP
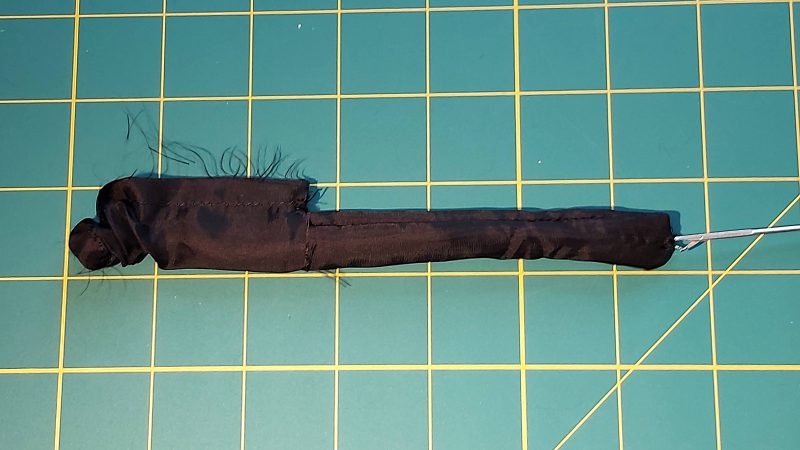
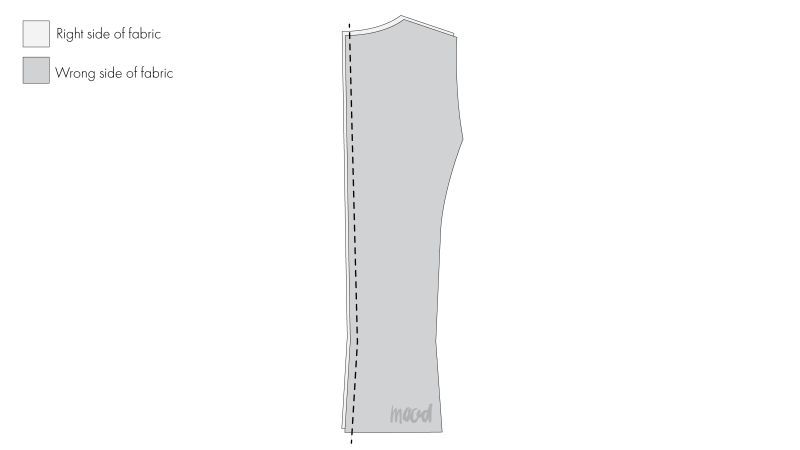
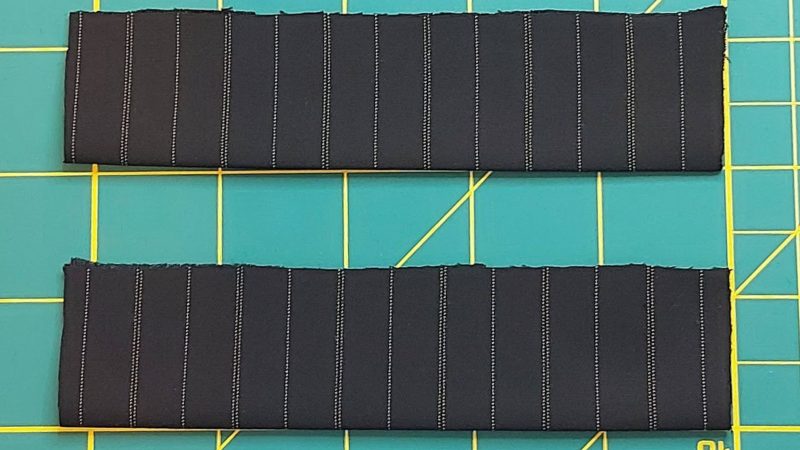
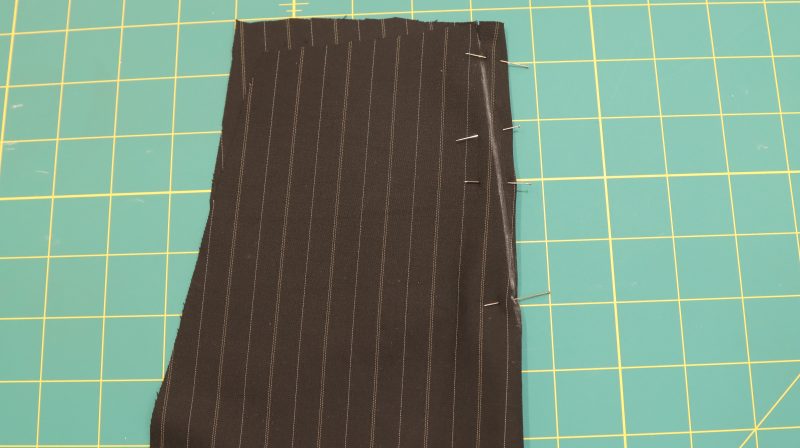
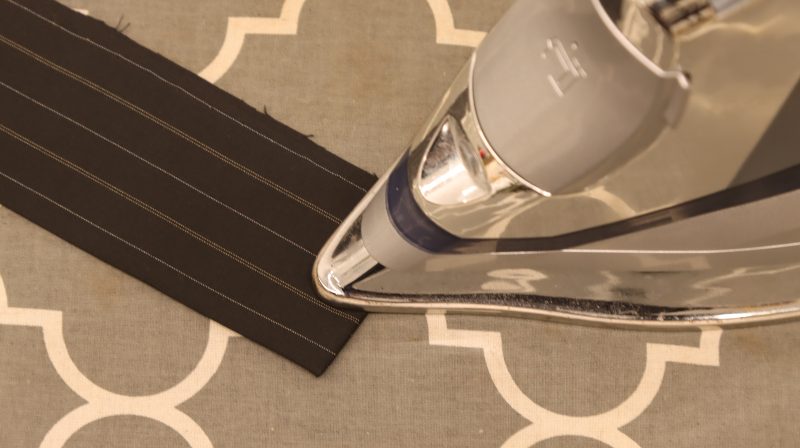
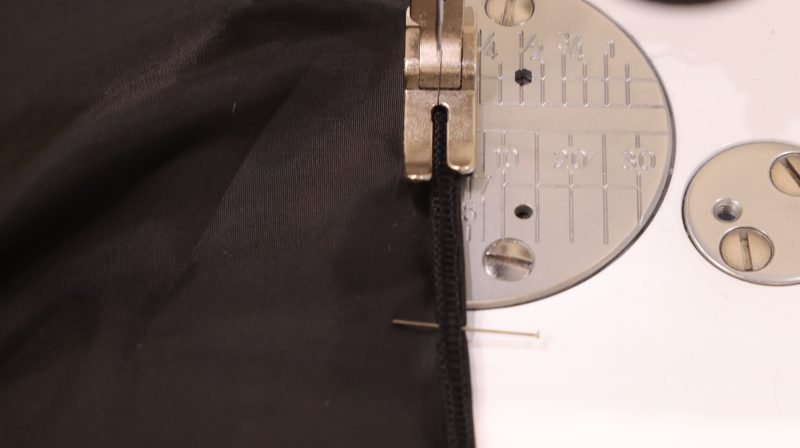
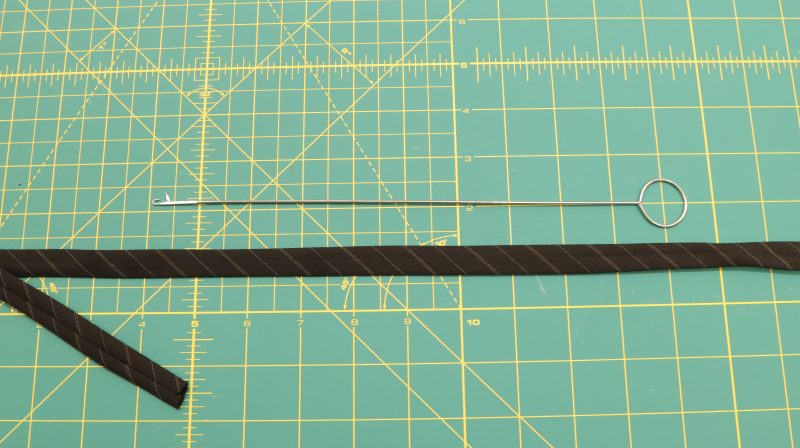
- Fold the back waist straps lengthwise with right sides together. Stitch along the long edge using a ½” seam allowance, leaving one short end open for turning.
- Turn the straps right side out using a loop turner or a thin cylindrical tool (like a knitting needle or chopstick). Press flat to set the shape.
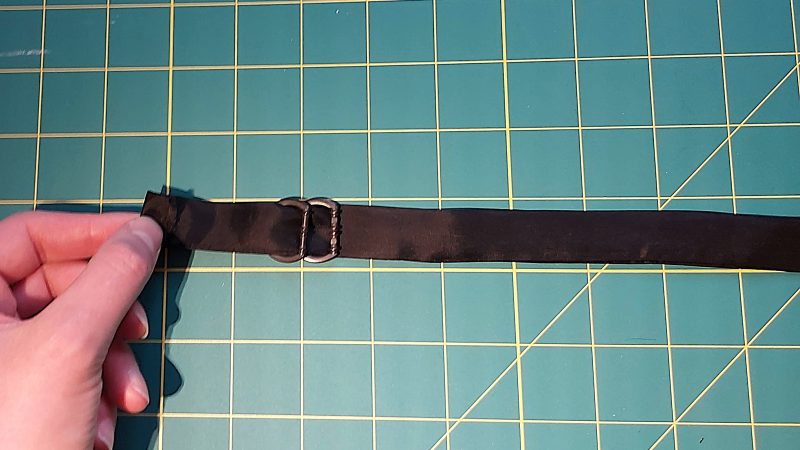
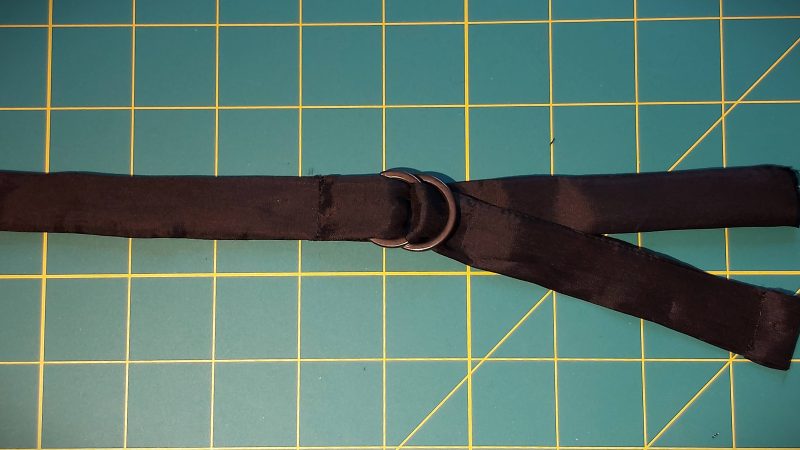
- Slide two D-rings onto the strap designated for the left back. Position them near the closed end.
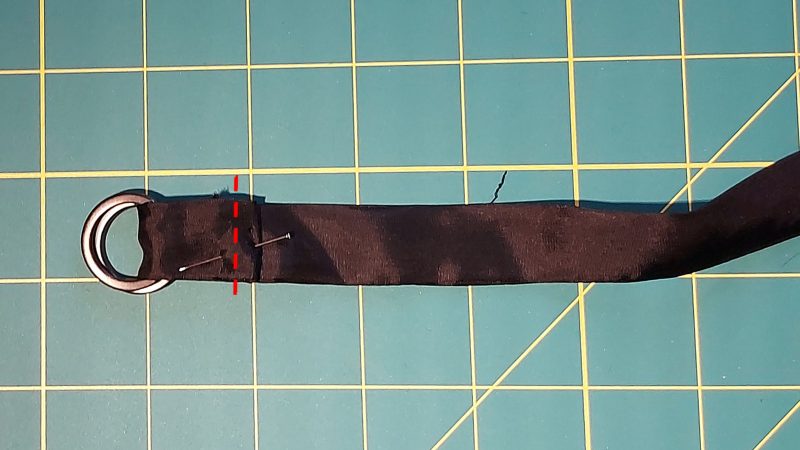
- Fold the closed end of the strap over the D-rings by just over 1″ and stitch to secure them in place.
Step 2
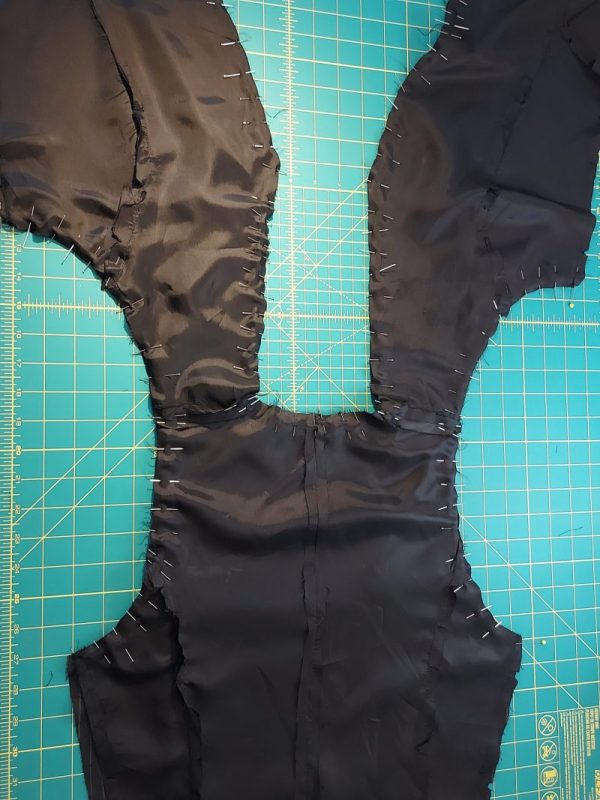
BACK PANELS
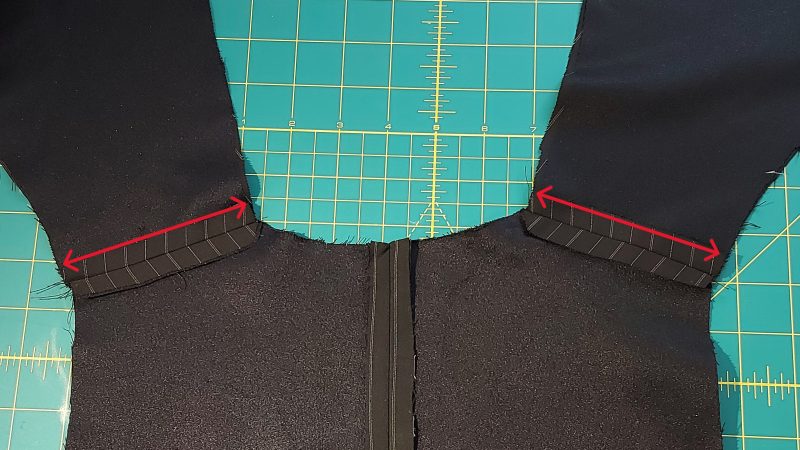
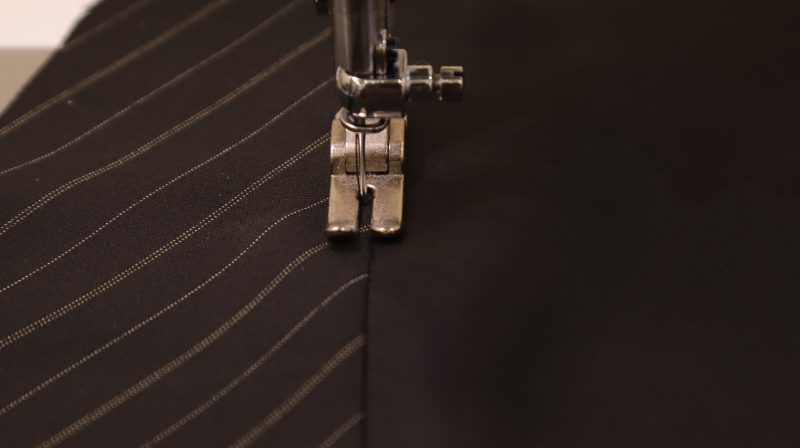
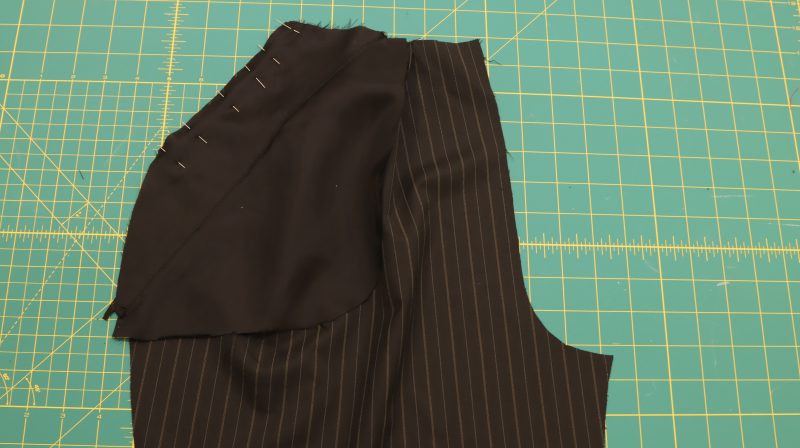
- Place the two center back pieces right sides together and stitch along the center back seam using a ½” seam allowance. Press the seam open.
- With right sides together, sew the back side pieces to each side of the center back piece, sandwiching the back straps in between.
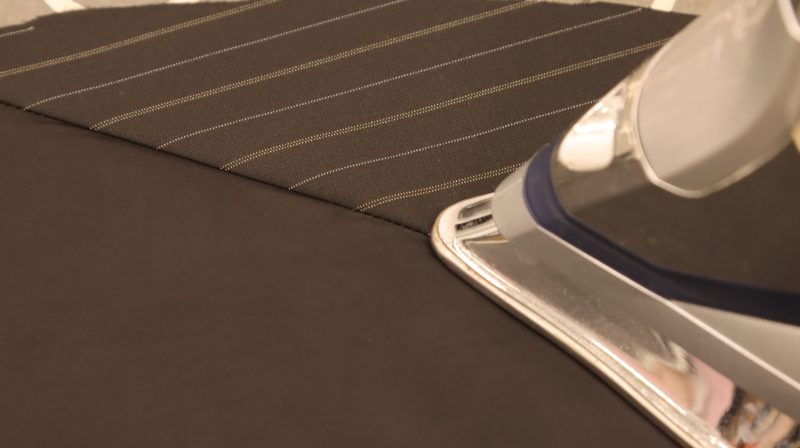
- Clip the curved parts of the seams and press.
PRO TIPS:
⇒ Interfacing can be applied to the main fabric if additional structure is needed.
⇒ Clip the curved seam areas to help them press flat for a smoother finish.

Step 3
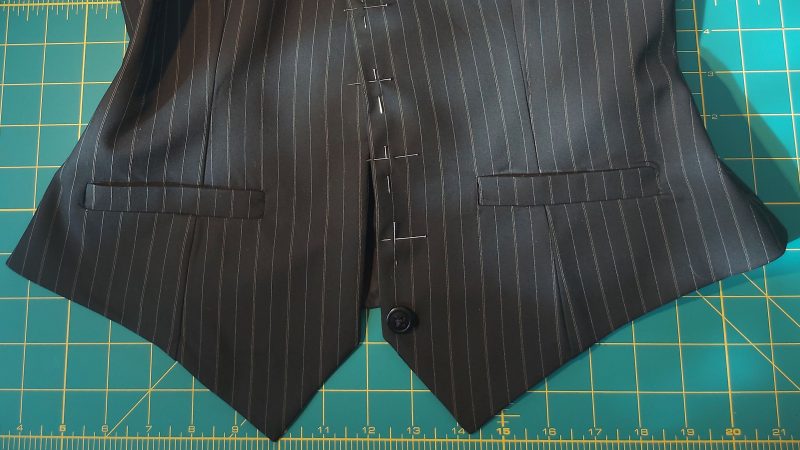
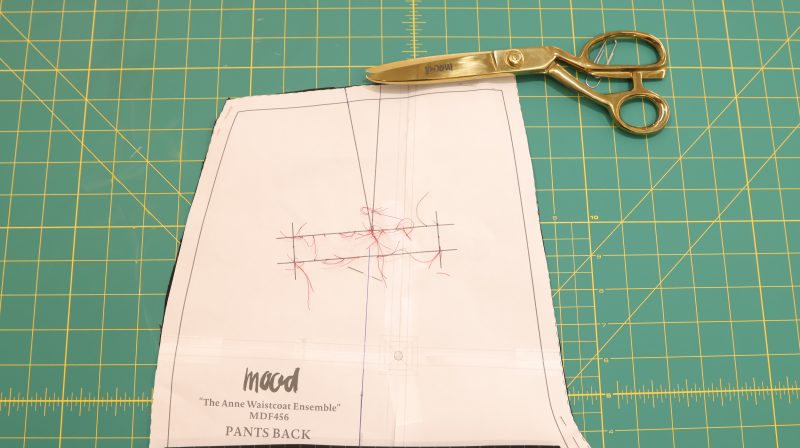
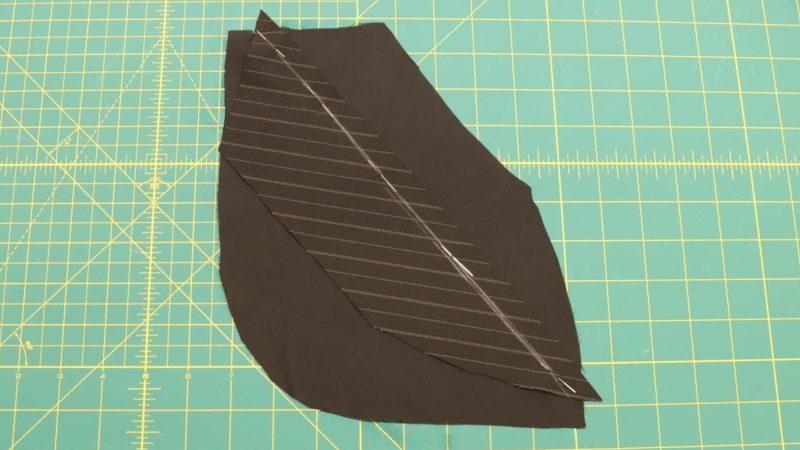
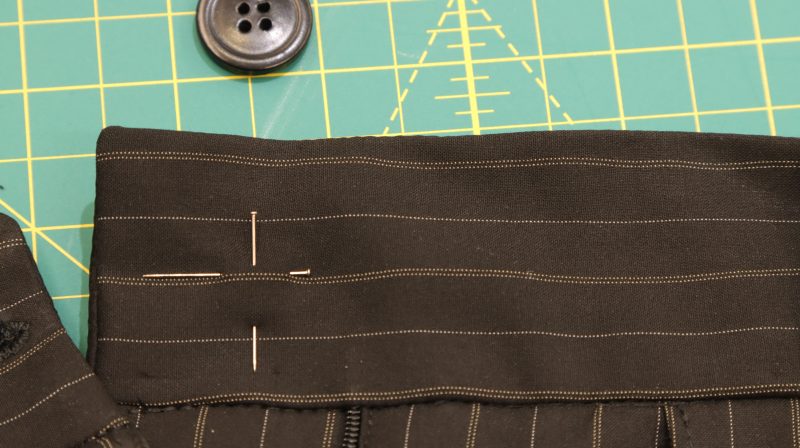
FRONT PANELS / THREAD TRACING
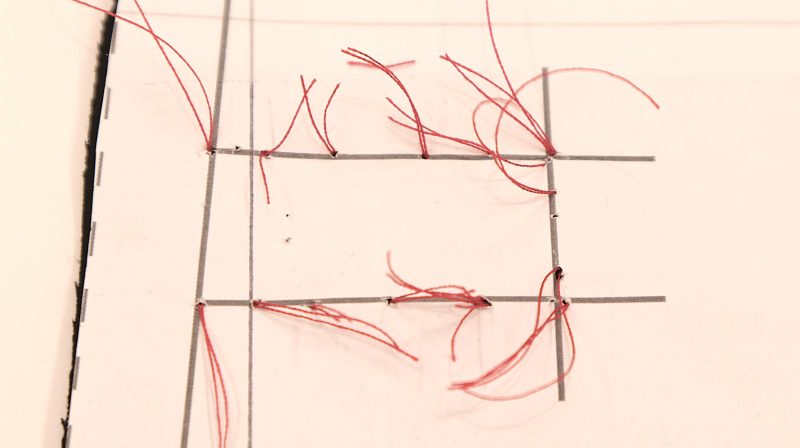
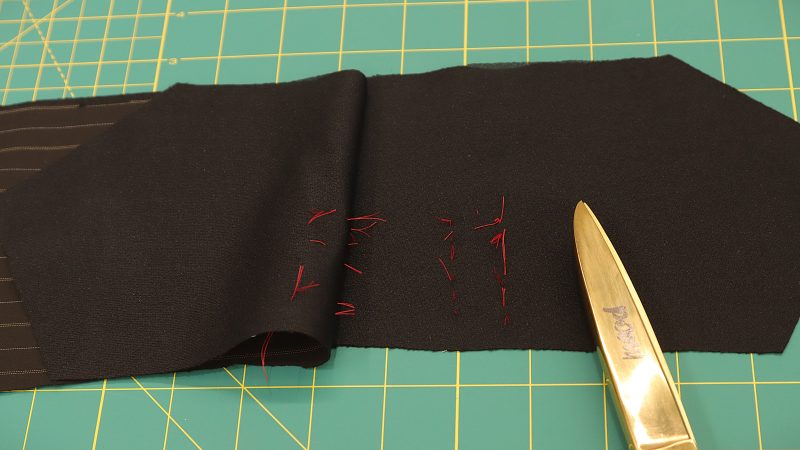
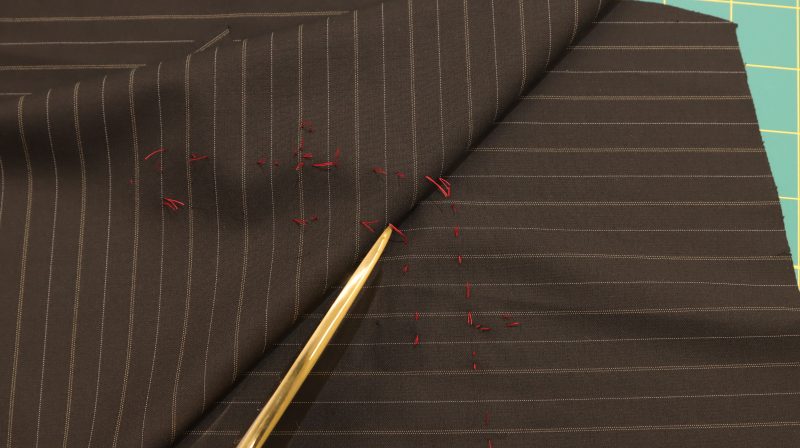
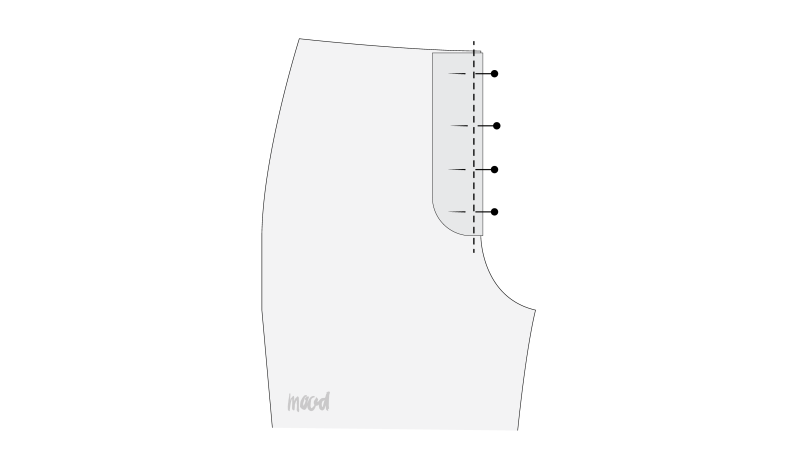
- Poke holes through the paper pattern along the faux welt pocket placement lines. Align the pattern over both the main fabric and lining fabric pieces and start ‘tracing’ the placement lines using short lengths of thread to create and ‘transfer’ the markings.
- Carefully remove the paper pattern so you’re left with the thread tracings sewn through both your main and lining fabrics.
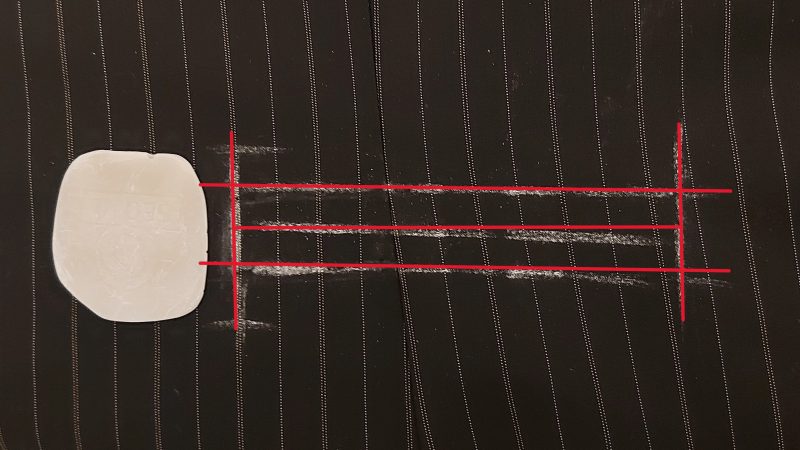
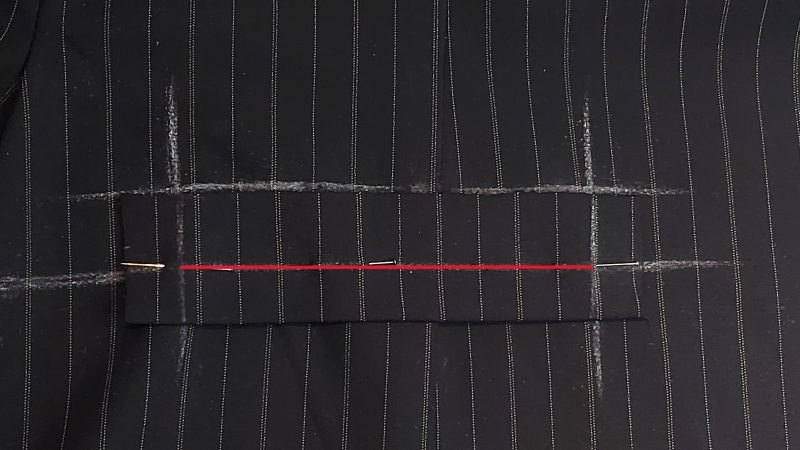
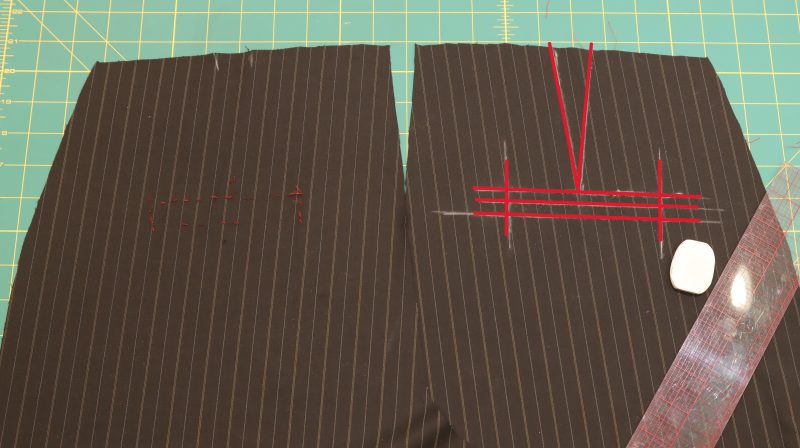
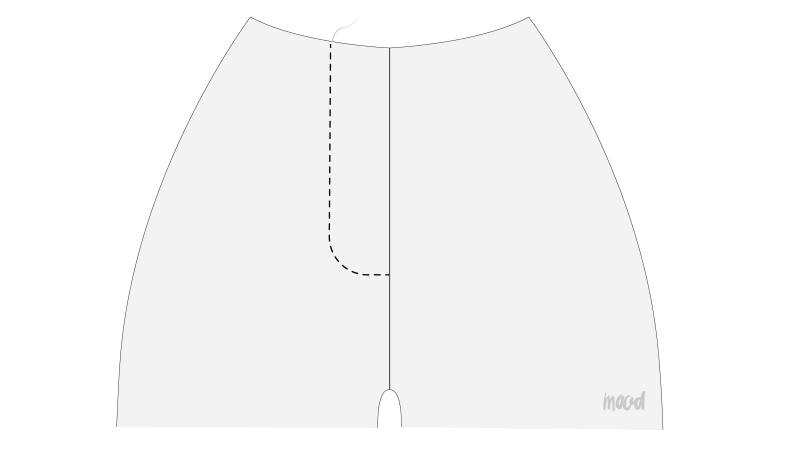
- Using tailor’s chalk and a ruler, connect the thread tracings. Essentially you’ll draw a rectangle.
- Draw a line lengthwise through the center of the rectangle to divide it in half.
- Sew the front waist and back waist panels together at the shoulder seams, using a ½” seam allowance. Press.
Step 4
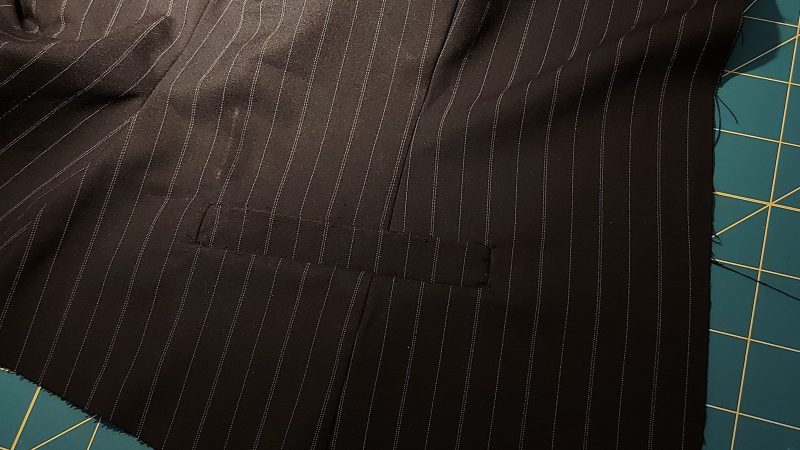
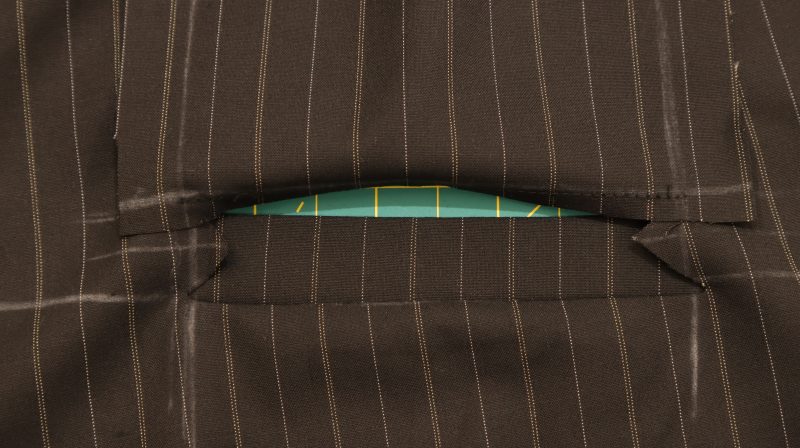
FAUX WELT POCKETS
- Fold the A pieces of the faux pockets in half lengthwise, along the fold line indicated on the pattern. Press.
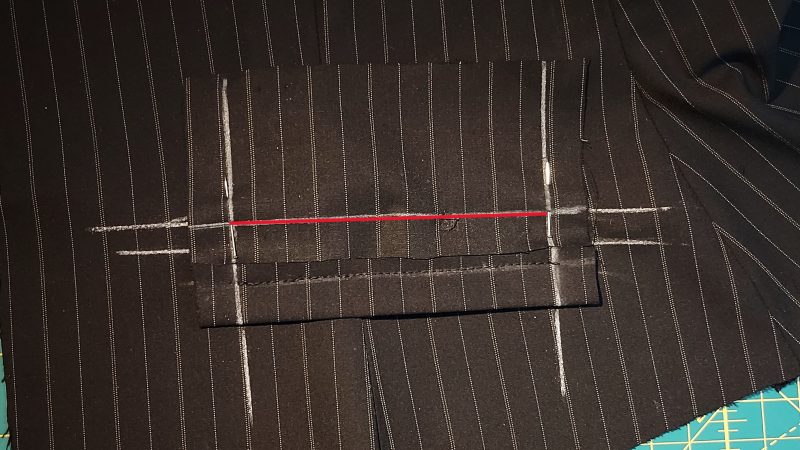
- Place piece A of the faux pocket on the rectangle marked on the front piece, aligning the faux pocket’s stitching line with the base line of the rectangle. Sew along the same line.
- Place piece B of the faux pocket, aligning its seam allowance line with the top line of the rectangle, and stitch in place.
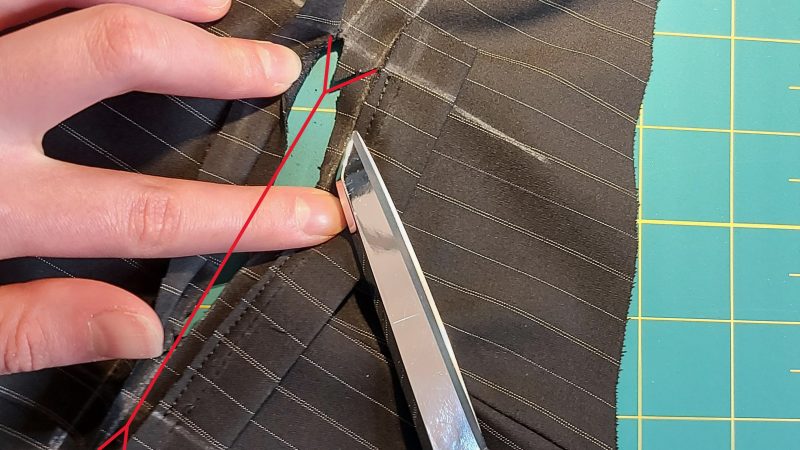
- Cut along the center line we marked earlier on the rectangle, and make triangular cuts at the ends.
- Turn both pocket pieces to the wrong side. Press.
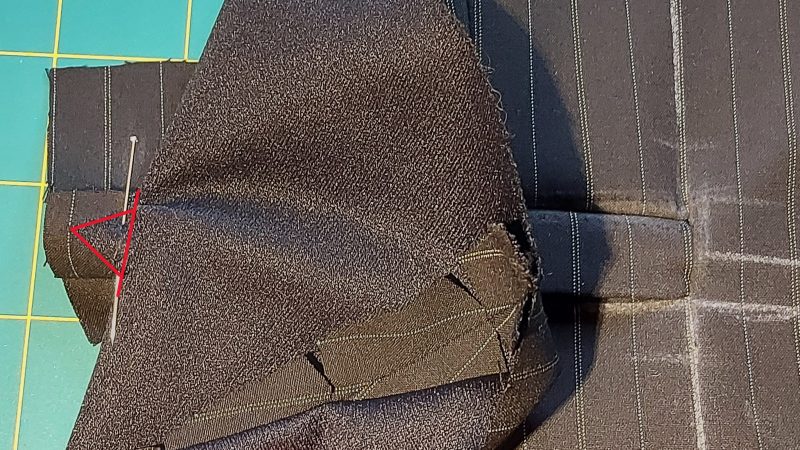
- On the wrong side of the garment, align the triangular flaps with the sides of the pocket pieces and stitch them together.
- Trim any excess seam allowance.
Step 5
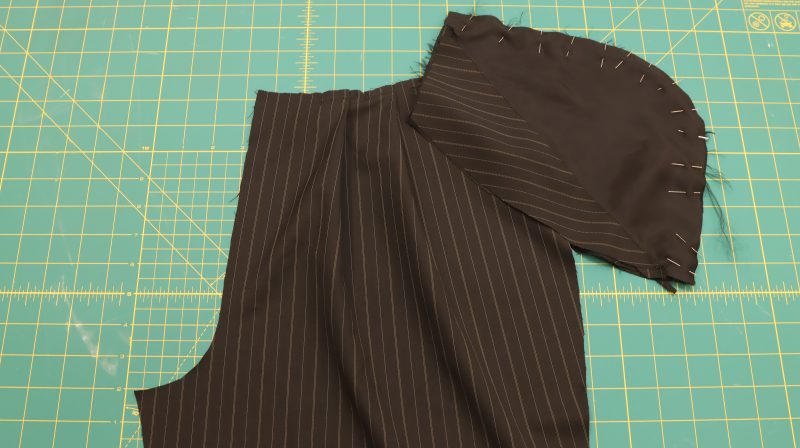
VEST LINING
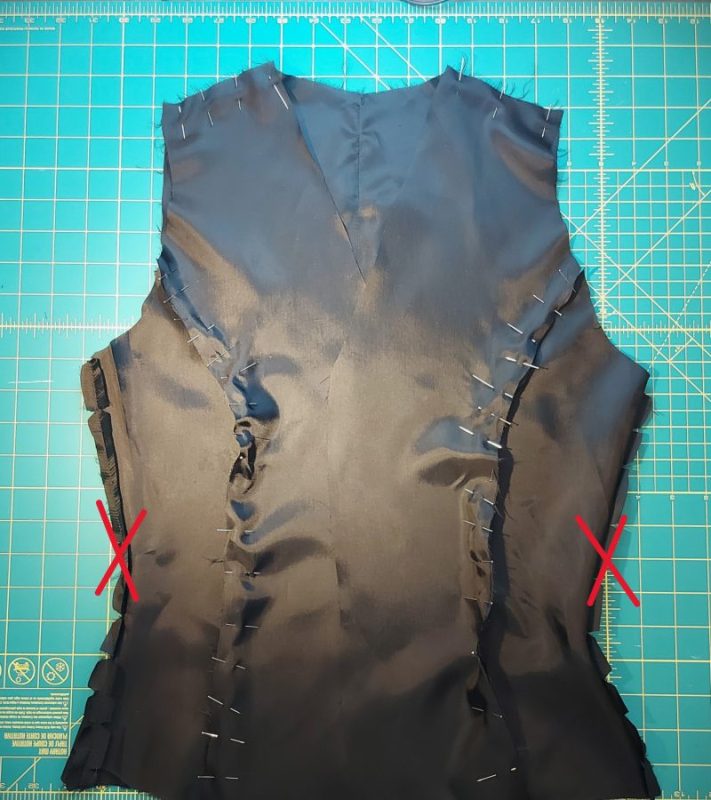
- Place the main fabric and the lining fabric right sides together, and sew the necklines, the front opening, the armholes, and the bottom area near the center. Leave the side seams and the bottom edges of the back and front open.
- Snip center front corners. Make sure to clip the armhole and neckline seam allowance.
- Press seam allowance toward lining and under stitch. This will keep the lining from poking outwards.
- Turn the waistcoat right side out and press.

Step 6
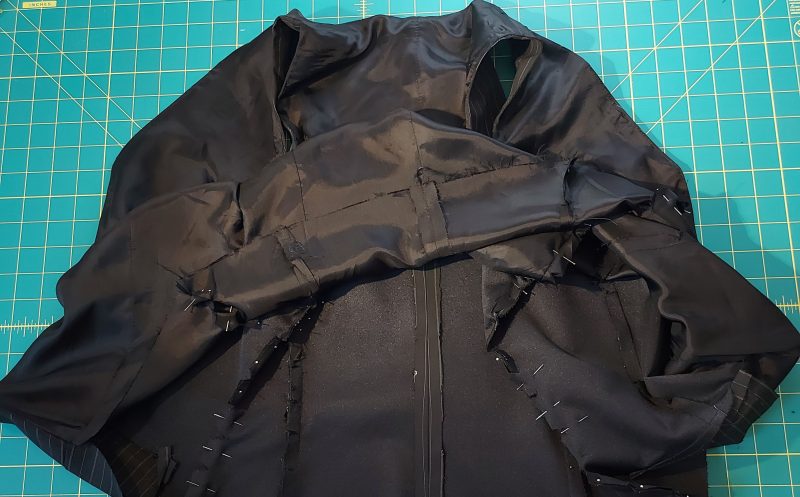
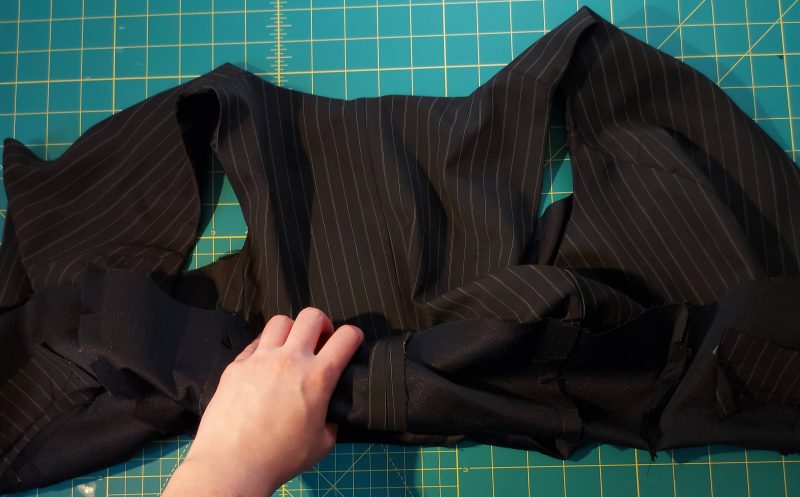
VEST SIDE SEAMS & HEM
- Match front and back side seams and sew with a ½” seam allowance.
- Grab the main fabric and roll it toward the inside. Flipping the vest to the wrong side.
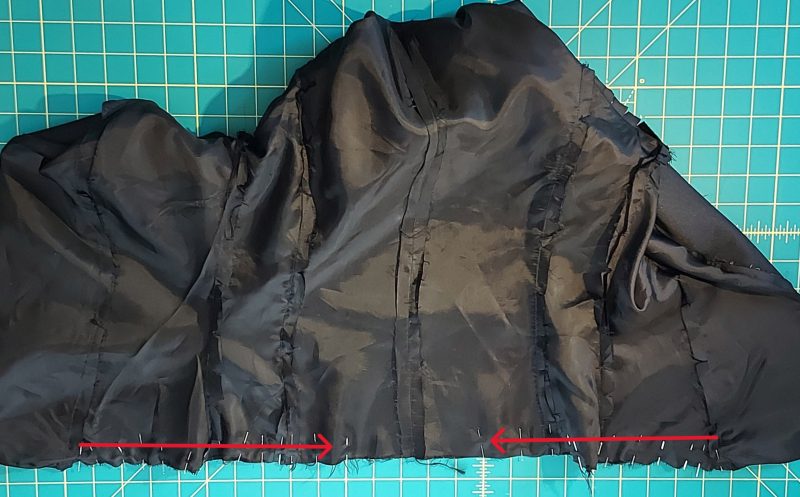
- Pin and sew from the front princess lines toward the back. Leave at least 4” of an open gap in order to turn the vest to the right side.
- Turn the vest to the right side. Press the remaining open seam allowance up to the wrong side and slip stitch closed.

Step 7
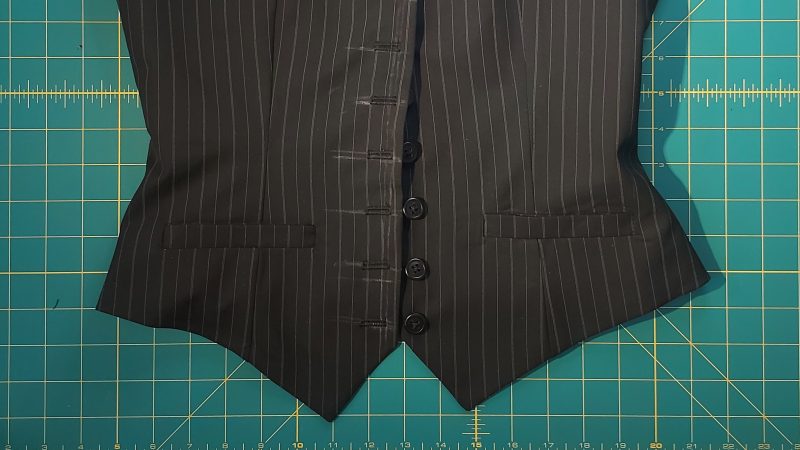
BUTTONS & BUTTONHOLES
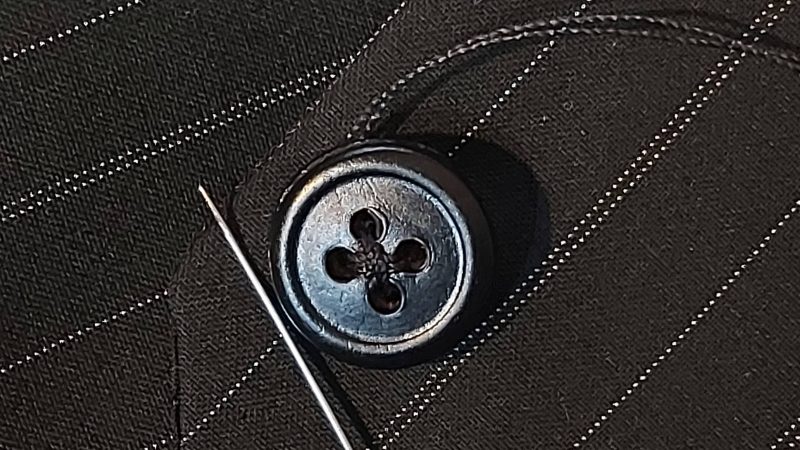
- Mark the button placement points approximately 1″ apart. This may vary depending on the number of buttons you want, the size of the buttons, and the garment size you’re sewing. In our case, we used 9 buttons for a size small and used 24L/15mm buttons.
- Sew the buttons onto the points we marked.
- Mark the places for the buttonholes the same way you marked the points for the buttons, and draw the buttonholes to match the width required by your buttons.
- Make the button holes.

HOW TO SEW BALLOON PANTS
Step 8
TAILOR TUCK & CHALK
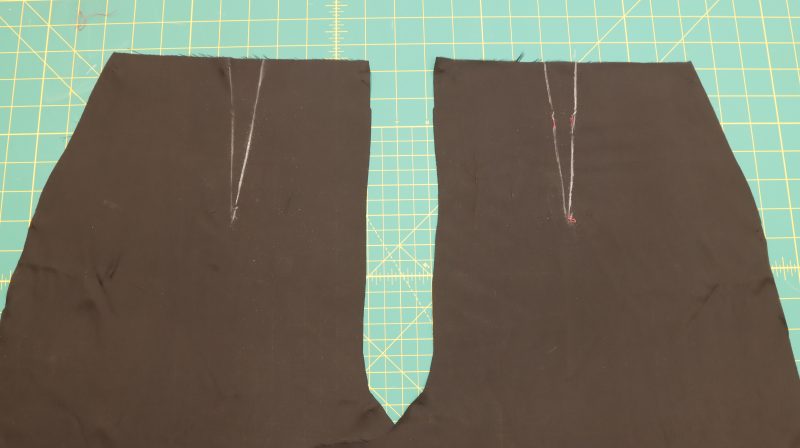
- Transfer the dart and the faux pockets to the back pieces, using the same thread-tracing method we used for the waistcoat.
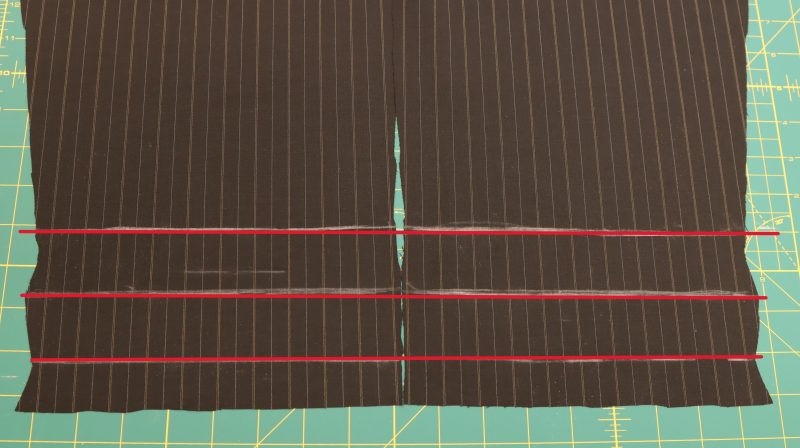
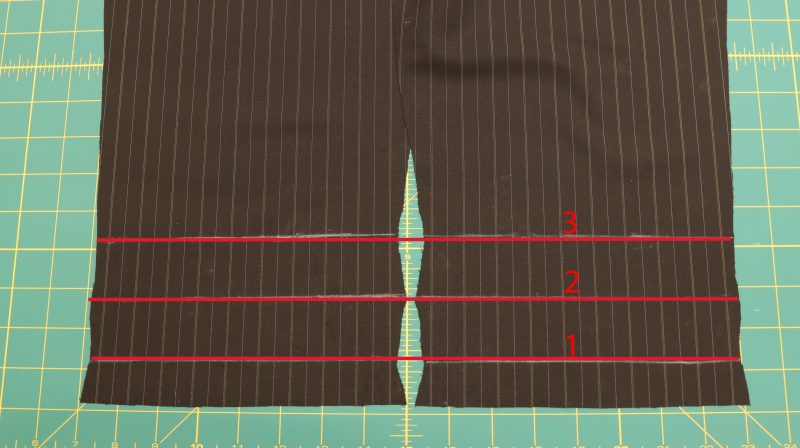
- Transfer the hem lines from the pattern onto the fabric piece and trace them with chalk.
Step 9
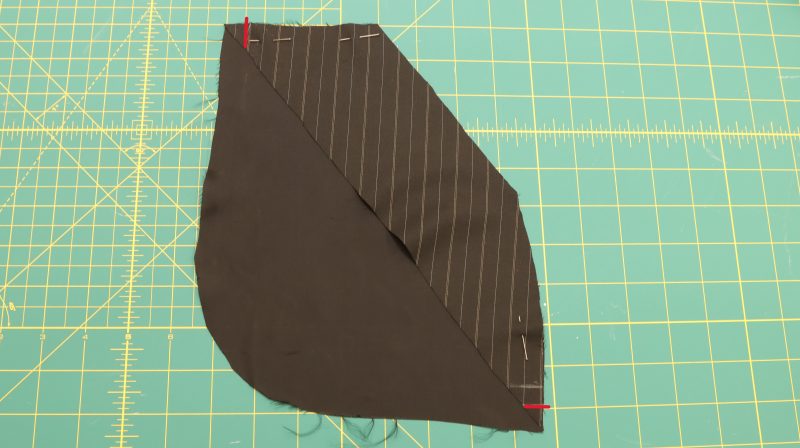
DARTS
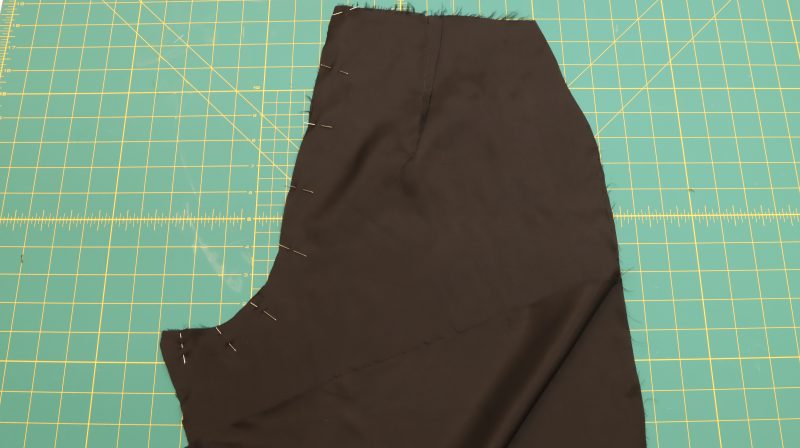
- Fold the back piece, aligning the two diagonal lines we previously marked for the dart, and pin to hold in place.
- Sew the dart. Do not back stitch at the end. Keep sewing and cut 1” of the twisted thread.

Step 10
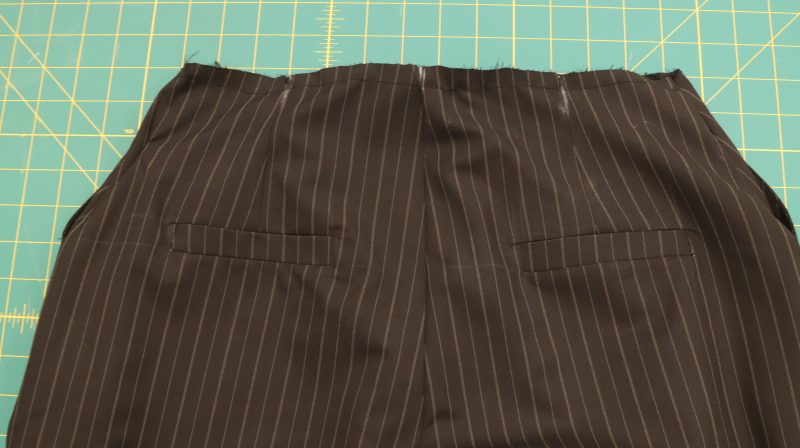
FAUX WELT POCKETS
- Sew the faux pockets onto the back pieces of the pants, following the same procedure we used for the waistcoat.
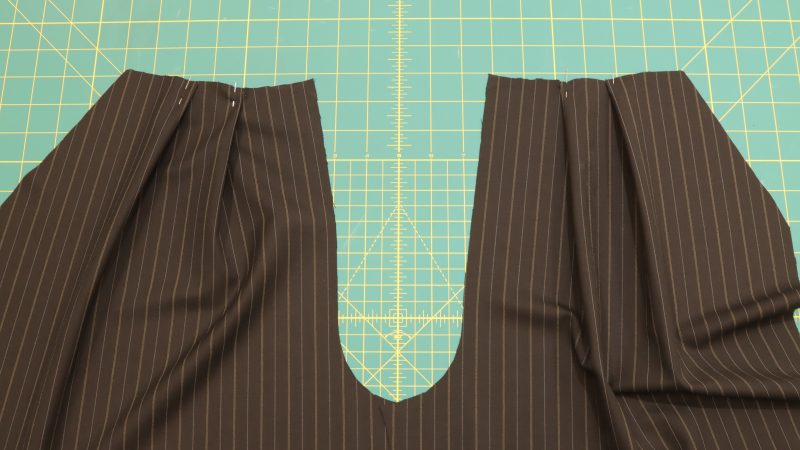
Step 11
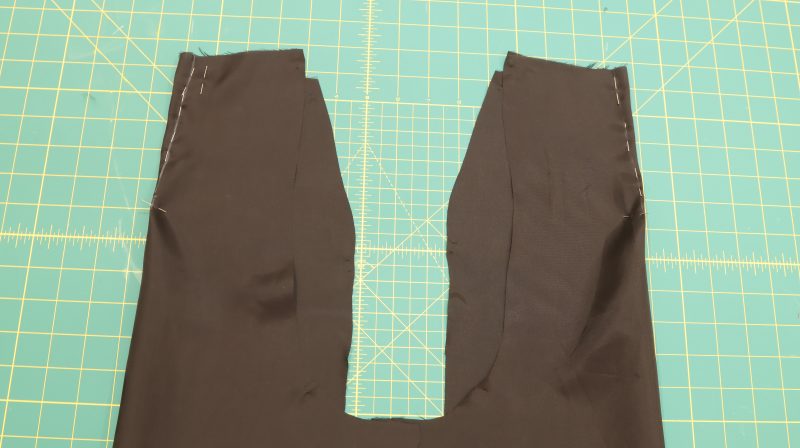
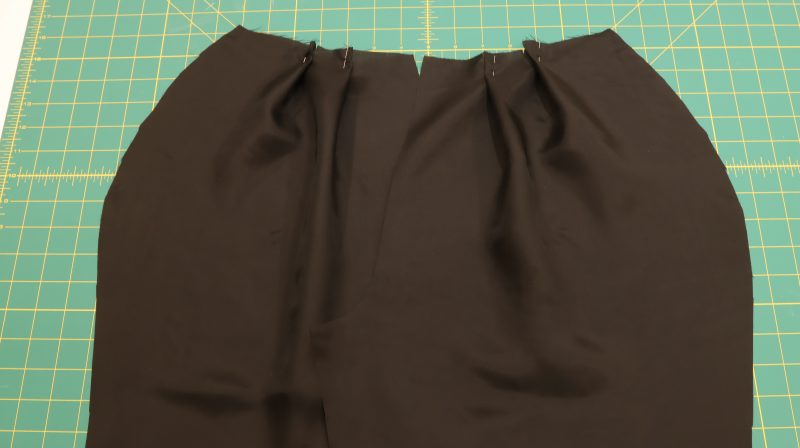
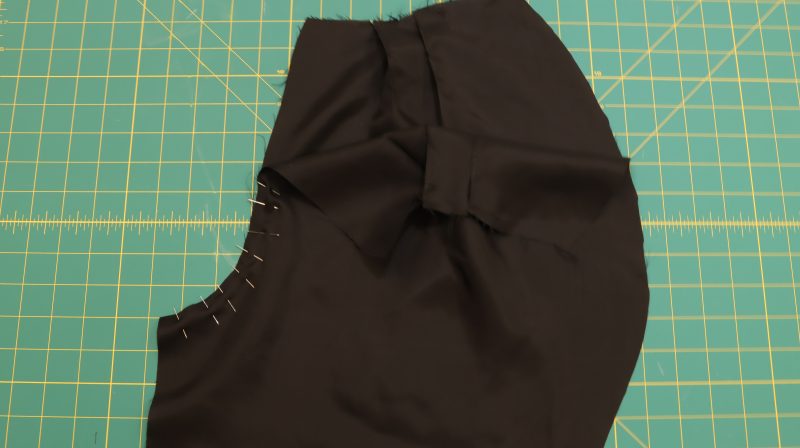
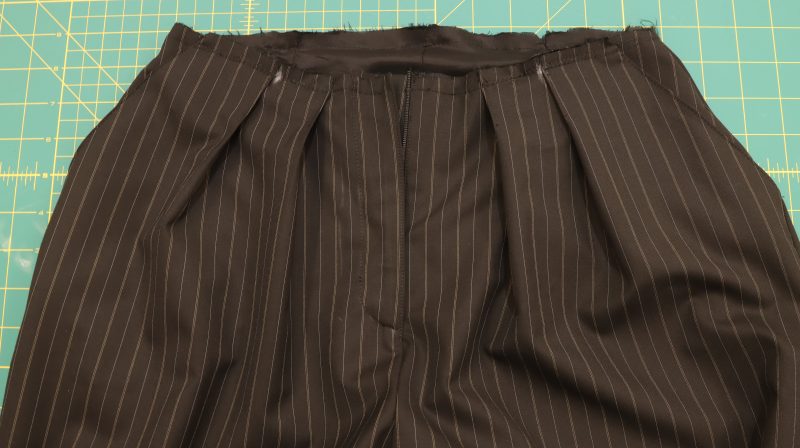
FRONT PLEATS
- Fold the pleats on the front pants pieces to the points marked on the pattern, pin and baste to hold them in place.
Step 12
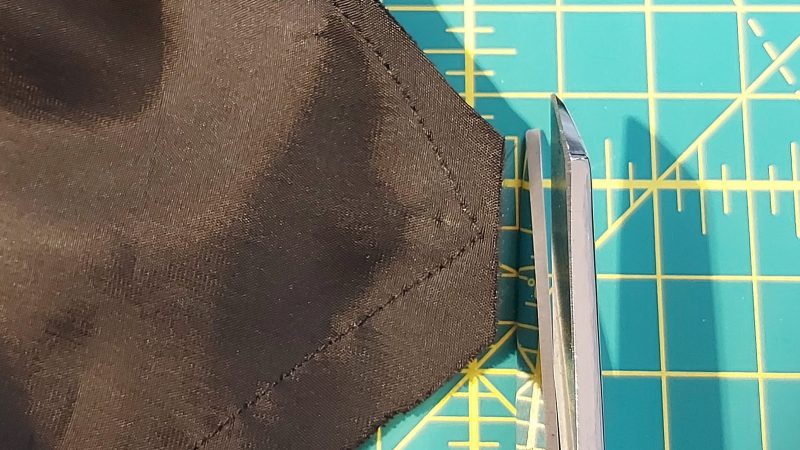
SIDE POCKETS
- With wrong sides together, place Pocket A Facing on top of Pocket A.
- Mark the 1/2″ seam allowance with a small notch on each side.
- Flip the facing over and pin with the notches aligned.
- Sew the facing onto the pocket. Press.
- Turn the facing over and press.
- Top stitch the facing a 1/16″ from the seam.
Step 13
ATTACHING SIDE POCKETS
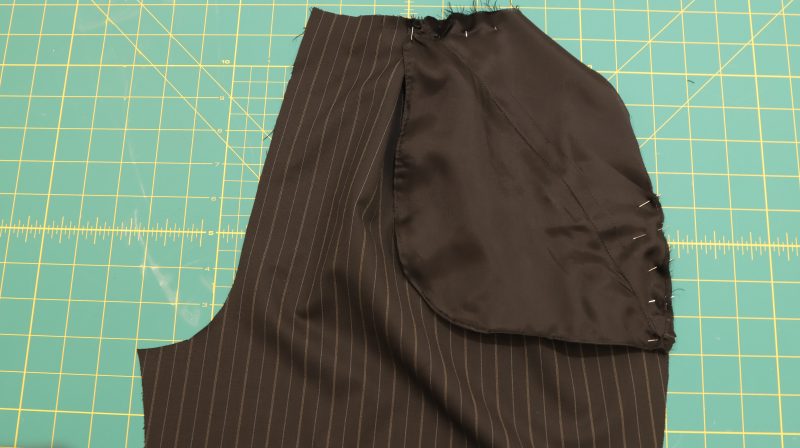
- With right sides together, pin and sew pocket B by the openings on the front pants. Press the seam. Bring the pocket to the wrong side of the pants and press again.
- Open out pocket piece A flat, and place pocket piece B on top of it with their wrong sides together.
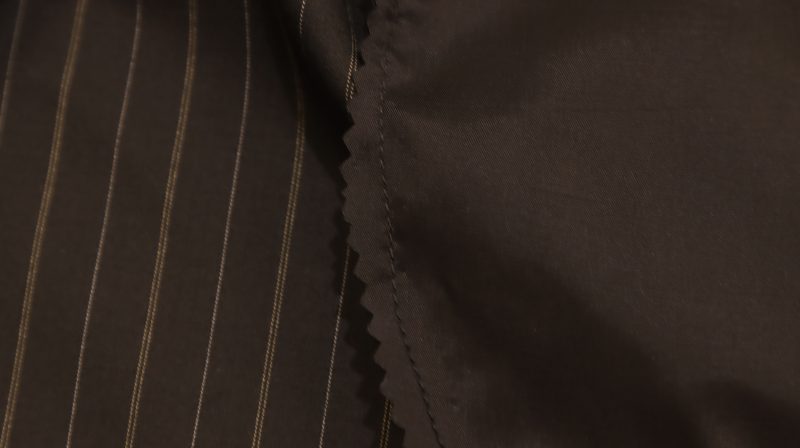
- Pin and sew piece B to piece A along the bottom and the sides.
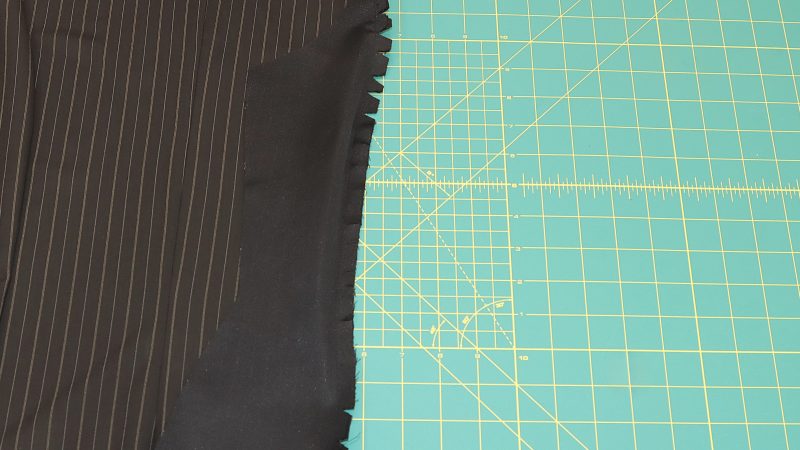
- Trim the seam allowance using fabric pinking shears to prevent the fabric from fraying. Alternatively, you can finish with a french seam.
- Turn the pocket wrong side out, and press.
Step 14
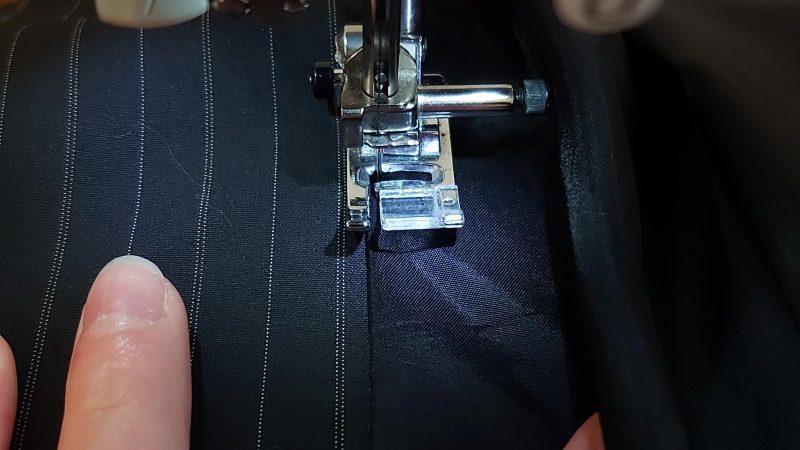
FRONT FLY & ZIPPER
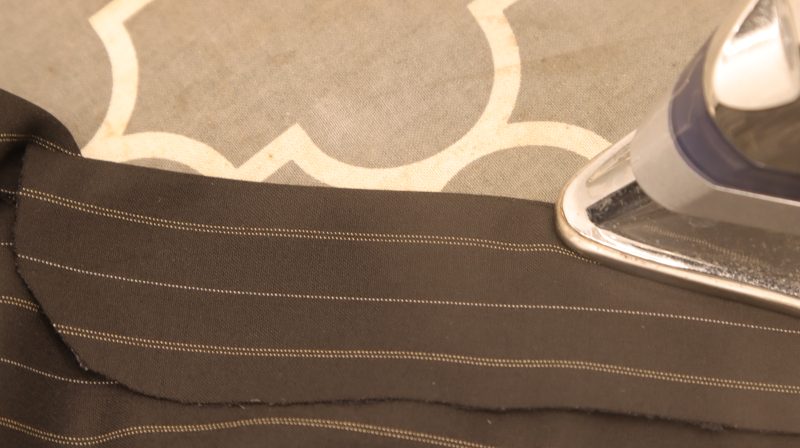
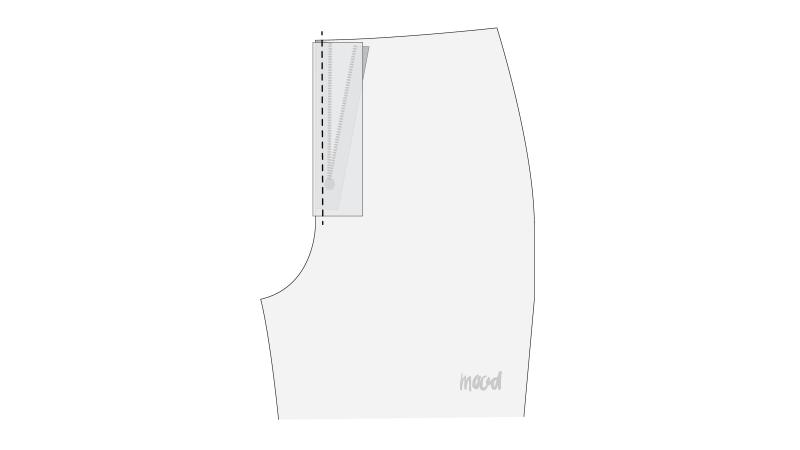
- Apply interfacing to the fly and fly shield.
- Fold the fly shield in half lengthwise. Press.
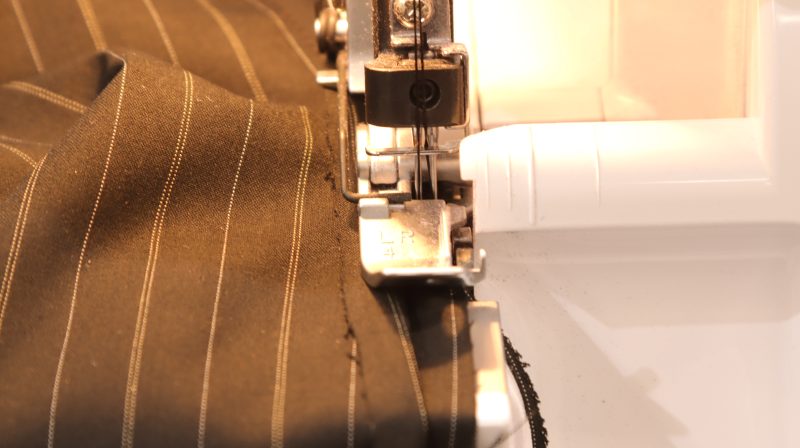
- Finish the edges of the fly and fly shield. You can finish them either using a serger or an overcast stitch.
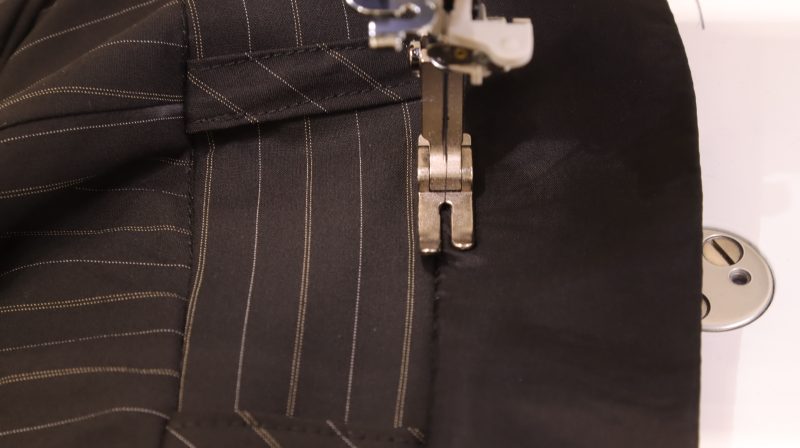
- Pin the fly piece to the right side front piece at the center front, aligning the edges, and stitch in place.
- Bring the fly to the wrong side of the pants and press.
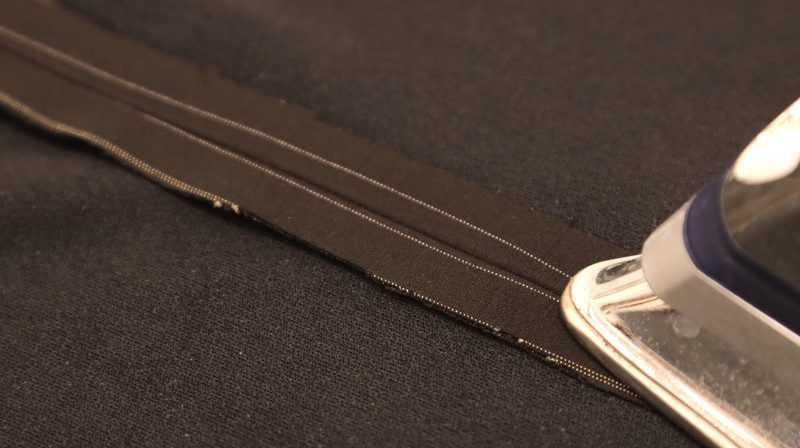
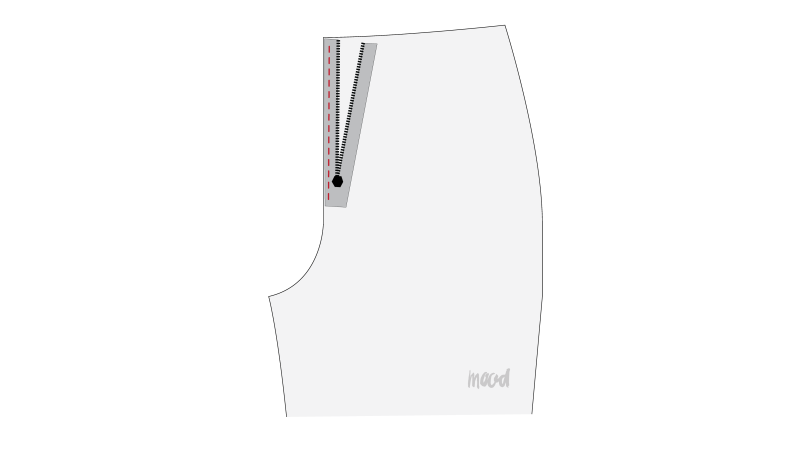
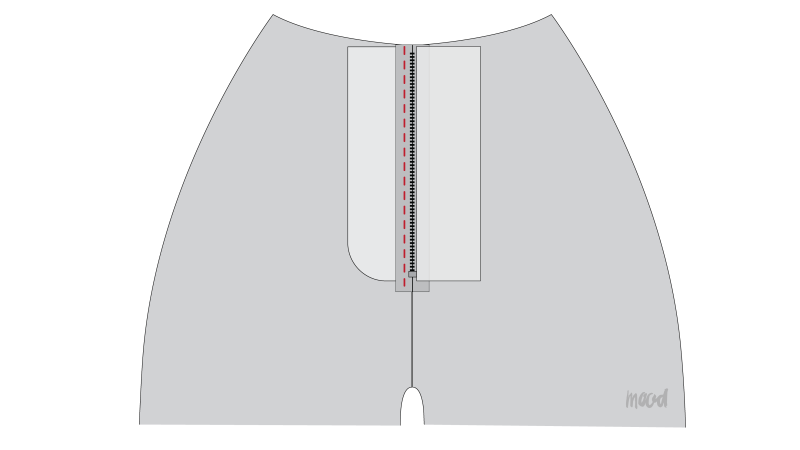
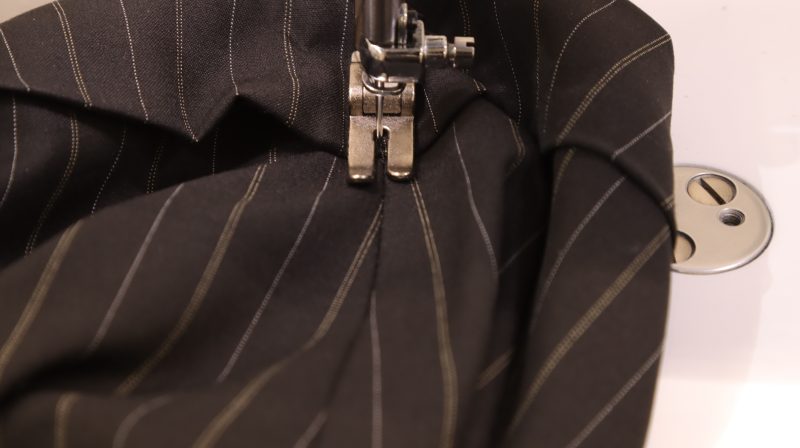
- Place one side of the zipper along the center front edge of the left front piece, right sides together. Line up the zipper tape with the raw fabric edge and pin it in place. Sew close to the zipper teeth using a zipper foot.
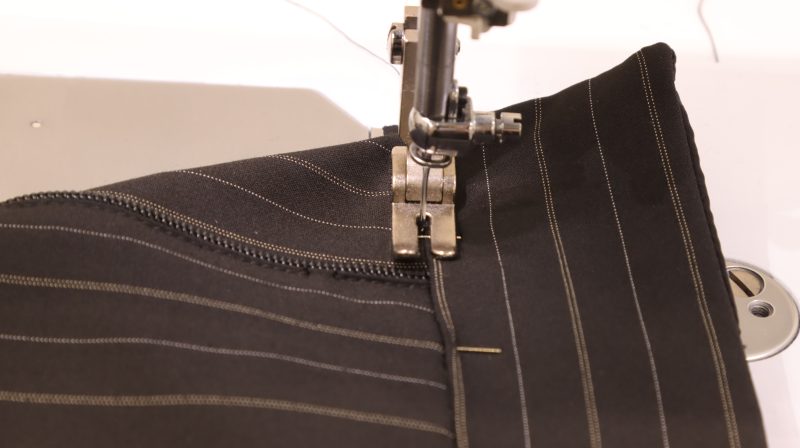
- Place the open edge of the fly shield over the zipper and stitch through all three layers: front pants, zipper, and fly shield. Be careful to sew right next to the zipper teeth.
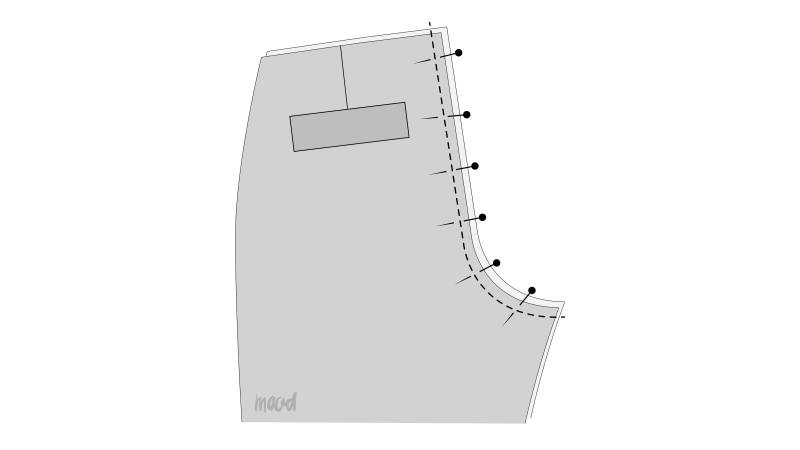
- Place the two front pants pieces right sides together. Pin and sew along the crotch seam using a ½” seam allowance. If needed, let the end of the zipper stick out into the seam allowance so it doesn’t get caught in the stitching.
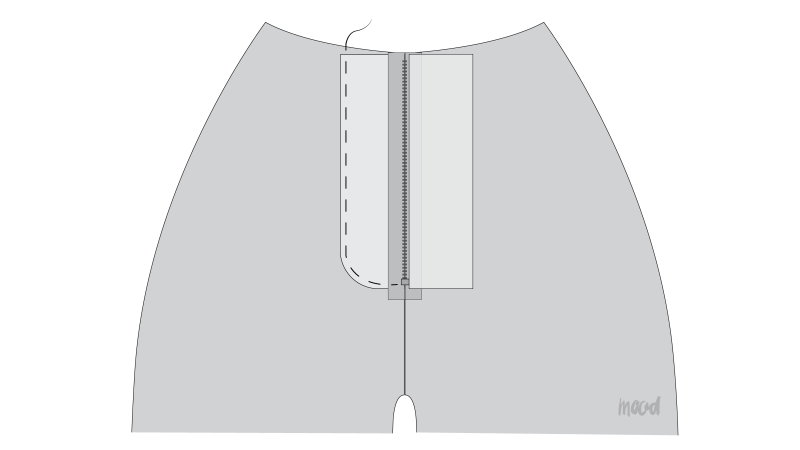
- Sew the free side of the zipper to the fly piece. Make sure you only sew through the zipper tape and the fly. Do not stitch through the front pants piece. Use a zipper foot on your sewing machine so you can sew close to the zipper teeth.
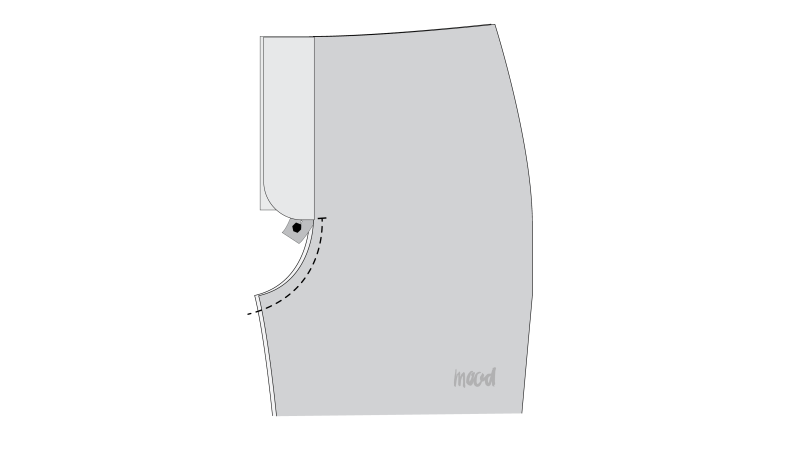
- From the wrong side of the pants, sew a temporary basting stitch along the outer edge and bottom curve of the fly. Stitch through both the fly piece and the front pants fabric to mark the fly’s shape.
- Now, on the right side of the pants, sew by machine with a stitch length of about 2.5–3 mm, following the basting line you made earlier. Press the fly area flat, then remove the basting stitches.
Step 15
SEWING FRONT & BACK
- Place the two back pieces with the right sides together, lining up the crotch seams, pin them together, and sew along the seam.
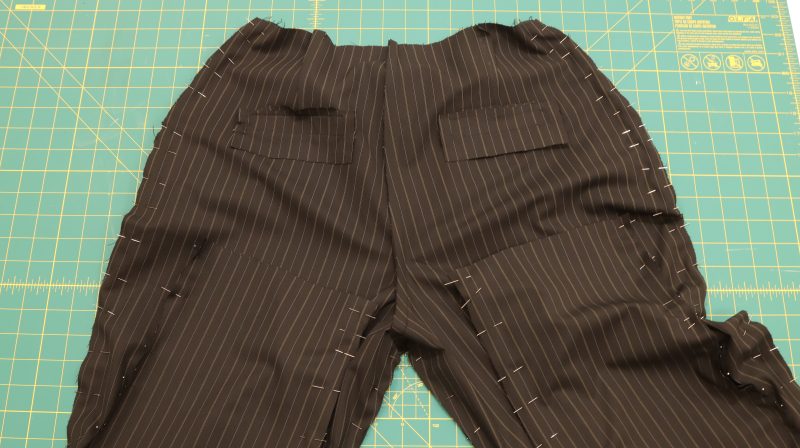
- Place the front and back pants pieces right sides together, aligning the side seams and inner leg seams. Pin, then sew using a ½-inch seam allowance.
- Serge the seam allowance for a neat finish.
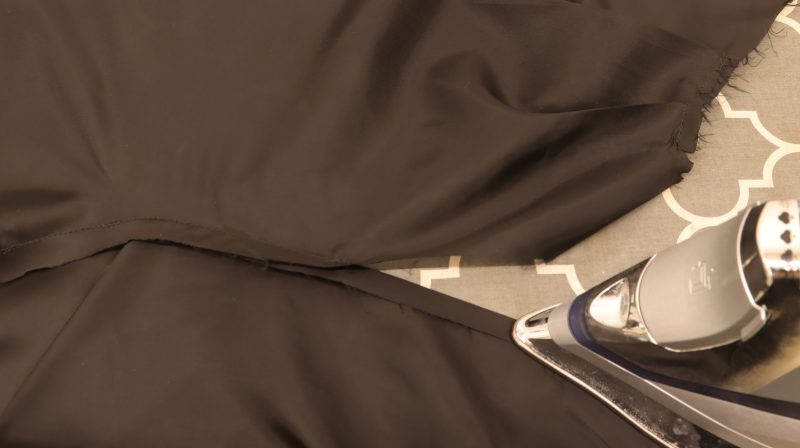
- Press the seams open.
Step 16
LINING
- Using the previously made thread tracing, mark the back darts with chalk.
- Fold the back pieces, aligning the two diagonal lines, and pin to hold in place.
- Sew the dart. Do not back-stitch at the end. Keep sewing and cut 1” of the twisted thread.
- Fold the front pleats, pin them, and sew or baste at the waistline to secure them in place.
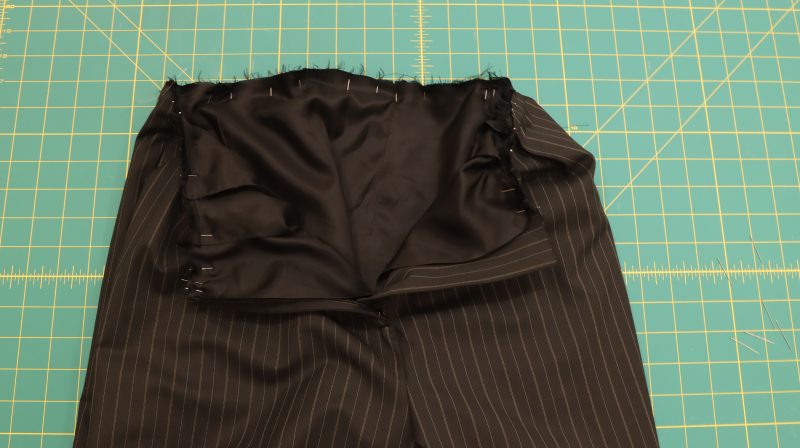
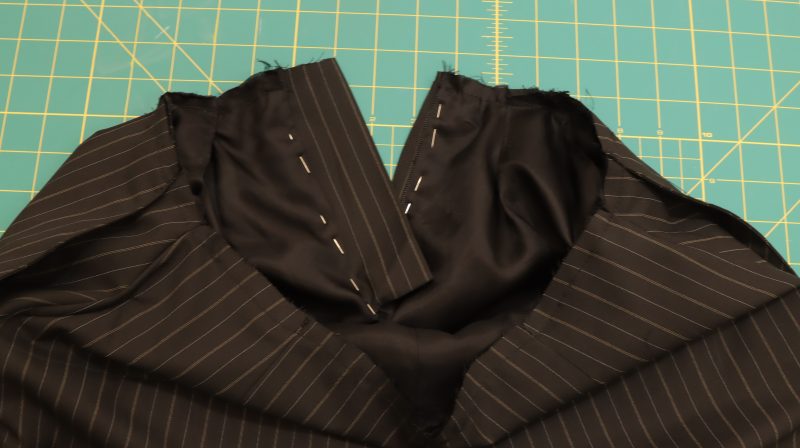
- Place the two back pieces with the right sides together, lining up the crotch seams, pin them together, and sew along the seam.
- Place the two front pieces with the right sides together, lining up the crotch seams, pin only the bottom curve, and sew.
- Fold the seam allowance toward the wrong side and press, only from the top point of the crotch stitch line, up to the waistline.
- Place the front and back pieces right sides together, aligning the side seams and inner leg seams. Pin and sew.
- To hem the pants lining, finish the raw edge with a serger (or overcast stitch). Then fold the edge an ⅛” to the wrong side and stitch it down.
Step 17
ATTACH LINING
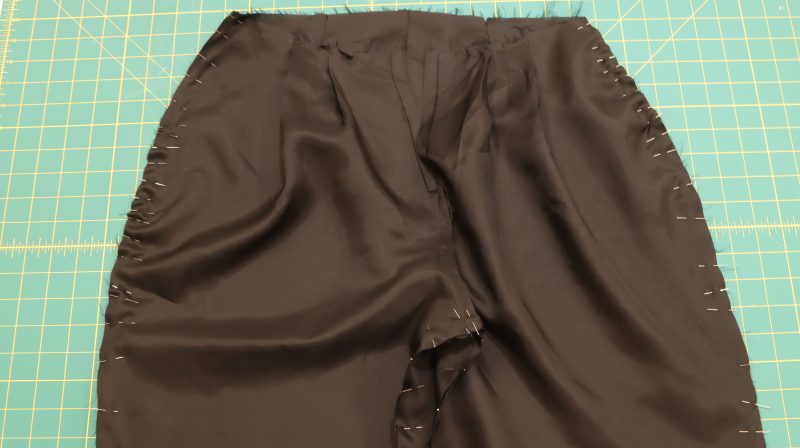
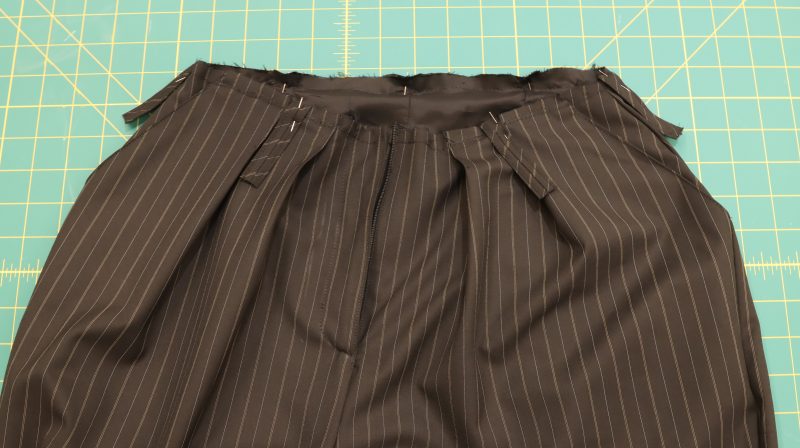
- Place the lining inside the pants with the wrong sides of the fabrics touching each other. Line up the waist edges, pin them together, and sew or baste to hold both layers in place.
- Place the lining inside the pants with the wrong sides together. Line up the waist edges, pin them together, and sew or baste to hold both layers in place.
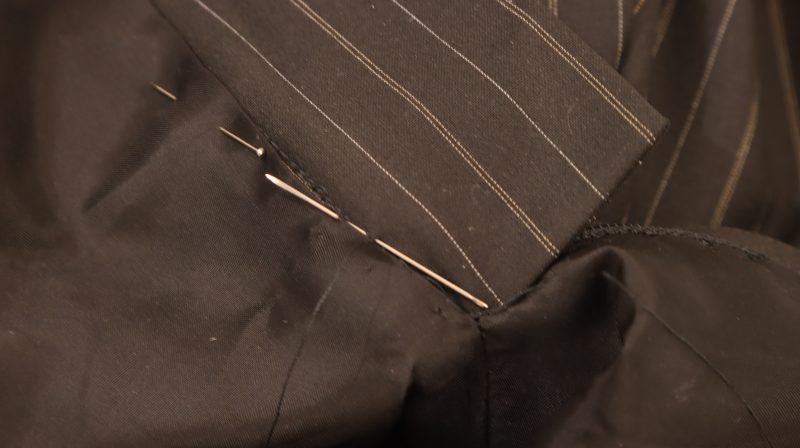
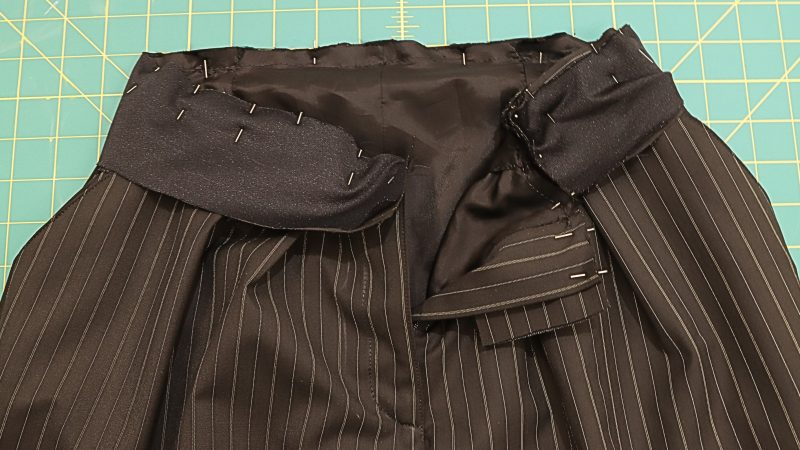
- On the wrong side of the garment, align the pressed seam allowance edge of the lining’s front opening with the zipper opening on the pants. Pin to secure the lining and shell together.
- Slip stitch along the pinned places.
Step 18
CREATE BELT LOOPS
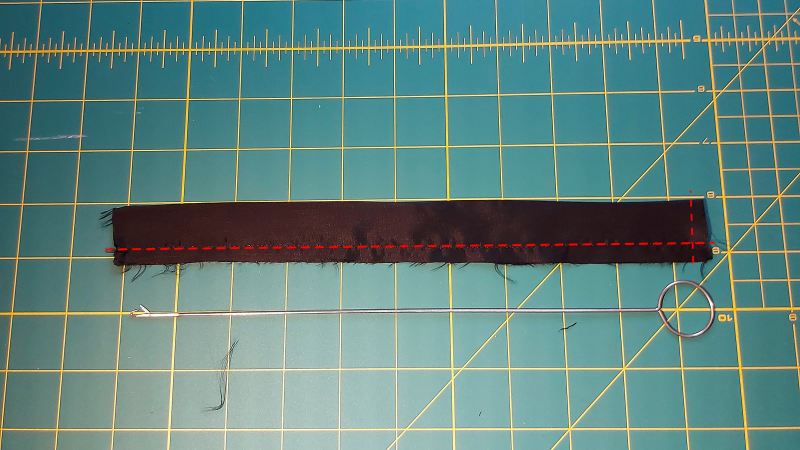
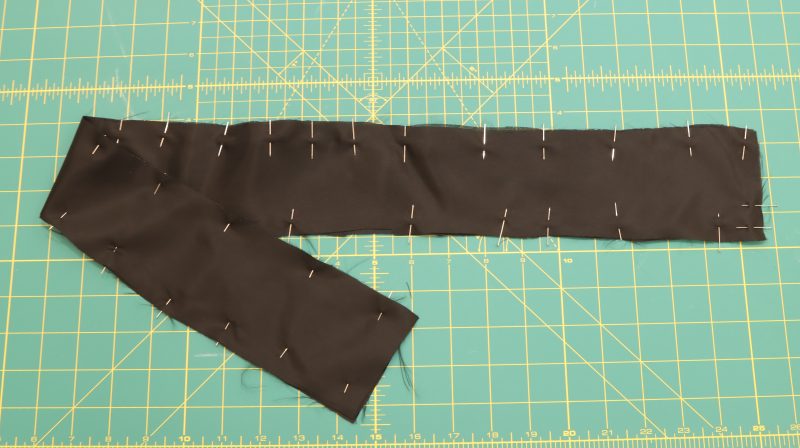
- Cut a fabric strip 20 inches long by 1½ inches wide.
- Fold the strip in half lengthwise with right sides together, and stitch along the long edge.
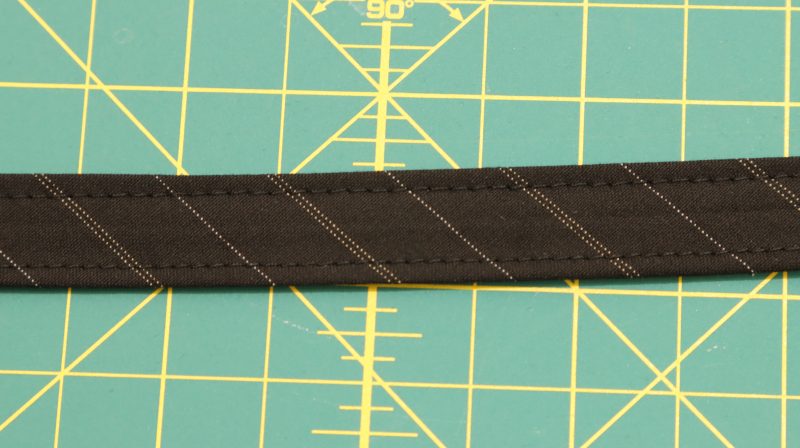
- Using a turning tool, turn the strip right side out.
- Press the strip with the seam positioned at the center back; this side will be the back of the loops.
- Topstitch a 1/16 inch from each edge.
- Cut the strip into seven pieces, each measuring 2¾ inches, to create the loops.


Step 19
ATTACH BELT LOOPS
- Mark two loop placement points on the front of the pants, positioned at the center of each front piece.
- Mark three placement points on the back: one at the center-back seam and two at the midpoint of each back piece.
- Mark the last two placement points at the side seams.
- Pin the loops at the marked points.
Step 20
WAISTBAND
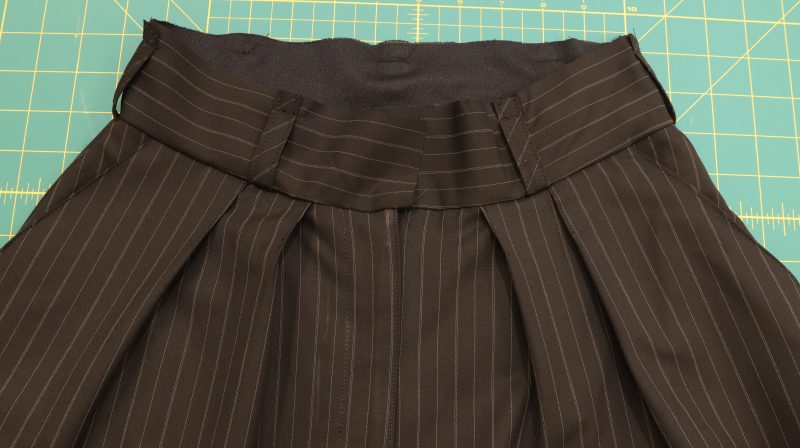
- Pin the waistband to the pants waistline with the loops sandwiched between the pants and the waistband, and stitch in place. Prior to this step, you can apply interfacing to the waistband if your fabric needs extra structure.
- Unfold the waistband upward, press, and sew the top ends of the loops to the upper edge of the waistband.
Step 21
WAISTBAND LINING
- Place the two waistband lining pieces right sides together and stitch all the way around using a ⅜ inch seam allowance.
- Mark a line a ½ inch from one of the long edges.
- Fold along the marked line and press.
- Pin the lining to the waistband, matching the unfolded long edge with the top edge of the waistband and keeping the pressed fold facing downward toward the garment. Sew along the top edge to attach the waistband lining to the waistband. The folded edge should remain to the outside. Pin and stitch the short ends of the waistband lining at the front opening edges of the pants as well.
- Trim the front corners of the waistband seam allowance.
- Understitch the lining, then turn it to the wrong side of the pants and press.
- From the right side of the pants, stitch in the ditch along the waistband seam, securing the lower edge of the waistband lining to the inside of the pants.
- Make the buttonhole and attach the button.


Step 22
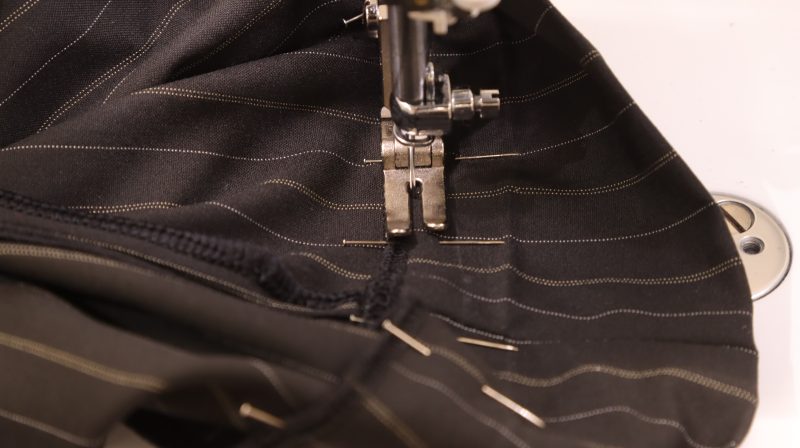
CUFFED HEM
- Number the hem fold lines marked in Step 8 from bottom to top, 1 through 3.
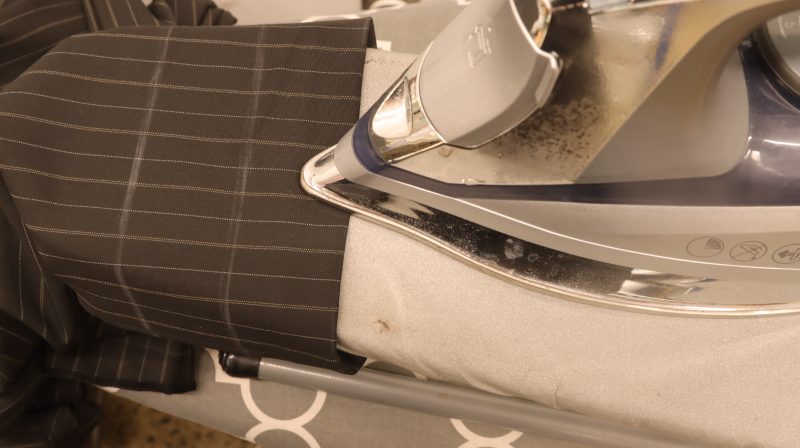
- Fold along Line 1 to the wrong side and press.
- Fold along Line 2 to the wrong side and press again.
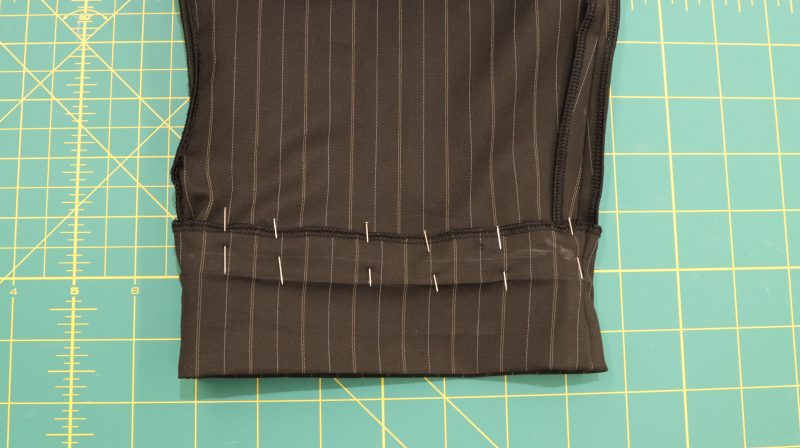
- Turn the pant leg wrong side out and pin the folded section to secure it.
- Stitch an ⅛ inch from the raw edge.
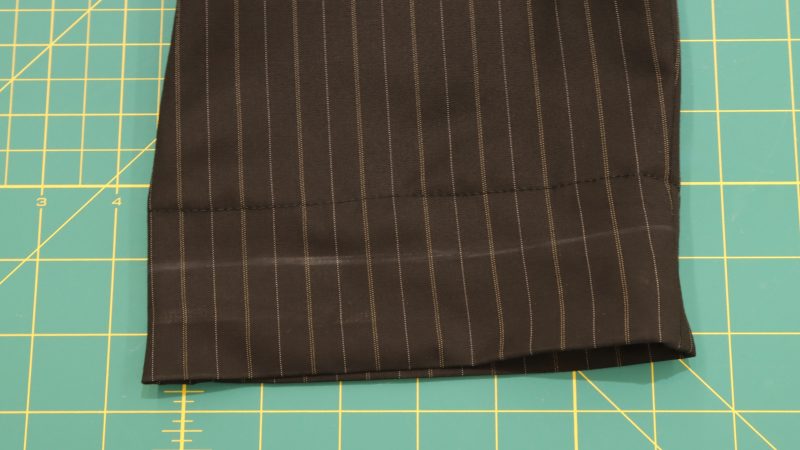
- Turn the pant leg right side out. At this point, Line 3 should be visible just below the seam you stitched.
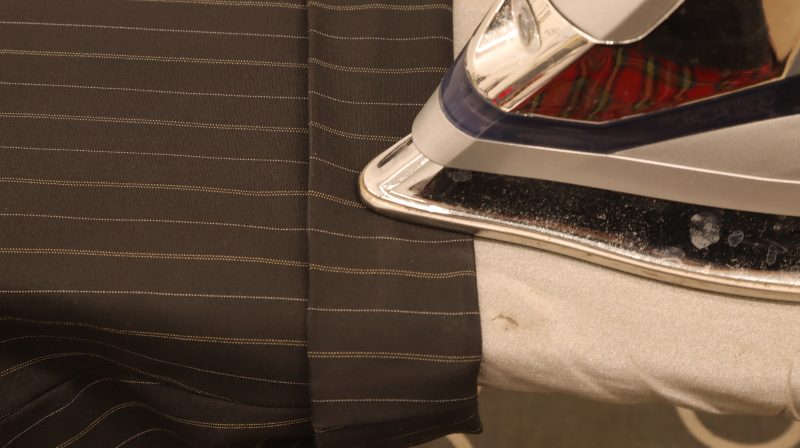
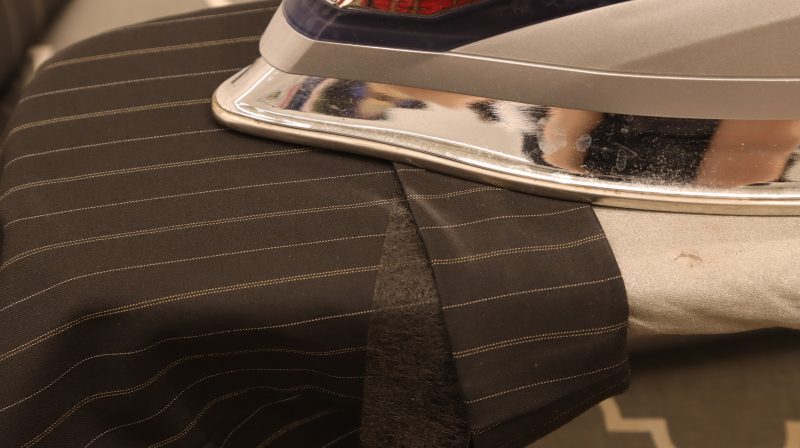
- Fold along Line 3 upward over the right side of the pants and press.
- (Optional) You may insert fusible bonding web into the fold as you press to help hold the cuff in place.
- Topstitch along the side seams to secure the cuffed hem.

Sewing Success: The Finished Anne Waistcoat Ensemble
Share this post with a friend (or two!), download the Anne Waistcoat Ensemble free sewing pattern, and show us which fabrics and colors you choose, using the hashtags #MoodAnnePattern & #MadeWithMood—and don’t forget to tag us @MoodFabrics, too.

Free Sewing Pattern Inspiration for Your Next Project
With 450+ free sewing patterns and counting, your opportunities for sewing with Mood are endless!
We hope you had as much fun sewing this waistcoat pattern as we did! As always, we want to hear from you—share your thoughts and comments below and let us know where you’ll be wearing the Anne Waistcoat Ensemble free sewing pattern!
Love it! Very on trend for the Fall season and the barrel leg look. Cannot wait to try this out with some fabrics from my Mystery Fabric box I got earlier in the year. Definitely a scrap buster for the vest pattern. The possibilities are endless….. Thank you for sharing your talent with us!
Thank you Mood! I have been waiting for you guys to bring out a waistcoat pattern like this! Can’t wait to try it!
Muchas bendiciones, por favor cómo se imprime para la talla L
Lovely pattern!!!!!!!!!!! Great instrucutions!!!!!Completely in love!
Love the idea of a pattern for a fitted vest! But, is there a step missing in Step 4 FAUX WELT POCKETS? Seems like after step 6 of sewing the side triangles and step 7 of trimming seam allowance, there should be another step in closing up the opening to the pocket. Otherwise it is just an opening thru/behind the welt that would let the wearer drop things into the “pocket” which would just fall better then the fashion layer and the lining, since there isn’t an actual pocket in it.
On the wrong side of the garment, align the triangular flaps with the sides of the pocket pieces and stitch them together.
Trim any excess seam allowance.
Hi Karen! I just published another blog post with a different explanation for how to sew welt pockets in the Nolita Vest Pattern. Check out those instructions and see if that helps you figure out the pockets. I know welt pockets can be tough, believe me.
Great Pattern, how can I transform the pants in a wide leg Version?
Take a ruler or yardstick and line it up with the outside line for the leg. Create a new line that goes straight down instead of tapering in. You can do the same with the inside line for the leg. This will give you a wide or flared leg pants pattern.
Hi there! What is the yardage for each garment individually?
Hi Danielle, it depends on what size you’re making. For a size medium, the pattern calls for 5 yards of main fabric and 5 yards of lining. I recommend buying 2 yards of each if you’re making just the waistcoat and 3 yards of each for just the pants, unless you’re making a bigger size, in which case you can still use this same ratio.
Hi! Beautiful pattern, how many yards just for the top?
Hi Clarissa, it depends on what size you’re making. For a size medium, the pattern calls for 5 yards of main fabric and 5 yards of lining. I recommend buying 2 yards of each if you’re making just the waistcoat and 3 yards of each for just the pants, unless you’re making a bigger size, in which case you can still use this same ratio.
Hi, this is such a gorgeous ensemble! I just wonder, how much material do I need for the vest only? Can it be done without lining? I’m a beginner and I’m not sure I could make it with a lining. Thanks in advance! Best regards from Poland 🙂
Hi Karolina, it depends on what size you’re making. For a size medium, the pattern calls for 5 yards of main fabric and 5 yards of lining. I recommend buying 2 yards of each if you’re making just the waistcoat and 3 yards of each for just the pants, unless you’re making a bigger size, in which case you can still use this same ratio.
I would definitely recommend using a lining for the waistcoat, but you could always try making it with just the main fabric and then hemming all the raw edges around the arms, waistline, and neckline.
Hi! What would the yardage be for just the top?
Hi Haley, it depends on what size you’re making. For a size medium, the pattern calls for 5 yards of main fabric and 5 yards of lining. I recommend buying 2 yards of each if you’re making just the waistcoat and 3 yards of each for just the pants, unless you’re making a bigger size, in which case you can still use this same ratio.
I definitely need to make this one
Hi, it’s such a great pattern! I wonder, how much fabric do I need for the vest only? Thank you!
Hi Karolina, it depends on what size you’re making. For a size medium, the pattern calls for 5 yards of main fabric and 5 yards of lining. I recommend buying 2 yards of each if you’re making just the waistcoat and 3 yards of each for just the pants, unless you’re making a bigger size, in which case you can still use this same ratio.
There is no guide on the pattern as to where to place and pin the back straps. I looked on the center piece and the side pattern pieces and there are no markings on them about where those need to be sewn in.
I just noticed the same thing Katie, thanks for pointing that out. For the back strap, I recommend placing it in line with the smallest part of the waist on the waistcoat. In terms of the placements of the ends of the straps, the technical drawing shows that they are in line with the back seam that connects the back center pieces and the back side pieces. I hope this helps you finish your garment!
Hello. I don’t see any instructions on when/how to sew the front side pieces of the waistcoat to the front center pieces. It goes over how to do the side pieces on the back center panel, but skips over the part about attaching the front center and front side pieces (presumably before adding the faux pockets).
Hi Katie,
You’re right, the front and front side pieces should be pinned and sewn together before sewing the welt pockets.
If im only trying to make the waistcoat what pages would i print? Please and thank you its for my doc holliday costume this Halloween
Hi Lillian,
If you look at the pattern pieces on the blog under “Pattern Pieces & Fabric Cuts Needed”, you will only need to print out the pattern pieces for A, B, C, D, E, F, and G. The rest of the pattern pieces are for the pants.
Can’t wait to try this! Where are the shorten lines on the vest? I’m short & will probably need to shorten the length of the vest by 1-2”. Thank you!
Hi Sam! There are not shorten lines on the pattern, but I recommend shortening it from the smallest part of the waist.
Confused about order in the vest instructions. When do you sew the front and front side together? Between step 2 and 3? Why sew the front and back shoulders before finishing the welt pockets? Why thread mark through the main fabric and the lining? The later picture shows the front lining does NOT have the pocket.
Hi Becky, I’ll answer your questions in the order you wrote them.
1. Yes, you’re correct. I would sew the front and front side together between steps 2 and 3.
2. You don’t necessarily have to sew the shoulders before the welt pockets, some steps are interchangeable in their order.
3. Thread marking is one of many ways to mark where a detail is supposed to go on a pattern, such as a pocket or a dart. It just helps you mark exactly where something is supposed to go and makes sure its even on both sides if the pattern is symmetrical.
4. The welt pockets in this garment are faux pockets. They have the welt opening and the flap, but no lining to put your hand in. They are simply decorative which is why the pocket is not on the lining.
Lovely. The pants OMG I’m so in love. Can I use the waistcoat for man too. Want to try it for someone.
You can absolutely use this pattern for a men’s waistcoat, but I recommend creating a blending line to make the waist pieces more straight at the side seams instead of curved. The waistline on this pattern is tapered for a women’s fit, but it could easily be altered to fit men too!
Thank you Mood for the wonderful pattern, I am however unable to download it, is there a way I can get the pattern?
Thank you
Hi Maria, please enter your name and email address into the fields and click “Subscribe and Download”. You should get an email in your inbox with a link to the pattern. If you’ve checked your spam folders and its still not there, send us an email at patterns@moodfabrics.com and we will assist you there.
Este patrón es solo para dama o se puede adaptar para caballero ??
Sí, puedes, pero recomiendo que la cintura y la cadera del chaleco queden bien ajustadas para un hombre. Asegúrate de usar la tabla de tallas para elegir la talla correcta.
Thank you Marisa.
I noticed a typo in the sizing chart, just want to let you know! Excited to make this waistcoat. Thank you for sharing some more non-binary clothing patterns.
Hi Jamie! Is the typo in the size chart on the blog or the size chart on the printed pattern? Thanks for noticing!
Hi love this pattern, can’t wait to make it. Looking through the instructions, I can’t see directions for sewing pieces C and D. Is this just me missing this. Please advice if possible. Thanks Steph
Hi Steph! I think you’re right actually. I don’t see where the instructions say to put the two front pieces of the vest together. It looks like they should be sewn together, right sides together (the same way the back is constructed) at the beginning of step 2 before you start the welt pockets. I hope this clears things up!
The pattern calls for a 9 inch Zipper, but for the size pants I’m making, the fly and fly shield are only 7 inches long. Do I just trim the zipper to the exact size of the fly and fly shield? Then line it up with the raw edges of the top of the pant pieces?
Hi Katie! Typically when I’m sewing a zipper fly, I will line the bottom of the zipper up with the bottom of the fly shield, regardless of the length of the zipper. Whatever length of zipper is leftover can just hang off the top of the pants until you’re ready to sew your waistband. Once I start pinning and sewing the waistband to the waistline of the pants, then I will open my zipper (with the zipper pull all the way at the bottom of the fly), trim the top of the zipper off so that it’s aligned with the waistline of the pants, and then encase the cut edge of the zipper into the waistband so that the zipper pull only goes as far up as the waistband will let it. Let me know if this explanation helped!
How much fabric will I need just for the waistcoat in 3xl?
Hi ALice! I recommend 2.5 yards of the main fabric and 2.5 yards of lining fabric for a size 3XL for just the waistcoat.
Hi! I need to shorten the length on the vest. I don’t see a raise/shorten line, where would that be? I only need it shortened 1-2 inches since I’m 4”11. Thank you!
Hey Sam, I would shorten it right above where the marking for the welt pocket is on the pattern. You may have to blend the new hip and waist line with each other if you shorten it from here, but it should still look correctly proportioned.
Hello,
i’m french so i try to translate the pattern.
But for the pants i don’t understand when use the “o” parts for the pocket. I don’t understand how sew the pocket.
Can someone help me ?
Merci
Hi there.
Thank you for the pattern, I made the waistcoat for my daughter.
The pattern was great, however my one criticism would be the princess seams need notches, I am an experienced sewer and even I don’t feel comfortable without them.
Hi there.
Thank you for the pattern, I made it for my daughter and it was great. However my one suggestion is to add notches to princess seams, I am an experienced sewer and even I am uncomfortable sewing without them.
Hi Laura
Thank you for your comment. We love that our pattern was useful for you! Thank you so much for the suggestion. We’ll do our best to include notches on princess seams in future patterns and add them to this one as soon as possible. Happy sewing!
I love this pattern, but these instructions are the absolute worst ever!! I have been sewing from the time I was 9 years old and have never encountered such confusing directions. The vest was extremely convoluted, but I was able to construct with prior knowledge and intuition. The pants do not really show the same direction for the pleats that the pattern does and the zipper is way longer than the fly pattern! I have not started the pant lining yet, but am already worried…
Thanks for the pattern, but I have made detailed period garments with clearer instructions.
Hey Elaine! Thanks for the feedback. I recommend checking out our pattern for the Perugia Peplum Blazer and Pants Suit. It is a different silhouette from the Anne Waistcoat Ensemble, but it has similar features (faux welt pockets, lined pants, etc).
I made this pattern about a month ago and love it! I did have some challenges with it but all in all it is a great pattern; great fit; and it is a very flattering ensemble. I used the recommended fabric and buttons (used some lining fabric I had) and have enough left to make the vest for my husband who wants one! Thanks Marisa for a great look! By the way, the corrects in the comments are very helpful and answered some of the questions I had with construction.
muchas gracias
I love this pattern, and it turned out beautifully! I had charcoal pinstripe suiting wool in my fabric stash that worked perfectly. I left off the belt loops to eliminate any bulk beneath the vest and after struggling a bit with some of the instructions, was happy with the results. Thank you!
Thank you for this pattern, but as a warning to anyone else making the pants, they are MASSIVE and don’t look all that much like the picture. Pick your size based on the garment measurements, and NOT the size chart. I picked XL, because that’s what the size chart said would fit and what I normally wear. My measurements were all on the top end of the range for the size, so I was worried it might be too small, but figured it would be fine since it’s supposed to be baggy. The garment measurements seemed a little big, but I’m not used to measuring things in inches so it didn’t jump out at me as too big, and I figured it was just supposed to be like that, and even if the legs might be too wide for my preference, at least it should fit in the waist, hips and crotch, since it’s supposed to be the “correct” size. The picture makes them look like it’s a “you can comfortably walk and sit”-kinda baggy, but my result was more of a “8 year old wearing their dads pants”-baggy… I took off about 16 cm on each leg, and it’s getting there to be something more like what I was aiming for, but it still definitely looks like I’m just wearing the wrong size pants, rather than wearing pants that are supposed to be baggy. Mainly because there’s still waaaay too much fabric in the front at the crotch. Its fully my fault for not realising just how ridiculously big the pants was gonna be before actually putting them on, next time I’m not gonna blindly trust the process so much. They are cute though, and I’ll probably make them again, just with some alterations.
Hey Maria! We love how detailed this feedback is and I’m super glad you were able to alter the pants to make them fit you better. This pattern is an example of one of our patterns that has a good amount of ease built into it. It you look at the difference between the body measurements size chart and the garment measurements size chart, there can sometimes be a 3-5 inch difference between your actual waist or hip measurement and the measurement of the finished garment. Depending on if you want your garment to be loose fitting or tight, you can choose a size with a little more or less ease. We would love if you shared pictures of your final garment with us on social media and tagged us with the hashtags #MadeWithMood and #MoodAnnePattern so we can feature your work on our page. Thank you again for your comment!
LOL at the idea of this vest fitting over my chest. I bought some additional yardage in case this happened. Definitely designed for A-cups or less.
Hey Jen, If your measurements are dramatically different sizes, you can always blend two sizes together. For example, if your waist measurement is a size 8 but your bust is a size 12, take a pencil and blend the waist line from the smaller size with the bust line of the bigger size. Make sure the lines are blended gradually. Just cut out around the new line and it should be tailored to your measurements a bit better.
Hello, I love the pattern but am stuck with the exta Side Pocket Facing B. I don’t know where it’s mentioned in the directions. I am already seeing the inner leg seams together and moving to sewing the side seams but can’t find where that piece goes. It’s left out in the making of the pocket instructions.
Hey Kat, the pocket facings in this pattern are the same as the pocket facings in the Amherst Palazzo Set, which has directions that might be a little more detailed and clear. Check out that pattern and let me know if you still have quesitons.
I really like the pattern!!! The instructions are super precise and easy to understand