

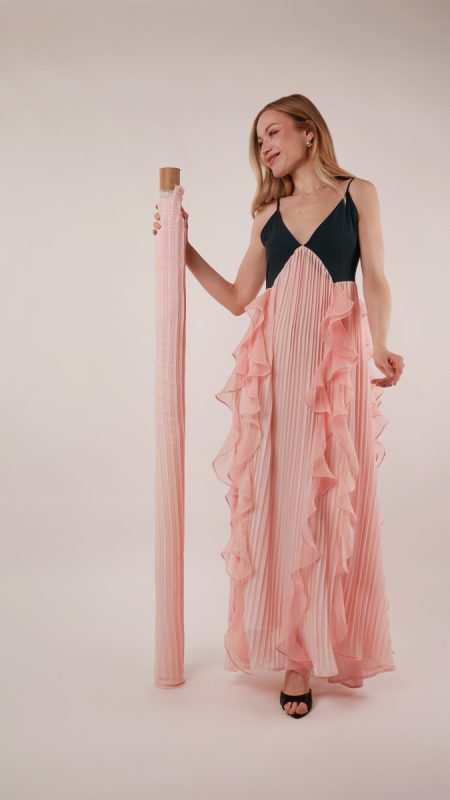
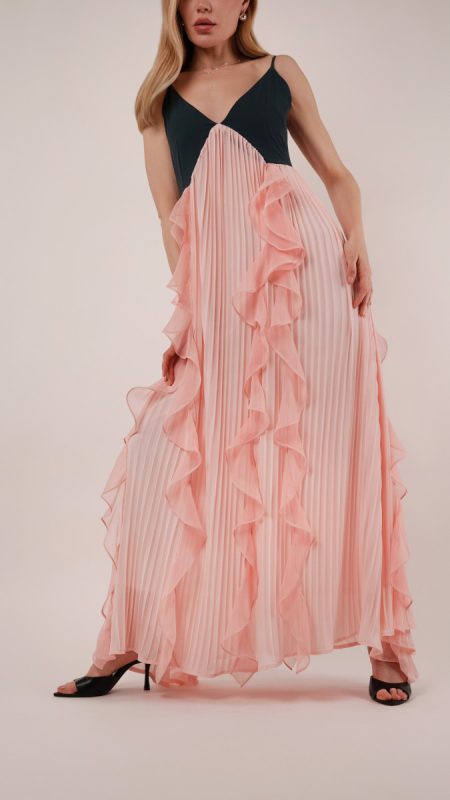
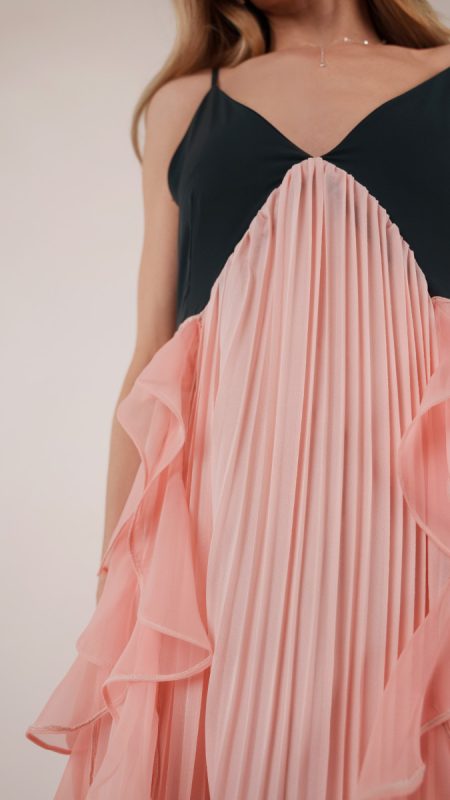
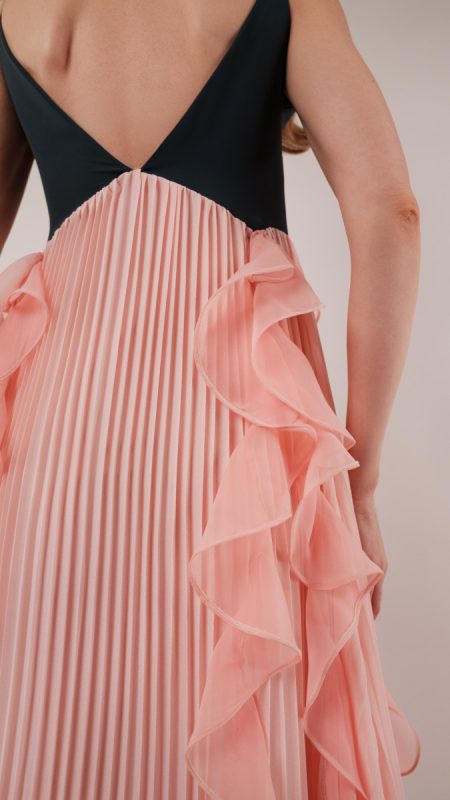
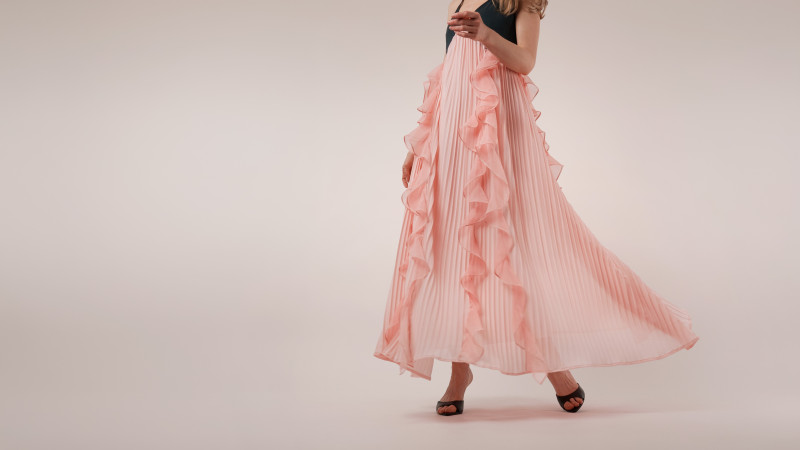
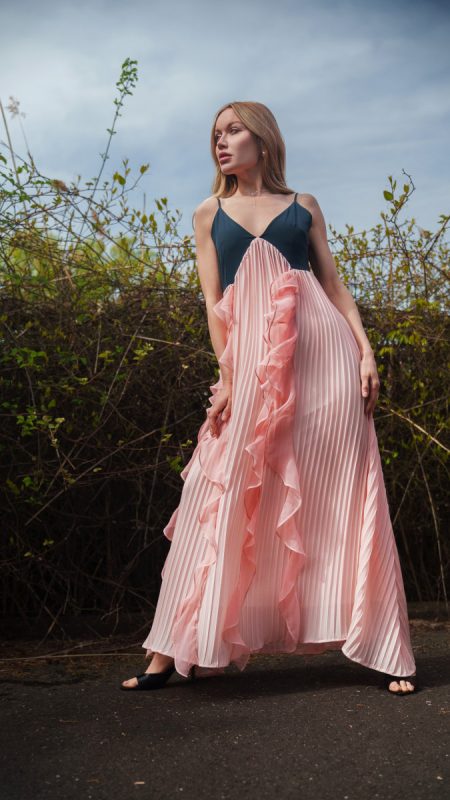
Soft and flowing, flirty and romantic, the Pyrite Pleated Dress was made to move with you like a shadow. Crafted from featherweight pre-pleated chiffon in a delicate rosy pink, this dress catches the air in the most dreamy way, creating dimension and texture with every sway. The contrast charcoal gray double georgette bodice adds just the right amount of structure, with carefully placed bust darts that shape a flattering, fitted silhouette before flowing into the airy skirt below.
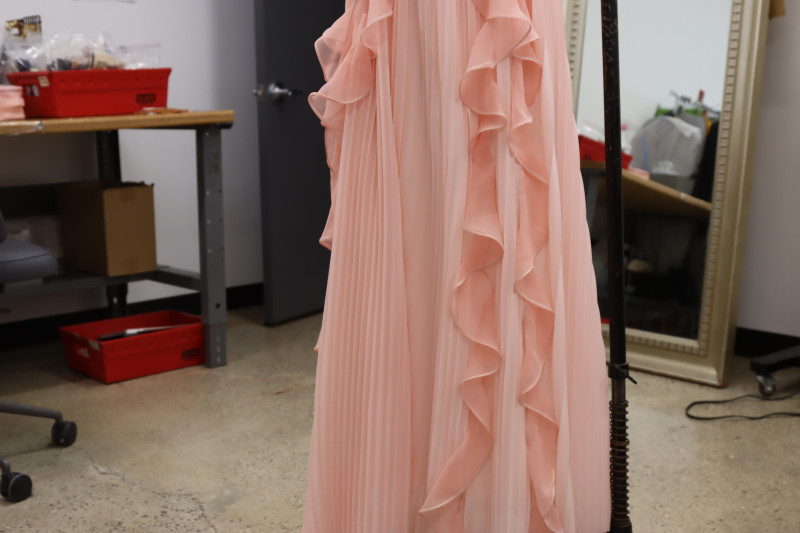
Designed with both beauty and wearability in mind, the Pyrite features a side seam zipper for a seamless finish and a full lining for comfort. Cascading from the bust, spiral chiffon ruffles wind their way down the dress, adding an extra layer of whimsy and movement that feels playful yet elevated. It is those little details that make this dress feel truly special.
Perfect for sunset dinners on vacation, garden parties, spring weddings, or strolling through a coastal town with a breeze at your back, the Pyrite Pleated Dress brings a sense of escape wherever you wear it. Pair it with delicate sandals for an easy daytime look or dress it up with heels and statement jewelry for an evening that calls for something unforgettable.


Essential Materials & Sizing Guide for the Pyrite Pleated Dress
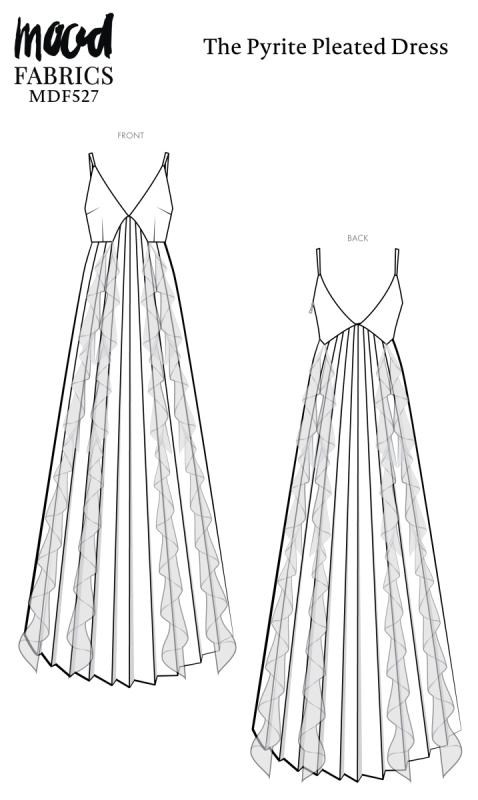
Continue reading for a breakdown of what knowledge and materials you need for creating your very own pleated dress! We’ve got you covered with the recommended materials we used—if you want to follow along exactly—as well as a curated list of alternative fabric type recommendations if you want to customize your own version. The Pyrite Pleated Dress free sewing pattern download includes technical drawings for seam and pleated dress visibility, plus a size chart to help you find your perfect fit!
Purchase Products Used Below:
Quantities indicated are for sewing a size small pleated dress. Toggle the ‘SHOP THIS LOOK’ box to find quantity estimates for other sizes.
- 1 yard of Polyester Double Georgette – Charcoal Gray – Mimosa Collection by Mood
- 7 yards of Accordion Pleated Chiffon – Rose Shadow Pink – Etereo Collection
- 4 yards of Polyester Chiffon – Rose – Regina Collection
- 2 yards of Japanese Pima Cotton Lawn – Pale Pink – Georgie Collection
- 1 each of Invisible Zipper 24″ by YKK – 377 Dull Pink
- 1 each of Gutermann Sew All Thread 100m – 118 Burnt Charcoal
- 2 each of Gutermann Sew All Thread 100m – 371 Salmon Buff
- MDF528 – The Pyrite Pleated Dress Sewing Pattern (Free download below!)
Additional Products Used:
*Quick Tip! The ‘SHOP THIS LOOK’ box defaults to full-yard quantities. To order an exact half-yard quantity for any fabric, simply use the decrease quantity button (-) to subtract by the half yard. Then click “ADD TO CART” to add all materials to your cart. (Our system can only display full-yard quantities initially.)
Alternative Fabric Type Recommendations:
The Pyrite Pleated Dress sewing pattern is best suited for featherweight fashion fabrics. Explore other fabric types or colors from our featured collections for your pleated dress with the links below.
Fabric Collections Used in this Post:
Download Your Free Sewing Pattern
Submit your name and email in the form below to receive the download link for the Pyrite Pleated Dress free sewing pattern directly in your inbox. Mood Sewciety Patterns will send your free download link via email with the subject line: ‘Your Free Download from Mood Sewciety – The Pyrite Pleated Dress’ (in PDF format for A4 and letter-size printing).
© MoodFabrics.com / MoodSewciety.com – Mass production, resale, or distribution of this pattern in any form is strictly prohibited.
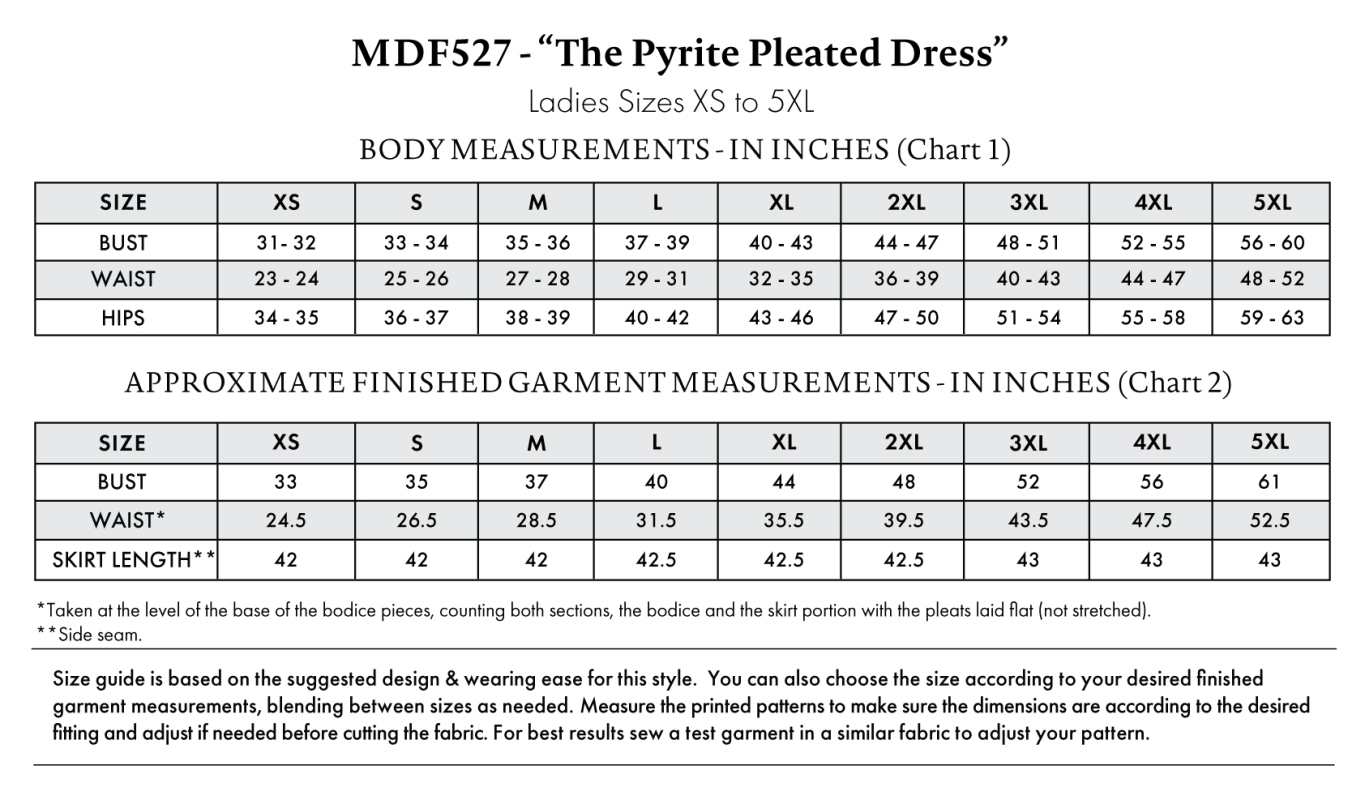
Find Your Perfect Fit
The Pyrite Pleated Dress Sizing Guide is based on the suggested design & wearing ease for this style. You can also choose the size according to your desired finished garment measurements, blending between sizes as needed. Measure the printed patterns to make sure the dimensions are according to the desired fitting and adjust if needed before cutting the fabric. For best results, sew a test garment in a similar fabric to adjust your pattern.
Note: Always read all the instructions before cutting the fabric!
How to Sew The Pyrite Pleated Dress
The instructions provided below are designed to guide you through sewing the Pyrite Pleated Dress from start to finish.
3 Tips for Sewing with Pleated Chiffon
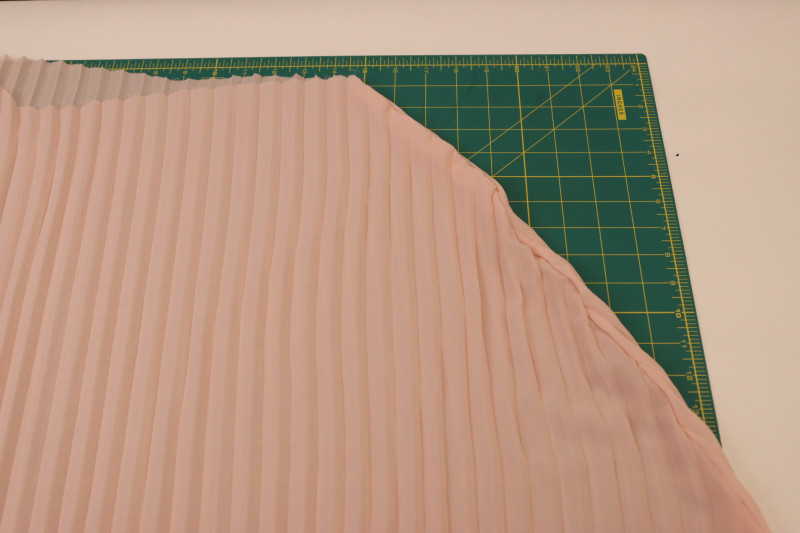
⇒ If you choose to use pre-pleated fabric for this project like I did, do not under any circumstances iron the fabric. The pleats will disappear and it will be as if they were never there to begin with.
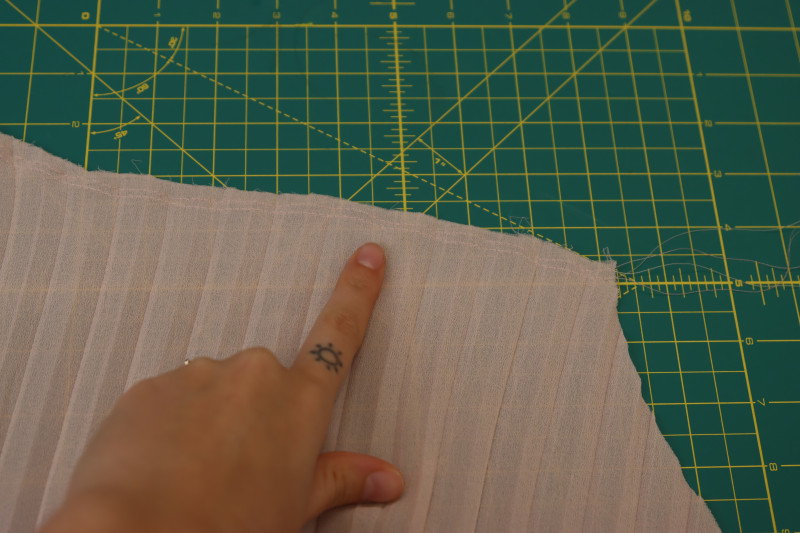
⇒ When cutting out the pleated skirt pattern, make sure that the fabric is folded on its pleats before cutting the pattern pieces out. In other words, the fabric will actually be about twice the length of the pattern piece after you cut it out because the pleats will have been folded before you cut the fabric. If you cut the fabric with the pleats stretched out, then they won’t be visible at all under the bust.
⇒ This one is important: if you choose to use fabric that does not already have pleats in it and you want the skirt to be full and gathered, you have to slash and spread the paper pattern before cutting out the fabric. You can either leave the skirt pieces attached at the waistline and spread the bottom, or you can cut slits all the way through the paper pattern vertically and spread all the pieces out.

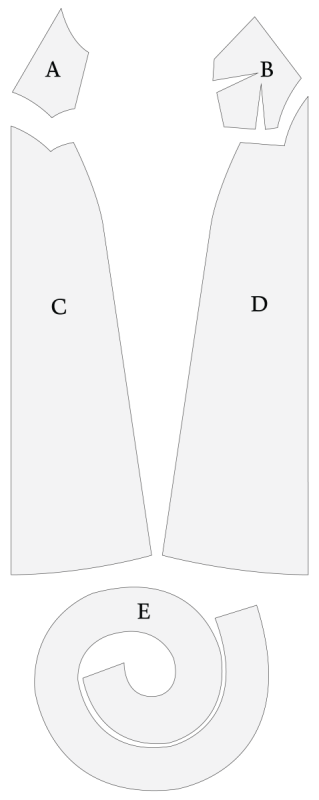
Pattern Pieces & Fabric Cuts Needed
- (A) TOP BACK
- Fabric – Cut 2 Mirrored Sets
- (B) TOP FRONT
- Fabric – Cut 2 Mirrored Sets
- (C) SKIRT BACK
- Fabric – Cut 1 on Fold
- Lining – Cut 1 on Fold
- (D) SKIRT FRONT
- Fabric – Cut 1 on Fold
- Lining – Cut 1 on Fold
- (E) RUFFLES
- Fabric – Cut 8
Sew with a 1/2″ seam allowance for all seams unless otherwise specified.
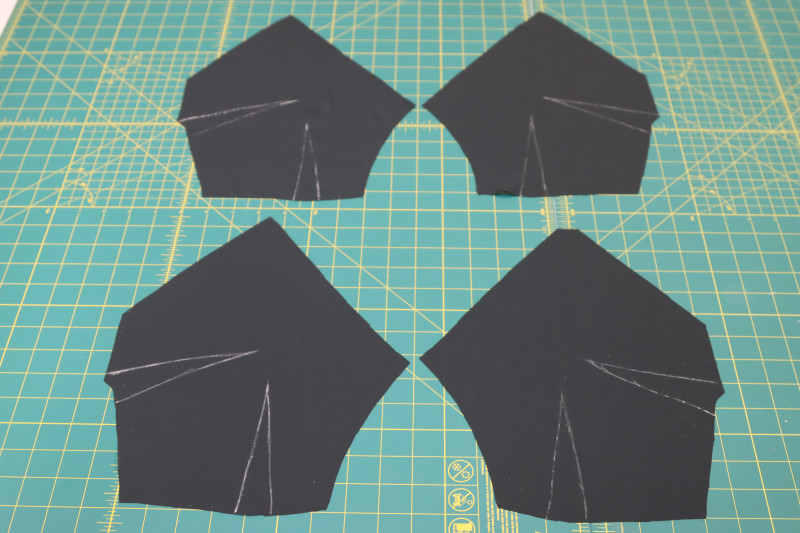
Step 1
BUST DARTS
- Mark the dart lines on the wrong sides of the front bodice pieces using tailor’s chalk.
- Fold each piece right sides together centered over each dart.
- Pin the dart lines together on either side of the fold.
- Sew both the darts on all 4 pieces.
- Press the horizontal dart down and the vertical dart towards the outer sides of the front bodice pieces.
Step 2
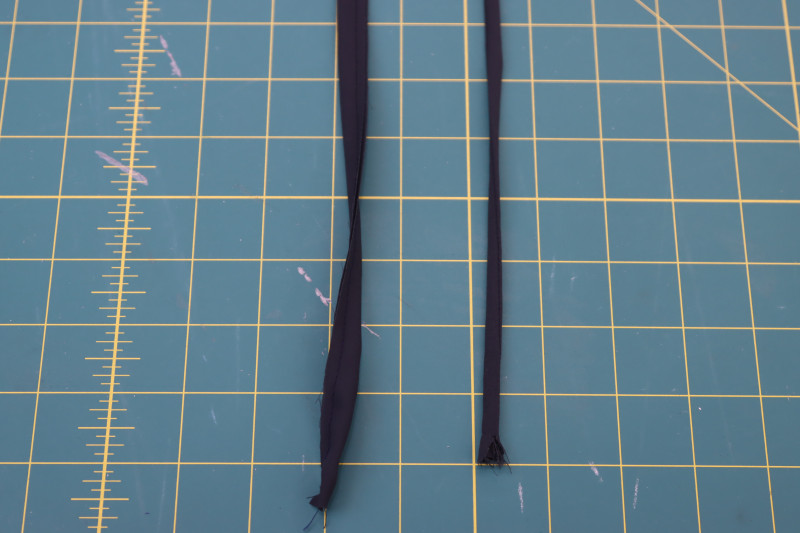
MAKE STRAPS
- Cut a strip of fabric that is 1 inch wide and at least 30 inches long.
- Fold the strip right sides together longways.
- Sew the strip with a ⅛ inch seam allowance, leaving a ⅜ inch wide strap.
- Flip the strap right sounds out using a loop turner.
- Press the strap flat.
- Cut the strap in half to make two of them.
Step 3
ATTACH STRAPS IN FRONT
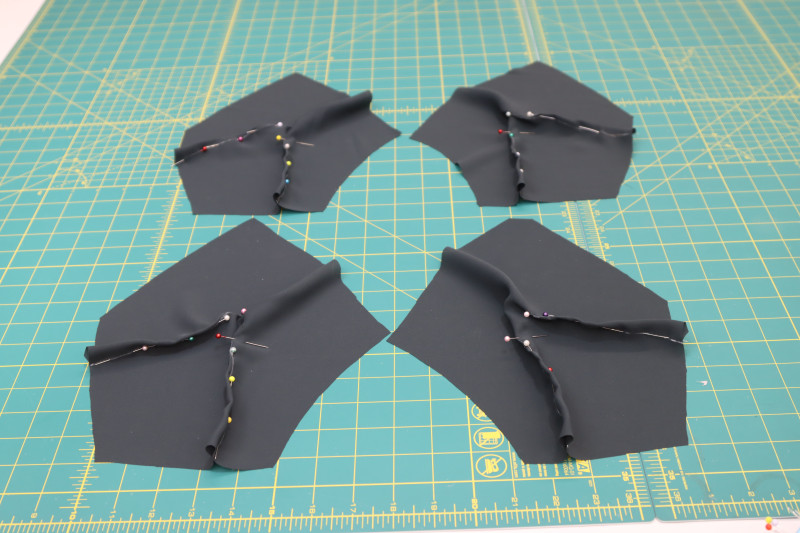
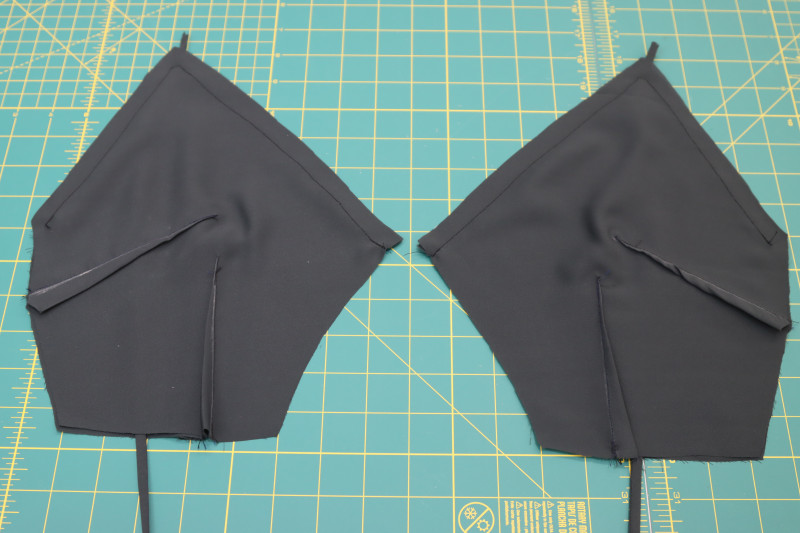
- Place two of the front bodice pieces right sides up on your workspace.
- Place the straps in the center of each front bodice piece lined up with the top corner.
- Place the other two front bodice pieces right sides together on top of the ones on the table, sandwiching the strap between the two layers of the front bodice pieces.
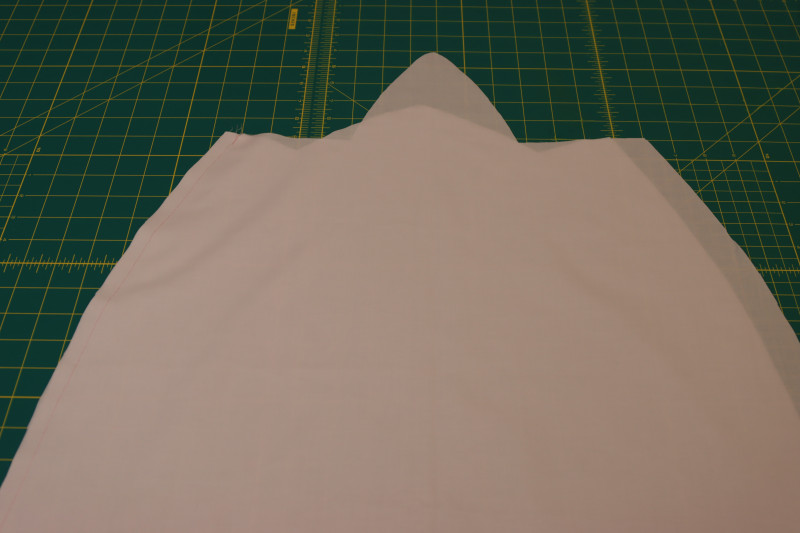
- Pin and sew around the top edges of both pieces as shown in the photo below.
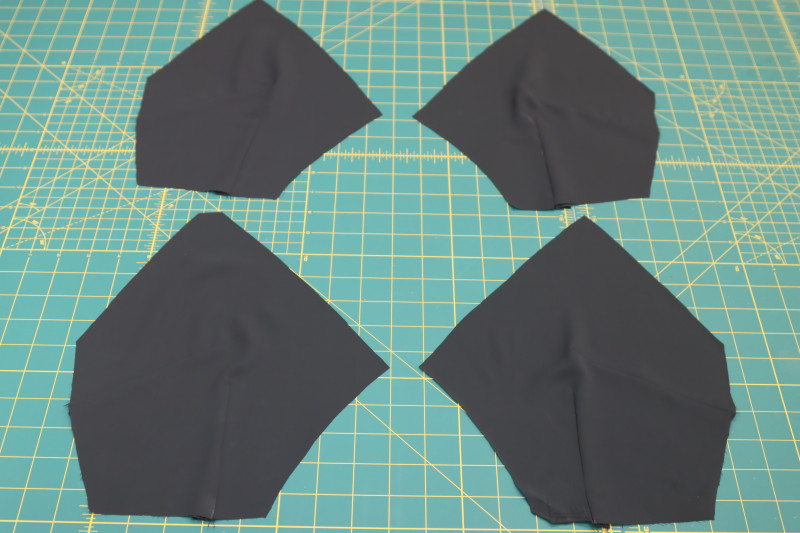
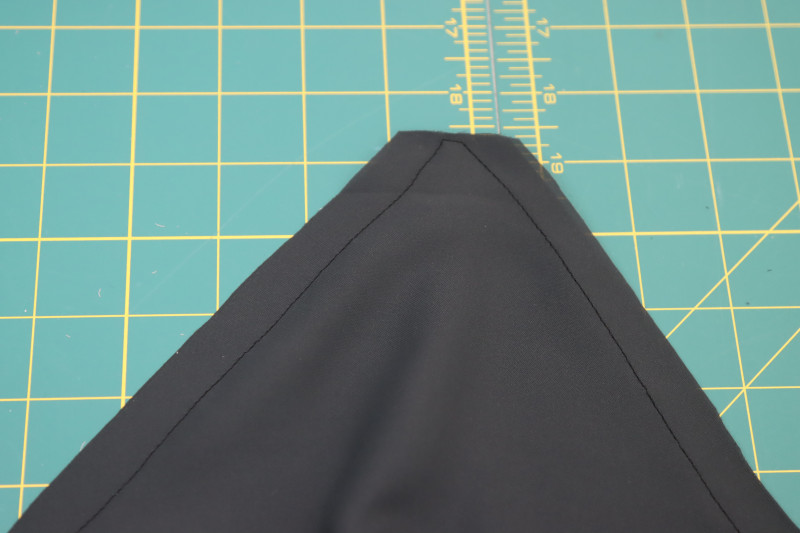
- Clip the top corners of the front bodice pieces.
- Flip the front bodice pieces right sides out and press the seams flat.


Step 4
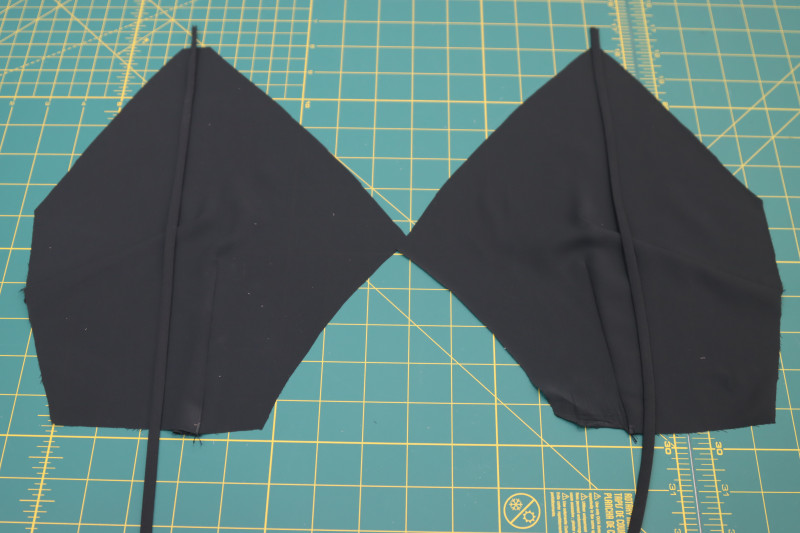
ATTACH STRAPS IN BACK
- Sandwich the straps between the back bodice pieces the same way you did with the front bodice pieces.
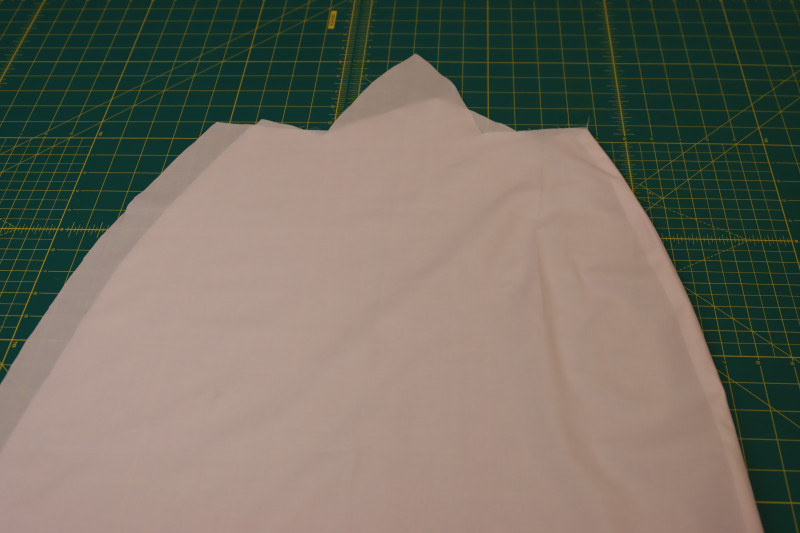
- Pin and sew around the neckline of the back bodice pieces.
- Clip the top corner of the back neckline then flip the back bodice pieces right sides out
- Press the back bodice neckline seams flat.

Step 5
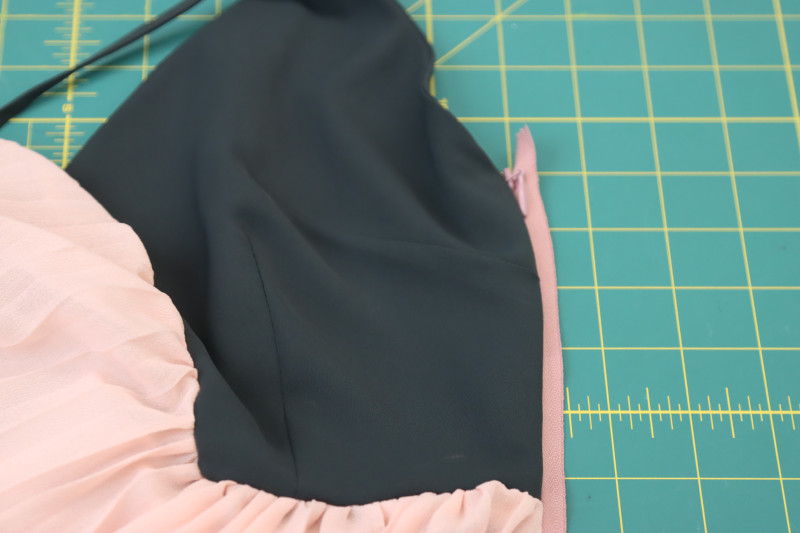
BUST SIDE SEAM
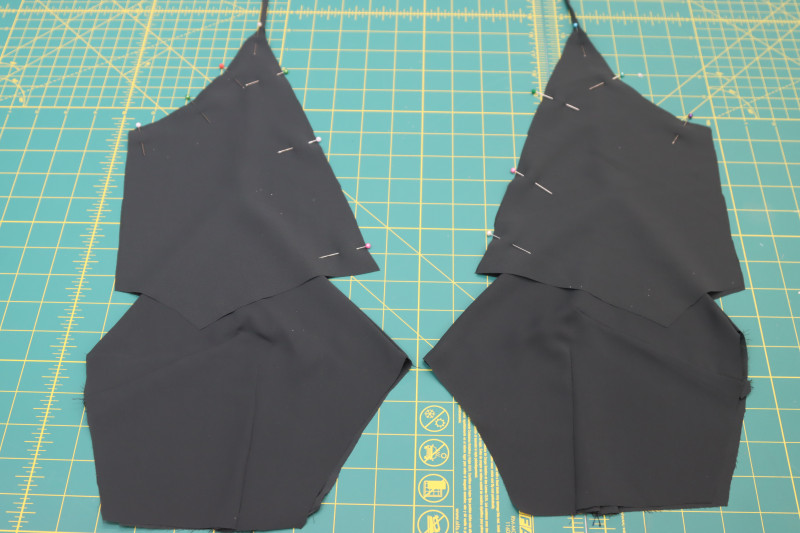
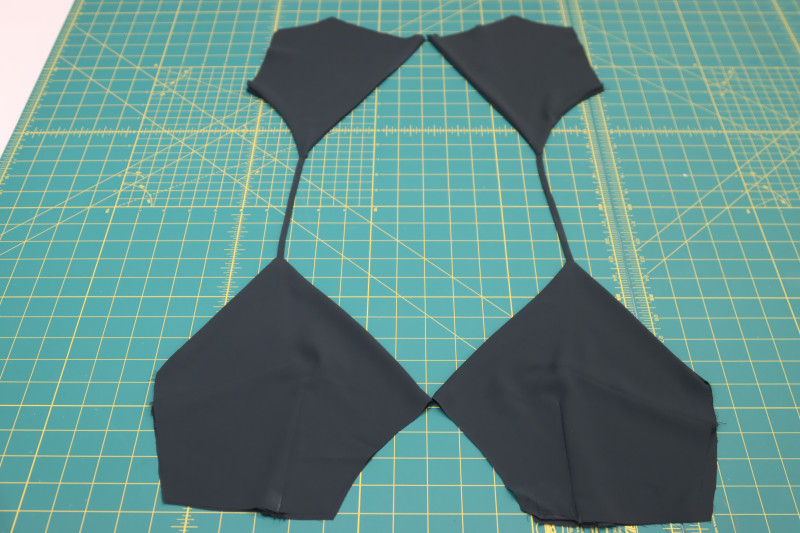
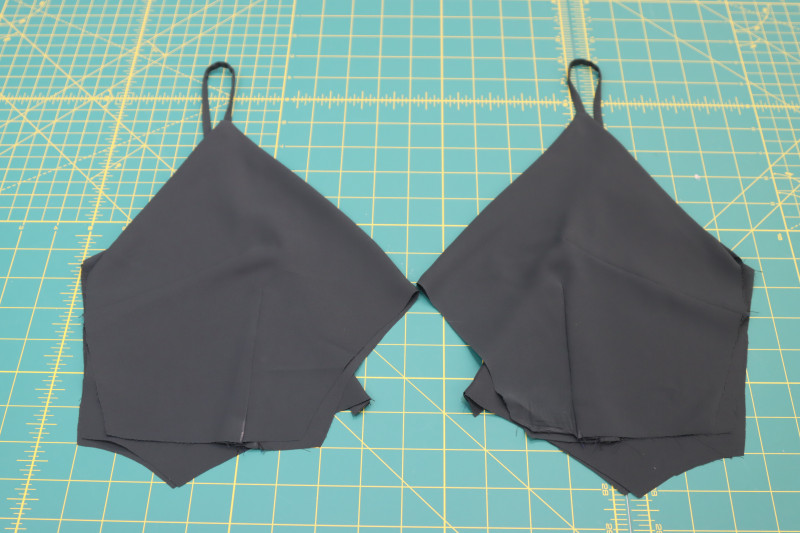
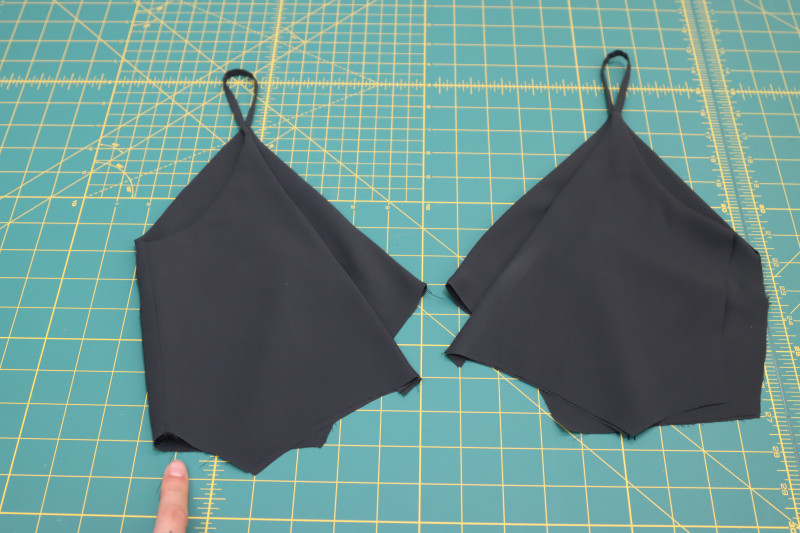
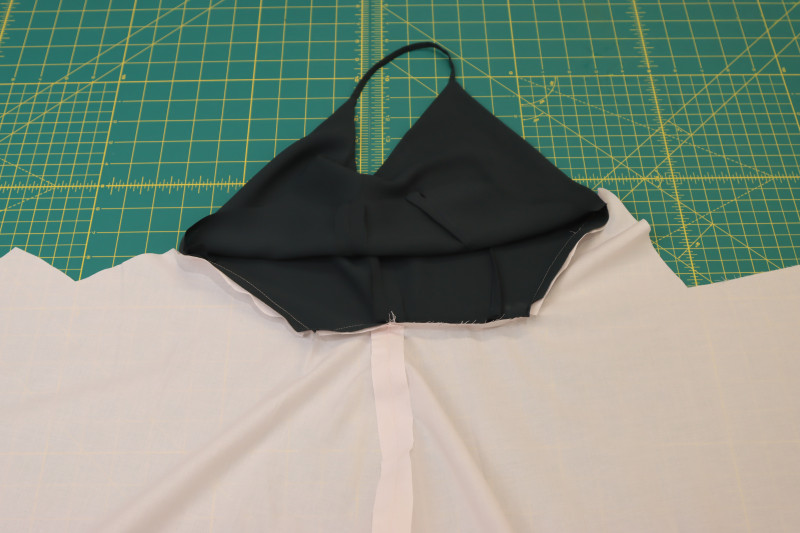
- Layout the bodice so that the front bodice pieces are laying on top of the back bodice pieces, as shown in the photo below.
- Take one of the sets (front and back) and make sure that it is on the side that lines up with the closed side seam of the skirt lining (I mention this part because an invisible zipper is going to go in the side seam that is not sewn to itself. Therefore, only one of the side seams needs to be closed up).
- Separate the front and back side seams of the side of the bodice that aligns with the side seam of the skirt.
- Place the opened side seams of the front and back bodice pieces, right sides together with the seam at the underarm lined up on both pieces.
- Pin and sew the front and back bodice pieces right sides together at the side seams.
Step 6
SKIRT SIDE SEAM
- Layout the back skirt piece right sides up.
- Place the front skirt pieces right sides together on top of the back skirt piece.
- Pin and sew one of the side seams of the skirt, making sure it is the same side seam that matches up with the lining skirt and the bodice.
- Flip the skirt right sides up.
Step 7
LINING SIDE SEAM
- Place the front lining skirt right sides together on top of the back lining skirt with one of the side seams lined up.
- Pin and sew the lining skirt side seam.
- Press the lining skirt side seam open and flat.
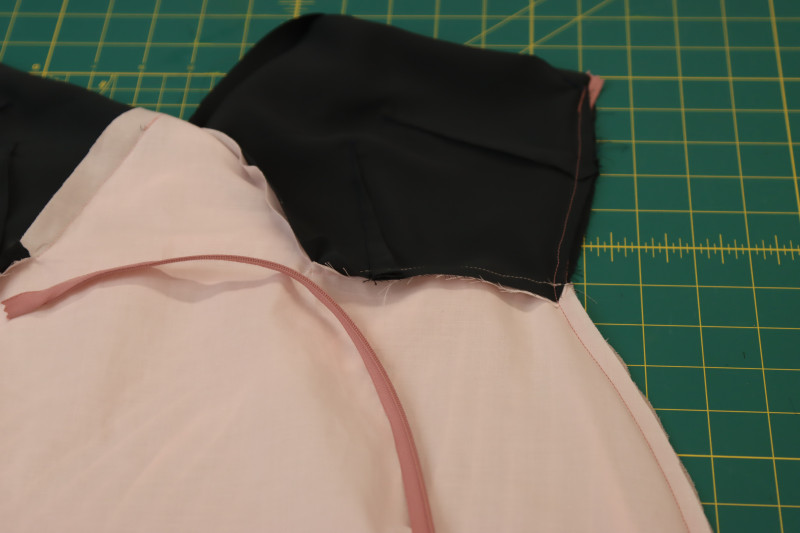
Step 8
ATTACH LINING TO BODICE
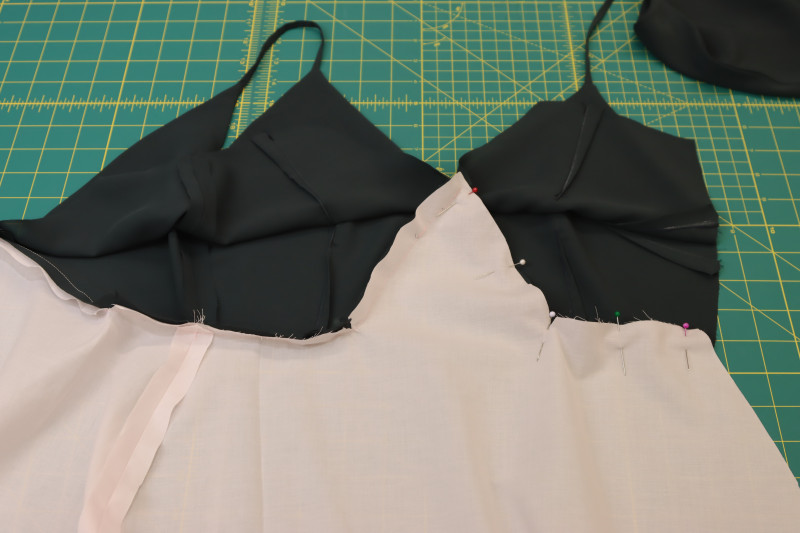
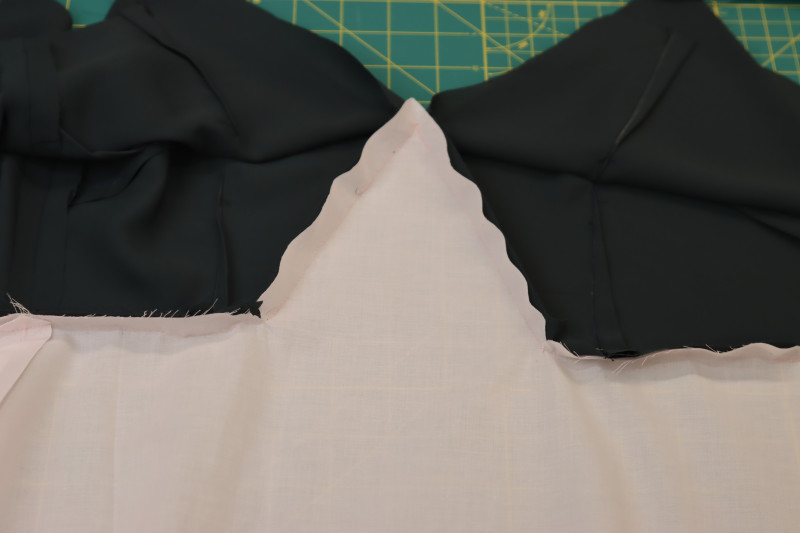
- Pin the top edge of the lining skirt right sides together with the bottom edge of the bodice lining (the inner layer of the bodice) making sure that the front and back points of the lining skirt match up with the front and back points of the bodice.
- Sew the lining skirt right sides together with the bodice lining, taking it section by section to make sure all the points line up.
- Press the seam between the lining skirt and the bodice lining DOWN toward the bottom of the dress.
Step 9
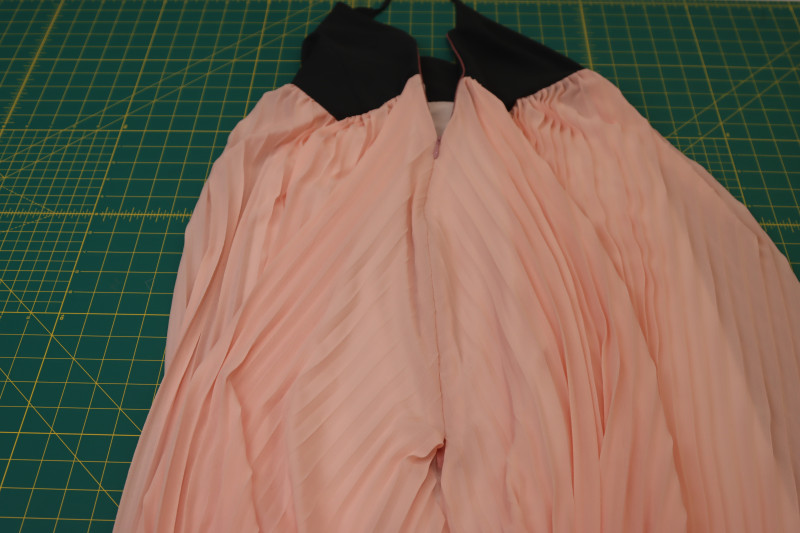
GATHER SKIRT
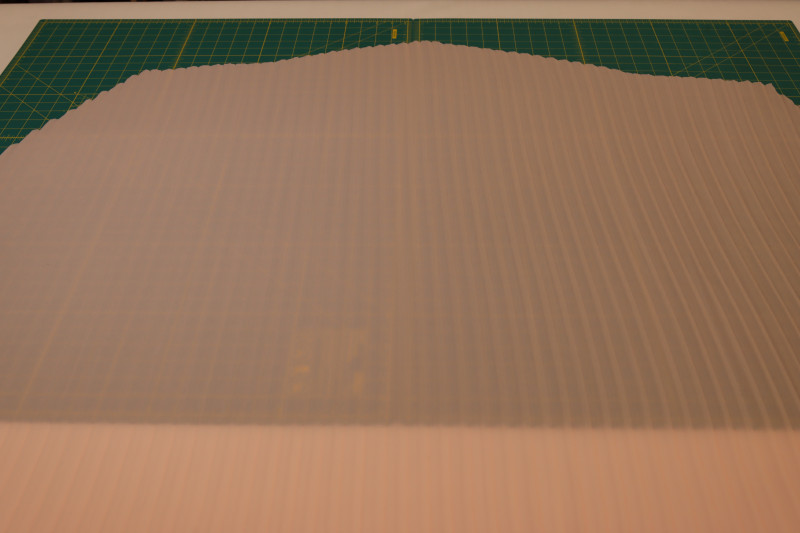
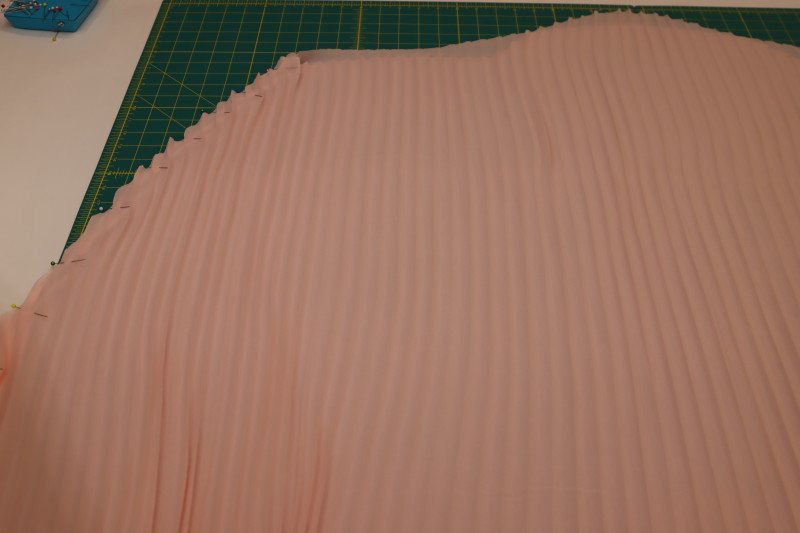
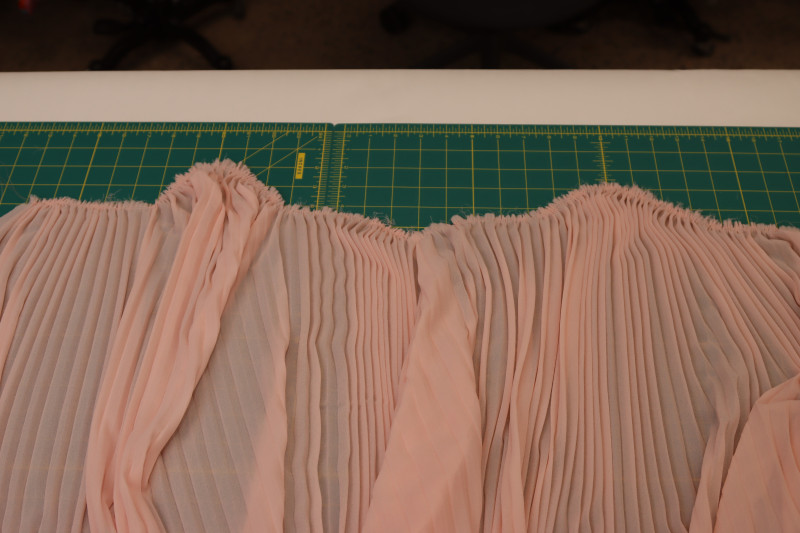
- Sew two parallel straight stitches with a stitch length of 4 millimeters along the waistline of the pleated skirt.
- Pull the top threads of the parallel stitches to begin gathering the waistline of the dress.
- As you’re gathering the pleated waistline of the skirt, be mindful of which parts of the waistline need to be higher so that they fit in the center front corner. Make sure that the pleats are all falling vertically and aren’t sticking out sideways as you gather the waistline.
- Gather the waistline of the skirt to roughly the length of the waistline of the bodice.
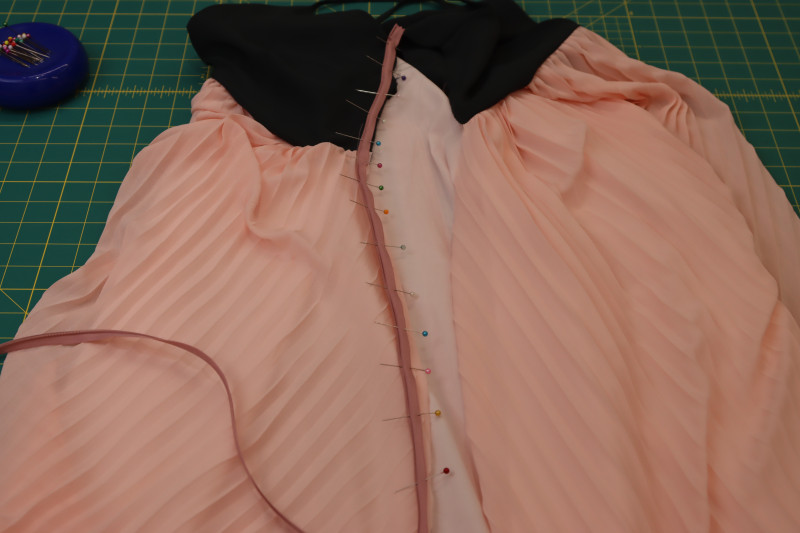
Step 10
ATTACH SKIRT TO BODICE
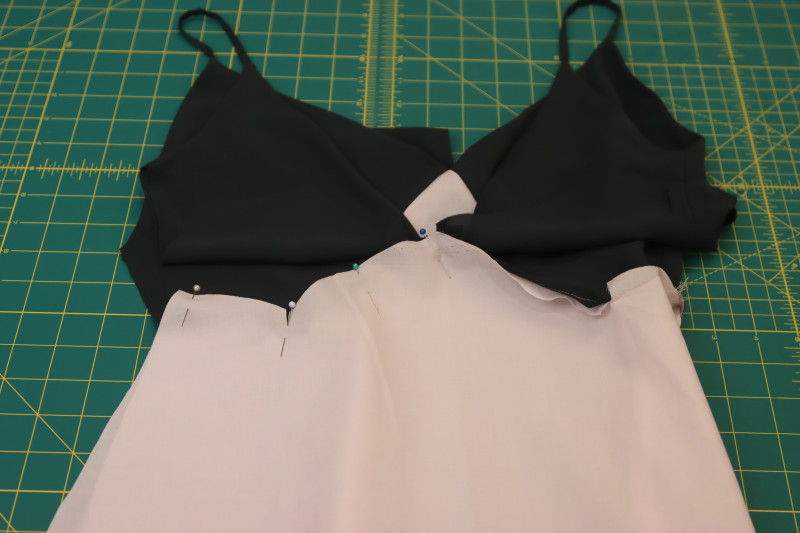
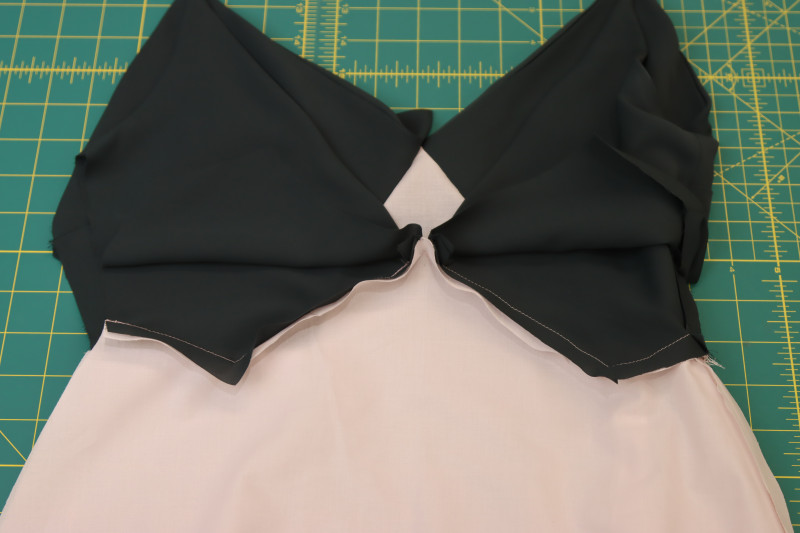
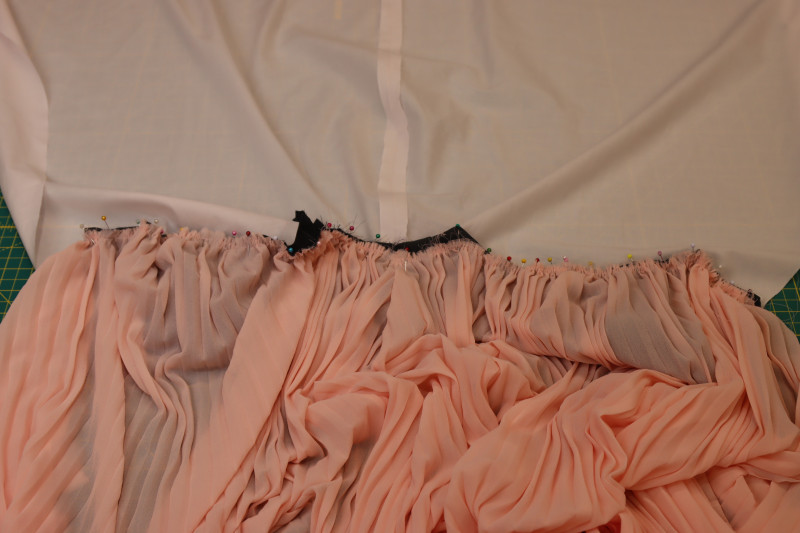
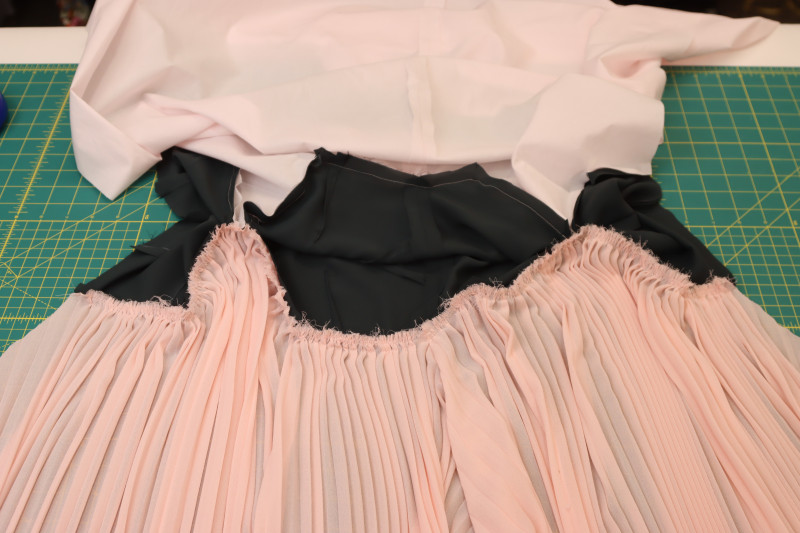
- Pin the gathered waistline of the skirt to the outer layer of the bodice, the same way the lining skirt was attached to the lining bodice.
- Sew the gathered pleated skirt to the outer layer of the bodice at the waistlines.
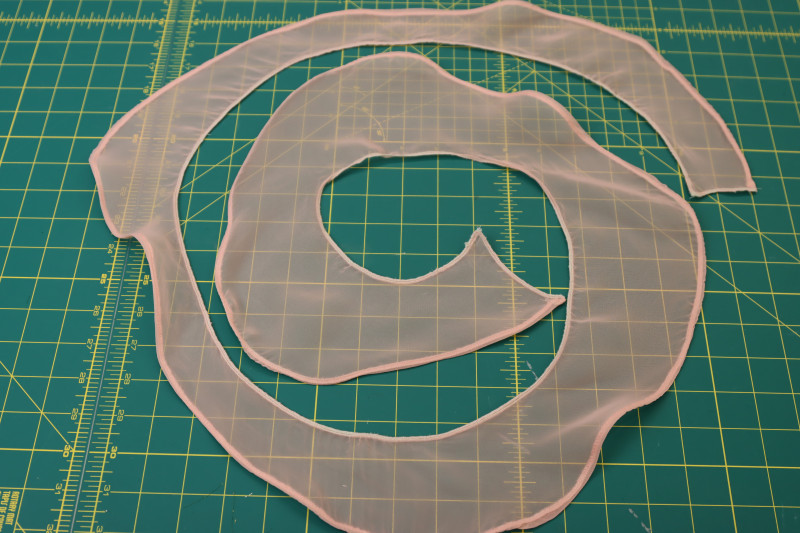
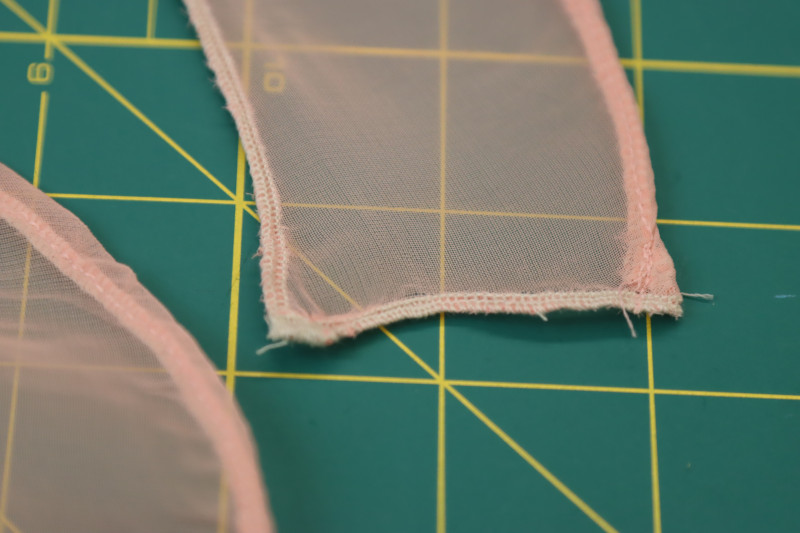
Step 11
RUFFLES
- Finish all the edges of the spiral ruffle pieces with a serger OR by sewing a tiny double rolled baby hem.
Step 12
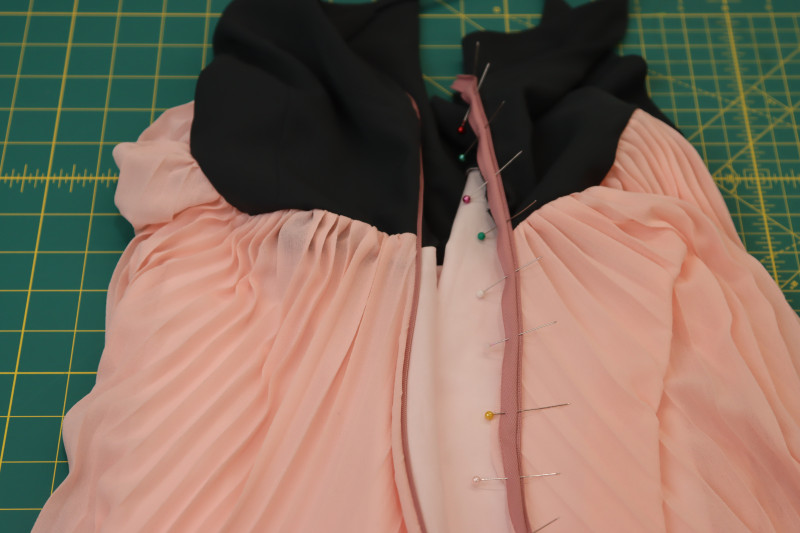
INVISIBLE ZIPPER
- Pin the zipper so that it is right sides together with the main fabric and sandwiched between the main fabric and the lining layers at the center back seam of the dress.
- Sew one side of the zipper.
- Pin the other side of the zipper right sides together with the main fabric on the opposite side of the center back seam.
- Sandwich the zipper between the main fabric and the lining on the other side.
- Sew the other side of the zipper.
- Flip the dress fully right sides out and zip the zipper.
Step 13
FINISH SIDE SEAM
- Pin and sew the lining side seam right sides together under the zipper.
- Pin and sew the pleated skirt side seam right sides together under the zipper.
Step 14
HEM LINING
- Sew a double rolled ½ inch hem on the bottom of the lining.
- Press the hem flat.
Step 15
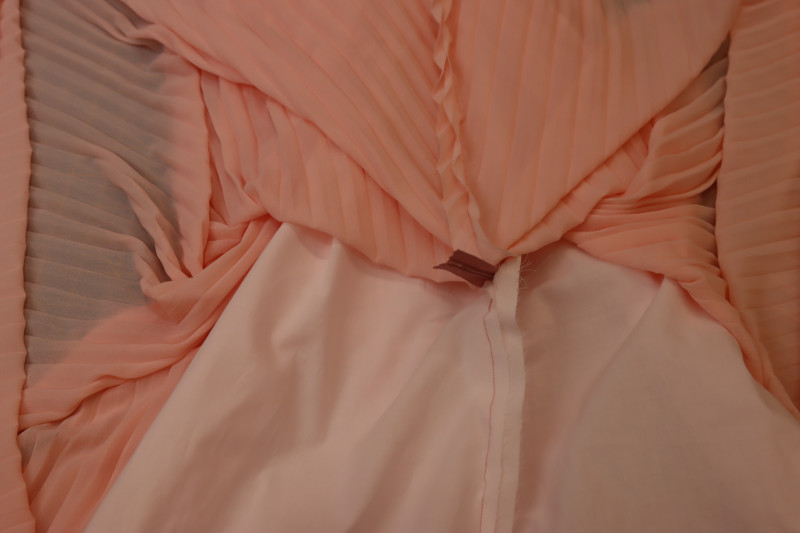
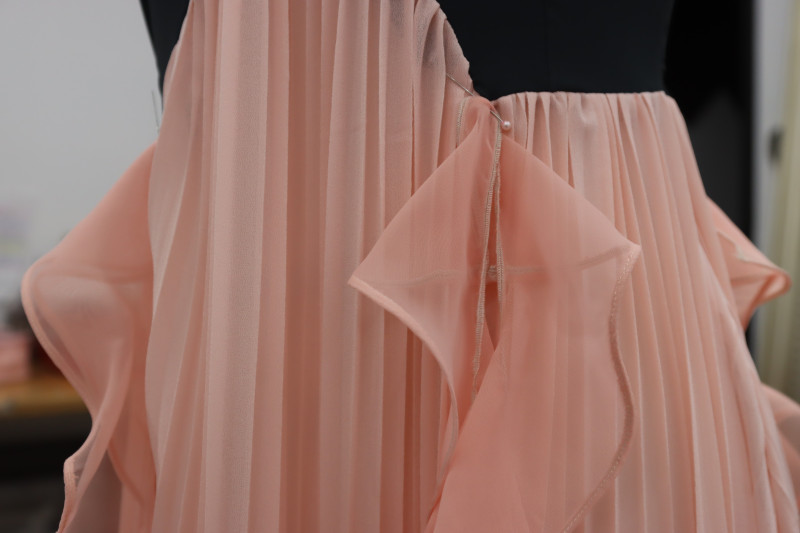
ATTACH RUFFLES
- Layout the ruffles so that the inner corners (the ones at the center of the spiral) are lined up with the outer corners.
- Grab two ruffles by the inner corner of the spiral and pin them directly under one of the front corners of the bodice, as shown in the photo below.
- Repeat for the other three corners at the waistline of the bodice.
- Sew both pieces of the ruffle to each corner, then, isolate one of the ruffles.
- Locate the inner rounded edge of the ruffle (the inner circle, not the outer circle).
- Position the dress under your sewing machine so that you are only sewing the ruffle to the pleated skirt.
- As you sew down the length of the ruffle, you want to sew it so that it falls at an angle, not perfectly vertical. In other words, the ends of each ruffle should be a few pleat lengths apart after they’re sewn on.
- Sew the other ruffle on that same corner but angle it the opposite direction away from the first ruffle.
- Check the photos below to make sure your ruffles are landing roughly in the same way as the sample.
Step 16
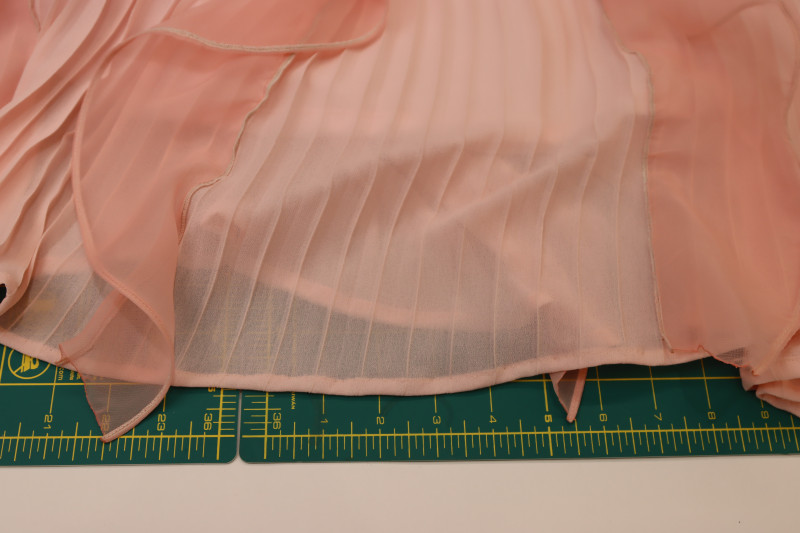
HEM MAIN SKIRT
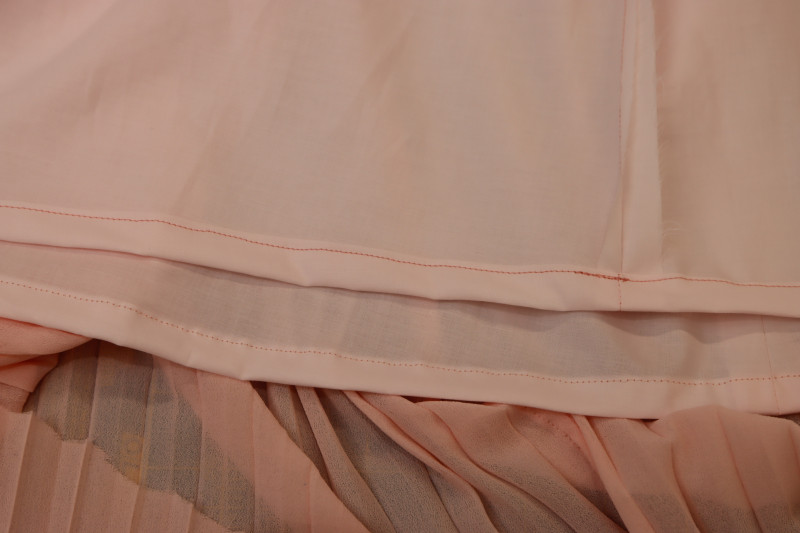
- Hem the main skirt with a double rolled ¼ inch seam allowance.
- To finish the ends of the chiffon ruffles, I actually melted the fabric with a lighter because it was made out of polyester. You can serge or roll the ends of the ruffles, but this was the easiest way for me and for this sample.
Sewing Success: The Finished Pyrite Pleated Dress
Share this post with a friend (or two!), download the Pyrite Pleated Dress free sewing pattern, and show us which fabrics and colors you choose, using the hashtags #MoodPyritePattern & #MadeWithMood—and don’t forget to tag us @MoodFabrics, too


Free Sewing Pattern Inspiration for Your Next Project
With 525+ free sewing patterns and counting, your opportunities for sewing with Mood are endless!
We hope you had as much fun sewing this pleated dress pattern as we did! As always, we want to hear from you—share your thoughts and comments below and let us know where you’ll be wearing the Pyrite Pleated Dress free sewing pattern!
Can’t get enough sewing with Mood? Browse your next make with our latest free sewing patterns.
Beautiful thanks. Ii am still a beginner in sewing
Are the ruffles loose or sewn attached to the entire skirt?
Hey Juanita, They are sewn down the length of the skirt.
Please Where is the top front no está en el patrón que imprimí a pesar que dice en la parte B pero está la falda y no la parte delantera del top
Hola Karina
Una vez que ensambles tu patron completo, el delantero del top esta justo debajo de la falda trasera. Busca las páginas: F1, F2. F3, G1, G2, G3, y ahi está 🙂
Hello! Not sure who to contact about this but I noticed this Etsy shop is selling Mood’s free patterns for profit, I wanted to reach out to Mood first to see if the owner worked out a special deal with Mood or if he is stealing. The Etsy shop is called “DigitallyDesignable” owned by Muhammad Basit Ali.
Hey Maggie! Thank you so much for letting us know. We found the etsy page and are contacting the seller to remove the stolen patterns.