

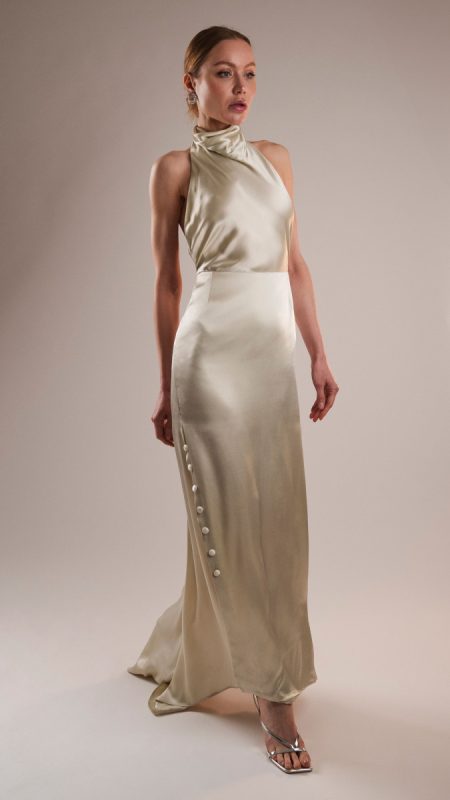
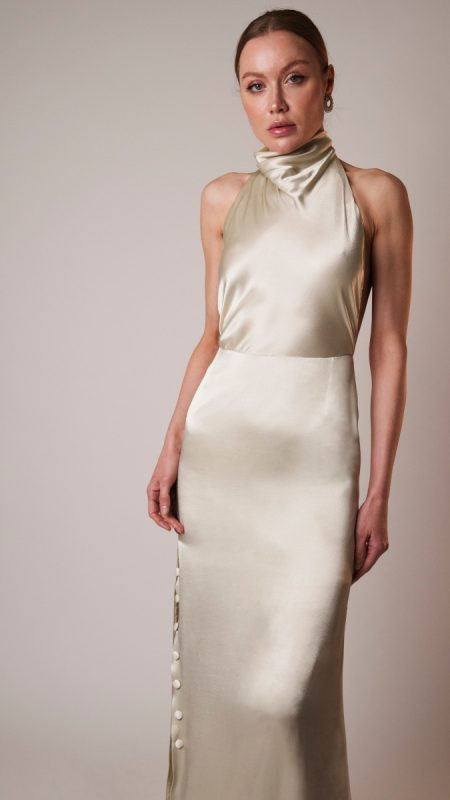
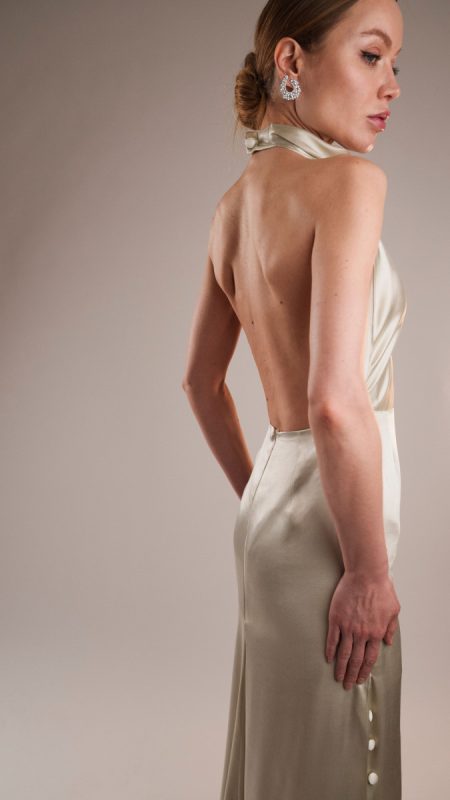
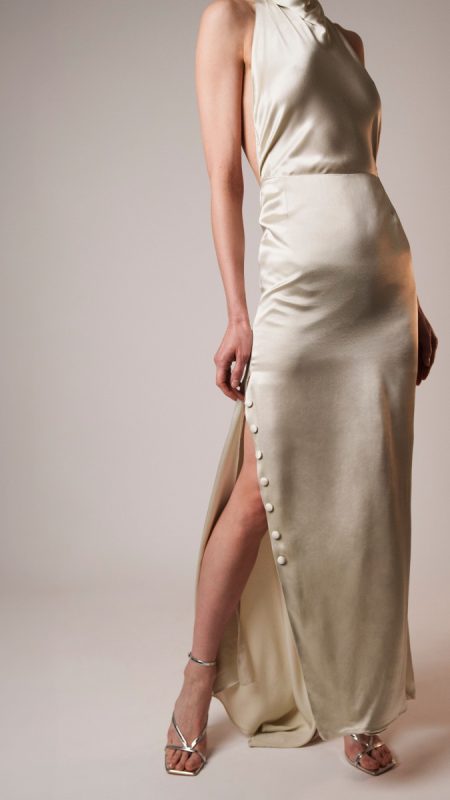
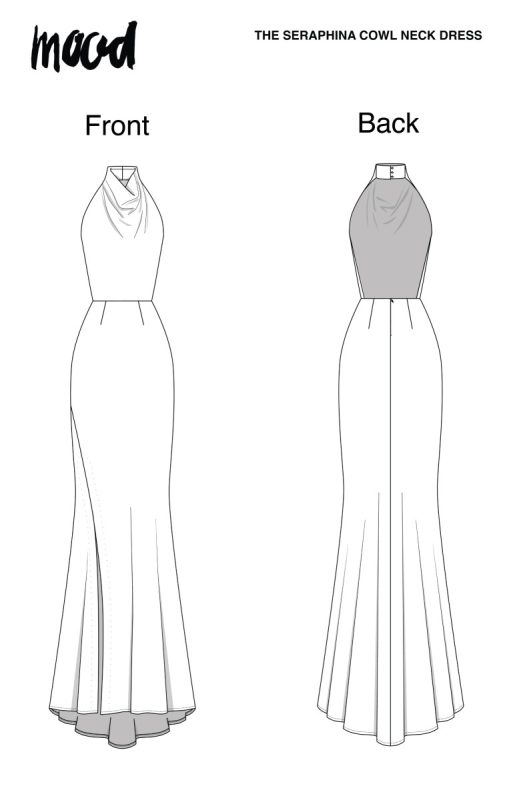
Capturing attention and igniting admiration: The Seraphina Dress free sewing pattern encapsulates elegance with its enchanting design! Sewn with meticulous care and attention, this breathtaking pattern puts together a stunning cowl neck with an open back, as well as a side slit with silk buttons.
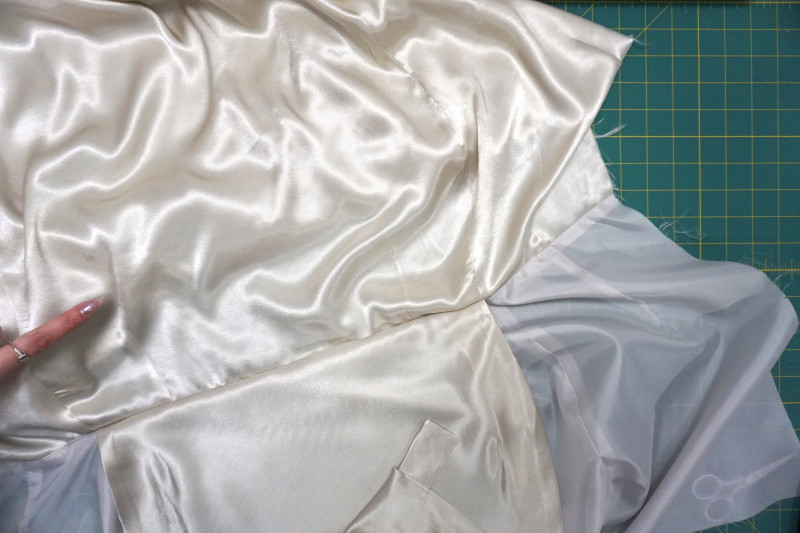
Draped in fluid, silky satin, this ivory dress flows with luxury and gleams with sophistication. Perfect for your wedding day dress, your bridesmaids’ dresses, and any special occasion, treat yourself to Mood’s Premium Silk Charmeuse Collection when designing your Seraphina Dress Free Sewing Pattern. Available in 90+ colors, these silk charmeuse fabrics are a designer’s dream and a perfect pair with Mood’s Premium Silk Covered Buttons Collection—spanning 28+ colors and 4 different sizes.
Turn any event into a cherished memory full of allure and grace! Whether you’re attending a gala or a formal event, the magic of The Seraphina Dress will surely leave a lasting impression that won’t be forgotten.
Purchase Products Used Below:
- 2.5 yards of Mood Exclusive Elliana Light Stone Sustainable Viscose Fluid Satin
- 2.5 yards of Margot Champagne Polyester Lining
- 1 yard of Off-White Weft Fusible Interfacing
- 8 each of Ivory Silk Covered Button – 24L/15mm
- 1 each of 841 Off-White 24″ Invisible Zipper
- 1 spool of 1240 Ecru 100m Gutermann Cotton Thread
- MDF374 – The Seraphina Dress sewing pattern (Free download below!)
Alternative Recommended Fabrics:
How to Sew The Seraphina Dress Free Sewing pattern
Step 1
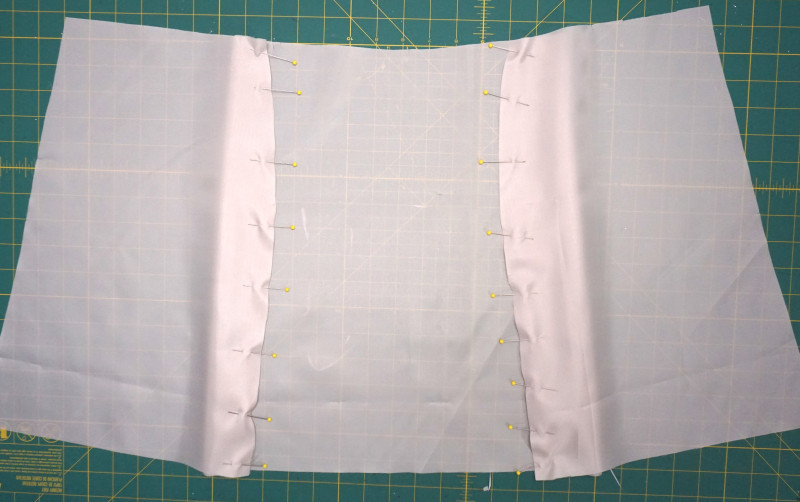
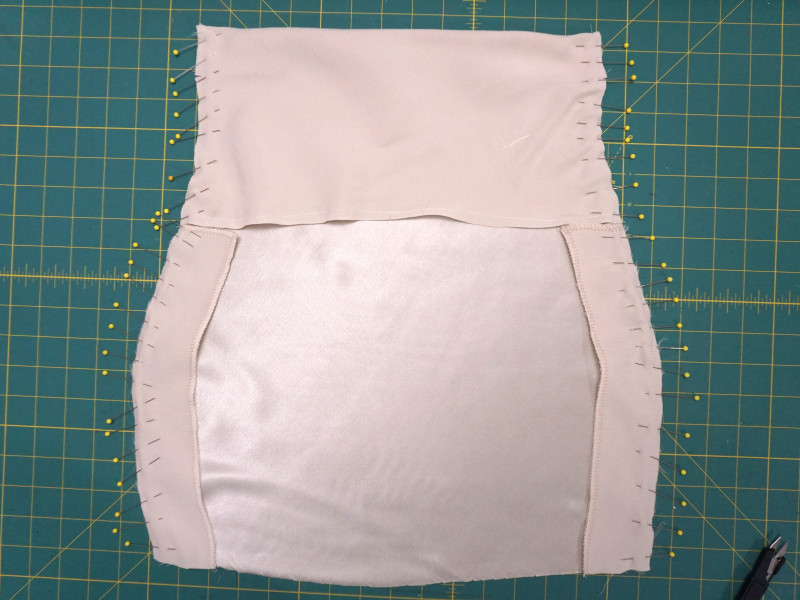
Join skirt lining Front and Back pieces along side seams, then sew darts. This allows for fit adjustments to the skirt lining and self fabric early on in the project as these will align to one another later in the instructions. Optional: Utilize the back skirt facing instead of fully lining the skirt portion of this dress.
Step 2
Press open side seams and darts using a Tailor Ham as these areas allow for curve in the garment, repeat steps for self Skirt Font and Back panels.

Pro Tip: when cutting any pattern ‘on the fold’ always clip a notch to represent the fold (in this case Center Front) that way when aligning the lining and self skirt panels, a notch is in place.
Step 3
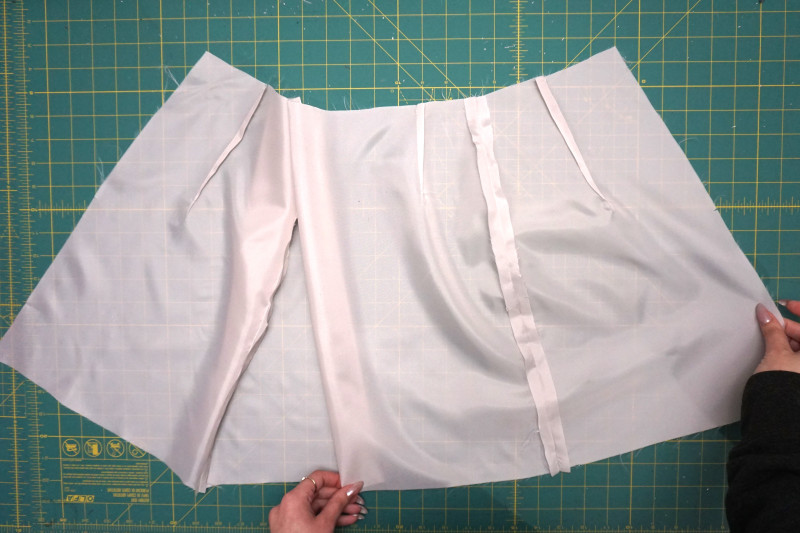
Sew darts on Front self skirt and press toward side seams.
Step 4
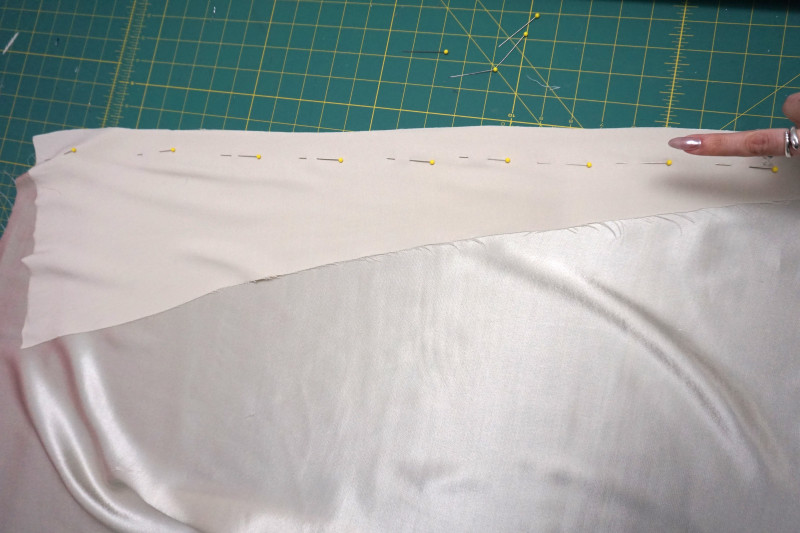
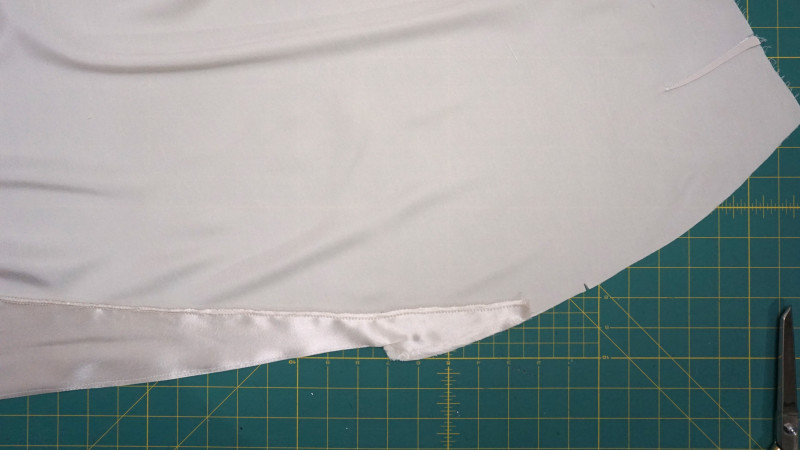
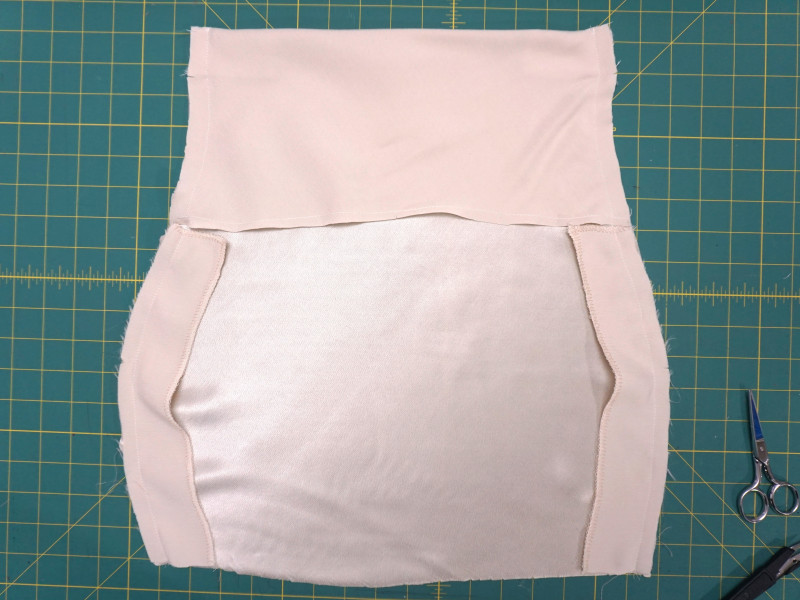
When joining Front and Back skirt panels, be sure to align the notch at the side seam this is roughly at the widest point of the hip. For the Slit Facing piece, mark the area with thread tracing that represents ‘Slit Being here’ and sew straight down from this point to the hem, consider thread tracing a running stitch by hand first, then sewing at the machine.
Step 5
Consider an understitch for the facing, by sewing both seam allowances toward the facing and joining all three layers together with a stitch toward the facing about ⅛” away from the original stitching.
Step 6
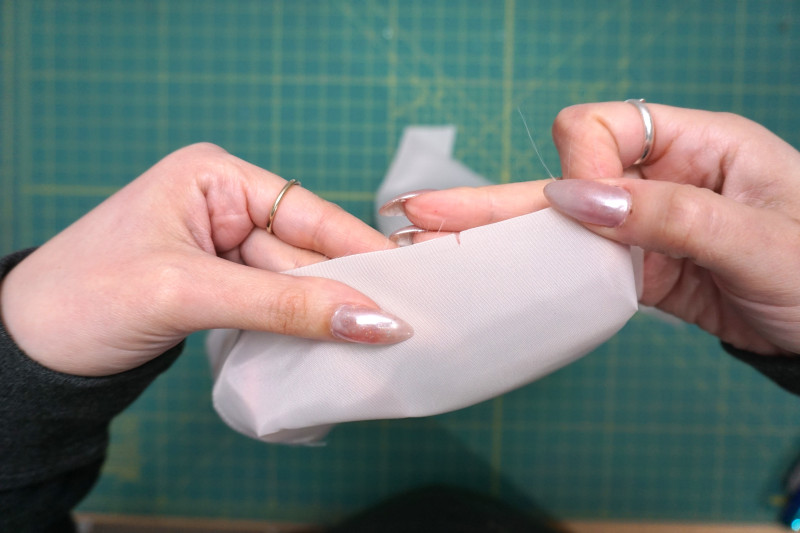
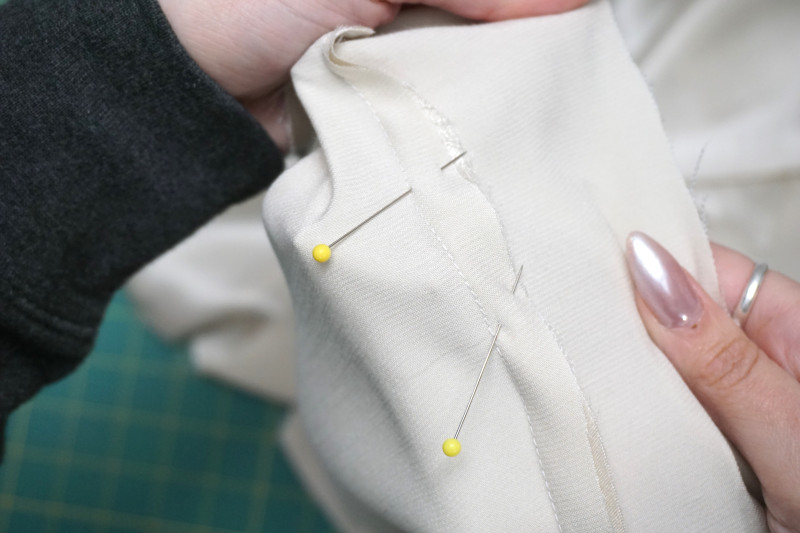
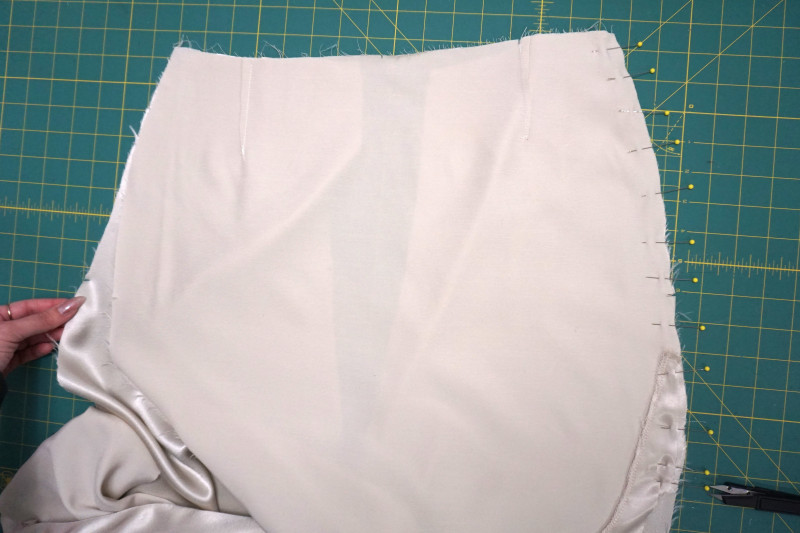
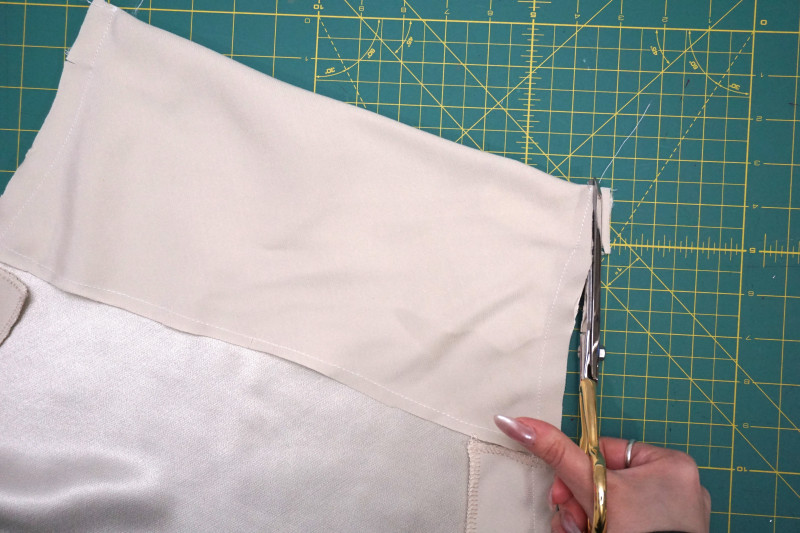
At the top of the facing, clip the seam allowance and turn your fabric right side out, do a running stitch by machine to secure the pinned area of the skirt facing to the side seam of Front Skirt (the area in my hands is the understitch we just applied to the Skirt Slit facing piece).
Step 7
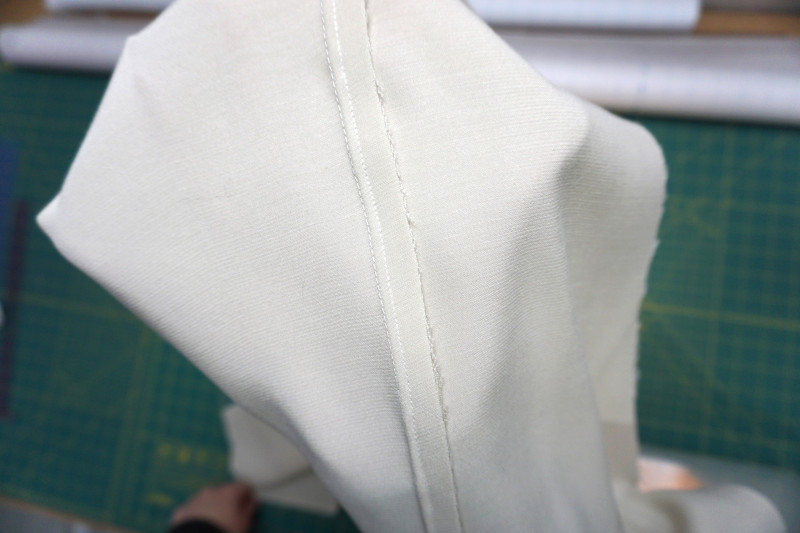
Serge/clean finish the raw edge of your Skirt Slit facing piece and join side seams of front and back skirt panels.
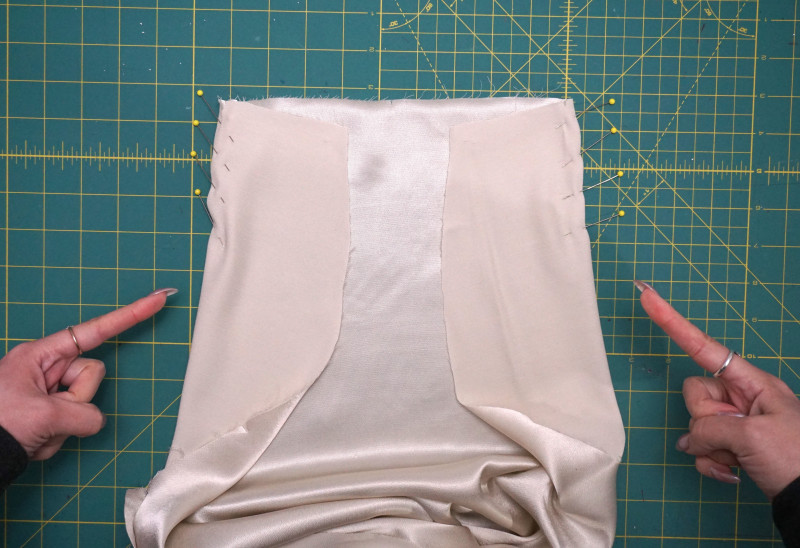
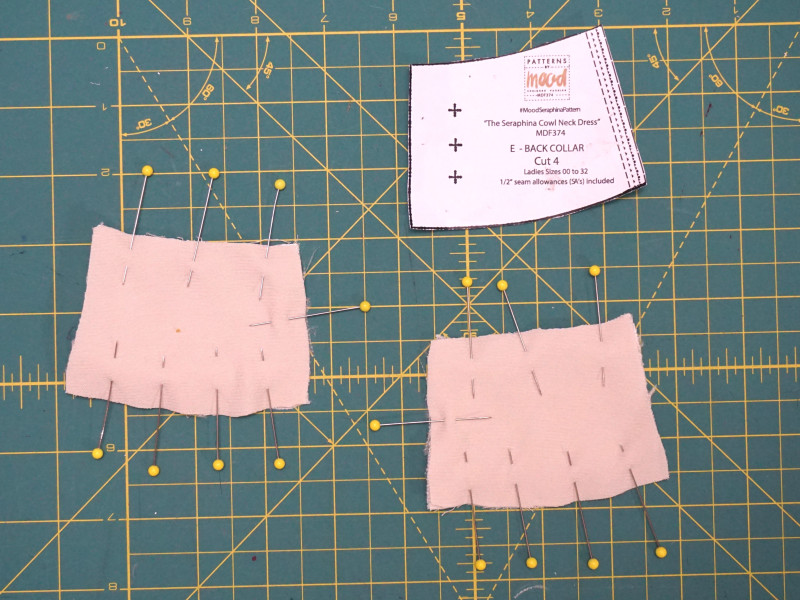
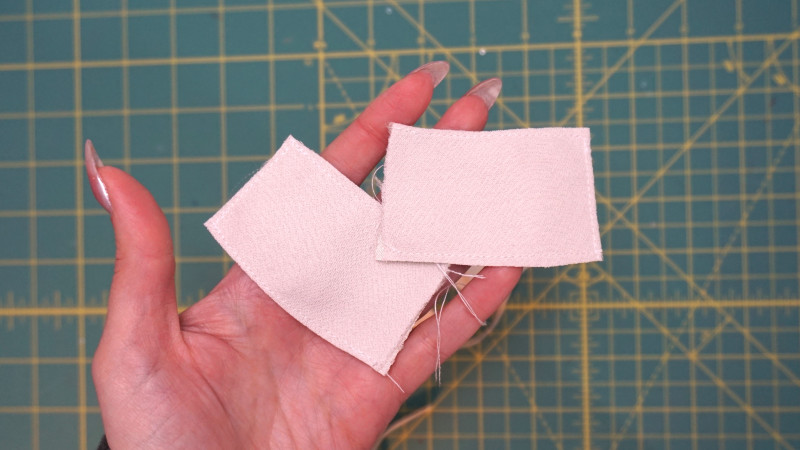
Step 8
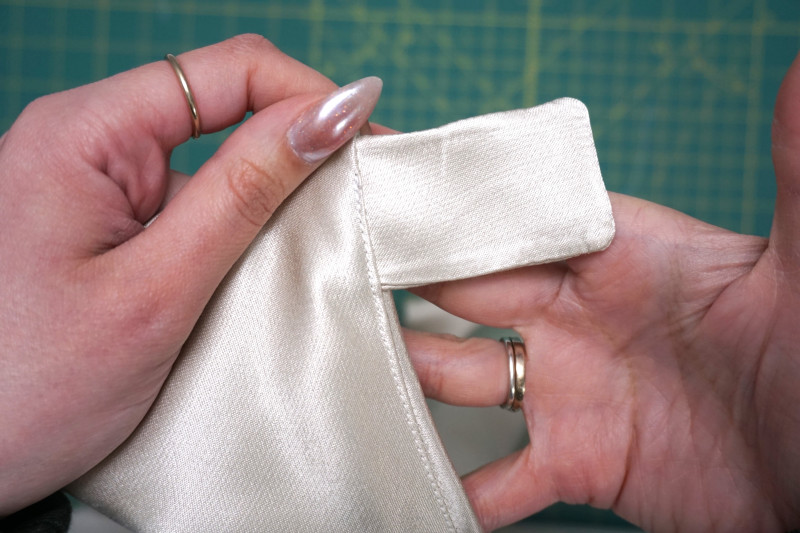
Cut the Back Collar pieces, optional to fuse one set as reinforcement, this will become the collar attachment where the button closure will be – consider adding extra length if you want the cowl drape of the neckline to fall lower on your body, the longer the Back Collar, the more drape you will have from the front of the bodice. Sew right sides together on three pinned sides seen in photo. Trim down seam allowance to about ⅛=¼”, flip to right side, and press. Pins indicate button locations.
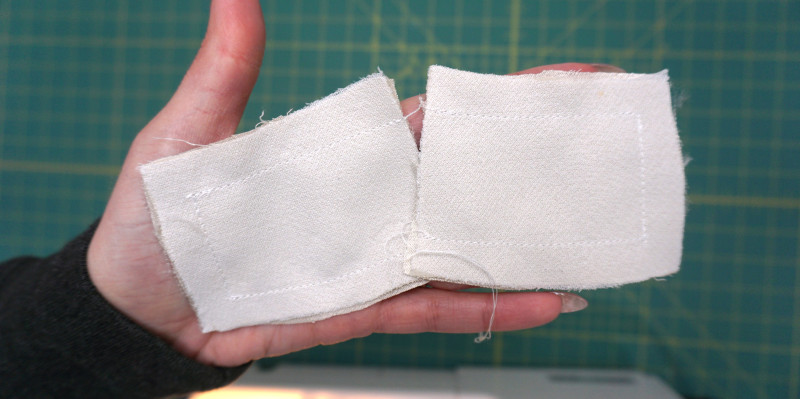
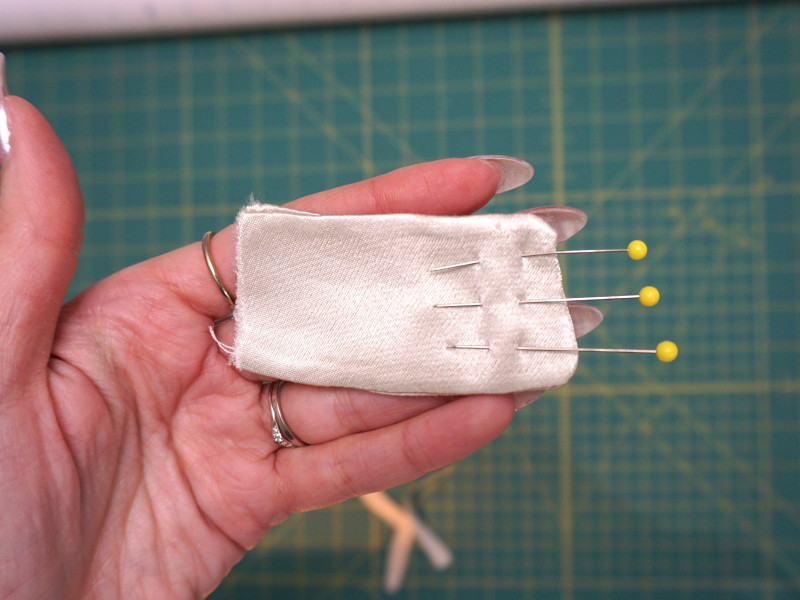
Step 9
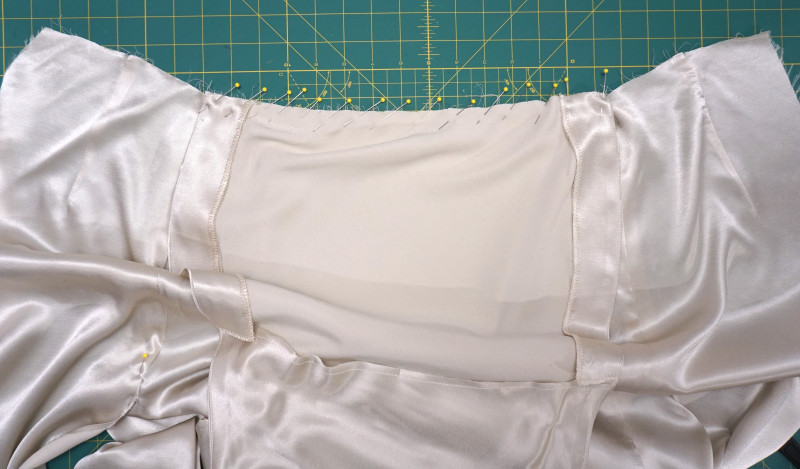
With Front bodice panel right side up, pin the back collar pieces below the second notch (not the fold line) and do a running stitch at the machine to secure in place.
Step 10
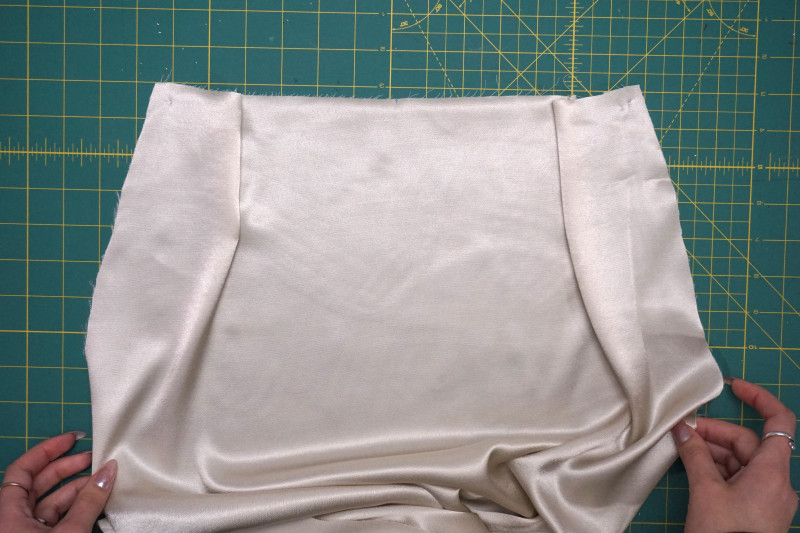
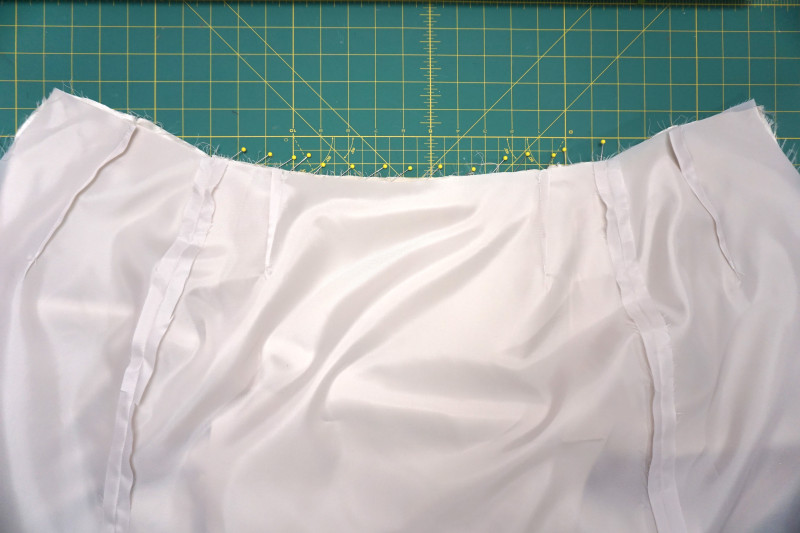
Clean finish the side of the Bodice Facing piece that does not have the notch, the notched side will join to the sides of the bodice and fold the facing of the bodice along the ‘fold line’ sewing ½” seam allowance down either side. Clip corners and flip bodice right sides out, it is recommended to include an understitch as this will keep the facings toward the inside of the bodice for a clean edge from the right side.
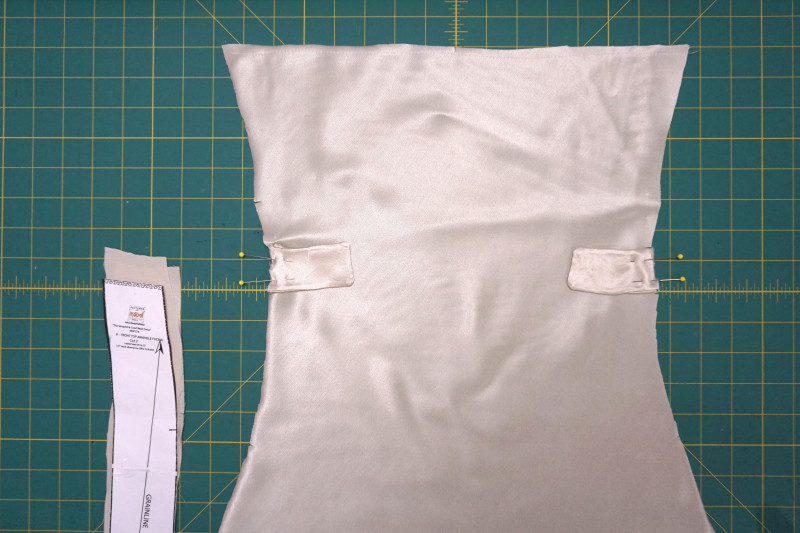
Step 11
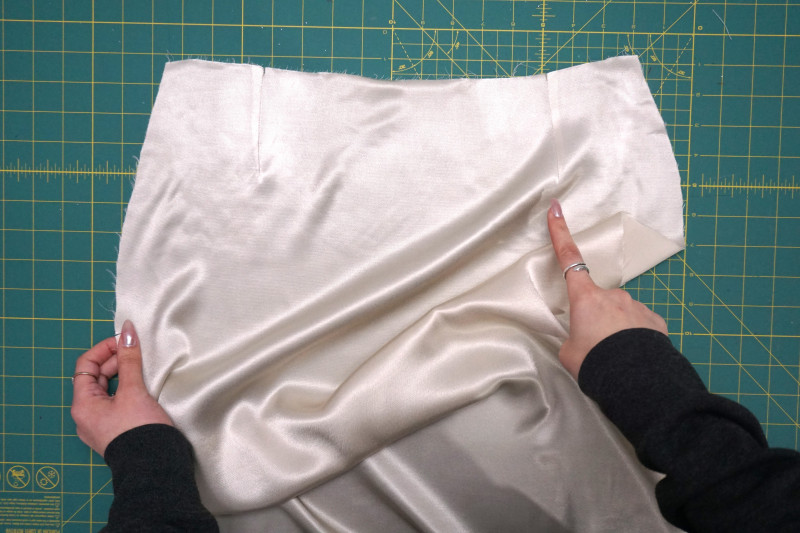
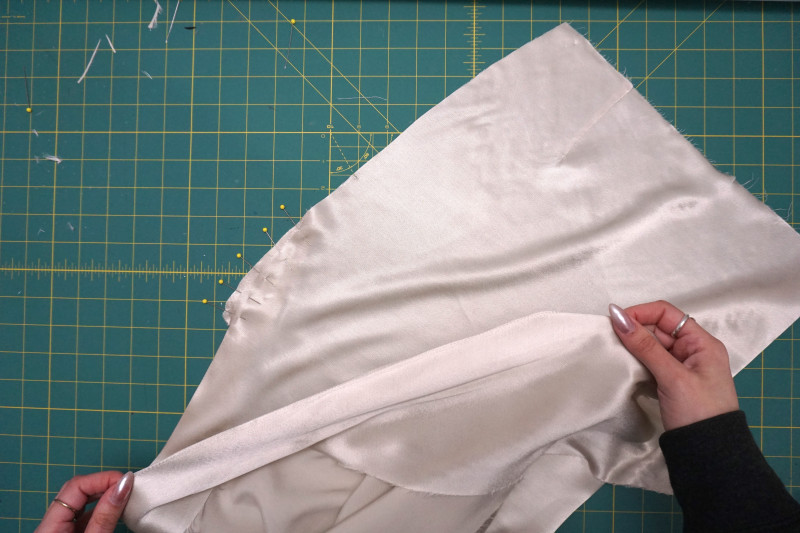
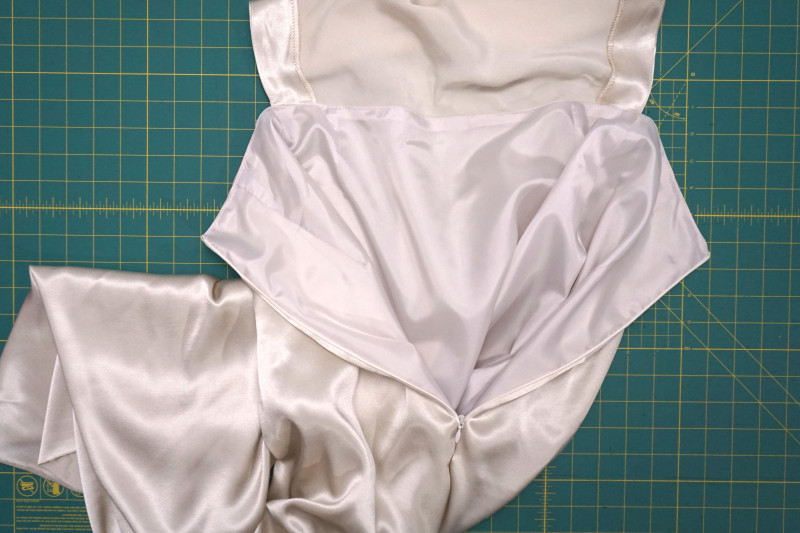
Bring bodice to self skirt with right sides facing, aligning either side of the bodice to where the side seams meet at the skirt. Optional: secure these layers with a running stitch at the machine. If opting for the Back Skirt facing you will skip the next step and instead join the back facing to the back skirt when joining the bodice.
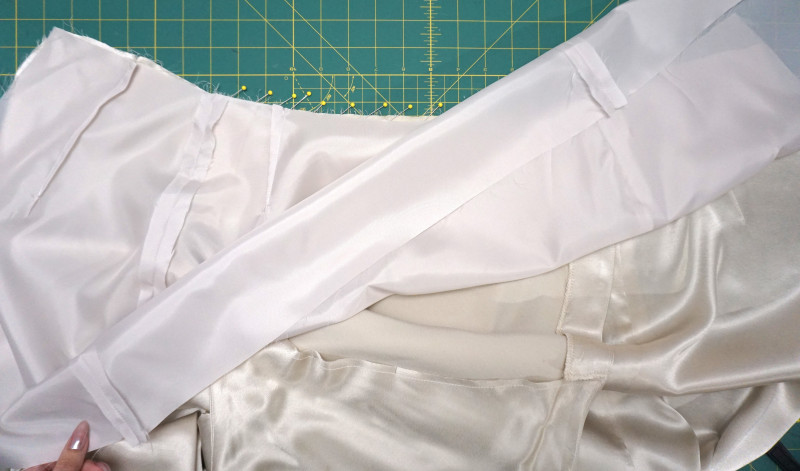

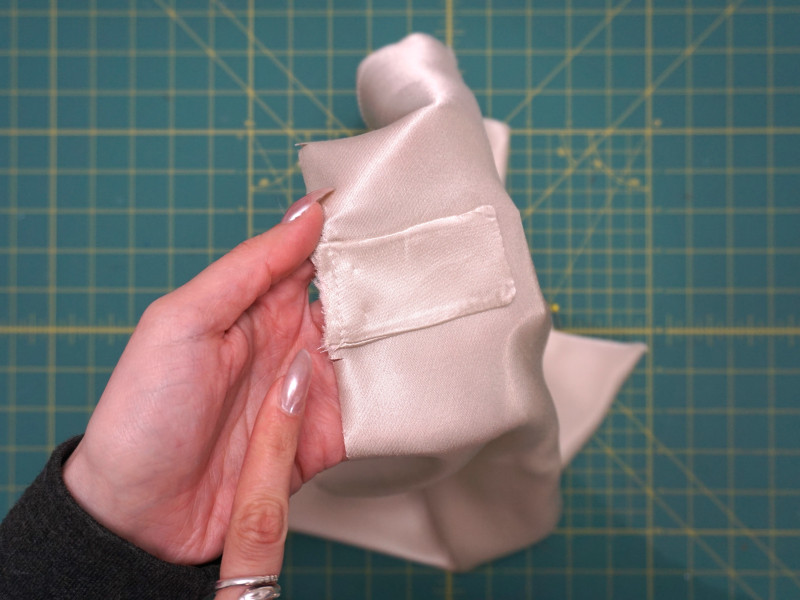
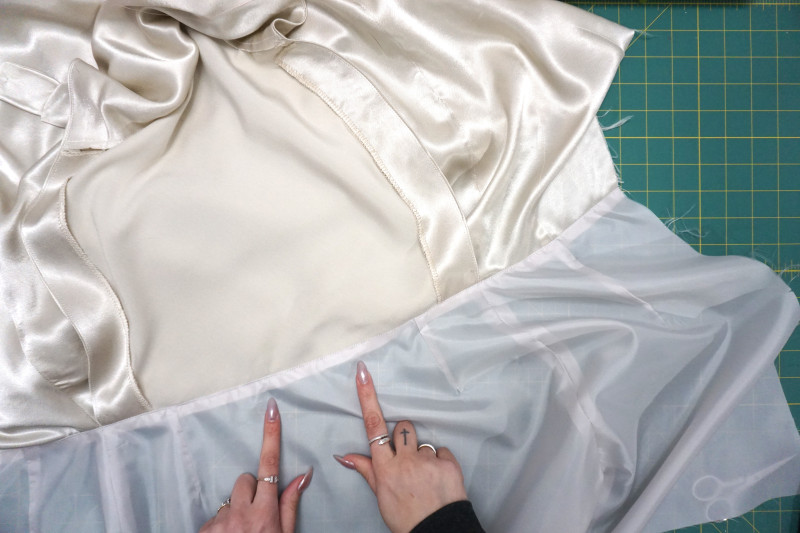
Step 12
Add an understitch to join bodice and self skirt seam allowance to the lining, the understitch will only be visible at the top edge of where the lining meets the self seam area. From the right side of the dress you should see the following once the lining is attached:
Step 13
Attach your zipper by sandwiching between your lining and self skirts, hem both the lining and self skirts and you have completed the Seraphina Cowl Dress!
Thank you for joining us in creating The Seraphina Dress free sewing pattern, we hope that the instructions help guide you into creating an excellent dress! Pay attention to the smallest details to ensure a polished and refined look. Take the time to steam or press the Seraphina Dress before wearing it to ensure a smooth and pristine appearance that reflects the dress’s luxurious quality.

When a silhouette is this stunning, it is bound to shine in almost any color or fabric! With so many elegant fabrics to select from, what will you make out of your Seraphina Dress free sewing pattern? Tag and share your outstanding projects on social media with #madewithmood and #moodseraphinapattern.
Hello. Thanks for this nice pattern. Do you think I could use a viscose crêpe? Thanks in d’avance for your Replay.
Yes, viscose crepe would work great with this pattern!
Hi, I am 60 years old. The dress is gorgeous. Any idea how to add sleeves to the dress.
Many thanks.
Ha Nada! First of all, you could totally rock this dress without sleeves. However, if you were to try and add sleeves to it, I think you would need to close the back as well so that the back of the sleeve had something to be sewn onto. You could probably steal a back bodice pattern piece from another dress on our blog and Frankenstein the pattern together. As far as sleeves go, we have this gorgeous sleeve pattern pack with multiple different types of sleeves to choose from. Let me know if you end up checking them out!
This is perfection! So sleek and stylish, love the addition of the buttons!
hi. i’m so stuck on the slit facing. does the slit actually button?
Hello, the slit does not close as the buttons are just decorative.
Hello,
This pattern is lovely! I am in the process of making it but had a few questions.
In the pattern, my piece “D” does not have the top notch like it shows in the pattern overview and what it looks like in the instructions. Does piece “D” attach to the front or the back? IN the instructions it looks like it attaches to the front, but in the rendering it looks like it attaches to the back piece?
In the instructions you mention a “slit facing piece”, whish piece is this? Is this the “Back Skirt Facing” or is it something else? If it isn’t the back skirt facing, where does the pack skirt facing go?
Thank you!
Hey there,
This is a really pretty dress. I did have some questions a bout how the skirt part is constructed. You mention a “slit facing piece” what piece is this? Is this piece d, the “Front skirt right side detail”? I am also unclear on where this piece goes, does it attach to the front skirt? or the back skirt?
Also, for step 5, you mention joining all three layers, which 3 pieces are these?
Do you have a video to follow the pattern?
Hello, although we do not have a video for the Seraphina Cowl Neck Dress, you can view our tips and tutorials on our youtube page.
First let me say thank you so much for the stunning free pattern!!!I had just gotten 5 yards of this beautiful gold Charmeuse, that I got for pennies from my local creative reuse non-profit that was perfect for this dress! But I am struggling to figure out how the slit facing gets sewn. The image that is supposed to help show that step isn’t terribly helpful. I have the entire rest of the dress, with the exception of the slit and the hem, finished. Any help you could possibly provide would be greatly appreciated!!!
Hey there! I’ll do my best to try and explain it. So when a garment has facing (on any part of it, whether it’s the neckline or a slit or a hem), all that you’re going to do to sew it into place is sew the facing to the main fabric right sides together. After sewing it right sides together, all you have to do it iron that seam open and flat, then fold the facing part towards the wrong side of the main fabric so that the seam allowance is hidden between the main fabric and the facing. Sometimes people will even hold the facing in place with a blind stitch or iron-on hem tape. Alternately, you’re more than welcome to finish the slit with a regular rolled hem.
This is beautiful.
Hello,
I’d like to sew this dress for me, but I’m only 1m52, do you have any hacks to reduce the length of the dress ?
Also, I would like to use a fabric with a color gradient, but if I use it, I will need to cut the top piece in another way that indicated on the pattern. Will it be okay ?
PS : excuse my English, it is not my native language
Hi Chloe! You can either cut the dress out exactly from the pattern and hem it shorter at the end, or you can cut the skirt a few inches shorter than the pattern so you don’t waste fabric. Additionally, you might want to use a 1 inch seam allowance instead of 1/2 inch seam allowance when attaching the skirt to the top. This is because it will shorten the waist of the dress since it would probably be too long on your torso. I hope this explanation makes sense!
As far as the color gradient fabric, as long as you’re following the grain lines on your fabric and pattern, its okay if you have to cut the top a little differently.