

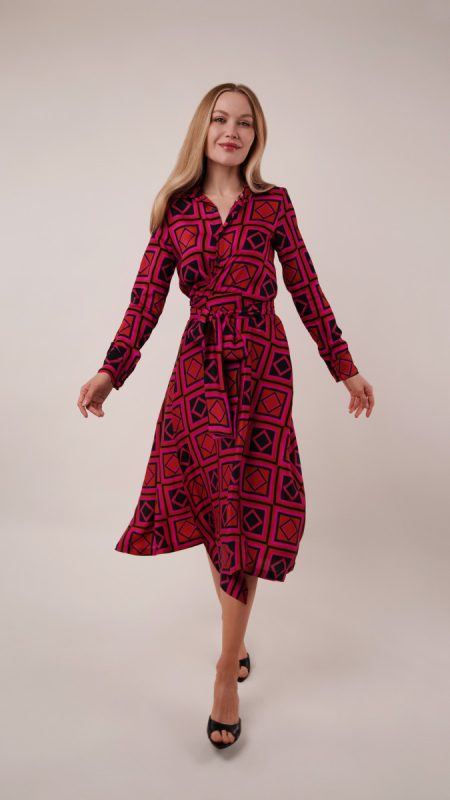
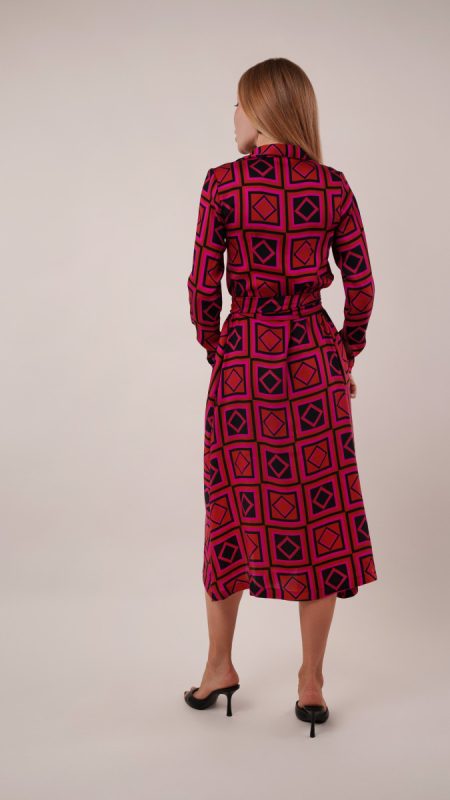
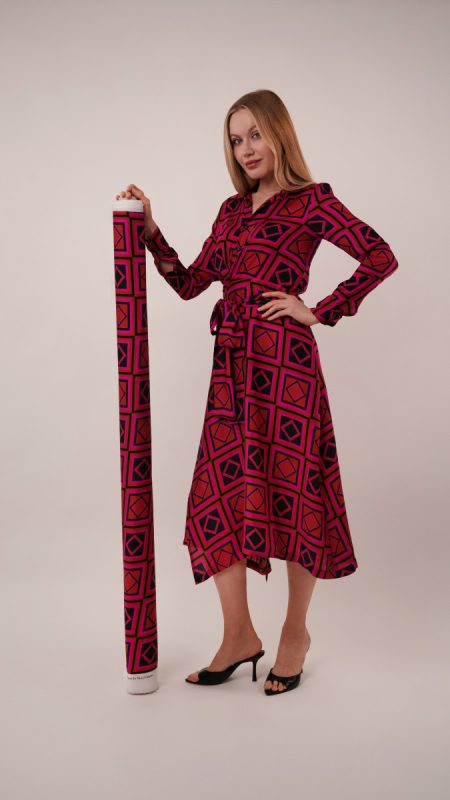
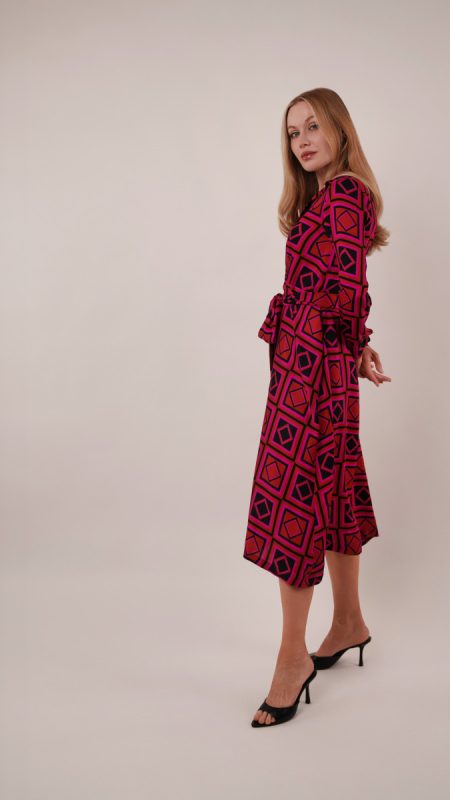
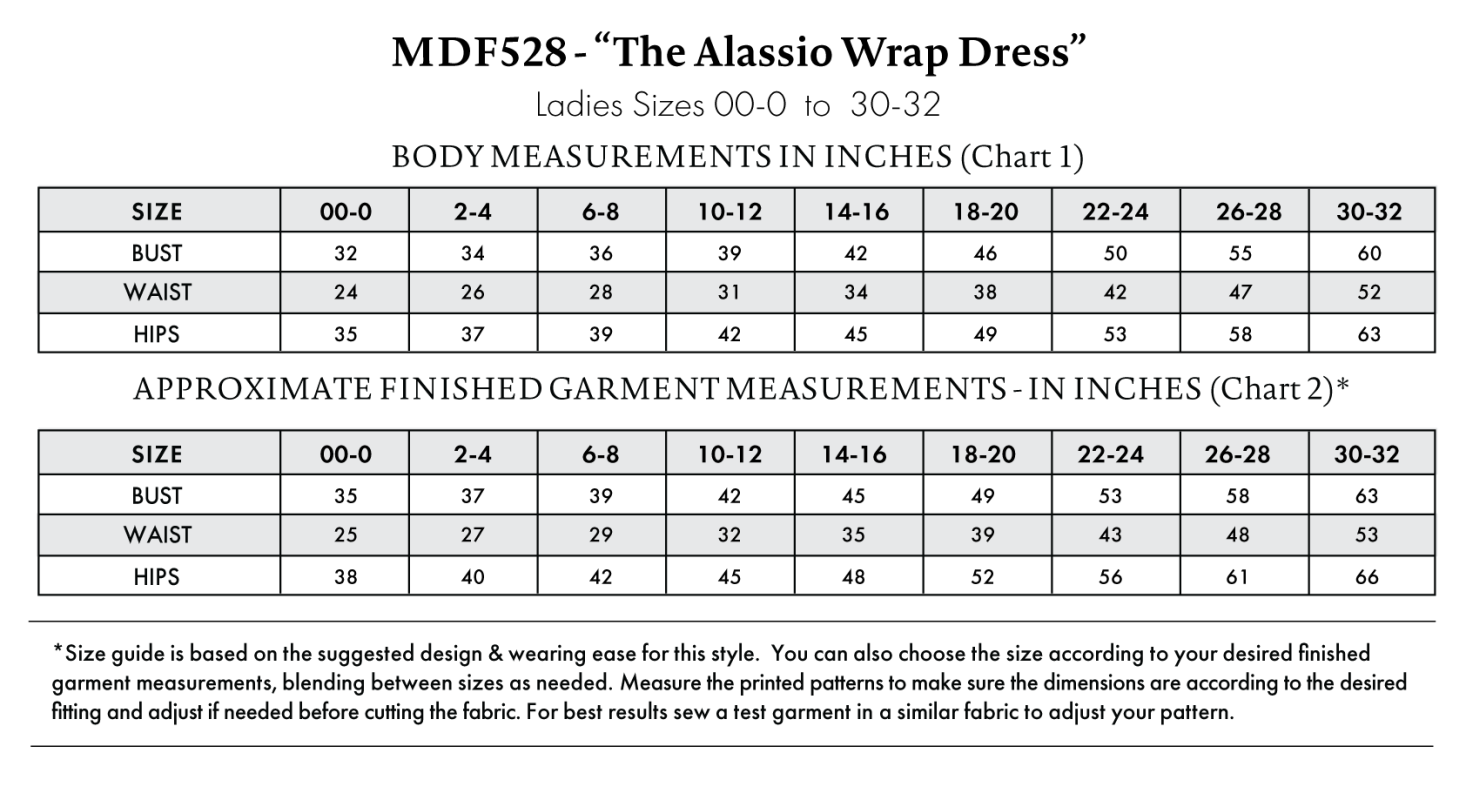
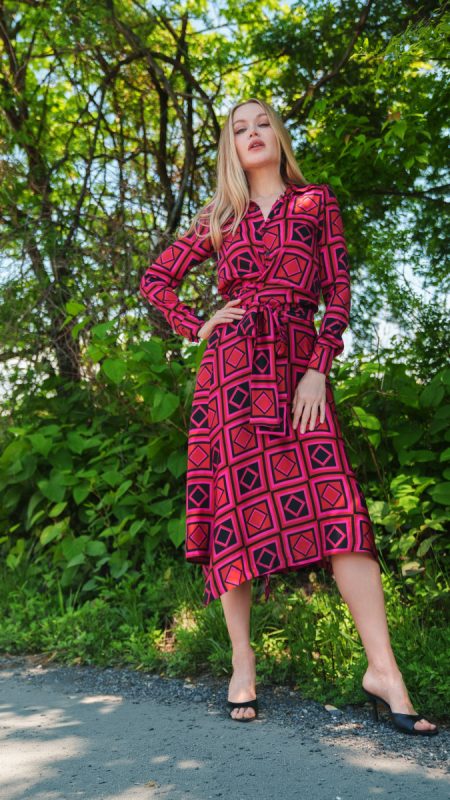
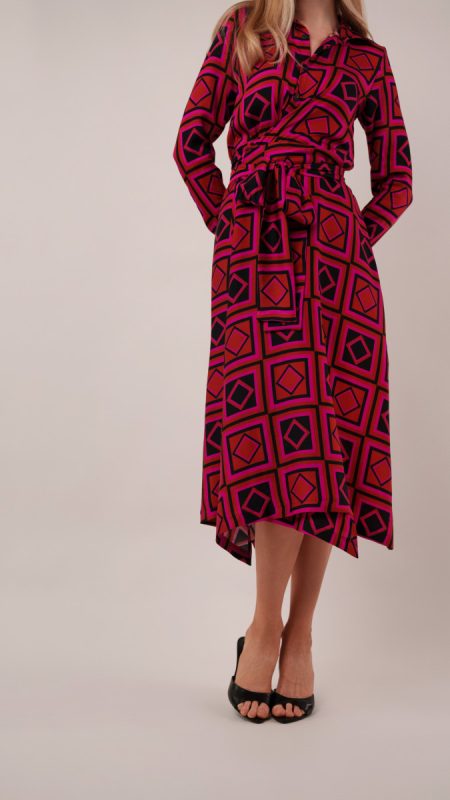
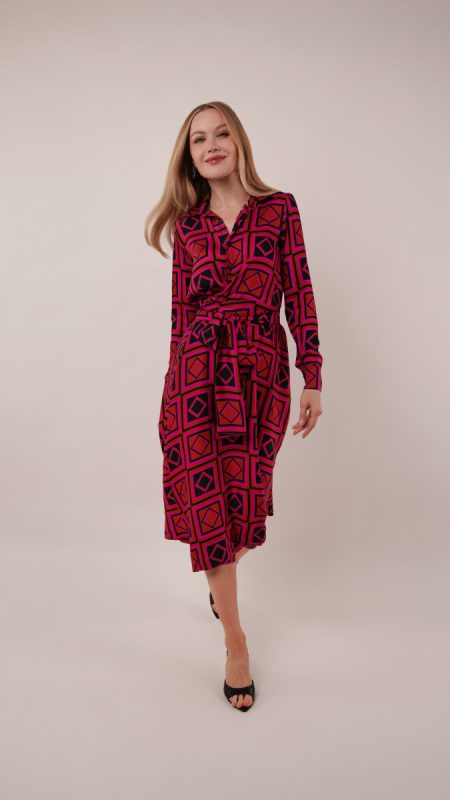
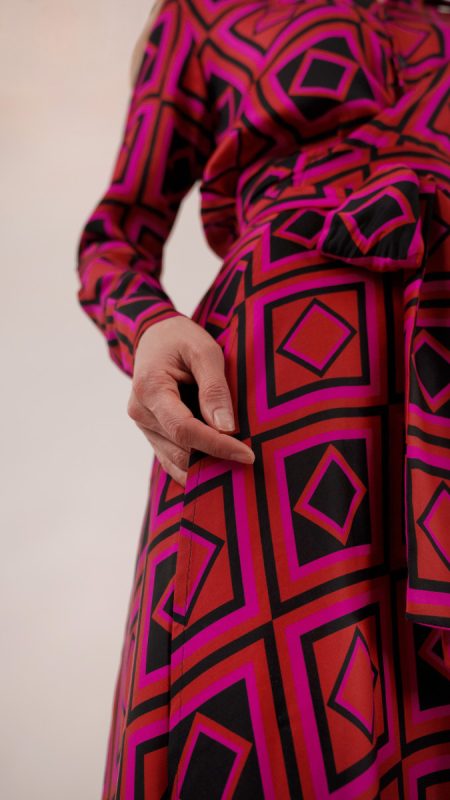
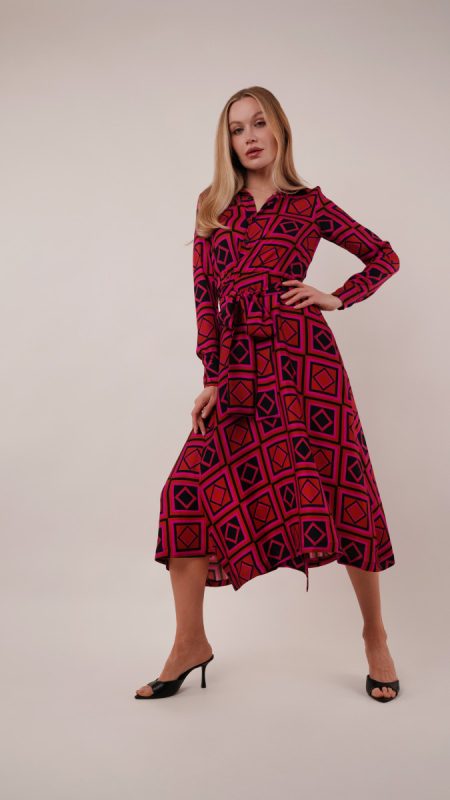
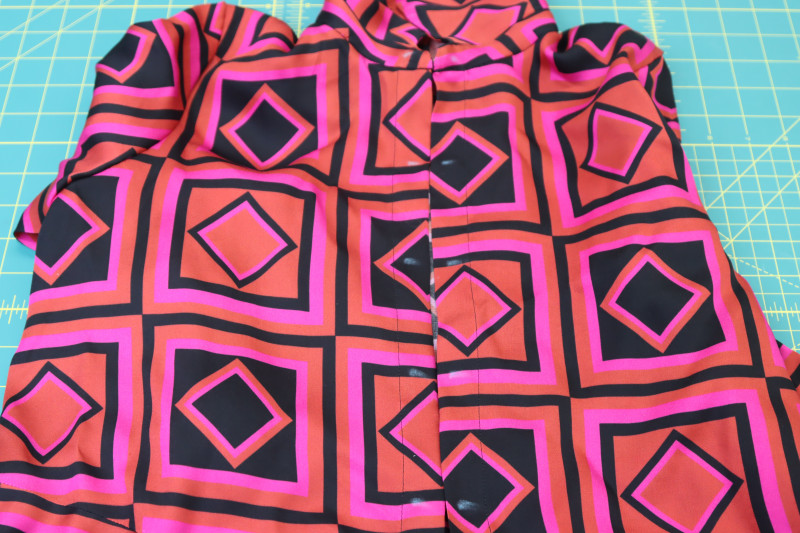
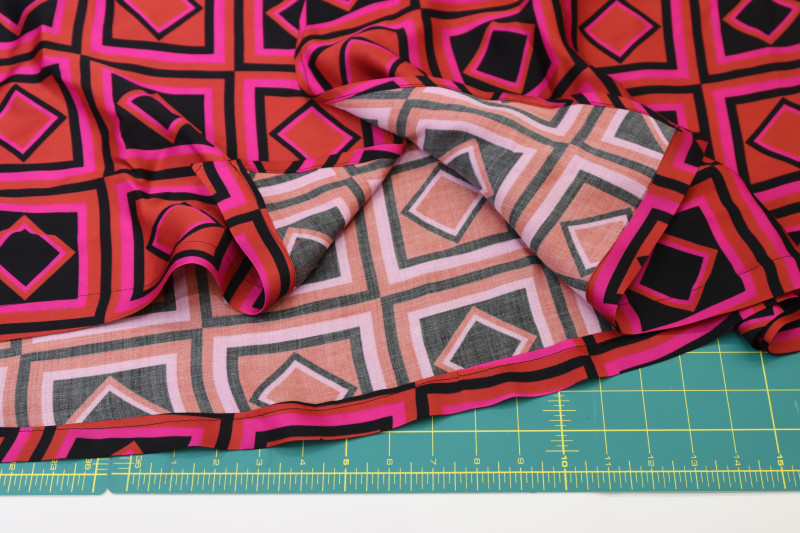
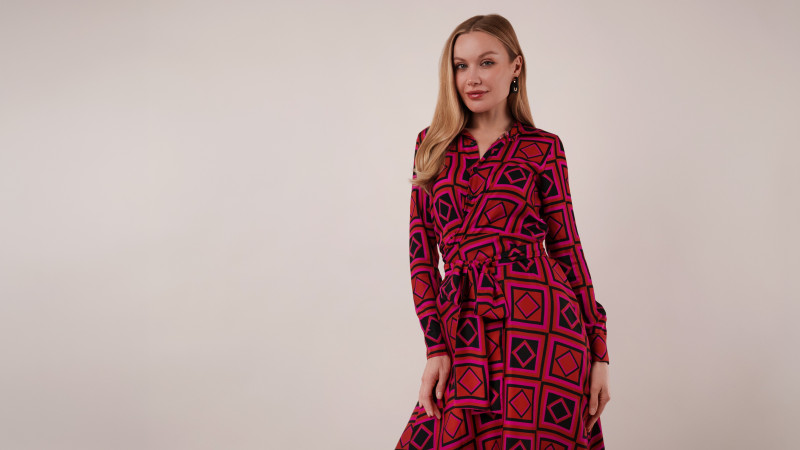
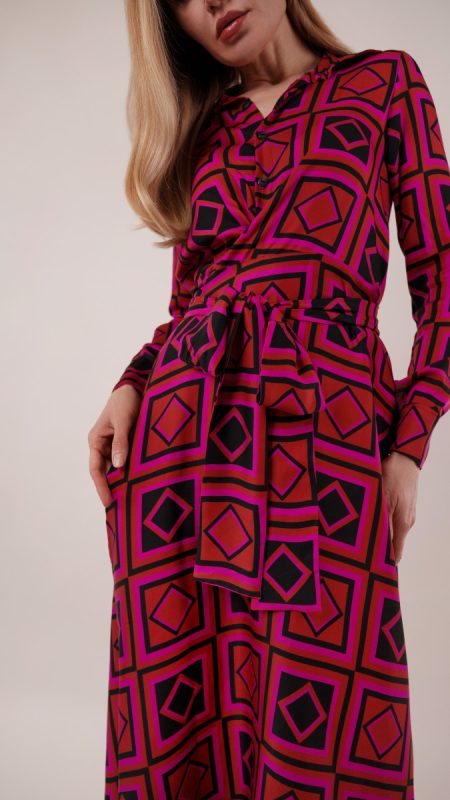
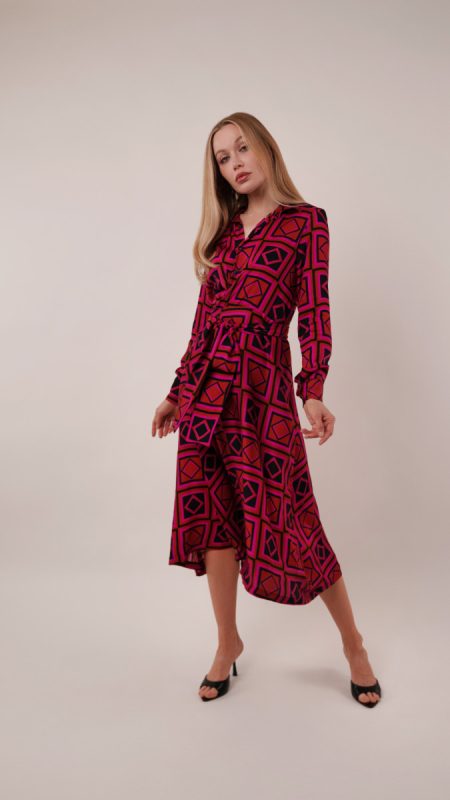
Bold, effortless, and impossible to ignore, the Alassio Wrap Dress was made for dancing long after sunset. Crafted from our Mood Exclusive Red When the Night Falls Rayon Challis, this dress brings together retro glamour and easy everyday wearability in one striking silhouette. Saturated shades of electric pink, deep red, and black form a geometric pattern that feels straight out of a vintage nightclub, while the soft drape and subtle sheen of the rayon challis keep the look elevated and fluid.
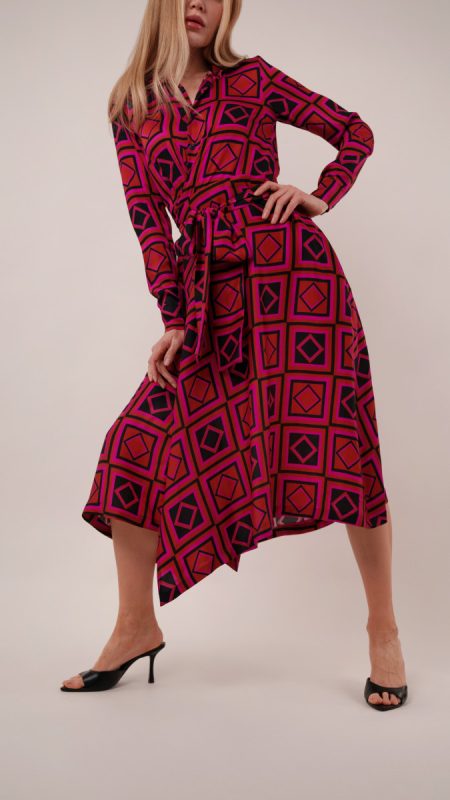
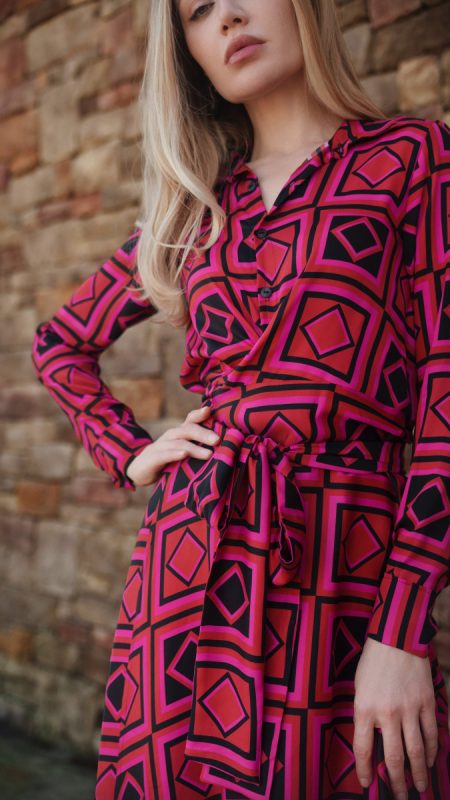
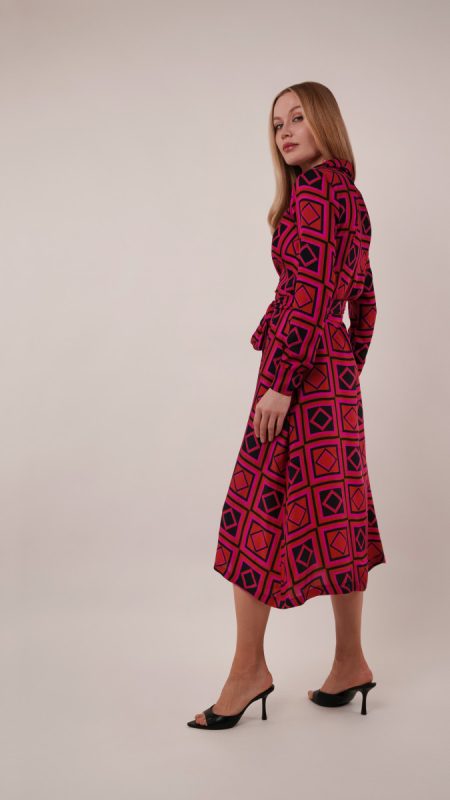
The Alassio Wrap Dress features a flattering wrap silhouette that cinches beautifully at the waist with a dramatic tie, creating shape while still feeling relaxed and comfortable. The softly structured collar and long sleeves add a touch of polish, balancing the movement of the sweeping skirt for a look that feels equally chic, styled casually or dressed up for a night out. Lightweight with a breezy drape, this dress moves beautifully with every step, making it the kind of garment you’ll want to twirl in at every opportunity.
Perfect for rooftop dinners, gallery openings, vacation nights out, holiday parties, or simply adding a little drama to your everyday wardrobe, the Alassio Wrap Dress is designed for the person who never wants to blend into the background. Pair it with sleek heels and bold earrings for a statement evening look, or throw it on with boots and a leather jacket for an effortlessly cool daytime outfit.
Essential Materials & Sizing Guide for the Alassio Wrap Dress
Continue reading for a breakdown of what knowledge and materials you need for creating your very own wrap dress! We’ve got you covered with the recommended materials we used—if you want to follow along exactly—as well as a curated list of alternative fabric type recommendations if you want to customize your own version. The Alassio Wrap Dress free sewing pattern download includes technical drawings for seam and wrap dress visibility, plus a size chart to help you find your perfect fit!

Purchase Products Used Below:
Quantities indicated are for sewing a size small wrap dress. Toggle the ‘SHOP THIS LOOK’ box to find quantity estimates for other sizes.
- 5 yards of Mood Exclusive Red When the Night Falls Rayon Challis
- 9 each of Italian Black 2-Hole Button – 20L/12.5mm
- 1 each of Gutermann Sew All Thread 250m – 10 Black
- MDF528 – Alassio Wrap Dress Sewing Pattern (Free download below!)
Additional Products Used:
*Quick Tip! The ‘SHOP THIS LOOK’ box defaults to full-yard quantities. To order an exact half-yard quantity for any fabric, simply use the decrease quantity button (-) to subtract by the half yard. Then click “ADD TO CART” to add all materials to your cart. (Our system can only display full-yard quantities initially.)
Alternative Fabric Type Recommendations:
The Alassio Wrap Dress sewing pattern is best suited for light or medium weight fashion fabrics. Explore other fabric types or colors from our featured collections for your wrap dress with the links below.
Download Your Free Sewing Pattern
Submit your name and email in the form below to receive the download link for the Alassio Wrap Dress free sewing pattern directly in your inbox. Mood Sewciety Patterns will send your free download link via email with the subject line: ‘Your Free Download from Mood Sewciety – The Alassio Wrap Dress’ (in PDF format for A4 and letter-size printing).
© MoodFabrics.com / MoodSewciety.com – Mass production, resale, or distribution of this pattern in any form is strictly prohibited.
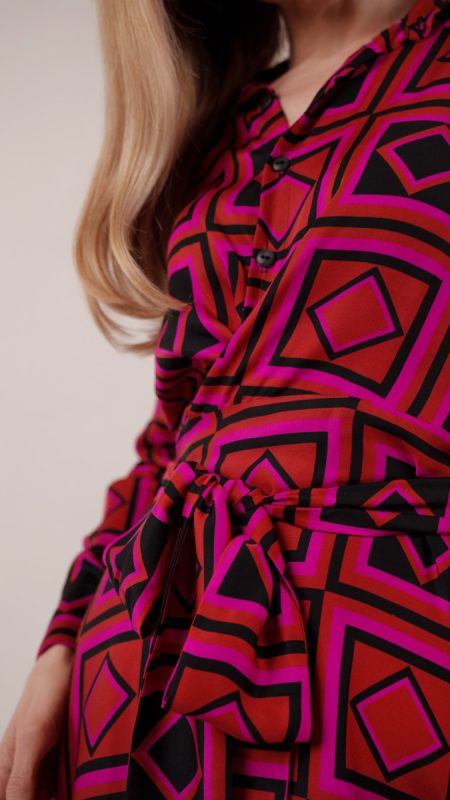
Find Your Perfect Fit
The Alassio Wrap Dress Sizing Guide is based on the suggested design & wearing ease for this style. You can also choose the size according to your desired finished garment measurements, blending between sizes as needed. Measure the printed patterns to make sure the dimensions are according to the desired fitting and adjust if needed before cutting the fabric. For best results, sew a test garment in a similar fabric to adjust your pattern.
Note: Always read all the instructions before cutting the fabric!
How to Sew The Alassio Wrap Dress
The instructions provided below are designed to guide you through sewing the Alassio Wrap Dress from start to finish.

5 Tips for Sewing with Rayon Challis
⇒ I highly recommend cutting out this fabric with a rotary cutter on a self healing mat. This fabric shifts around a lot on the bias, and its a lot easier to cut out curved pattern pieces with the rotary cutter than with straight scissors.
⇒ Make sure you press all your seams open and flat between steps. Pressing will be your best friend during this project.
⇒ Launder your fabric before cutting out the pattern pieces so that it is pre-shrunk.
⇒ I didn’t show this in the tutorial, but I do recommend french seams for most of the main joining stitches.
⇒ If you want a really professional finish on the hem, put the finished dress on a mannequin and tie it the way you would if you were wearing it. Let the dress hang for 24 hours, then trim the raw hem of the dress so that it is even all the way around before hemming. This is because rayon challis tends to warp when it hangs.
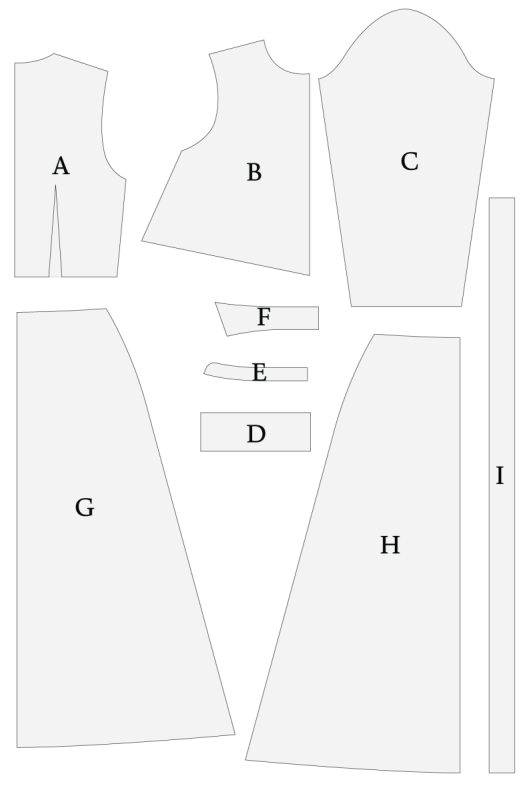
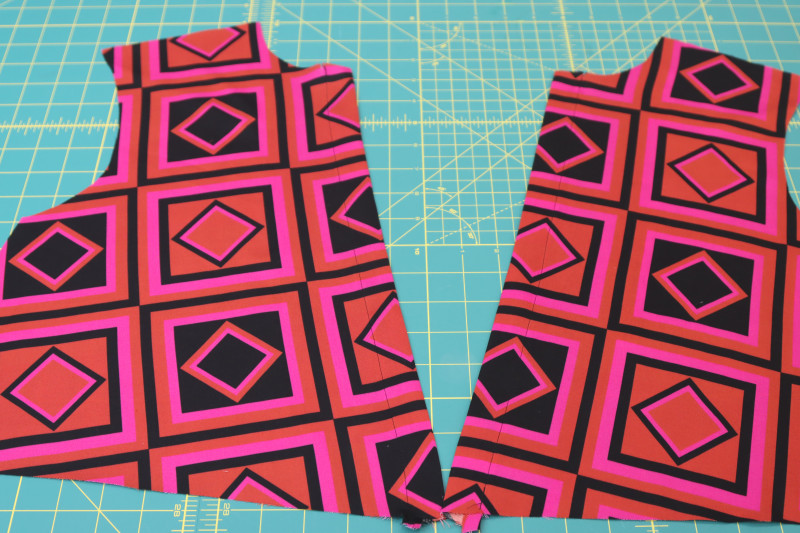
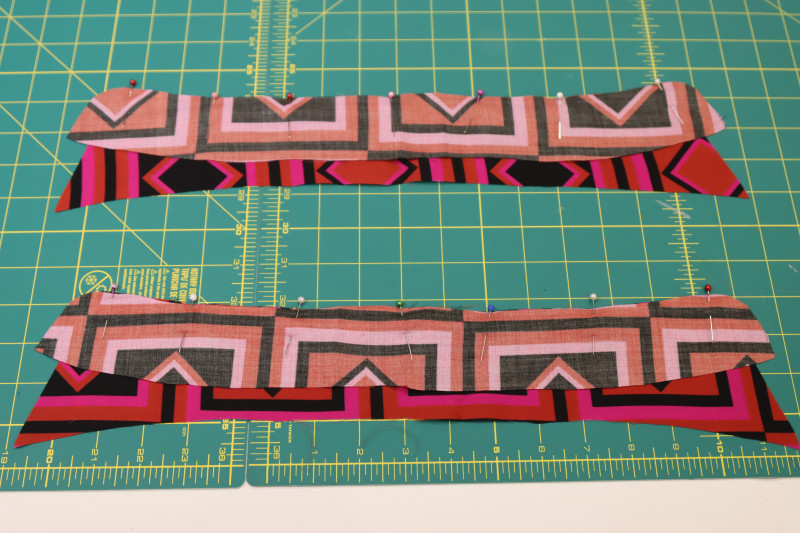
Pattern Pieces & Fabric Cuts Needed
- (A) TOP BACK
- Fabric – Cut 1 on Fold
- (B) TOP FRONT
- Fabric – Cut 2 Mirrored
- (C) SLEEVES
- Fabric – Cut 2 Mirrored
- (D) CUFFS
- Fabric – Cut 4
- (E) COLLAR STAND
- Fabric – Cut 2 on Fold
- (F) COLLAR
- Fabric – Cut 2 on Fold
- (G) SKIRT BACK
- Fabric – Cut 1 on Fold
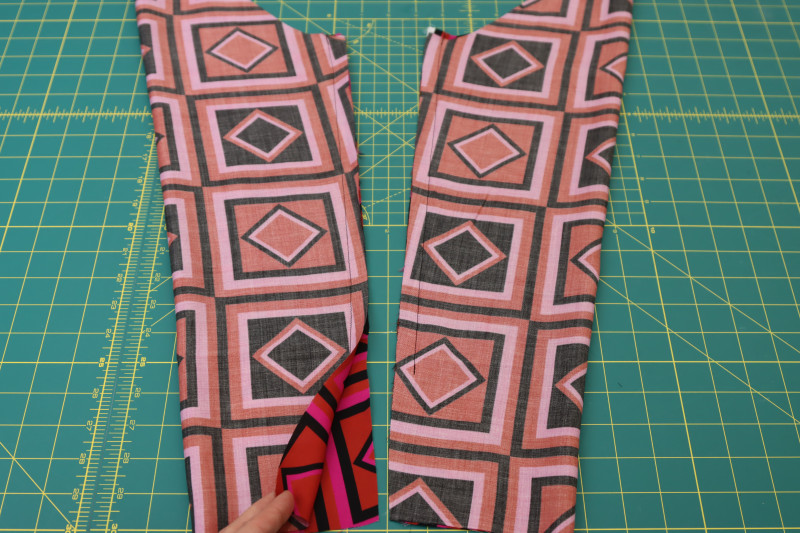
- (H) SKIRT FRONT
- Fabric – Cut 2 Mirrored
- (I) WAIST TIES
- Fabric – Cut 4
Sew with a 1/2″ seam allowance for all seams unless otherwise specified.
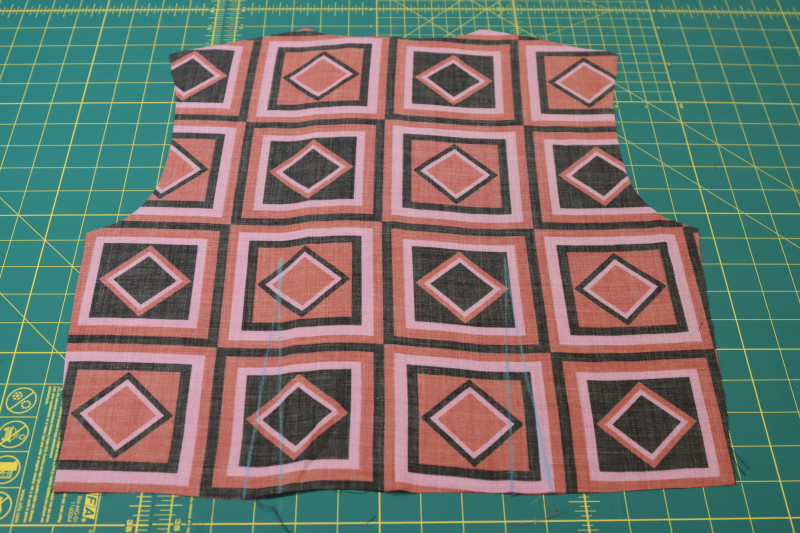
Step 1
DARTS
- Mark the darts on the back bodice with tailor’s chalk.
- Fold the back bodice right sides together centered over each dart.
- Pin the chalk lines on either side of the dart to each other.
- Sew the darts.
- Press the darts toward the side seam.

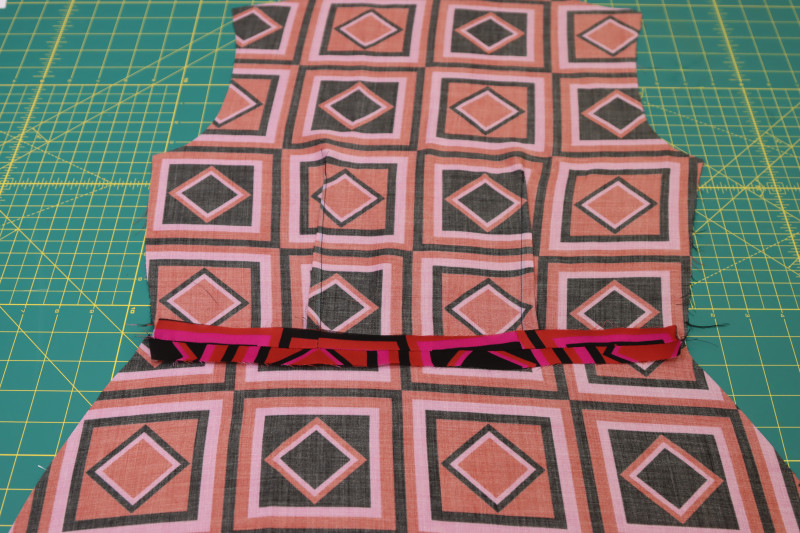
Step 2
BACK WAIST
- Place the back bodice right sides together with the waistline of the back skirt.
- Pin and sew the back bodice to the back skirt.
- Press the waist seam open and flat.
Step 3
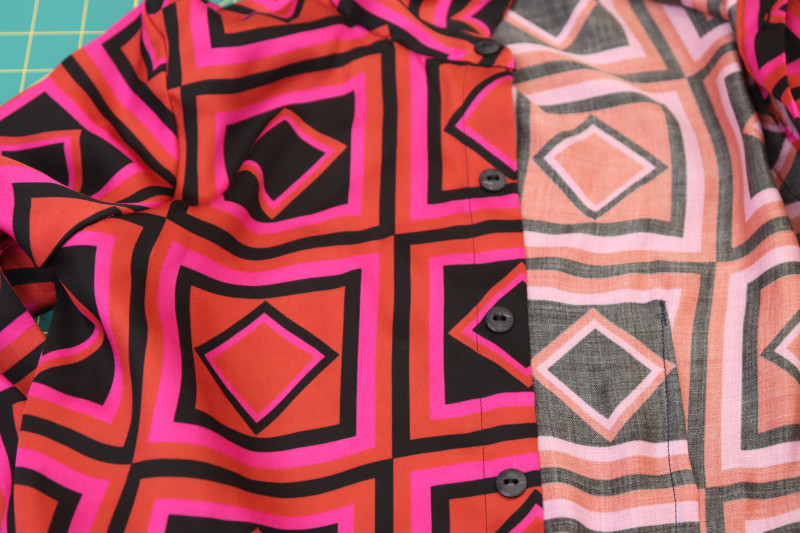
BUTTON PLACKET
- Fold the center front raw edges of the front bodice pieces according to the notches on the pattern. One of the notches is for the seam allowance and one is for the end of the button placket.
- Press the button placket folds into place.
- Topstitch over the seam allowance of the button placket.
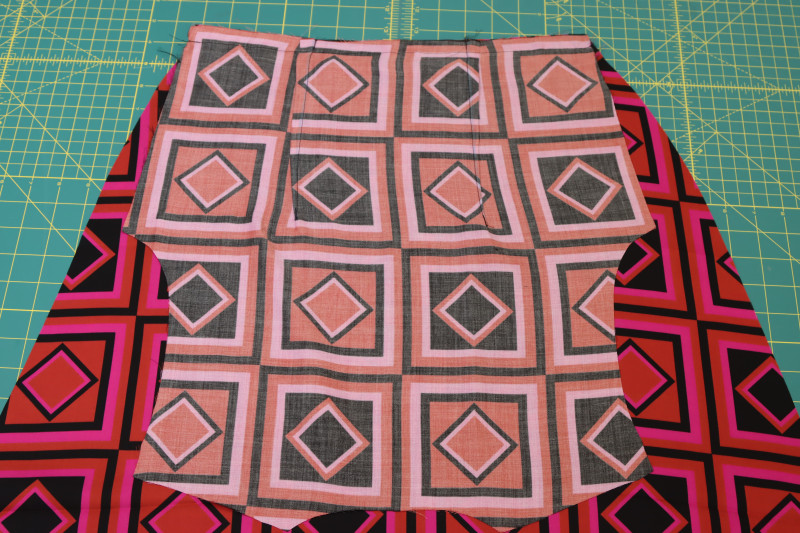
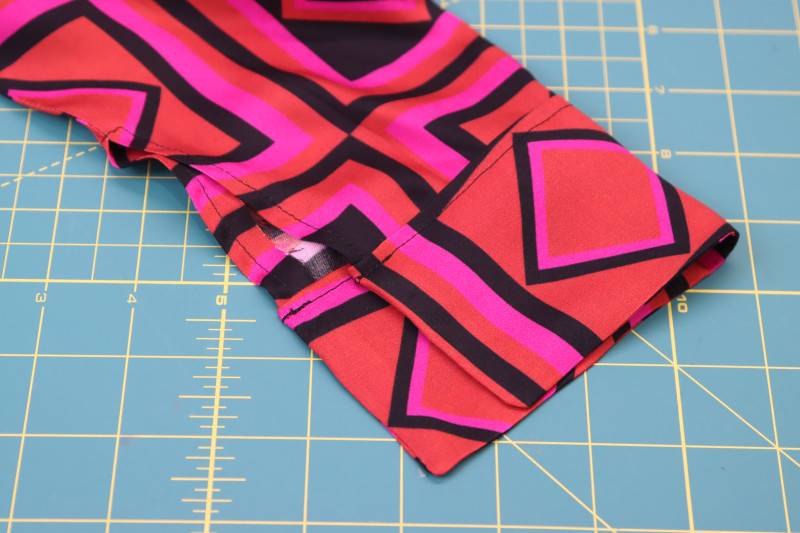
Step 4
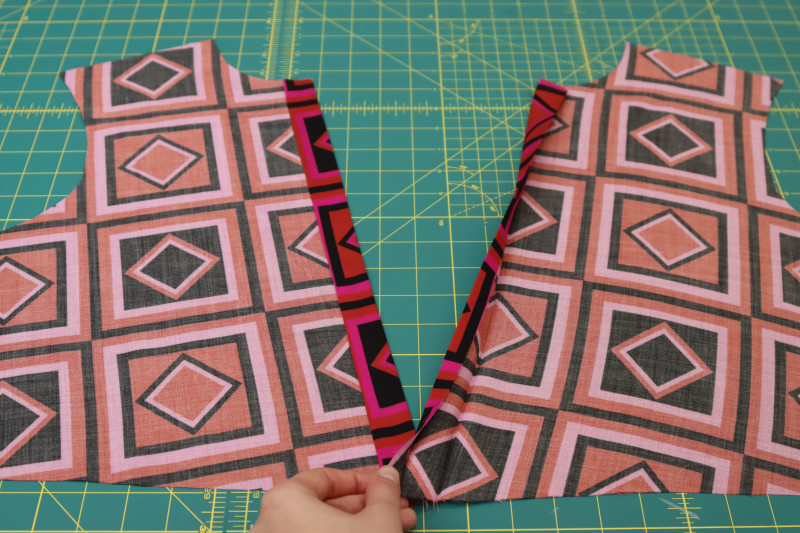
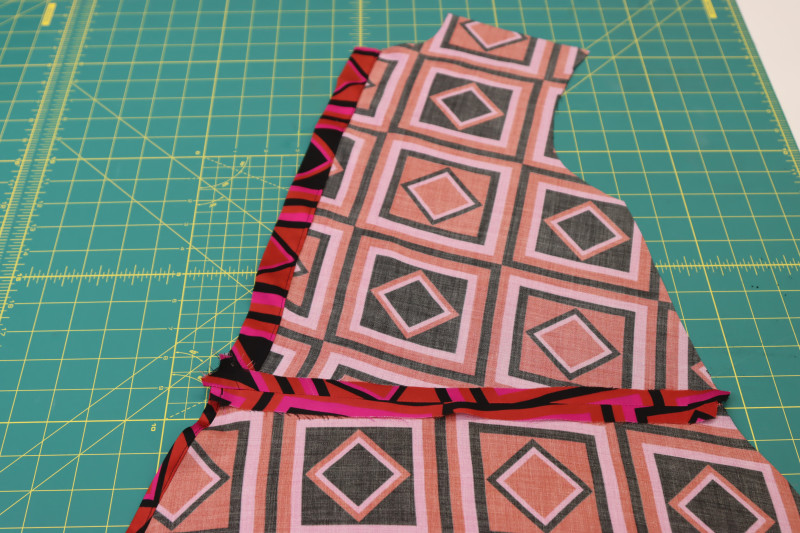
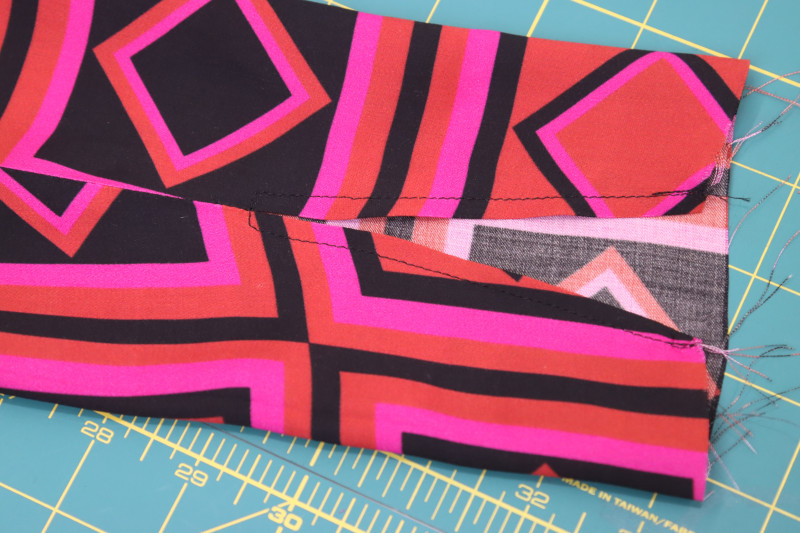
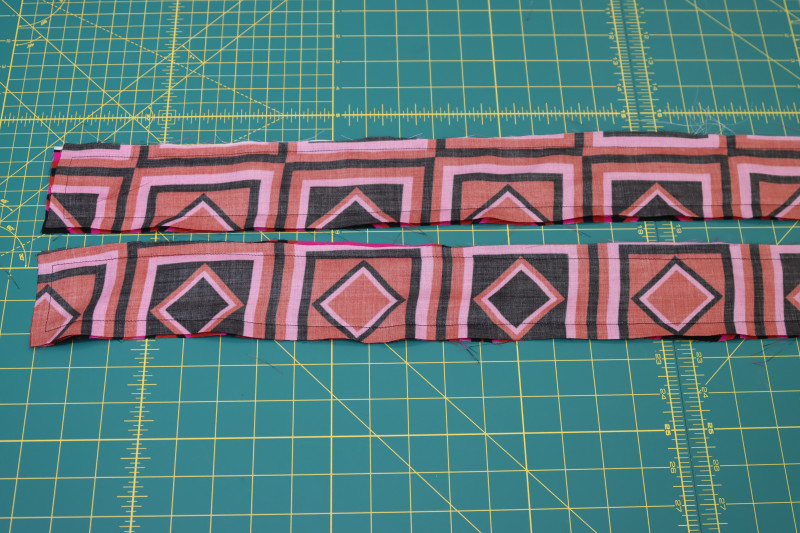
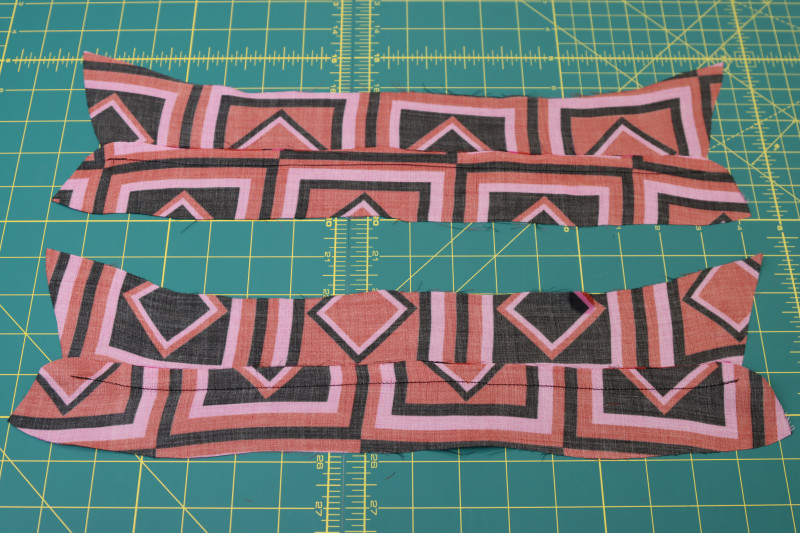
FRONT SKIRT
- Sew a skinny double folded ¼ inch hem into mirrored sides of the front skirt pieces, as shown in the photo below.
- Press the folded hem.

Step 5
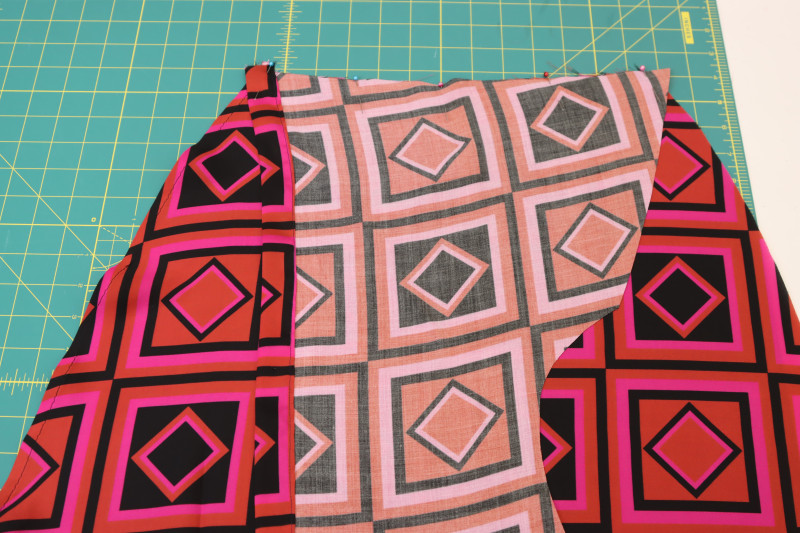
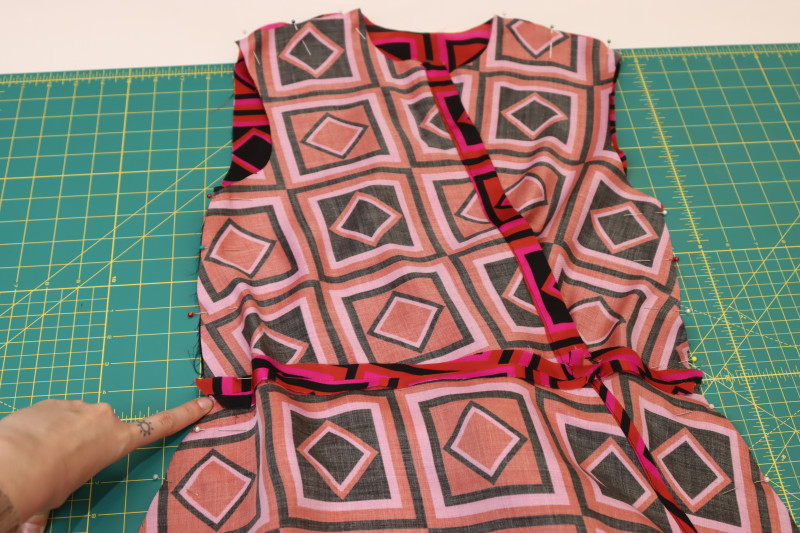
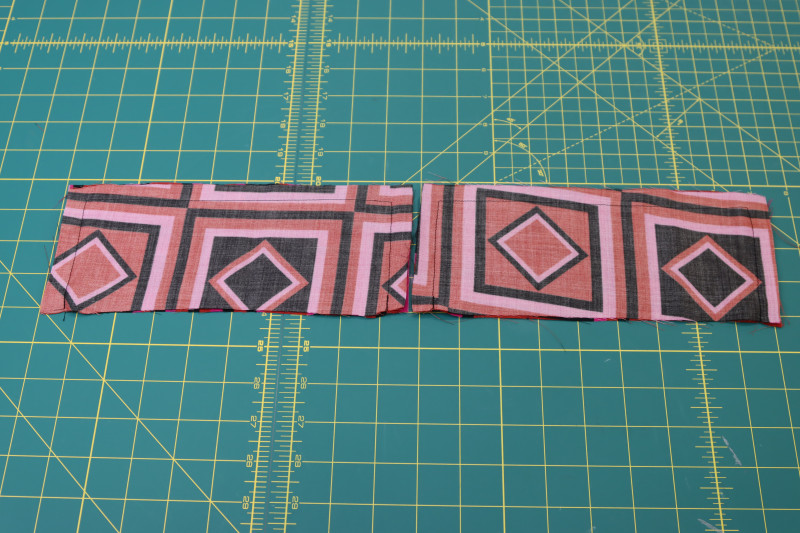
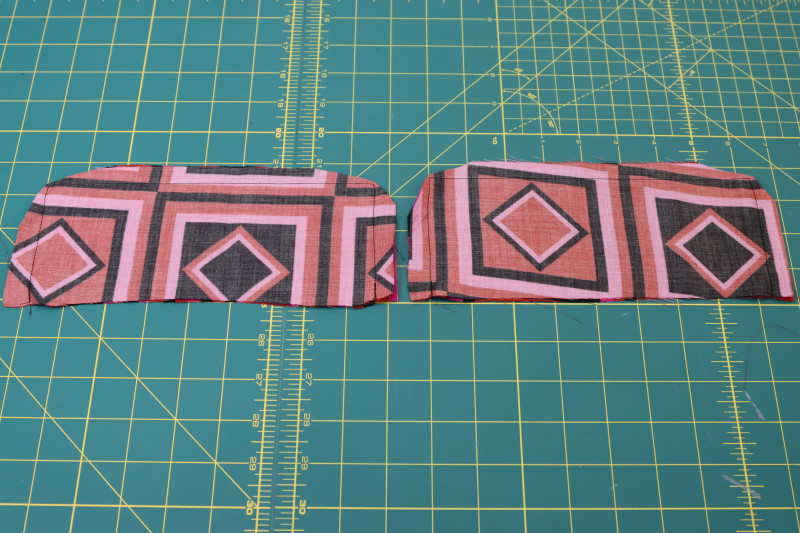
FRONT WAIST
- Place the front bodice pieces right sides together with the waistlines of the front skirt pieces, making sure the button placket is on the same side of the dress as the hemmed side of the front skirt.
- Pin and sew the front left bodice to the front left skirt and the front right bodice to the front right skirt.
- Press the front waist seams open.
Step 6
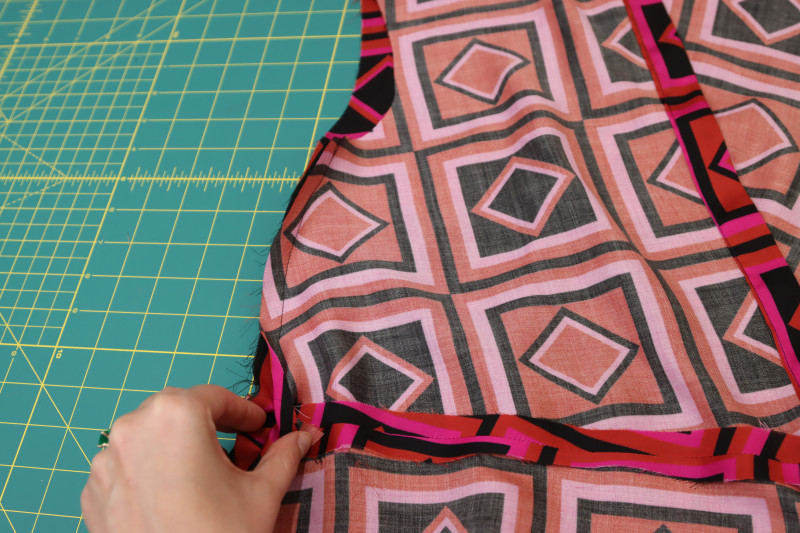
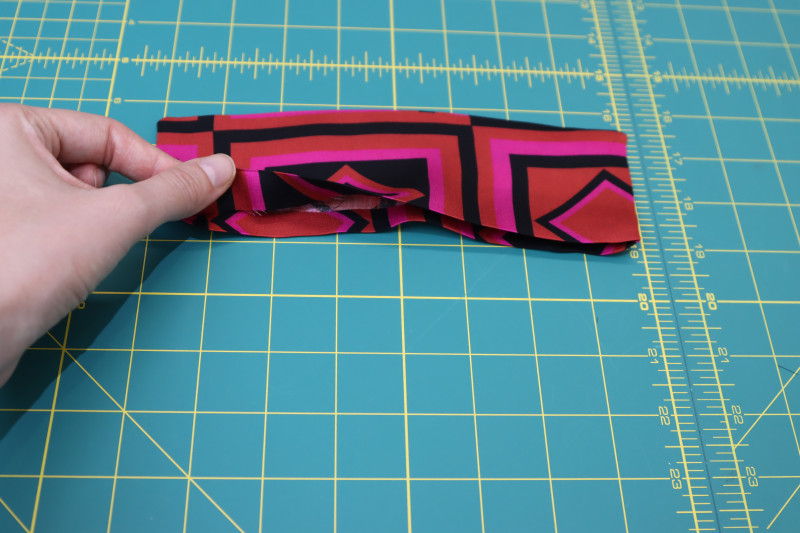
SIDE SEAMS
- Place the front dress pieces right sides together on top of the back dress piece with the sides and shoulders lined up.
- Pin and sew the front and back dress pieces together at the shoulder seams.
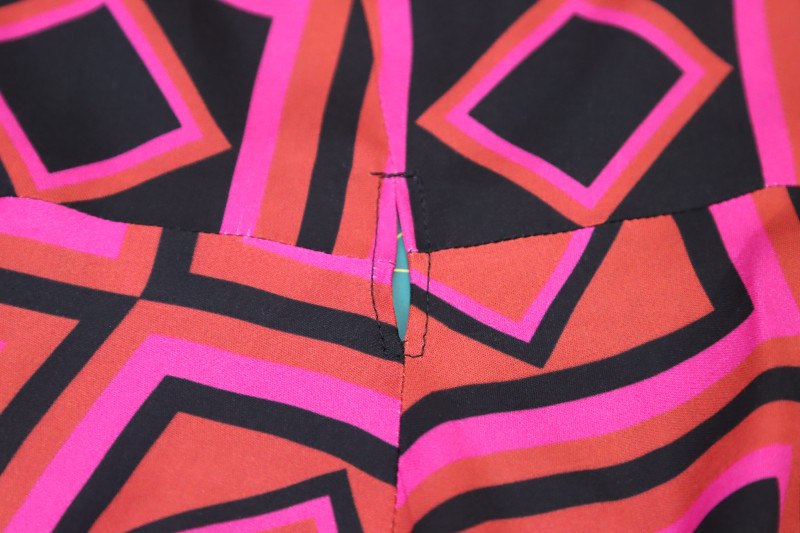
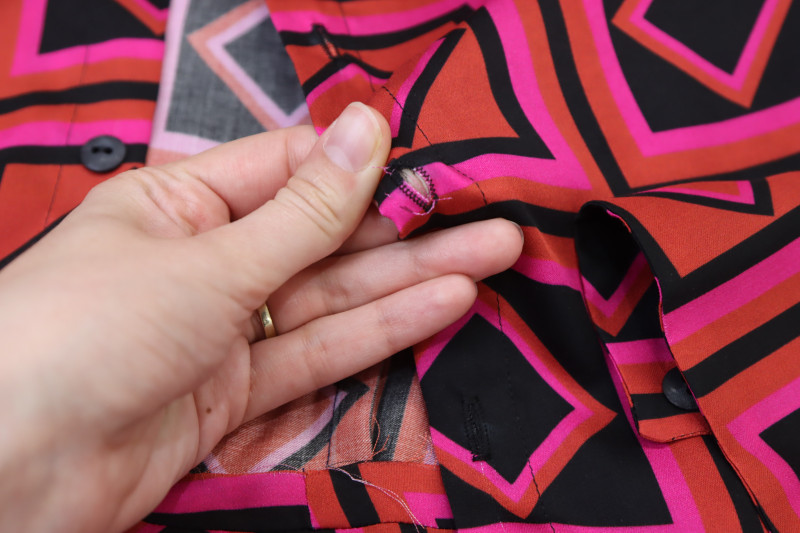
- Pin the front and back pieces together at the side seams, being sure to leave a 2 inch gap at the waist seam for the waist ties.
- Sew the side seams of the dress, being sure to backstitch at the top and bottom of the gaps to secure them in place.
- Press the side seams open and flat.
- Topstitch around the gap with a ¼ inch seam allowance to reinforce the hole and prevent the raw edge of the seam allowance from sticking out of the hole.
Step 7
SLEEVE INSEAMS
- Fold the sleeves right sides together with the inseams lined up.
- Pin and sew the inseam of each sleeve except for a 5 inch gap at the bottom of the inseam for the sleeve placket.
- Press the sleeve inseam seam allowance open and flat.
- Topstitch over the sleeve placket to secure and reinforce it.
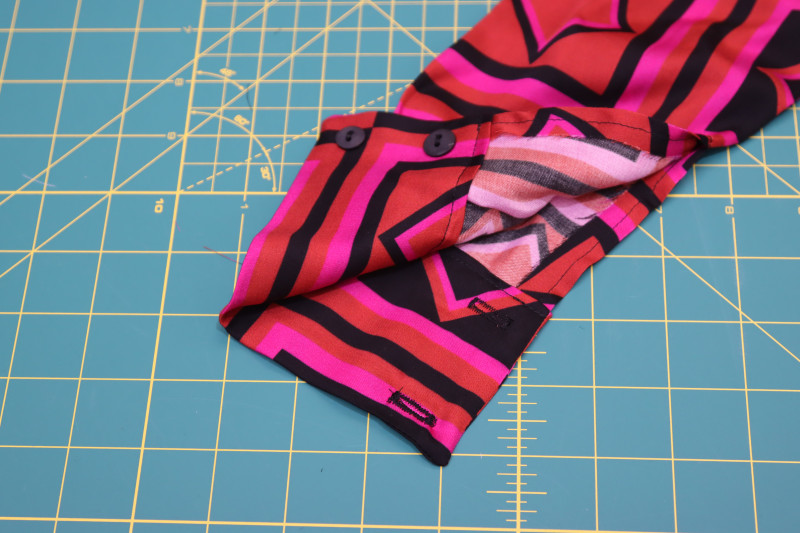
Step 8
CUFFS
- Place the cuffs right sides together.
- Pin and sew around the two short sides and one of the long sides of each pair of cuffs, leaving one long side open.
- Clip the corners of the cuffs.
- Flip the cuffs right sides out and press.
- Press a ½ inch fold into the raw edges of the cuffs so that they’re hidden inside of the cuffs.
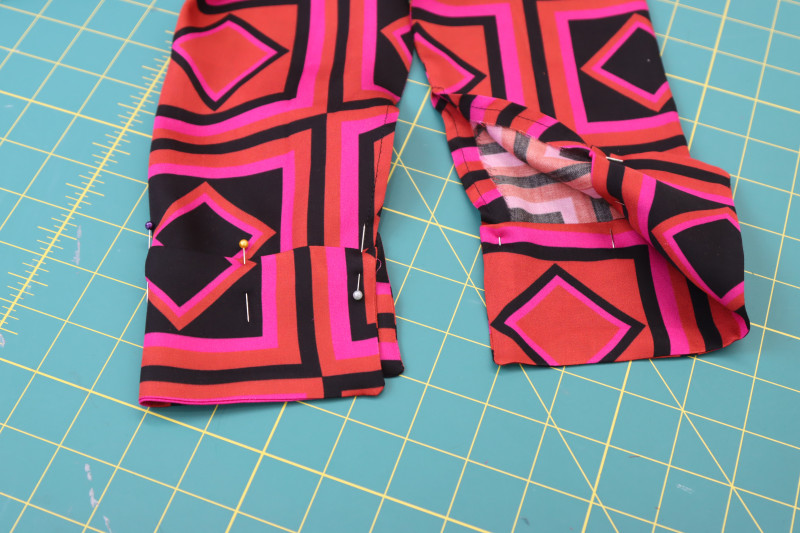
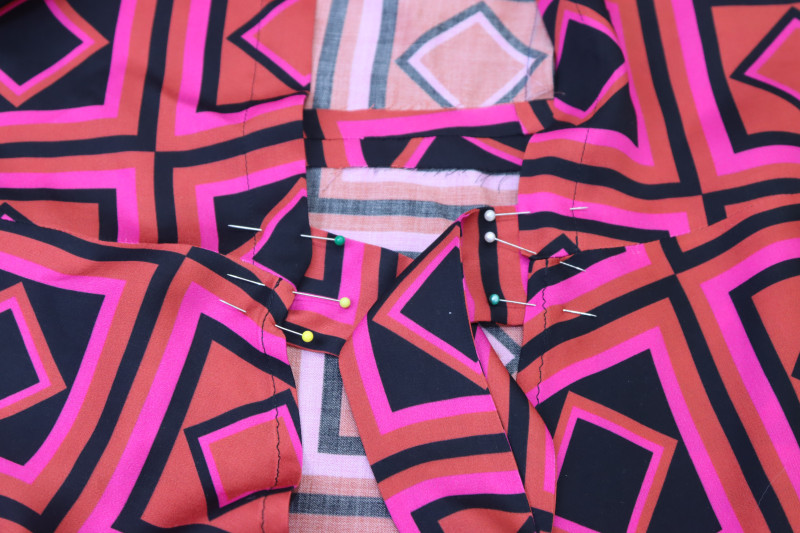
Step 9
ATTACH CUFFS
- Sandwich the cuffs around the ends of the sleeves.
- Pin the ends of the sleeves in between the two layers of the cuff.
- Topstitch over the folded edge of the cuff on each sleeve.
Step 10
ATTACH SLEEVES
- Pin the sleeves right sides together into their respective armscyes, making sure the seams under the arms are lined up.
- Sew the sleeves into the armscyes.
Step 11
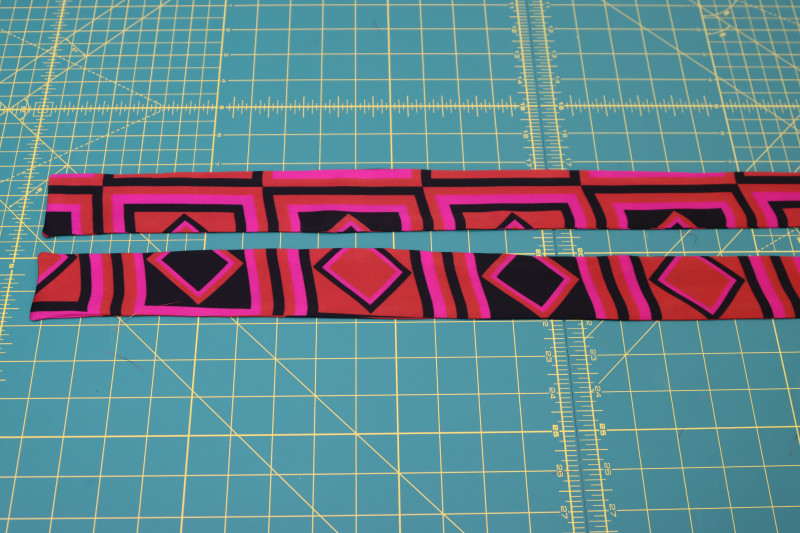
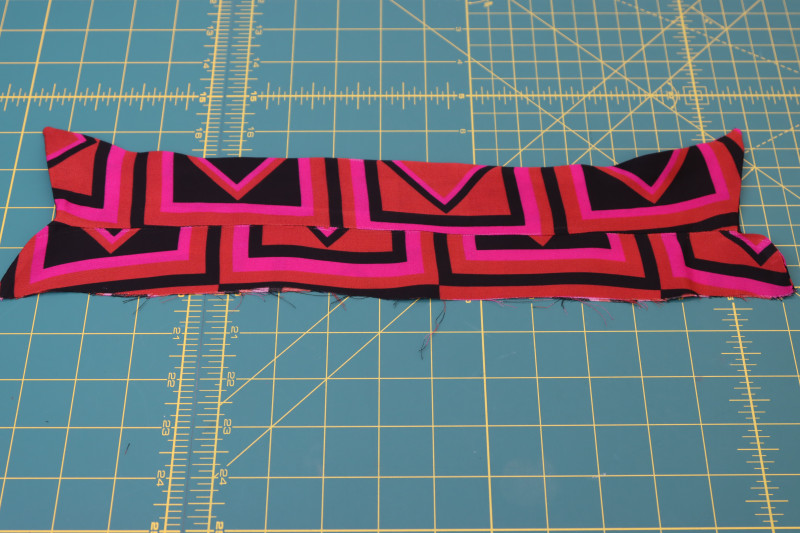
TIES
- Place the ties right sides together as shown below.
- Pin and sew the two long sides and one of the short sides on each pair of ties, leaving one of the short sides open.
- Clip the corners of the ties.
- Flip the ties right sides out and press.
Step 12
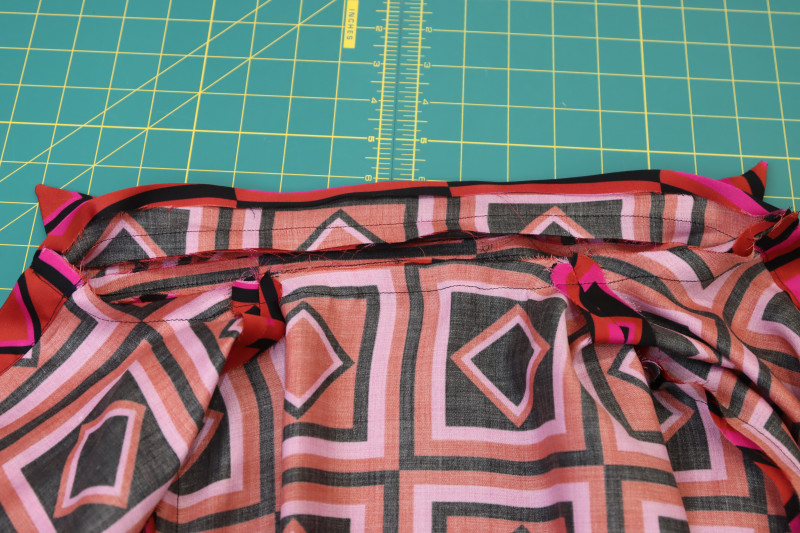
ATTACH TIES
- Pin the raw edges of the ties to the center front of the dress at the waist seam.
- Topstitch over the ties to secure them to the center front of the dress.
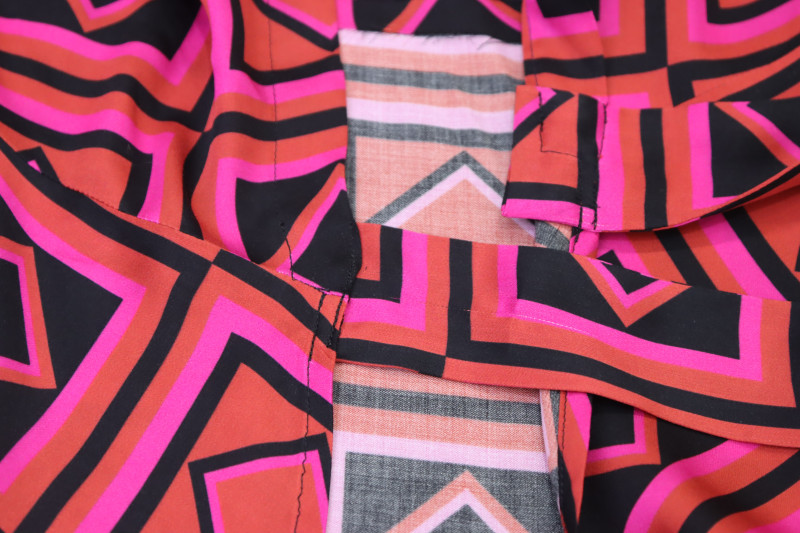
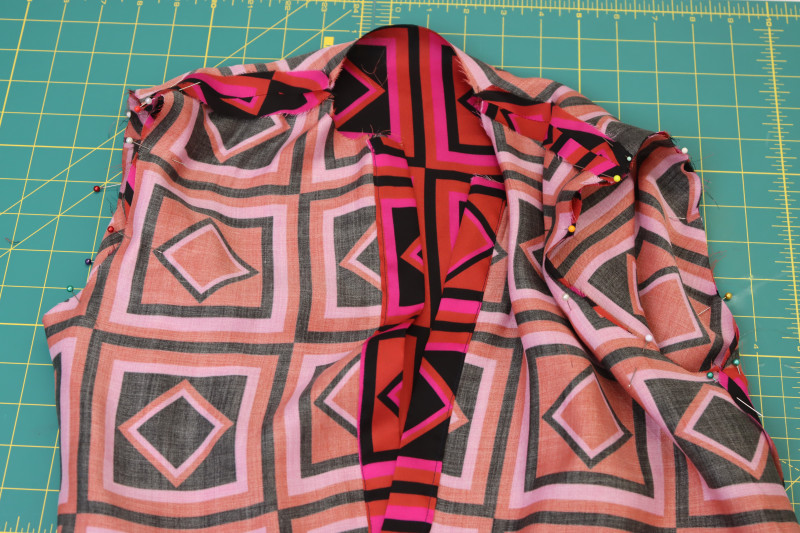
Step 13
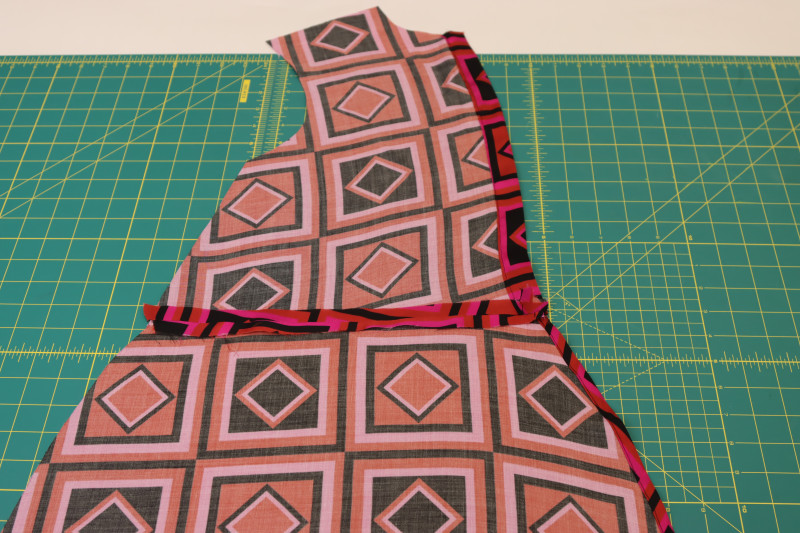
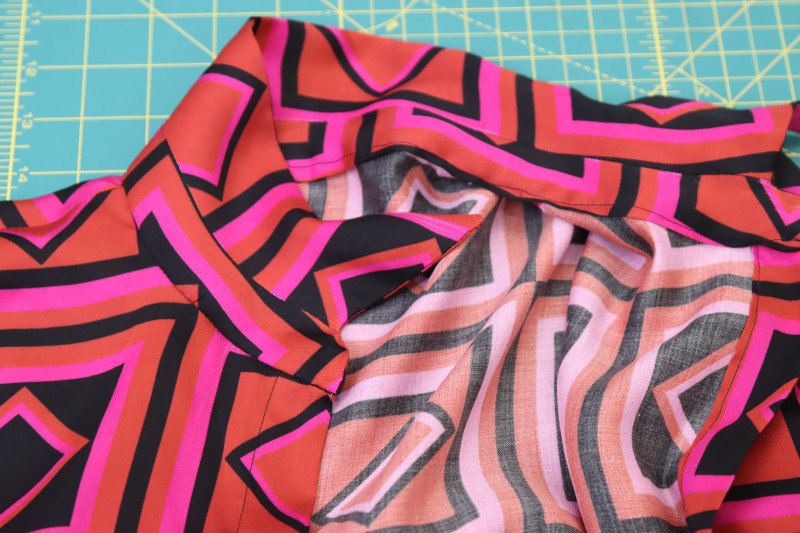
COLLAR
- Place the rounded edge of the collar band right sides together with the shorter curved edge of the collar.
- Pin the collar band to the collar.
- Sew the collar bands to the collars and press the seam allowances toward the points of the collar (up).
- Place the two collar pieces right sides together.
- Pin and sew around all edges of the collar and collar band except for the bottom of the collar band.
- Clip the corners of the collar and collar band.
- Flip the collar and band right sides out and press.


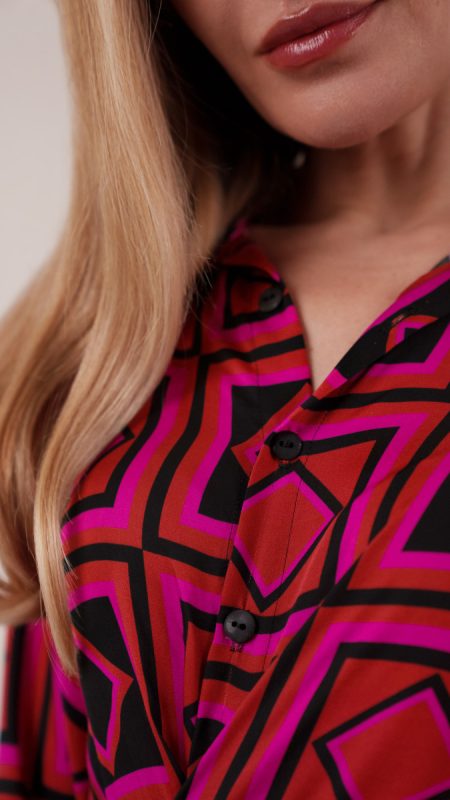
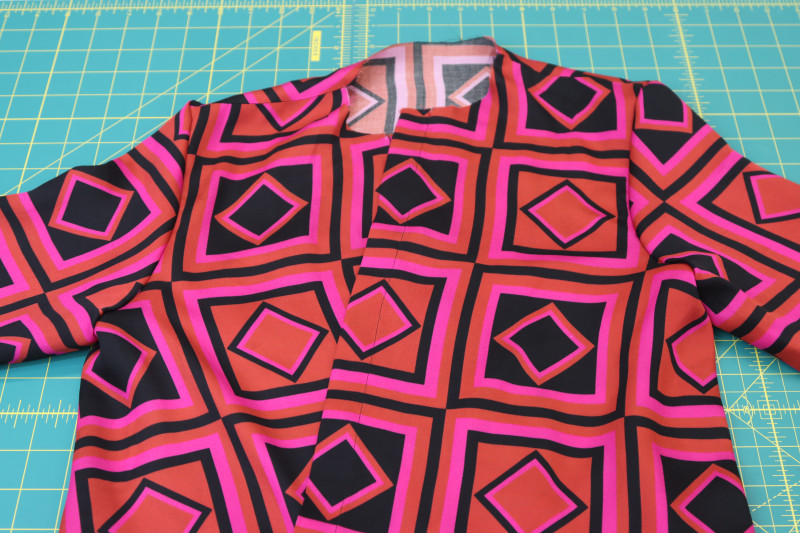
Step 14
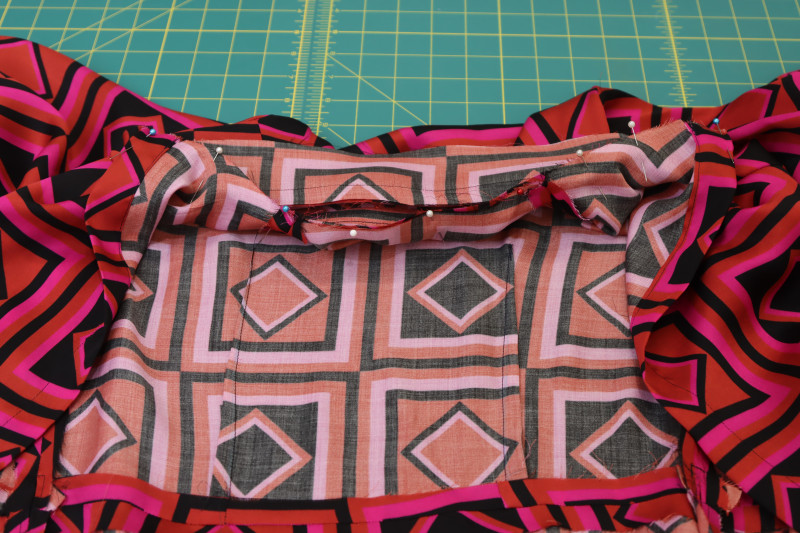
ATTACH COLLAR
- Pin one of the raw edges of the collar band to the raw edge of the dress neckline right sides together, making sure the ends of the collar band are lined up with the button placket.
- Sew the pinned edge of the collar band to the neckline.
- Press a ½ inch fold into the other raw edge of the collar band.
- Pin the folded edge of the collar band to the neckline seam.
- Sew a stitch in the ditch of the neckline seam from the outside of the dress, making sure to catch the folded edge of the collar band in the stitch.

Step 15
FRONT BUTTONS
- Mark the locations of your buttons on the button plackets using tailor’s chalk.
- Hand sew buttons onto the wearer’s right side of the button placket.
- Use the buttonhole foot attachment on your sewing machine to sew buttonholes on the chalk marks opposite to the buttons.
- Open the buttonholes with a seam ripper.
Step 16
CUFF BUTTONS
- Mark the locations of the buttons and buttonholes on the sleeve cuffs using tailor’s chalk.
- Sew the buttonholes to the side of the cuff that faces out away from your body.
- Sew the buttons to the INSIDE of the cuff that is closest to your body.
- Cut the button holes open with a seam ripper.
Step 17
HEM
- Press a 1 inch fold into the hem of the dress.
- Fold the folded edge up another inch and press that fold with an iron.
- Topstitch over the double folded hem with a ⅞ inch seam allowance.
Sewing Success: The Finished Alassio Wrap Dress
Share this post with a friend (or two!), download the Alassio Wrap Dress free sewing pattern, and show us which fabrics and colors you choose, using the hashtags #MoodAlassioPattern & #MadeWithMood—and don’t forget to tag us @MoodFabrics, too.


Free Sewing Pattern Inspiration for Your Next Project
With 525+ free sewing patterns and counting, your opportunities for sewing with Mood are endless!
We hope you had as much fun sewing this wrap dress pattern as we did! As always, we want to hear from you—share your thoughts and comments below and let us know where you’ll be wearing the Alassio Wrap Dress free sewing pattern!
Can’t get enough sewing with Mood? Browse your next make with our latest free sewing patterns.
How do you know? I need a pattern and boom—you deliver. I’m planning on using it as a base to sew a modern Ms. Frizzle dress. Thank you so much!
Great minds think alike! I can’t wait to see how your project turns out! Share a picture on social media and tag us with the hashtag #MadeWithMood so we can see it and feature you on our page!
Hello the Alassio Wrap Dress, i have downloaded the pattern but i am looking for that fabric you show in the instructions and completion. Can u give me the details love the fabric please.
Thanks so much
Brenda
Hey Brenda! The fabric used in this post is listed in the materials list at the top of the page! All you have to do is click the hyperlink and it will take you to our website to purchase it for yourself.
Hi! Thank you so much for this pattern, I’ve been looking for one to make a dress for my mother who loves this style. Do you have any tips for how you would go about to make it short-sleeved? Thank you!
Hey Ariane! Just cut the sleeves to the length you want and omit the cuff!
A gorgeous dress and fabric. Thank you.
This looks like a great pattern for a knit fabric; it may just need a bit more stabilization, especially along the wrapped edges of the skirt and bodice or they could stretch out over time. I am working on a special project with knits using a few different types and different dress patterns, this could be one of the three! Thanks!
Great design, it addresses a lot of the upper bodice issues with a typical wrap pattern, but still gives the ease and comfort of wrap styling. I think it needs some pockets.
Will it become as useful as my Cardinal Blouse?
Hey Kira! Thank you so much for the feedback. I can see this becoming a wardrobe staple for you <3
There seems to be a problem here. The front skirt pieces are far too wide for the bottom of the bodice. Are you SURE they are cut 2 on the fold and not cut 2 mirrored like the bodice?
Hopefully I’ll get an answer soon. Normally it’s forever after and I’ll have dumped the stupid thing
Hey Laura, you’re right, it’s cut 2 mirrored. I just updated it in the blog post instructions. Thank you for pointing this out!
Thanks for updating it, however I’m still not sure it is right. The edges that need to be put together ie the bottom of the bodice and the top of the skirt are completely different lengths.
If you look at the second photo under step 5 the two pieces line up and have the same length across the seam. I’m struggling to see how that happened with the pattern pieces as supplied.
Having made the dress and just free cutting the skirt panels to work I genuinely think the wrong pattern piece has been printed for the front skirt panel. It is identical to the back panel so I think this was duplicated in error instead of the different piece for the front
Hi Laura
I see where the confusion is. The front skirt pattern piece should also be cut on the fold, and as the label indicates, you need to cut 2 pieces, once you cut it on the fold you get double the width at the waistline, which matches correctly with the width of the top waistline. Two pieces are cut because one is needed for each front top piece.
Edit: Laura, I just read through the entire comment thread. I’m going to review the pattern size by size and, if necessary, we’ll update it as soon as possible. Thank you!
Hi can u please send the wrapped dress pattern
Thank u
Hey Sagree! Check your email.
This pattern is gorgeous. i need a dress for work and i want to start wearing natural fibers. how do i dowload pattern. i could free hand it but i haven’t sewn in a very long time
I’m running into a bit of trouble with this pattern. I’m on step 5, to make the front waist. When I pin the bodice piece to the front skirt piece, the bodice is way, way wide. I pin the part that makes the button placket to the folded hem of the skirt and it is 8 inches too wide. I don’t understand. Is there a way I can leave a picture to show you what I mean?
Hey Tara, I know the pattern piece for the front skirt says cut 2 on fold, but you’re actually supposed to cut 2 mirrored. That is why the front skirt is way too wide.
I made this out of broderie anglais and it is very comfortable!