

Meet the Spokane and Harrington Hoodies, two perfectly relaxed layers designed to live at the center of your everyday wardrobe. Equal parts comfort and intention, these hoodies share the same DNA while offering silhouettes tailored to different styles and bodies.
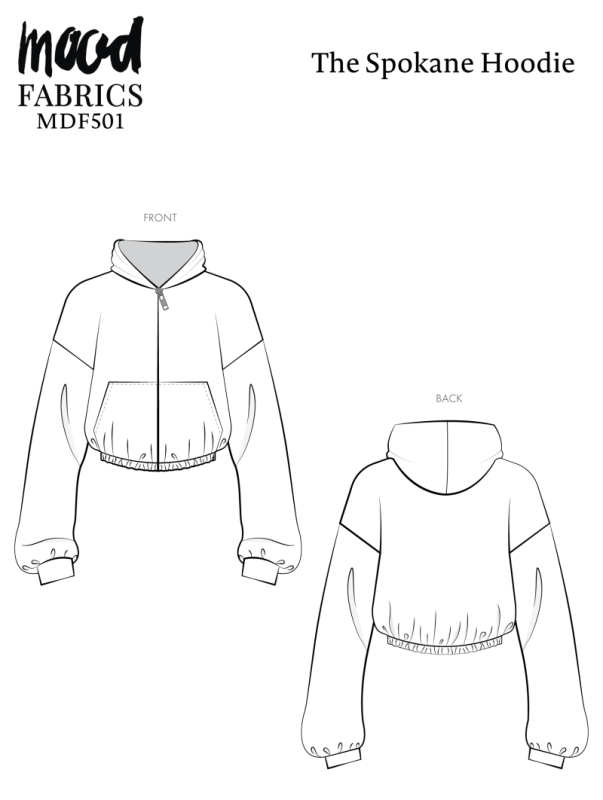
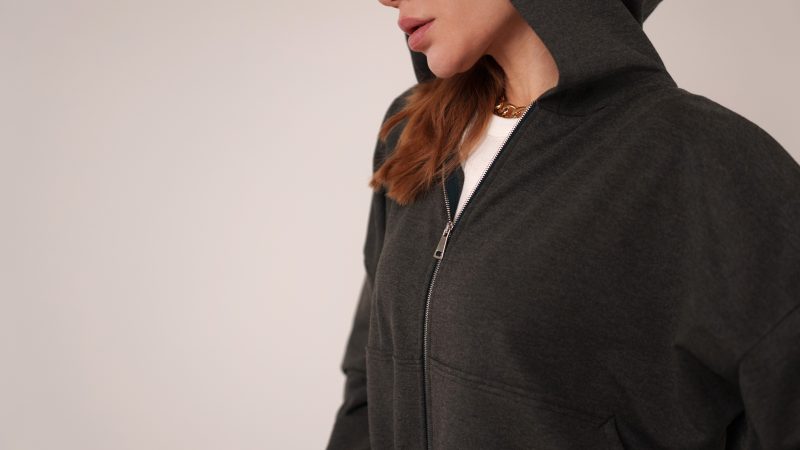
The Spokane Hoodie features a cropped, oversized fit designed with a women’s silhouette in mind. It balances volume and shape effortlessly, pairing just as easily with high-waisted trousers as it does with your favorite lounge bottoms. The Harrington Hoodie mirrors that laid-back ease in a more unisex, mensware-inspired silhouette, offering a slightly longer length and broader proportions for an easy, throw-on-and-go feel.
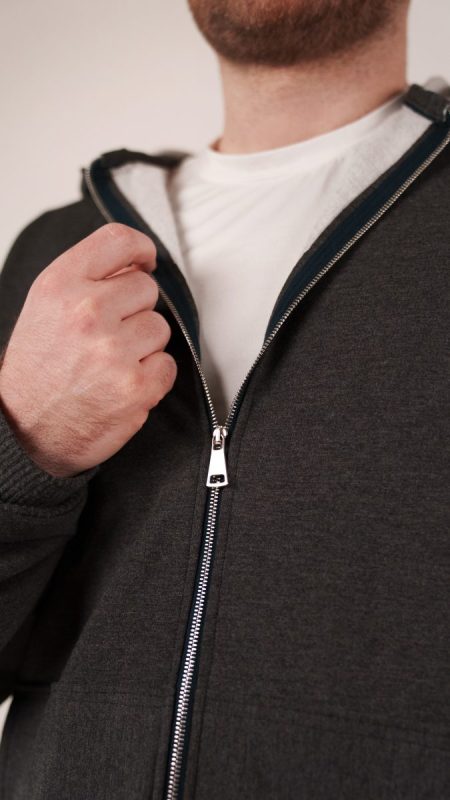
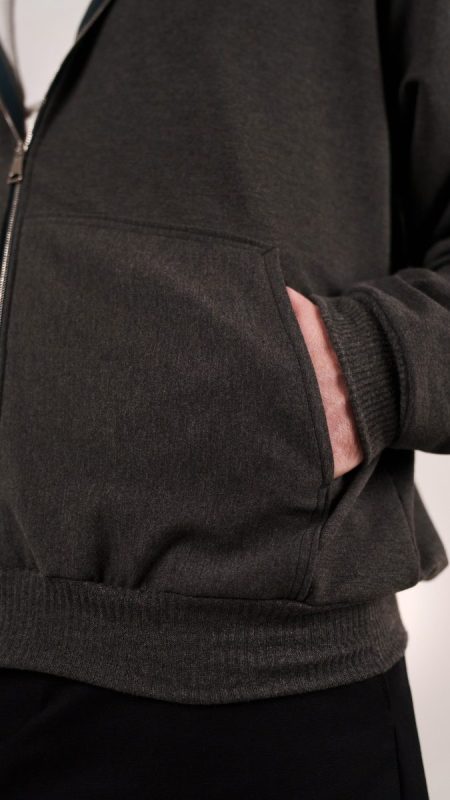
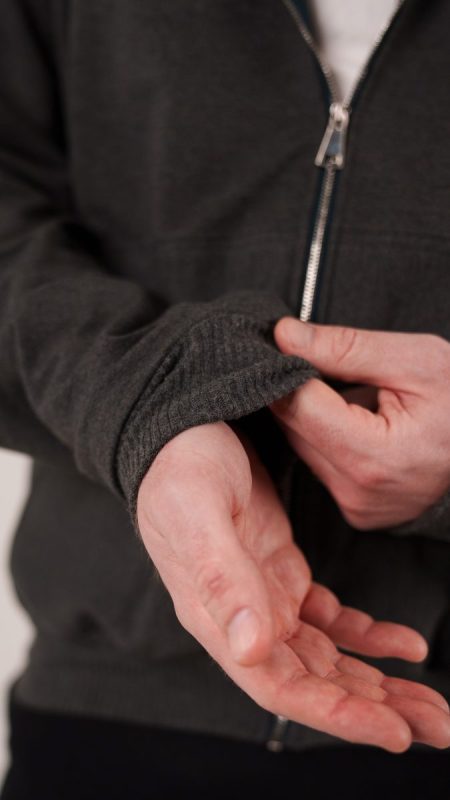
Both patterns are made in a bamboo and cotton stretch knit fleece that feels plush and cloud-soft against the skin, with a brushed interior that makes slipping it on feel like a small luxury. Brushed viscose rib knit cuffs gently cinch the sleeves, keeping the shape relaxed yet intentional. Finished with a Mood Exclusive open-end zipper and matching zipper pull, these hoodies invite customization by swapping hardware, adding embellishments, or keeping it clean and classic.
Whether you’re heading out to run errands, layering up for a chilly morning walk, or curling up indoors with something warm to drink, these hoodies adapt effortlessly to your day. Sew them as everyday staples, elevated athleisure, or even a cozy his-and-hers set perfect for Valentine’s Day lounging, if you can beat the clock to the last stitch.


Essential Materials & Sizing Guide for the Spokane and Harrington Hoodies
Continue reading for a breakdown of what knowledge and materials you need for creating your very own hoodie! We’ve got you covered with the recommended materials we used—if you want to follow along exactly—as well as a curated list of alternative fabric type recommendations if you want to customize your own version. The Spokane and Harrington Hoodie free sewing pattern download includes technical drawings for seam and hoodie visibility, plus a size chart to help you find your perfect fit!

Purchase Products Used Below:
Quantities indicated are for sewing a size small hoodie. Toggle the ‘SHOP THIS LOOK’ box to find quantity estimates for other sizes.
- 2.5 yards of Bamboo and Cotton Stretch Knit Fleece – Heather Charcoal – Jessamyn Collection
- 0.5 yards of Brushed Cozy Stretch Viscose 2×2 Rib Knit – Anthracite Gray – Deadstock
- 1 each of Mood Exclusive Italian Navy and Silver T3 Open End Metal Zipper – 27.5″
- 1 each of Mood Exclusive Italian Small Silver Flat Trapezium Metal Zipper Pull
- 1 each of Dritz Braided Elastic – White – 0.75″ x 3yds (only required for the Spokane pattern)
- 1 each of Gutermann Sew All Thread 100m – 118 Burnt Charcoal
- MDF501 – Spokane Hoodie Sewing Pattern (Free download below!)
- MDF502 – Harrington Hoodie Sewing Pattern (Free download below!)
Additional Products Used:
*Quick Tip! The ‘SHOP THIS LOOK’ box defaults to full-yard quantities. To order an exact half-yard quantity for any fabric, simply use the decrease quantity button (-) to subtract by the half yard. Then click “ADD TO CART” to add all materials to your cart. (Our system can only display full-yard quantities initially.)
Fabric Collections Used in this Post:
Alternative Fabric Type Recommendations:
The Spokane and Harrington Hoodie sewing patterns are best suited for medium weight stretch knit fashion fabrics. Explore other fabric types or colors from our featured collections for your hoodie with the links below.
Download Your Free Sewing Patterns
Submit your name and email in the forms below to receive the download links for the Spokane Hoodie or Harrington Hoodie free sewing patterns directly in your inbox. Mood Sewciety Patterns will send your free download links via email with the subject line: ‘Your Free Download from Mood Sewciety – The Spokane Hoodie’ or ‘Your Free Download from Mood Sewciety – The Harrington Hoodie’ (in PDF format for A4 and letter-size printing).
© MoodFabrics.com / MoodSewciety.com – Mass production, resale, or distribution of this pattern in any form is strictly prohibited.
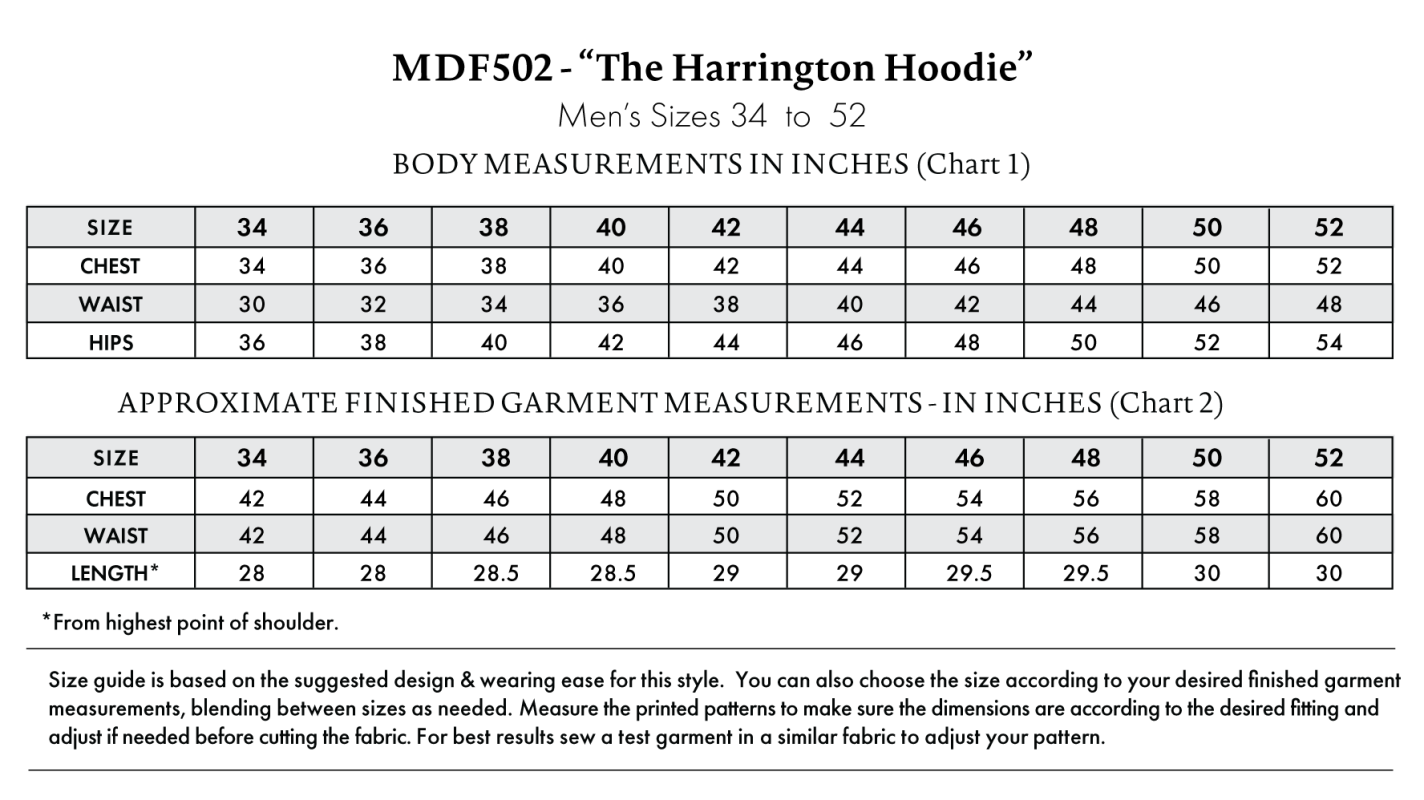
Find Your Perfect Fit
The Spokane Hoodie and Harrington Hoodie Sizing Guides are based on the suggested design & wearing ease for these styles. You can also choose the size according to your desired finished garment measurements, blending between sizes as needed. Measure the printed patterns to make sure the dimensions are according to the desired fitting and adjust if needed before cutting the fabric. For best results, sew a test garment in a similar fabric to adjust your pattern.
Measurements may vary after adjustments. If using non-stretch fabrics, reference the approximate finished garment measurements chart to choose your size.
Note: Always read all the instructions before cutting the fabric!

How to Sew the Spokane and Harrington Hoodies
The instructions provided below are designed to guide you through sewing the Spokane and Harrington Hoodies from start to finish.


2 Tips for Sewing with Stretch Knit Fleece
⇒ When you’re cutting out your pattern pieces, make sure that the stretchiest direction of the fabric is horizontal with your body. You want the fabric to be able to stretch around your hips, waist, bust, and belly if needed.
⇒ Use a stretch stitch or a straight stitch with a shorter stitch length (like 1.5 or 2 millimeters) when assembling the pattern to allow for the fabric to retain its stretch.

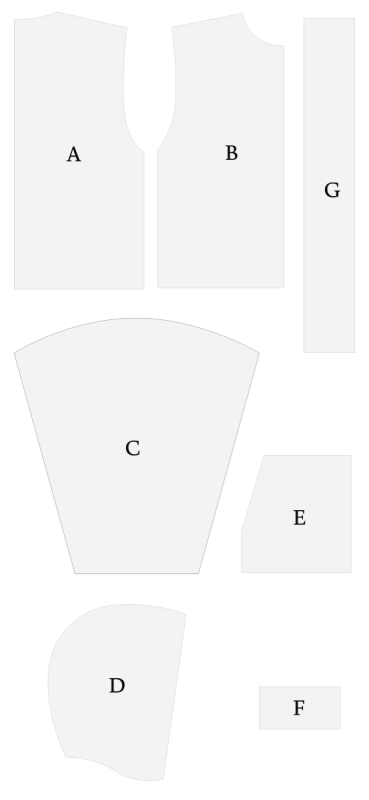
Pattern Pieces & Fabric Cuts Needed
Keep reading for a list-style breakdown of the pattern pieces needed for both the Spokane Hoodie and Harrington Hoodie.
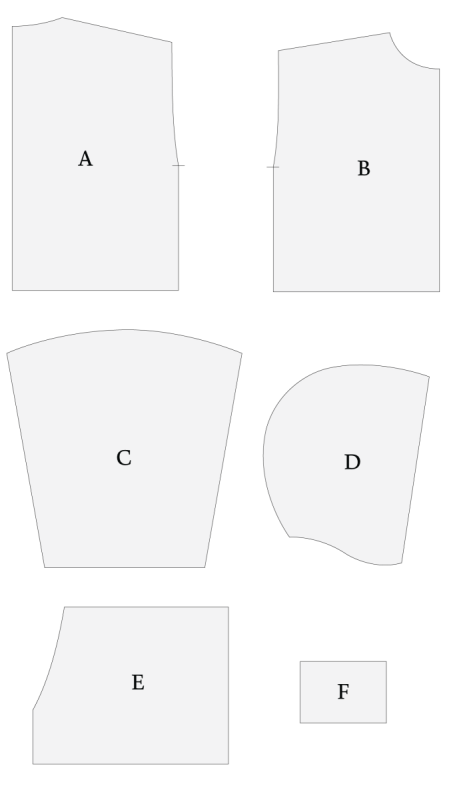
Spokane Hoodie Pattern Pieces
- (A) BACK
- Fabric – Cut 1 On Fold
- (B) FRONT
- Fabric – Cut 2 Mirrored
- (C) SLEEVE
- Fabric – Cut 2 Mirrored
- (D) HOOD
- Fabric – Cut 2 Mirrored
- (E) POCKETS
- Fabric – Cut 2 Mirrored
- (F) CUFFS
- Rib Knit Fabric – Cut 2

Harrington Hoodie Pattern Pieces
- (A) BACK
- Fabric – Cut 1 On Fold
- (B) FRONT
- Fabric – Cut 2 Mirrored
- (C) SLEEVE
- Fabric – Cut 2 Mirrored
- (D) HOOD
- Fabric – Cut 2 Mirrored
- (E) POCKETS
- Fabric – Cut 2 Mirrored
- (F) CUFFS
- Rib Knit Fabric – Cut 2
- (G) WAISTBAND
- Rib Knit Fabric – Cut 1

Sew with a 1/2″ seam allowance for all seams unless otherwise specified.
HOW TO SEW THE SPOKANE HOODIE (WOMEN’S SILHOUETTE)
Step 1
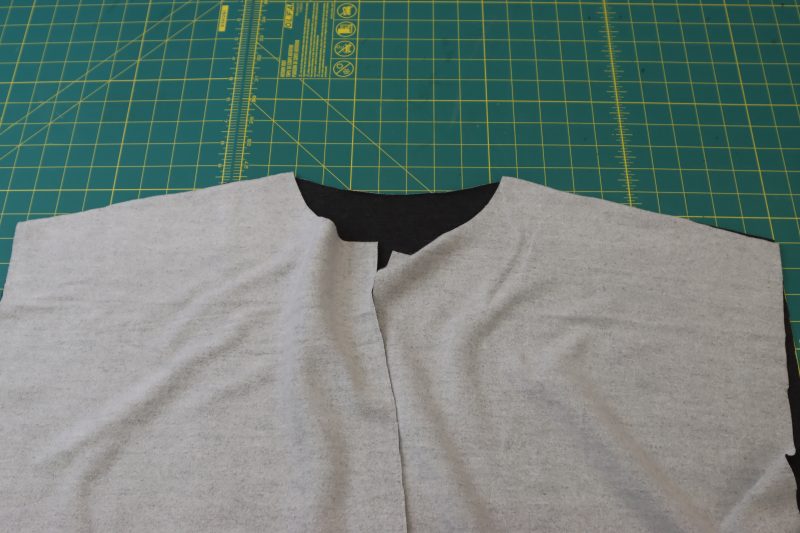
SHOULDERS
- Place the front hoodie pieces right sides together on top of the back hoodie piece with the shoulders lined up.
- Pin and sew the front and back pieces together at the shoulders.

Step 2
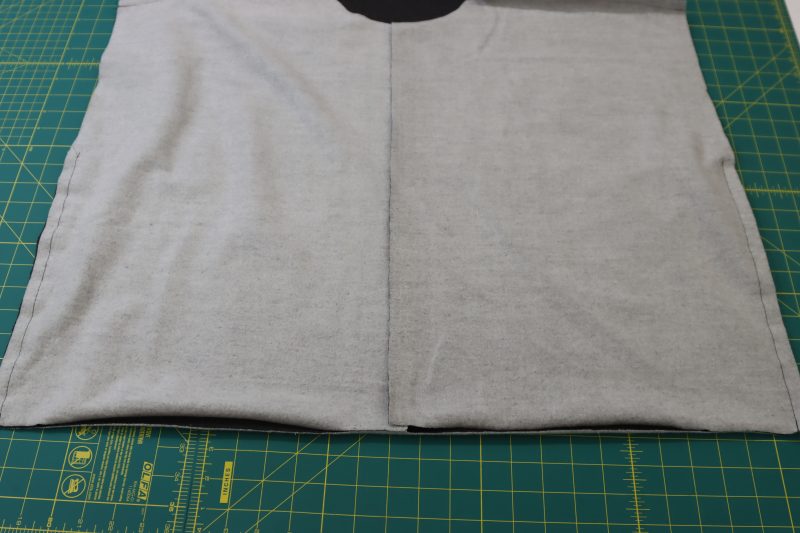
SIDE SEAMS
- Line up the front and back side seams of the hoodie.
- Pin and sew front and back pieces together at the side seams.
Step 3
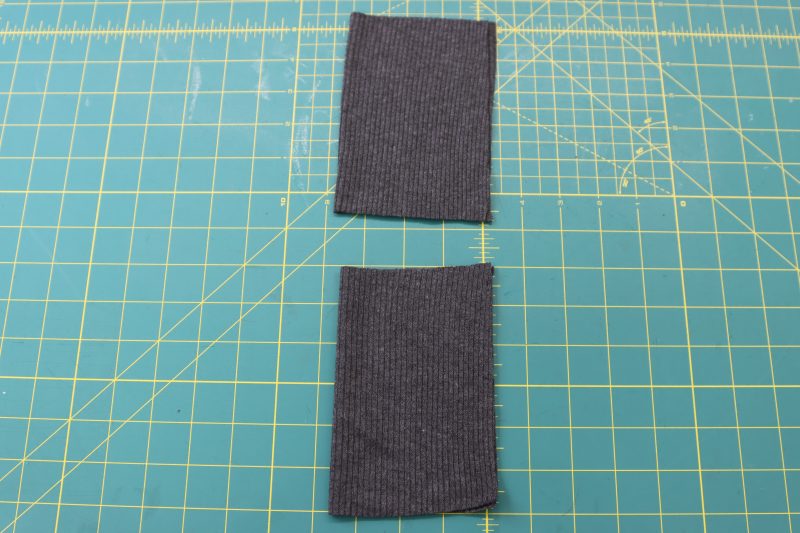
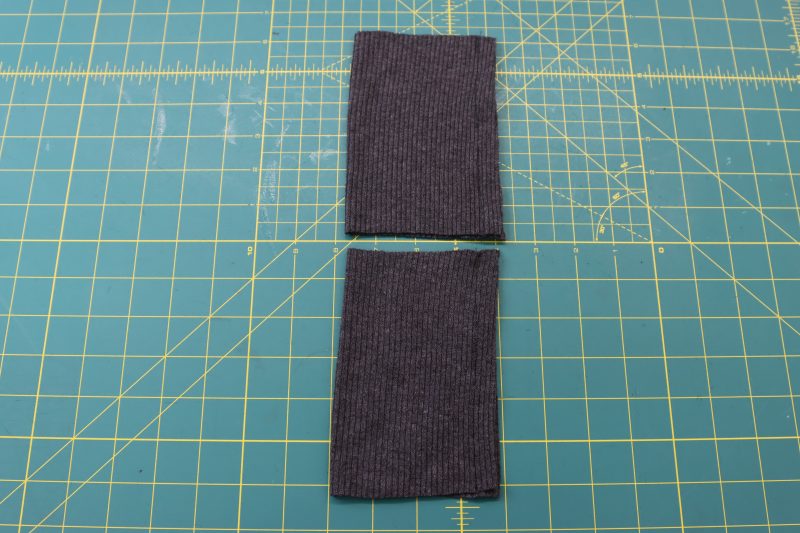
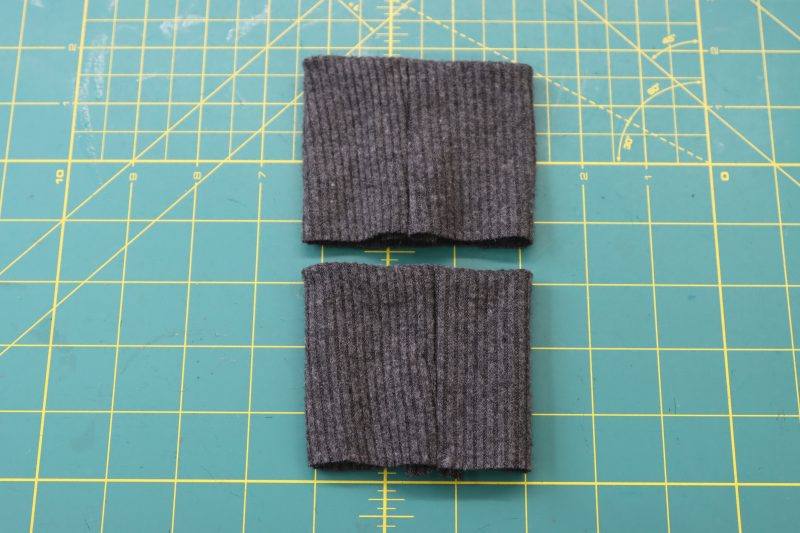
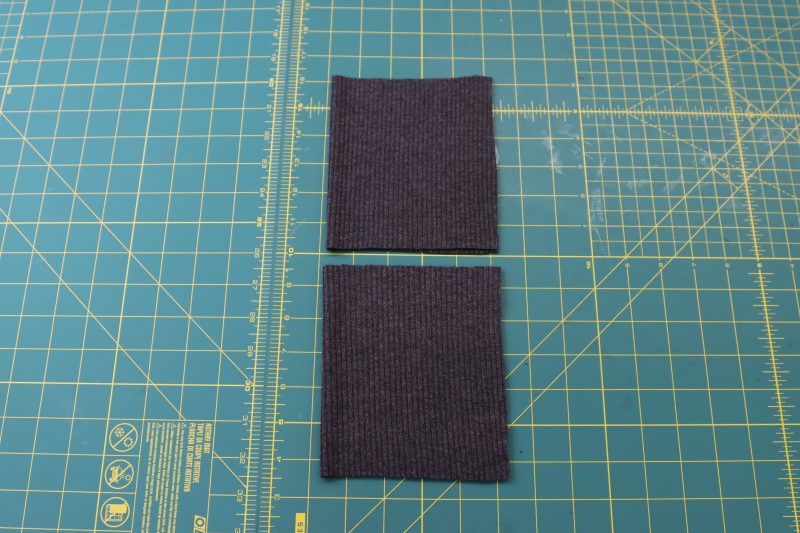
CUFFS
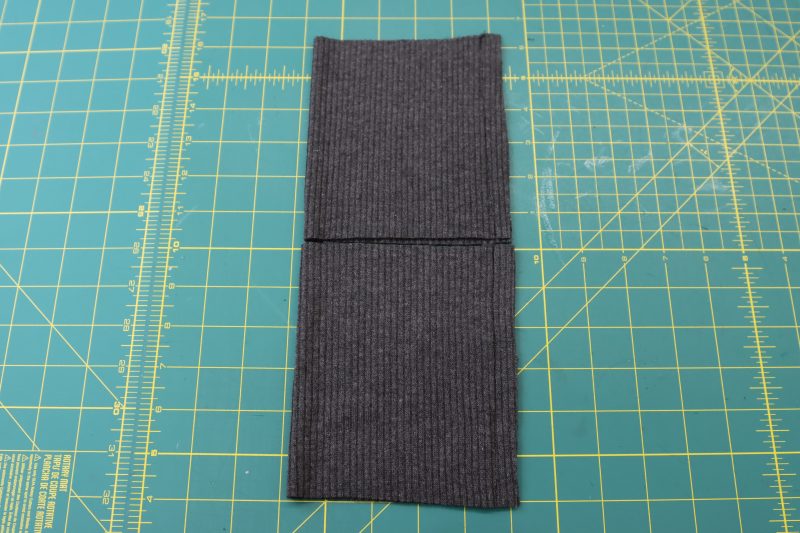
- Fold the cuffs in half short ways, right sides together.
- Pin and sew the short overlapping ends of the cuffs to make closed loops,
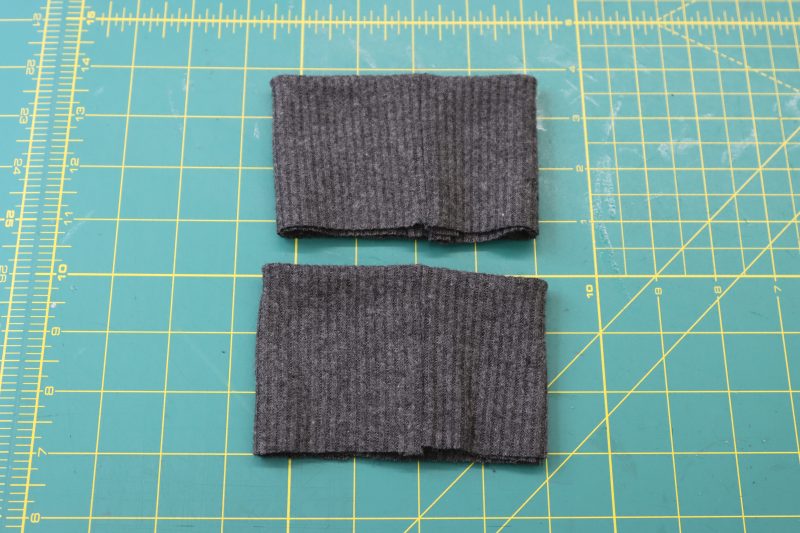
- Fold the cuffs in half wrong sides together so that the seam allowances are hidden inside of the cuff.
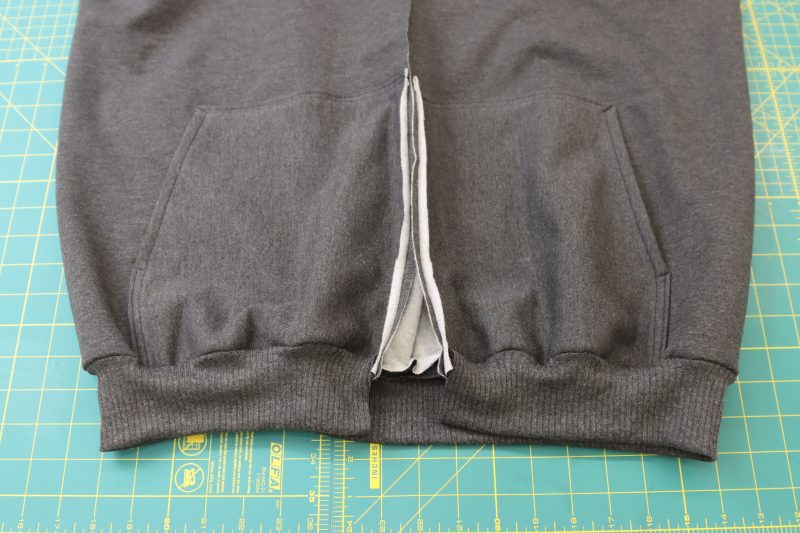
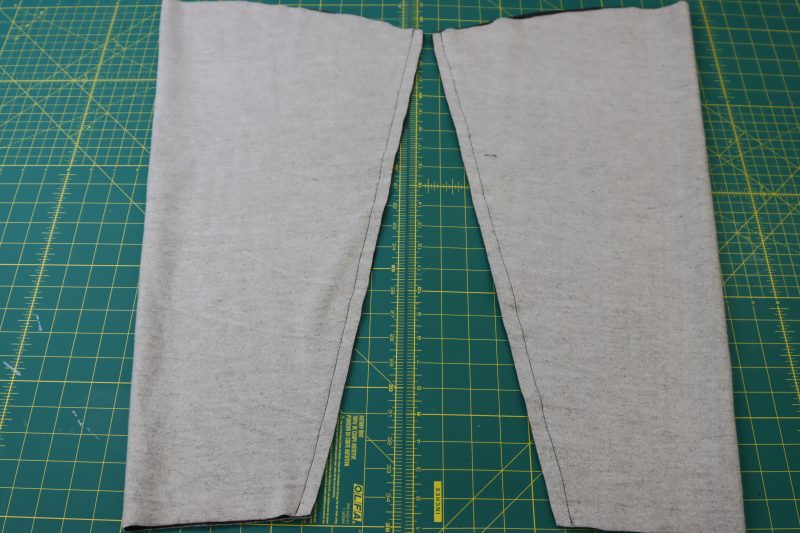
Step 4
SLEEVES
- Fold the sleeves in half long ways, right sides together with the inseams lined up.
- Pin and sew the sleeve inseams.
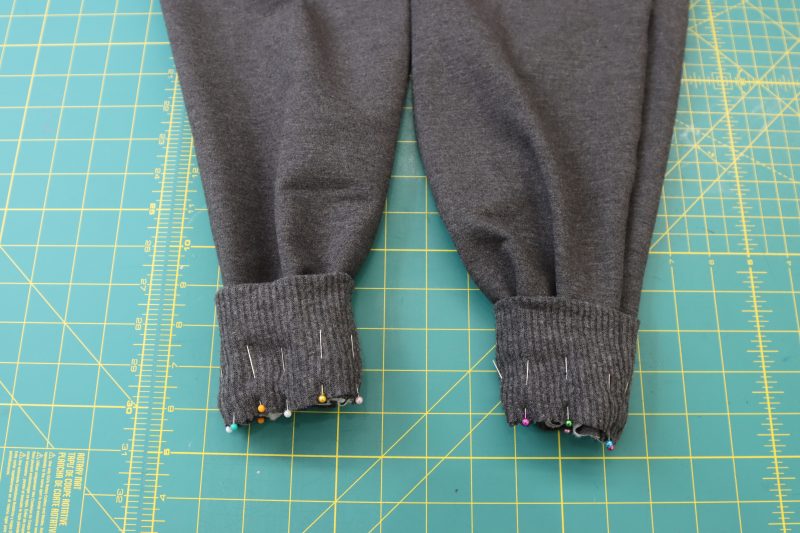
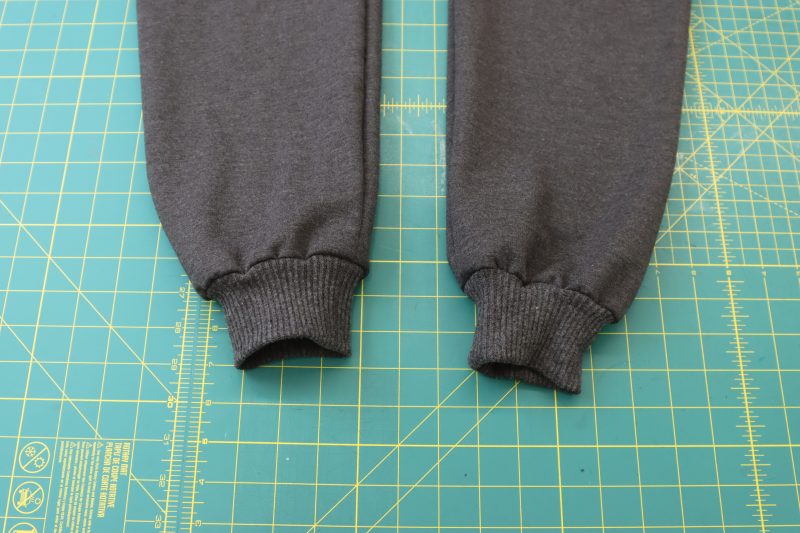
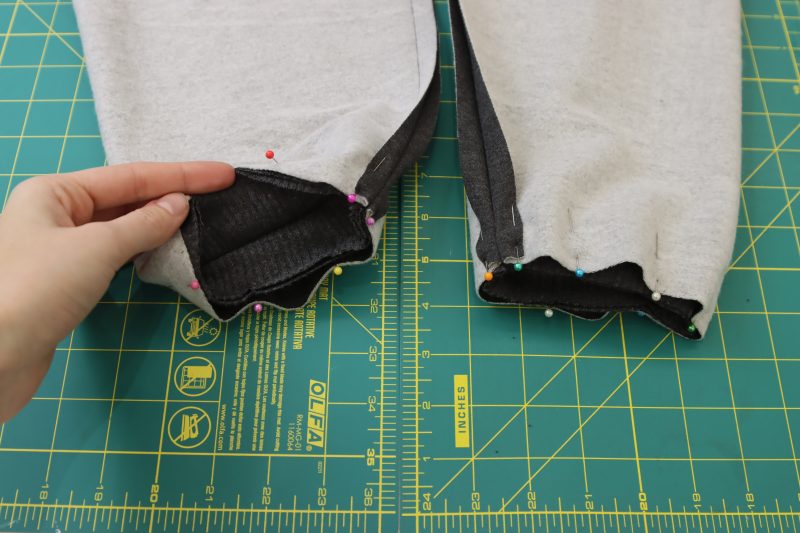
- Pin the raw edges of the cuffs to the raw edges of the ends of the sleeves, right sides together, stretching the fabric if needed while pinning.
- Sew around the sleeve opening to attach the cuffs.
- Place the sleeves inside of the body of the hoodie and line the sleeve caps up with the armscyes, right sides together.
- Pin and sew the sleeve caps to the armscyes.

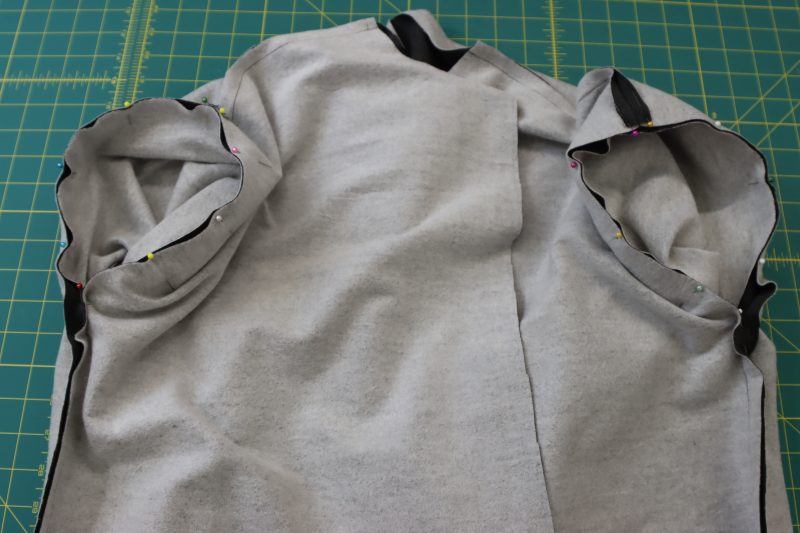
Step 5
POCKETS
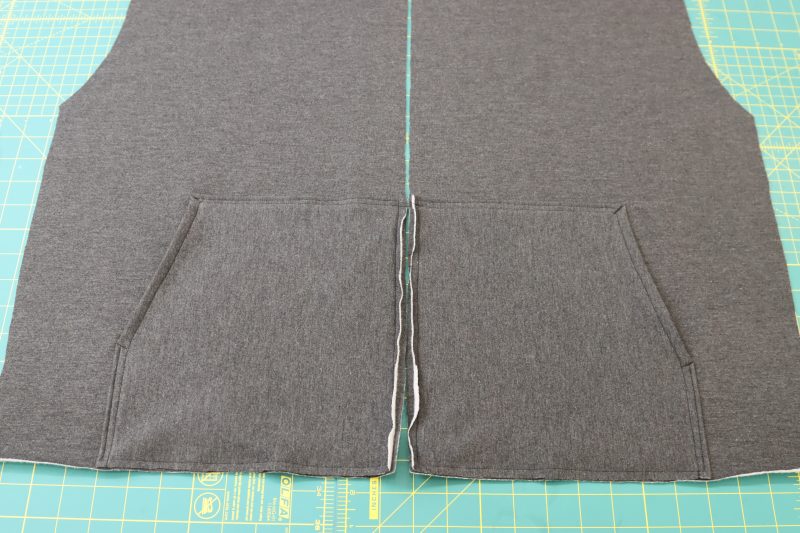
- Fold all the edges of the pocket pieces toward the wrong side of the fabric by ½ inch, EXCEPT for the edge of the pocket that will be sewn into the zipper (the center seam).
- Press your folds into place.
- Pin and sew the folded edges of the pockets with ⅜ inch seam allowance.
Step 6
ATTACH POCKETS
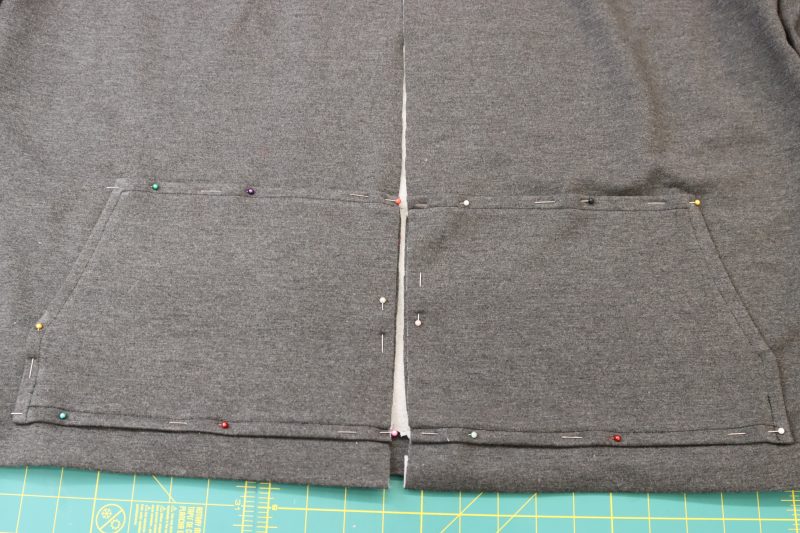
- Place the pockets on the front of the hoodie where the pockets are marked on the pattern, leaving room for the waistband on the bottom of the hoodie.
- Pin the pockets to the front of the hoodie.
- Sew the perimeter of the pockets to the front of the hoodie EXCEPT for the diagonal edge where you’re supposed to put your hands. Do not sew over that part, otherwise, you will fully close your pocket and won’t be able to use it.
Step 7
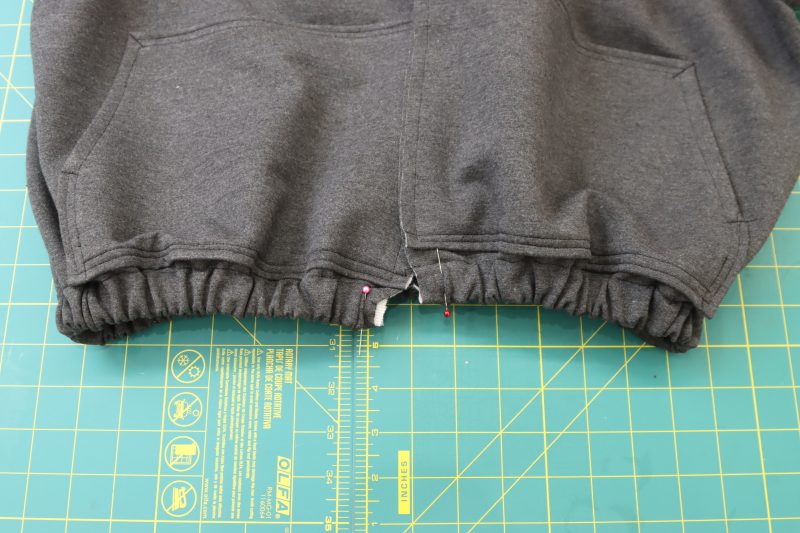
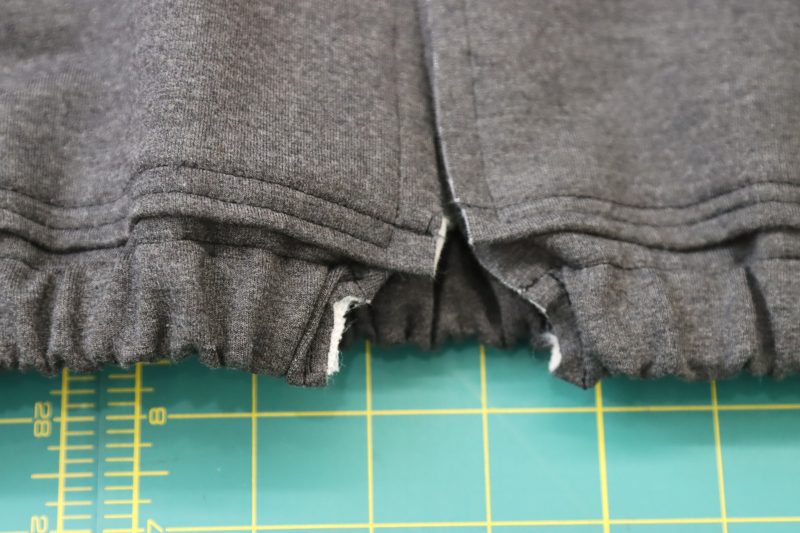
WAISTBAND
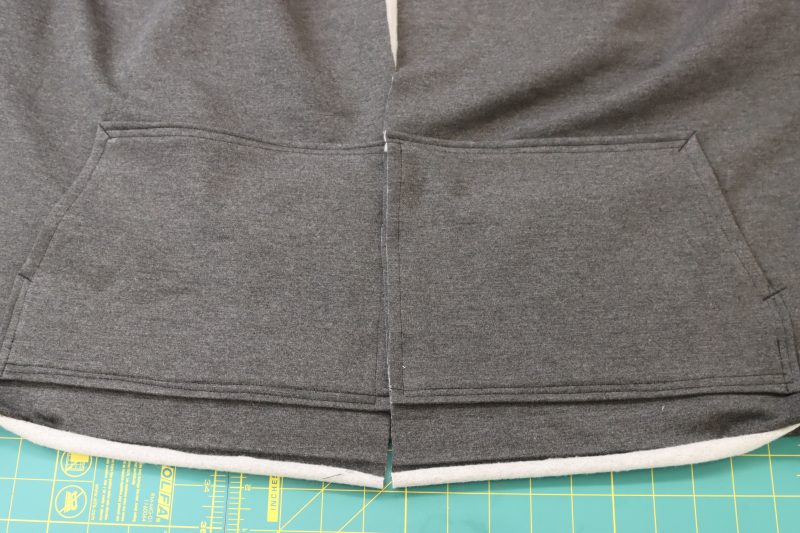
- Fold the bottom hem of the hoodie up toward the wrong side of the fabric with a 1 inch fold.
- Press the fold into place.
- Sew the fold with ⅞ inch seam allowance.
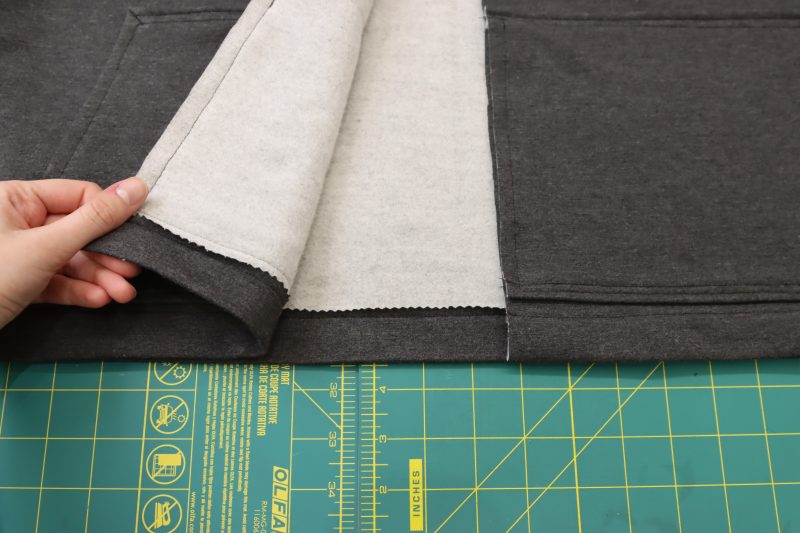
- Trim the raw edges of the waistband hem with pinking shears (if you want, I just think it looks neater).
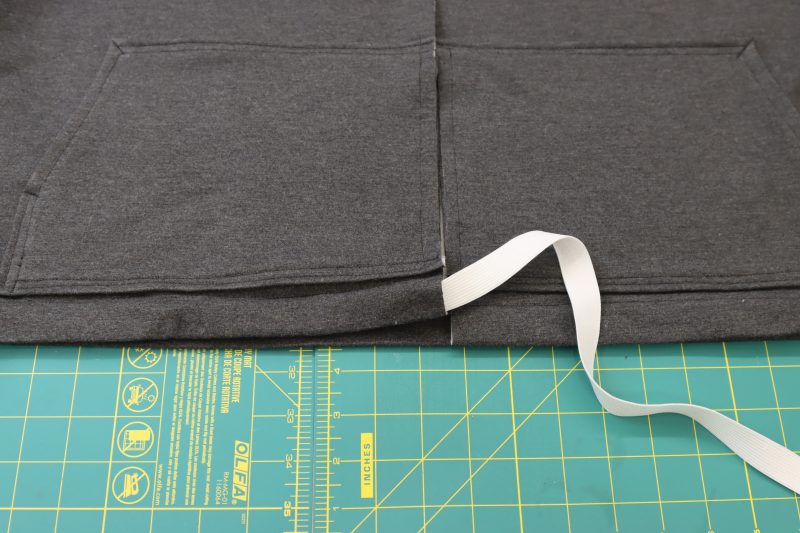
- Insert elastic into the casing you just sewed using a safety pin to guide it through.
- Once the elastic gets to the other end of the casing, secure the elastic on both ends with a straight stitch so that it doesn’t move around in the casing.
Step 8
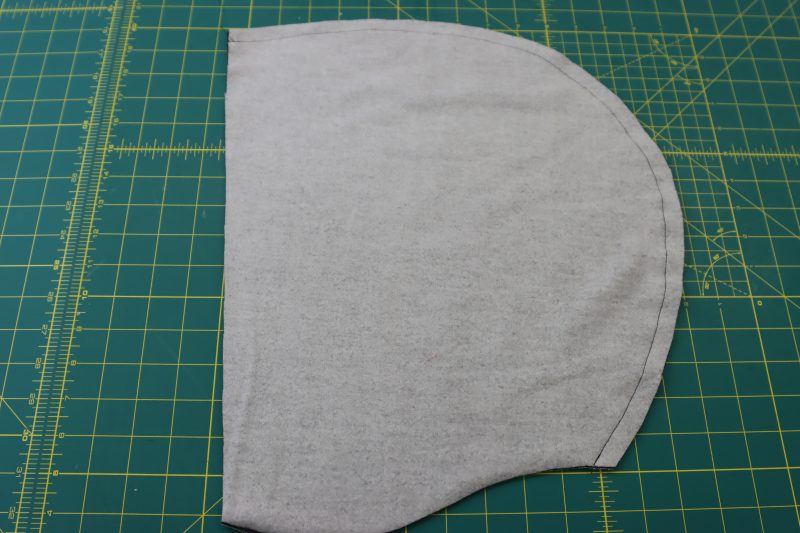
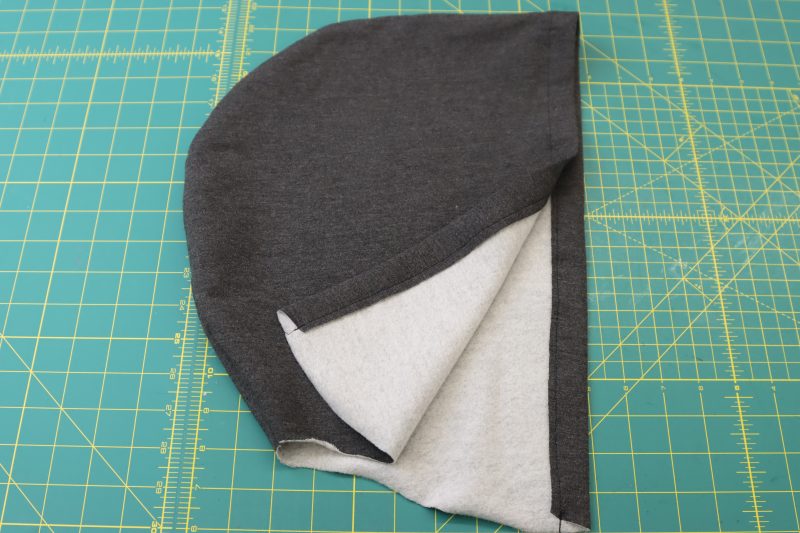
HOOD
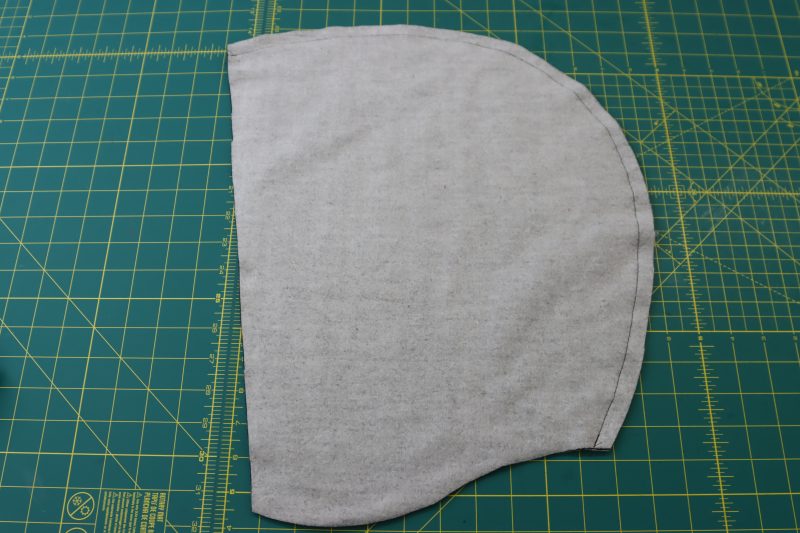
- Place the two hood pieces right sides together.
- Pin and sew around the rounded edge of the hood.
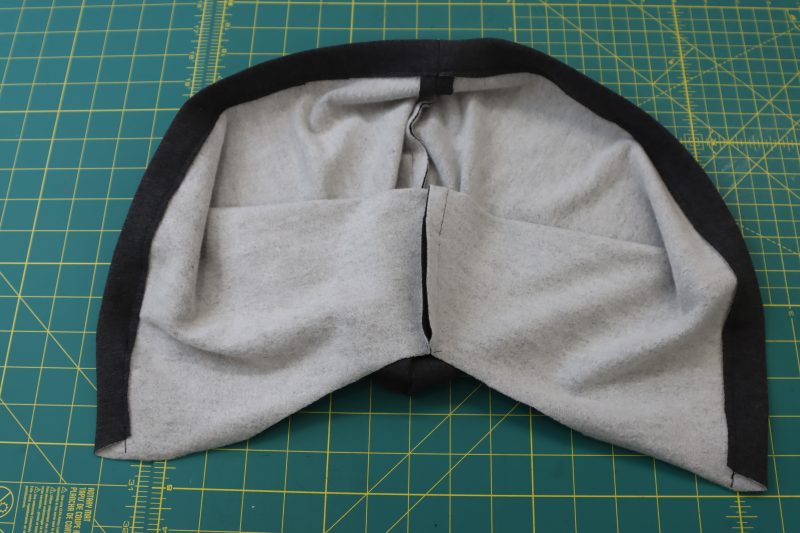
- Fold the front opening of the hood toward the wrong side of the fabric by 1 inch.
- Press the fold into place.
- Sew the hood hem with a ⅞ inch seam allowance.
Step 9
ZIPPER
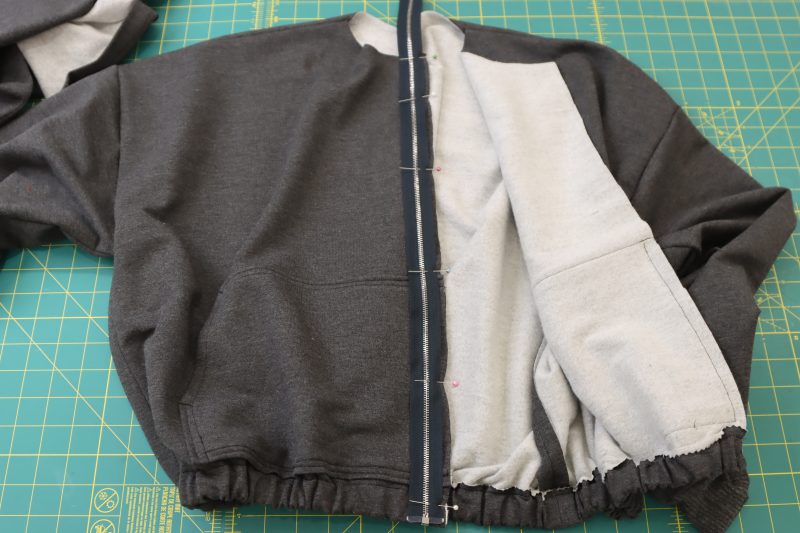
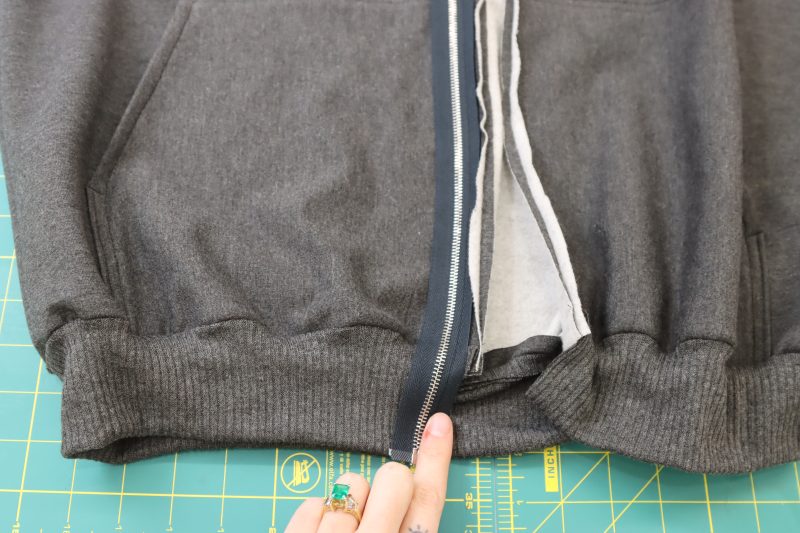
- Pin the zipper face down to the wearer’s right side of the center front of the hoodie.
- Sew the side of the zipper tape furthest from the raw edge of the fabric to the hoodie.
- Flip the hoodie inside out.
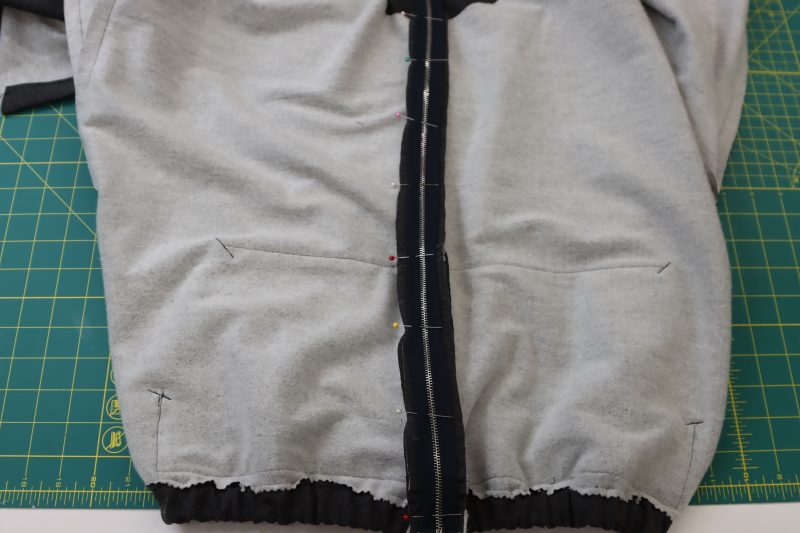
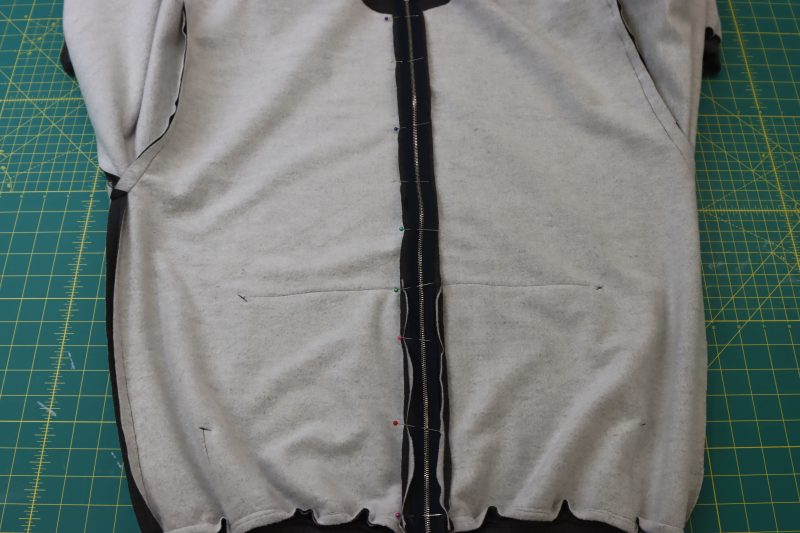
- Pin the opposite side of the zipper tape to the opposite side of the center front of the hoodie, right sides together, making sure that the pockets, neckline, and waistband line up on both sides of the zipper so that it’s symmetrical when it’s zipped.
- Sew the opposite side of the zipper.
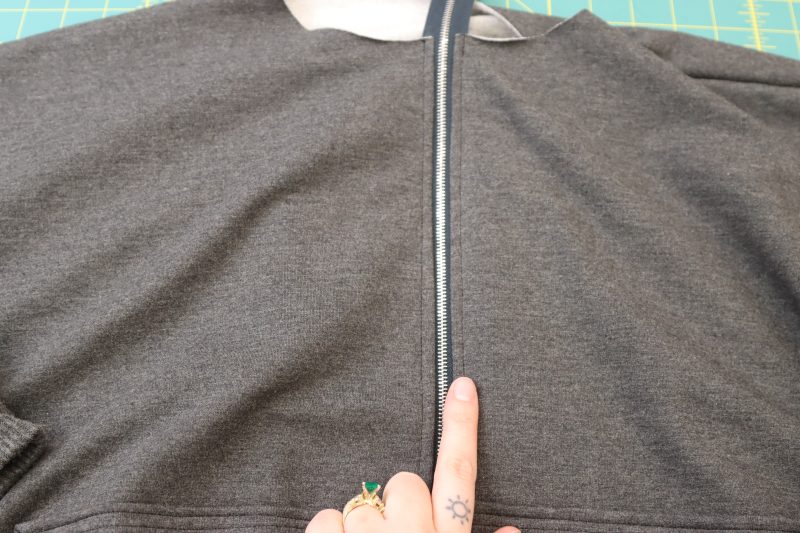
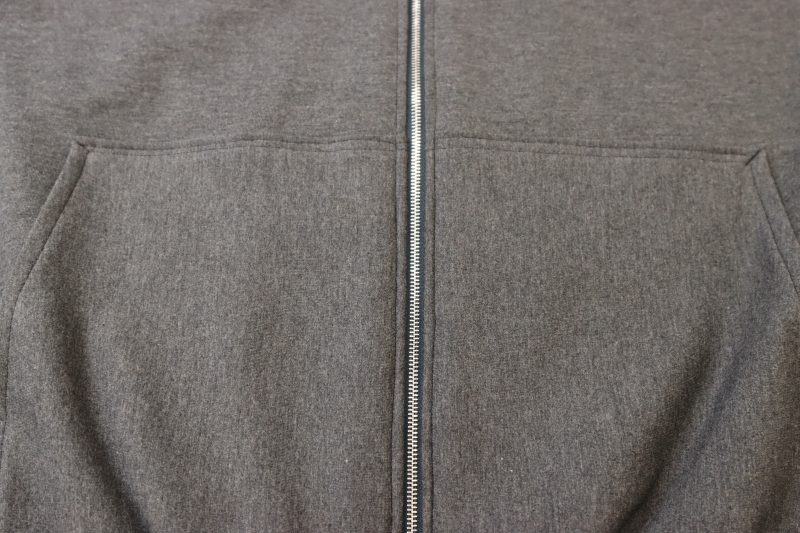
- Flip the hoodie right sides out and topstitch over both sides of the zipper.
Step 10
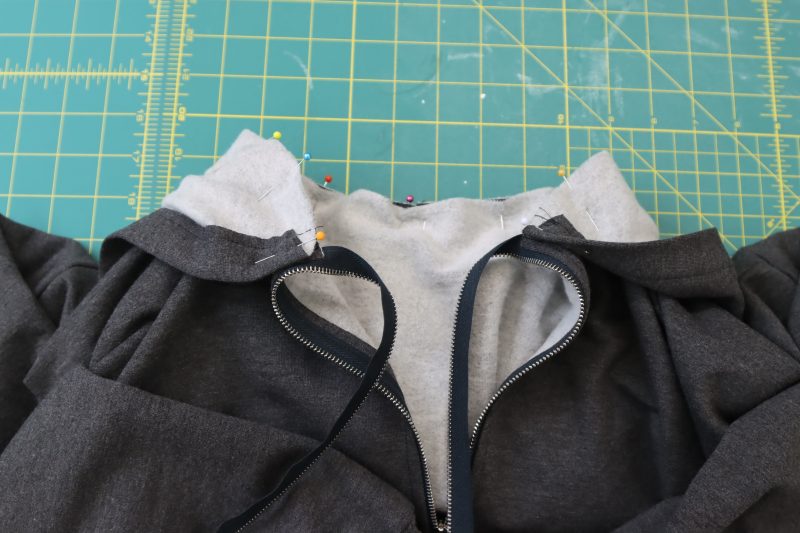
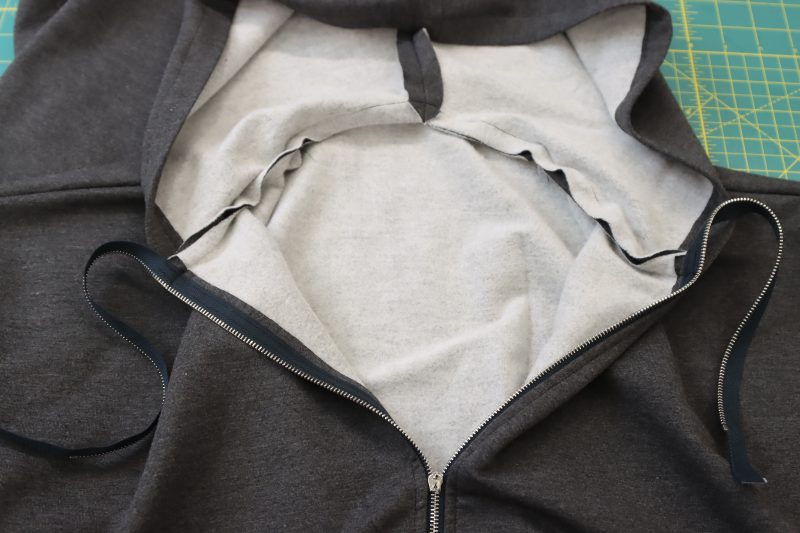
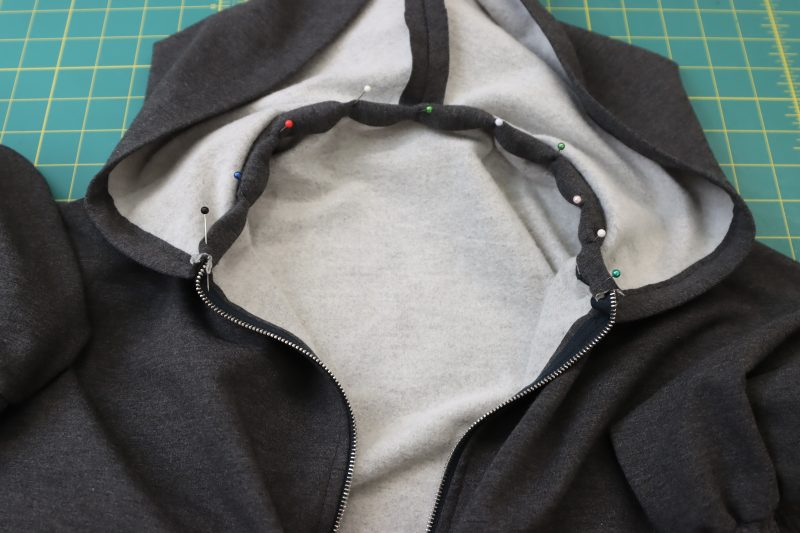
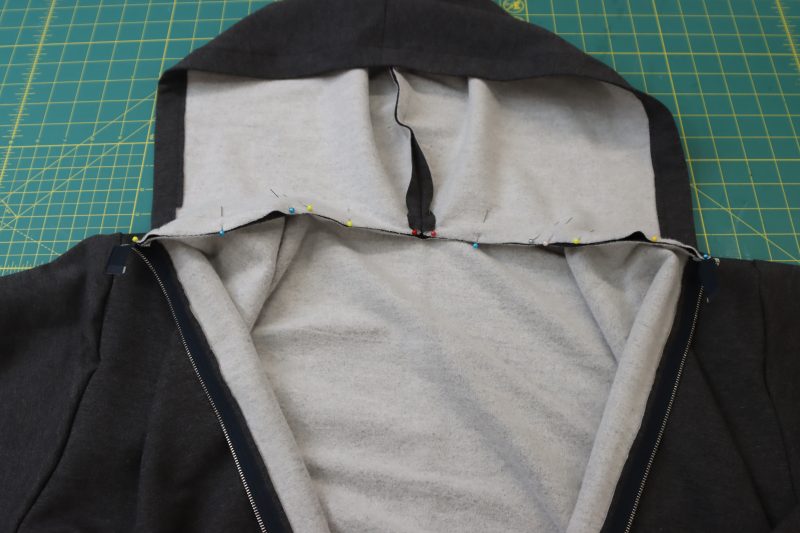
ATTACH HOOD
- Pin the raw edge of the hood to the neckline of the hoodie, making sure that the folded edges of the hood line up with the center front of the hoodie.
- Sew the hood to the neckline (it is okay to sew over the zipper, just be careful that your needle doesn’t break on the teeth).
Step 11
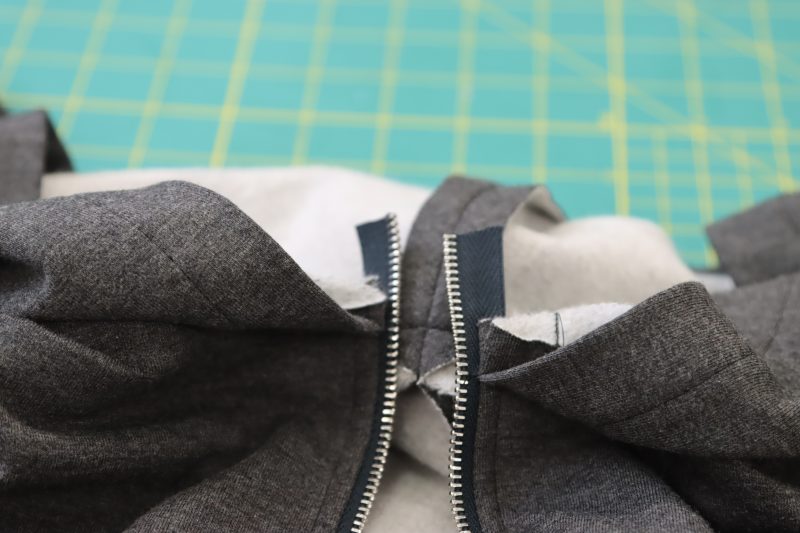
BIAS BINDING
- Clip the ends of the zipper so they’re sticking out from the neckline by 1 inch.
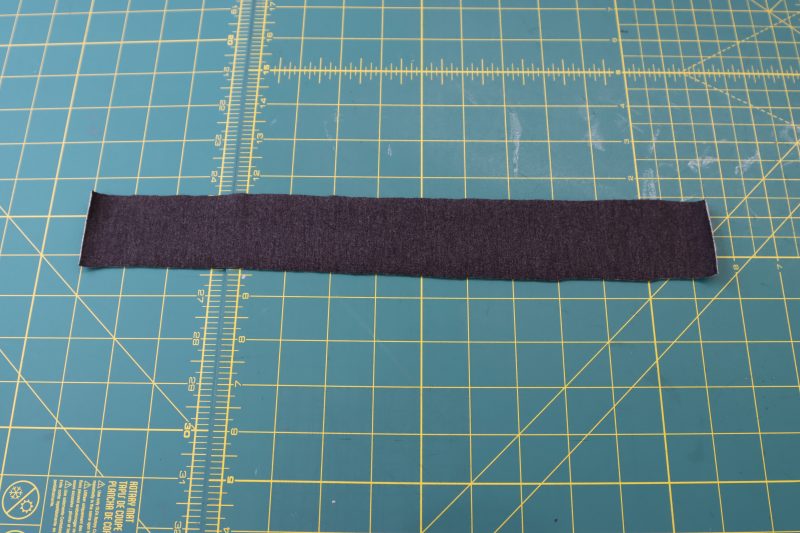
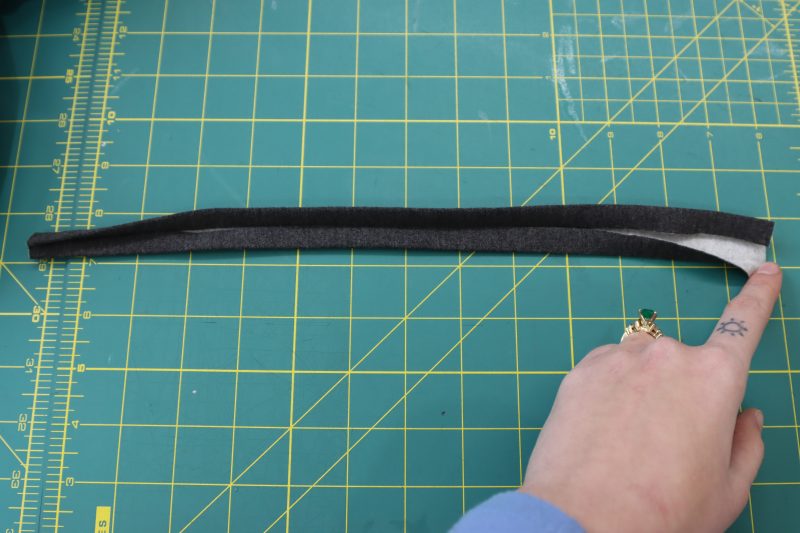
- Cut a piece of fleece that is 15 inches long and 2 inches wide to use as bias binding. Make sure the stretch direction of the fabric is aligned with the longer dimension of the bias binding.
- Press the fleece bias strip so that it is folded into quarters.
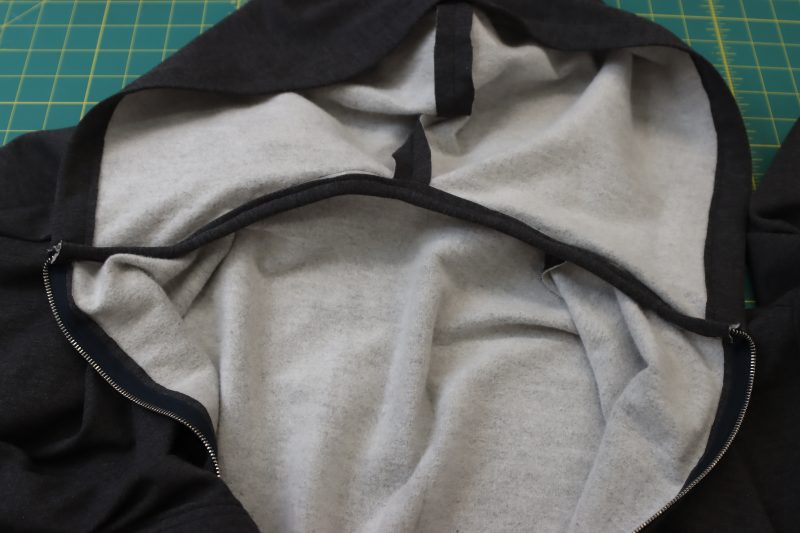
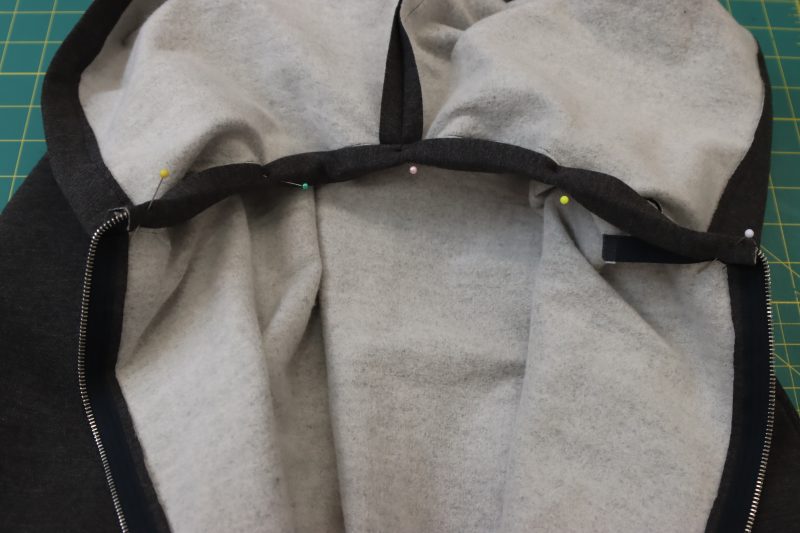
- Pin the bias binding around the seam allowance that connects the hood to the neckline of the hoodie, making sure that the seam allowance is fully encased by the folded strip of fleece.
- Sew the bias binding to the seam allowance, making sure that the end of the zipper tape also gets tucked into the binding.


HOW TO SEW THE HARRINGTON HOODIE (MEN’S SILHOUETTE)
Step 12
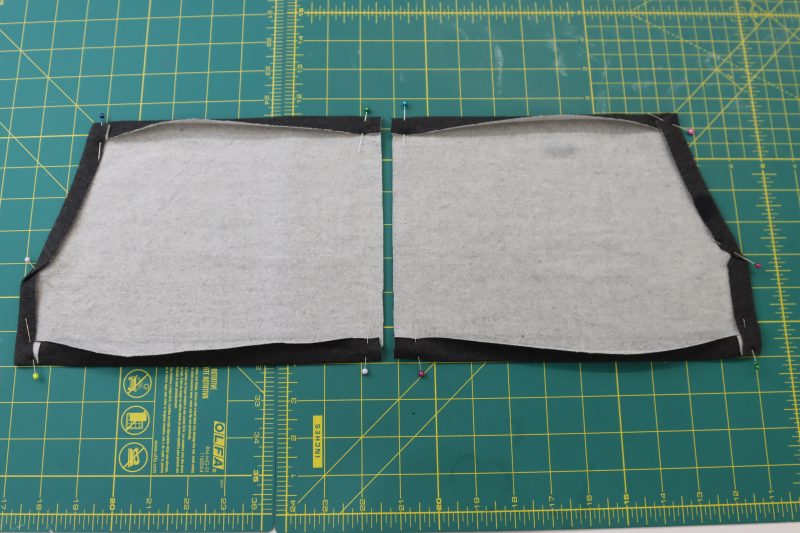
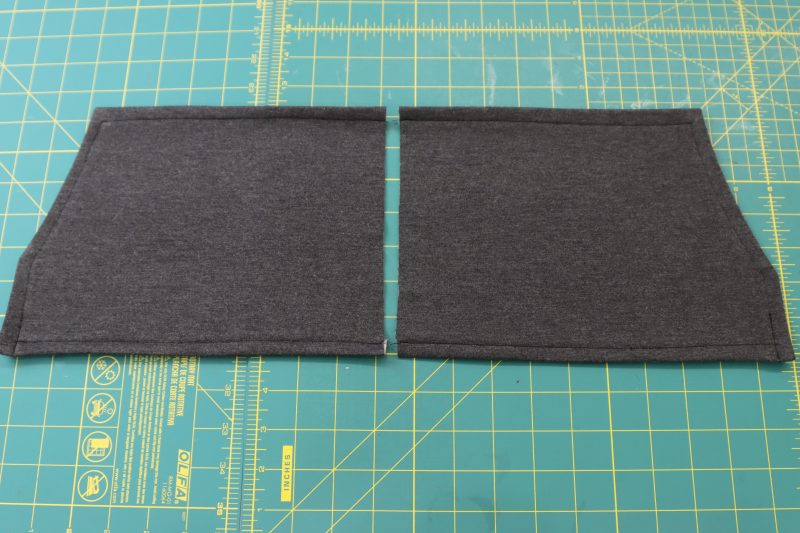
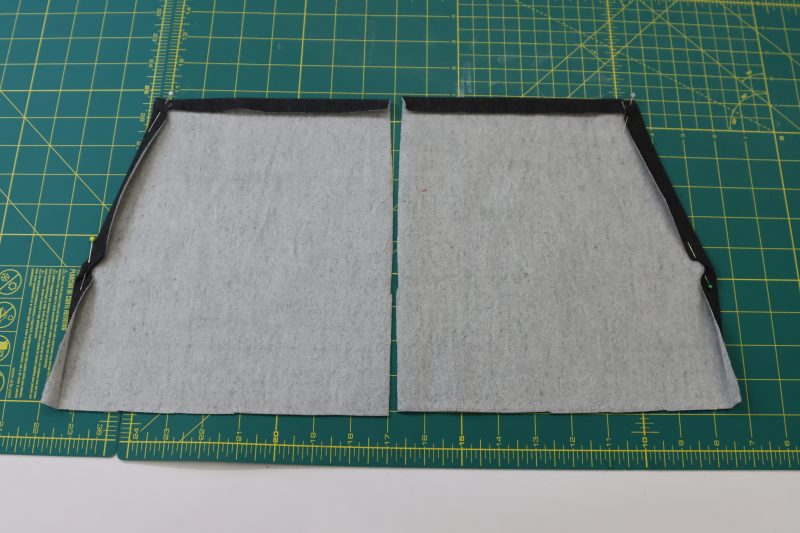
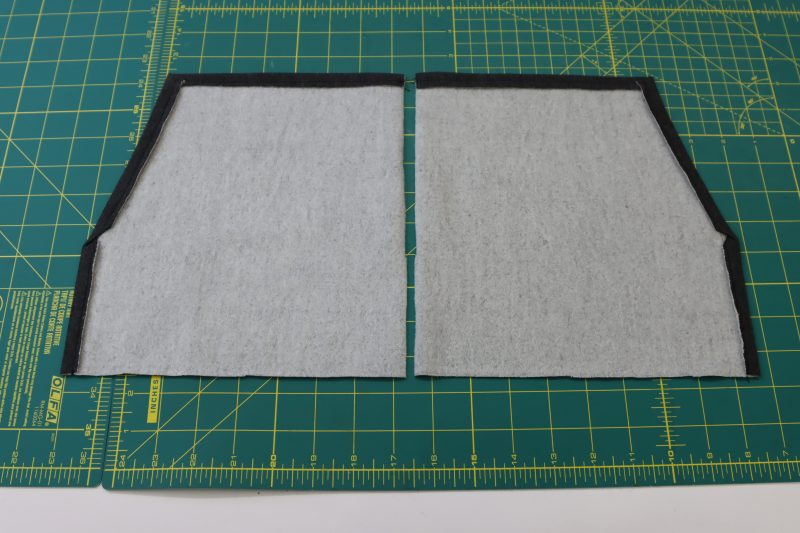
POCKETS
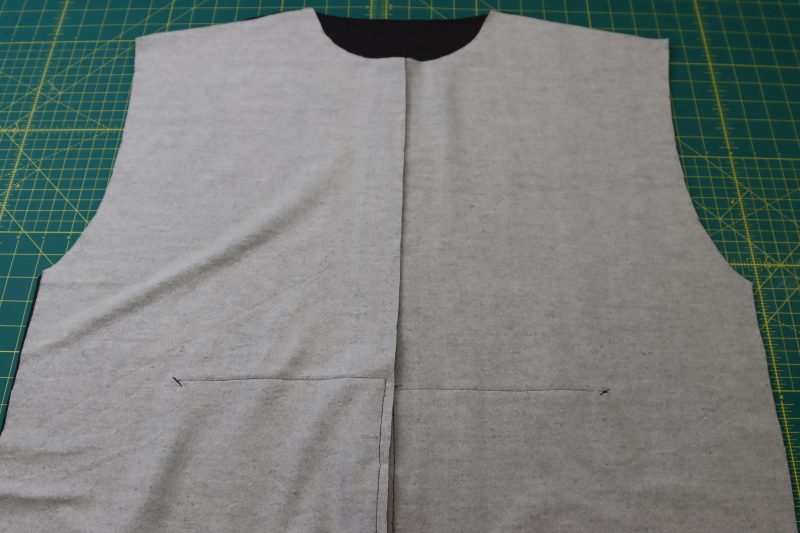
- Fold the top, diagonal edge, and short side of the pockets toward the wrong side of the fabric by ½ inch.
- Press the fold into place and pin.
- Sew the folded edges of the pockets with ⅜ inch seam allowance.
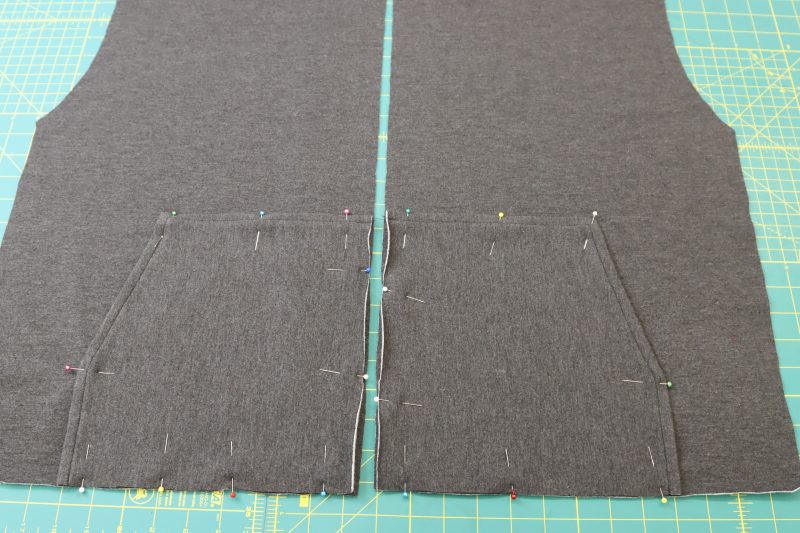
Step 13
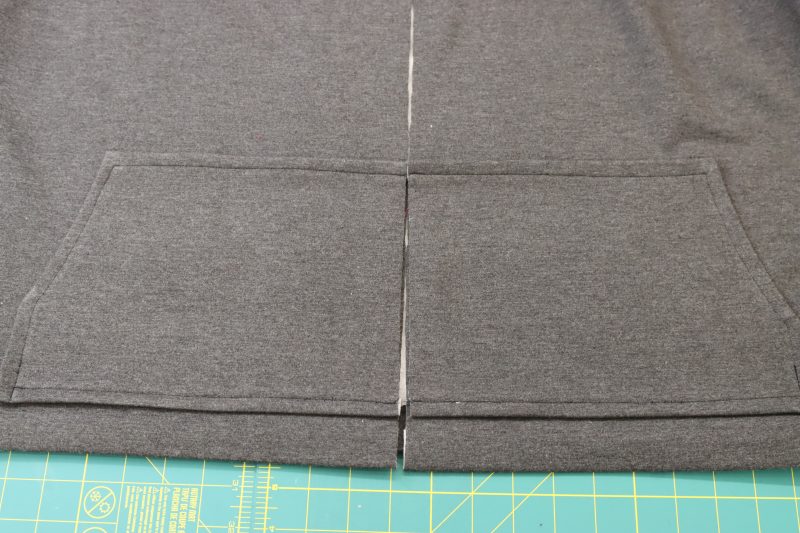
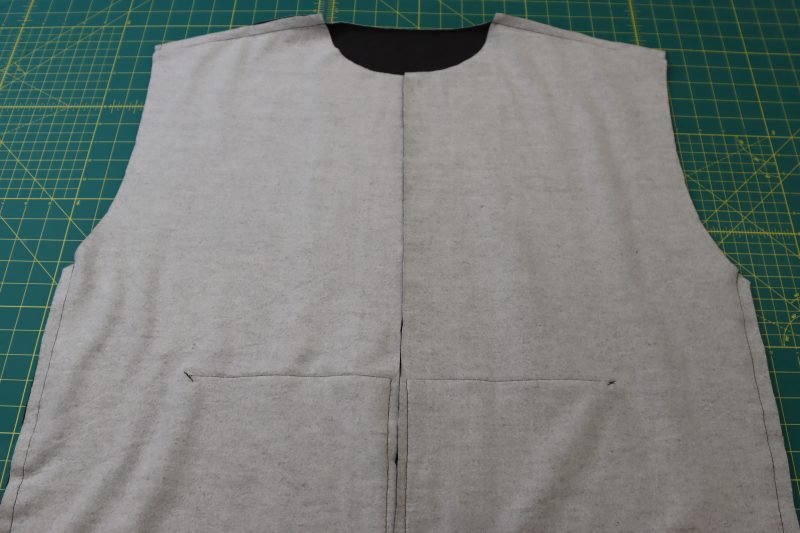
ATTACH POCKETS
- Place the pockets onto the front hoodie pattern pieces where indicated in the paper pattern.
- Pin all the sides of the pockets to the front of the hoodie EXCEPT for the diagonal side where you put your hands.
- Sew all sides of the pocket to the hoodie except for the pocket opening.
Step 14
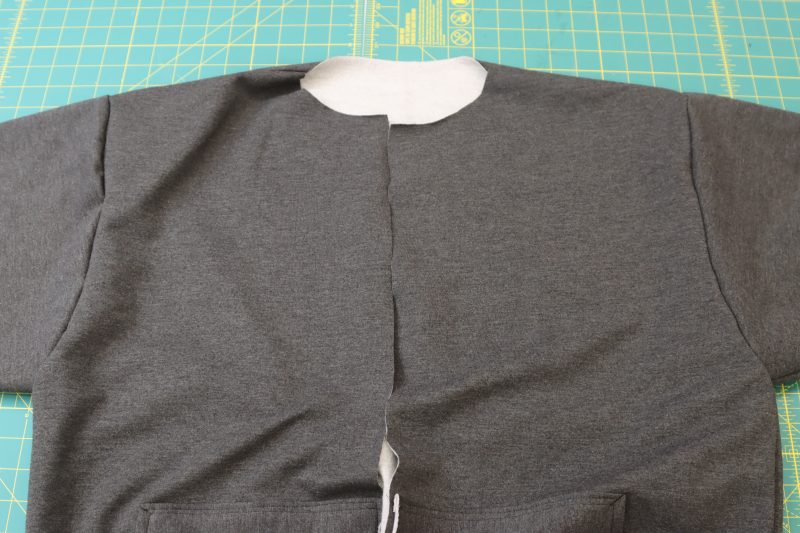
SHOULDERS & SIDE SEAMS
- Place the front hoodie pieces on top of the back hoodie piece right sides together with the side seams and shoulders lined up.
- Pin and sew the front and back hoodie pieces together at the shoulders and side seams.
Step 15
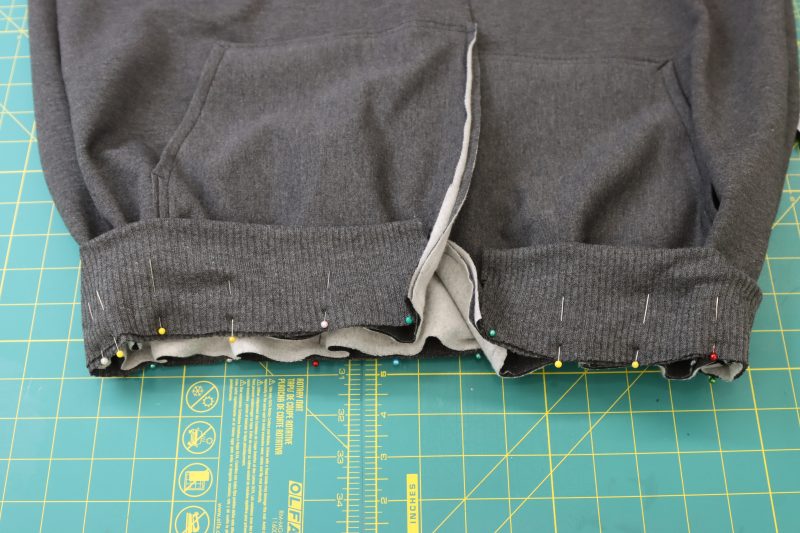
WAISTBAND
- Fold the waistband pattern piece in long ways wrong sides together.
- Pin the raw edge of the folded waistband to the bottom hem of the hoodie, right sides together.
- Sew the waistband to the hem.
Step 16
CUFFS
- Fold the cuffs in half short ways, right sides together.
- Pin and sew the short overlapping ends of the cuffs to make closed loops,
- Fold the cuffs in half wrong sides together so that the seam allowances are hidden inside of the cuff.
Step 17
SLEEVES
- Fold the sleeves in half long ways, right sides together with the inseams lined up.
- Pin and sew the sleeve inseams.
- Pin the raw edges of the cuffs to the raw edges of the ends of the sleeves, right sides together, stretching the fabric if needed while pinning.
- Sew around the sleeve opening to attach the cuffs.
- Place the sleeves inside of the body of the hoodie and line the sleeve caps up with the armscyes, right sides together.
- Pin and sew the sleeve caps to the armscyes.


Step 18
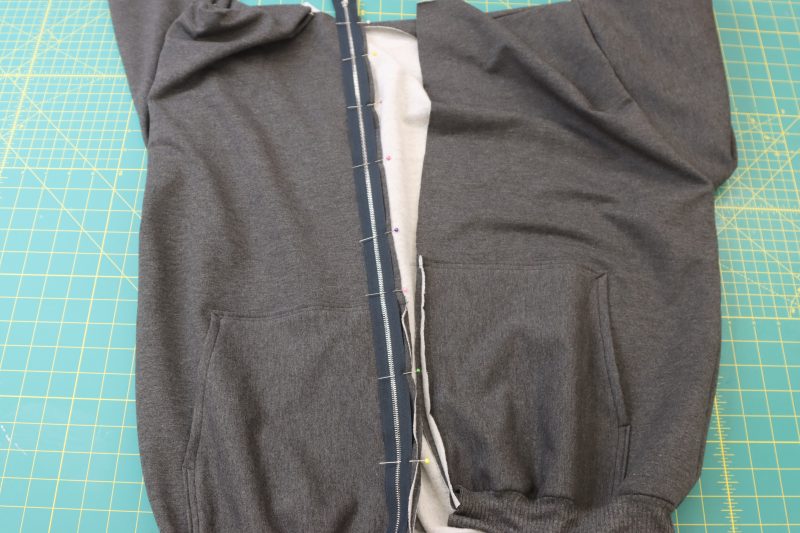
ZIPPER
- Pin the zipper face down to the wearer’s right side of the center front of the hoodie.
- Sew the side of the zipper tape closest to the raw edge of the fabric to the hoodie.
- Flip the hoodie inside out.
- Pin the opposite side of the zipper tape to the opposite side of the center front of the hoodie, right sides together, making sure that the pockets, neckline, and waistband line up on both sides of the zipper so that it’s symmetrical when it’s zipped.
- Sew the opposite side of the zipper.
- Flip the hoodie right sides out and topstitch over both sides of the zipper.
Step 19
HOOD
- Place the two hood pieces right sides together.
- Pin and sew around the rounded edge of the hood.
- Fold the front opening of the hood toward the wrong side of the fabric by 1 inch.
- Press the fold into place.
- Sew the hood hem with a ⅞ inch seam allowance.
- Pin and sew the raw edge of the hood to the neckline of the hoodie.
Step 20
BIAS BINDING
- Clip the ends of the zipper so they’re sticking out from the neckline by 1 inch.
- Cut a piece of fleece that is 15 inches long and 2 inches wide to use as bias binding. Make sure the stretch direction of the fabric is aligned with the longer dimension of the bias binding.
- Press the fleece bias strip so that it is folded into quarters.
- Pin the bias binding around the seam allowance that connects the hood to the neckline of the hoodie, making sure that the seam allowance is fully encased by the folded strip of fleece.
- Sew the bias binding to the seam allowance, making sure that the end of the zipper tape also gets tucked into the binding.


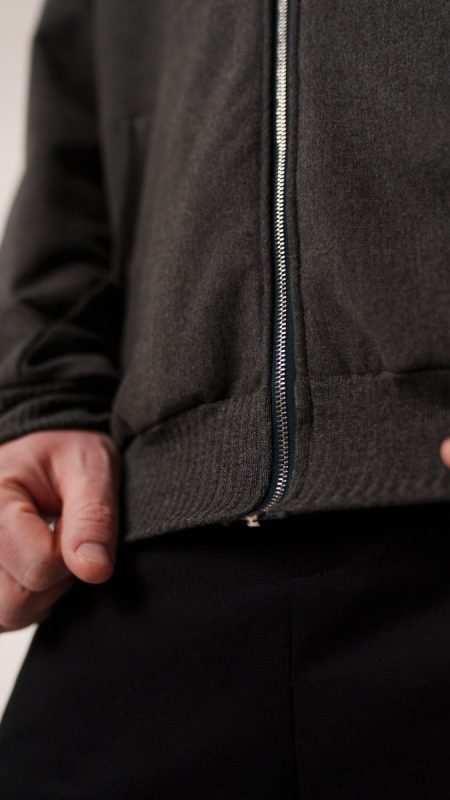
Sewing Success: The Finished Spokane and Harrington Hoodies
Share this post with a friend (or two!), download the Spokane and Harrington Hoodie free sewing patterns, and show us which fabrics and colors you choose, using the hashtags #MoodSpokanePattern, #MoodHarringtonPattern, & #MadeWithMood—and don’t forget to tag us @MoodFabrics, too.


Free Sewing Pattern Inspiration for Your Next Project
With 500+ free sewing patterns and counting, your opportunities for sewing with Mood are endless!
We hope you had as much fun sewing this hoodie pattern as we did! As always, we want to hear from you—share your thoughts and comments below and let us know where you’ll be wearing the Spokane and Harrington Hoodie free sewing pattern!


Es hermoso gracias
Thanks
Thank you
Can the women’s version be finished without the elastic?
Hey Stacey! Yeah, you can finish the hem of the women’s silhouette without the elastic. Just follow the instructions for the men’s silhouette with how the hem is finished instead.
Can I use a cotton fabric instead? I realize that it won’t stretch, but it’s a limited edition fabric that would be perfect. Ty!
Hey Tricia! If you end up using a non-stretch fabric, just make sure you check the final garment measurements to ensure that the hoodie will fit you even if it can’t stetch.
esta hermoso y muy completo