
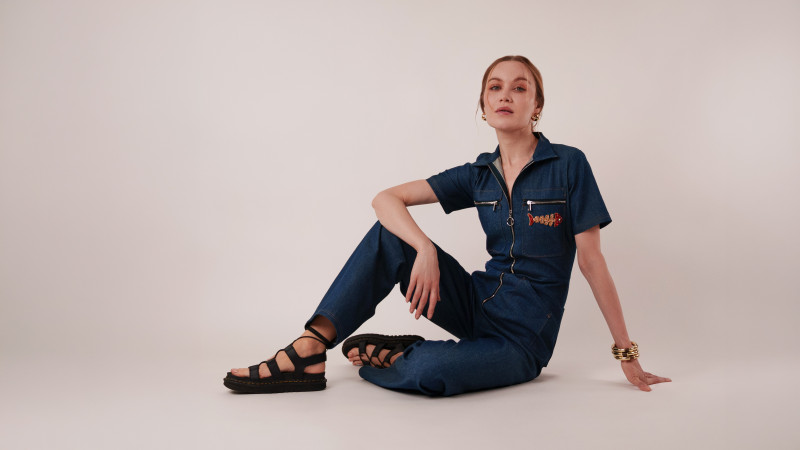
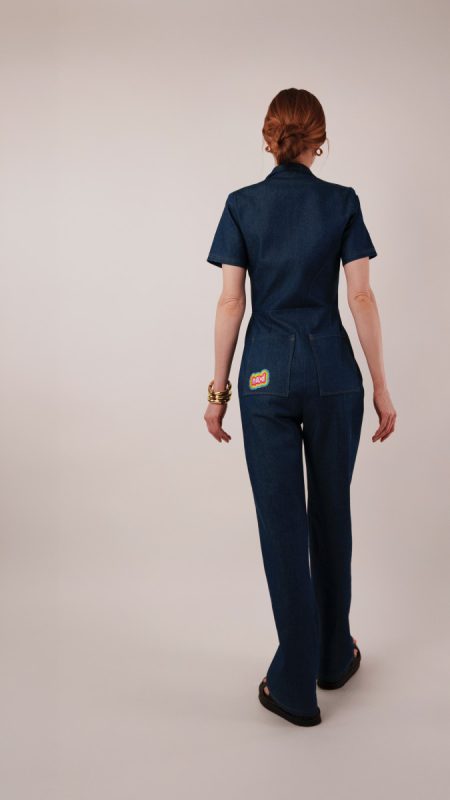
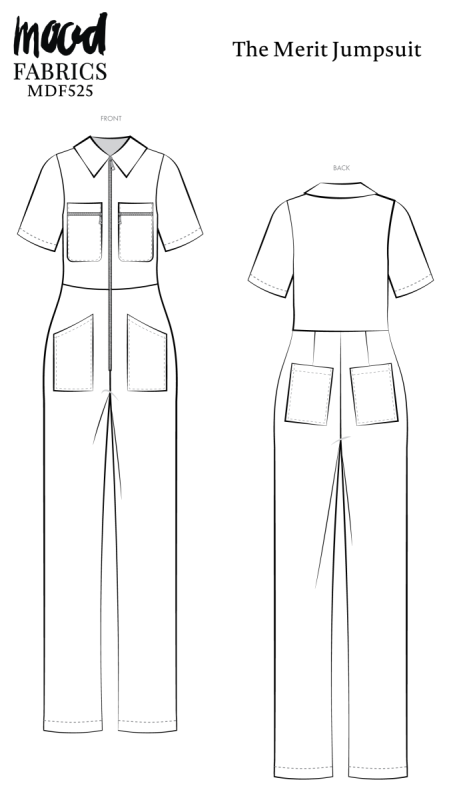
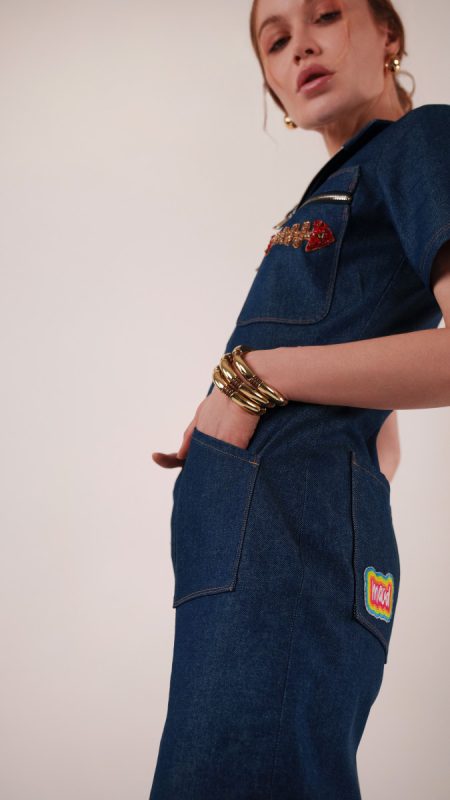
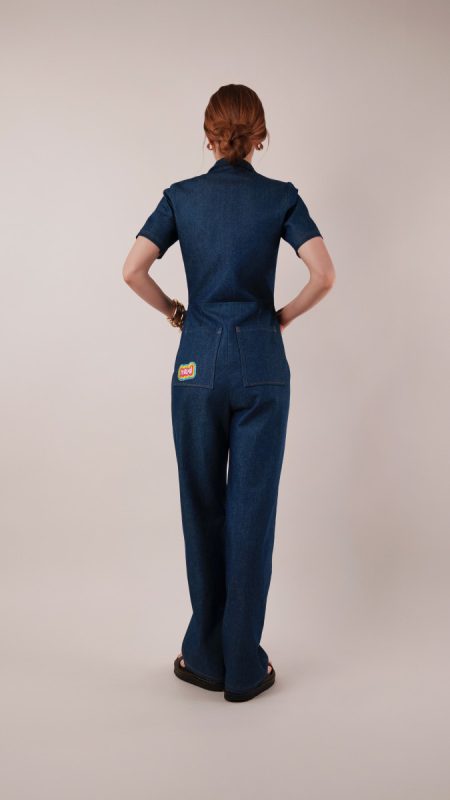
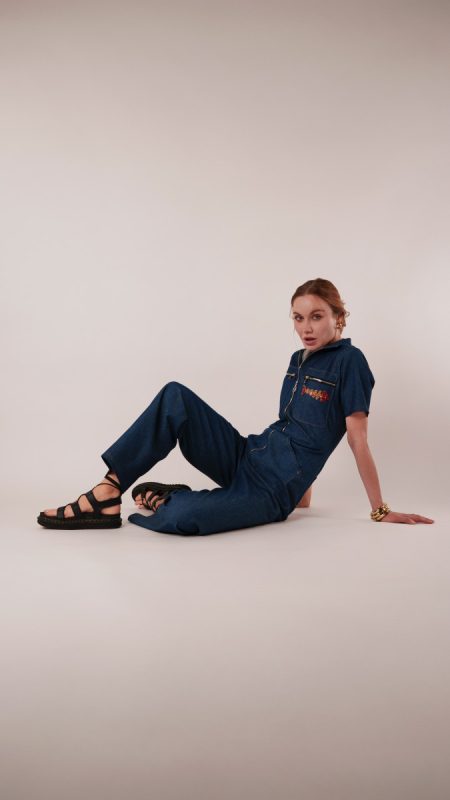
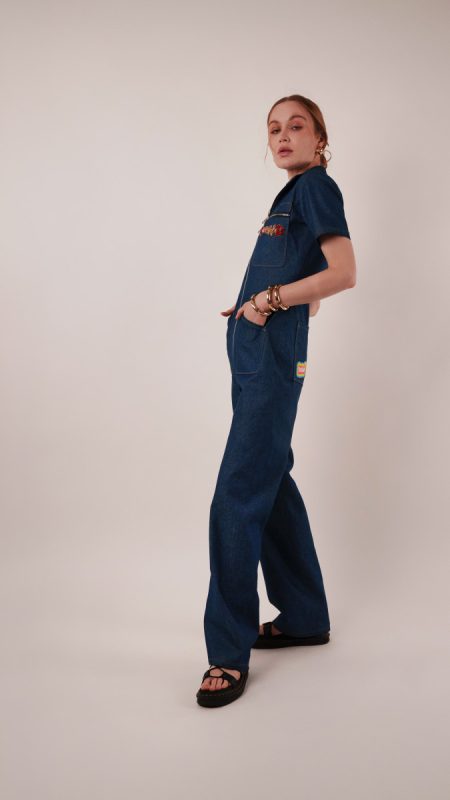
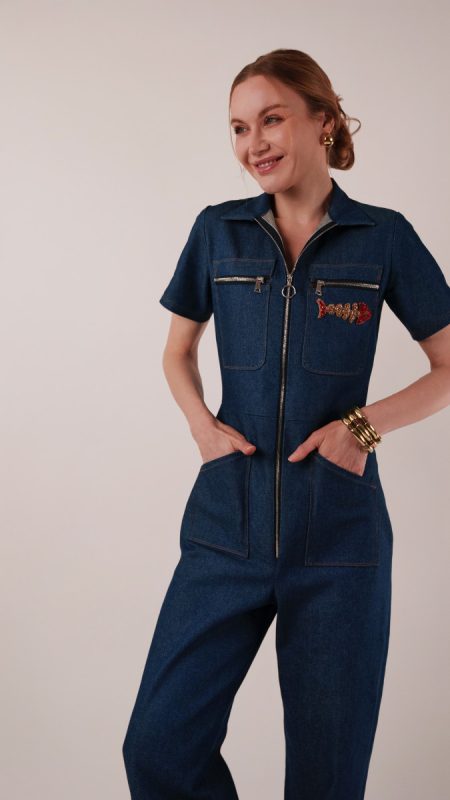
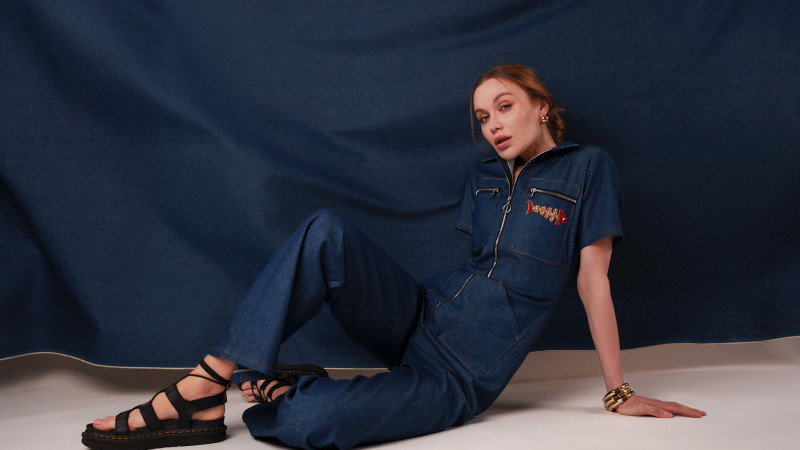
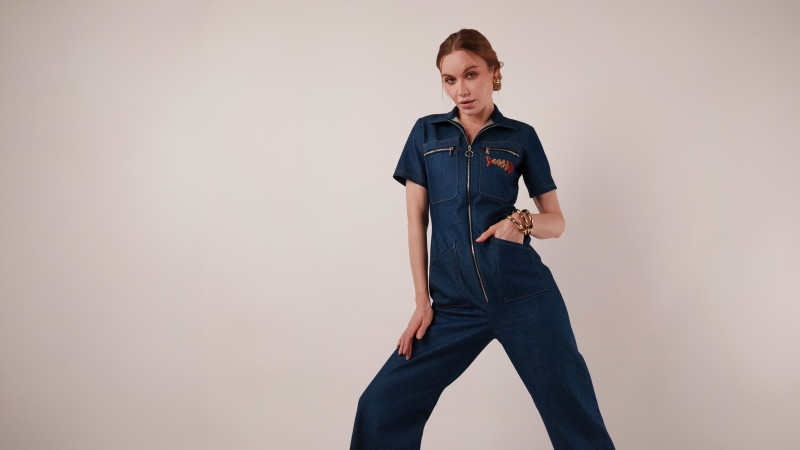
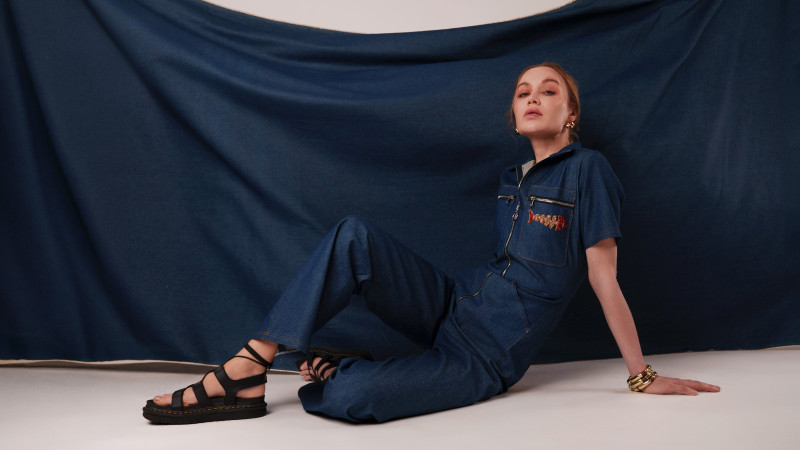
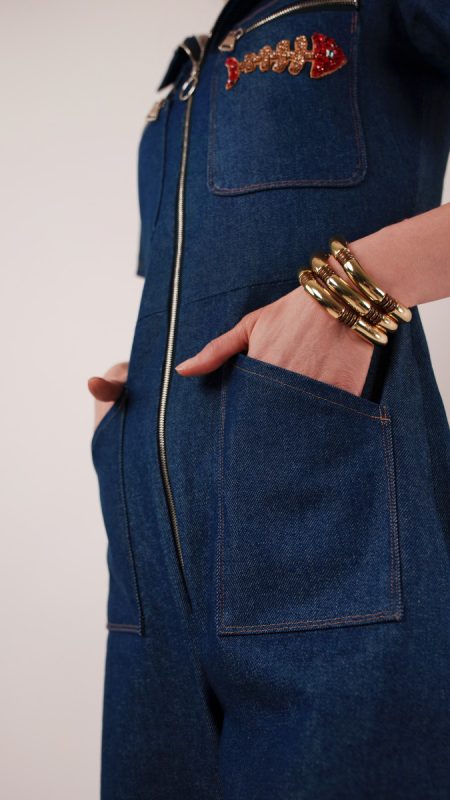
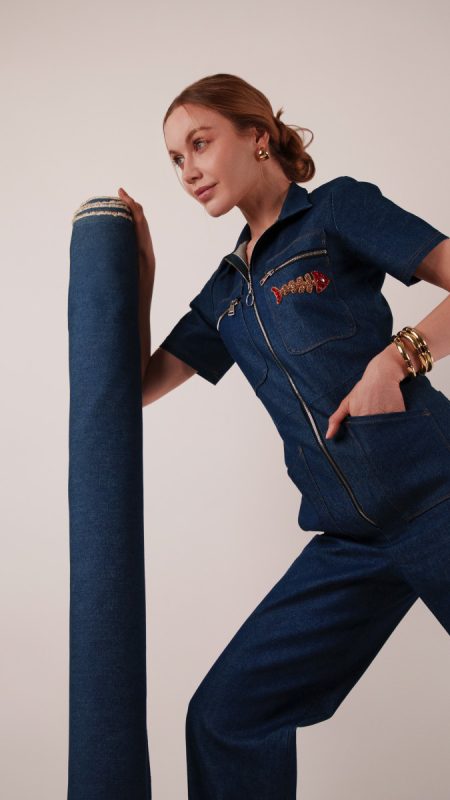
Some outfits are just cute. The Merit Jumpsuit is cute and capable. Made from a lightweight rigid cotton denim twill in a classic indigo hue, this one-piece wonder is equal parts polished and practical. With a front zipper closure for easy on and off, a crisp structured collar, six convenient pockets, and playful patches to match your style, the Merit Jumpsuit is packed with details that make it as functional as it is fun.
It’s giving mechanic, but make it high fashion. Durable enough to help a friend move, run errands, or even change the oil on your car, but chic enough to look completely intentional while doing it. Throw it on when you need a full outfit in five seconds flat and let the denim do all the work. Bold, timeless, and undeniably cool, the Merit Jumpsuit proves workwear can absolutely be the main character.

Essential Materials & Sizing Guide for the Merit Jumpsuit Free Sewing Pattern
Continue reading for a breakdown of what knowledge and materials you need for creating your very own jumpsuit! We’ve got you covered with the recommended materials we used—if you want to follow along exactly—as well as a curated list of alternative fabric type recommendations if you want to customize your own version. The Merit Jumpsuit free sewing pattern download includes technical drawings for seam and silhouette visibility, plus a size chart to help you find your perfect fit!
Purchase Products Used Below:
Quantities indicated are for sewing a size small* jumpsuit. Toggle the ‘SHOP THIS LOOK’ box to find quantity estimates for other sizes.
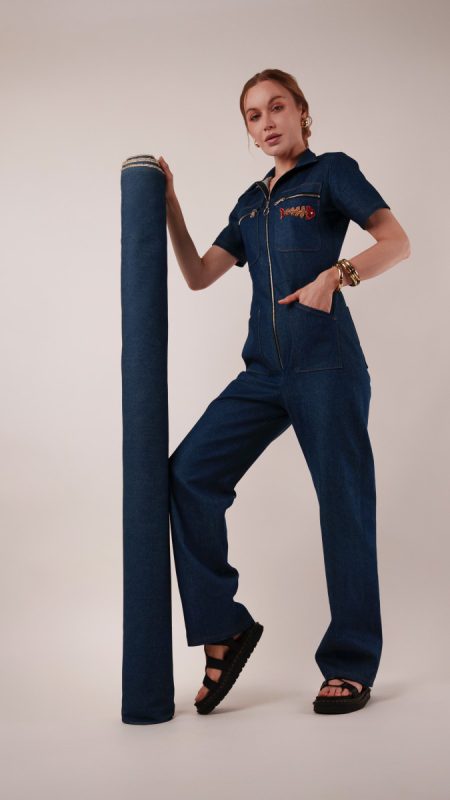
- 3 yards of Lightweight Rigid Cotton Denim Twill – Light Indigo and Cream – Deadstock
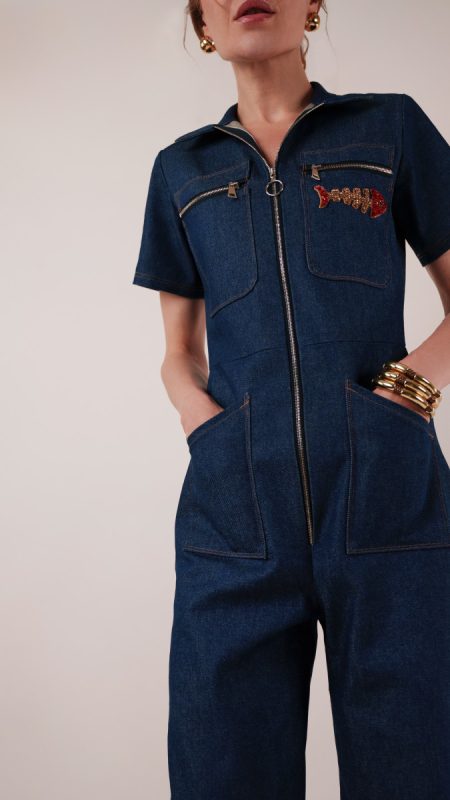
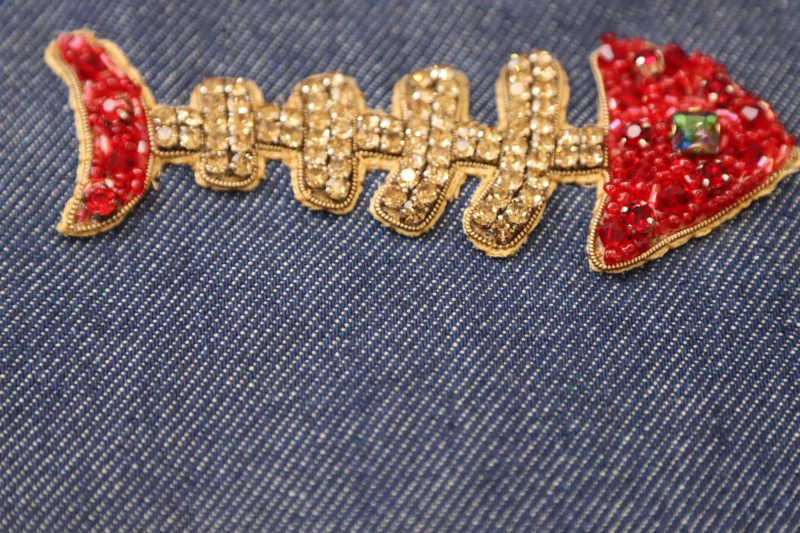
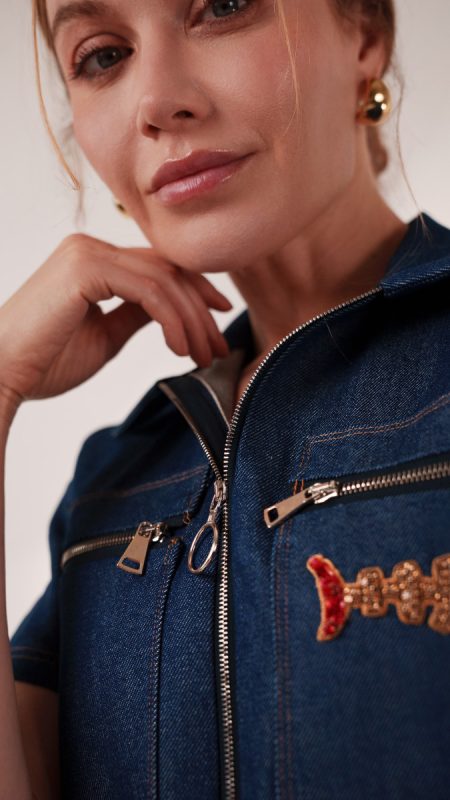
- 1 each of Red and Gold Skeletal Fish Rhinestones and Glass Beaded Applique – 1.5″ x 4.125″
- 2 each of Mood Exclusive Italian Navy and Silver T5 Closed End Metal Zipper – 9″
- 1 each of Mood Exclusive Italian Navy and Silver T3 Open End Metal Zipper – 27.5″
- 2 each of Mood Exclusive Italian Small Silver Flat Trapezium Metal Zipper Pull
- 1 each of Mood Exclusive Italian Large Silver Round Metal Zipper Pull
- 1 each of Gutermann Sew All Thread 1000m – 272 Navy
- 1 each of Gutermann Sew All Thread 100m – 865 Golden Wheat
- MDF525 – Merit Jumpsuit Sewing Pattern (Free download below!)
Additional Products Used:
*Quick Tip! The ‘SHOP THIS LOOK’ box defaults to full-yard quantities. To order an exact half-yard quantity for any fabric, simply use the decrease quantity button (-) to subtract by the half yard. Then click “ADD TO CART” to add all materials to your cart. (Our system can only display full-yard quantities initially.)
Alternative Fabric Type Recommendations:
The Merit Jumpsuit sewing pattern is best suited for medium weight fashion fabrics. Explore other fabric types or colors from our featured collections for your jumpsuit with the links below.
Download Your Free Sewing Pattern
Submit your name and email in the form below to receive the download link for the Merit Jumpsuit free sewing pattern directly in your inbox. Mood Sewciety Patterns will send your free download link via email with the subject line: ‘Your Free Download from Mood Sewciety – The Merit Jumpsuit’ (in PDF format for A4 and letter-size printing).
© MoodFabrics.com / MoodSewciety.com – Mass production, resale, or distribution of this pattern in any form is strictly prohibited.
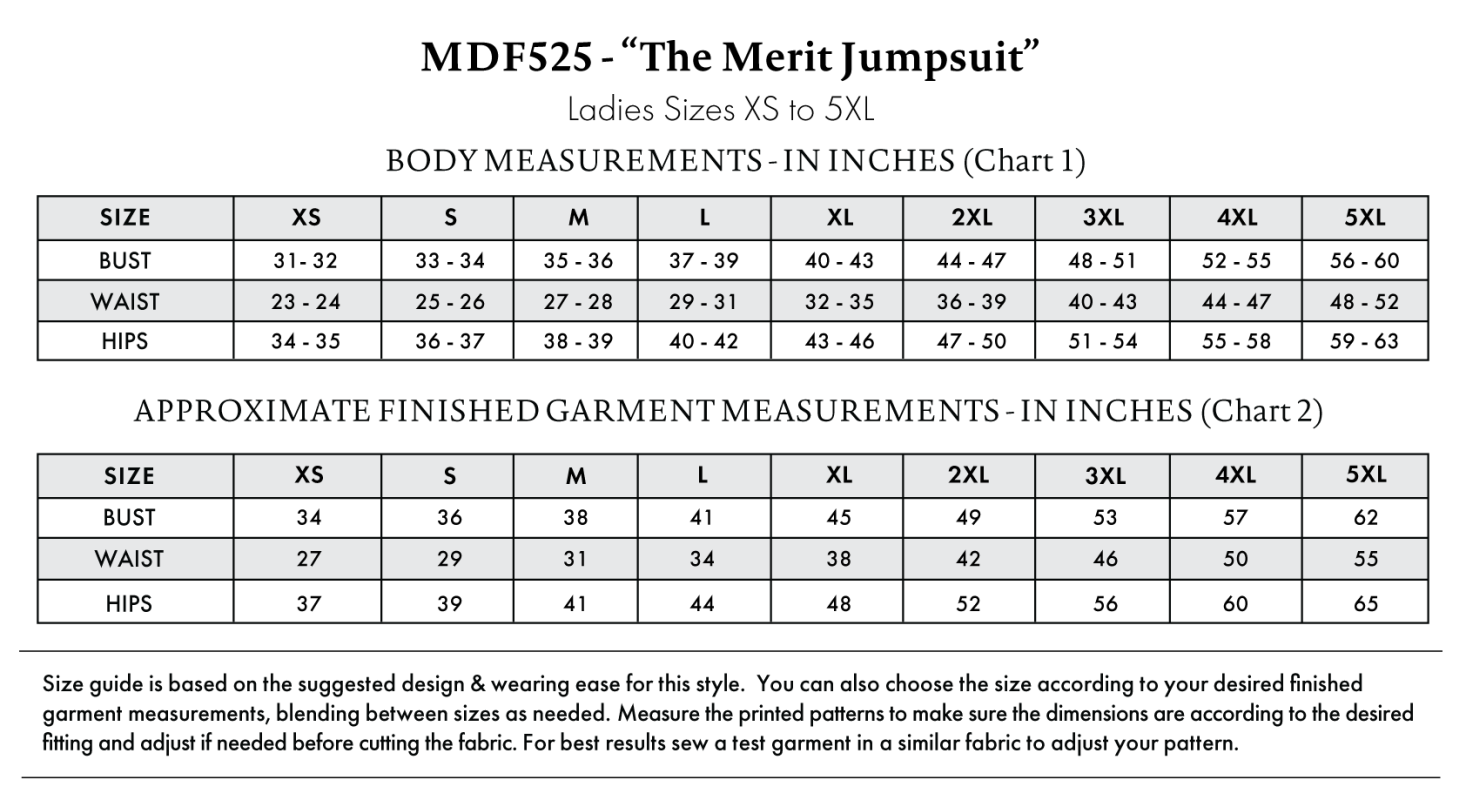
Find Your Perfect Fit
The Merit Jumpsuit Sizing Guide is based on the suggested design & wearing ease for this style. You can also choose the size according to your desired finished garment measurements, blending between sizes as needed. Measure the printed patterns to make sure the dimensions are according to the desired fitting and adjust if needed before cutting the fabric. For best results, sew a test garment in a similar fabric to adjust your pattern.
Note: Always read all the instructions before cutting the fabric!


How to Sew The Merit Jumpsuit
The instructions provided below are designed to guide you through sewing the Merit Jumpsuit from start to finish.
3 Tips for Sewing with Denim Twill
⇒ If you notice in the materials list above, I listed two different colors of thread: navy and gold. The navy thread is for attaching seams together (like the crotch seams, inseams, waist seams, etc.) while the gold thread is for contrast topstitching on the pockets. You can either thread two different sewing machines (if you have two of them), switch back and forth between the two colors of thread, or strategically sew most of the seams with the blue thread before switching to topstitching thread.
⇒ Wash and dry your fabric before cutting out the pattern because it will shrink.
⇒ I didn’t show it in the tutorial below, but you’re going to want to choose a way to finish the raw edges of the seam allowances inside of the jumpsuit. Either serge or zigzag the raw edges, OR alternatively, you can sew flat felled seams all over the garment to get that iconic blue jean look.
Pattern Pieces & Fabric Cuts Needed
- (A) TOP BACK
- Fabric – Cut 1 on Fold
- (B) TOP FRONT
- Fabric – Cut 2 Mirrored
- (C) SLEEVES
- Fabric – Cut 2 Mirrored
- (D) FANTS FRONT
- Fabric – Cut 2 Mirrored
- (E) PANTS BACK
- Fabric – Cut 2 Mirrored
- (F) COLLAR
- Fabric – Cut 2 on Fold
- (G) TOP FRONT POCKETS UPPER
- Fabric – Cut 2
- (H) TOP FRONT POCKETS LOWER
- Fabric – Cut 2
- (I) PANTS FRONT POCKETS
- Fabric – Cut 2 Mirrored
- (J) PANTS BACK POCKETS
- Fabric – Cut 2

Sew with a 1/2″ seam allowance for all seams unless otherwise specified.
Step 1
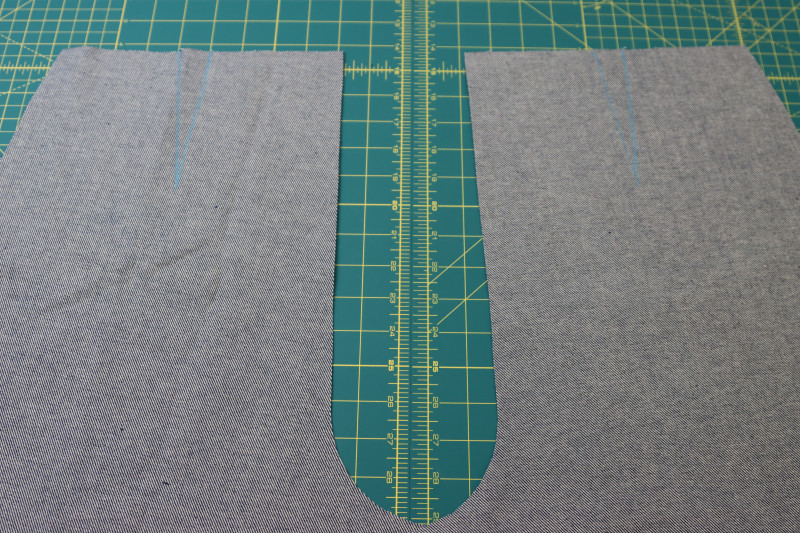
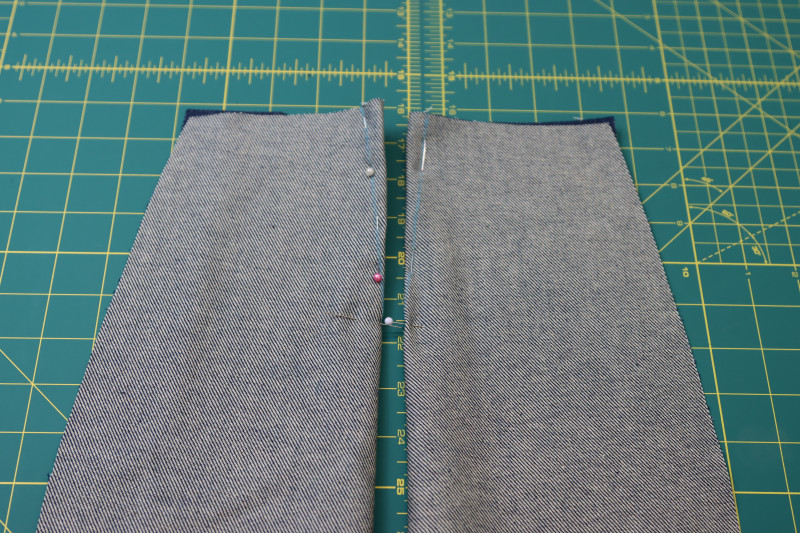
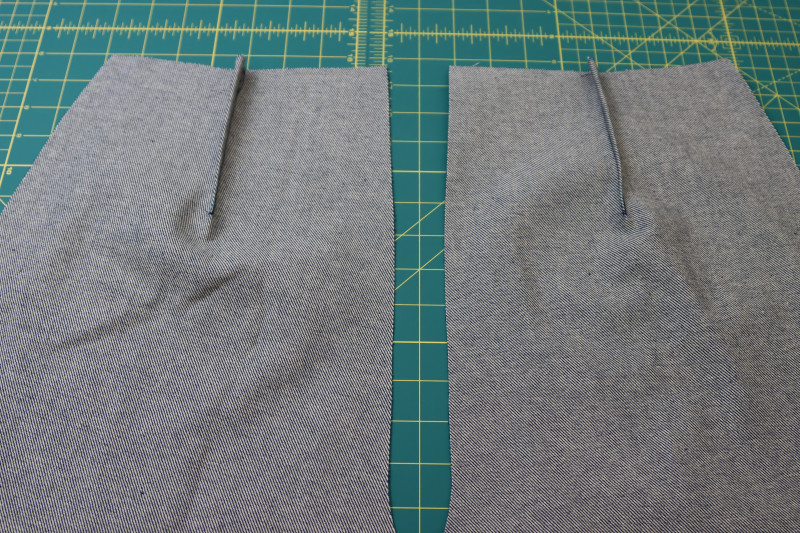
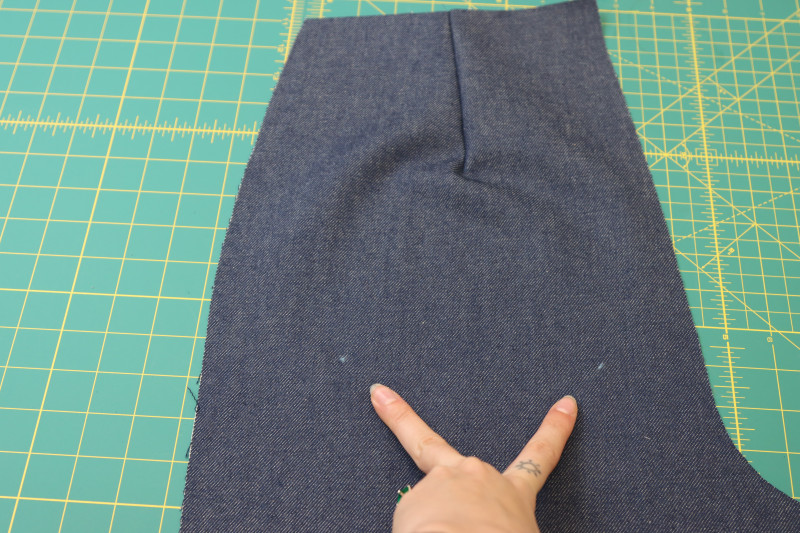
PANTS DARTS
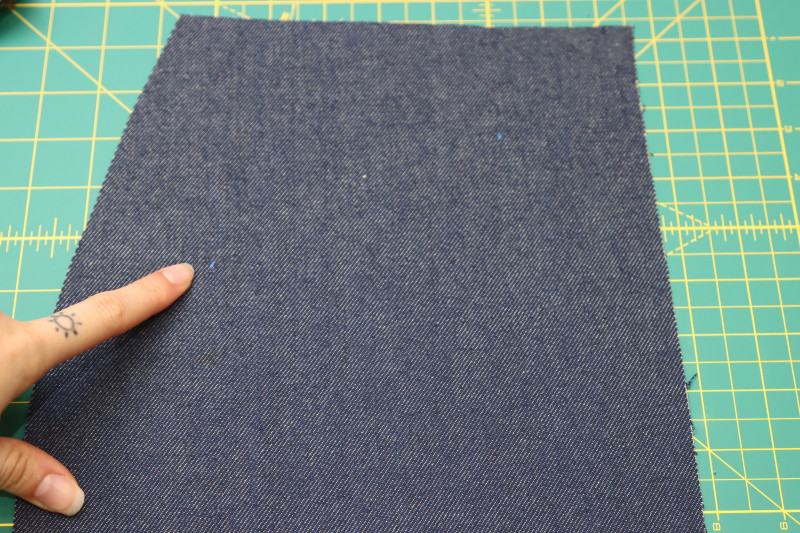
- Mark the dart lines on the wrong side of the back pants pieces with tailor’s chalk.
- Fold the back pant pieces right sides together to line up either side of each dart line.
- Pin the dart lines together.
- Sew along the dart line.
- Press the darts towards the side seams of the pants.
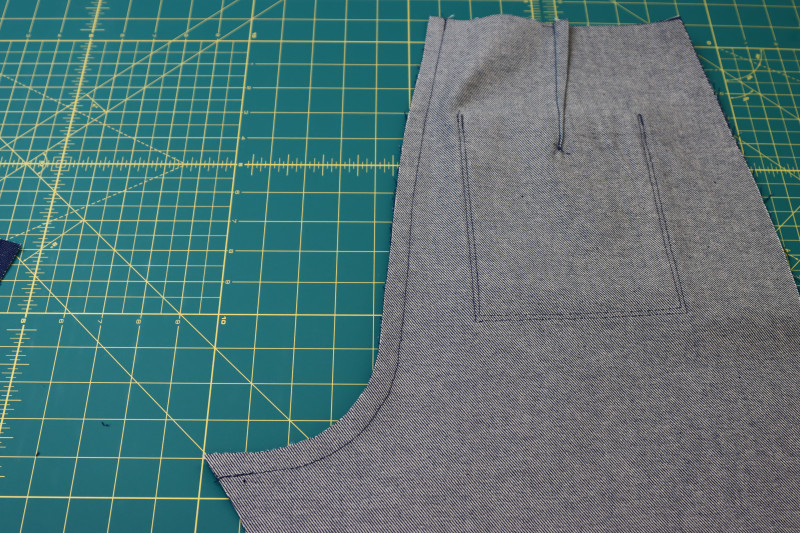
Step 2
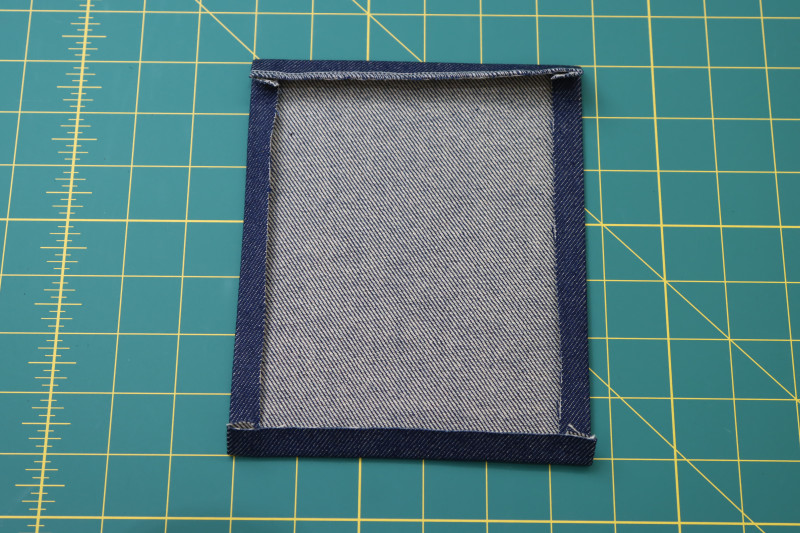
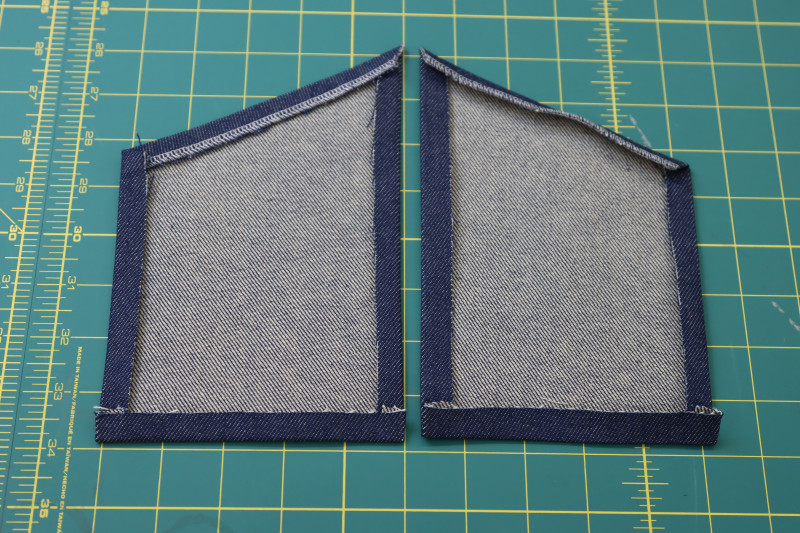
BACK POCKETS
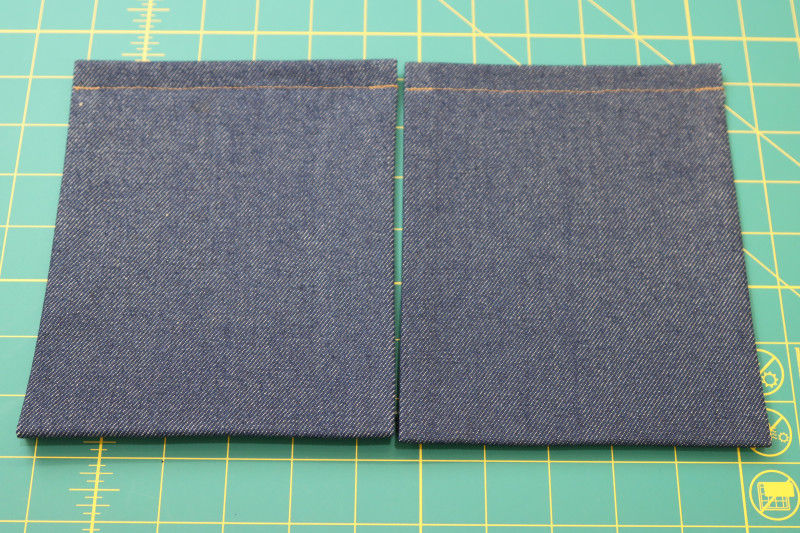
- Serge or zigzag the top edge of the back pockets.
- Fold and press the sides and bottom edges of the back pockets toward the wrong side of the fabric.
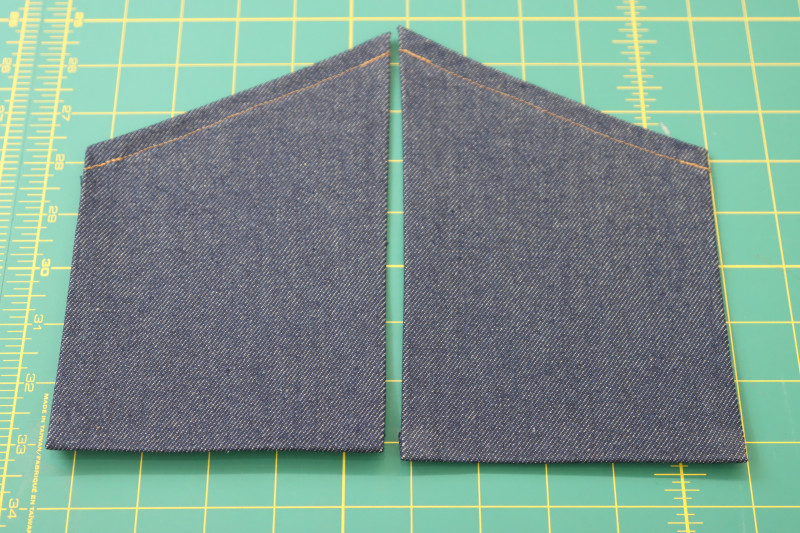
- Topstitch over the top folded edge of the pocket with the gold contrast thread.
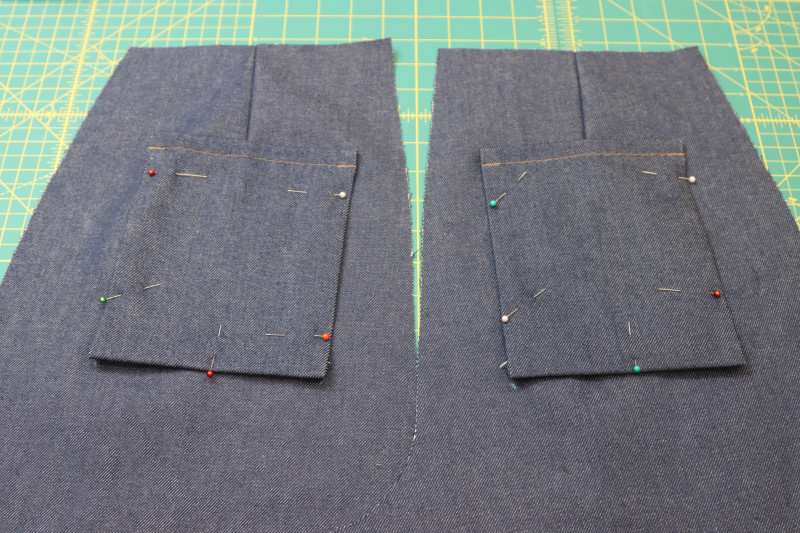
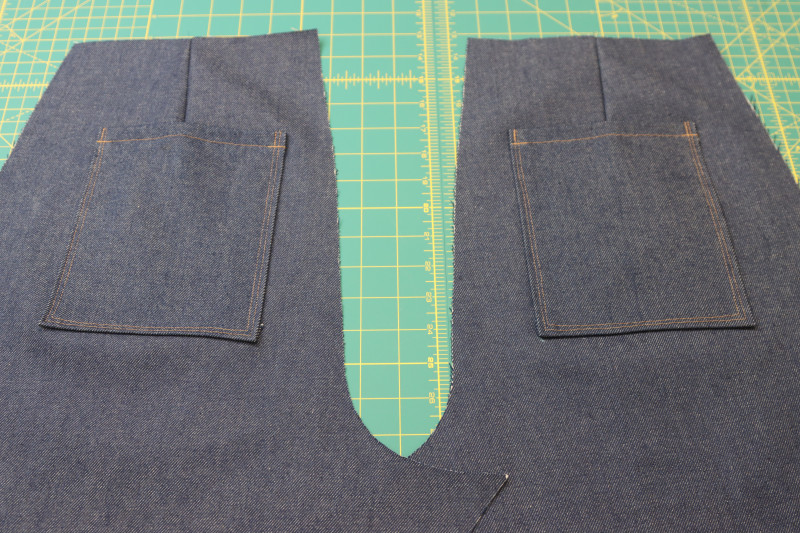
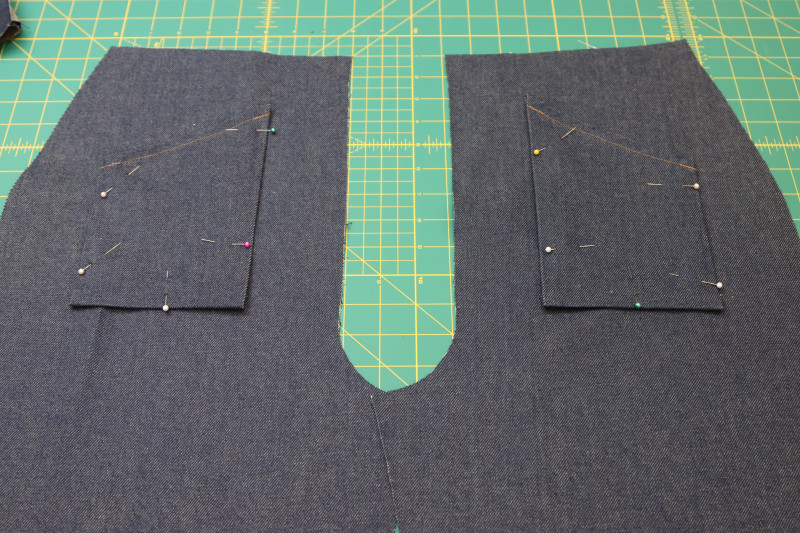
- Mark the location of the back pockets on the backs of the pants with tailor’s chalk.
- Pin and sew the sides and bottoms of both back pockets to the backs of the pants with two parallel straight stitches that are ⅛ inch apart.
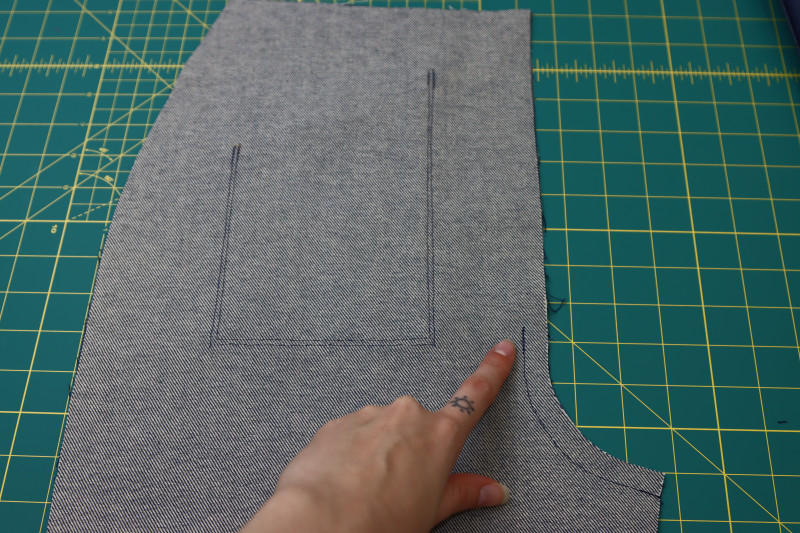
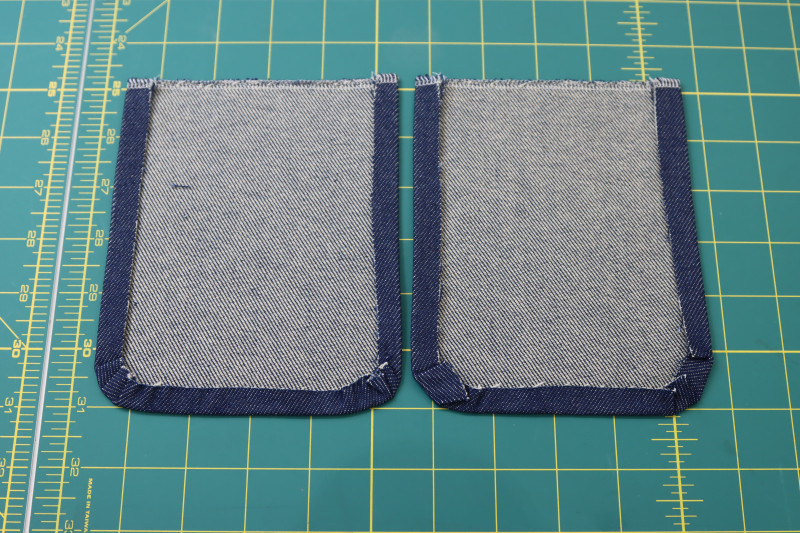
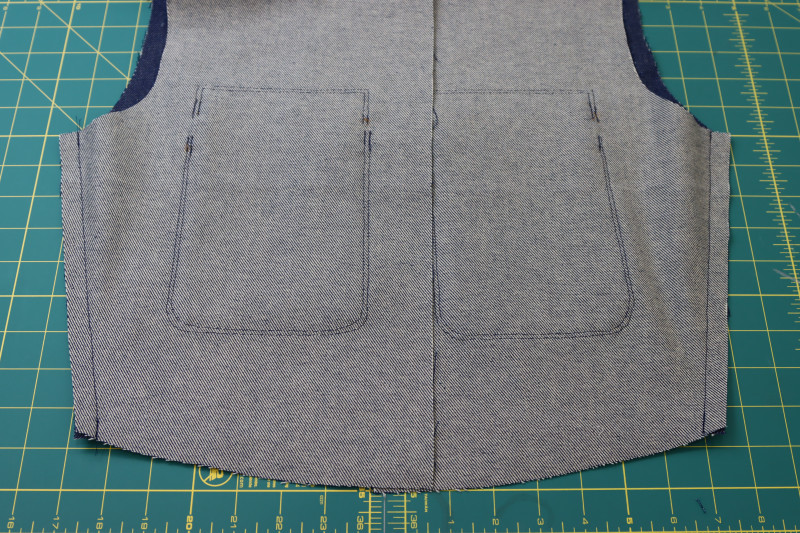
Step 3
FRONT POCKETS
- Serge or zigzag the top edge of the front pockets.
- Fold and press the sides and bottom edges of the front pockets toward the wrong side of the fabric.
- Topstitch over the top folded edge of the pocket with the gold contrast thread.
- Mark the location of the front pockets on the fronts of the pants with tailor’s chalk.
- Pin and sew the sides and bottoms of both front pockets to the fronts of the pants with two parallel straight stitches that are ⅛ inch apart.
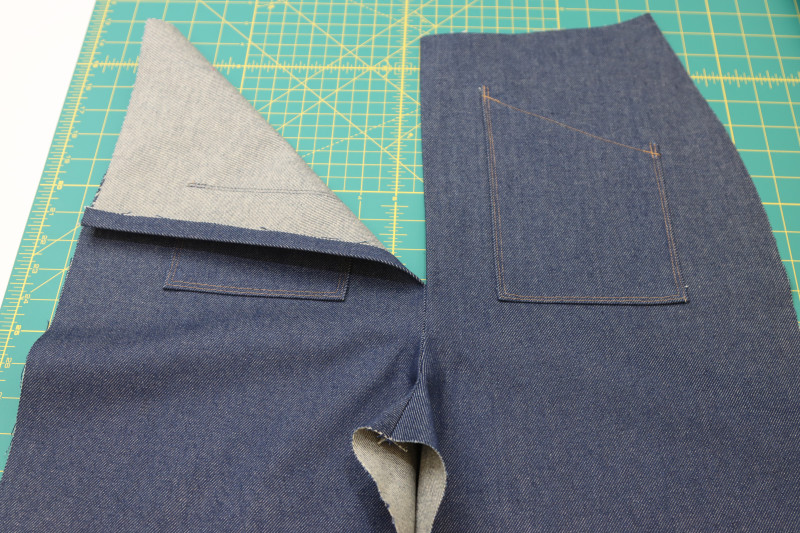
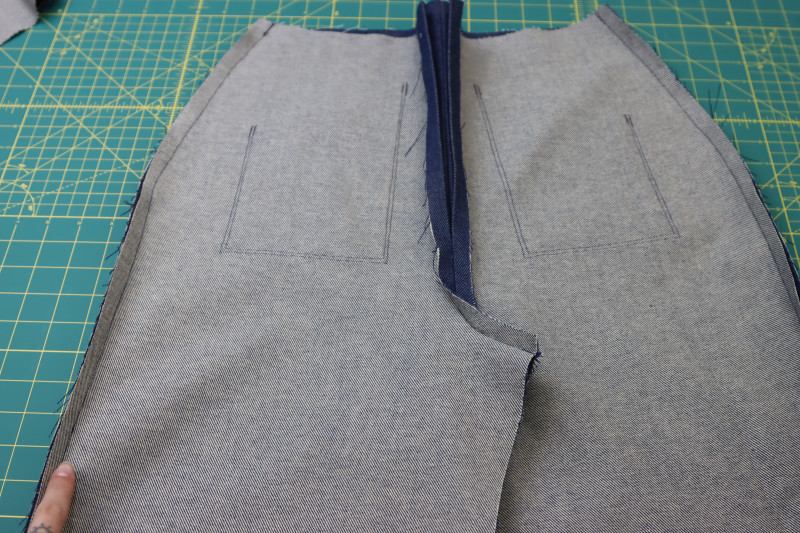
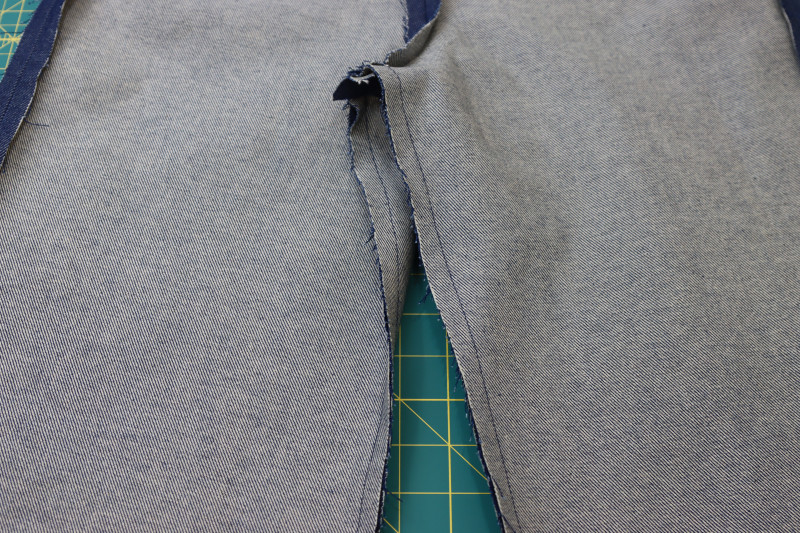
Step 4
CROTCH SEAMS
- Place the two back pants pieces right sides together.
- Pin and sew the back crotch seam of the pants.
- Place the two front pants pieces right sides together.
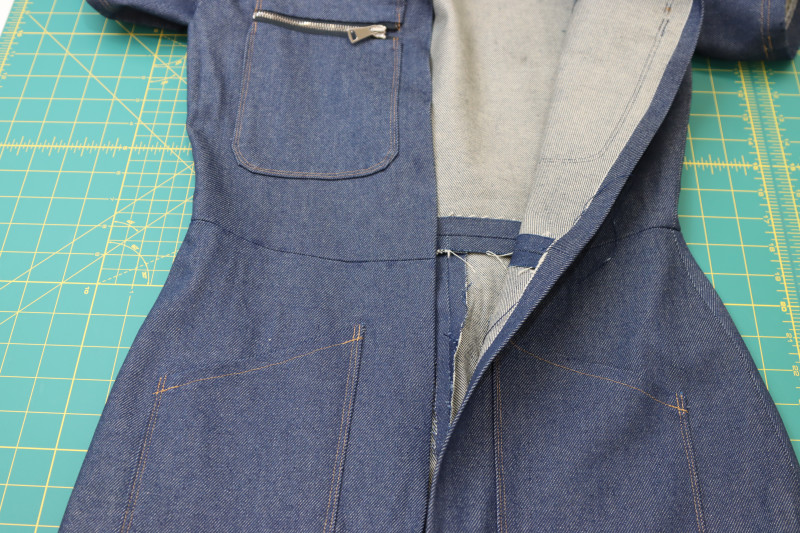
- Pin and sew the front crotch seam of the pants, but only the bottom 6 inches. Leave the top front crotch seam unsewn.
- Press the crotch seam allowances open and flat.
- Press the raw edges of the front crotch that were not sewn so that they are folded in toward the wrong side of the fabric.
Step 5
BREAST POCKETS
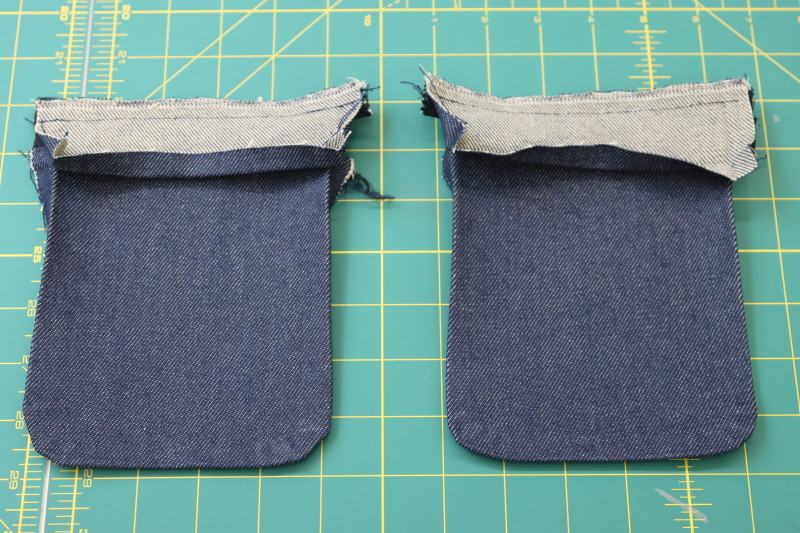
- Fold and press a ½ inch fold into the sides and bottoms of the breast pockets.
- Do the same for the tops and sides of the upper front pocket pieces.
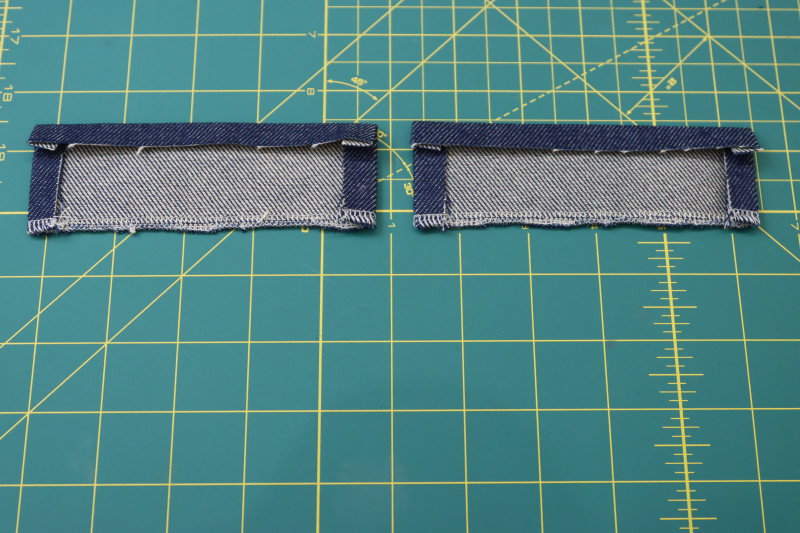
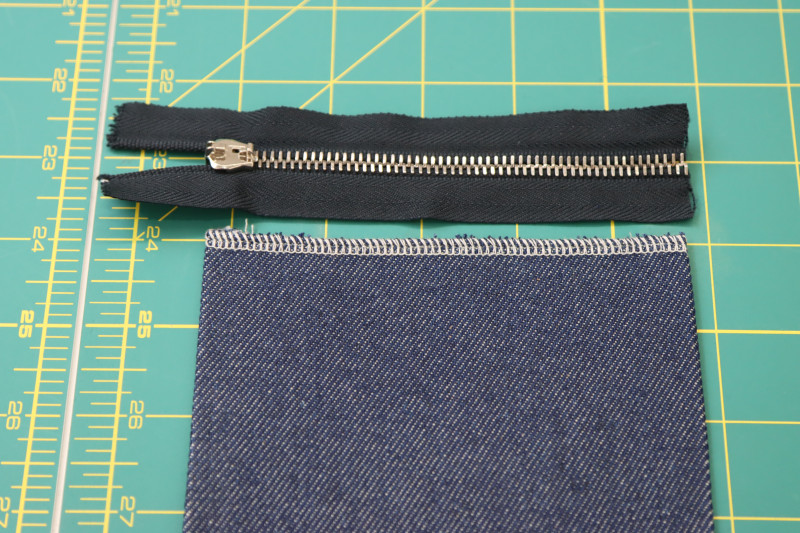
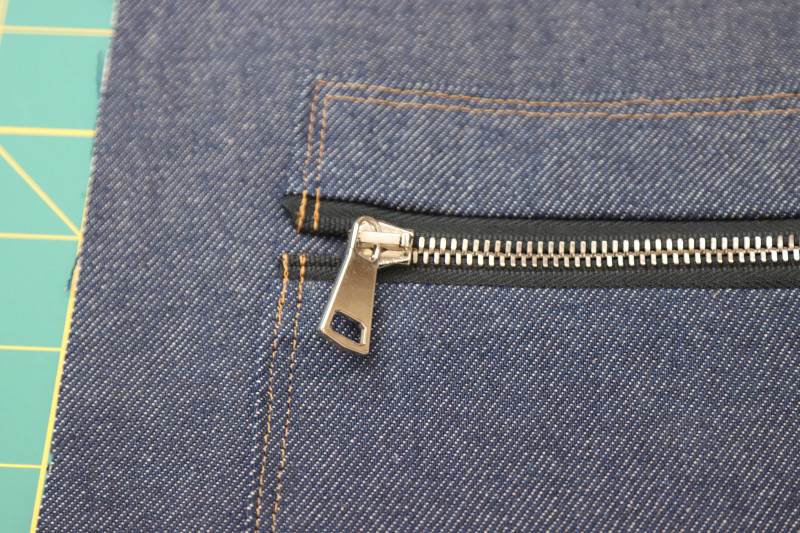
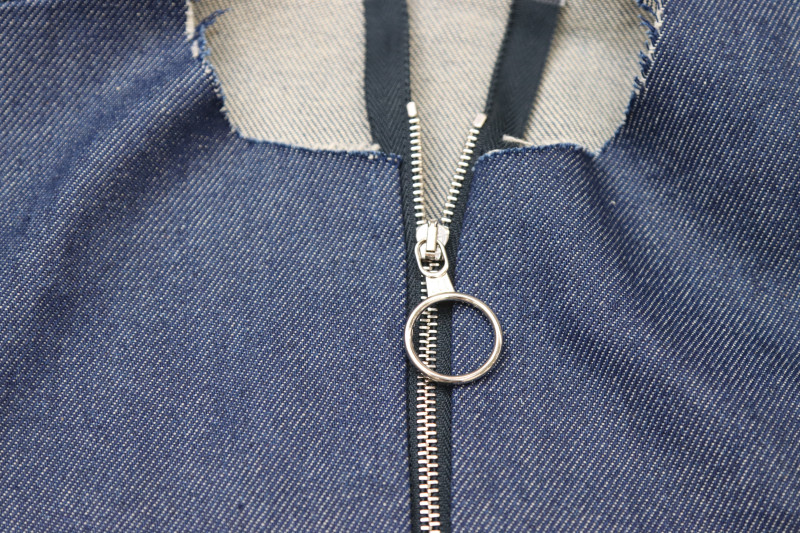
Step 6
BREAST POCKET ZIPPERS
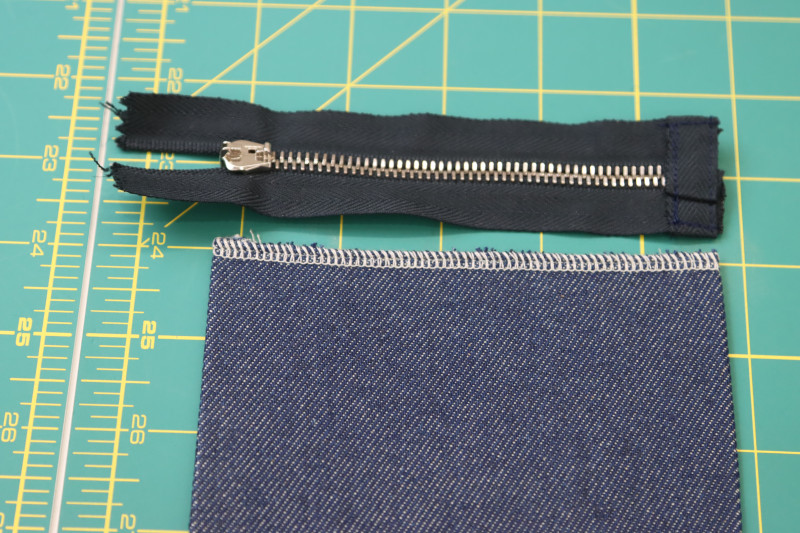
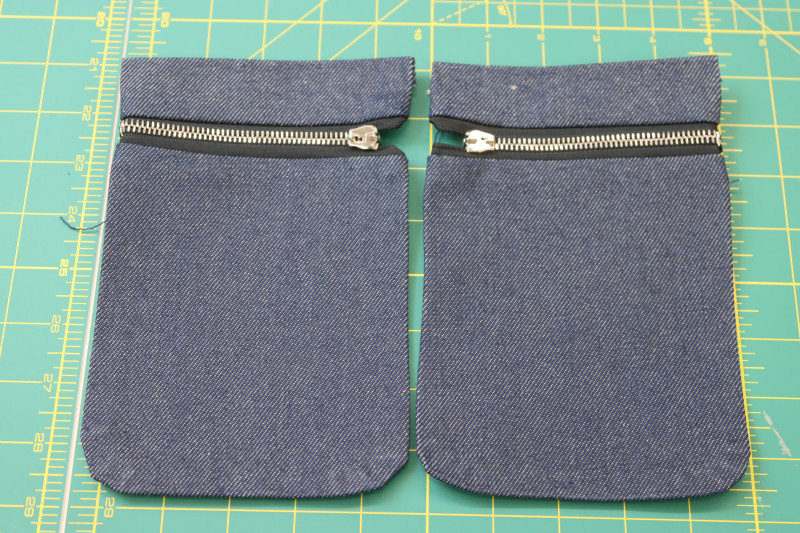
- Cut the shorter zippers so that the length of the zipper teeth is the same as the length of the breast pockets.
- Take a piece of zipper tape from the excess zipper and wrap it around the bottom raw edge of the zipper.
- Sew the zipper tape around the bottom of the zipper to secure it in place and create a new zipper stopper.
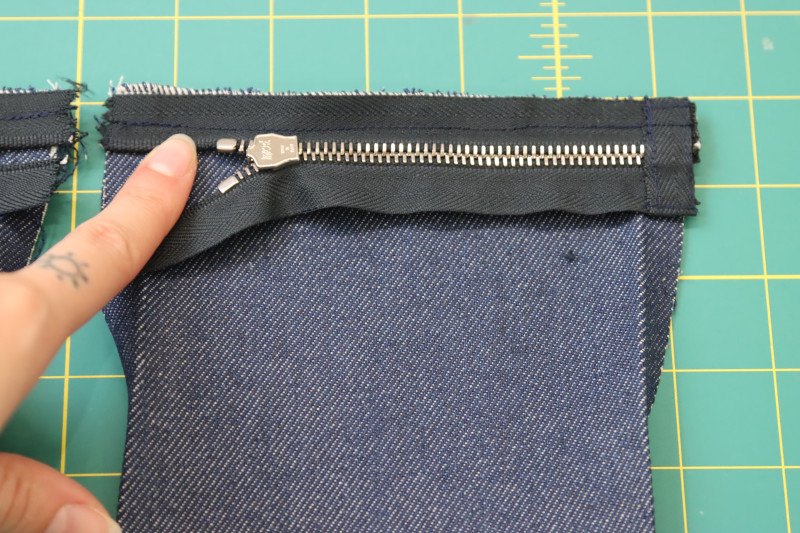
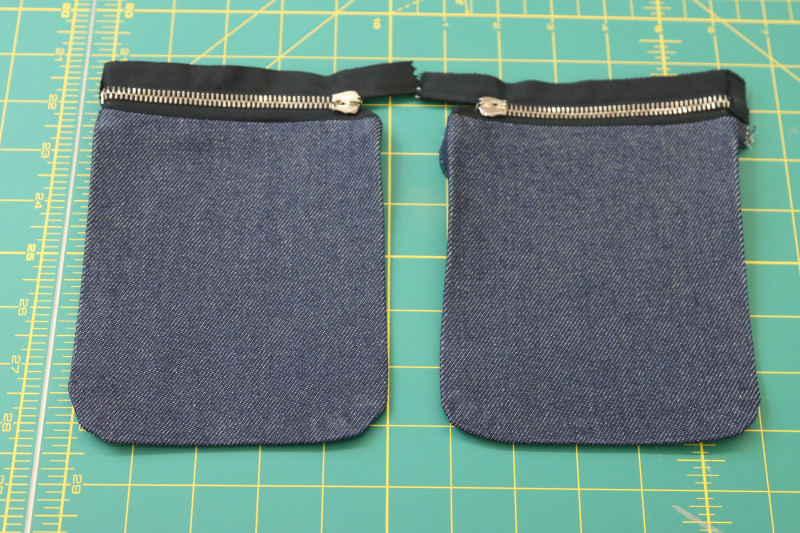
- Pin and sew the zippers right sides together with the top serged edge of the breast pockets.
- Press the zipper away from the breast pocket.
- Place the raw edges of the upper pocket pieces right sides together on top of the other side of the zipper tape.
- Pin and sew the upper pockets to the zipper tape.
- Press the zipper away from the upper pocket pieces and repress the folded edges of the pockets.
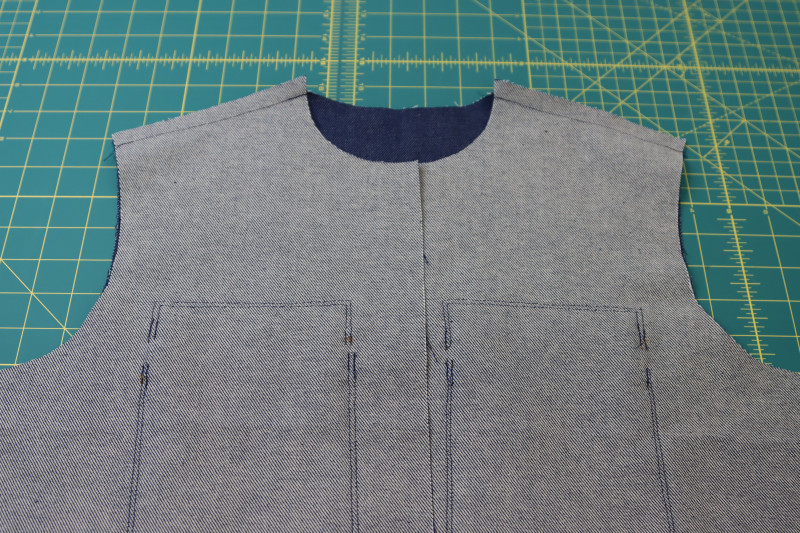
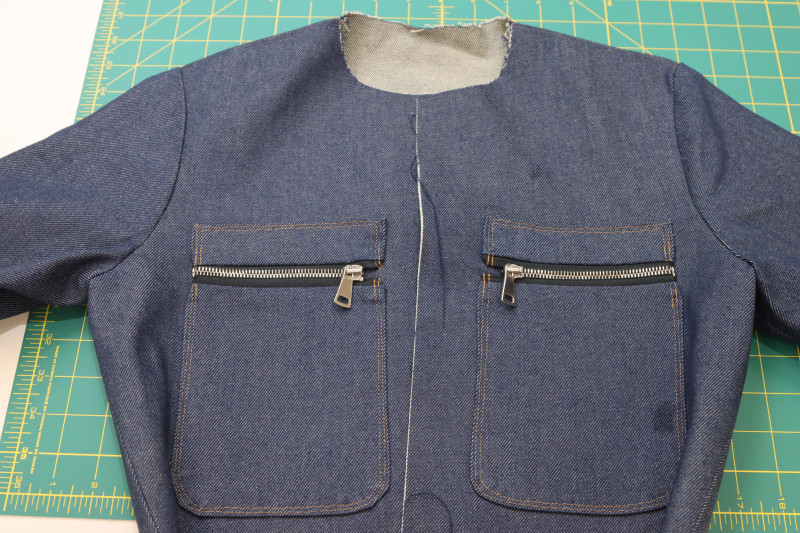
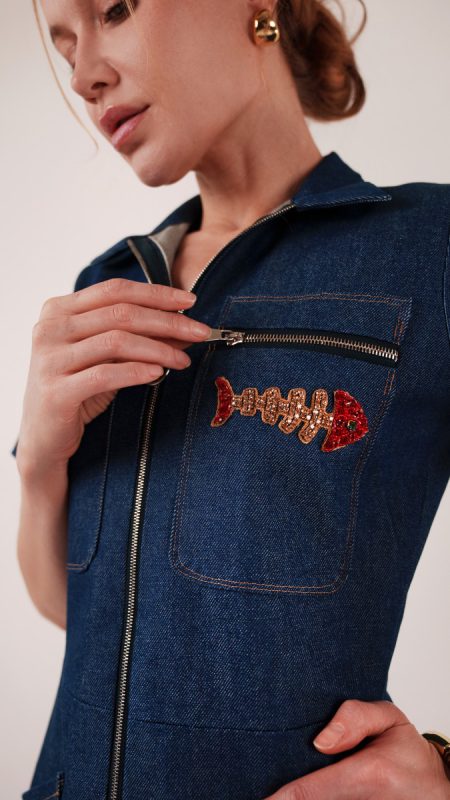
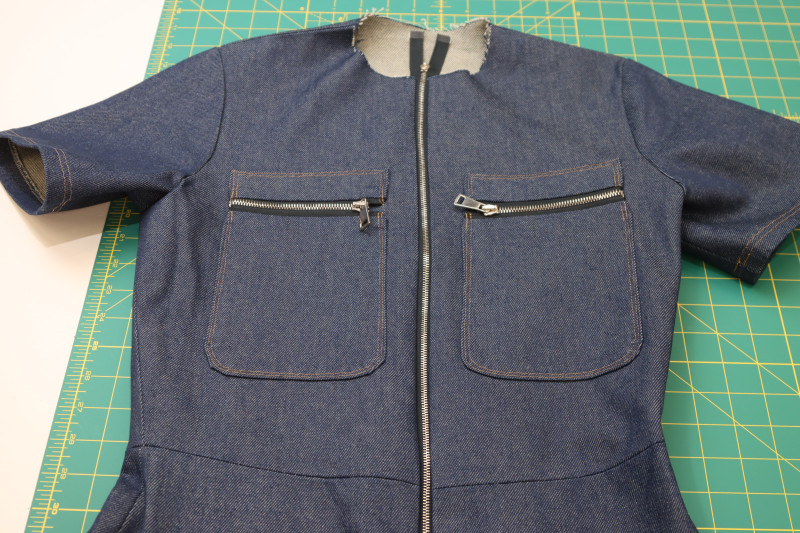
Step 7
TOPSTITCH BREAST POCKETS
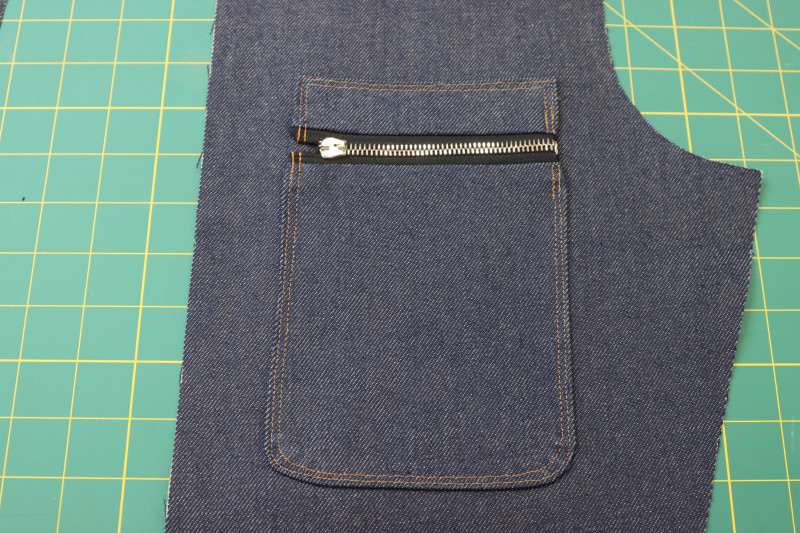
- There is no marking for where the breast pockets are meant to go because it is dependent upon your preference. I placed mine so that the zipper landed about 6 inches below the neckline, but you may want to place them higher or lower depending on your bust size.
- Pin the perimeter of the breast pockets and upper pocket pieces to the fronts of the jumpsuit.
- Sew around the perimeter of the breast pockets with two parallel straight stitches in the gold contrast thread.
- Take this time to attach the zipper pull to the zipper if you’re using a zipper that didn’t come with one like mine.

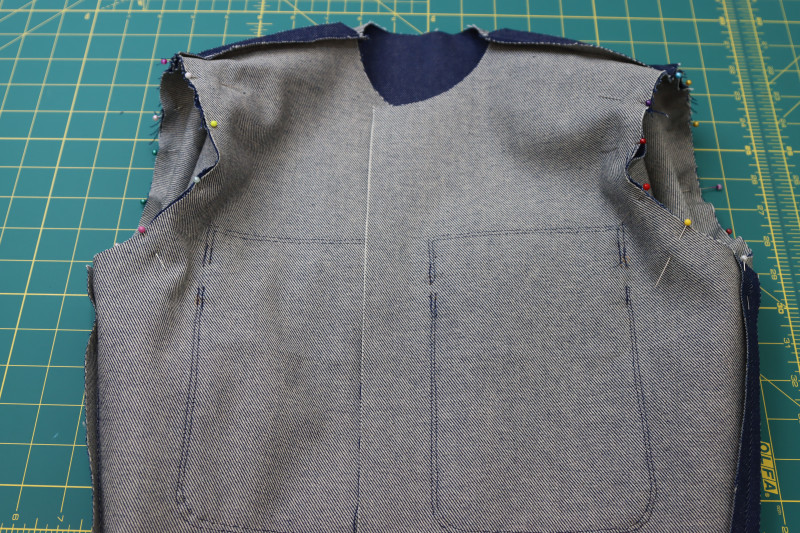
Step 8
BODICE SEAMS
- Place the front top pieces right sides together on top of the back top piece.
- Pin and sew the front and back top pieces together at the side seams.
- Pin and sew the front and back top pieces together at the shoulder seams.
- Press the seams open and flat.
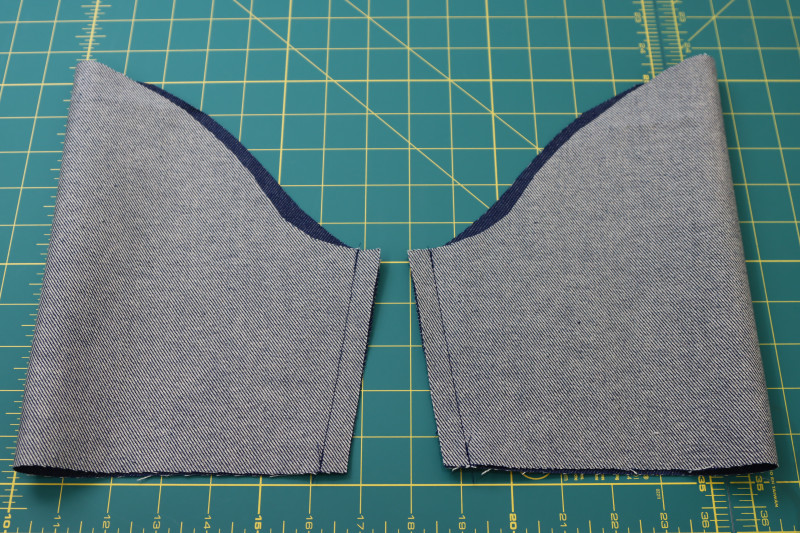
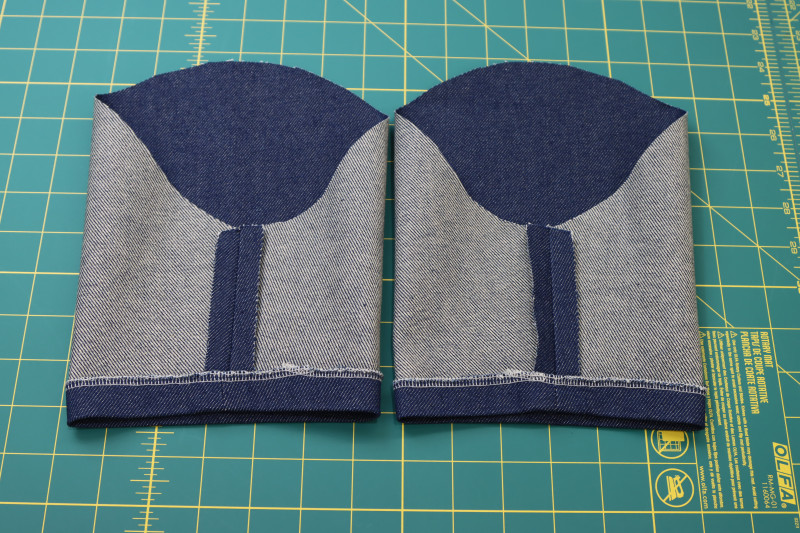
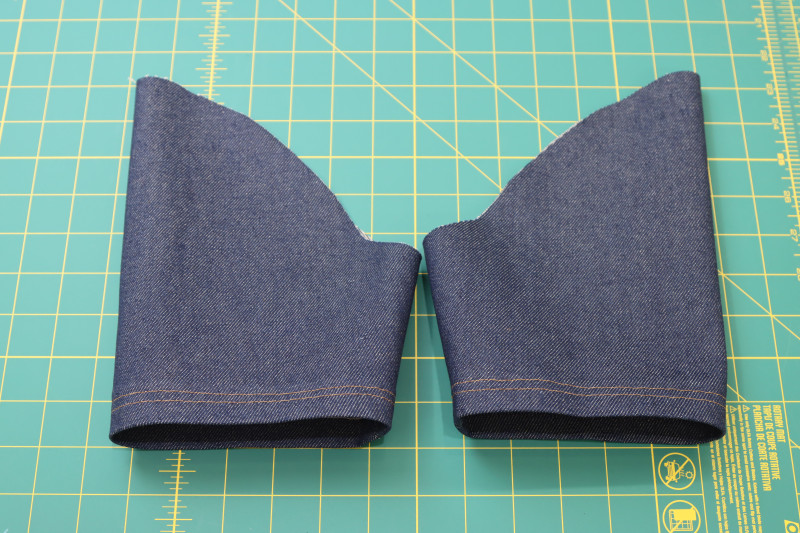
Step 9
SLEEVES
- Fold the sleeves right sides together with the inseams lined up.
- Pin and sew the sleeve inseams, then press the seam open and flat.
- Fold and press a 1 inch fold into the bottom raw edge of the sleeves.
- Topstitch over the hem of the sleeve with two parallel contrasting straight stitches.
Step 10
SET SLEEVES
- Pin the sleeves right sides together into the armscyes of the bodice, making sure that the fronts of the sleeves are matched up with the front of the top.
- Sew the sleeves into the top.
Step 11
PANTS SIDE SEAMS
- Place the front pants pieces right sides together on top of the back pants pieces.
- Pin and sew the front and back pants pieces together at the side seams.
- Press the side seams open and flat.
Step 12
INSEAM
- Line up the front and back crotch seams of the pants.
- Line up the inseams on both sides of the pants.
- Pin and sew the pants inseam.
- Press the inseam open and flat.
Step 13
WAISTLINE
- Pin the waistline of the top right sides together with the waistline of the pants, making sure that the side seams and front opening of both line up with each other.
- Sew the waistlines of the pieces together.
- Press the waistline seam open and flat.

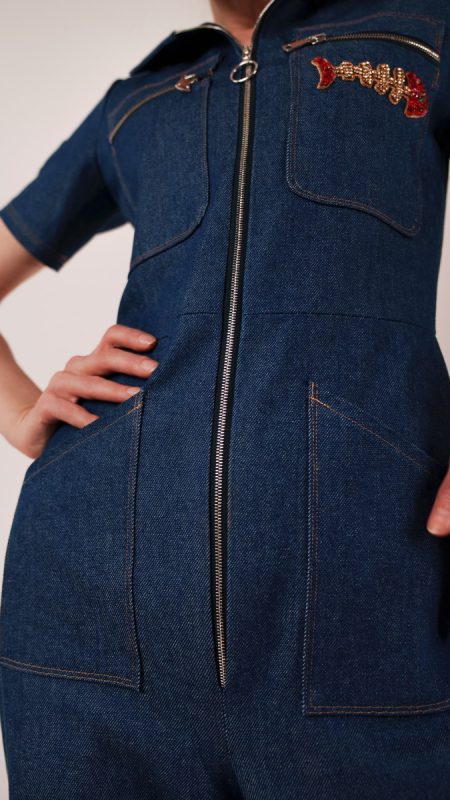
Step 14
CENTER FRONT ZIPPER
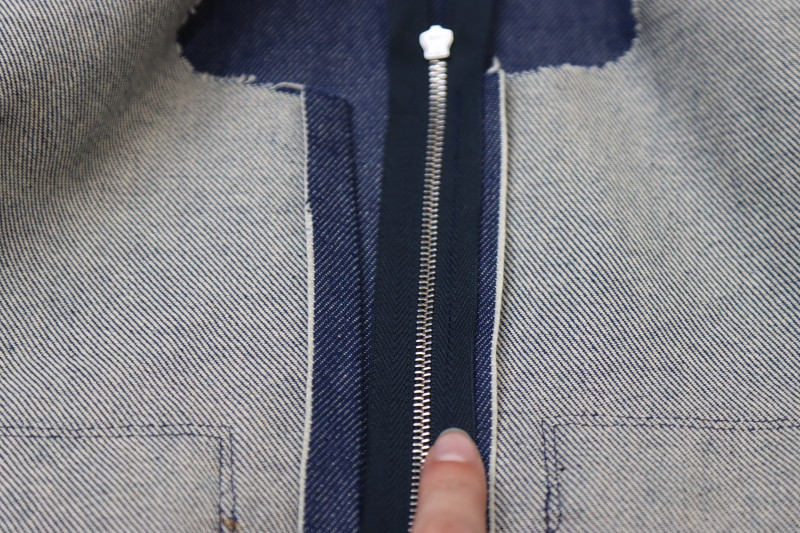
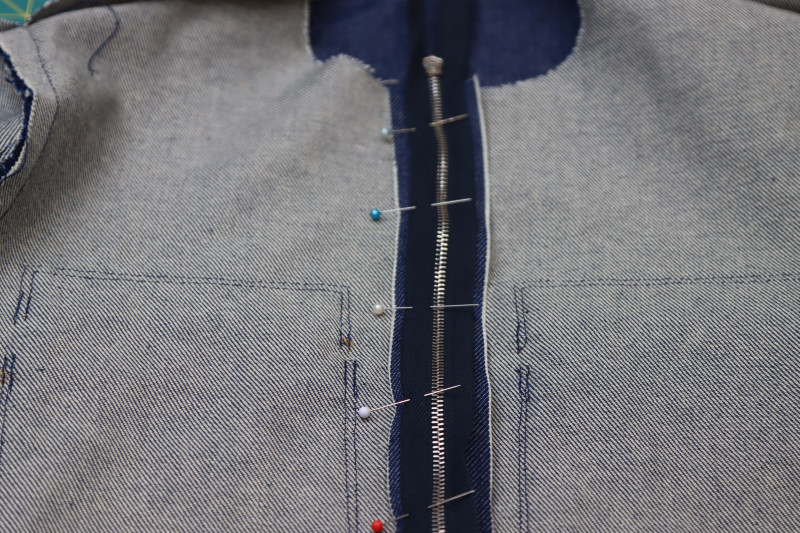
- Place the zipper right sides together against the center front opening of the jumpsuit.
- One side at a time, pin and sew each side of the zipper tape to its corresponding side of the center front opening.
- Press the seams attaching the zipper to the jumpsuit.
- Note: the zipper is going to be longer than the center front opening. Either cut the bottom of the zipper and finish it like I did in step 6 or just let it hang loose on the inside of the jumpsuit at the crotch.
- Attach the zipper pull if your zipper needs one.
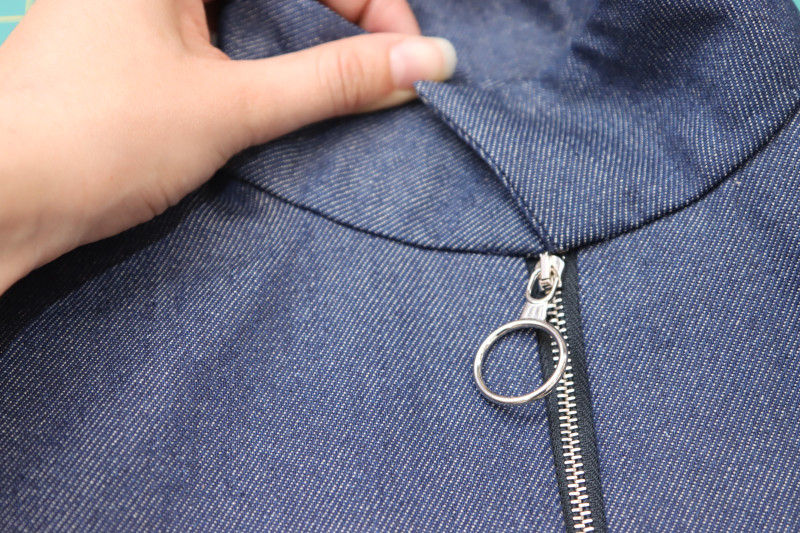
Step 15
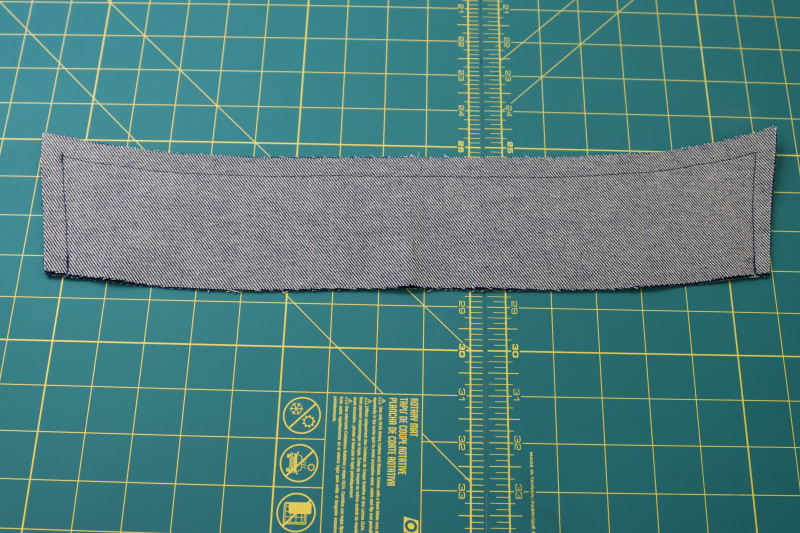
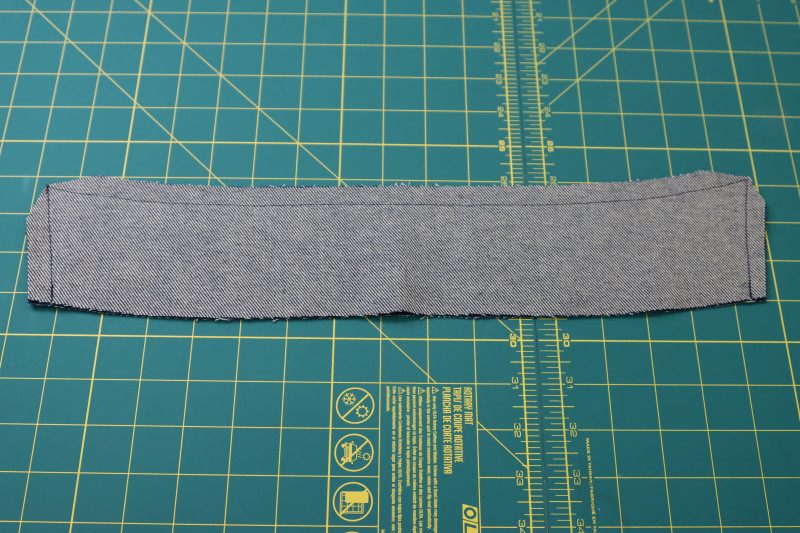
COLLAR
- Place the collar pieces right sides together.
- Pin and sew around the sides and top edge of the collar.
- Clip the corners of the collar.
- Flip the collar right sides out.
- Press the seams of the collar flat.
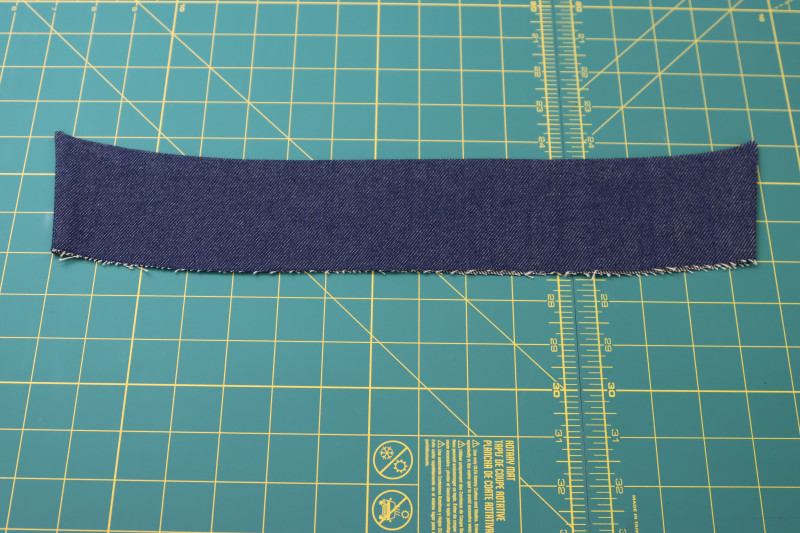
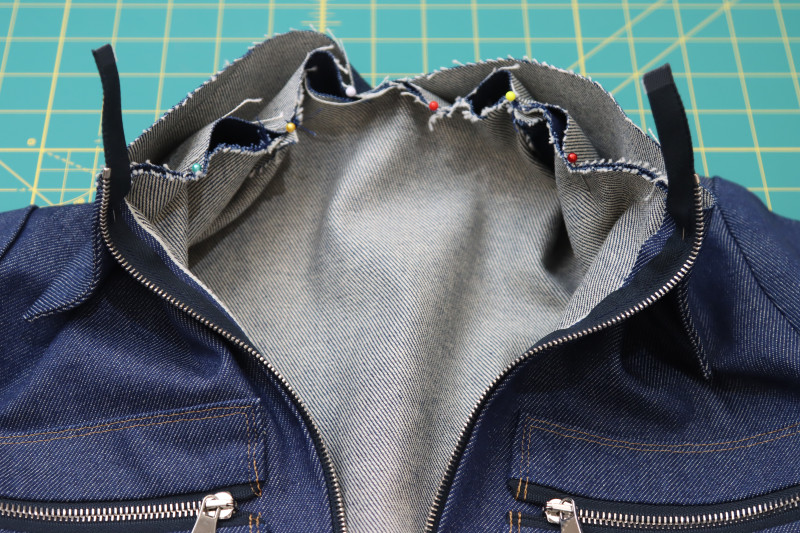
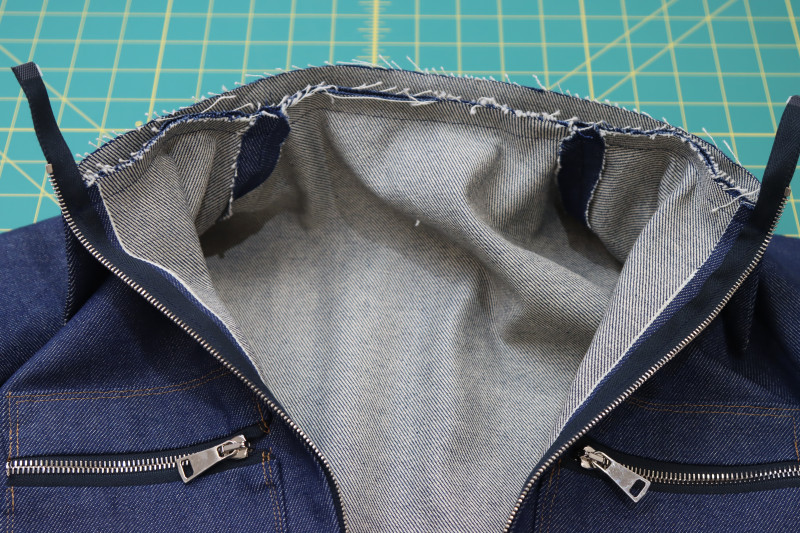
Step 16
ATTACH COLLAR
- Pin one of the raw edges of the collar to the raw edge of the jumpsuit neckline, right sides together.
- Sew the pinned edge of the collar to the neckline.
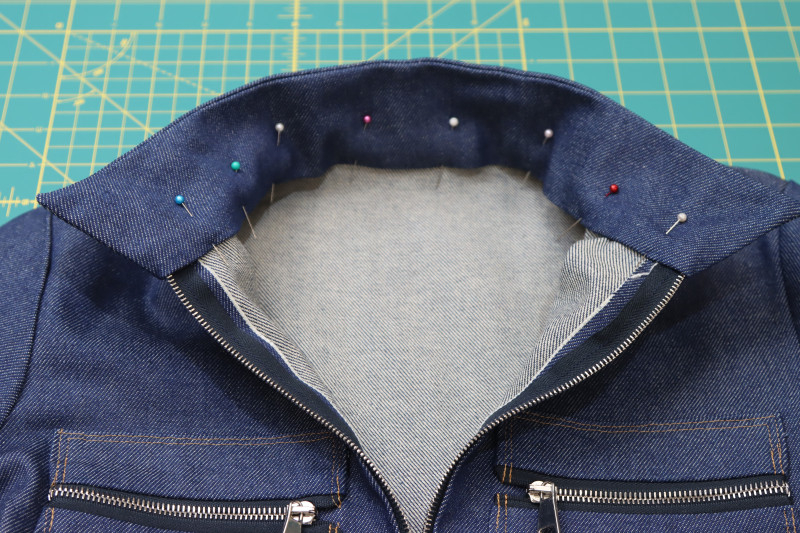
- Press the other raw edge of the collar toward the inside of the collar with a ½ inch fold.
- Pin the folded edge of the collar directly on top of the first neckline seam you just sewed earlier in this step, making sure that the ends of the zipper tape are sandwiched into the collar.
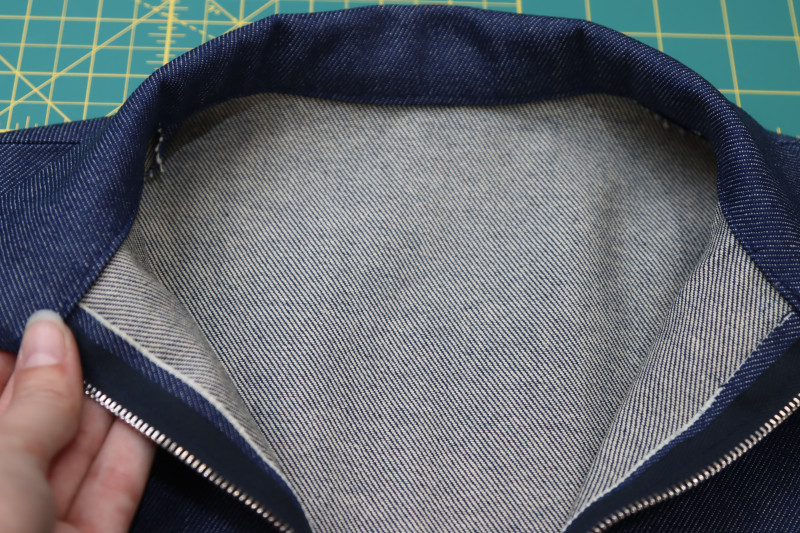
- Sew a stitch in the ditch at the neckline seam that attached the collar to the jumpsuit to attach the folded edge of the collar to the neckline.
- Make sure the stitch in the ditch is not visible from the outside and that the folded edge of the collar got caught in the seam.
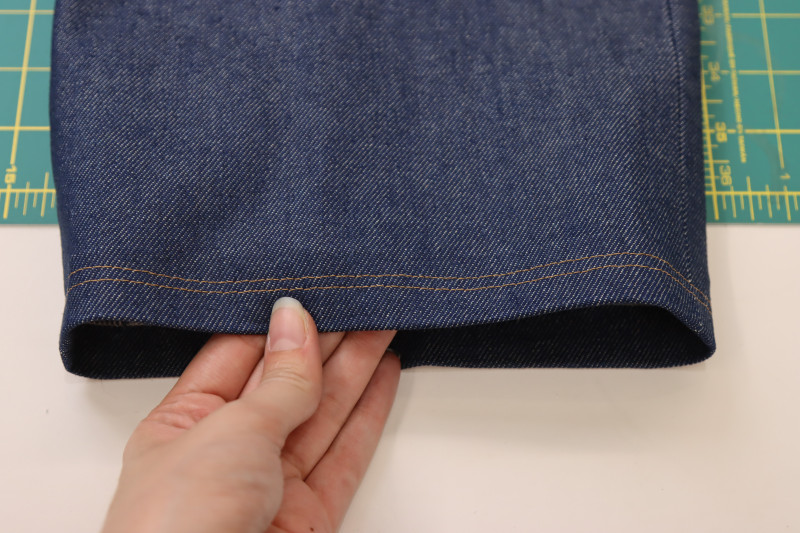
Step 17
HEM
- Fold the bottom hem of the pants up by 1 inch.
- Hem the pants the same way the sleeves were hemmed with contrasting stitching.
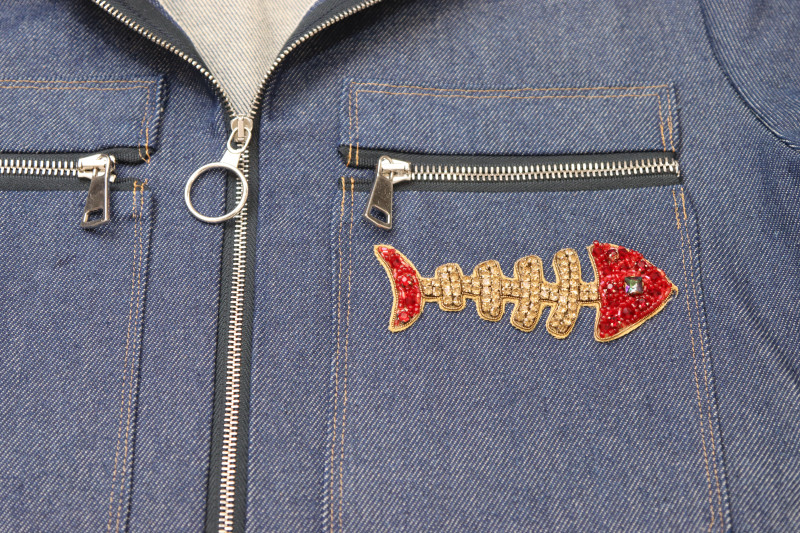
Step 18
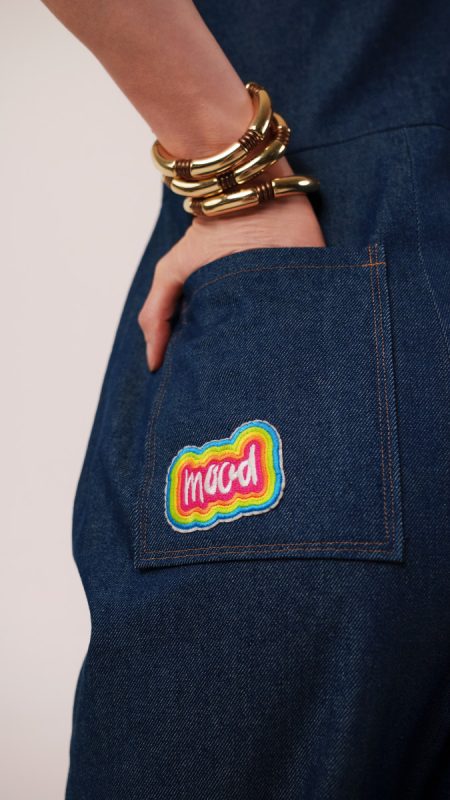
PATCHES & APPLIQUES
- Place the appliques or patches wherever you want them to be on the jumpsuit.
- If your applique or patch has adhesive backing (mine does not), simply place a piece of muslin over the patch and press the iron onto it until it adheres to the garment.
- If your applique or patch is not adhesive, use a hand sewing needle and a whip stitch to attach the edges/backing of it to the jumpsuit.
Sewing Success: The Finished Merit Jumpsuit
Share this post with a friend (or two!), download the Merit Jumpsuit free sewing pattern, and show us which fabrics and colors you choose, using the hashtags #MoodMeritPattern & #MadeWithMood—and don’t forget to tag us @MoodFabrics, too.

Free Sewing Pattern Inspiration for Your Next Project
With 500+ free sewing patterns and counting, your opportunities for sewing with Mood are endless!
We hope you had as much fun sewing this jumpsuit pattern as we did! As always, we want to hear from you—share your thoughts and comments below and let us know where you’ll be wearing the Merit Jumpsuit free sewing pattern!
Can’t get enough sewing with Mood? Browse your next make with our latest free sewing patterns.
This is so adorable but I hate the feeling of a zipper against my skin. Any recommendations on how to change that?
Hey Atlas, this is a great question. The only thing I would change is adding a fly shield to the inside of the zipper. To do that, you have to cut out a piece of fabric that is as long as your zipper and roughly 4 inches wide. Fold this strip of fabric in half, wrong sides together, and serge or zigzag the raw edges. Then, AFTER you attach your zipper on one of the sides of the center front opening, sew the zipper shield to the zipper tape on the wrong side (inside) of the jumpsuit. Literally just top stitch it on, or you can just sew it to the zipper tape/seam allowance of the zipper. This piece of fabric will protect your skin from the cold metal of the zipper. I hope this helps! Let me know if you try it.
I love this garment! I was wondering if the pattern would work on a lighter-weight / cooler fabric for the summer?
Hey Peggie! Yes you could absolutely use a linen or a thinner twill than the denim in this sample.
Hi good afternoon. Can you please share some simple dresses and pants suits so that I can sew my nursing uniforms? Thanks in advance
Hey Alana! I recommend taking a look at the Lydia Loungewear Set and the Taormina Joggers, both of them are easy and versatile patterns that can be used for loungewear or workwear depending on the setting!
This would be awesome in some sort of UPF thin lightweight fabric, like a sportswear brand button up shirt for hiking. I wonder what the equivalent would be at mood! I would wear this for all my yardwork with a long sleeve made in UPF material
Hello, I have been printing and cutting out several of the recent Mood patterns. How many yards of fabric would be required for size 3 or 4 XL? Also can 44” wide fabric be used?
Hey Tamara, I recommend 5 yards for a 3X or 4X. Maybe even 6 if you’re using a fabric with 44 inch width.
Would this work with stretch denim or does is need to be a non – stretch fabric?
Hey Gen, you can use a stretch denim for this. Just make sure you pick the size with the finished garment measurements that you desire. Stretch denim means it has the potential to be more skin tight if you want it to be.
This pattern is SOOO cute! I used it to make an oversized jumpsuit and it was the perfect amount of oversized (I’m a size 4/6 and I made a size 10). Thank you MOOD for making it super simple to follow along and for an easy-alter pattern! We love you guys!
Thank you MOOD