

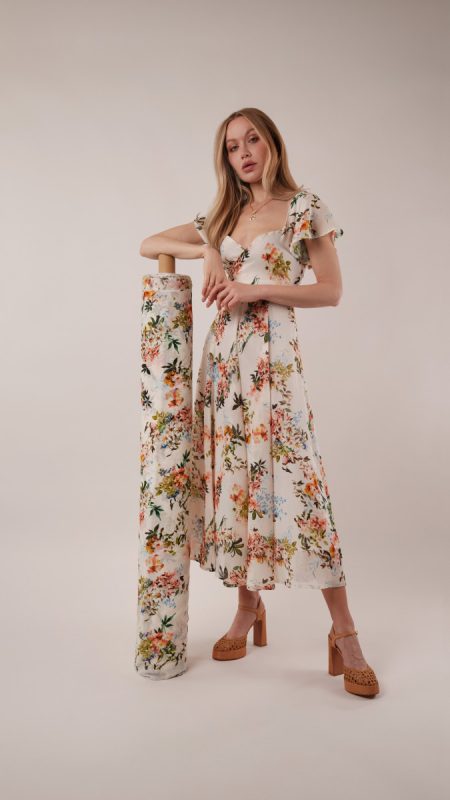
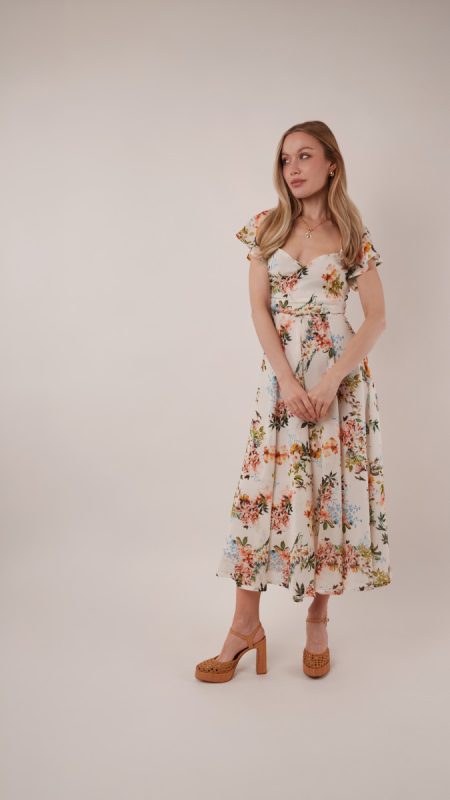
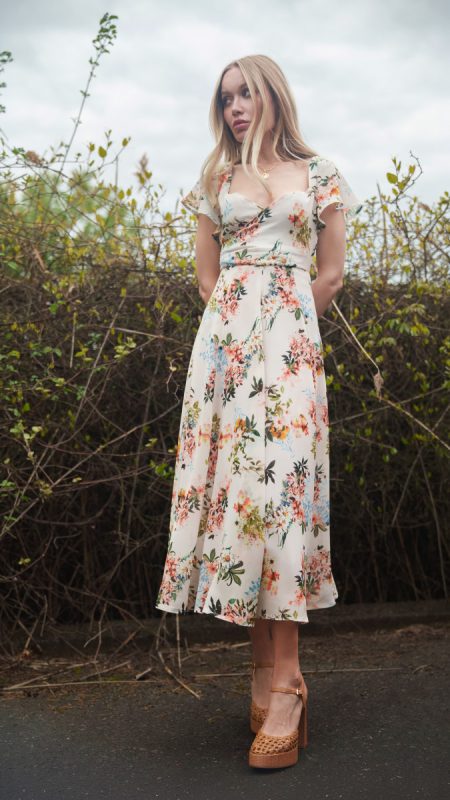
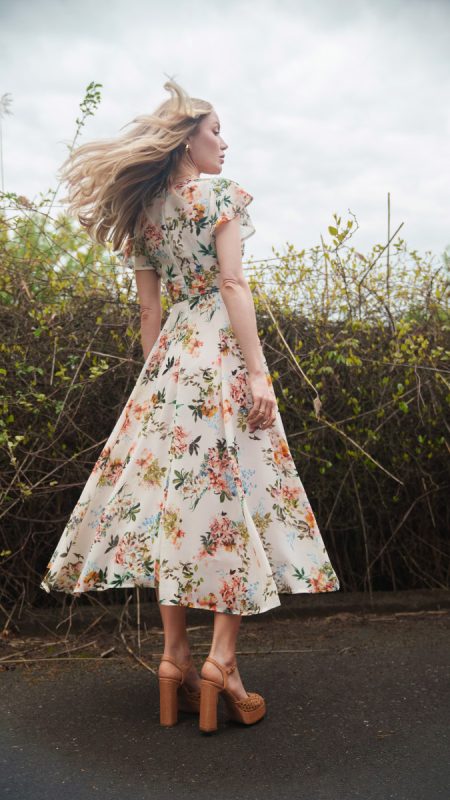
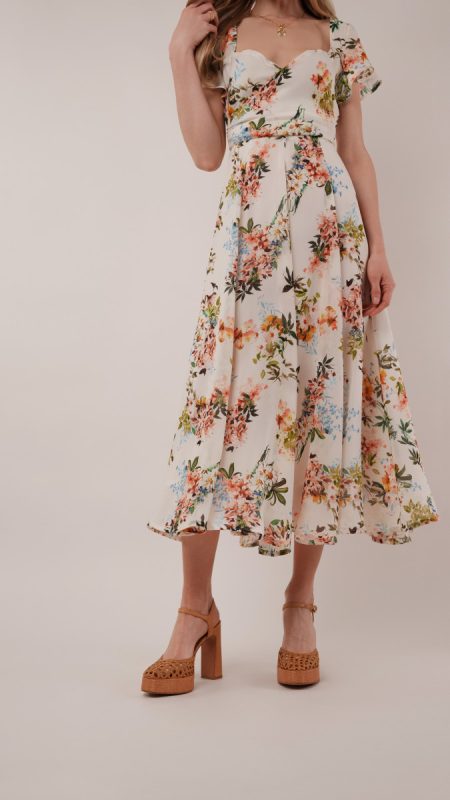
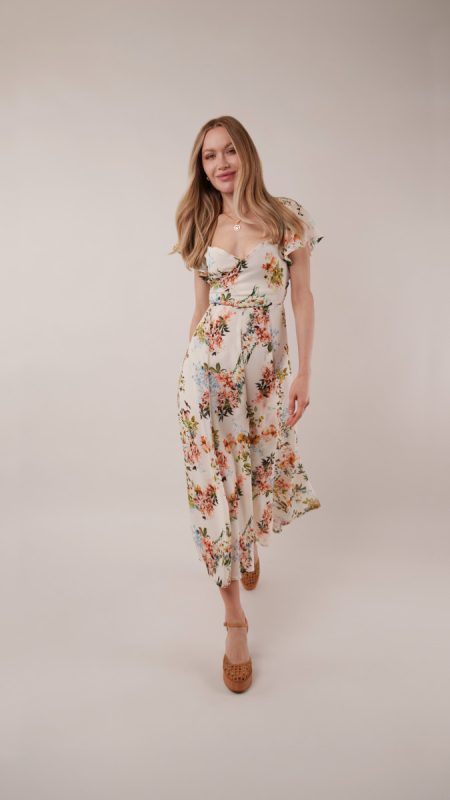
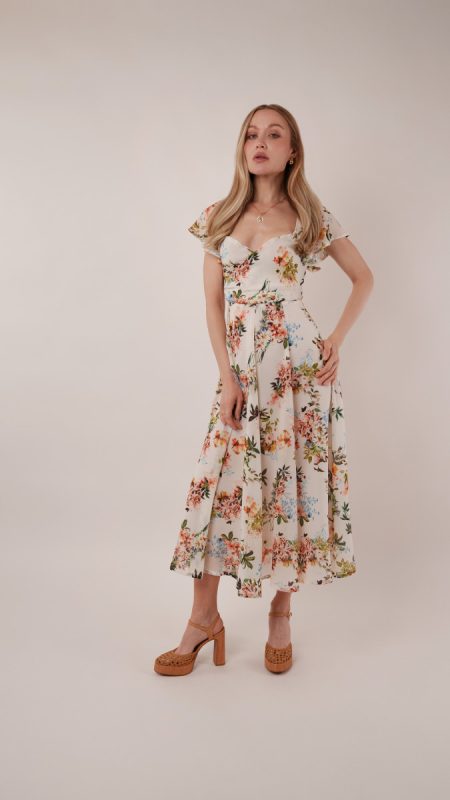
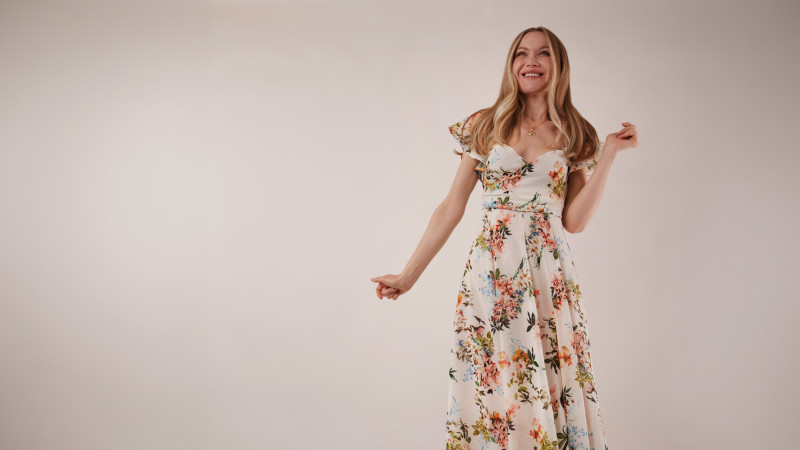
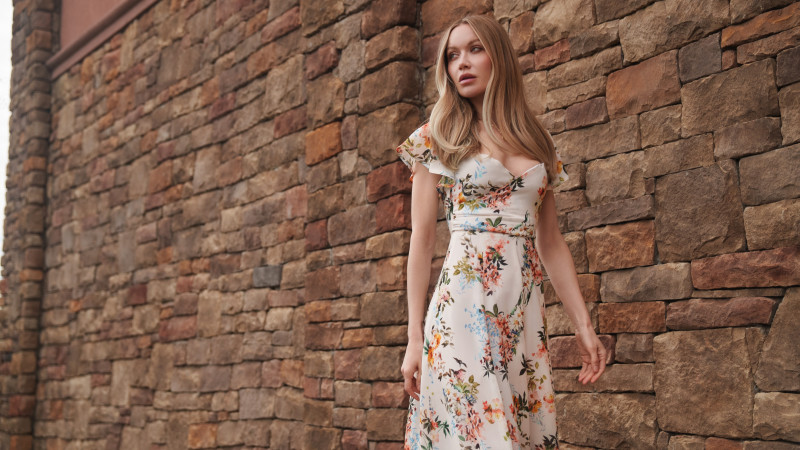
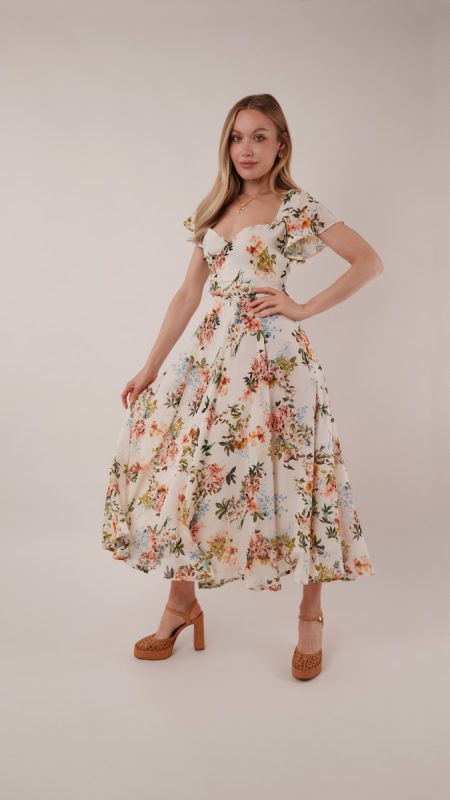
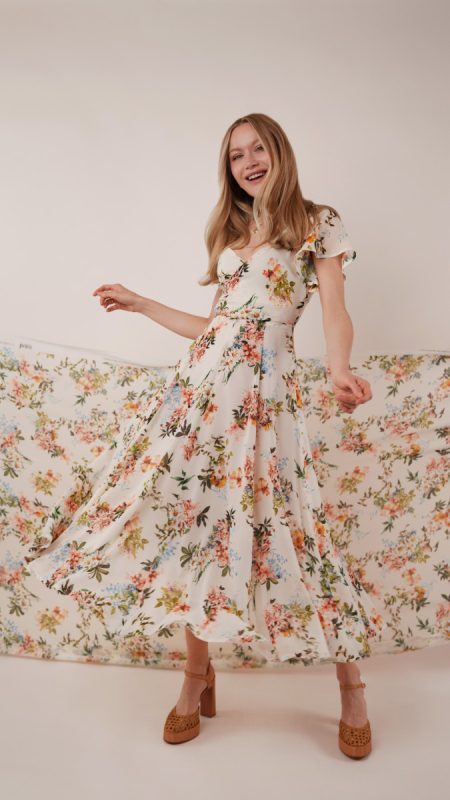
Florals for spring? Groundbreaking… but honestly, when they look this good, we’re not complaining. The Valensole Paneled Gown is the kind of dress that feels made for golden hour garden parties, spring weddings, bridal showers, and every excuse to throw on a dress that is made for twirling.
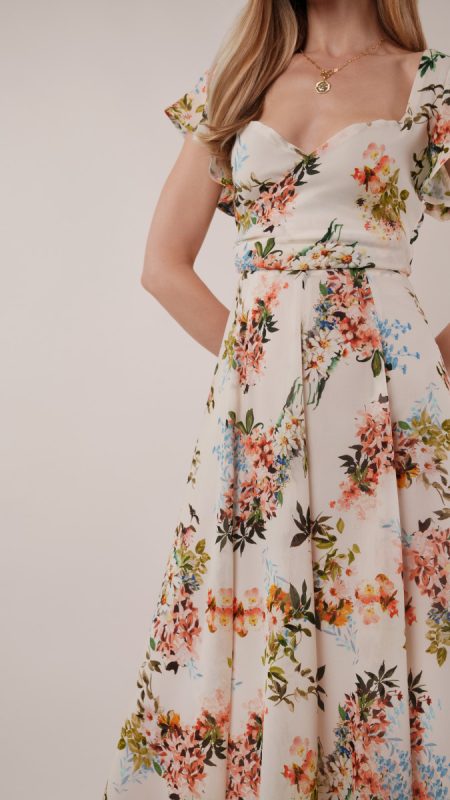
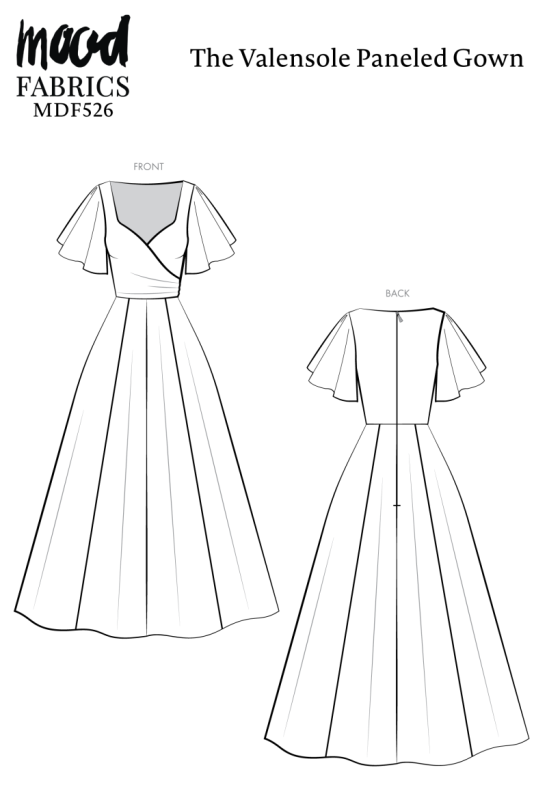
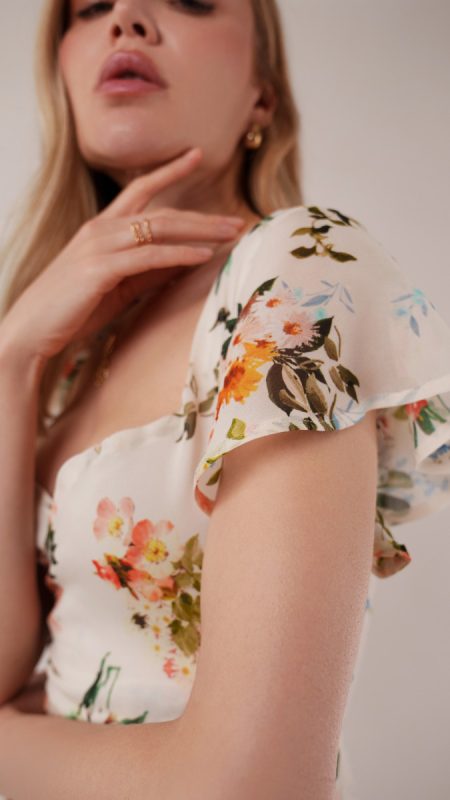
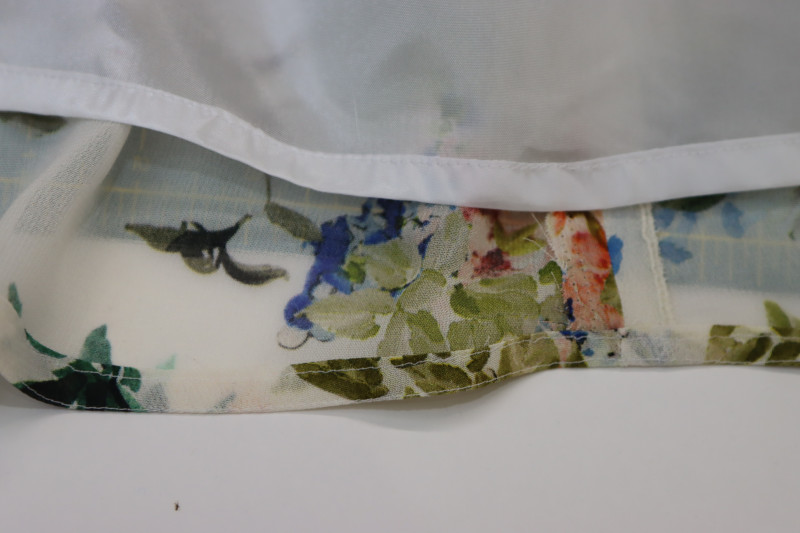
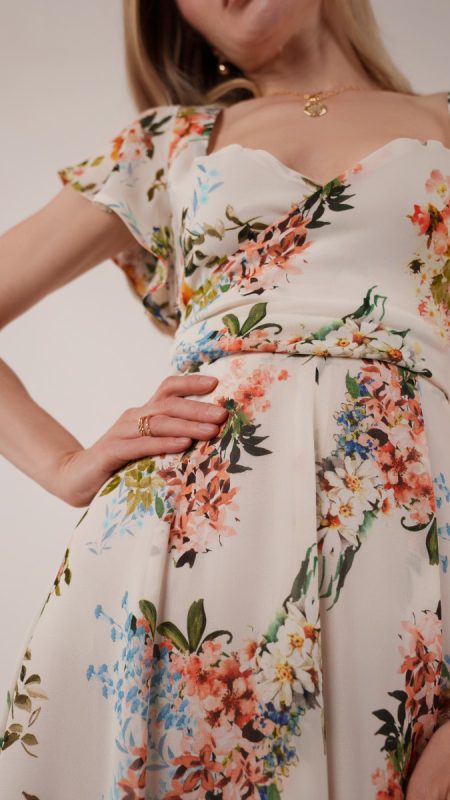
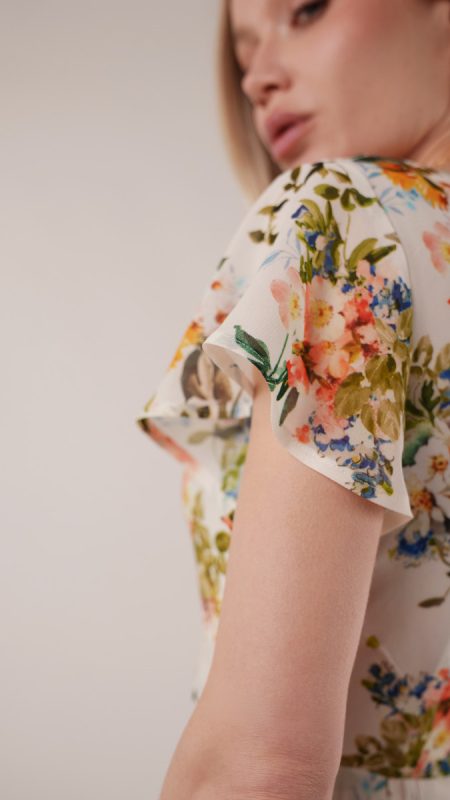
Made from a sheer and silky viscose georgette in a dreamy pastel floral print, this gown is classically elegant and romantic. The flutter sleeves add light, airy movement, while the gathered bust and sweetheart neckline create a flattering, feminine silhouette that feels timeless without trying too hard.
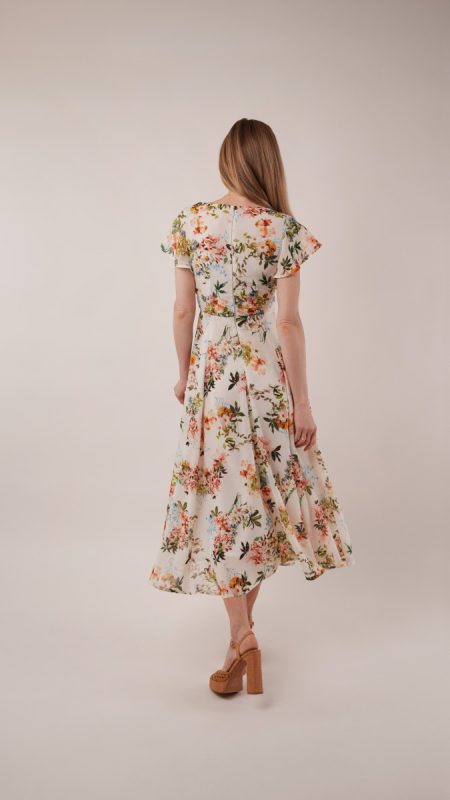
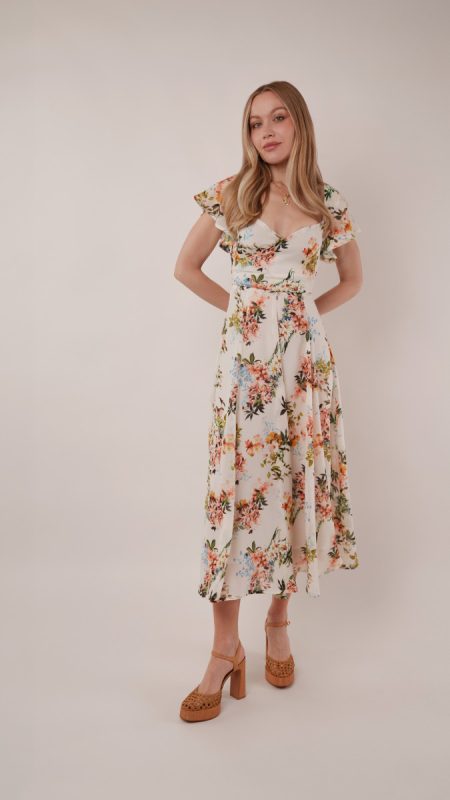
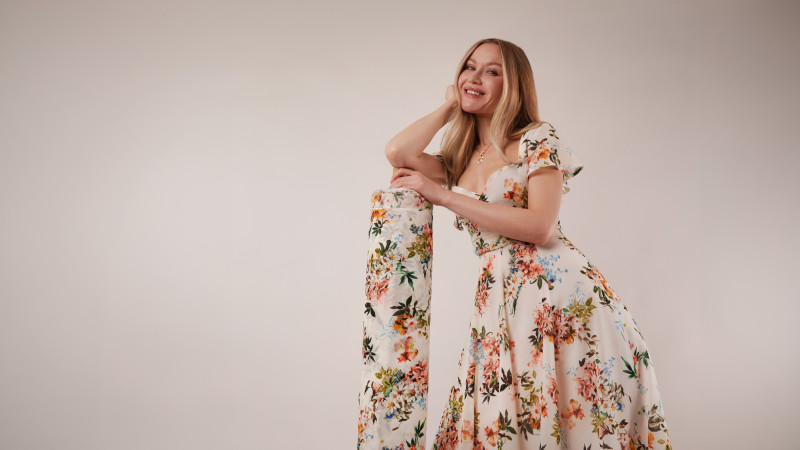
And despite all that drama, the construction is surprisingly approachable. The skirt comes together quickly with just 8 mirrored panels, giving you all that sweeping volume without the headache. It’s the perfect project for when you want something that looks impressively intricate but is actually kind of a breeze.
Pretty and polished with a touch of drama, the Valensole Paneled Gown is ready for whatever RSVP you’ve been avoiding.
Essential Materials & Sizing Guide for the Valensole Paneled Gown
Continue reading for a breakdown of what knowledge and materials you need for creating your very own paneled gown! We’ve got you covered with the recommended materials we used—if you want to follow along exactly—as well as a curated list of alternative fabric type recommendations if you want to customize your own version. The Valensole Paneled Gown free sewing pattern download includes technical drawings for seam and silhouette visibility, plus a size chart to help you find your perfect fit!
Purchase Products Used Below:
Quantities indicated are for sewing a size small* paneled gown. Toggle the ‘SHOP THIS LOOK’ box to find quantity estimates for other sizes.
- 6 yards of Mood Exclusive White Arranged to Engage Viscose Georgette
- 4 yards of Polyester Lining Fabric – White – Margot Collection
- 1 each of Invisible Zipper 24″ by YKK – 316 Light Gray
- 1 each of Gutermann Sew All Thread 500m – 800 Champagne
- 1 each of Dritz Nickel Hook & Eyes Size 1 – 14ct
- MDF526 – Valensole Paneled Gown Sewing Pattern (Free download below!)
Additional Products Used:
*Quick Tip! The ‘SHOP THIS LOOK’ box defaults to full-yard quantities. To order an exact half-yard quantity for any fabric, simply use the decrease quantity button (-) to subtract by the half yard. Then click “ADD TO CART” to add all materials to your cart. (Our system can only display full-yard quantities initially.)
Alternative Fabric Type Recommendations:
The Valensole Paneled Gown sewing pattern is best suited for light or feather weight fashion fabrics. Explore other fabric types or colors from our featured collections for your paneled gown with the links below.
Download Your Free Sewing Pattern
Submit your name and email in the form below to receive the download link for the Valensole Paneled Gown free sewing pattern directly in your inbox. Mood Sewciety Patterns will send your free download link via email with the subject line: ‘Your Free Download from Mood Sewciety – The Valensole Paneled Gown’ (in PDF format for A4 and letter-size printing).
© MoodFabrics.com / MoodSewciety.com – Mass production, resale, or distribution of this pattern in any form is strictly prohibited.
Find Your Perfect Fit
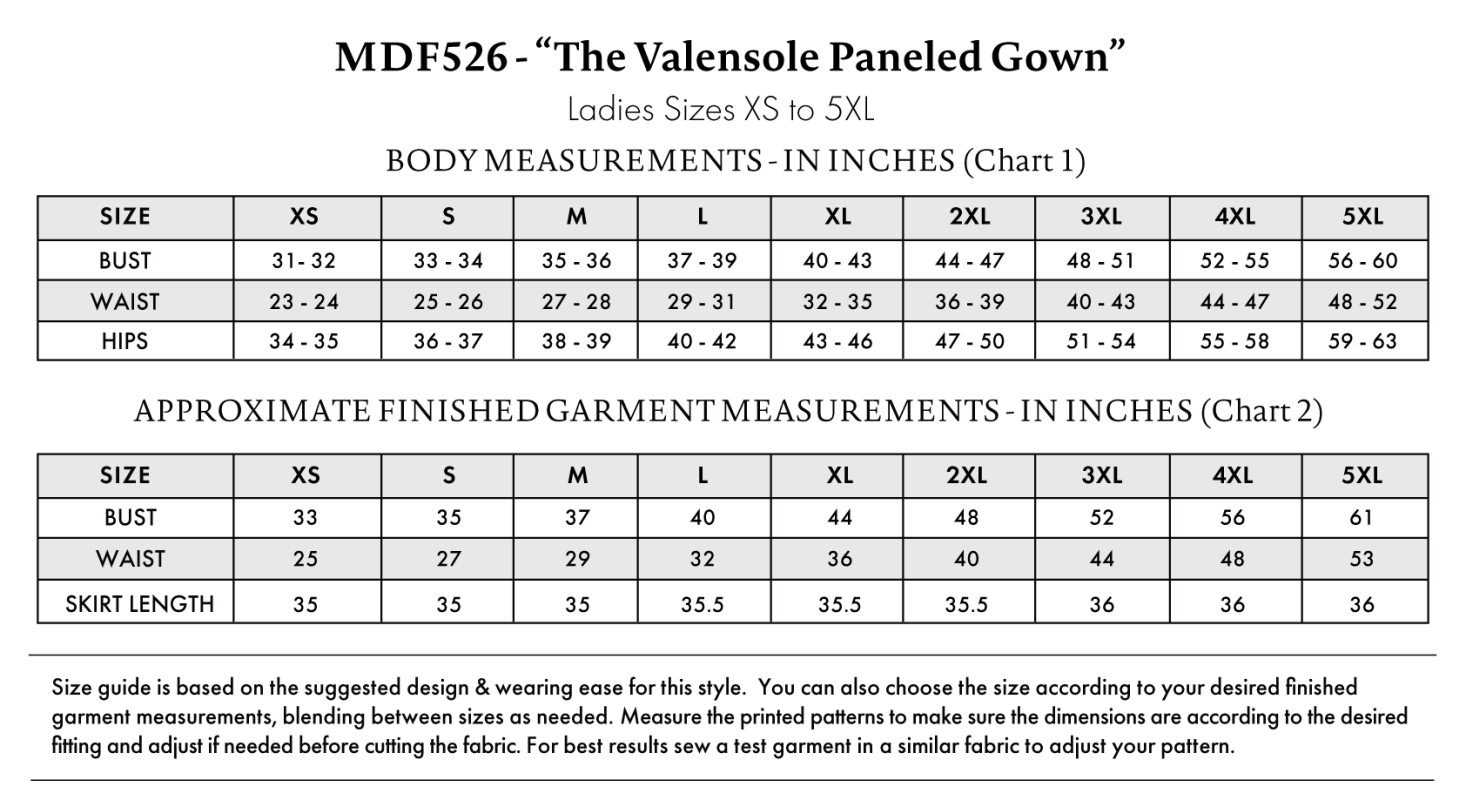
The Valensole Paneled Gown Sizing Guide is based on the suggested design & wearing ease for this style. You can also choose the size according to your desired finished garment measurements, blending between sizes as needed. Measure the printed patterns to make sure the dimensions are according to the desired fitting and adjust if needed before cutting the fabric. For best results, sew a test garment in a similar fabric to adjust your pattern.
Note: Always read all the instructions before cutting the fabric!
How to Sew The Valensole Paneled Gown
The instructions provided below are designed to guide you through sewing the Valensole Paneled Gown from start to finish.
3 Tips for Sewing with Viscose Georgette
⇒ Use a super fine super sharp Microtex needle on your sewing machine to prevent pulls in the viscose georgette.
⇒ Use silk pins for pinning your fabric together. This will prevent pulls in your fabric and it will prevent the fabric from shifting on the bias while you sew it.
⇒ I didn’t show how to do this in the tutorial, but if you plan on wearing and washing this dress a lot (and don’t have the self control to only hand wash/dry clean it) then I recommend doing French seams on the entire skirt.
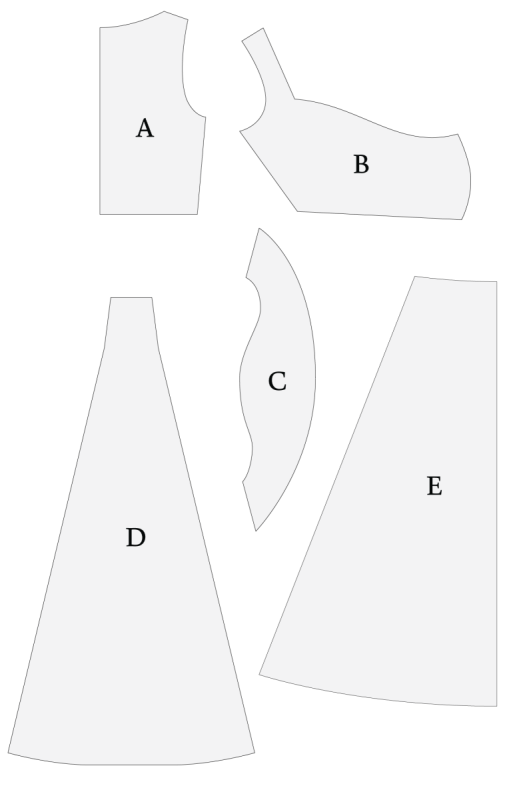
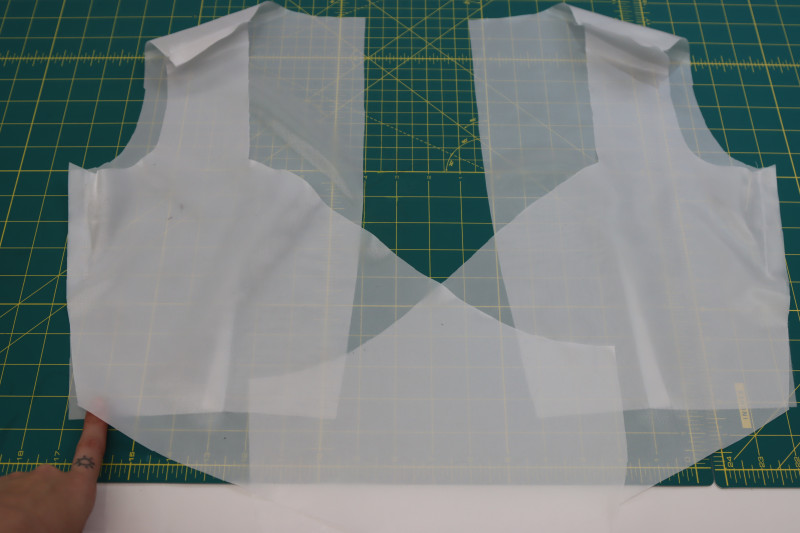
Pattern Pieces & Fabric Cuts Needed
- (A) TOP BACK
- Fabric – Cut 2 Mirrored
- Lining – Cut 2 Mirrored
- (B) TOP FRONT
- Fabric – Cut 2 Mirrored
- Lining – Cut 2 Mirrored
- (C) SLEEVES
- Fabric – Cut 2 Mirrored
- (D) SKIRT PANELS
- Fabric – Cut 8
- (E) SKIRT LINING
- BACK: Lining – Cut 2 Mirrored
- FRONT: Lining – Cut 1 on Fold
Sew with a 1/2″ seam allowance for all seams unless otherwise specified.
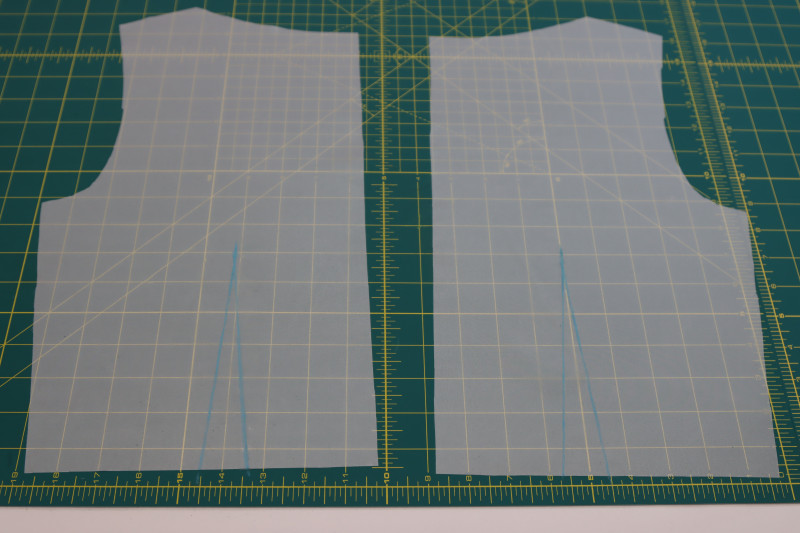
Step 1
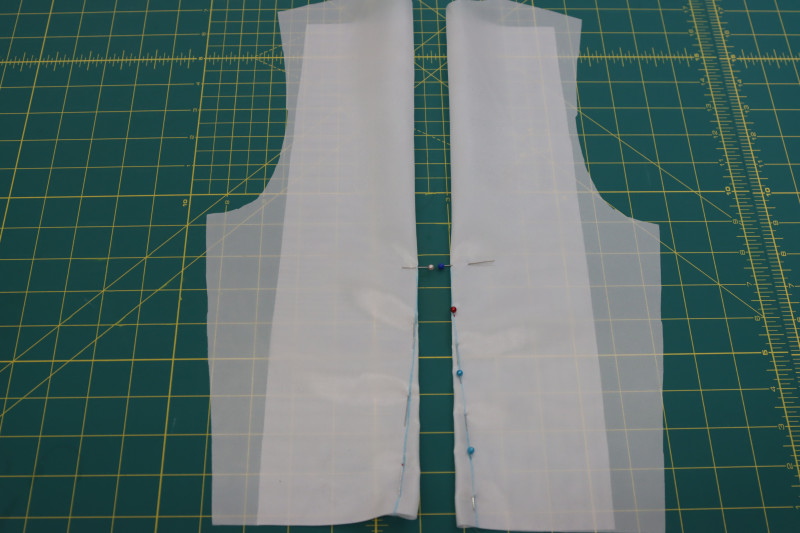
BACK DARTS
- Mark the back darts on the wrong side of the back bodice pieces using tailor’s chalk.
- Fold the back bodice pieces right sides together with the dart centered on the fold.
- Pin the two chalk lines of the dart together.
- Sew along the chalk lines.
- Press the darts towards the side seams.
- Repeat for both the lining pieces and the outer fabric pieces.
- NOTE: There is an optional dart on the bust neckline. I recommend making a muslin draft of the top first to check if you need it or not. If you choose to use the bust dart, sew them the same way the back darts are sewn.
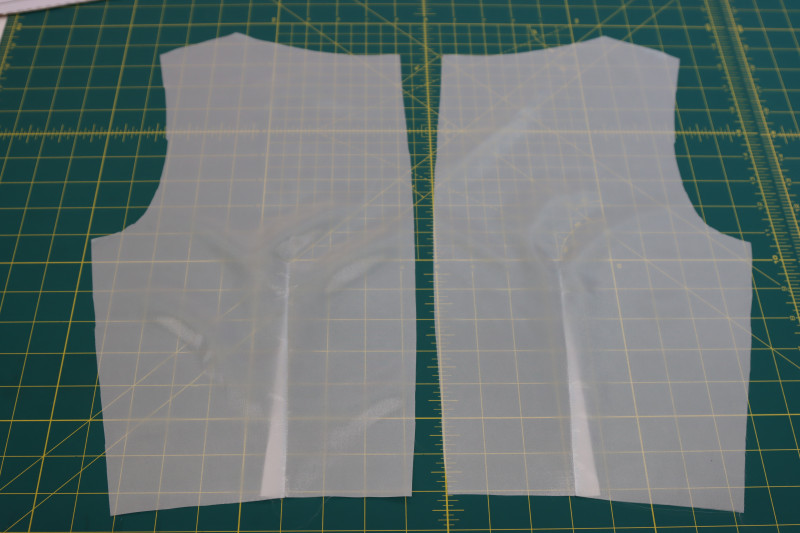
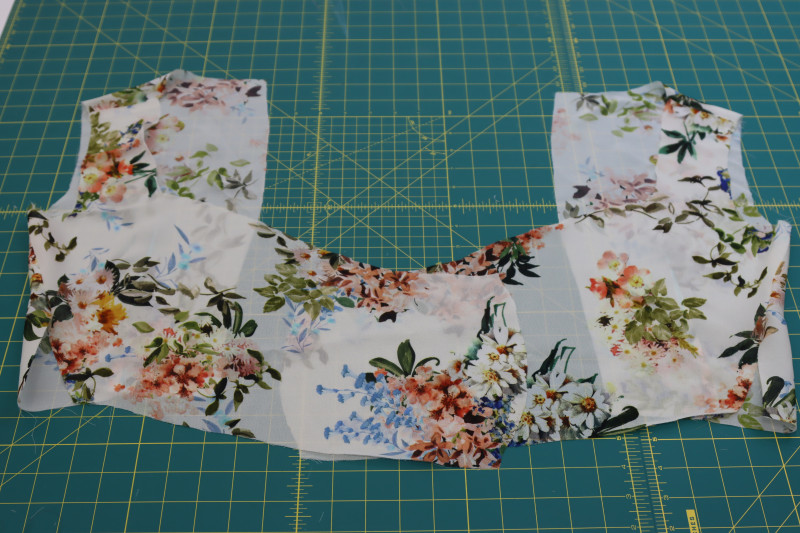
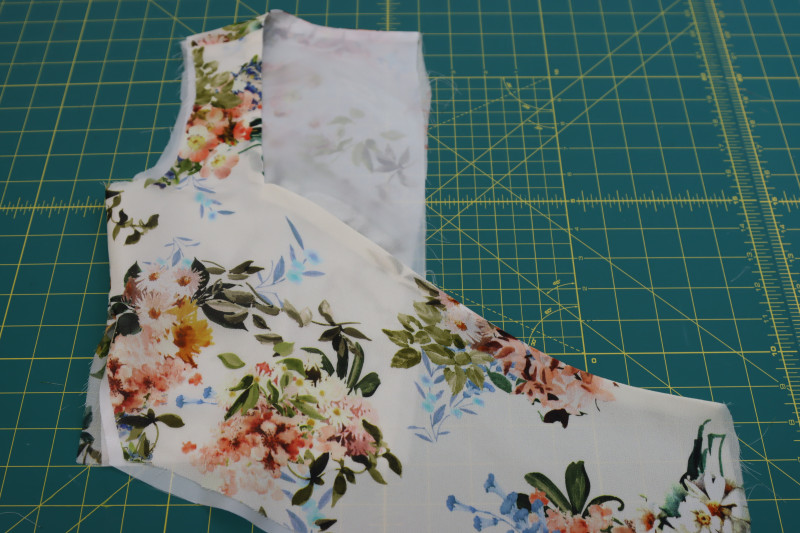
Step 2
SHOULDER & SIDE SEAMS
- Place the front bodice pieces right sides together onto the back bodice pieces.
- Line up the shoulder and side seams of the front and back pieces.
- Pin and sew the front and back pieces together at the shoulder seams.
- Pin and sew only the top half of the side seams of the bodice (you’ll see why later).
- Repeat for both the lining bodice and the main fabric bodice.
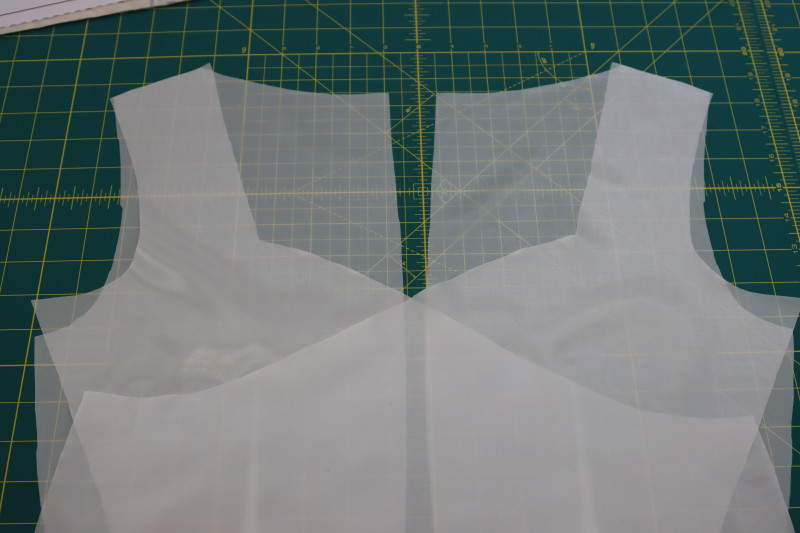
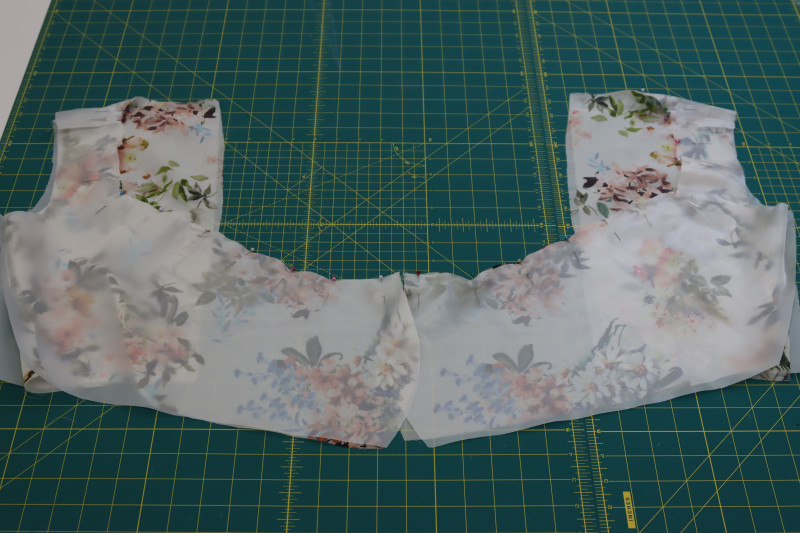
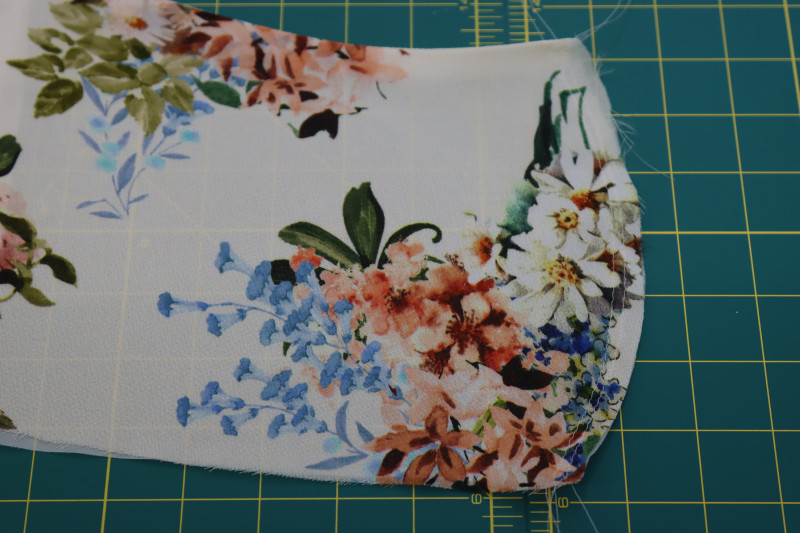
Step 3
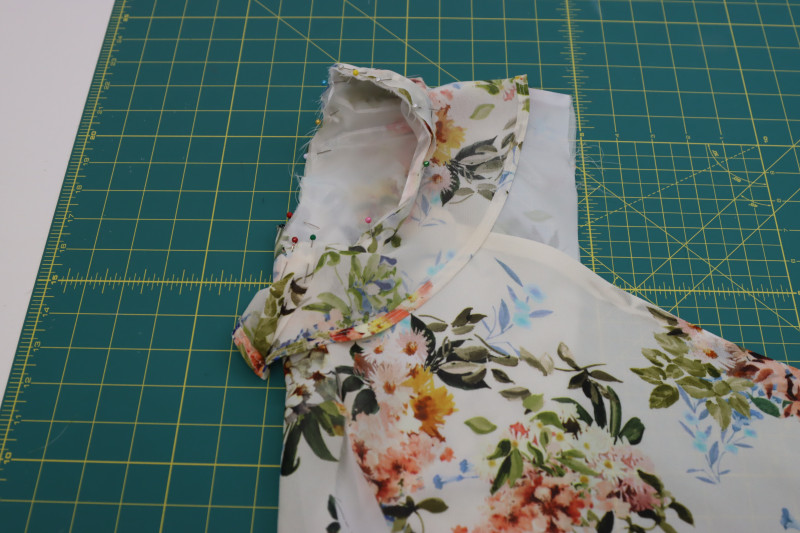
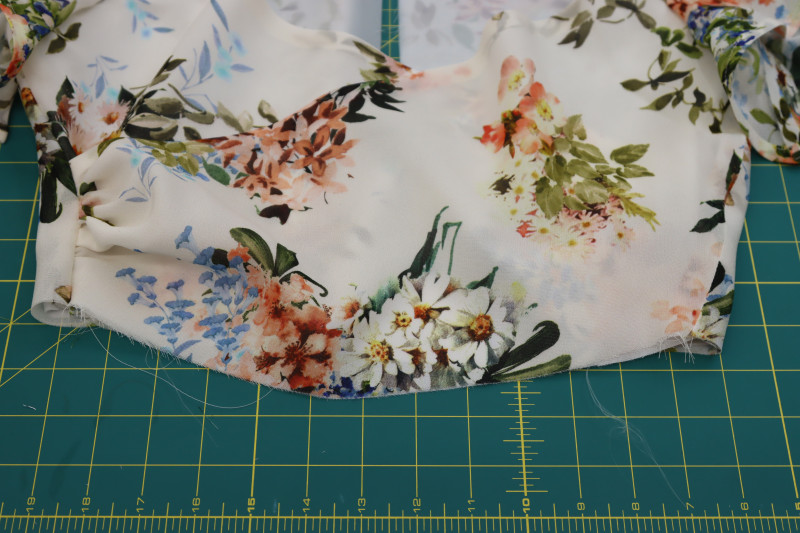
NECKLINE
- Place the lining bodice pieces right sides together with their corresponding main fabric bodice piece.
- Pin around the entire neckline on both sides of the bodice.
- Sew the neckline.
- Clip the corners and rounded edges of the neckline.
- Flip the necklines right sides out and press the seams.
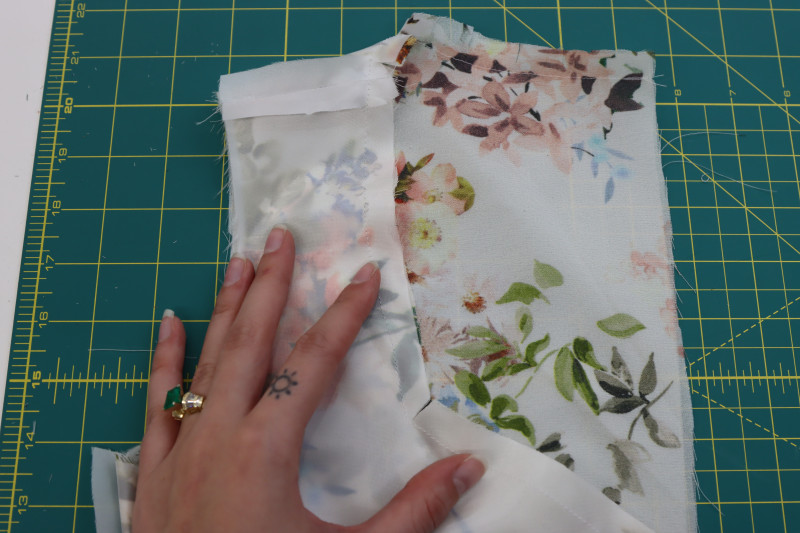
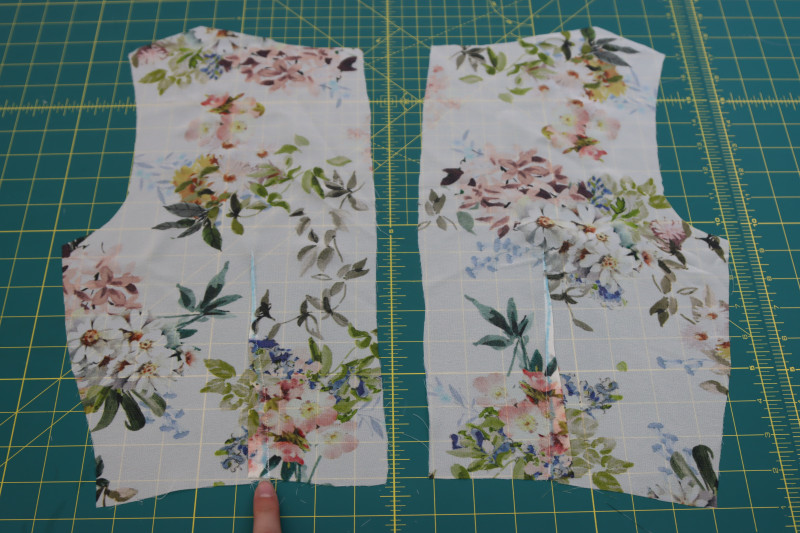
Step 4
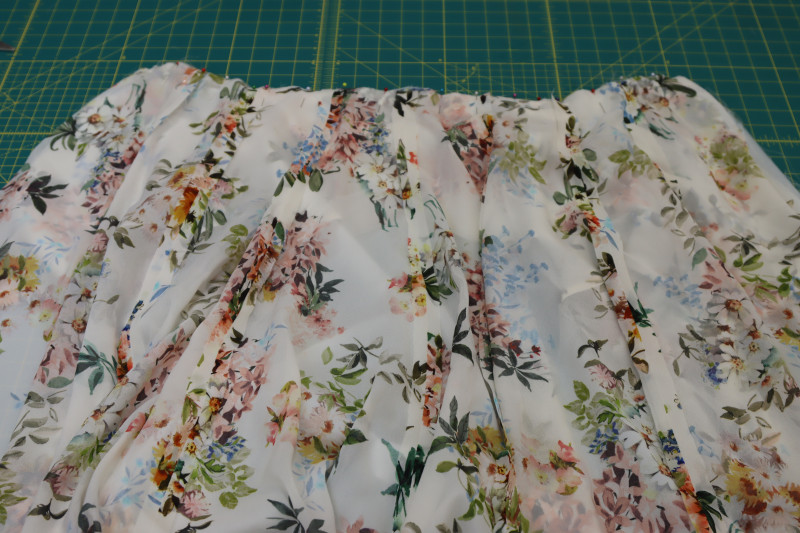
GATHERS
- Sew two parallel straight stitches with a stitch length of 4 millimeters along the short edge of the front bodice pieces.
- Begin pulling on the top threads of the two stitches to gather the side of the front bodice.
- Do this on both of the front bodice pieces.

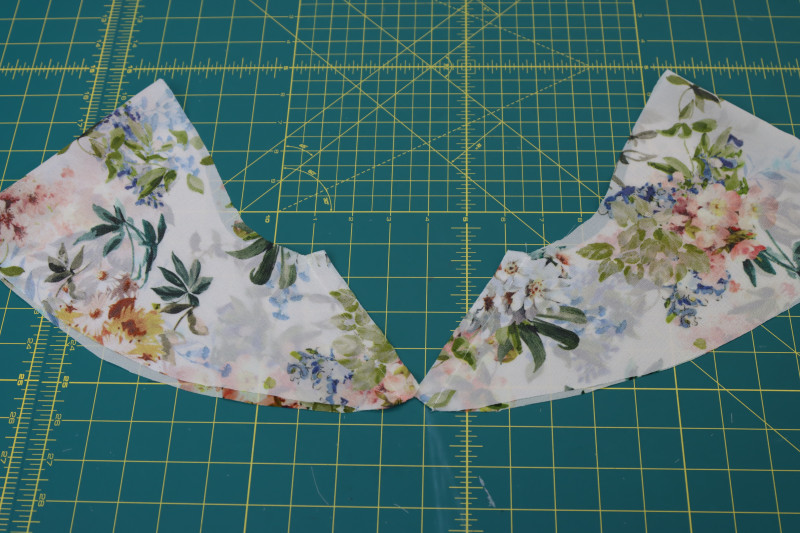
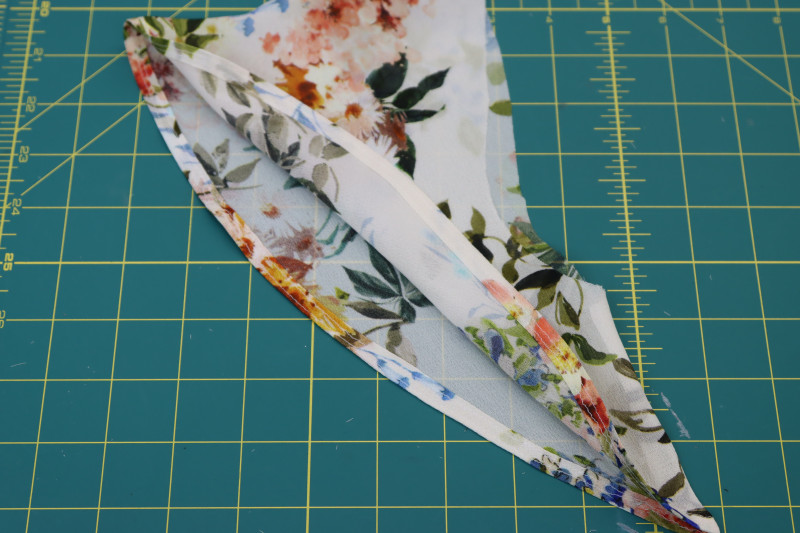
Step 5
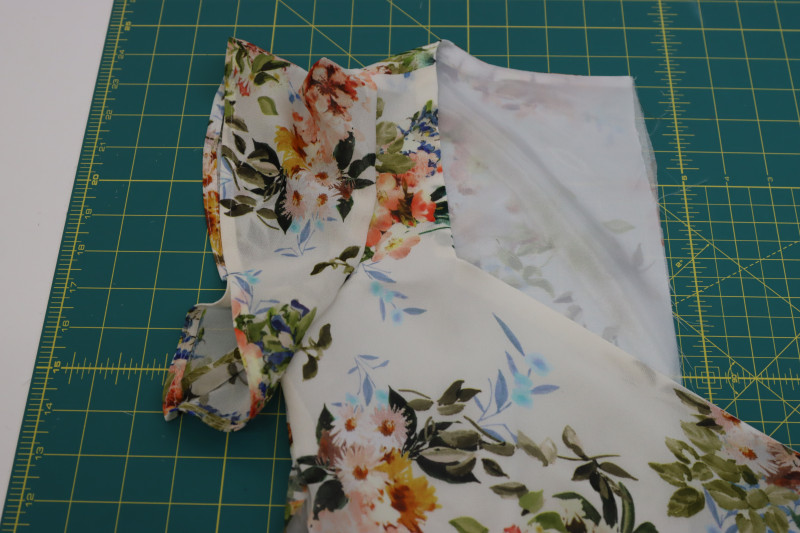
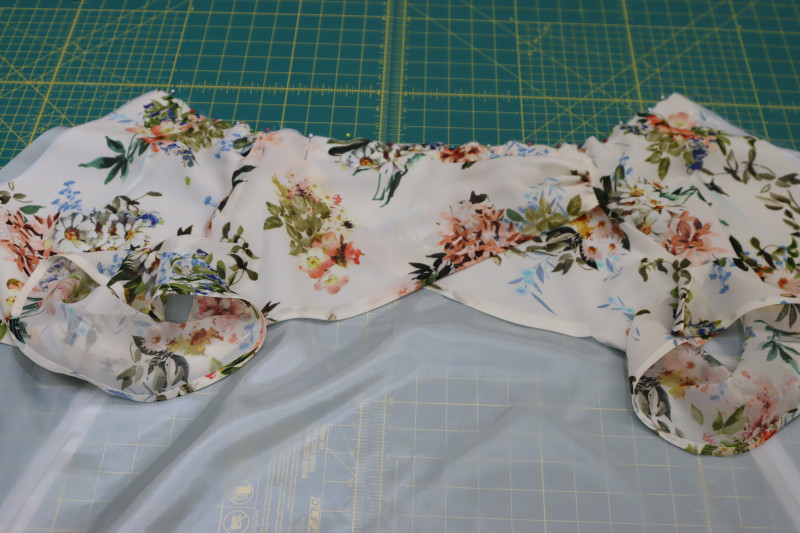
SLEEVES
- Fold the sleeves right sides together with the inseams lined up.
- Pin and sew the sleeve inseams.
- Press the sleeve inseams open and flat.
- Hem the bottom edge of the sleeves with a double rolled ¼ inch hem.
- Pin the sleeves right sides together with the armscyes of the bodice.
- Sew the sleeves to the bodice.
Step 6
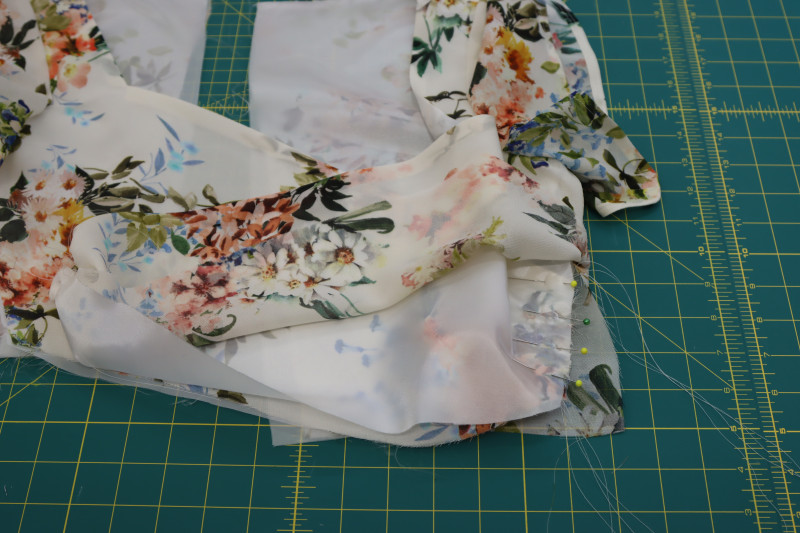
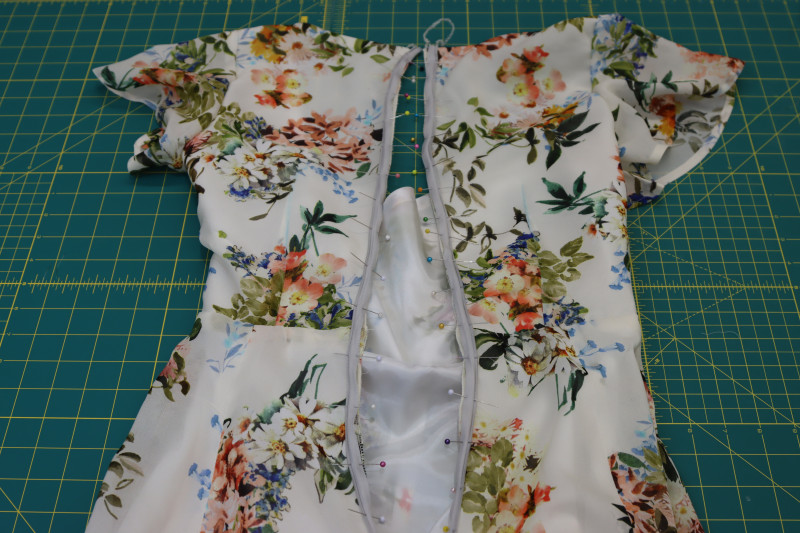
SECURE GATHERS
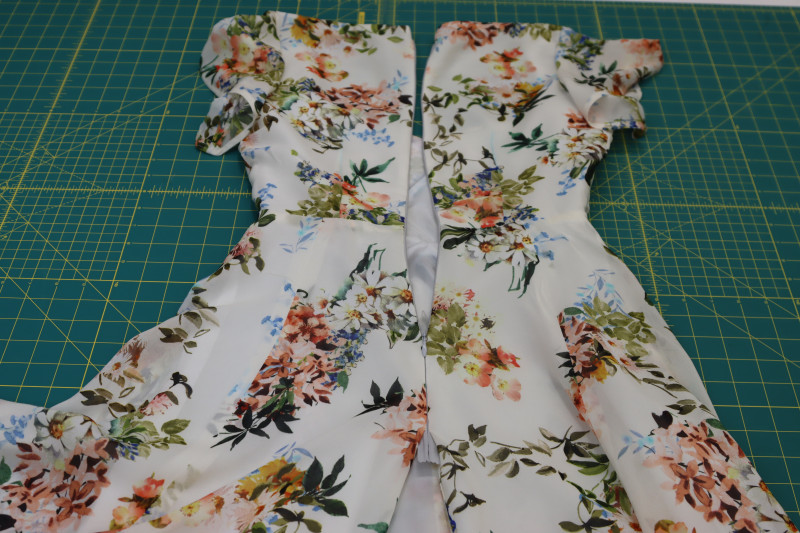
- Try and follow along with this explanation: At the front of the bodice, one layer will be on the outside and one will be on the inside. This means the bodice has overlapping layers in the front. In order to make all these layers secure and to hide all the raw edges, we have to sew the gathered edge of the bodice into the side seams.
- For the outside layer, sandwich the gathered side of the bodice in between the MAIN FABRIC side seam.
- Pin and sew the outside layer of the bodice in between the main fabric side seam. Close the main fabric side seam OPPOSITE to the one with the gathered fabric in it as well.
- For the inside layer, sandwich the gatherer side of the bodice in between the LINING side seam on the inside of the dress.
- Pin and sew the inside layer of the bodice in between the lining side seam. Close the lining fabric side seam OPPOSITE to the one with the gathered fabric in it as well.
- NOTE: At this point, I recommend trying on the bodice. If it seems like the neckline is too low or is not sitting flat against your chest, now would be the time to add a elastic into the neckline. To do so, cut 2 pieces of elastic that are each 2/3 of the length of the of one side of the neckline. Pin and sew one side of the elastic to the corner of the neckline where it meets the strap and sew the other side of the elastic into the side seam. The elastic should be in between the main fabric and the lining. After securing both sides of the elastic, sew a stitch under it to create a channel for it to stay in. Do this on both the left and right side of the bodice neckline. This will also give the neckline of the dress that “milkmaid dress” style.


Step 7
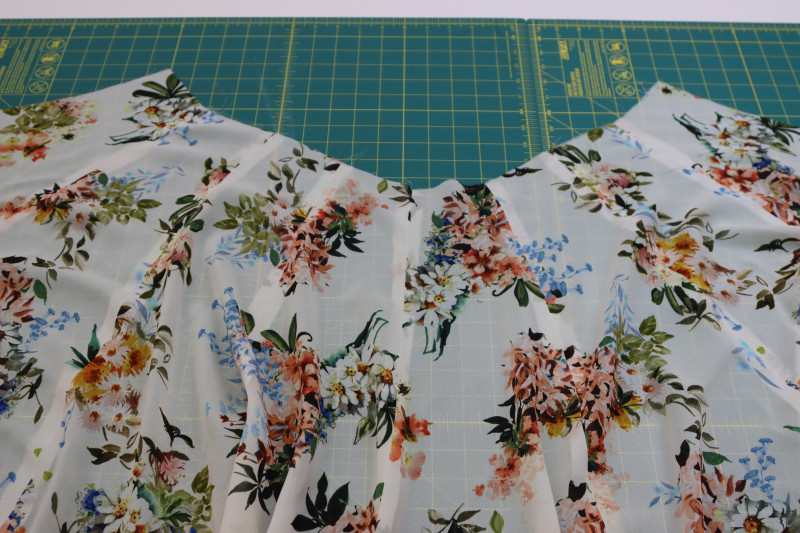
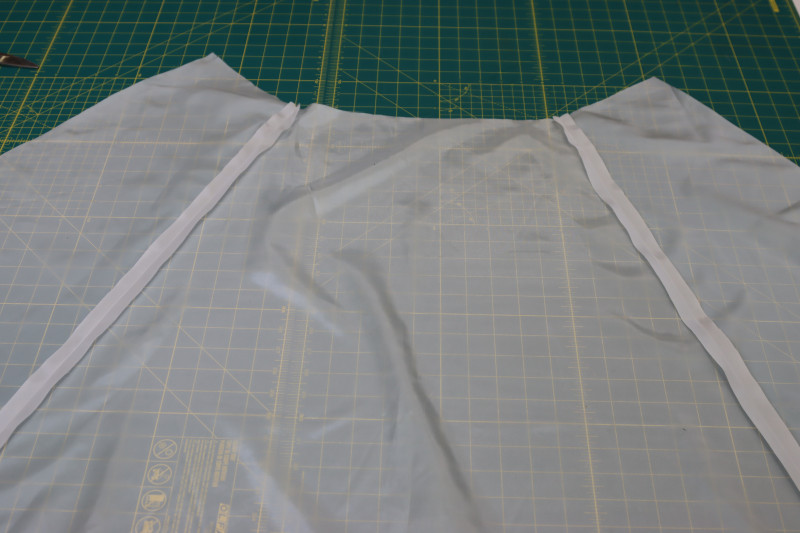
SKIRT PANELS
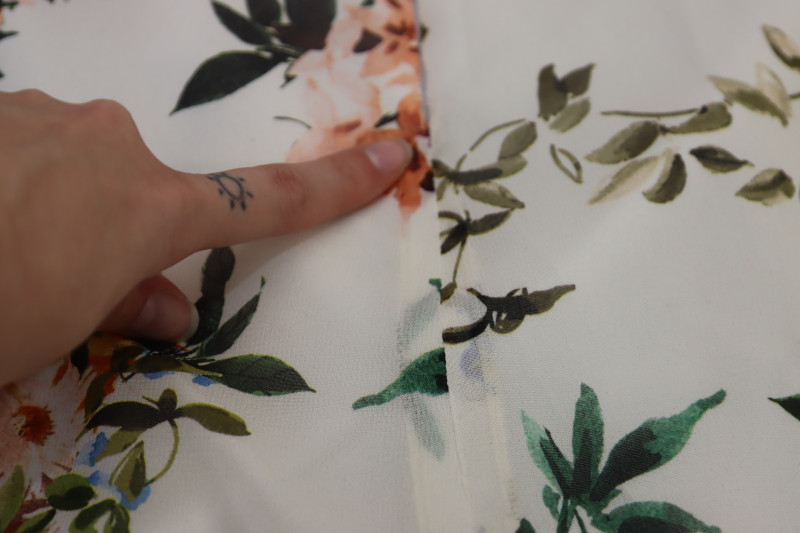
- Sew all 8 of the skirt panels to each other at the side seams, leaving each end open.
- Press all the skirt seam open and flat.
- Place the back skirt linings right sides together on top of the front skirt lining.
- Pin and sew the side seams of the skirt lining.
- Press the lining side seams open and flat.
Step 8
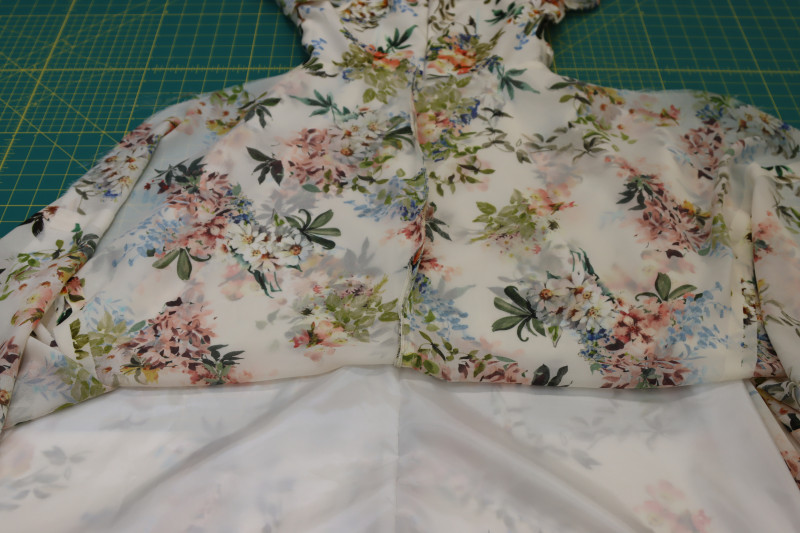
WAISTLINE
- Lay the bodice onto the lining skirt so that the lining of the bodice and the lining skirt are right sides together.
- Layer the main fabric skirt on top of the bodice and lining skirt so that the main fabric of the bodice and the main fabric skirt are right sides together.
- Pin and sew the waist seam of the dress with all the layers sandwiched together.
Step 9
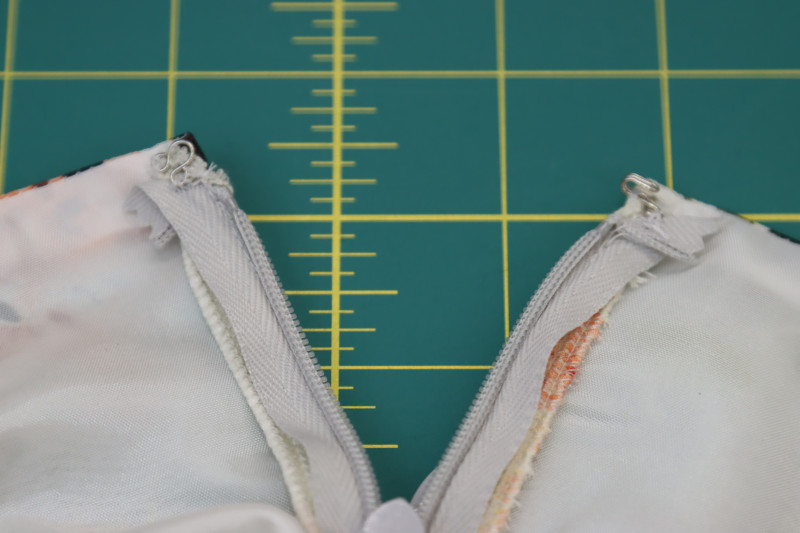
INSERT ZIPPER
- Pin the invisible zipper right sides together with both sides of the center back opening, making sure that the waist and neckline seams line up on either side of the zipper.
- Sew the zipper tape close to the teeth on both sides of the center back opening.
- Zip the zipper and press the zipper seams open and flat.
- Pin and sew the rest of the lining closed under the zipper at the center back seam.
- Pin and sew the rest of the main fabric closed under the zipper at the center back seam.
- Press the center back seams open and flat.
Step 10
HOOK & EYE
- Hand sew a hook and eye closure to the center back neckline of the dress above the zipper.
Step 11
HEMS
- Hem the lining skirt and the main fabric skirt with a ½ inch double rolled hem.
Sewing Success: The Finished Valensole Paneled Gown
Share this post with a friend (or two!), download the Valensole Paneled Gown free sewing pattern, and show us which fabrics and colors you choose, using the hashtags #MoodValensolePattern & #MadeWithMood—and don’t forget to tag us @MoodFabrics, too.
Free Sewing Pattern Inspiration for Your Next Project
With 525+ free sewing patterns and counting, your opportunities for sewing with Mood are endless!
We hope you had as much fun sewing this paneled gown pattern as we did! As always, we want to hear from you—share your thoughts and comments below and let us know where you’ll be wearing the Valensole Paneled Gown free sewing pattern!
Can’t get enough sewing with Mood? Browse your next make with our latest free sewing patterns.
Hi there! What does “cut 2 mirrored” mean? When cutting out the pattern pieces
Hey Anna, “Cut 2 Mirrored” means you have to cut two pieces of fabric that are symmetrically opposite to each other. This usually means you’ll want to fold your fabric right sides together and place the pattern piece on both layers of the fabric, then cut it out. This will give you two pieces are are “mirrors” of each other.
I **adore** this pattern!! I can’t wait to sew it. I have the perfect viscose floral for this in my stash.
Quick question on lining fabric options: would a lightweight/featherweight linen (like a handkerchief weight linen or linen lawn) be an appropriate substitution? I prefer natural fibers on my skin and usually line chiffons/rayon sheers/viscose sheers with super lightweight linens or cottons (single gauze, lawn, etc…). I’m assuming this would work, but would just like to double check.
Also: Thank you for producing such a wide range of free patterns in so many different styles! I’m mostly self taught and have found your patterns and resources invaluable in my learning journey. I’ve been a subscriber for several years and deeply appreciate all the work you do!
Hey Meg! Yeah you can definitely use a lightweight linen or cotton for the lining, just make sure you launder it first so that it’s pre-shrunken.
And I’m so delighted to hear that you’ve been loving our patterns! My team has been working super hard to get more patterns published and to make the patterns higher quality and easy to understand. Its great to hear that our customers are noticing!
I loooove Mood’s patterns, and am looking forward to making this one in particular- it’s gorgeous, and perfect for spring. However, I am confused by the finished garment hip measurements in the chart on this page and in the pattern itself. Is there any clarification I could get on that? The numbers don’t seem to follow the same pattern as the Chart 1 measurements. Thanks for your help!
Hi Chrissy
Thank you so much! we are happy that you like our patterns. Great catch on the size chart, the last row of measurements corresponds to the skirt length not the hips, I will correct it and update the chart as soon as possible. I hope you enjoy making The Valensole dress! let us know if you have any other questions.
Happy Sewing 🙂
I think on the finished measurements the bust and hips are reversed??
Good catch Heather! Thanks for bringing this to our attention. We just updated the size chart.
Could a lightweight to medium ITY fabric be used for this? Just go with a slight reduction in size to create negative ease? What do you think? I have enough yardage in a pretty, floral print in my stash and I like the style of this dress. Thoughts?
Hey Terri! Honestly I hadn’t even considered making this dress out of a knit but I think that would be super cute and comfortable. I would do exactly what you are saying, choose a slightly smaller size so that there is negative ease.
I had this thought too, since I also have a lovely knit in my stash. Do you think a knit version would still need the zipper?
Probably not, but I would try it on before closing the center back seam without the zipper.
As a continuation of my prior question, I could probably leave out the lining in the skirt so that the dress is not too heavy and modify how I attach it at the waist, right?
I was about to say the same thing when I read your previous comment. I don’t think you would necessarily need a lining if you use a knit, and you can just attach the skirt directly to both layers of the bodice, right sides together.
Thank you so much for your respkn3se!!!!
This is nice.
The hip measurements in Chart 2 of the pattern make no sense — can someone please review? They do not appear to scale up in proportion with the rest of the pattern.
Hey Charis, thanks for pointing this out. We have updated the size chart and it should be correct now.
If anyone has any tips to add structure to the chest without making it a milkmaid style dress, I’d love to hear. WIth such a lightweight fabric, you can see from the photos the top chest area of the dress doesn’t lay flat and is wavy. Thanks for the pattern, it’s a lovely dress!!
Does anyone have any tips on how to add structure to the chest so it lay’s flat without making it a milkmaid style dress? With such a lightweight fabric you can see in the photos it’s wavy on the chest. Lovely dress, thanks!
Hi Adrienne
That’s a very good question. I’m glad you asked. One option is to sew the optional adjustment dart included in the pattern, adjusting it to fit your bust as needed. You could also use interfacing for additional support. Another option, if you’re an advanced sewer, is to create a simple base bustier and drape the front crossed pieces over it.
Happy sewing!
This is absolutely stunning. I am planning to make it and will order fabric for it however… I’m a little surprised to see it requires 6-7 yd of the fashion fabric (plus 3-4 yd for lining). Even for other maxi dresses I’ve made (eg the Mood Rue dress), I didn’t even require that much. I’m curious whether that’s because the fabric in your example is directional maybe (it doesn’t really look like it but maybe I’m missing something). I’m excited to dive into this one but just want to double check the fabric requirements are accurate.
Love it
Hi,
Such a lovely pattern. cant wait to sew it up. How much should the side of the front bodice be gathered up to?
Hey Roshine! I gathered it to about half of its original length.
Hi!
Thank you for the pattern! One question: Why are there more than one line for size “L” on the pattern? Is there some instruction about this that I have missed? Thank you!
Hi Elin
It is only the line style. For size L, please use the smaller of those two sizes that share the same line style. (The first size with that line style is L and the next one is XL.) I will update the pattern as soon as possible. Thank You!
Thank you for the response!
Hi!
Love this pattern!
I was just curious if I wanted to make a mini version of this dress, how much fabric would I need?
Hey Marlo, totally dependent upon the size you choose, but I would recommend at least 4 yards of the main fabric still.