

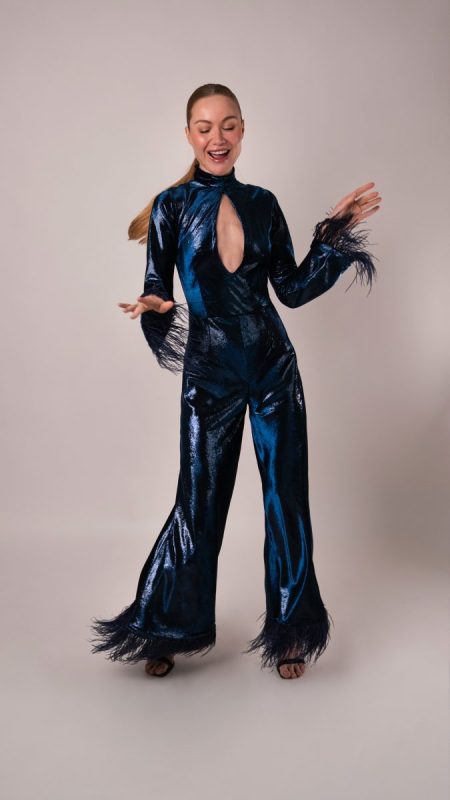
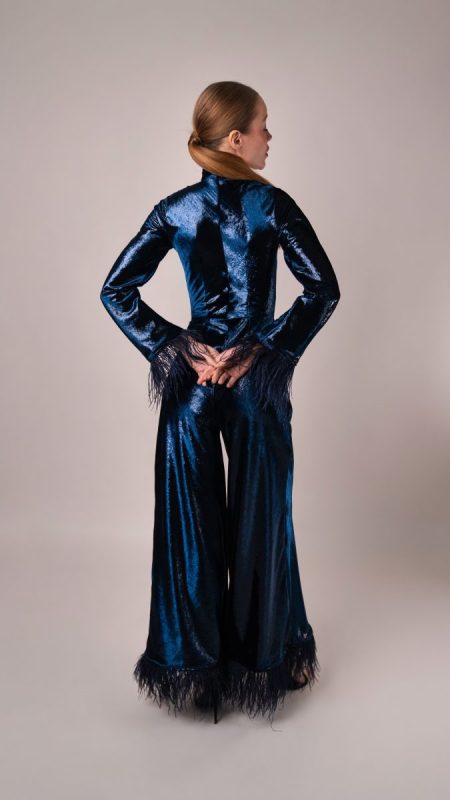
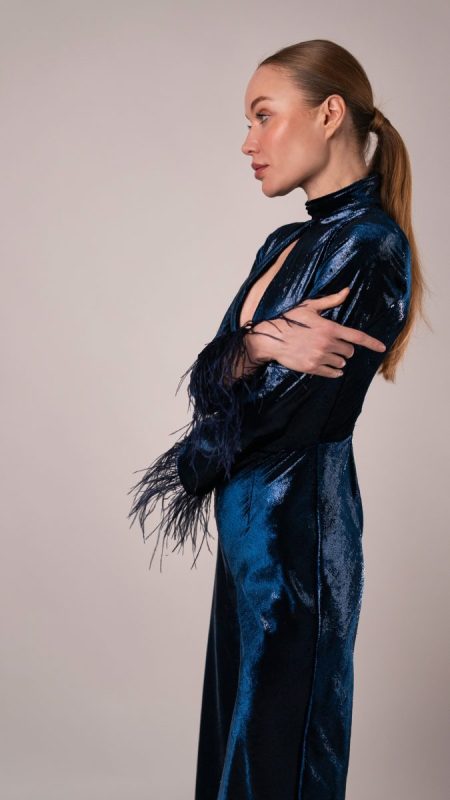
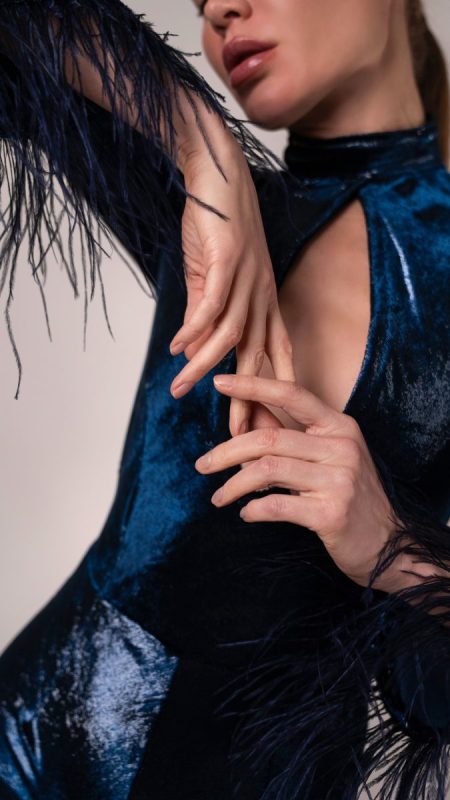
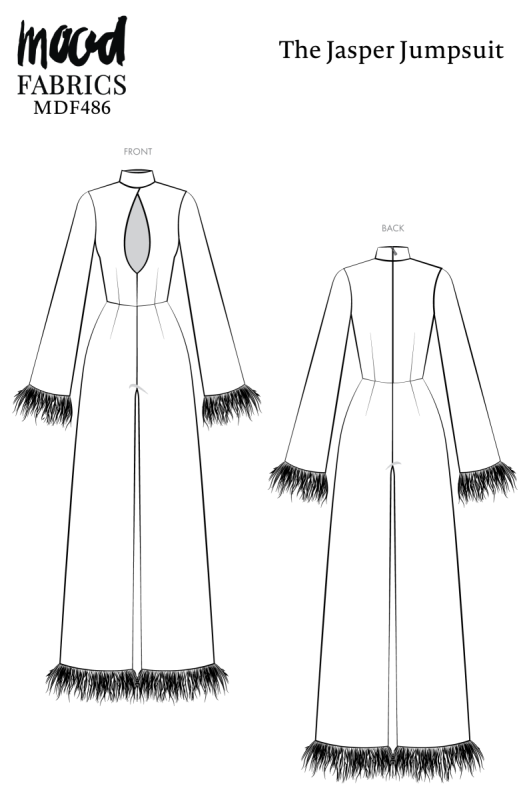
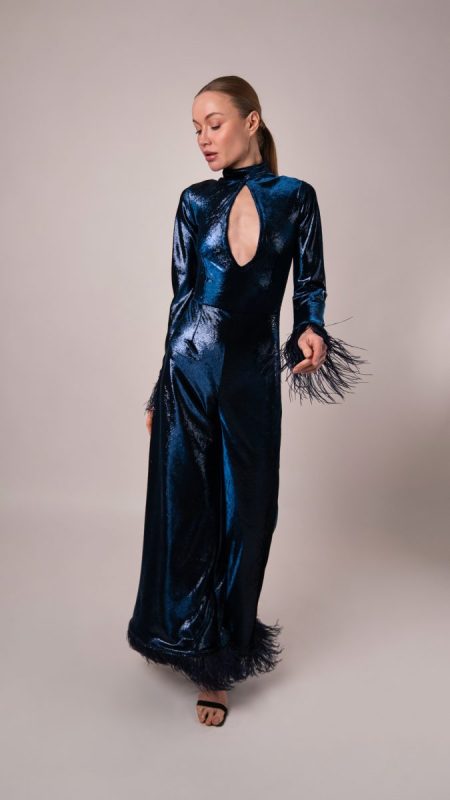
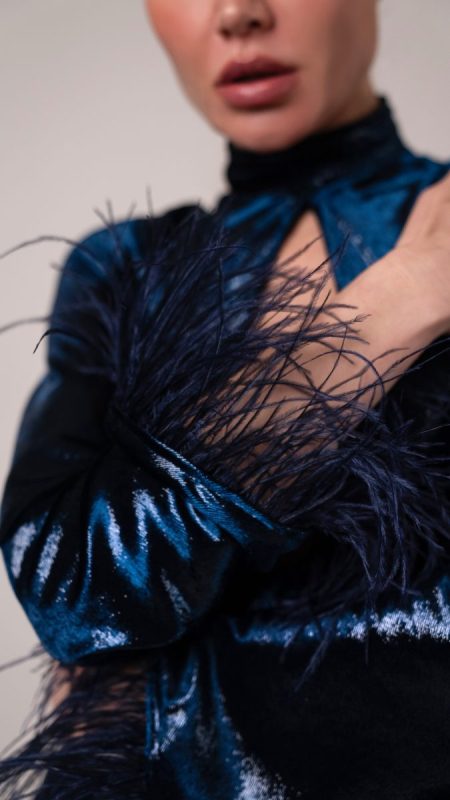
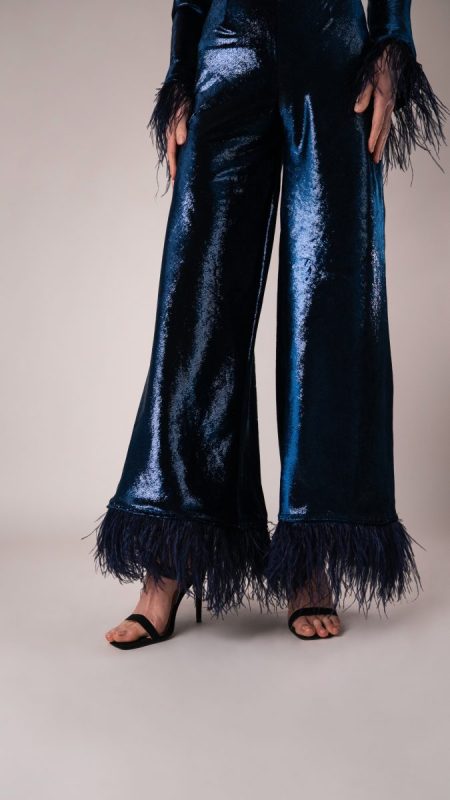
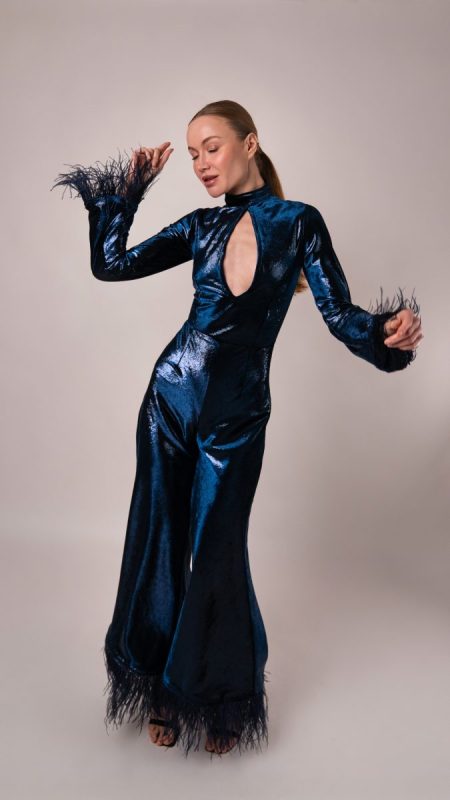
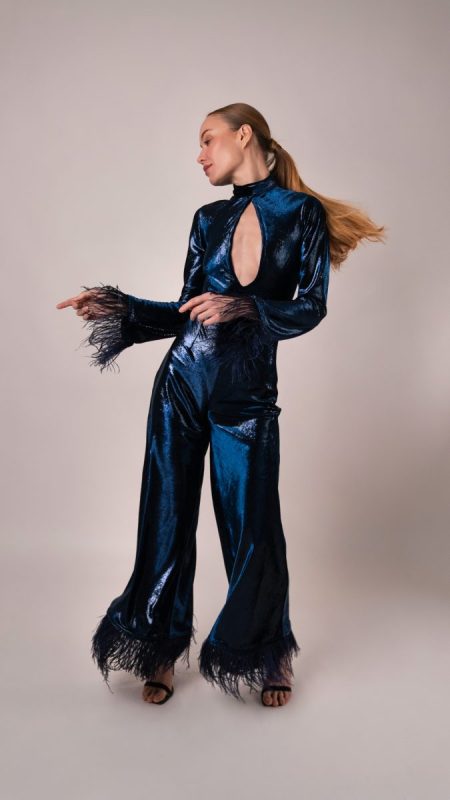
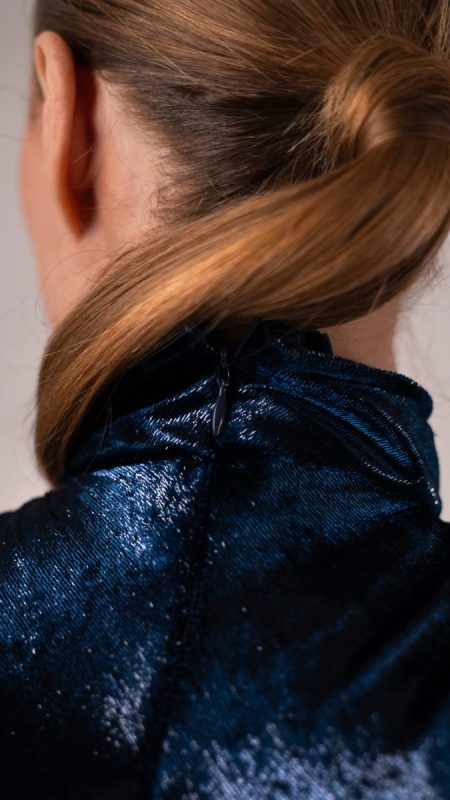
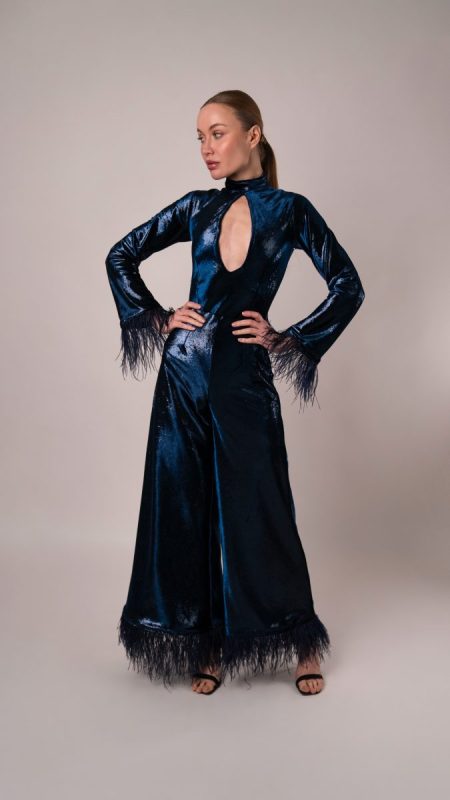
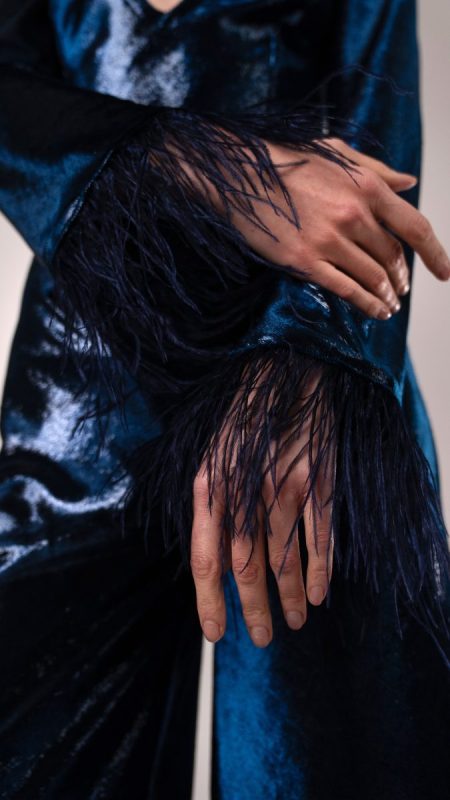
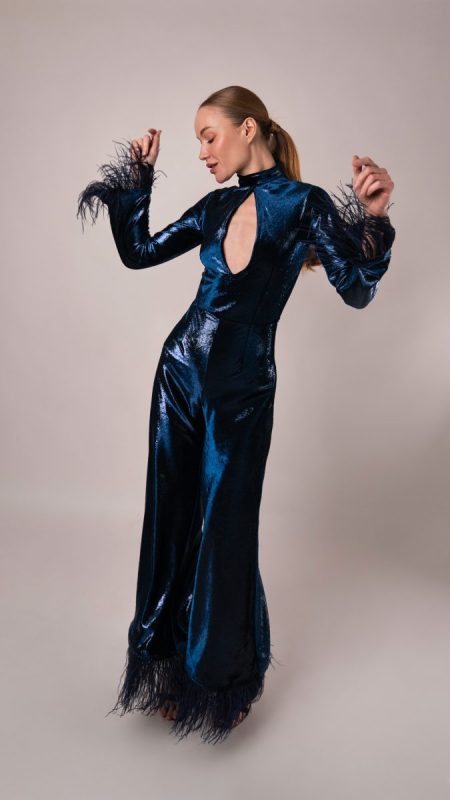
The Jasper Jumpsuit is your invitation to step into the New Year glowing. Cut on the bias from shimmering metallic velvet and framed with the softest, light weight ostrich-feather trim, it’s a piece that refuses to go unnoticed. The silhouette is striking and dramatic but comfortable enough to wear all night long until the sun comes back up. The ultra wide leg pants sway with every step, its flared sleeves flutter as you move, and the plunging keyhole neckline offers just a hint of skin beneath the sparkling surface. It’s elegant, playful, and unapologetically festive.
Where will you be when the clock strikes midnight? Belting out karaoke with friends, cozy at a house party, packed into the streets of NYC watching the ball drop, popping champagne, or leaning in for that New Year’s kiss? Wherever the night takes you, the Jasper Jumpsuit can be the outfit that marks your first moments of the year with shine, softness, and confidence.
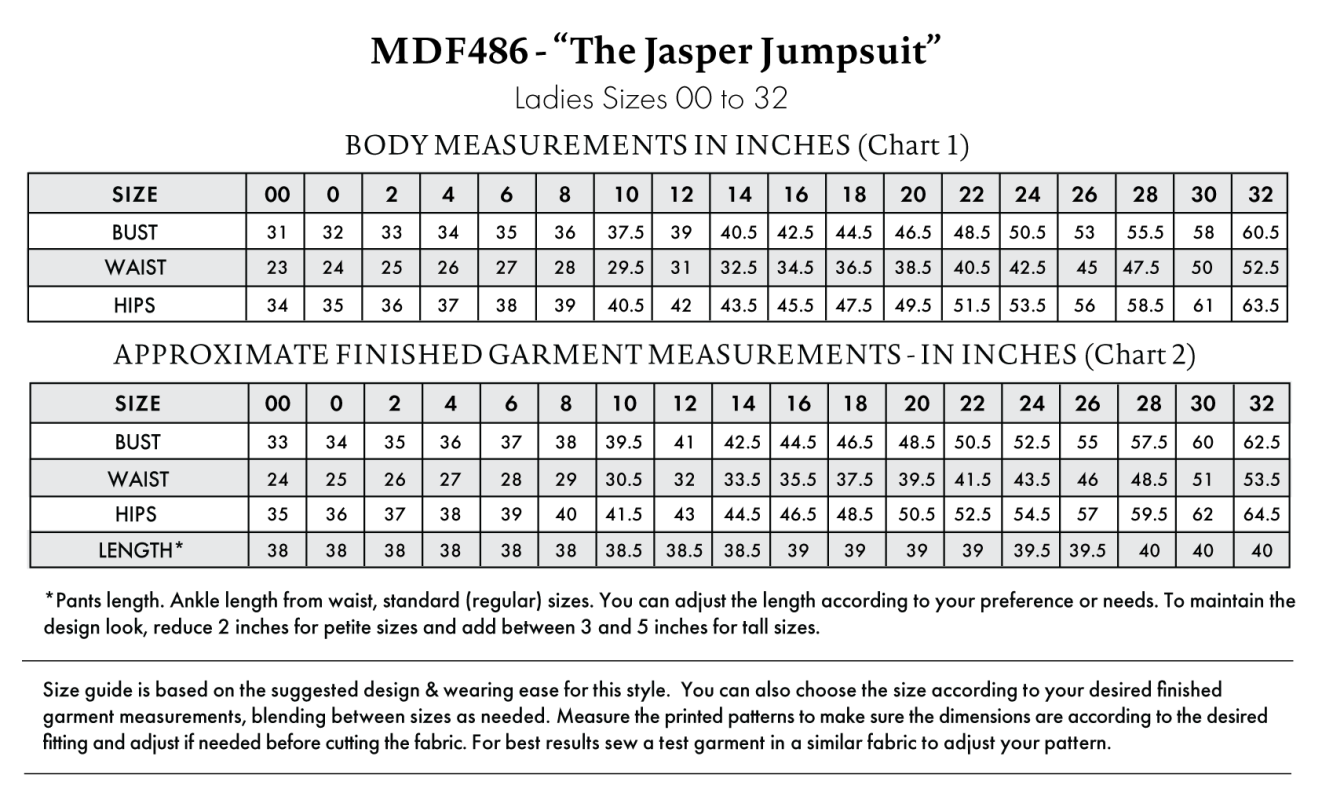
Essential Materials & Sizing Guide for the Jasper Jumpsuit
Continue reading for a breakdown of what knowledge and materials you need for creating your very own jumpsuit! We’ve got you covered with the recommended materials we used—if you want to follow along exactly—as well as a curated list of alternative fabric type recommendations if you want to customize your own version. The Jasper Jumpsuit free sewing pattern download includes technical drawings for seam and jumpsuit visibility, plus a size chart to help you find your perfect fit!
Purchase Products Used Below:
Quantities indicated are for sewing a size small jumpsuit. Toggle the ‘SHOP THIS LOOK’ box to find quantity estimates for other sizes.
- 4 yards of Metallic Velvet – Navy – Ava Collection
- 5 yards of Ostrich Feather Fringe Trim 5″ Single Ply – Navy – Aviana Collection
- 1 each of Invisible Zipper 24″ by YKK – 560 Deep Navy
- 1 each of Gutermann Sew All Thread 250m – 272 Navy
- MDF486 – Jasper Jumpsuit Sewing Pattern (Free download below!)
Alternative Fabric Type Recommendations:
The Jasper Jumpsuit sewing pattern is best suited for medium weight fashion fabrics. Explore other fabric types or colors from our featured collections for your jumpsuit with the links below.
Download Your Free Sewing Pattern
Submit your name and email in the form below to receive the download link for the Jasper Jumpsuit free sewing pattern directly in your inbox. Mood Sewciety Patterns will send your free download link via email with the subject line: ‘Your Free Download from Mood Sewciety – The Jasper Jumpsuit’ (in PDF format for A4 and letter-size printing).
© MoodFabrics.com / MoodSewciety.com – Mass production, resale, or distribution of this pattern in any form is strictly prohibited.
Find Your Perfect Fit
The Jasper Jumpsuit Sizing Guide is based on the suggested design & wearing ease for this style. You can also choose the size according to your desired finished garment measurements, blending between sizes as needed. Measure the printed patterns to make sure the dimensions are according to the desired fitting and adjust if needed before cutting the fabric. For best results, sew a test garment in a similar fabric to adjust your pattern.
*Pants length: ankle length from waist, standard (regular) sizes. You can adjust the length according to your preference or needs. To maintain the desired look, reduce 2 inches for petite sizes and add between 3 and 5 inches for tall sizes.
Note: Always read all the instructions before cutting the fabric!
How to Sew The Jasper Jumpsuit
The instructions provided below are designed to guide you through sewing the Jasper Jumpsuit from start to finish.
3 Tips for Sewing with Metallic Velvet
⇒ DO NOT IRON.
⇒ This fabric sheds a lot, so make sure you cut it in a place where you don’t mind making a mess.
⇒ This jumpsuit was cut on the bias because the fabric we chose did not have any stretch. I recommend that if you use a fabric without stretch like this one, you should either cut it on the bias or size it up based on the finished garment measurements.
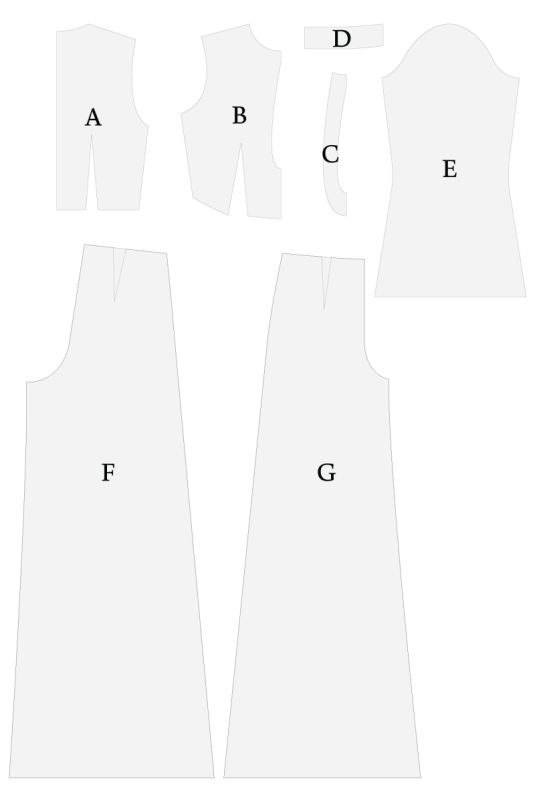
Pattern Pieces & Fabric Cuts Needed
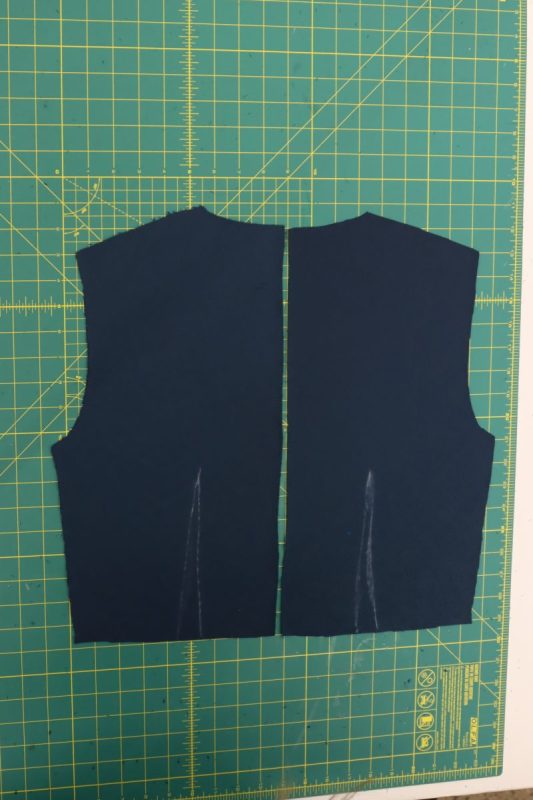
- (A) TOP BACK
- FABRIC – CUT 2 MIRRORED
- (B) TOP FRONT
- FABRIC – CUT 1 ON FOLD
- (C) KEYHOLE FACING
- FABRIC – CUT 1 ON FOLD
- (D) COLLAR
- FABRIC – CUT 2 MIRRORED
- (E) SLEEVES
- FABRIC – CUT 2 MIRRORED
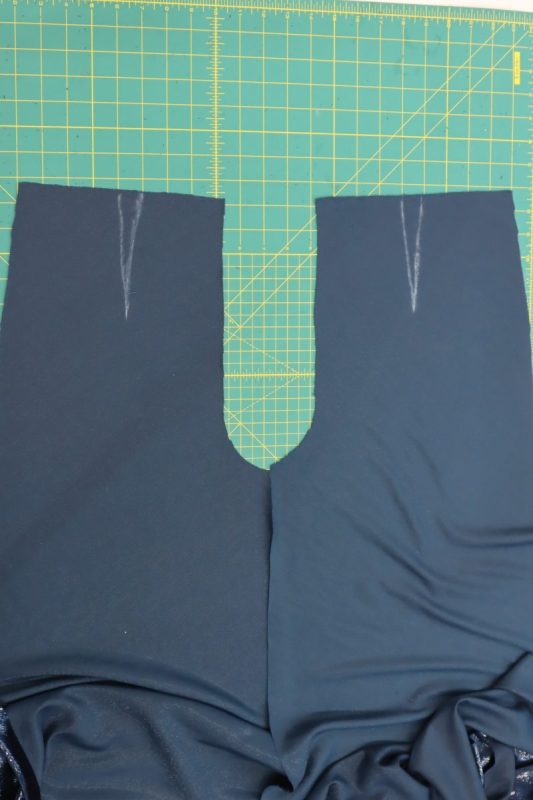
- (F) PANTS BACK
- FABRIC – CUT 2 MIRRORED
- (G) PANTS FRONT
- FABRIC – CUT 2 MIRRORED
Sew with a 1/2″ seam allowance for all seams unless otherwise specified.
Step 1
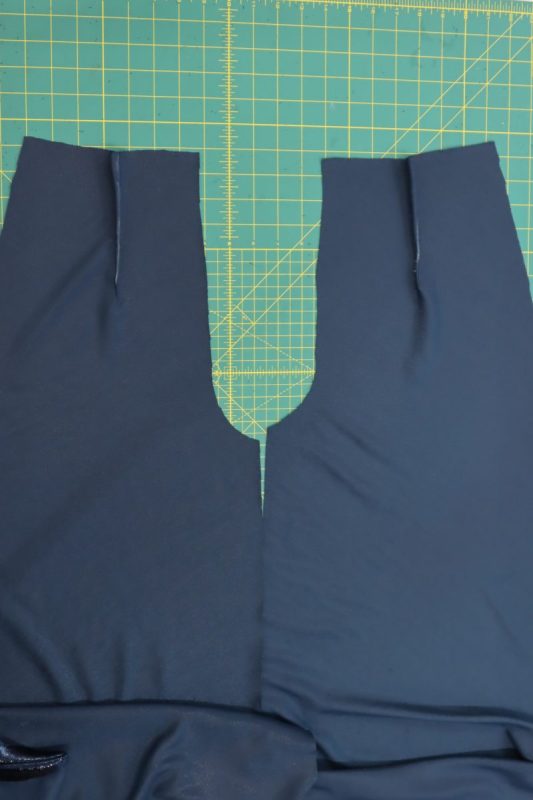
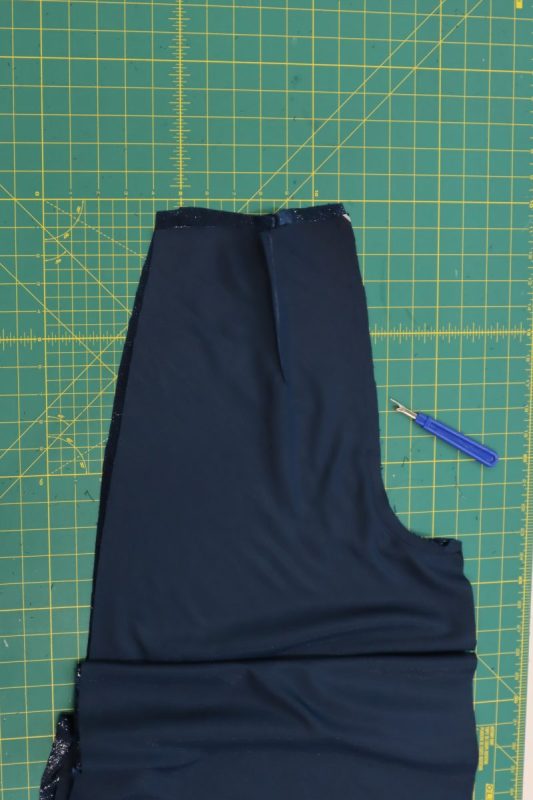
FRONT DARTS
- Mark the front darts on the wrong side of the front pants pieces using tailor’s chalk and the cutouts from the pattern pieces.
- Fold the front pants pieces right sides together centered over the darts.
- Pin and sew the folded darts.
- Unfold the fronts of the pants.

Step 2
BACK DARTS
- Repeat the steps from step 1 to sew the back darts.

Step 3
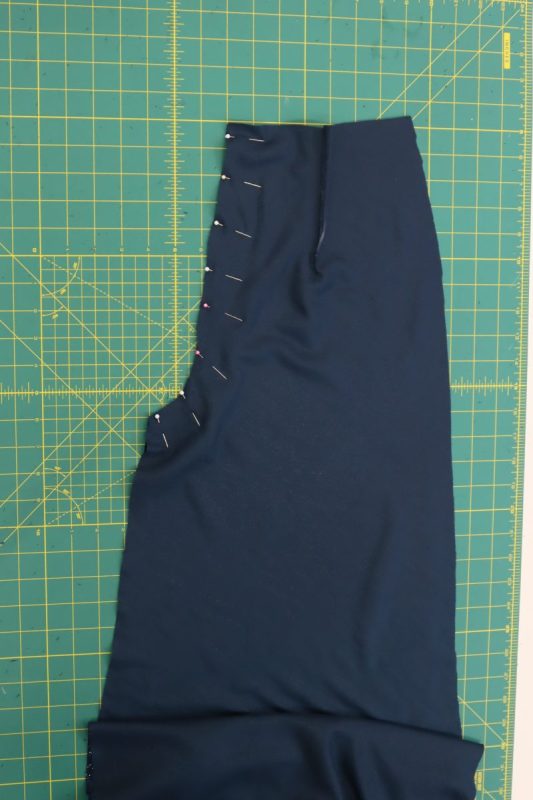
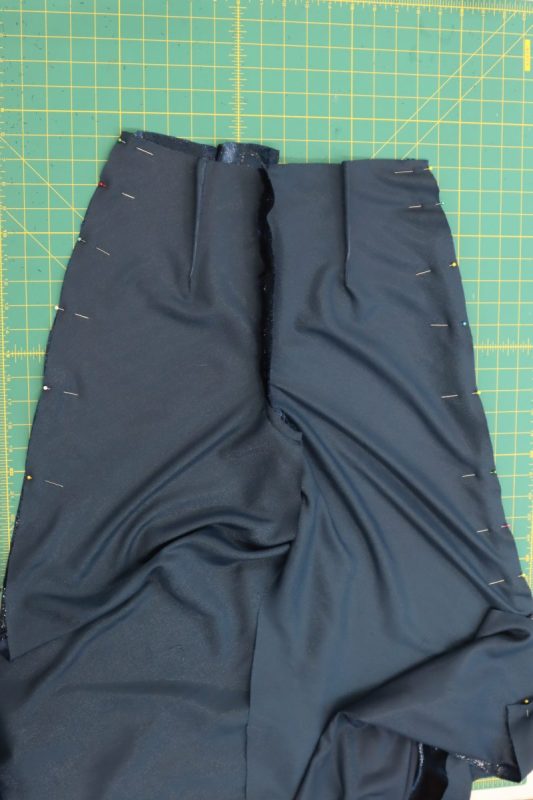
CROTCH SEAMS
- Place the two front pants pieces right sides together.
- Line up the front crotch seams and pin them together.
- Sew the front crotch seam along the pinned curve.
- Place the two back pants pieces right sides together.
- Line up the back crotch seams and pin them together.
- Sew the bottom half of the back crotch seam, leaving the top of the crotch seam unsewn so that a zipper can be inserted later.
Step 4
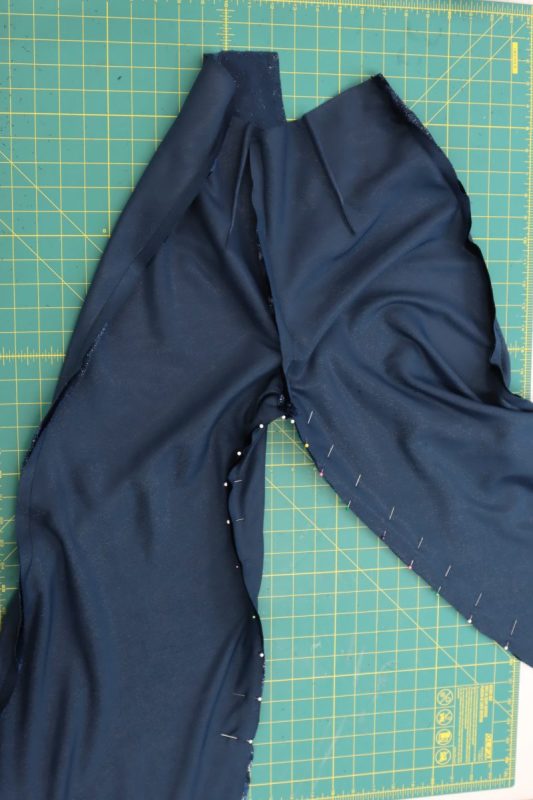
PANTS SIDE SEAMS
- Place the front and back pants pieces right sides together with the side seams lined up.
- Pin and sew the side seams together.
Step 5
INSEAM
- Keeping the pants right sides together, line up the front and back inseams and pin them together, making sure to line up the front and back crotch seams.
- Sew the crotch seam shut (I don’t know if I’ve ever shared this in a blog post before, but when I sew my inseams, I ALWAYS start from the crotch seam, sew down one leg, then go back up to the crotch seam and sew down the other leg. I’m not sure where I heard this piece of advice, but I find that it helps to make sure there is no awkward buckling or puckering on your pant legs).


Step 6
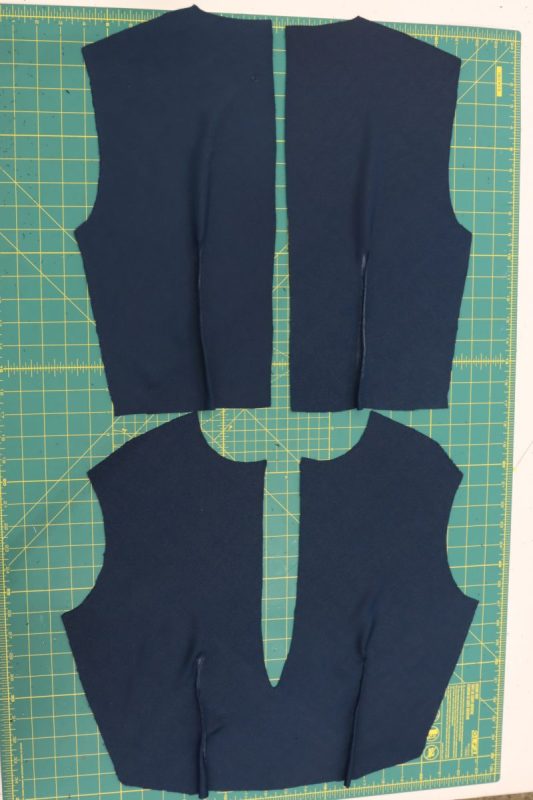
BLOUSE FRONT DARTS
- Mark the front darts on the wrong side of the front top piece using tailor’s chalk and the cutouts from the pattern pieces.
- Fold the front top pieces right sides together centered over the darts.
- Pin and sew the folded darts.
- Unfold the top.
Step 7
BLOUSE BACK DARTS
- Repeat the steps from step 6 to sew the top back darts.
Step 8
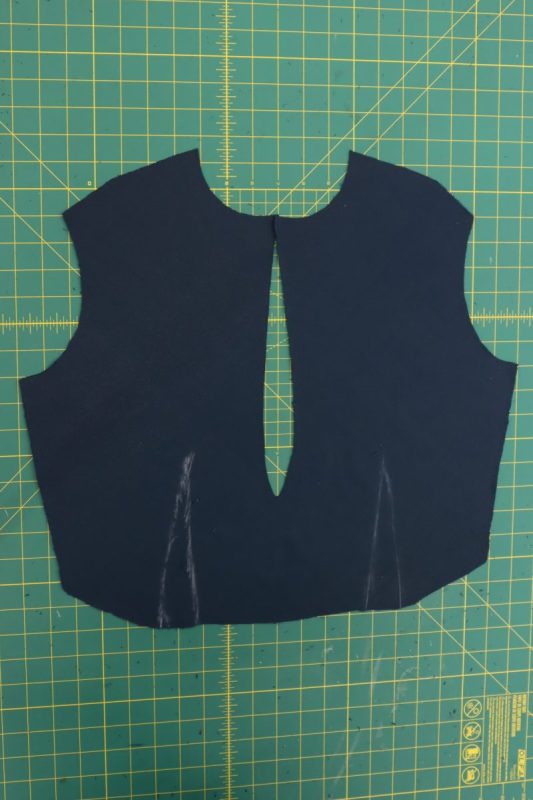
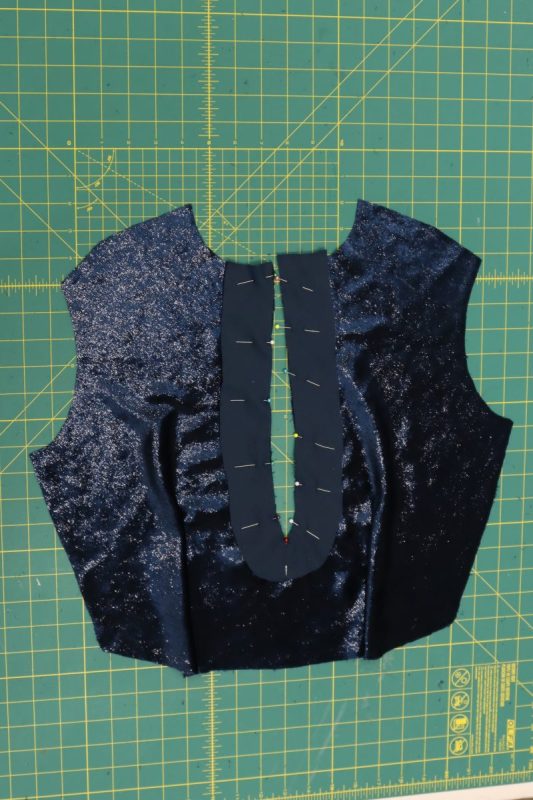
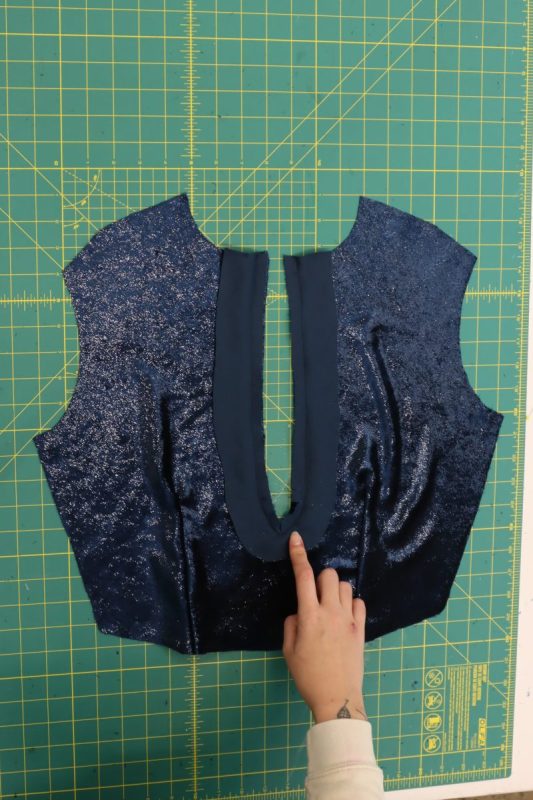
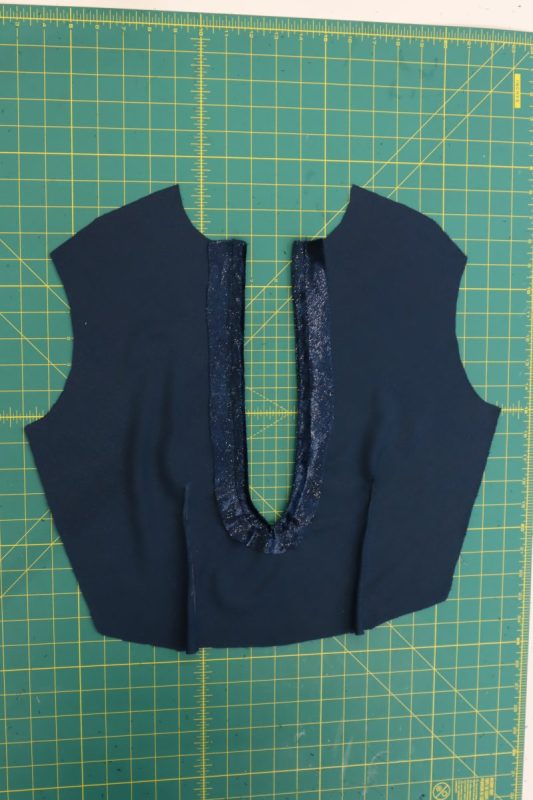
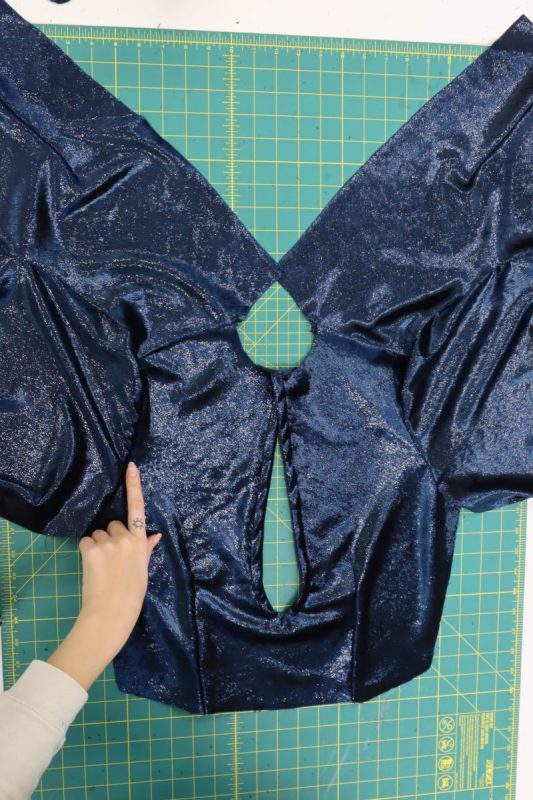
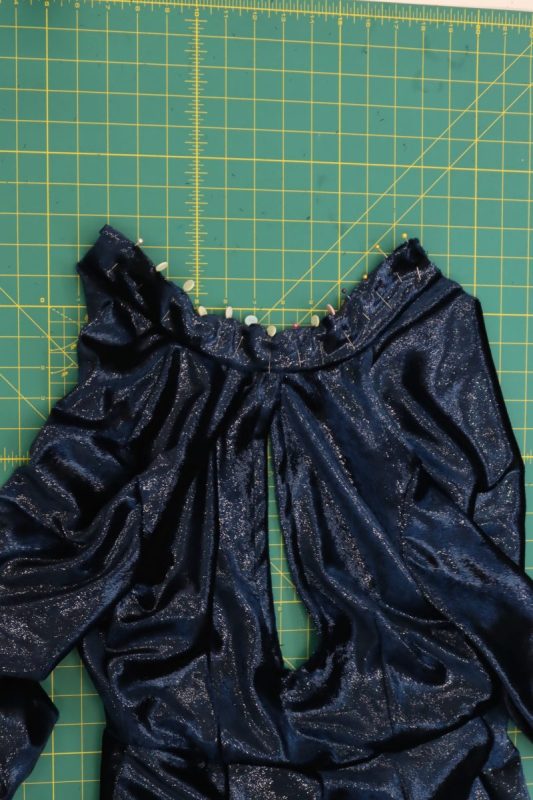
KEYHOLE NECKLINE
- Place the keyhole facing on top of the keyhole, right sides together.
- Pin the keyhole facing into place on the keyhole.
- Sew around the opening of the keyhole.
- Clip the curved seam allowance on the bottom of the keyhole.
- Flip the keyhole facing to the wrong side of the fabric.
- Topstitch around the keyhole to keep the facing in place.
Step 9
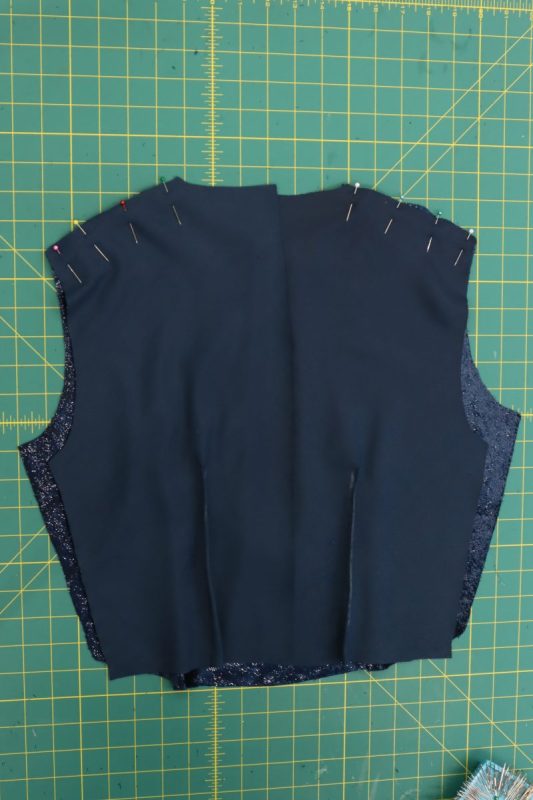
SHOULDERS
- Place the front and back top pieces right sides together.
- Line up and pin the front and back shoulders together.
- Sew the shoulder seams.
Step 10
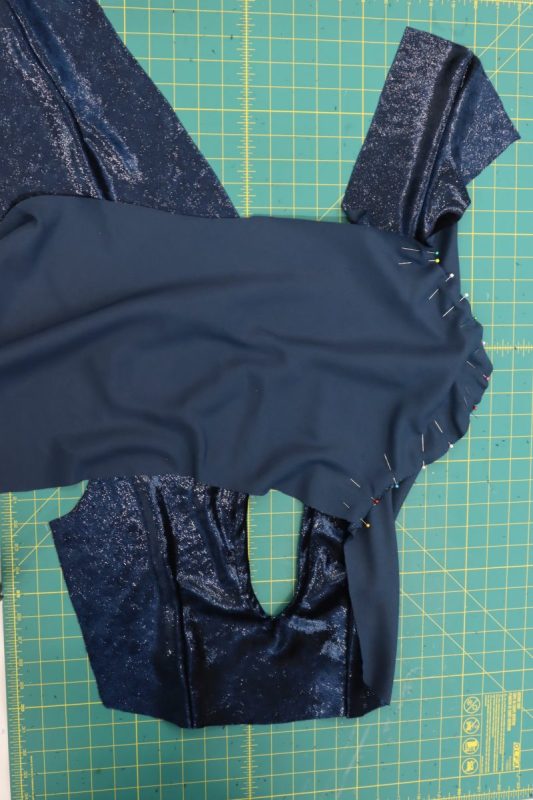
SLEEVES
- Open up the top at the shoulders and lay it flat, wrong sides facing down.
- Line up the sleeve caps of each sleeve with the armscyes on each side of the top, right sides together. Make sure that the part of the sleeves marked “sleeve front” is lined up with the front of the armscye.
- Pin and sew the sleeve caps to the armscyes, right sides together.
Step 11
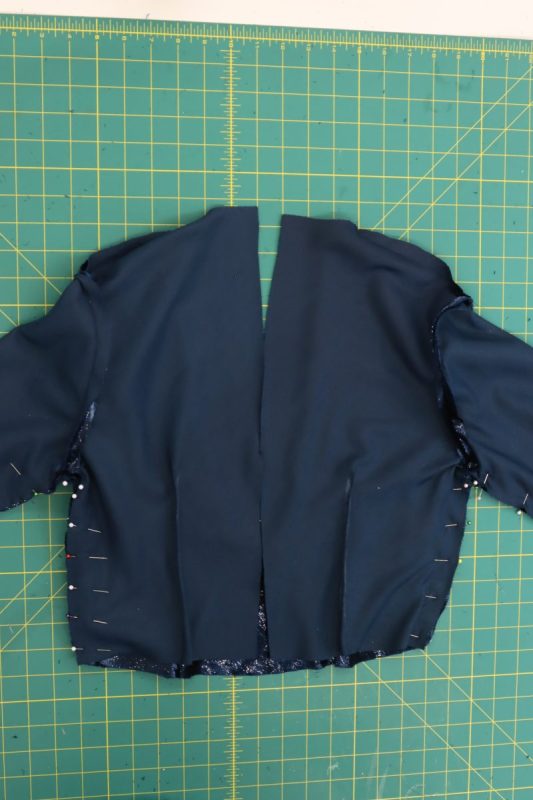
BLOUSE SIDE SEAMS
- Fold the top in half at the shoulder seams, right sides together.
- Line up the open ends of the sleeves and the sides of the top together.
- Pin the front and back sleeves and front and back sides together.
- Sew a single stitch connecting the front and back sleeves and the side seams, making sure that the ends of the armscyes are lined up with each other.
Step 12
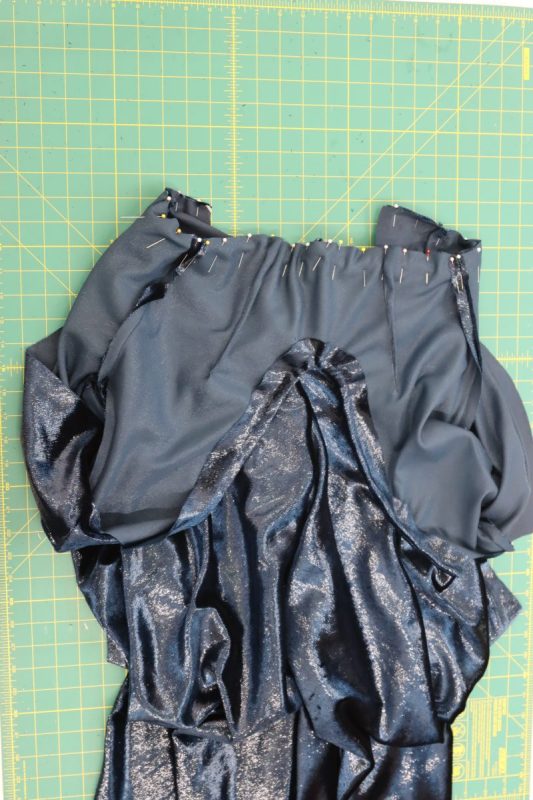
WAISTLINE
- With the top inside out, line up the top waistline with the pants waistline.
- Place pins to line up all the seams and darts on the top and bottom jumpsuit pieces.
- Pin and sew around the waistline to connect the top to the pants.
Step 13
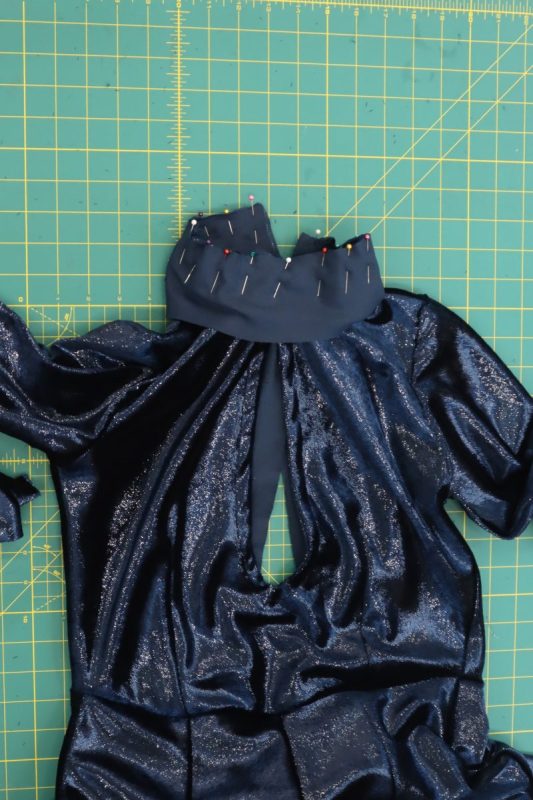
COLLAR
NOTE: If you feel that the cutout is too revealing or you’re worried about a potential wardrobe malfunction, this would the step where you would add a nude mesh into the keyhole neckline before adding the collar.
- Take the two collar pieces and sandwich the neckline of the jumpsuit between them with the two collar pieces facing right sides together (Note: the front keyhole opening might need to overlap itself a little bit in the front in order for the collar to fit around the neckline).
- Pin and sew the collar to the neckline of the jumpsuit over the pins.
- Unfold the collar pieces so that their right sides are facing out.
- Fold the top edge of both collar pieces in towards each other by ½ inch.
- Pin the top folded edge of the collar.
- Sew with ¼ inch seam allowance to tuck the raw edges of the collar into itself.
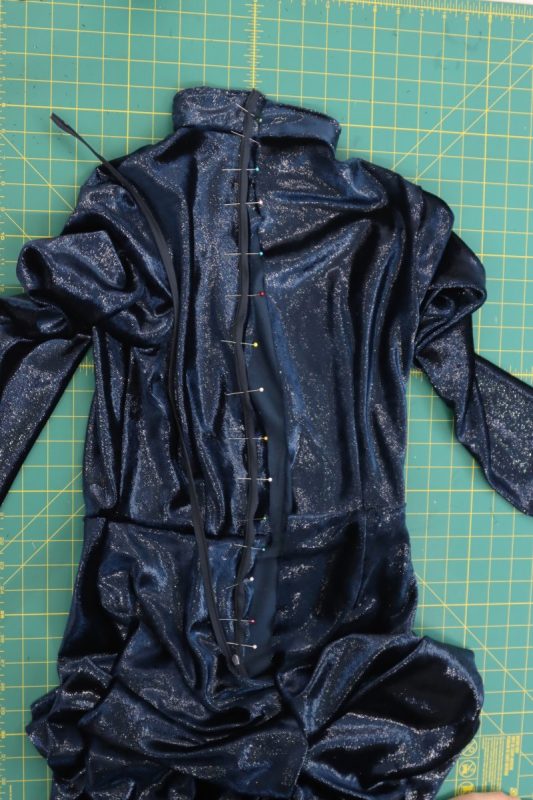
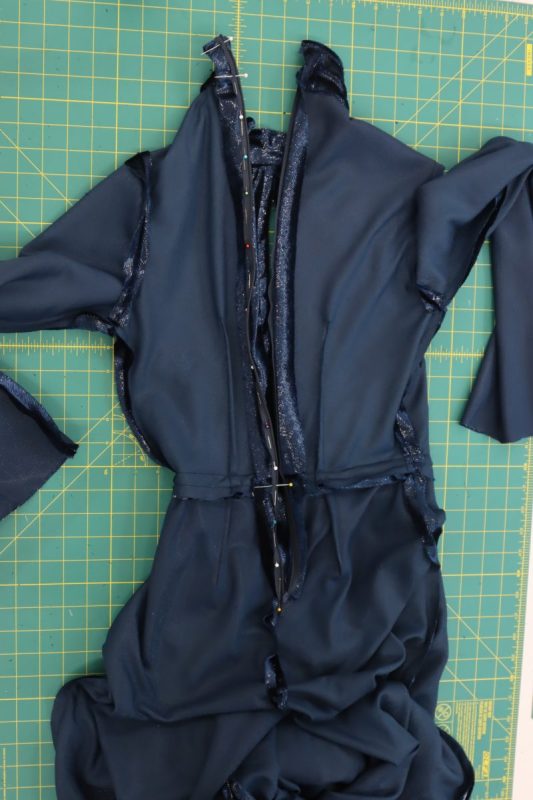
Step 14
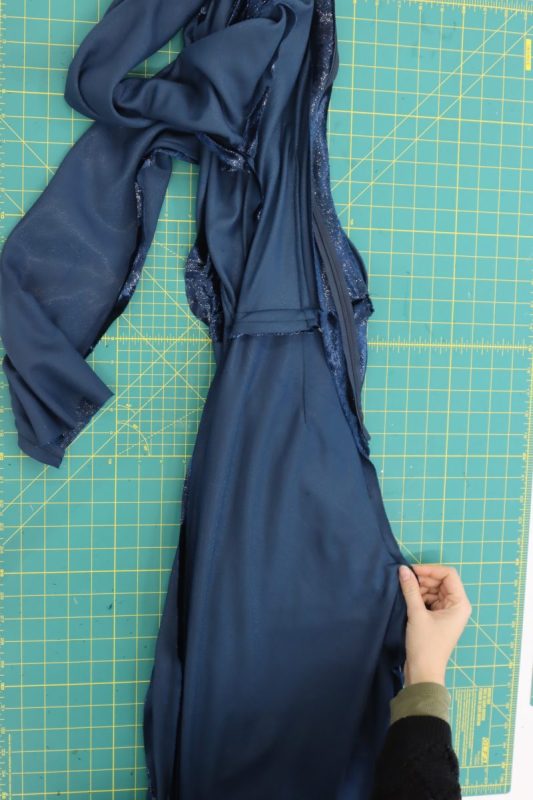
ZIPPER
- With the zipper closed, place the zipper face down against the right side of the center back of the jumpsuit.
- Line up the right hand side of the zipper tape with the left hand side of the back of the jumpsuit.
- Pin the zipper tape, open the zipper, and sew the right hand side of the zipper to the left hand side of the center back seam.
- Flip the jumpsuit inside out.
- Close the zipper.
- Line of the opposite side of the zipper with the opposite side of the center back opening of the jumpsuit.
- As you pin the other side of the zipper to the jumpsuit, right sides together, make sure that the collar seams and waistline seams are lined up on either side of the zipper.
- Open the zipper after pinning, then sew it into place (it can be difficult to sew an invisible zipper while it is closed because the teeth won’t lay flat. I recommend keeping it closed for pinning and placement, then opening it to sew.
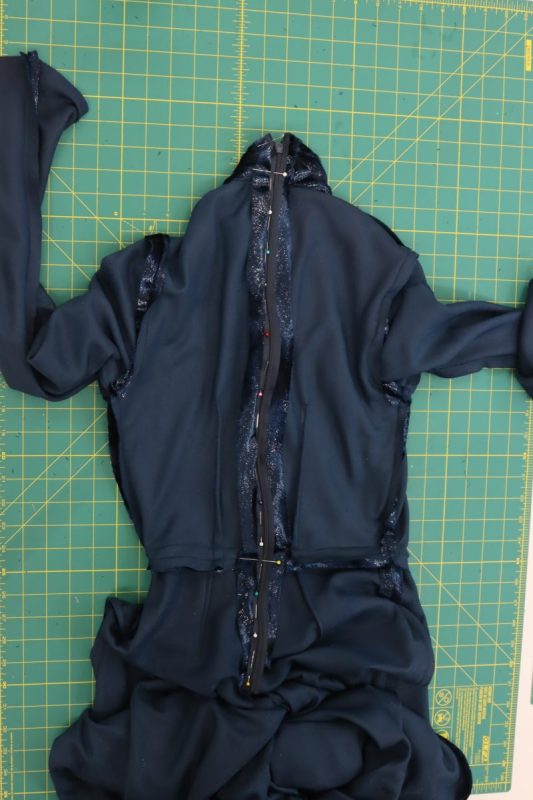
Step 15
BACK CROTCH SEAM
- Fold the jumpsuit in half with the zipper on the fold.
- Lay the two back pant legs right sides together with the crotch seam lined up.
- Pin and sew the rest of the crotch seam under the zipper closed to finish the back seam of the jumpsuit.
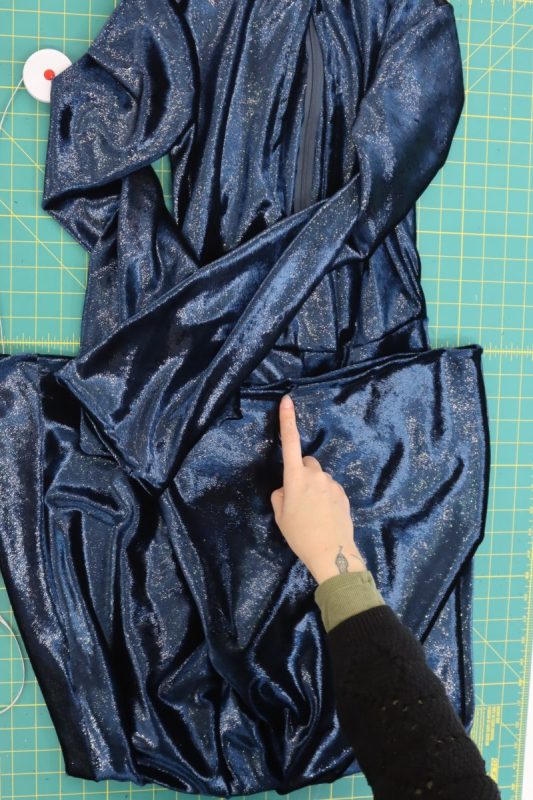
Step 16
HEMS
- Fold the ends of the sleeves and pant legs in by ½ inch.
- Sew a ½ inch hem with ⅜ inch seam allowance around the hems of the sleeves and pant legs.
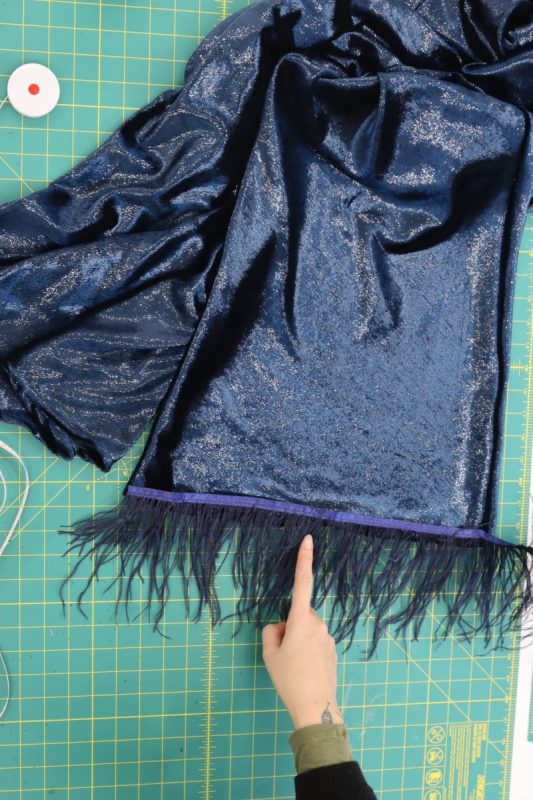
Step 17
FEATHER TRIM
- Place the feather trim around the inside of the hems of the sleeves and pant legs.
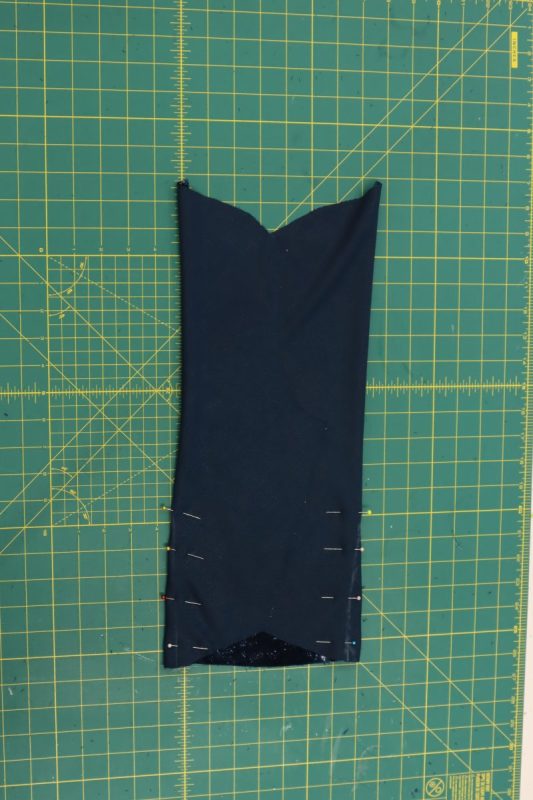
- Pin and sew the trim to the inside hem of the sleeves and pant legs so that only the feathers are sticking out from the hem, not the trim tape.
- Optionally, you can sew two layers of the ostrich feather trim around the hems if you want the feathers to be fuller and less sheer.
Sewing Success: The Finished Jasper Jumpsuit
Share this post with a friend (or two!), download the Jasper Jumpsuit free sewing pattern, and show us which fabrics and colors you choose, using the hashtags #MoodJasperPattern & #MadeWithMood—and don’t forget to tag us @MoodFabrics, too.


Free Sewing Pattern Inspiration for Your Next Project
With 480+ free sewing patterns and counting, your opportunities for sewing with Mood are endless!
We hope you had as much fun sewing this jumpsuit pattern as we did! As always, we want to hear from you—share your thoughts and comments below and let us know where you’ll be wearing the Jasper Jumpsuit free sewing pattern!