

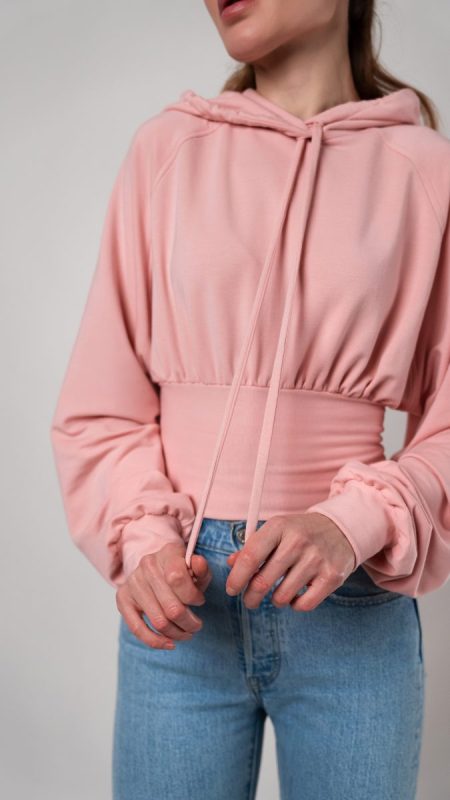
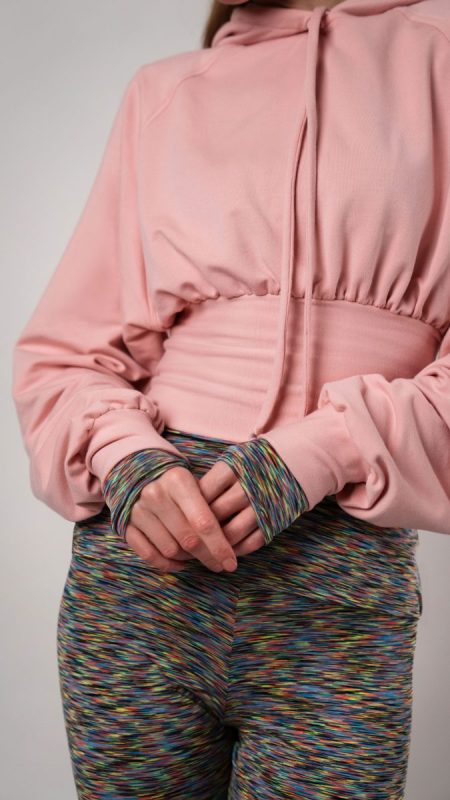
The calendar flips and suddenly the world feels like a starting line. The Forest Park Hoodie celebrates that moment when motivation stretches its limbs and steps forward. Whether you call it New Year, New Fit or something entirely your own, this hoodie was designed to carry you into January feeling ready and warm.
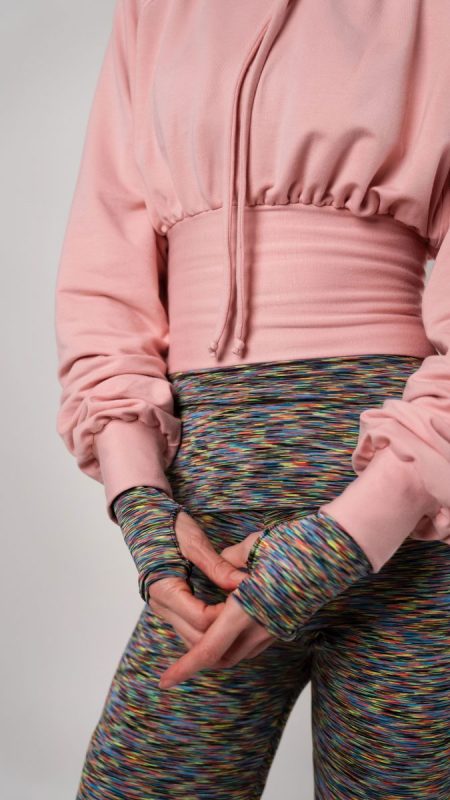
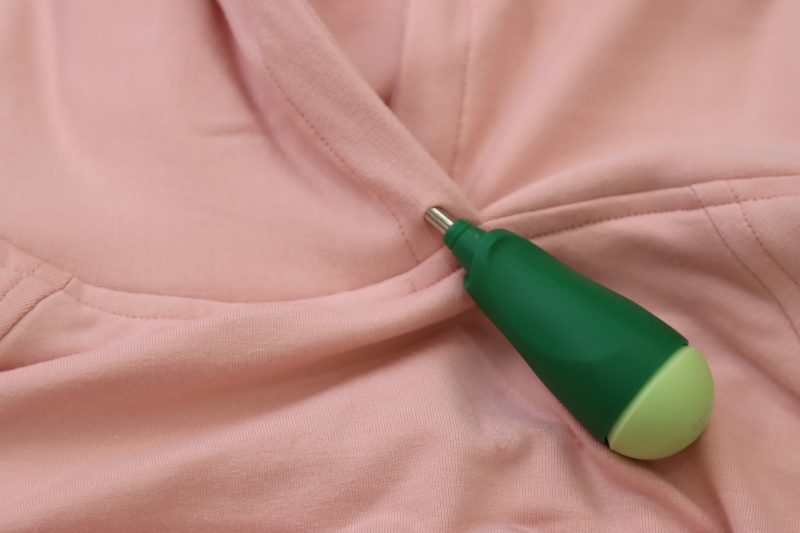
Inspired by the rush of a below-freezing winter breeze stinking your nose and cheeks, this ultra cozy hoodie offers a cocoon of bamboo french terry that feels like a daydream. Its roomy raglan sleeves and relaxed bodice create a cloudlike silhouette that tapers into an extra wide waistband that hugs in all the right places, sealing in warmth exactly where you need it.
Take the Forest Park Hoodie with you whether you’re jet-setting, hitting the gym, or lounging on your best friend’s couch with a mug of hot chocolate. Wherever the new year takes you, the Forest Park Hoodie is ready to follow you there.


Essential Materials & Sizing Guide for the Forest Park Hoodie
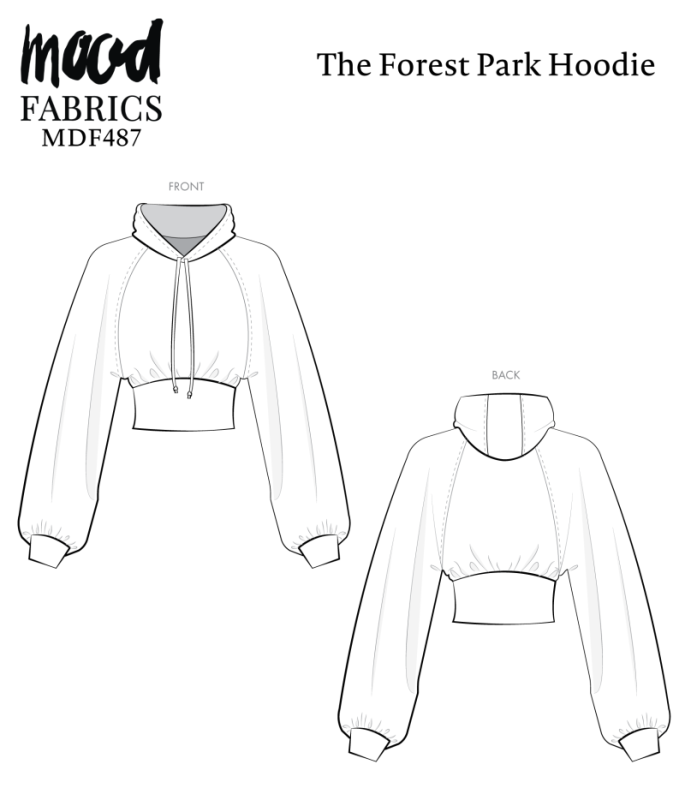
Continue reading for a breakdown of what knowledge and materials you need for creating your very own hoodie! We’ve got you covered with the recommended materials we used—if you want to follow along exactly—as well as a curated list of alternative fabric type recommendations if you want to customize your own version. The Forest Park Hoodie free sewing pattern download includes technical drawings for seam and silhouette visibility, plus a size chart to help you find your perfect fit!
Purchase Products Used Below:
Quantities indicated are for sewing a size small hoodie. Toggle the ‘SHOP THIS LOOK’ box to find quantity estimates for other sizes.
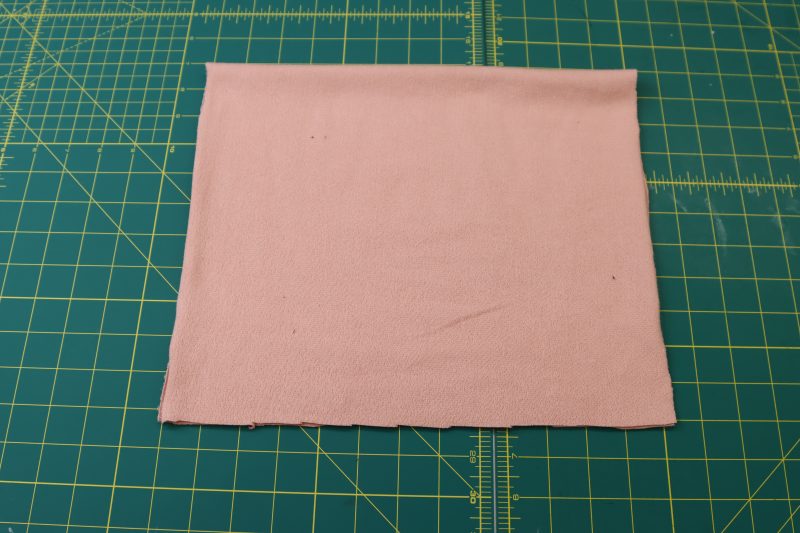
- 2 yards of Bamboo Stretch French Terry – Mellow Rose – Emei Collection
- 1 each of Gutermann Sew All Thread 250m – 305 Petal Pink
- MDF487 – Forest Park Hoodie Sewing Pattern (Free downloads below!)
Additional Products Used:
*Quick Tip! The ‘SHOP THIS LOOK’ box defaults to full-yard quantities. To order an exact half-yard quantity for any fabric, simply use the decrease quantity button (-) to subtract by the half yard. Then click “ADD TO CART” to add all materials to your cart.
(Our system can only display full-yard quantities initially.)
Alternative Fabric Type Recommendations:
The Forest Park Hoodie sewing pattern is best suited for medium weight stretch knit fashion fabrics. Explore other fabric types or colors from our featured collections for your silhouette with the links below.
Download Your Free Sewing Pattern
Submit your name and email in the form below to receive the download link for the Forest Park Hoodie free sewing pattern directly in your inbox. Mood Sewciety Patterns will send your free download link via email with the subject line: ‘Your Free Download from Mood Sewciety – The Forest Park Hoodie’ (in PDF format for A4 and letter-size printing).
© MoodFabrics.com / MoodSewciety.com – Mass production, resale, or distribution of this pattern in any form is strictly prohibited.
Find Your Perfect Fit
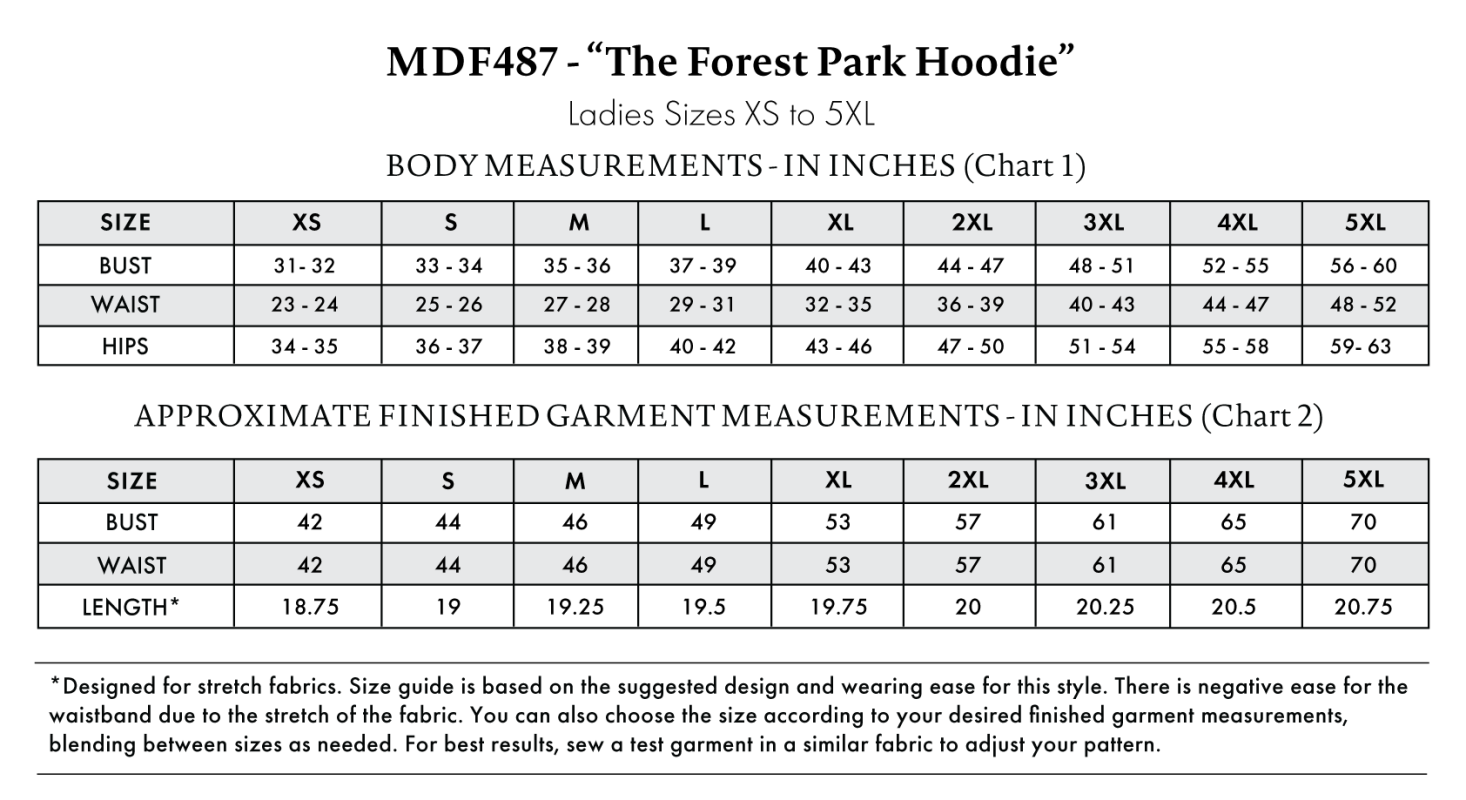
The Forest Park Hoodie Sizing Guide is based on the suggested design & wearing ease for this style. You can also choose the size according to your desired finished garment measurements, blending between sizes as needed. Measure the printed patterns to make sure the dimensions are according to the desired fitting and adjust if needed before cutting the fabric. For best results, sew a test garment in a similar fabric to adjust your pattern.
Note: Always read all the instructions before cutting the fabric!
How to Sew The Forest Park Hoodie
The instructions provided below are designed to guide you through sewing the Forest Park Hoodie from start to finish.


3 Tips for Sewing with French Terry
⇒ If you’re able to adjust the pressure of your presser foot on your sewing machine, make it a little looser so that it’s not pressing so hard on the fabric. This will prevent the french terry from warping after its sewn.
⇒ Stretch the french terry every so slightly while you sew the straight stitch so that it can still stretch a little bit after its sewn.
⇒ You are more than welcome to serge your raw edges in your seam allowance, but french terry doesn’t fray too much, so you don’t have to.


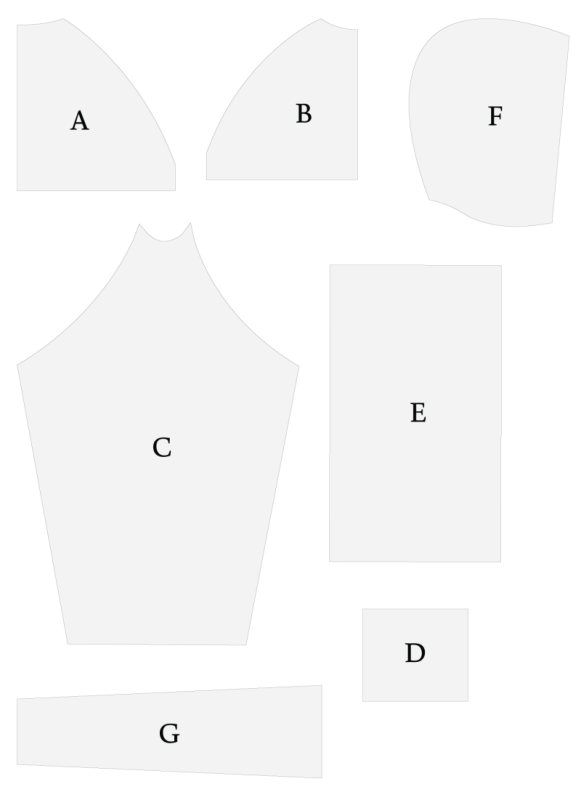
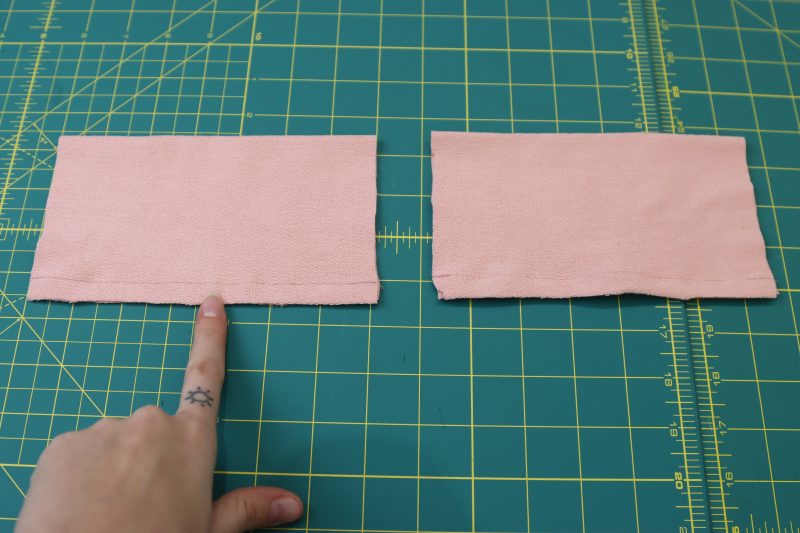
Pattern Pieces & Fabric Cuts Needed
- (A) BACK
- Fabric – Cut 1 on Fold
- (B) FRONT
- Fabric – Cut 1 Mirrored
- (C) SLEEVES
- Fabric – Cut 2 Mirrored
- (D) CUFFS
- Fabric – Cut 2
- (E) WAISTBAND
- Fabric – Cut 1
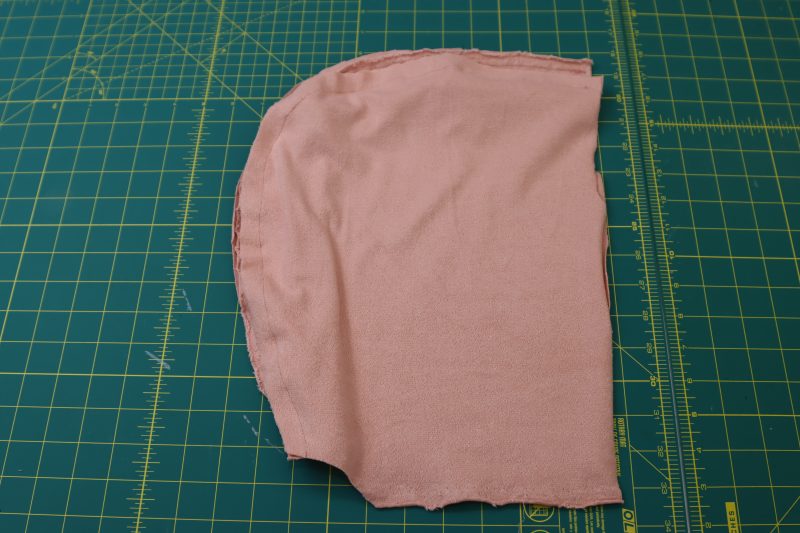
- (F) HOOD SIDES
- Fabric – Cut 2 Mirrored Sets
- (G) HOOD CENTER
- Fabric – Cut 2
Sew with a 1/2″ seam allowance for all seams unless otherwise specified.


Step 1
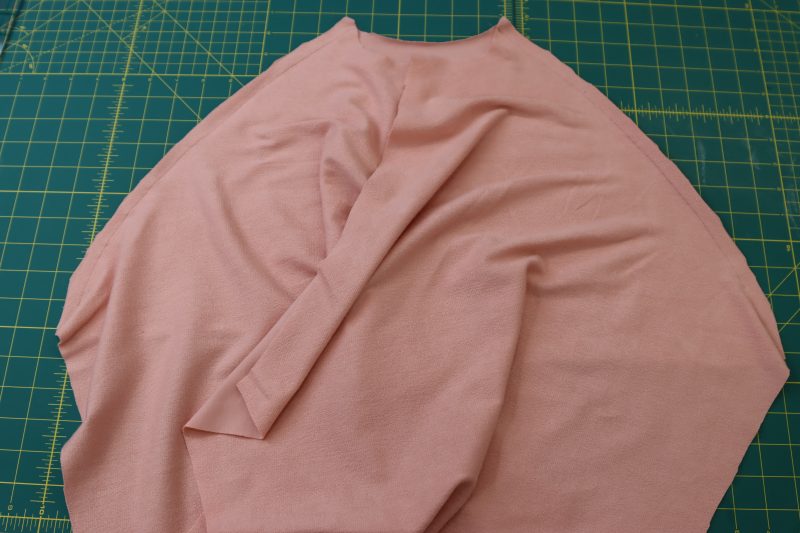
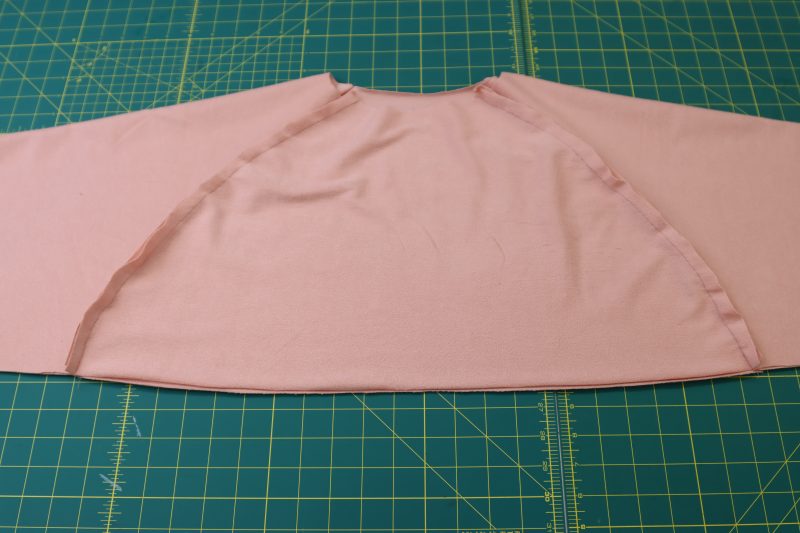
RAGLAN SLEEVES
- Place the fronts of the sleeve caps right sides together with the side seams of the front hoodie piece.
- Pin the fronts of the sleeve caps to the sides of the front hoodie piece.
- Sew the front raglan seam.
- Open the raglan seams so that they are laying flat.
- Repeat the same steps but with the back sleeve caps and the back hoodie piece.
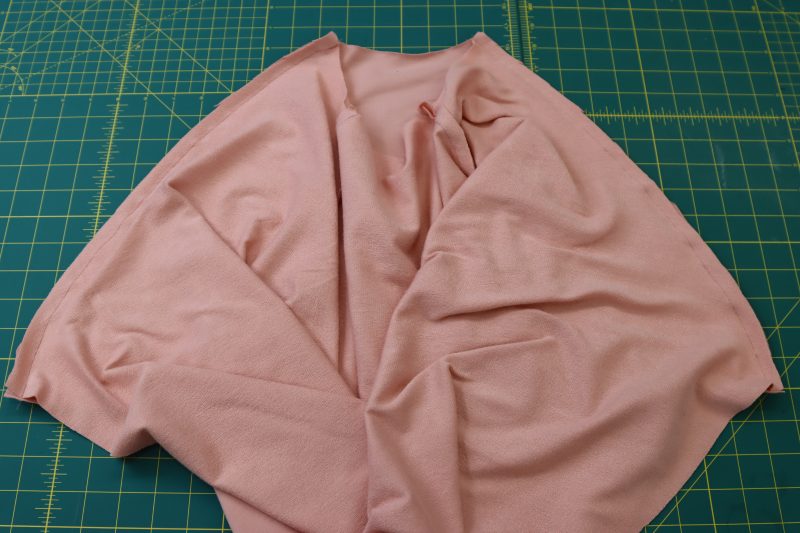
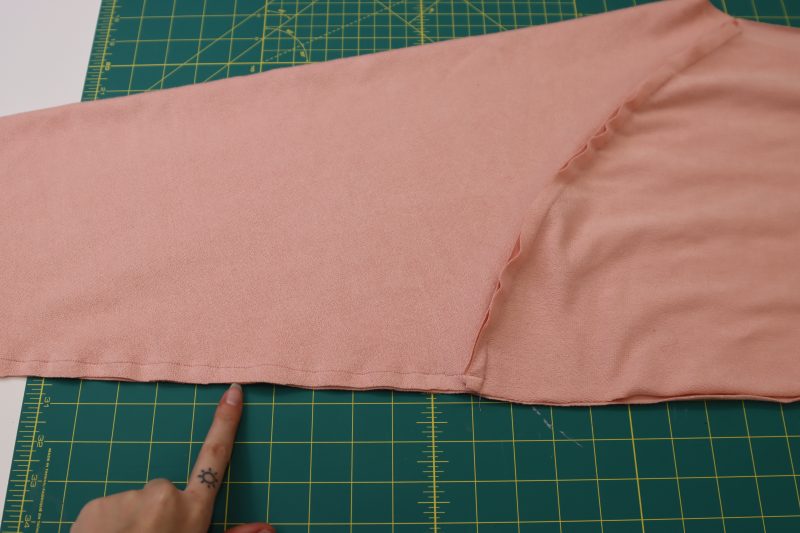
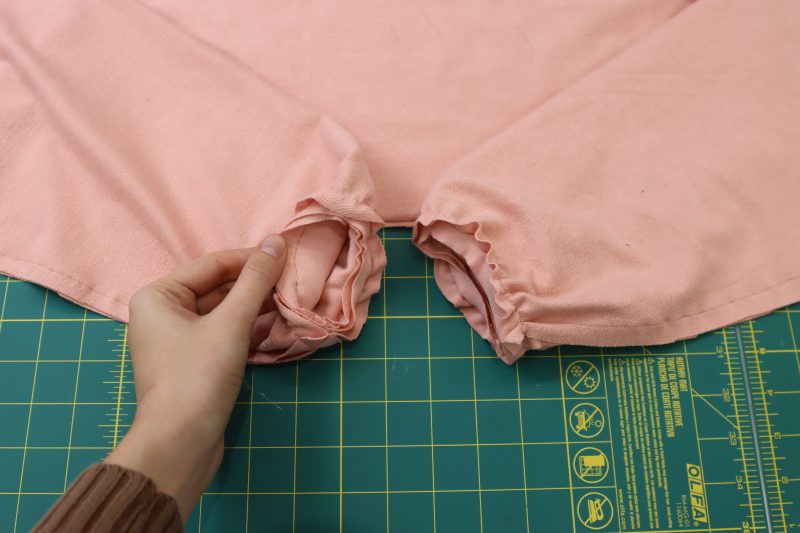
- Once the back raglan seam is attached, fold the entire piece of fabric right sides together along the sleeves, as shown in the photo below.
- Sew a straight stitch from the wrist to the raglan sleeve to create the oversized sleeve.
- Repeat on both sleeves.
Step 2
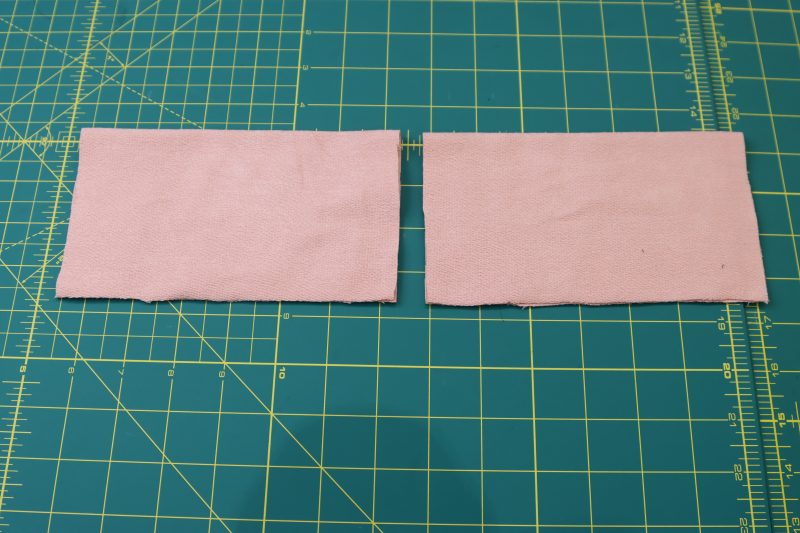
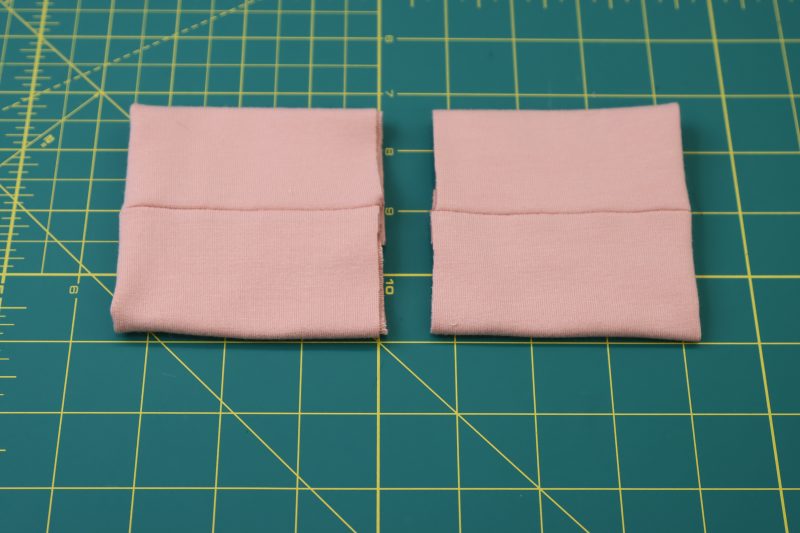
SLEEVE CUFFS
- Fold the sleeve cuffs right sides together hamburger style (hamburger style means you want the longest edge of the rectangle to be the one that is cut in half by the fold. Hotdog style would be if the long side of the rectangle was parallel with the fold instead of perpendicular. Does that make sense?).
- Pin and sew the edge opposite to the fold to create a closed loop.
- Fold the loop wrong sides together to create one side that has raw edges and one side that is folded. The folded side will be the very edge of the sleeve.
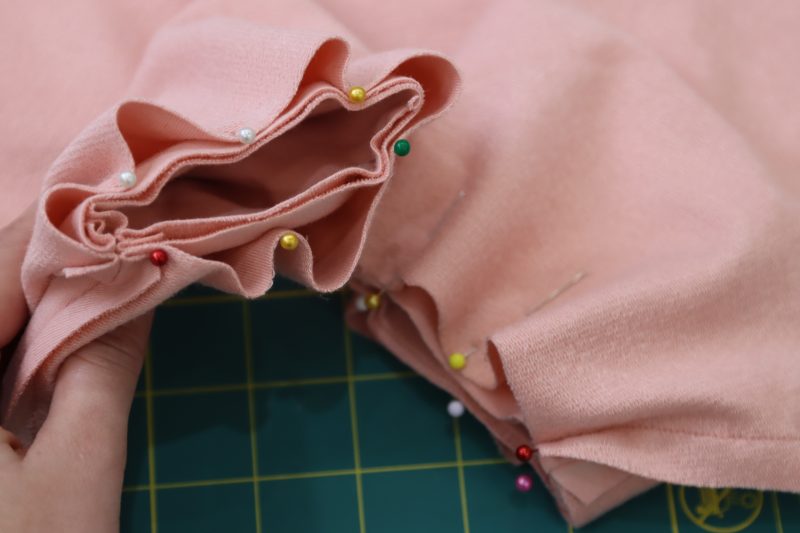
- Pin and sew the sleeve cuffs to the openings of the sleeves, right sides together.
Step 3
WAISTBAND
- The process for attaching the waistband is pretty much identical to attaching the sleeve cuffs, except on a bigger scale.
- Fold the waistband piece right sides together hamburger style.
- Pin and sew the edge of the waistband opposite to the fold.
- Fold the waistband wrong sides together so that the right sides are facing out on both the inside and the outside of the waistband.
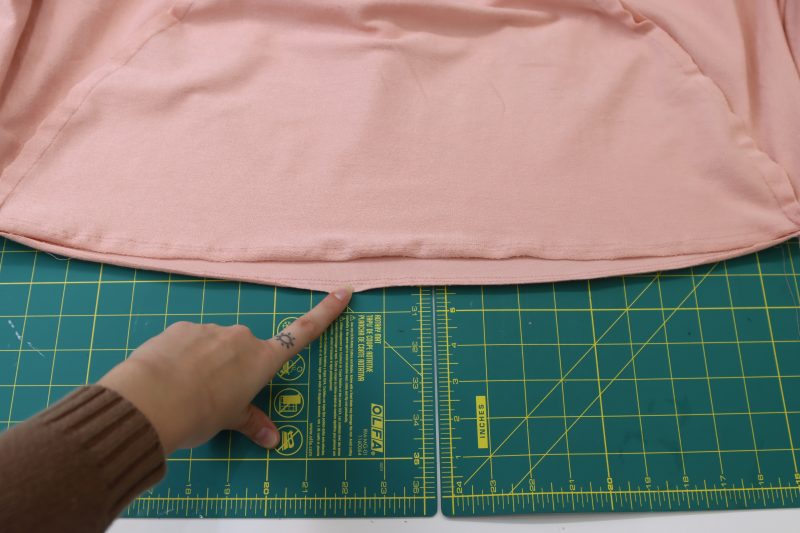
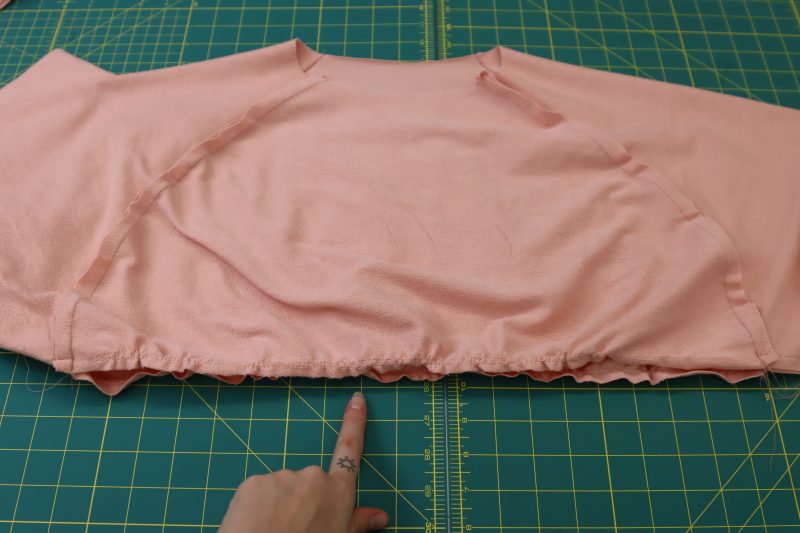
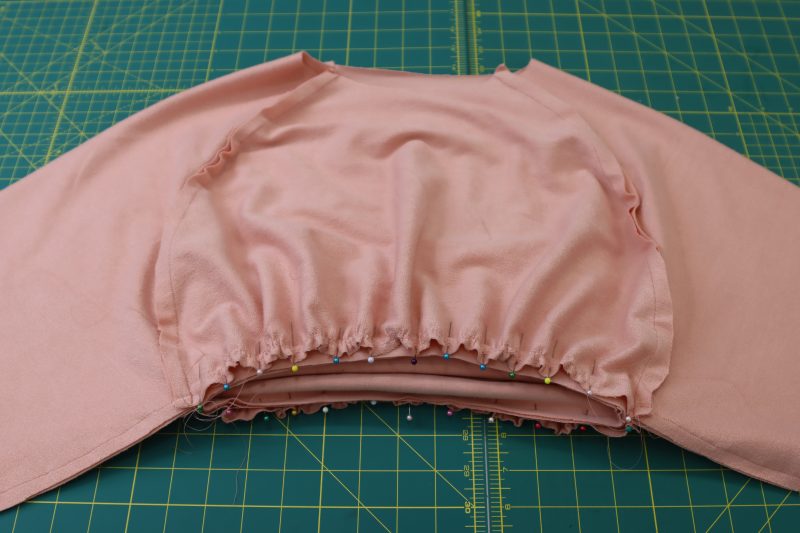
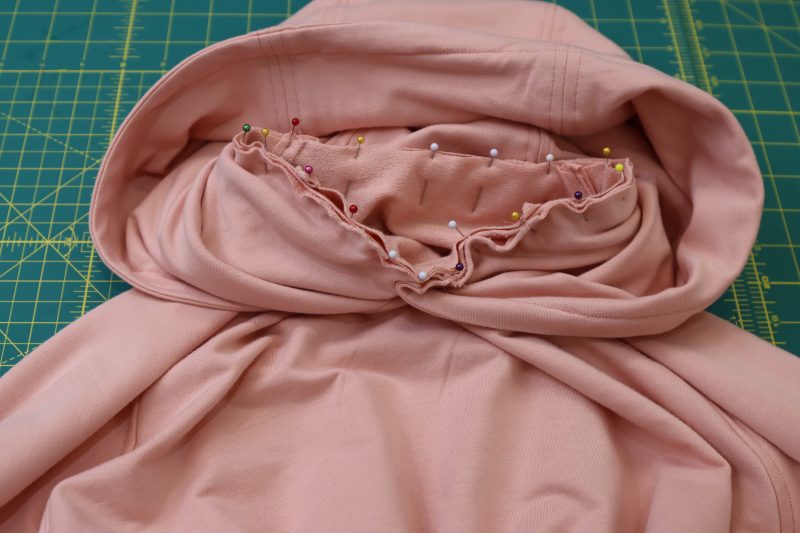
- Now we’re going to gather the waistline of the hoodie because it’s actually much bigger than the waistband and we want it to be really poofy and billowy. Start by sewing two parallel straight stitches with a 3.5 millimeter stitch length along the bottom opening of the hoodie.
- Grab only the top threads that you just sewed and tug on them gently while sliding the fabric along the thread to ruffle it.
- Keep gathering the waistline of the hoodie until it is the same length as the waistband piece.
- Pin and sew the waistband to the gathered waistline of the hoodie, right sides together.
Step 4
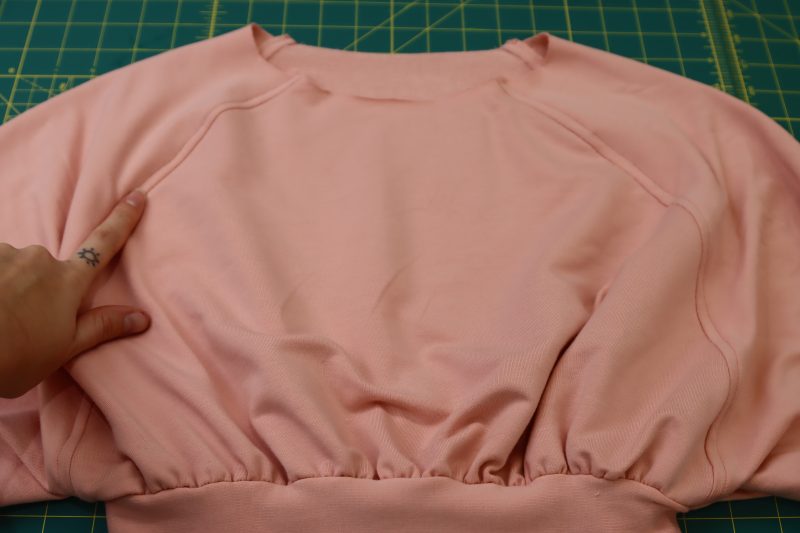
TOPSTITCH
- Fold the seam allowance at the raglan seams towards the sleeves.
- Topstitch over the seam allowance on the outside of the original raglan seam.
Step 5
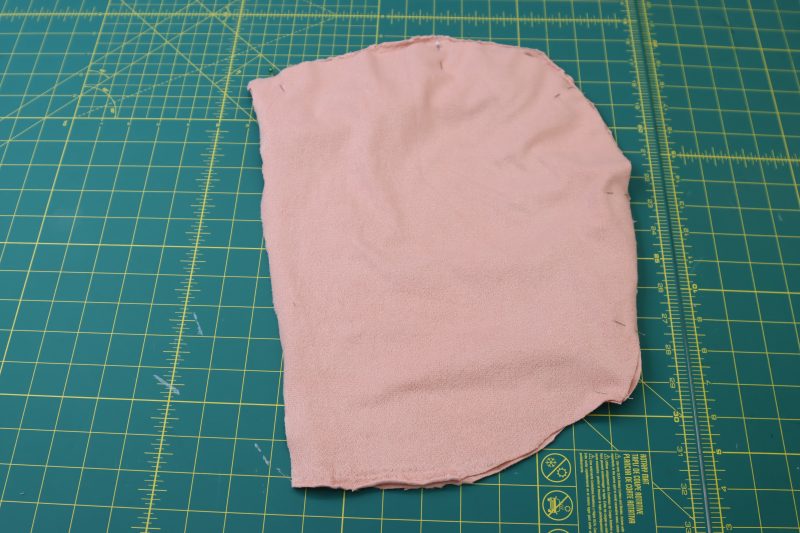
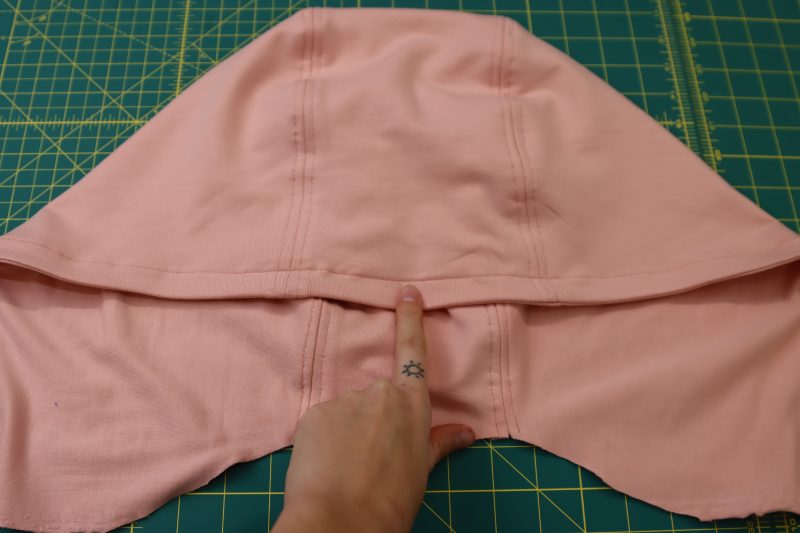
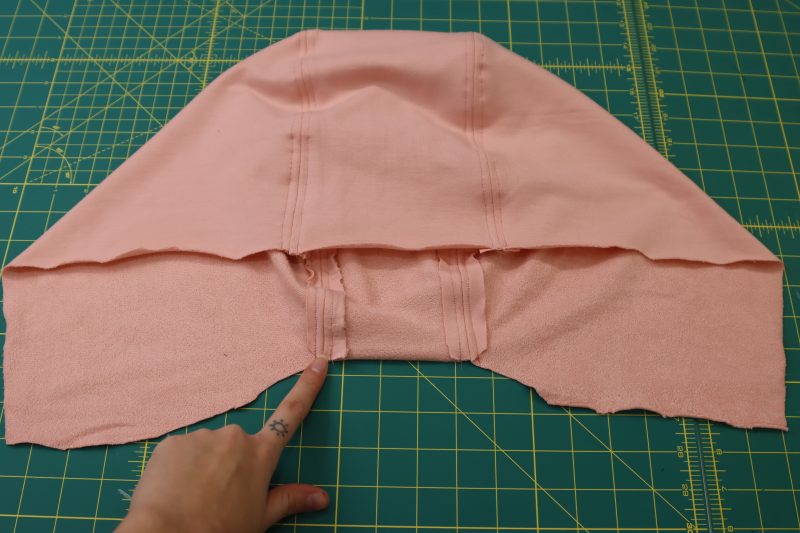
CONSTRUCT HOOD
- We are now going to make two identical copies of the hood: one for the outside and one for the lining.
- Place the long edge of the hood center right sides together with the long curved edge of the hood.
- Pin the hood center to the hood side.
- Repeat the same steps with the opposite side of the hood center so that it has pins and a hood side on both of its long sides.
- Sew around the pins on each side of the hood center.
- Repeat the above steps for the hood lining (made with the exact same fabric here).
- Once both hoods are assembled, open the seam allowances flat and topstitch on both sides of the center hood seams.
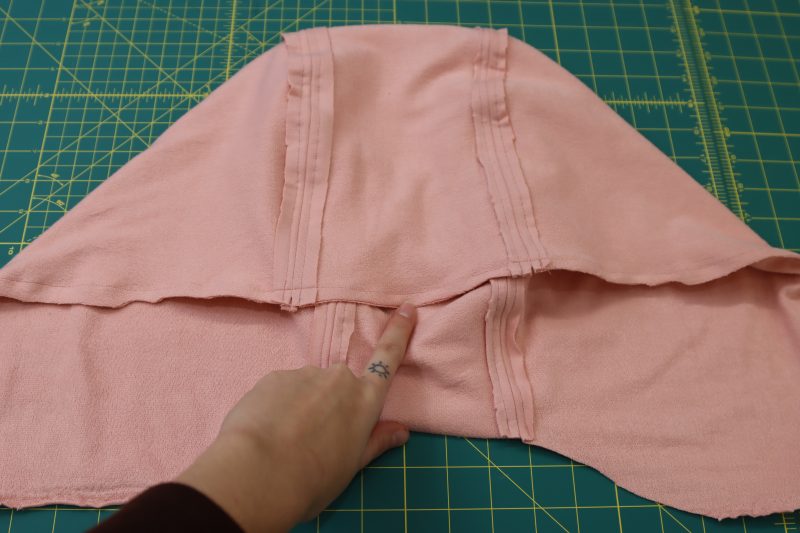
- Place the hood right sides together (one inside of the other).
- Pin and sew around the face opening at the front of the hood (perpendicular to the seam you just sewed before).
- Flip the hood right sides out and fold it along the seam you just sewed around the face opening.
- Sew a closed channel around the face opening with a 1 inch seam allowance. This is where the drawstring will go later.
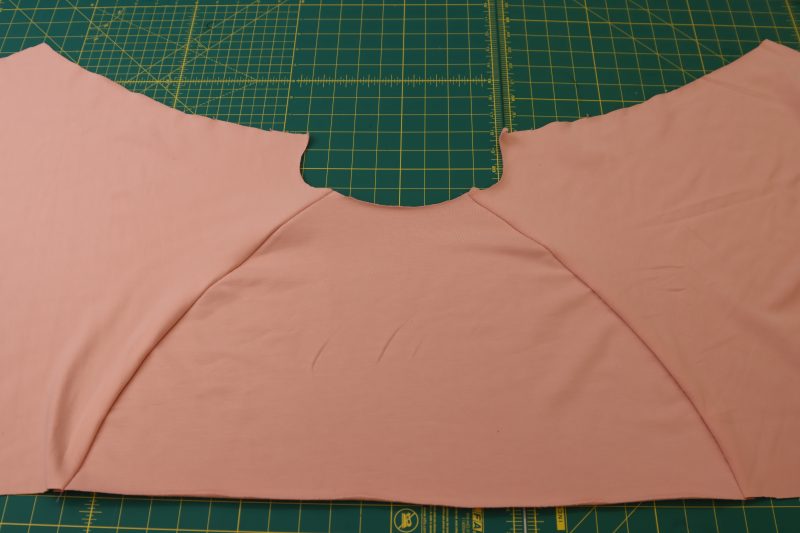
Step 6
ATTACH HOOD
- Pin the hood right sides together with the neckline of the hoodie, letting the front corners of the hood overlap with each other a little bit in the front.
- Sew around the neckline to attach the hood.
- Fold the seam allowance down into the body of the Hoodie topstitch the seam allowance under the neckline.

Step 7
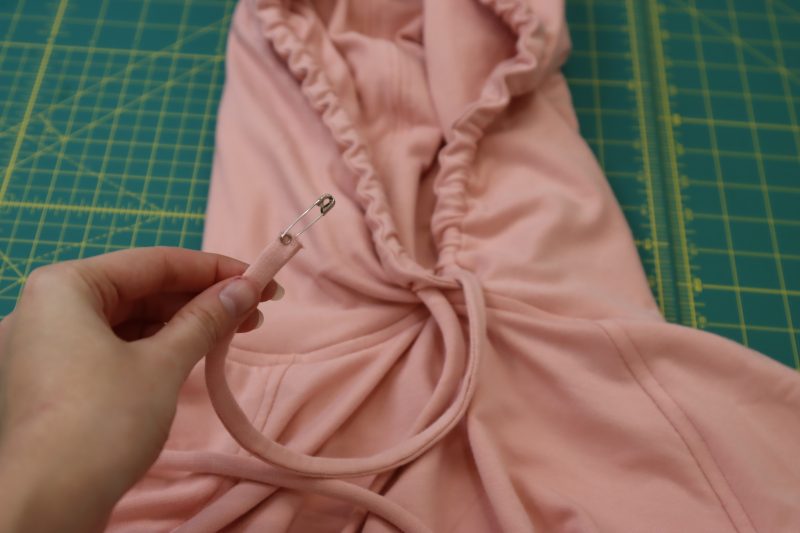
DRAWSTRING
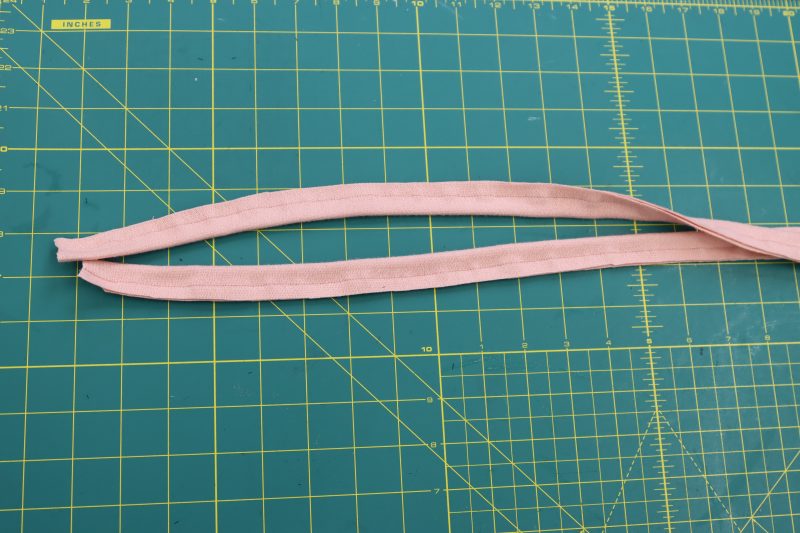
- Cut a piece of your fabric that is at least 1 yard long and 1.5 inches wide.
- Fold the strip of fabric in half hotdog style (with the long edges of the strip parallel with the fold).
- Sew across the length of the strip with 1.4 inch seam allowance to create a closed tube.
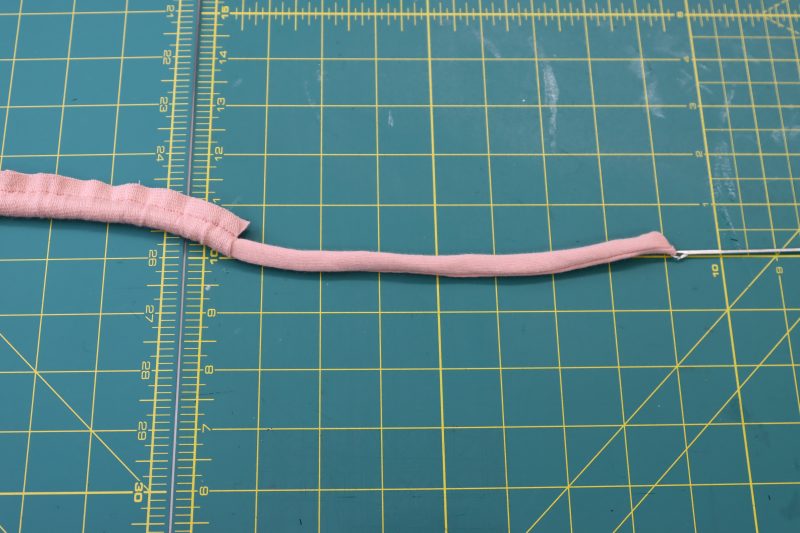
- Flip the tube right sides out using a tube turner.
- Use an awl to poke a tiny hole on both sides of the channel you made in the hood in the previous step (only poke the awl through the outer layer of the hood. Don’t go through both layers).
- Poke a safety pin through one of the ends of the drawstring.
- Feed the safety pin all the way through the channel around the hood so that it goes in one hole and out the other.
- Detach the safety pin once the drawstring goes all the way around the hood.
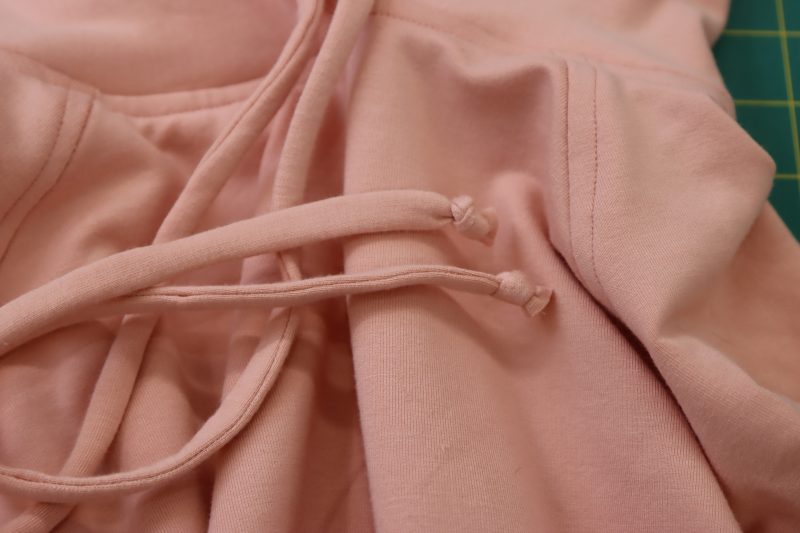
- Tie tiny knots on the ends of the drawstrings and trim off any extra fabric at the end of the knot.


Sewing Success: The Finished Forest Park Hoodie
Share this post with a friend (or two!), download the Forest Park Hoodie free sewing pattern, and show us which fabrics and colors you choose, using the hashtags #MoodForestParkPattern & #MadeWithMood—and don’t forget to tag us @MoodFabrics, too.


Free Sewing Pattern Inspiration for Your Next Project
With 480+ free sewing patterns and counting, your opportunities for sewing with Mood are endless!
We hope you had as much fun sewing this hoodie pattern as we did! As always, we want to hear from you—share your thoughts and comments below and let us know where you’ll be wearing the Forest Park Hoodie free sewing pattern!
I need that space dye legging fabric!
Thanks it’s beautiful
Gracias
Can we just extend the bodice pieces longer and not gather it into the tight waistband? This doesn’t look like it would work for plus sizes…
Of course! You can always use the same waistband piece in the pattern but just make it longer so that the bottom of the hoodie doesn’t need to be gathered to fit into it.
Is it just me or the website is not working properly? Im trying to download patterns and can’t find the button anywhere:(
I already tried a few patterns on different browsers, no luck
Hey Barb! You can download the pattern for free by entering your name and email address into the field under “Download Your Free Sewing Pattern”. Then, check your email inbox (and your spam, just in case) for an email from Mood Sewciety Patterns with the subject line “Your Free Download from Mood Sewciety”. Scroll down to the blue link under the title of the email and click on that. It will bring you to a web browser page where you have to scroll down and find the orange button that says “click here to download your free sewing pattern”. That button will redirect you to the webpage with the PDF of the pattern, which can be printed on 8.5×11 paper on your printer at home. Let me know if you need any additional help accessing the pattern!
Hello! I love love love this pattern, but I don’t have 42 pages worth of ink at my home printer. I could print it somewhere else, but is there an A0 version of this pattern I could send to a print shop or something?
Hi Zhani! Unfortunately we do not offer the A0 version for large printing, but if you send the A4 version to a print shop, they should be able to print all the pages for you, you just have to tape them together.
I made this with cotton fleece and the sleeves were way to big.
Hi Milica! The sleeves are meant to be super oversized and go all the way down to the waist. Are they too long? If so, you want always cut them from the bottom to make them shorter.
It’s very pretty
Is the waistband supposed to be cut on the crossgrain? I didn’t see any fabric pattern layout. Or should I be using 4 way stretch fabric? Thanks.
Hey Laura! This one was 4 way stretch, but you can use 2 way stretch. Just make sure that when you cut out the waistband, the part that goes around your waist and over your head should be cut so that it can stretch a lot (the stretchiest direction of the fabric should be horizontal on your body).
After cutting out my pieces, how many should I have?
Hey Penny, under the Pattern Pieces & Fabric Cuts Needed section, it tells you how many fabric pieces there should be of each pattern piece.
Thanks for this pattern. I think it’s very impactful and not too difficult. Do you think I could make a buttonhole rather than use the awl? I’m using Ponte Roma (UK) and I’m not so sure if it will cope with a poked hole. I might also use a coloured cord. Thanks and thanks again for a great pattern!
Yeah Martin! You can use a buttonhole instead of an awl.
Can I sew a buttonhole rather than hole to thread the cord through rather than poke a hole with an awl? I’m using Pont Roma. I love the pattern. It is impactful.
Yeah of course, you could do a buttonhole or even hand stitch around the hole to reinforce it.
Hey there,
There is a slight discrepancy in the fabric cutting guide. Under B front, it says cut one mirrored, whereas in the actual printout pattern it says cut one on fold. Otherwise, the pattern is great; I love the baggy sleeves and fitted waist.
Thank you
Merci
I LOVE THIS!!!!!!!!!!!!!!!!!!!!!!!!!!!!!!!!!!!!!!!!!!!!!!!!!!!!!
AND WE LOVE YOU!!!
Really cute hoodie but why is the hood GIANT? I feel like I should have a bobble head. Easily tweaked though. The poofy sleeves and fitted waist are darling. I’ll have fun playing with this in some different fabrics. Recommend adding several inches to the waist if using fleece that does not have as much stretch.
Hey Kristie! We would love to see how you altered the hood for this pattern! Tag us on social media with the hashtag #MadeWithMood to share your creation!
When attaching the sleeves, does the armhole attach to just the curved parts of A and B or all the way down to the waist, including the short, straight portion? I hope that question makes sense! I’m wondering if there’s short portion of the top below the sleeves and above the waistband or do the sleeve go right to the waisband.
Thanks!
Hey Cherie! Thanks for your question. The sleeves need to span the entire side seam of the hoodie. THEN, once the sleeves are attached, the waistband goes around the waistline of the hoodie, with the armpits of the sleeves touching the top of the waistband. I hope this is a helpful explanation!
It sure is. Thank you!