

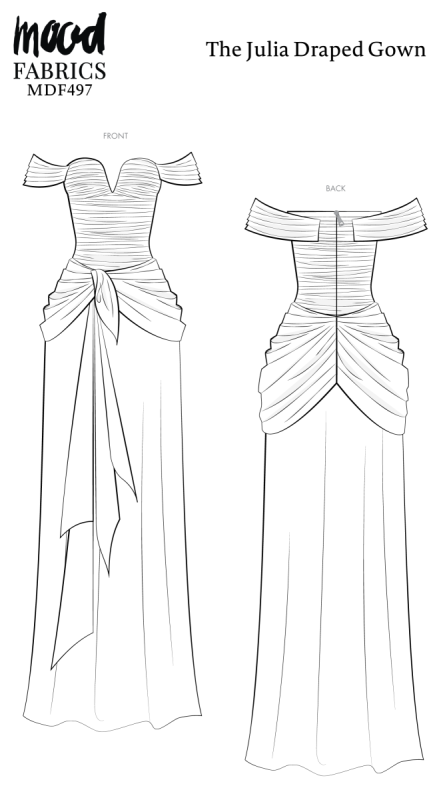
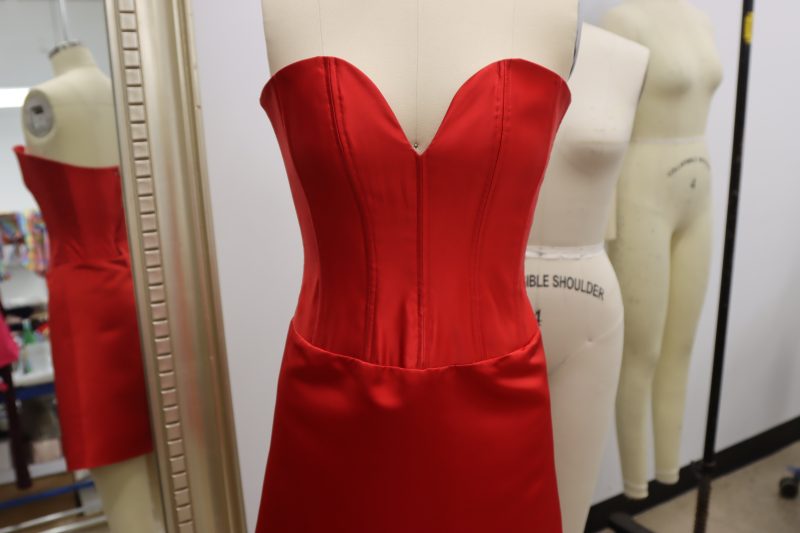
If you’re looking to feel like a pretty woman this Valentine’s day, then meet the Julia Draped Gown, arriving just in time for the most romantic day of the year. This gown channels old-Hollywood romance with a couture-inspired approach to fit and drape. A structured satin corset bodice sculpts the body with softly contoured seams, while the deep sweetheart neckline and off-the-shoulder sleeves frame the décolletage in a way that feels both elegant and alluring.
The sheer chiffon overlay is gathered and hand-draped across the bodice, creating fluid ruching and a dramatic front drape that cascades from the waist. Each fold is intentional, allowing the fabric to fall naturally and move beautifully with the body. The result is a silhouette that feels sculptural and romantic..
This pattern walks you through the full couture-inspired process, from creating a muslin mockup for a custom fit to constructing a boned corset and hand draping the gathered chiffon overlay directly onto the bodice. While the techniques may look impressive, they are broken down step by step so you can approach the project with confidence and creativity.
Whether you are dressing up for an intimate date night, a glamorous Galentine’s celebration, or simply sewing something special for yourself, the Julia Draped Gown is designed to feel cinematic and personal. With a couple of weeks before Valentine’s Day, there is still plenty of time to create a gown that fits your body beautifully and feels just as meaningful as the occasion.


Essential Materials & Sizing Guide for the Julia Draped Gown
Continue reading for a breakdown of what knowledge and materials you need for creating your very own draped gown! We’ve got you covered with the recommended materials we used—if you want to follow along exactly—as well as a curated list of alternative fabric type recommendations if you want to customize your own version. The Julia Draped Gown free sewing pattern download includes technical drawings for seam and draped gown visibility, plus a size chart to help you find your perfect fit!
Purchase Products Used Below:
Quantities indicated are for sewing a size small draped gown. Toggle the ‘SHOP THIS LOOK’ box to find quantity estimates for other sizes.
- 3 yards of Polyester High-Multi Chiffon – Red – Netta Collection by Mood
- 3 yards of Polyester Double Georgette – Red – Mimosa Collection by Mood
- 1.5 yards of Premium Polyester Satin – Red – Gavia Collection by Mood
- 3 yards of Clear Rigilene – 12mm/0.5″
- 1 each of Invisible Zipper 24″ by YKK – 818 Red
- 1 each of Gutermann Sew All Thread 500m – 420 Chili Red
- 1 each of Dritz Black Hooks & Eyes Size 2 – 14ct
- MDF497 – Julia Draped Gown Sewing Pattern (Free download below!)
Additional Products Used:
- Maxi-Lock Serger Thread 3000yds – Poppy Red
- Dritz Sharp Needles Size 5/10 – 20ct
- Gingher Pinking Shears – 7.5”
*Quick Tip! The ‘SHOP THIS LOOK’ box defaults to full-yard quantities. To order an exact half-yard quantity for any fabric, simply use the decrease quantity button (-) to subtract by the half yard. Then click “ADD TO CART” to add all materials to your cart.
(Our system can only display full-yard quantities initially.)
Alternative Fabric Type Recommendations:
The Julia Draped Gown sewing pattern is best suited for featherweight fashion fabrics. Explore other fabric types or colors from our featured collections for your draped gown with the links below.
Fabric Collections Used in this Post:
Download Your Free Sewing Pattern
Submit your name and email in the form below to receive the download link for the Julia Draped Gown free sewing pattern directly in your inbox. Mood Sewciety Patterns will send your free download link via email with the subject line: ‘Your Free Download from Mood Sewciety – The Julia Draped Gown’ (in PDF format for A4 and letter-size printing).
© MoodFabrics.com / MoodSewciety.com – Mass production, resale, or distribution of this pattern in any form is strictly prohibited.
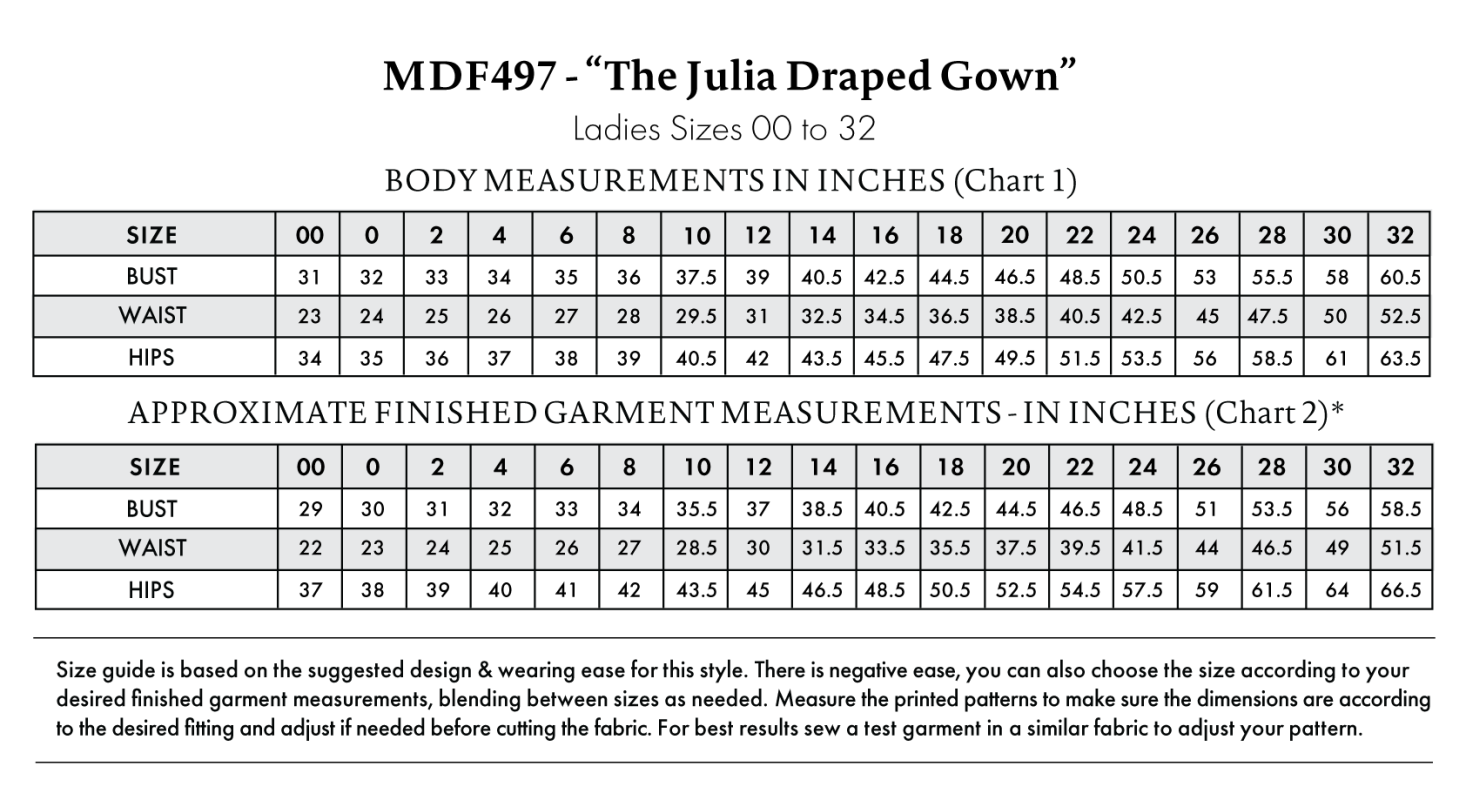
Find Your Perfect Fit
The Julia Draped Gown Sizing Guide is based on the suggested design & wearing ease for this style. You can also choose the size according to your desired finished garment measurements, blending between sizes as needed. Measure the printed patterns to make sure the dimensions are according to the desired fitting and adjust if needed before cutting the fabric. For best results, sew a test garment in a similar fabric to adjust your pattern.
Note: Always read all the instructions before cutting the fabric!
How to Sew The Julia Draped Gown
The instructions provided below are designed to guide you through sewing the Julia Draped Gown from start to finish.


3 Tips for Sewing with Chiffon
⇒ Use extra sharp microtex needles on your machine to keep from pulling on threads in the chiffon.
⇒ Always steam or press your gathers to make sure they’re laying as flat as they can, that way the gathers will lay really close to the body on the corset.
⇒ Sew baby hems on every raw edge. Chiffon is thin and looks clean and professional with a rolled baby hem.


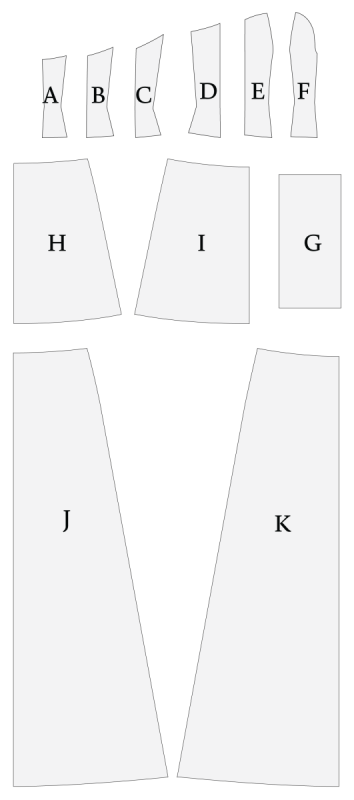
Pattern Pieces & Fabric Cuts Needed
(A) CORSET BACK CENTER
-
FABRIC – CUT 2 MIRRORED
-
LINING – CUT 2 MIRRORED
(B) CORSET BACK MIDDLE
-
FABRIC – CUT 2 MIRRORED
-
LINING – CUT 2 MIRRORED
(C) CORSET BACK SIDE
-
FABRIC – CUT 2 MIRRORED
-
LINING – CUT 2 MIRRORED
(D) CORSET FRONT SIDE
-
FABRIC – CUT 2 MIRRORED
-
LINING – CUT 2 MIRRORED
(E) CORSET FRONT MIDDLE
-
FABRIC – CUT 2 MIRRORED
-
LINING – CUT 2 MIRRORED
(F) CORSET FRONT CENTER
-
FABRIC – CUT 2 MIRRORED
-
LINING – CUT 2 MIRRORED
(G) SLEEVES
-
FABRIC – CUT 2
(H) SKIRT LINING BACK
-
LINING – CUT 2 MIRRORED
(I) SKIRT LINING FRONT
-
LINING – CUT 1 ON FOLD
(J) SKIRT BACK
-
FABRIC – CUT 2 MIRRORED
(K) SKIRT FRONT
-
-
FABRIC – CUT 1 ON FOLD
-
Sew with a 1/2″ seam allowance for all seams unless otherwise specified.


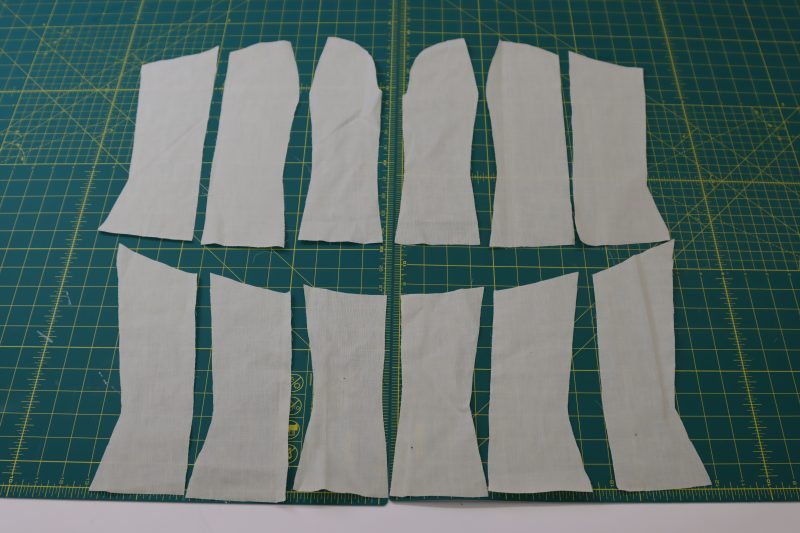
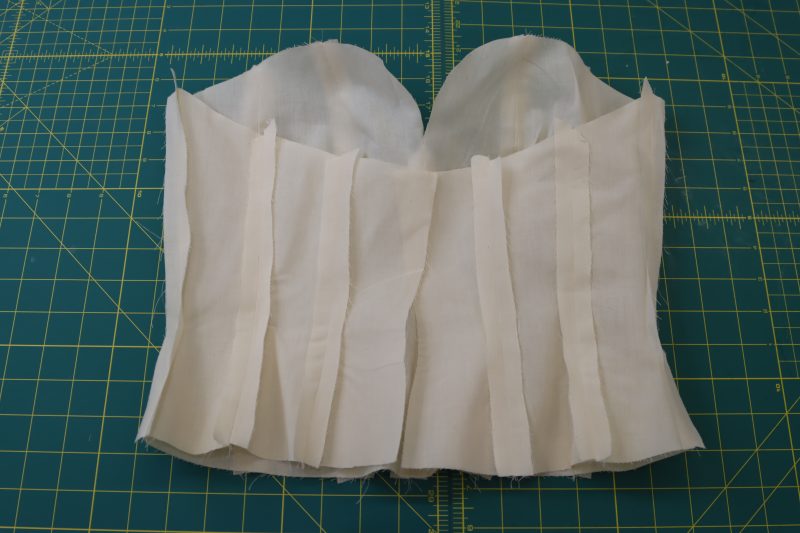
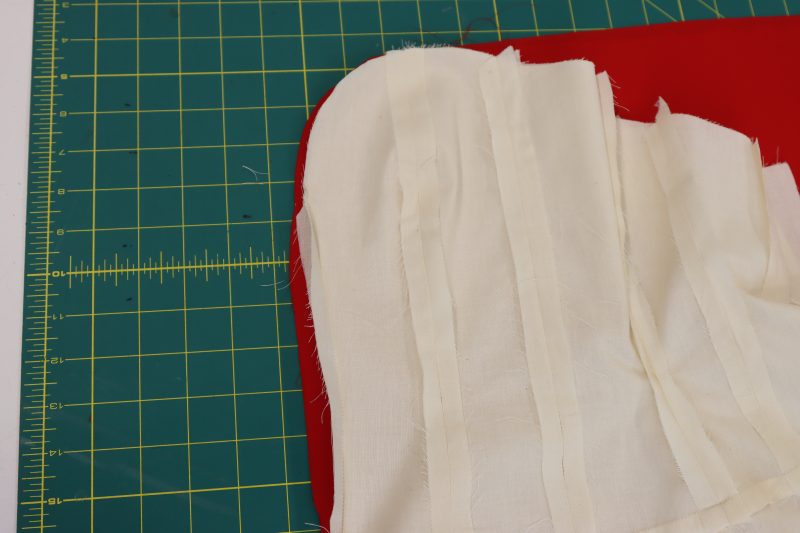
Step 1
MUSLIN BODICE
- Before cutting out the corset pieces with the satin lining, cut them out of muslin to make sure the corset will fit you.
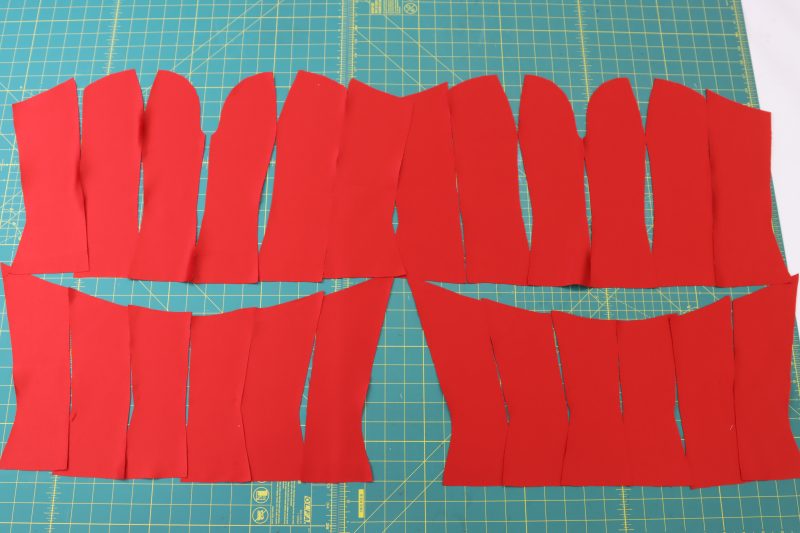
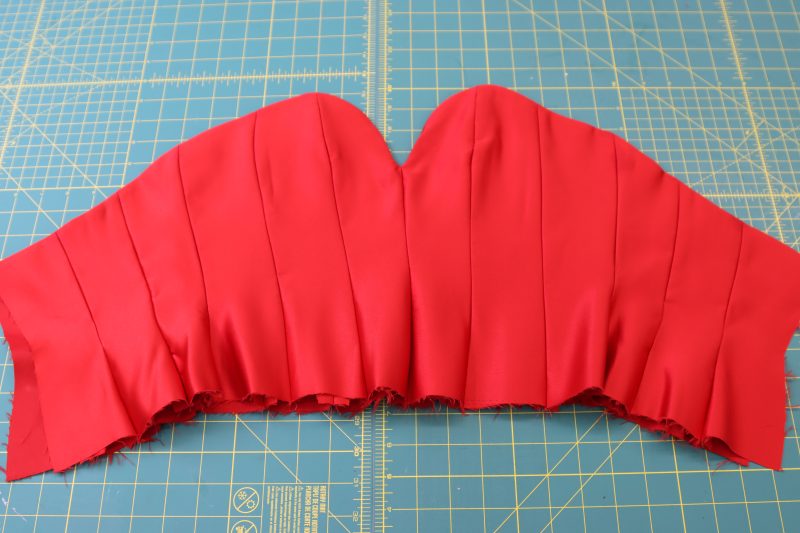
- Layout all the corset pieces with their pattern pieces.
- Place the corset pieces in the order that they will be sewn to each other.
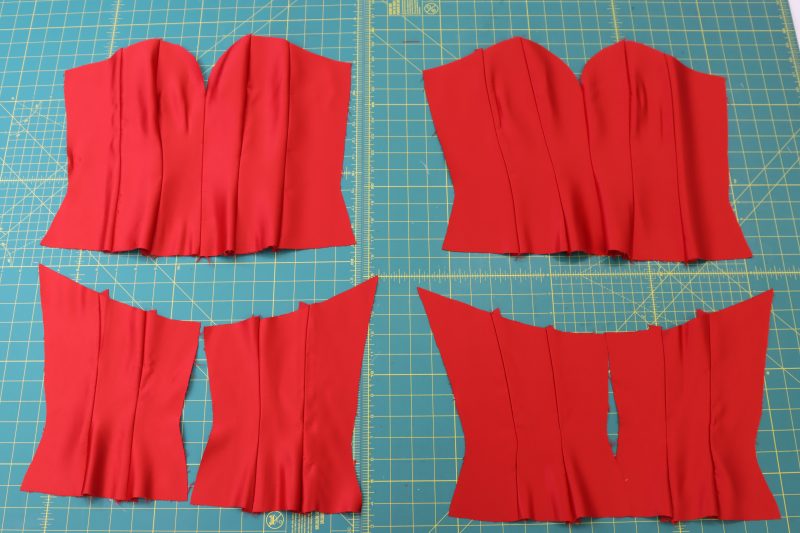
- Pin and sew the corset pieces together as shown in the photo below.
- Pin and sew the corset side seams.


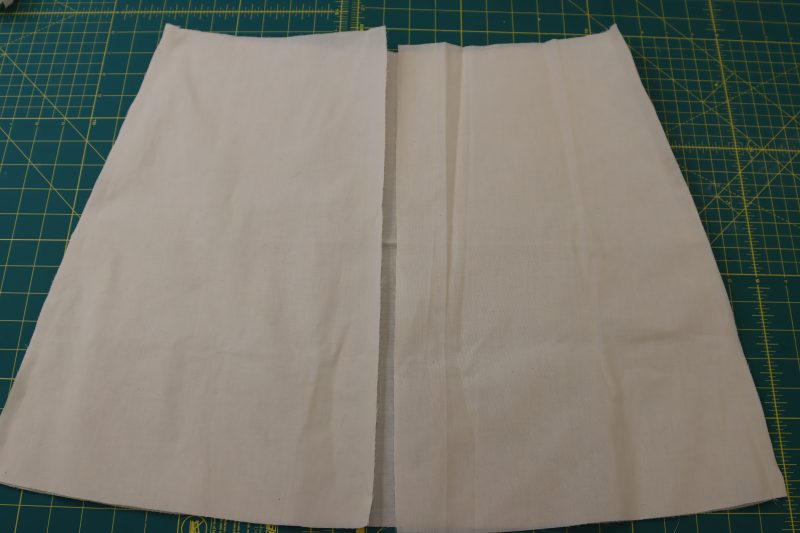
Step 2
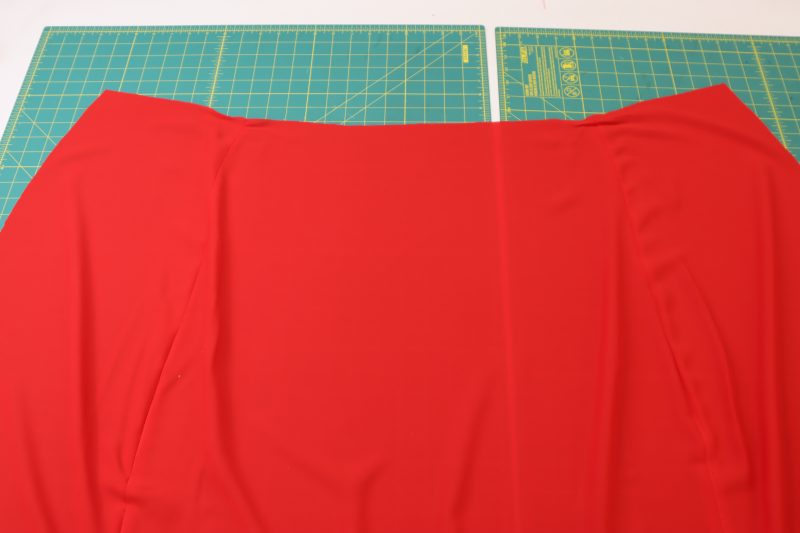
MUSLIN SKIRT
- Before cutting out the lining skirt with the satin, cut it out in muslin to make sure it fits you.
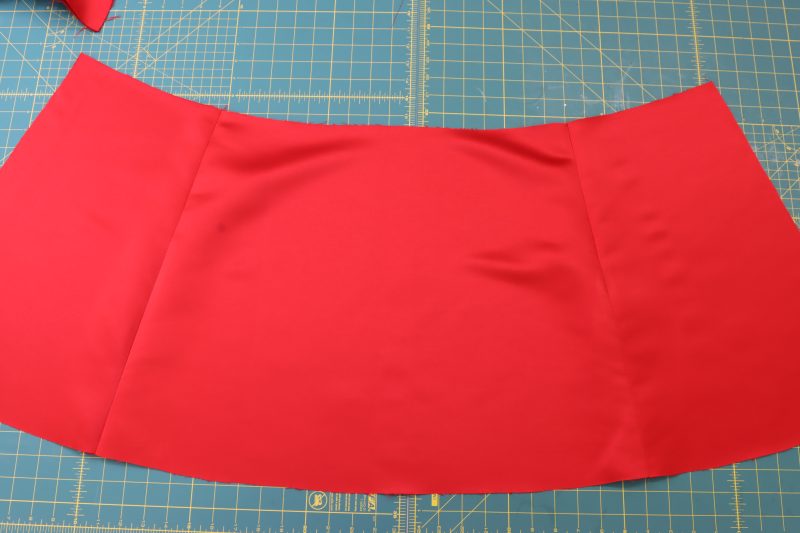
- Place the back skirt pieces right sides together with the front skirt pieces.
- Pin and sew the side seams of the skirt.
- Open the skirt and iron the side seams open and flat.
- Pin and sew the waistline of the corset (keep in mind, we haven’t put boning in the corset yet. When you repeat all these steps with the real fabric, we’ll put the boning in BEFORE we sew the skirt to the corset).
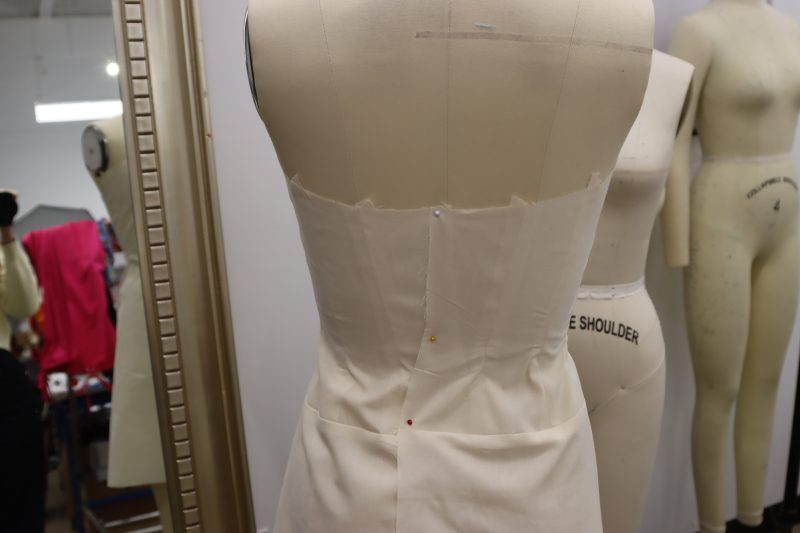
Step 3
CHECK FOR FIT
- Try your muslin mockup on.
- Make sure you have enough room in the back to insert an invisible zipper.
- If any part of the mockup is too big or too small, blend two sizes together when recutting the fabric (for example, if the waist fits fine but the hips are too narrow, blend a smaller size at the waist with a bigger size at the hips, then recut the fabric).

Step 4
SATIN BODICE
- Repeat every single step from step 1 but with the actual satin lining fabric.
- Perform the steps twice, because the corset has two layers (one touching your skin, and one on the outside).

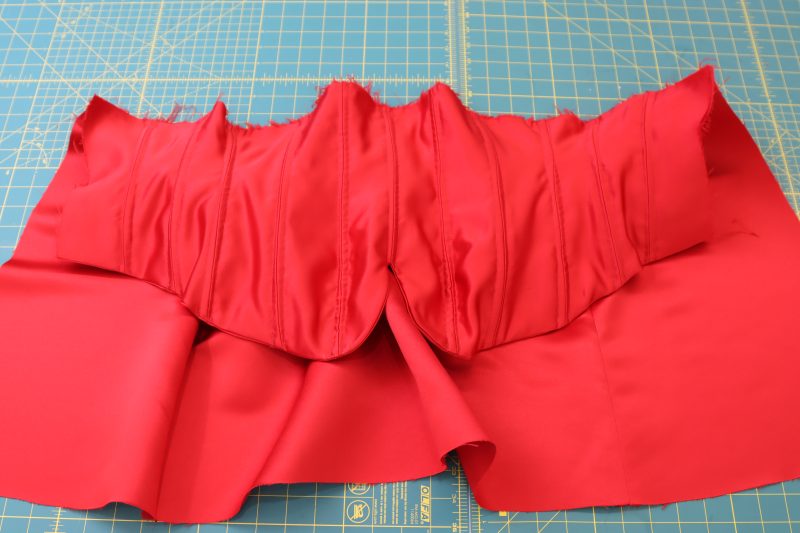
Step 5
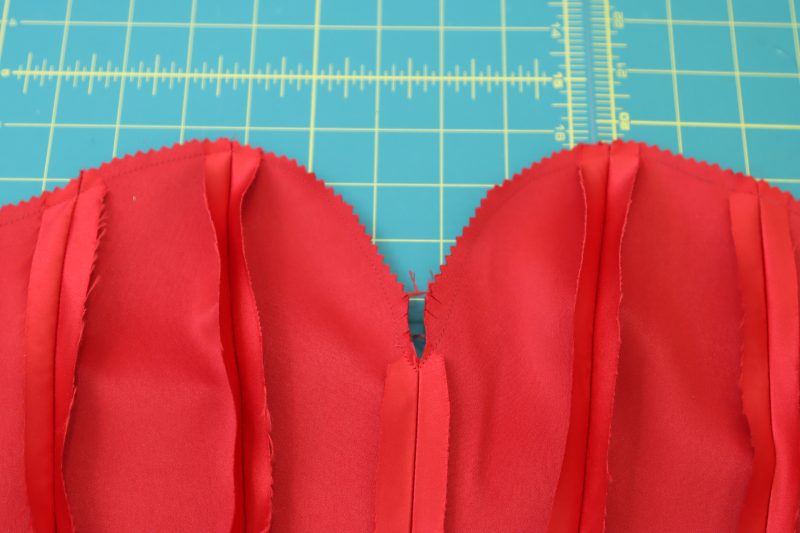
BODICE NECKLINE
- Place the two corset pieces right sides together with the necklines lined up.
- Pin and sew the two necklines together.
- Trim the seam allowance on the neckline with pinking shears to eliminate bulk.
- Flip the corset right sides out.
- Press the neckline seam flat so that the lining is hidden on the inside of the corset.
Step 6
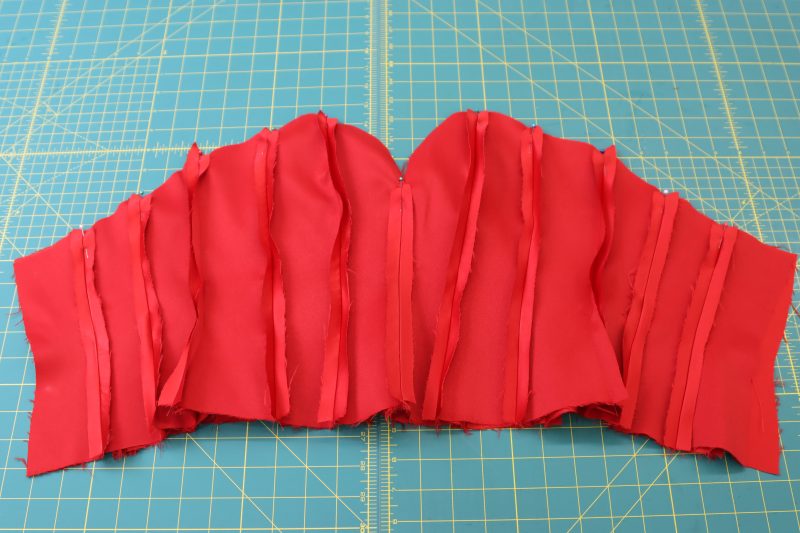
BONING CHANNELS
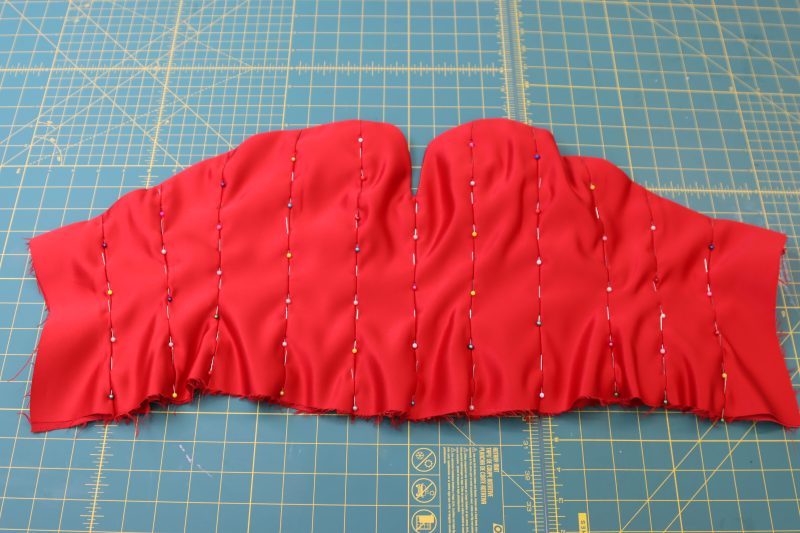
- Carefully place pins along the seams through both layers of fabric to outline where you’ll sew your boning channels.
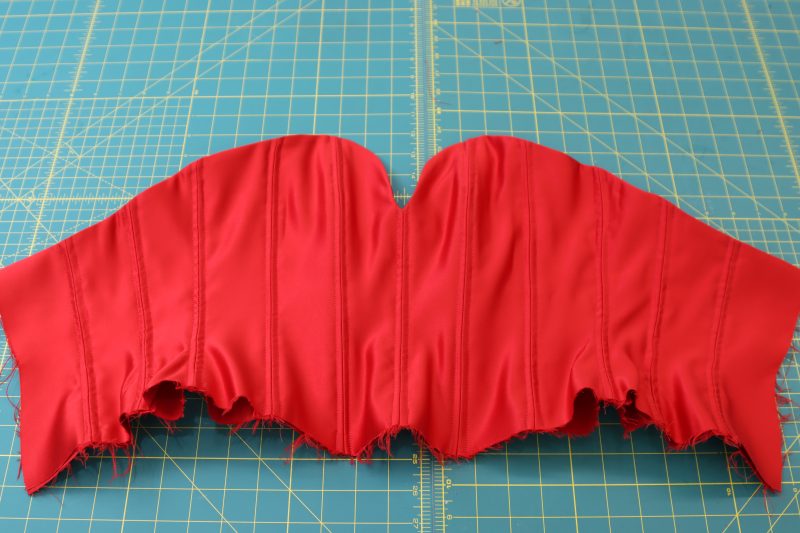
- Sew a straight stitch on either side of each corset seam with a ¼ inch seam allowance.
- Cut pieces of rigilene boning that are ½ inch shorter than the length of each channel.
- Insert the boning into the channels.

Step 7
SATIN SKIRT
- Construct the satin lining skirt the exact same way the muslin skirt was constructed in step 2.
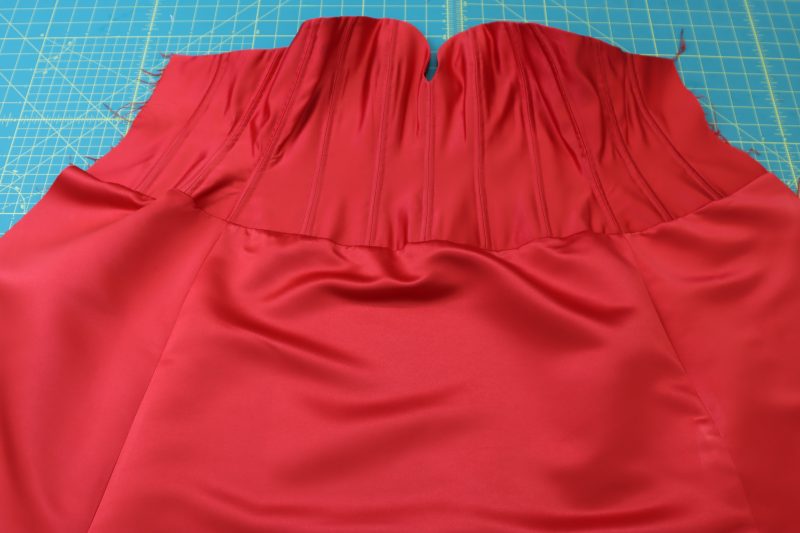


Step 8
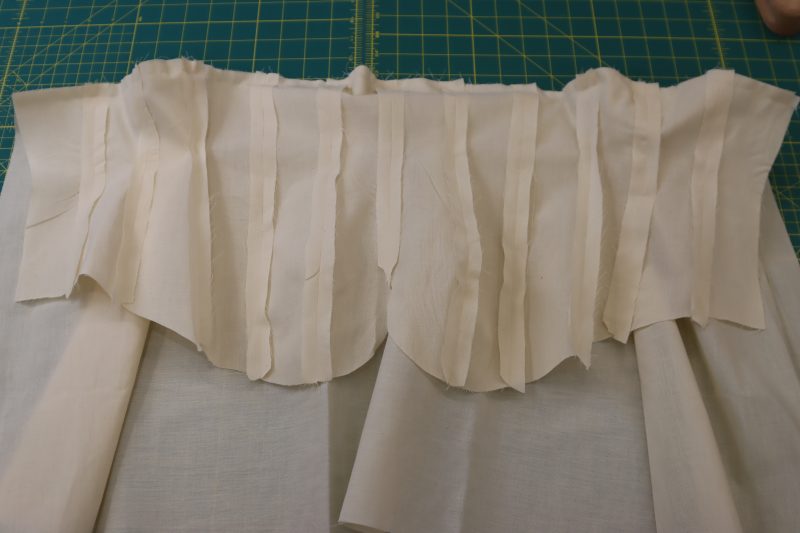
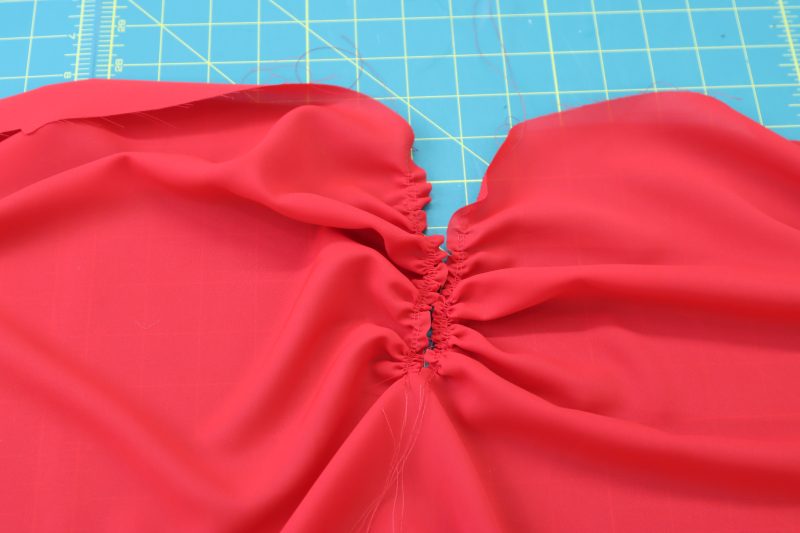
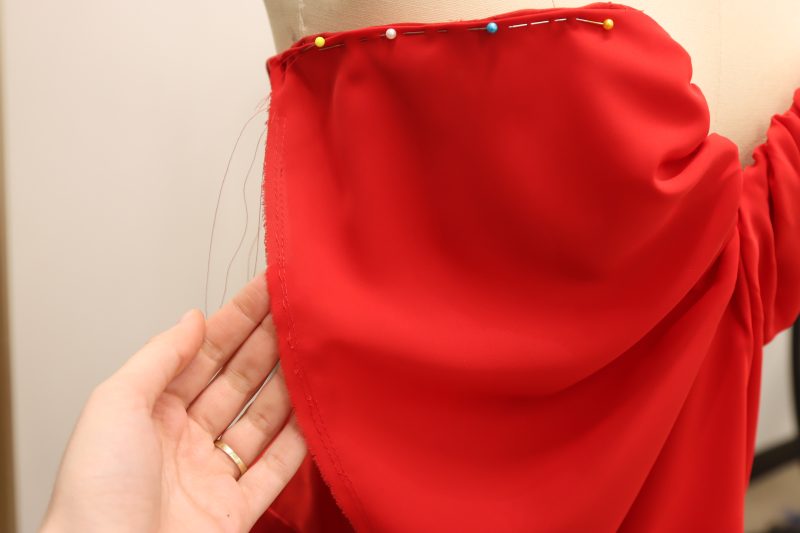
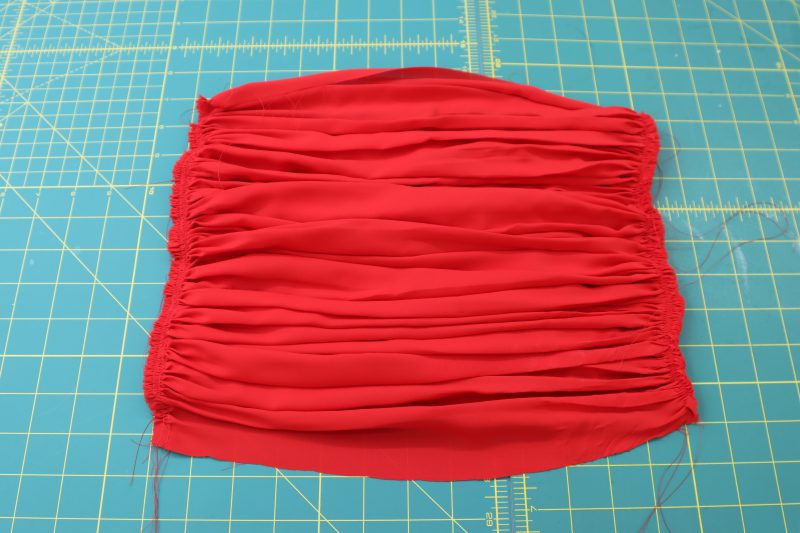
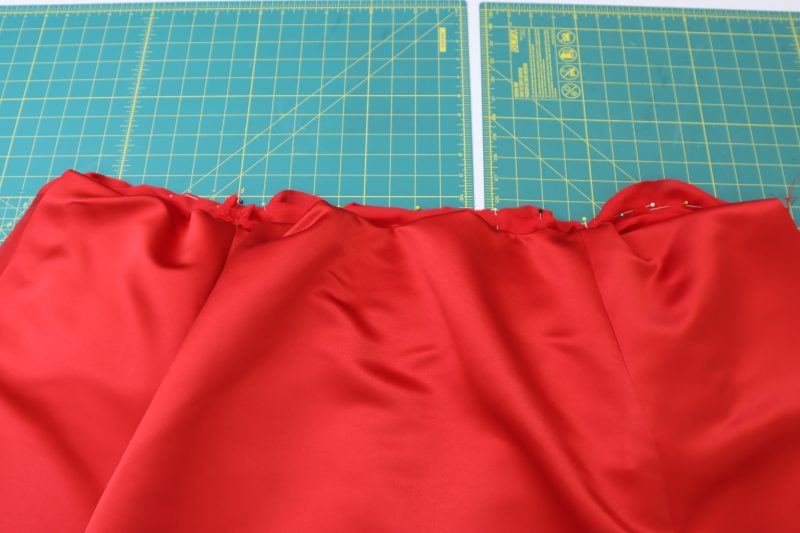
NECKLINE GATHERS
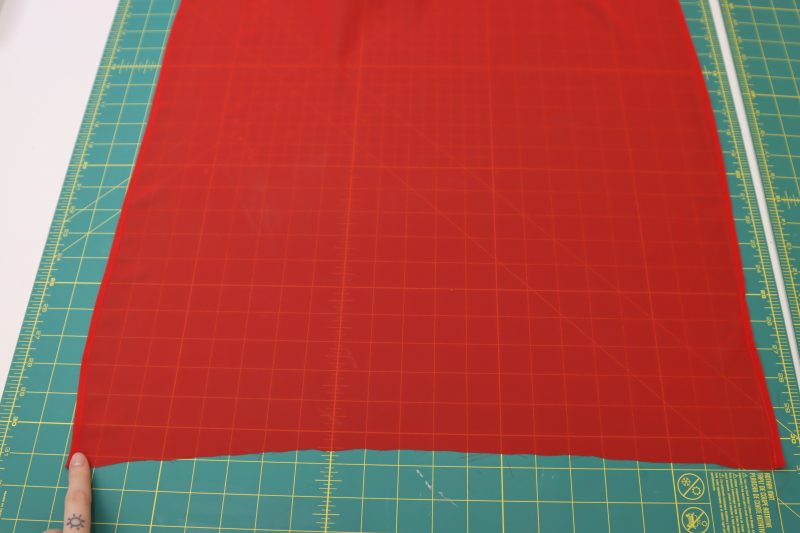
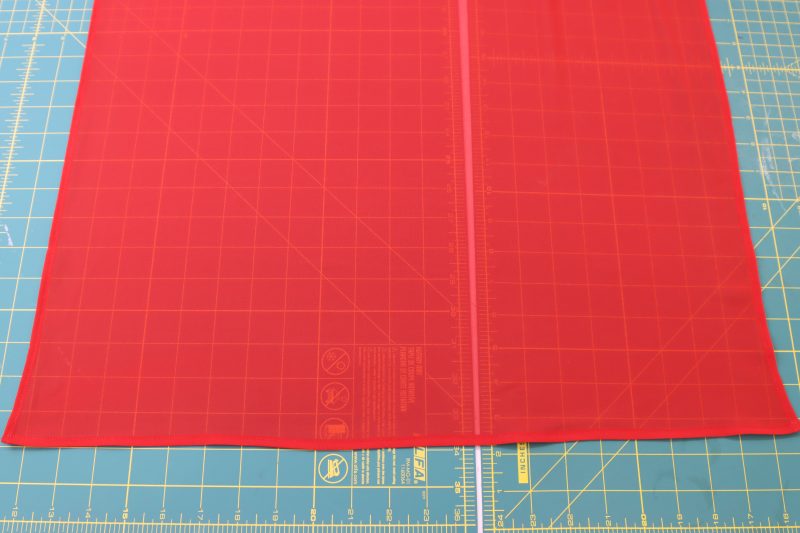
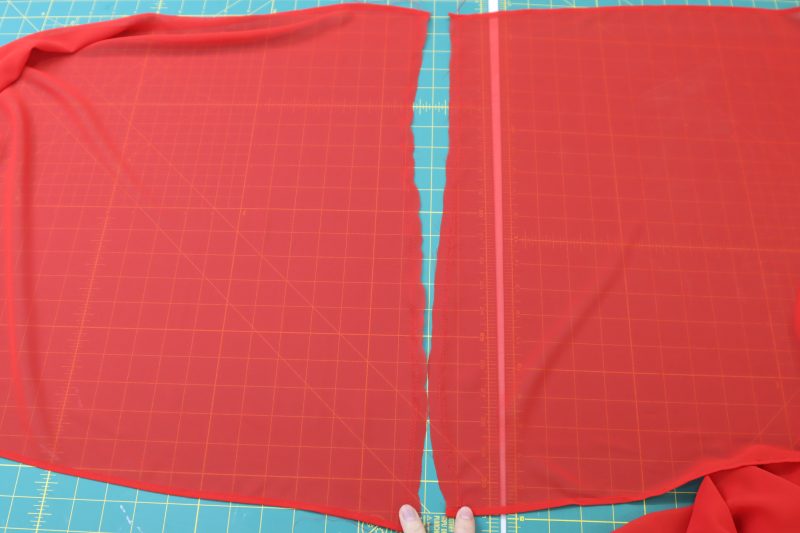
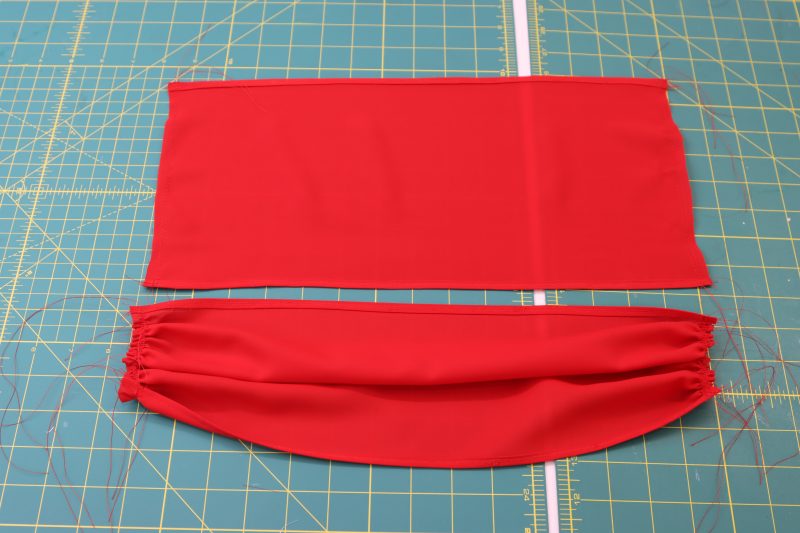
- Cut a piece of the chiffon that is the same width as the corset from side seam to side seam (plus a little extra to give yourself room to make mistakes) and twice the length of the corset.
- Fold that piece of chiffon in half longways and lay the muslin bodice draft on the fold.
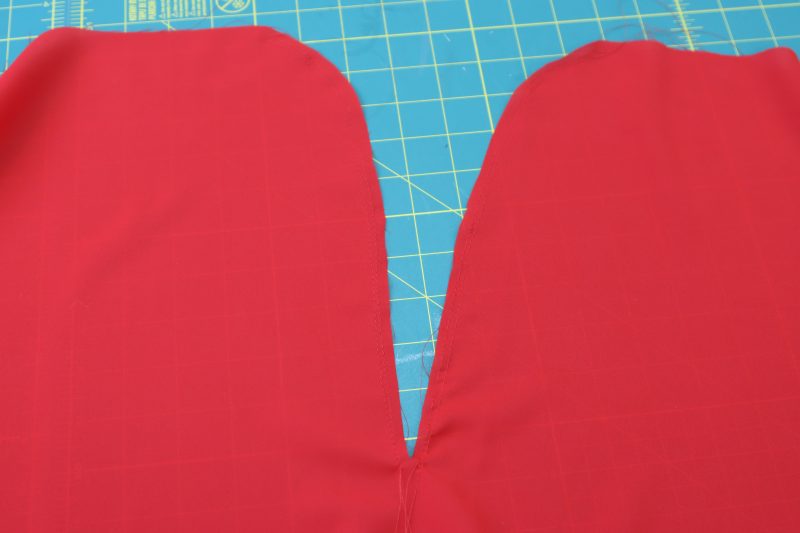
- Cut the chiffon around the V-neck of the muslin as shown in the photos below.
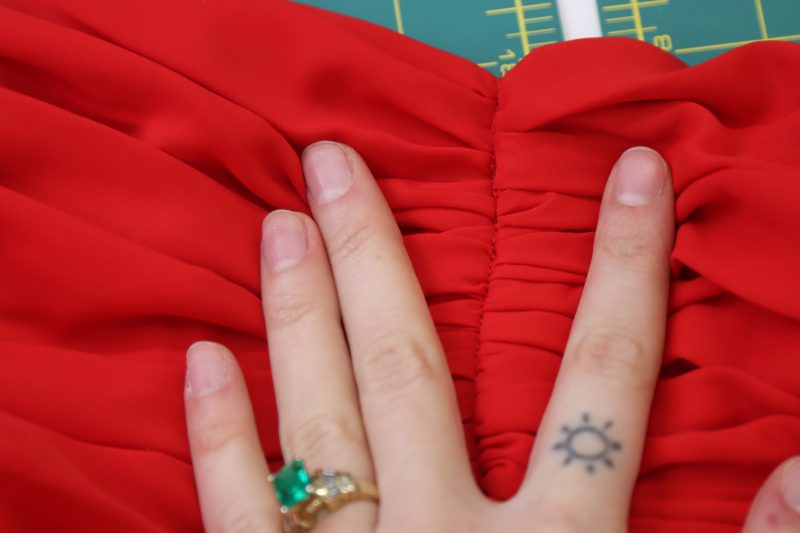
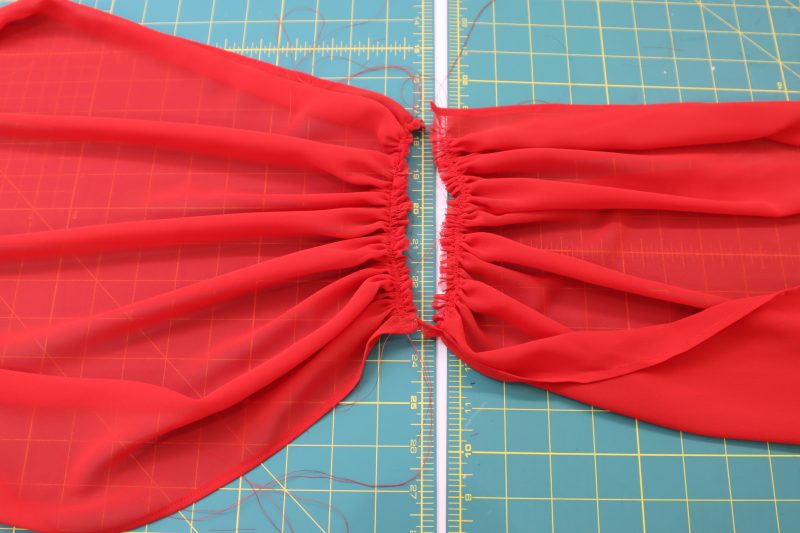
- Sew gathering stitches along both sides of the V-neck.
- Pull the gathering stitches to gather the V-neck.
- Press the V-neck gathers with an iron.

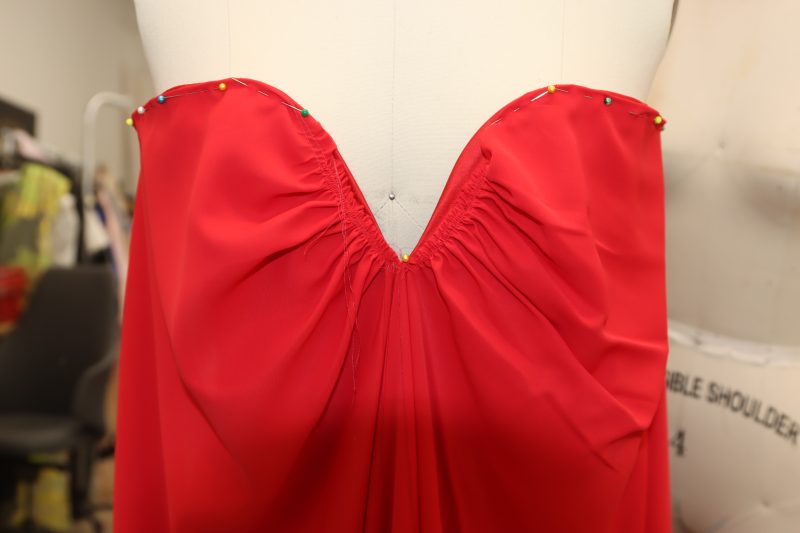
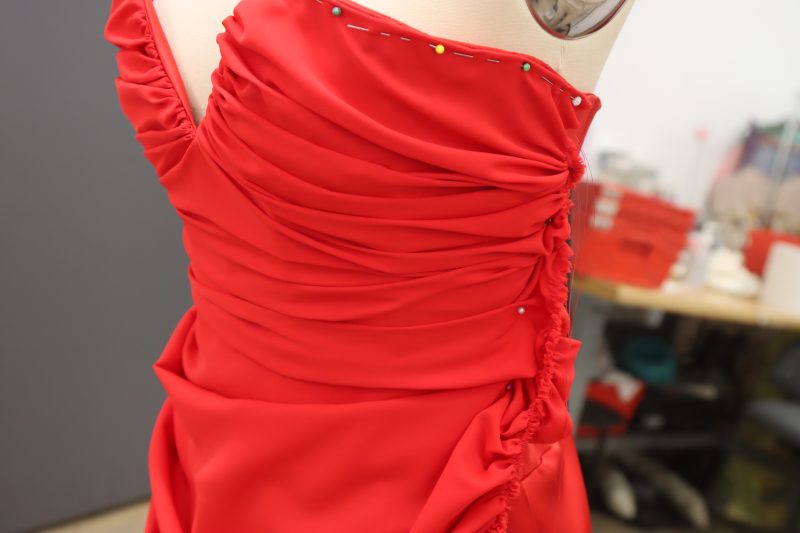
Step 9
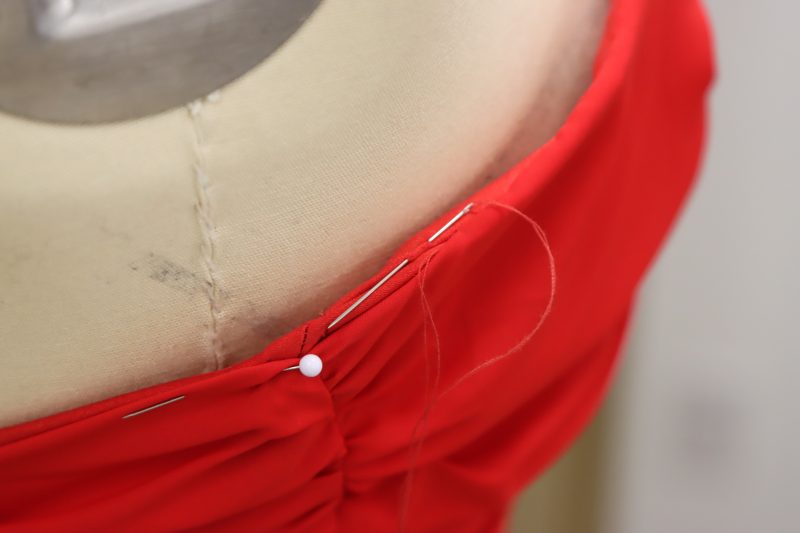
HAND SEW NECKLINE
- Put the corset and skirt lining on a mannequin (or on yourself if you don’t have one).
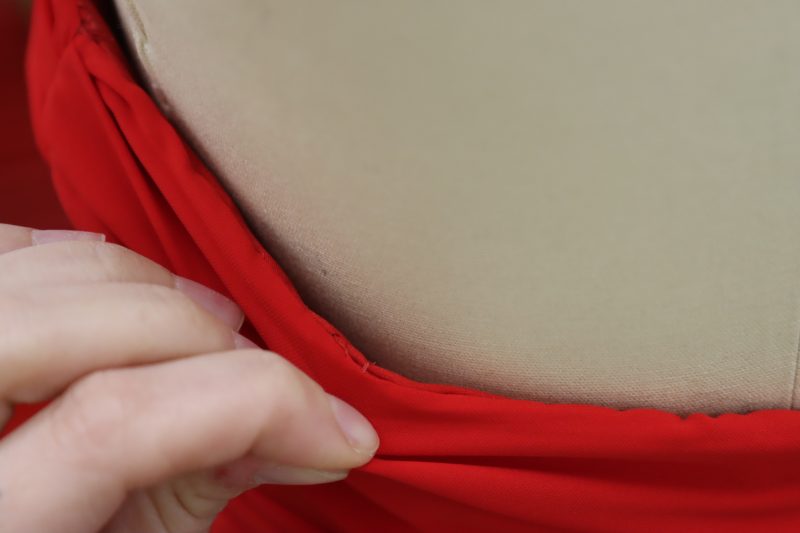
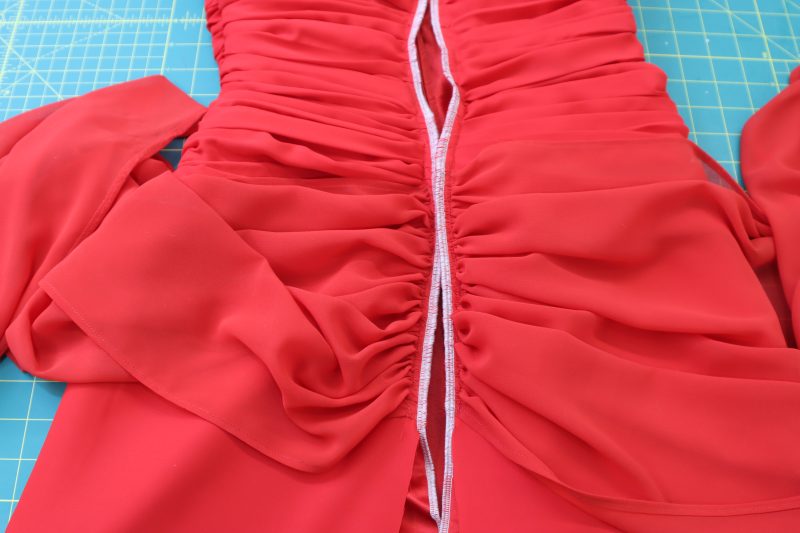
- Pin the neckline of the chiffon to the neckline of the corset, making sure that the raw edges are tucked in between the corset and the chiffon layer.
- Fold the gathered V-neck under itself to hide the raw edges and pin to the V-neck of the corset.
- Hand sew the V-neck gathers to the corset.
Step 10
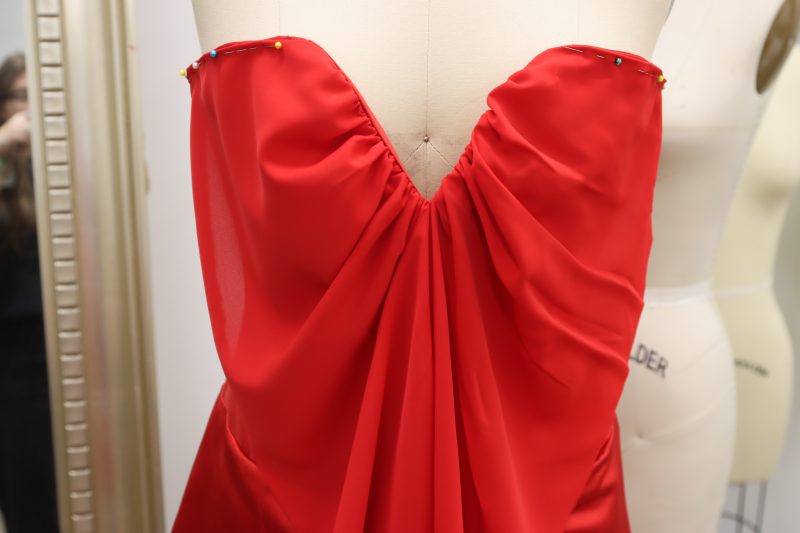
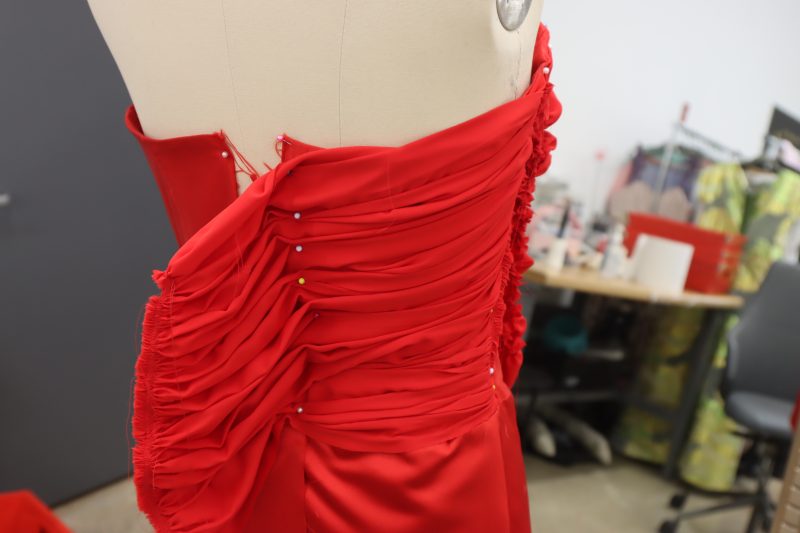
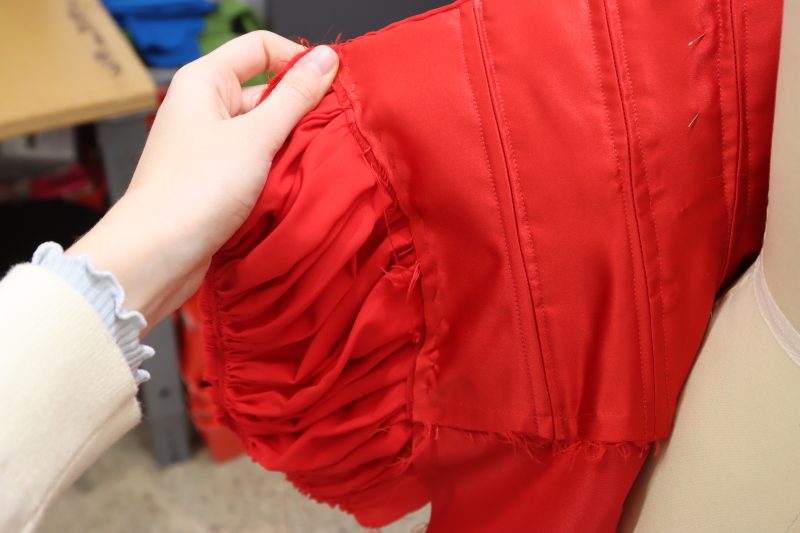
SIDE SEAM GATHERS
- Without detaching the chiffon from the corset, sew gathering stitches on both sides of the chiffon overlay piece.
- Gather the sides of the chiffon overlay by pulling on the gathering stitches.
- Pin the gathered sides to the side seam of the corset, making sure to pull the fabric taught while pinning so that the gathers don’t sag.
- Trim any extra fabric that sticks out past the side seams of the corset.
- Hand or machine sew the gathers into place (do not sew them to the corset yet, just sew the gathers to themselves so that it doesn’t come undone).

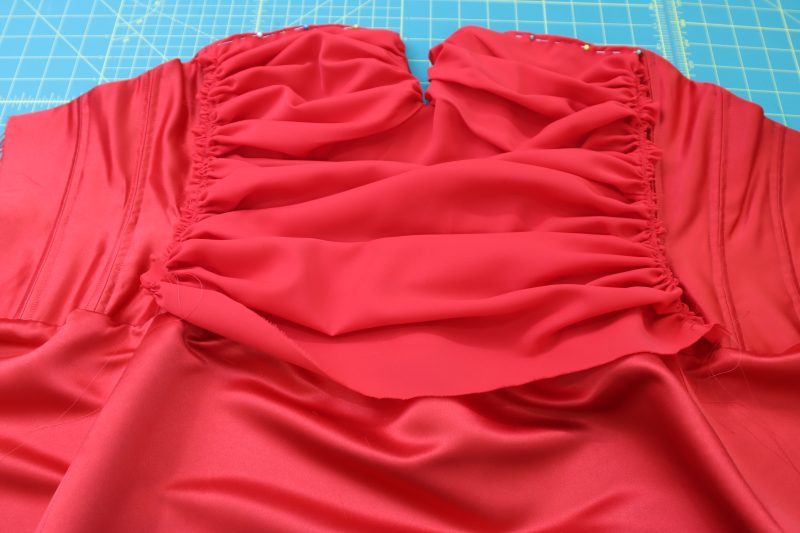
Step 11
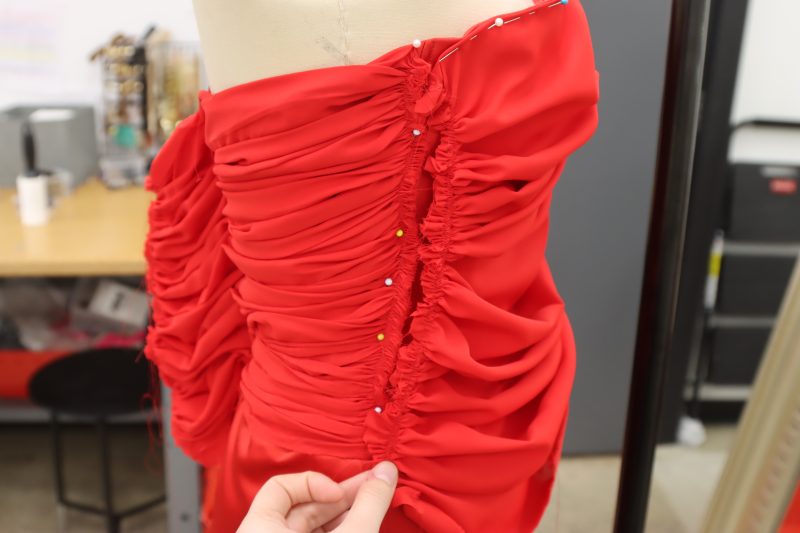
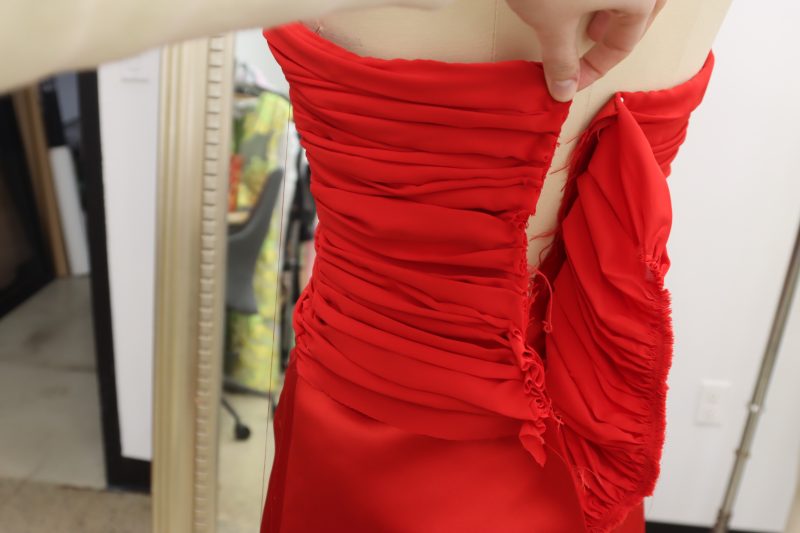
BACK GATHERS
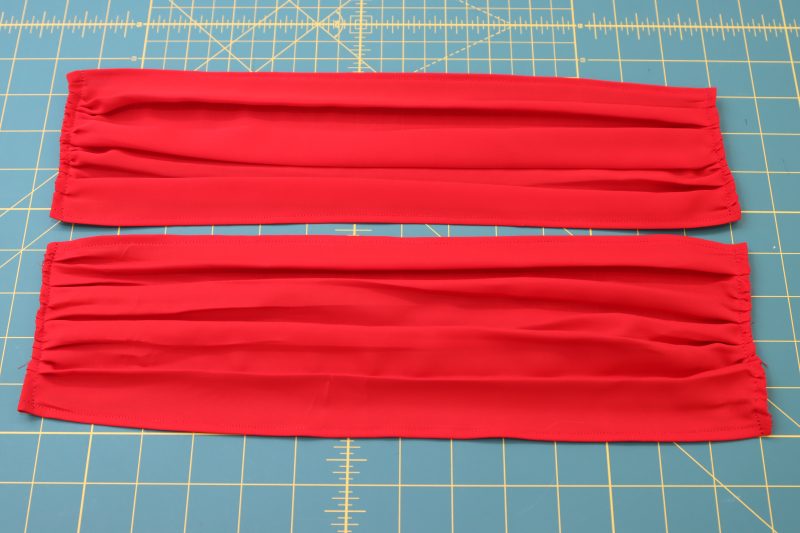
- Cut two mirrored pieces of chiffon that are as wide as your back panels (or slightly wider) and twice as long.
- Sew gathering stitches along the two longer sides of the panels.
- Gather the panels and press the gathers.
- Pin the panels on both sides of the back bodice of the dress (pin at the side seams, neckline, and center back of the dress).
Step 12
SEW SIDE SEAM GATHERS
- Before sewing the rest of the neckline, we have to sew the two gathered overlay side seams.
- Pin and sew the gathered overlay pieces right sides together at the side seams.
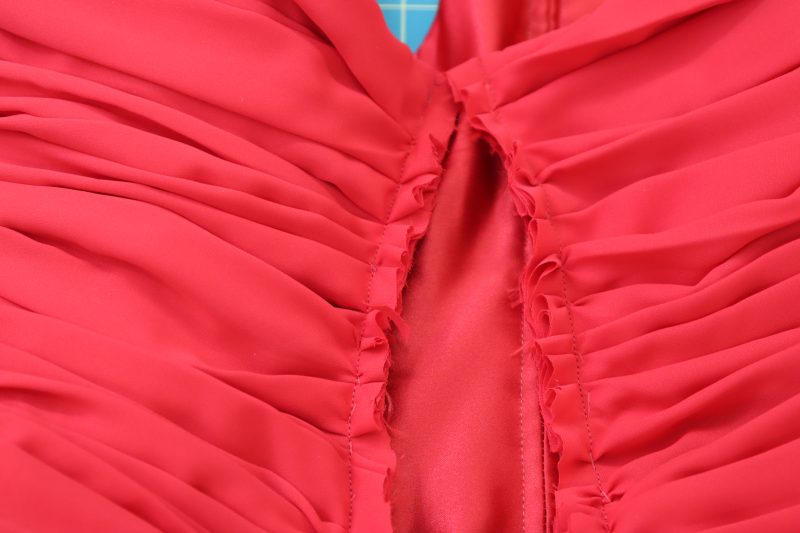
Step 13
HAND SEW NECKLINE
- Hand sew the overlay piece around the entire neckline.


Step 14
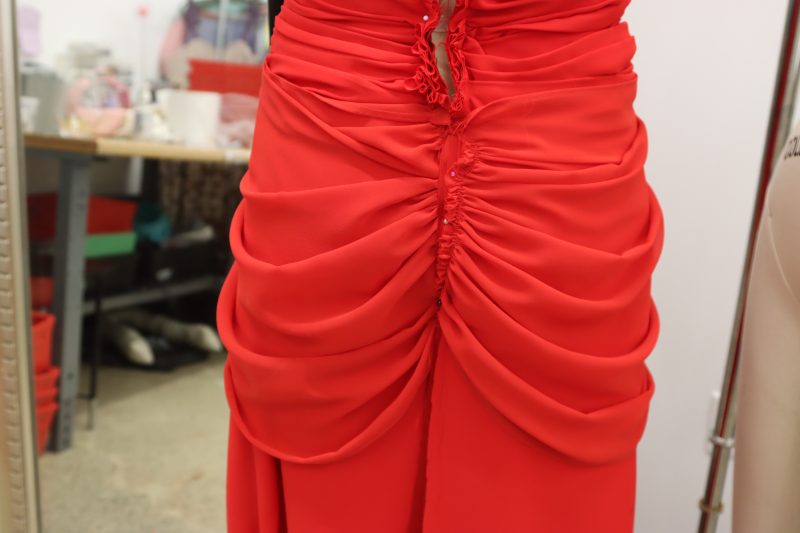
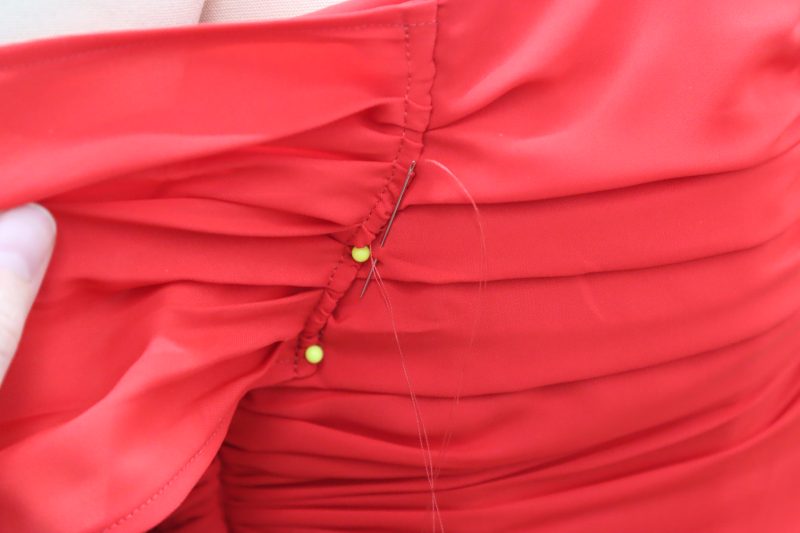
SECURE CENTER BACK GATHERS
- Hand sew the gathered chiffon overlay to the center back of the dress on both sides.
- Trim the excess chiffon from the center back.
- Go over your hand stitching with a machine to secure the gathers.
Step 15
TOPSTITCH SIDE GATHERS
- Pin the gathered side seams of the overlay piece to the side seam of the corset.
- Sew a stitch in the ditch along the side seams of the chiffon overlay to attach it to the corset.
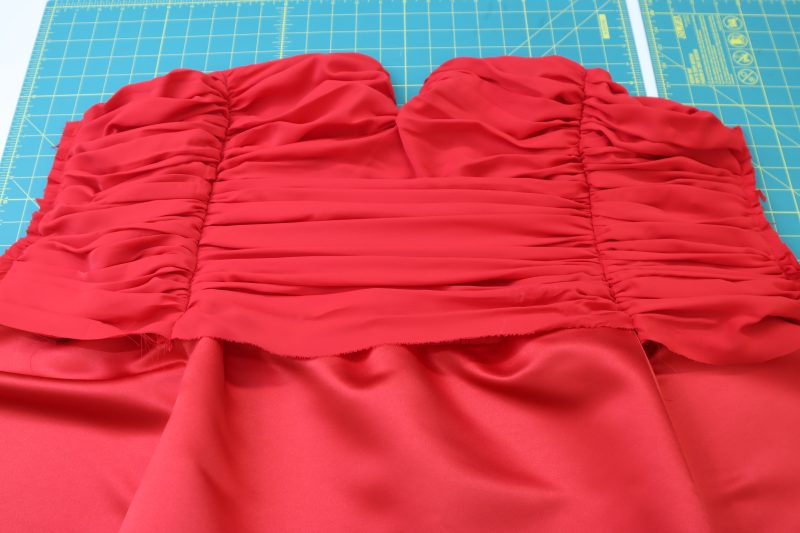
Step 16
OUTER SKIRT
- There are two options for cutting the skirt. You can either use the same skirt pattern that you used for the lining skirt and just extend it to floor length, or you can cut a circle skirt or half circle skirt. Depending on how you cut your skirt, ,the dress will be more or less flowy on the bottom hem.
- Cut the skirt out of the georgette fabric (we used chiffon for the overlay pieces and georgette for the skirt because the georgette is less sheer).
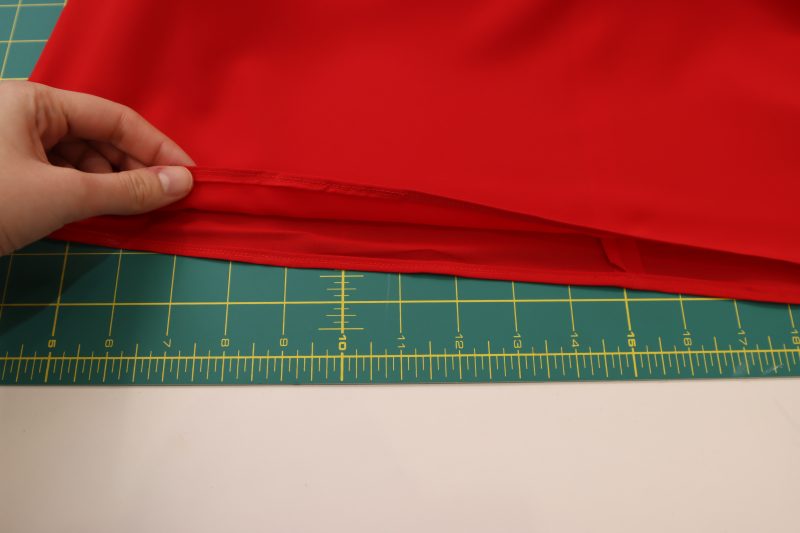
- Place the skirt pieces right sides together with the sides lined up.
- Pin and sew the skirt side seams.
- Pin the skirt right sides together with the bottom hem of the chiffon overlay piece of the bodice.
- Sew the georgette skirt to the hem of the chiffon overlay.
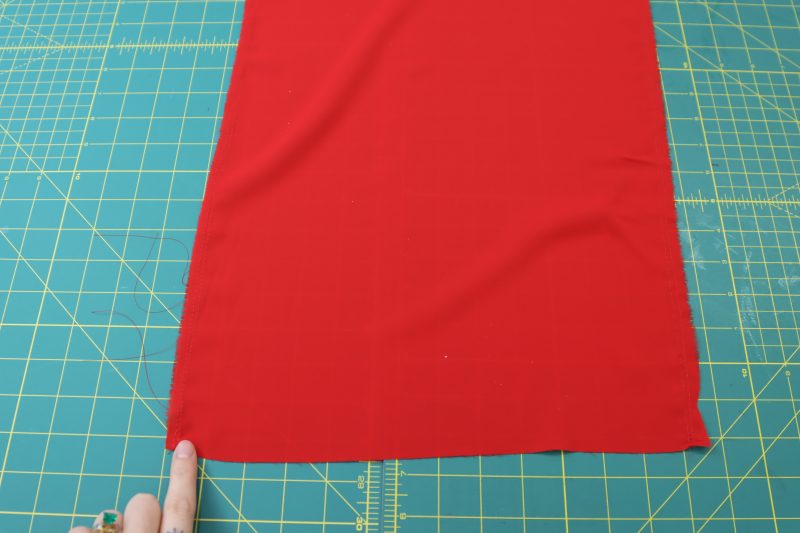
Step 17
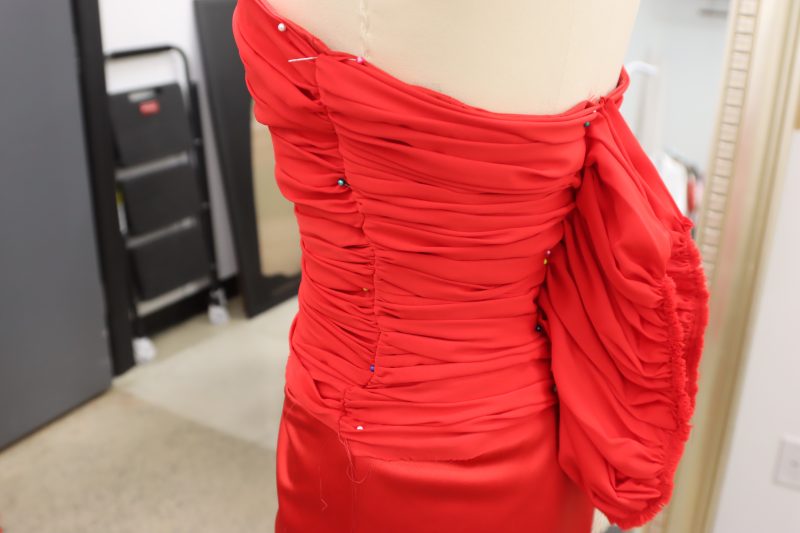
WAIST TIES
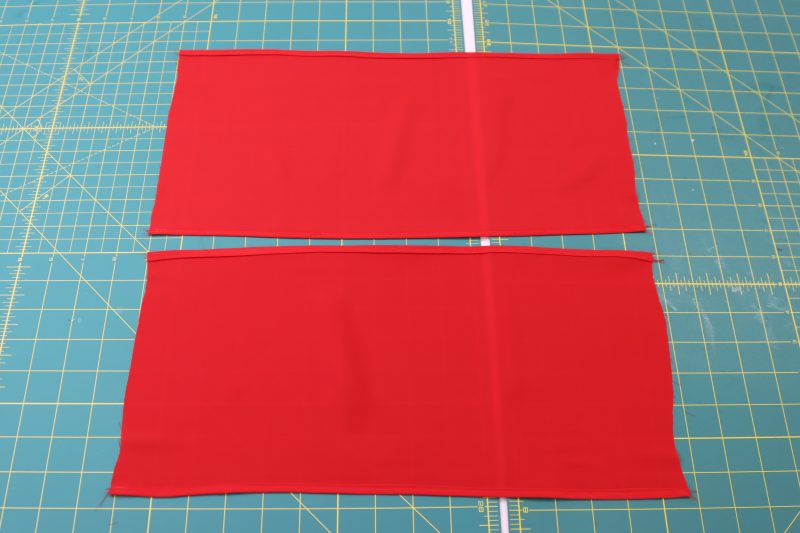
- Cut two strips that are 22 inches wide and long enough to fully wrap around your hips with the ties almost at floor length when tied.
- Hem 3 sides of each strip (two long sides and one short side).
- Gather the unhemmed side with gathering stitches.
- Pin the gathered ends of the ties to the center back opening of the dress, making sure the seam where the corset meets the skirt is covered entirely by the waist ties.
- Sew the waist ties to the center back of the dress.
Step 18
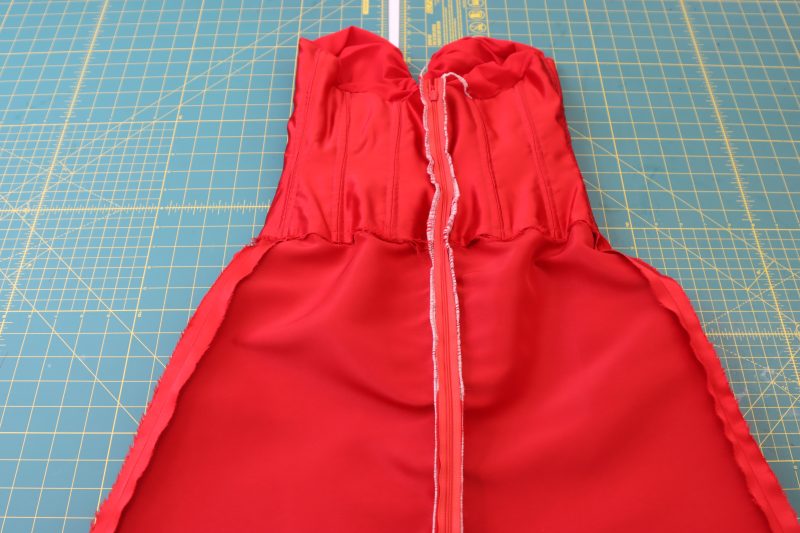
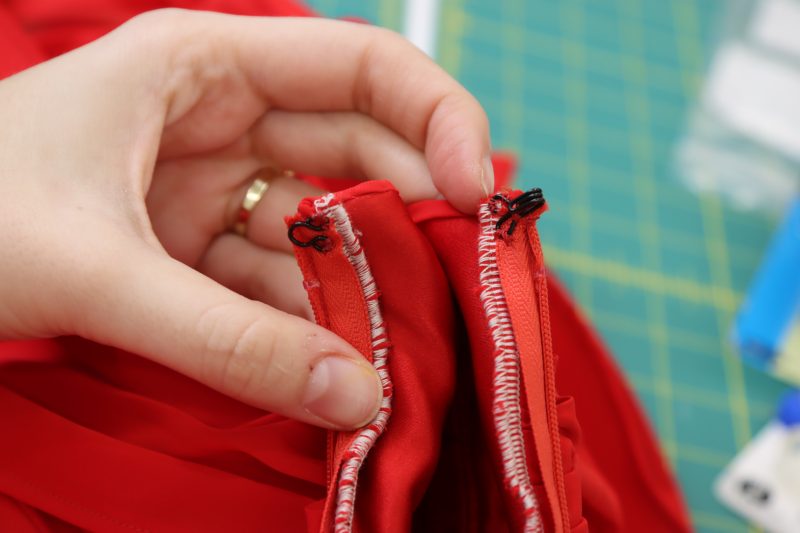
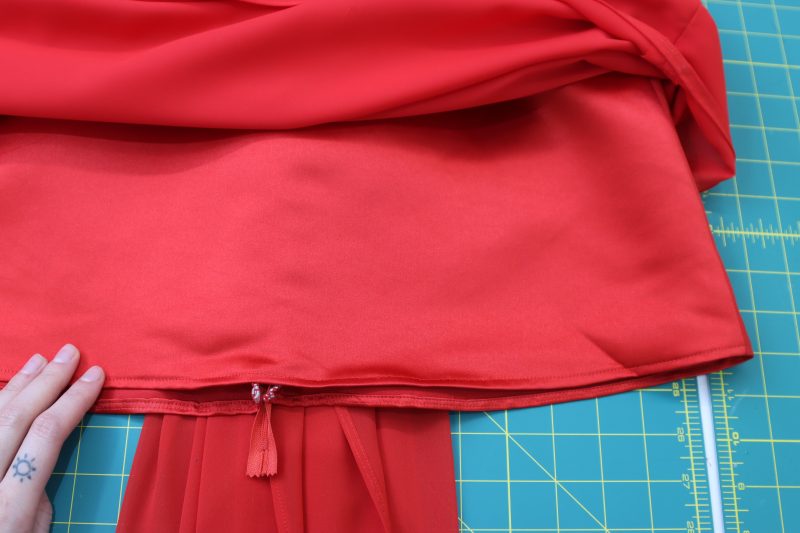
INSIBILE ZIPPER
- Insert an invisible zipper into the center back of the dress by sewing the zipper right sides together with one side of the dress, then the other.
- Hand sew a hook and eye closure to the top center back seam of the dress.
Step 19
HEM
- Sew rolled baby hems on both the lining and the georgette skirt.
Step 20
SLEEVES
- Sew a rolled baby hem along the two long sides of both sleeves.
- Sew gathering stitches on both short sides of the sleeves.
- Gather the short sides of the sleeves.
- Iron the gathers flat.
- Fold the gathered edges towards the wrong side of the fabric.
- Pin and sew the folded gathered edge so that the raw edges are hidden on the wrong side of the fabric.
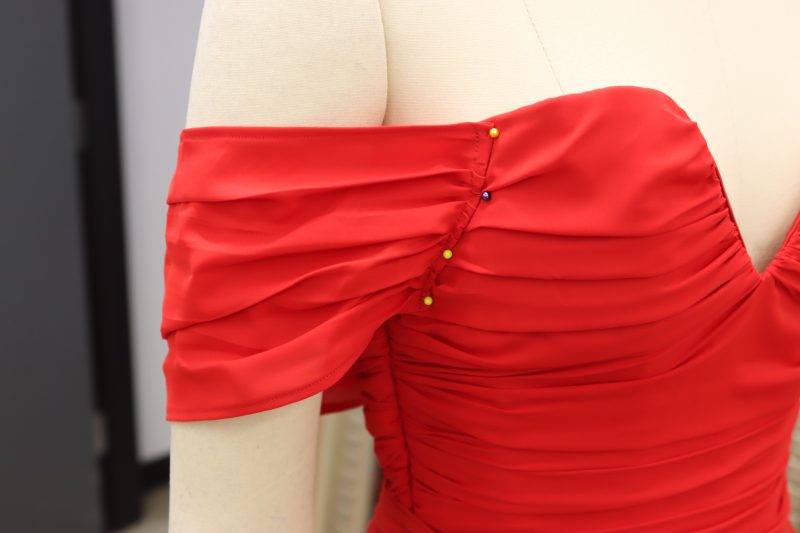
- Pin the sleeves to the front and back of the dress near the bust.
- Hand sew the sleeves to the front and back of the dress

Sewing Success: The Finished Julia Draped Gown
Share this post with a friend (or two!), download the Julia Draped Gown free sewing pattern, and show us which fabrics and colors you choose, using the hashtags #MoodJuliaPattern & #MadeWithMood—and don’t forget to tag us @MoodFabrics, too.


Free Sewing Pattern Inspiration for Your Next Project
With 480+ free sewing patterns and counting, your opportunities for sewing with Mood are endless!
We hope you had as much fun sewing this draped gown pattern as we did! As always, we want to hear from you—share your thoughts and comments below and let us know where you’ll be wearing the Julia Draped Gown free sewing pattern!
What a stunning dress and a feat it would be to create it! Thanks for another great pattern, Mood!
A waist stay (grograin) would be helpful to stabilise the bodice.
That’s actually a really good point. It probably would help with zipping the dress too because it can be hard to pull an invisible zipper up on a dress with a thick corset like this.
What alterations would be needed to allow the wearer of the dress to raise their arms.? Other that not putting on the sleeves at all?
Hi Christine! You can use the same sleeve pattern as the one included in the download, but instead of hand sewing them on so that they lay horizontally on your body, you can orient them so that they lay vertically over your shoulders and they could potentially be more supportive that way.
Szeretnem
How do you get the corset to stay up?
Hey Dallas! Because of the boning throughout the bodice, the corset stays up by itself.
Used to love Mood so much because you could often see the patterns on plus sized models. Super disappointed to see that’s no longer the case – I had to go back to 2023 to see a pattern on a body like mine.
Hey Jaya! We really appreciate feedback like this. We love working with all the models we’ve included on the blog so far, but we’re always looking to make our patterns more accessible to all body types.
The sizing is not exactly accurate, it still doesn’t meet at the back even at size 12 when I’m usually a mood size 10. What would be the best way to add the back without losing the front? Also the sides underarm stick out like if it was too lose when I put in on my body in muslin. Would appreciate your help.
This design has 2 inches of negative ease. It’s normal for your size to seem different for this garment, but regardless of the size number, choose your size based on your body measurements and the finished garment measurement you want, as shown in chart 2.
Because we work with standard sizes, you may sometimes need to make adjustments so the garment fits your measurements properly. Especially since this is a corset. That’s why we make a muslin first, to check the fit and make any necessary changes. If it feels too big at the armhole, I recommend taking it in slightly, distributing the amount evenly across the four side panels.
Thank you for your comment!
Hi, yes I did measure I’m a 36 at the bust and even doing size 12 which is closer it just doesn’t meet. It’s missing almost 5 inches. I’m leaving a 1/2 inch seam. I’m doing it in muslin and I’ve done two of them one in 10 and the other at 12. There are some parts in the pattern that both 10 and 12 share the same line. Can you please suggest how to add the extra inches so they can meet? Thank you, much appreciated.
Hi Ambar 🙂
I just measured the patterns to double-check, and yes, as shown in the chart, size 12 has a finished bust measurement of 37 inches, which is actually larger than your bust measurement.
Please email me photos of your muslins with the corset laid flat and open, showing a measuring tape across the top from one edge to the other, so I can see how wide each piece is measuring.
Also include your waist and hip measurements. I’ll continue assisting you by email since we’ll need to exchange images to guide you more accurately. My email: sandy@moodfabrics.com
Thank you!