
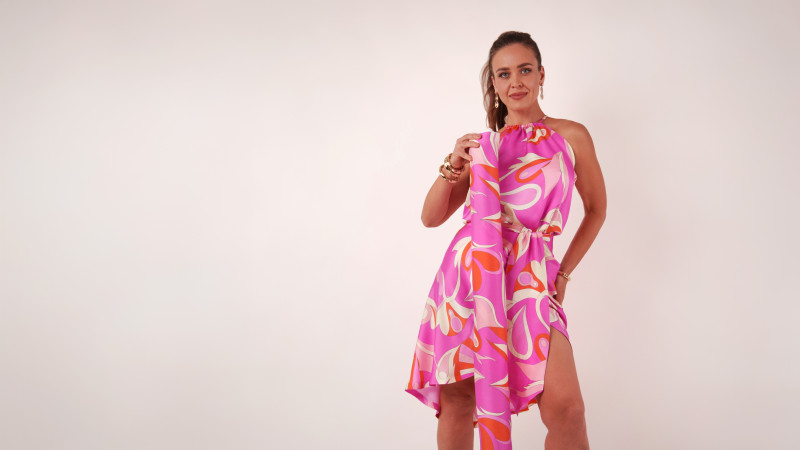
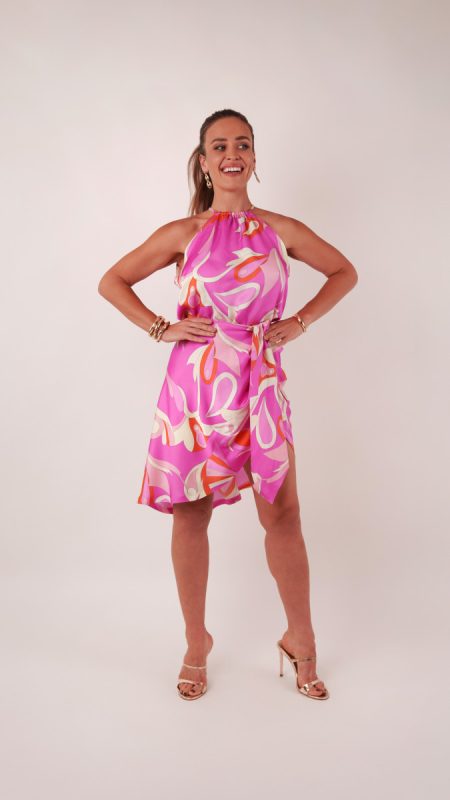
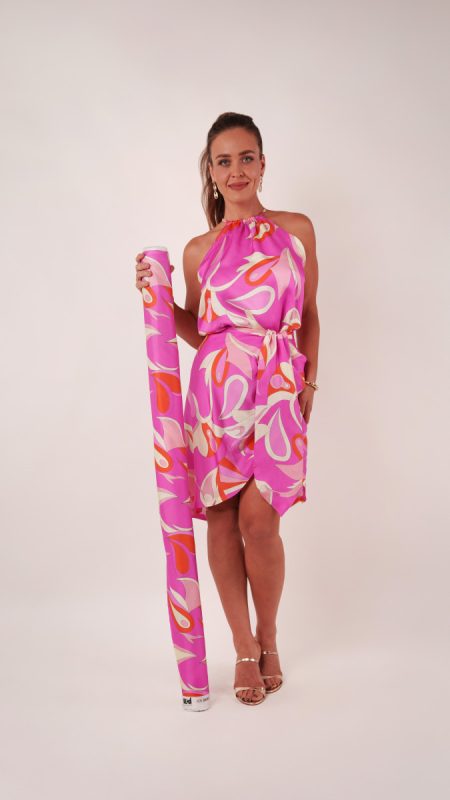
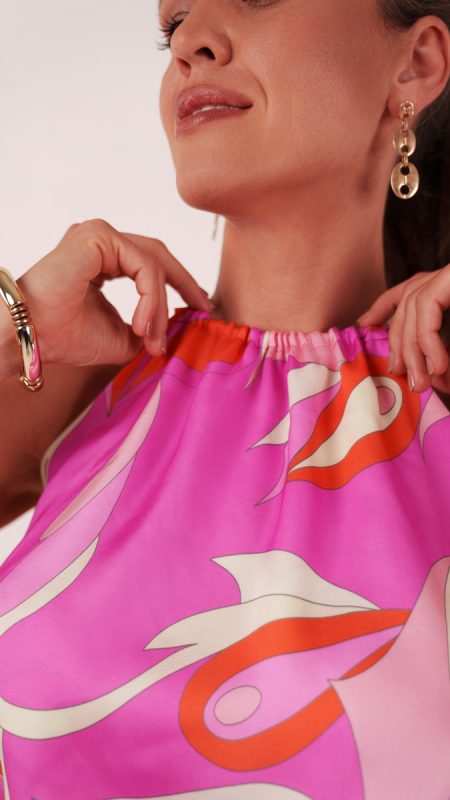
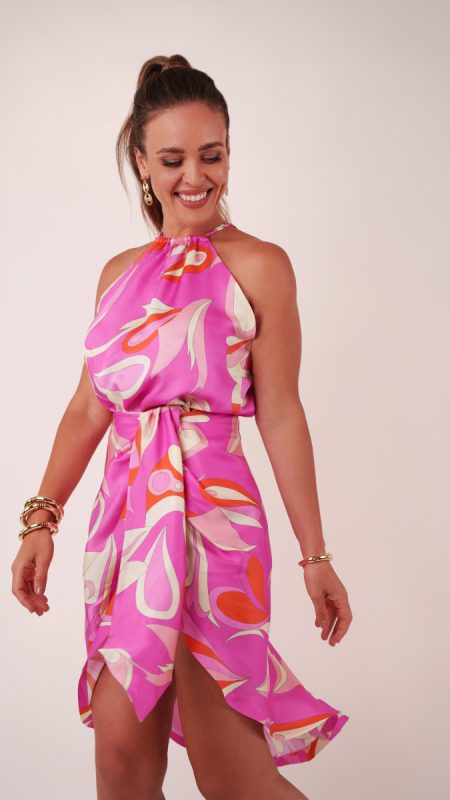
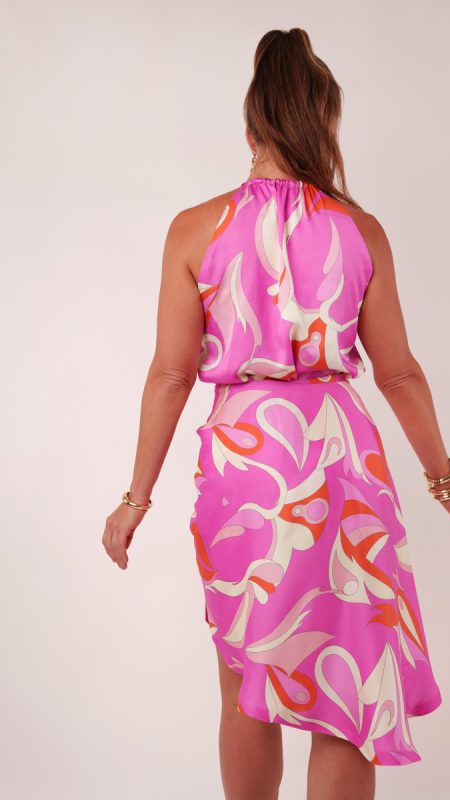
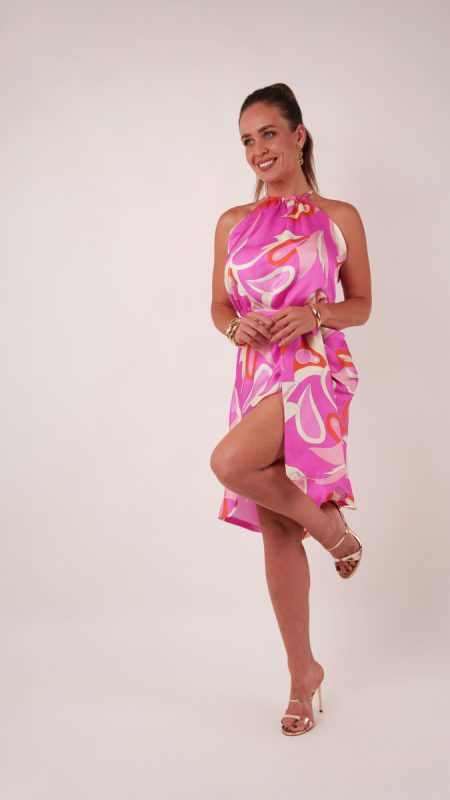
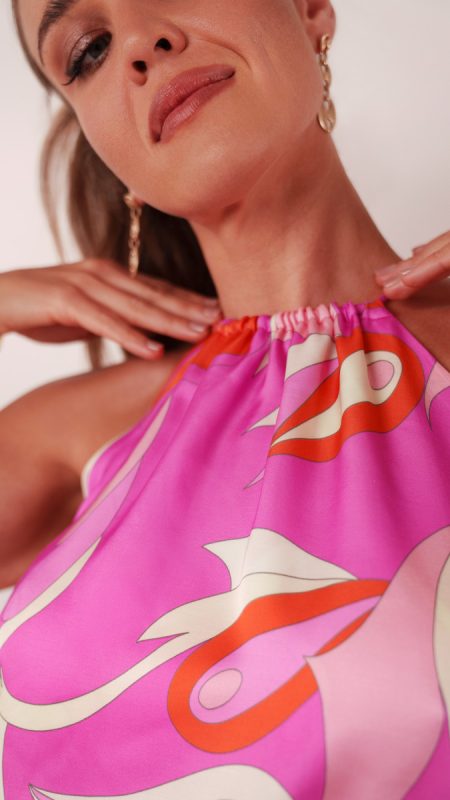
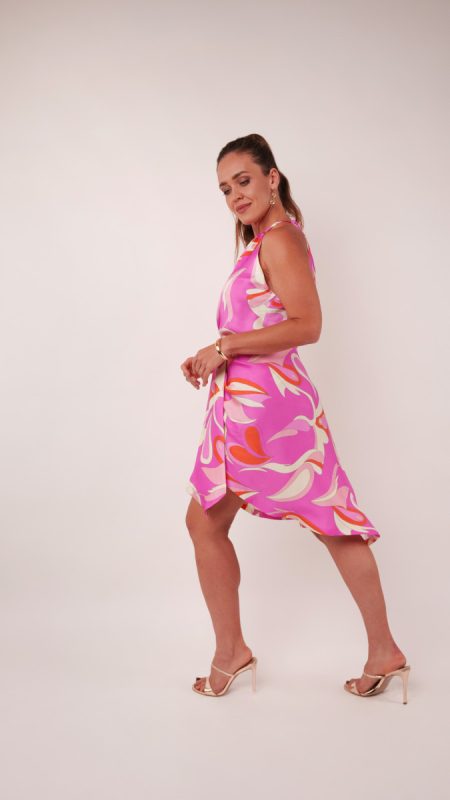
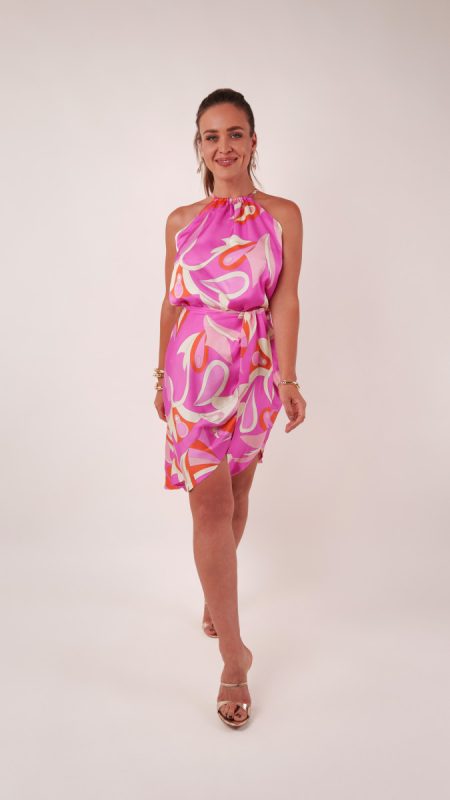
Nothing says summer quite like a breezy satin co-ord. The Rhodonite Co-Ord Halter & Skirt Set combines an effortless halter top with a beautifully draped asymmetrical skirt, creating a look that’s both relaxed and sophisticated. Designed here with viscose satin, this set comes alive in bold prints and vibrant colours, making every version uniquely your own.
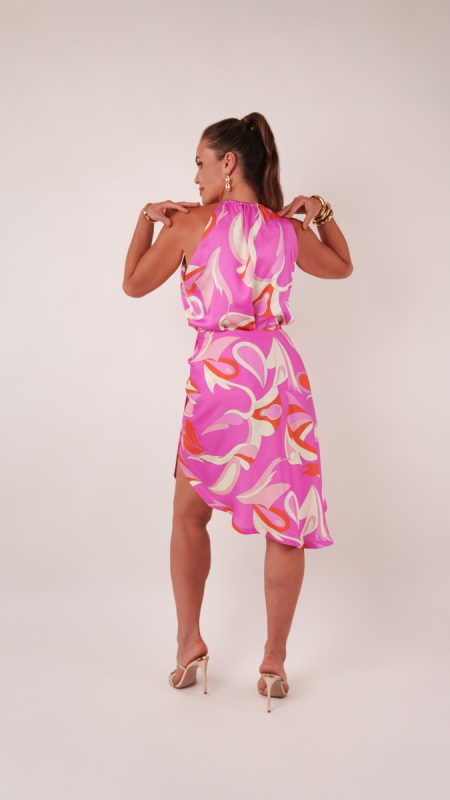
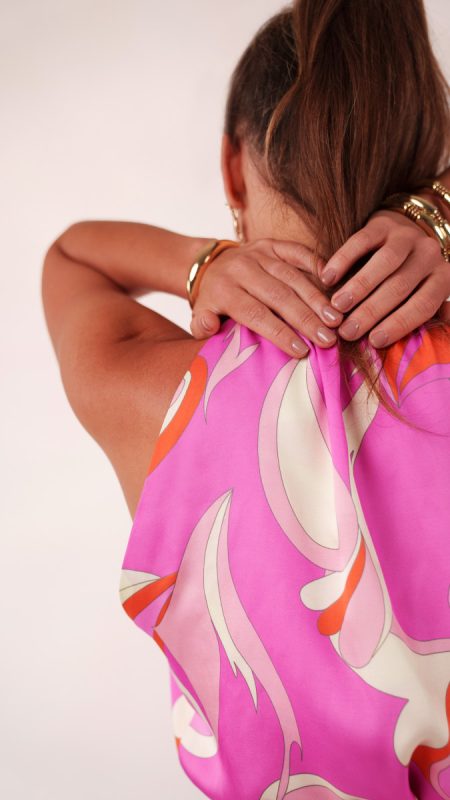
The halter top features an easy, forgiving fit that requires minimal adjustments for most sewists. With its softly gathered neckline and simple hidden snap closure at the back of the neck, it’s a quick and satisfying make that looks far more complicated than it is.
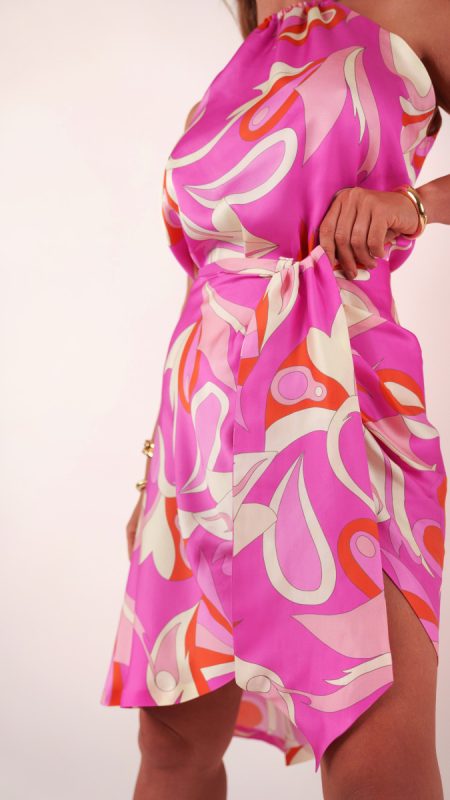
The skirt is equally rewarding. If you’ve sewn a circle skirt before and are comfortable with pleats, you’ll love creating the stunning draped silhouette and dramatic asymmetric hem. The result is a glamorous skirt that moves beautifully with every step.
What makes the Rhodonite Co-Ord set truly special is its versatility. Wear the pieces together for a statement summer look that’s perfect for weddings, garden parties, and holiday evenings, or style them separately to create endless outfit possibilities.
Whether you’re sewing for a special occasion or simply adding a little luxury to your everyday wardrobe, the Rhodonite Co-Ord Halter & Skirt Set is a pattern you’ll want to make more than once. You’ll be surprised how approachable this pattern is once it’s cut out and ready to sew. So what’s stopping you from getting started?
Essential Materials & Sizing Guide for the Rhodonite Co-Ord Halter and Skirt
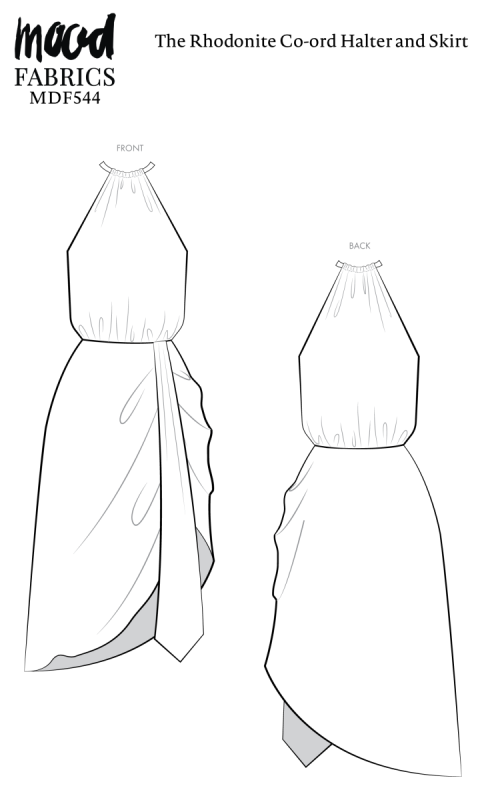
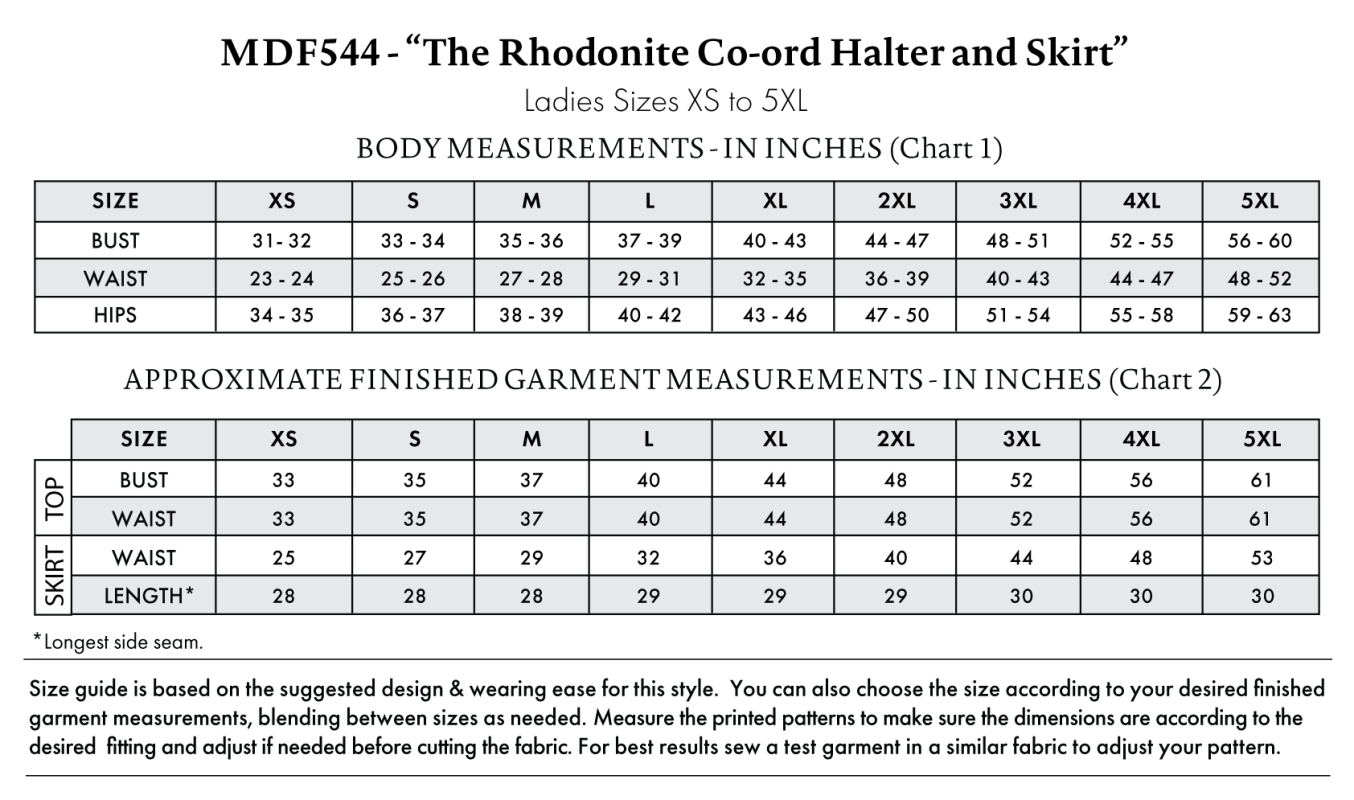
Continue reading for a breakdown of what knowledge and materials you need for creating your very own co-ord halter and skirt! We’ve got you covered with the recommended materials we used—if you want to follow along exactly—as well as a curated list of alternative fabric type recommendations if you want to customize your own version. The Rhodonite Co-Ord Halter and Skirt free sewing pattern download includes technical drawings for seam and co-ord halter and skirt visibility, plus a size chart to help you find your perfect fit!
Purchase Products Used Below:
Quantities indicated are for sewing a size medium* co-ord halter and skirt. Toggle the ‘SHOP THIS LOOK’ box to find quantity estimates for other sizes.
- 4 yards of Sustainable and Recycled Viscose Satin Print – Hot Pink, Red-Orange and White Abstract – Mood Exclusive Free Falling
- 1 each of Invisible Zipper 24″ by YKK – 516 Fuchsia
- 2 each of Gutermann Sew All Thread 100m – 318 Fuchsia
- 1 each of Dritz Sew-On Snaps – Nickel – Assorted Sizes, 36 Sets
- MDF544 – Rhondonite Co-Ord Halter and Skirt Sewing Pattern (Free download below!)
Additional Products Used:
*Quick Tip! The ‘SHOP THIS LOOK’ box defaults to full-yard quantities. To order an exact half-yard quantity for any fabric, simply use the decrease quantity button (-) to subtract by the half yard. Then click “ADD TO CART” to add all materials to your cart. (Our system can only display full-yard quantities initially.)
Alternative Fabric Type Recommendations:
The Rhodonite Co-Ord Halter and Skirt sewing pattern is best suited for lightweight fashion fabrics. Explore other fabric types or colors from our featured collections for your co-ord halter and skirt with the links below.
Download Your Free Sewing Pattern
Submit your name and email in the form below to receive the download link for the Rhodonite Co-Ord Halter and Skirt free sewing pattern directly in your inbox. Mood Sewciety Patterns will send your free download link via email with the subject line: ‘Your Free Download from Mood Sewciety – The Rhodonite Co-Ord Halter and Skirt’ (in PDF format for A4 and letter-size printing).
© MoodFabrics.com / MoodSewciety.com – Mass production, resale, or distribution of this pattern in any form is strictly prohibited.
Find Your Perfect Fit
The Rhodonite Co-Ord Halter and Skirt Sizing Guide is based on the suggested design & wearing ease for this style. You can also choose the size according to your desired finished garment measurements, blending between sizes as needed. Measure the printed patterns to make sure the dimensions are according to the desired fitting and adjust if needed before cutting the fabric. For best results, sew a test garment in a similar fabric to adjust your pattern.
Note: Always read all the instructions before cutting the fabric!
How to Sew The Rhodonite Co-Ord Halter and Skirt
The instructions provided below are designed to guide you through sewing the Rhodonite Co-Ord Halter and Skirt from start to finish.
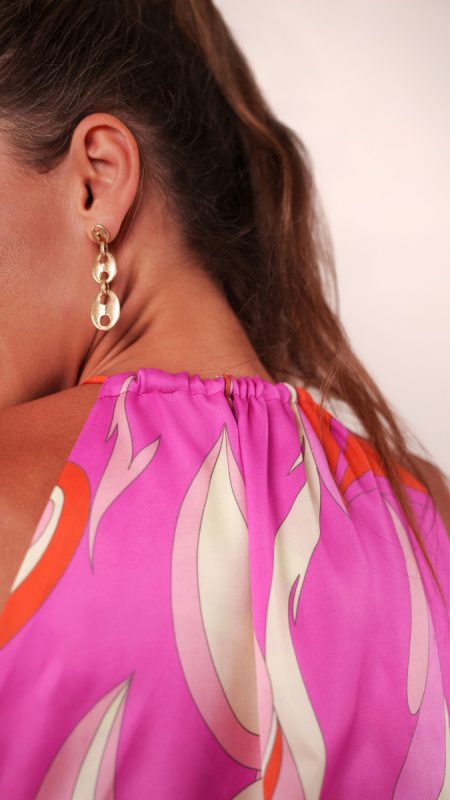
3 Tips for Sewing with Viscose Satin
⇒ Use a super sharp, super thin, chrome sewing machine needle to prevent thread pulls and runs.
⇒ Launder your fabric before cutting out the pattern because it will shrink.
⇒ Make sure the grainlines of your fabric are straight before cutting out the pattern. This fabric shifts a lot on the grain and you want to make sure your fabric is perfectly straight before cutting into it.
Pattern Pieces & Fabric Cuts Needed
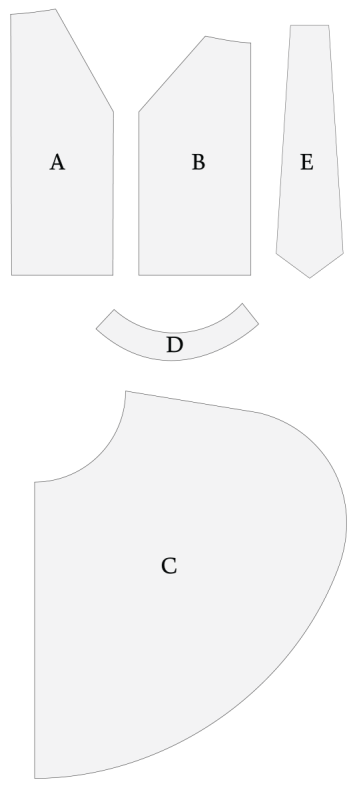
- (A) TOP BACK
- Fabric – Cut 2 on Fold
- (B) TOP FRONT
- Fabric – Cut 2 on Fold
- (C) SKIRT
- Fabric – Cut 1 on Fold
- (D) SKIRT FACING
- Fabric – Cut 1 on Fold
- (E) WAIST SASH
- Fabric – Cut 2 Mirrored
Sew with a 1/2″ seam allowance for all seams unless otherwise specified.
Step 1
NECK TIE
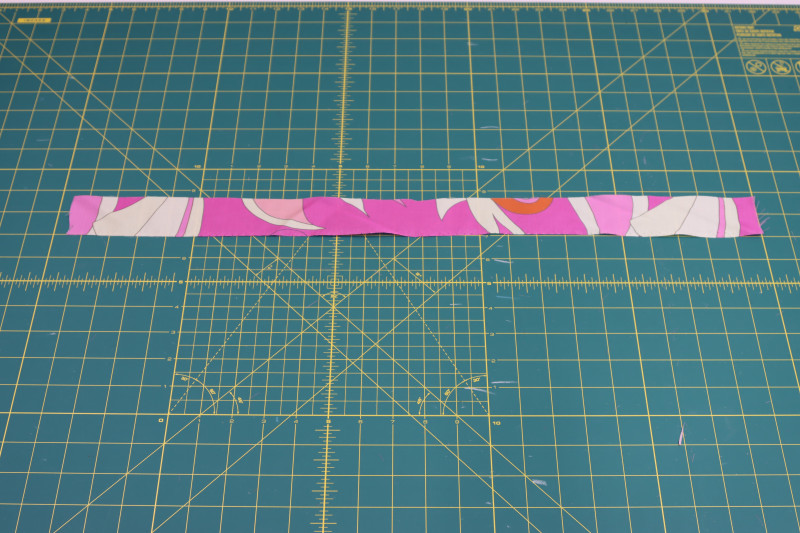
- Cut a strip of fabric that is 2 inches wide and 22 inches long.
- Fold the strip of fabric longways, right sides together.
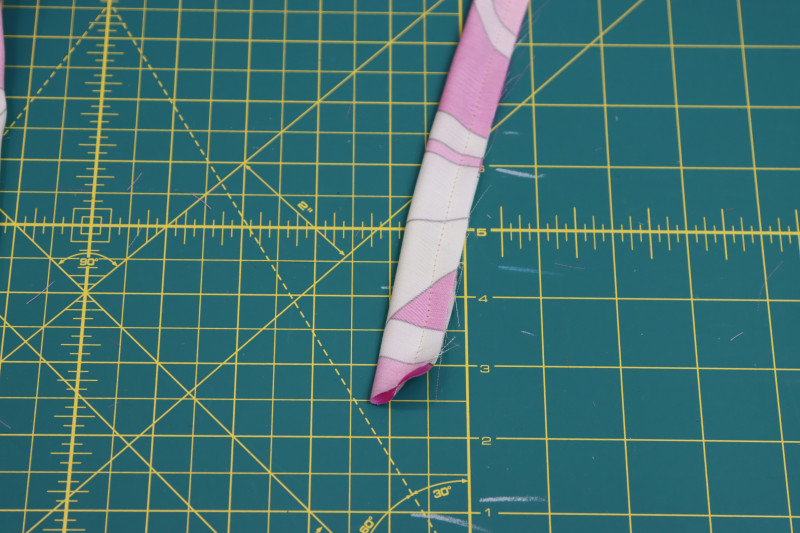
- Sew along the raw edge of the folded strip with a ¼ inch seam allowance (this is the only time during this pattern that you’ll sew with a ¼ inch seam allowance, the rest will be ½ inch).
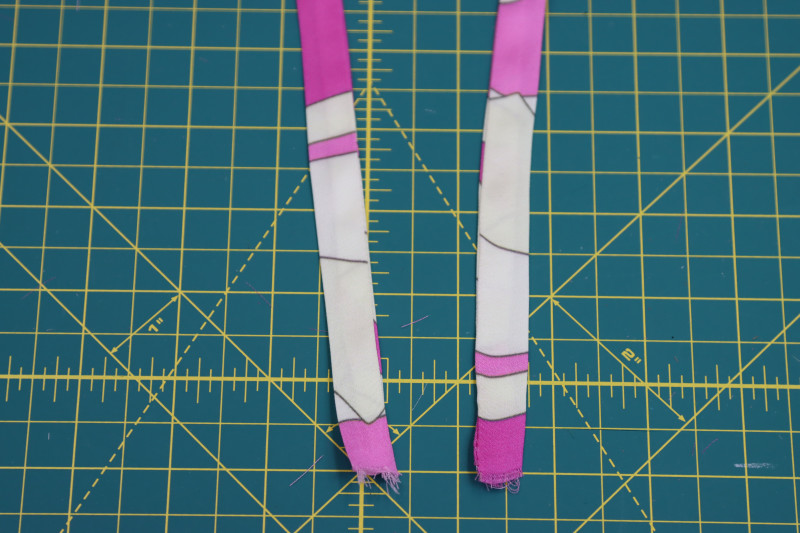
- Flip the neck tie right sides out using a loop turner.
- Press the tie flat.
Step 2
SIDE SEAMS
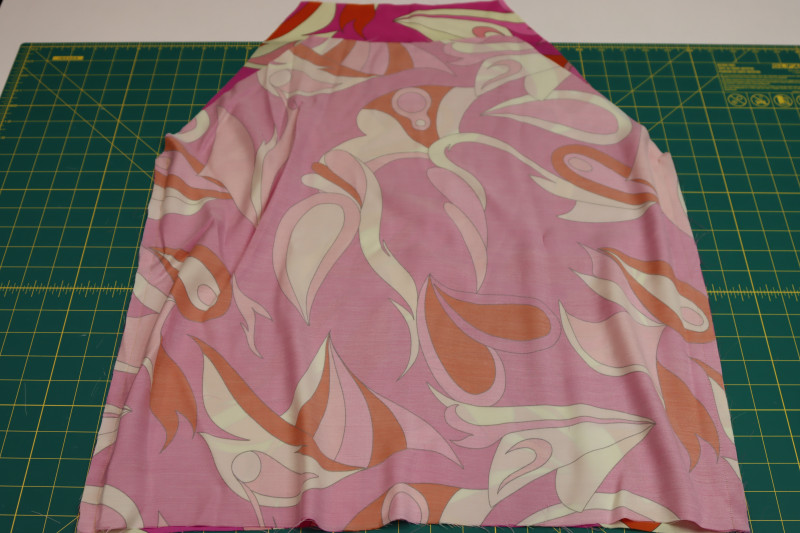
- Take one front and one back of the top pieces and place them right sides together with their sides lined up.
- Pin and sew the front and back tops together at the side seams.
- Press the side seams open and flat.
- Repeat for the other front and back of the top so that you’ll have two tops in total (you can also use a contrasting fabric as a lining, it doesn’t have to be the same exact fabric).
Step 3
NECKLINE
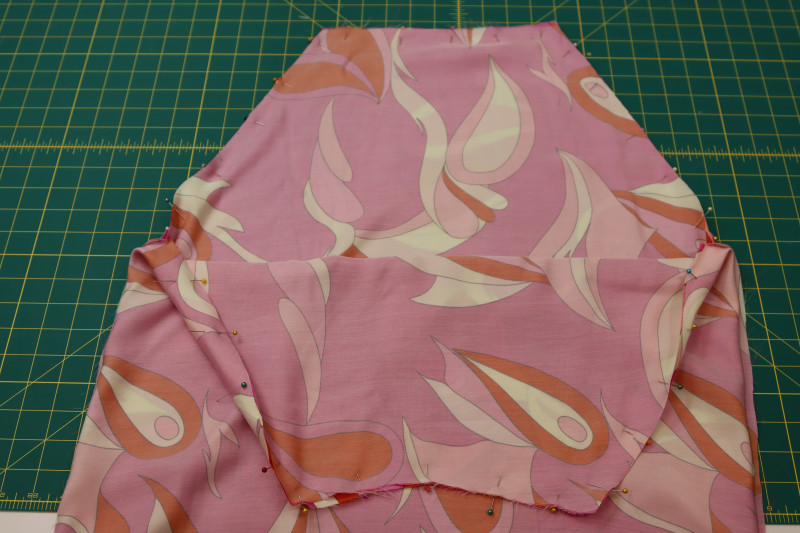
- Place one of the tops inside of the other so that they are right sides together.
- Pin the two tops together all along the neckline.
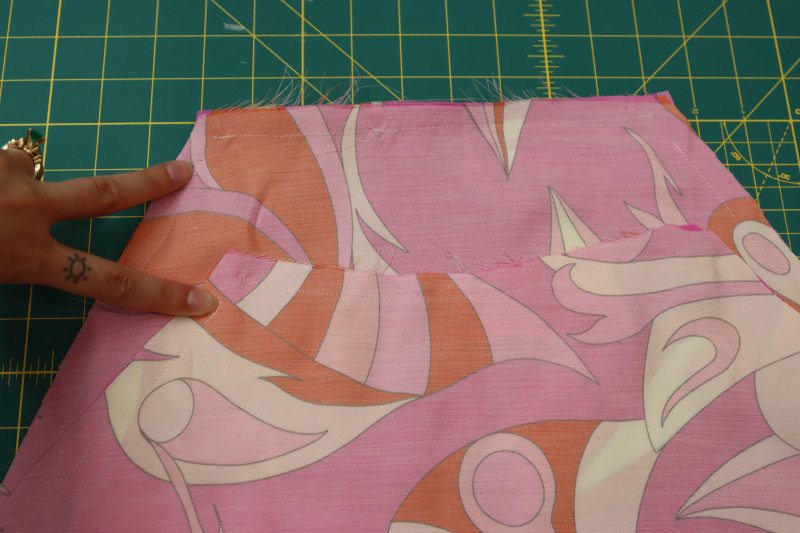
- Sew all around the pinned edge of the neckline EXCEPT for a ½ inch gap at the top of the neckline, as shown in the second photo below, so leave room for the neck tie to be inserted later.
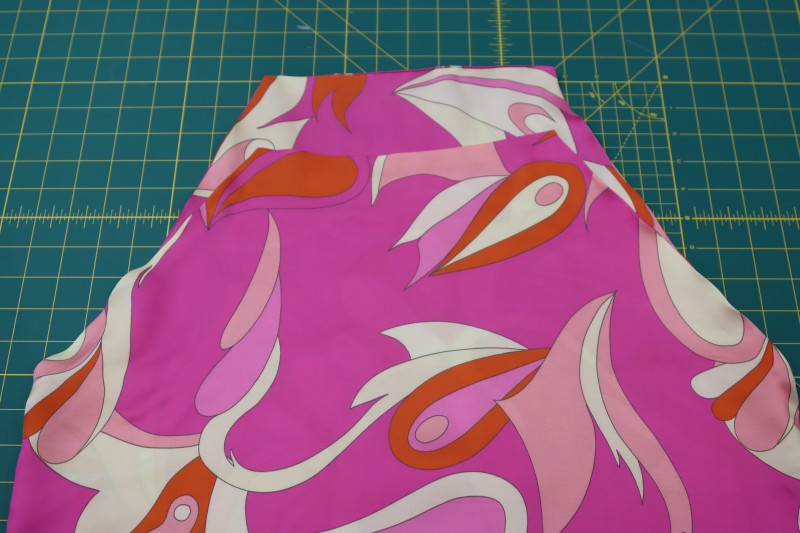
- Flip the top right sides out.
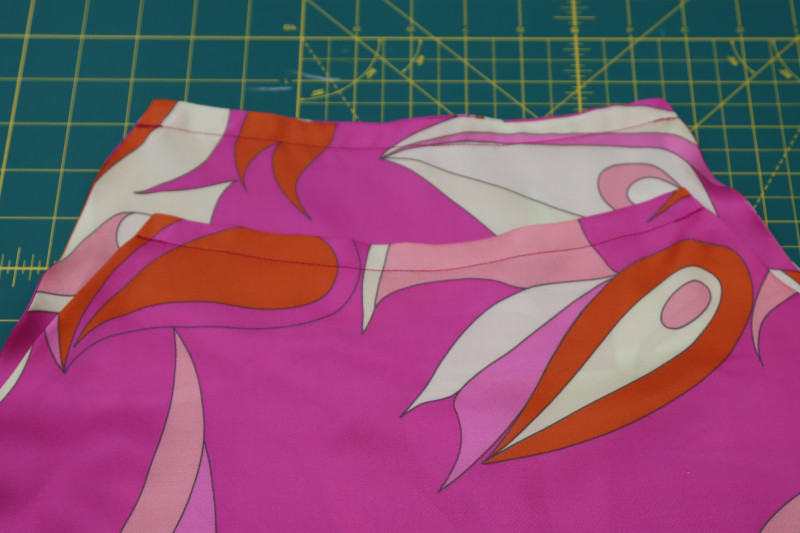
- Press the seams folded flat.
- Topstitch along the top of the neckline with a ½ inch seam allowance to create a channel through which the neck tie can be inserted later.
Step 4
INSERT NECK TIE
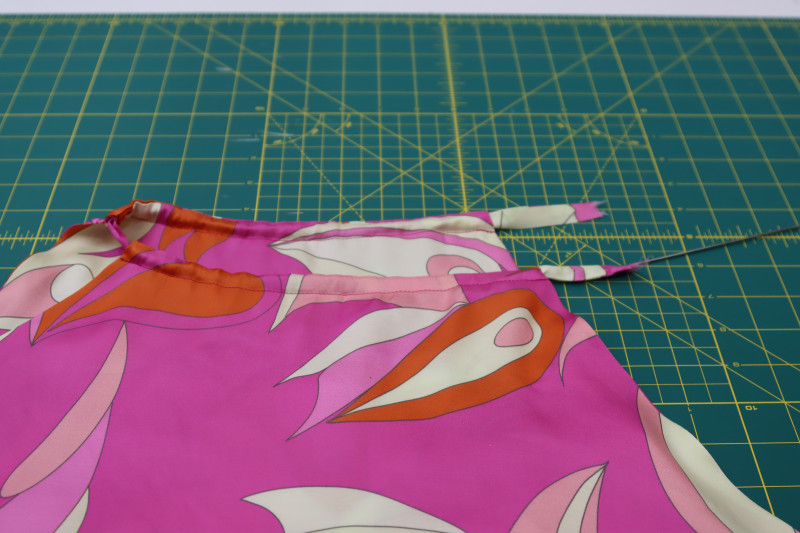
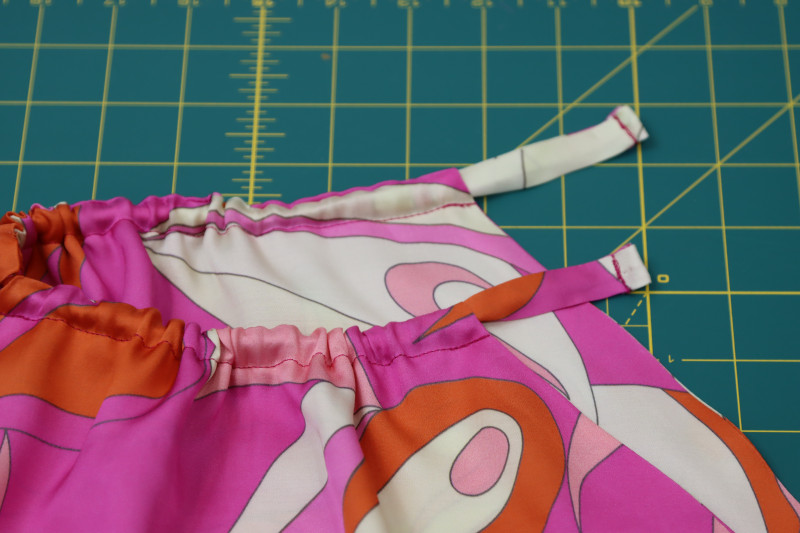
- Feed the loop turner from right to left through the front casing and left to right through the back casing.
- Hook the end of the loop turner onto the end of the neck tie.
- Pull the neck tie through both the back and front neckline casings.
- Cut the neck tie so that it is 2 inches longer than the circumference around your neck.
- Finish the ends of the neck ties by folding them over themselves and top stitching the raw edge inside.
Step 5
SEW SNAP
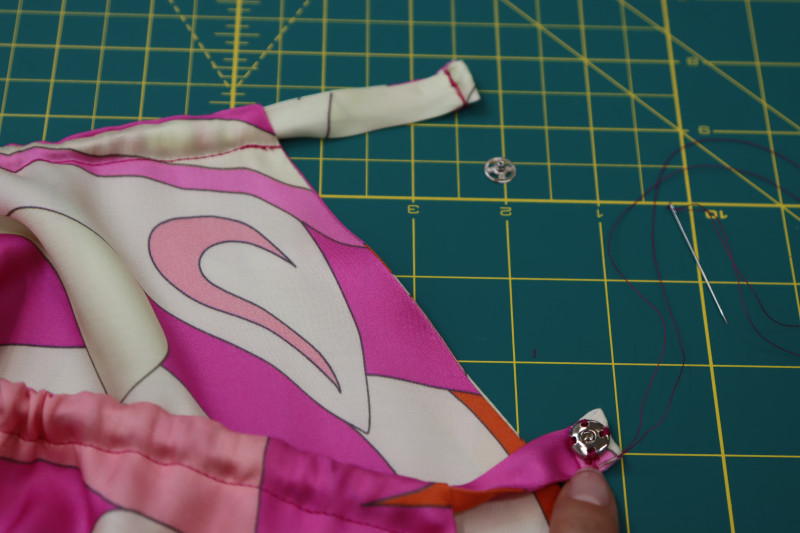
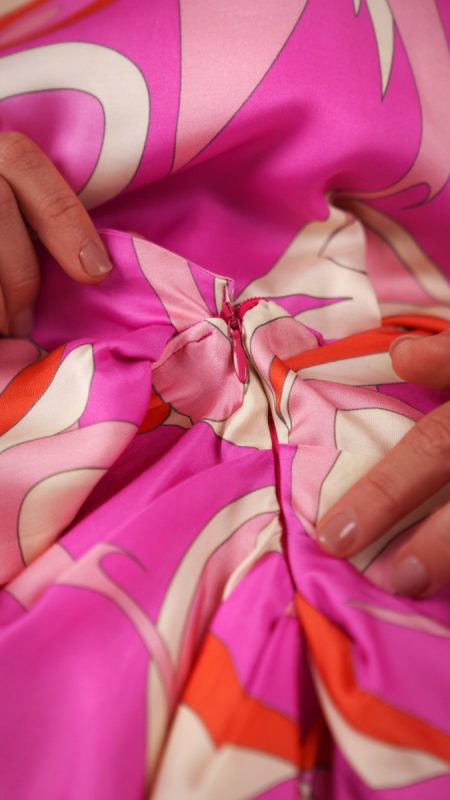
- Using a hand sewing needle and thread, sew the stud and the socket to the two opposite ends of the neck tie.
- Tie off your thread securely.
- Snap the two ends of the snap together.
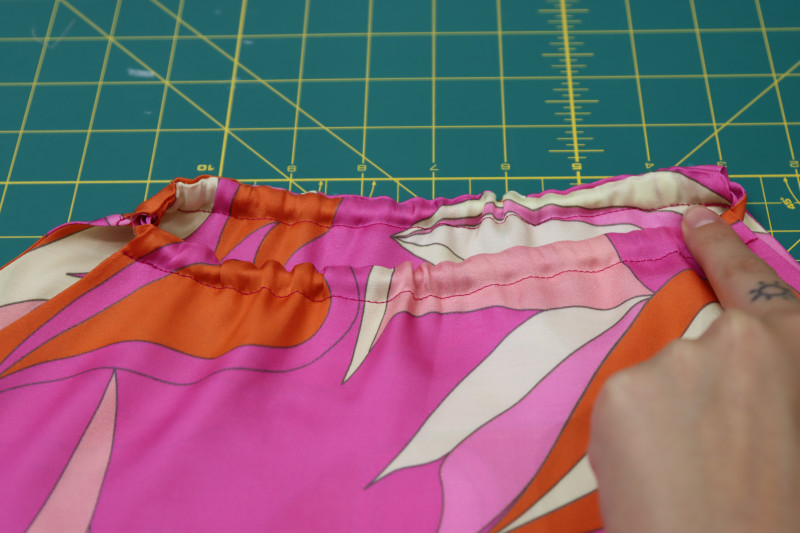
- Pull the snaps through the neckline casing so that the hardware is hidden on the inside of the garment.
Step 6
HEM TOP
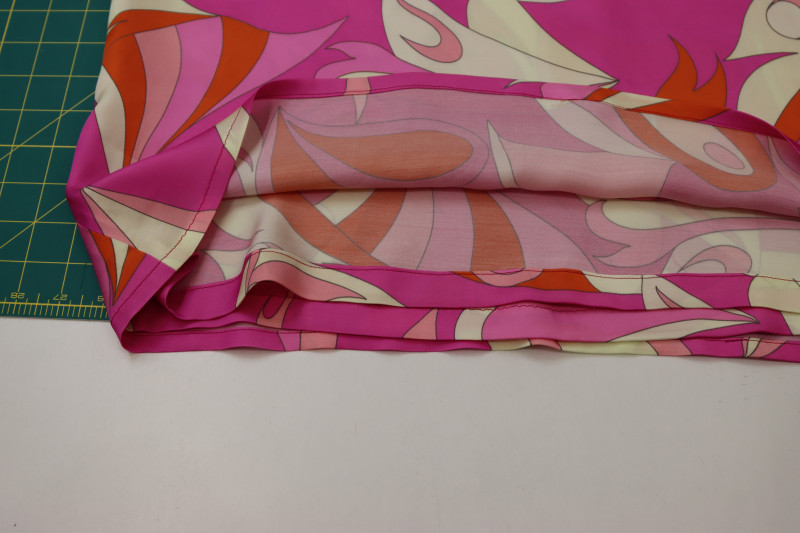
- Sew a double rolled 1 inch hem on the inner layer of the top.
- Sew a double rolled ½ inch hem on the outer layer of the top.
- Press both hems.
Step 7
MEASURE CIRCLE SKIRT
- NOTE: This is how I made the skirt in the photos, but if you want your skirt to be longer, fuller, or more draped, you can make changes to the steps below.
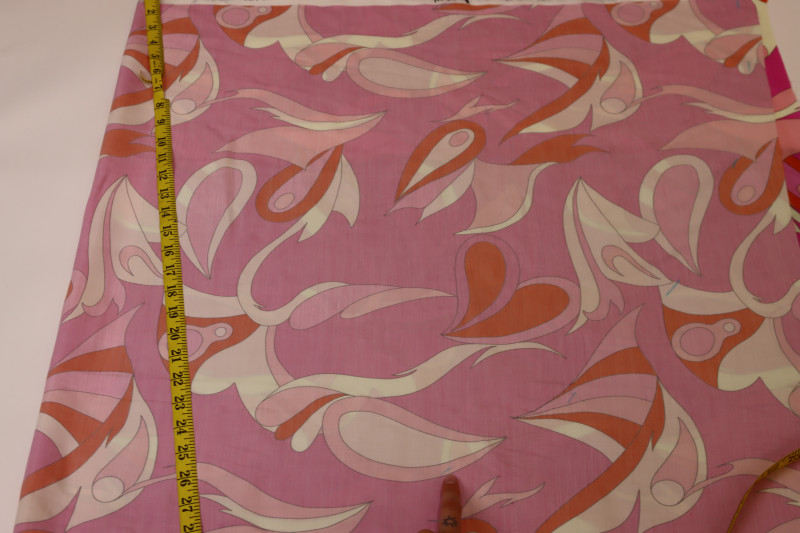
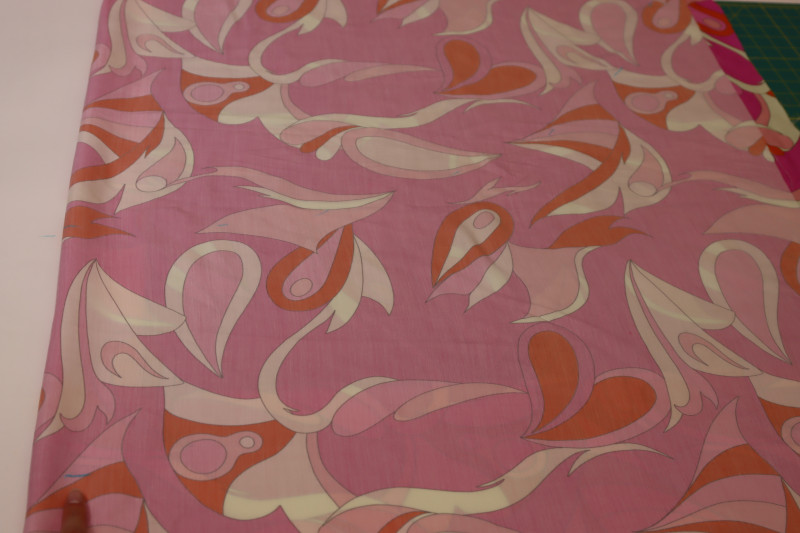
- Fold 2 yards of fabric in half short ways (this means the two raw edges of the fabric should be right sides together while the selvages are folded on themselves).
- Measure your waist where you want your skirt to sit and add 1 inch to that measurement. In my case, I added 1 inch to 28 inches.
- The circumference of a circle = 2pi(radius). This means that the circumference of a half circle = pi(radius). The radius of a half circle with a circumference of 29 inches is therefore 9.23 inches. Mark a quarter circle from the folded corner of the fabric with a radius of 9¼ inches.
- Measure on your body how long you want the longer end of the skirt to be. In my case, I wanted it to be 29 inches long so that it fell just below my knee.
- Mark 29 inches from the waistline you just cut out starting from the folded edge of the fabric.
- Mark 25 inches from the waistline of the skirt on the raw edge opposite to the fold.
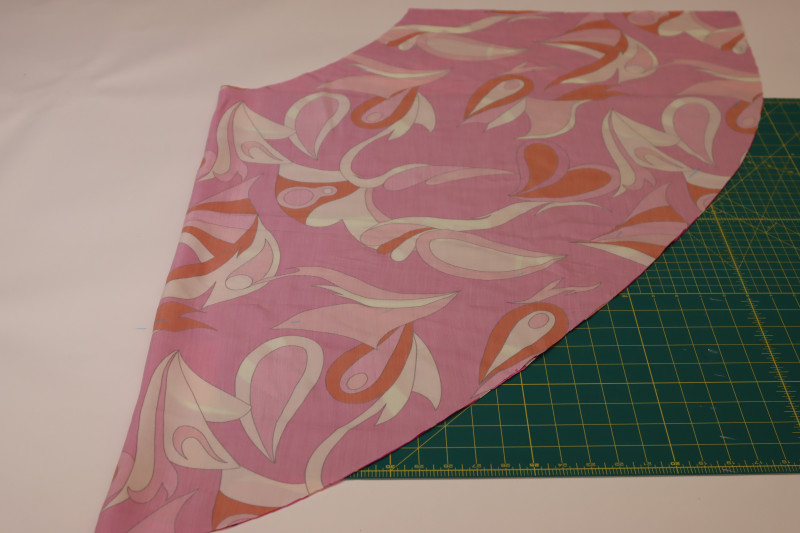
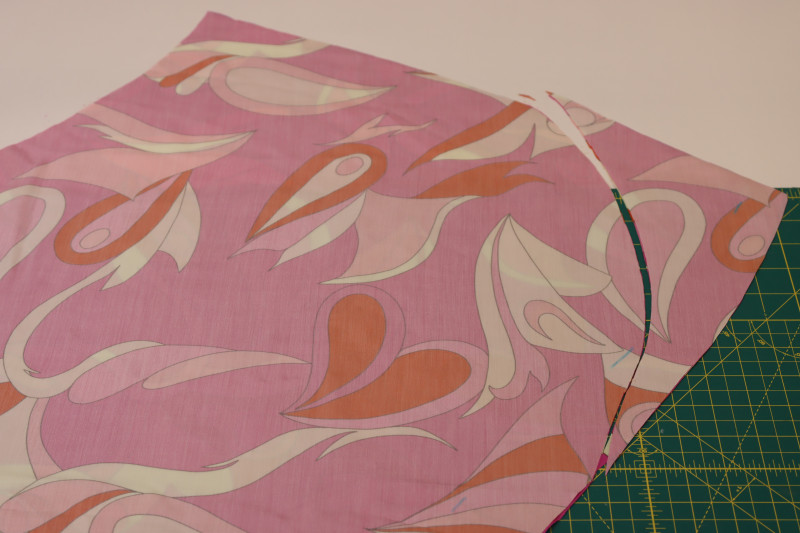
- Cut the hem so that the 29 inch line is blended with the 25 inch line.
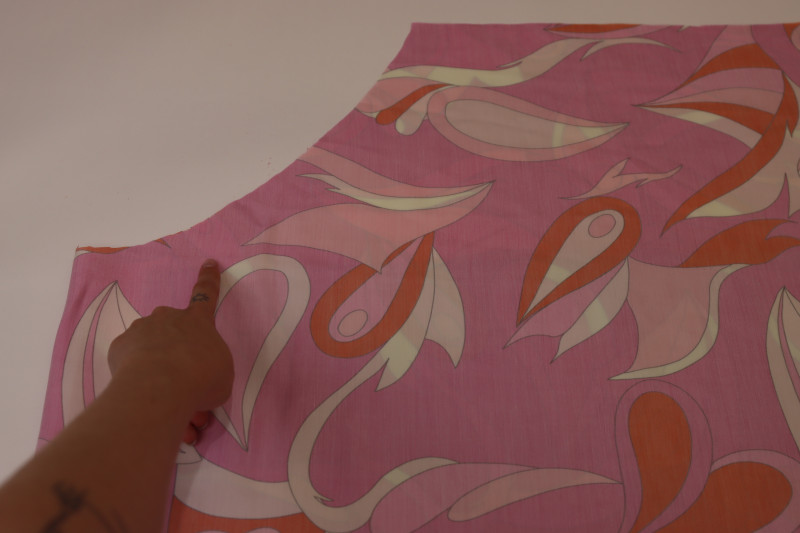
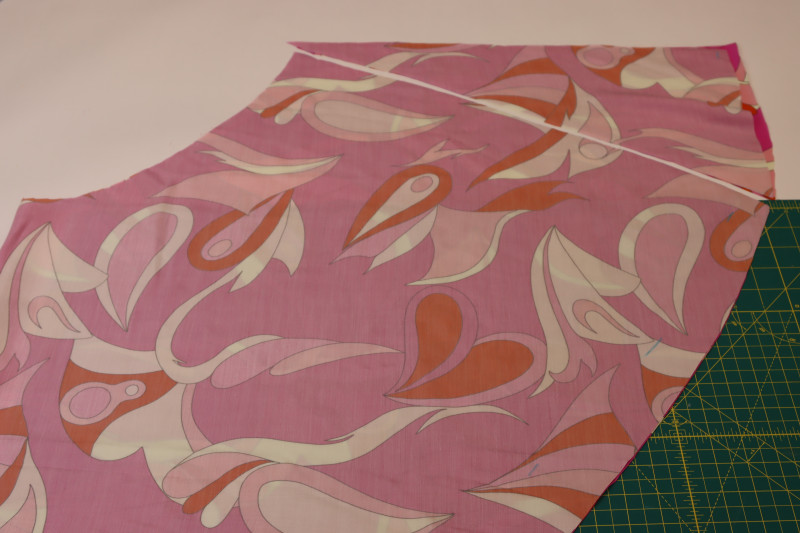
- Straighten out the raw hem slit of the skirt without cutting anything from the waistline.
- Cut a curved line to connect the shorter end of the hem with the side seam slit.
Step 8
SKIRT PLEATS
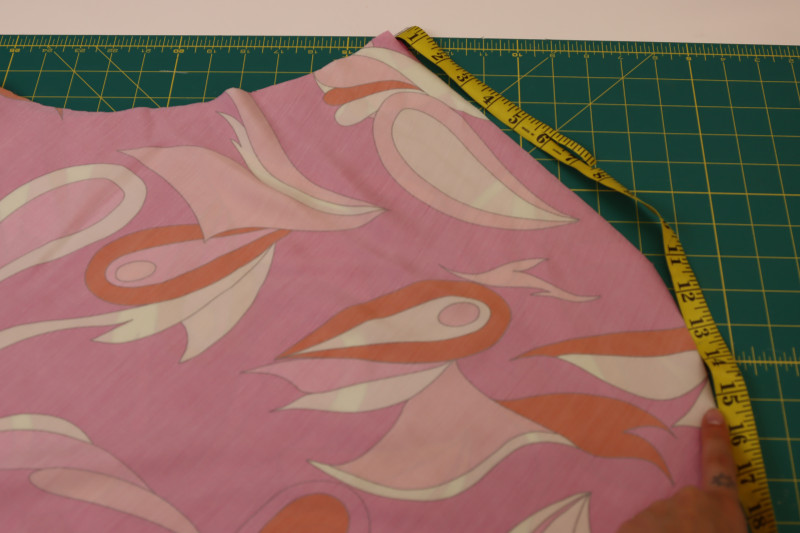
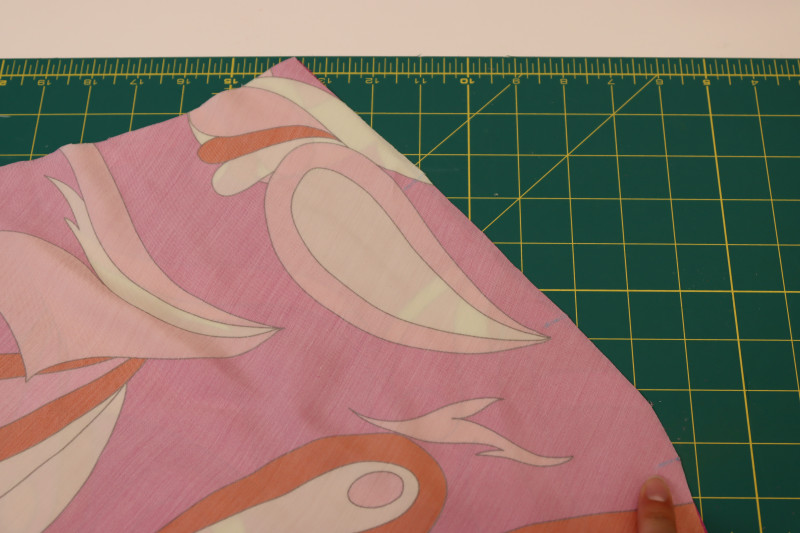
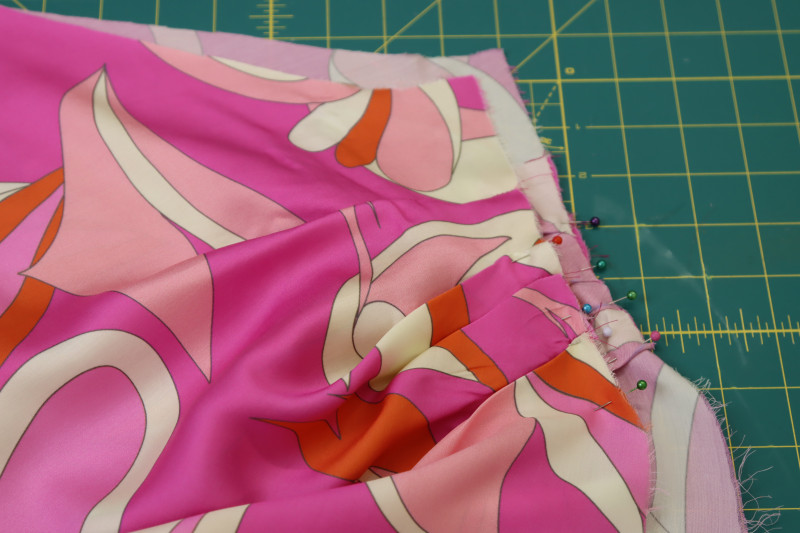
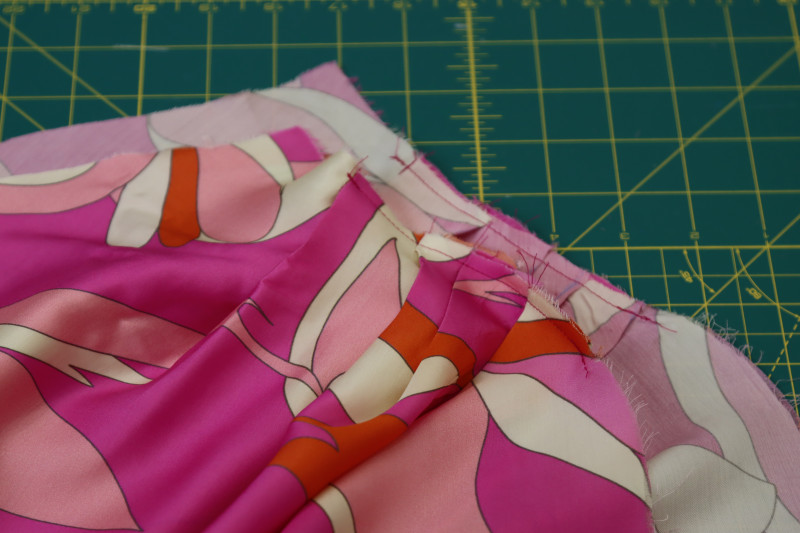
- Make 4 markings along the slit opening of the skirt. My markings were 4 inches apart from each other, starting 4 inches from the waistline. These markings will be the center of each pleat.
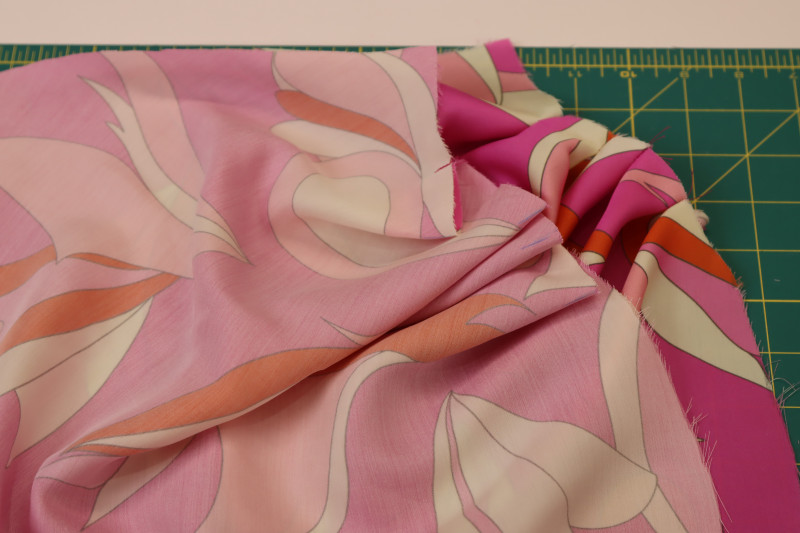
- Pull 2 inches of fabric into each pleat by folding the fabric right sides together centered over the chalk mark and pinning the fabric together 1 inch away from the center of the pleat.
- Sew a 1 inch seam at the pin marking to secure each pleat.
- Repeat this for all 4 pleats on both the front and back side of this slit. There will be 8 pleats in total when you’re done, and 8 inches of fabric will have been taken up on each side.
- Press the pleats so that the bulk of the on the inside of the skirt is facing the hem of the skirt.
- Pin the pressed pleats so that they lay flat.
- Sew a stay stitch ¼ inch away from the side slit to secure the pleats flat.
Step 9
SKIRT SASH
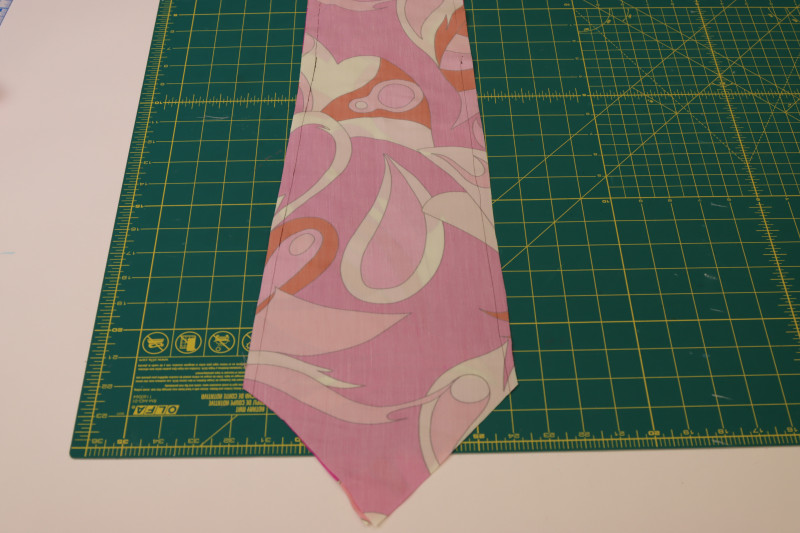
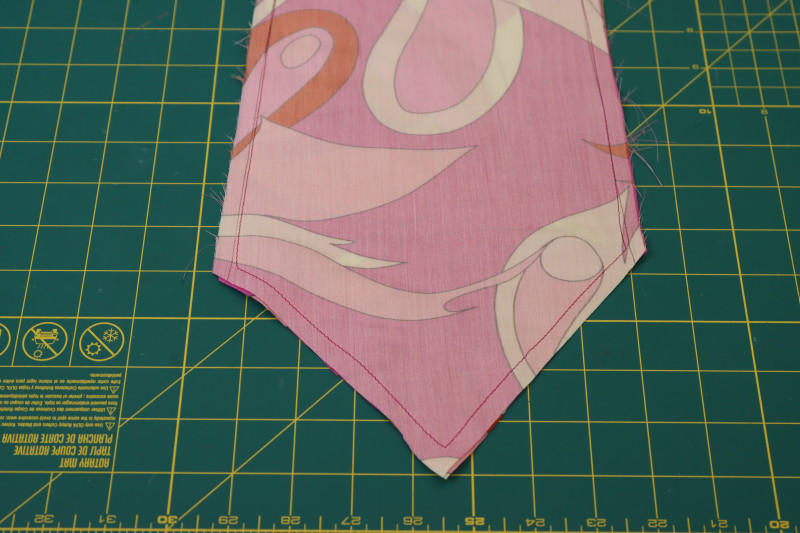
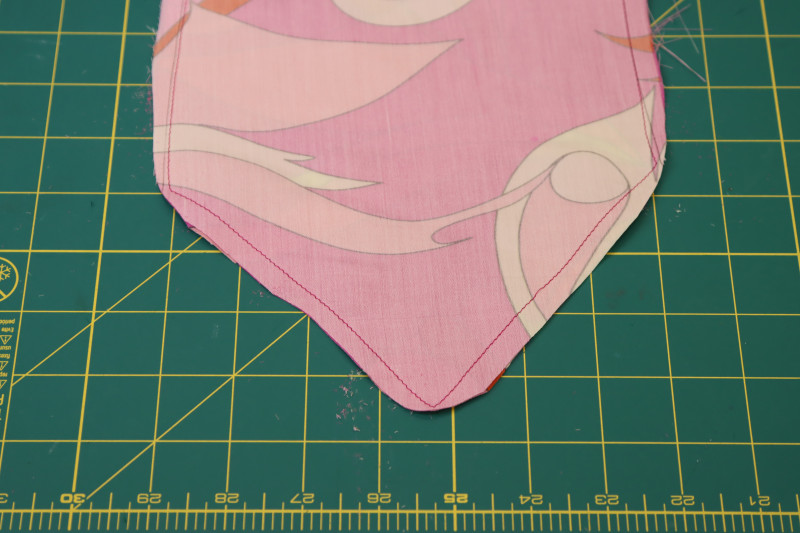
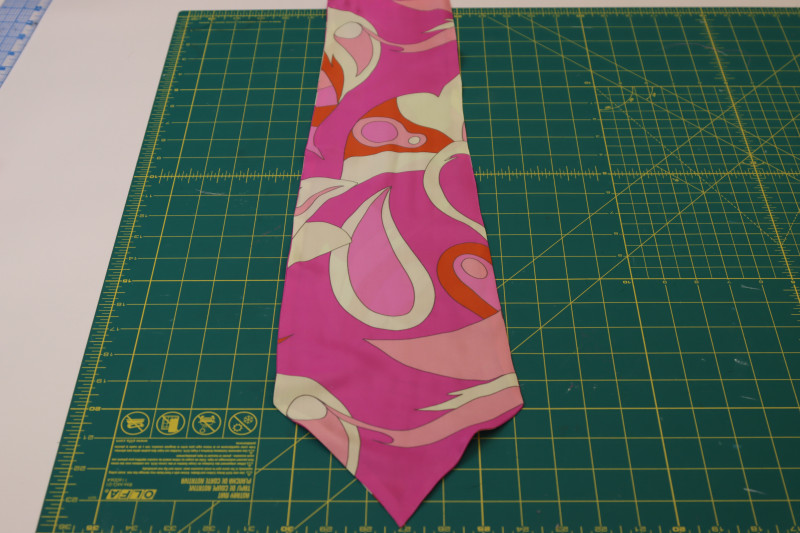
- Place the two skirt sash pieces on top of each other right sides together.
- Pin and sew around the two side seam and the bottom corner of the sash. Leave the top raw edge open.
- Clip the corners of the sash.
- Flip the sash right sides out and press the seams.
Step 10
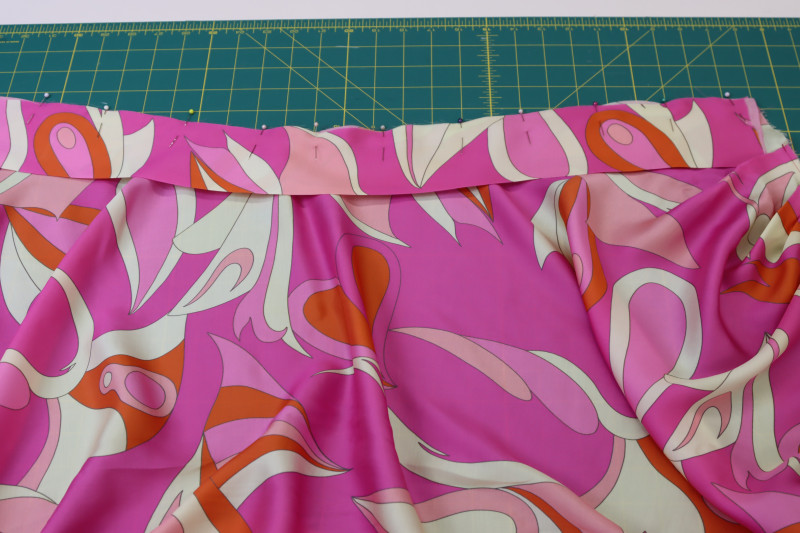
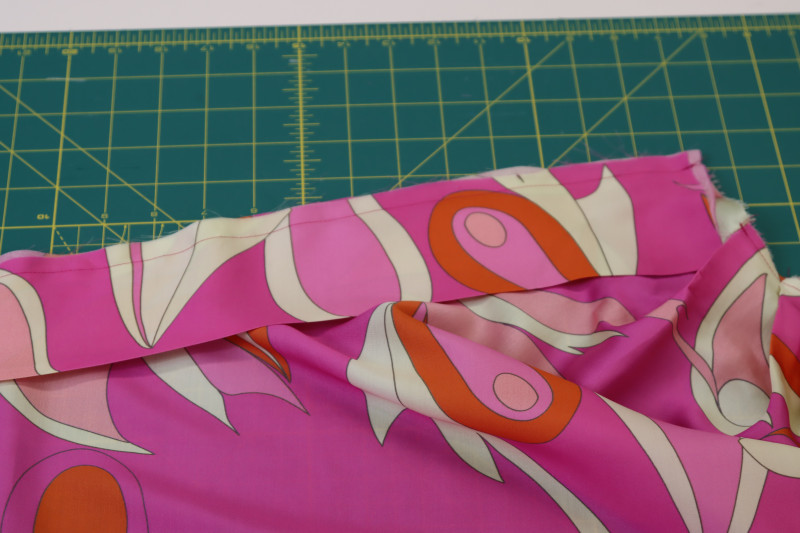
SKIRT WAISTLING FACING
- I made my own waistband facing for this pattern instead of using the pattern piece, but they are essentially attached the same way.
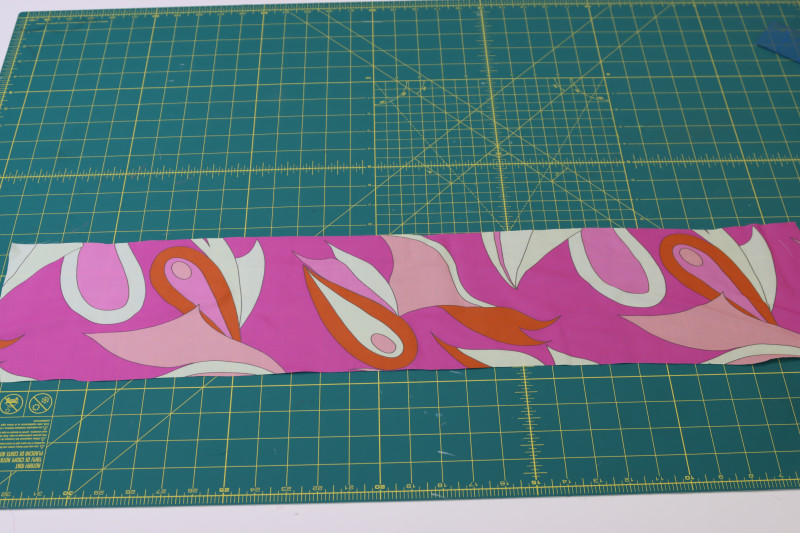
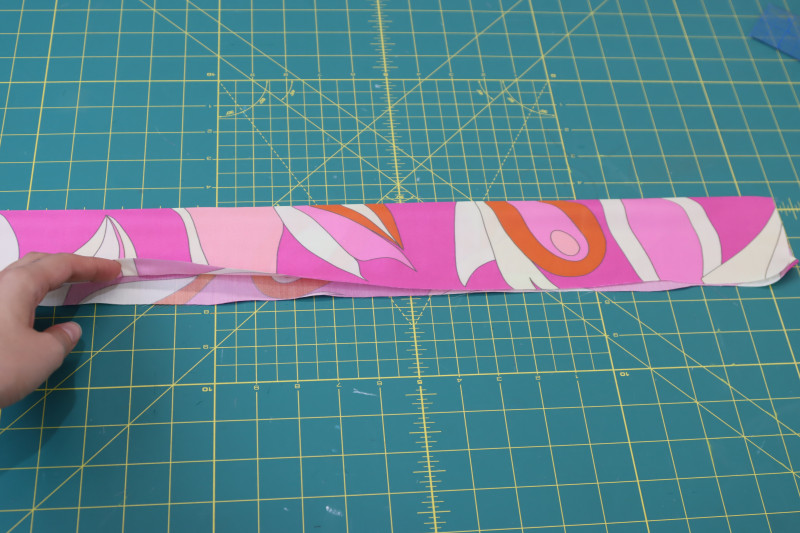
- If using the method below, cut a strip of fabric that is 6 inches wide and 29 inches long.
- Fold that strip of fabric wrong sides together longways and press the fold.
- Pin the raw edge of the waistband to the raw edge of the waistline of the skirt, right sides together.
- Sew the waistband to the waistline.
- Flip the waistband to the inside of the skirt.
- Understitch the waistband to the seam allowance between the waistband and the skirt waistline.
Step 11
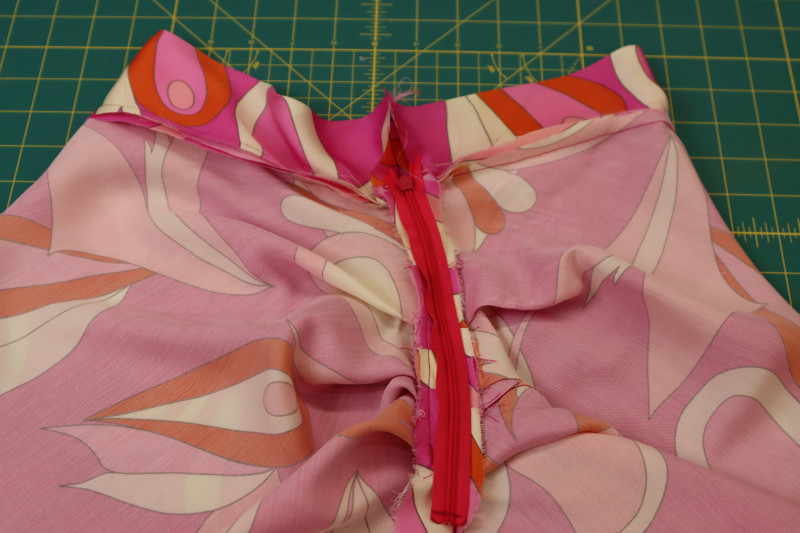
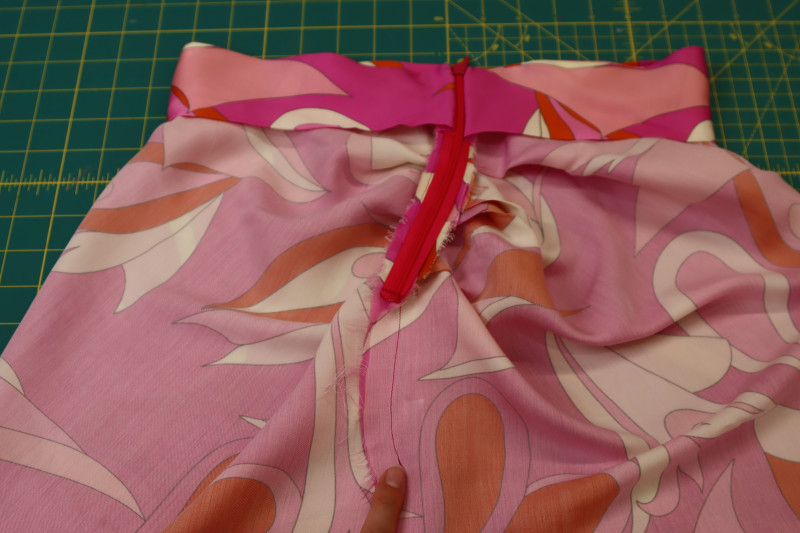
ZIPPER
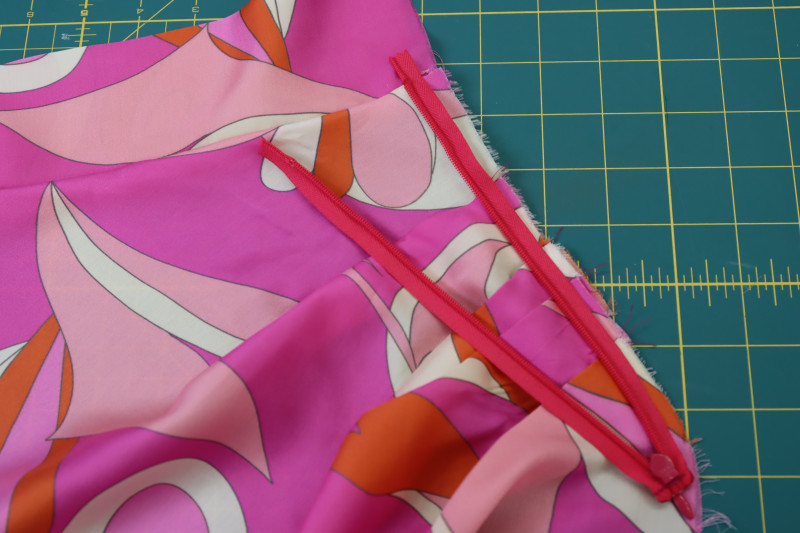
- NOTE: If you got a 24 inch zipper like I did, you’ll need to shorten it. To do so, close the zipper and cut it to the length you want. Then, burn the end of the zipper with a lighter to melt the plastic teeth. Finally, sew a thick tack at the bottom of the zipper that goes right over the teeth to prevent the zipper pull from falling off the end.
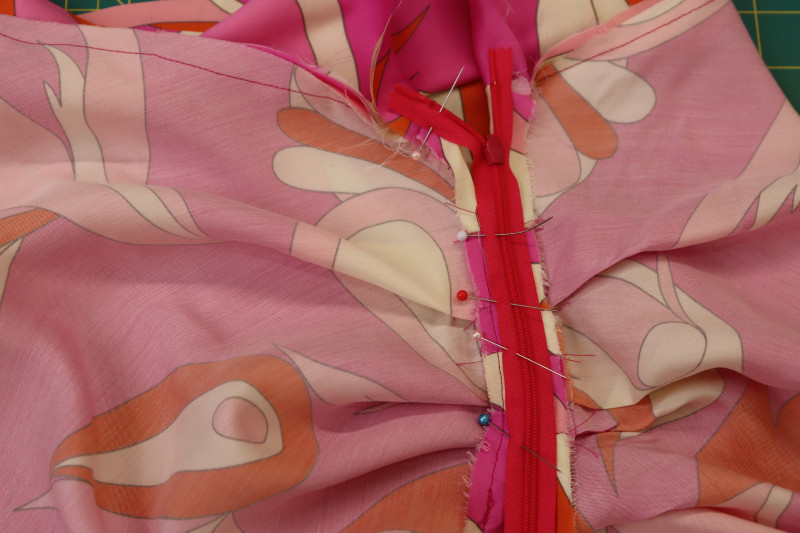
- Place the zipper right sides together with the front side seam of the skirt, making sure the zipper is laying flat on top of the pleats and the top of the zipper STOPS at the seam between the waistline and the waistband.
- Pin and sew the side of the zipper tape closest to the raw edge of the side seam.
- Zip the zipper.
- Line up the other side of the zipper with the back side seam of the skirt, right sides together.
- Pin and sew the opposite side of the zipper to the back side seam.
Step 12
ZIPPER FACING
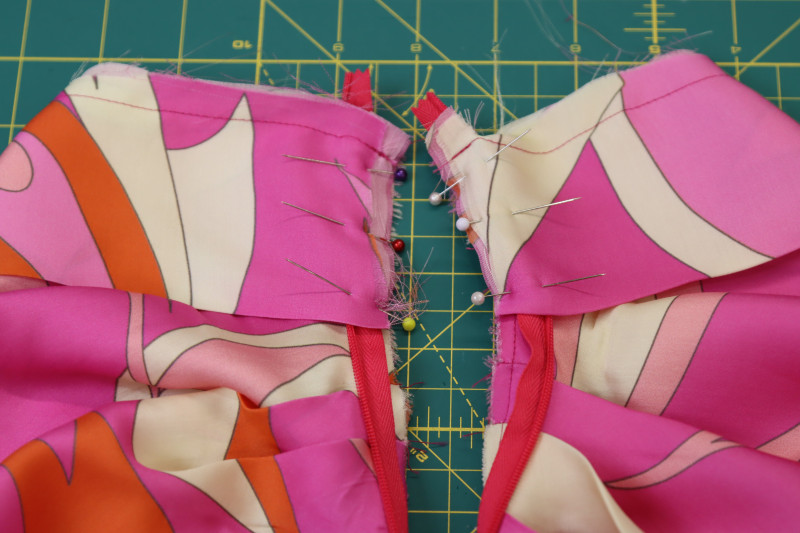
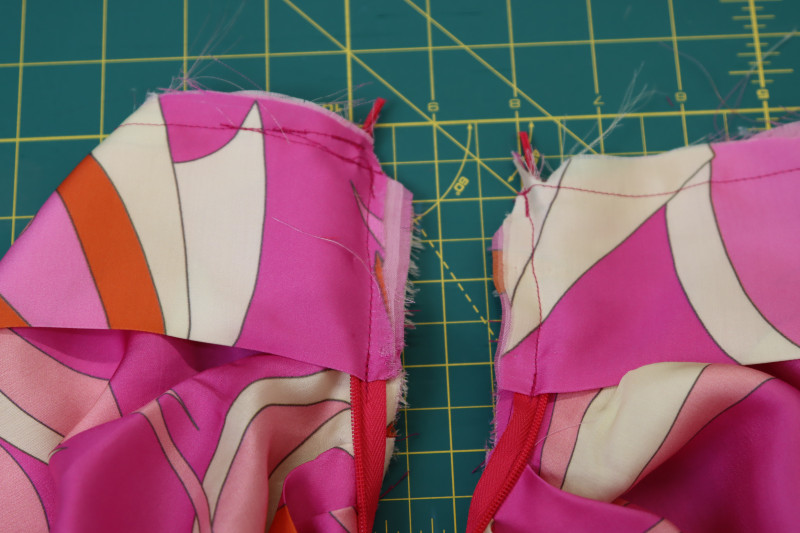
- Flip the waistband so that it is right sides together with the main skirt.
- Pin the raw edges of the sides of the waistband on top of the ends of the zipper.
- Sew the raw edges of the sides of the waistband on top of the first zipper seam you sewed.
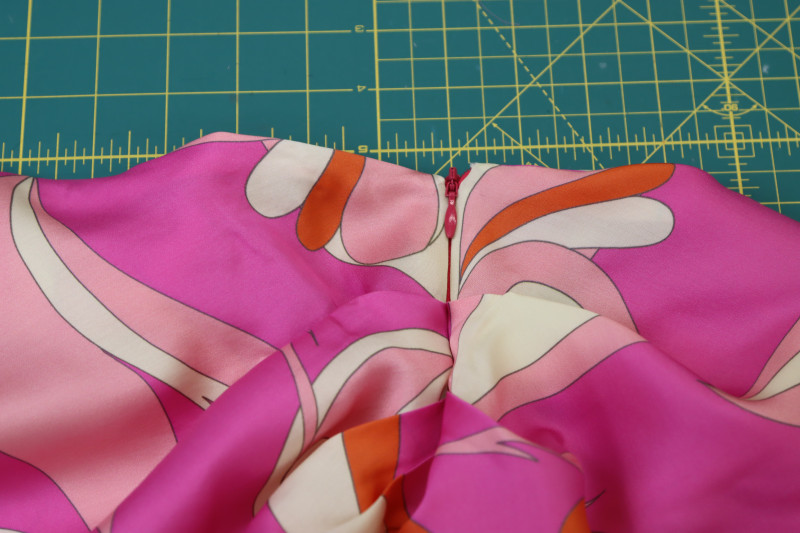
- Clip the corners of the waistband and flip it right sides out.
- Zip the zipper.
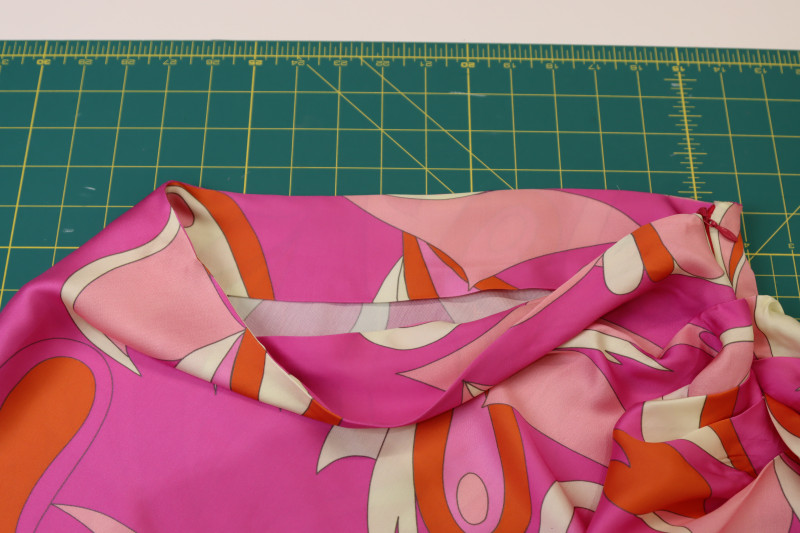
Step 13
ATTACH SASH
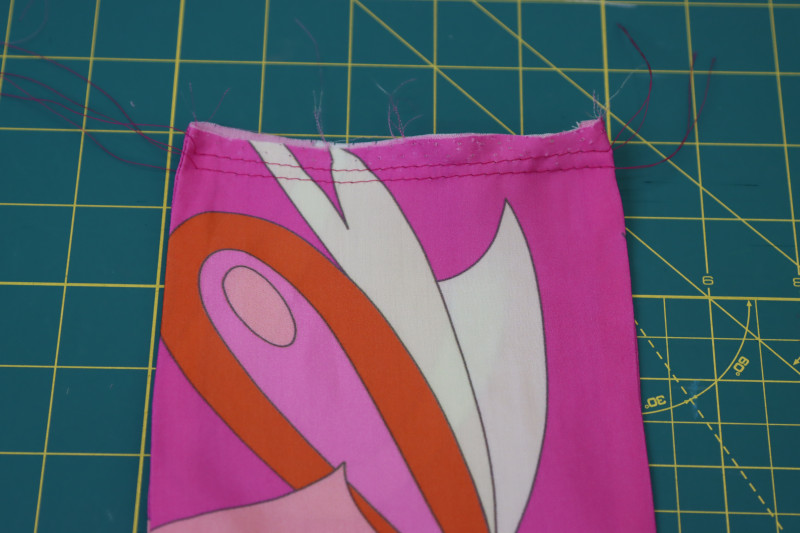
- Sew two gathering stitches at the raw edge of the sash.
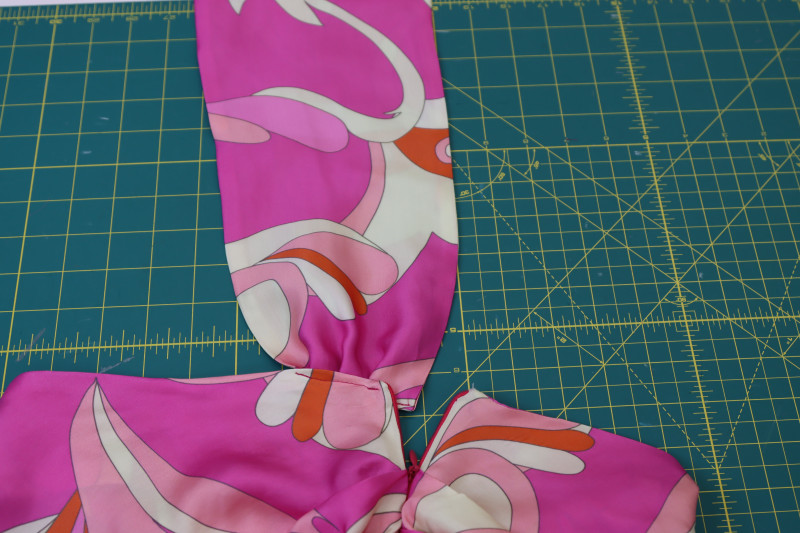
- Gather the raw edge of the sash as much as you can possibly gather it. We want it to be really scrunched.
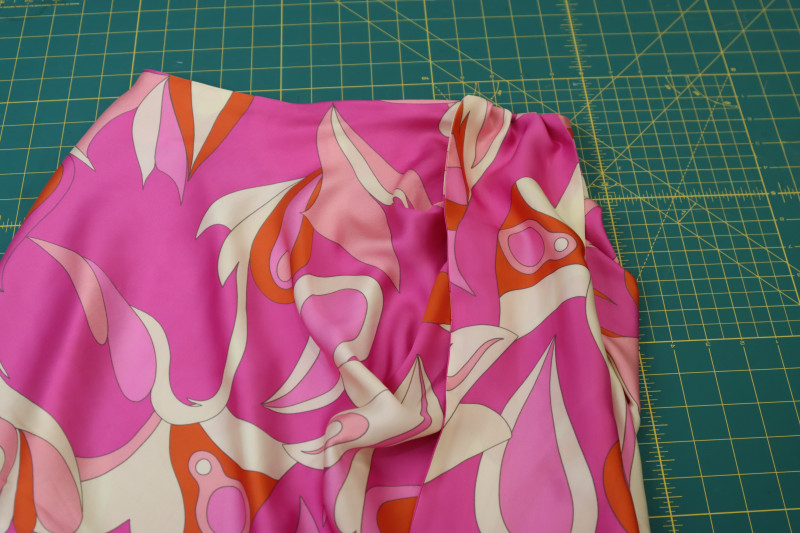
- Pin the gathered edge of the sash to the inside of the waistband so that when the zipper is unzipped, the sash is hanging over the edge of the zipper, covering it. DO NOT sew it on both sides of the zipper. You won’t be able to get the skirt on and off if you do that.
- Zip the zipper and make sure that the sash covers it.
Step 14
FINISH SLIT
- Place the skirt right sides together with the front side seam laying on top of the back side seam.
- Pin and sew the side seam under the zipper so that the slit ends right before the curve of the skirt begins (the seam under the zipper was 4 inches long when I sewed it).
Step 15
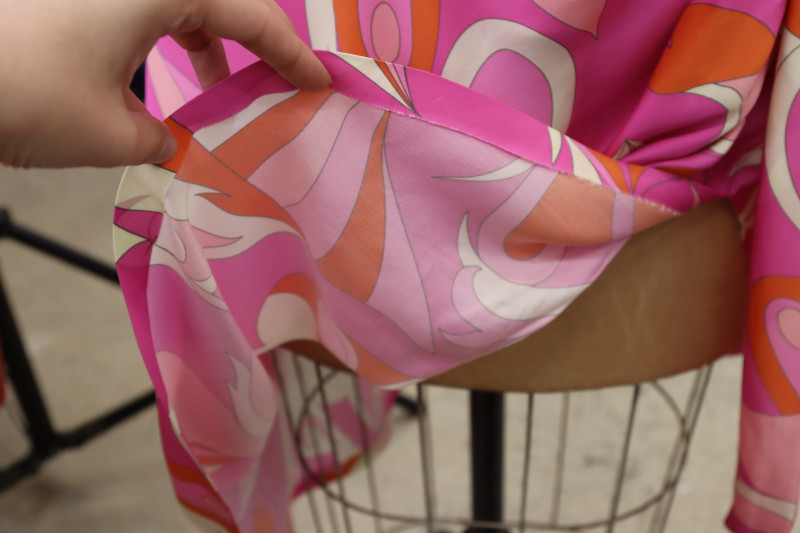
SKIRT HEM
- Press a 1 inch fold into the hem of the skirt.
- Press stitch witchery fusible hem tape into the folded hem of the skirt.
Sewing Success: The Finished Rhodonite Co-Ord Halter and Skirt
Share this post with a friend (or two!), download the Rhodonite Co-Ord Halter and Skirt free sewing pattern, and show us which fabrics and colors you choose, using the hashtags #MoodRhodonitePattern & #MadeWithMood—and don’t forget to tag us @MoodFabrics, too.
Free Sewing Pattern Inspiration for Your Next Project
With 525+ free sewing patterns and counting, your opportunities for sewing with Mood are endless!
We hope you had as much fun sewing this co-ord halter and skirt pattern as we did! As always, we want to hear from you—share your thoughts and comments below and let us know where you’ll be wearing the Rhodonite Co-Ord Halter and Skirt free sewing pattern!
Can’t get enough sewing with Mood? Browse your next make with our latest free sewing patterns.
