

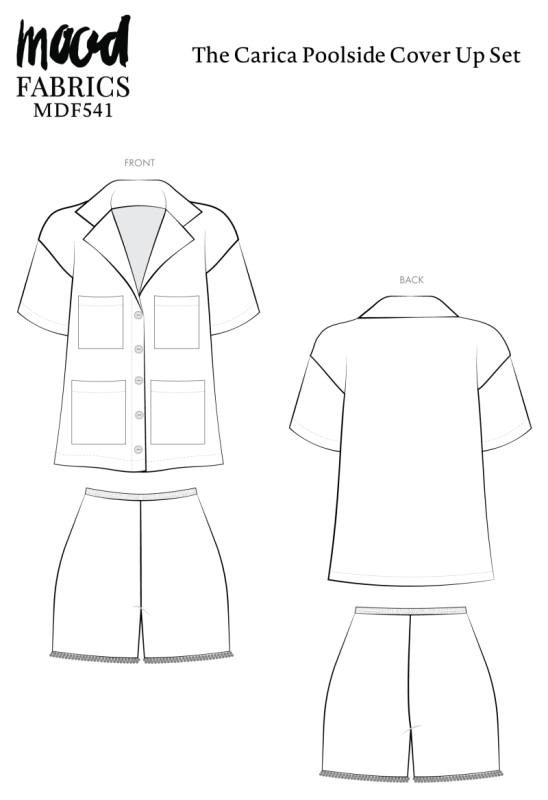
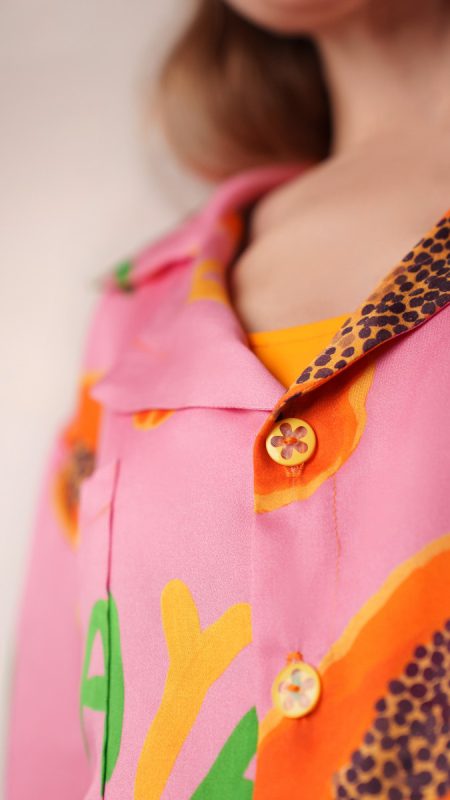
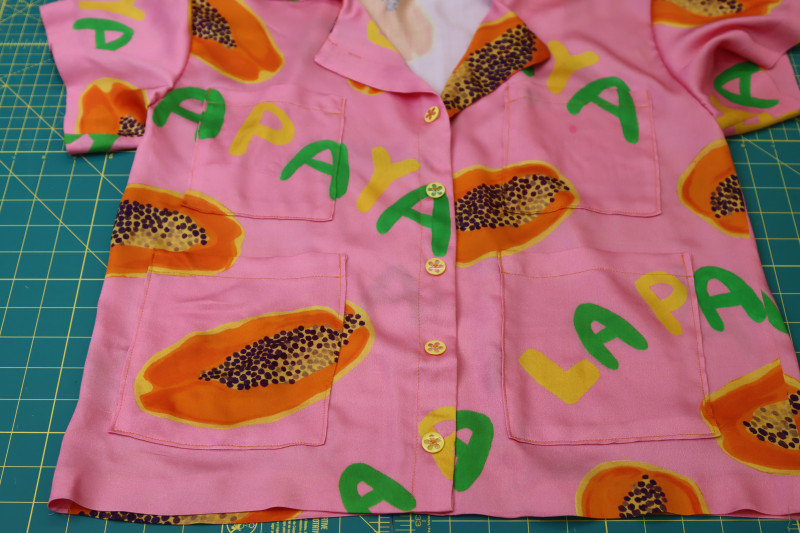
Meet the Carica Poolside Cover Up Set, your new excuse to linger a little longer in the sunshine. Designed with carefree summer days in mind, this chic two-piece set combines comfort, style, and playful charm. Sew it up in a vibrant yet breezy rayon challis from Mood’s Citrus Collection and you’ll have a look that feels just as good as it looks.
The relaxed button-up shirt features a classic camp collar that drapes beautifully over the body, creating an easy, laid-back silhouette perfect for layering over swimwear or styling as a standalone statement piece. Paired with the matching shorts, trimmed with sweet pom pom detailing that echoes the whimsy of the fruity print, the result is summery sweet poolside style.
Best of all, this set is wonderfully approachable to sew. The shorts come together with just two pattern pieces and a simple elastic waistband, making them a quick project you’ll reach for again and again. Whether you’re creating a colorful resort-ready ensemble, a luxurious pajama set, or an everyday summer staple, the Carica Set adapts beautifully to your lifestyle.
Choose a lightweight woven with plenty of drape, and let the Carica Poolside Cover Up Set become your go-to for poolside lounging, vacation mornings, cozy evenings, and everything in between. After all, the best handmade pieces are the ones you’ll never want to take off.


Essential Materials & Sizing Guide for the Carica Poolside Cover Up Set
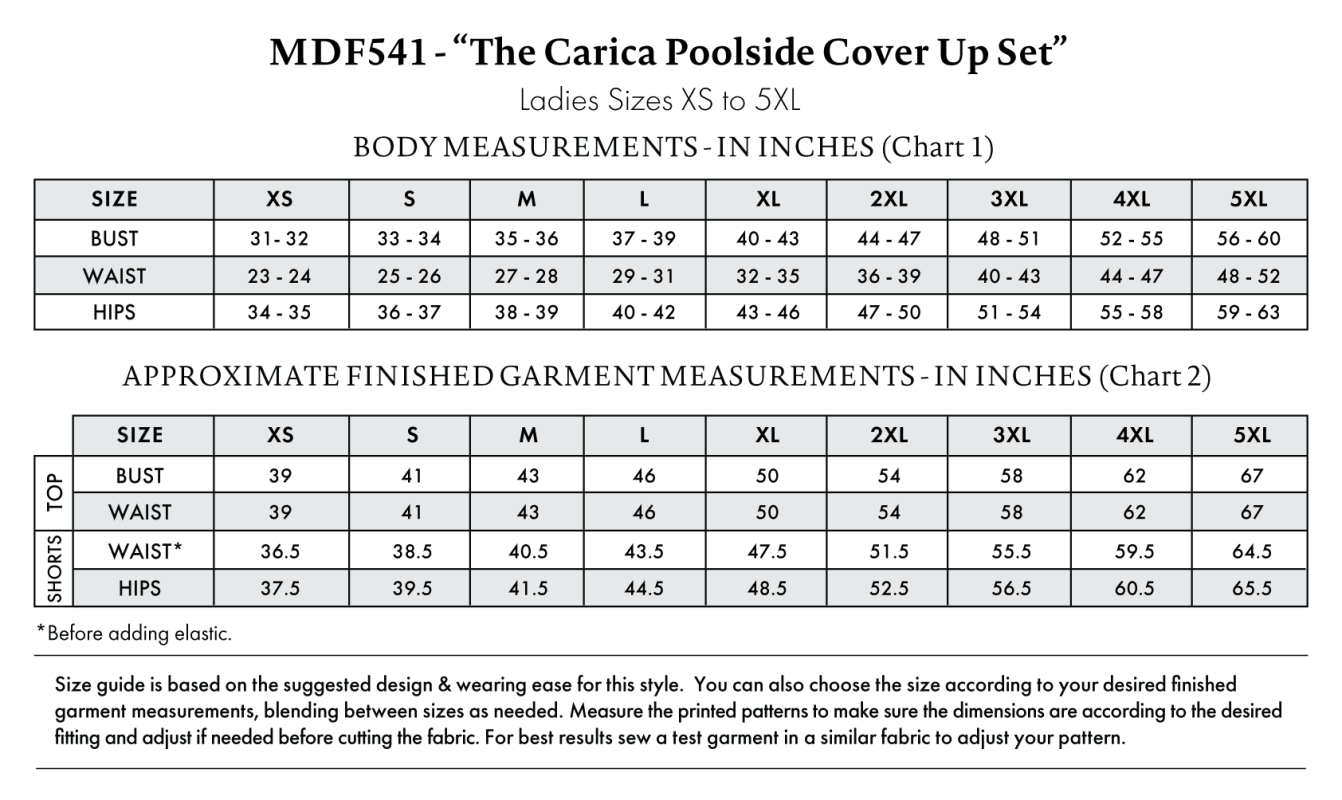
Continue reading for a breakdown of what knowledge and materials you need for creating your very own cover up set! We’ve got you covered with the recommended materials we used—if you want to follow along exactly—as well as a curated list of alternative fabric type recommendations if you want to customize your own version. The Carica Poolside Cover Up Set free sewing pattern download includes technical drawings for seam and cover up set visibility, plus a size chart to help you find your perfect fit!
Purchase Products Used Below:
Quantities indicated are for sewing a size small* cover up set. Toggle the ‘SHOP THIS LOOK’ box to find quantity estimates for other sizes.
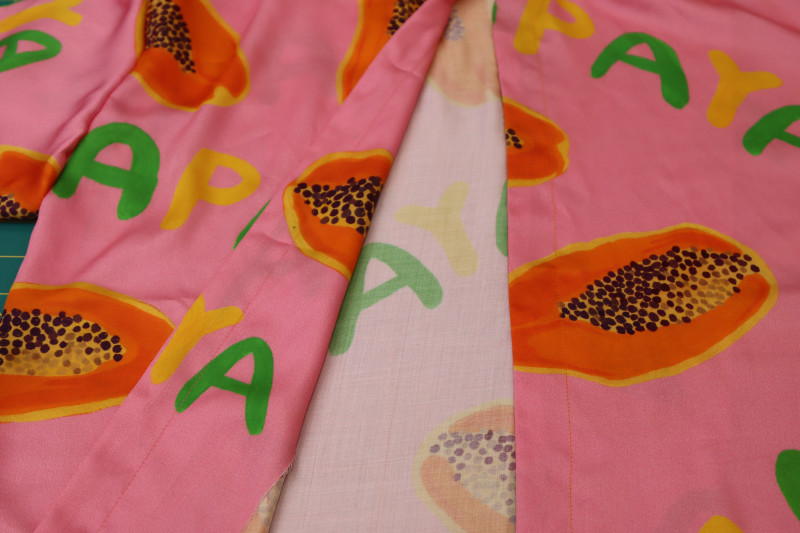
- 2.5 yards of Rayon Challis – Pink Papayas – Snack Time Print – Mood Exclusive Citrus Collection
- 2 yards of Yellow Two Row Mini Pom Pom Trim
- 5 each of Italian Yellow Floral Plastic Button – 24L/15mm
- 1 each of Gutermann Sew All Thread 100m – 462 Tangerine
- 1 yard of White Elastic – 0.5”
- MDF541 – Carica Poolside Cover Up Set Sewing Pattern (Free download below!)
Additional Products Used:
*Quick Tip! The ‘SHOP THIS LOOK’ box defaults to full-yard quantities. To order an exact half-yard quantity for any fabric, simply use the decrease quantity button (-) to subtract by the half yard. Then click “ADD TO CART” to add all materials to your cart. (Our system can only display full-yard quantities initially.)
Alternative Fabric Type Recommendations:
The Carica Poolside Cover Up Set sewing pattern is best suited for lightweight fashion fabrics. Explore other fabric types or colors from our featured collections for your cover up set with the links below.
Fabric Collections Used in this Post:
Download Your Free Sewing Pattern
Submit your name and email in the form below to receive the download link for the Carica Poolside Cover Up Set free sewing pattern directly in your inbox. Mood Sewciety Patterns will send your free download link via email with the subject line: ‘Your Free Download from Mood Sewciety – The Carica Poolside Cover Up Set’ (in PDF format for A4 and letter-size printing).
© MoodFabrics.com / MoodSewciety.com – Mass production, resale, or distribution of this pattern in any form is strictly prohibited.
Find Your Perfect Fit
The Carica Poolside Cover Up Set Sizing Guide is based on the suggested design & wearing ease for this style. You can also choose the size according to your desired finished garment measurements, blending between sizes as needed. Measure the printed patterns to make sure the dimensions are according to the desired fitting and adjust if needed before cutting the fabric. For best results, sew a test garment in a similar fabric to adjust your pattern.
Note: Always read all the instructions before cutting the fabric!
How to Sew The Carica Poolside Cover Up Set
The instructions provided below are designed to guide you through sewing the Carica Poolside Cover Up Set from start to finish.


4 Tips for Sewing with Rayon Challis
⇒ I highly recommend cutting out this fabric with a rotary cutter on a self healing mat. This fabric shifts around a lot on the bias, and it’s a lot easier to cut out curved pattern pieces with the rotary cutter than with straight scissors.
⇒ Launder your fabric before cutting out the pattern pieces so that it is pre-shrunk.
⇒ Choose a size 70/10 needle for sewing a thin fabric like rayon challis. It will prevent runs in the weave and thread pulls.
⇒ Use medium heat on your iron when pressing your seams to avoid scorching your fabric.


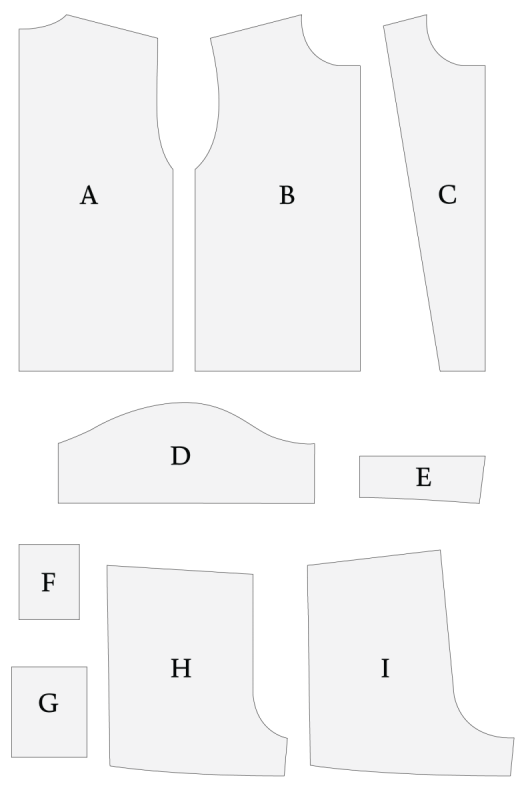
Pattern Pieces & Fabric Cuts Needed
- (A) TOP BACK
- Fabric – Cut 1 on Fold
- (B) TOP FRONT
- Fabric – Cut 2 Mirrored
- (C) TOP FRONT FACINGS
- Fabric – Cut 2 Mirrored
- (D) SLEEVES
- Fabric – Cut 2 Mirrored
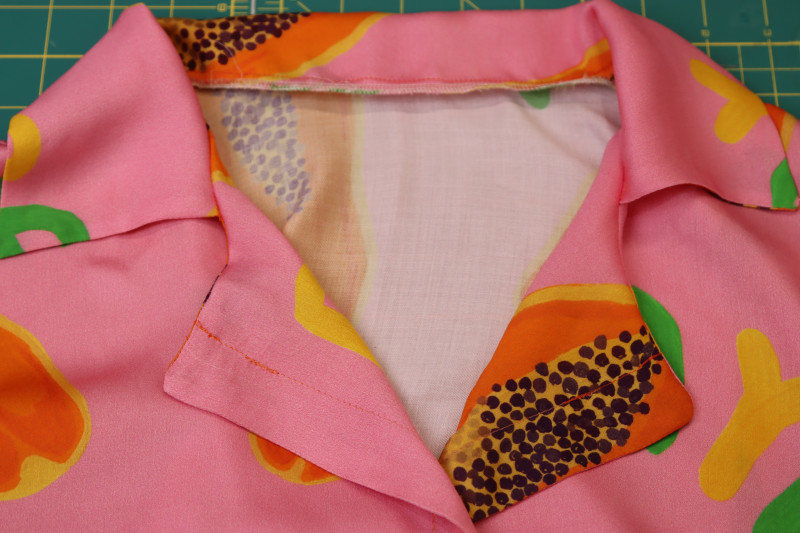
- (E) COLLAR
- Fabric – Cut 2 on Fold
- (F) TOP UPPER POCKET
- Fabric – Cut 2
- (G) TOP LOWER POCKET
- Fabric – Cut 2
- (H) SHORTS FRONT
- Fabric – Cut 2 Mirrored
- (I) SHORTS BACK
- Fabric – Cut 2 Mirrored

Sew with a 1/2″ seam allowance for all seams unless otherwise specified.
Step 1
SHORTS CROTCH SEAMS
- Place the fronts of the shorts right sides together.
- Pin and sew along the crotch seam.
- Repeat for the back shorts crotch seam.
Step 2
SHORTS SIDE SEAMS
- Open both shorts pieces along the crotch seams.
- Lay the front shorts on top of the back shorts right sides together with the sides lined up.
- Pin and sew the front shorts to the back shorts along the side seams.
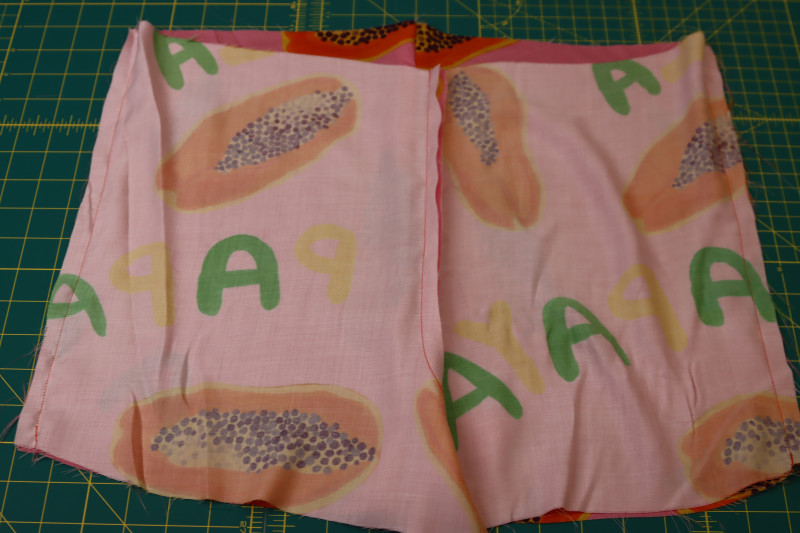
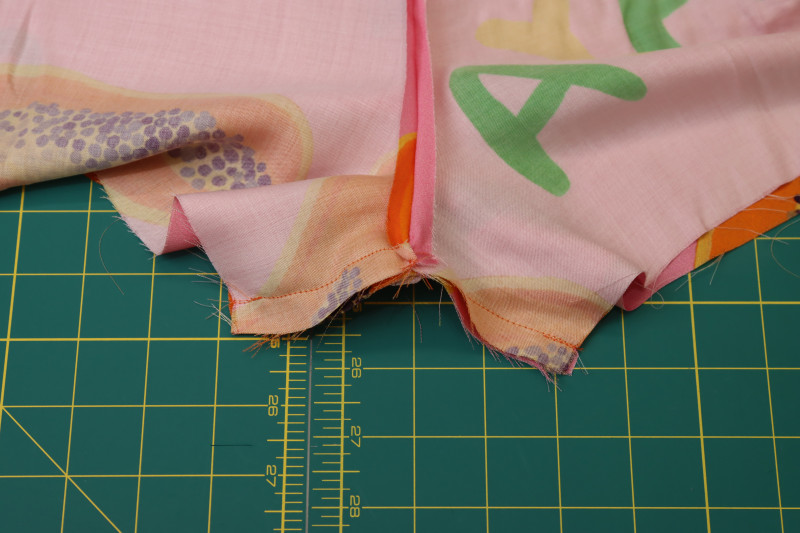
Step 3
SHORTS INSEAM
- Match up the front crotch seam with the back crotch seam.
- Pin and sew the shorts inseam right sides together.
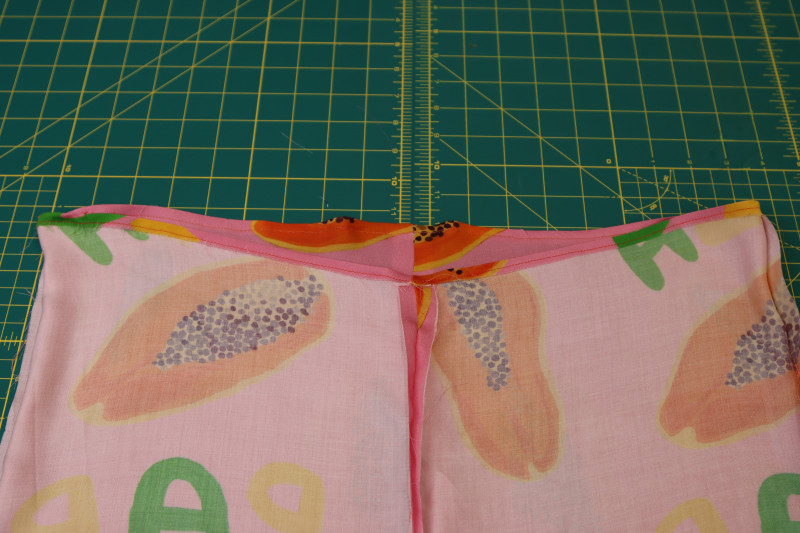
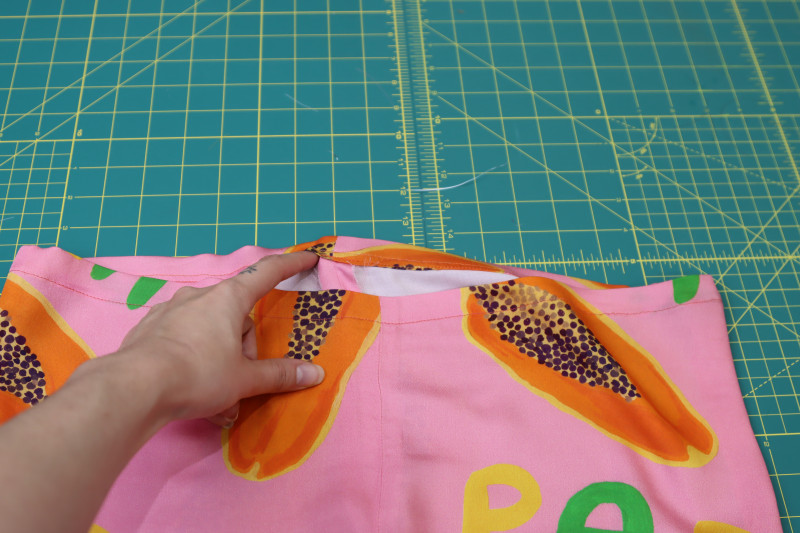
Step 4
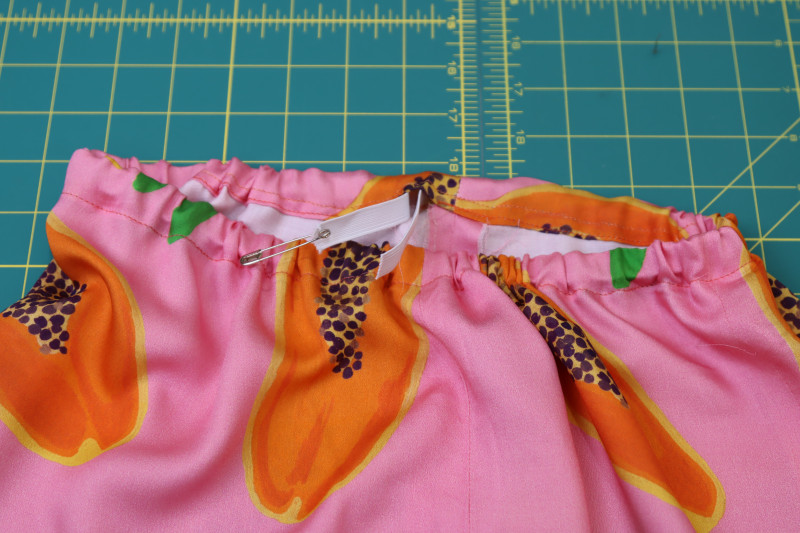
SHORTS WAISTBAND
- Press a ¼ inch fold into the waistline of the shorts to tuck away the raw edges of the fabric.
- Press another ½ inch fold into the waistline of the shorts. This fold is the beginning of the elastic channel.
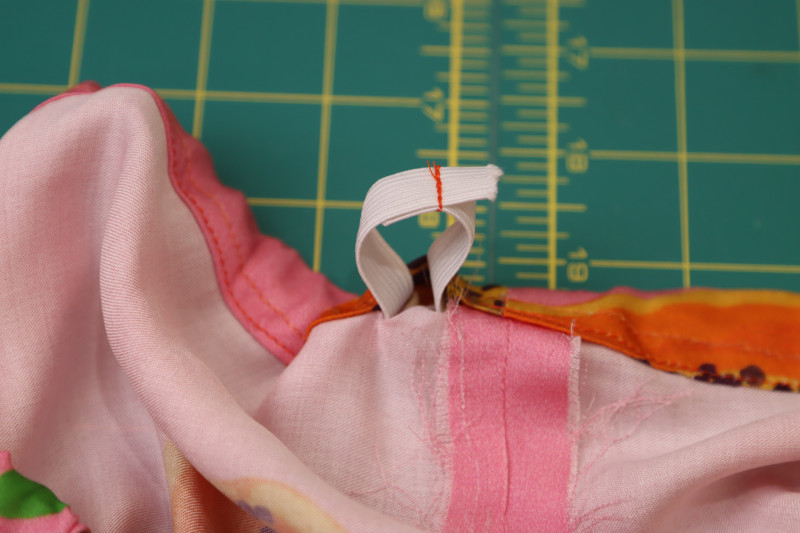
- Sew along the waistline of the pants with a ⅜ inch seam allowance, but DO NOT sew completely around the waistline. Leave a small gap to insert the elastic.
- Use a safety pin to feed a piece of elastic through the channel you just sewed. The elastic should fit snugly around the smallest part of your waist without digging into your skin.
- Secure the elastic to itself to make it a closed loop.
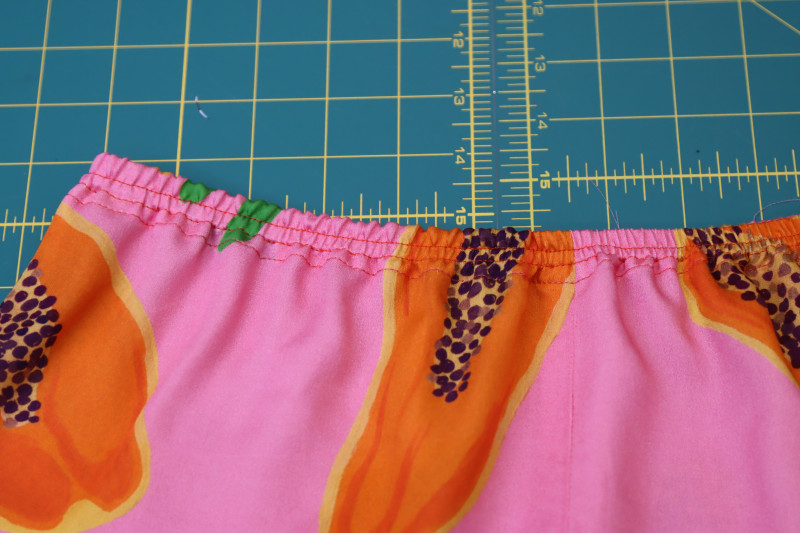
- Topstitch over the gap in the elastic channel to secure the elastic inside of the waistband.
- While pulling the elastic taut, topstitch directly over the elastic.
Step 5
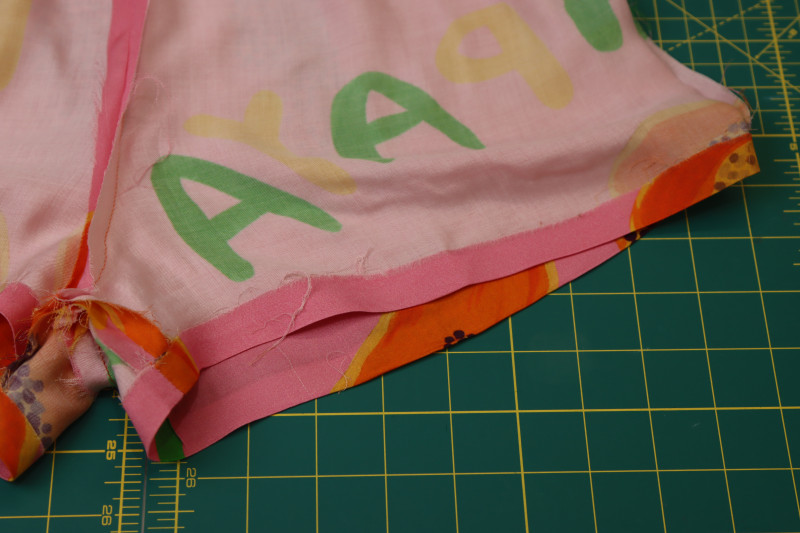
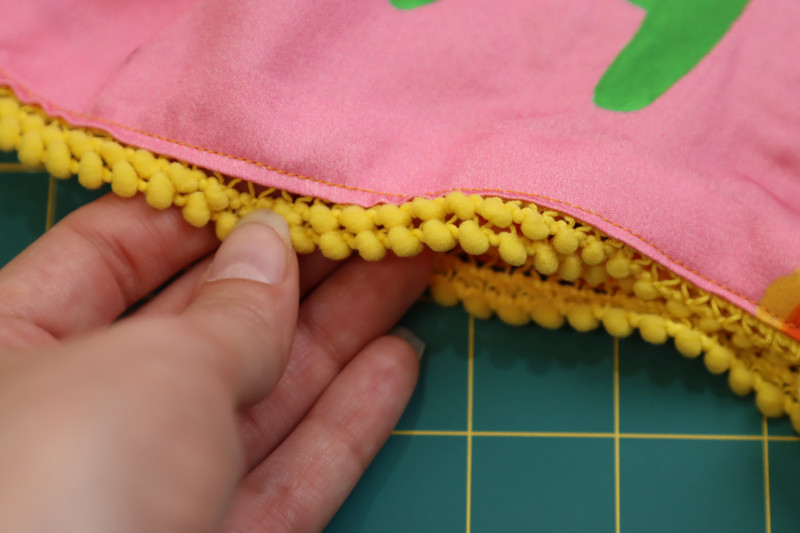
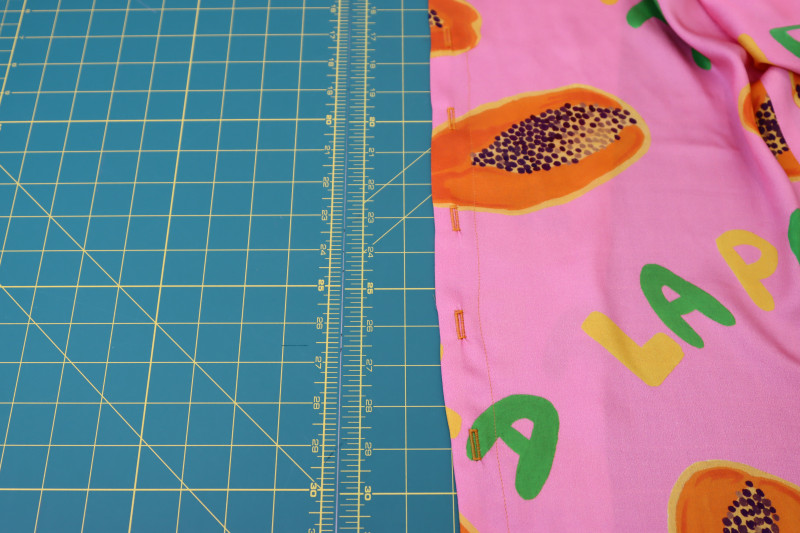
SHORTS HEM
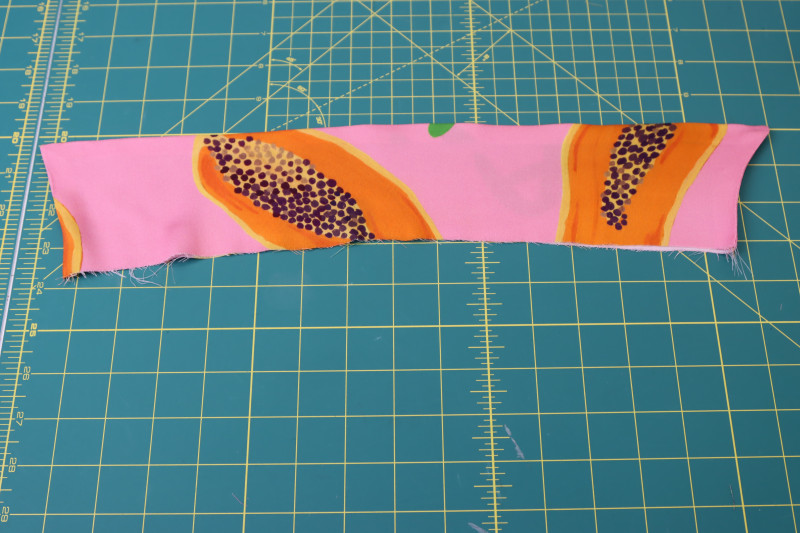
- Press a ½ inch fold into the hem of the shorts.
- Pin the pom pom trim to the very edge of the folded shorts hem.
- Sew the pom pom trim to the shorts hem with a ⅛ inch seam allowance so that only the puff balls stick out from the hem, not the trim itself.


Step 6
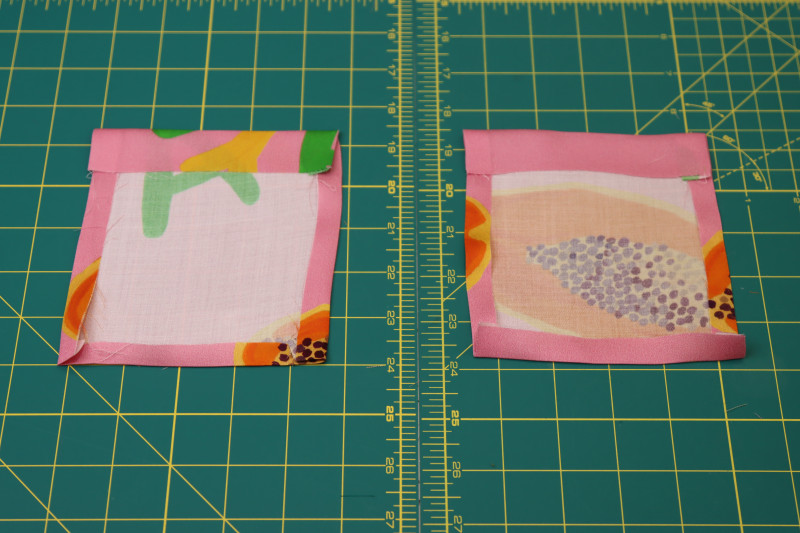
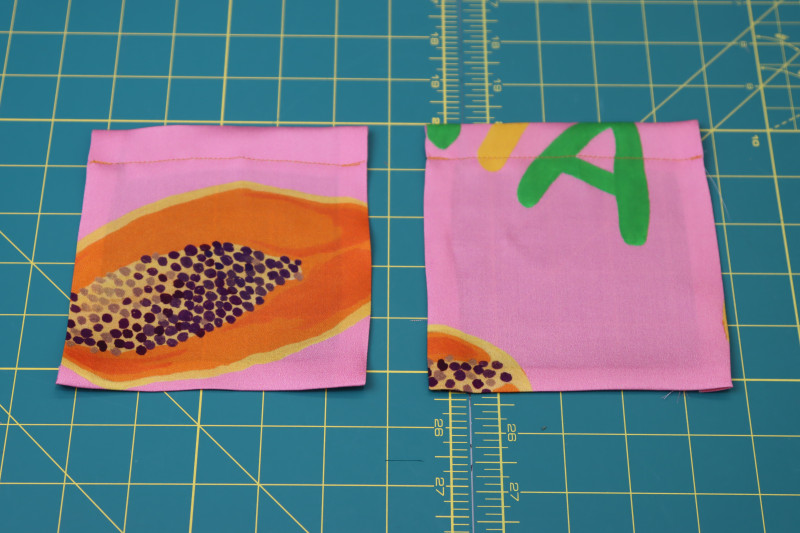
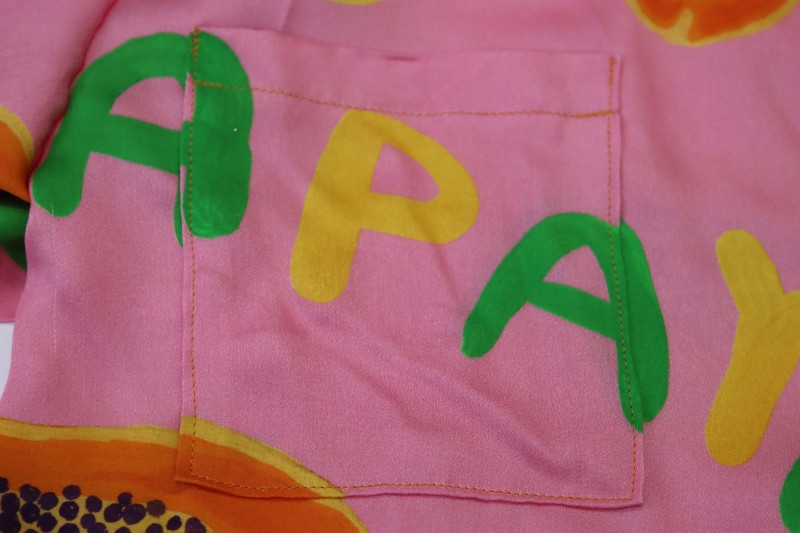
SHIRT POCKETS
- Press a ½ inch fold into the sides and bottoms of the shirt pockets.
- Press a 1 inch fold into the top of the shirt pockets.
- Topstitch over the 1 inch fold on the shirt pockets with a ⅞ inch seam allowance.
- Repeat for both the smaller pockets and the bigger ones.
Step 7
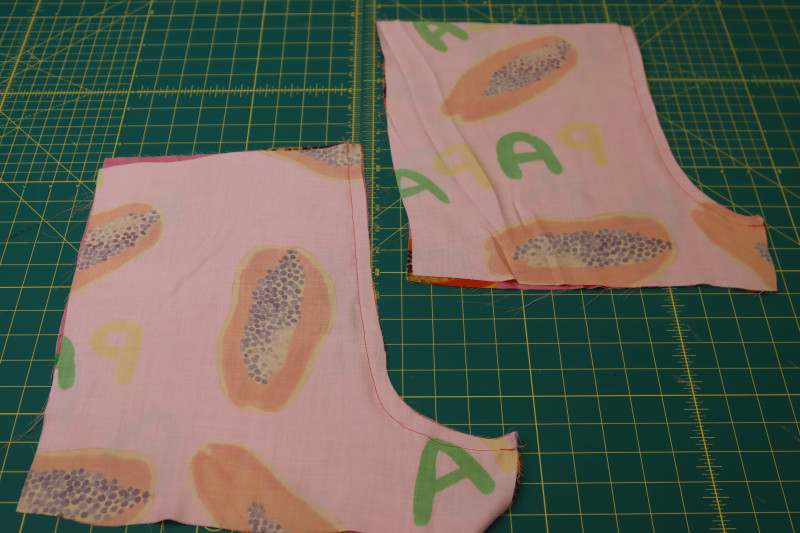
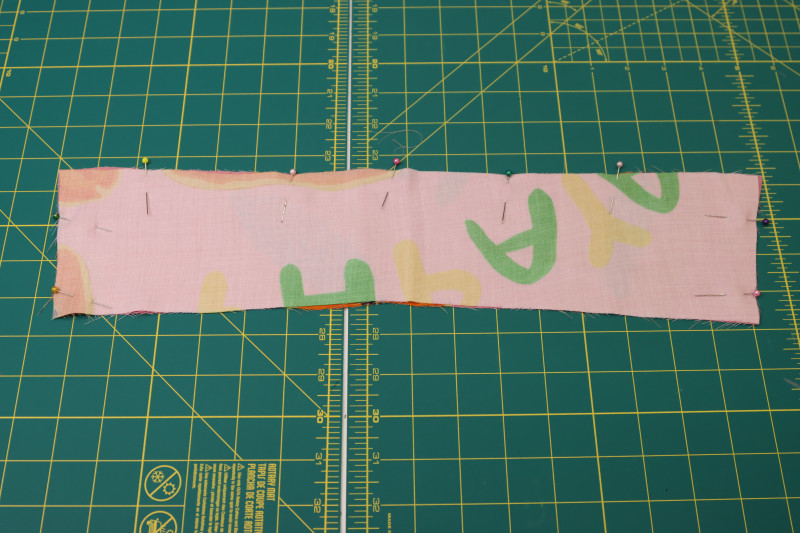
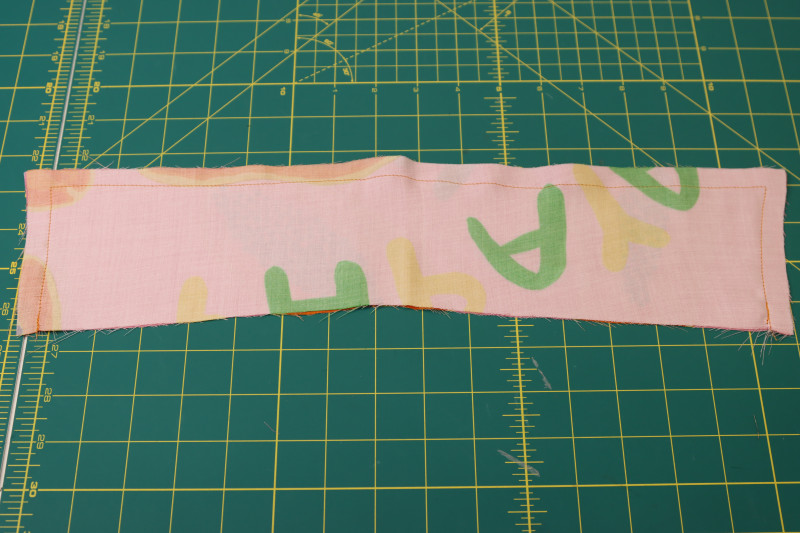
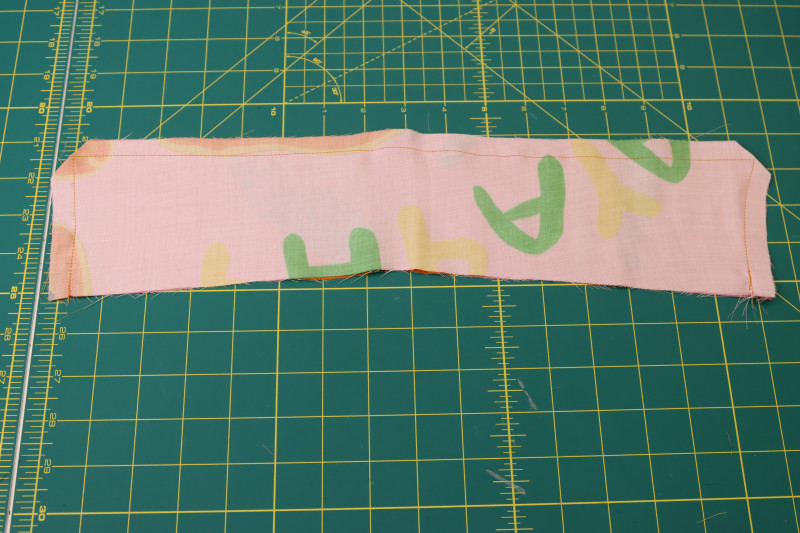
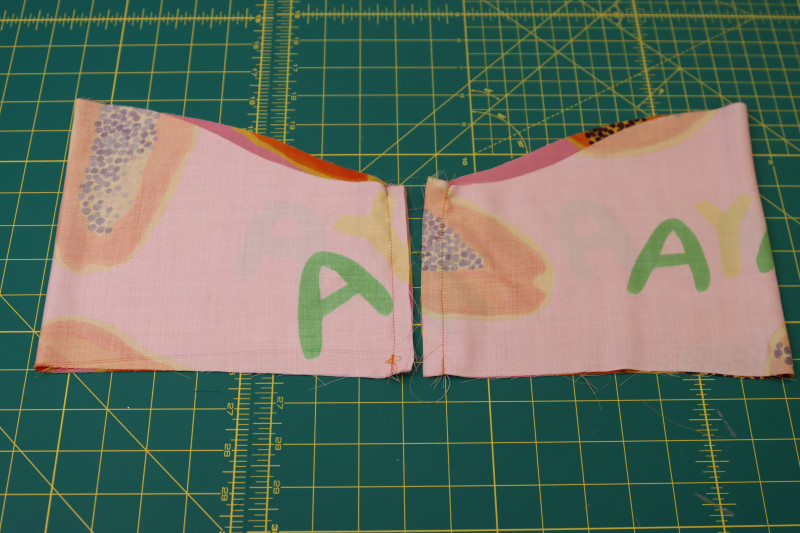
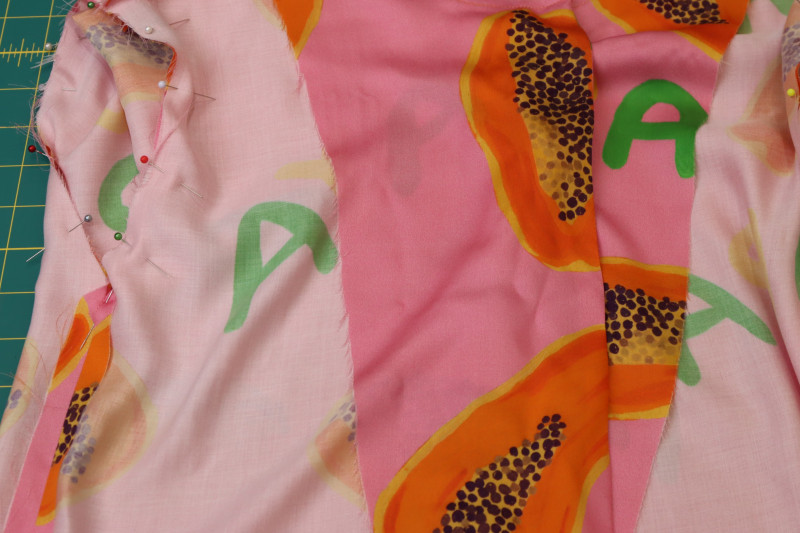
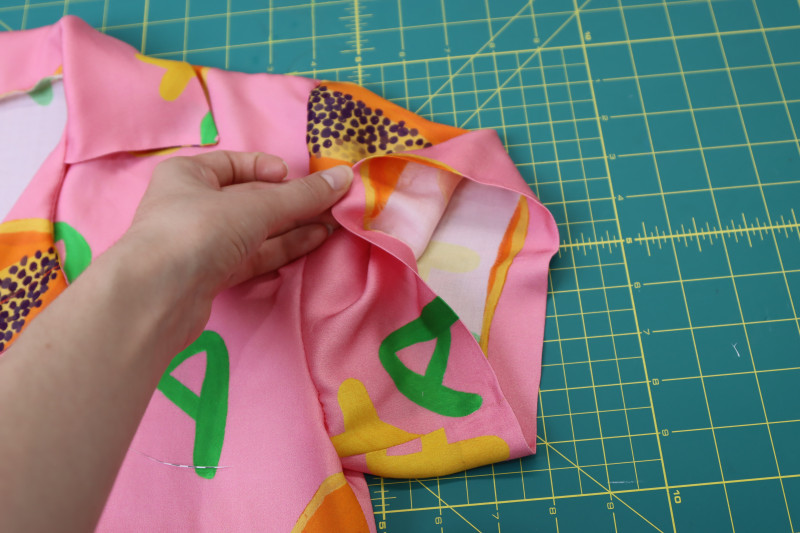
MAKE COLLAR
- Place the two collar pieces right sides together.
- Pin around the sides and top of the collar, but not the bottom, as shown in the photo below.
- Sew along the pins, leaving the bottom edge of the collars unsewn.
- Clip the corners of the collar.
- Flip the collar right sides out and press the seams.
Step 8
SHIRT SIDE SEAMS
- Place the front shirt pieces right sides together on top of the back shirt piece with the sides and shoulders lined up.
- Pin and sew the front and back shirt pieces together at the side seams.
Step 9
SHOULDER SEAMS
- Line up the shoulders of the two front pieces with the shoulders of the back piece, right sides together.
- Pin and sew the front and back pieces together at the shoulder seams.
Step 10
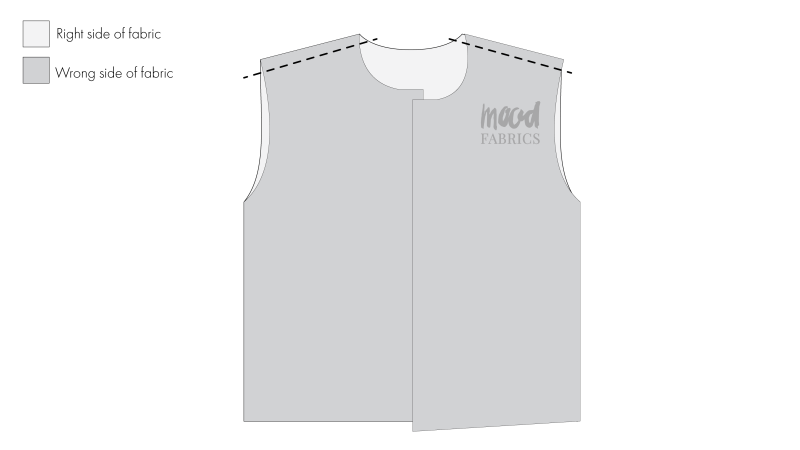
ATTACH COLLAR
- Pin the raw edge of the collar to the raw edge of the neckline, right sides together, with the collar centered on the center back neckline of the shirt.
- Sew the collar to the neckline.
- Serge or zigzag the raw edge of the collar seam allowance.

Step 11
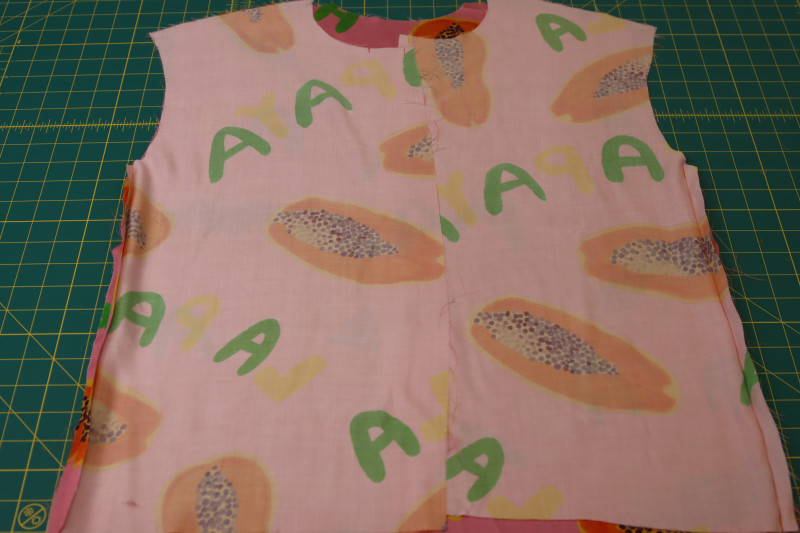
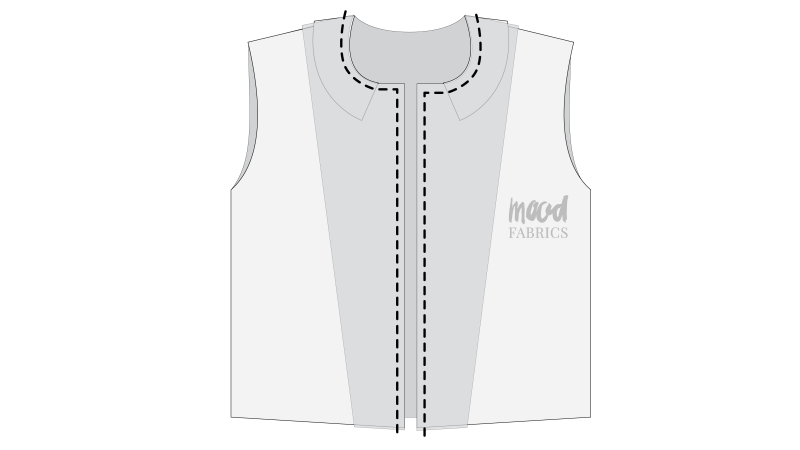
SHIRT FRONT FACING
- Lay the front facing pieces on top of the front shirt pieces, right sides together with their center front openings and corners lined up.
- Make sure that the collar is sandwiched between the facings and the fronts of the shirt.
- Pin the facings to the front of the shirt around the neckline and down the center front of the shirt.
- Sew along the neckline and center front of the shirt to attach the facings.
- Clip the center front corners of the neckline to eliminate bulk before flipping the facing to the inside.
- Flip the facings to the inside of the shirt (wrong sides together) and press the center front opening and camp collar neckline.
Step 12
SLEEVES
- Fold the sleeves in half right sides together with their inseams lined up.
- Pin and sew the sleeve inseams.
- Press the sleeve inseams open and flat.
- Insert the sleeves into the armscyes of the shirt, right sides together, making sure that the fronts of the sleeves are lined up with the front of the shirt.
- Pin the sleeve caps into the armscyes.
- Sew the sleeves into the armscyes.


Step 13
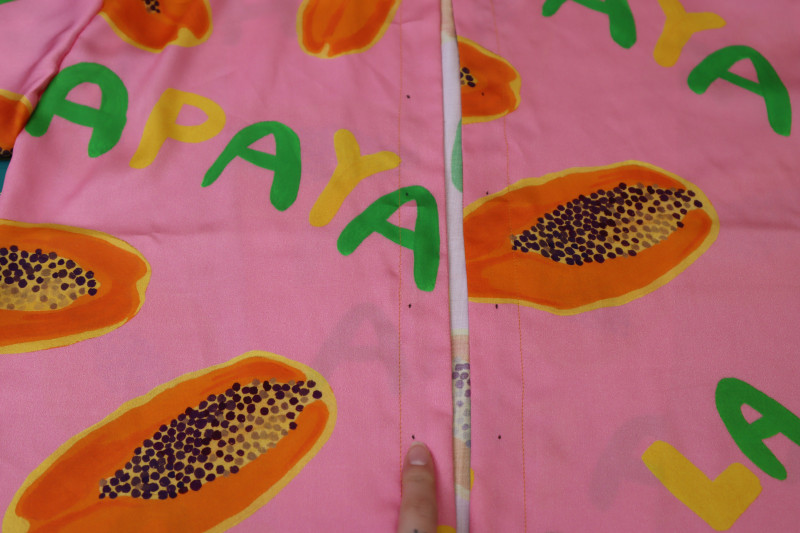
BUTTON PLACKET
- Sew a seam along both sides of the center front opening of the shirt with a 1 inch seam allowance. This will mark your button placket.
- Mark 5 evenly placed dots with your fabric marking pen on both sides of the center front opening of the shirt for your buttons and button holes.
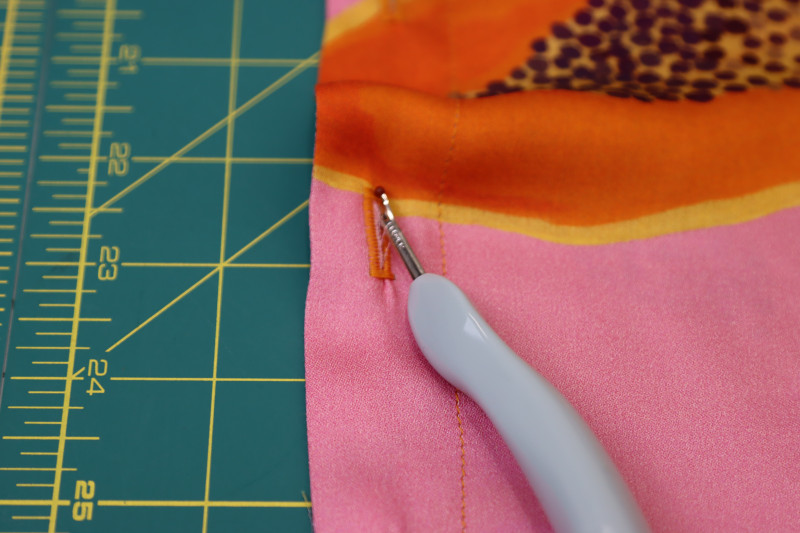
Step 14
BUTTONS & BUTTON HOLES
- Use the buttonhole foot attachment on your sewing machine to make buttonholes on each of the marks on the wearer’s left side of the button placket.
- Gently open the buttonholes in the center of the rectangle with a seam ripper.
- Hand sew the buttons to the marks on the wearer’s right side of the button placket.

Step 15
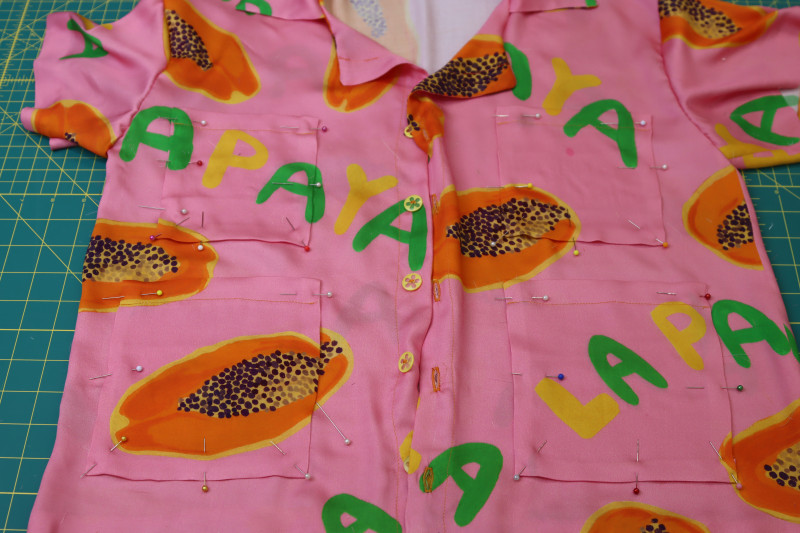
ATTACH POCKETS
- Pin the four pockets to the front of the shirt. The two smaller ones should be centered on the chest and the two larger ones should be located 2 inches below the smaller ones, centered below them.
- Sew around the sides and bottoms of each pocket, making sure the facing is not getting bunched up on the inside of the shirt.
Step 16
HEM TOP
- Press a 1 inch fold into the hem of the shirt.
- Press a 1 inch fold into the hem of the sleeves.
- Press stitch witchery fusible hem tape into the folded hems at both the bottom of the shirt and the ends of the sleeves.

Sewing Success: The Finished Carica Poolside Cover Up Set
Share this post with a friend (or two!), download the Carica Poolside Cover Up Set free sewing pattern, and show us which fabrics and colors you choose, using the hashtags #MoodCaricaPattern & #MadeWithMood—and don’t forget to tag us @MoodFabrics, too.


Free Sewing Pattern Inspiration for Your Next Project
With 525+ free sewing patterns and counting, your opportunities for sewing with Mood are endless!
We hope you had as much fun sewing this poolside cover up set pattern as we did! As always, we want to hear from you—share your thoughts and comments below and let us know where you’ll be wearing the Carica Poolside Cover Up Set free sewing pattern!
Can’t get enough sewing with Mood? Browse your next make with our latest free sewing patterns.