
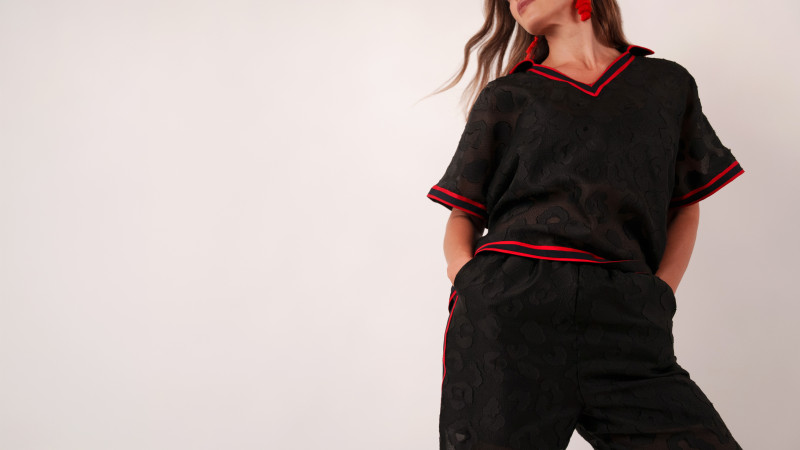
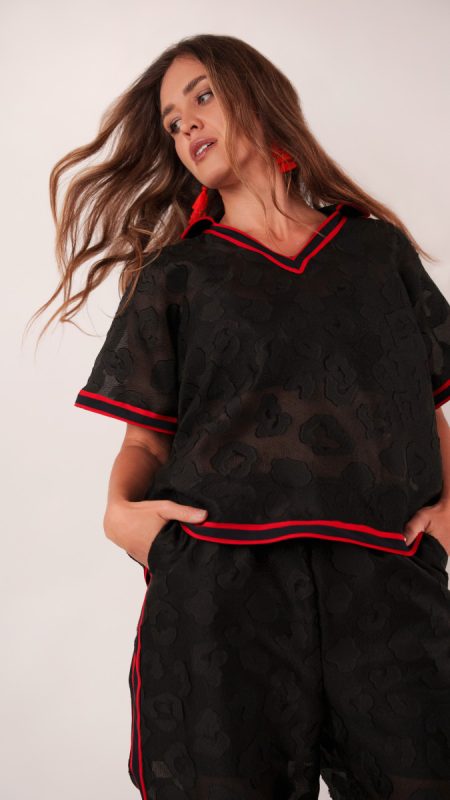
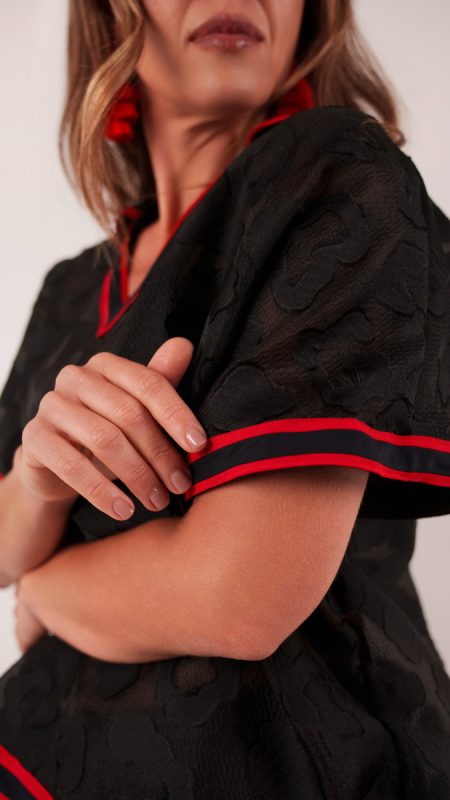
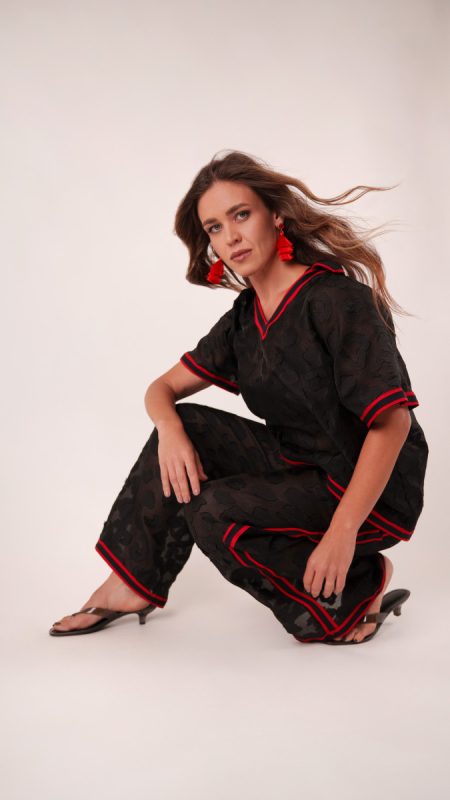
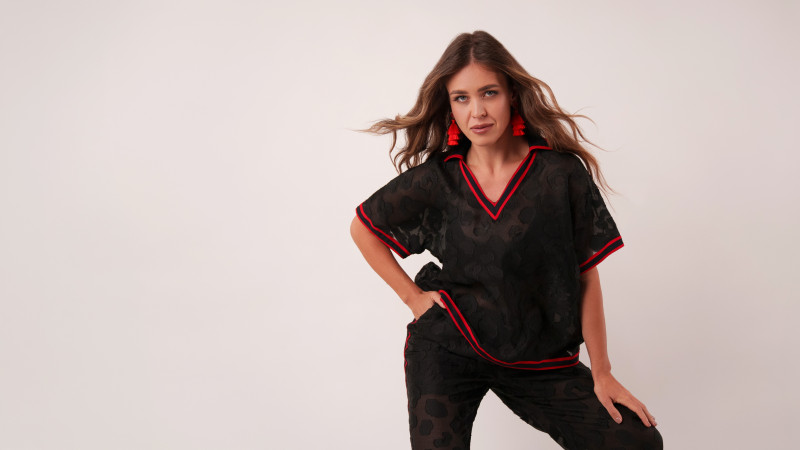
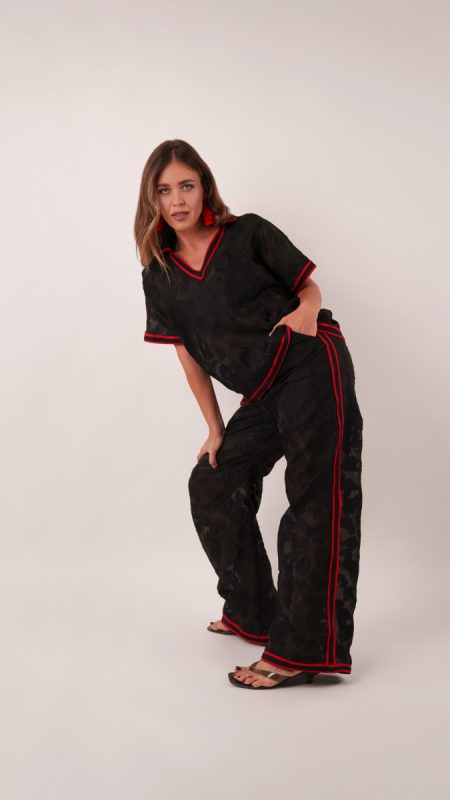
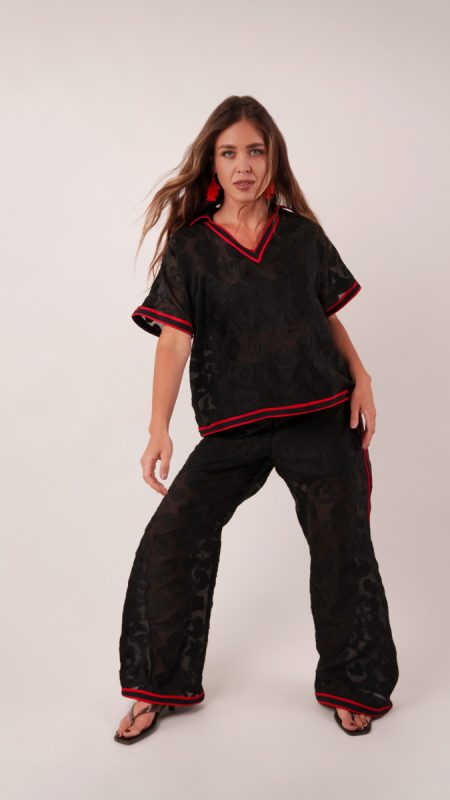
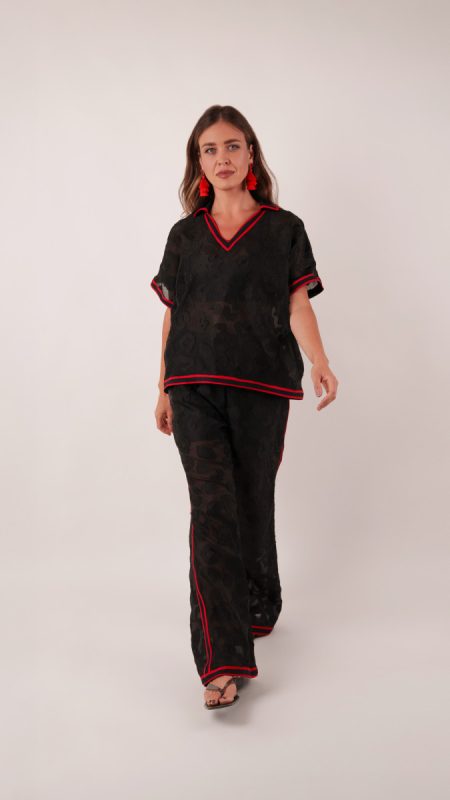
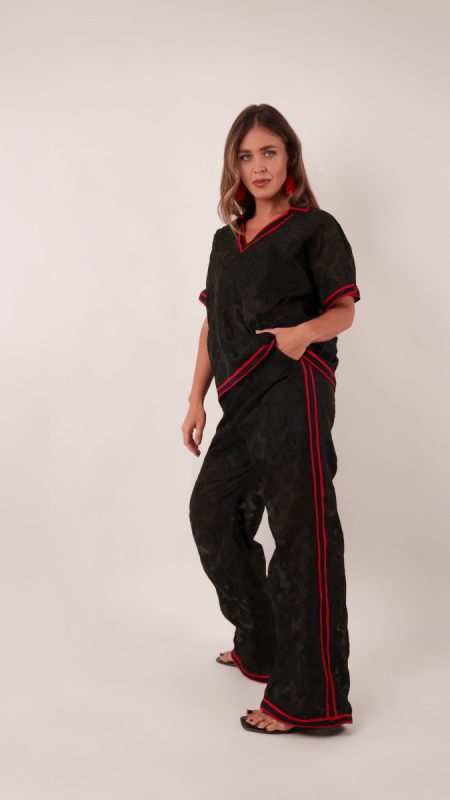
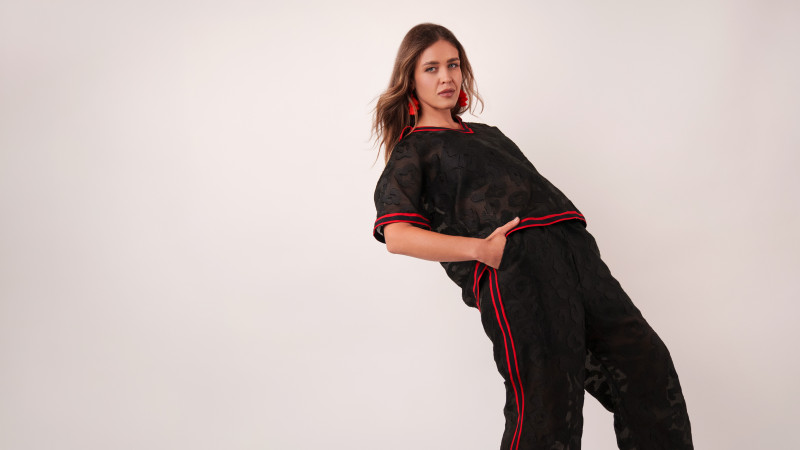
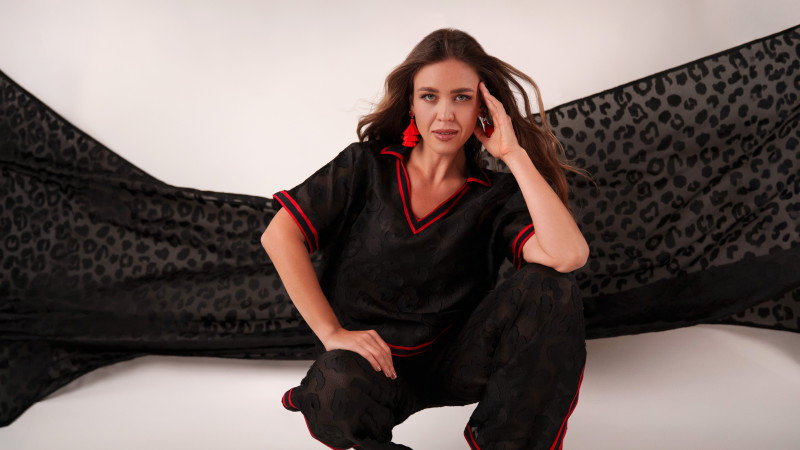
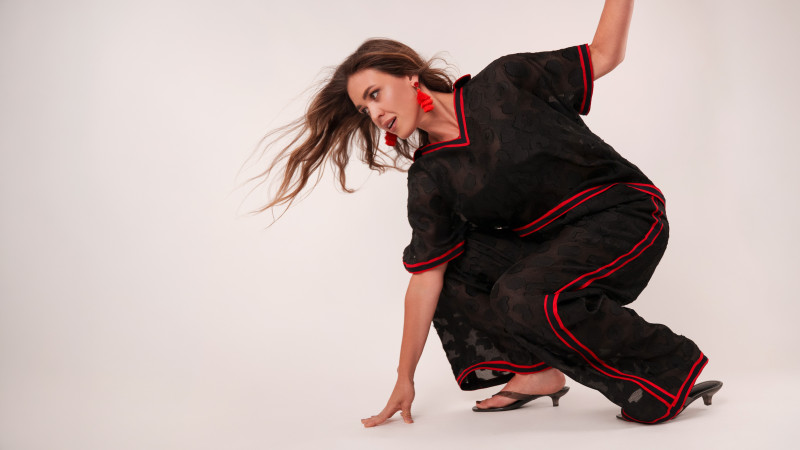
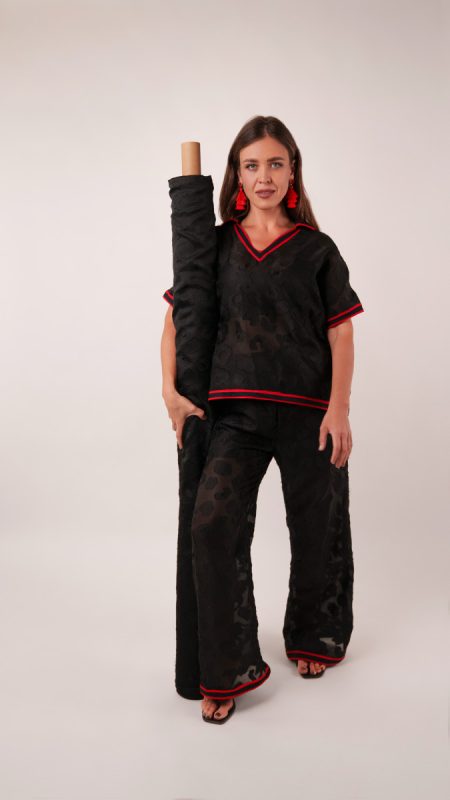
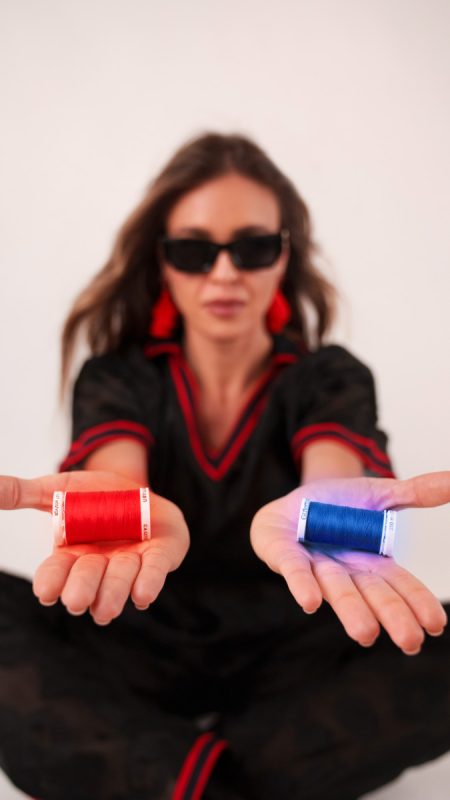
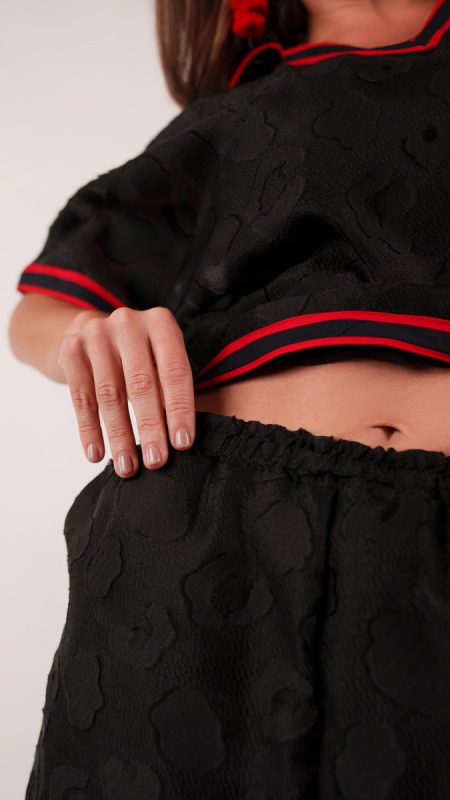
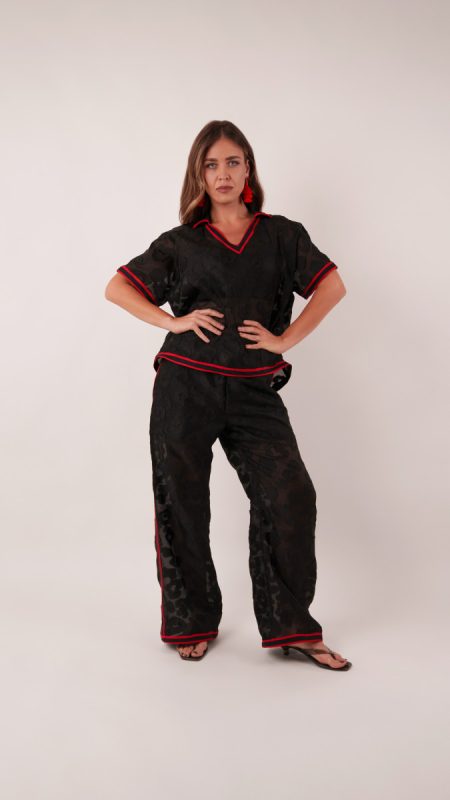
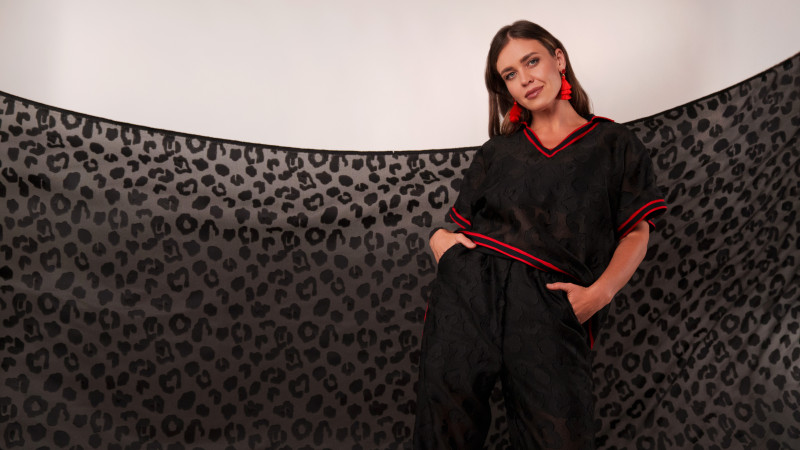
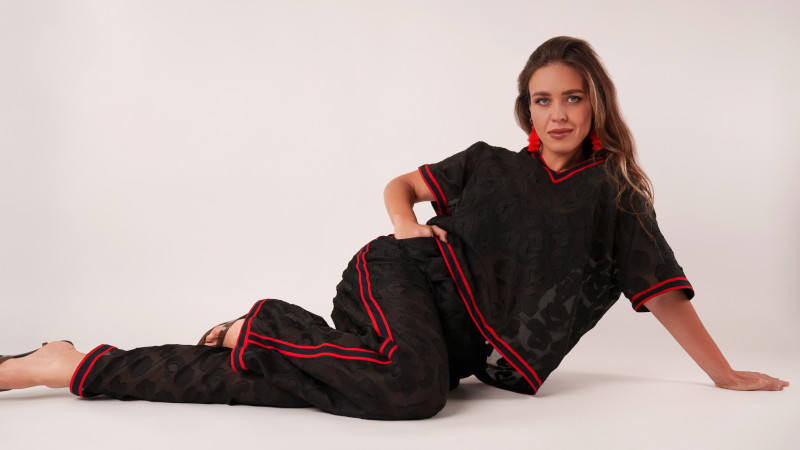
Meet the Matrix Shawl Collar Ensemble, the set that blurs the line between loungewear and street style in the best way. Crafted from a sheer burnout brocade with a subtle animal print woven into its texture, this ensemble brings a touch of drama to an otherwise relaxed silhouette..
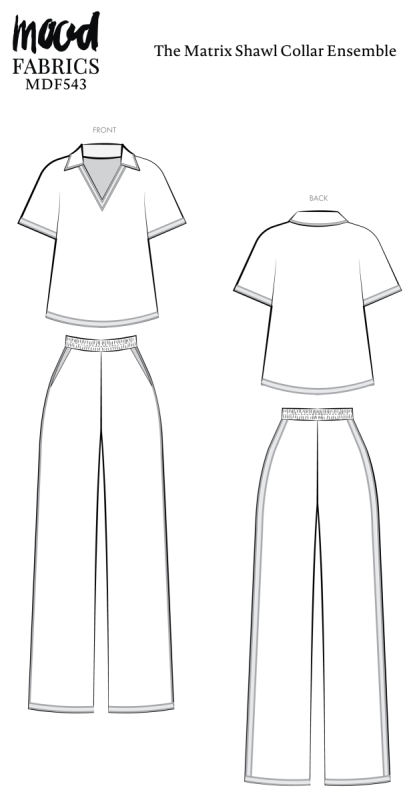
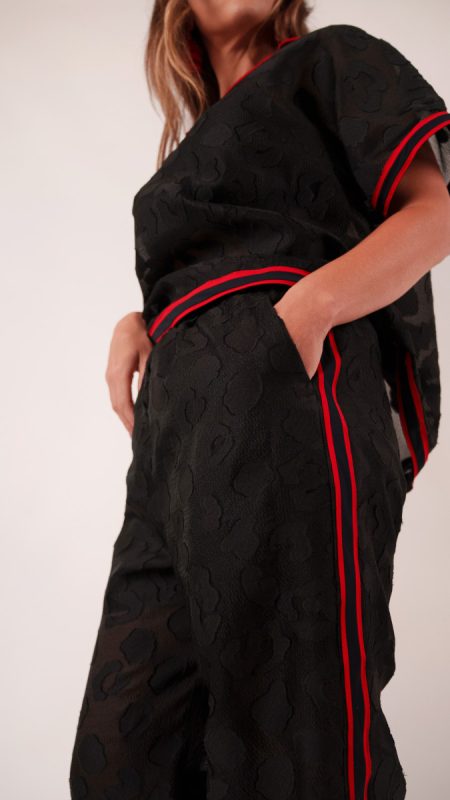
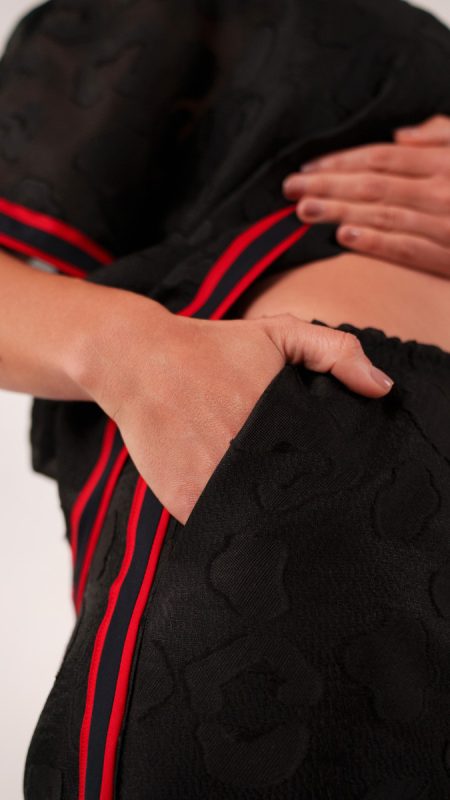
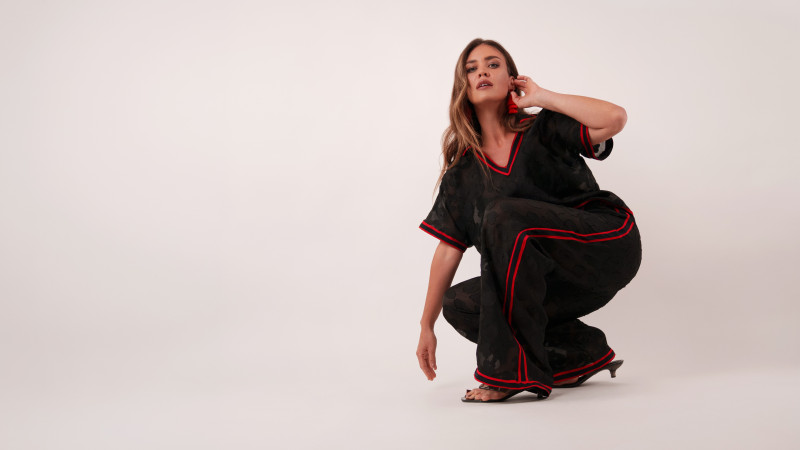
Despite its elevated look, this pattern is surprisingly simple to sew. There are no zippers, buttons, or closures to fuss over, making it an approachable project for confident beginners and seasoned sewists alike. The most intricate detail is the custom striped trim, which adds a sporty, modern edge to the ensemble. The top features a deep, wide V-neckline with a shawl-inspired collar that slips easily over the head, while the pants keep things effortlessly comfortable with an elastic waistband and practical French side seam pockets.
The Matrix Shawl Collar Ensemble is cozy enough for a lazy Sunday morning, yet polished enough for a dinner reservation. Throw it on with sneakers for running errands, brunch with friends, or a day of travel, then swap in a pointed kitten heel and statement earrings for cocktails or an evening out.
Equal parts comfort and sophistication, this set proves that relaxed dressing doesn’t have to sacrifice style. Whether you’re running errands or hitting the runway, the Matrix Shawl Collar Ensemble will be the center of attention.
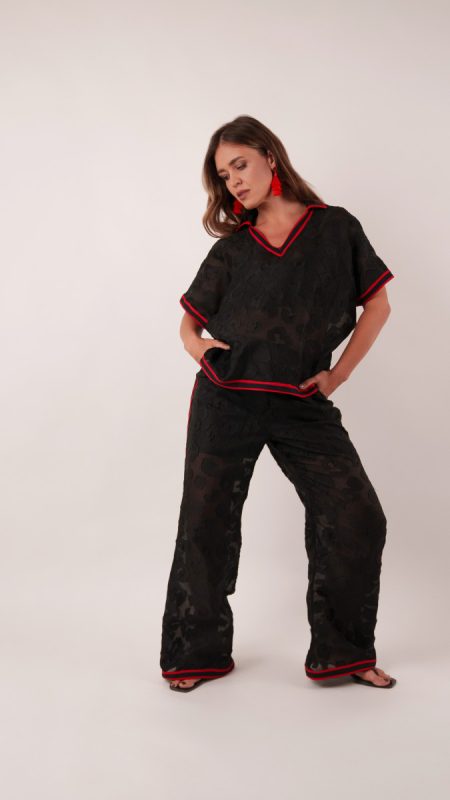
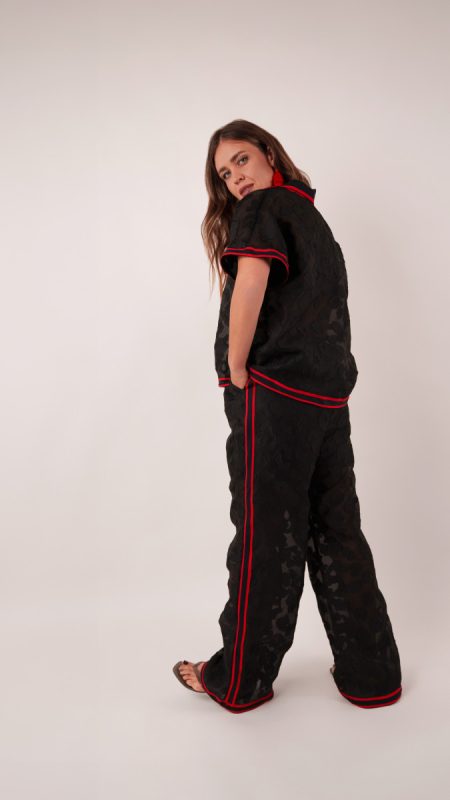

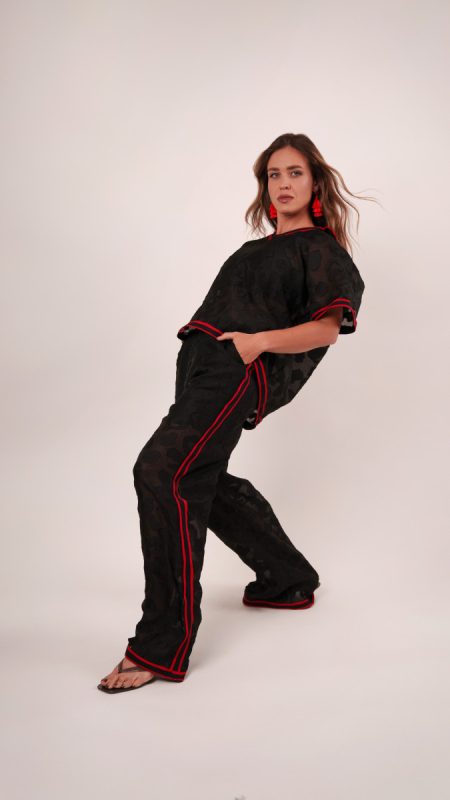
Essential Materials & Sizing Guide for the Matrix Shawl Collar Ensemble
Continue reading for a breakdown of what knowledge and materials you need for creating your very own shawl collar ensemble! We’ve got you covered with the recommended materials we used—if you want to follow along exactly—as well as a curated list of alternative fabric type recommendations if you want to customize your own version. The Matrix Shawl Collar Ensemble free sewing pattern download includes technical drawings for seam and shawl collar ensemble visibility, plus a size chart to help you find your perfect fit!
Purchase Products Used Below:
Quantities indicated are for sewing a size small* shawl collar ensemble. Toggle the ‘SHOP THIS LOOK’ box to find quantity estimates for other sizes.
- 4.5 yards of Lightweight Textured Burnout Brocade – Black on Black Animal Spots
- 0.5 yards of Premium Solid Quilting Cotton by Northcott – Tomato – Colorworks Collection
- 0.5 yards of Premium Solid Quilting Cotton by Northcott – Black – Colorworks Collection
- 1 each of Dritz Braided Elastic – Black – 0.75″ x 3yds
- 1 each of Gutermann Sew All Thread 500m – 410 Primary Red
- 1 each of Gutermann Sew All Thread 1000m – 10 Black
- MDF543 – Matrix Shawl Collar Ensemble Sewing Pattern (Free download below!)
*Quick Tip! The ‘SHOP THIS LOOK’ box defaults to full-yard quantities. To order an exact half-yard quantity for any fabric, simply use the decrease quantity button (-) to subtract by the half yard. Then click “ADD TO CART” to add all materials to your cart. (Our system can only display full-yard quantities initially.)
Alternative Fabric Type Recommendations:
The Matrix Shawl Collar Ensemble sewing pattern is best suited for lightweight or featherweight fashion fabrics. Explore other fabric types or colors from our featured collections for your shawl collar ensemble with the links below.
Fabric Collections Used in this Post:
Download Your Free Sewing Pattern
Submit your name and email in the form below to receive the download link for the Matrix Shawl Collar Ensemble free sewing pattern directly in your inbox. Mood Sewciety Patterns will send your free download link via email with the subject line: ‘Your Free Download from Mood Sewciety – The Matrix Shawl Collar Ensemble’ (in PDF format for A4 and letter-size printing).
© MoodFabrics.com / MoodSewciety.com – Mass production, resale, or distribution of this pattern in any form is strictly prohibited.
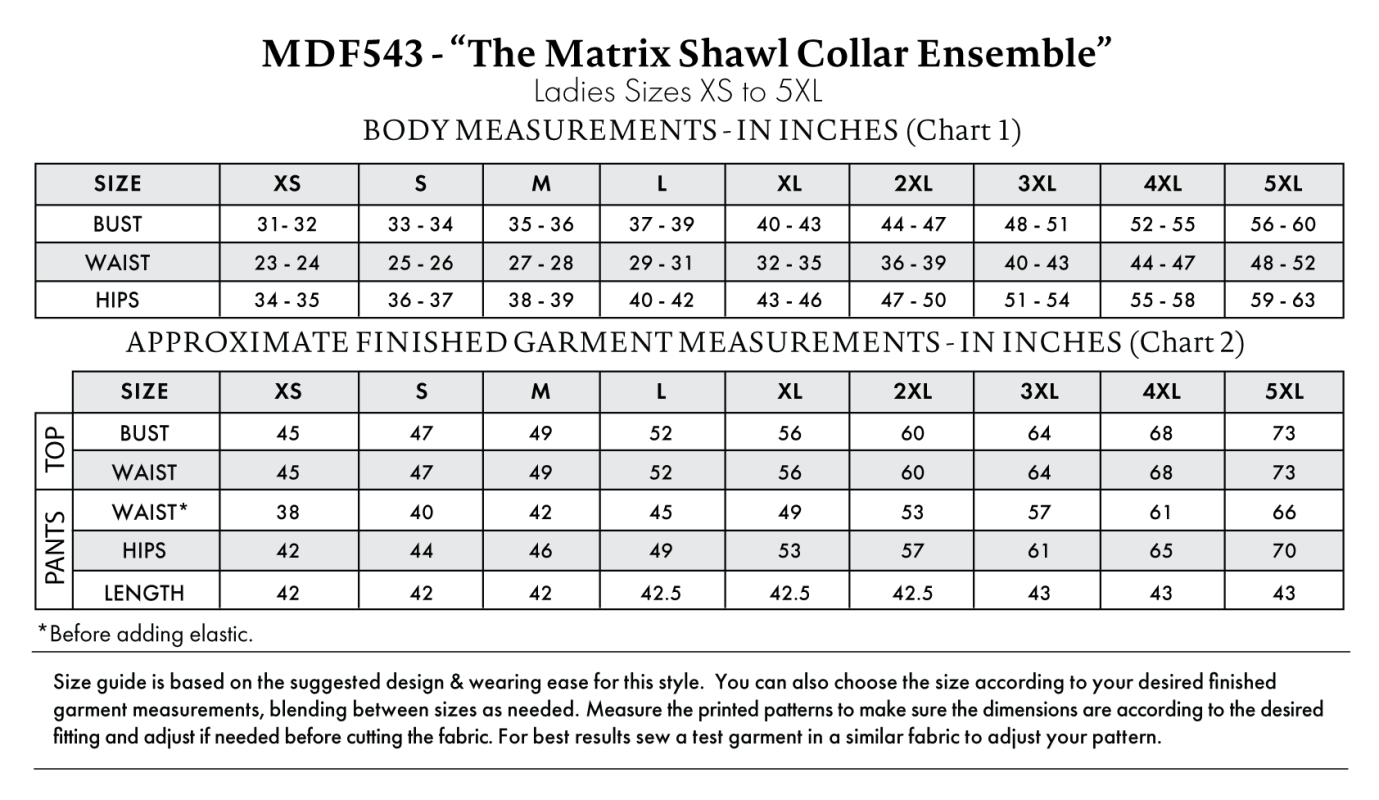
Find Your Perfect Fit
The Matrix Shawl Collar Ensemble Sizing Guide is based on the suggested design & wearing ease for this style. You can also choose the size according to your desired finished garment measurements, blending between sizes as needed. Measure the printed patterns to make sure the dimensions are according to the desired fitting and adjust if needed before cutting the fabric. For best results, sew a test garment in a similar fabric to adjust your pattern.
Note: Always read all the instructions before cutting the fabric!
How to Sew The Matrix Shawl Collar Ensemble
The instructions provided below are designed to guide you through sewing the Matrix Shawl Collar Ensemble from start to finish.
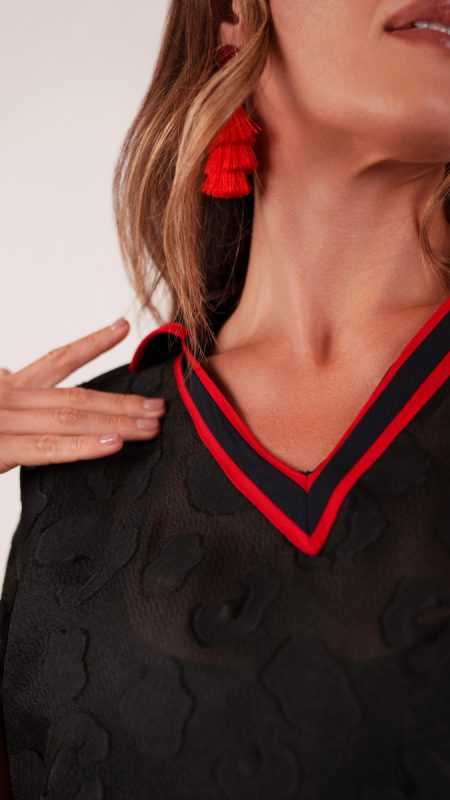
3 Tips for Sewing with Burnout Brocade
⇒ Use a super sharp, super thin size 60 or 70 Microtex needle on your sewing machine.
⇒ Launder ALL your fabric before cutting out pattern pieces to pre-shrink everything.
⇒ Decide on a method to finish the raw edges of your seam allowance, whether it’s serging, zigzag stitching, or sewing a French seam.
Pattern Pieces & Fabric Cuts Needed
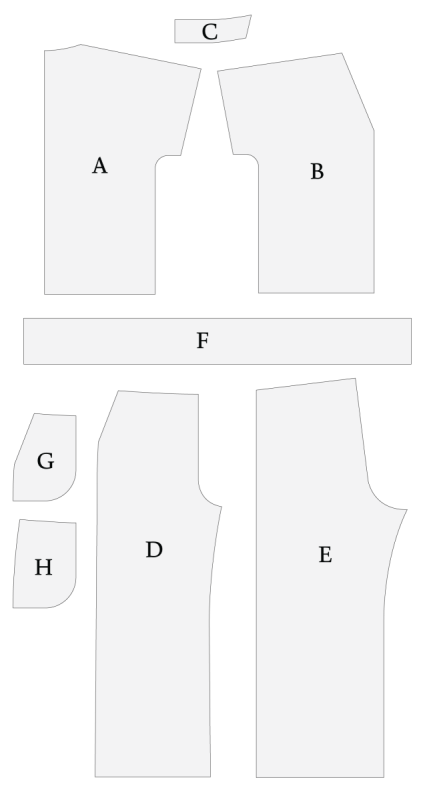
- (A) TOP FRONT
- Fabric – Cut 1 on Fold
- (B) TOP BACK
- Fabric – Cut 1 on Fold
- (C) COLLAR
- Fabric – Cut 2 on Fold
- (D) PANTS FRONT
- Fabric – Cut 2 Mirrored
- Lining – Cut 2 Mirrored at Shorten Line
- (E) PANTS BACK
- Fabric – Cut 2 Mirrored
- Lining – Cut 2 Mirrored at Shorten Line
- (F) PANTS WAISTBAND
- Fabric – Cut 2 Mirrored
- (G) PANTS POCKETS (A)
- Fabric – Cut 2 Mirrored
- (H) PANTS POCKETS (B)
- Fabric – Cut 2 Mirrored
Sew with a 1/2″ seam allowance for all seams unless otherwise specified.
Step 1
PANTS LINING
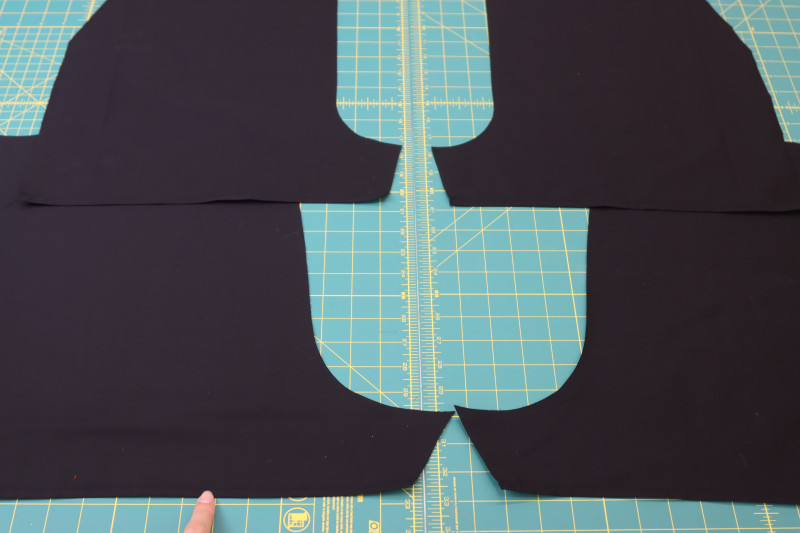
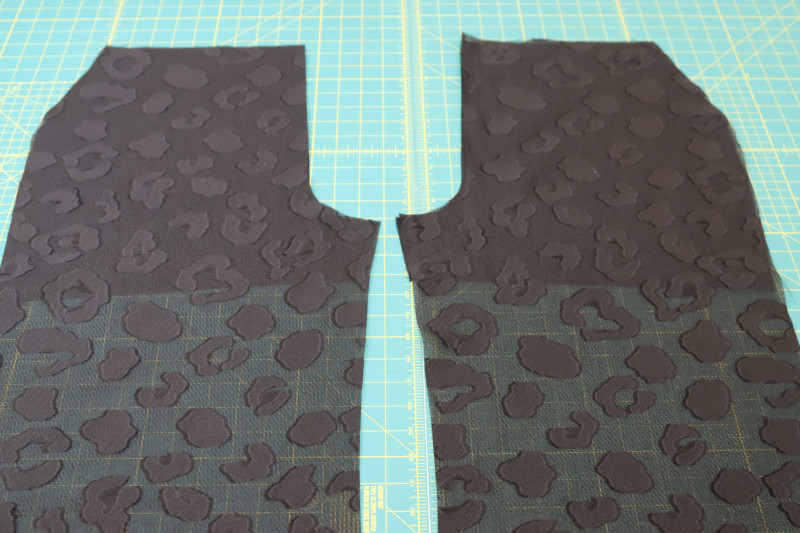
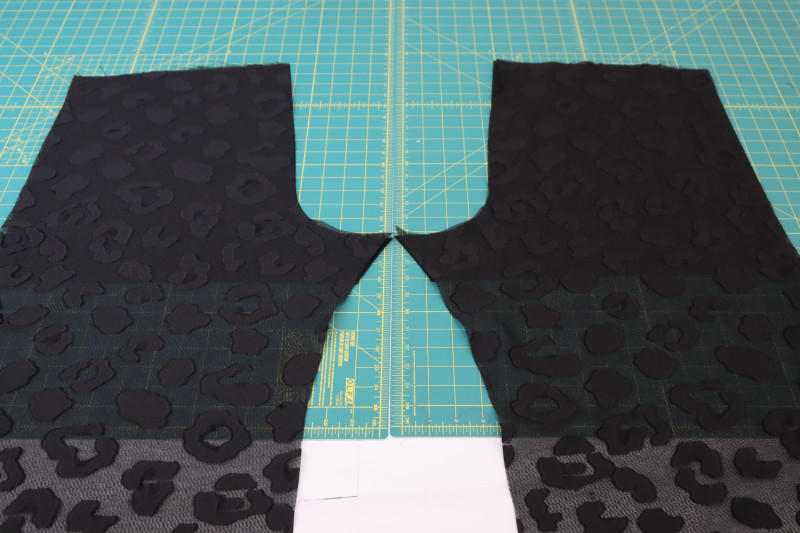
- Press a double rolled ¼ inch hem into the bottom of the pants lining shorts.
- Topstitch over the double folded hem.
- Place the front lining pieces under the front pants and the back lining pieces under the back pants. The right side of the lining pieces should be touching the wrong side of the sheer outer fabric.
Step 2
PANTS FRONT SIDE POCKET
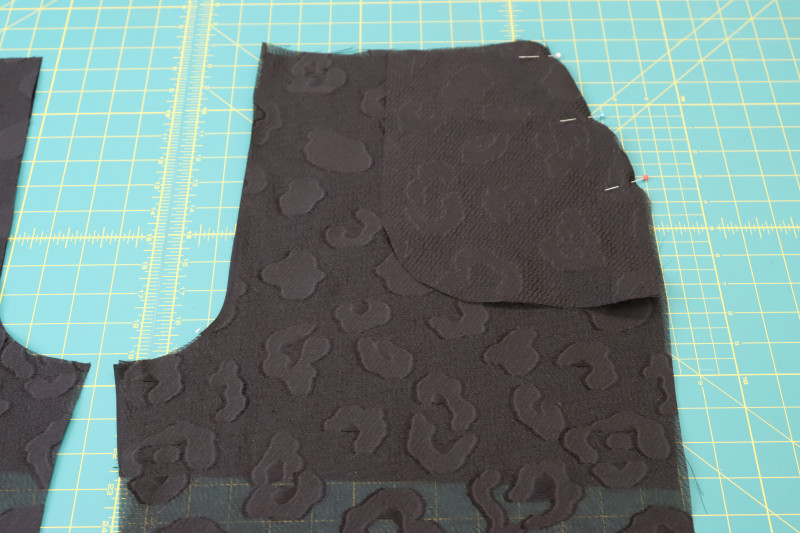
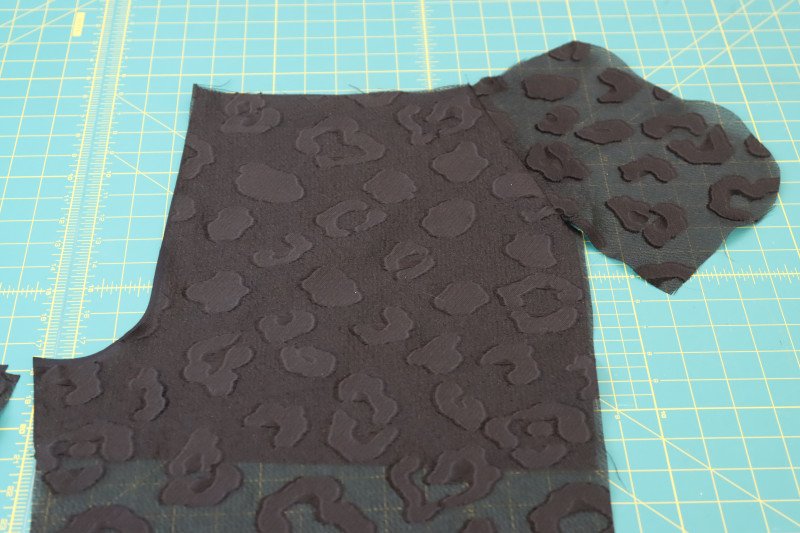
- Pin and sew the A pocket linings to the side seams of the front pants pieces, right sides together (make sure when you sew the pocket bags to the pants that you’re only sewing the top half of the pocket. This will be the part of the pocket you put your hand into. The bottom of the pocket remains unsewn so that it hangs freely without pulling on the side seams).
- Press the front pocket seams open and flat.
Step 3
PANTS BACK SIDE POCKET
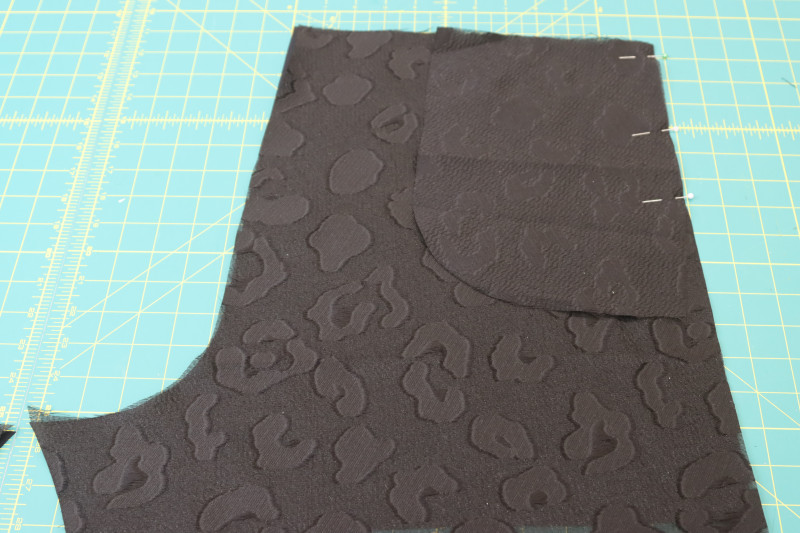
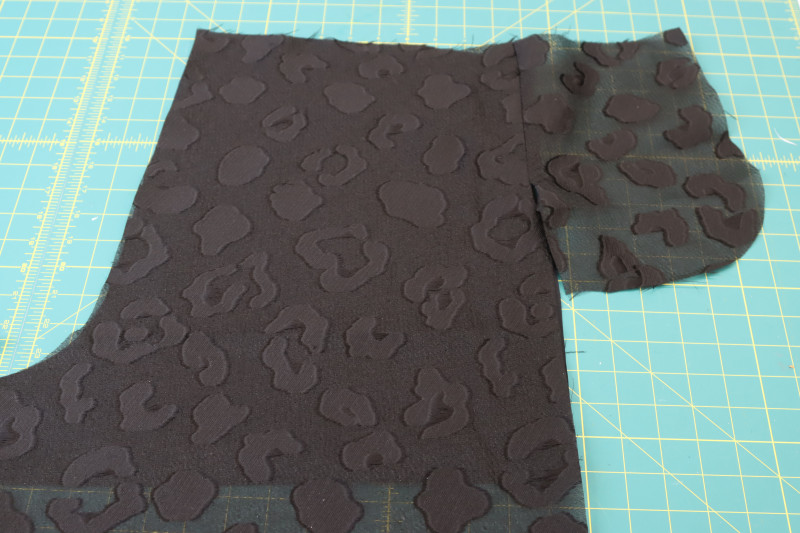
- Pin and sew the B pocket linings to the side seams of the back pants pieces, right sides together (follow the same pointer as above).
- Press the back pocket seams open and flat.
Step 4
ATTACH SIDE POCKETS
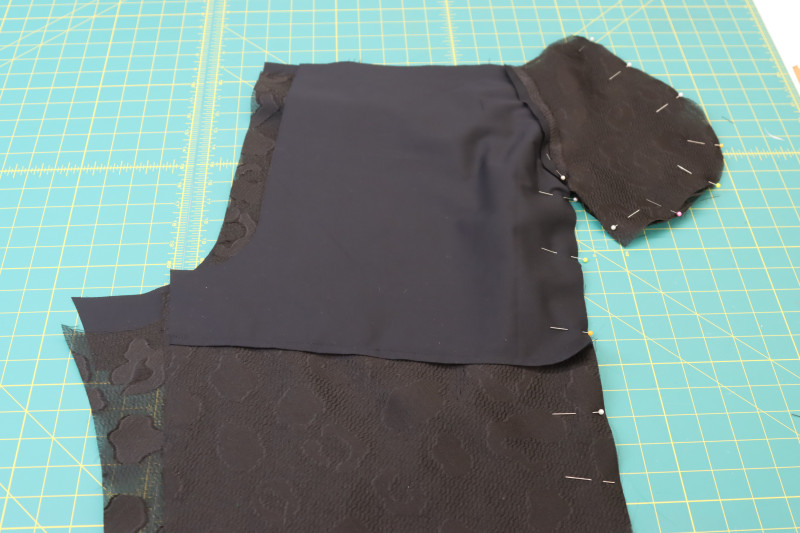
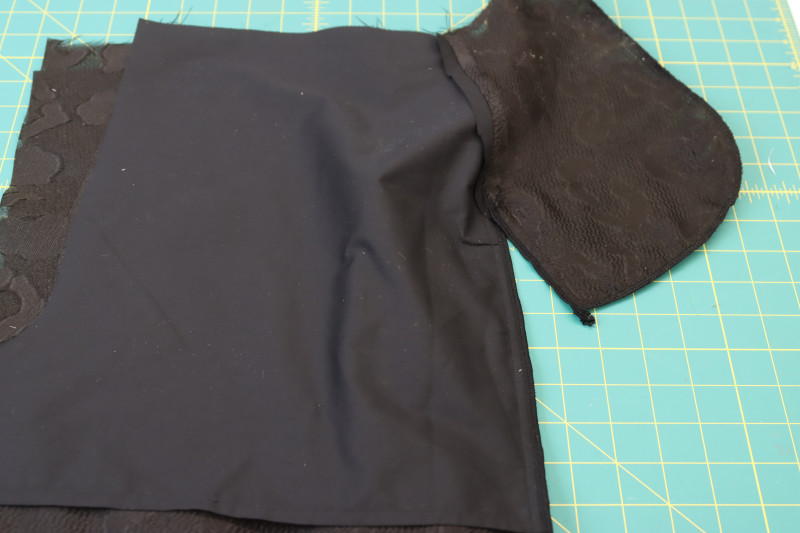
- Lay the front pants pieces right sides together on top of the back pants pieces with the pocket bags and the side seams lined up.
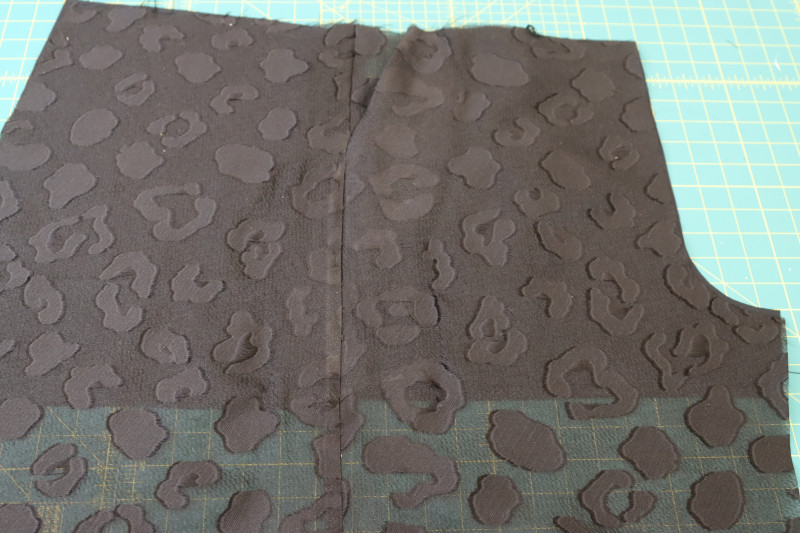
- Pin and sew around the pocket bags and side seams, leaving the top of the pocket open (look closely at the photo below to see how the front and back pants are connected at the pockets and side seams. I sewed around the perimeter of the pocket, then when I got to the seam that connects the pocket to the pants, I pivoted the fabric on the sewing machine needle and sewed down the side seam of the pants).
- Open the pants at the side seams to press the side seam open and flat.
Step 5
MAKE TRIM
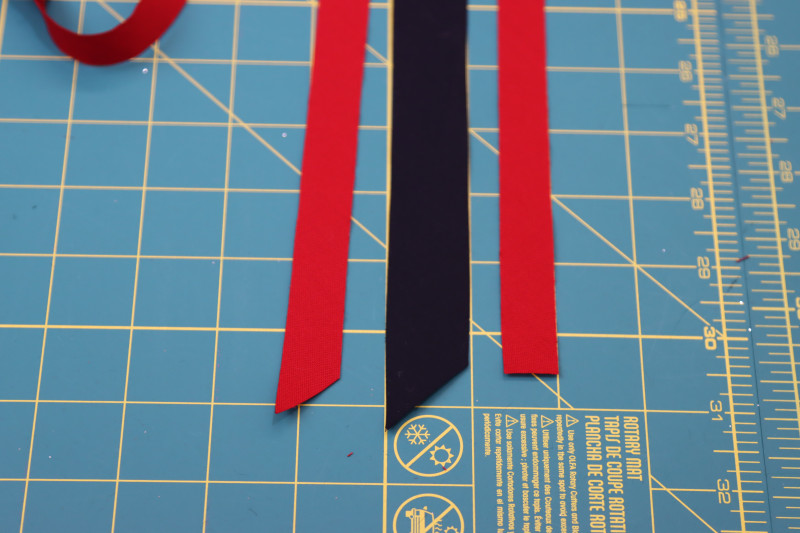
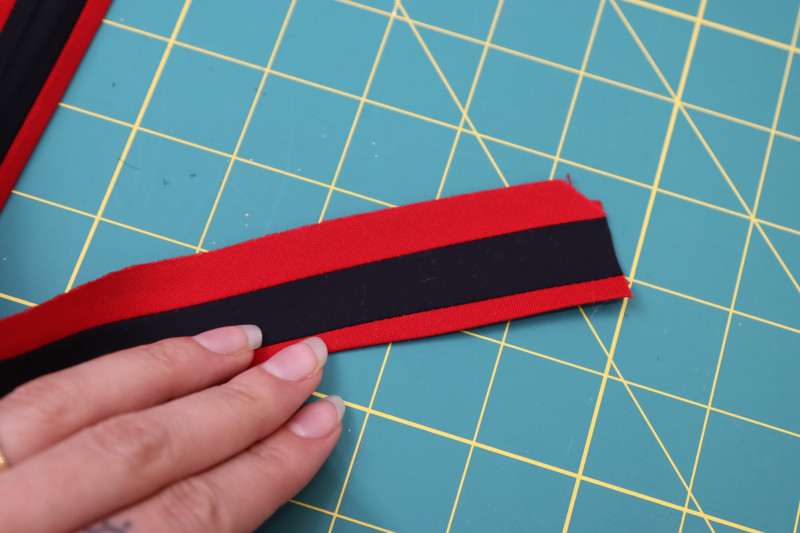
- Cut the black cotton fabric on the bias into a 1 inch wide strip.
- Cut the red cotton fabric on the bias into a ¾ inch wide strip.
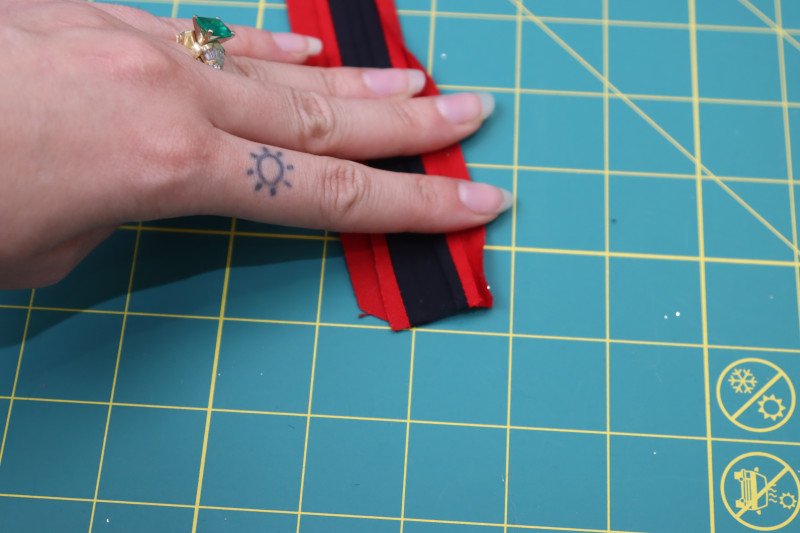
- Sew the red strips to the black strip, right sides together with a ⅛ inch seam allowance.
- Press the seams between the red and black strips open and flat.
- Press the outer raw edges of the new striped trim toward the wrong side of the fabric with a ¼ inch fold.
- In total, you’ll want about 6 yards of bias tape. Make sure to sew together individual strips (short sides together) BEFORE sewing the red strips to the black strip.
Step 6
PANTS SIDE TRIM
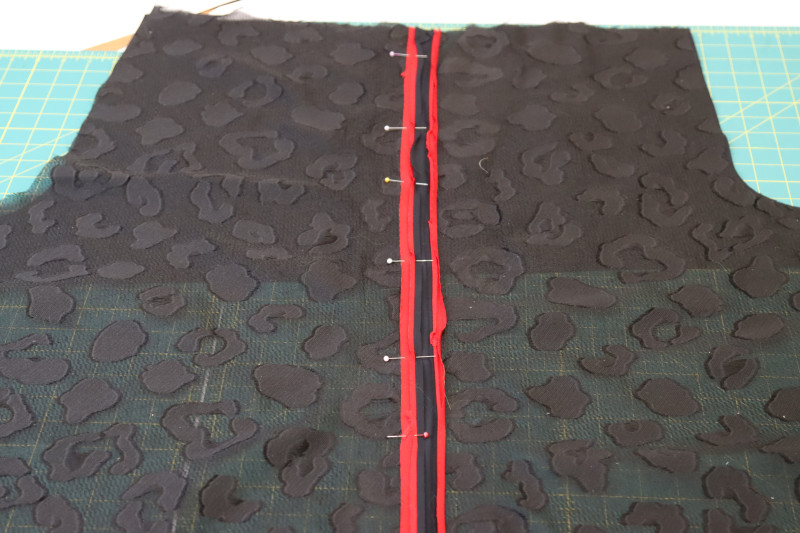
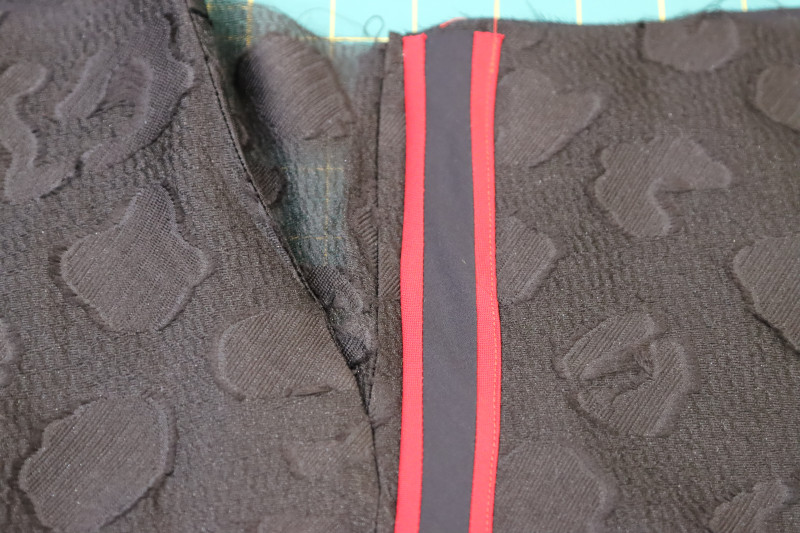
- Place the trim right sides together on top of the side seam of the pants, with one of the raw edges directly on top of the side seam and the other raw edge overlapping the front pocket.
- Pin the trim to the side seam.
- Sew the trim to the side seam with a ¼ inch seam allowance.
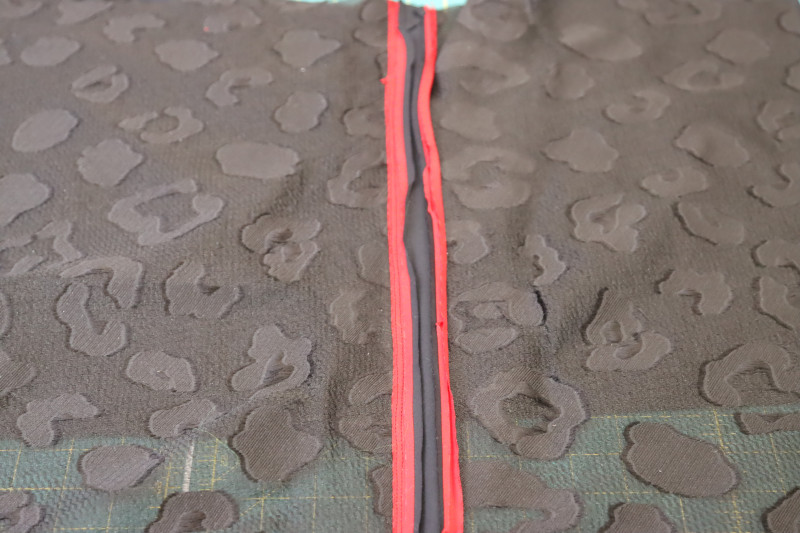
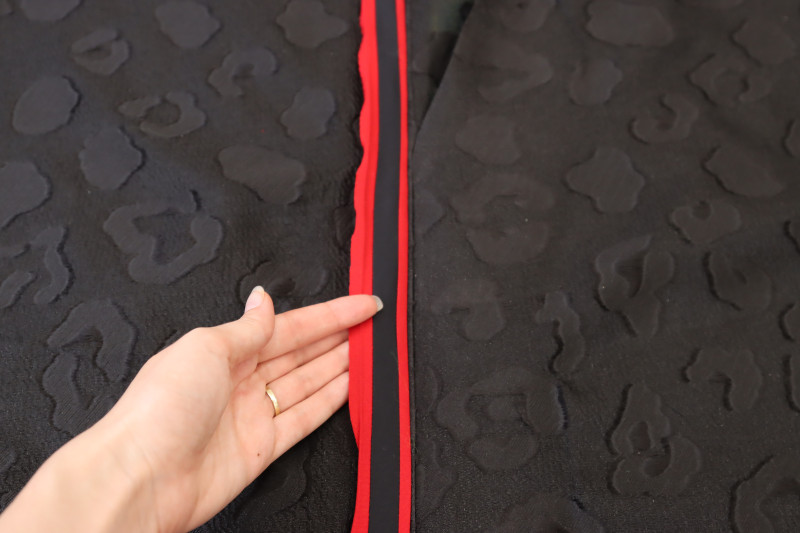
- Press the trim so that the wrong side of it is now touching the right side of the pants.
- Pin the other folded edge of the trim to the side of the pants.
- Topstitch along the other side of the trim.
Step 7
PANTS CROTCH SEAMS
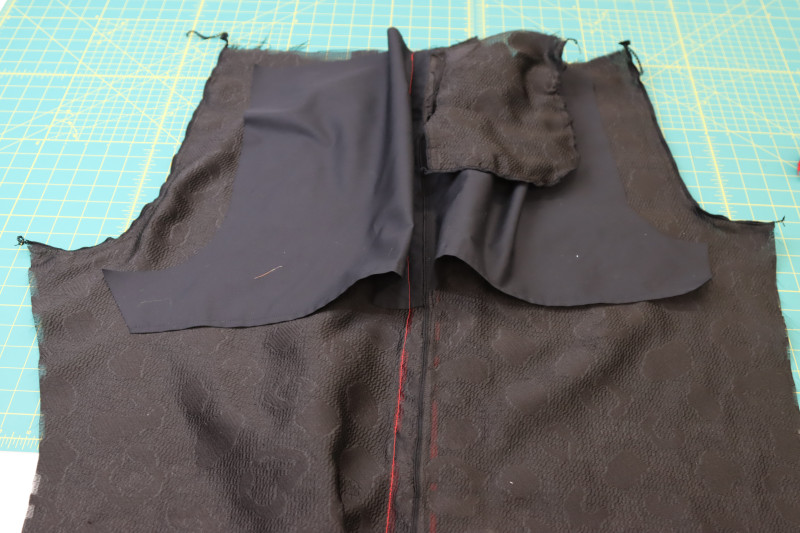
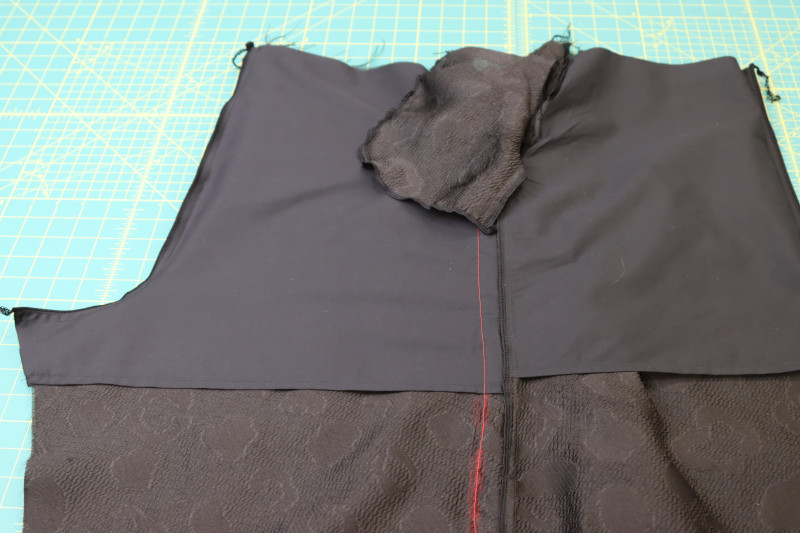
- Place the pants pieces right sides together with the crotches lined up.
- Pin and sew the front and back crotch seams.
- Move the front and back crotch seams slightly out of the way so that you can sew the front and back lining crotch seams.
Step 8
STAYSTITCH POCKETS
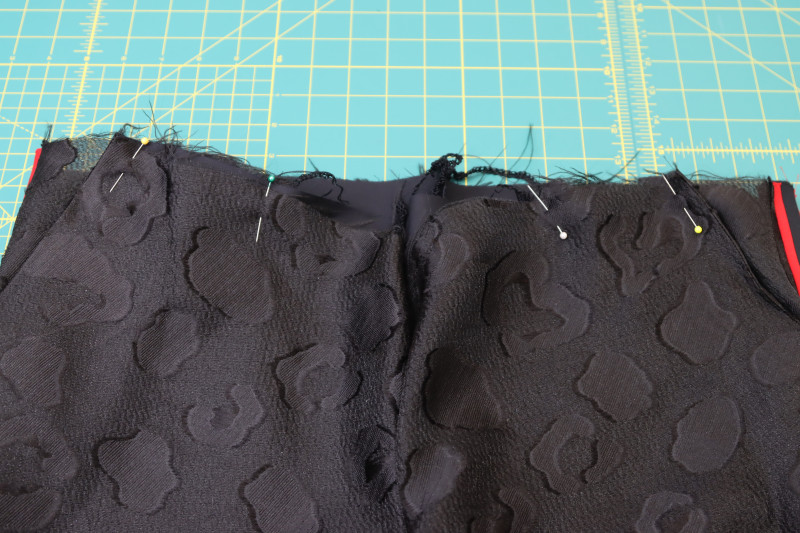
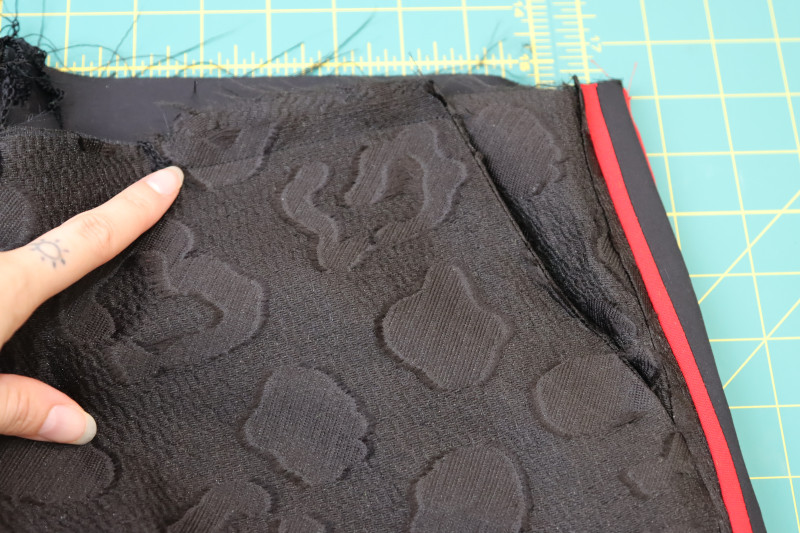
- Fold the pockets into the pants while the pants are right sides out.
- Line up the top edge of the pocket bag with the waistline of the pants and make sure that the pocket is laying completely flat.
- Topstitch the top of the pocket bag to the waistline of the pants with a ¼ inch seam allowance.
Step 9
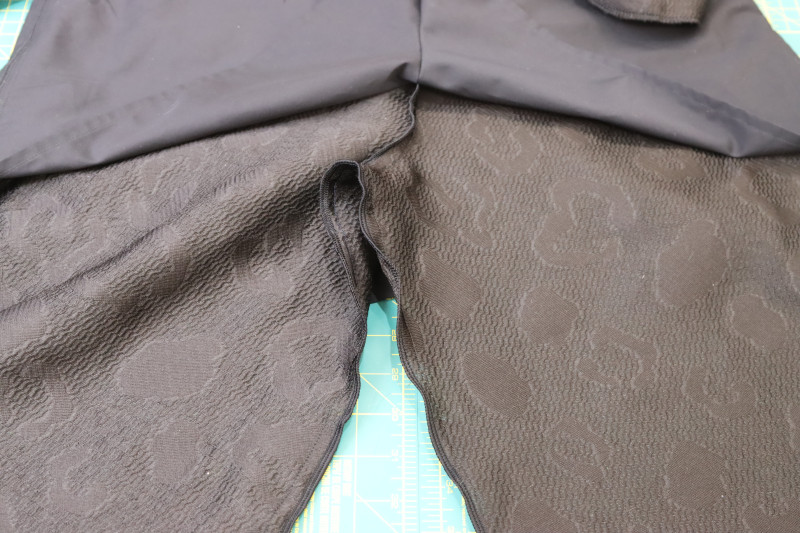
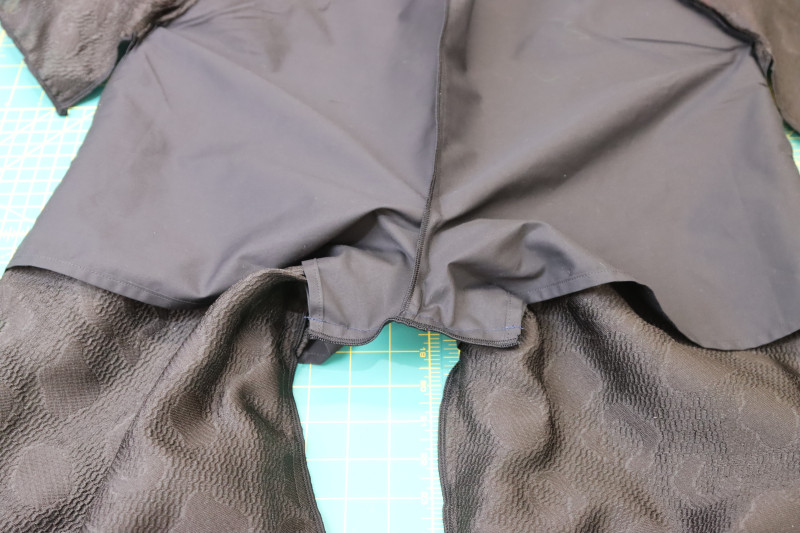
PANTS INSEAMS
- Place the front and back pants right sides together with the inseams lined up.
- Pin and sew the pants inseam.
- Repeat the same process with the lining inseam.
Step 10
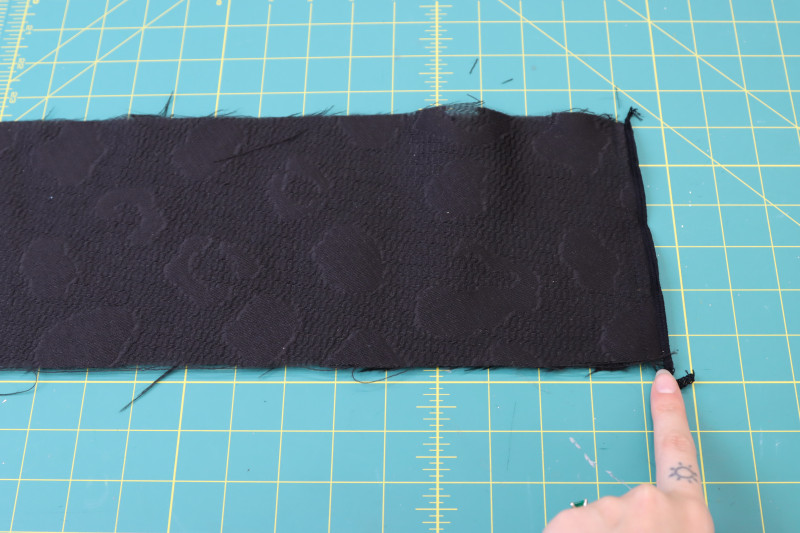
PANTS WAISTBAND
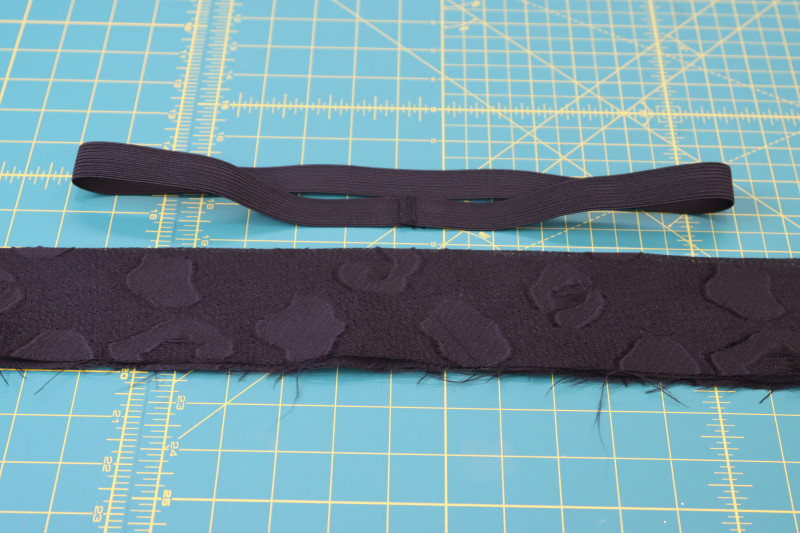
- Fold the waistband in half shortways, so that the short ends of the waistband are right sides together.
- Pin and sew the short ends of the waistband together.
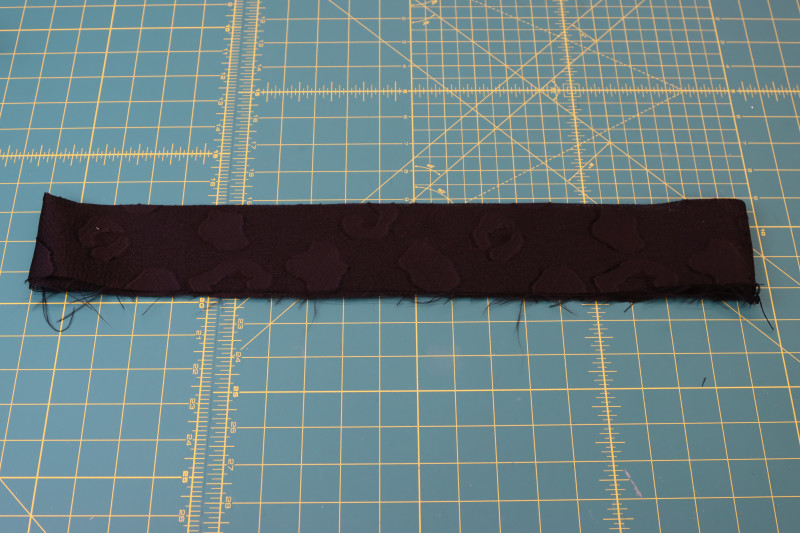
- Fold the waistband in half longways now, wrong sides together, so that both the inside and outside of the waistband are the right side of the fabric.
- Cut a piece of elastic that is long enough to fit at your high hip/low waist comfortably without digging into your skin.
- Sew the ends of that piece of elastic to each other to create a closed loop.
Step 11
ATTACH WAISTBAND
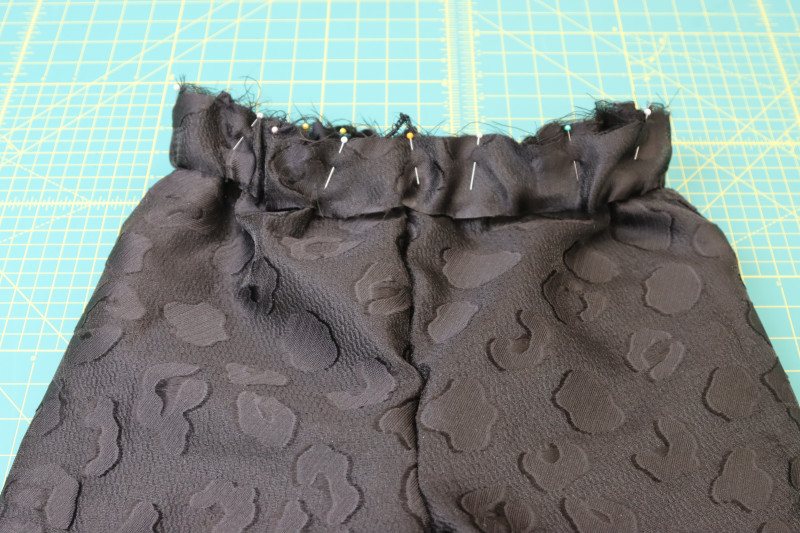
- Insert the elastic in between the layers of the waistband.
- Pin the raw edge of the waistband to the waistline of the pants.
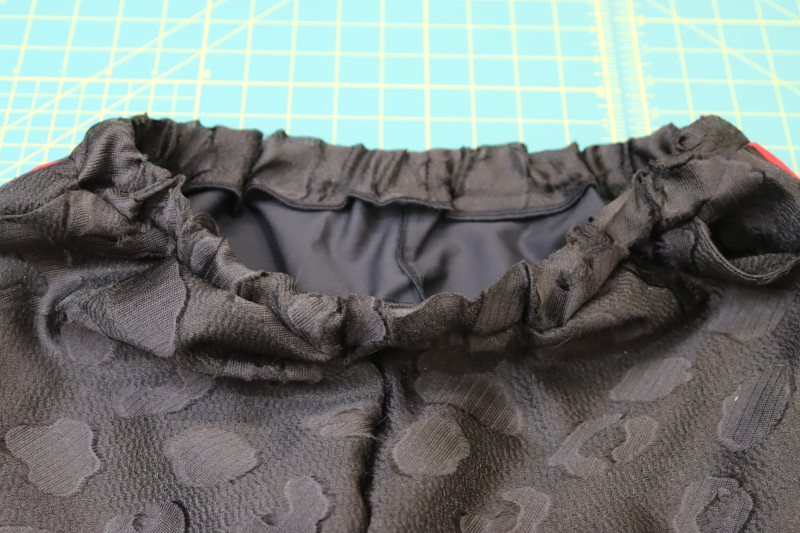
- Sew the waistband to the pants with a 1 inch seam allowance.
- Serge or zigzag the seam allowance of the waistband.
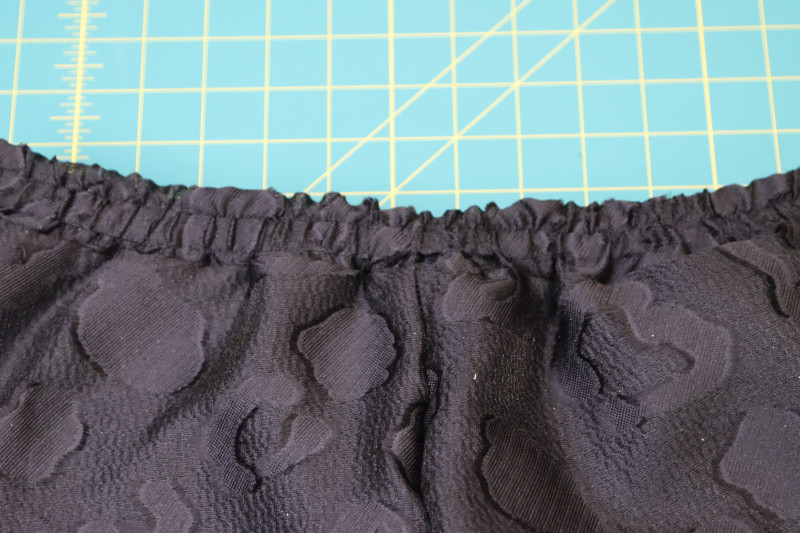
- While pulling the elastic taut, topstitch over the elastic of the waistband.
Step 12
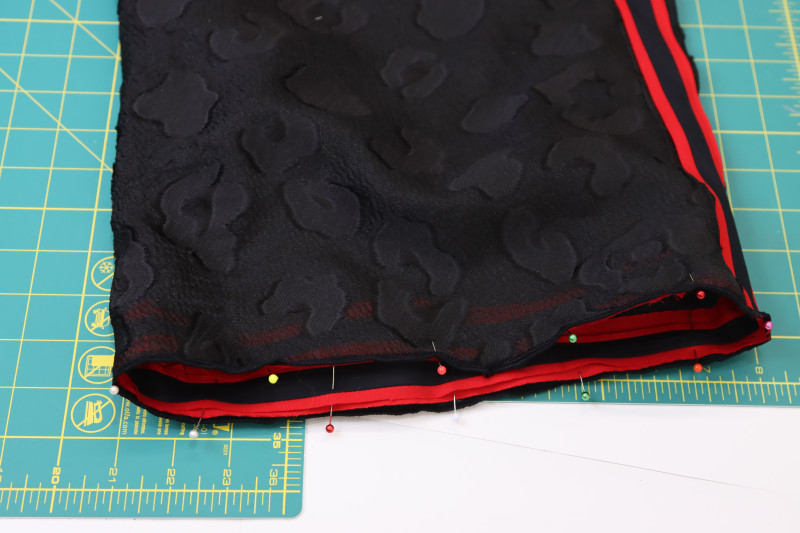
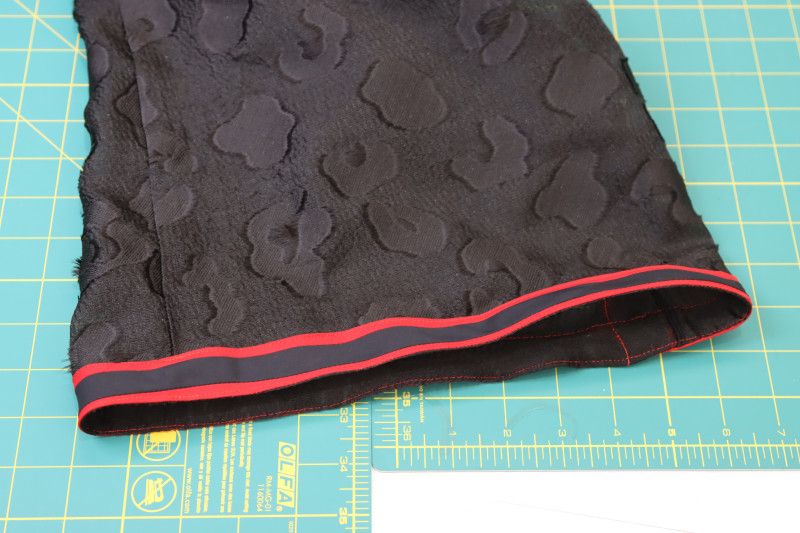
PANTS HEM
- Pin the RIGHT SIDE of the trim to the WRONG SIDE of the pants hem.
- Sew the trim to the pants hem with a ¼ inch seam allowance.
- Fold and press the trim to the outside of the pants hem.
- Topstitch over the other folded side of the trim to encase the raw hem of the pants.
Step 13
COLLAR
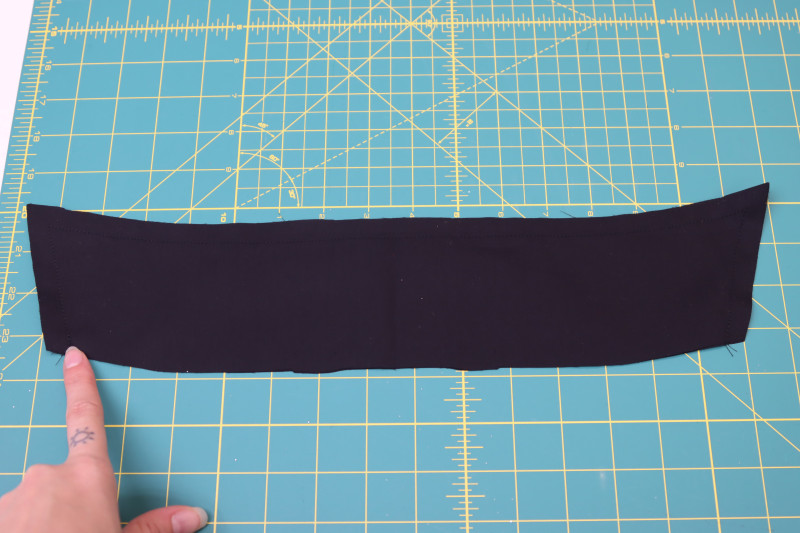
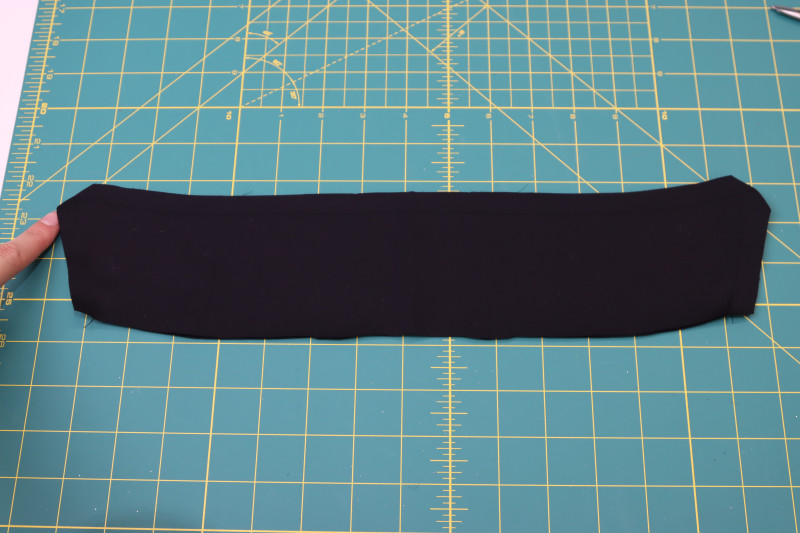
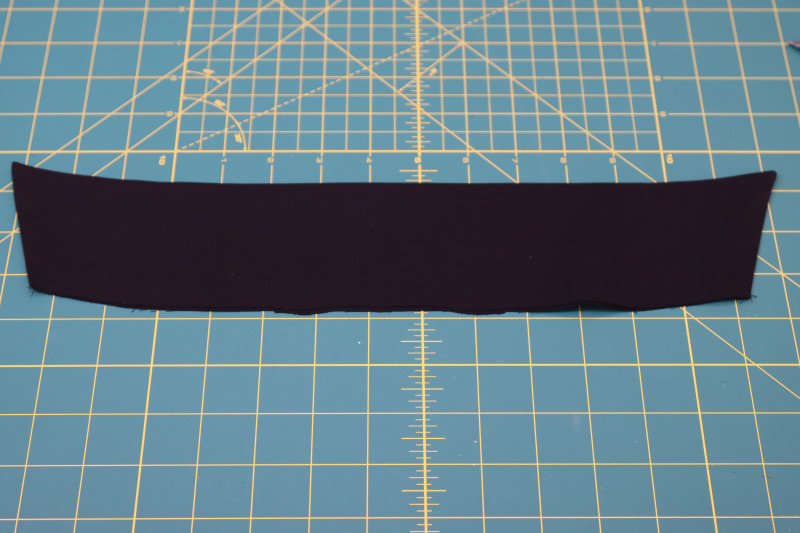
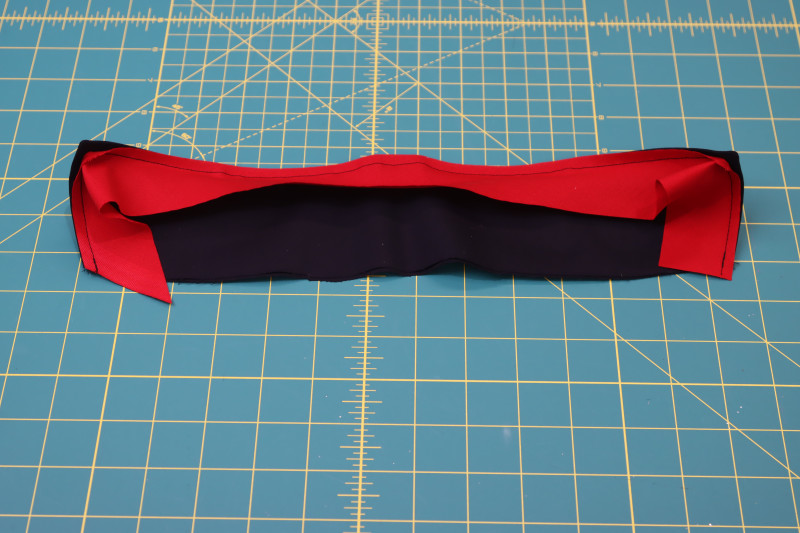
- Place the collar pieces right sides together.
- Pin and sew around the top and sides of the collar pieces, but not the bottom.
- Clip the corners of the collar pieces.
- Flip the collar right sides out.
Step 14
COLLAR TRIM
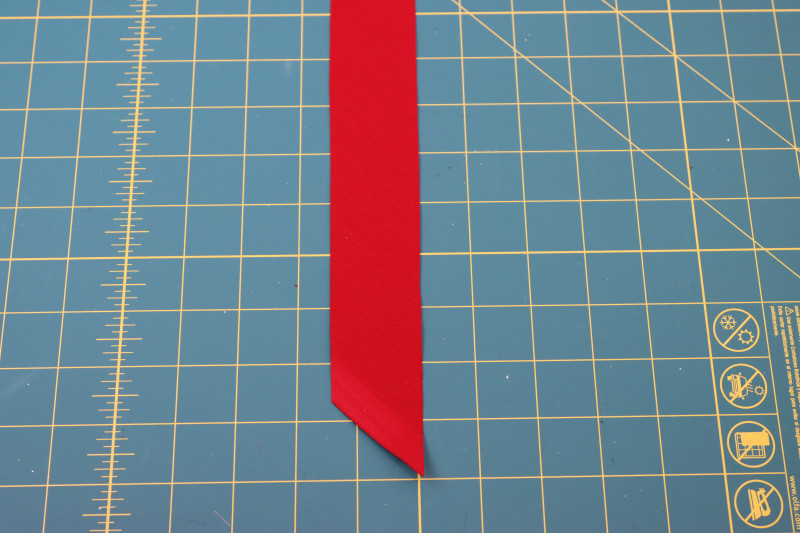
- Cut a strip of bias tape that is 1.5 inches wide and long enough to fit around the perimeter of your collar.
- Pin the bias tape right sides together with the edge of the collar, stretching it SLIGHTLY as you pin.
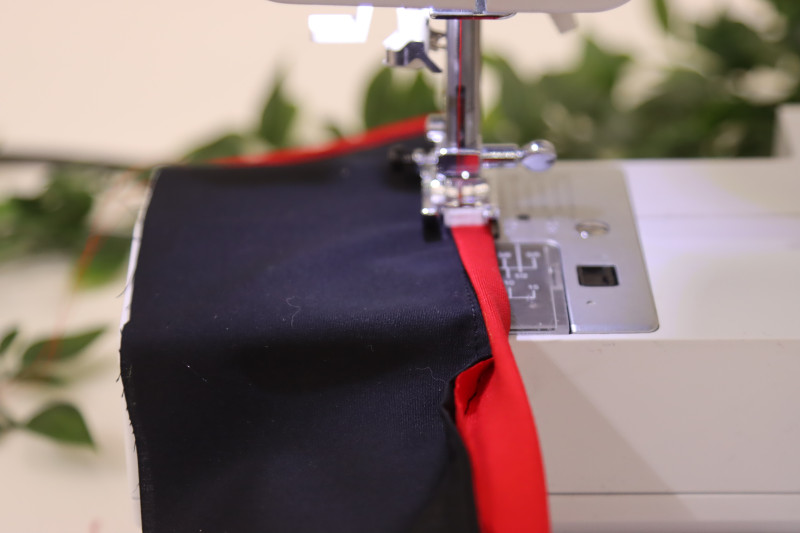
- Sew the bias binding to the edge of the collar with a ¼ inch seam allowance.
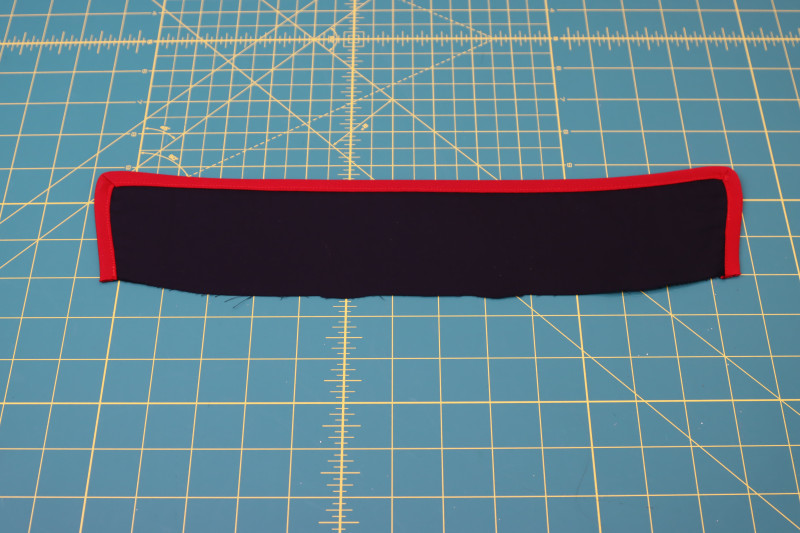
- Fold the unsewn edge of the bias binding toward itself to wrap it around the edge of the collar.
- Pin the rolled bias binding all around the edge of the collar.
- Topstitch the other side of the bias binding to secure it around the collar, making sure to fold the bias binding neatly around the corners.
Step 15
PREPARE NECKLINE TRIM
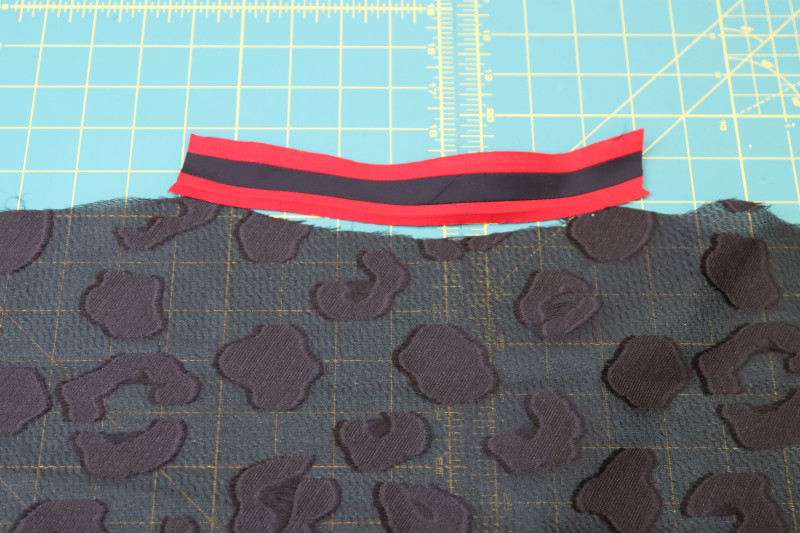
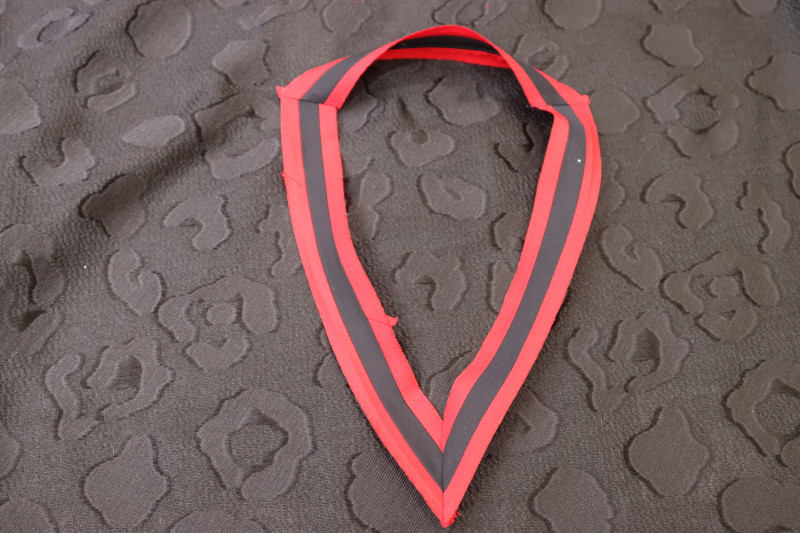
- Cut two strips of trim that are long enough to cover the entire front neckline of the top.
- Cut another strip of trim that is long enough to bend across the back neckline.
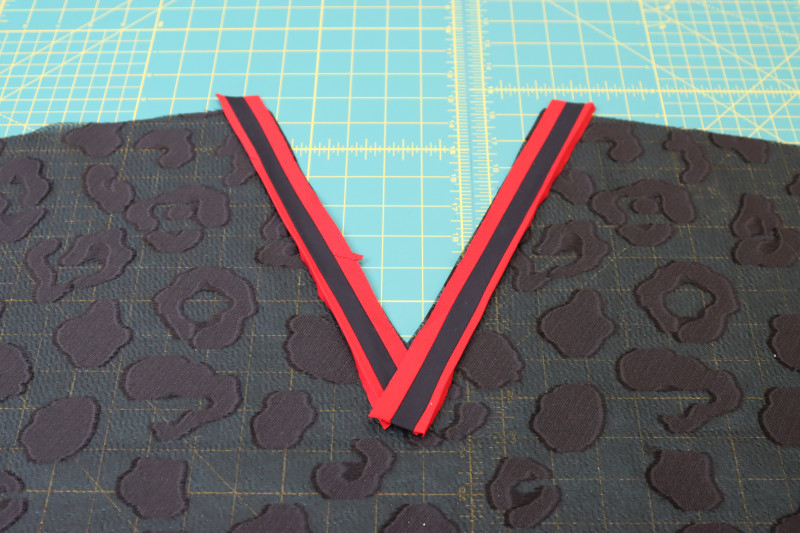
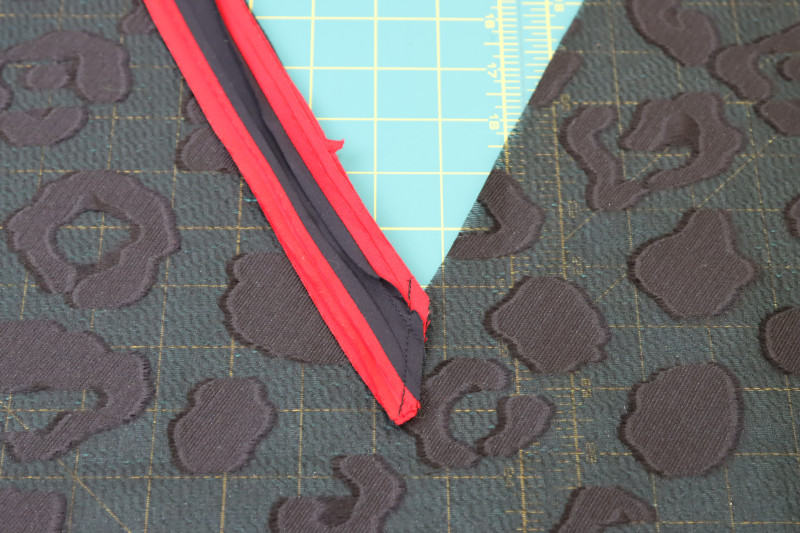
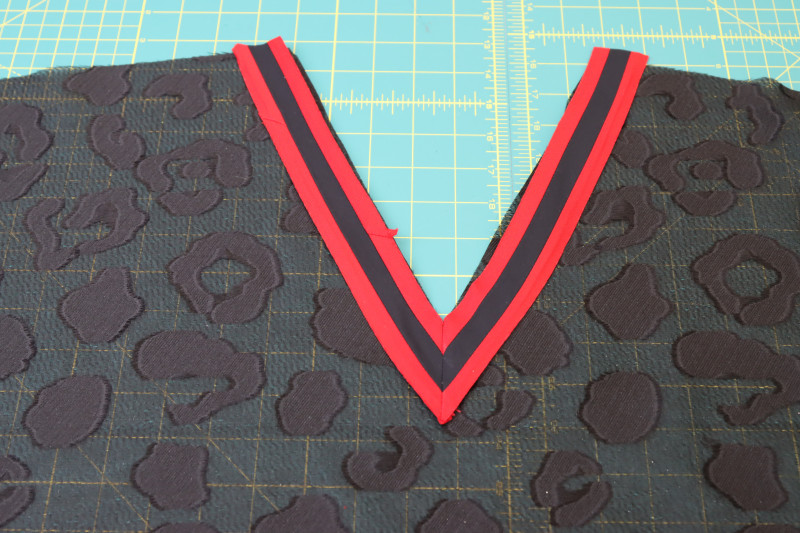
- Sew the front neckline trim pieces right sides together at an angle as shown in the photo below.
- Press the center front seam of the neckline trim open and flat.
- Sew the ends of the back neckline trim to the ends of the front neckline trim, right sides together.
Step 16
SHIRT SIDE SEAMS
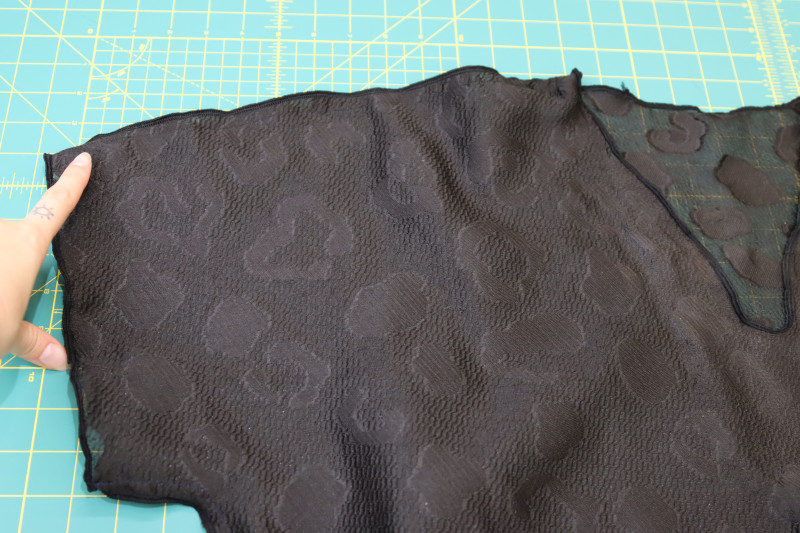
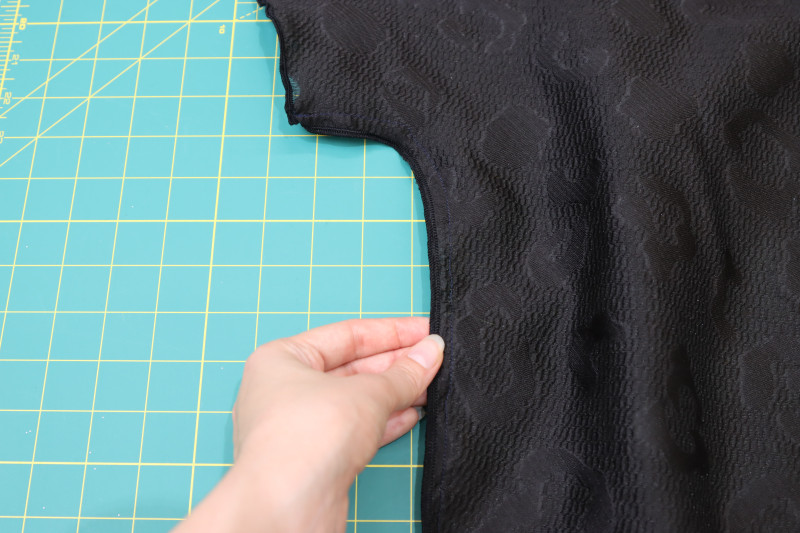
- Place the front shirt right sides together on top of the back shirt.
- Pin and sew the front and back shirt pieces together at the side, shoulder, and under arm seams.
Step 17
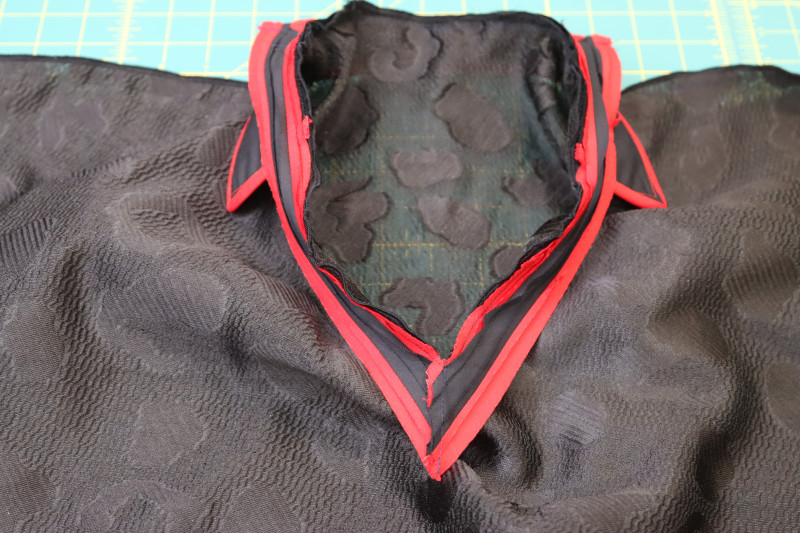
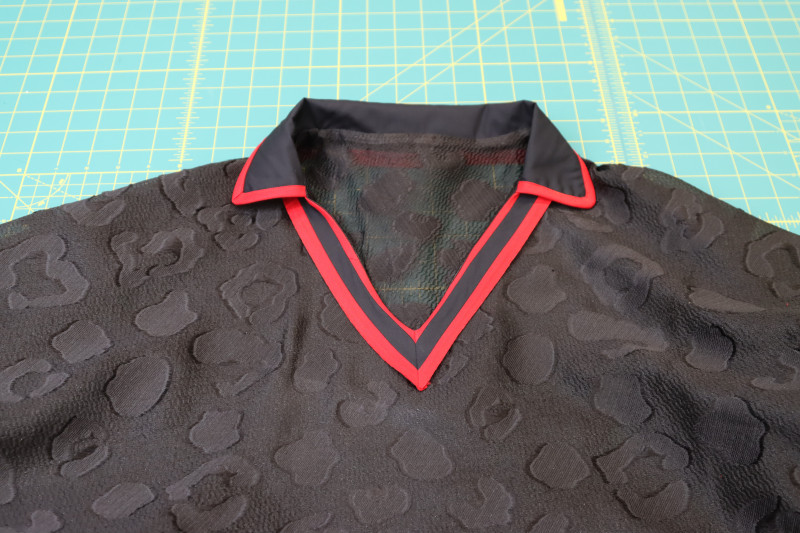
ATTACH COLLAR
- Flip the shirt so that it is inside out.
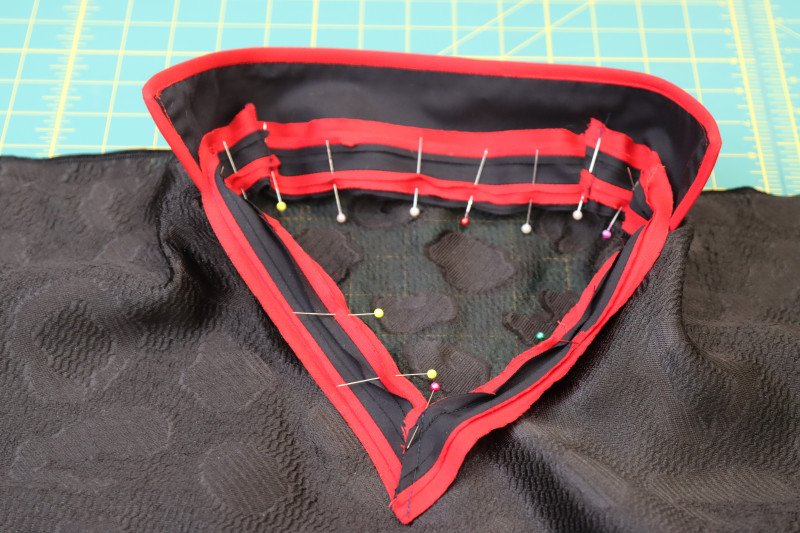
- Pin the collar to the wrong side of the neckline of the shirt so that it is centered on the center back of the shirt.
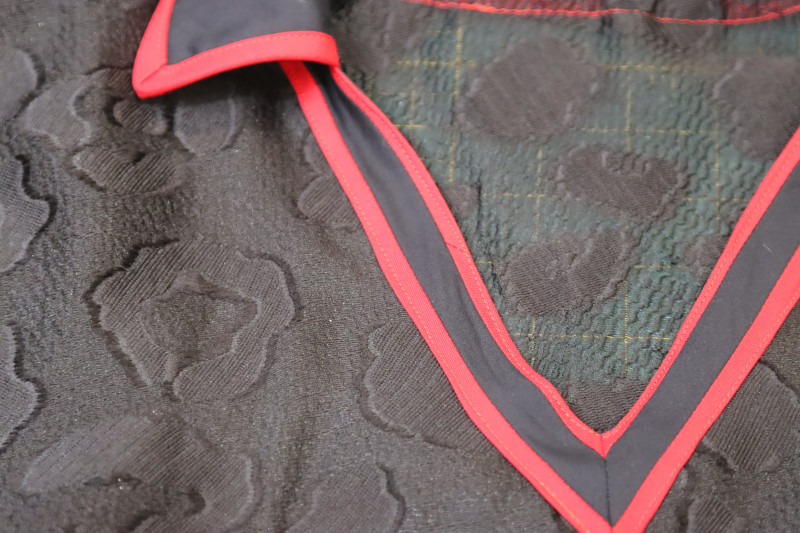
- Pin the right side of the neckline trim ON TOP OF the collar, so that the collar is sandwiched between the trim and the neckline.
- Sew around the neckline with a ¼ inch seam allowance.
- Flip the trim and collar to the outside of the shirt.
- Topstitch the outer folded edge of the neckline trim to secure it to the neckline and encase the raw edges of the neckline.
Step 18
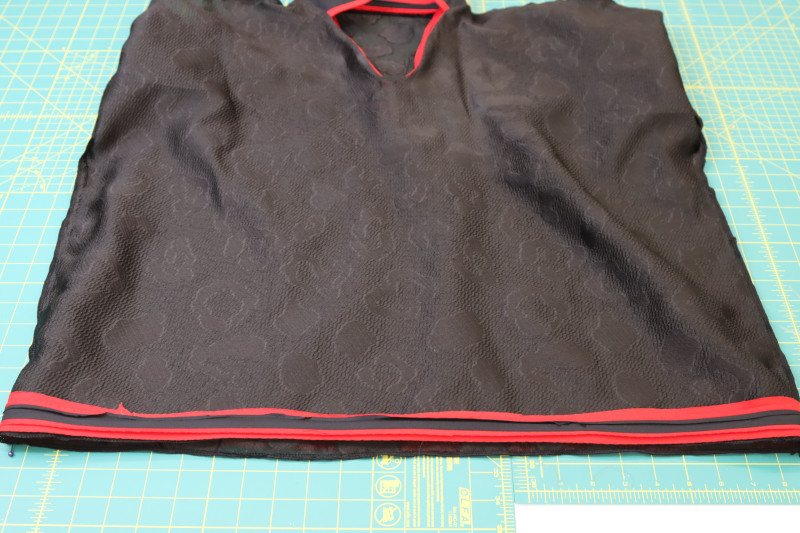
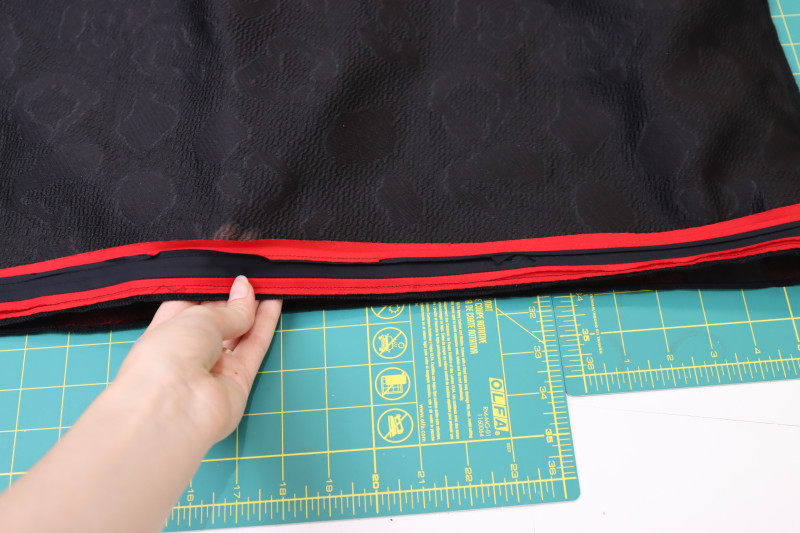
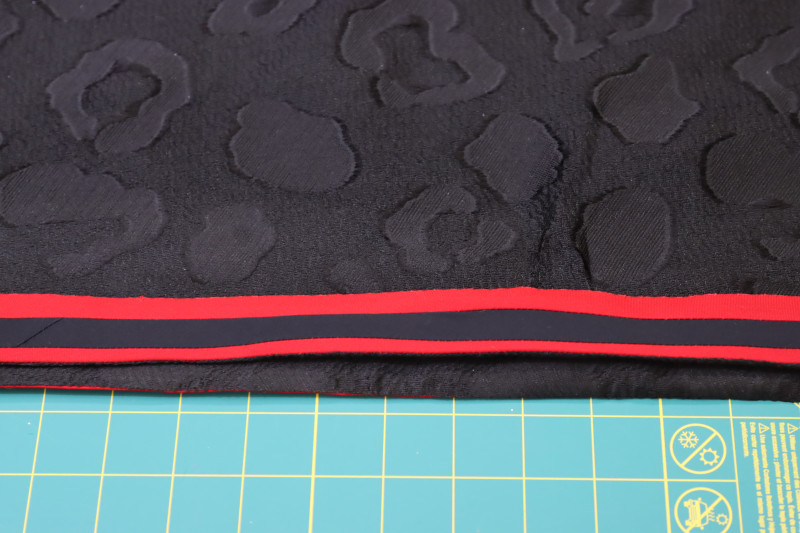
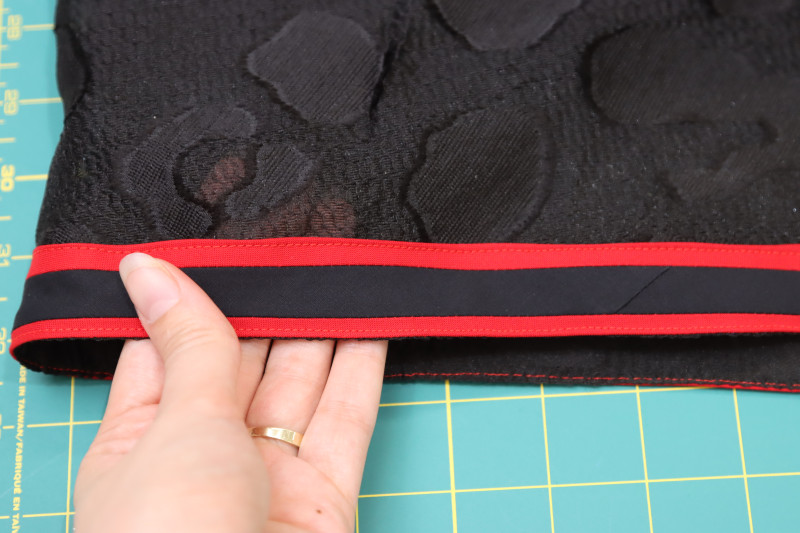
SHIRT HEM TRIM
- Sew the trim to the hem of the shirt the same way you sewed it to the hem of the pants.
Step 19
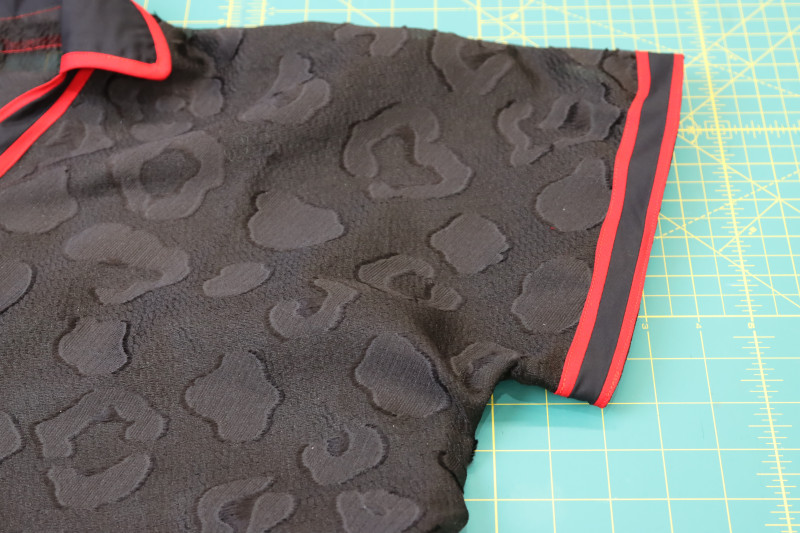
SLEEVE TRIM
- Sew the trim to the hems of the sleeves the same way you sewed it to the hems of the pants and shirt.
Sewing Success: The Finished Matrix Shawl Collar Ensemble
Share this post with a friend (or two!), download the Matrix Shawl Collar Ensemble free sewing pattern, and show us which fabrics and colors you choose, using the hashtags #MoodMatrixPattern & #MadeWithMood—and don’t forget to tag us @MoodFabrics, too.
Free Sewing Pattern Inspiration for Your Next Project
With 525+ free sewing patterns and counting, your opportunities for sewing with Mood are endless!
We hope you had as much fun sewing this shawl collar ensemble pattern as we did! As always, we want to hear from you—share your thoughts and comments below and let us know where you’ll be wearing the Matrix Shawl Collar Ensemble free sewing pattern!
Can’t get enough sewing with Mood? Browse your next make with our latest free sewing patterns.
