
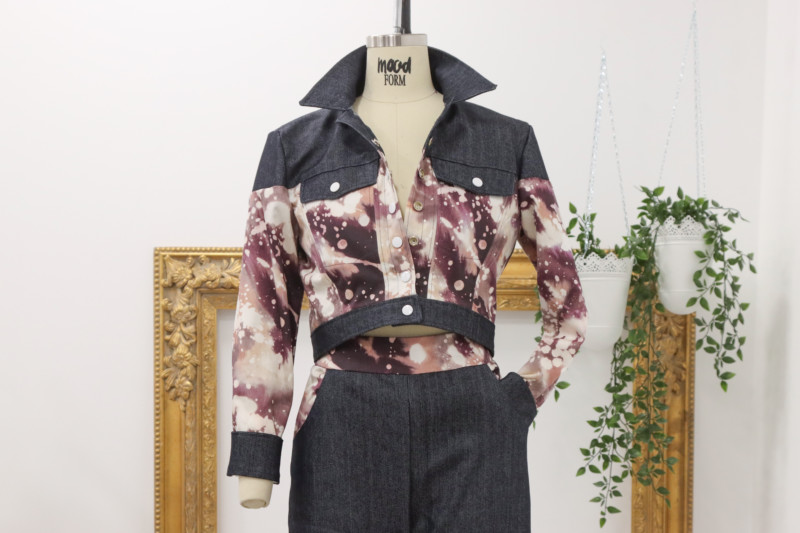
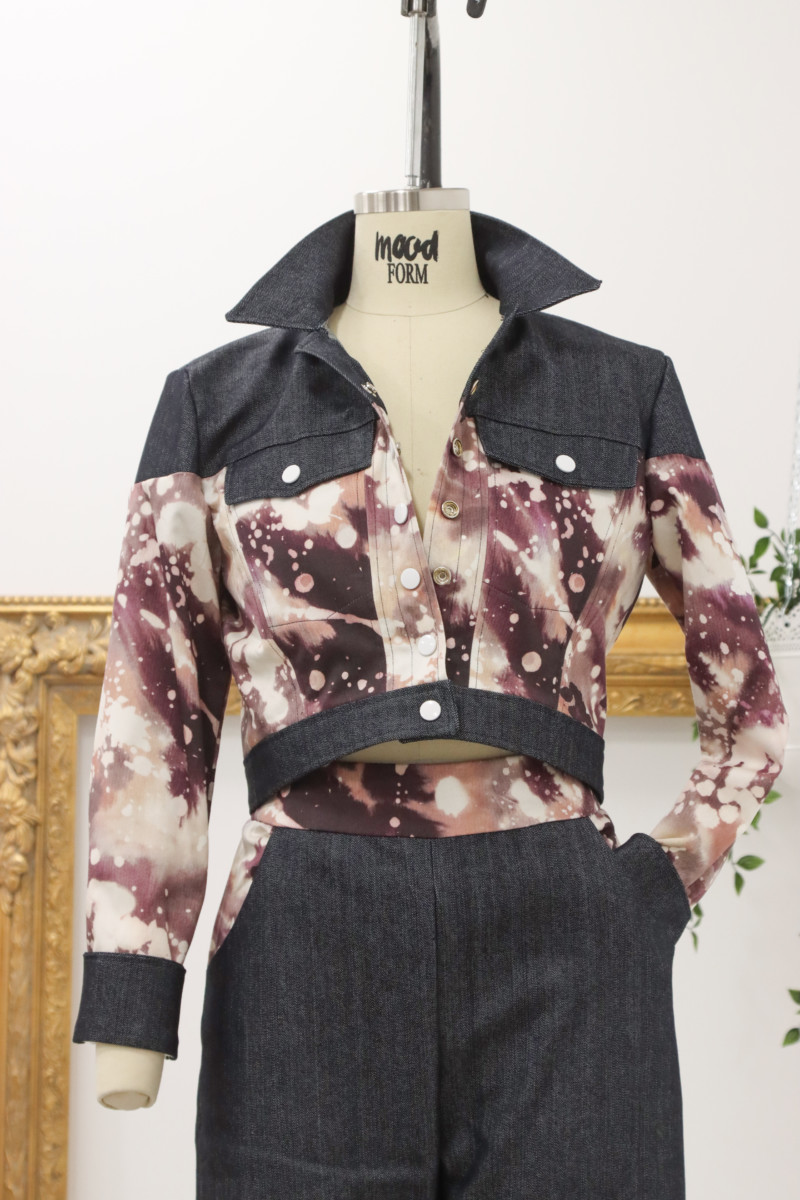
Now that it’s getting colder, why not go bolder with a Mood Exclusive print and a brand new Mood sewing pattern? The Annie Jacket brings some of those subtle western vibes that we’re sure to see this upcoming spring, making it the perfect transitional piece to start adding to your closet this season. Pair yours with a patchwork version of our free Ren Jeans to complete the look!


Purchase Materials Used Below:
- 1-2 yards Night Sky Cotton Denim Twill with Give
- 1-2 yards Mood Exclusive L’Amour en Feu Stretch Cotton Sateen
- 2 pkgs Dritz Heavy Duty Nickel Snaps Size 24-5/8″ – 7ct
- MDF277 – The Annie Jacket Sewing Pattern (free download below!)
Note: If you are using a super stiff fabric, you can avoid using interfacing. If you choose to use a twill or a lightweight fabric, you will need to interface the collar, cuffs, and waistband.
Note: Some of the seam allowances are smaller than others, please keep that in mind when sewing so nothing gets misaligned. Seam allowances are noted on the first page of your pattern printout.
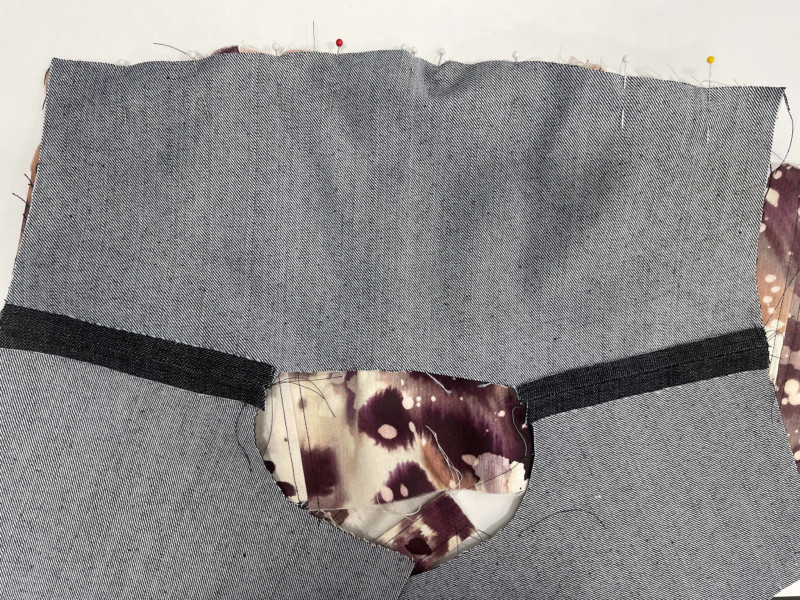
Step 1
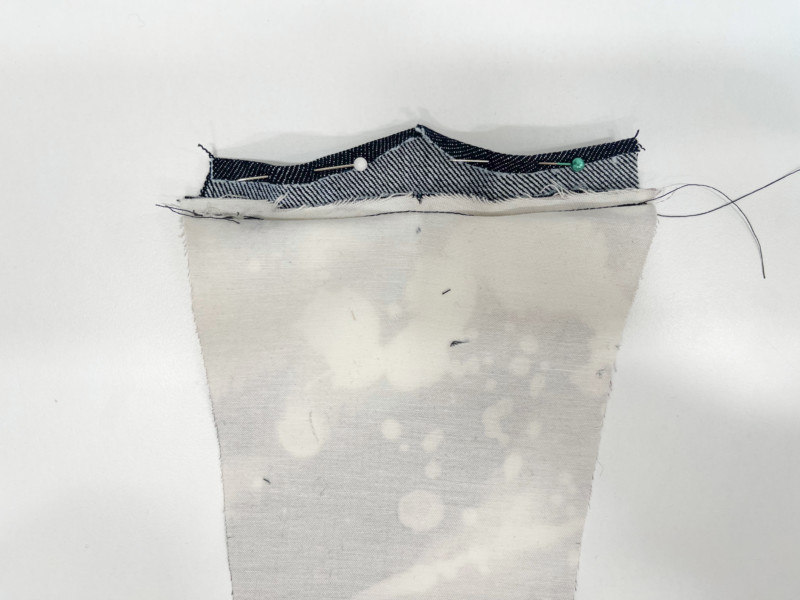
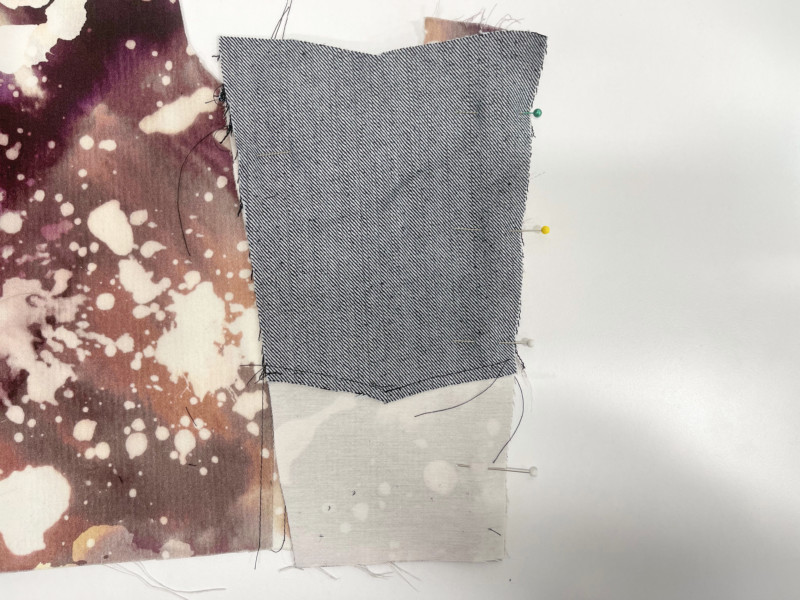
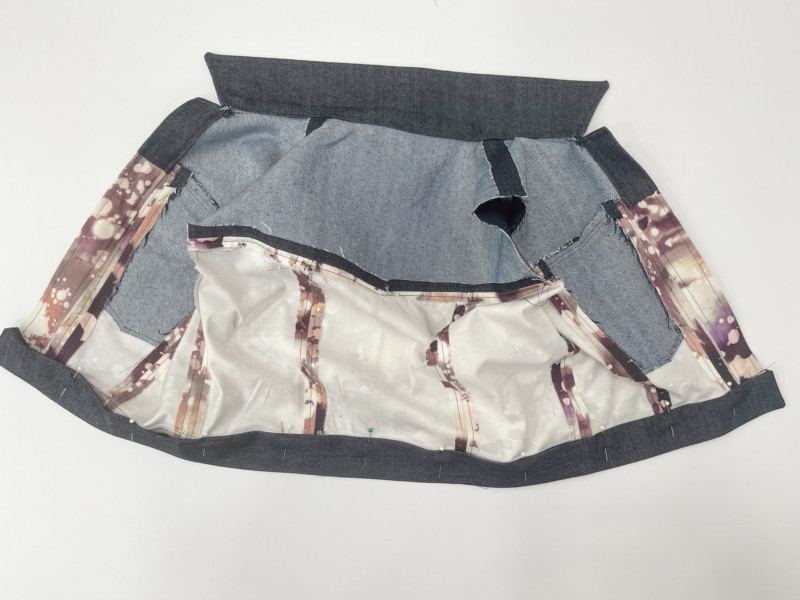
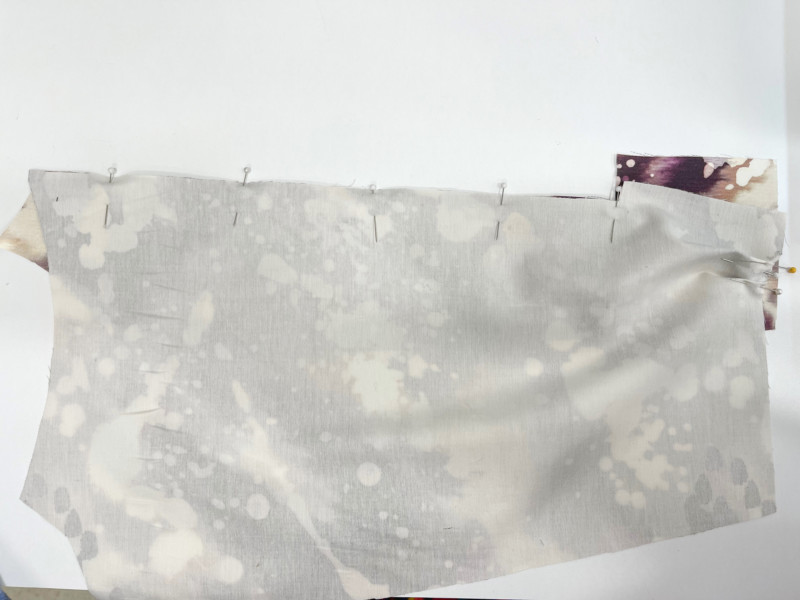
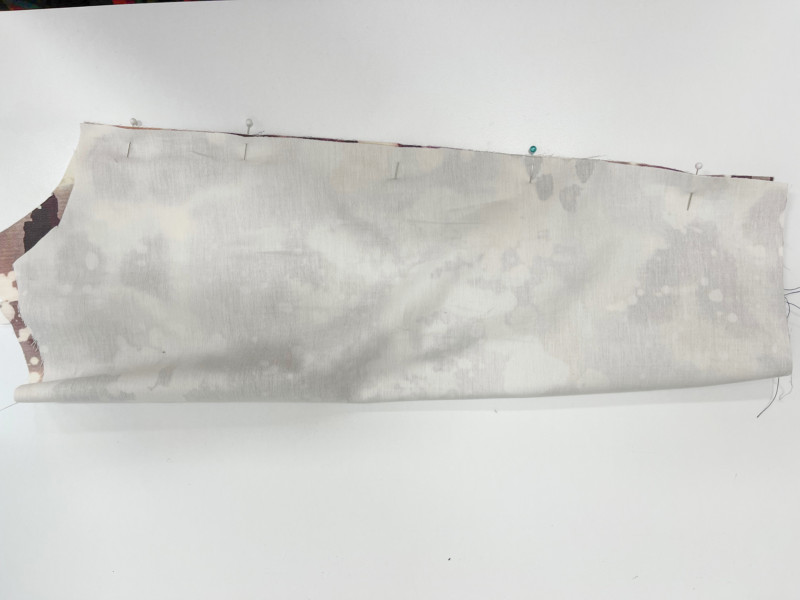
With the right sides together, pin your pocket opening facing to the middle front panel. Now stitch a 1/4″ along the top and press flat.
Step 2
Make a clean finish to the facing by sewing a small hem. An alternative way would be to serge or zig-zag stitch.
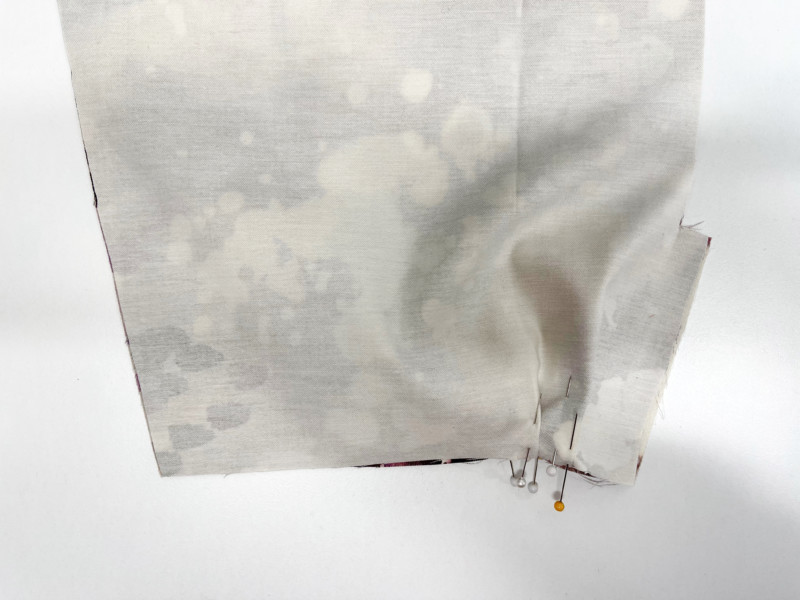
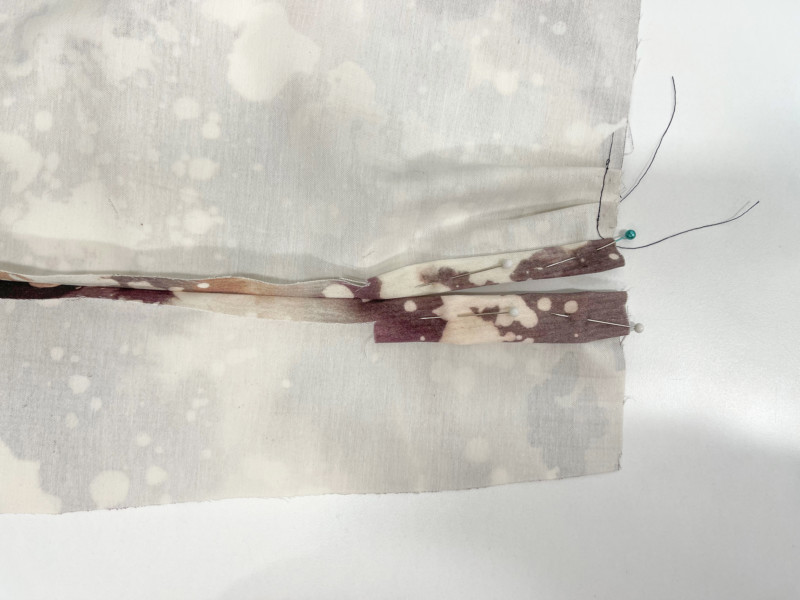
Step 3
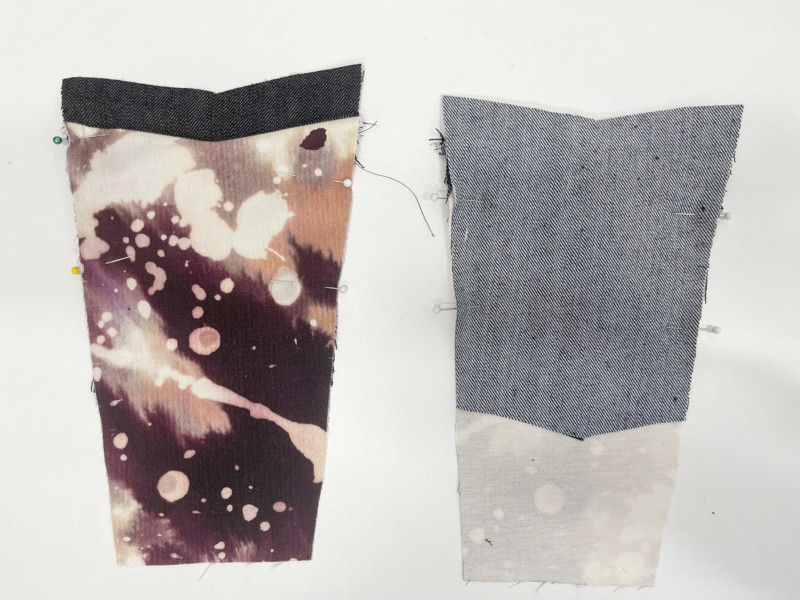
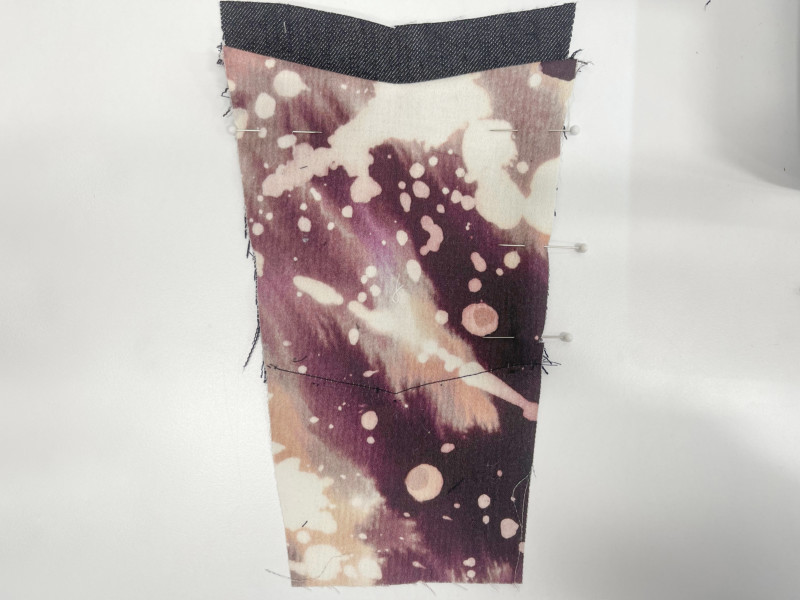
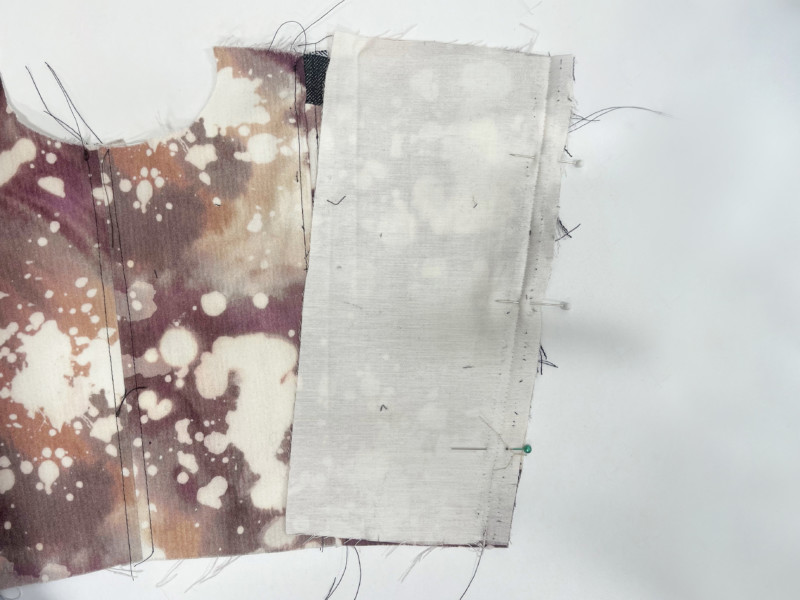
Place the interior pocket underneath the middle front panel. The pocket will extend 1/2″ above the middle front panel. Pin and top stitch pocket into place.
Step 4
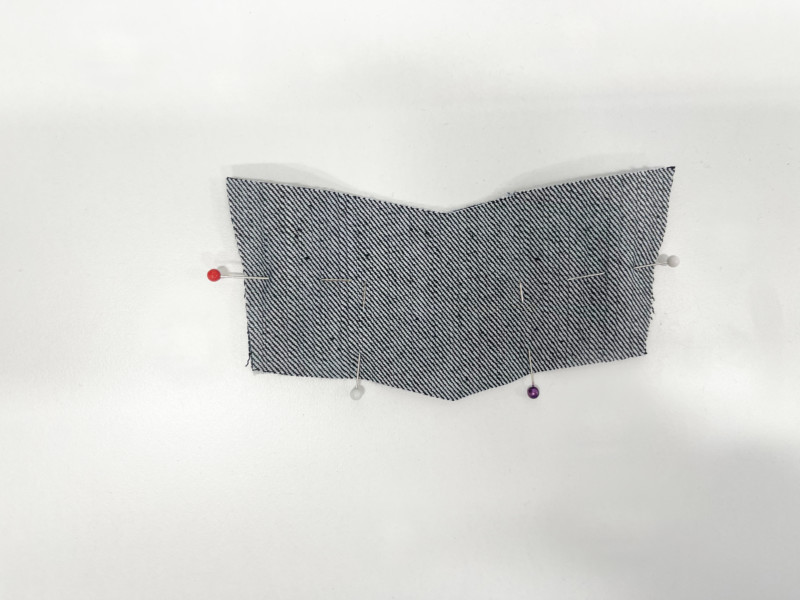
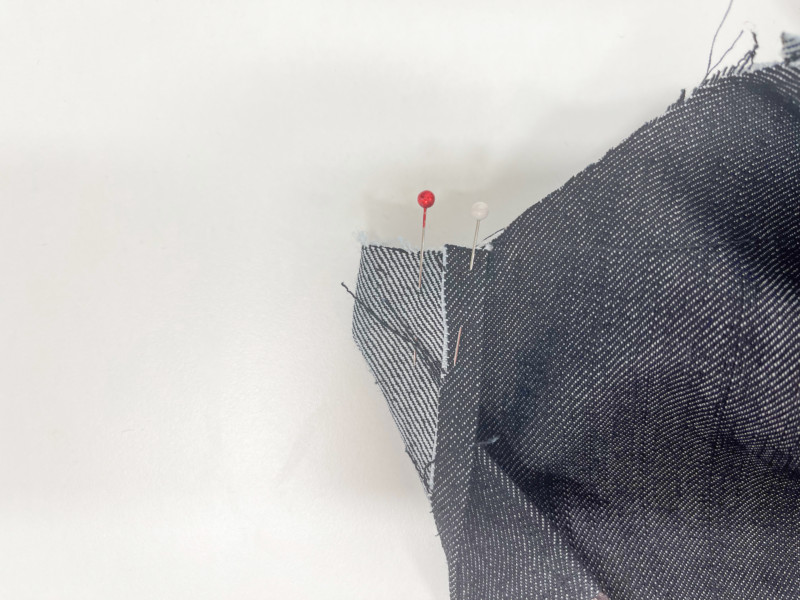
Pin and sew your side back pieces together to center back, matching notches.
Step 5
Now pin your side front pieces together, matching to the side back notches, and sew.
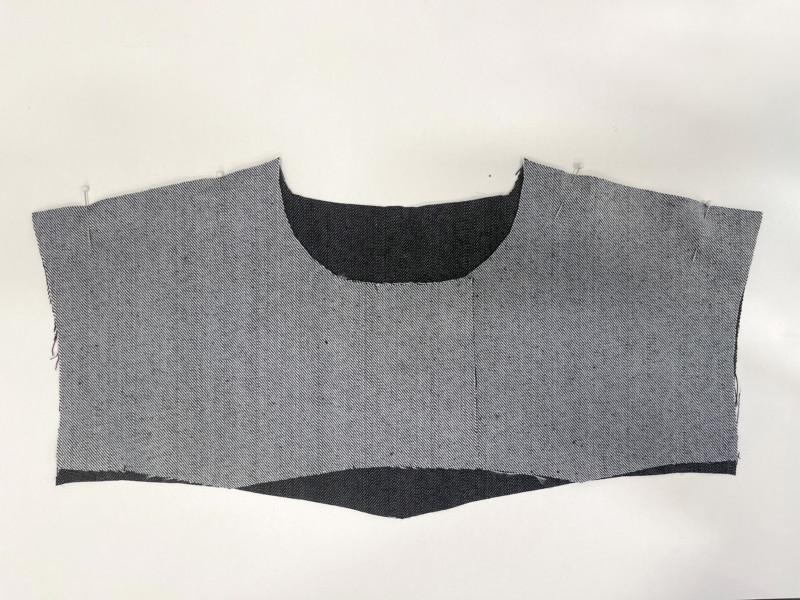
Step 6
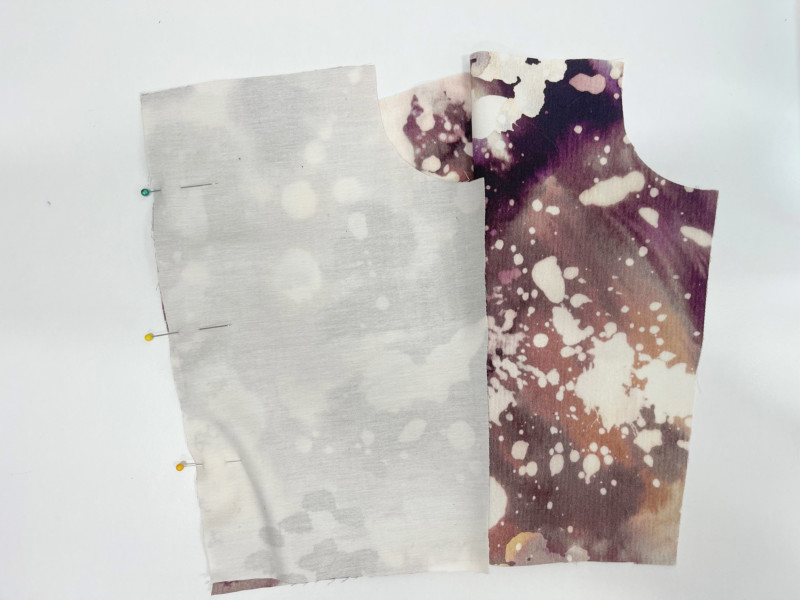
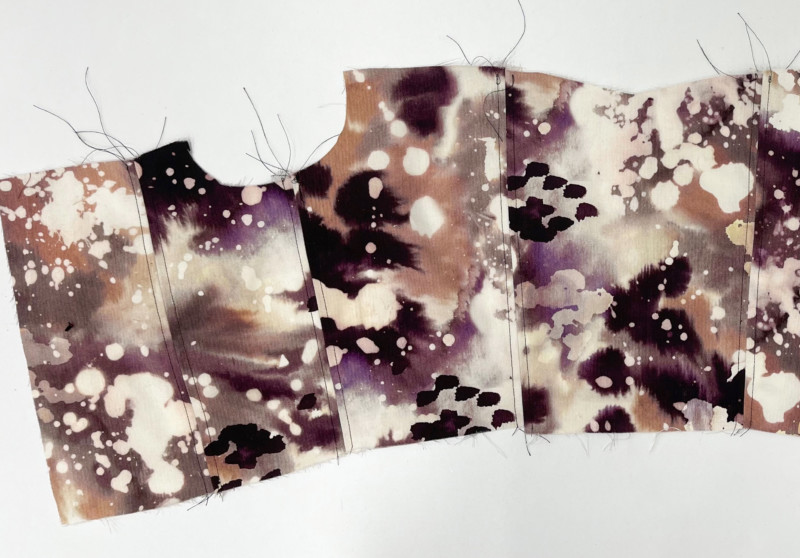
Next, pin your middle front piece to the side front.
Step 7
Next, sew the center front piece to the middle front matching notches.
Step 8
Press all of the bodice seams open and then topstitch along the seam allowance. Below is a detailed shot of the topstitching; I used the presser foot as a guide for each seam. You can change how far from the seam you want your stitching to be, it’s totally up to you.
Step 9
Pin and stitch pocket flap around the edges, leaving the top open. Remember this seam allowance for this is 1/4″. Once sewn, trim corners, flip, press, then topstitch.
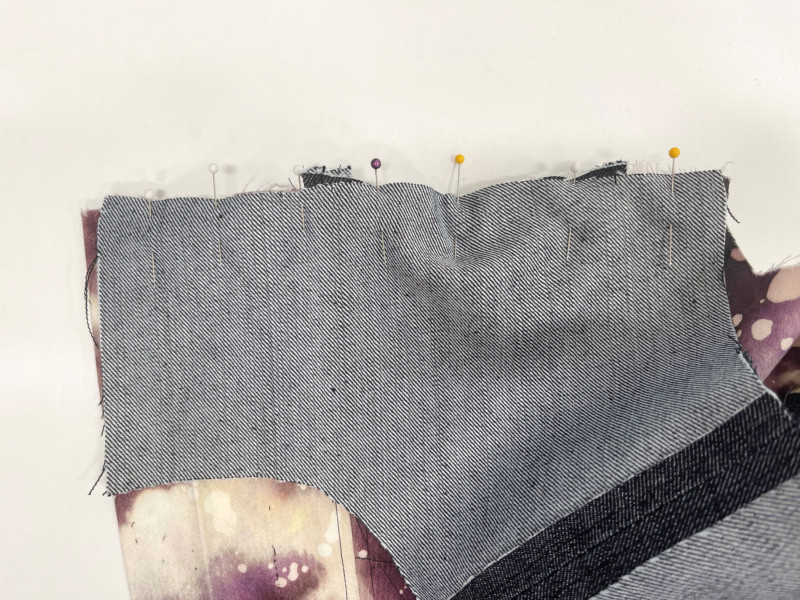
Step 10
Now pin the front yoke to the back yoke at the shoulder seams and sew.
Step 11
Press and topstitch the yoke at the shoulders.
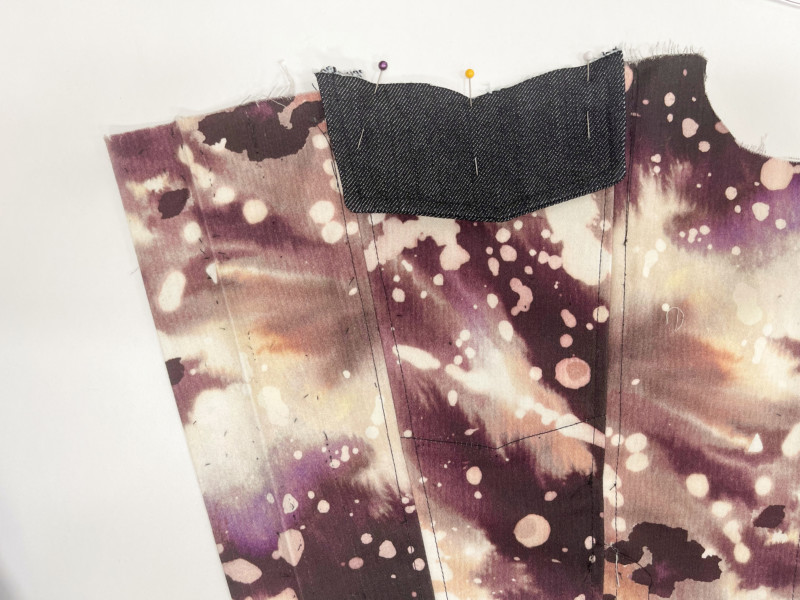
Step 12
Pin the back panel to the top of the back bodice, sew, press, and then topstitch.
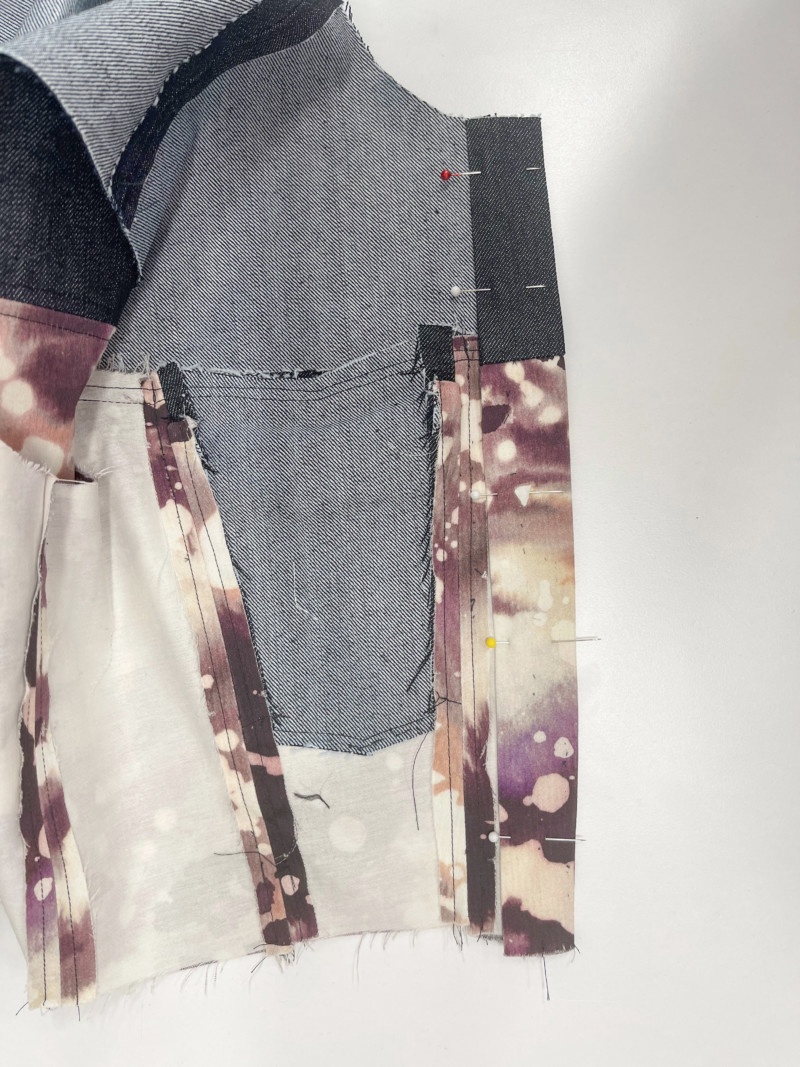
Step 13
Pin your pocket flap, over the middle front piece on the bodice.
Tip: If you want to stay stitch in place, you can because in the next step you will have multiple layers.
Note: There will be a 1/8in on each side to overlap the seam. So make sure you center the pocket flap.
Step 14
Now pin the front yoke to the front pieces, matching the seams. You will be sandwiching the pocket flap in between the yoke and front bodice. Press and topstitch.
Step 15
With right sides together, pin collar pieces and stitch around, leaving the bottom open. Trim, turn right side out, and press. Reminder there is a 3/8″ seam allowance for the collar and neckline.
Note: Since I used denim, I didn’t interface because it was so thick. If you use an alternative material or switch up the patchwork look, you will need to interface the collar.
Step 16
With the right sides together, fold over the top to the first notch. Pin and sew 3/8″. Make a little snip on the corner to make it easier to attach the collar.
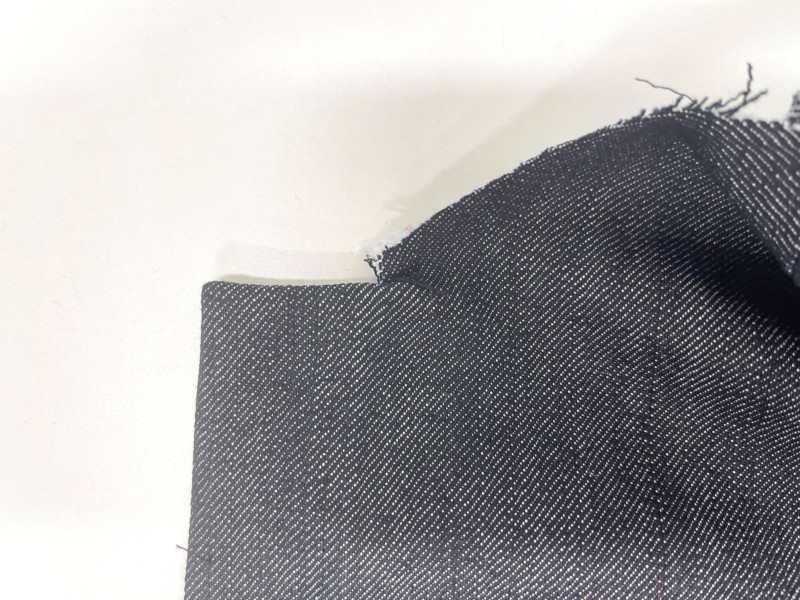
Step 17
Fold the placket over following the markings from your pattern piece. Press, pin, and topstitch.
Step 18
Pin your collar to the jacket matching notches and sew your collar at 3/8″.
Tip: To make sure you are accurate, fold the collar and jacket in half and place a pin in each piece in the middle. Doing this will ensure your collar matches.
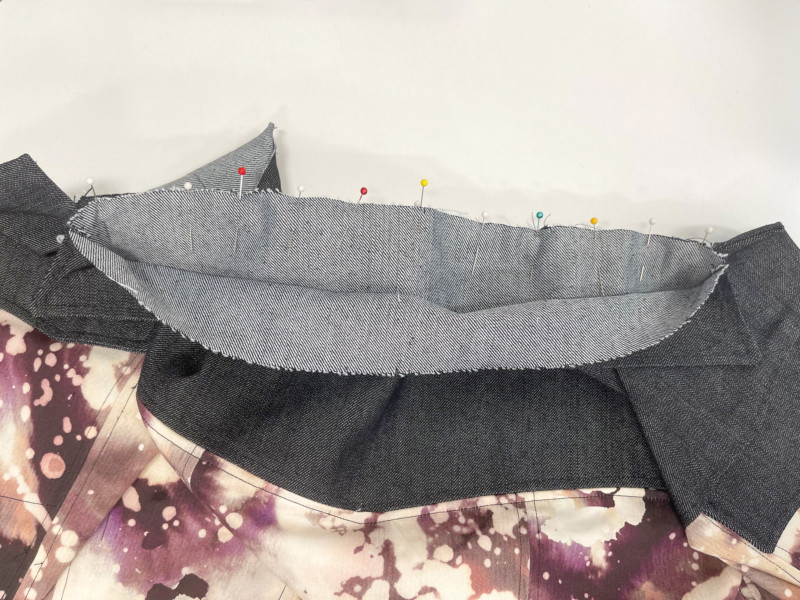
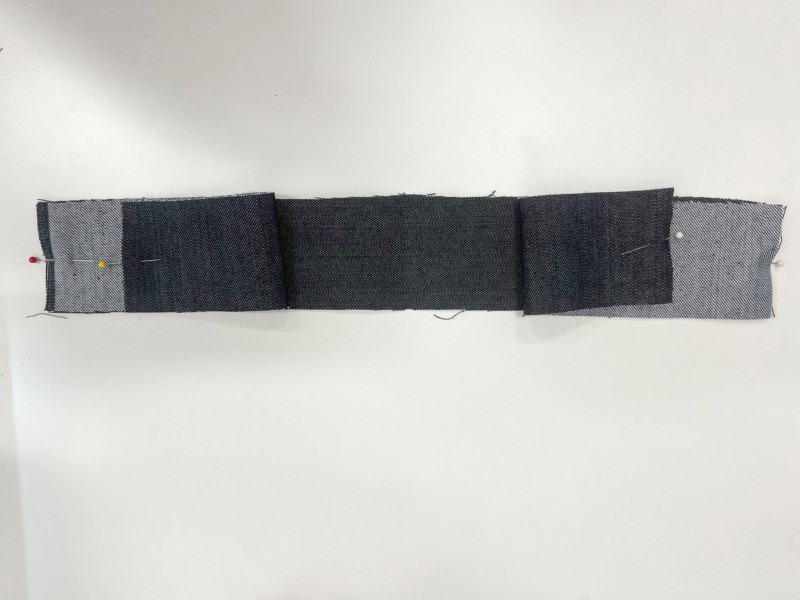
Step 19
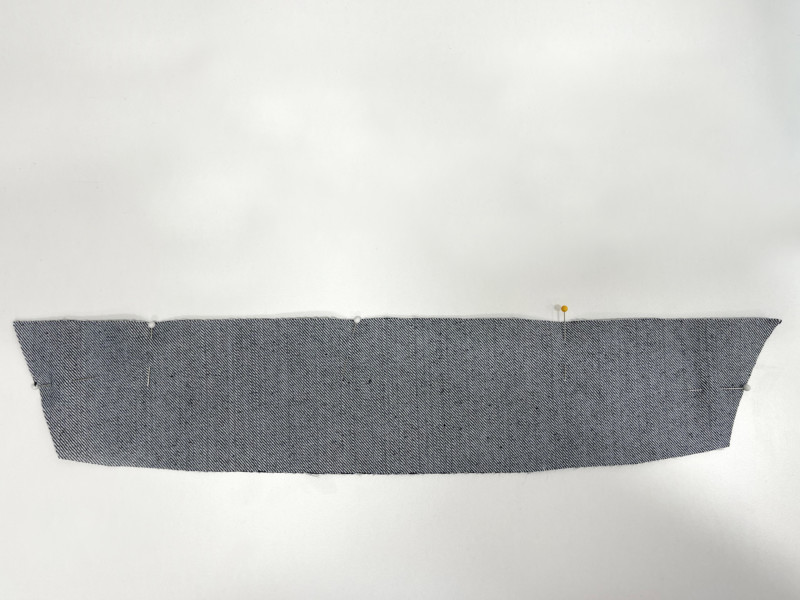
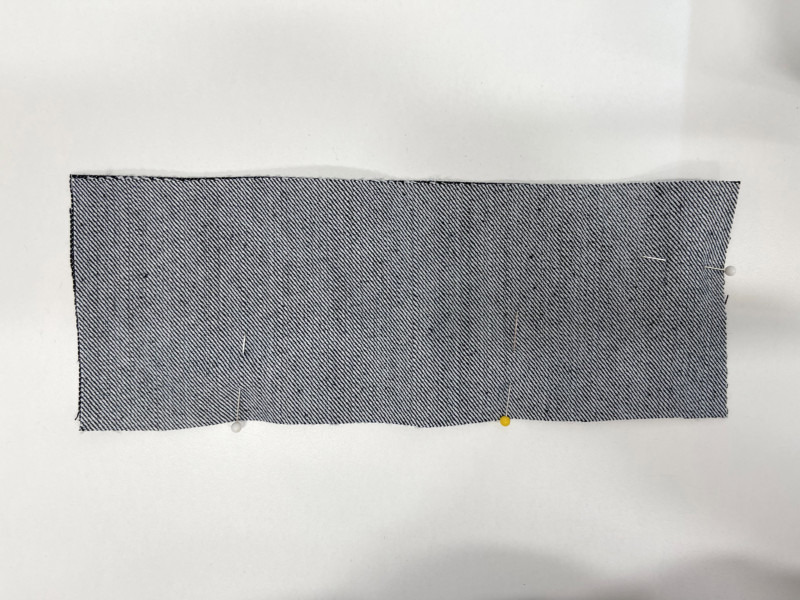
Sew your front waistbands to your back waistbands, matching notches, then press.
Step 20
With the right sides together pin both of the bottom bands and sew around the outside, leaving the top open.
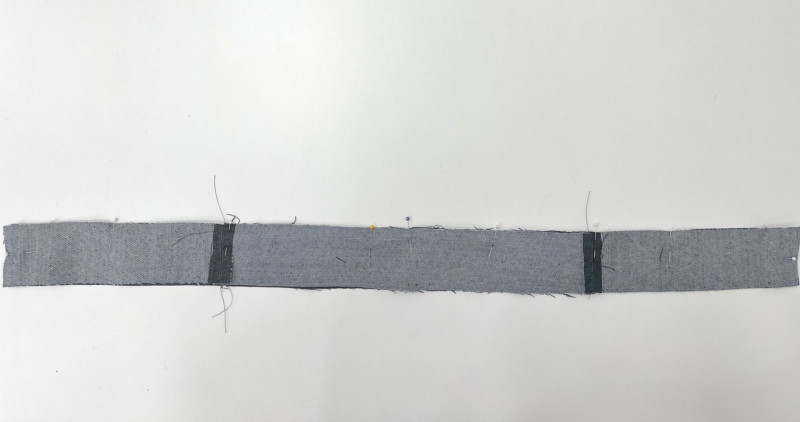
Step 21
Flip the waistband right side out and press.
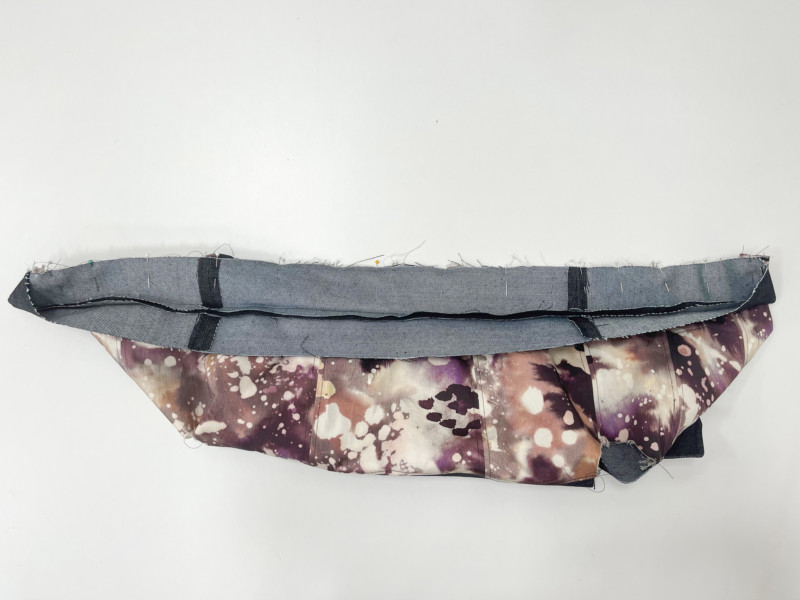
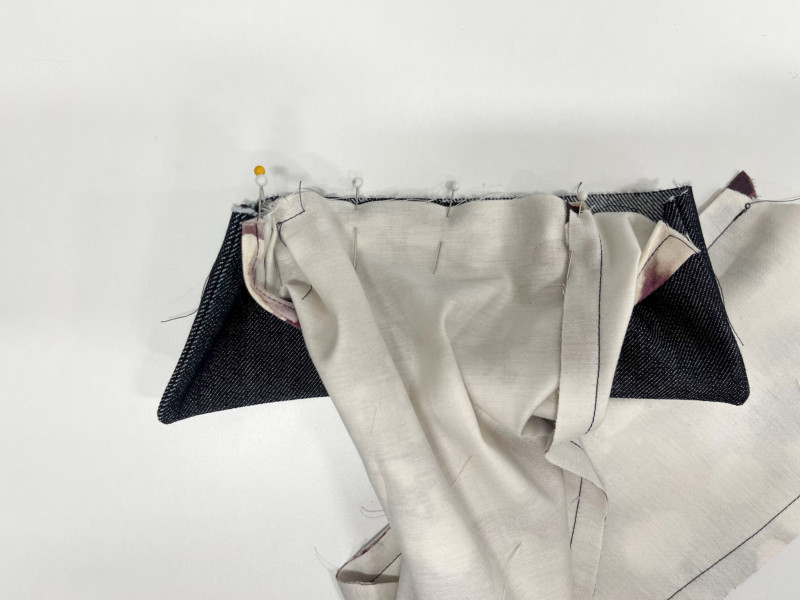
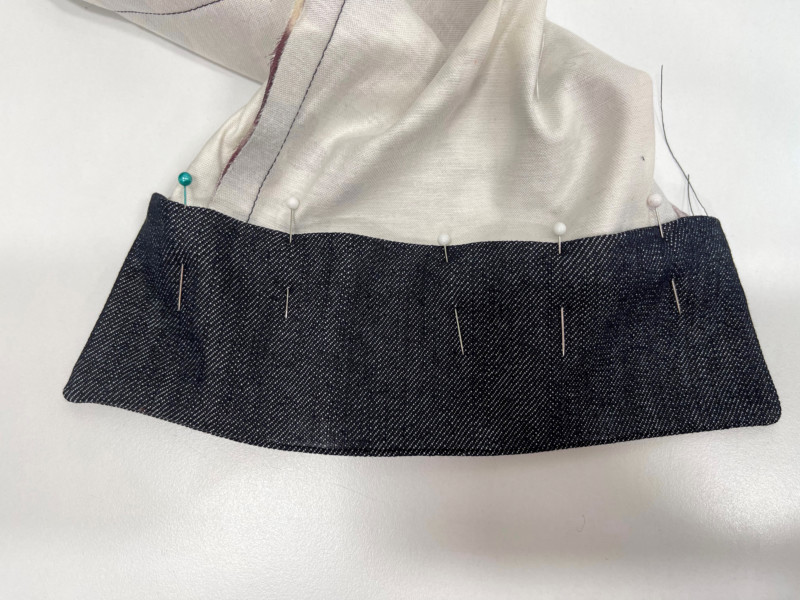
Step 22
Pin the band matching seams and sew.
Step 23
Fold the raw edge inward 1/2″, press, and then topstitch shut.
Step 24
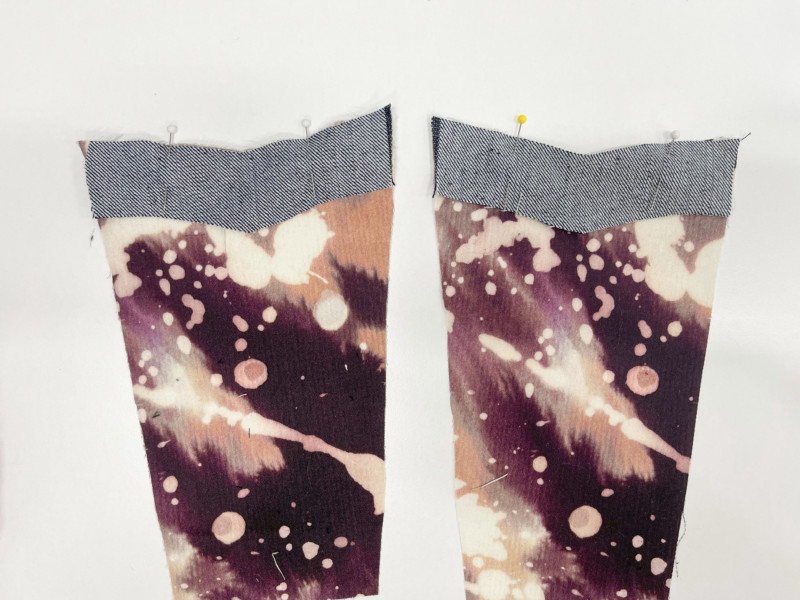
Create each of your sleeves by attaching the upper and lower panels at the back seam.
Step 25
Pin and staystitch your pleats down.
Step 26
Fold the side vent down and sew them, making sure all raw edges are tucked.
Step 27
Now pin and sew the inseam of your sleeve shut.
Step 28
With the right sides together, sew your cuffs around the outer three edges, leaving the top side open. Trim and corners and press. Note: I didn’t use interfacing here because the denim was so thick and didn’t need stabilizer.
Step 29
With the right sides together, pin and sew one layer of the cuff to the bottom of the sleeve.
Step 30
Fold the raw edge of the cuff to the inside and pin. Now topstitch around the whole cuff.
Step 31
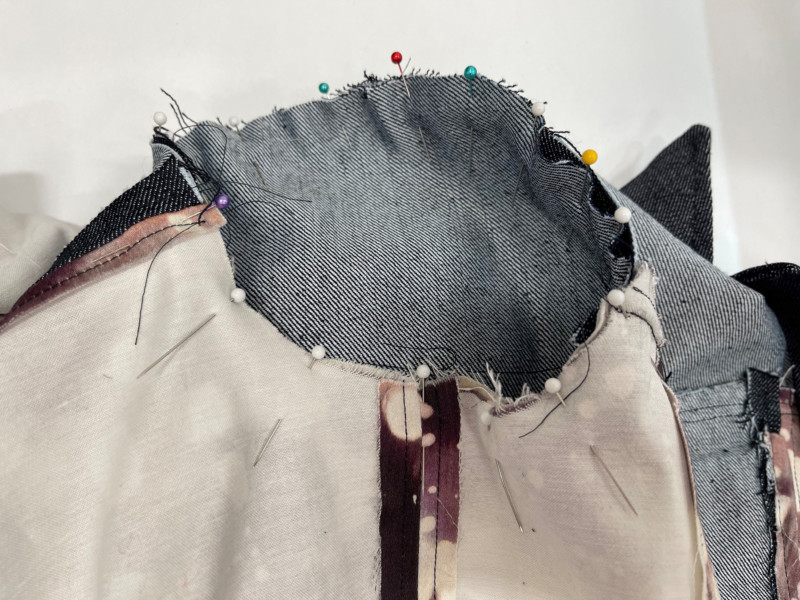
Pin the sleeve cap, to the top of the sleeve matching notches to the front and back respectively.
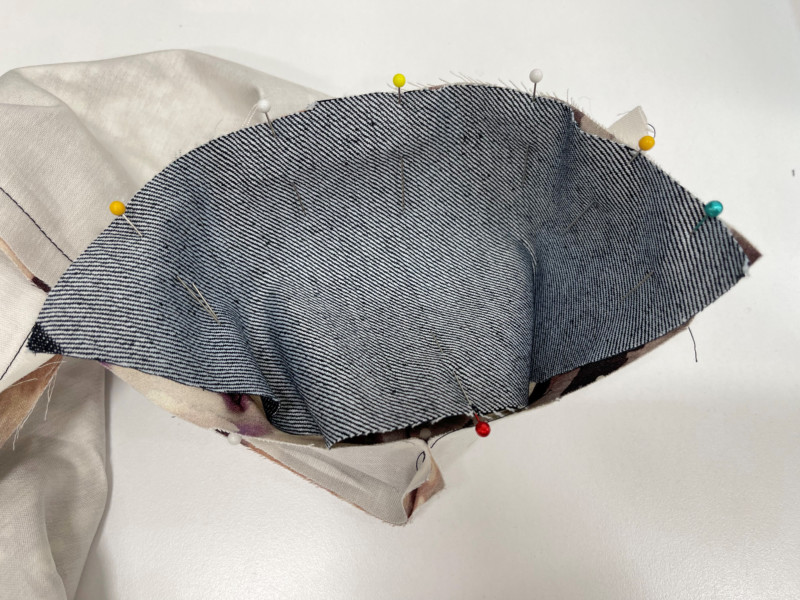
Step 32
Pin your sleeves, matching side seams and notches at the armscye.
Step 33
Trim and clip all threads.
Step 34
Following the guide on your pattern, mark your buttons and buttonholes and sew. Alternatively, set in some heavy duty snaps like I did!
What a terrific outfit! Can’t wait to make this combo.
Thanks, Greg!
It’s soo great combo.
This is an incredible jacket and pattern. Highly recommended pattern. I have made 3 Annie jackets so far and there will be more.!!
This looks great, but where are the fabric requirements. I look forward to making it.
Thanks for your help
SuZ
Hi Susan, the yardage requirements are listed in the “shop this look” box, located on the upper right corner. 🙂
Beautiful pattern, but is there a pattern for a longer jean jacket?
Hi Valentina, as far as long jean jackets go, unfortunately we don’t have any. But you could always use one of our long jacket patterns and adapt it to your needs!
I LOVE this jacket, but I am confounded by how to attach the sleeves. The armhole looks WAY too big for the sleeve, and I am confused by where the notches on the sleeve connect to the armhole…. Anyone have any tips? Sleeves are a huge weak point for me and I’m at a loss.
Hi Kieran! Make sure you’re using the correct seam allowance, and that your sleeve pieces are matched at the points on the pattern. After you’ve got your sleeve assembled, sew a gathering stitch along the top edge of the sleeve.
Next, ease the sleeve into the armscye:
Match the notch at the top of the sleeve to the shoulder seam on the jacket. Similarly, match the inner arm seam to the jacket’s side seam. After you’ve got those points pinned, pull the thread of the gathering stitch an inch or so. Distribute the gathers evenly across the top curve of the armscye, until the gathers are no longer visible…it’ll look more like slight puckers. Do this until the sleeve fits in the armscye.
Keep an eye out when you sew. You don’t want the sleeve to have any pleats or gathers detectable from the right side! This may take a little practice first.
Thank you so much! This is super helpful!
Great pattern, thank you Mood. The fit is excellent no alterations needed. I have 7 sisters and now they want the same outfit. Not showing them again what I make. Love it!!!!
Help! Very sorry if this is a stupid question. I’m new at this and am at the point of sewing the side front bodice (G) to the back and the instructions say to match the notches but I can’t find any notches on the back that would correspond to the front
Hi Jennifer, that’s not a stupid question at all! I’ve just taken a look at the pattern, and it seems that you’re right – there aren’t any notches for these two pieces. Thank you for pointing that out! We will revise that section in the instructions. As for these two pieces, there are officially no notches. Pieces like this don’t normally need them, as they are pretty basic and easily identifiable pieces. Good luck!
Thank you so much for getting back to me. I was just going to go ahead and pin them as I thought I should go but I’m trying to do everything exactly right so going through the instructions carefully step by step.
I’m actually making a toile right now because I wanted to make sure I knew what I was doing and that it fit before ordering expensive material.
Thanks again.
Excellent, Jennifer! We encourage everyone to make a toile first, so you’re already on the right track! Good luck. 🙂
Just want to give an update that for size 20, the shoulder seam is off by 1/5”. I’ve checked and rechecked the pattern pieces and they just can’t line up. Any tips on how to line it up while sewing?
Hi Elle, we’re sorry for the delay in responding to your question! We get dozens of comments and questions each day, and so many questions get buried and, unfortunately, unanswered. We are now focusing user support on patterns 2 years and newer. We hope this will prevent questions on our more current patterns from going unanswered. Although this is late, we wanted to respond in case anyone else has the same question: We recommend re-checking the cut pieces and matching up the sewing (stitch) line and not the seam allowance.
Hi, I have been in love with a long denim coat with like a sherpa lining for years, hoping to one day have it, but it just doesn’t seem to come in style. 🙁 But today I came across this and wondered; that if I remove the waistband and make the part from the top of the pockets straight and just continue it, if that would be possible? What are your thoughts?
Also since I live in a similar climate as Alaska or Canada, if I am to make the denim coat with sherpa lining should I add a proper lining to it, to help it be more windproof?
Hello Katariina, we’re sorry for the delayed response! We get dozens upon dozens of questions each day, and sometimes a few might slip through the cracks! Regardless, we wanted to answer this: Yes, you could lengthen this jacket but you accommodate for the hips and would strongly recommending making a muslin first! Another option you could do is using the Calypso Jacket. If you made the lining with sherpa, you would not need to add a proper lining.
Hello! I am having a really difficult time understanding step 16. Which piece is this step referring to? It’s after creating the collar but I’m not sure which top we are folding over. Could you please clarify? Thank you!
Hello there!
Thanks for visiting the Mood Sewciety Blog! We’re proud to have released over 350 free sewing patterns, and we hope you’re enjoying them.
Behind the scenes we’re a dedicated team of three, and we want to be able to offer top notch support. We have exciting plans for our patterns on the horizon, and as we continue to grow, we’ve decided to focus our sewist support on patterns from the last 2 years. If this pattern hasn’t been recently reduxed or updated, we won’t be able to respond to technical questions on these older posts.
If you come across any pattern errors, rest assured our team is on it – just let us know!
Don’t miss out on our Mood Sewciety Facebook Group – a fantastic space for fellow sewists to connect, share wins, and tackle challenges together.
Thank you for your understanding and happy sewing!
Hello! I’m in need of assistance.
I cannot for the life of me understand step 16.
I don’t understand which piece is worked on nor what to do. The notch on the collar seams to long to be the one on the picture.
Yeah I just read that myself and it is kind of confusing. Let me try to explain it differently. The part of the jacket that they’re working on in that step is the button placket (before attaching the collar). If you look at the technical drawings and sample photos of the finished garment, you can see that the button placket extends out past the collar so that the collar doesn’t overlap itself when the jacket is buttoned up. This means, you need to find a way to finish the top edge of the button placket so that there aren’t any raw edges sticking out of the side of the collar.
Additionally, it looks like the photos for step 16 and 17 were taken out of order, so you can’t see in step 17 that they finished the top edge of the button placket before sewing it into place down the front. All you have to do in this step is fold the top edge of the jacket by the neckline in by 1/4 or 1/2 inch to encase the raw edge, then fold , press, and sew the button placket into place. Finally, you can attach the collar. I hope this clears up your confusion, that was a complicated step without very detailed pictures.
Omg just working on this pattern with a leather fabric and yellow tartan and its so beautiful I am gonna swap out the collar to one you have on like a leather jacket, but other then that its so pretty, and once you get the hang of it, really easy to follow and make. Think this one will only take me about 3-6 hours max a good, easy, fast and pretty piece, deff recommend
Hello. I was thinking of doing a leather combo as well. Can you share pictures of your make?
Bonjour, je souhaiterai coudre cette veste dans un seul tissu, quel quantité me faut-il?
Bonjour!
Merci d’avoir visité et téléchargé depuis Mood Sewciety !
Notre objectif est de vous offrir les meilleurs conseils possibles, même si nos patrons de couture gratuits peuvent contenir quelques approximations afin de conserver leur accessibilité. Nous vous recommandons d’imprimer le patron et de l’assembler selon votre taille. En alignant les pièces du patron en fonction des lignes de grain, vous pouvez estimer avec une plus grande précision la longueur requise pour votre taille spécifique. Vous pouvez également trouver une case « Achetez ce look » en haut à droite de l’article de blog qui estime le nombre de mètres par taille. Une liste des produits et du nombre de mètres utilisés dans cet article se trouve à côté des dessins techniques.
Bonne couture !
L’équipe MoodSewciety
Hi, i have a question i really want to make this pattern. But is it possible to put in a hood?
Totally! You can use the pattern piece for the hood from the Boxwood Hoodie for this pattern. I would attach the hood to the neckline right before step 18, before putting on the collar.
hi, do you maybe also have a a0 format of this pattern?
Hello,
In order to keep our free sewing patterns free, we are exclusively offering an A4-Letter size version that includes all sizes.
We appreciate your request and will keep it in mind for future patterns.
Happy Sewing!
The MoodSewciety Team
Hi, this jacket appears to be unlined. Is there a way to line it?
To sew this jacket with a lining, you will need to cut out lining fabric with the front and back bodice patterns. This main fabric and the lining fabric get sewn separately, then joined together at the sleeves, the neckline, front opening, and bottom edge. Please view The Bergen Coat for better instructions on sewing a jacket with lining.
buenos dias gracia por los moldes quisiera saber cual es la talla M en el molde estoy desorientada le agradezco inmensamente soy principiante y quiero hacer el blazer
Hola, una talla mediana se traduciría entre los numeros 8 y 14.
This is an amazing pattern! I am a beginner sewist but I was really in the mood to make a denim jacket, so I challenged myself to give it a try and I absolutely love how it turned out at the first try! I made it in Size 6 in a light blue denim fabric and it fits perfectly, no alterations needed. As a beginner, some of the instructions were a bit vague (e.g. how to sew the collar) but I looked up some techniques on YouTube and managed to follow through without any problems. Thanks for sharing these fantastic patterns for free! Can’t wait to make more of them!
My printer prints the mood square as 1 and7/8 inch. How to I adjust it?
Hi Emma, it’s okay if the print is off by 1/8 inch. If anything, just sew with 3/8 seam allowance instead of 1/2 inch and that should make up the difference.
Hi, idk if its like an idea for you guys to do but mayhe make a youtube channel. And show how to make the patterns and such. Im more a visual learner and sometimes pictures confusse me quite a bit. And im probably not the only one that has this issue. So I just wanted to share/give ideas for maybe the future.
Hey Queen! We really appreciate feedback like this. You can find our Youtube channel at this link and browse all the tutorials and instructional videos we have so far. We’re working hard to post more videos to the channel for our more complicated patterns.
Hi i have trouble understanding the fisrt few steps with the pocket
Hey hey! This jacket is so cute, I’m having a lot of fun making it, but I think I noticed a typo on one of the pieces (specifically piece L the front waistband). It says to only cut 2 of the front waist band, but I believe it should be 4, as I was having a really difficult time trying to put those pieces together when I had only cut out 2 of the front waistband. But once I cut out two more pieces of the front waistband it worked a lot better! Just wanted to give you guys a heads up!
I know the pants are the ren jeans, but in this photo, it doesn’t look like there is a button like on the ren jeans. I want the look of this one in the photo but confused on how the waist band is put together. I see a zipper on it just wanted to know if it’s a flap that’s covering a button.
Hey Ashlyn, this is an older pattern so I’m not exactly sure how these pants were finished, but based on the pictures it looks like it must have an invisible zipper at the center back crotch seam.
Hello, I printed out the pattern and made a prototype in canvas to see if the size would suit me, but I noticed that the shoulder length at the front and back wasn’t the same. The front shoulder is longer than the back shoulder. I also noticed that the front side was longer than the centre front panel, so I included the pocket opening, but there is still a difference in length.
Hi Julie
Unfortunately, we were not provided with the native files for our older patterns, so I can’t check for you why certain pieces are larger. What I can recommend for this type of issue is to trace the stitching lines 1/2″ from the edge of the pattern pieces. Sometimes when seam allowance is added, certain corners can make a piece appear larger, so align the stitching lines you marked, sew, and trim away the excess seam allowance. This happens frequently on shoulder seams.
For the side seams, the easiest solution would be to adjust the longer piece by trimming the excess, but if that reduces the length you want, then for your final garment add the extra length to the smaller piece instead.
It was great that you made a muslin. That’s definitely what I always recommend with any pattern. And thank you for the feedback! I’ve added this pattern to the list of patterns to review or remake in the future.