

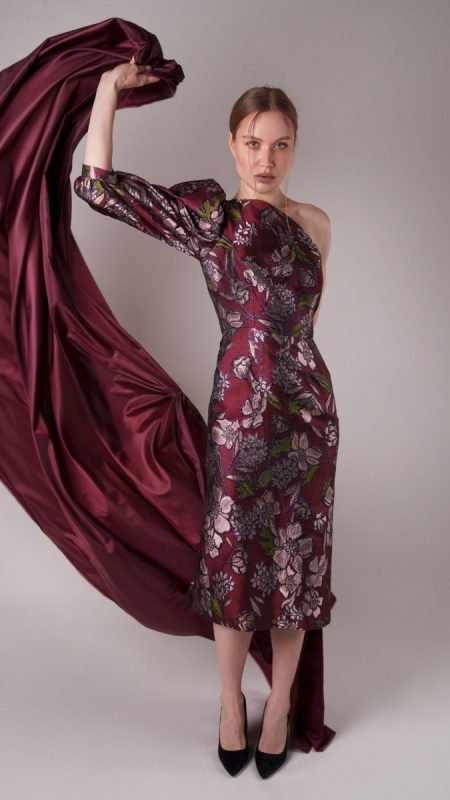
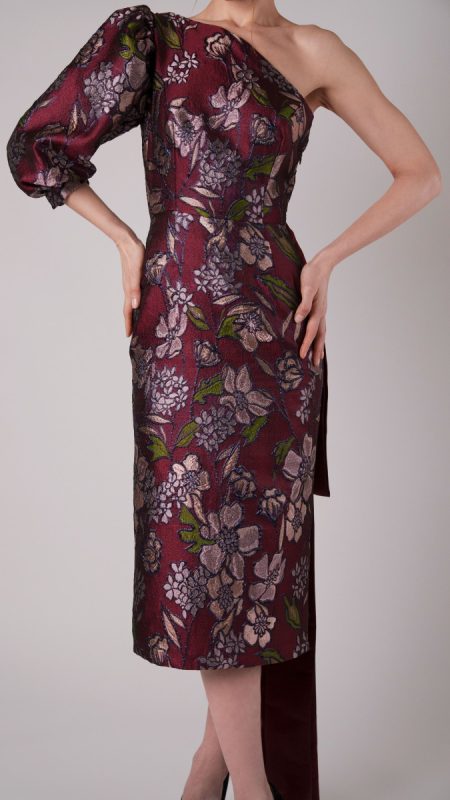
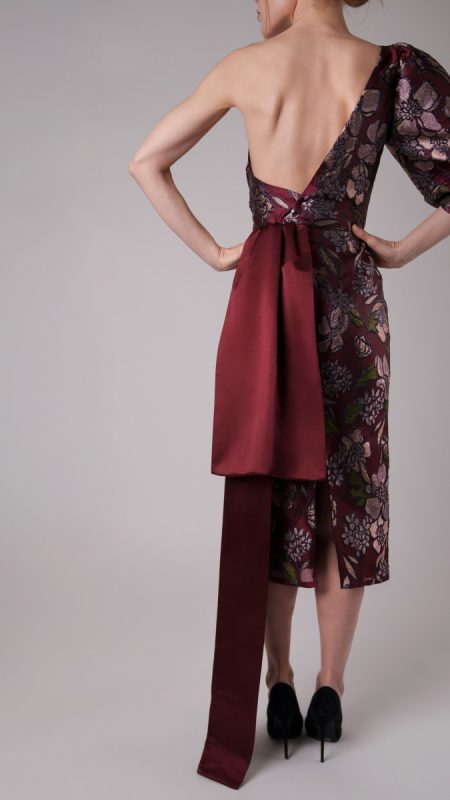
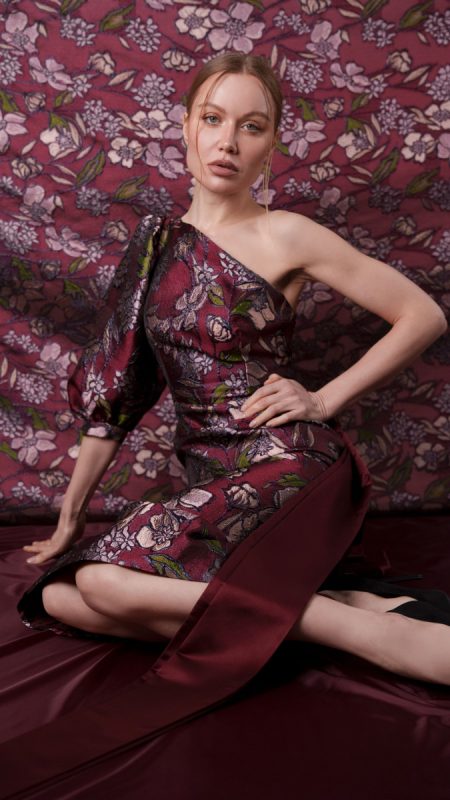
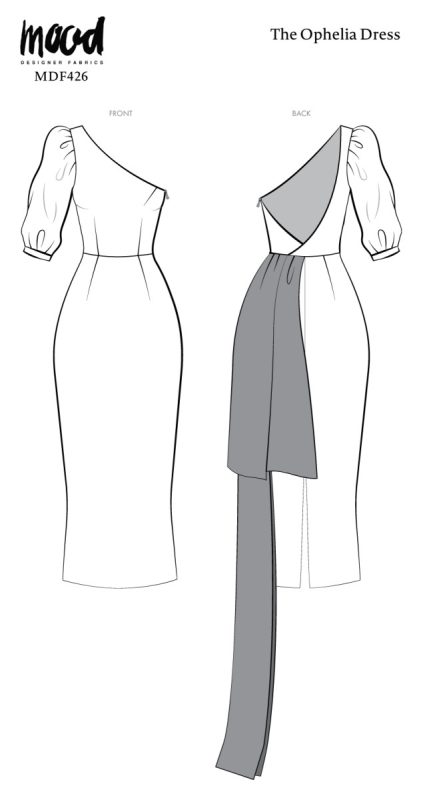
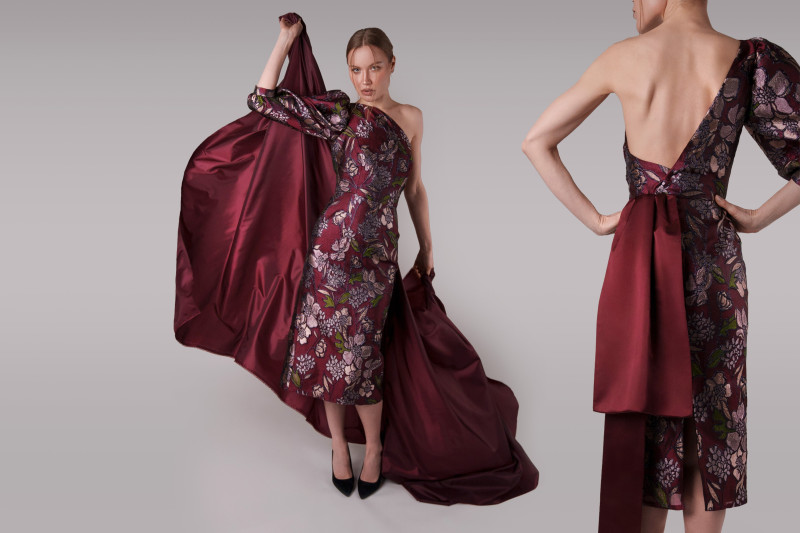
Drape yourself in elegance with the Ophelia Dress, a statement-making gown that embodies modern glamour with a touch of classic drama. This free sewing pattern is perfect for those who love couture-inspired silhouettes, featuring an asymmetrical neckline, a single bishop sleeve for an air of regal sophistication, and a stunning wrap-back detail. The dress contours the body with a side zipper and a back slit for ease of movement, while the pièce de résistance—a flowing satin train—cascades from the back, creating an ethereal, runway-worthy effect.
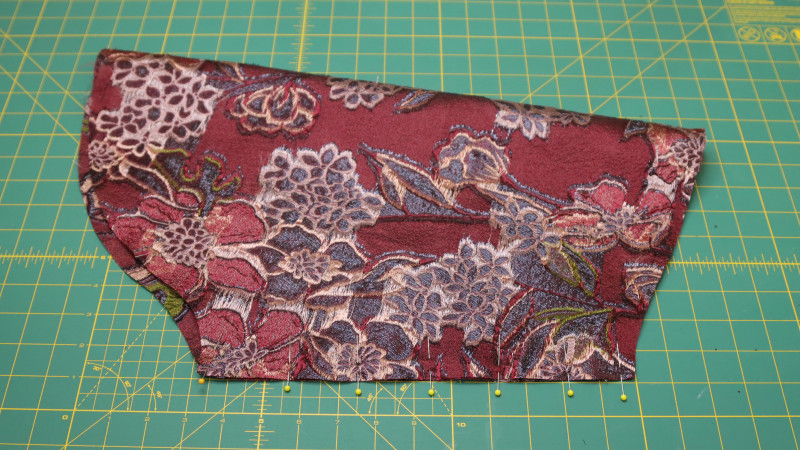
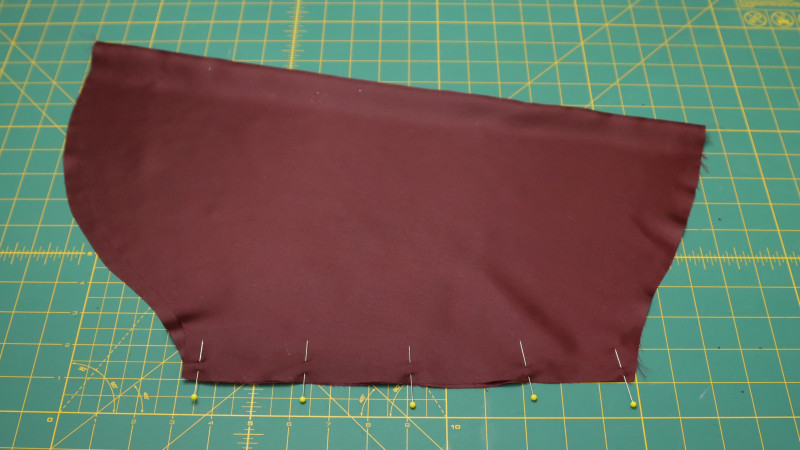
Sewn with metallic burnout brocade and fully lined with lightweight polyester lining, this show-stopping dress is ideal for evening events, galas, and red-carpet moments. The visually dynamic texture from the brocade brings a touch of dimension with a shimmering finish. The polyester lining provides structure and comfort while making sure the dress drapes flawlessly. If you’re looking to customize this dress, consider alternative fabrics like jacquard for added depth, Duchesse satin for a sleek contrast, or taffeta for a crisp, sculptural feel. Each fabric choice transforms the final look, allowing you to create a dress that is uniquely yours.
Designed for experienced sewists and those eager to challenge their skills, the Ophelia Dress Free Sewing Pattern offers a one-of-a-kind garment that rivals red carpet couture. The bold asymmetry of the neckline and the statement bishop sleeve add an element of grandeur, while the elegant train enhances the drama. The wrap-back design introduces an element of intrigue, revealing just the right amount of skin for an alluring yet sophisticated touch.
With the Ophelia Dress Free Sewing Pattern, you have the opportunity to create a jaw-dropping piece that is truly unforgettable. Style the dress with strappy heels, bold earrings, and a sleek clutch for a high-fashion evening look. For a more avant-garde approach, layer it with structured outerwear or pair it with sculptural accessories to enhance its couture aesthetic. The beauty of this dress can shine in various ways – whether in a deep jewel tone, shimmering metallic, or classic black, it transforms into a bespoke masterpiece that reflects your style. Download the free pattern today and bring your vision to life with Mood Fabrics’ exquisite collection of metallic brocades, luxury linings, and sumptuous satins—all the perfect materials to complete your dream dress!
Essential Materials & Sizing Guide for The Ophelia Dress
Here is the breakdown of what knowledge and materials you need for creating your very own dress! We’ve got you covered with the recommended materials we used—if you want to follow along exactly—as well as a curated list of alternative fabric recommendations if you want to customize your own version. The Ophelia Dress free sewing pattern download includes technical drawings for seam and silhouette visibility, plus a size chart to help you find your perfect fit!
Purchase Products Used Below:
Quantities indicated are for sewing a size small gown. Toggle the ‘SHOP THIS LOOK’ box to find quantities for other sizes.
- 2 yards of Metallic Burnout Brocade – Burgundy, Peachy Beige and Navy Festive Florals
- 2 yards Polyester Lining Fabric – Burgundy – Margot Collection
- 2 yards of Silk Duchesse Satin – Wine – Premium Collection
- 2 each of Gutermann Sew All Thread 100m – 450 Burgundy
- 1 each of Invisible Zipper 24″ by YKK – 525 Wine
- 1 each of Dritz Black Hooks & Eyes Size 2 – 14ct
- MDF426 – Ophelia Dress Sewing Pattern (Free download below!)
Alternative Fabric Recommendations:
The Ophelia Dress is best suited for medium weight and heavy fashion fabrics.
Download Your Free Sewing Pattern
Submit your name and email in the form below to receive the Ophelia Dress Free Sewing Pattern directly in your inbox. Mood Sewciety Patterns will send your free download via email with the subject line: ‘Your Free Download from Mood Sewciety’ (in PDF format for A4 and letter-size printing).
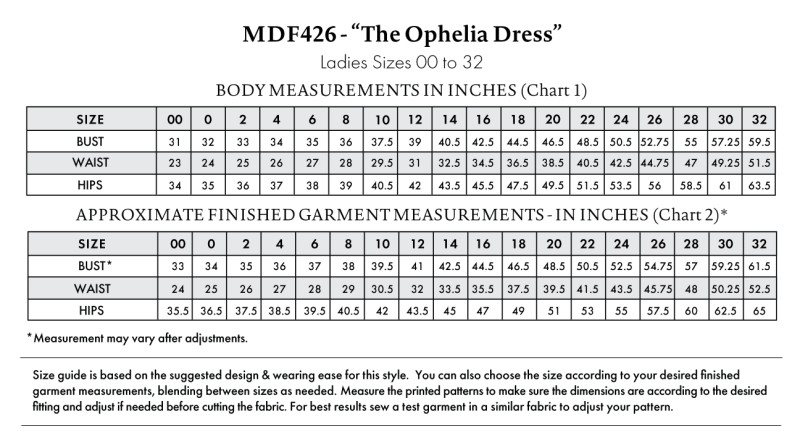
Find Your Perfect Fit
Our Ophelia Dress is a close fitted garment – the size guide below is based on the suggested design & wearing ease for this style. You can choose the size according to your desired finished garment measurements, blending between sizes as needed. Measure the printed patterns to make sure the dimensions are according to the desired fitting and adjust—if needed—before cutting the fabric. For best results, sew a test garment in a similar fabric to adjust your pattern.
Note: Measurements may vary after adjustments. If using non-stretch fabrics, reference the approximate finished garment measurements chart to choose your size.
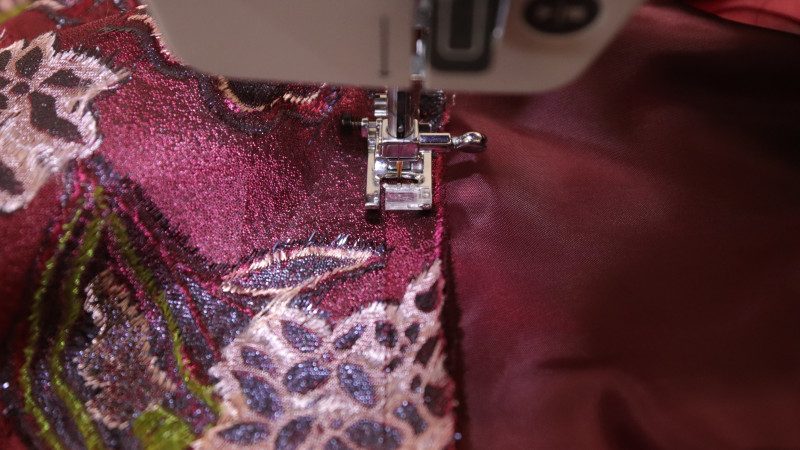
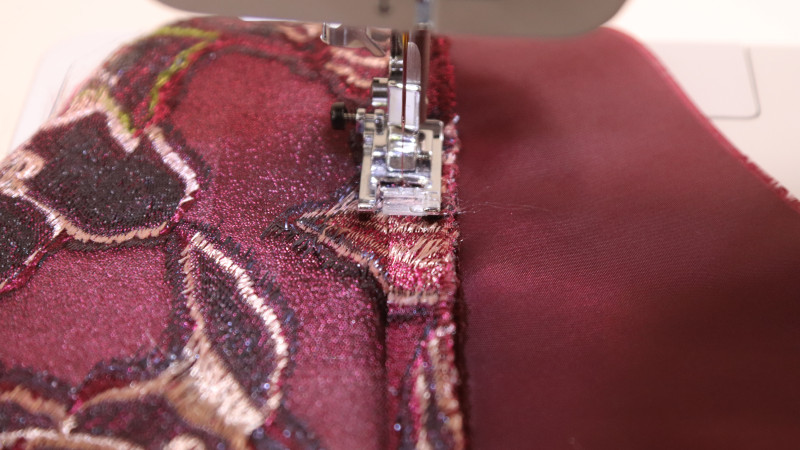
How To Sew The Ophelia Dress
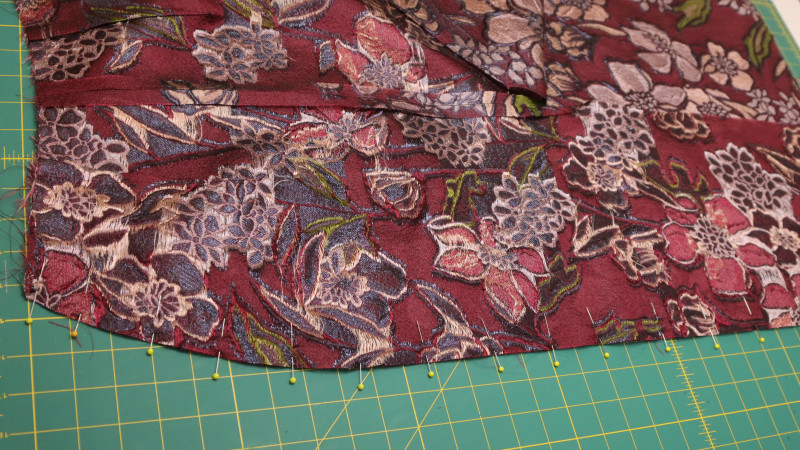
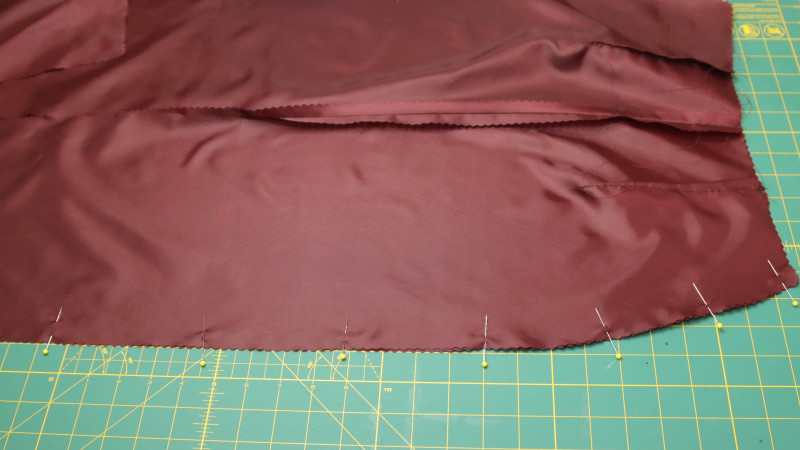
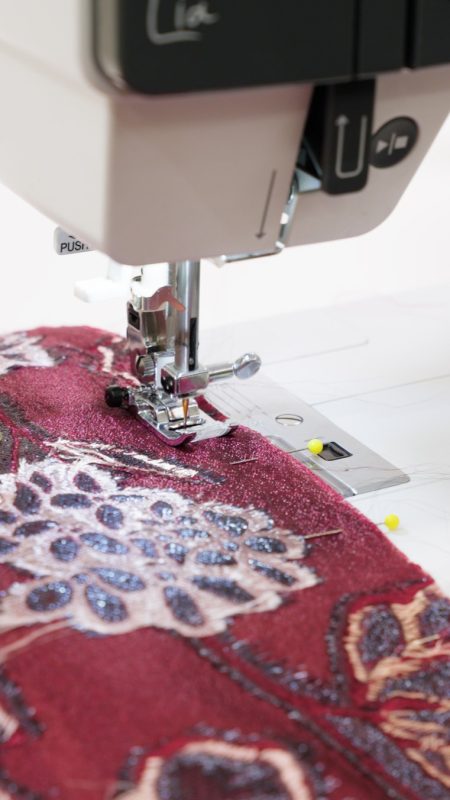
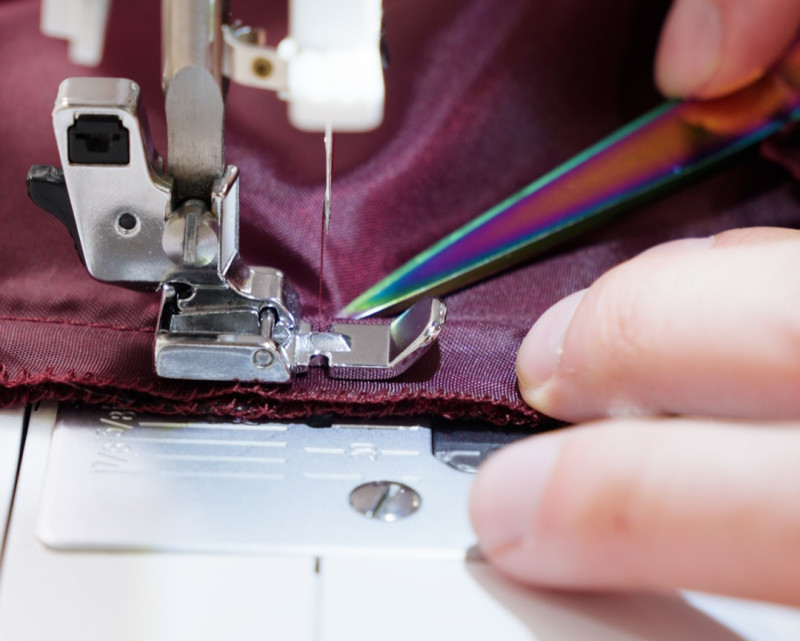
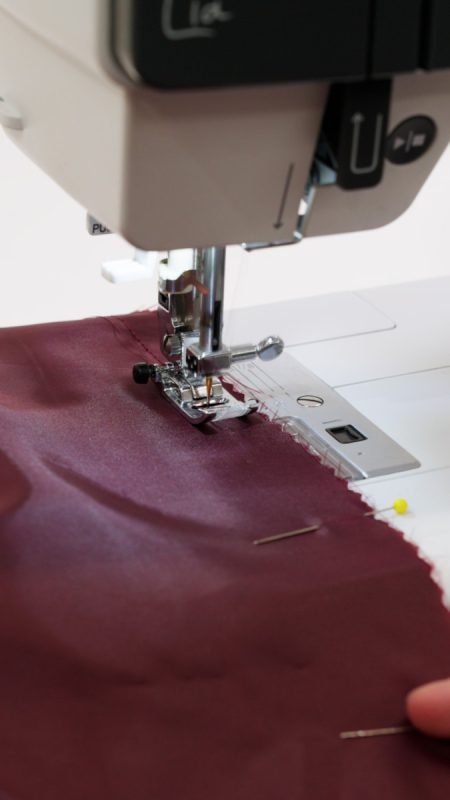
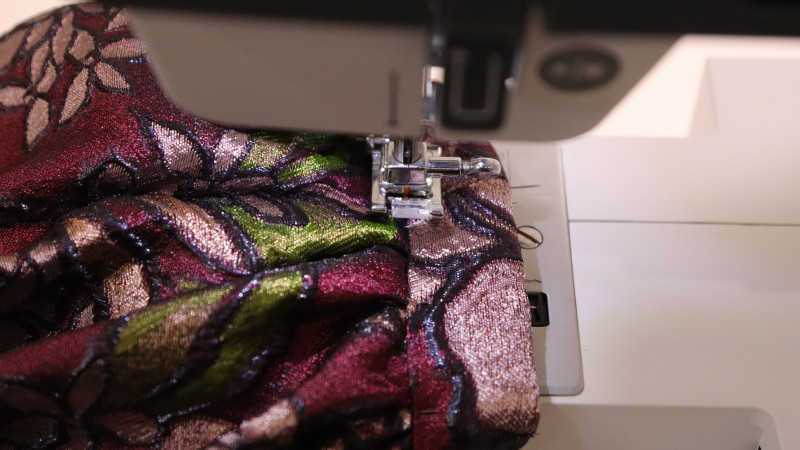
Sew with a 1/2″ seam allowance for all seams unless otherwise specified.
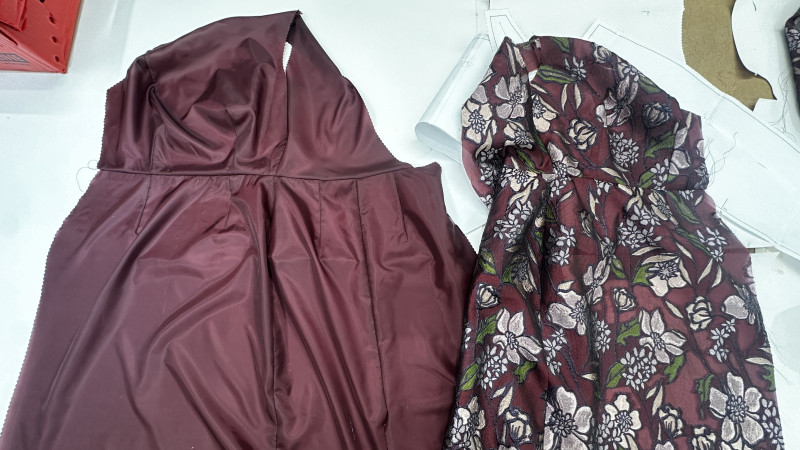
The instructions provided are designed to guide you through sewing the main fabric and the lining fabric for the Ophelia Dress simultaneously.
IMPORTANT NOTE –
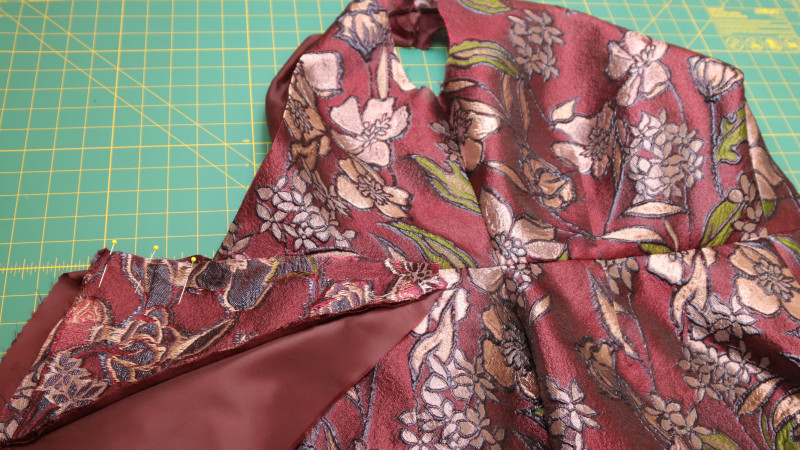
The main fabric and the lining must be sewn in opposite directions. Since the Ophelia dress is asymmetrical, the lining pieces should be cut in a mirror reflection from the main fabric. When cutting the lining, turn over the pattern pieces so they are facing down on the fabric.
Step 1
WAIST DARTS
Sew the waist darts on the Top Front.
Mirror this step for the lining.
Step 2
NECKLINE DART
Sew the neckline dart on the Top Front.
Mirror this step for the lining.
We recommend making a muslin to determine if you need to adjust the darts for a perfect fitting.
Step 3
TOP SIDE SEAM
Sew the Top Front and the Top Back Right at the side seam.
Mirror this step for the lining.
Step 4
SHOULDER SEAM
Sew the Top Front and the Top Back Right at the shoulder seam
Mirror this step for the lining.
Step 5
FRONT SKIRT DARTS
Sew the waist darts on the Skirt Front.
Mirror this step for the lining.
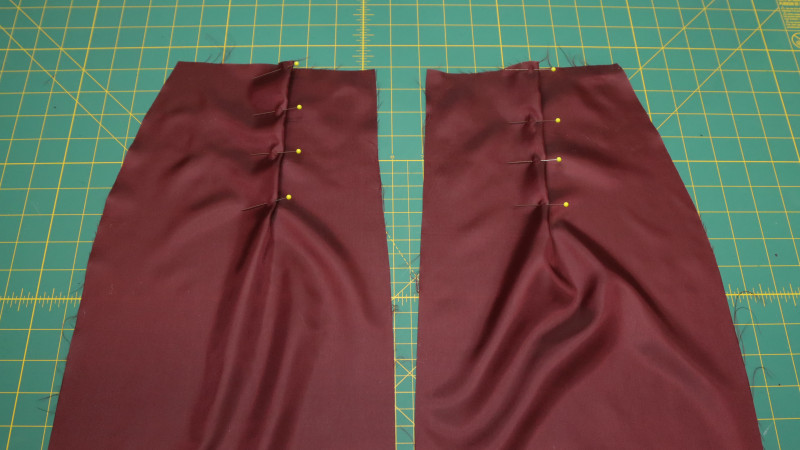
Step 6
BACK SKIRT DARTS
Sew the waist darts on the Skirt Back.
Mirror this step for the lining.
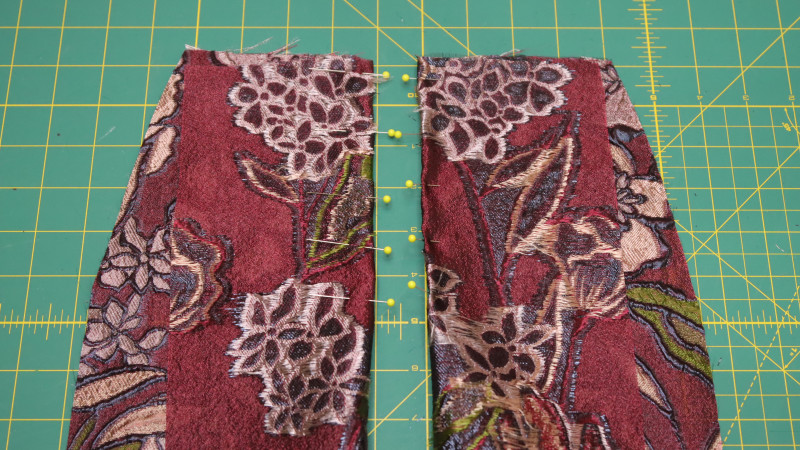
Step 7
SKIRT CENTER BACK
Sew the Skirt Back pieces at center back up to the slit notch.
Mirror this step for the lining.

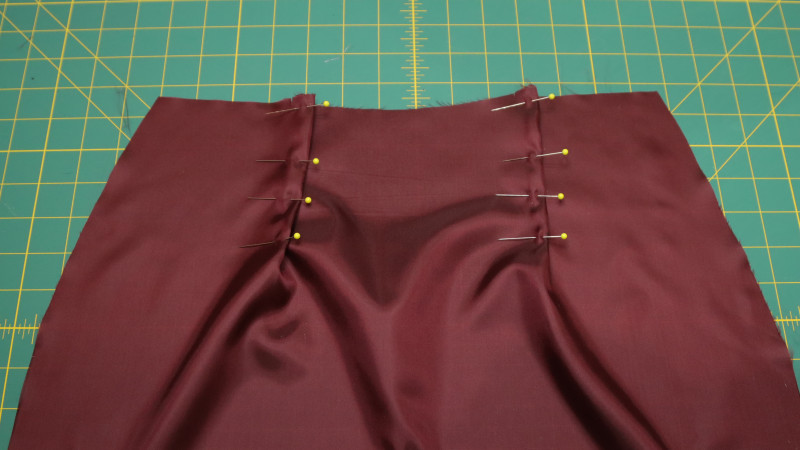
Step 8
SKIRT SIDE SEAM
Sew the Skirt Back pieces and the Skirt Front at the right side seam.
Mirror this step for the lining.
Step 9
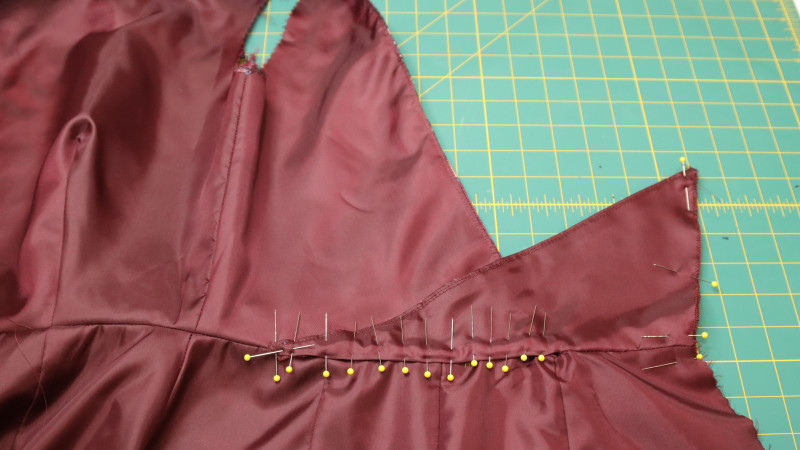
WAIST SEAM
Sew the Top and the Skirt together at the waistline.
Mirror this step for the lining.
Step 10
JOIN MAIN FABRIC & LINING
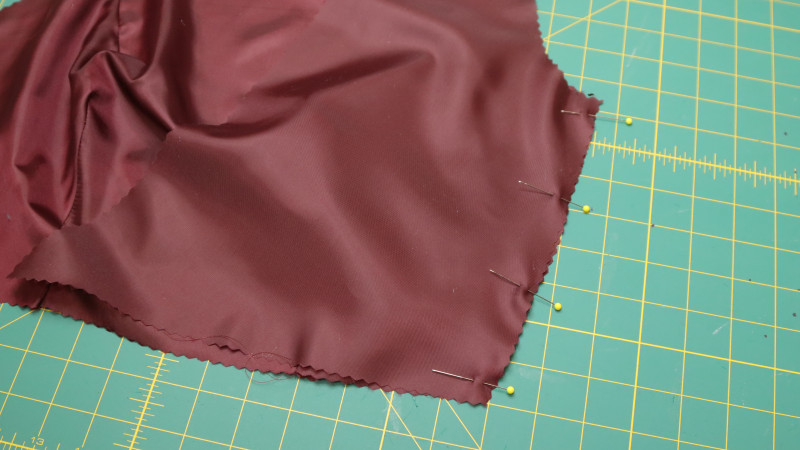
Right sides together, sew the main fabric and the lining around the neckline.
Leave the waistline area open to add the back left pattern.
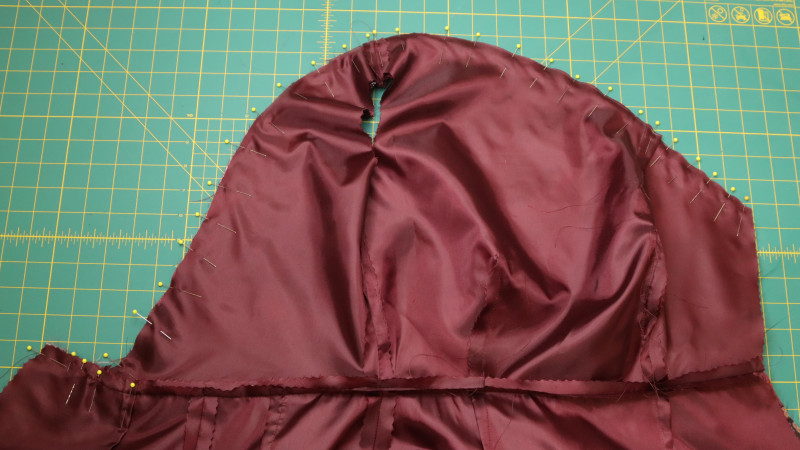
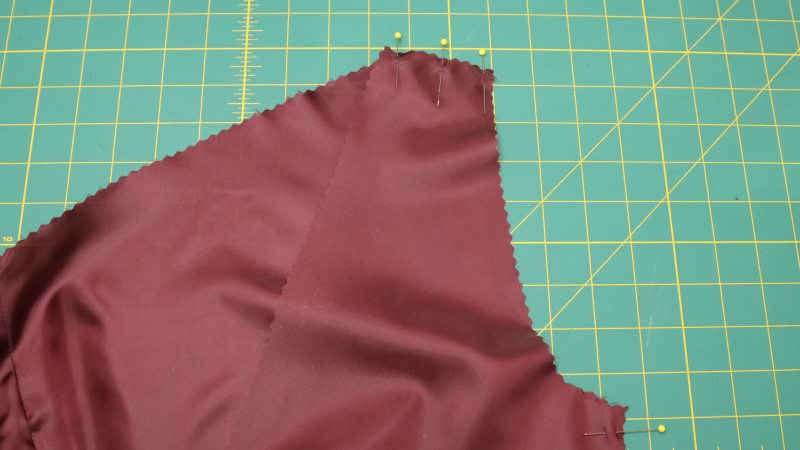
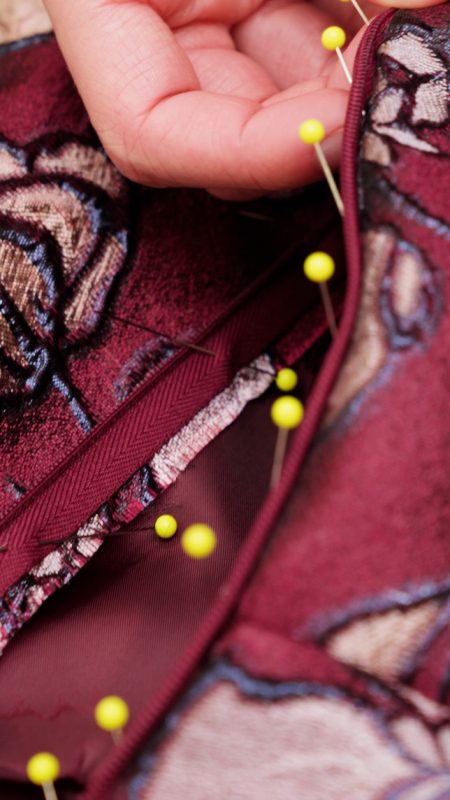
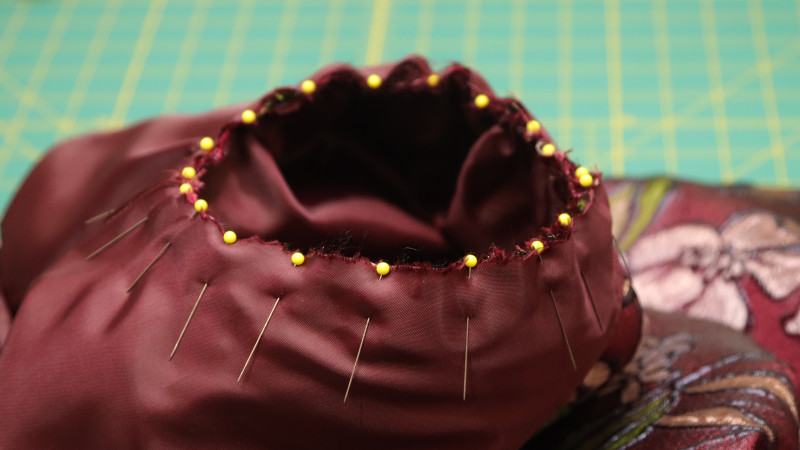
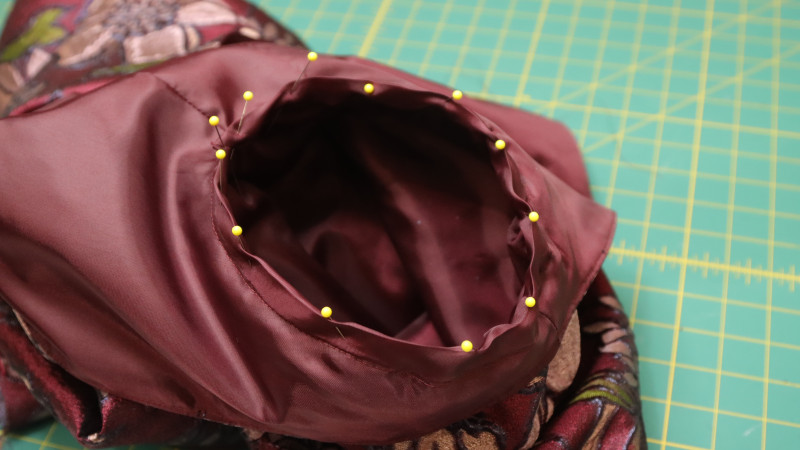
Step 11
UNDERSTITCH
Bring the seam allowance toward the lining and understitch 1/8” from the seam.
Step 12
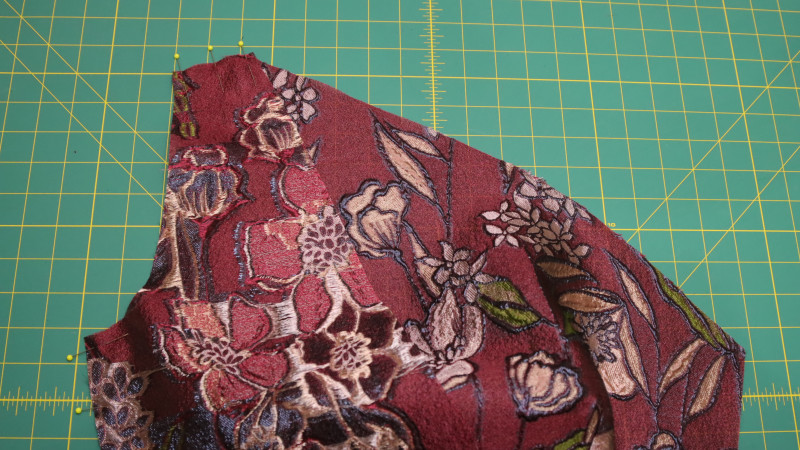
TOP BACK LEFT
Serge or overlock the raw edges.
Join the main fabric and the lining of the top back left piece.
Sew them across the top edge with right sides together.
Step 13
UNDERSTITCH TOP BACK LEFT
Bring the seam allowance toward the lining.
Understitch 1/8” from the seam.
Step 14
ATTACH TOP BACK LEFT
Sew the bottom edge of the main fabric to the waistline of the main fabric.
Step 15
BACK LEFT LINING
Sew the bottom edge of the lining to the waistline of the Lining.

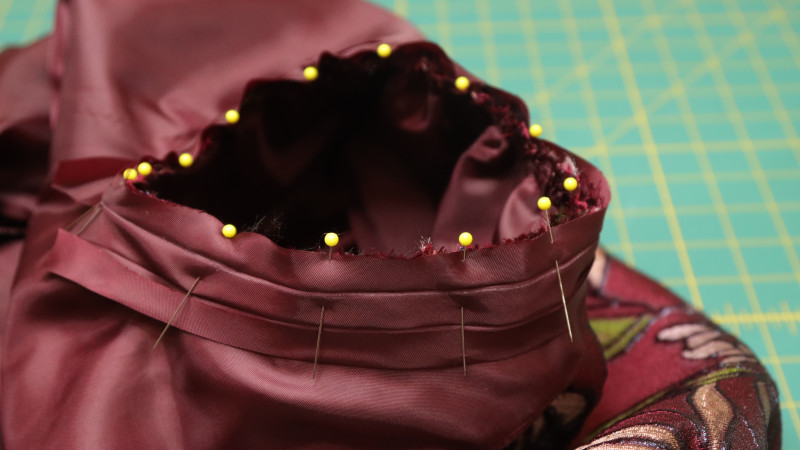
Step 16
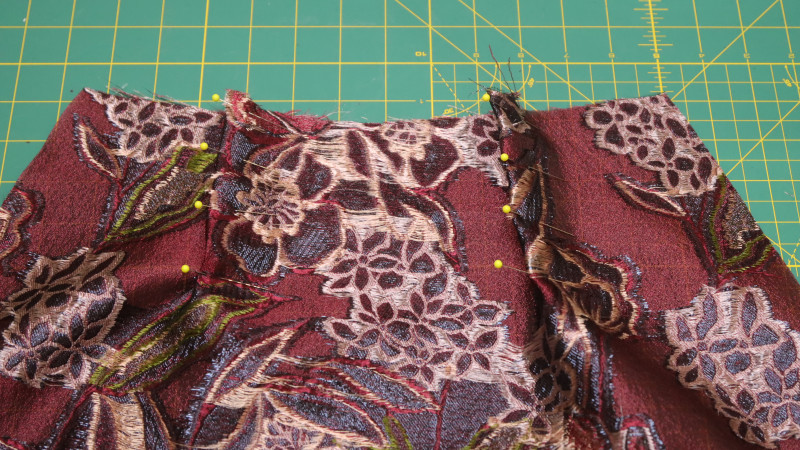
STITCH IN THE DITCH
Bring the Back Left piece behind the Back Right piece.
Fold in the rest of the seam allowance.
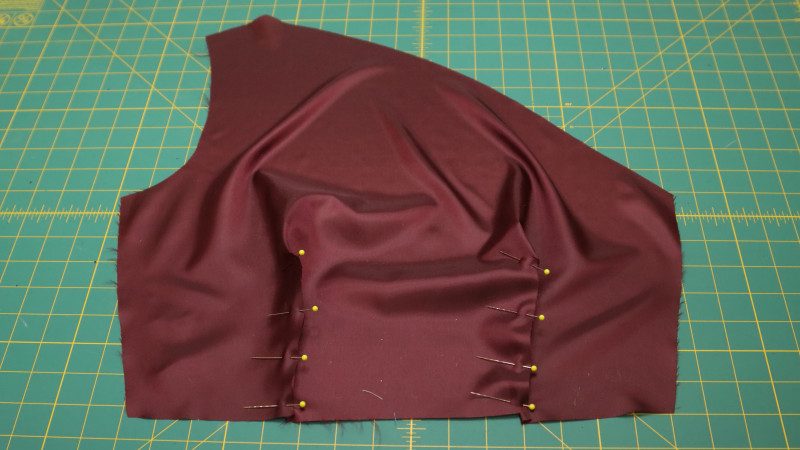
Sew the bottom of the Top Back Left by stitching in the ditch from the inside of the lining waistline.

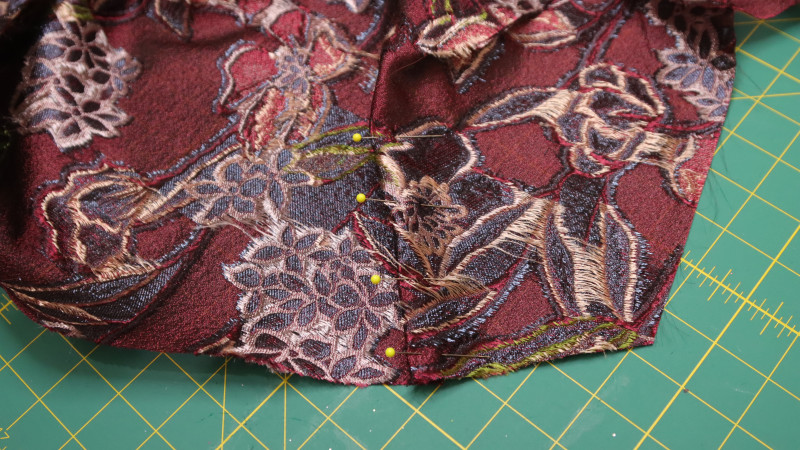
Step 18
MAIN FABRIC
Sew the rest of the side seam below the zipper.
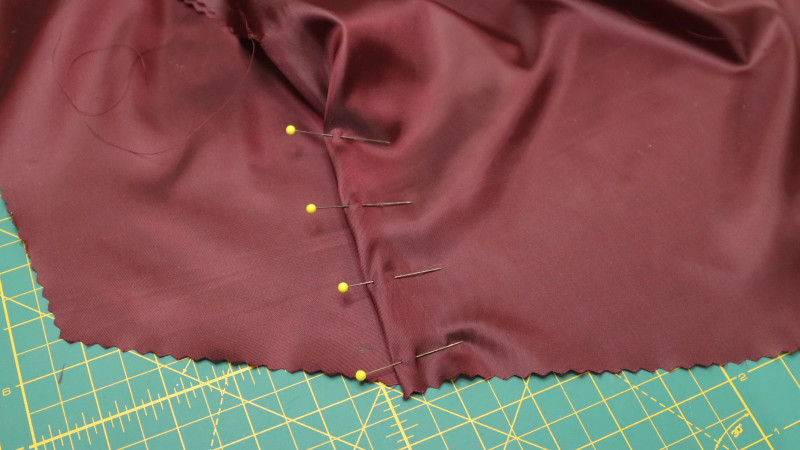
Step 19
SANDWICH ZIPPER
Turn the lining over with right sides together.
Sandwich the zipper between the main fabric and the lining.
Pin and sew the zipper to the lining fabric.
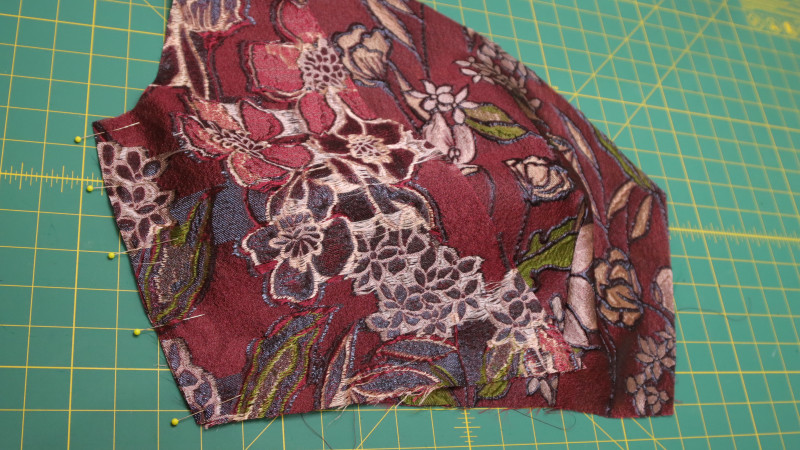
Step 20
LINING
Sew the rest of the side seam below the zipper.
Step 21
HOOK AND EYE
Sew the hook on one side above the zipper.
Sew the eye on the other side above the zipper.
Step 22
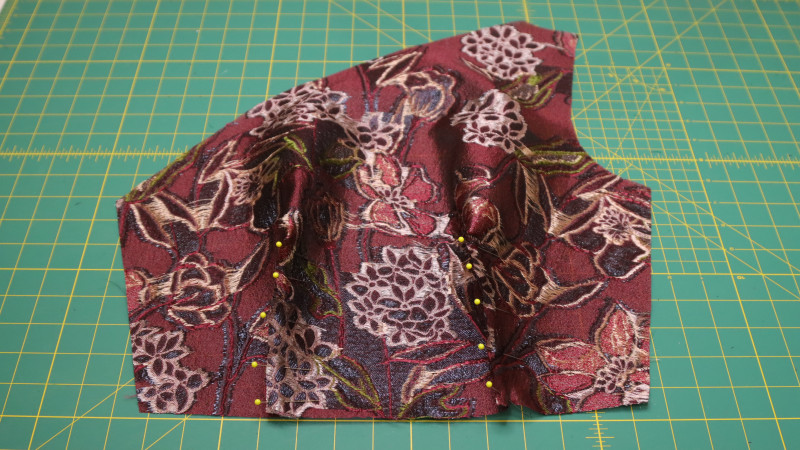
SLEEVE INSEAM
Close the sleeve by sewing the inner seam.
Repeat this step for the lining.
Step 23
JOIN THE SLEEVE
Join the main fabric and the lining sleeve with wrong sides together.
Sew 2 rows of basting stitches around the top of the sleeve cap.
Sew 2 rows of basting stitches around the bottom of the sleeve.
Step 24
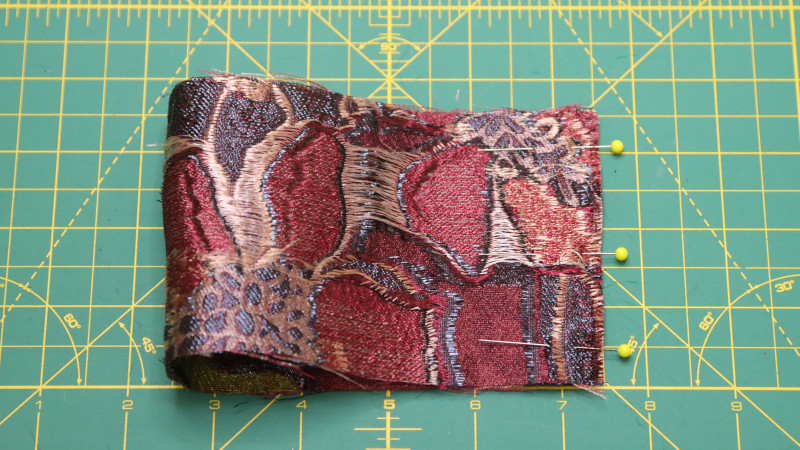
SLEEVE CUFF
Sew the seam of the cuff to create a loop.
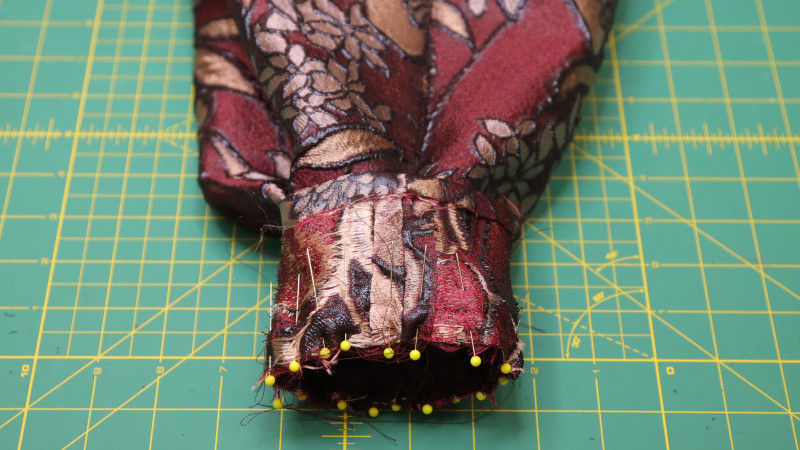
Step 25
ATTACH CUFF
Gather the bottom of the sleeve.
Sew one side of the cuff around the outside of the sleeve.
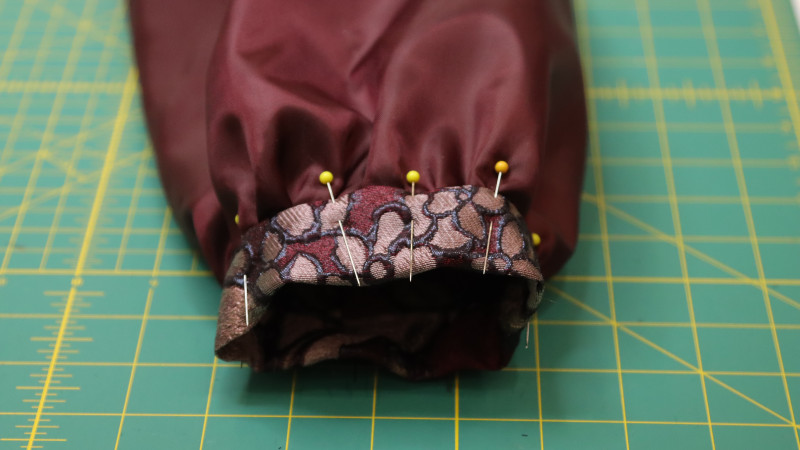
Step 26
Pin the other side of the cuff to the inside of the sleeve.
Stitch in the ditch from the outside.
Step 27
SET-IN SLEEVE
Create gatherings throughout the sleeve cap.
Set-in the sleeve.
Sew around the armhole.
Step 28
BIAS BINDING
Create 2″ bias binding from the lining fabric.
Press it with 4 separate sections of 1/2″.
Sew one side of the binding to the outside of the armhole.
Turn the other side of the binding and sew to the inside of the armhole.
Step 29
INVISIBLE HEM
Sew the main fabric and the lining together at the slit on center back.
Sew the 1” hem at the bottom with a 1/2″ double-folded invisible hem.
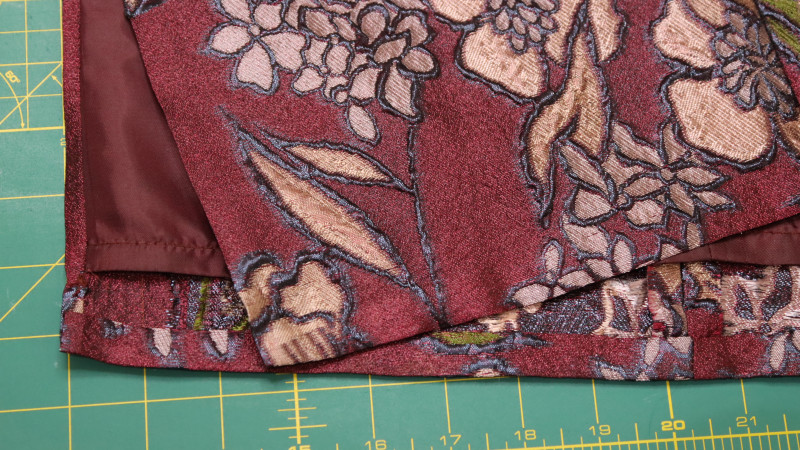
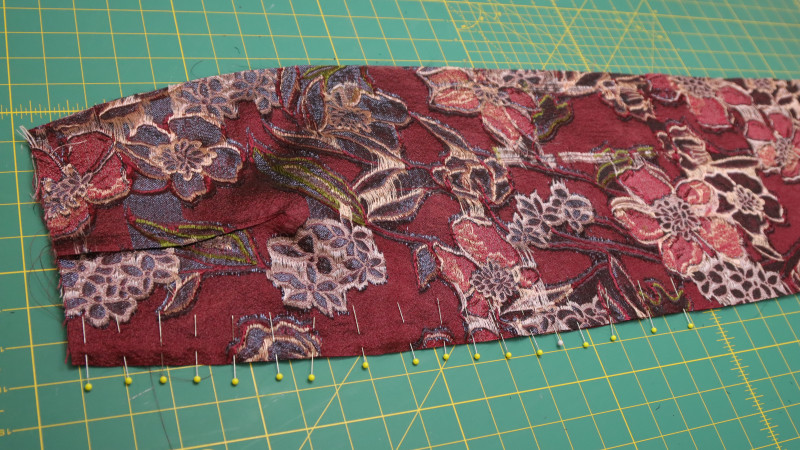
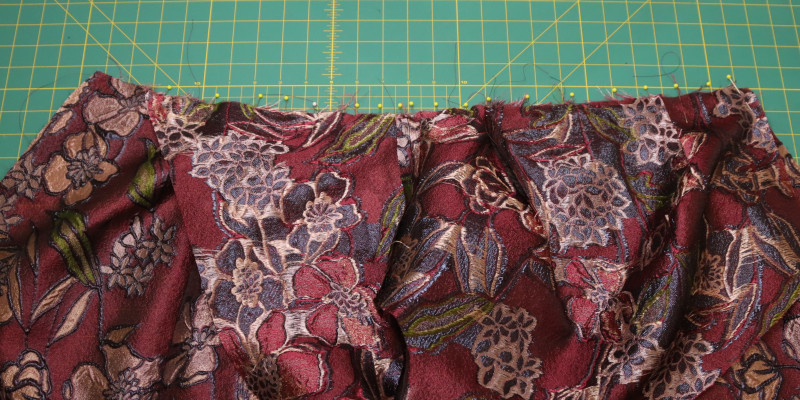
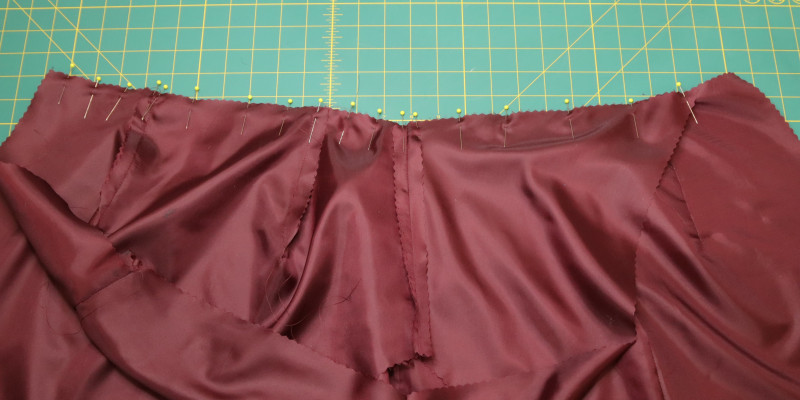
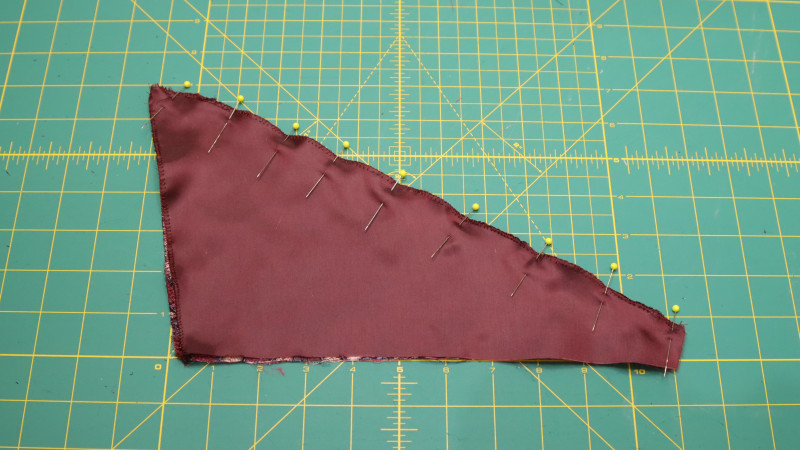
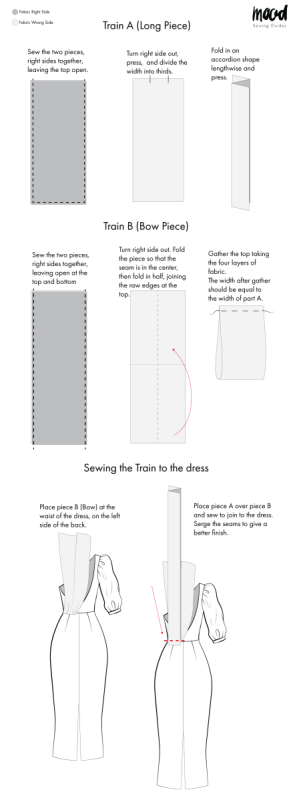
Step 30
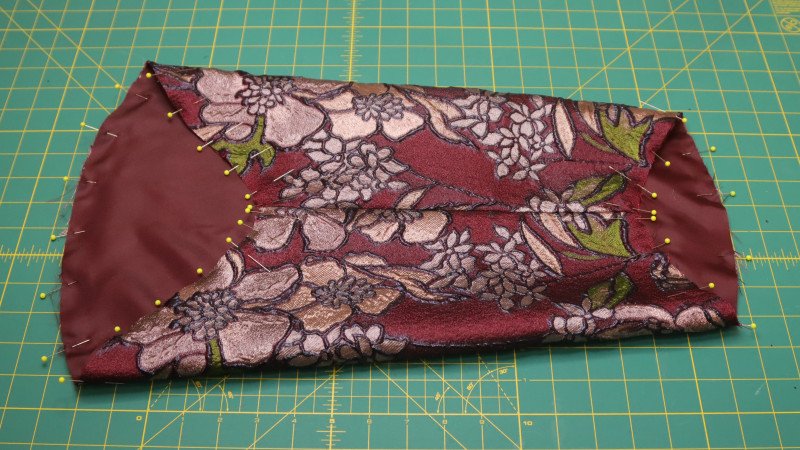
TRAIN
Add the final touch by sewing the train onto the back of the dress!
The Completed Ophelia Dress Free Sewing Pattern by Mood Fabrics
We can’t wait to see your version of the Ophelia Dress! Whether you choose Jacquard, Taffeta, or Duchesse Satin, this pattern is the perfect canvas for your creativity and sewing skills.
Share this post with a friend (or two!), download The Ophelia Dress Free Sewing Pattern, and show us which fabrics and colors you choose, using the hashtags #MoodOpheliaPattern & #MadeWithMood.
This is stunning!
Thank you very much, we hope you enjoy!
What bra would you wear with this? Or how could you sew something in that would give breast support? or has this been designed for women with no boobs?
Hello, you can go with a few options of breast support such as strapless bra, pasties, pads, or a backless adhesive bra. You can also add bra cups into this pattern by sewing them in between the main fabric and the lining.
Really excited to make this one. Just a heads up, definitely measure the pattern before deciding what size to cut. The pattern is much smaller than what the size chart says. I double checked the print dimensions, the size, everything but my muslin sewed up 2-3 inches smaller than expected. I’ll have to reprint the pattern and go with a much larger size.
Hello, the pattern pièces says to cut 2 sleeves and two lining ,is it a mistake ?
Yeah it looks like it should only be one sleeve and one lining since the dress only has one sleeve. Thanks for pointing that out!
I am wondering why the sleeve is a mirrored ‘Cut 2’ as well as the sleeve cuff, when there is only 1 sleeve? Don’t you only need 1 main fabric sleeve, 1 lining sleeve and 1 main fabric sleeve cuff?
Hey Erin, you’re right. You only need to cut 1 sleeve unless you’re going to line it, in which case you can cut 1 sleeve with the main fabric and 1 sleeve with the lining.
Has anyone actually made a dress with this pattern? I tried to do a calico for a formal event coming up, in size 10 according to my measurements, but it was way too large up top, gaping at the back and it was too big to simply adjust. Is it just me or is there an issue with the back pieces being somewhat off?
Hey Michelle, for most of the patterns on our blog, I will reference not only the body measurements in the size chart, but also the finished garment measurements. This is because most patterns are made with a little bit of ease (the garment is not totally skin tight because it’s not comfortable and it’s difficult to put on and take off), but sometimes I don’t want as much ease as the pattern has in it! Normally I wear a size 8, and my measurements line up with a size 8, but I would make a size 6 in this dress because the finished garment measurements are exactly the same as my own measurements without ease and I want this dress to be figure hugging.
I also have that problem I don’t know what to do
Hi, I’m sewing this dress and purchased the recommended 2yds of satin for the train/bow. But with the size of the pattern pieces, each needing to be Cut x2, I can’t see how 2yds is enough. Am I doing something wrong?
Hey Erin, this is because the dress is lined. That means, you have to cut the instructed number of pieces out of main fabric and then the same amount out of the lining fabric. Additionally, the bow is made out of a different fabric from the dress. If you look at the “Shop This Look” widget on the side, it should tell you exactly how much you need of each type of fabric (even if you don’t use our exact fabrics) to be able to achieve this look. I hope this helps!
Hi Marisa,
Yes, sorry to clarify I know there is lining, main fabric and the fabric for the bow. I am only referring to the bow/train pieces and the fabric for those. That said, your blog/pattern guide says only 2yds of satin fabric are required for the bow and train. I bought two yards of satin and laid it out and 2 yds of fabric is not enough for 2 cuts each of the two bow and train pattern pieces.
I think you’re right. I just took a look at the pattern and it looks like the pattern pieces for the train take up an area of 9 pieces of paper by 5 pieces of paper (with a paper size of 8.5X11). This means that you would probably need 4 yards of fabric since it says to cut 2 of each piece of the bow in the back. That being said, the instructions say that the bow gets folded in an accordion shape at the end, so if you don’t have enough fabric, you could always cut 1 of each pattern piece and the bow would just be more narrow.
I made this dress but struggling to get the back to fit nicely. It’s gapping I don’t know why. Overall, the dress is stunning, love how it shows off my hips. There’s just one problem. And thank you Moodfabric for your beautiful patterns
Hi Modiehi, where is the dress gapping for you?
The back pieces