

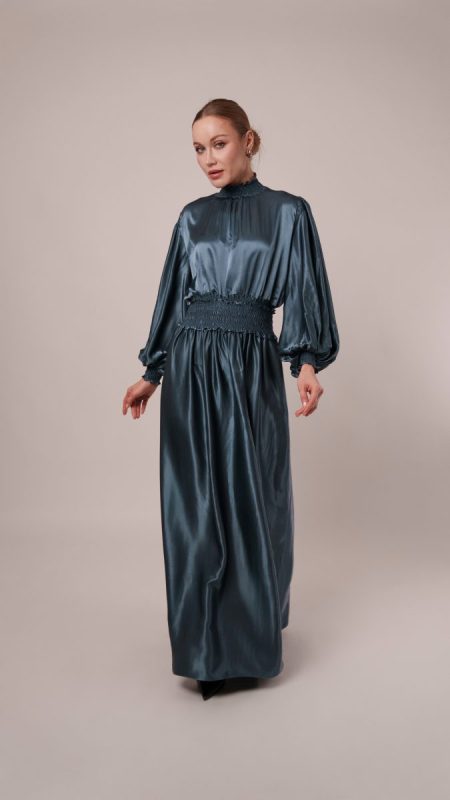
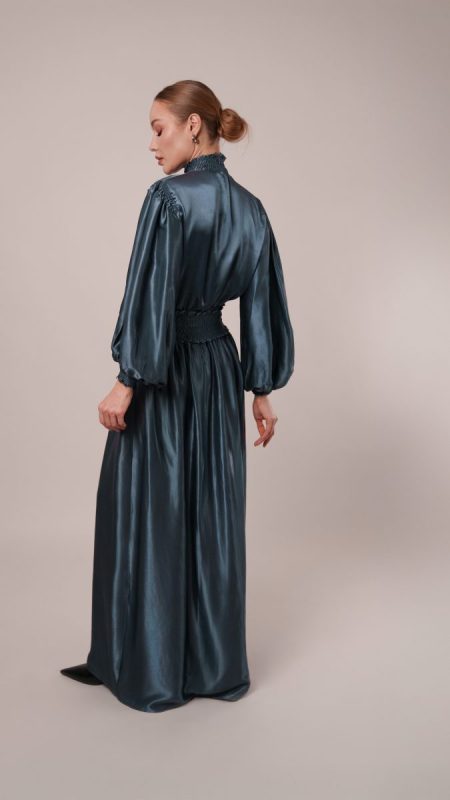
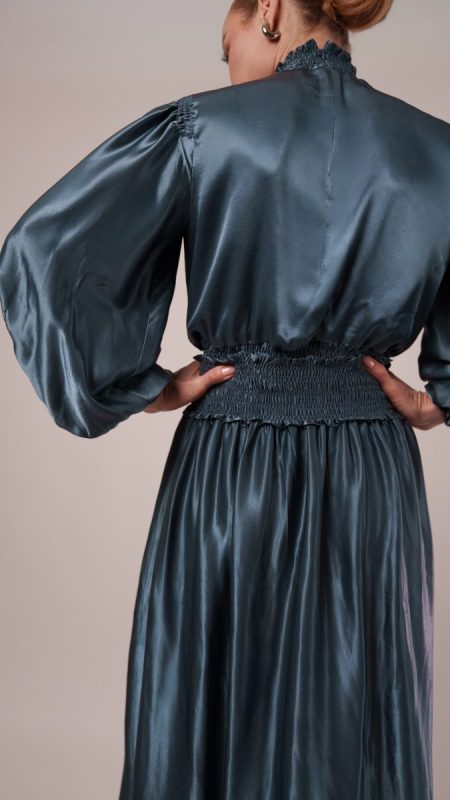
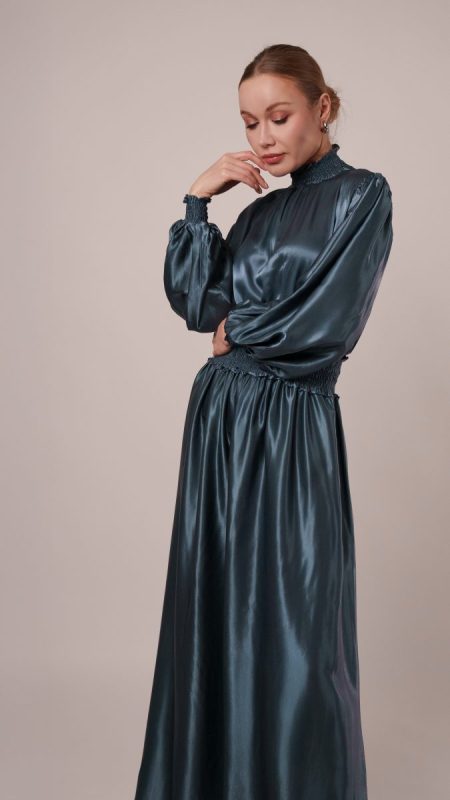
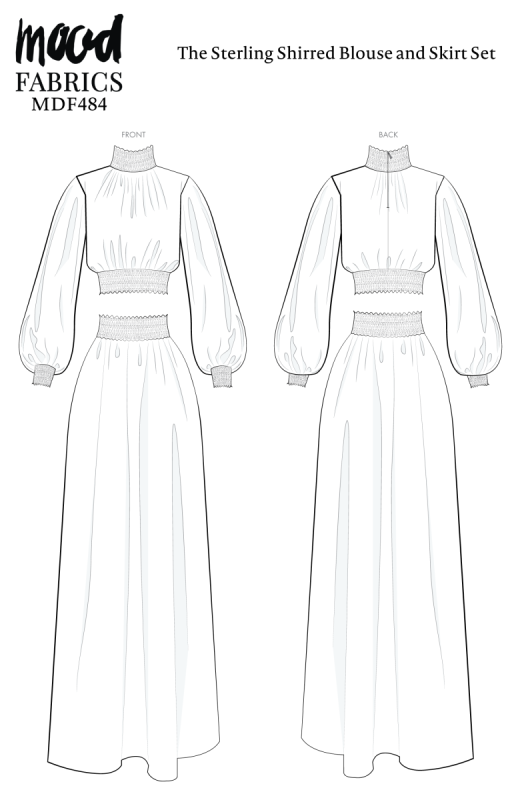
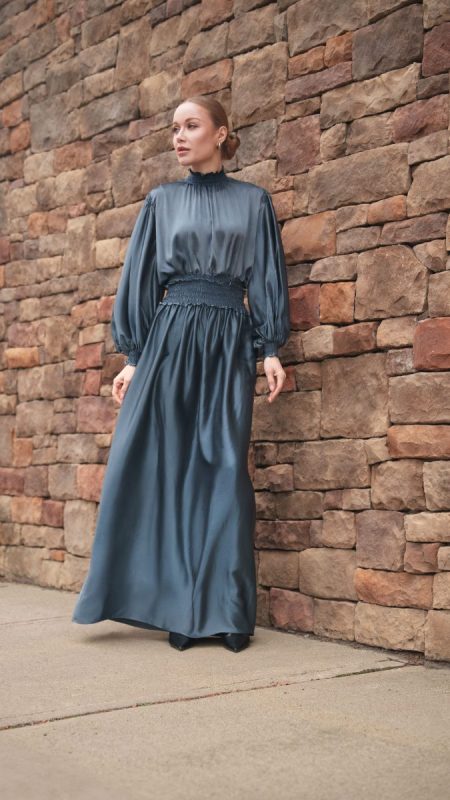
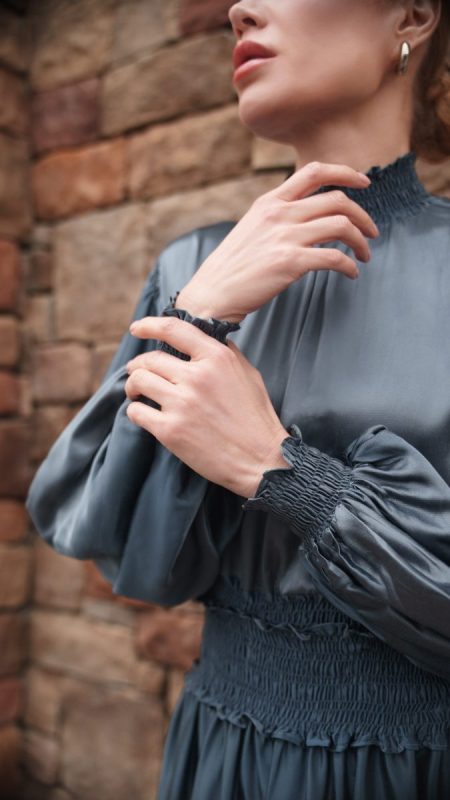
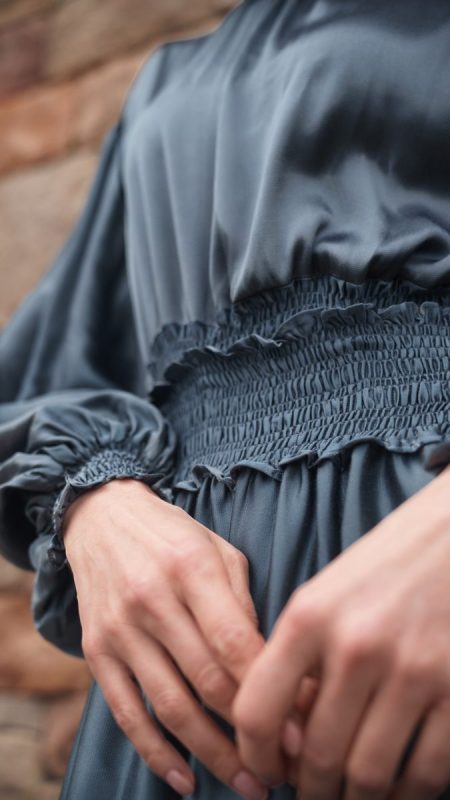
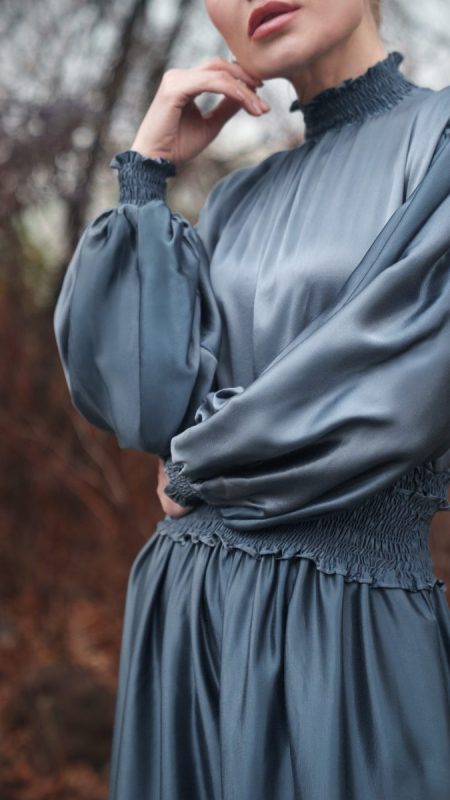
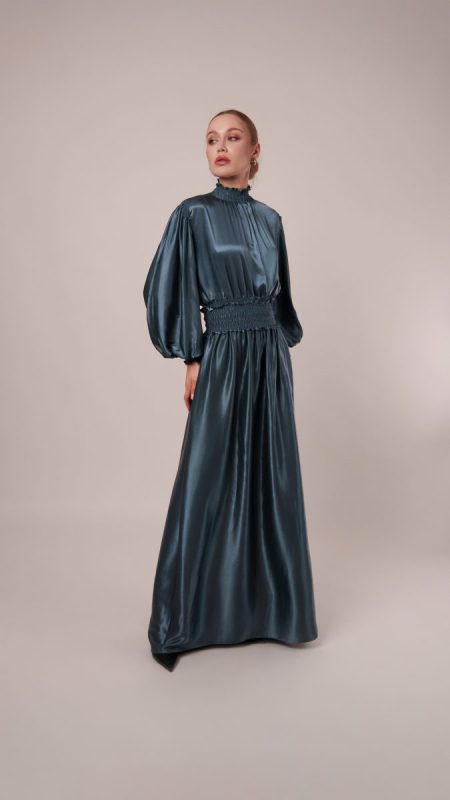
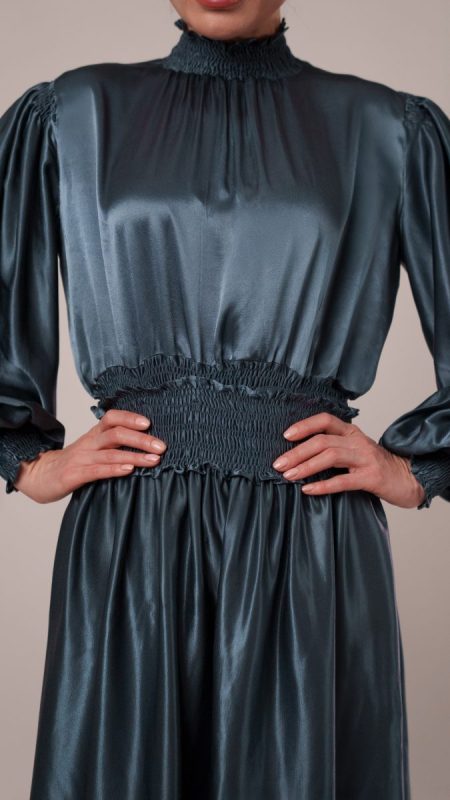
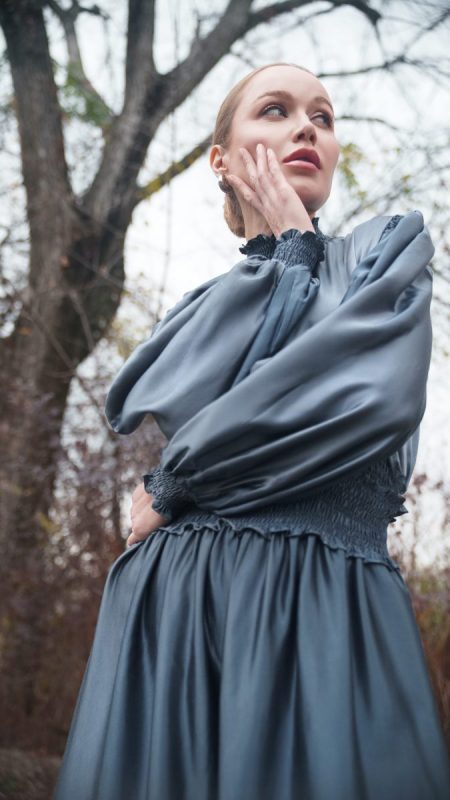
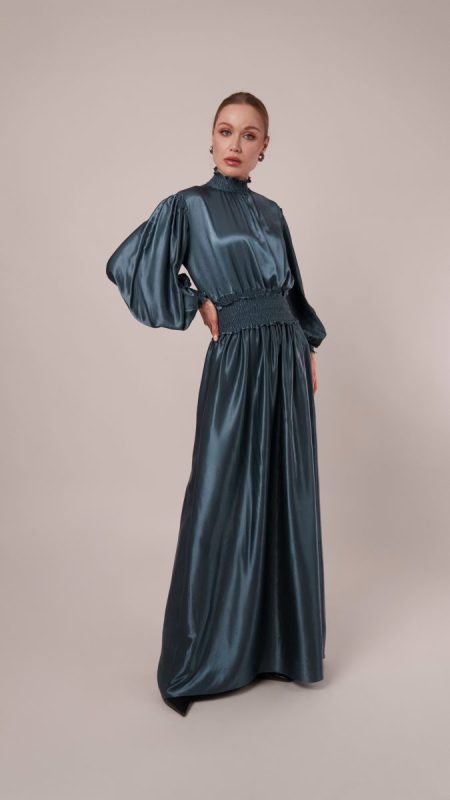
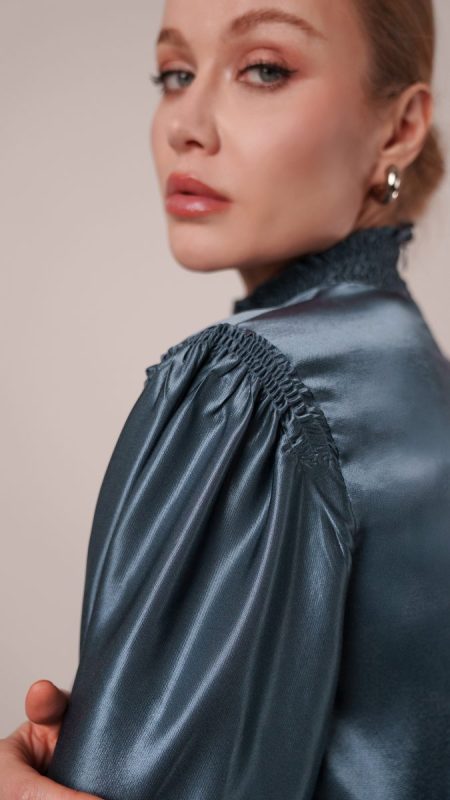
Meet the Sterling Shirred Blouse and Skirt Set, a pattern designed to bring effortless sophistication to your wardrobe. Crafted in a fluid viscose satin, this ensemble drapes over the body with a liquid sheen, giving the impression that it was poured on rather than sewn. The silhouette is modest and refined, yet far from boring. The shirring at the collar, cuffs, and waist of both the blouse and skirt adds texture and dimension, playfully catching the light with every step, strut, sway, and turn.
Versatility is built into the design: shorten the skirt for a flirty, tights-ready look, or transform the blouse by omitting the sleeves for a bold, sleeveless statement. If you’ve never incorporated shirring into your sewing practice, this pattern is the perfect opportunity to learn. It guides you through each gathered detail, helping you master a technique that delivers maximum visual impact with minimal effort.
Essential Materials & Sizing Guide for the Sterling Shirred Blouse and Skirt Set
Continue reading for a breakdown of what knowledge and materials you need for creating your very own shirred blouse and skirt set! We’ve got you covered with the recommended materials we used—if you want to follow along exactly—as well as a curated list of alternative fabric type recommendations if you want to customize your own version. The Sterling Shirred Blouse and Skirt Set free sewing pattern download includes technical drawings for seam and shirred blouse and skirt set visibility, plus a size chart to help you find your perfect fit!
Purchase Products Used Below:
Quantities indicated are for sewing a size small shirred blouse and skirt set. Toggle the ‘SHOP THIS LOOK’ box to find quantity estimates for other sizes.
- 4.5 yards of Sustainable Viscose Fluid Satin – Petrol – Mood Exclusive Elliana Collection
- 1 each of Invisible Zipper 24″ by YKK – 321 Antique Blue
- 2 each of Gutermann Sew All Thread 100m – 117 Peppercorn
- 3 each of Gutermann Elastic Thread 10m – 5019 White
- MDF484 – Sterling Shirred Blouse and Skirt Set Sewing Pattern (Free download below!)
Alternative Fabric Type Recommendations:
The Sterling Shirred Blouse and Skirt Set sewing pattern is best suited for lightweight fashion fabrics. Explore other fabric types or colors from our featured collections for your shirred blouse and skirt set with the links below.
Download Your Free Sewing Pattern
Submit your name and email in the form below to receive the download link for the Sterling Shirred Blouse and Skirt Set free sewing pattern directly in your inbox. Mood Sewciety Patterns will send your free download link via email with the subject line: ‘Your Free Download from Mood Sewciety – The Sterling Shirred Blouse and Skirt Set’ (in PDF format for A4 and letter-size printing).
© MoodFabrics.com / MoodSewciety.com – Mass production, resale, or distribution of this pattern in any form is strictly prohibited.
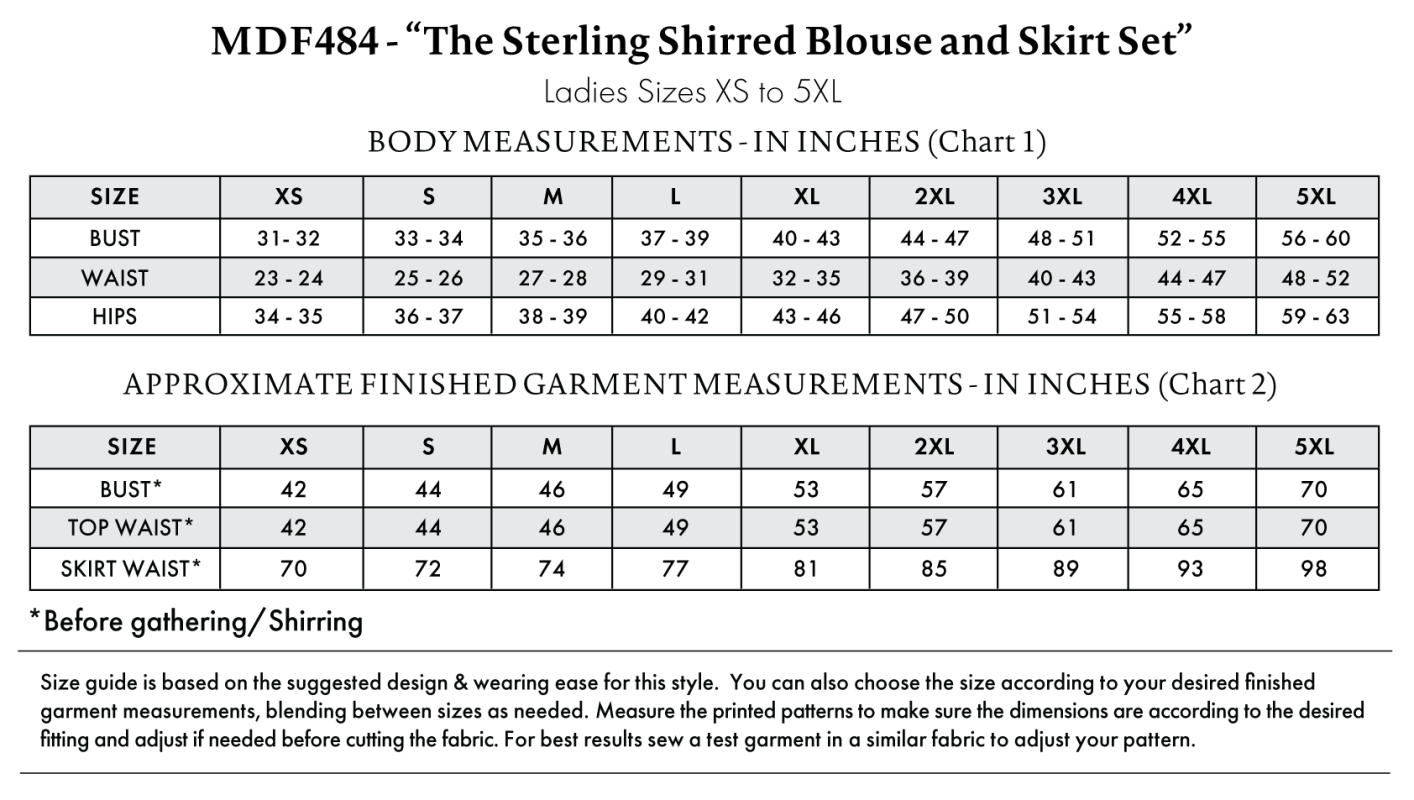
Find Your Perfect Fit
The Sterling Shirred Blouse and Skirt Set Sizing Guide is based on the suggested design & wearing ease for this style. You can also choose the size according to your desired finished garment measurements, blending between sizes as needed. Measure the printed patterns to make sure the dimensions are according to the desired fitting and adjust if needed before cutting the fabric. For best results, sew a test garment in a similar fabric to adjust your pattern.
Approximate finished garment measurements are before gathering/shirring.
Note: Always read all the instructions before cutting the fabric!
How to Sew The Sterling Shirred Blouse and Skirt Set
The instructions provided below are designed to guide you through sewing the Sterling Shirred Blouse and Skirt Set from start to finish.
4 Tips for Shirring Satin
⇒ Wind at least 3 or 4 bobbins with the elastic thread before starting your project. The shirring elastic on the bobbin runs out quickly so you’ll have to change out your bobbin several times. It’s just easier when you have them wound already.
⇒ Stretch the elastic thread slightly with your fingers as the bobbin is being wound so that the elastic thread is under tension while you’re sewing with it.
⇒ Always iron the sections of the garment after shirring. This will help the elastic thread bunch up even more and it will make the gathered fabric lay flat.
⇒ While sewing rows of shirring parallel to the previous row you just sewed, stretch the previous rows so that the fabric is laying flat. This will ensure that all your rows are evenly spaced apart.

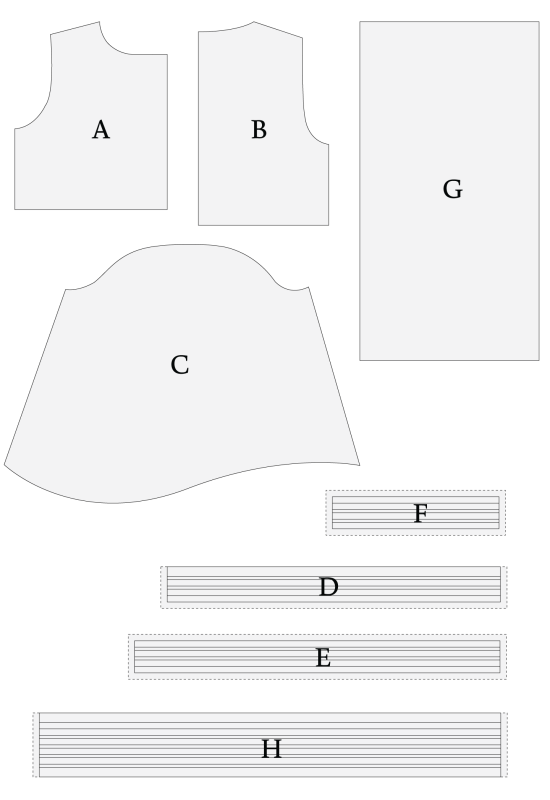
Pattern Pieces & Fabric Cuts Needed
- (A) TOP FRONT
- FABRIC – CUT 1 ON FOLD
- (B) TOP BACK
- FABRIC – CUT 1 ON FOLD
- (C) SLEEVES
- FABRIC – CUT 2 MIRRORED
- (D) TOP WAISTBAND
- FABRIC – CUT 2
- (E) COLLAR
- FABRIC – CUT 1
- (F) CUFFS
- FABRIC – CUT 2
- (G) SKIRT
- FABRIC – CUT 2 ON FOLD
- (H) SKIRT WAISTBAND
- FABRIC – CUT 2 ON FOLD
Sew with a 1/2″ seam allowance for all seams unless otherwise specified.
Step 1
SHIRRING PREPARATION
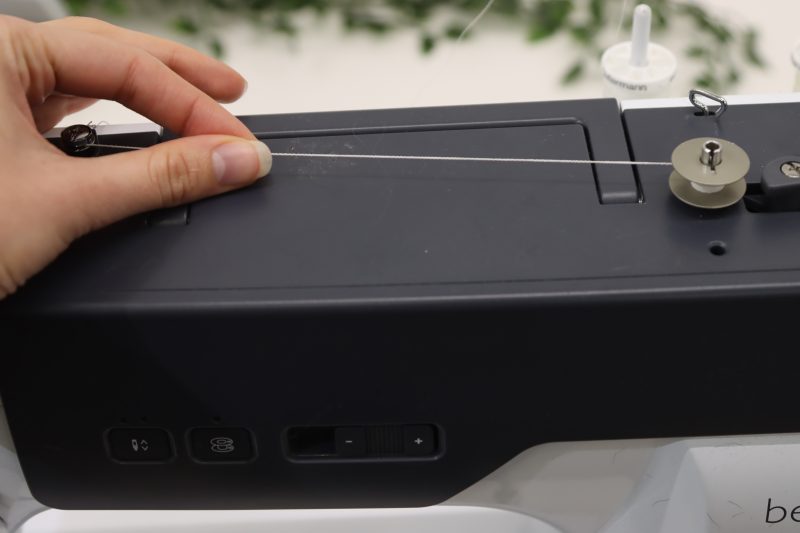
- Before you start sewing anything, you need to wind several bobbins with the elastic thread (I say several because the elastic thread is thick, therefore not as much of it can fit on a bobbin, therefore it runs out quickly).
- Thread your bobbin winder the same way you would for any other type of thread, but with the elastic thread.
- While the bobbin is being wound with the elastic thread, use your fingers to slightly pinch the elastic thread as it is being wound so that it is being stretched slightly while the bobbin is winding. This is really important. You want to make sure the elastic is stretched around the bobbin so that when you sew with it, the elastic scrunches the fabric with it.
- When you’re done winding a few bobbins with the elastic thread, don’t load the elastic bobbin into the machine just yet. We’re going to sew with regular thread first.
Step 2
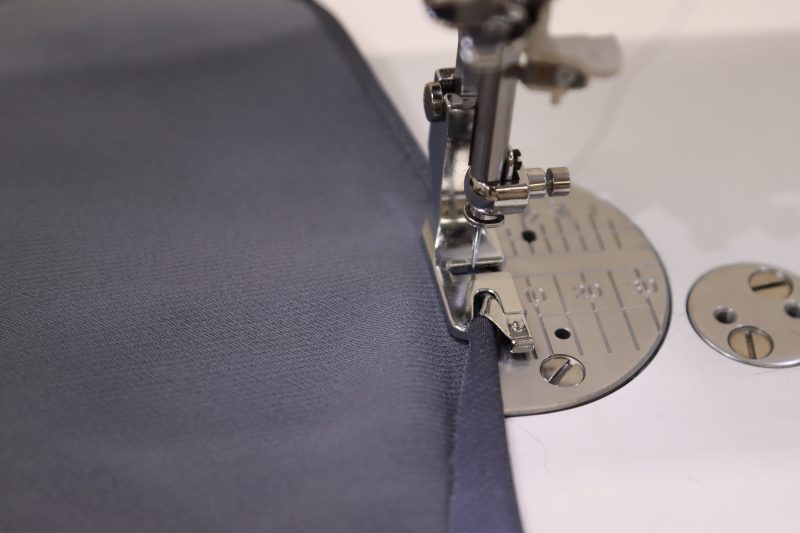
BABY HEMS
- Using a rolled hem foot (or by sewing a teeny tiny hem with a regular foot and a lot of patience), sew a tiny rolled hem along the edges of the following pieces:
- Both long sides of both skirt waistband pieces.
- One of the long sides of both top waistband pieces.
- One of the long sides of the collar.
- One of the long sides of both cuff pieces.
- Note: If you look at the technical drawings for the blouse and skirt, you’ll see why we’re hemming both sides of the skirt waistband but only one side of the other pieces.

Step 3
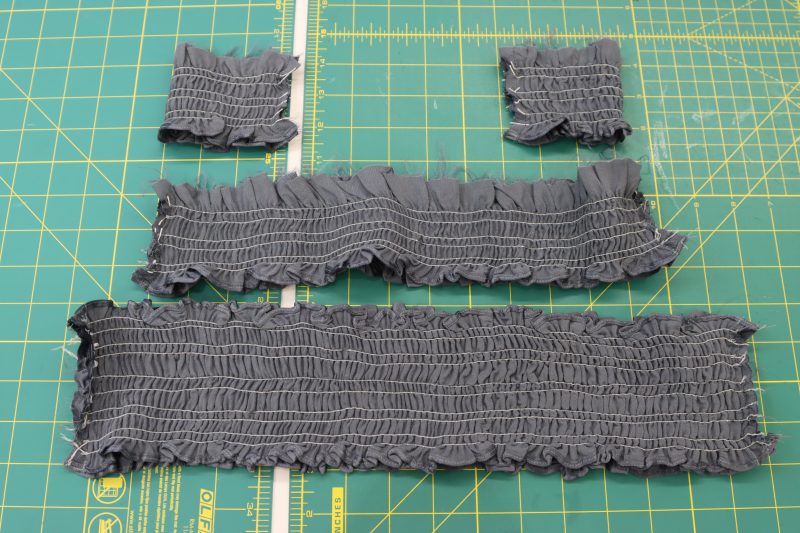
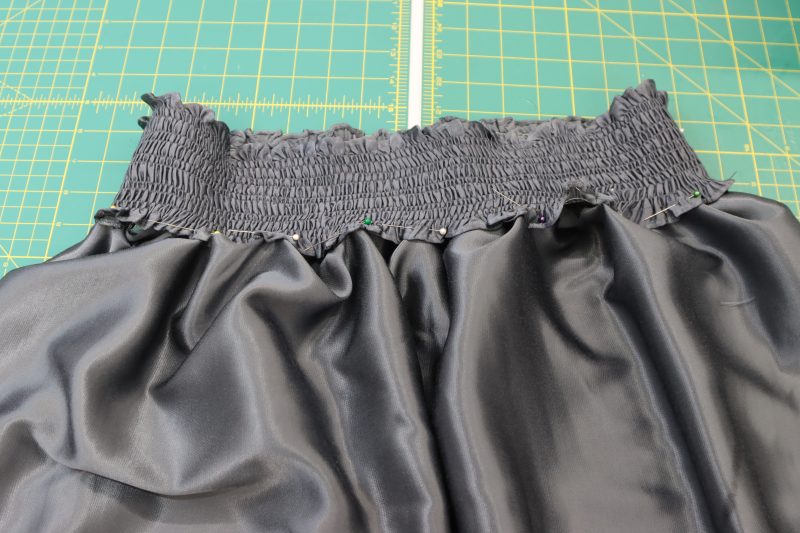
SHIRRING
- Load the bobbin with the elastic thread into the machine, but just use regular thread for your top thread.
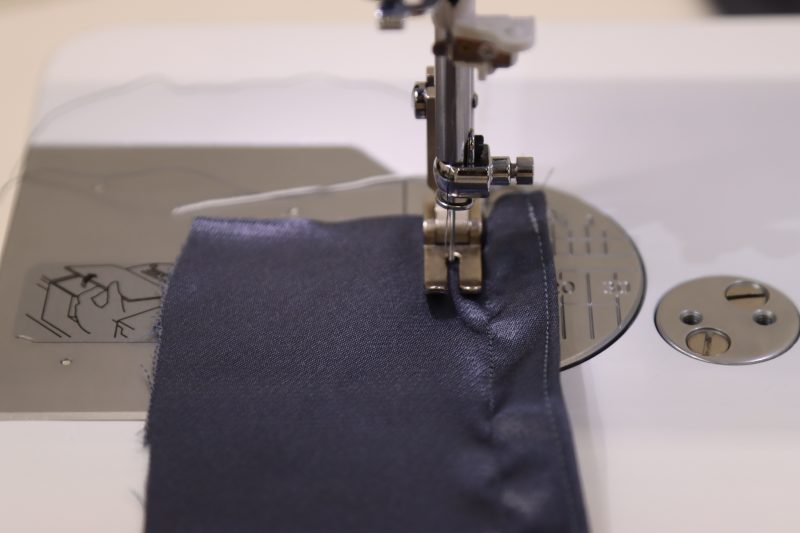
- Set your stitch length to 2.5 millimeters.
- Start with the collar piece first. Place the collar piece under the presser foot with a ½ inch seam allowance from the hemmed edge. Begin sewing in a straight line until you get to the other side of the collar. Make sure to backstitch a little bit on both sides.
- Sew another stitch parallel to the one you just sewed with ¼ inch seam allowance.
- Sew another stitch parallel to the previous one with ½ inch seam allowance.
- Sew another stitch parallel to that one with ¼ inch seam allowance.
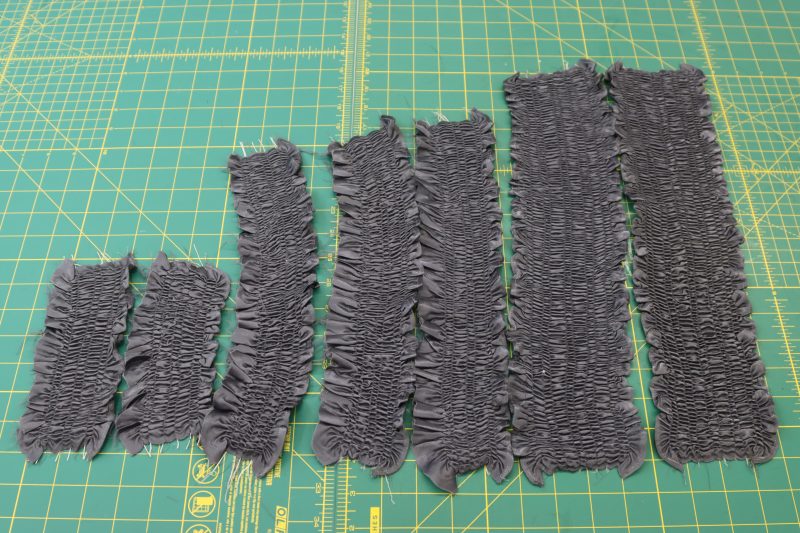
- You’re going to repeat this pattern for the collar, cuffs, and waistband pieces. Here are the specifications for each piece.
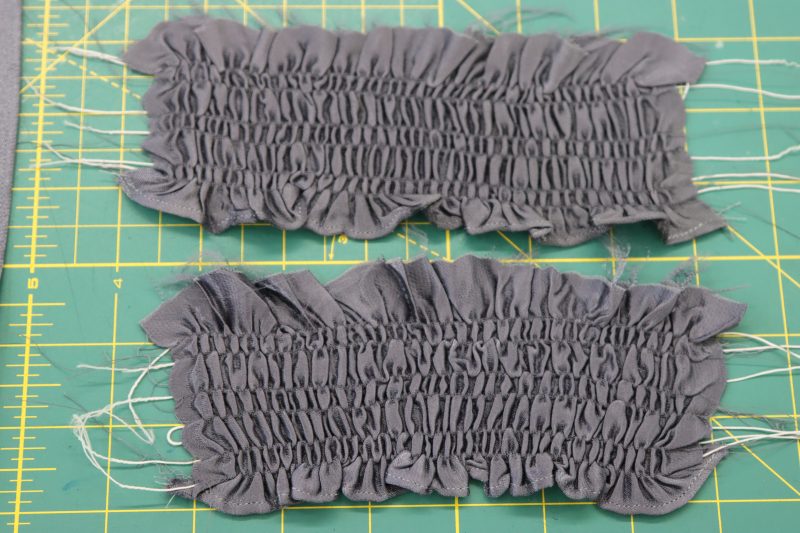
- The collar should have 6 lines of shirring in total (3 sets of 2, spaced ½ inch apart from each other).
- The cuffs should be the same as the collar.
- The blouse waistband should be the same as the collar and the cuffs.
- The skirt waistband should have 10 lines in total (5 sets of 2, spaced ½ inch apart from each other).
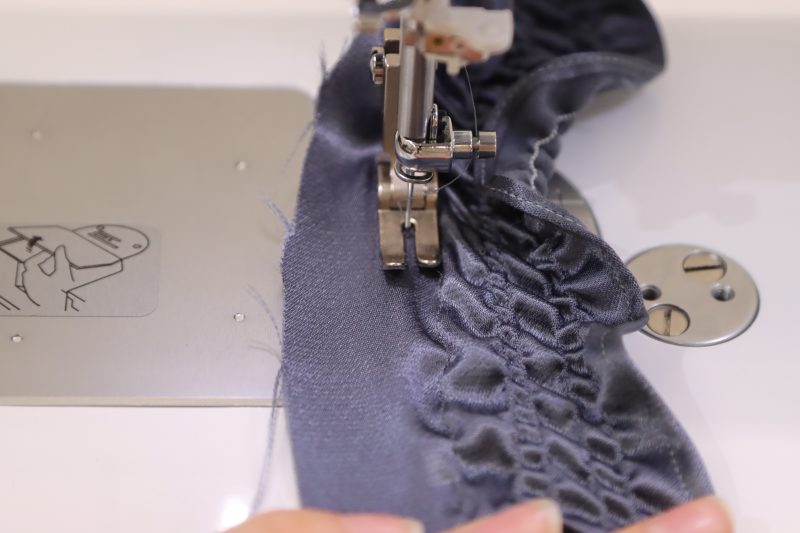
- When you’ve made all the shirring lines on every one of the above pieces, iron and steam each piece so that the elastic scrunches up even more and the fabric lays relatively flat even when it’s scrunched.
- The end length of each shirred piece should be ½ of the original length of the fabric before it was shirred.
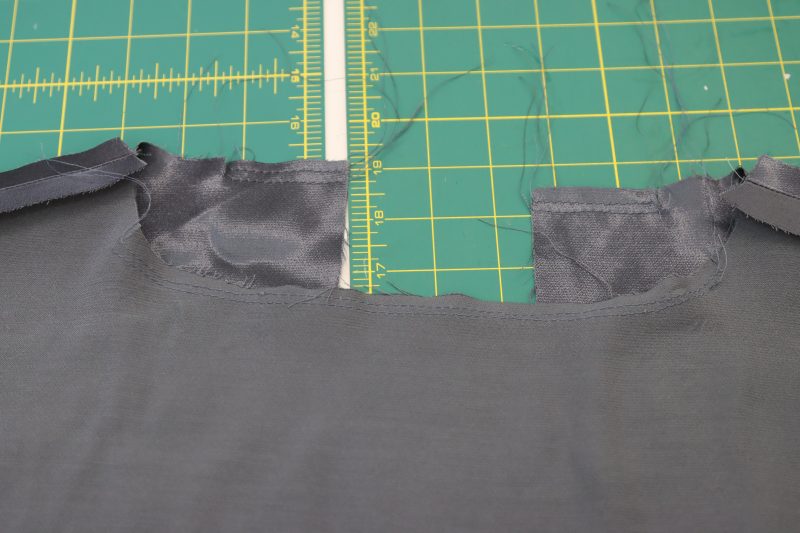
- Sew the top waistband pieces, the bottom waistband pieces, and the cuffs into closed loops by placing them right sides together and sewing the side seams.
Step 4
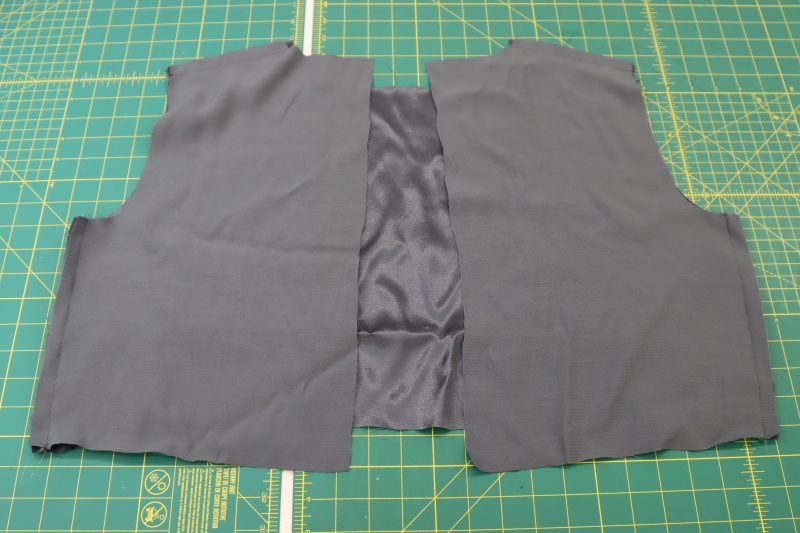
BLOUSE
- Put a bobbin with regular matching thread in the bobbin casing of the sewing machine.
- Place the back blouse pieces on top of the front blouse piece, right sides together, with the shoulders and side seams lined up.
- Pin and sew the side and shoulder seams together.
- Iron the seams open and flat.
Step 5
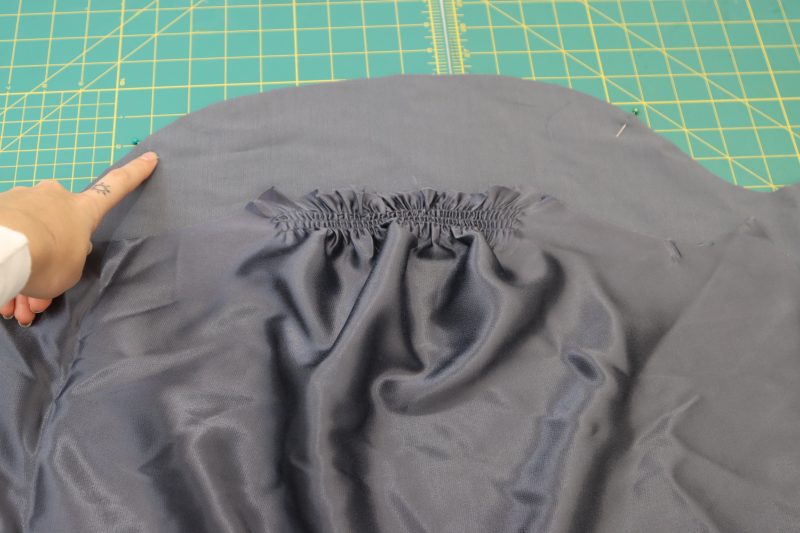
SLEEVES
- Put the bobbin with the elastic thread back into the bobbin casing.
- Sew a stitch ⅜ inch away from the raw edge of the sleeve cap between the two notches on the sleeve, following the curved edge of the sleeve cap.
- Sew two more parallel lines below the first row of shirring, all ¼ inch away from each other.
- Iron the shirring on the sleeve cap to make it scrunch up and lay flat.
- Put a bobbin with regular thread back in the machine.
- Fold the sleeves in half, right sides together, and sew down the side seams.
- Sew two parallel straight stitches with a stitch length of 3.5 millimeters along the bottom edge of the sleeve to gather it for the cuff, making sure not to backstitch on either side of the gathering stitches.
Step 6
CUFFS
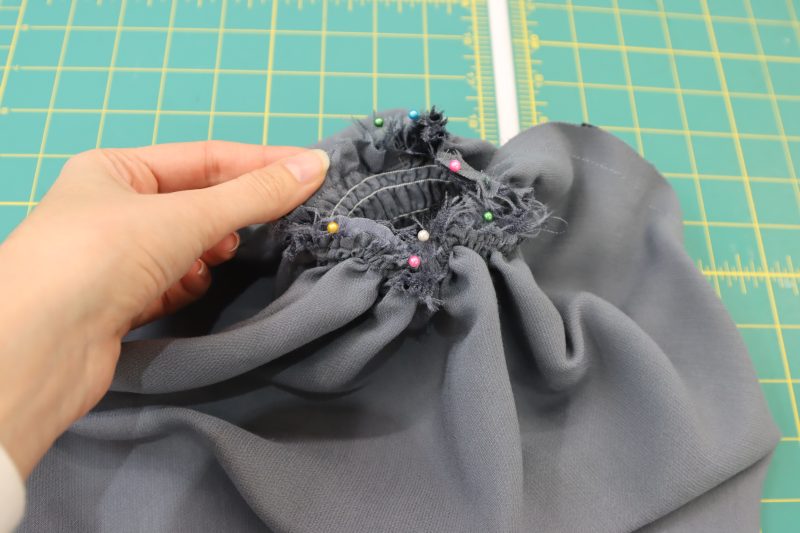
- Gather the bottom of the sleeve by pulling the top threads and scrunching the fabric until the opening of the bottom of the sleeve matches the opening of the shirred cuff.
- Place the cuff inside of the sleeve opening, right sides together.
- Pin and sew the cuff to the sleeve opening, making sure to stretch the raw edge of the cuff as you sew.
Step 7
COLLAR
- Sew two parallel straight stitches around the neckline of the blouse with a stitch length of 3.5 millimeters.
- Gather the neckline of the blouse with the bulk of the gathers at the front center and back center neckline.
- Pin the gathered neckline to the shirred collar, right sides together.
- Sew the shirred collar to the gathered neckline, stretching the collar as you sew.

Step 8
ZIPPER
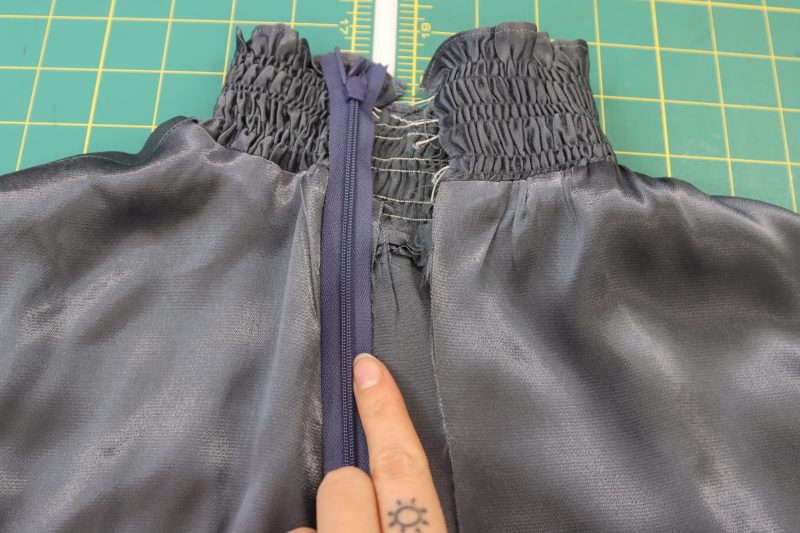
- Place the invisible zipper face down onto one of the sides of the center back opening of the blouse.
- Pin the side of the zipper tape closest to the raw edge of the center back opening to the blouse and sew it down with an invisible zipper foot.
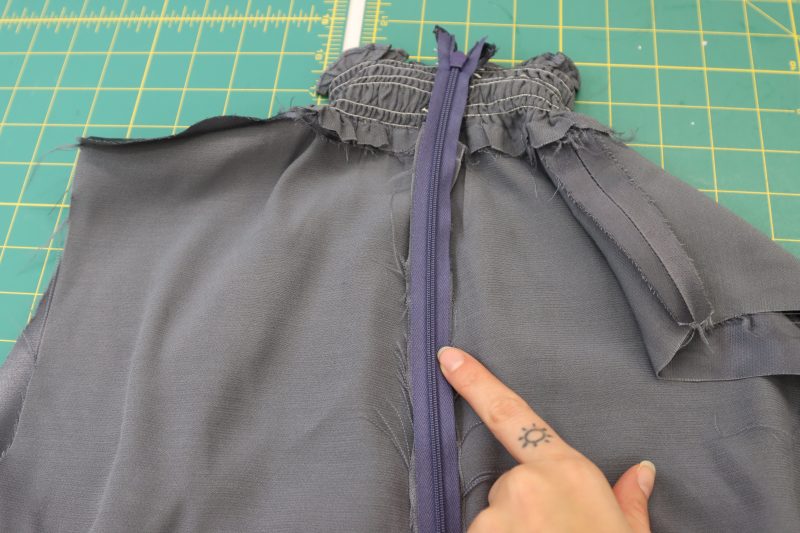
- Flip the blouse inside out.
- Pin and sew the opposite side of the zipper tape to the opposite side of the center back blouse opening.
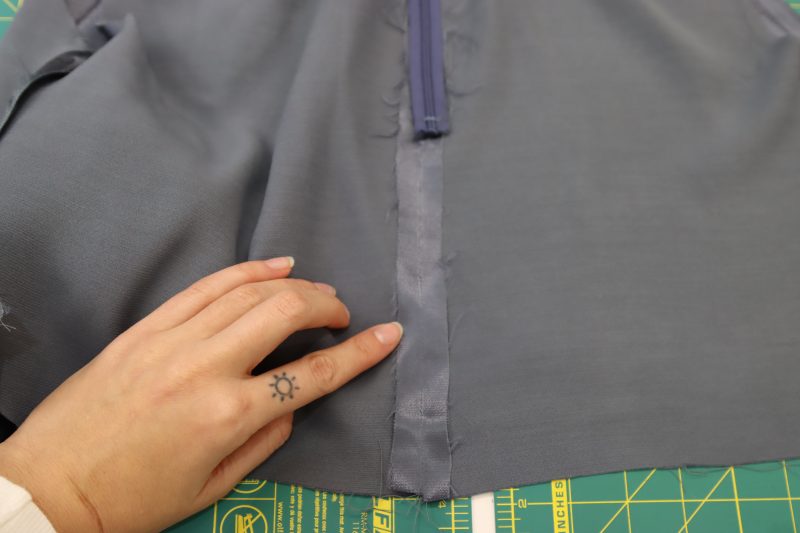
- Pin and sew the rest of the center back opening closed under the zipper.
- Iron the center back seam open and flat.
Step 9
ATTACH SLEEVES
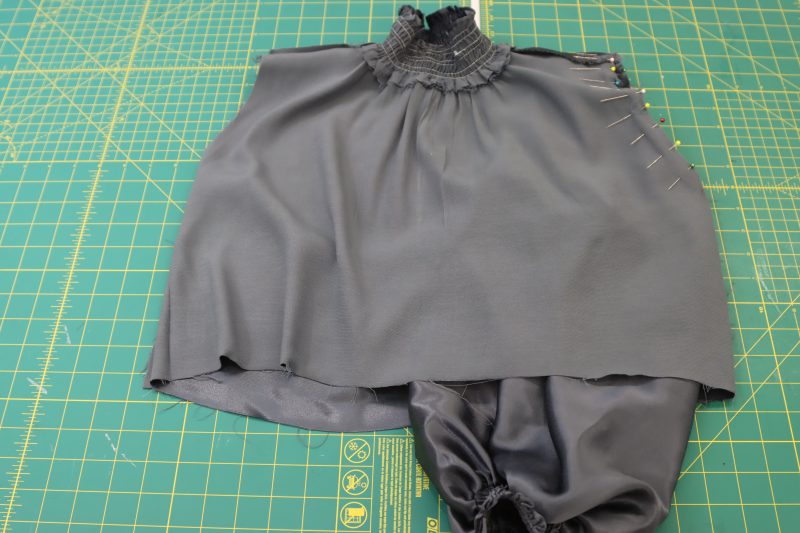
- Place the sleeves right sides together inside of the blouse, lining up the shirred opening of the sleeve with the armscye.
- Pin the sleeve opening to the armscye.
- Sew around the armscye.
- Lay the blouse right sides out and iron the seam open and flat.

Step 10
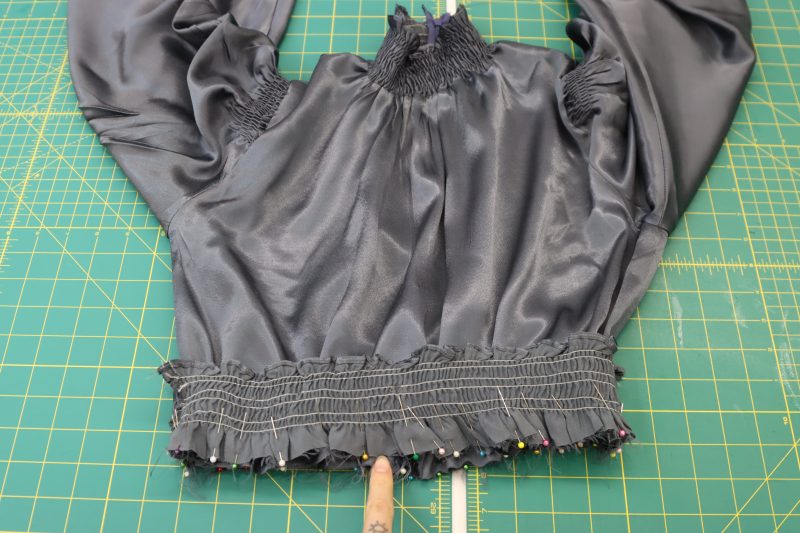
TOP WAISTBAND
- Lay the shirred blouse waistband right sides together around the bottom of the blouse.
- Pin the shirred waistband to the bottom of the blouse, stretching the waistband to pin it evenly.
- Sew the waistband to the blouse.
Step 11
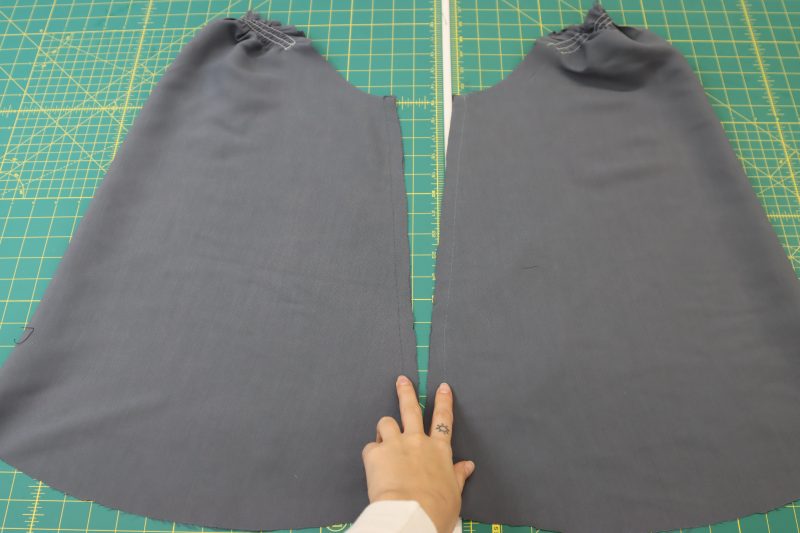
SKIRT BASE
- Place the two skirt pieces right sides together, making sure that the sides of the rectangular skirt pieces with the longer lines become the side seams of the skirt.
- Pin and sew the side seams of the skirt.
- Iron the side seams open and flat.
Step 12
SKIRT WAISTBAND
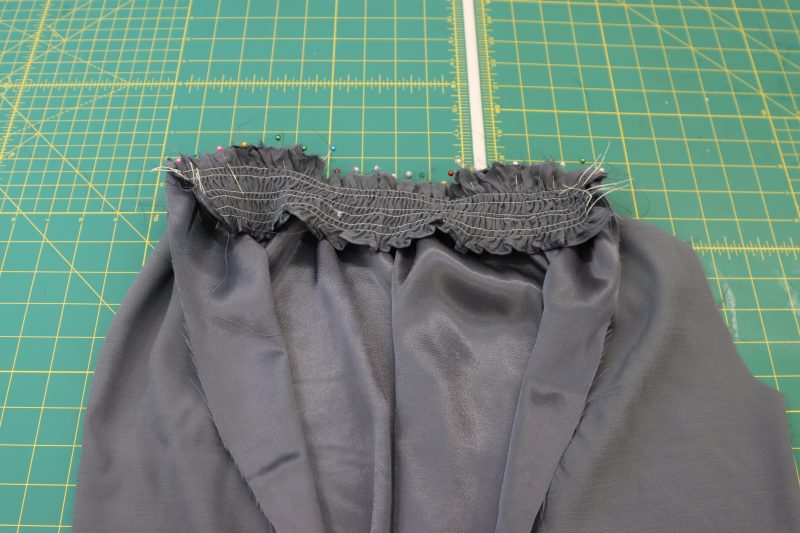
- Pin the right side of the waistline of the skirt to the wrong side of the skirt waistband, so that the hemmed edges of the skirt waistband are both sticking out over the skirt (you will have to stretch the waistband to pin it evenly around the skirt).
- Sew a straight stitch around the skirt waistband under the very bottom row of shirring to attach it to the waistline of the skirt. Make sure you stretch the waistband as you’re sewing.
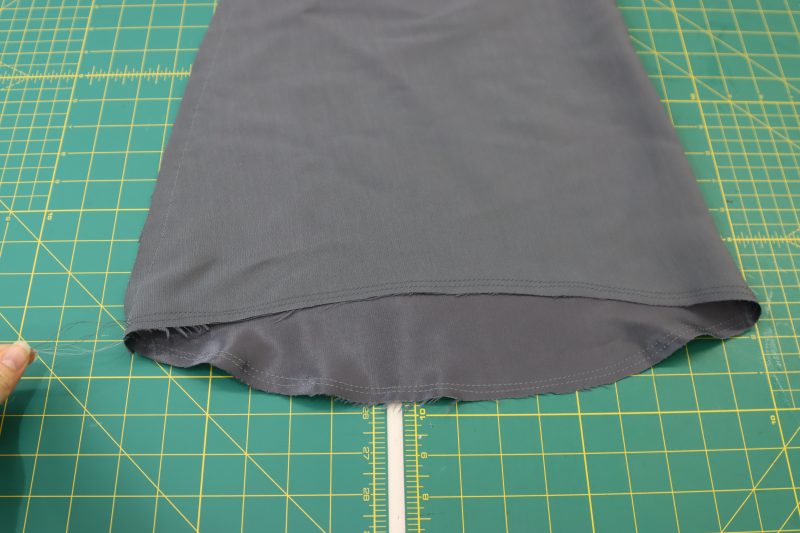
- Sew a tiny baby hem on the bottom of the skirt the same way that the shirred pieces were hemmed in step 2 using the rolled hem foot.
Sewing Success: The Finished Sterling Shirred Blouse and Skirt Set
Share this post with a friend (or two!), download the Sterling Shirred Blouse and Skirt Set free sewing pattern, and show us which fabrics and colors you choose, using the hashtags #MoodSterlingPattern & #MadeWithMood—and don’t forget to tag us @MoodFabrics, too.

Free Sewing Pattern Inspiration for Your Next Project
With 480+ free sewing patterns and counting, your opportunities for sewing with Mood are endless!
We hope you had as much fun sewing this shirred blouse and skirt set pattern as we did! As always, we want to hear from you—share your thoughts and comments below and let us know where you’ll be wearing the Sterling Shirred Blouse and Skirt Set free sewing pattern!
Could you use a already gathered fabric for this project?
If you mean a pre-smocked or pre-shirred fabric, you can absolutely use that for this pattern! Just make sure the read the instructions before cutting out all the pieces to make sure you cut out all the waistbands, neckbands, and wristbands out of the shirred section of the fabric and the other pieces can be cut out of the un-shirred part of the fabric.
Just curious, do you know about how long it takes to make the top?
It took me about 5 hours!