
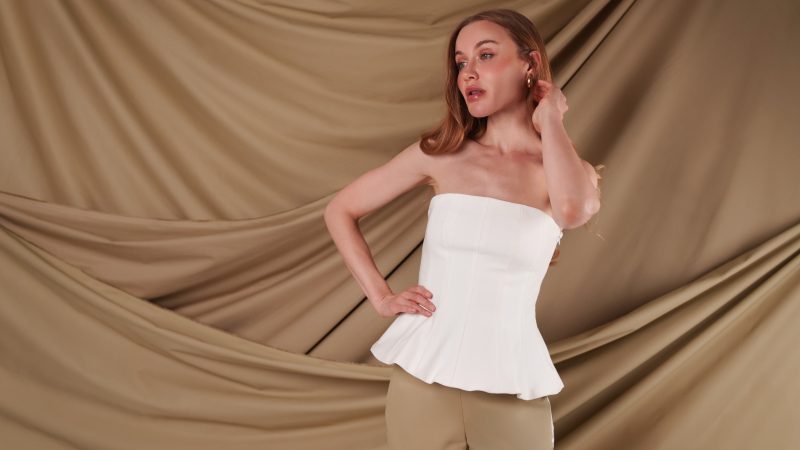
Sculpted style meets everyday elegance in the Ortigia Peplum Blouse free sewing pattern! Give your wardrobe a polished upgrade with a structured, feminine silhouette made for modern makers. Designed with contour and flair in all the right places, this peplum blouse brings sophistication, shape, and stretch to your sewing lineup!
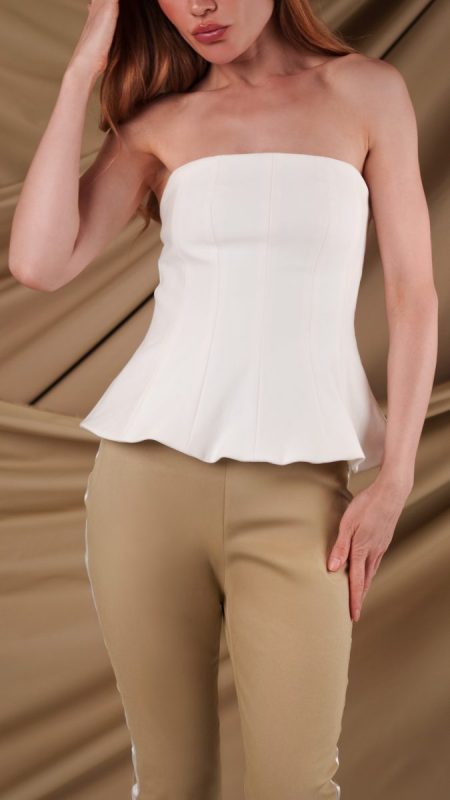
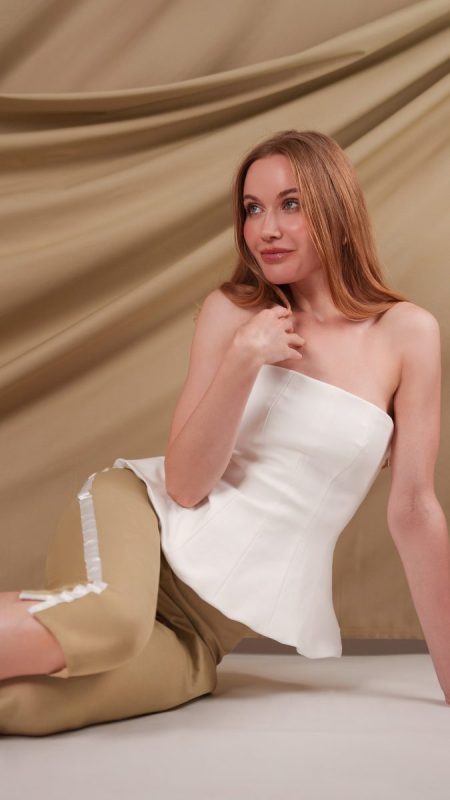
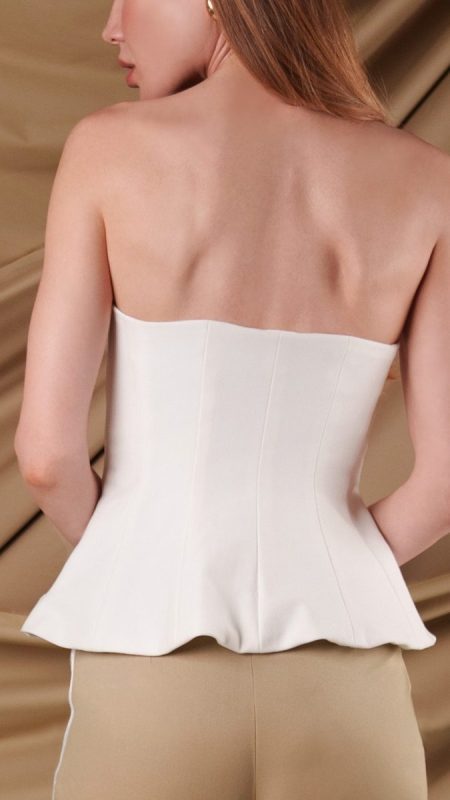
This modern classic features a paneled blouse with a peplum-like flare, and a close-fitting bodice that highlights the torso with grace and precision. The invisible zipper at the side seam ensures a smooth fit, while the self-lining offers added support. Whether you’re dressing for work or going out for brunch, pair the Ortigia Peplum Blouse with the Promenade Capri Pants for a clean, architectural silhouette with a subtle romantic twist.
The secret to this blouse’s sculpted shape? Mood’s stretch ponte knit—a dense, resilient fabric with just the right amount of give. This stable knit fabric offers the perfect combination of softness and structure, giving your finished blouse that ready-to-wear finish you’d expect from a boutique brand. Its slight stretch ensures comfort and flexibility, making it ideal for form-fitting styles with tailored elegance. Whether you opt for a classic shade or a bold jewel tone, this fabric gives the blouse a luxe, high-end feel.
Ready to master your next go-to piece? Download the Ortigia Peplum Blouse free sewing pattern today and follow our step-by-step tutorial on the Mood Sewciety blog. Be sure to browse our wide selection of Ponte knit fabrics to find the perfect color and bring your vision to life with confidence, comfort, and couture-level style!

Essential Materials & Sizing Guide for the Ortigia Peplum Blouse
Here is the breakdown of what knowledge and materials you need for creating your very own peplum blouse! We’ve got you covered with the recommended materials we used—if you want to follow along exactly—as well as a curated list of alternative fabric recommendations if you want to customize your own version. The Ortigia Peplum Blouse free sewing pattern download includes technical drawings for seam and silhouette visibility, plus a size chart to help you find your perfect fit!

Purchase Products Used Below:
Quantities indicated are for sewing a size small. Toggle the ‘SHOP THIS LOOK’ box to find quantities for other sizes.
- 2 yards of Stretch Ponte Knit – Whisper White – Papilio Collection
- 1 each of Invisible Zipper 24″ by YKK – 501 White
- 1 spool of Gutermann Sew All Thread 250m – 21 Oyster
- MDF446 – Ortigia Peplum Blouse Sewing Pattern (Free download below!)
Alternative Fabric Recommendations:
The Ortigia Peplum Blouse sewing pattern is best suited for medium weight fashion fabrics. If you want to explore other fabric types for sewing the Ortigia Peplum Blouse check out the links below.
Download Your Free Sewing Pattern
Submit your name and email in the form below to receive the Ortigia Peplum Blouse free sewing pattern directly in your inbox. Mood Sewciety Patterns will send your free download via email with the subject line: ‘Your Free Download from Mood Sewciety – The Ortigia Peplum Blouse’ (in PDF format for A4 and letter-size printing).
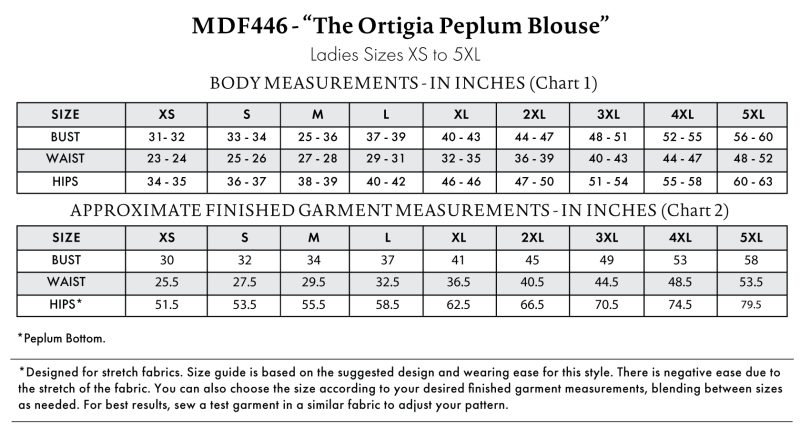
Find Your Perfect Fit
Designed for stretch fabrics. Size guide is based on the suggested design and wearing ease for this style. There is negative ease due to the stretch of the fabric. You can choose the size according to your desired finished garment measurements, blending between sizes as needed. For best results, sew a test garment in a similar fabric to adjust you pattern.
How To Sew the Ortigia Peplum Blouse
The instructions provided are designed to guide you through sewing the main fabric and the self-lining fabric for the Ortigia Peplum Blouse simultaneously.
Sew with a 1/2″ seam allowance for all seams unless otherwise specified.
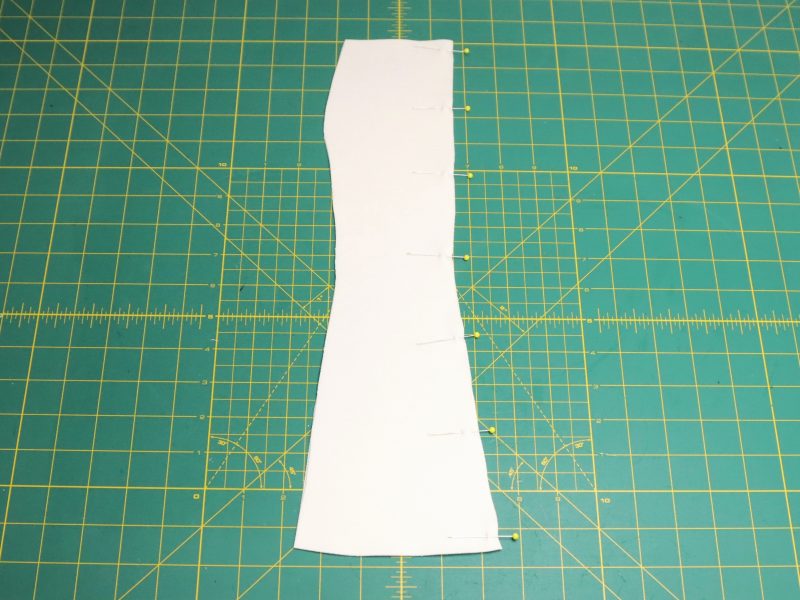
Step 1
FRONT CENTER
Sew the Front Center pieces together at center front.
(Repeat this step for the lining fabric)
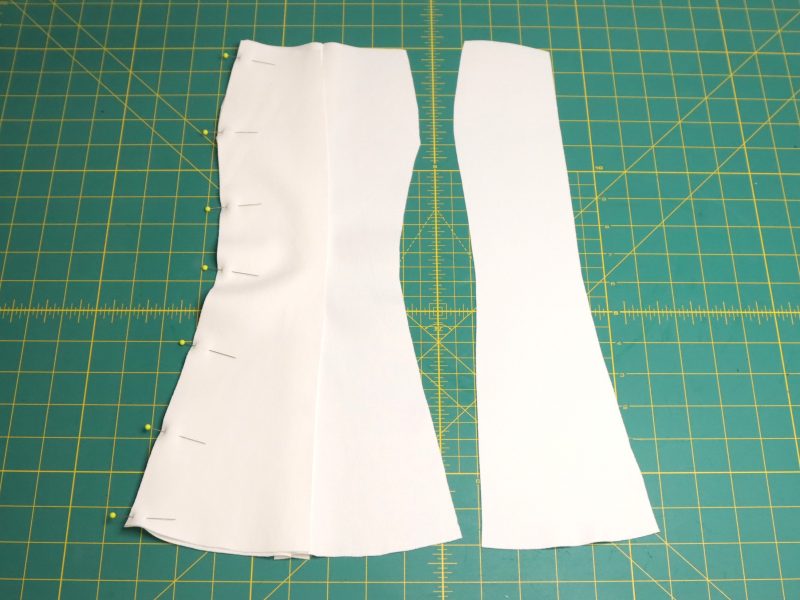
Step 2
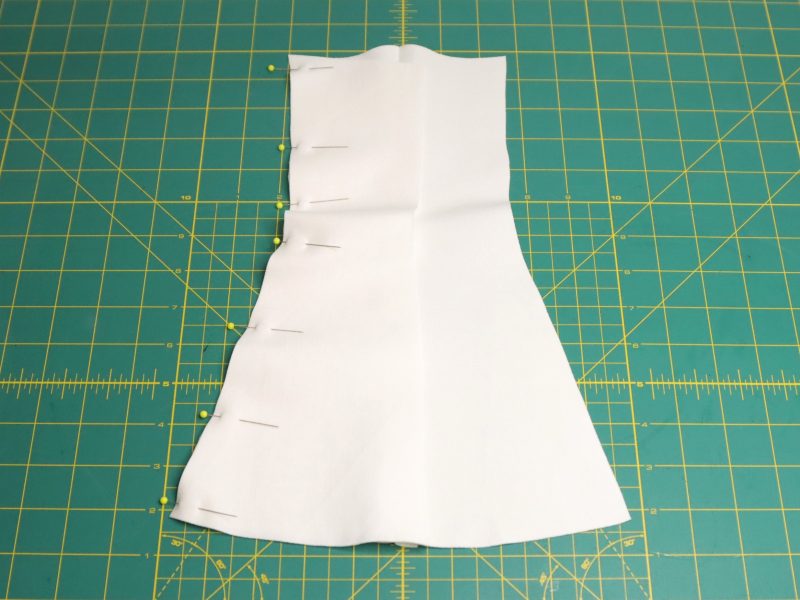
FRONT MIDDLE
Sew the Front Middle pieces to each side of Front Center
(Repeat this step for the lining fabric)
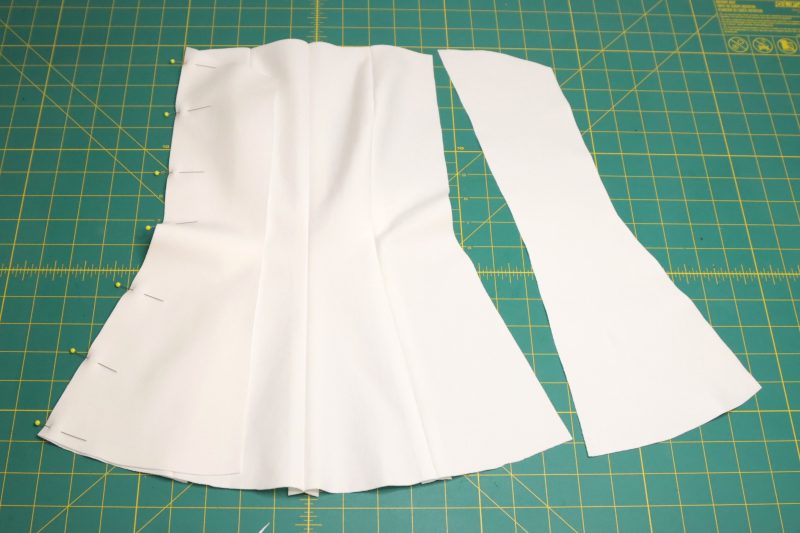
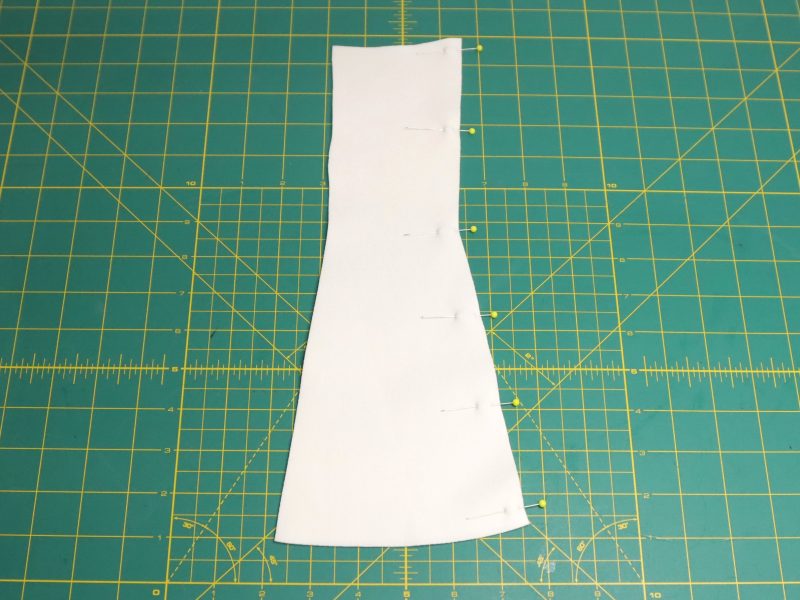
Step 3
FRONT SIDE
Sew the Front Side pieces on each side of the Front Middle.
(Repeat this step for the lining fabric)
Step 4
BACK CENTER
Sew the Back Center pieces together at center back.
(Repeat this step for the lining fabric)
Step 5
BACK MIDDLE
Sew the Back Middle pieces to each side of Back Center
(Repeat this step for the lining fabric)
Step 6
BACK SIDE
Sew the Back Side pieces to each side of Back Middle.
(Repeat this step for the lining fabric)
Step 7
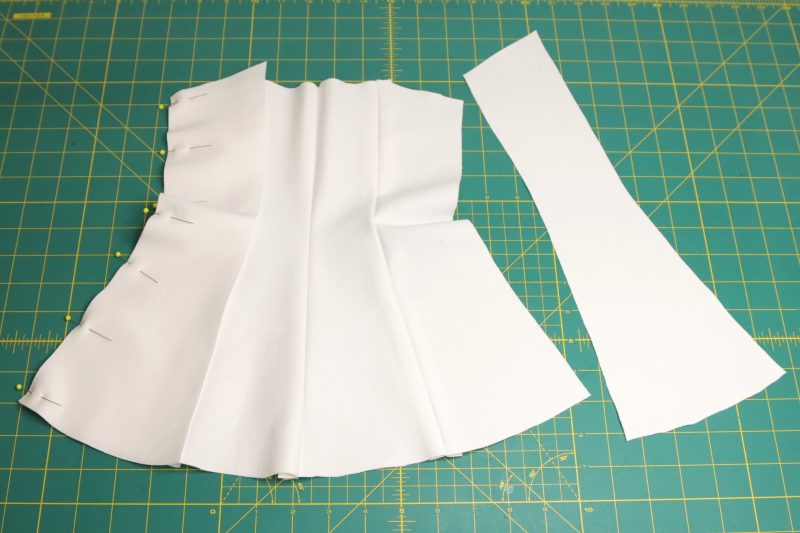
SIDE SEAM
Sew the front and the back together at the right side seam.
(Mirror this step for the lining fabric by sewing them at the left side seam)

Step 8
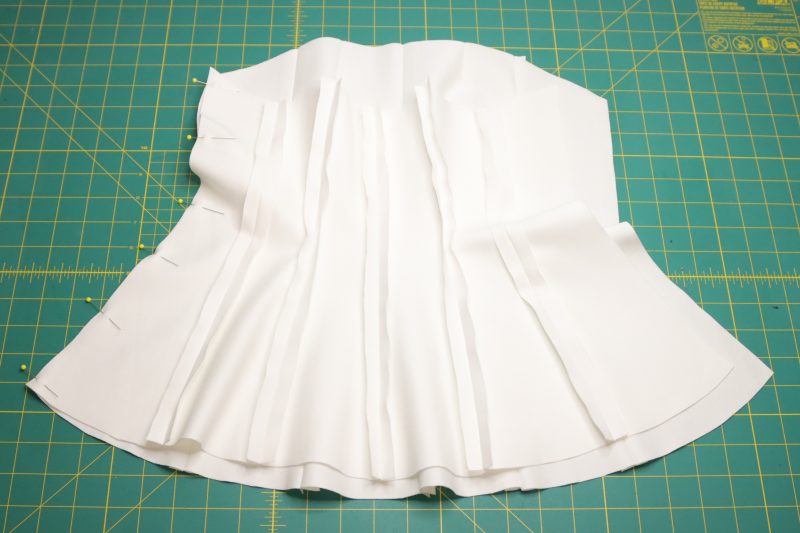
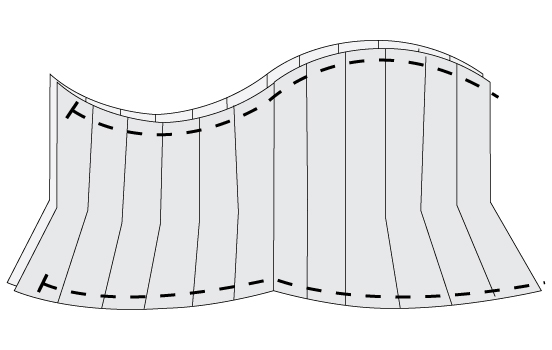
JOIN MAIN FABRIC & SELF-LINING
Sew the main fabric and the self-lining together across the top & bottom of the blouse.
Step 9
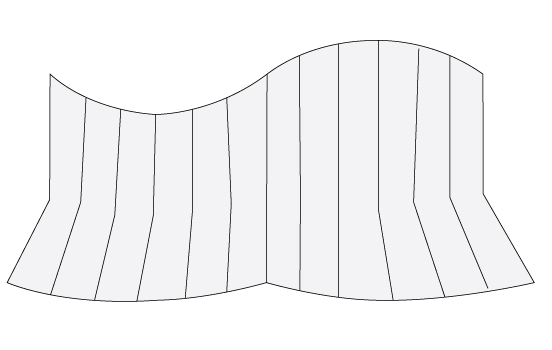
TURN RIGHT SIDE OUT
Turn the blouse right side out and press.
Step 10
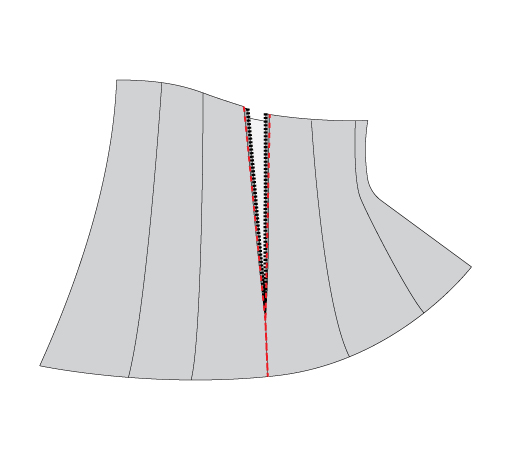
ZIPPER CLOSURE
The zipper should be 2 inches shorter than the blouse side seam. With the lining facing out, sew the bottom 2 inches of the side seam first, then attach the zipper only to the main fabric of the opening.
Step 11
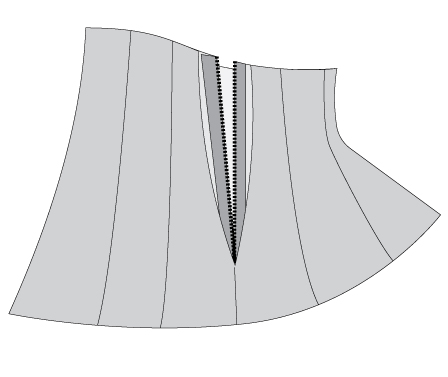
FINISH LINING
Fold the seam allowances of the lining covering the zipper seam and keeping the teeth out. Finish by hand-stitching the lining with an invisible stitch for a neater look. You can also use a sewing machine for a quicker finish.
Sewing Success: The Finished Ortigia Peplum Blouse Free Sewing Pattern by Mood Fabrics
Now, we can’t wait to see your version of the Ortigia Peplum Blouse!
Share this post with a friend (or two!), download the Ortigia Peplum Blouse free sewing pattern, and show us which fabrics and colors you choose, using the hashtags #MoodOrtigiaPattern & #MadeWithMood.
love this pattern! I was wondering if I could use a non-stretch fabric with this, without having to size up from my normal size (since a zipper is being installed)? thank you for such an awesome design
Yeah it probably wouldn’t be a bad idea to size up since there is no ease in the pattern.
I went by the finished garment measurements, sewing in a cotton poplin, with a muslin lining, and it fit well (I had to do a minor bust adjustment at the top.)
How do you suggest I grade between sizes with this type of pattern? Make specific panels smalller or another approach?
Hi karen
To grade this pattern to another size, determine how much you want to increase or decrease, then divide that amount by the number of panels to proportionally increase or decrease the same amount on each panel. I hope this helped—let me know if you need anything else.
Kind Regards
Sandy
Mood Sewciety
Hi there, do you think if i want to lenghten the hem to make it a dress, the top can hold and support the extra weight?
Yes, definitely. I think it would work even if you turned it into a strapless dress as long as it’s snug around the bust and waist.
I know this is older, but this is a fantastic idea and I’m going to try it, too.
I would love to try this
Hi the PDF is password protected
Sorry about that! You should be able to access it now!
What if i use cotton (shirt) material? Will it still works?
Hey M! As long as the material has a little bit of stretch and is thick/sturdy enough to hold its shape, you can totally use a stretch knit cotton. That being said, cotton jersey might be a little bit too thin for this pattern.
OMG! I love this but how do I remove the other sizes before printing?
We’re so glad you love the pattern! Unfortunately, our free sewing patterns can’t be separated by size before printing—all sizes are included together in the file.
Is it necessary to overlock finish the pieces? Thanks for the pattern
Nope, it is not necessary, just a suggestion.
Hi! Do you think this top works with denim?
Hey Clara! Yes this top would look to cute in denim.
HOLA MARISA
UNA CONSULTA ESTE PATRON VIENE CON MARGEN DE COSTURA INCLUIDO
GRACIAS
Hola Milena! Todos los patrones incluyen un margen de costura de 1/2 pulgada.
so excited to try this pattern as it will be my first one from mood ! Wish there was a video tutorial though:(
We’re so excited to see how your blouse turns out Narah! Thank you for the feedback. We keep track of which patterns people request tutorials for, so keep an eye out.
Just finished making this (except the lining, which I might not do)! I used a stretch cotton shirting from Mood, and I’m in love with it already. It’s super flattering–I’m small and small-busted with an extra inch or two in my tummy (two c-sections, sigh), so I was worried this top might make me look…like I was obviously trying to hide it? Or maybe a little bit pregnant?
It doesn’t! At ALL! It flattens my tummy (visually, at least), makes my waist look more slender, and makes my small bust look bigger. It’s just a fantastic shape.
I do wish I could figure out why I constantly cut patterns way too big for me, though; that’s not the fault of the pattern, it’s me always going by the final garment measurements, I guess, but just…doing it wrong? I cut a Large, but have needed to take almost an inch off of every seam (so ≤2 inches per piece) to avoid swimming in it. Again, though, that’s a Me Problem, not a problem with the pattern.
I have some of the Mood stretch ponte, and an adorable dark olive stretch denim (which I also used to make the Kitchen Pickleball Dress, which is super cute), so I’m looking forward to having several variations of this lovely top. Thanks for the pattern!
Absolutely love this pattern, made a mock up in the size M for my daughter (36D bust size) and it it turned out great, just half an inch loose but otherwise perfect, will size down when i make the actual piece. Thank you!
I am a little confused about zipper attaching with two layers. 🙁
yes, me too
Hello! Could I use a stretchy fabric like jersey knit for this??
If you do, just make sure you cut out a size or two smaller than the size you would normally wear so that the top has negative ease and stays on your body even when stretched.
Also, do you happen to offer the pattern as a projector file?
Not yet, but stay tuned in the near future because we do plan on offering other print formats soon.
So nice