

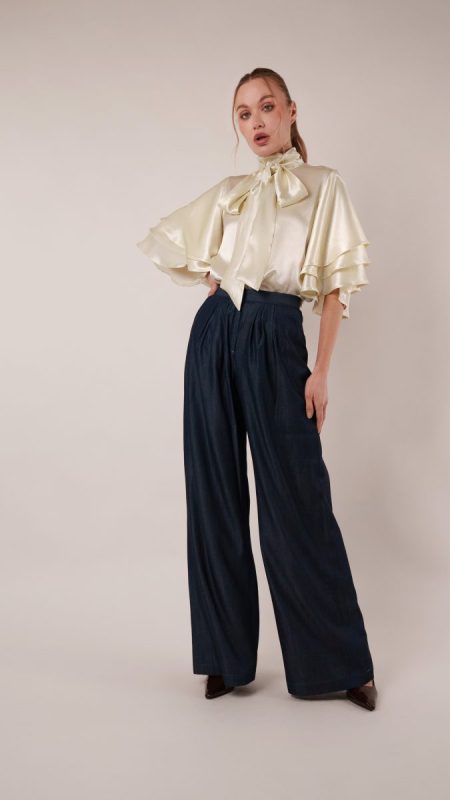
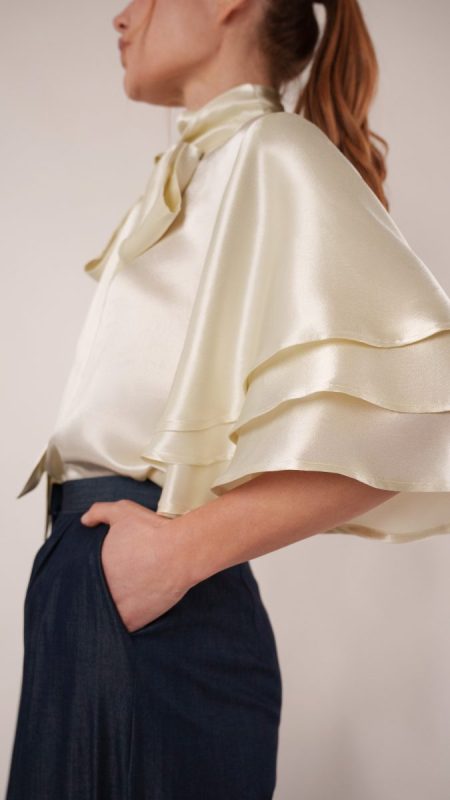
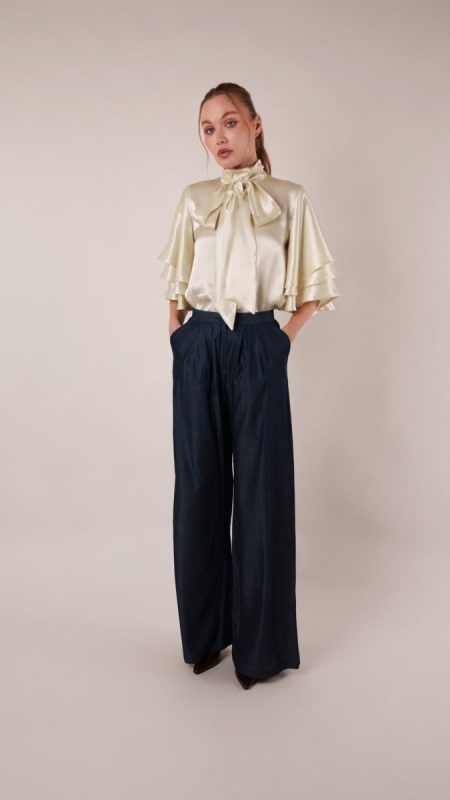
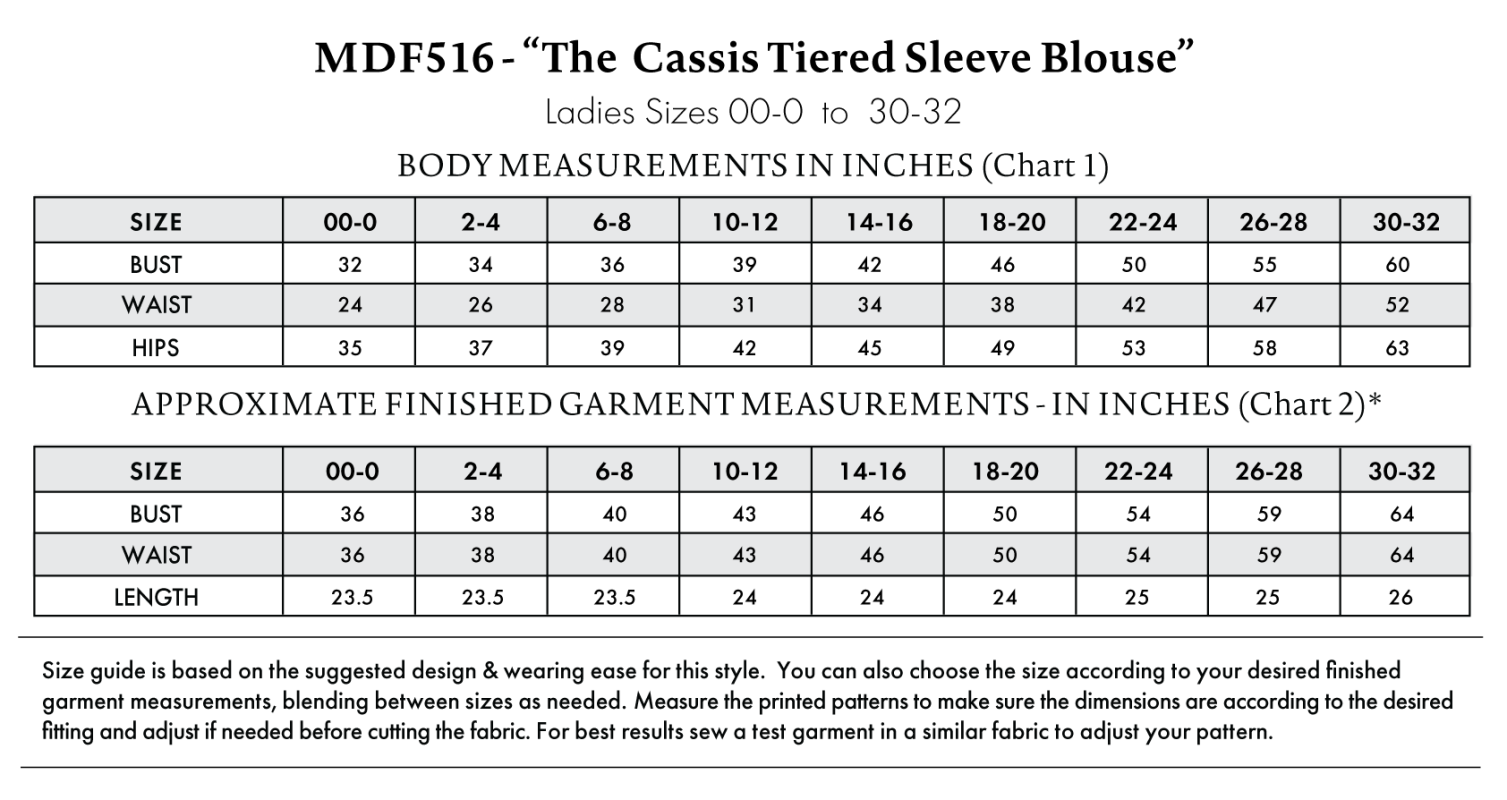
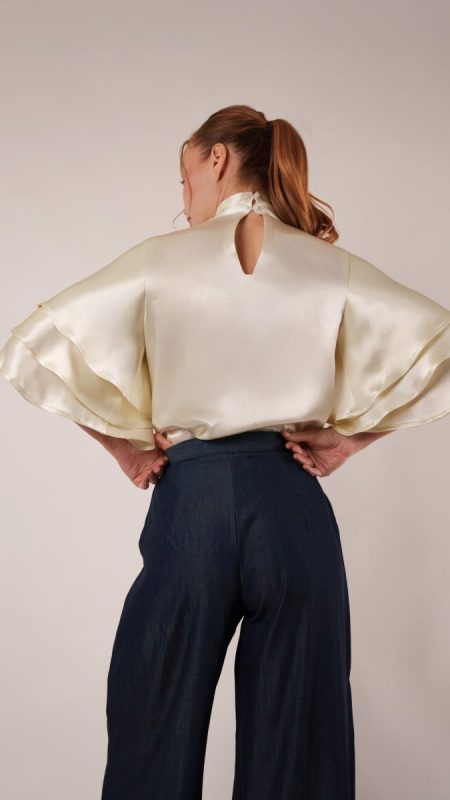
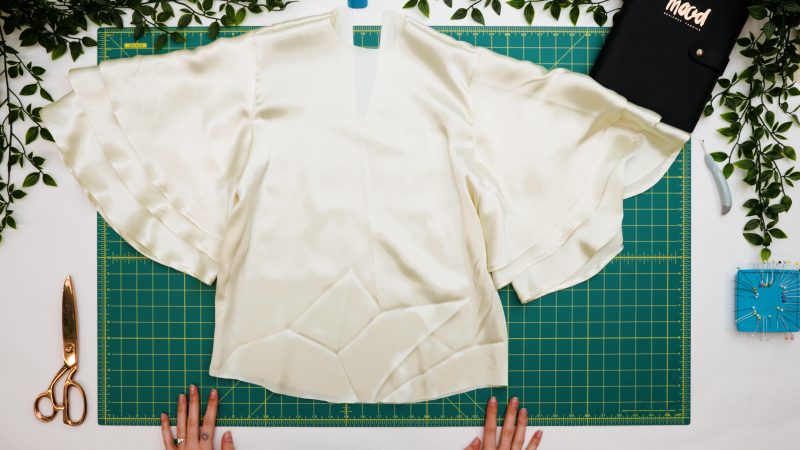
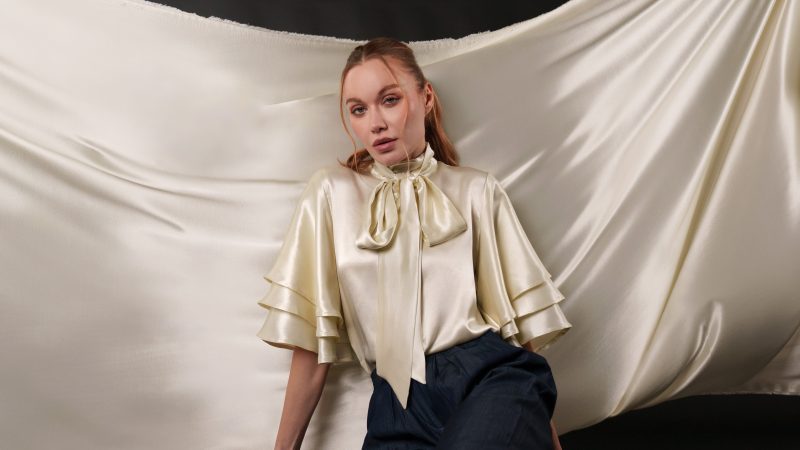
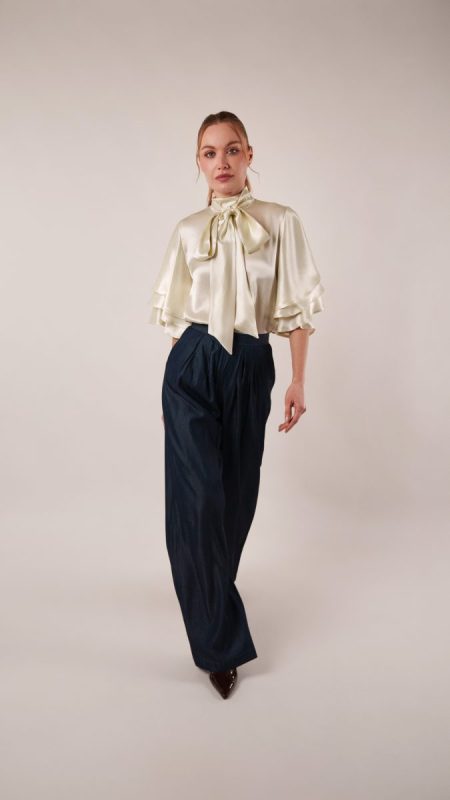
Meet the Cassis Tiered Sleeve Blouse, a luminous staple designed to bring effortless elegance to any wardrobe. Crafted in a gorgeous ivory viscose fluid satin, this blouse drapes like it was poured onto the body, catching the light with every movement for a soft, radiant glow.
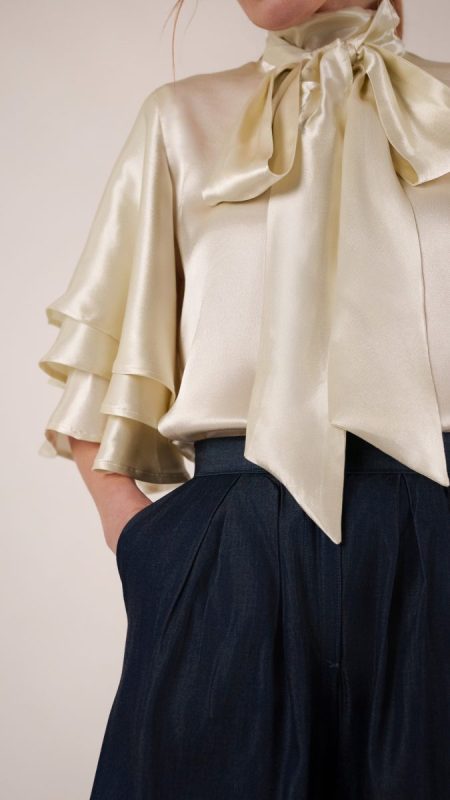
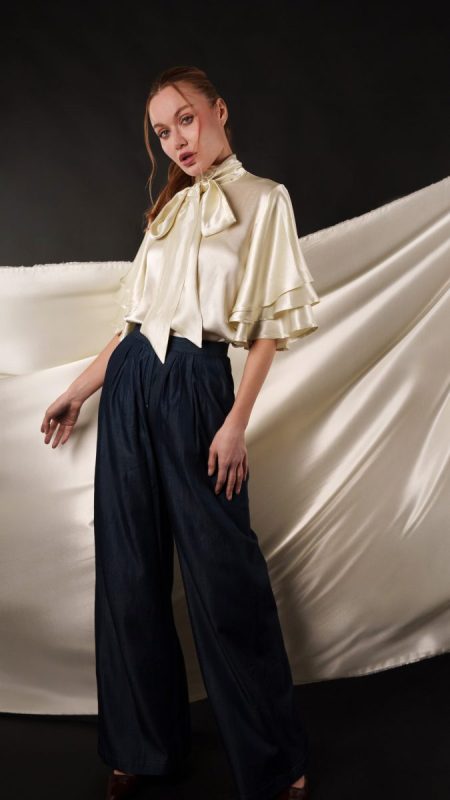
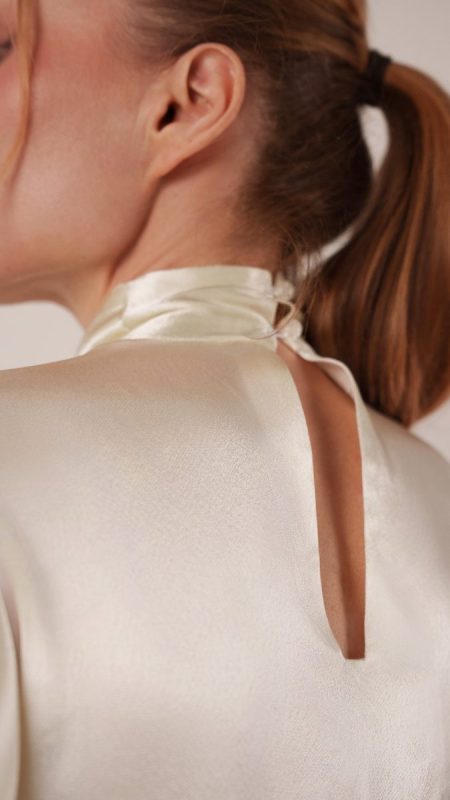
The statement sleeve features three tiered layers, creating beautiful volume and fluid motion, while a delicate bow at the collar adds a playful, feminine touch. At the back, a row of cloudy buttons secures the neckline, finishing in a subtly flirty keyhole detail.
Versatile and elevated, the Cassis Tiered Sleeve Blouse pairs seamlessly with jeans for a polished everyday look, a pencil skirt for the office, or layered over a tweed mini dress like the Lunette Cocktail Dress for a more styled ensemble. Best of all, this pattern can be sewn in a day and worn out the very same night.
Essential Materials & Sizing Guide for the Cassis Tiered Sleeve Blouse
Continue reading for a breakdown of what knowledge and materials you need for creating your very own tiered sleeve blouse! We’ve got you covered with the recommended materials we used—if you want to follow along exactly—as well as a curated list of alternative fabric type recommendations if you want to customize your own version. The Cassis Tiered Sleeve Blouse free sewing pattern download includes technical drawings for seam and silhouette visibility, plus a size chart to help you find your perfect fit!

Purchase Products Used Below:
Quantities indicated are for sewing a size small* tiered sleeve blouse. Toggle the ‘SHOP THIS LOOK’ box to find quantity estimates for other sizes.
- 2.5 yards of Sustainable Viscose Fluid Satin – Ivory – Mood Exclusive Elliana Collection
- 1 yard of Super White Hot Rolling Nonwoven Fusible Interfacing
- 2 each of Milky Cloud Dancer Dome Shaped Plastic Shank Back Buttons – 16L/10mm
- 1 each of Gutermann Sew All Thread 250m – 795 Antique White
- MDF516 – Cassis Tiered Sleeve Blouse Sewing Pattern (Free download below!)
Additional Products Used:
*Quick Tip! The ‘SHOP THIS LOOK’ box defaults to full-yard quantities. To order an exact half-yard quantity for any fabric, simply use the decrease quantity button (-) to subtract by the half yard. Then click “ADD TO CART” to add all materials to your cart. (Our system can only display full-yard quantities initially.)
Alternative Fabric Type Recommendations:
The Cassis Tiered Sleeve Blouse sewing pattern is best suited for lightweight to medium weight fashion fabrics. Explore other fabric types or colors from our featured collections for your tiered sleeve blouse with the links below.
Fabric Collections Used in this Post:
Download Your Free Sewing Pattern
Submit your name and email in the form below to receive the download link for the Cassis Tiered Sleeve Blouse free sewing pattern directly in your inbox. Mood Sewciety Patterns will send your free download link via email with the subject line: ‘Your Free Download from Mood Sewciety – The Cassis Tiered Sleeve Blouse’ (in PDF format for A4 and letter-size printing).
© MoodFabrics.com / MoodSewciety.com – Mass production, resale, or distribution of this pattern in any form is strictly prohibited.
Find Your Perfect Fit
The Cassis Tiered Sleeve Blouse Sizing Guide is based on the suggested design & wearing ease for this style. You can also choose the size according to your desired finished garment measurements, blending between sizes as needed. Measure the printed patterns to make sure the dimensions are according to the desired fitting and adjust if needed before cutting the fabric. For best results, sew a test garment in a similar fabric to adjust your pattern.
Note: Always read all the instructions before cutting the fabric!
How to Sew The Cassis Tiered Sleeve Blouse
The instructions provided below are designed to guide you through sewing the Cassis Tiered Sleeve Blouse from start to finish.

4 Tips for Sewing with Fluid Viscose Satin
⇒ Pre-shrink your fabric before cutting out the pattern.
⇒ Use a super skinny, super sharp microtex needle (like size 60/8 or 70/10) to prevent pulls and skipped stitches.
⇒ Press every seam open unless otherwise instructed.
⇒ Use a lot of pins while cutting and sewing to prevent the fabric grain from shifting and warping while you make this garment.
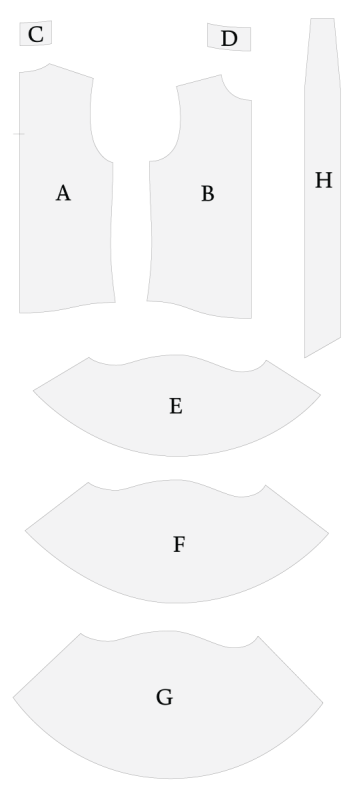
Pattern Pieces & Fabric Cuts Needed
- (A) BACK
- Fabric – Cut 1 on Fold
- (B) FRONT
- Fabric – Cut 1 on Fold
- (C) BACK COLLAR
- Fabric – Cut 2 Mirrored Sets
- (D) FRONT COLLAR
- Fabric – Cut 2 on Fold
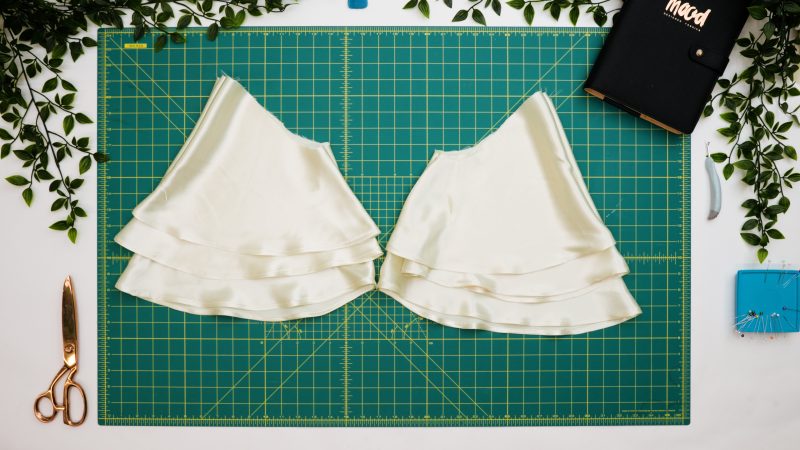
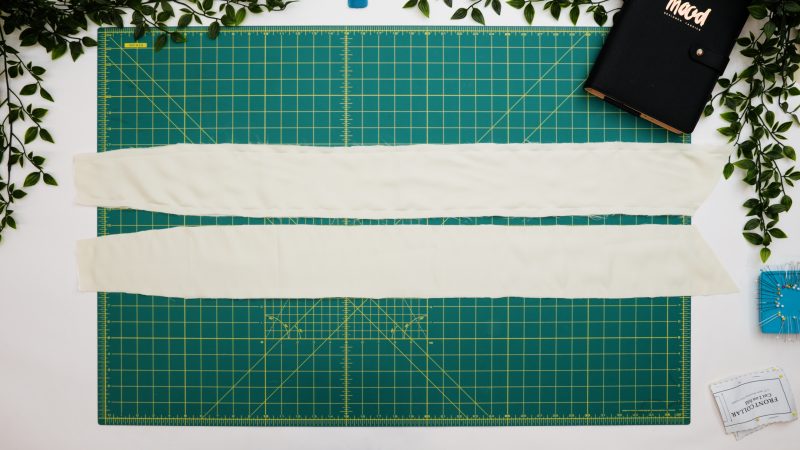
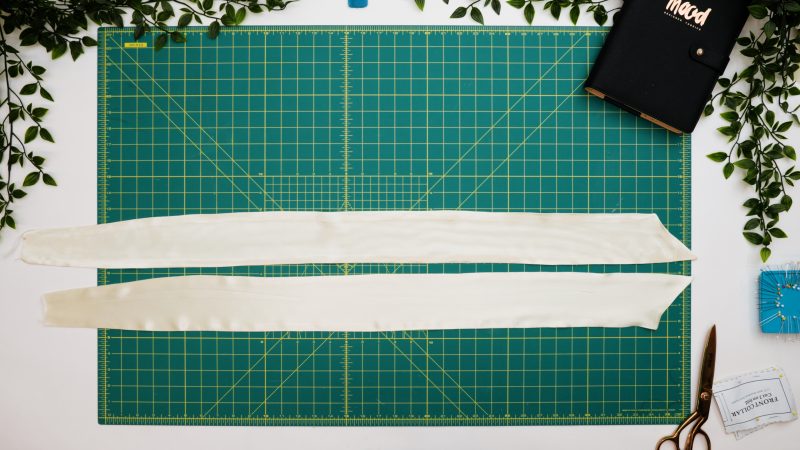
- (E) SLEEVE UPPER LAYER
- Fabric – Cut 2 Mirrored
- (F) SLEEVE MIDDLE LAYER
- Fabric – Cut 2 Mirrored
- (G) SLEEVE BOTTOM LAYER
- Fabric – Cut 2 Mirrored
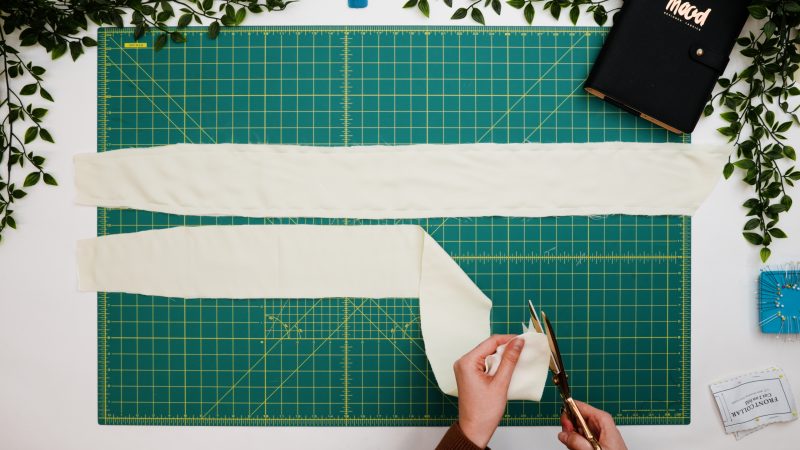
- (H) BOW TIES
- Fabric – Cut 4
Sew with a 1/2″ seam allowance for all seams unless otherwise specified.
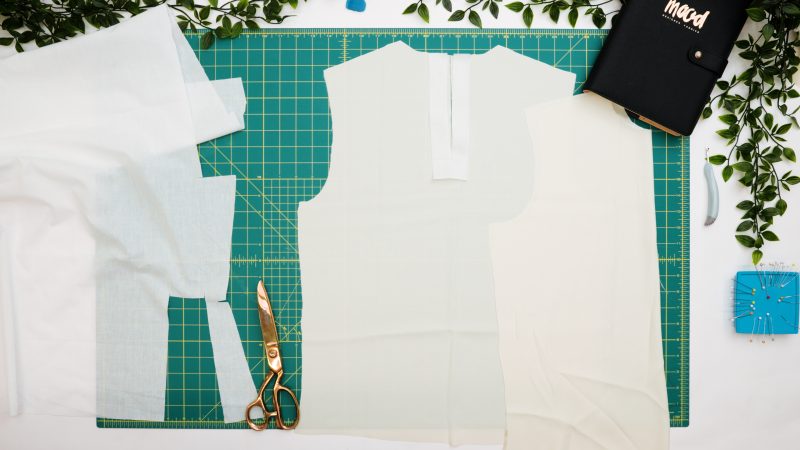
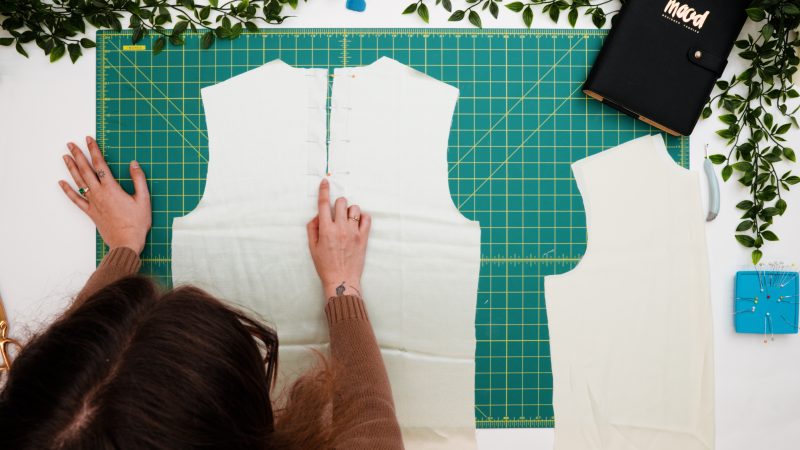
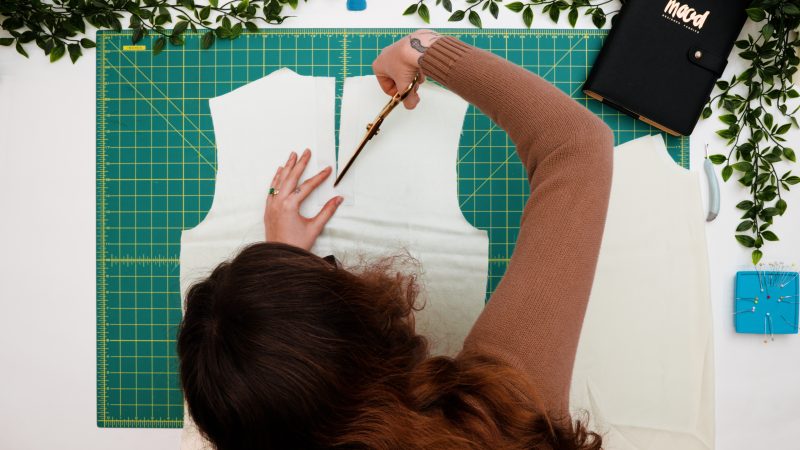
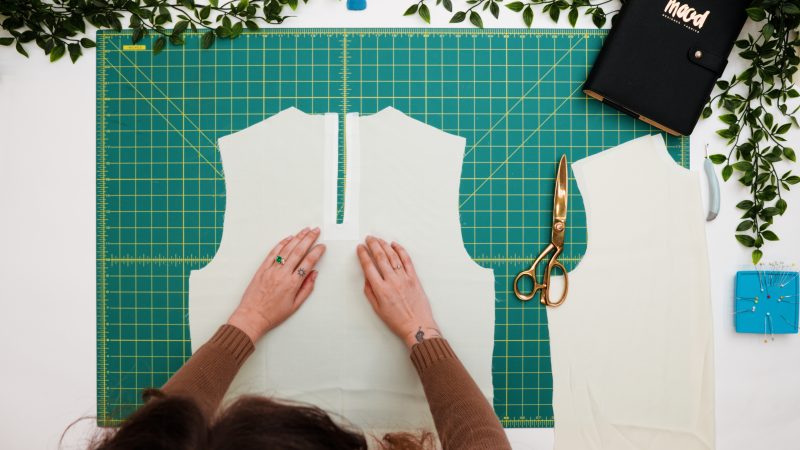
Step 1
KEYHOLE
- Cut the keyhole down the top center back of the blouse as shown in the paper pattern.
- Cut out a strip of fusible interfacing that is 1 inch longer than your keyhole and 2 inches wide.
- Cut the strip of interfacing down the middle, but leave 1 inch of fabric attached at the bottom.
- Pin the keyhole facing right sides together with the keyhole on the back of the blouse (this means the right side of the viscose should be touching the NON-STICKY side of the interfacing. You’ll see why in a second).
- Sew the interfacing to the perimeter of the keyhole with ¼ inch seam allowance.
- Clip the bottom corners of the keyhole so that the interfacing can be flipped.
- Flip the interfacing towards the wrong side of the fabric so that the raw edges are hidden between the interfacing and the back of the blouse.
- Press the interfacing with an iron to fuse it to the wrong side of the back of the blouse. Make sure none of the interfacing shows from the outside of the blouse.
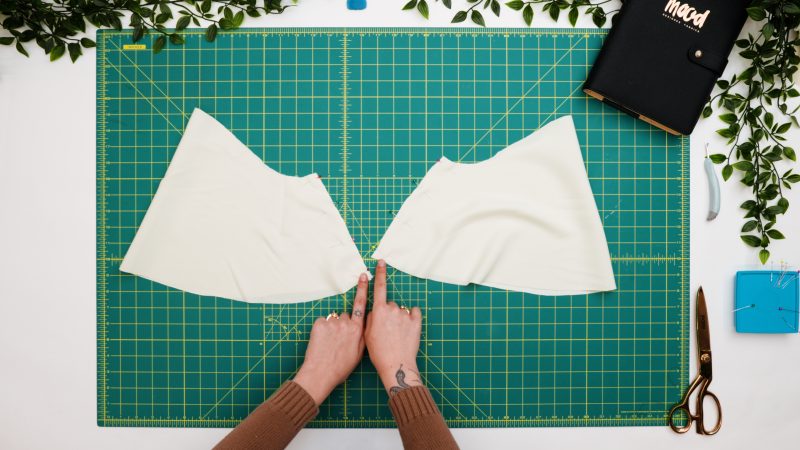
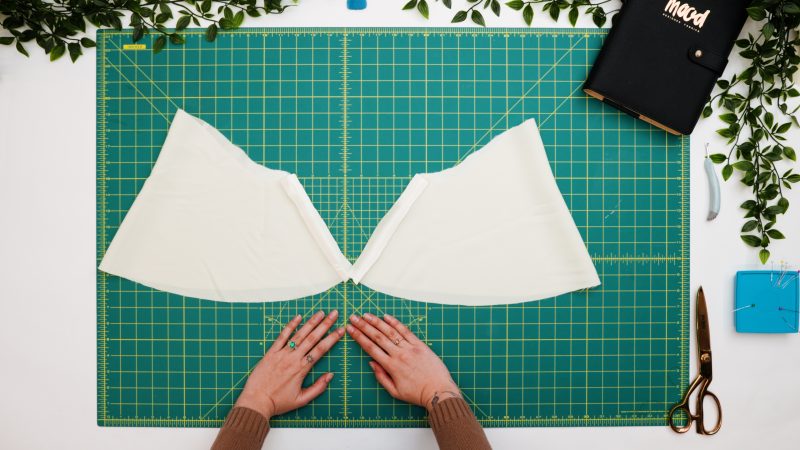
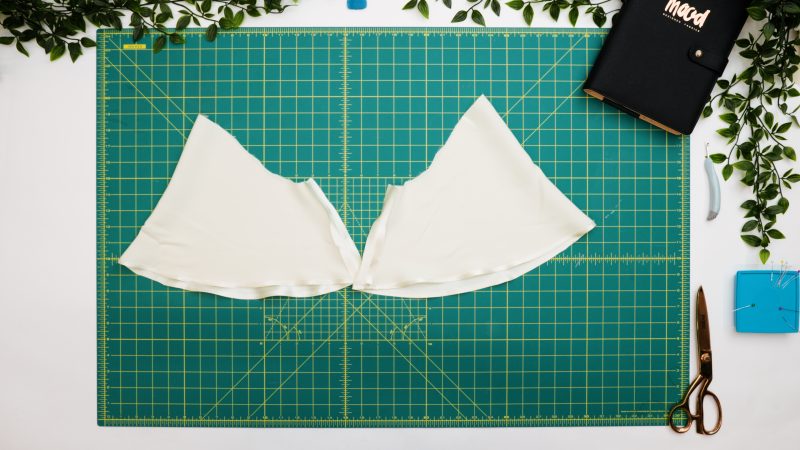
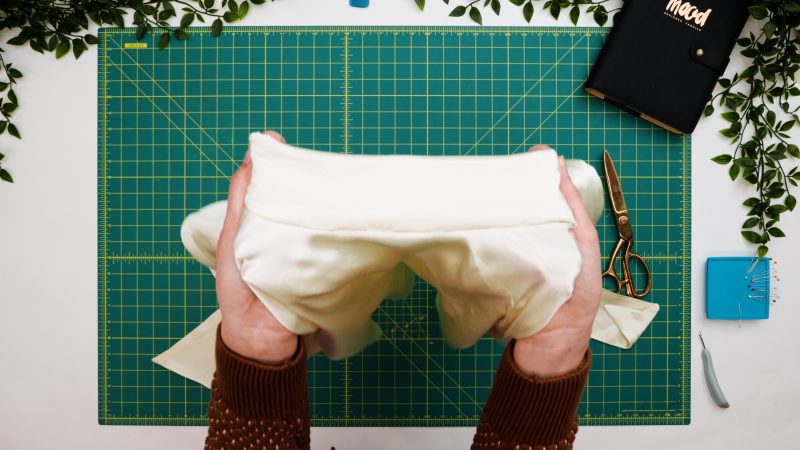
Step 2
PREPARE SLEEVES
- Fold the smalled of the 3 sets of sleeves in half right sides together with the sleeve inseams lined up.
- Pin and sew the sleeve inseams.
- Press the sleeve inseams open and flat.
- Hem the bottoms of the sleeves with a ¼ inch double rolled hem.
- Press the sleeve hems.
- Repeat for all 3 sets of sleeves.
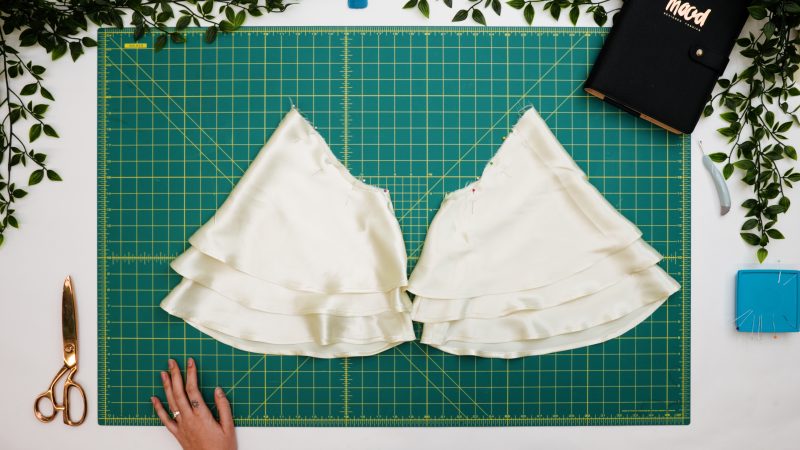
- Stack the sleeves inside each other so that the longest sleeve is the innermost, the medium sleeve is in the middle, and the shortest sleeve is the outermost.
- Pin the sleeve caps of the three sleeves together.
- Sew a stay stitch around the sleeve caps with ¼ inch seam allowance.
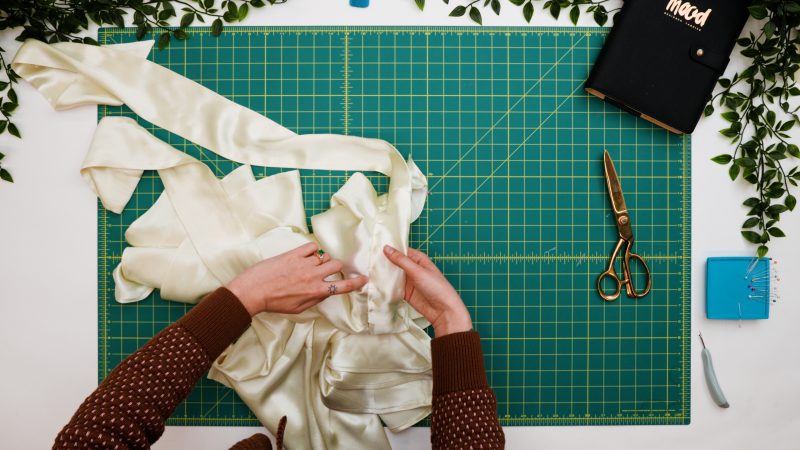
Step 3
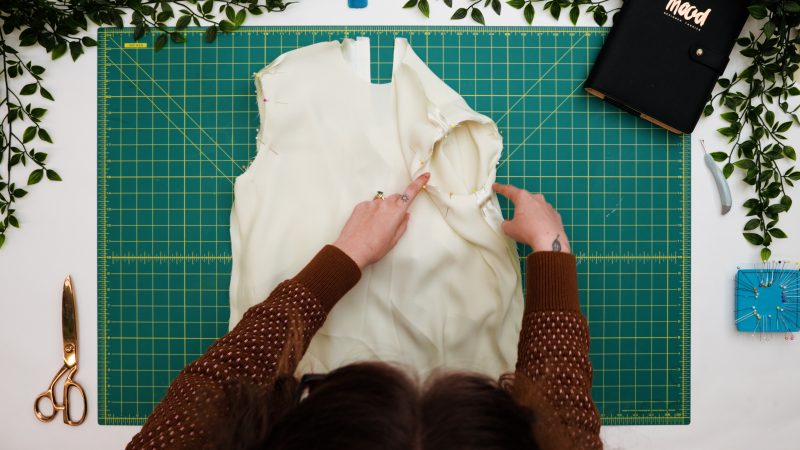
ATTACH SLEEVES
- Insert the sleeves right sides together into the armscyes of the blouse, making sure that the front and back of the sleeves are lined up with the front and back of the blouse.
- Pin and sew the sleeve caps to the armscyes.
Step 4
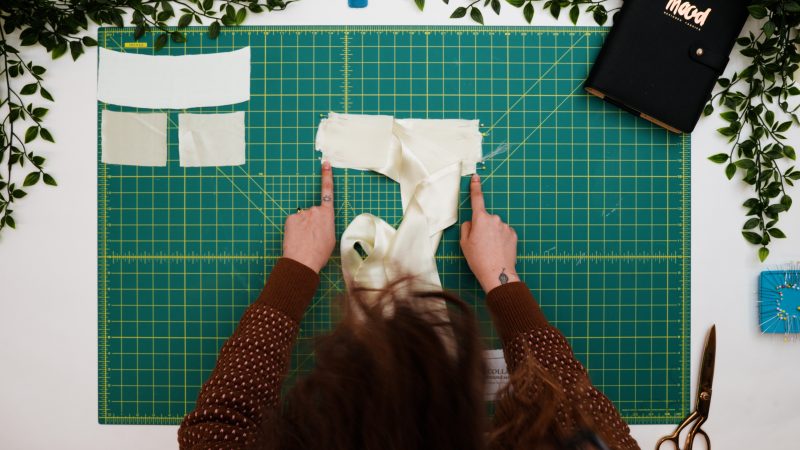
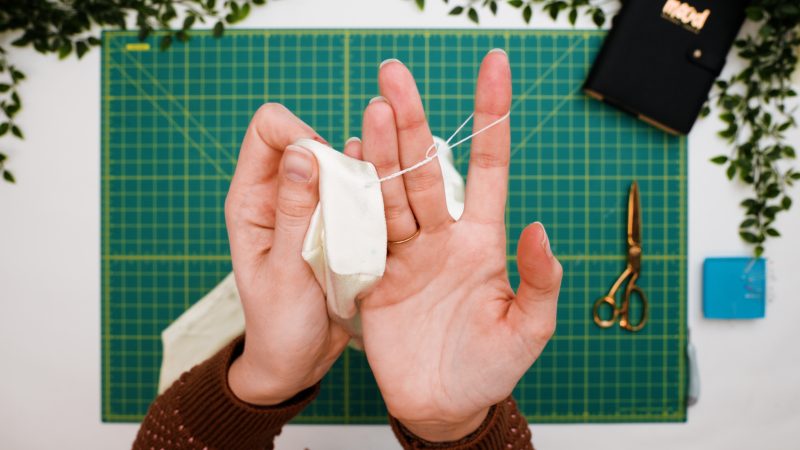
PREPARE BOWTIE
- Place the bowtie pieces right sides together (you should have two mirrored sets).
- Pin and sew around the two long edges and the pointy diagonal edge of the bowties, leaving the short flat end open to flip them right sides out.
- Clip the pointed corners of the ties.
- Flip the ties right sides out and press them flat.
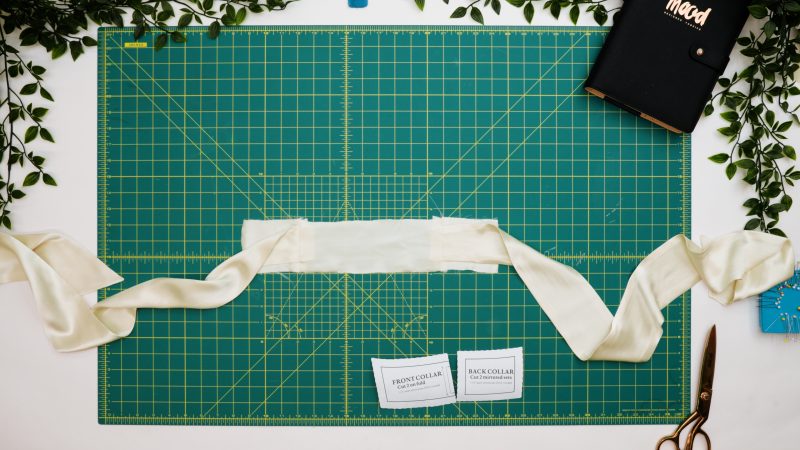
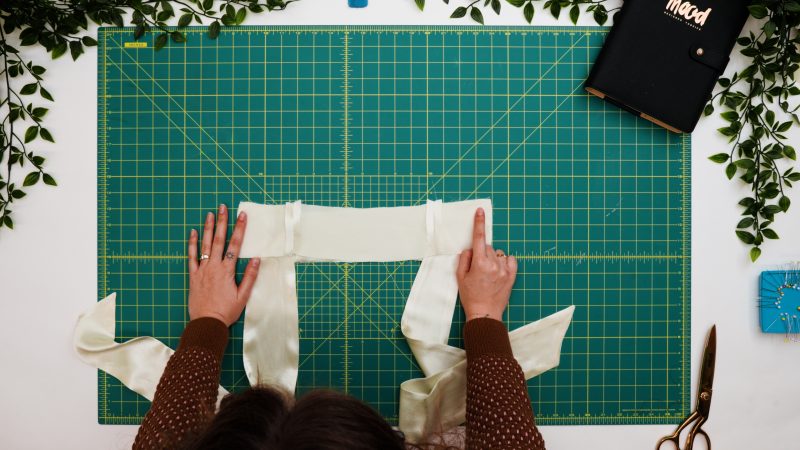
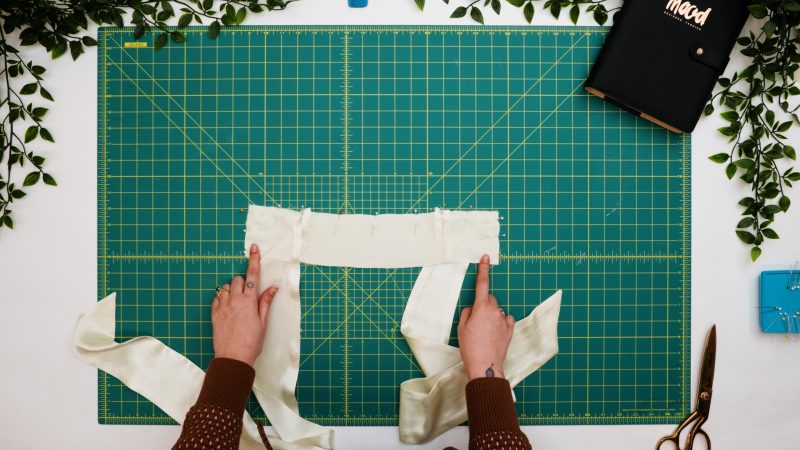
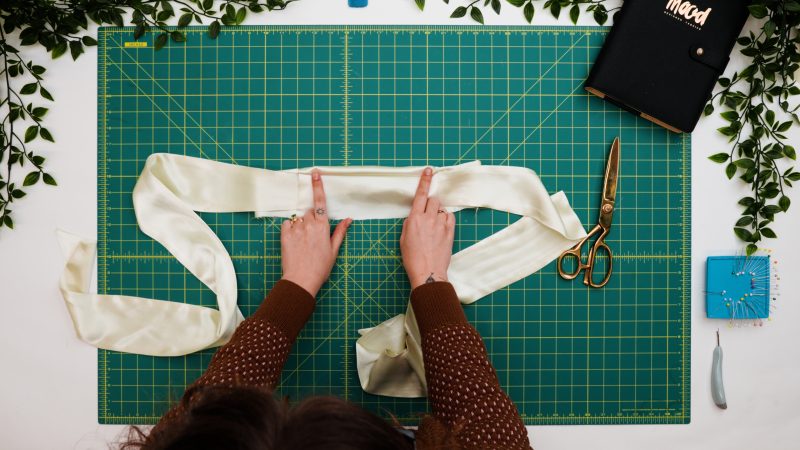
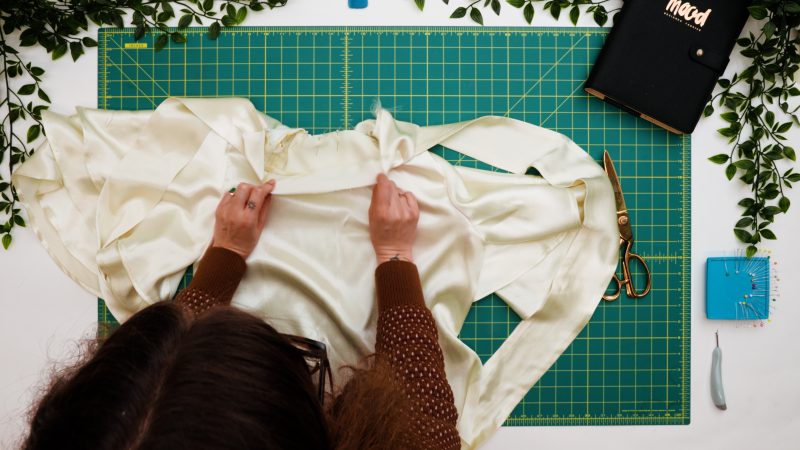
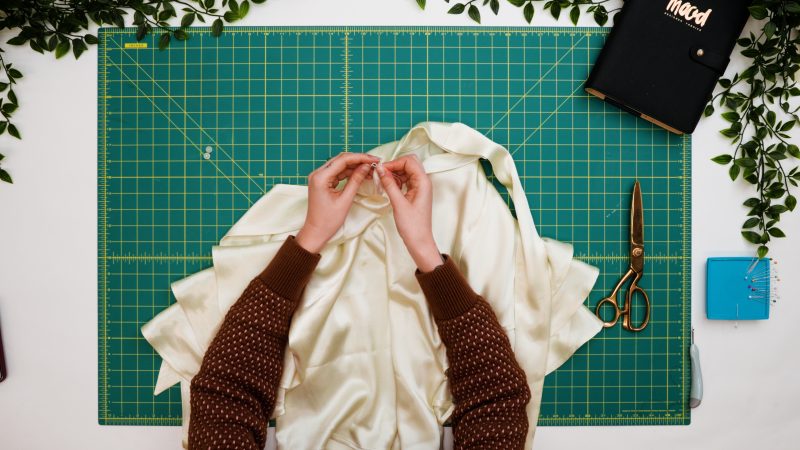
Step 5
PREPARE COLLAR
- Layout the front collar piece.
- Place the raw edges of the bowties on top of the raw edges of the sides of the front collar.
- Place the back collar pieces right sides together on top of the bowties and front collar piece.
- Pin the side seams of the collar with the bowties sandwiched between the layers.
- Sew the side seams of the collar and press the seams open and flat.
- Attach the other set of collar pieces the same way you attached the first set, but without the bowties sandwiched between the layers.
- Place the collar piece without the bowties right sides together on top of the collar piece with the bowties.
- Pin the top edge and sides of the collar pieces together.
- Sew the three sides of the collar together.
- Clip the corners of the collar then flip it right sides out.

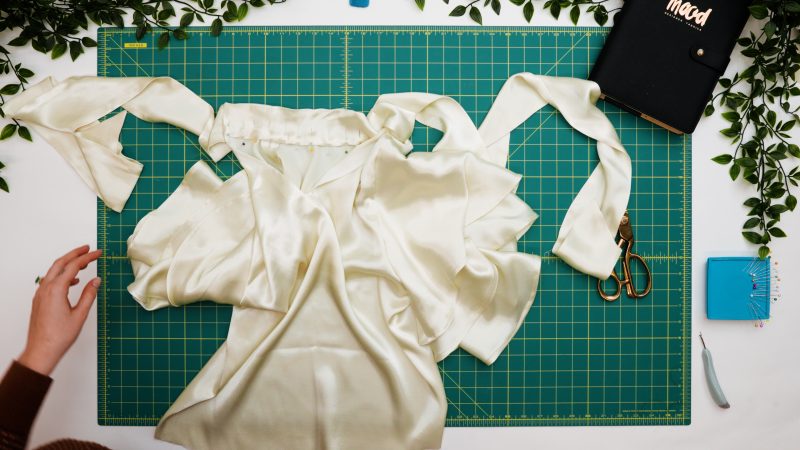
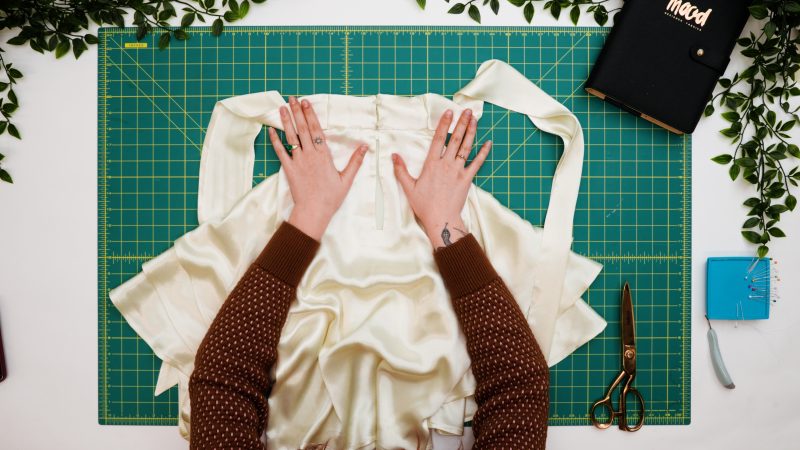
Step 6
ATTACH COLLAR
- Line up the neckline of the blouse with the raw edge of the outer layer of the collar (the one with the bowties).
- Pin only the outer layer of the collar to the neckline of the blouse.
- Sew the collar to the neckline.
- Press a ½ inch fold into the raw edge of the inner collar piece.
- Pin the folded edge of the inner collar directly on top of the collar seam that you just sewed. Make sure that the folded edge of the inner collar is sticking out just slightly below the collar seam. Also make sure that the entire raw edge of the neckline is sandwiched between the two layers of the collar.
- From the outside of the blouse, topstitch a stitch in the ditch to attach the inner collar to the neckline invisibly.
Step 7
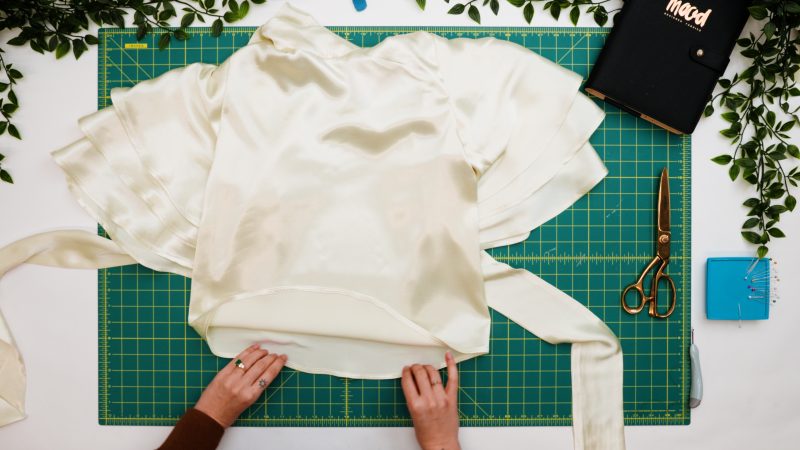
HEM BLOUSE
- Create a ¼ inch double folded hem on the bottom of the blouse the same way you did in step 2 for the sleeves.
- Press the hem.
Step 8
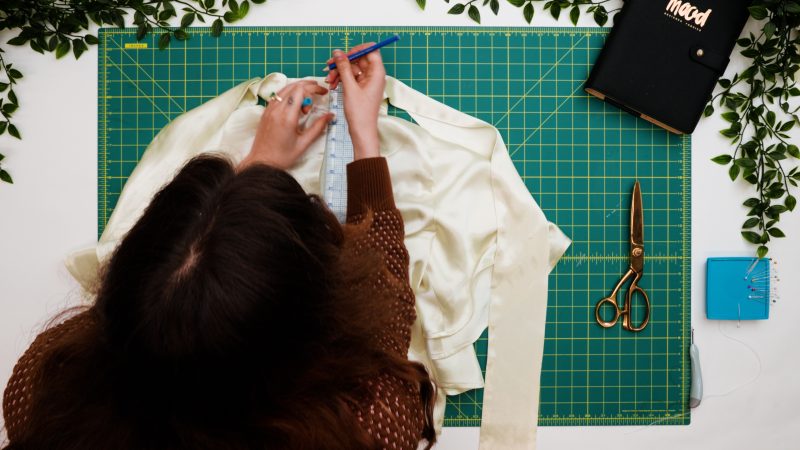
BUTTONLOOPS
- Mark the desired location for your buttons and button loops on the center back collar of the blouse.
- Thread a needle so that there are two strands going through the eye of the needle (4 threads hanging from the needle) and tie a knot at the end of the thread.
- Thread the needle through one of the chalk markings you made.
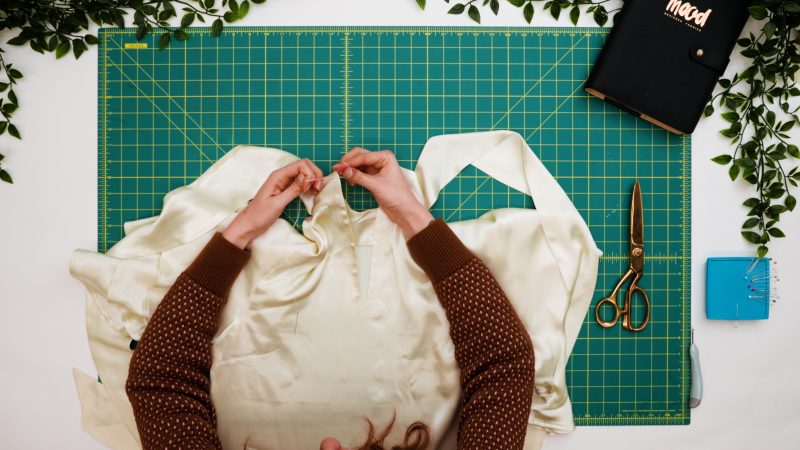
- Begin crocheting a chain stitch with the thread with your hands (or a crochet hook if you have one, but I just used my fingers). To start a chain stitch, start by tying a slip knot into the thread. Make sure the knot of the slip knot is flush against the right side of the fabric.
- Reach through the loop of the slip knot and grab the loose thread. Make a new loop with the loose thread and pull the previous loop tight.
- Repeat these steps over and over until your chain is long enough to fit around the perimeter of your button.
- Poke the needle back through the back of the thread once the chain is long enough and tie off the hand stitching with a knot in the inside of the blouse.
- Make another one of these button loops on the other chalk mark.
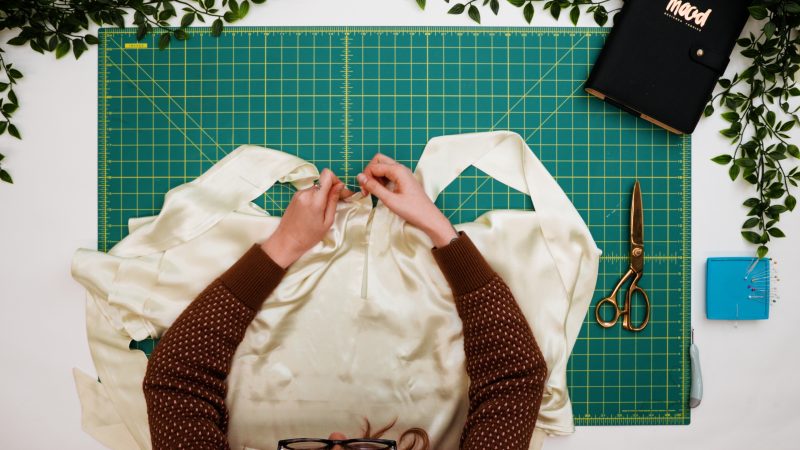
Step 9
BUTTONS
- Hand sew buttons on the center back neckline at the chalk marks opposite to the button loops.
- Button the buttons and tie the bow at the front of the blouse and you’re ready to wear it!
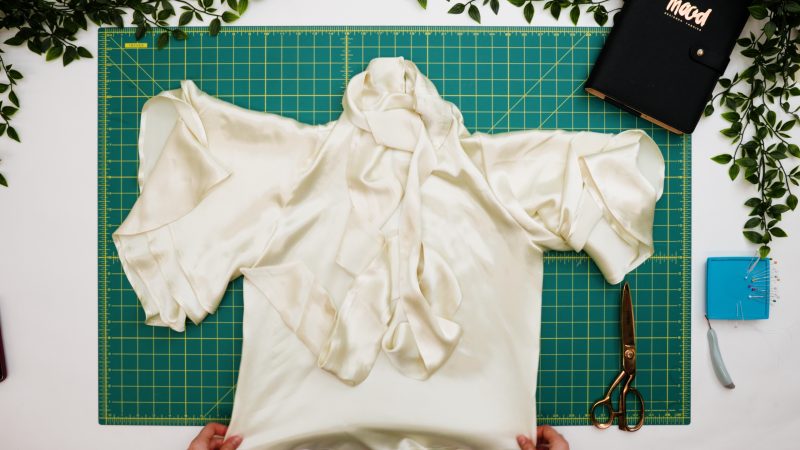
Sewing Success: The Completed Cassis Tiered Sleeve Blouse
Share this post with a friend (or two!), download the Cassis Tiered Sleeve Blouse free sewing pattern, and show us which fabrics and colors you choose, using the hashtags #MoodCassisPattern & #MadeWithMood—and don’t forget to tag us @MoodFabrics, too.
Free Sewing Pattern Inspiration for Your Next Project
With 500+ free sewing patterns and counting, your opportunities for sewing with Mood are endless!
We hope you had as much fun sewing this Cassis Tiered Sleeve Blouse pattern as we did! As always, we want to hear from you—share your thoughts and comments below and let us know where you’ll be wearing the Cassis Tiered Sleeve Blouse free sewing pattern!
Can’t get enough sewing with Mood? Browse your next make with our latest free sewing patterns.
Bonus: The Cassis Tiered Sleeve Blouse pairs perfectly with our Lunette Cocktail Dress Free Sewing Pattern as well as the Amherst Palazzo Set Free Sewing Pattern!
How much fabric needed for 14-16?
Hi Brenda
You need 3.25 yards of fabric with a width of 55″ to 58″.
Could this one be sewn without the bow collar?
Hi Anne
Yes, of course! The bow straps are sewn to the sides of the collar, so you can simply skip steps 4 and 5 and sew the collar directly to the neckline. You can also omit the collar side seams if you prefer. Just join the back and front collar pattern pieces and cut the collar as one piece.
Hi I would like to know if a lightweight cotton would work I don’t have anything like satin and I really like the pattern
Yes that would totally work!
Thank you so much it looks great!! Definitely something I’d actually really like to have in my closet 🙂
It means a lot to have free patterns, especially for beginners like me, so thanks again it’s very very much apprecaiated!!!
—
FYI I noticed the pattern says cut 4 of H where actually I believe it should be 2 mirrored sets
Is there a pattern for that pant the model is wearing?
Hi Kajal! These are the Amherst Palazzo Pants from the Mood Sewciety Blog.