
Who decided shorts belong only in the summer? Meet the Dresden Shorts, the pattern that politely but firmly refuses to hibernate.
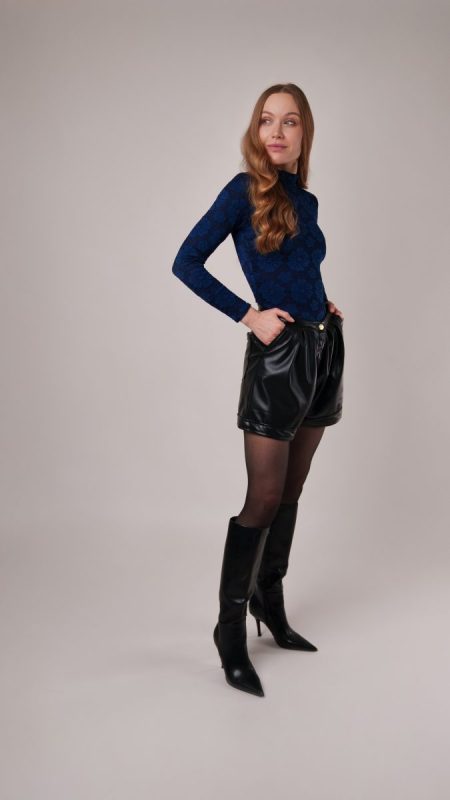
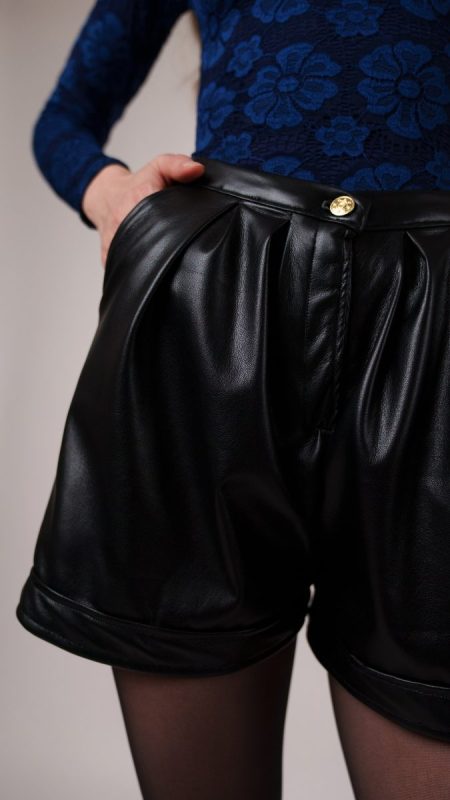
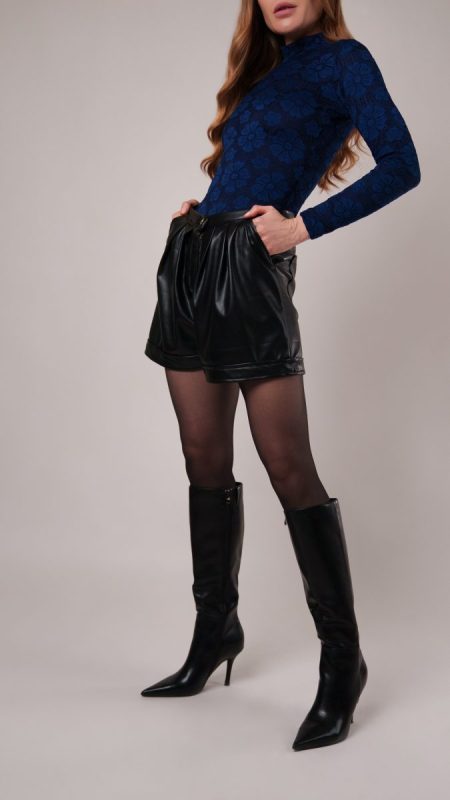
The Dresden Shorts pattern was designed to give shorts their cozy winter moment. Cut from buttery soft faux leather with a brushed suede backing, these shorts offer warmth, structure, and shine. The pleated silhouette is clean and flattering, with just enough drape to move beautifully while still holding its shape. The two different types of pockets give you an opportunity to show off the refinement of your tailoring skills. These shorts feel indulgent to wear and look unapologetically cool.
If you need a little extra guidance while sewing, be sure to check out the full-length YouTube tutorial linked at the top of this page. In the tutorial, we create the Dresden Shorts using Mood’s Carbon Brushed Stretch Khaki Twill from the Averill Collection, a beautifully soft fabric available in eight gorgeous colors that are perfect for creating comfortable yet elevated wardrobe staples.
These shorts are made for city sidewalks, holiday dinners, late nights, and all the moments when you want your outfit to do the talking. The Dresden Shorts prove that cold weather style does not have to play it safe. Sometimes, it gets better when it breaks the rules.
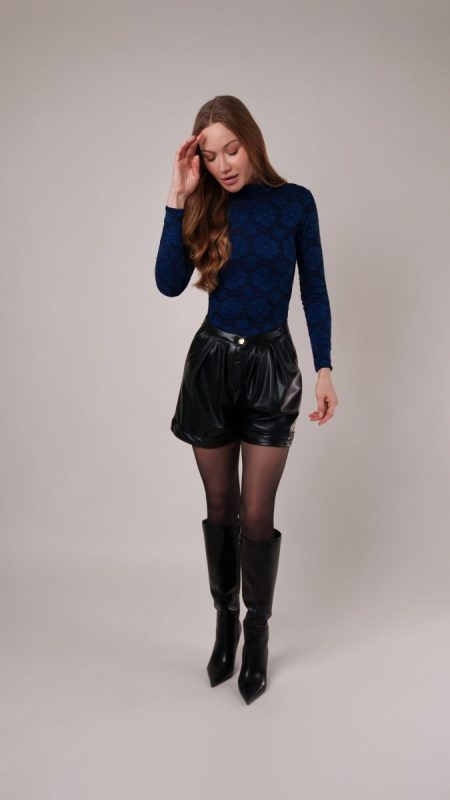
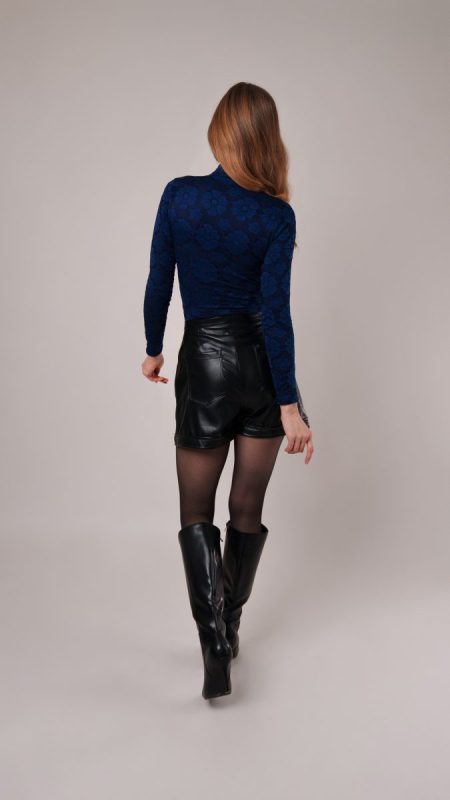
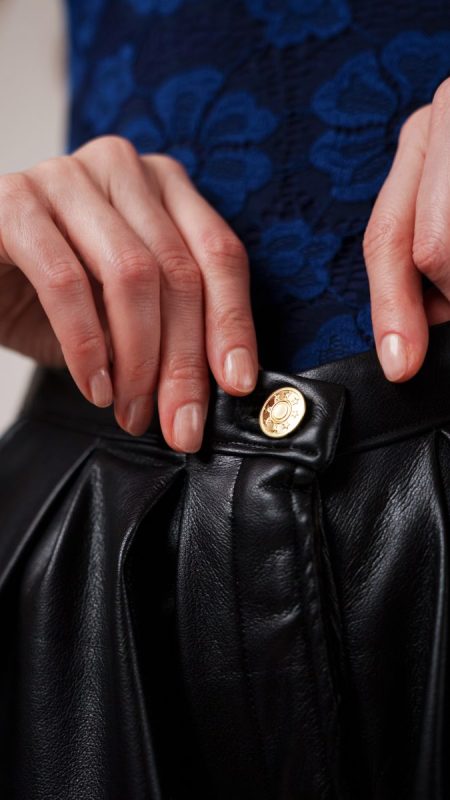
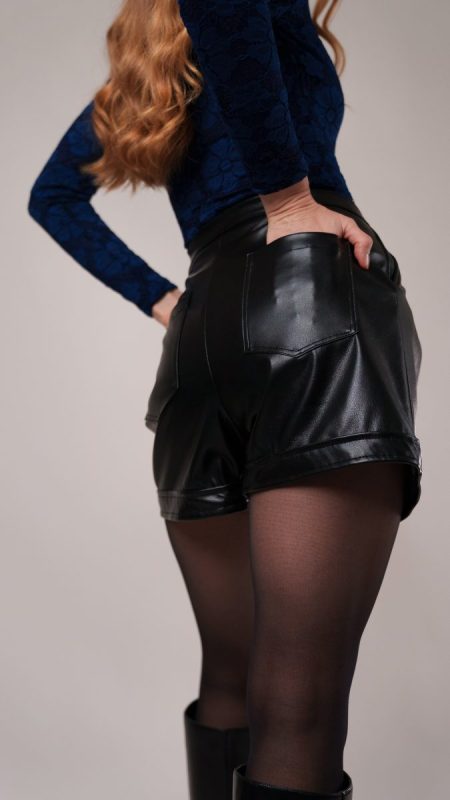
Essential Materials & Sizing Guide for the Dresden Shorts
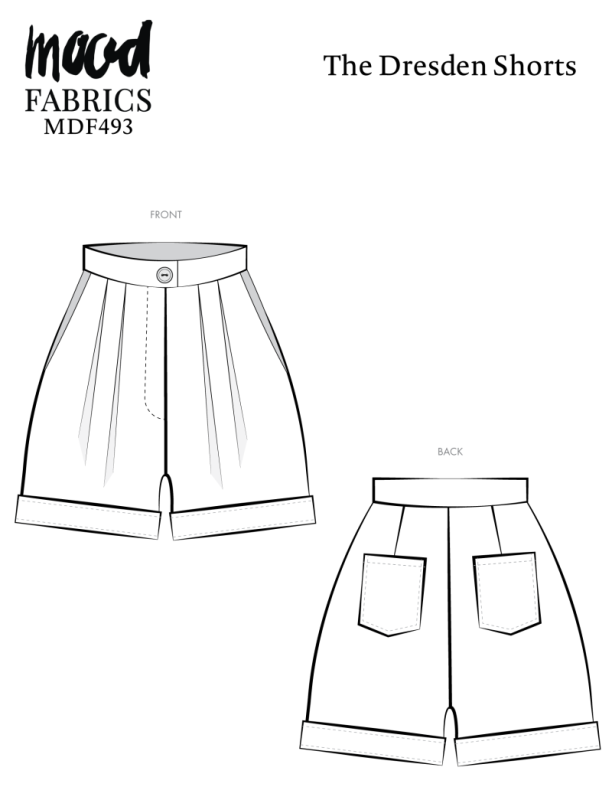
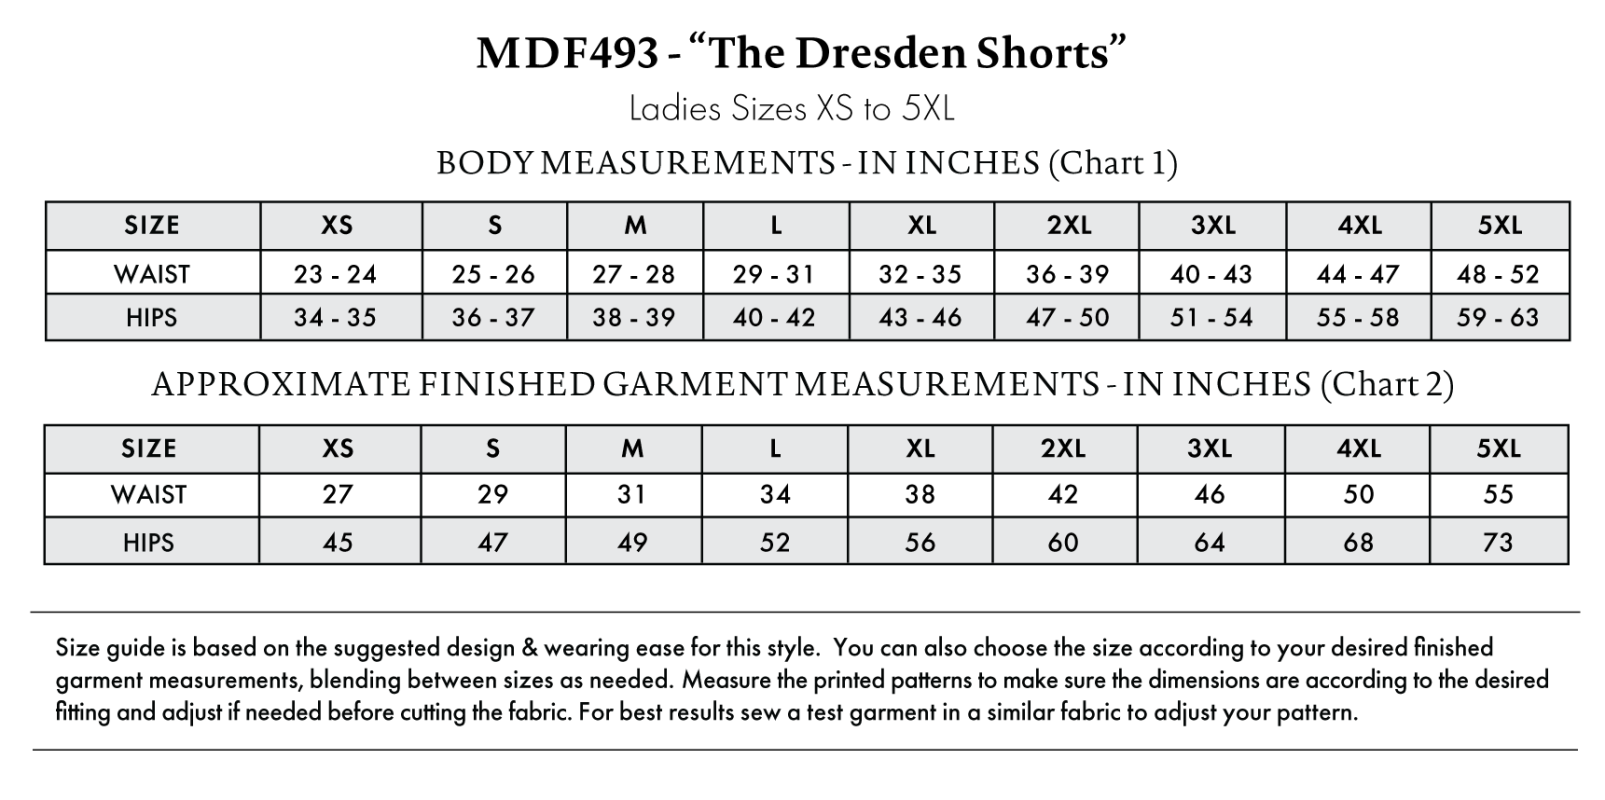
Continue reading for a breakdown of what knowledge and materials you need for creating your very own shorts! We’ve got you covered with the recommended materials we used—if you want to follow along exactly—as well as a curated list of alternative fabric type recommendations if you want to customize your own version. The Dresden Shorts free sewing pattern download includes technical drawings for seam and shorts visibility, plus a size chart to help you find your perfect fit!
Purchase Products Used Below:
Quantities indicated are for sewing a size small shorts.* Toggle the ‘SHOP THIS LOOK’ box to find quantity estimates for other sizes.
- 1.5 yards of Buttery Faux Leather with Brushed Suede-like Backing – Black – Veronica Collection
- 0.5 yards of Black Paisley Polyester Jacquard
- 1 each of Dritz Gold Jean Buttons – 6 ct
- 1 each of Metal Closed Bottom Zipper with Gold Teeth 8″ – Navy
- 1 each of Gutermann Sew All Thread 250m – 10 Black
- MDF493 – Dresden Shorts Sewing Pattern (Free download below!)
Additional Products Used:
*Quick Tip! The ‘SHOP THIS LOOK’ box defaults to full-yard quantities. To order an exact half-yard quantity for any fabric, simply use the decrease quantity button (-) to subtract by the half yard. Then click “ADD TO CART” to add all materials to your cart.
(Our system can only display full-yard quantities initially.)
Alternative Fabric Type Recommendations:
The Dresden Shorts sewing pattern is best suited for medium or heavy weight fashion fabrics. Explore other fabric types or colors from our featured collections for your shorts with the links below.
Download Your Free Sewing Pattern
Submit your name and email in the form below to receive the download link for the Dresden Shorts free sewing pattern directly in your inbox. Mood Sewciety Patterns will send your free download link via email with the subject line: ‘Your Free Download from Mood Sewciety – The Dresden Shorts’ (in PDF format for A4 and letter-size printing).
© MoodFabrics.com / MoodSewciety.com – Mass production, resale, or distribution of this pattern in any form is strictly prohibited.
Find Your Perfect Fit
The Dresden Shorts Sizing Guide is based on the suggested design & wearing ease for this style. You can also choose the size according to your desired finished garment measurements, blending between sizes as needed. Measure the printed patterns to make sure the dimensions are according to the desired fitting and adjust if needed before cutting the fabric. For best results, sew a test garment in a similar fabric to adjust your pattern.
Note: Always read all the instructions before cutting the fabric!
How to Sew The Dresden Shorts
The instructions provided below are designed to guide you through sewing the Dresden Shorts from start to finish
3 Tips for Sewing with Faux Leather
⇒ It cannot be ironed, so if you want to make your seams lay open and flat, you can use a tool like a clapper to press your seams without heat.
⇒ It was already mentioned in the materials list, but I highly recommend using leather needles on your sewing machine. These needles prevent your stitches from skipping on thick and sticky fabric.
⇒ Faux leather will get permanent holes in it after your puncture it with a needle, so make sure you really understand the directions before you start this project so you can avoid seam ripping and having visible holes in your shorts.
Pattern Pieces & Fabric Cuts Needed
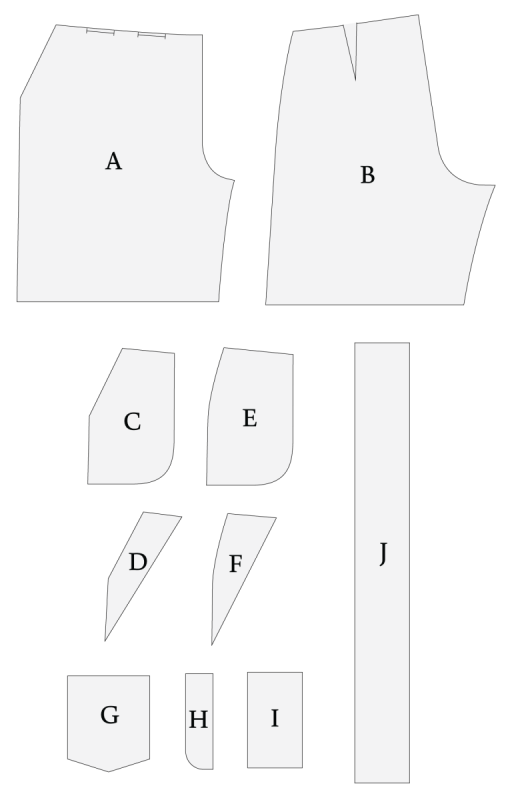
- (A) FRONT
- FABRIC – CUT 2 MIRRORED
- (B) BACK
- FABRIC – CUT 2 MIRRORED
- (C) SIDE POCKETS (A)
- LINING – CUT 2 MIRRORED
- (D) SIDE POCKETS (A) FACING
- FABRIC – CUT 2 MIRRORED
- (E) SIDE POCKETS (B)
- LINING – CUT 2 MIRRORED
- (F) SIDE POCKETS (B) FACING
- FABRIC – CUT 2 MIRRORED
- (G) BACK POCKETS
- FABRIC – CUT 2 MIRRORED
- (H) FLY
- FABRIC – CUT 2
- (I) FLY SHIELD
- FABRIC – CUT 1
- (J) WAISTBAND
- FABRIC – CUT 1

Sew with a 1/2″ seam allowance for all seams unless otherwise specified.
Step 1
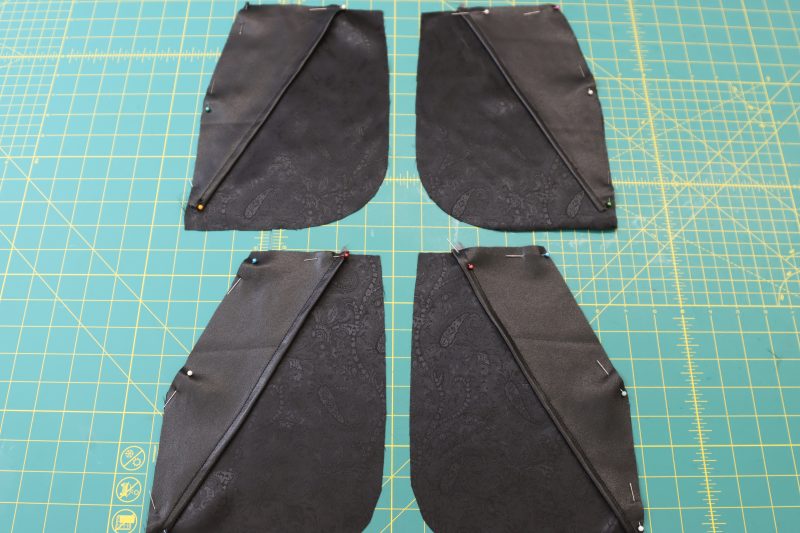
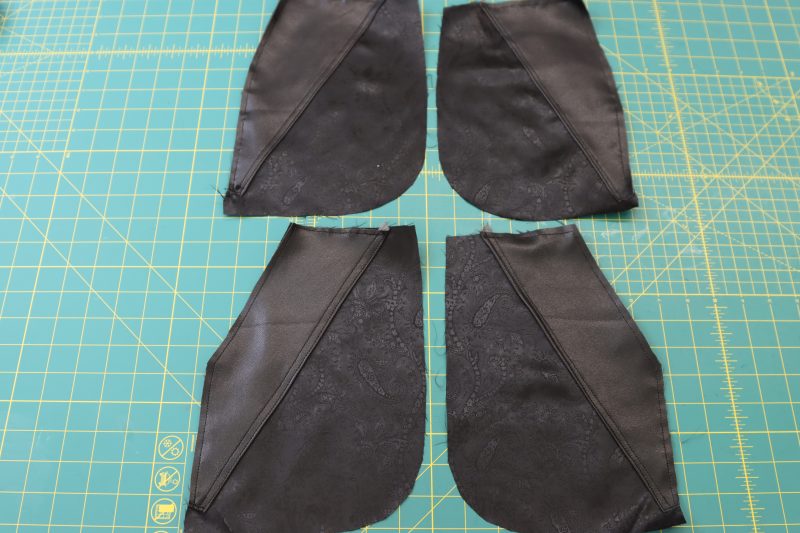
POCKET FACINGS
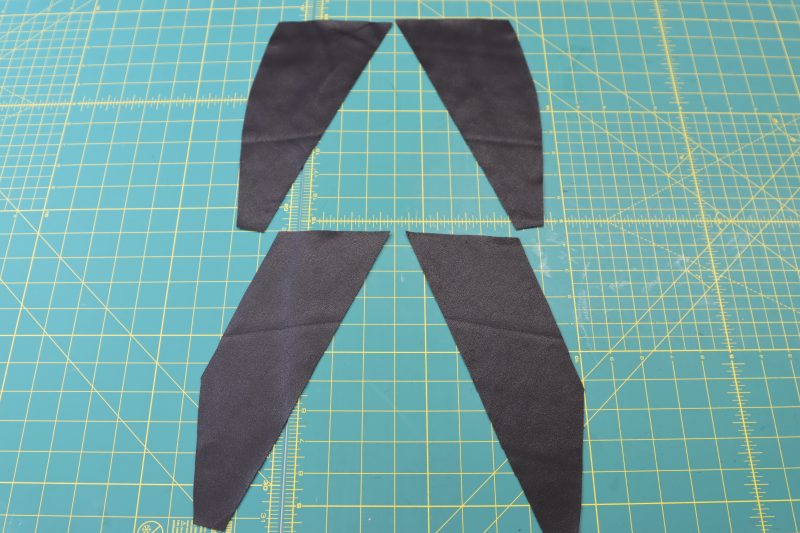
- Lay out all 4 pocket facing pieces so that they are mirroring their pair.
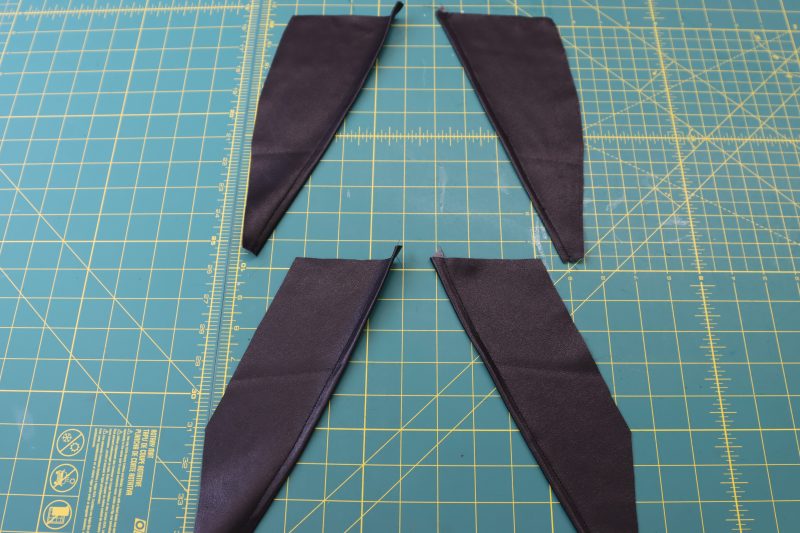
- Fold over the inside diagonal side of each pocket facing by ½ inch.
- Sew a straight stitch along the folded edge to hide the raw edge of the fabric.
- Place the A pocket facings on top of the A pockets and the B pocket facings on top of the B pockets with the wrong side of the pocket facings touching the right side of the pockets.
- Pin the pocket facings to the pockets.
- Sew the perimeter of each pocket facing to each pocket.
Step 2
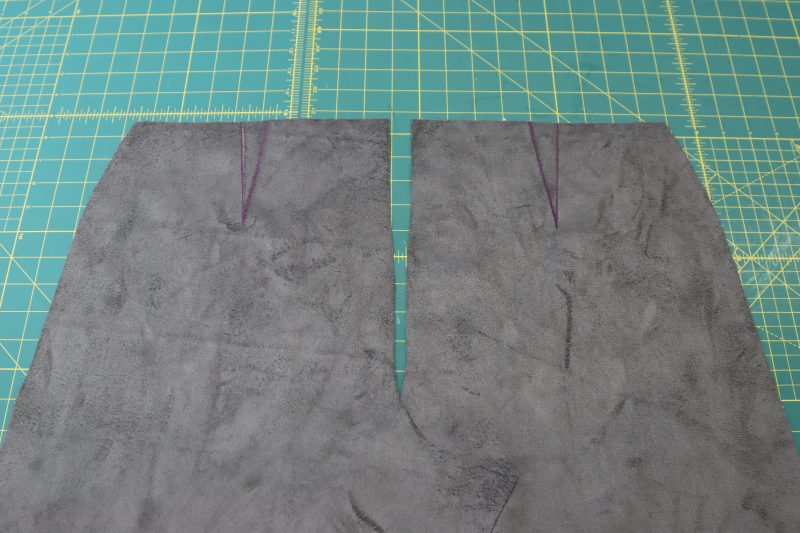
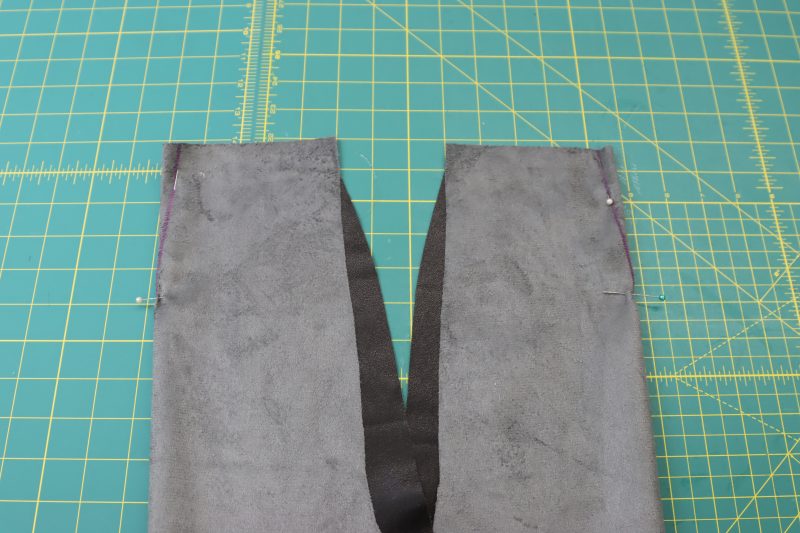
DARTS
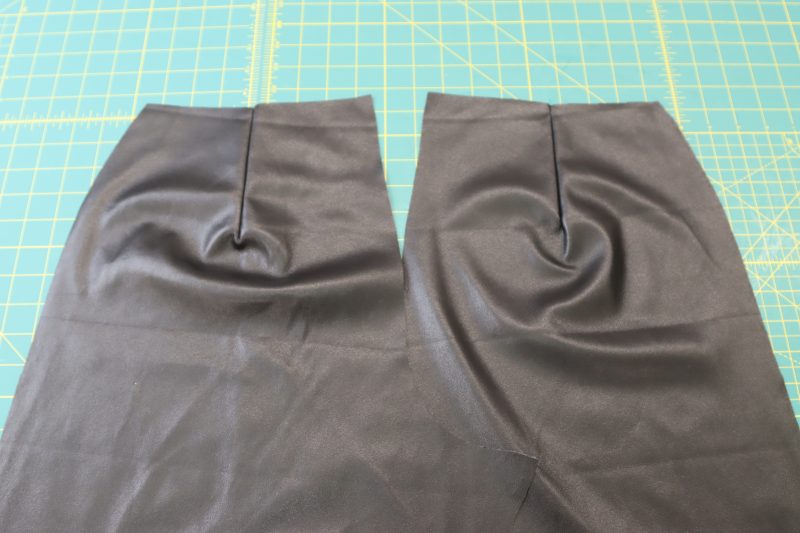
- Transfer the dart markings from the pattern paper to the fabric back shorts pieces using a fabric marker.
- Fold the back shorts pieces right sides together with the dart at the center of the fold.
- Pin the two sides of the darts to each other.
- Sew down each dart.
- Open the dart and lay the back shorts pieces flat.
Step 3
BACK SIDE POCKETS
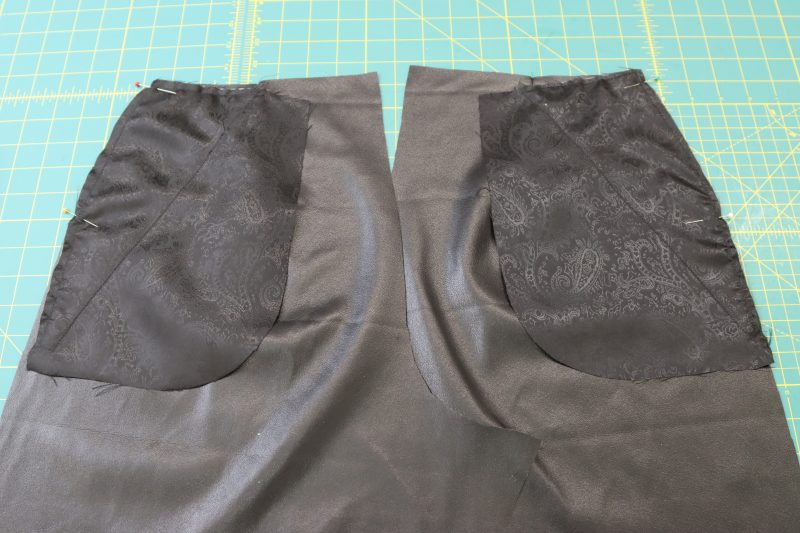
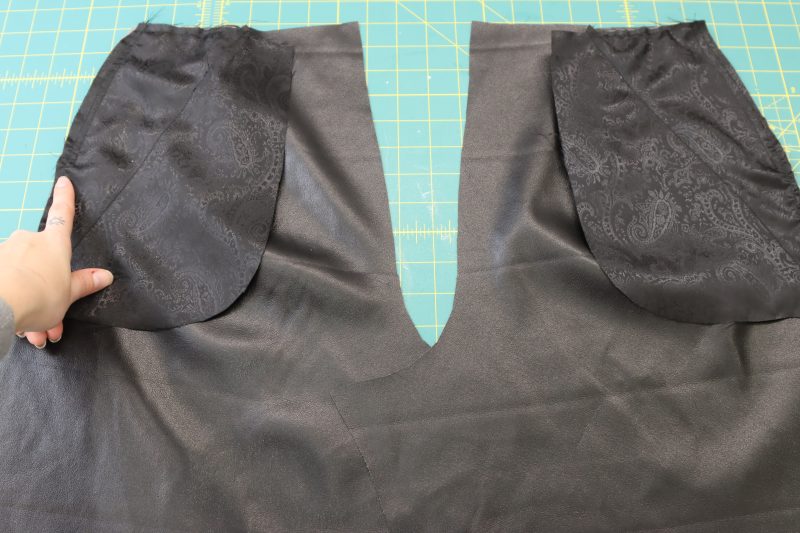
- Lay the B pockets against the back shorts pattern pieces, right sides together
- Pin the B pockets to the sides of the back shorts pieces, making sure to only pin the top half of the pocket to the side seams of the shorts.
- Sew the top half of the pocket to the side seams.
Step 4
BACK POCKETS
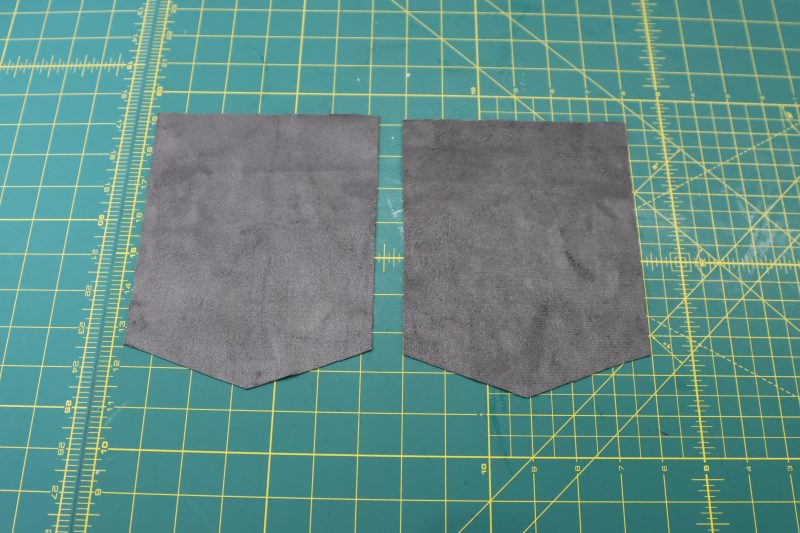
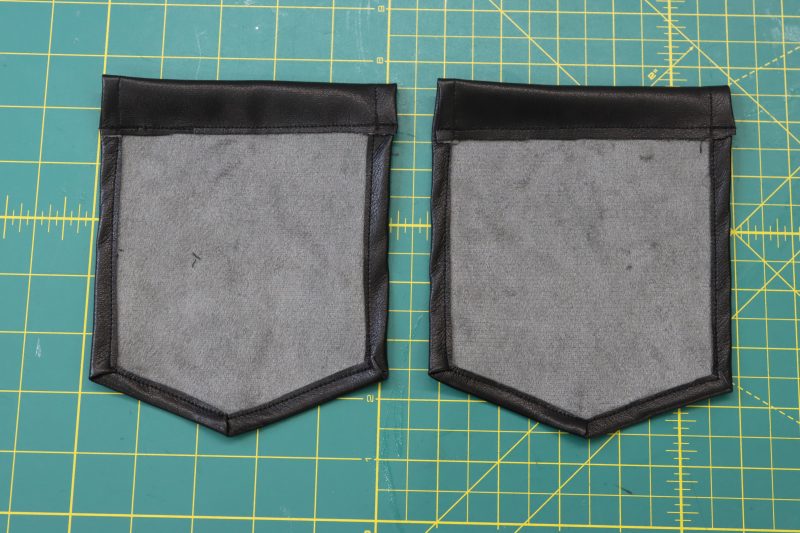
- Layout the back pocket pieces right sides down.
- Fold the top edge of the pocket down by 1 inch and pin in place.
- Sew the side and bottom edges of the pocket down by ¼ inch and pin in place.
- Sew around all edges of the back pocket to hide the raw edges.
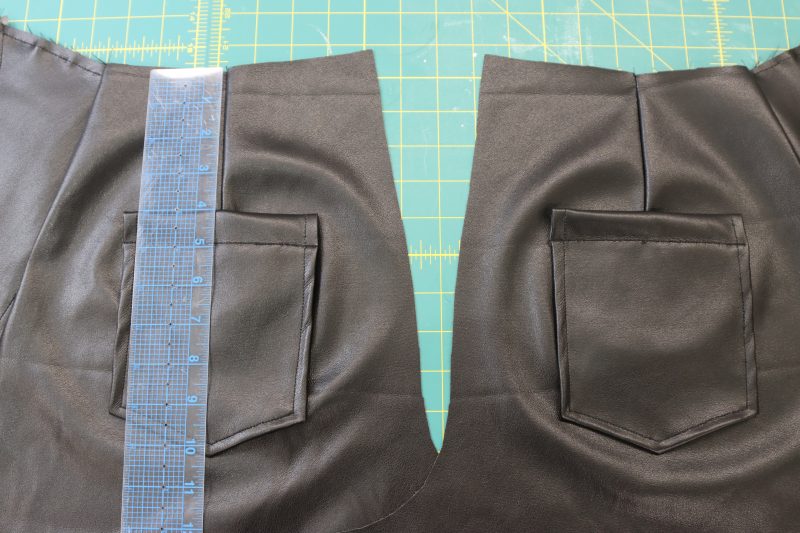
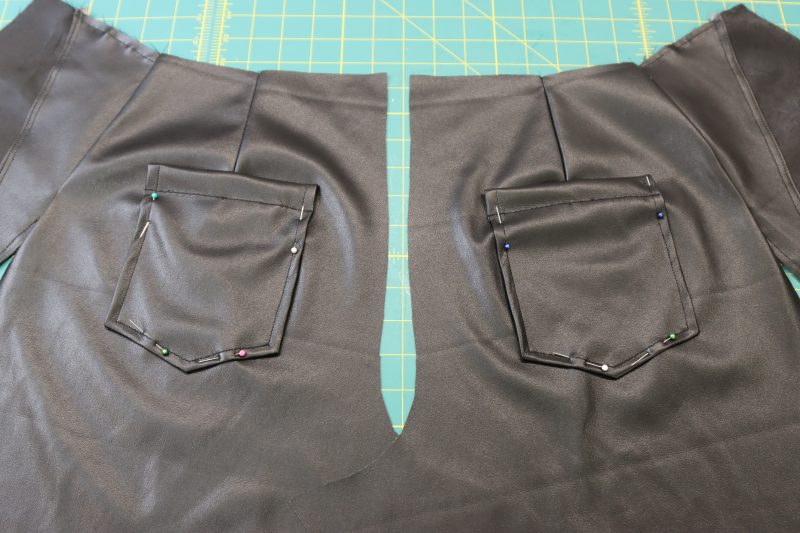
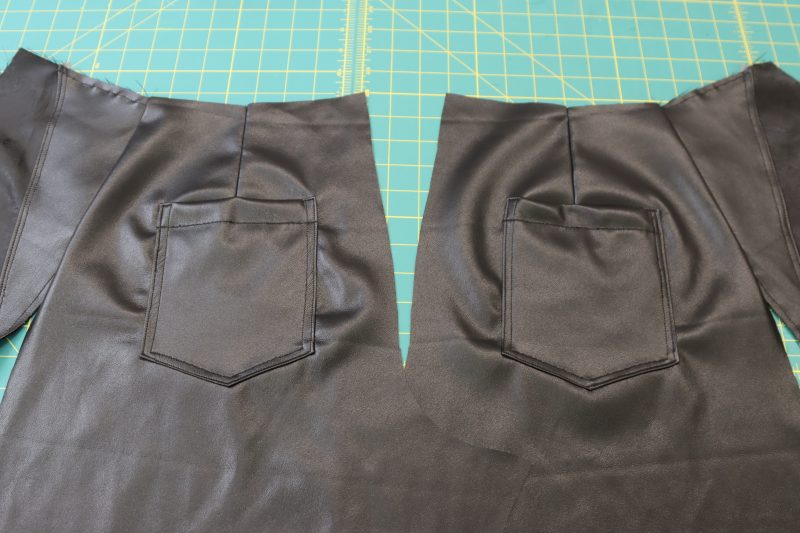
- Place the back pockets on the back of the shorts over the darts. Center the pockets so that they are exactly symmetrical over the dart and positioned 4 inches down from the waistline of the shorts.
- Pin and sew the sides and bottoms of the pockets to the backs of the shorts, leaving the top open.
Step 5
PLEATS
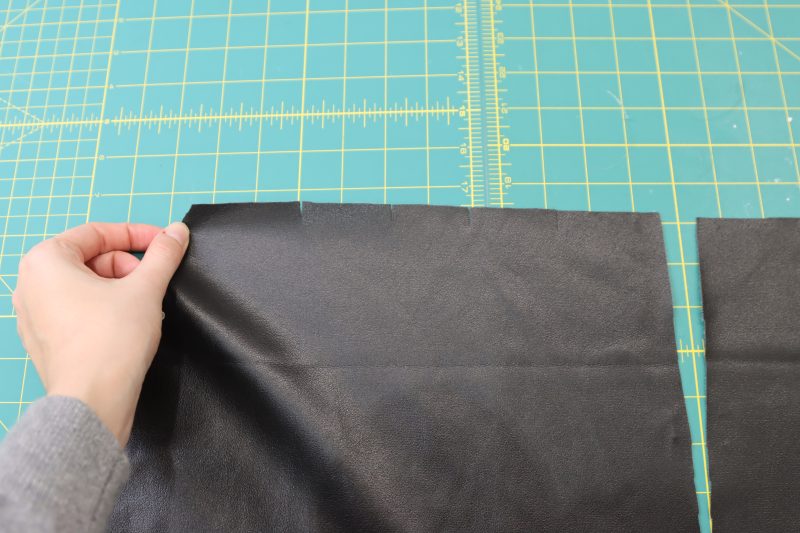
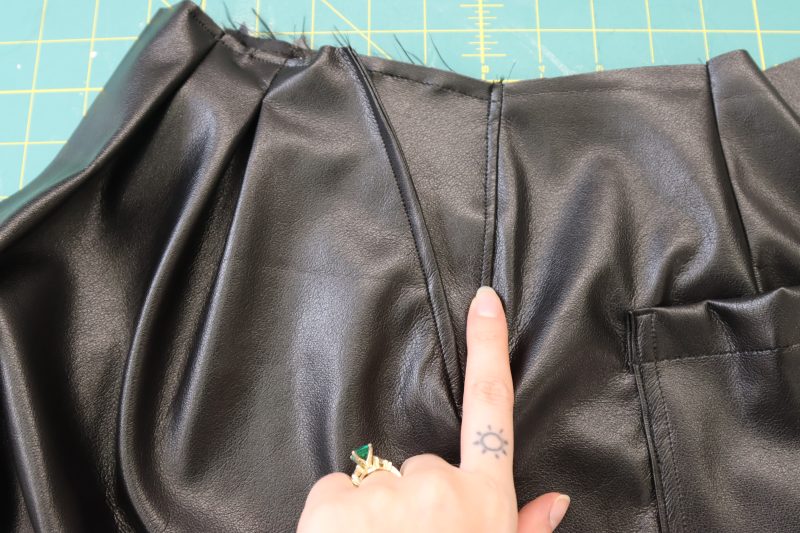
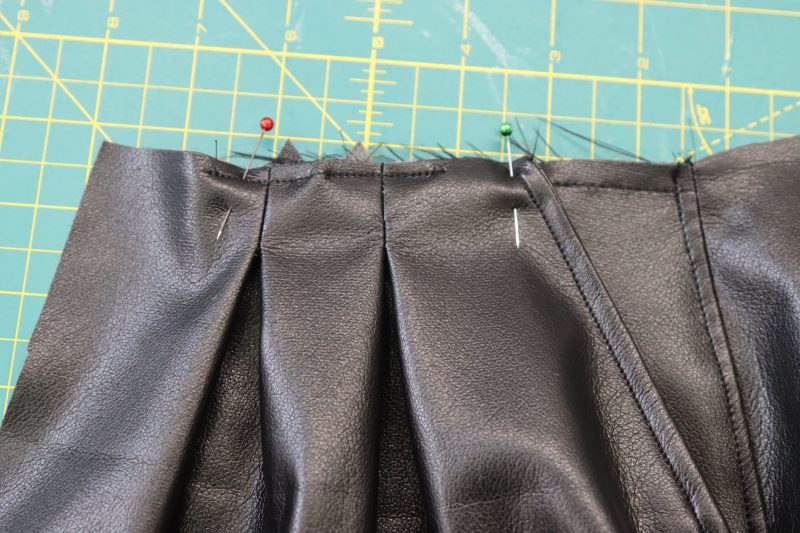
- Cut notches into the front shorts waistline to mark pleat placement.
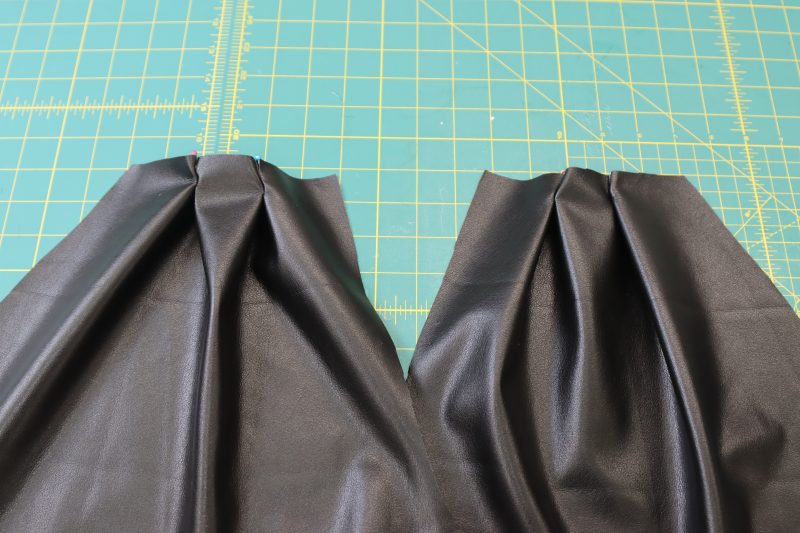
- On each side of the shorts, there are 4 notches. You have to fold the fabric right sides together so that each set of notches is kissing right sides together.
- Pin the notches right sides together.
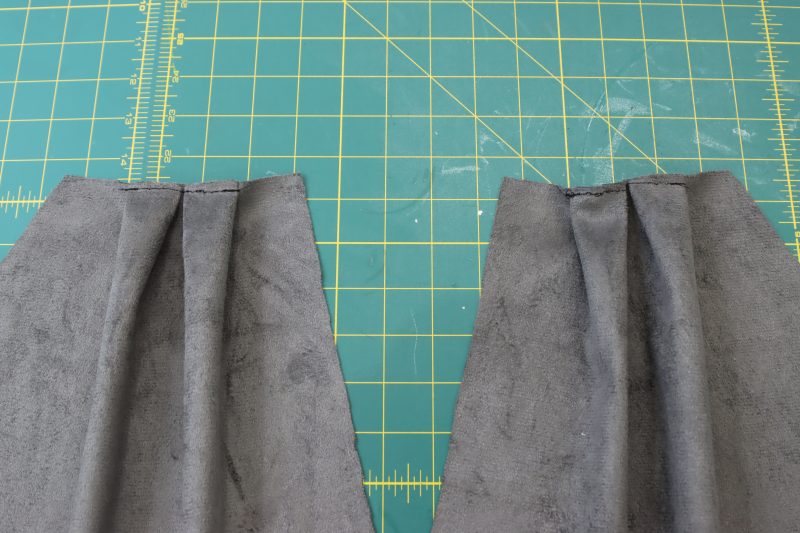
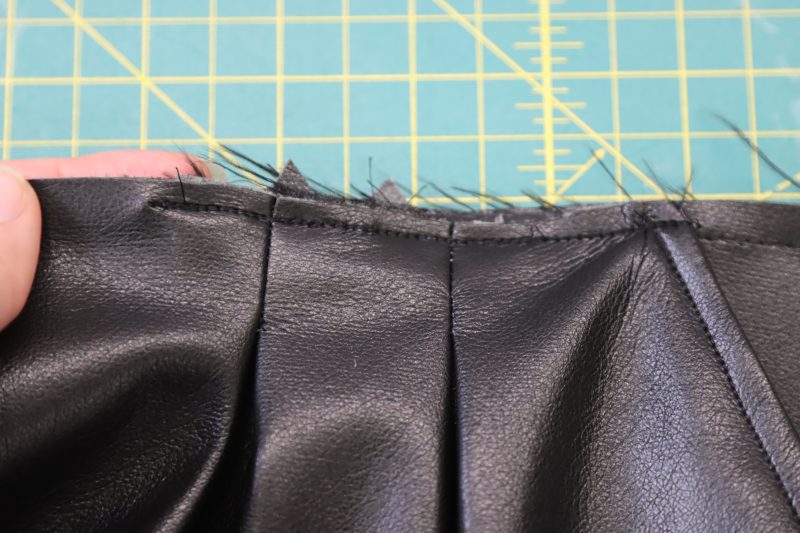
- Sew the notches down on the wrong side of the shorts, making sure the seam starts right at the notches and goes down one inch from the waistline of the shorts.
- Open up the pleats and lay them flat to turn them into box pleats.
- Topstitch over the box pleats to hold them in place.
Step 6
FRONT SIDE POCKETS
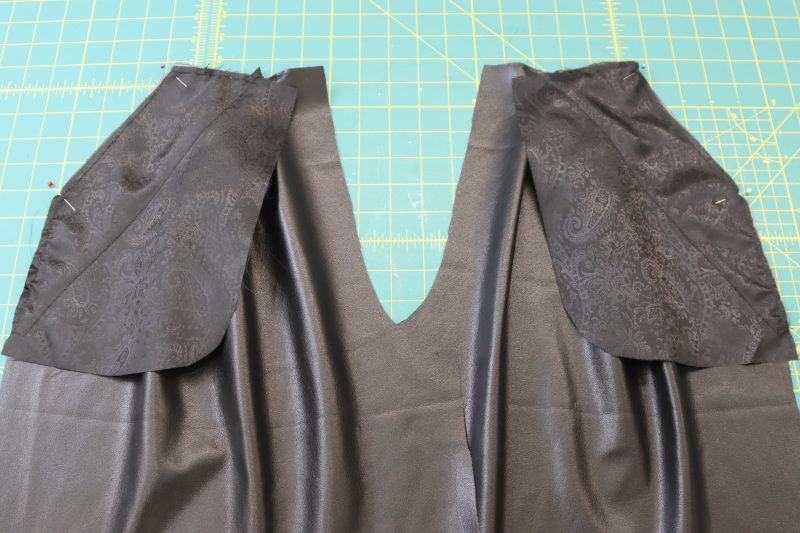
- Lay the A pockets against the front shorts pattern pieces, right sides together
- Pin the A pockets to the sides of the front shorts pieces, making sure to only pin the top half of the pocket to the side seams of the shorts.
- Sew the top half of the pocket to the side seams.
- Open the pocket from the shorts front and lay them splayed out.
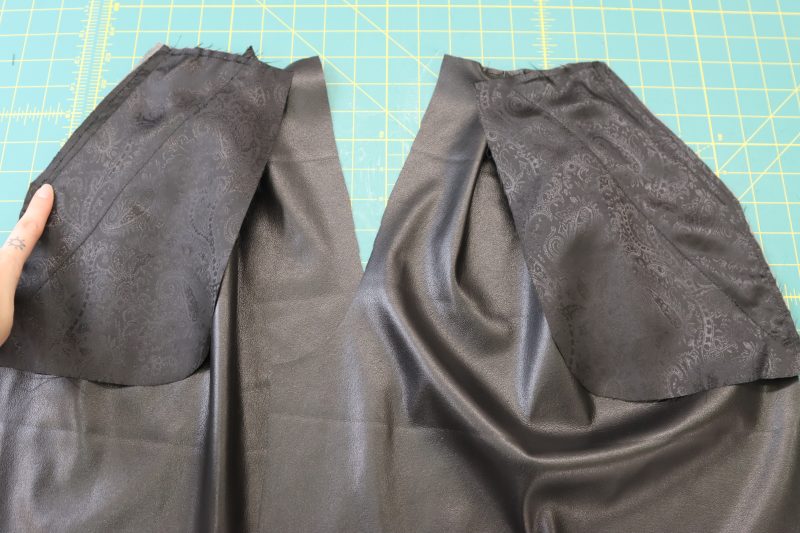
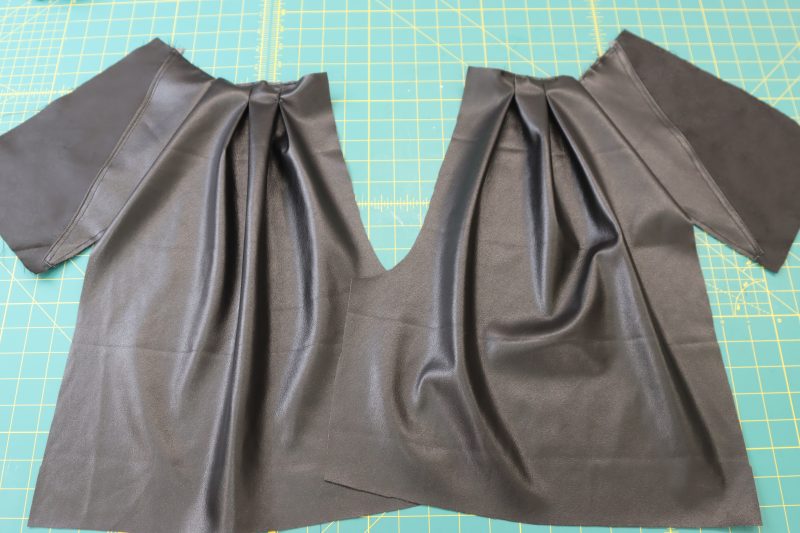
Step 7
SIDE SEAMS
- Lay the back shorts pieces on top of the front shorts pieces, right sides together, with the pockets and side seams lined up.
- Pin around the perimeter of the pockets and the side seams.
- Sew from the outer pocket corner, around the pocket, pivoting at the corner where the pocket meets the side of the shorts, and down the side seam of the shorts.
- Open the shorts at the side seams and topstitch the pocket openings.
- Topstitch the top of the pocket bag to the front waistline of the shorts to keep the pocket bag in place.
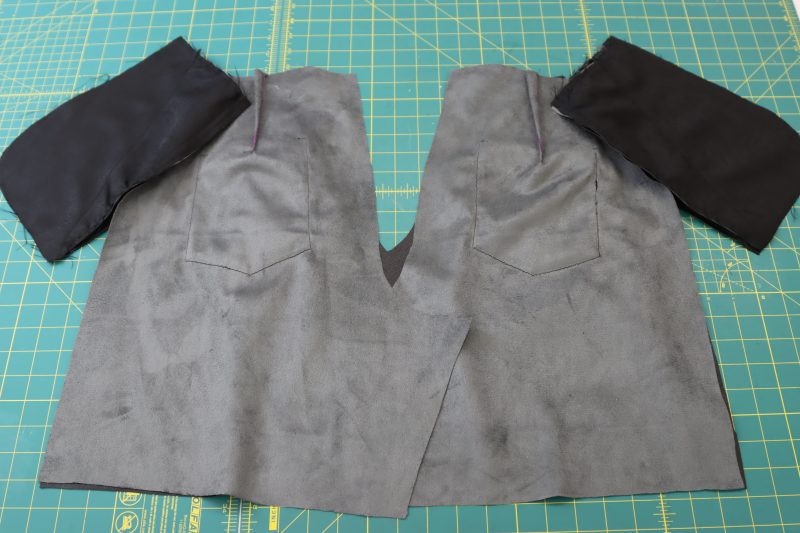
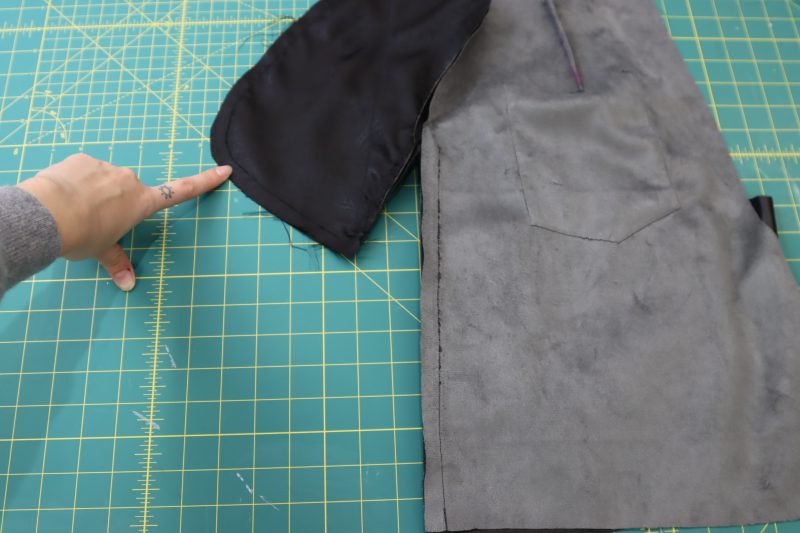
Step 8
PREPARE FLY
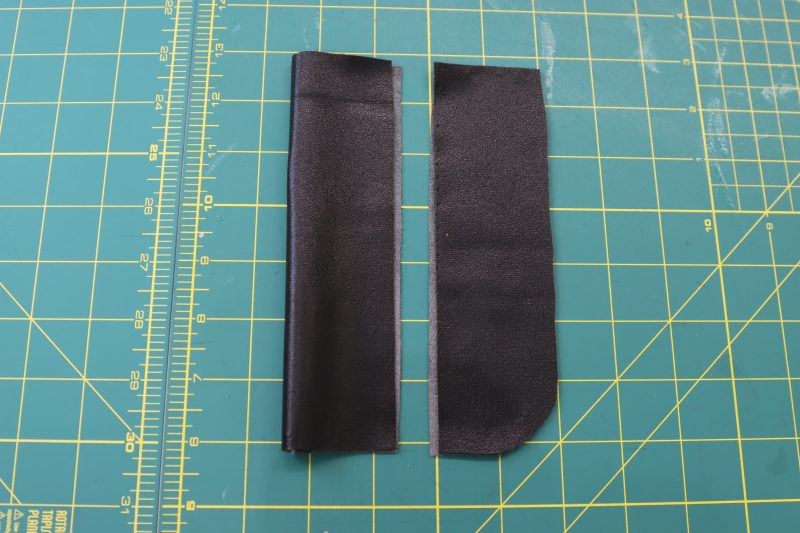
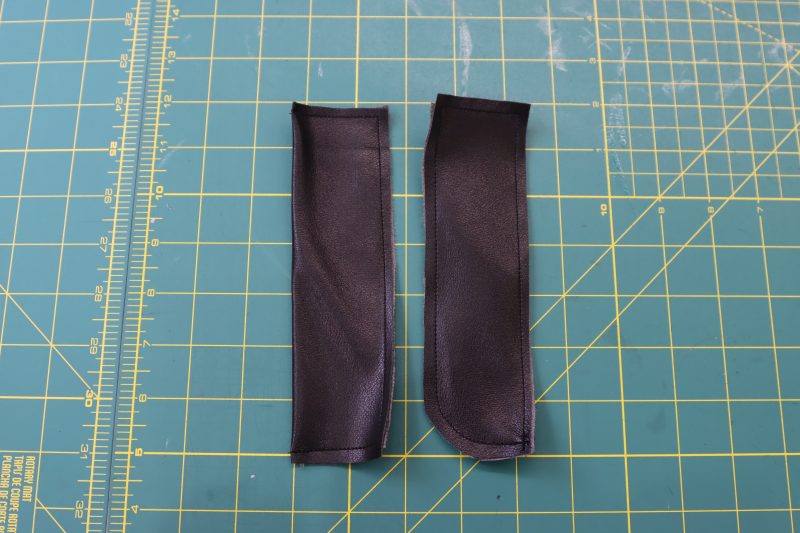
- Fold the fly shield wrong sides together.
- Sew around the 3 raw edges of the fly shield with ¼ inch seam allowance.
- Place the two fly facing pieces wrong sides together.
- Sew around the perimeter of the fly shield with ¼ inch seam allowance.
Step 9
FLY FACING
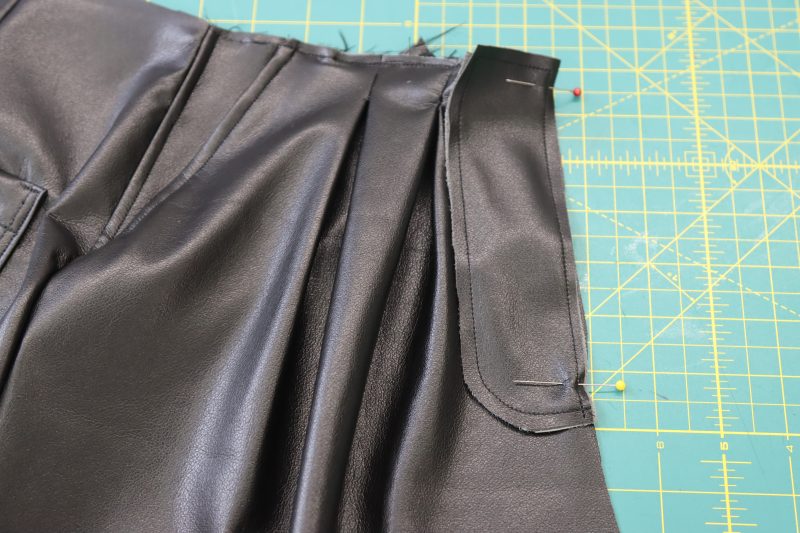
- Pin the long flat edge of the fly facing to one side of the front crotch opening.
- Sew the fly facing to the center front.
- Open the fly facing and lay it flat so that the seam allowance is hidden on the inside of the shorts.
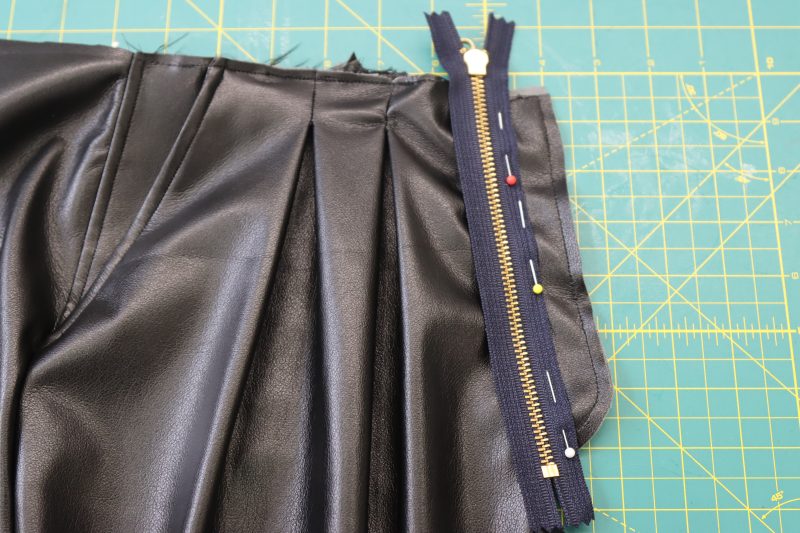
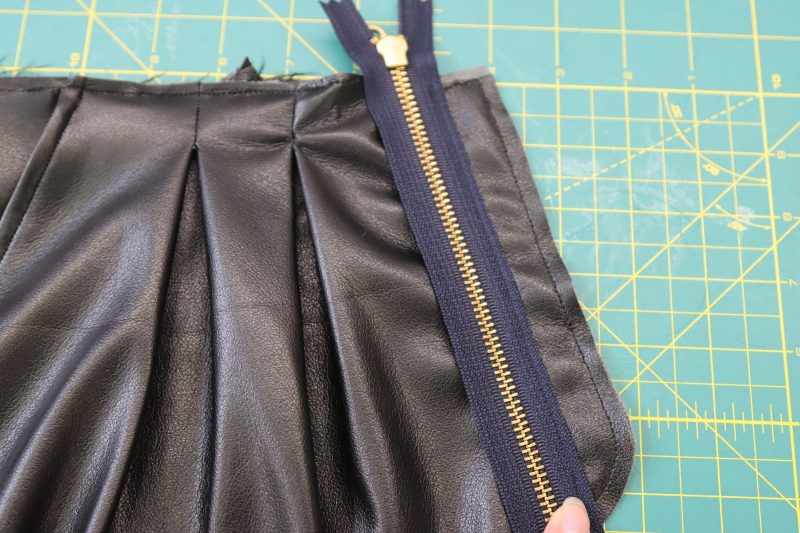
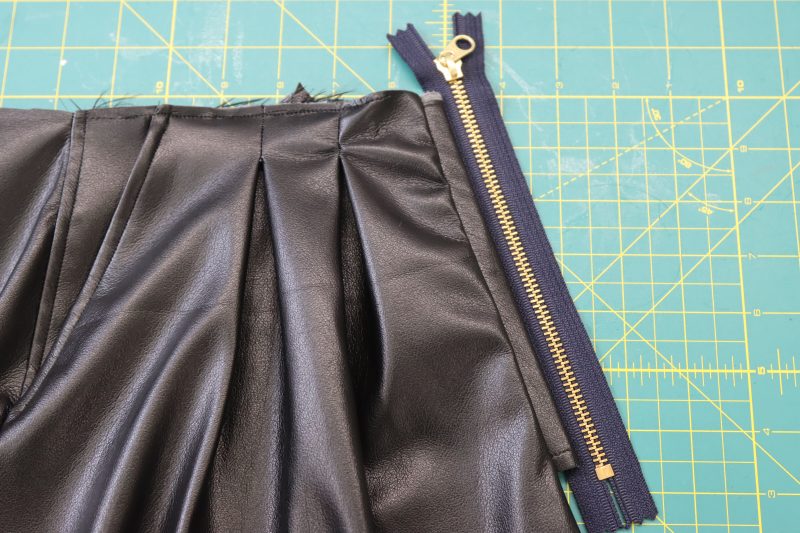
- Place the zipper face down on top of the fly shield and pin in place, as shown in the photo below.
- Sew the side of the zipper tape closest to the rounded edge of the fly facing.
- Flip the zipper so that it’s right sides up.
Step 10
FLY SHIELD
- Fold the entire pair of shorts in half, right sides together, with the two front crotch areas lined up with one another.
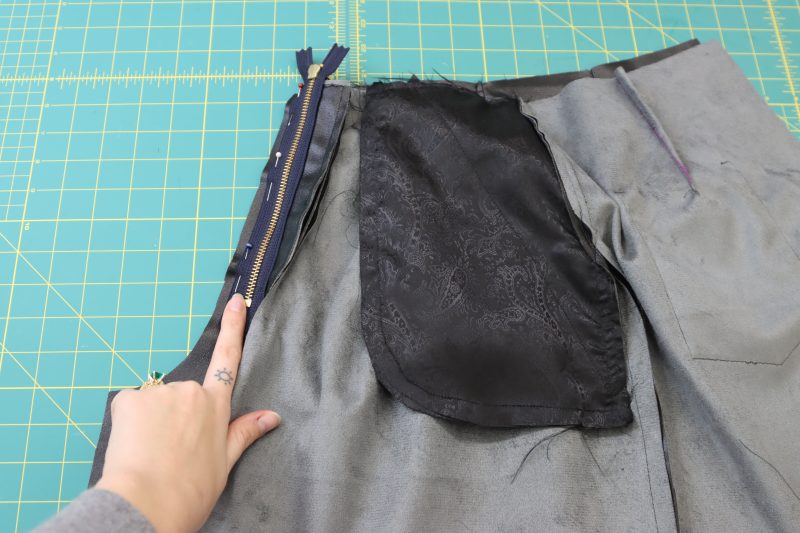
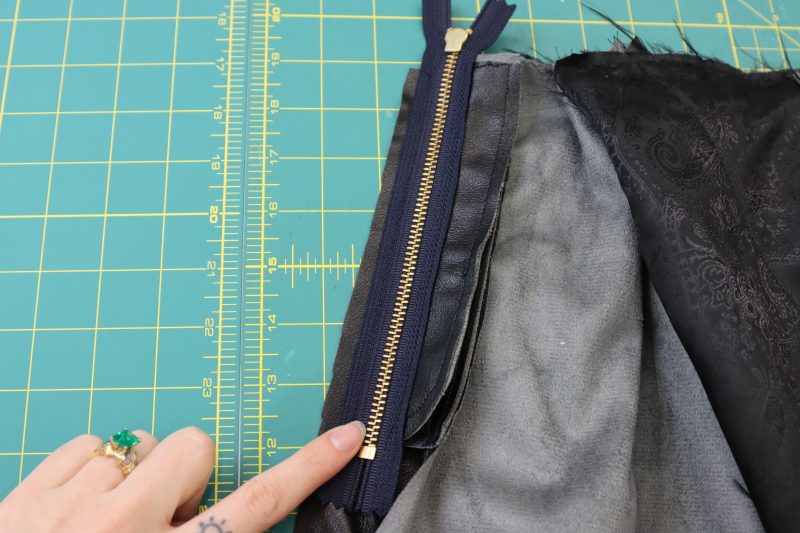
- Pin the side of the zipper tape that is free to the opposite side of the center front.
- Sew the zipper to the opposite side of the shorts.
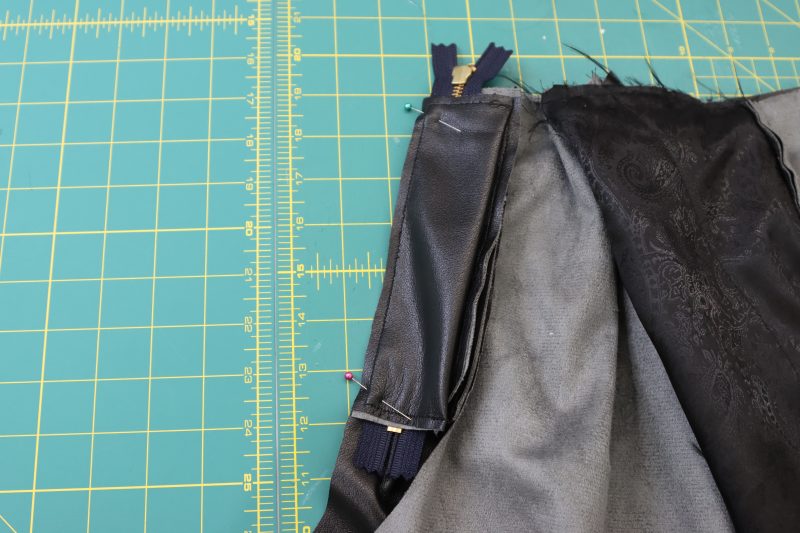
- Pin the fly shield on top of the stitch you just sewed and sew directly over that stitch to seamlessly attach the fly shield.
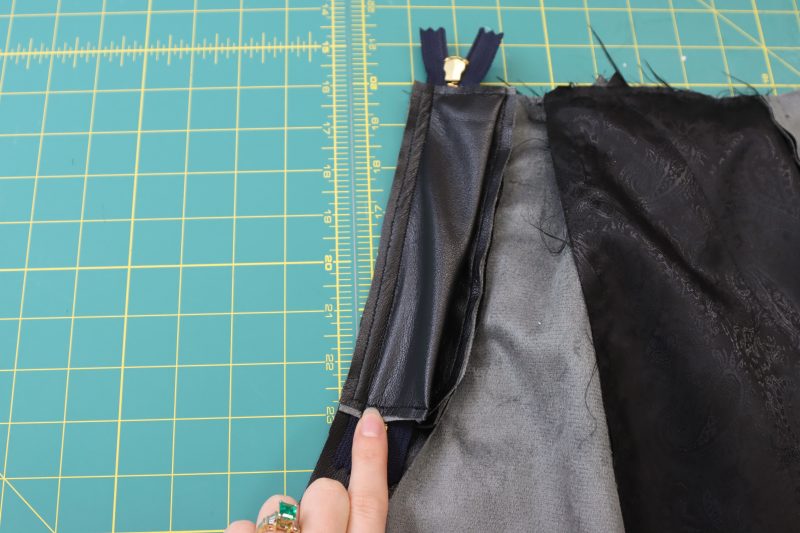
Step 11
CROTCH SEAMS
- Fold the pants at the waistline so that the crotch seams are laying flat on top of each other.
- Pin and sew the entire back crotch seams together.
- Pin and sew the front crotch seam until you reach the bottom of the zipper seam.
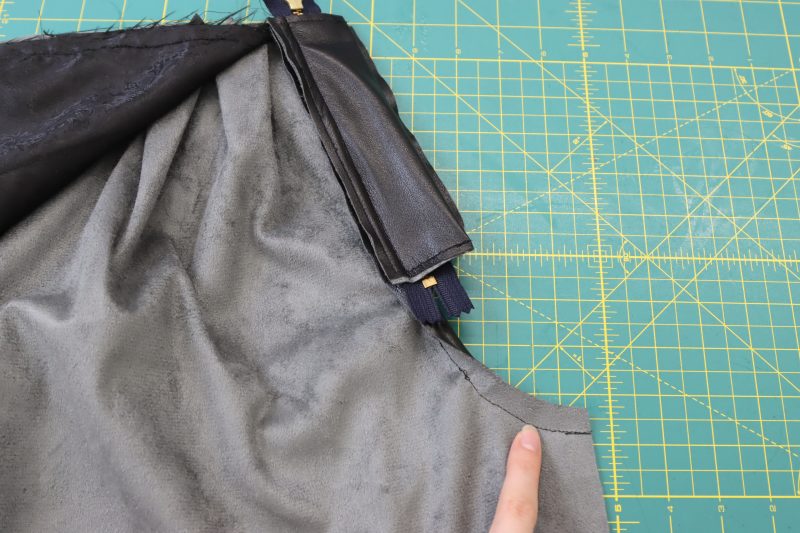
Step 12
- Close the zipper.
- Topstitch over the side of the zipper with the fly shield.
- Topstitch the outline of the fly facing next to the zipper.
- Topstitch over the edge of the fly facing flap without sewing the zipper shut.
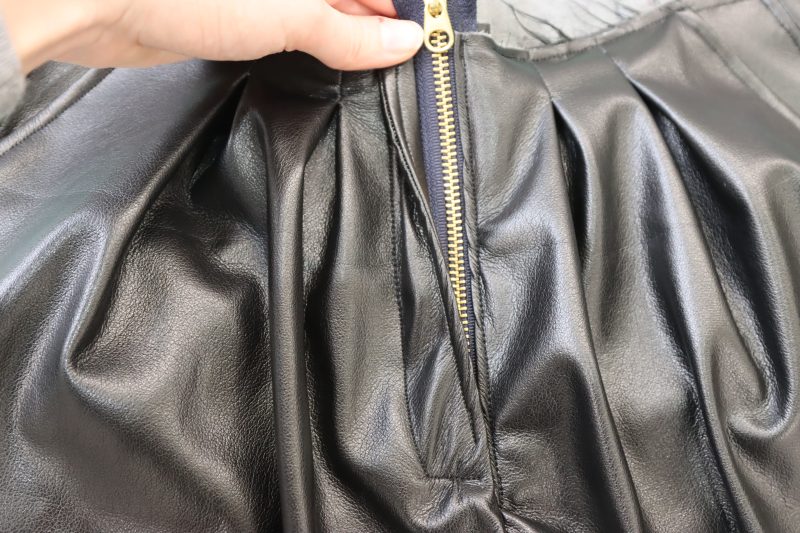
Step 13
INSEAM
- Line up the front and back crotch seams and pin them right sides together.
- Pin both sides of the inseam.
- Sew the entire inseam.
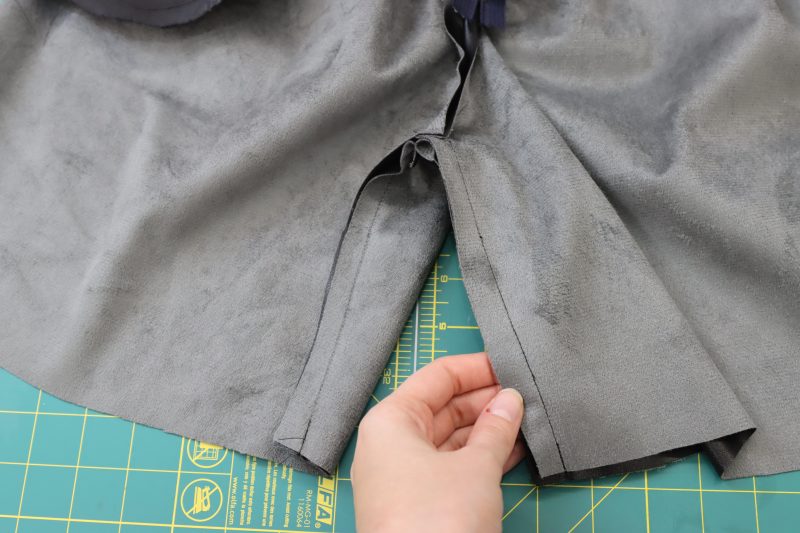
Step 14
WAISTBAND
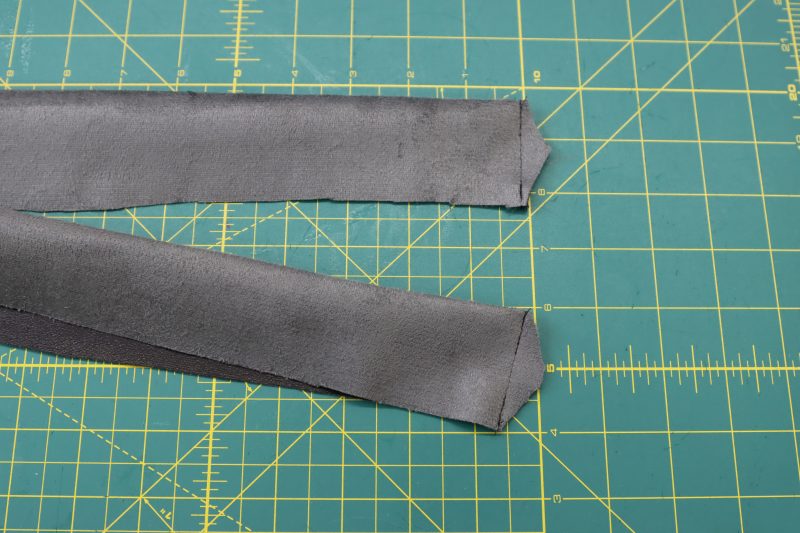
- Fold the long ends of the waistband right sides together.
- Sew along the short ends of both sides of the waistband to close the ends.
- Flip the waistband right sides out and poke the corners out.
- Fold the raw edges of the waistband in by ½ inch.
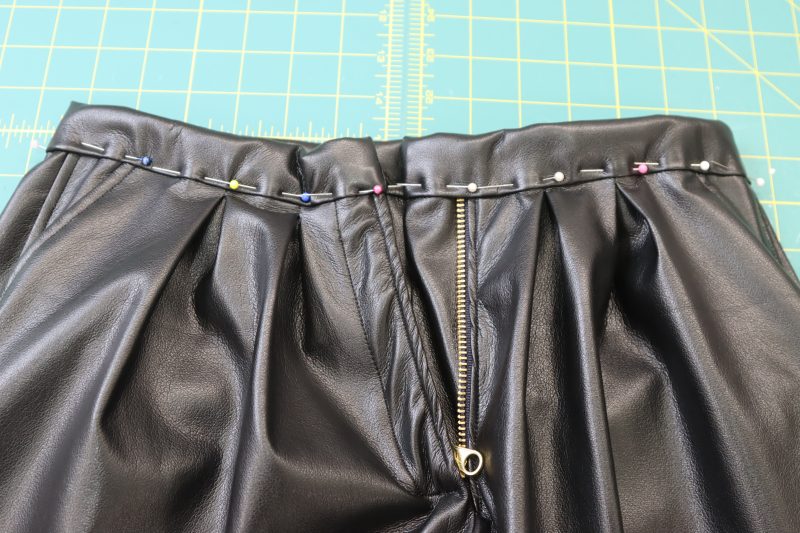
- Open the waistband and sandwich the waistline of the shorts inside of it.
- Pin the folded edges of the waistband to the waistline of the shorts.
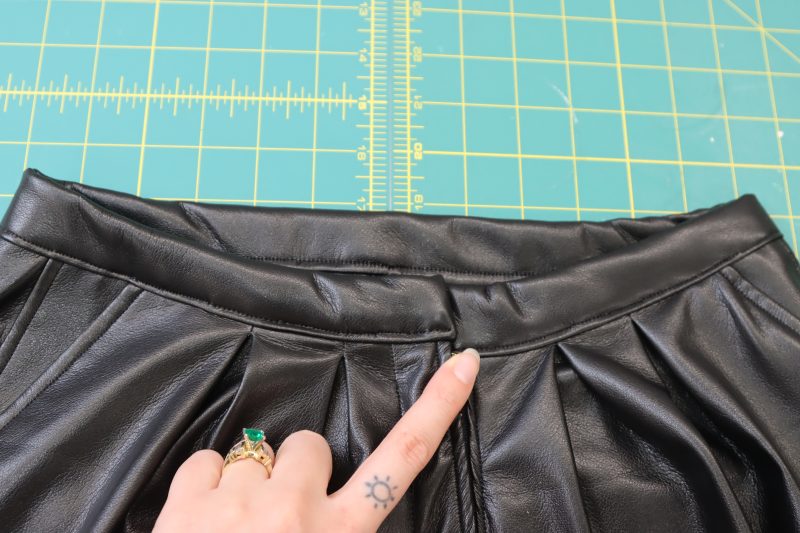
- Sew the waistband to the shorts with ⅛ inch seam allowance.
Step 15
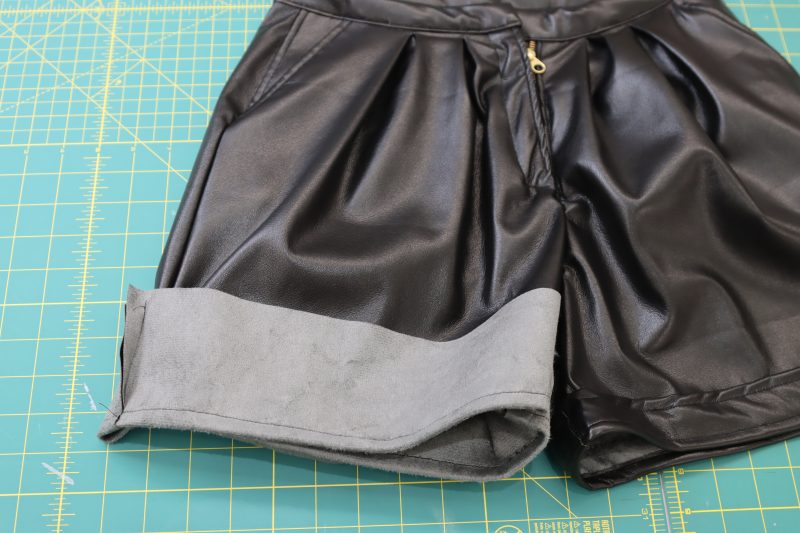
CUFFS
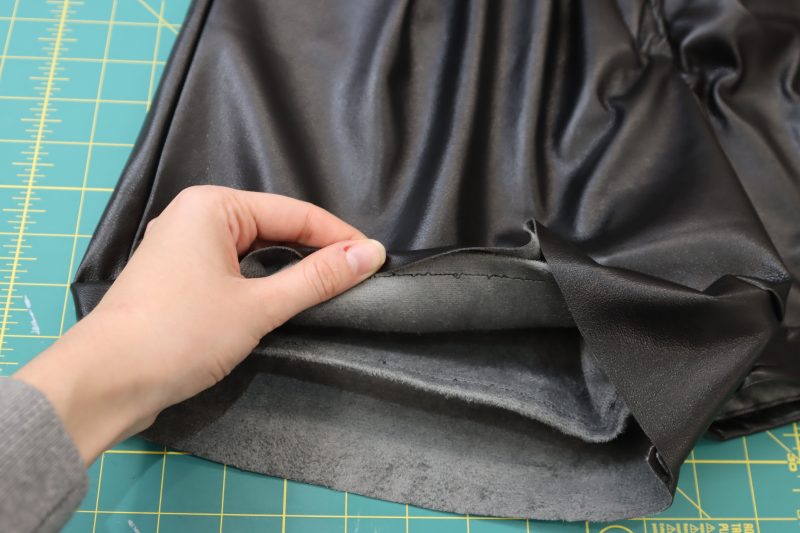
- Find how short you want the inseam of your shorts to be. Fold your shorts hem up right sides together with the fold at the length you want your inseam to be.
- Pin around the folded edge of the shorts hem.
- Sew the shorts hem with ½ inch seam allowance. This fold will be the bottom hem of your shorts.
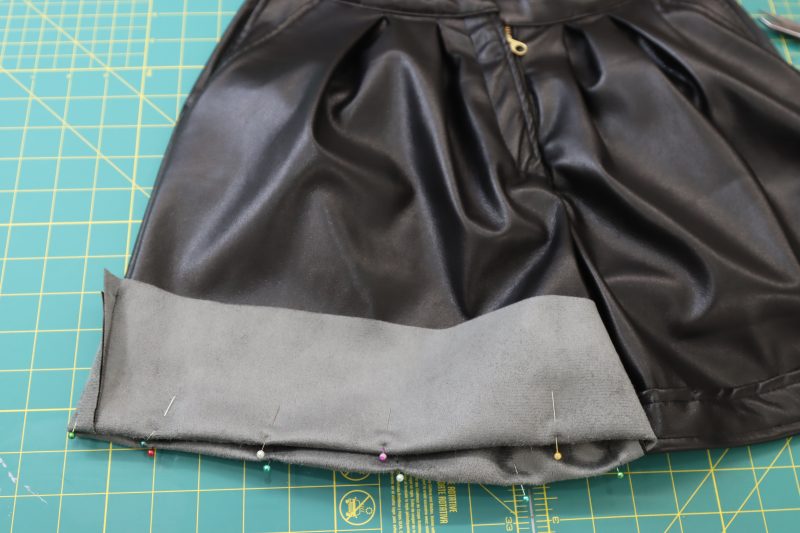
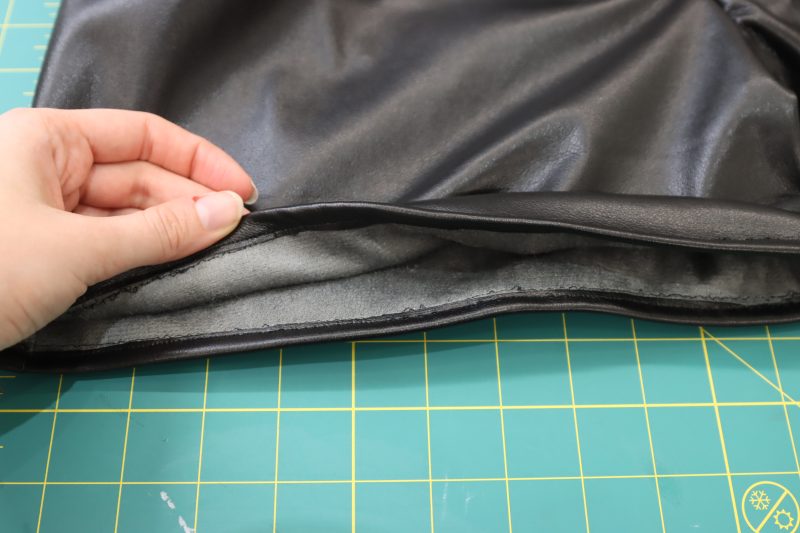
- Flip the shorts hem down and wrap the raw edge of the hem around the fold you just sewed.
- Pin the raw hem of the shorts around the folded hem so that the raw edge is tucked towards the inside of the shorts.
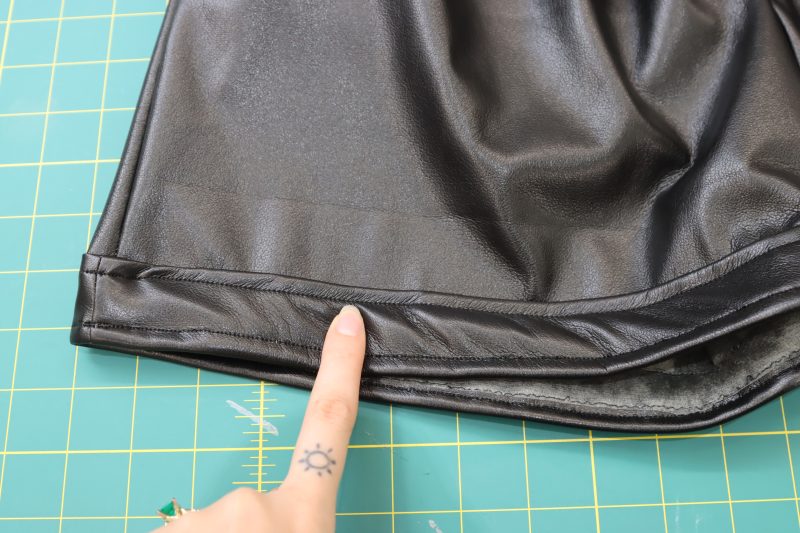
- Sew the raw edge of the shorts hem to the folded edge.
- Topstitch around the top of the cuff to match the seam on the bottom of the cuff.
- Repeat for both legs of the shorts.
Step 16
JEANS BUTTON
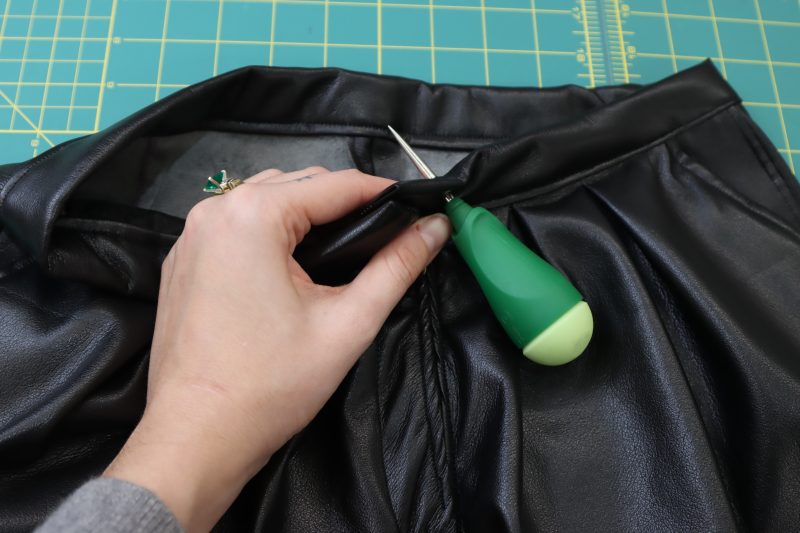
- Using a tailor’s awl, poke a hole through the waistband above the zipper through the back flap.
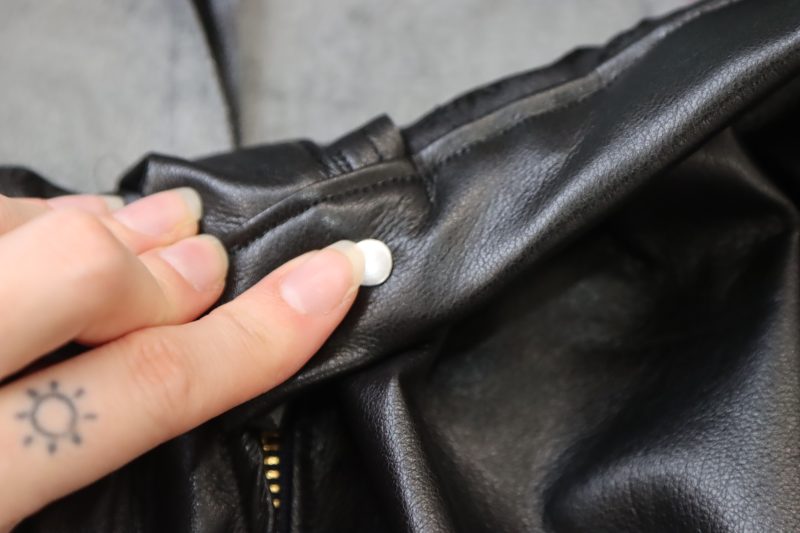
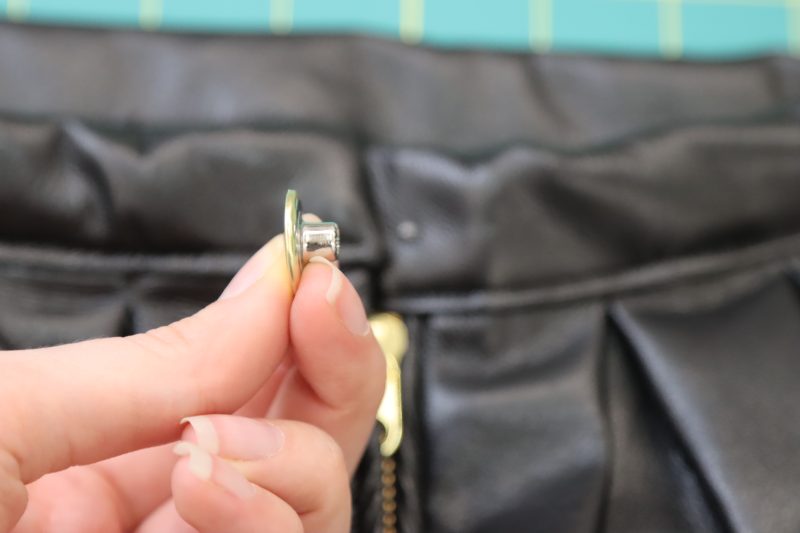
- Poke the jeans button backing through the back of the hole.
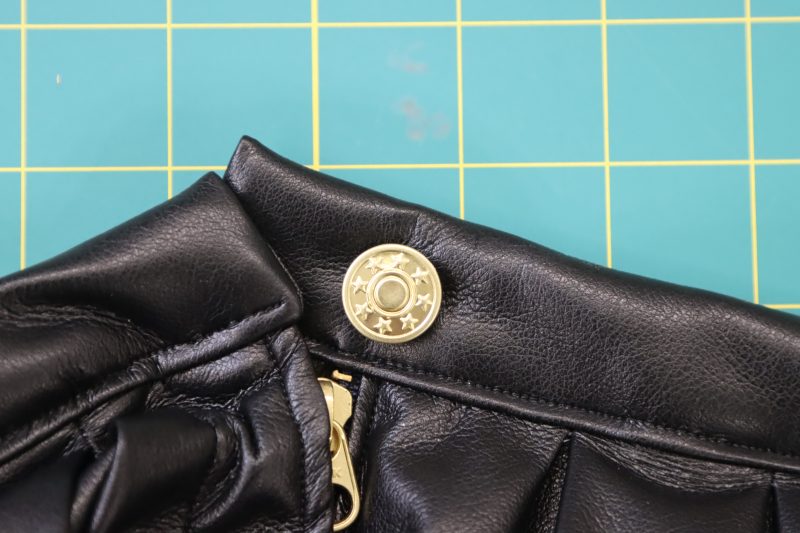
- Position the jeans button cap on top of the backing.
- Whack the jeans button cap with a hammer to secure it to the backing.
Step 17
BUTTONHOLE
- On the other end of the waistband (the overlapping side), use the buttonhole foot sewing machine attachment to create a buttonhole that is the size of your jeans button.
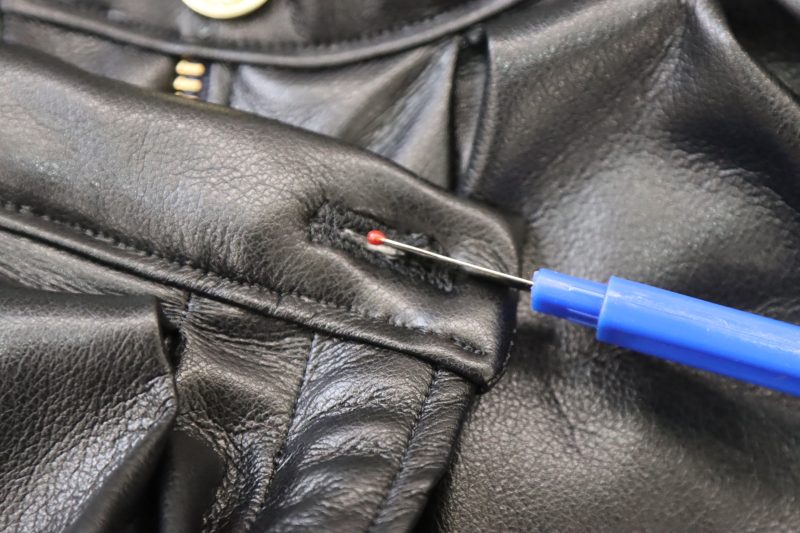
- Slice the center of the buttonhole open using a seam ripper, being careful not to rip through the tacks at the ends of the buttonhole.
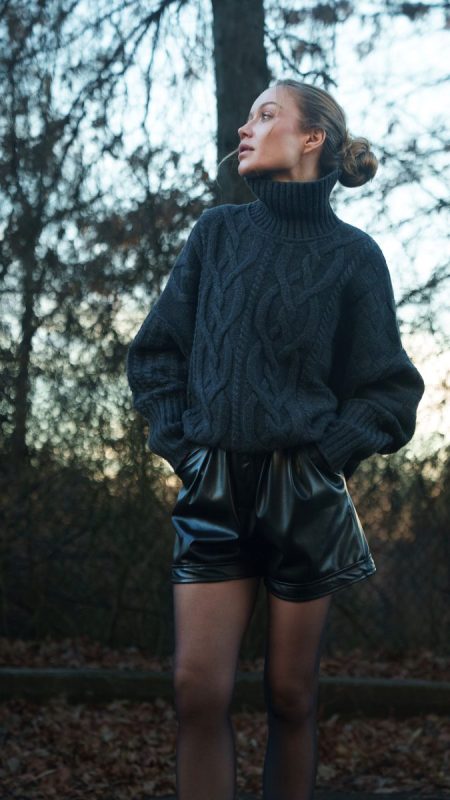
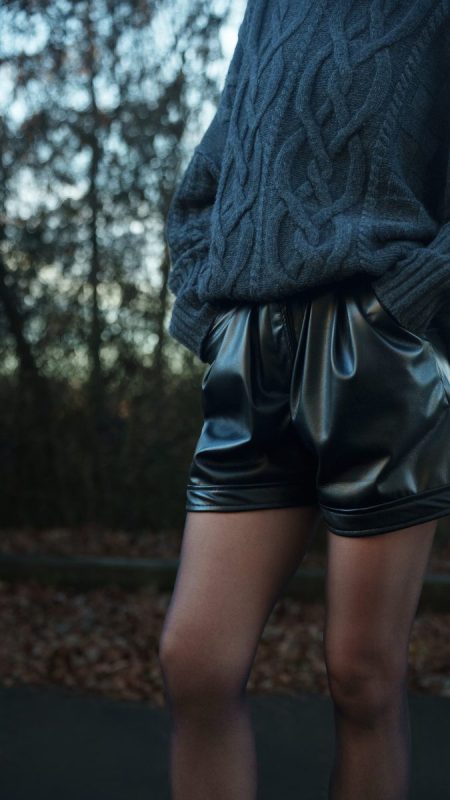
Sewing Success: The Finished Dresden Shorts
Share this post with a friend (or two!), download the Dresden Shorts free sewing pattern, and show us which fabrics and colors you choose, using the hashtags #MoodDresdenPattern & #MadeWithMood—and don’t forget to tag us @MoodFabrics, too.


Free Sewing Pattern Inspiration for Your Next Project
With 490+ free sewing patterns and counting, your opportunities for sewing with Mood are endless!
We hope you had as much fun sewing this shorts pattern as we did! As always, we want to hear from you—share your thoughts and comments below and let us know where you’ll be wearing the Dresden Shorts free sewing pattern!

Is there any chance we could download the pattern in A1 format as well?
Unfortunately we only offer 8.5×11 print format with the layered pattern sizes, but we really appreciate feedback like this to help us prioritize new additions to the blog in the future. This is definitely something we’re talking about and planning.
Rule breaking? I wore (dress) shorts to work in the 1990s in northern Indiana. Generally a little longer than these though., Worked better than a skirt since I was frequently going up/down a ladder.
What a trend setter! These would be perfect for you!
How do I download this pattern
You can download the pattern for free by entering your name and email address into the field under “Download Your Free Sewing Pattern”. Then, check your email inbox (and your spam, just in case) for an email from Mood Sewciety Patterns with the subject line “Your Free Download from Mood Sewciety”. Scroll down to the blue link under the title of the email and click on that. It will bring you to a web browser page where you have to scroll down and find the orange button that says “click here to download your free sewing pattern”. That button will redirect you to the webpage with the PDF of the pattern, which can be printed on 8.5×11 paper on your printer at home. Let me know if you need any additional help accessing the pattern!
These look fabulous and with clear instructions… looking forward to trying these out – thank you! 🙂
Can you add or reply with yardage for sizes 2XL – 5XL as the ‘Shop This Look’ function only goes to XL! Thanks
Hi Lia! I recommend buying 2.5 yards of fabric for a size 5X. They shorts don’t require a lot of fabric, even in bigger sizes.
Someone or people are selling your patterns on etsy
I think that the pocket notes are wrong. Can someone check?
Hey there, if the pocket instructions here are confusing, feel free to check out the pattern for the Amherst Palazzo Set. It has the same kind of side seam envelope pockets, but it’s made out of a fabric that is a bit more visible in the photos.
Thisbis a perfect pattern for my daughtet
Szuper
This is amazing!
Can we use other fabrics to make this shorts?
Yeah! We have alternate fabric suggestions for each of our patterns. This one would be great with a denim, corduroy, or something heavy enough to be bottom weight fabric.
Hi,
Love the pattern!
Is there a video tutorial as well?
There will be soon! Please stay tuned!
Love it
Hi! I am currently working on this pattern and so far i am very pleased with the instructions. However for the fly fabric you write “Place the two fly facing pieces wrong sides together.” But on the pattern (and your summery above) it’s the only piece not cut in mirror. But I am guessing it actually should?
Also I find it difficult to create a neat front pocket opening. How can I make sure that the punt where the side seams of the pants and the pockets meet are perfectly in line? (Not a native speaker, hope you understand my question) maybe there could be an additional photo or instruction how to pin the fabric best?
Looking forward for your answers!
Hey Chai! Check out the youtube tutorial that we just posted for these shorts and let me know if it makes the zipper insertion any easier for you.