

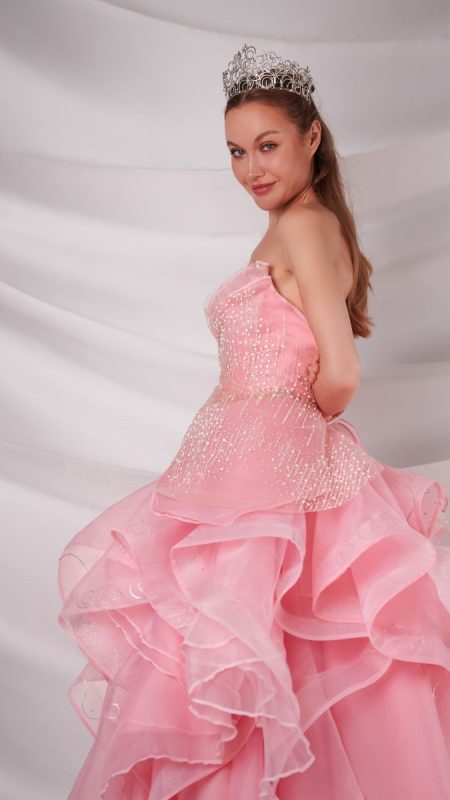
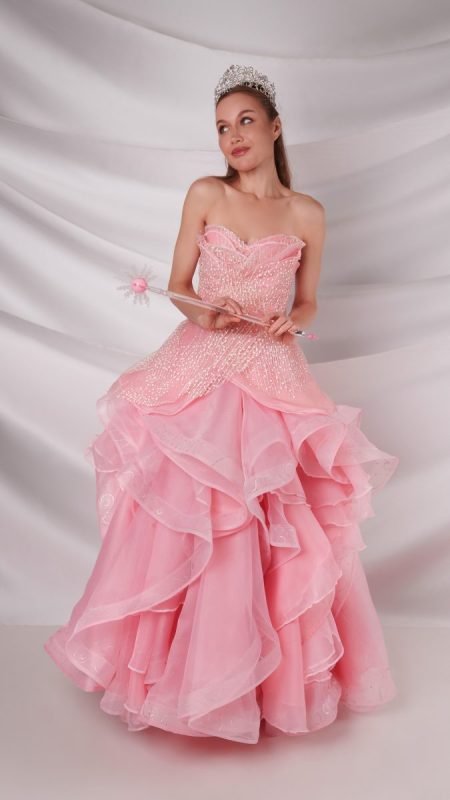
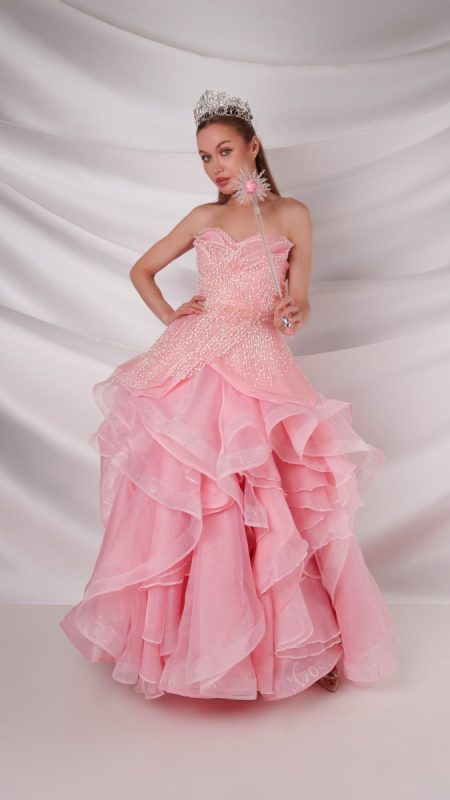
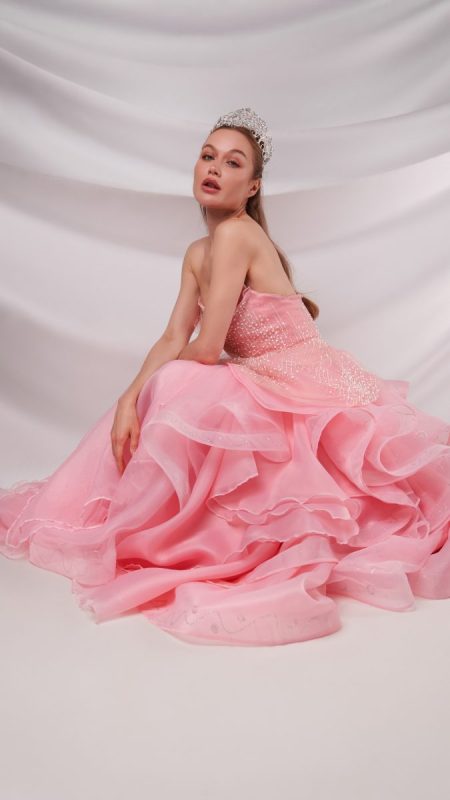
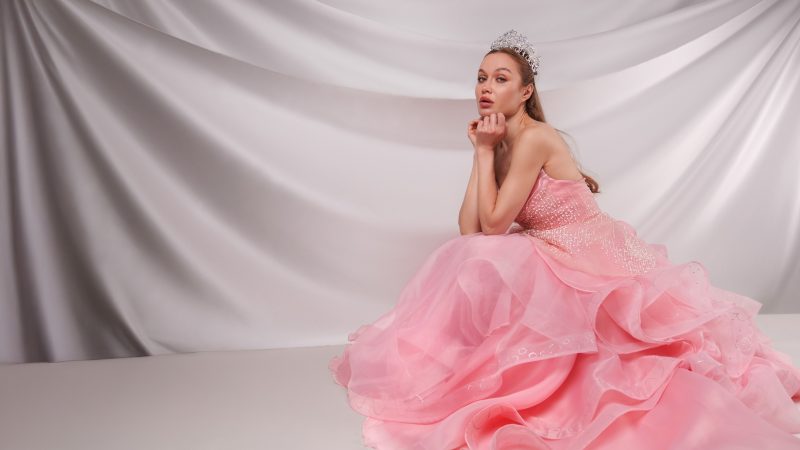
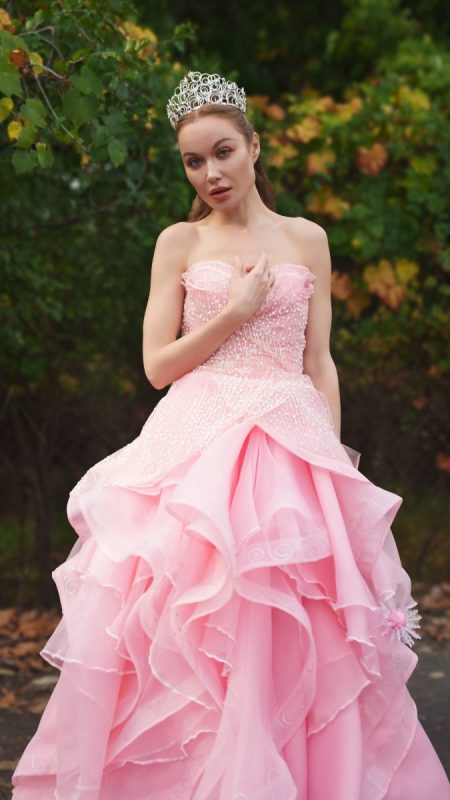
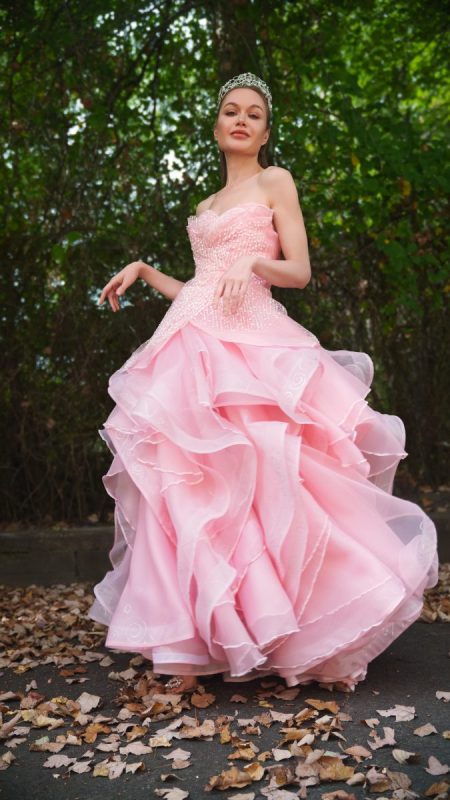
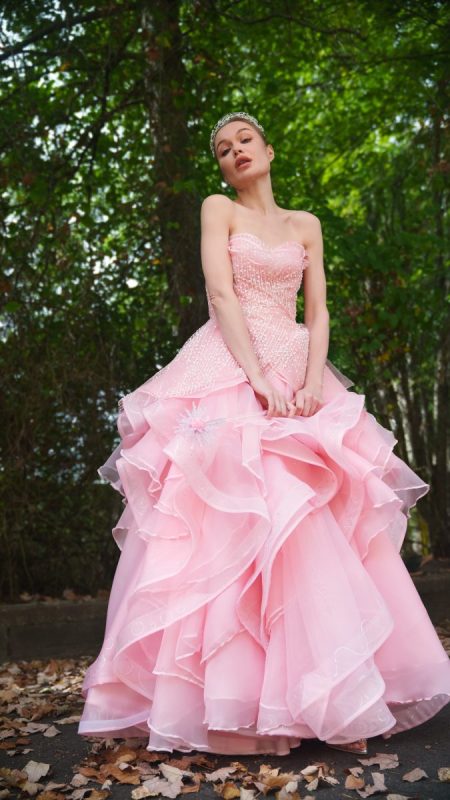
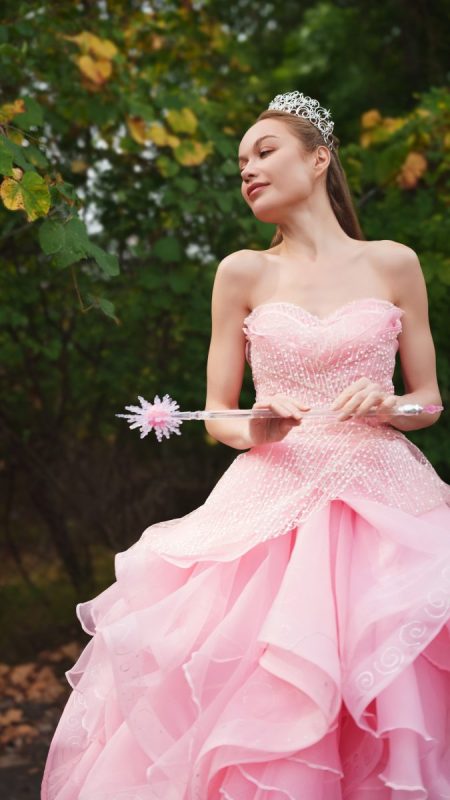
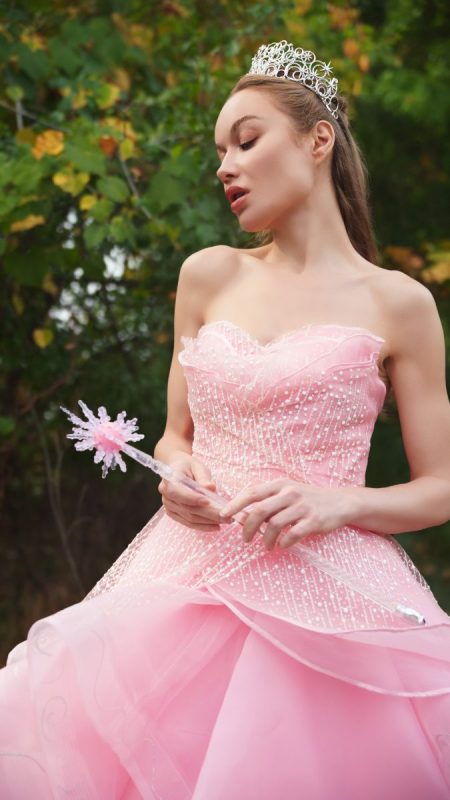
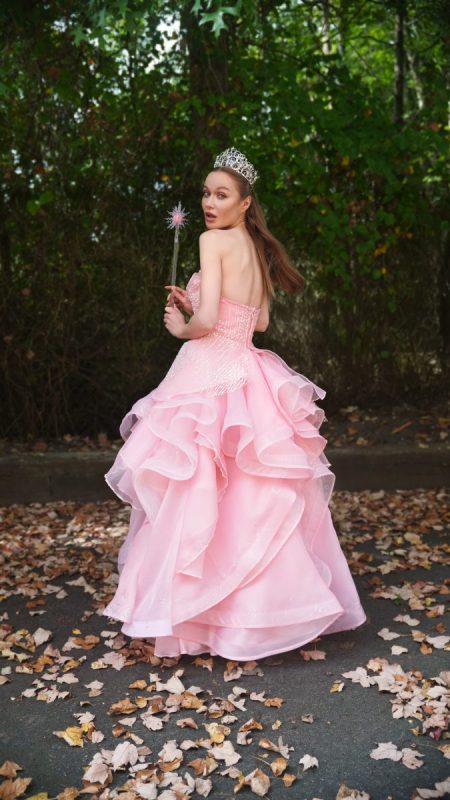
Make an entrance in the Glinda Gown, a show-stopping design that’s equal parts glamorous and enchanting. Whether you’re sewing the perfect Halloween costume or creating a gown for prom or another special occasion, this gown is designed to dazzle from every angle.
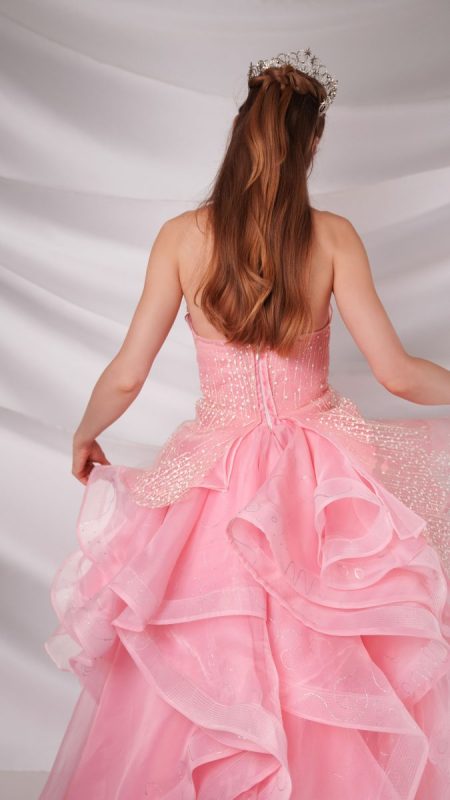
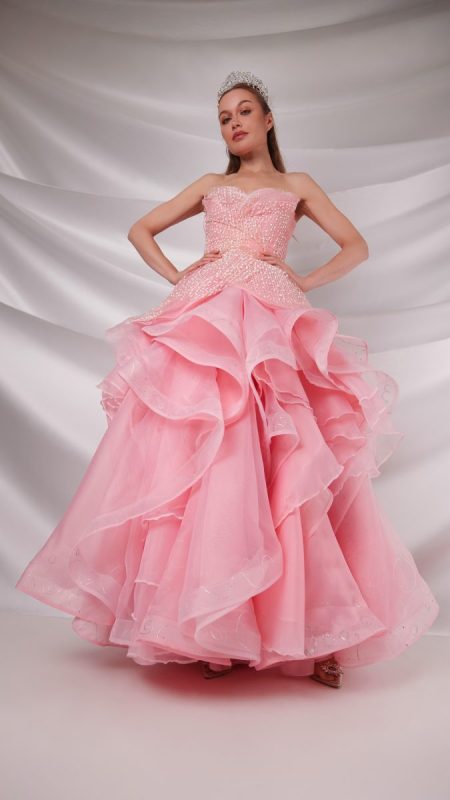
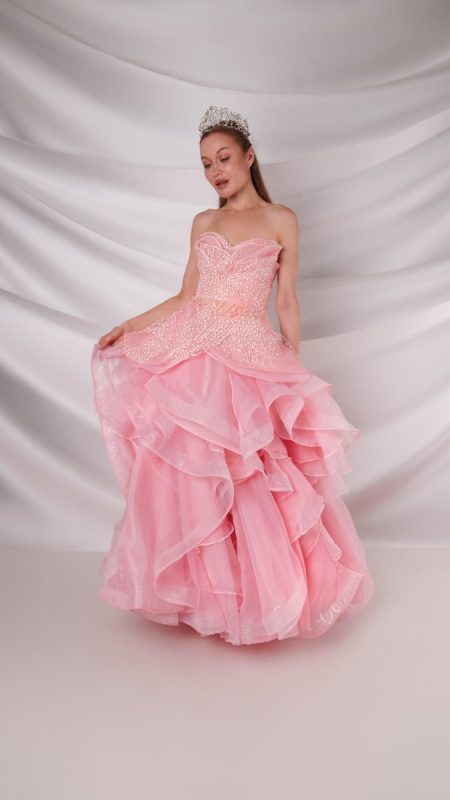
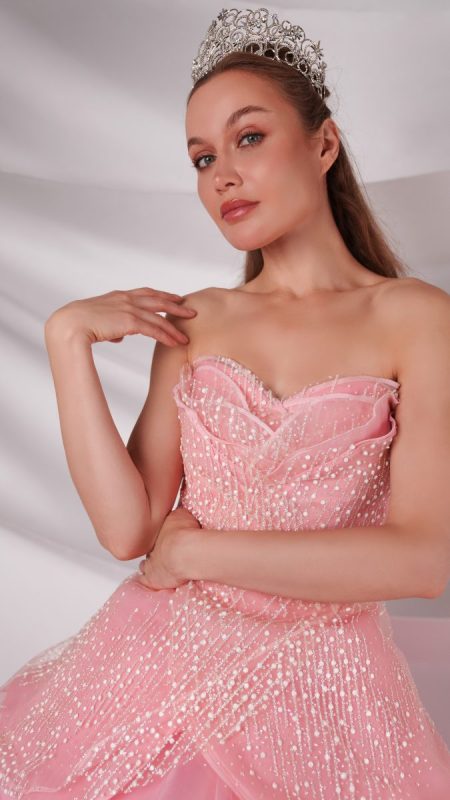
Crafted with layers of satin-faced organza and glitter tulle, the Glinda Gown is a masterclass in volume and shimmer. The bodice gleams with smooth satin, while airy organza creates a skirt that billows with dramatic fullness. Horsehair braid worked into the ruffles ensures that every tier holds its shape, giving the skirt its unforgettable, cloud-like poof.
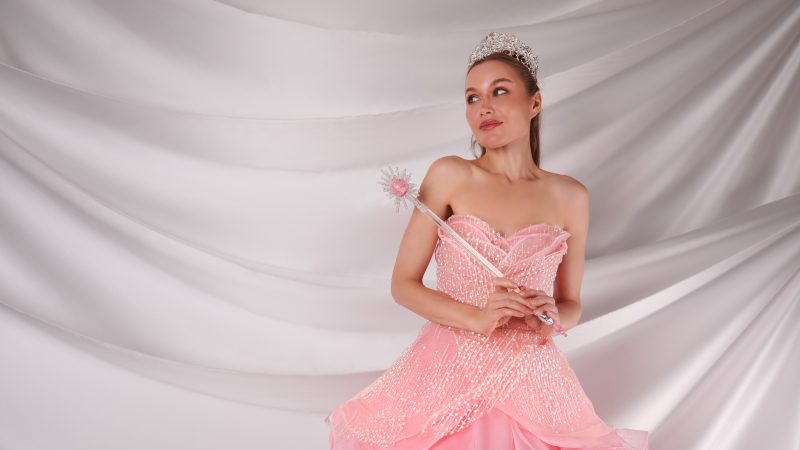
Glitter tulle overlays add a magical sparkle, catching the light as you move and amplifying the gown’s ethereal charm. Glamorous, voluminous, and layered with endless ruffles, this gown is designed to make you feel like the star of your own story.
Sewn in sweet candy pink, the Glinda Gown radiates fairytale magic, but with a change of color, it transforms seamlessly into a show-stopping prom or evening gown. Whether for the stage, the dance floor, or a once-in-a-lifetime celebration, the Glinda Gown free sewing pattern brings fantasy into reality, giving you a piece that’s as unforgettable as it is breathtaking.
Essential Materials & Sizing Guide for the Glinda Gown
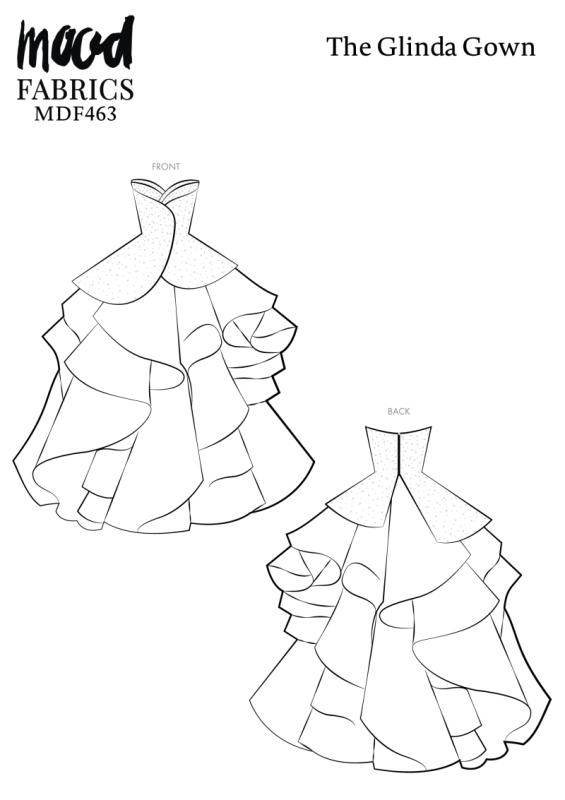
Continue reading for a breakdown of what knowledge and materials you need for creating your very own gown! We’ve got you covered with the recommended materials we used—if you want to follow along exactly—as well as a curated list of alternative fabric type recommendations if you want to customize your own version. The Glinda Gown free sewing pattern download includes technical drawings for seam and silhouette visibility, plus a size chart to help you find your perfect fit!
Purchase Products Used Below:
Quantities indicated are for sewing a size small gown. Toggle the ‘SHOP THIS LOOK’ box to find quantity estimates for other sizes.
- 20 yards of Polyester Organza – Candy Pink – Luscinia Collection by Mood
- 20 yards of Satin-Faced Polyester Organza – Candy Pink – Ardea Collection by Mood
- 6 yards of Polyester Lining Fabric – Bridal Pink – Margot Collection
- 1 yard of Premium Polyester Satin – Candy Pink – Gavia Collection by Mood
- 1 yard of 3D Puffy Glitter Tulle – Powder Pink Spotted Striations
- 1 yard of Pima Cotton Broadcloth – Pink – Sophia Collection
- 1 yard of White Non Woven Single Side Fusible Interfacing
- 50 yards of 2″ Stiff Transparent Horsehair
- 2 yards of Clear Rigilene – 6mm/0.25″
- 1 each of Invisible Zipper 24″ by YKK – 511 Pale Pink
- 3 each of Gutermann Sew All Thread 250m – 300 Light Pink
- 4 each of Maxi-Lock Serger Thread 3000yds – Pink
- 1 each of Jacquard Lumiere Textile Paint – 567 Super Sparkle – Light Body Metallic Acrylic
- MDF463 – Glinda Gown Sewing Pattern (Free download below!)
Additional Products Used:
Alternative Fabric Type Recommendations:
The Glinda Gown sewing pattern is best suited for featherweight and lightweight fashion fabrics. Explore other fabric types or colors from our featured collections for your gown with the links below.
Fabric Collections Used in this Post:
Download Your Free Sewing Pattern
Submit your name and email in the form below to receive the download link for the Glinda Gown free sewing pattern directly in your inbox. Mood Sewciety Patterns will send your free download link via email with the subject line: ‘Your Free Download from Mood Sewciety – The Glinda Gown’ (in PDF format for A4 and letter-size printing).
Find Your Perfect Fit
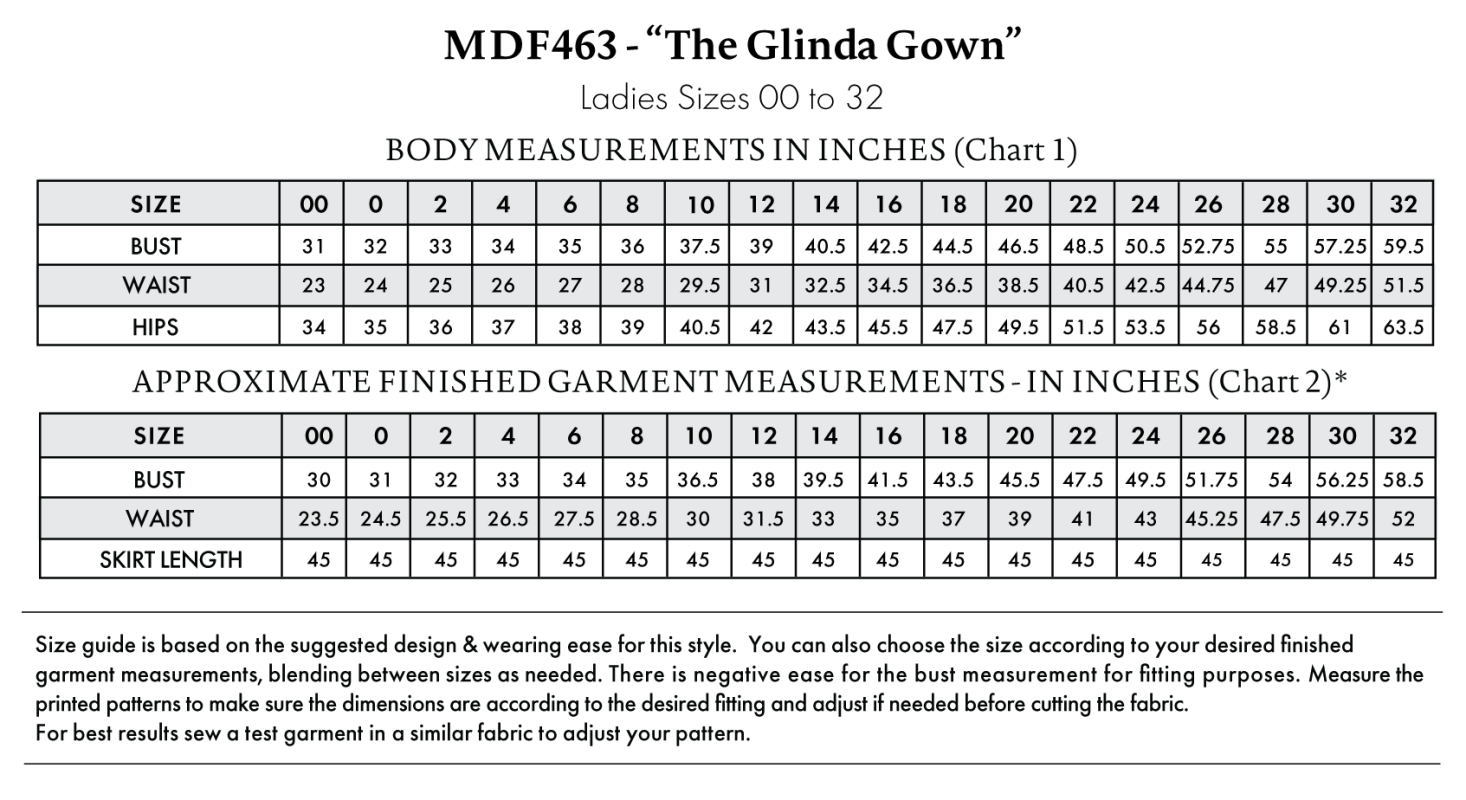
The Glinda Gown Sizing Guide is based on the suggested design & wearing ease for this style. You can also choose the size according to your desired finished garment measurements, blending between sizes as needed. Measure the printed patterns to make sure the dimensions are according to the desired fitting and adjust if needed before cutting the fabric. For best results, sew a test garment in a similar fabric to adjust your pattern.
Note: Always read all the instructions before cutting the fabric!
How to Sew The Glinda Gown
The instructions provided below are designed to guide you through sewing the Glinda Gown from start to finish.
3 Tips for Sewing with Organza
⇒ Use a super sharp, super fine microtex needle to avoid pulling and tearing the woven fibers in the organza.
⇒ If you don’t have a serger to finish the raw edges of the organza, a super tiny rolled hem is recommended.
⇒ Do your best to pin and sew your organza pattern pieces correctly the first time, because it is really difficult to seam-rip stitches out of organza. If you’re not feeling confident about cutting into your organza, make a mockup with muslin first.
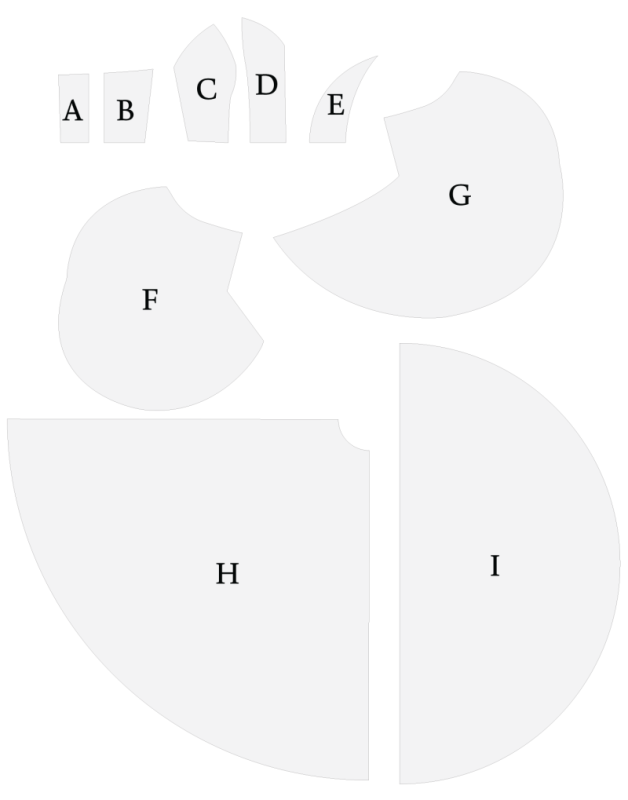
Pattern Pieces & Fabric Cuts Needed
- (A) CORSET BACK CENTER
- FABRIC – CUT 2 MIRRORED
- LINING – CUT 2 MIRRORED
- (B) CORSET BACK SIDE
- FABRIC – CUT 2 MIRRORED
- LINING – CUT 2 MIRRORED
- (C) CORSET FRONT SIDE
- FABRIC – CUT 2 MIRRORED
- LINING – CUT 2 MIRRORED
- (D) CORSET FRONT CENTER
- FABRIC – CUT 2 MIRRORED
- LINING – CUT 2 MIRRORED
- (E) BUST OVERLAY PIECES
- FABRIC 1 – CUT 2 ON FOLD
- FABRIC 2 – CUT 2 ON FOLD
- (F) OVERLAY LEFT
- FABRIC 1 – CUT 1
- FABRIC 2 – CUT 1
- (G) OVERLAY RIGHT
- FABRIC 1 – CUT 1
- FABRIC 2 – CUT 1
- (H) SKIRT
- LINING – CUT 1 ON FOLD (FRONT)
- LINING – CUT 2 MIRRORED (BACK)
- (I) SKIRT RUFFLES
- FABRIC 1 – CUT 10 ON FOLD*
- FABRIC 2 – CUT 10 ON FOLD*
*More than 10 ruffles may be needed for larger sizes.
Sew with a 1/2″ seam allowance for all seams unless otherwise specified.
Step 1
INTERFACING
- Iron interfacing to the wrong side of every bodice piece.
Step 2
BODICE SHELL
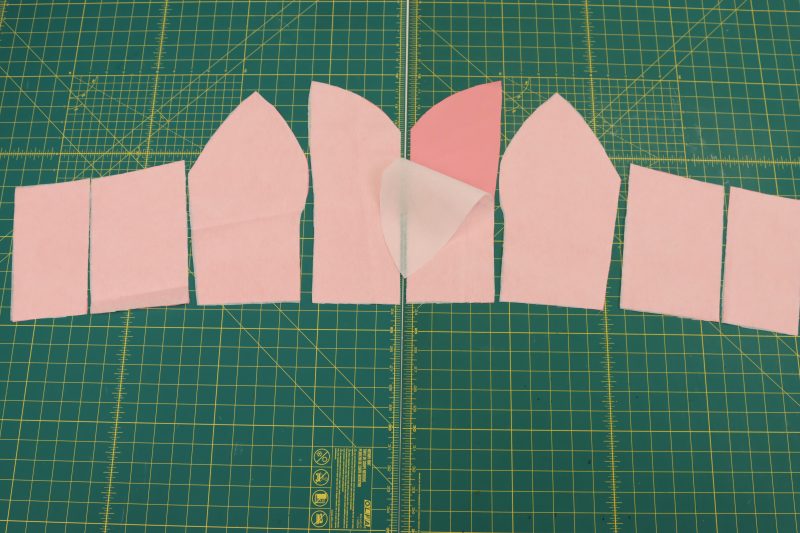
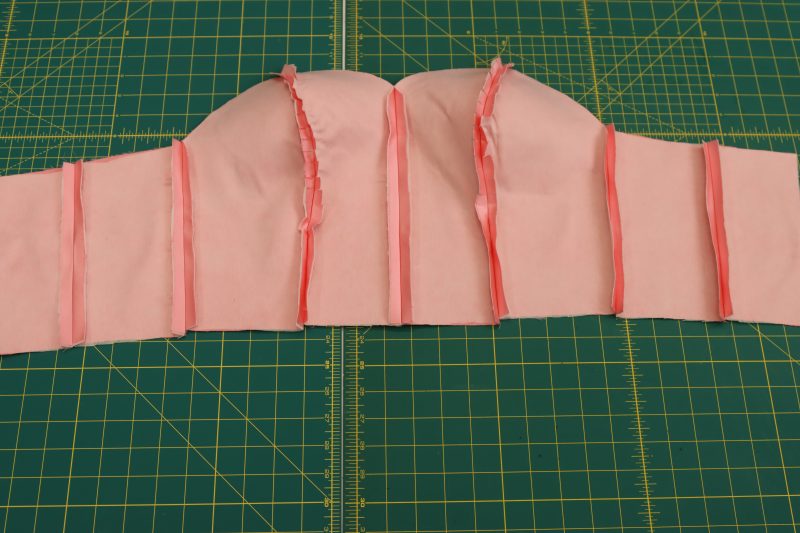
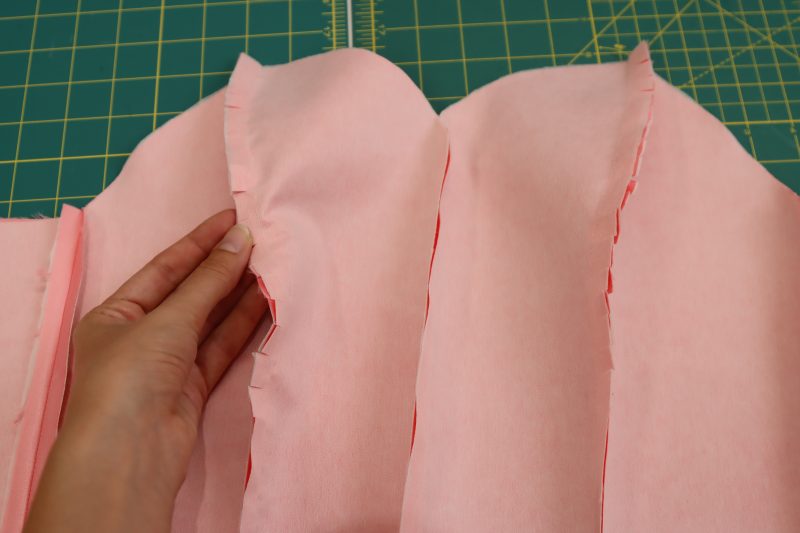
- Going piece by piece, sew the bodice shell together by placing each piece right sides together using a ¾ inch seam allowance.
- Clip notches into the rounded princess seam that goes over the bust to allow it to bend more naturally.
- Iron the seams open and flat.
Step 3
BODICE LINING
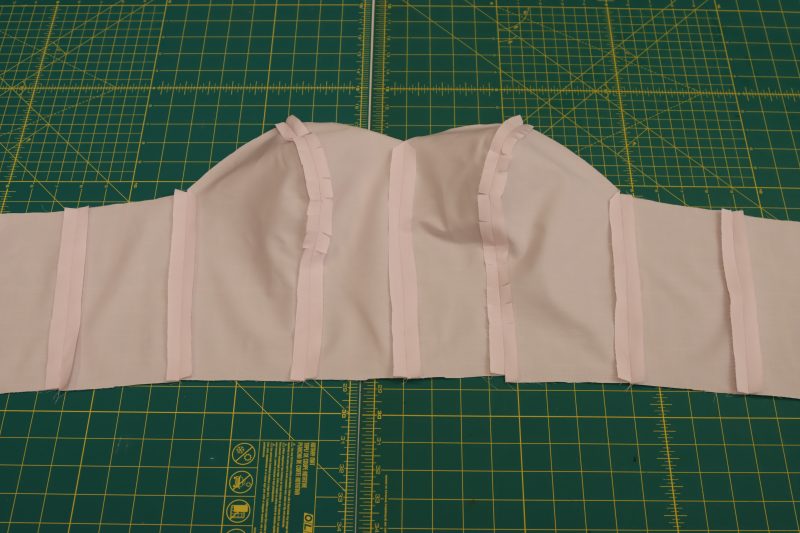
- Repeat the steps in step 2 for the lining pieces of the bodice.
Step 4
BONING
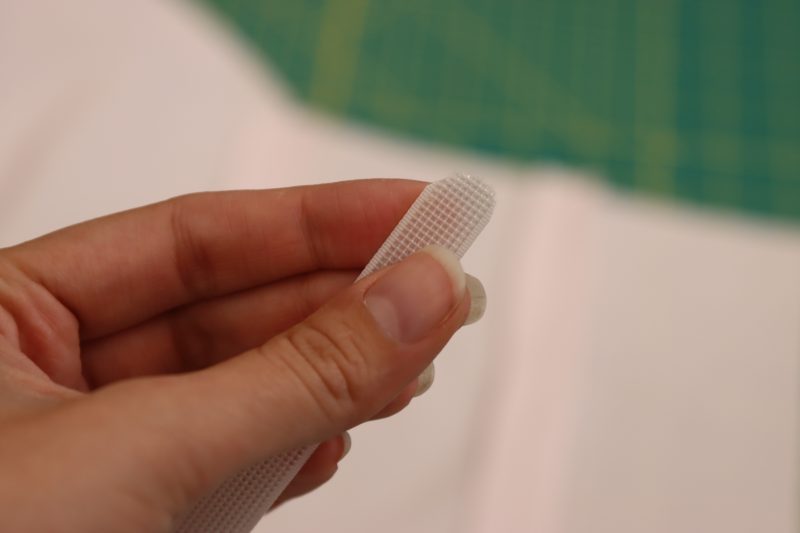
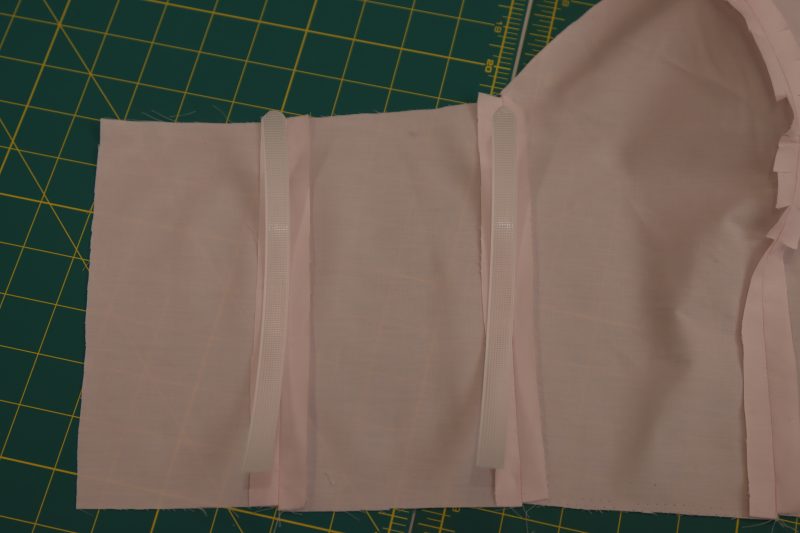
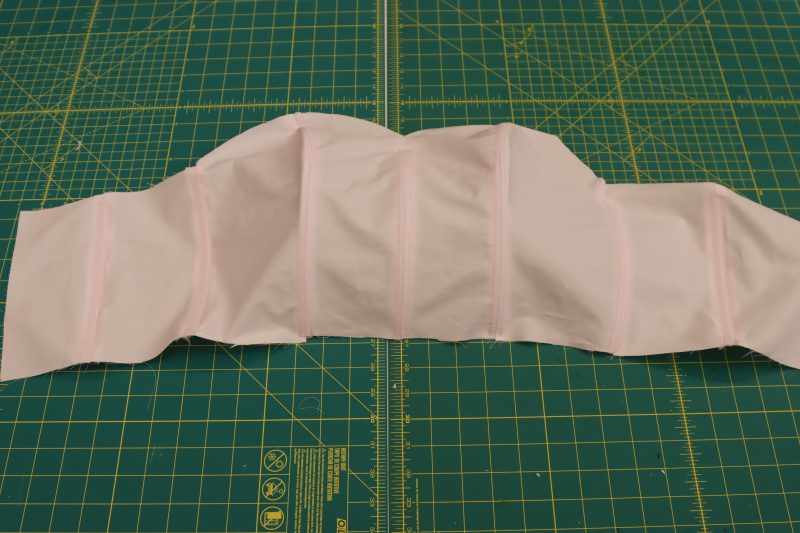
- Cut strips of rigilene boning that are 1 inch shorter than each vertical seam on the bodice lining (to leave room for seam allowance at the top of the bust).
- Round out the top edge of the boning by using a file or cutting it with scissors. This is to prevent any sharp edges of the boning from stabbing you while you wear it or potentially ripping through the fabric.
- Place the rigilene boning strips on top of their respective seams leaving 1 inch between the top rounded edge of the boning and the top raw edge of the bodice lining.
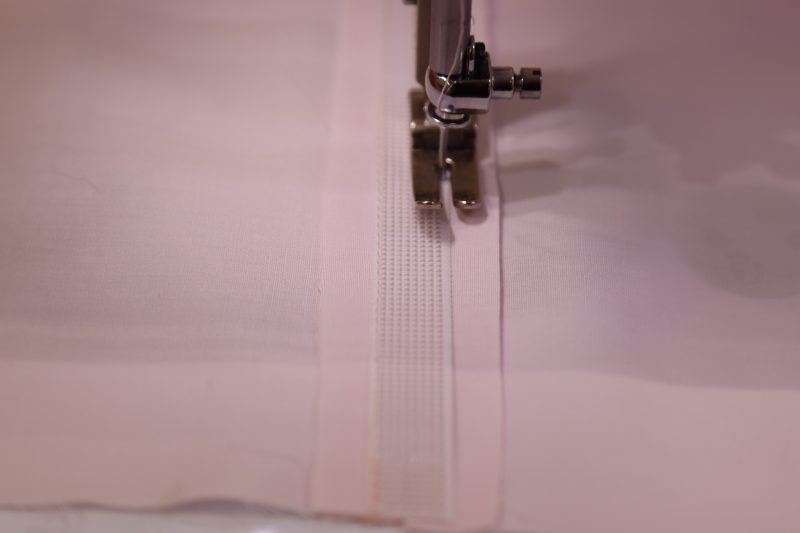
- Firmly hold the boning in place while sewing it down on both sides to the bodice lining so that it is centered over its assigned seam.
Step 5
ATTACH LINING & SHELL
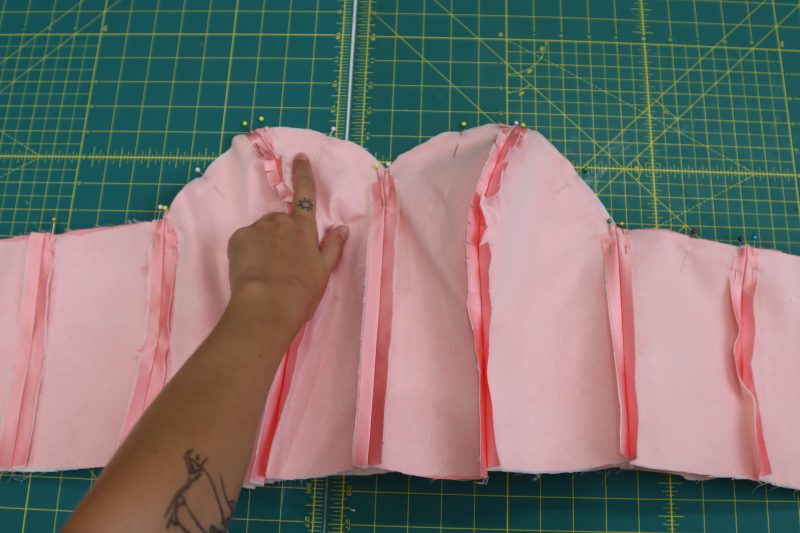
- Pin the lining and the shell bodice pieces right sides together along the top edge.
- Sew along the pins with 1 inch seam allowance.
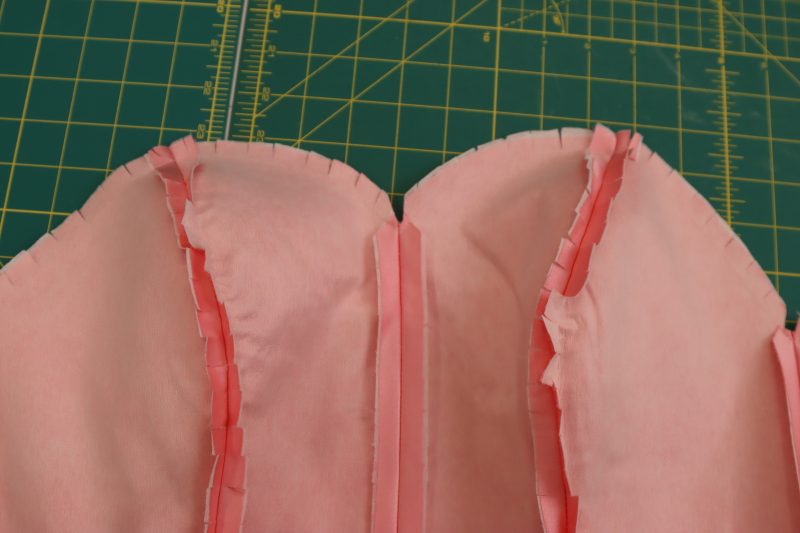
- Clip notches into the rounded edge of above the seam that was just sewn to allow for the bodice to be flipped right sides out.
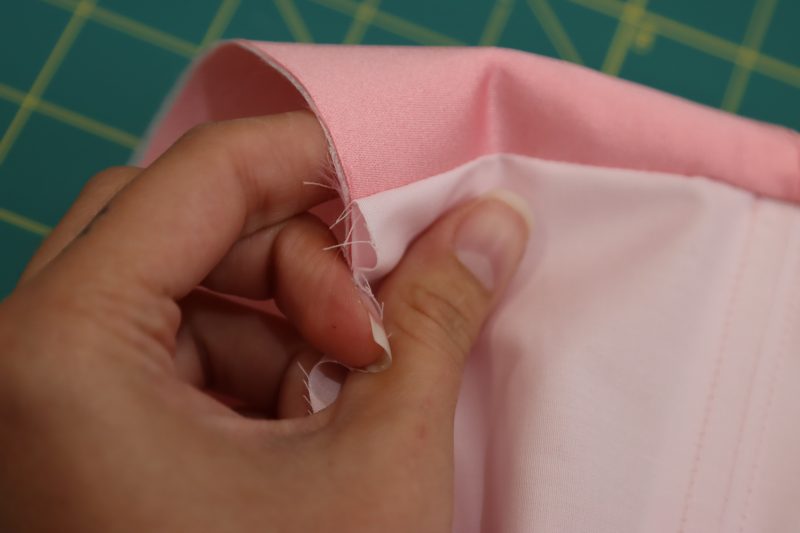
- Flip the bodice right sides out and lay the seam allowance against the wrong side of the lining.
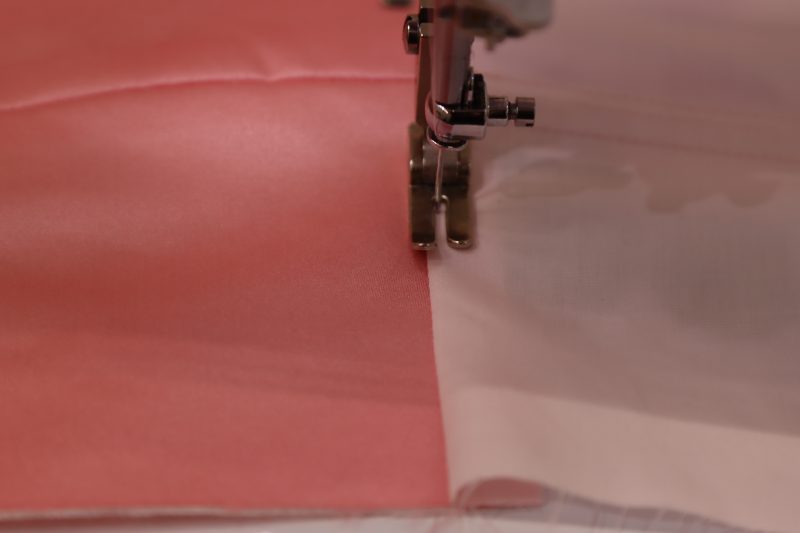
- Sew an understitch by sewing the lining of the bodice to the seam allowance (this will prevent the lining from showing along the top edge of the bodice when it’s being worn).
Step 6
SKIRT LINING
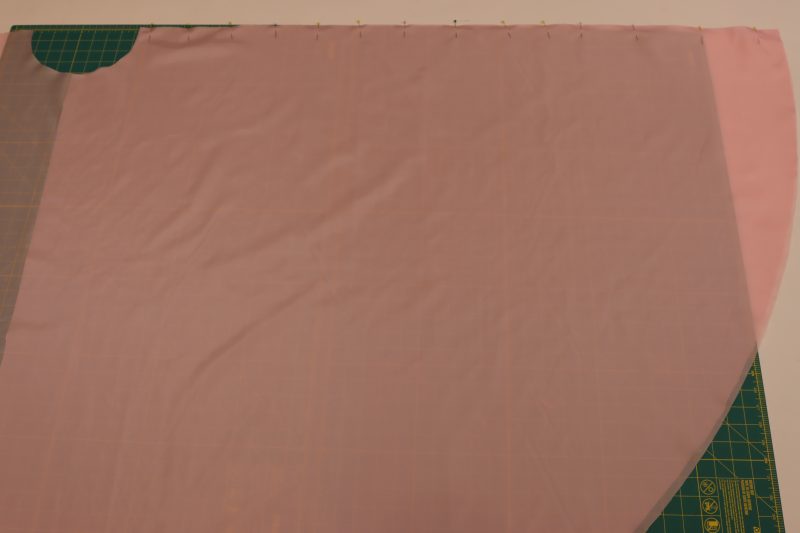
- Pin the two smaller skirt lining pieces to the front skirt lining piece at the side seams.
- Sew the side seams of the skirt lining together (Note: Do not sew the back seam of the lining shut yet, we still have to add a zipper).
- Sew a stay stitch along the top edge of the skirt to prevent it from stretching.
Step 7
UNDERSKIRT LAYERS
- Separate 10 of the circular organza ruffle pieces for the underskirt ruffled and save the other 10 for the overskirt ruffles.
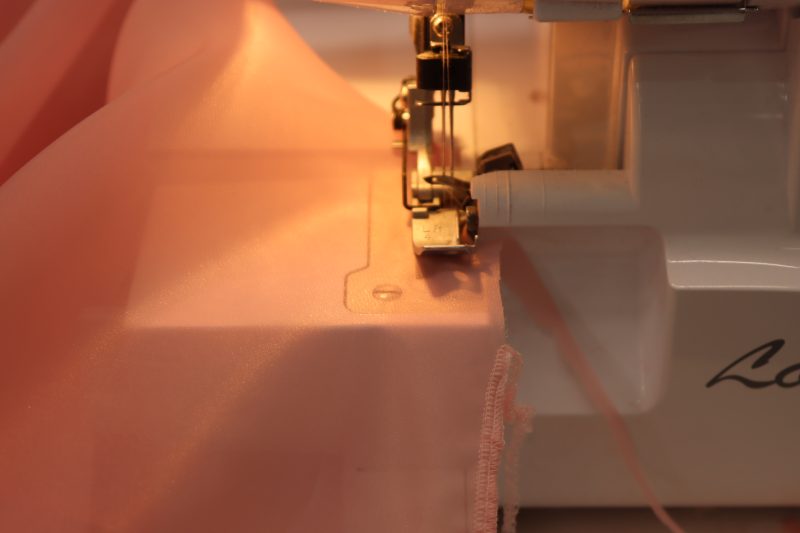
- Serge the raw edge of each of the 10 circles.
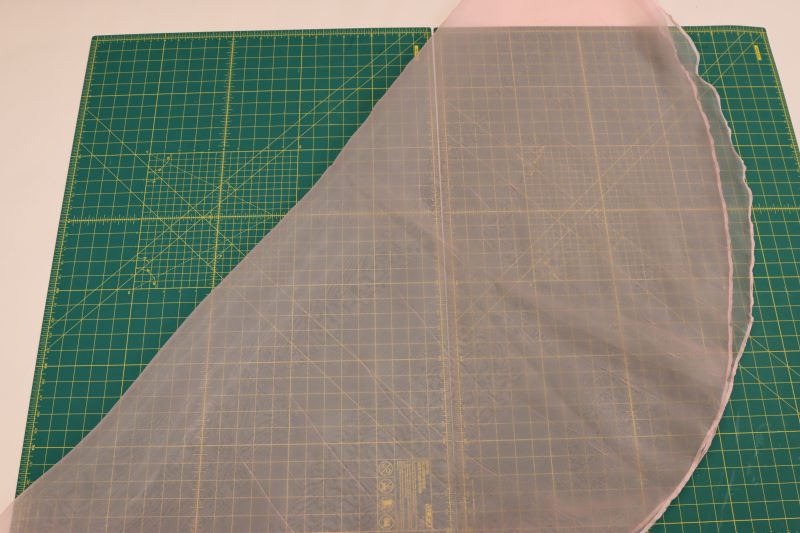
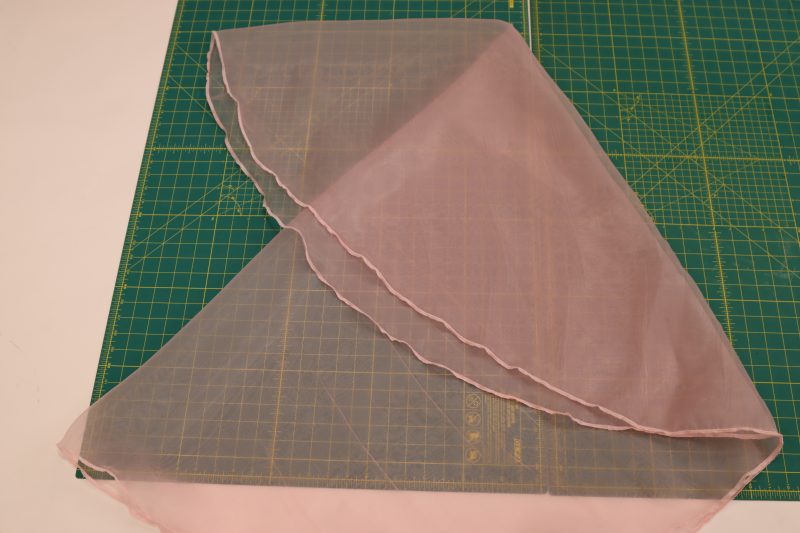
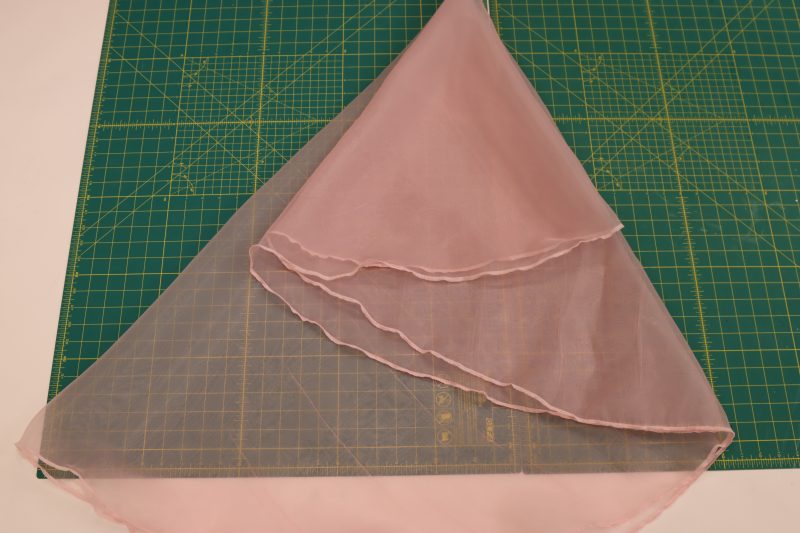
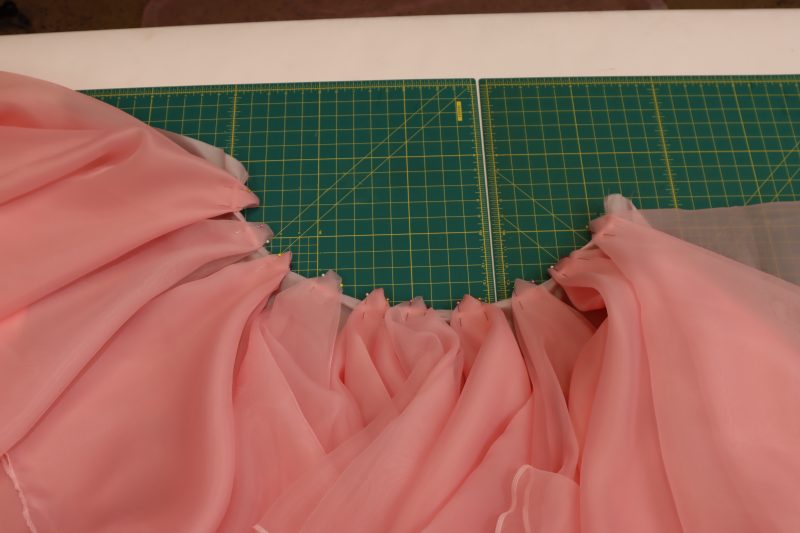
- Take one of the circles and fold it in half. Then, fold one third of the half circle over the folded edge of the half circle. Finally, create one more fold that aligns with the original fold of the half circle. This folding technique will give you the cascading ruffle effect that will be used throughout the entire skirt.
- Repeat this folding technique for all 10 underskirt ruffles.
- Pin and sew the folded corner of each underskirt ruffle to the top edge of the skirt lining, alternating organza colors.
Step 8
OVERSKIRT LAYERS
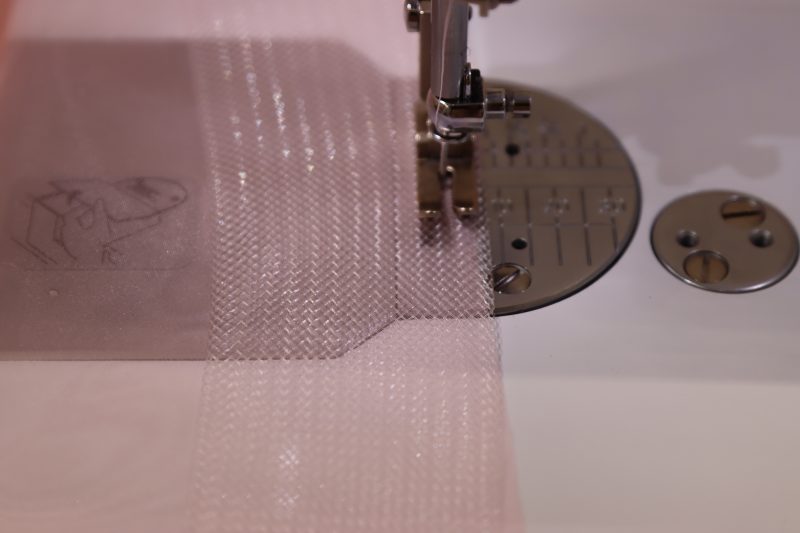
- Instead of finishing the raw edges of the overskirt ruffle pieces with the serger, they will be finished with horsehair braid.
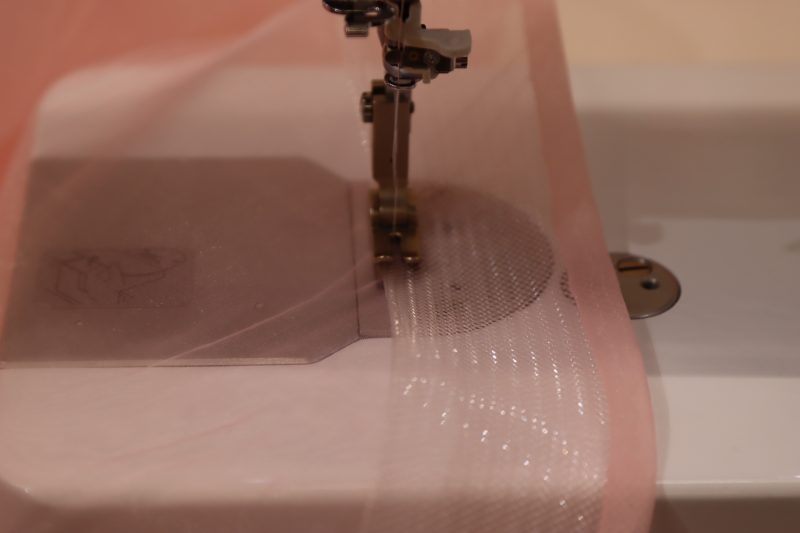
- To attach the horsehair braid, sew a straight stitch over the horsehair braid and the right side of the fabric with ¼ inch seam allowance, being sure to stretch the horsehair braid a little bit as you sew over it. Sew around the entire perimeter of the circular ruffle piece.
- Flip the horsehair braid to the wrong side of the fabric so that the seam allowance and raw edge are tucked under the right side of the fabric.
- Sew an additional stitch around the perimeter of the skirt, but sew it along the opposite side of the horsehair braid to stitch it in place. The horsehair braid does not need to be stretched for this stitch.
Step 9
GLITTER DETAILS
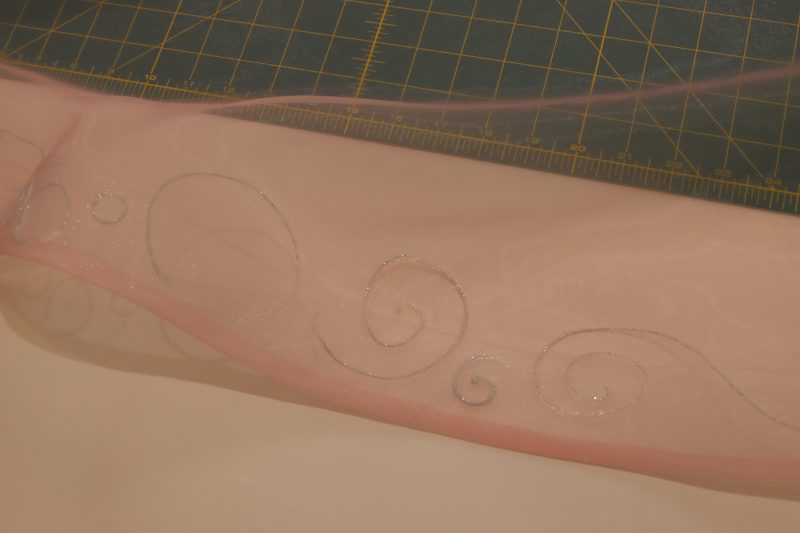
- Lay the circular overskirt ruffle pieces flat.
- Along the outer edge of each of the 10 circles with the horsehair braid in the hem, paint swirls, bubbles, and abstract sparkles using metallic fabric paint (or sparkly glue/paint of your choice).
Step 10
ATTACH OVERSKIRT
- Fold the overskirt ruffle pieces the same way the underskirt ruffle pieces were folded in step 7.
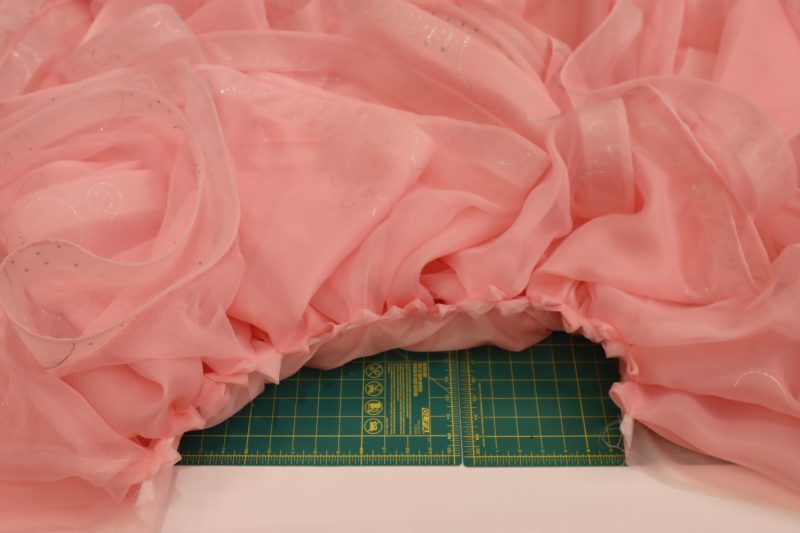
- Pin and sew the overskirt ruffles to the skirt lining with ½ inch seam allowance, filling in the gaps between the underskirt ruffles to make the skirt as full as possible.
Step 11
ATTACH BODICE
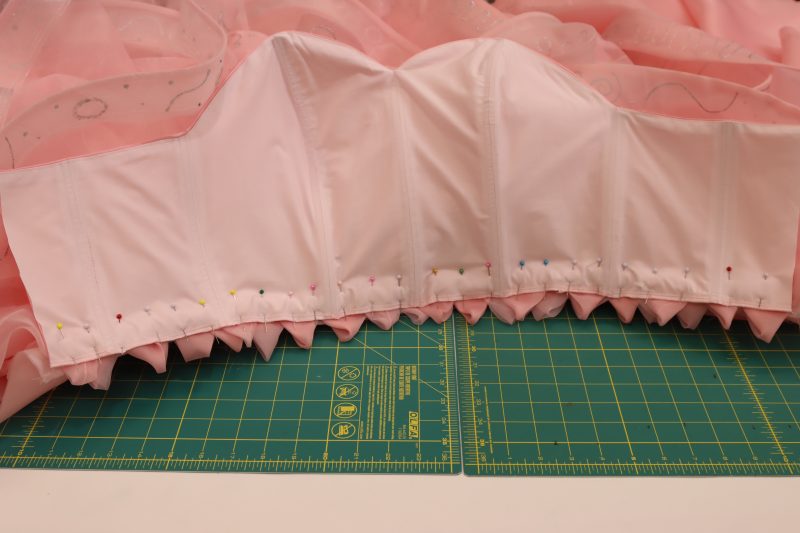
- Pin the bottom of the bodice to the waist of the skirt, right sides together.
- Sew the bodice to the skirt with ¾ inch seam allowance.
Step 12
ZIPPER CLOSURE
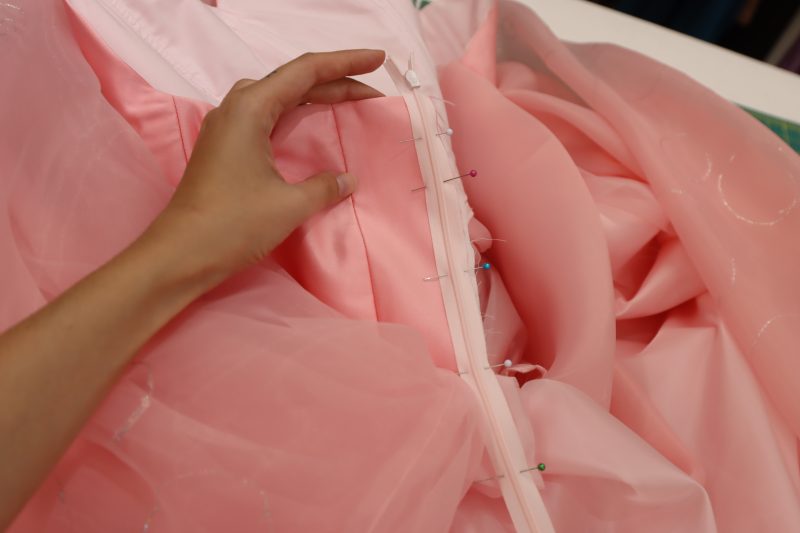
- Pin the invisible zipper right sides together with one of the sides of the back opening of the dress.
- Use an invisible zipper presser foot attachment on your sewing machine to sew as close to the teeth as possible, being sure to only sew over the side of the zipper tape that aligns with the raw edge of the back dress opening.
- Open up the zipper and pin the other side of it right sides together with the other side of the back dress opening.
- Sew along the other side of the zipper tape, ensuring that the ends of the zipper line up at the top of the dress so that the back of the dress is flat when the zipper is closed.
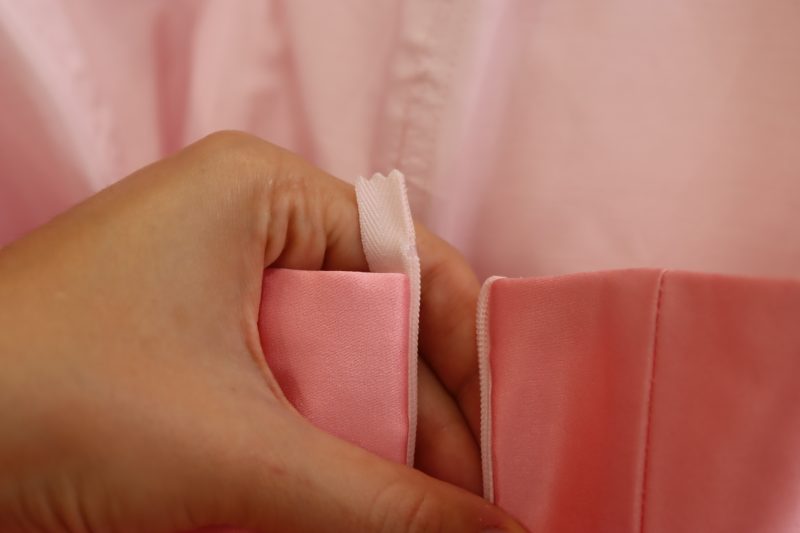
- Tuck the extra zipper tape at the top of the zipper into the seam allowance of the back opening and tack it down with a small stitch to keep it hidden.
- Sew the bottom of the dress under the zipper shut with ¾ inch seam allowance, being sure to sew up to the stitch that attaches the bottom of the zipper to the lining so there are no gaps.
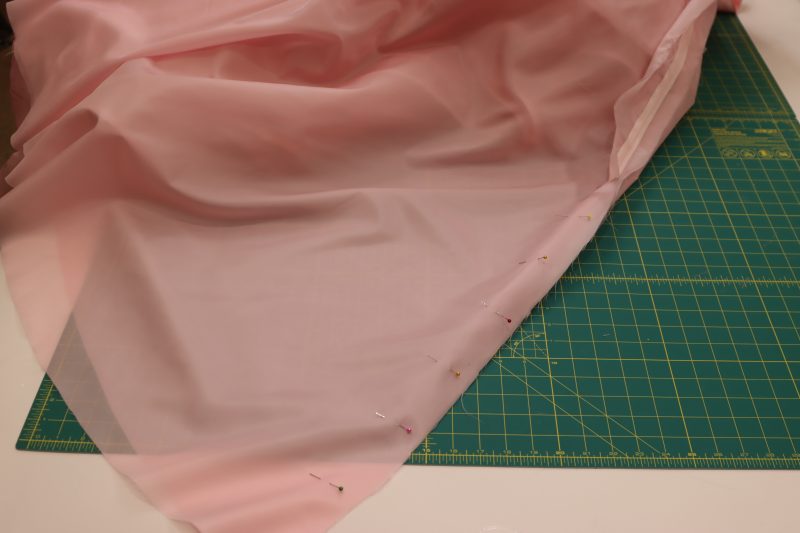
Step 13
OVERLAY PANELS
- One the left, right, and bust organza overlay panels, serge all the raw edges.
- After serging, fold the serged edge towards the wrong side of the fabric and sew it down with a straight stitch to create a tiny clean hem.
- Press the hem flat.
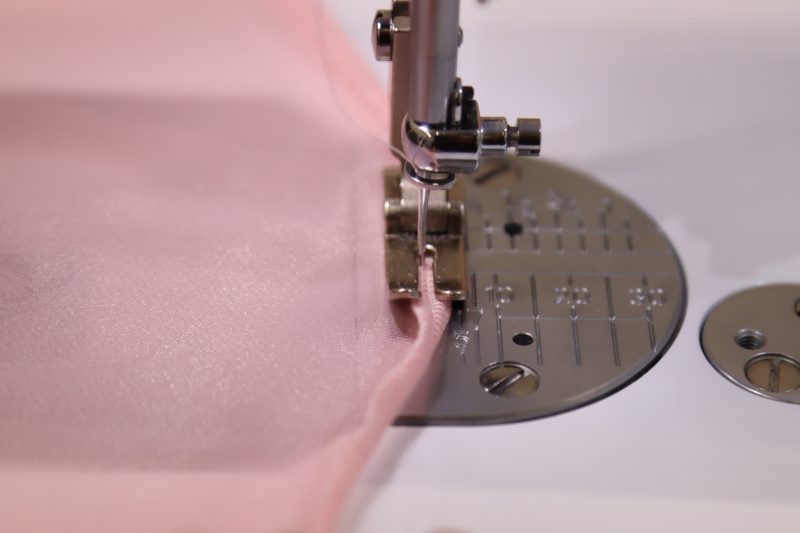
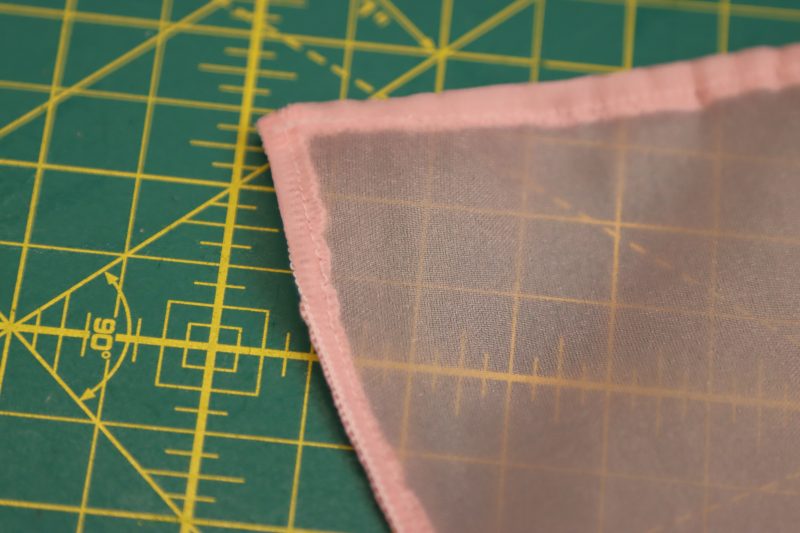
Step 14
OVERLAY BUST PANELS
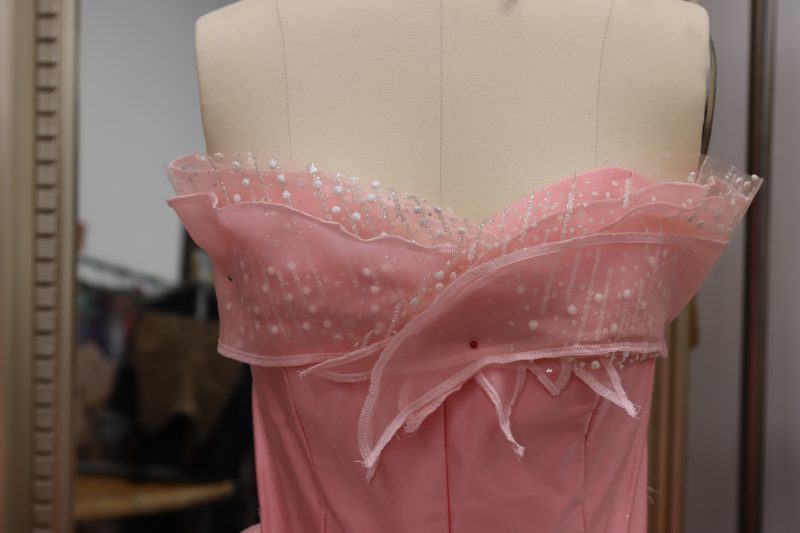
- Sandwich a sparkly tulle overlay bust panel in between one plain organza and one satin faced organza overlay bust panel.
- Fold the sandwiched pieces in half to create a half-crescent shape with 6 layers of fabric in total.
- Repeat the previous steps to make two matching sandwiches, one for each side of the bust.
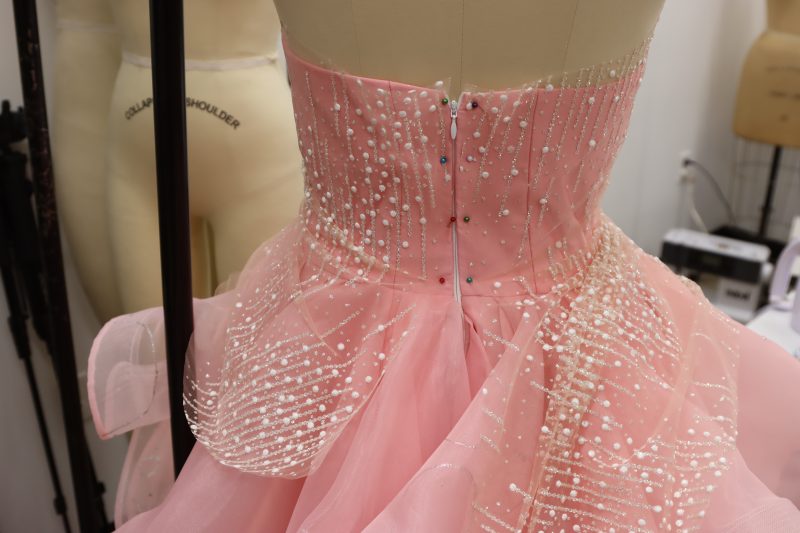
- Pin the overlay bust pieces to the neckline of the dress, ensuring that they overlap each other and slightly stick out past the neckline of the dress.
- Tack the overlay bust panels down by hand using a needle and thread (Note: It definitely helps to have a mannequin for the next few steps, but if you don’t have one, steps 14 and 15 can be completed while the dress is being worn or while it is laying flat. Just be sure to try on the dress before permanently sewing the overlay panels to the bodice to avoid having to seam rip).
Step 15
LEFT & RIGHT OVERLAYS
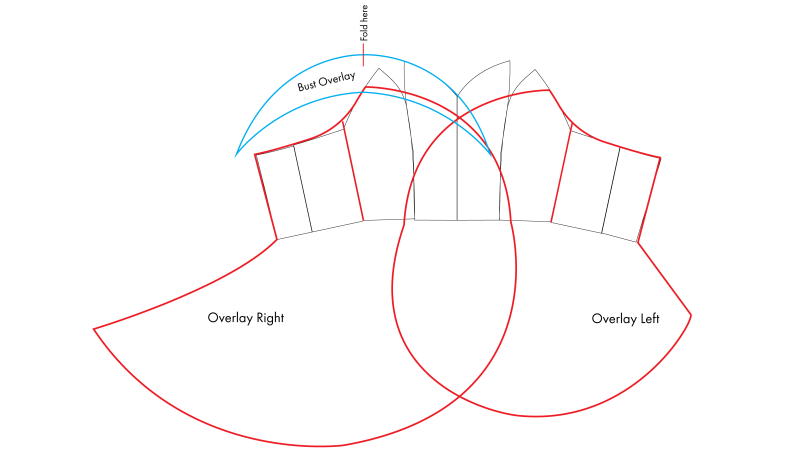
- Begin pinning the left and right overlay panels to the bodice by lining up the part of the panel pieces labeled “back seam” with the back seam of the dress.
- Pin the points of the pattern pieces (between the front waist and side seam) to the neckline of the dress next to the rounded princess seams (as shown in the drawing below).
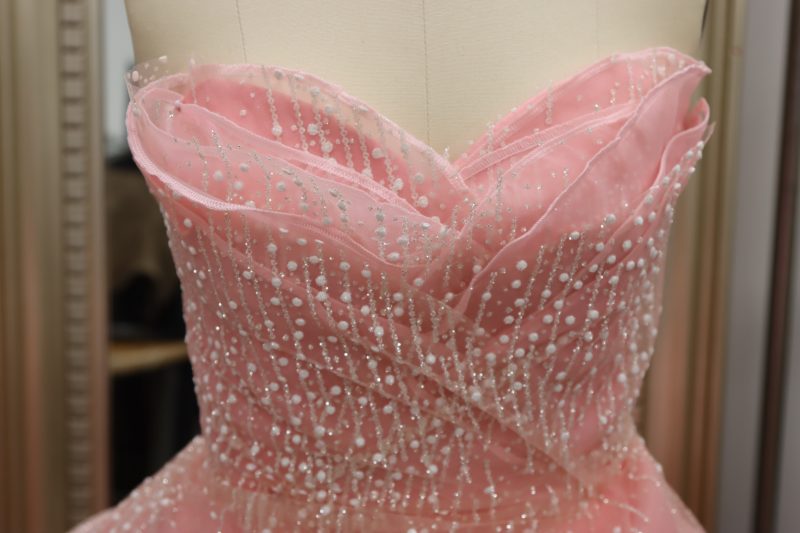
- The overlay pieces should be draped in an alternating overlapping pattern in the front of the dress, starting with the left overlay panel in plain organza. The overlay pieces were draped in the sample dress in this order:
- Left overlay panel in plain organza
- Right overlay panel in satin faced organza
- Left overlay panel in satin faced organza
- Right overlay panel in plain organza
- Left overlay panel in glitter tulle
- Right overlay panel in glitter tulle
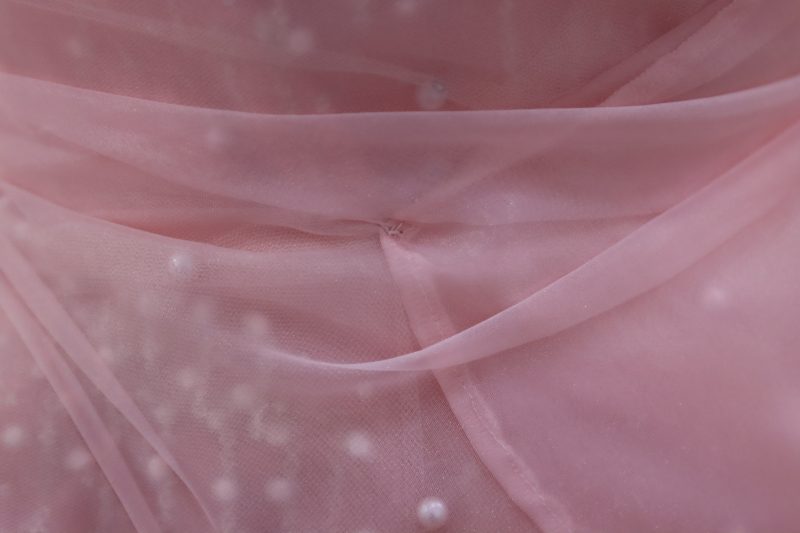
- As the panels are being draped over one another, the overlapping sections should be pinned down layer by layer to keep them draped on top of each other.
- See the third picture in this step for the intended final drape.
- Hand tack or baste the overlay panels in place along the back seam, back neckline, front waist, and front middle of the dress.
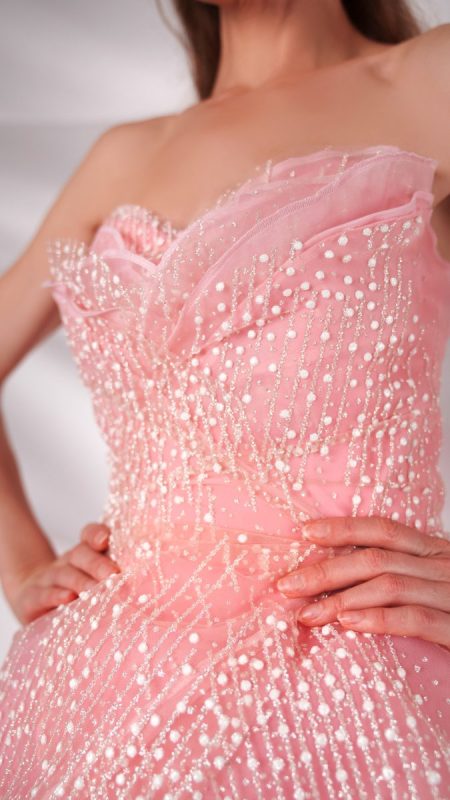
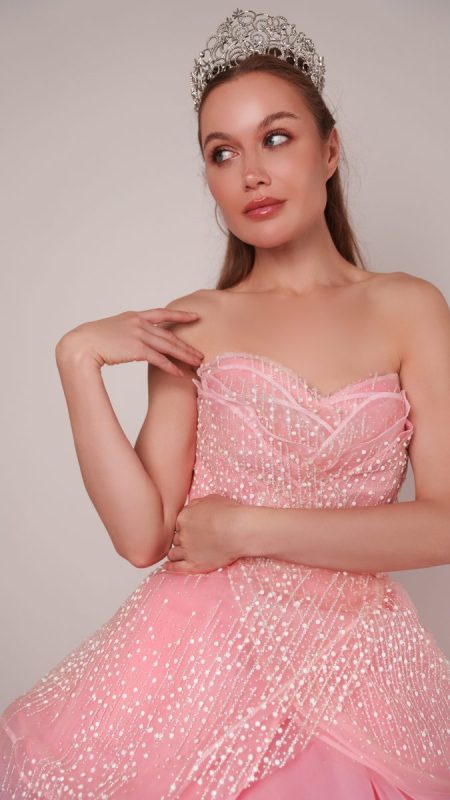
Sewing Success: The Finished Glinda Gown
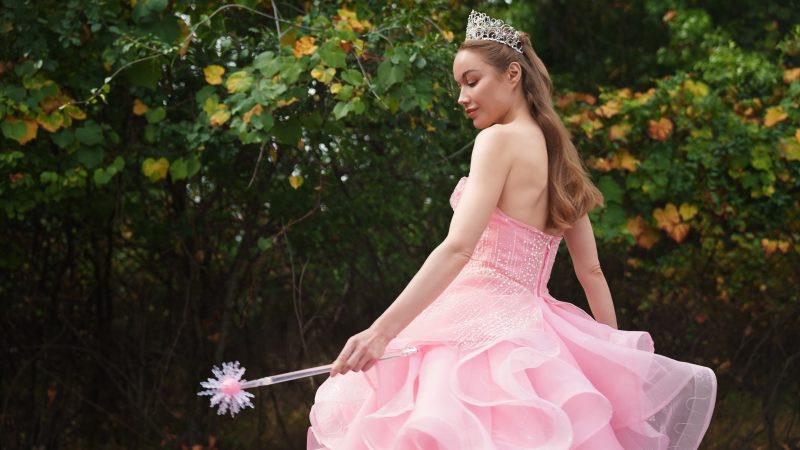
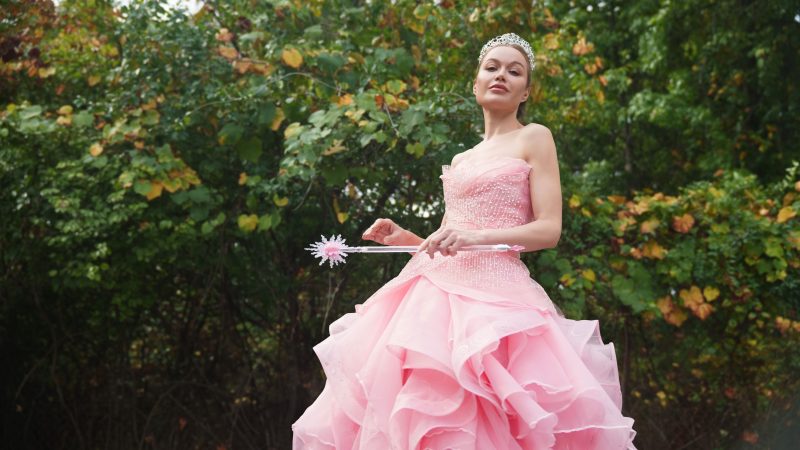
Share this post with a friend (or two!), download the Glinda Gown free sewing pattern, and show us which fabrics and colors you choose, using the hashtags #MoodGlindaPattern & #MadeWithMood—and don’t forget to tag us @MoodFabrics, too.
Free Sewing Pattern Inspiration for Your Next Project
With 450+ free sewing patterns and counting, your opportunities for sewing with Mood are endless!
We hope you had as much fun sewing this gown pattern as we did! As always, we want to hear from you—share your thoughts and comments below and let us know where you’ll be wearing the Glinda Gown free sewing pattern!

You have two different types of organza listed and ruffles cut out from; is there an order they should be attached to the skirt? Is one type of organza for the bottom layer of flounces while the other goes on top? Do they alternate?
Where is the broadcloth being used?
Is the lining fabric for both the bodice and to make an underskirt out of?
Thanks for asking Kelly!
1. I used 5 pieces of the regular organza and 5 pieces of the satin faced organza for the underskirt ruffles, and then the same for the overskirt ruffles, that way the two types of organza were being alternated throughout both layers of the entire skirt.
2. The broadcloth was used for the bodice lining.
3. The lining fabric is just for the skirt. The broadcloth was used for the bodice because it’s a bit softer and more comfortable up against the skin than the polyester lining in the skirt.
I hope this helps! Happy sewing!
Bonjour, cette robe est superbe, merci pour le patron, ma fille va être heureuse ♥ ♥ ♥
Thank you for posting this incredible pattern! I’m interested in possibly making a tea length version. Any thoughts as to how much the fabric needs for the organza would decrease in say, the size small?
Hi Abi! So the way the pattern is drafted now, the circumference of the circles used to make the ruffles is 60 inches, which is the standard width of most kinds of fabric. I recommend cutting circles with a circumference of 45 or 50 inches so that when you fold the circles to make the ruffles, they’re about 10-15 inches shorter than floor length. I hope this helps! Let me know how it works out for you.
What size zipper is used for this costume?
Hi Ashley, thank you for asking, I just realized the zipper was not included in the materials list. The zipper used is a 24 inch invisible zipper.
OK thank you. i love this pattern thank you much for creating this, its amazing!
This is beautiful. Are both the lining and exterior of the bodice the broadcloth? What are your thoughts on an extra interlining in the bodice?
Hi Selena, the lining is broadcloth but the exterior is polyester satin. An extra interlining is totally fine! It would add to the structure and the smoothness of the bodice.
Hi I love this design so much and am currently working on making my own. Thank you for this super easy pattern! I only have one question about the silver pattern on the organza, was that done with acrylic paint, and if so, will any acrylic paint work?
You can absolutely use whatever acrylic paint or glitter glue you like, as long as it will stick to the fabric!
D you think that the organza can be substituted with chiffon?
Yeah definitely! It might not be quite as poofy because organza is a little more stiff than chiffon, but they are equally as translucent so they would both work.
I love this light weight voluminous dress,am looking forward to make one,my question is,one small size dress takes 20yards
That’s correct. Because of all the layers of organza in the skirt, a size small requires at least 20 yards of fabric.
if i wanted to make the skirt bigger and denser like the movie? (i’m a drag queen big drama is my game!) how would i go about that?
Hi queen, there’s a few things I would recommend to make the skirt even bigger and more dramatic.
1. There is horsehair braid around the hem of 10 out of the 20 organza skirt ruffles. To make it even bigger and poofier, put the horsehair braid in ALL the skirt ruffles, not just the ones on the outside.
2. Use more ruffles in general. This pattern calls for 20 skirt ruffles (which are actually just circles that are folded into big ruffles), but you could do 30 or even 40 to make it more voluminous. At some point it might get heavy, but I feel like that’s probably something you could work around.
3. Finally, this dress was not photographed with a petticoat or hoop skirt underneath, but I think the one in the movie had both. I would definitely recommend one or both of those options to make it really hold its shape like the movie.
I was sent the link to the pattern, but unfortunately, I got the 404 error.
Hey Wendi, I just checked by downloading the pattern myself. The issue seems to be resolved. Go ahead and try again and let me know if you’re still having problems.
Any chance of an Elpheba Costume Pattern? Would be amazing to make both
Not on our schedule yet, but might I recommend making some alterations to the Nightshade Dress to make it more Wicked-esque?