

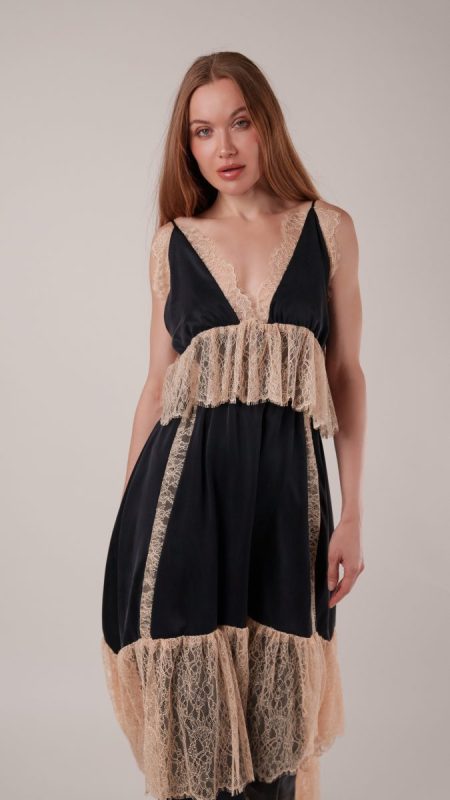
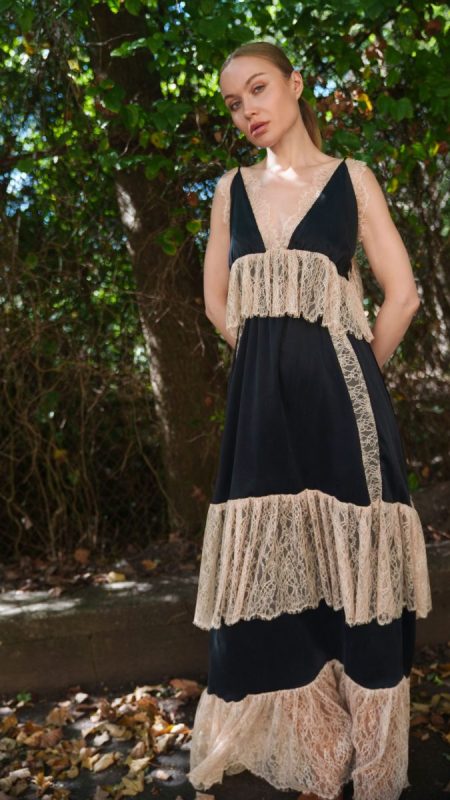
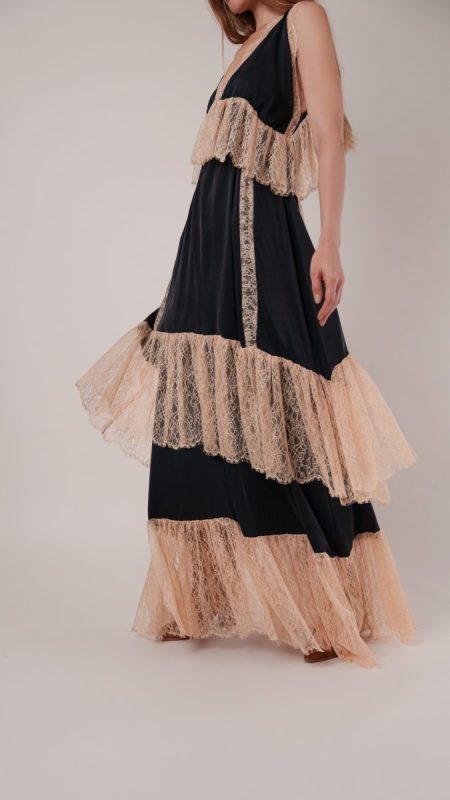
Ever dreamed of rocking the runway? Mood’s Odette Lingerie Dress Free Sewing Pattern will make your high-fashion dreams prove true! Strut to your heart’s content wearing this trending lingerie dress silhouette and dare to amaze your audience with layered looks for days or paired with a leather jacket for a fun-filled night out.
At the end of night, when it’s time to hit the pillow, Odette calls out, “nightgown, anyone”? Yes, please! Bedtime just became so much more fierce: luxurious washed silk charmeuse settles beautifully against the skin, granting restful sleep again and again. And when you snooze your alarm one too many times, this lingerie dress sewing pattern is already ready to start the day!
This intermediate level sewing pattern is a rewarding make for sewists ready to refine their skills. From handling slippery silks to mastering delicate lace and clean finishes, the Odette Lingerie Dress will expand your technical know-how while leaving you with a garment that feels couture-worthy. Whether you’re sewing it up as an everyday slip dress, a glamorous layering piece, or a truly luxurious nightgown, this lingerie dress is a pattern that works as hard as you do—day or night.
Essential Materials & Sizing Guide for the Odette Lingerie Dress
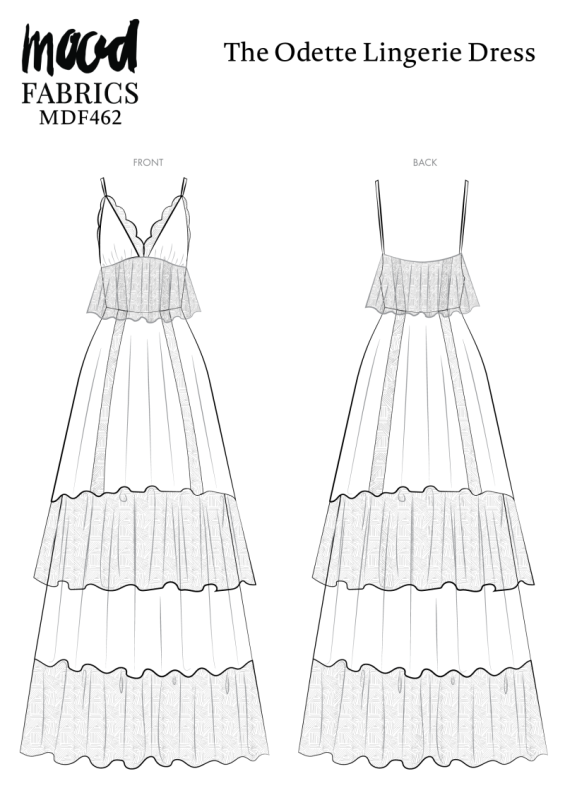
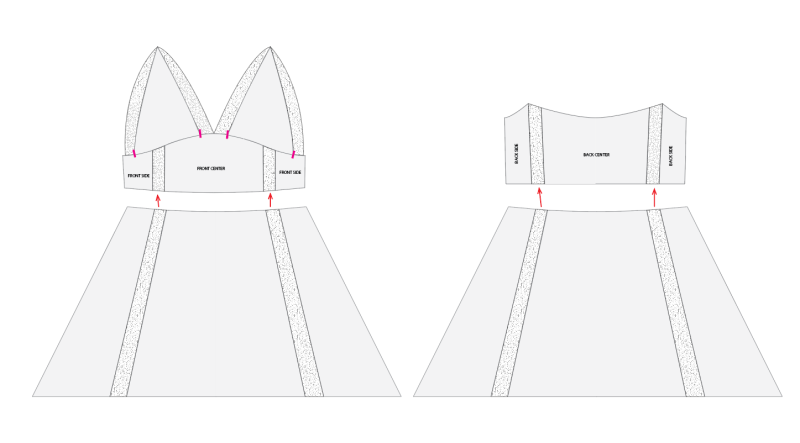
Continue reading for a breakdown of what knowledge and materials you need for creating your very own lingerie dress! We’ve got you covered with the recommended materials we used—if you want to follow along exactly—as well as a curated list of alternative fabric type recommendations if you want to customize your own version. The Odette Lingerie Dress free sewing pattern download includes technical drawings for seam and silhouette visibility, plus a size chart to help you find your perfect fit!
Purchase Products Used Below:
Quantities indicated are for sewing a size small lingerie dress. Toggle the ‘SHOP THIS LOOK’ box to find quantity estimates for other sizes.
- 4 yards of Washed Silk Charmeuse 19mm – Black
- 12 yards of Peach Floral Scalloped Re-Embroidered Lace with Eyelash Fringe – 12.75″
- 1 yard of Italian Tap Shoe Tubular Elastic Cord – 0.125”
- 2 yards of Black Elastic Trimming – 0.375″
- 1 each of Gutermann Sew All Thread 100m – 502 Sahara
- 1 each of Gutermann Sew All Thread 1000m – 10 Black
- MDF462 – Odette Lingerie Dress Sewing Pattern (Free download below!)
Alternative Fabric Type Recommendations:
The Odette Lingerie Dress sewing pattern is best suited for lightweight fashion fabrics. Explore other fabric types or colors from our featured collections for your lingerie dress using the links below. Discover our selection of silks for an incredibly soft hand and beautiful drape, or explore our premium, affordable fabrics that offer both fluidity and durability.
Download Your Free Sewing Pattern
Submit your name and email in the form below to receive the download link for the Odette Lingerie Dress free sewing pattern directly in your inbox. Mood Sewciety Patterns will send your free download link via email with the subject line: ‘Your Free Download from Mood Sewciety – The Odette Lingerie Dress’ (in PDF format for A4 and letter-size printing).
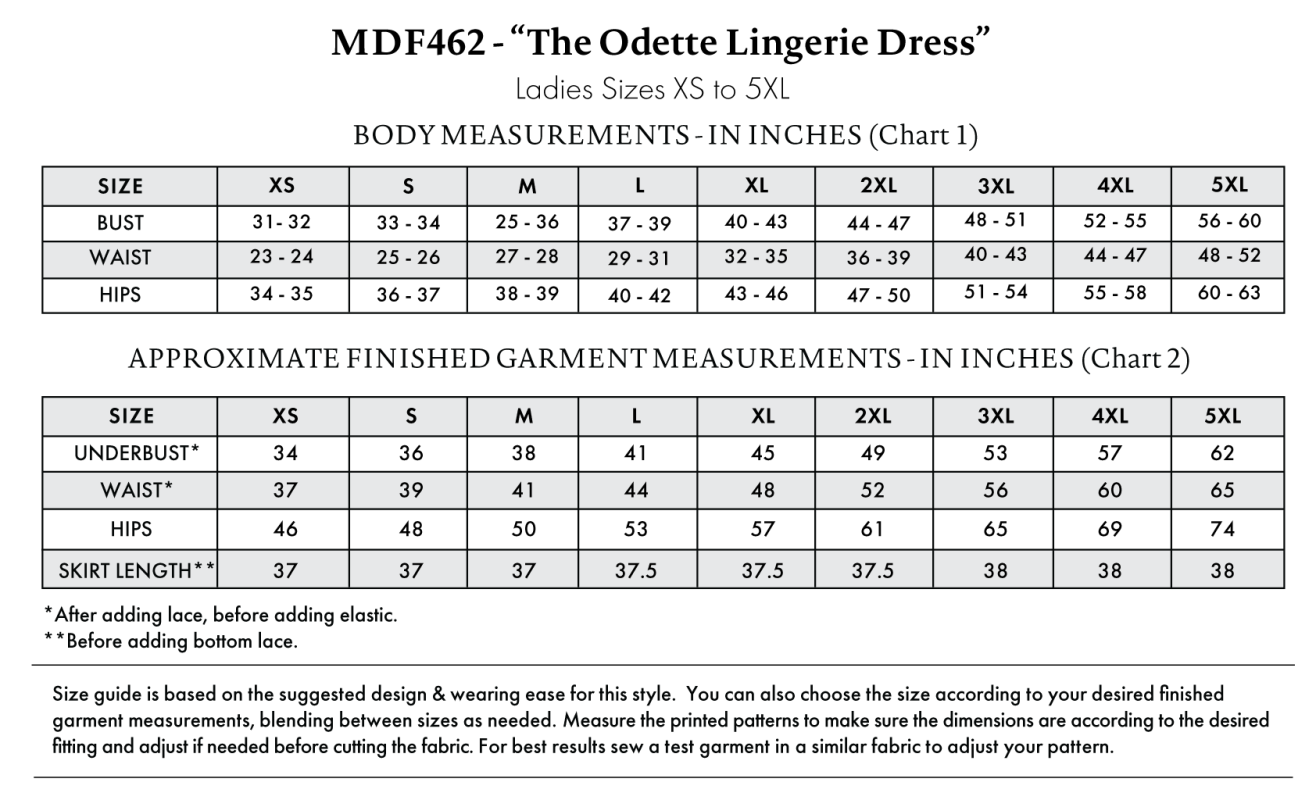
Find Your Perfect Fit
The Odette Lingerie Dress Sizing Guide is based on the suggested design & wearing ease for this style. You can also choose the size according to your desired finished garment measurements, blending between sizes as needed. Measure the printed patterns to make sure the dimensions are according to the desired fitting and adjust if needed before cutting the fabric. For best results, sew a test garment in a similar fabric to adjust your pattern.
Note: Always read all the instructions before cutting the fabric!
How to Sew The Odette Lingerie Dress
The instructions provided below are designed to guide you through sewing the Odette Lingerie Dress from start to finish.
4 Tips for Sewing with Slippery Fabrics
For professional results, the key to sewing with slippery fabrics is first, to minimize the movement! While sewing with fabrics such as silk charmeuse can feel intimidating, we’ve put together some tips and tricks for sewing with slippery fabrics just for you.
⇒ Forgo traditional scissors whenever possible. Use a rotary cutter and self-healing mat to cut out your pattern pieces. Instead of cutting on the fold, work with single layers only. If you must use scissors, ensure they are ultra sharp, and layer your fabric between tissue paper or another thin fabric.
⇒ Every new sewing project deserves a new machine needle—that is especially true when machine sewing slippery fabrics. Keep a pack of microtex or sharp machine needles on hand; sizes 60/8 or 70/10 will yield the best results. (Premium sew all thread or silk thread makes for a perfect pairing too!)
⇒ Always test sewing on a swatch of fabric first before opting for your final fabric! On the machine, shorten your stitch length to around 1.5 to 2.0 mm, and sew slowly, without pulling or stretching your slippery fabric.
⇒ When it comes to pressing, again, always test a swatch of fabric first. For slippery, delicate fabrics, set your iron on a low heat setting and utilize a press cloth to prevent shine marks or scorching. It may be tempting, but don’t skip out on pressing; crisp seams are always a must—for both ease of sewing and for a professionally made sewing project.
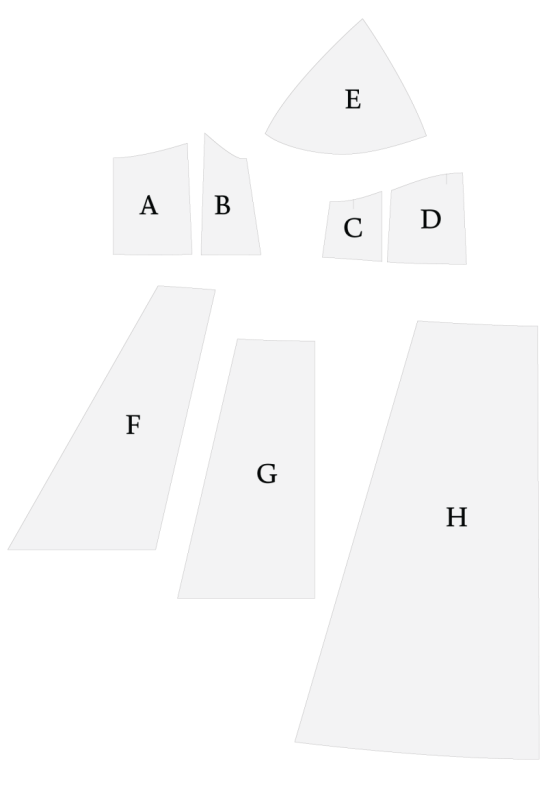
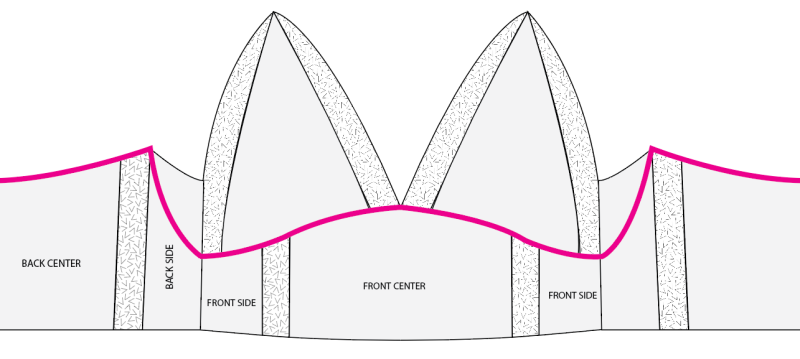
Pattern Pieces & Fabric Cuts Needed
- (A) TOP BACK CENTER
- Fabric – Cut 1 on Fold
- (B) TOP BACK SIDE
- Fabric – Cut 2 Mirrored
- (C) TOP FRONT SIDE
- Fabric – Cut 2 Mirrored
- (D) TOP FRONT CENTER
- Fabric – Cut 1 on Fold
- (E) CUPS
- Fabric – Cut 2 Mirrored Sets
- (F) OVER SKIRT SIDE
- Fabric – Cut 2 Mirrored Sets
- (G) OVER SKIRT CENTER
- Fabric– Cut 2 on Fold
- (H) UNDER SKIRT
- Fabric – Cut 2 on Fold
Sew with a 1/2″ seam allowance for all seams unless otherwise specified.
Step 1
CUT LACE
- In order to fill in the lace cutouts between the silk panels, the lace needs to be cut into strips that are 2.25 inches wide (1.25 inches showing in between each silk panel and 0.5 inch seam allowance on both sides to connect the lace to the silk). The length of the lace strips should match up with the length of each silk panel.
- For the lace trim around the bra cups, use the edge of the lace instead of the middle to keep the eyelash trim visible. The lace trim around the bra cups should be 1.75 inches (1.25 inches sticking out of the bra cup and 0.5 inch seam allowance). The length of the trim should extend a bit longer than the length of each side of the triangle shape of the bra cup.
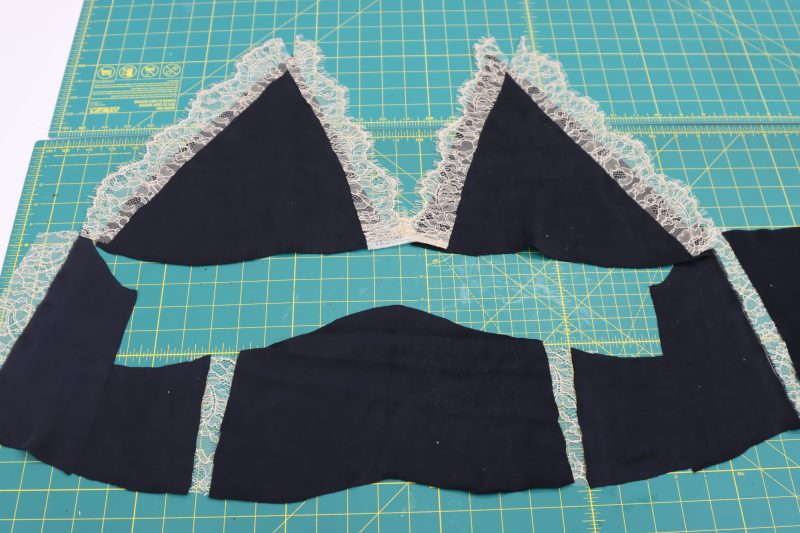
Step 2
BRA CUPS
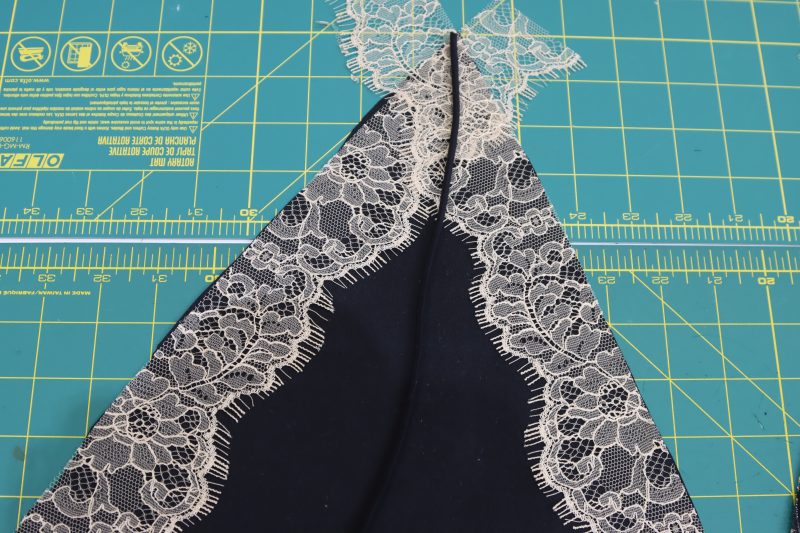
- Sandwich the lace trim and elastic cord between the two layers of the right bra cup, right sides together, as shown in the picture below.
- Sew the two sides of the triangle (not the bottom), being sure to sew one side of the lace at a time (when you get to the top corner, sew one side of the lace down and pull the other out of the way. Then, keep your needle down in the sewing machine, lift the presser foot, and move the other side of the lace in front of the needle. This will prevent the lace from overlapping at the top corner so that the lace trim lays flat against the skin when worn).
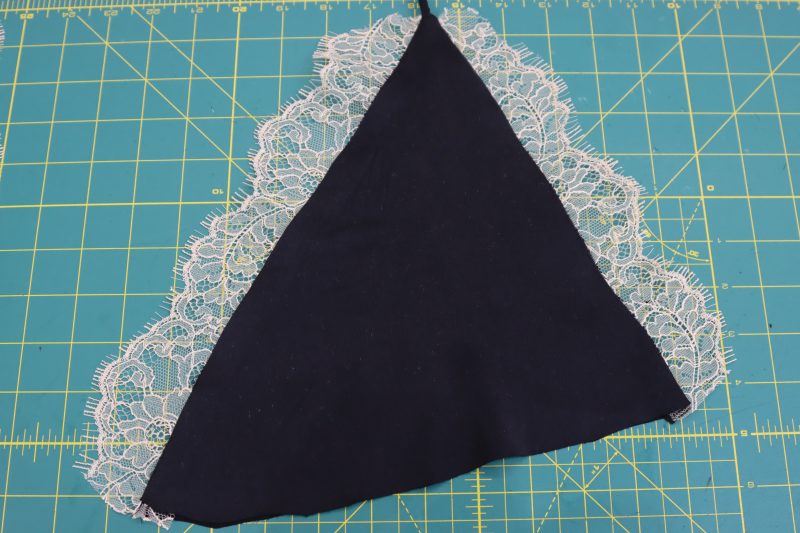
- Flip the bra cup inside out and check that the lace is laying flat on both sides.
- Repeat on the left bra cup.
Step 3
GATHER BRA CUPS
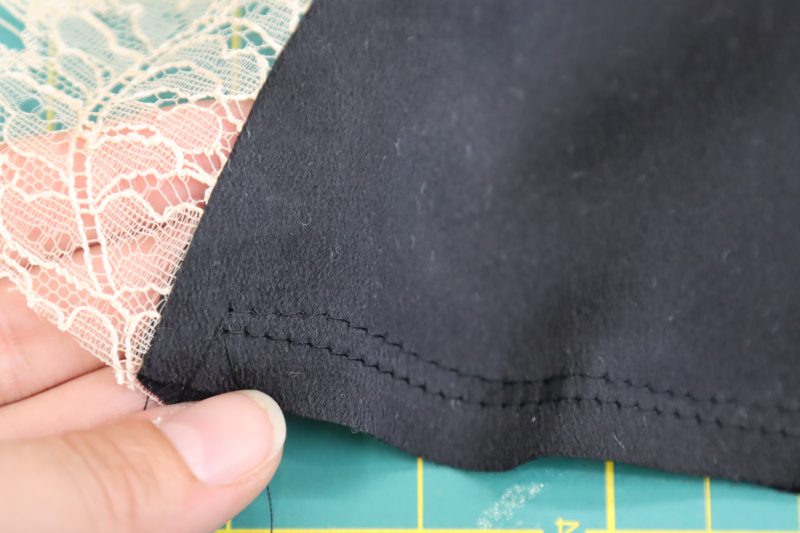
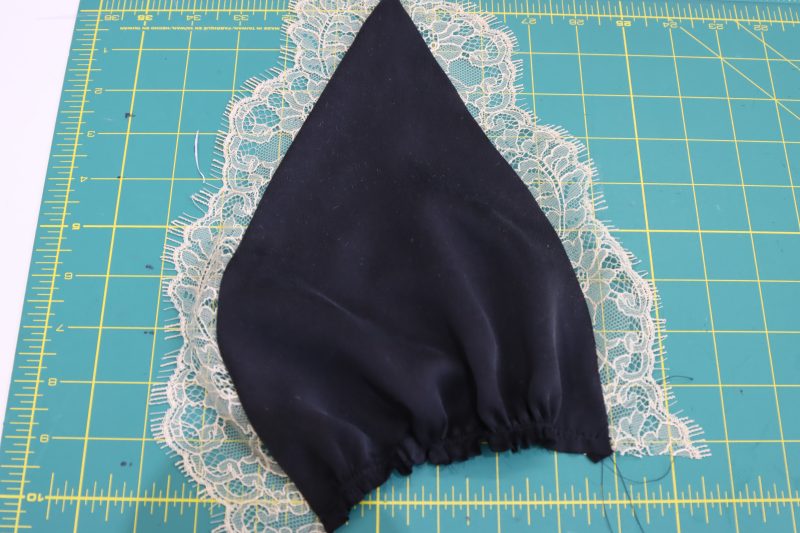
- Sew two parallel straight stitches with a 4 millimeter stitch length on the bottom edge of each bra cup.
- Pull on both of the top threads in the bra cup to begin gathering the bottom edges. The length of the gathered edge will be adjusted in the next step so that it matches up with the notches on the bodice.
Step 4
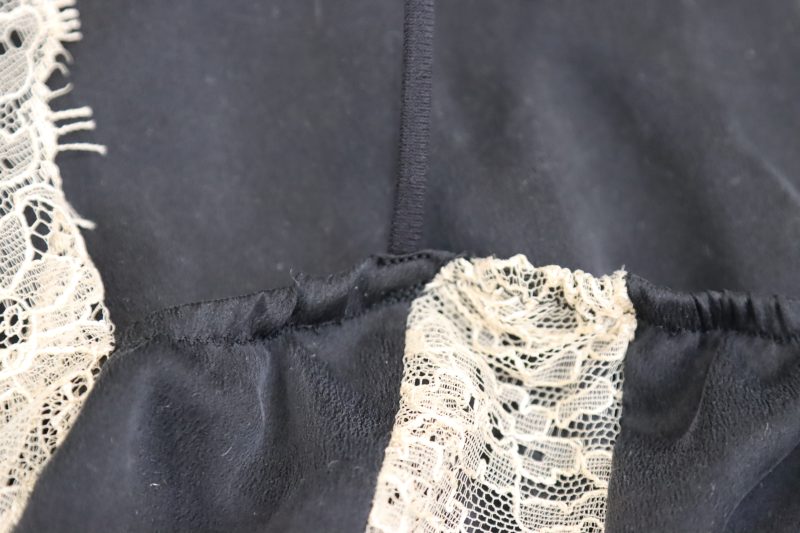
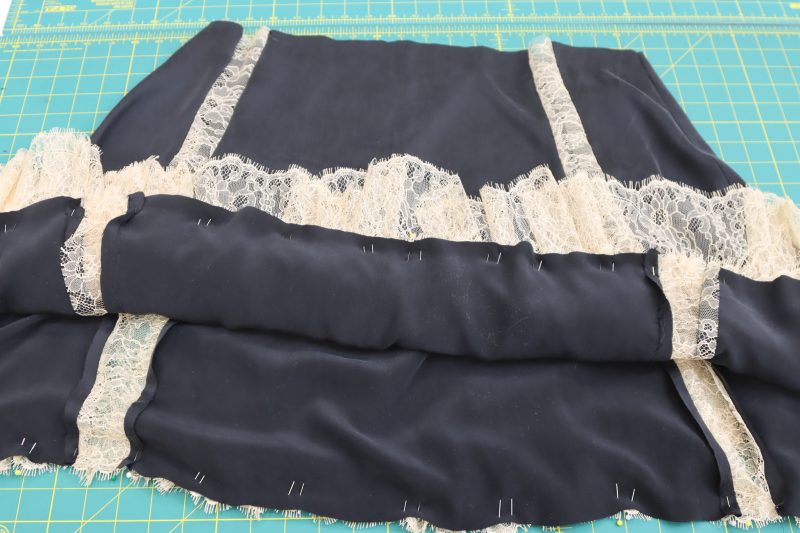
UNDERBUST
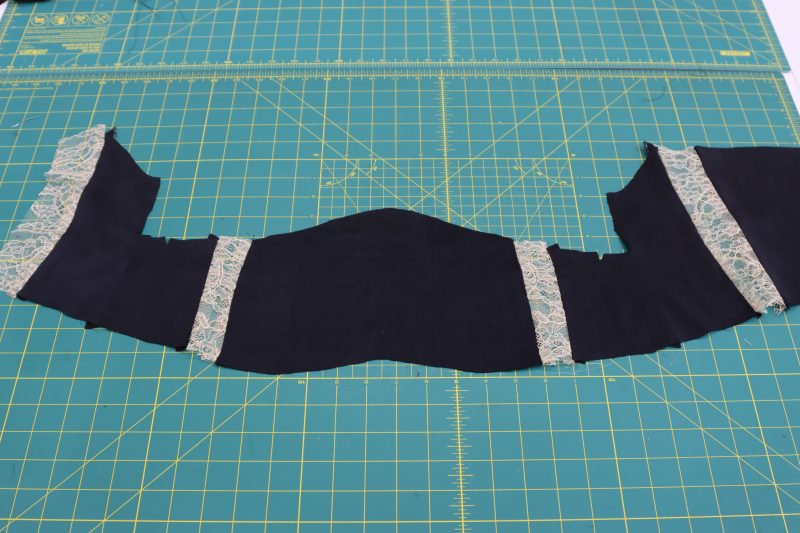
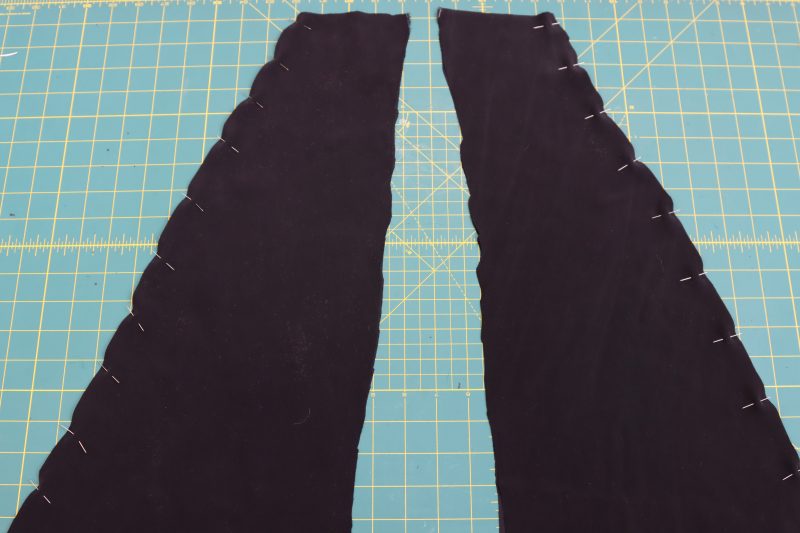
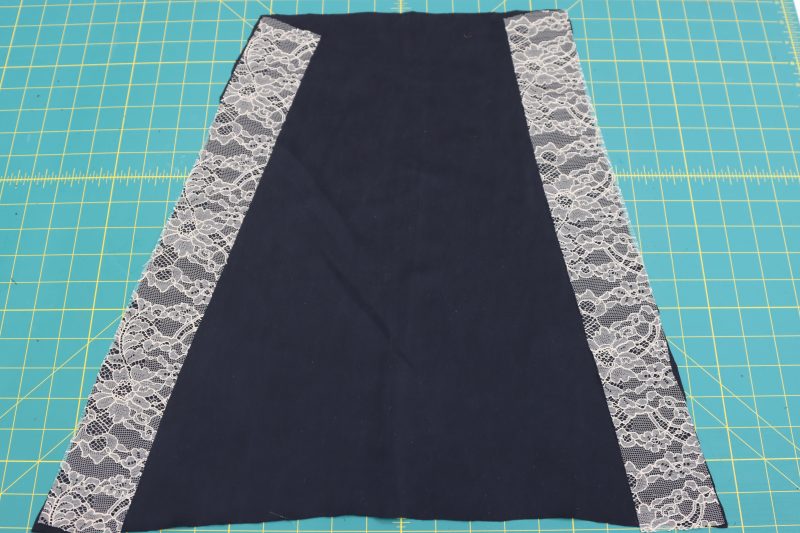
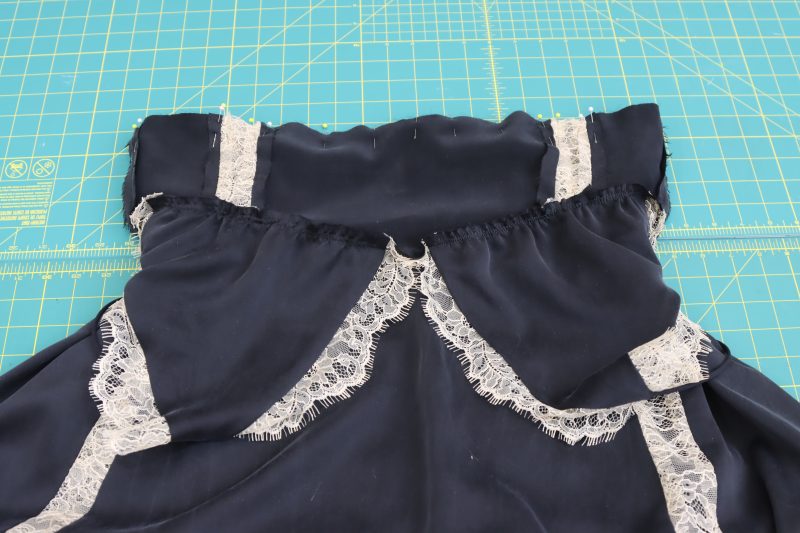
- Connect each piece of the underbust to one another by sewing lace cutouts between the silk panels as indicated in the photo below.
Step 5
ATTACH BRA CUPS
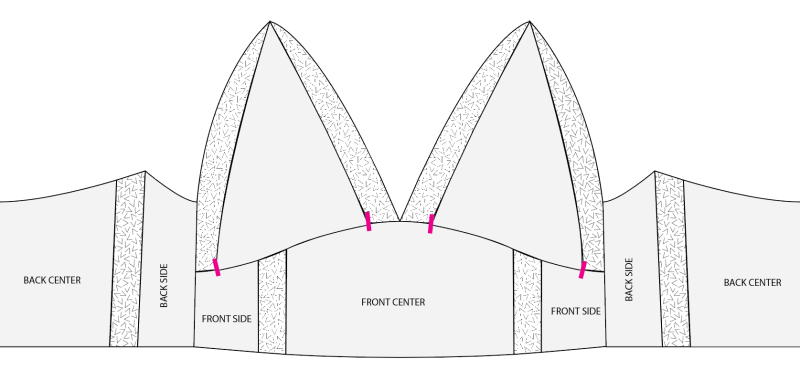
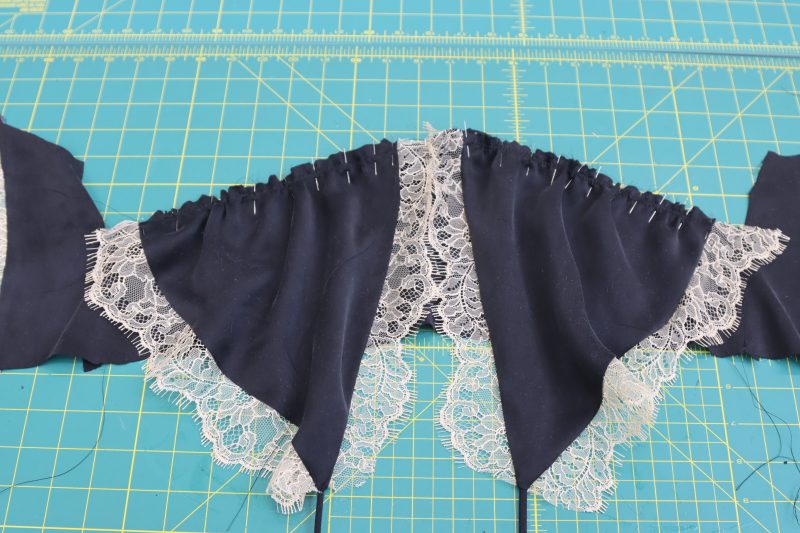
- Pin the bra cups to the underbust right sides together as shown in the picture below, being sure to line up the ends of the silk sections of the bra cups with the notches on the underbust.
- Sew a straight stitch to connect the bra cups to the underbust.
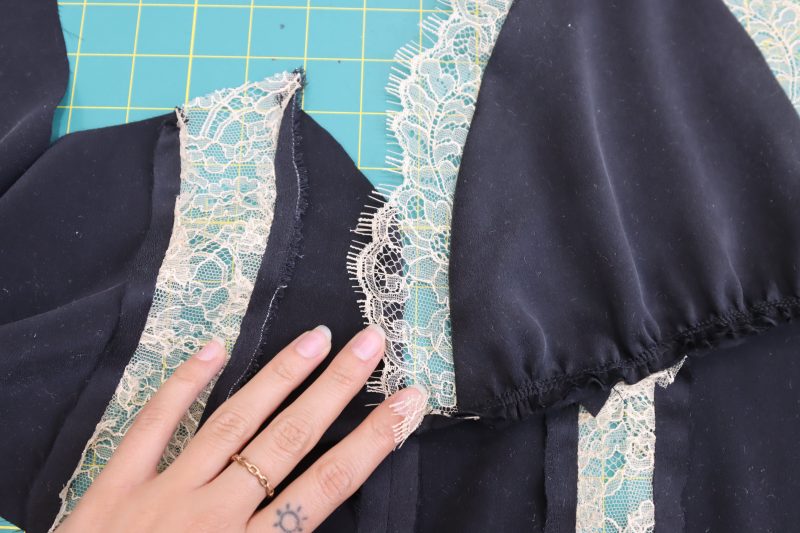
- Flip the bra cups upright and line up the sides of the bra cups with the back-side pieces of the underbust.
- Pin and sew the sides of the bra cups to the back-side pieces, right sides together.
Step 6
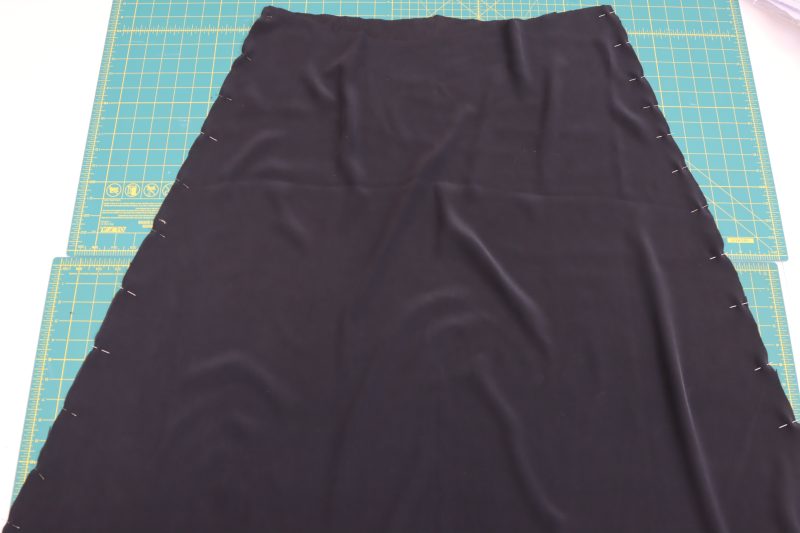
SIDE SKIRTS
- Place the two mirrored pairs of the side skirt pieces right sides together.
- Pin and sew the longest side of the trapezoid to connect the side seams of the two side skirt panels.
- Open the side seams and iron them flat.
Step 7
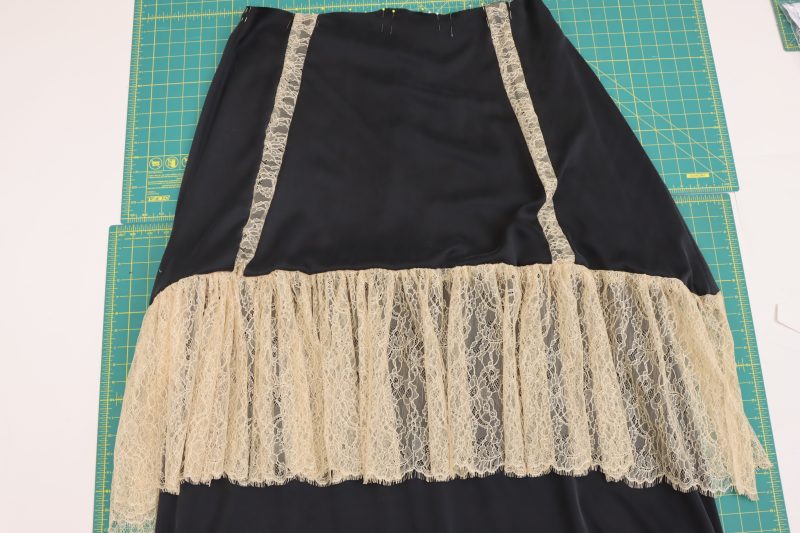
FRONT & BACK SKIRT
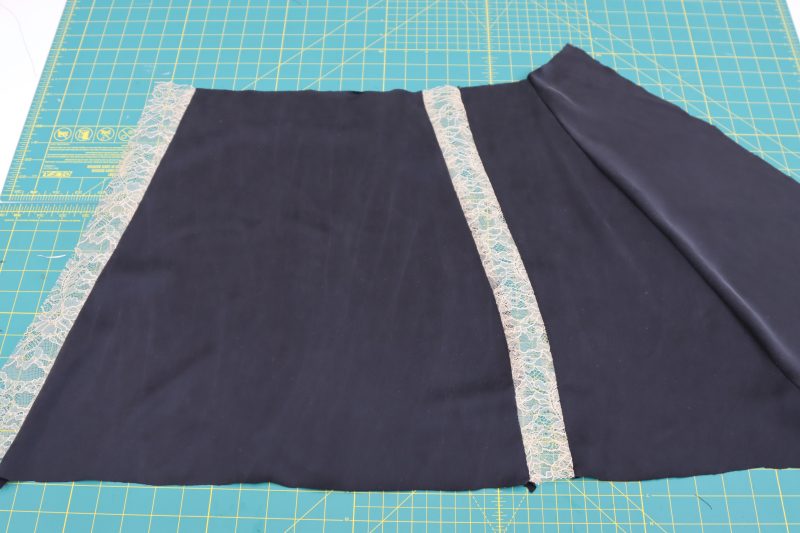
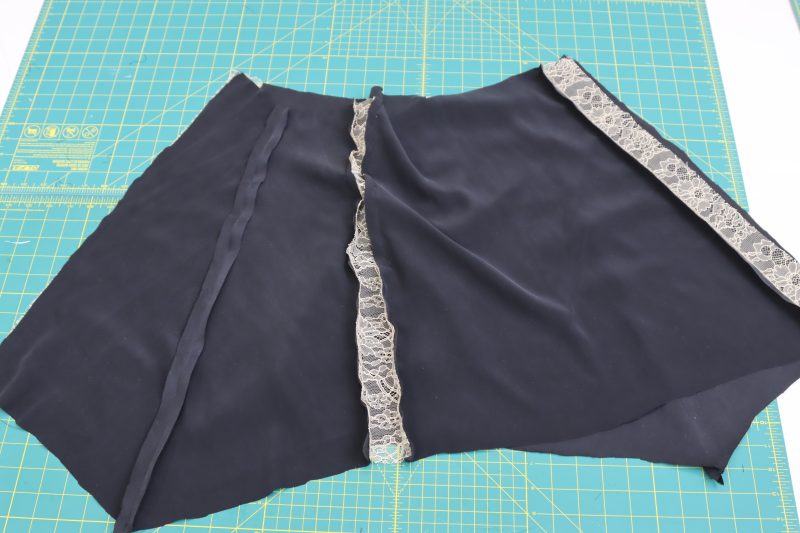
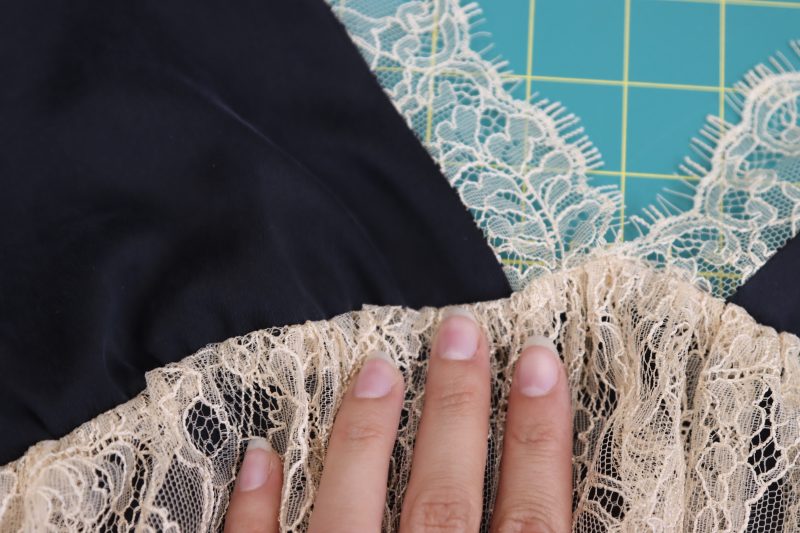
- Pin and sew a lace cutout on both sides of both the front and back overskirt panels, right sides together.
- Pin and sew a side skirt panel to the lace on both the left and right sides of the front skirt panel.
- Pin and sew the other sides of the side skirt panels to the lace on both sides of the back skirt panel, creating one big overskirt with lace cutouts separating the front and back panels from the side panels.
Step 8
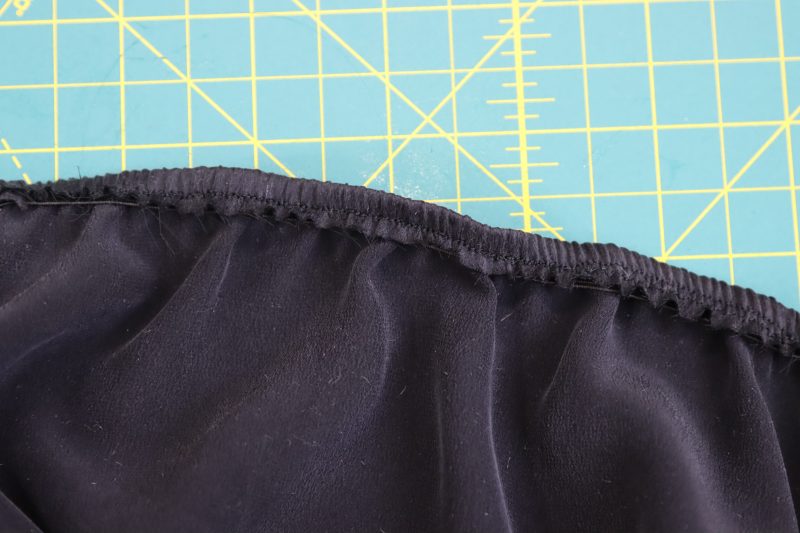
BACK ELASTIC
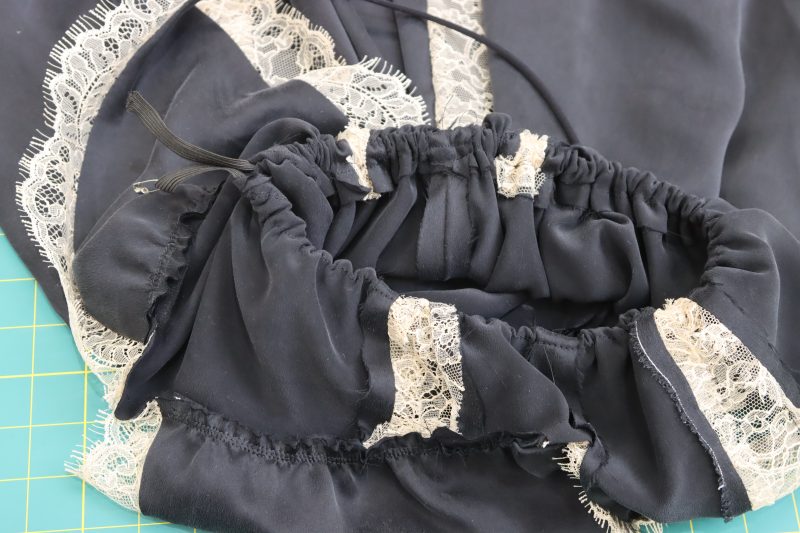
- Cut a piece of elastic that is long enough to stretch across the top back opening while slightly stretched.
- Pin and sew the elastic to the top back edge of the underbust, keeping the elastic as close to the edge as possible.
- Fold the fabric on the top back edge once to hide the elastic.
- Top stitch over the folded edge and the elastic to secure in place and hide the raw edge.
- Pin and sew the strap to the top back edge of the underbust at the pointed corner where the back side pattern piece meets the lace.

Step 9
UNDERSKIRT
- Place the two underskirt panels right sides together.
- Pin and sew the side seams of the underskirt panels together.
Step 10
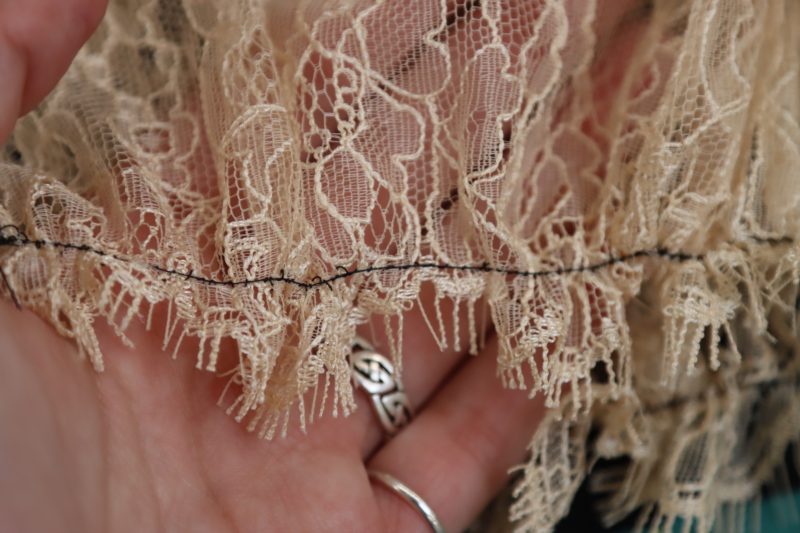
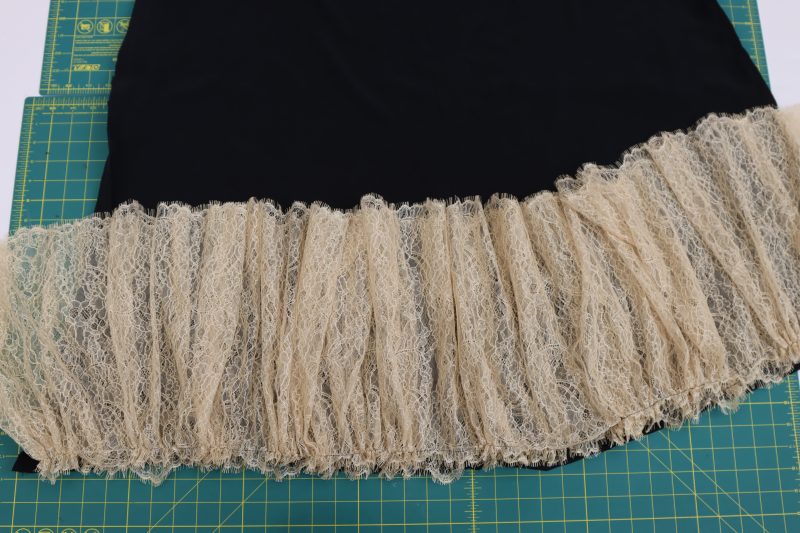
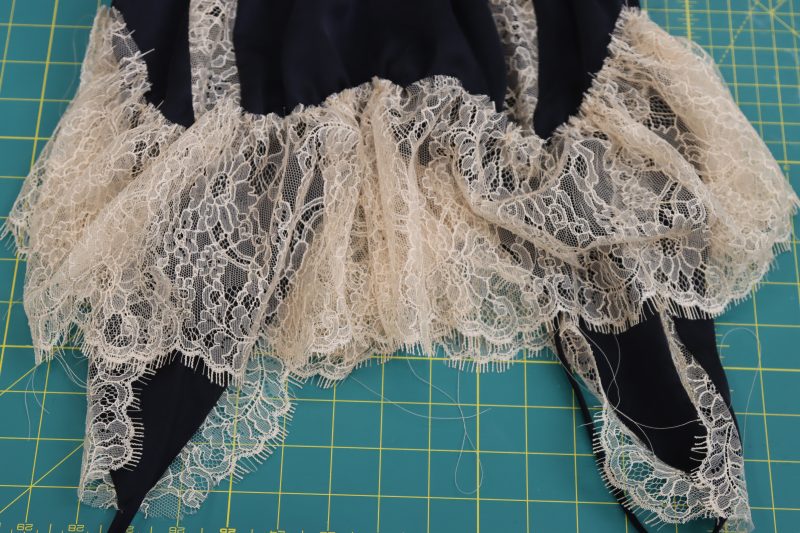
SKIRT RUFFLES
- For the lace ruffles on the overskirt and underskirt, cut two panels of lace that are 5 yards long and 12.75 inches wide (12.75 inches just happens to be the length of this lace, but if you want the ruffles to be longer/shorter, or the lace you purchase does not match this length, it is optional to cut it to this length or leave it as is. As long as the lace is 5 yards wide, the ruffling effect will be the same).
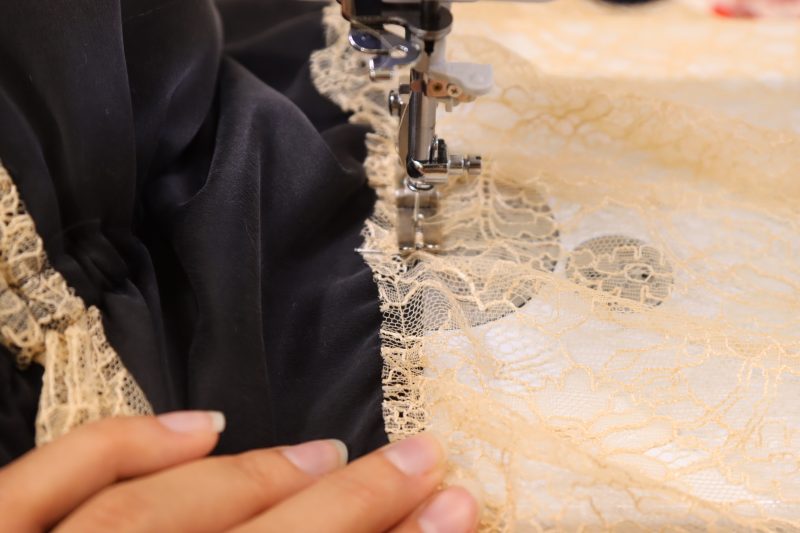
- Sew a straight stitch with a 4 millimeter stitch length along the entire edge of each 5 yard piece of lace.
- Pull on the top thread of the stitch to begin gathering the lace. Keep gathering until it is the same length as the bottom of each skirt opening.
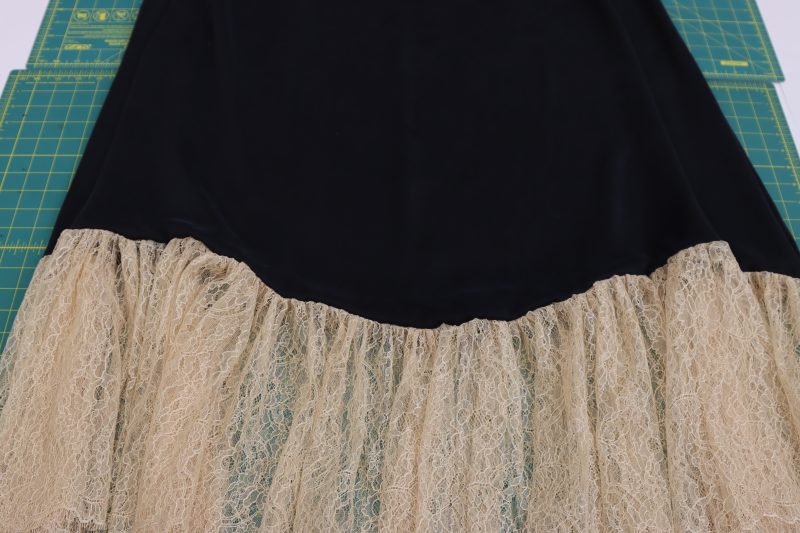
- Pin and sew each lace ruffle at the side seams to create a closed ruffle.
- Pin and sew the gathered edge of each lace ruffle to the bottom of each skirt piece.
- Place the underskirt inside of the overskirt and pin them together at the waist opening with the right side of the underskirt touching the wrong side of the overskirt.
- Sew the underskirt to the overskirt at the waist opening.
Step 11
WAISTBAND
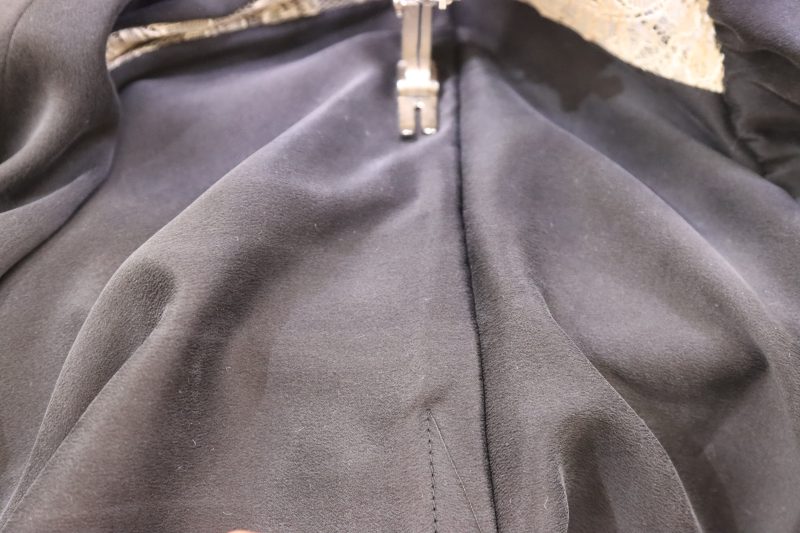
- Pin and sew the bottom of the underbust to the top of the waist opening of the skirt, right sides together, leaving a 1 inch seam allowance (this is the only time in the pattern where a 1 inch seam allowance is used instead of the ½ inch seam allowance. You will see why momentarily).
- Topstitch the raw edge of the waist seam allowance to the wrong side of the dress in order to create a narrow tunnel at the waistline. Leave a small opening in the tunnel to allow elastic to be inserted.
- Insert a piece of elastic that is the size of your waist measurement (slightly stretched) into the tunnel with a safety pin.
- Attach both ends of the elastic to each other to create a closed loop.
- Sew over the opening in the tunnel to enclose the elastic.
Step 12
UNDERBUST RUFFLE
- For the lace ruffle at the underbust, cut a piece of lace that is 2 yards wide and half the length of the skirt ruffles (the skirt ruffles here were 12.75 inches, so for the underbust ruffle, the lace was simply cut in half long ways so that the eyelash edge could still be exposed).
- Gather the lace ruffle using the same technique as in step 10. Close the side seam of the ruffle to create a closed loop.
- Pin and sew the gathered edge of the ruffle to the seam that connects the bra cups to the underbust, as indicated in the drawing below.
- Gently iron or stem the lace at the underbust after it is attached to make it lay flat and reduce bulk from the gathered edge.
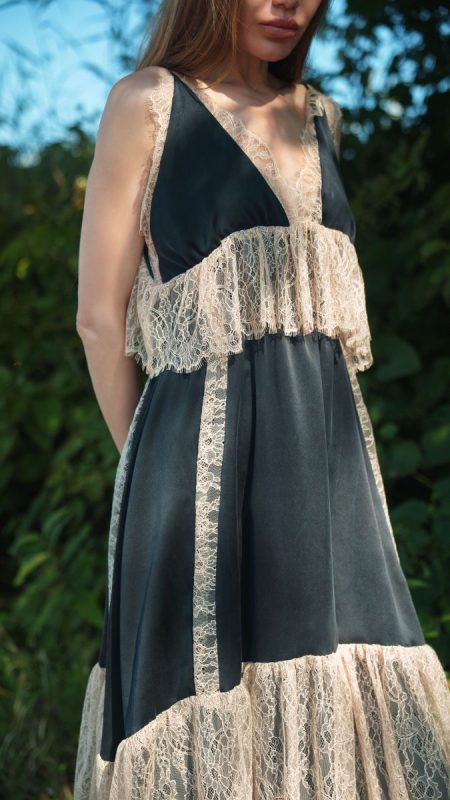
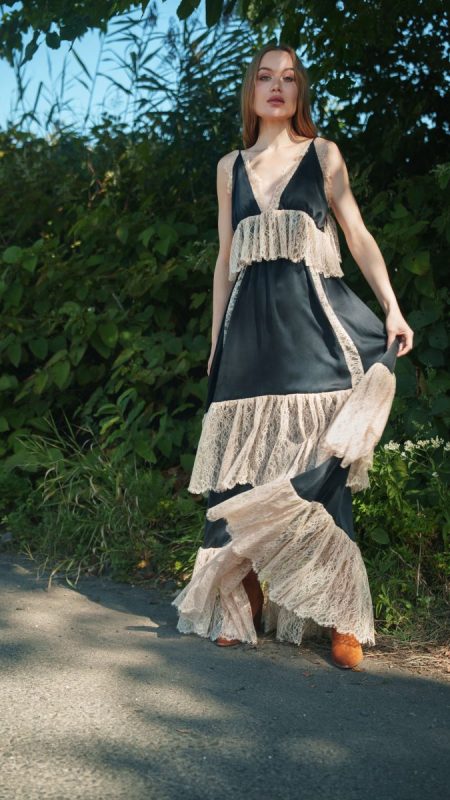
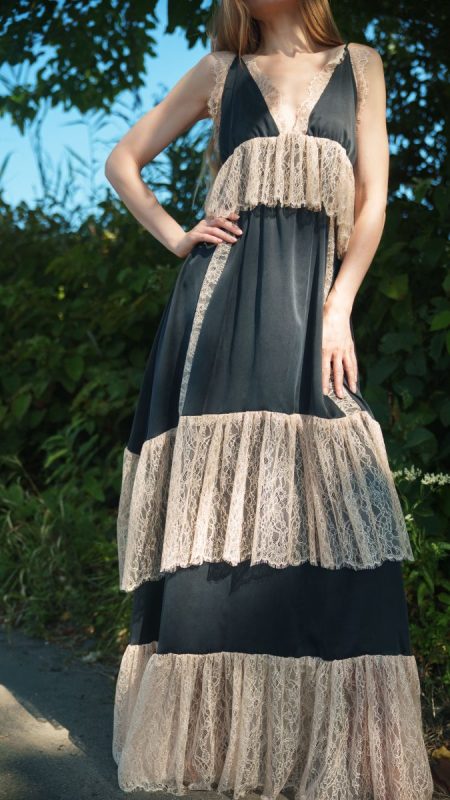
Sewing Success: The Finished Odette Lingerie Dress
Share this post with a friend (or two!), download the Odette Lingerie Dress free sewing pattern, and show us which fabrics and colors you choose, using the hashtags #MoodOdettePattern & #MadeWithMood—and don’t forget to tag us @MoodFabrics, too.

Free Sewing Pattern Inspiration for Your Next Project
With 450+ free sewing patterns and counting, your opportunities for sewing with Mood are endless!
We hope you had as much fun sewing this nightgown pattern as we did! As always, we want to hear from you—share your thoughts and comments below and let us know where you’ll be wearing the Odette Lingerie Dress free sewing pattern!
Dear Mood,
This is such a pretty and flowy dress! I am so excited to go out and find my dream fabric and lace to sew it up! Thank you for allowing us to download the pattern for free!
– Dani
This is such a pretty pattern! I’m excited to make it, although I want to use it as a stash buster/fabric recycler and mostly pull from various teal silks and lightweight fabrics I already have, perhaps augmenting with a yard or two of silk from Mood if needed. Since my fabrics aren’t all identical colors, it might be fun to do a subtle ombre effect from top to bottom as well.
But I’m wondering what to do for the lace. I’m not a fan of the peach (it’s pretty but not a color I wear) – would it work just using 3-4 full yards of lace fabric or soft embroidered fabric and just cut it and hem as needed, rather than using a trim? I need to print out the pattern and experiment.
I absolutely LOVE the idea of making this a patchwork piece with different types of fabric. That is going to turn out so cute.
Honestly if you’re not in love with the peach lace, you could always use a cotton lace eyelet fabric or even just make a long strip of fabric out of your scraps so that it can be gathered and you can get the same ruffle effect on the bottom of the skirt pieces without having to add lace. PLEASE PLEASE PLEASE tag us with the tag #MadeWithMood on social media when you’re done making this, we would absolutely love to see how it turns out.
I picked up one of those triangle bra cup sets in size 18 from Mood. Will this pattern have enough coverage to go over one of those? I am pretty sure I can modify it if it doesn’t, but I might have to experiment with some scrap fabric to figure out the ideal placement for a bit of extra support.
After looking at the listing for the size 18 bra cups, I’m pretty sure they’ll fit in a size 18 of this dress pattern. If not, the cups are foam and you can easily trim a little off the sides if need be.
Really wish this pdf had layers so it was easy to read and cut the correct sizing… kind of insane that not a single pattern from this website does. Accessibility is extremely lacking with these patterns. This could be a fantastic resource if the patterns were readable.
Hi Shi, unfortunately we only offer A4/Letter size pattern downloads with all layers (sizes) included as of right now. We’re always working to improve our offerings, and we hope to provide more formats and features like layering in the future. Your feedback helps us prioritize these improvements! Stay tuned for new features in the new year!
I love ur patterns but I wish you could post the assembled pattern file for people who use projectors and don’t want to waste paper and tape
Hi Sefis, at this time, we only offer A4/Letter size pattern downloads with all layers (sizes) included. We’re always working to improve our offerings, and we hope to provide more formats and features like layering in the future. Your feedback helps us prioritize these improvements! Stay tuned for new features in the new year!
Is 12 yards of lace (vs 4 of charmeuse) for a size small correct? From the photos that seems like way too much. (unless it’s to ensure you have the scallop edging for the panel hems, maybe?) If that amount is required solely for the edging, could you add a note about how much yardage you’d need if you used one of the alternative fabrics, like tulle? Also, the technical flat doesn’t seem to match the pattern. In the flat, it looks like the bottom 2 lace panels sit in separate layers on top of the charmeuse, but in the pattern, they’re sewn together.. Maybe that’s why the lace yardage is so high, if its going by the flat design?
The recommended lace yardage is correct because the lace is gathered before it is sewn to the hems of the skirts.
The lace is only 12″ wide, so I think that’s why the yardage is so much.
I plan to use lace fabric (found a perfect one in my stash!) so I wonder what the yardage with normal fabric would be, too! I would expect a single yard of fabric to get three 12″ strips, although it might be slightly different due to seam allowance. I probably won’t want to gather my lace quite as much since it’s thicker as well.
Tulle comes in varying widths, but I assume you could do something similar and either cut it into multiple strips or just modify the length of the tulle on each tier. (For example, I’ll probably use a thinner strip or a plainer fabric for the ruffle below the bust, and then gradually increase the length amount of each ruffle.)
Perfect…thank you
Can I use embroidered tulle instead of lace?
Absolutely!
Perfect Thanks
How much of the main fabric do you think to order if I didnt do the undershirt layer? I see how much to cut for the lace that I can subtract.
Thanks!
I would say order 3 to be safe. The upper skirt still used a good amount of the silk and the bra cups are double layered so I’m not certain 2 yards would be enough.
Can this only be made if you add the exact size cut lace pannels. How much does the size change if you dont include them? Does the pattern even match up without the lace?
Hi Cal
Yes, the pattern was made assuming lace will be added. If you want to make it without lace, I recommend choosing the size that is closest to the measurements you want for your dress, remove the 1/2″ seam allowance, then arrange the pieces as shown in the step 4 diagram, spacing them as if you were leaving room for the lace. Check the pattern measurements, and if they match what you want, trace a new outline including all the pieces together. Add your seam allowance again, and that’s it, your new pattern pieces for the dress without lace are ready.