
Calling all intermediate or experienced-beginner sewists, Mood’s new pleated skirt and tie pattern is the ultimate addition to your autumn wardrobe. Learn how to pleat and layer skirts as you pick up sewing tips and tricks for sewing with super wool suiting fabrics.
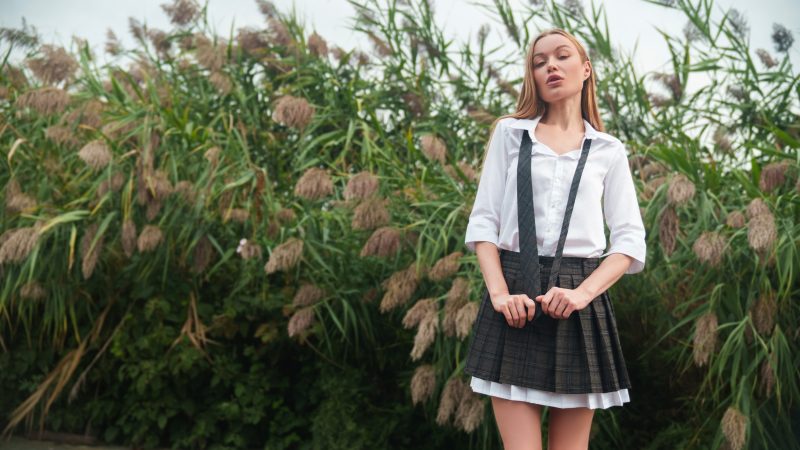
This pleated skirt takes classic tailoring and reimagines it with a youthful, polished edge. Crafted in a rich super wool suiting, its crisp pleats give the silhouette a structured fullness while still allowing graceful movement with every step. The matching tie adds a playful, academic charm—tying the look to traditional school-uniform inspiration while keeping it elevated for everyday wear.
With its high-waisted fit and sharp pleating, this skirt balances timeless sophistication with modern versatility. Dress it up with a button-down for a preppy statement or pair it with a simple knit for an effortlessly chic style. Finished with subtle detailing and layered hem accents, the design creates visual depth that feels both refined and fashion-forward.
Download the Oxford Pleated Skirt and Tie free sewing pattern to start sewing, and you’ll be up to date with fall sewing trends in no time! Whether styled for day or evening, this pleated skirt embodies Mood’s signature blend of craftsmanship and creativity—offering a piece that feels at once classic, functional, and undeniably fresh.


Essential Materials & Sizing Guide for the Oxford Pleated Skirt and Tie
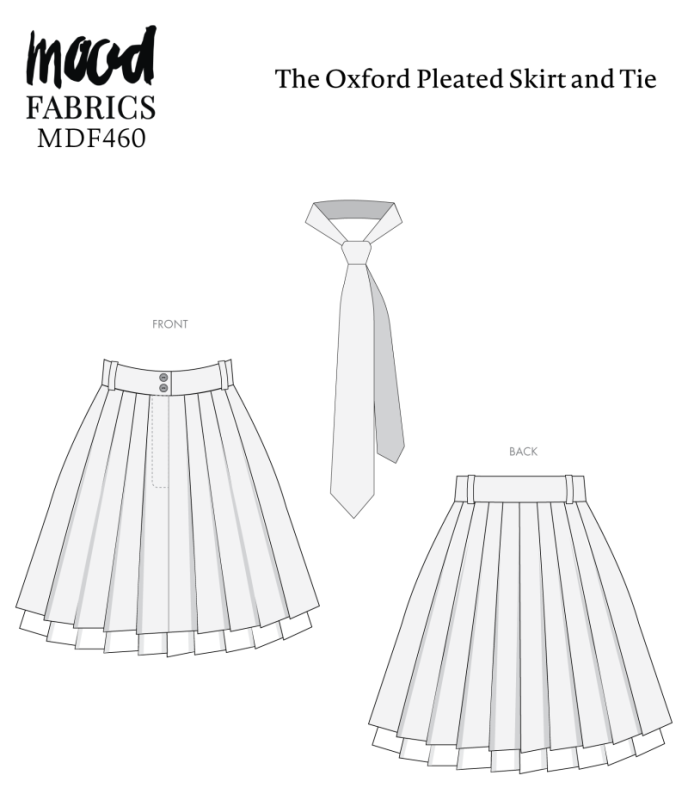
Continue reading for a breakdown of what knowledge and materials you need for creating your very own pleated skirt and tie! We’ve got you covered with the recommended materials we used—if you want to follow along exactly—as well as a curated list of alternative fabric type recommendations if you want to customize your own version. The Oxford Pleated Skirt and Tie free sewing pattern download includes technical drawings for seam and silhouette visibility, plus a size chart to help you find your perfect fit!
Purchase Products Used Below:
Quantities indicated are for sewing a size small pleated skirt and tie. Toggle the ‘SHOP THIS LOOK’ box to find quantity estimates for other sizes.
- 2 yards of Super 130s Wool Twill Suiting Made in Italy – Charcoal Gray and Navy Plaid – Deadstock
- 1.5 yards of Egyptian Cotton Shirting – Optic White – Giza Collection
- 0.5 yards of Premium Polyester Satin – Navy – Gavia Collection by Mood
- 1 yard of White Non Woven Single Side Fusible Interfacing
- 2 each of Chocolate Horn 4-Hole Buttons – 24L/15mm
- 1 each of Dritz Sharp Needles Size 7 – 20ct
- 1 each of Dritz Ultra Light Stitch Witchery
- 1 each of Regular Zipper 9″ by YKK – 916 After Dark
- 1 each of Gutermann Sew All Thread 500m – 594 Walnut
- MDF460 – Oxford Pleated Skirt and Tie Sewing Pattern (Free download below!)
Additional Products to Consider:
Alternative Fabric Type Recommendations:
The Oxford Pleated Skirt and Tie sewing pattern is best suited for medium weight fashion fabrics. Explore other fabric types or colors from our featured collections for your pleated skirt and tie with the links below.
Fabric Collections Used in this Post:
Download Your Free Sewing Pattern
Submit your name and email in the form below to receive the download link for the Oxford Pleated Skirt and Tie free sewing pattern directly in your inbox. Mood Sewciety Patterns will send your free download link via email with the subject line: ‘Your Free Download from Mood Sewciety – The Oxford Pleated Skirt and Tie’ (in PDF format for A4 and letter-size printing).
Find Your Perfect Fit
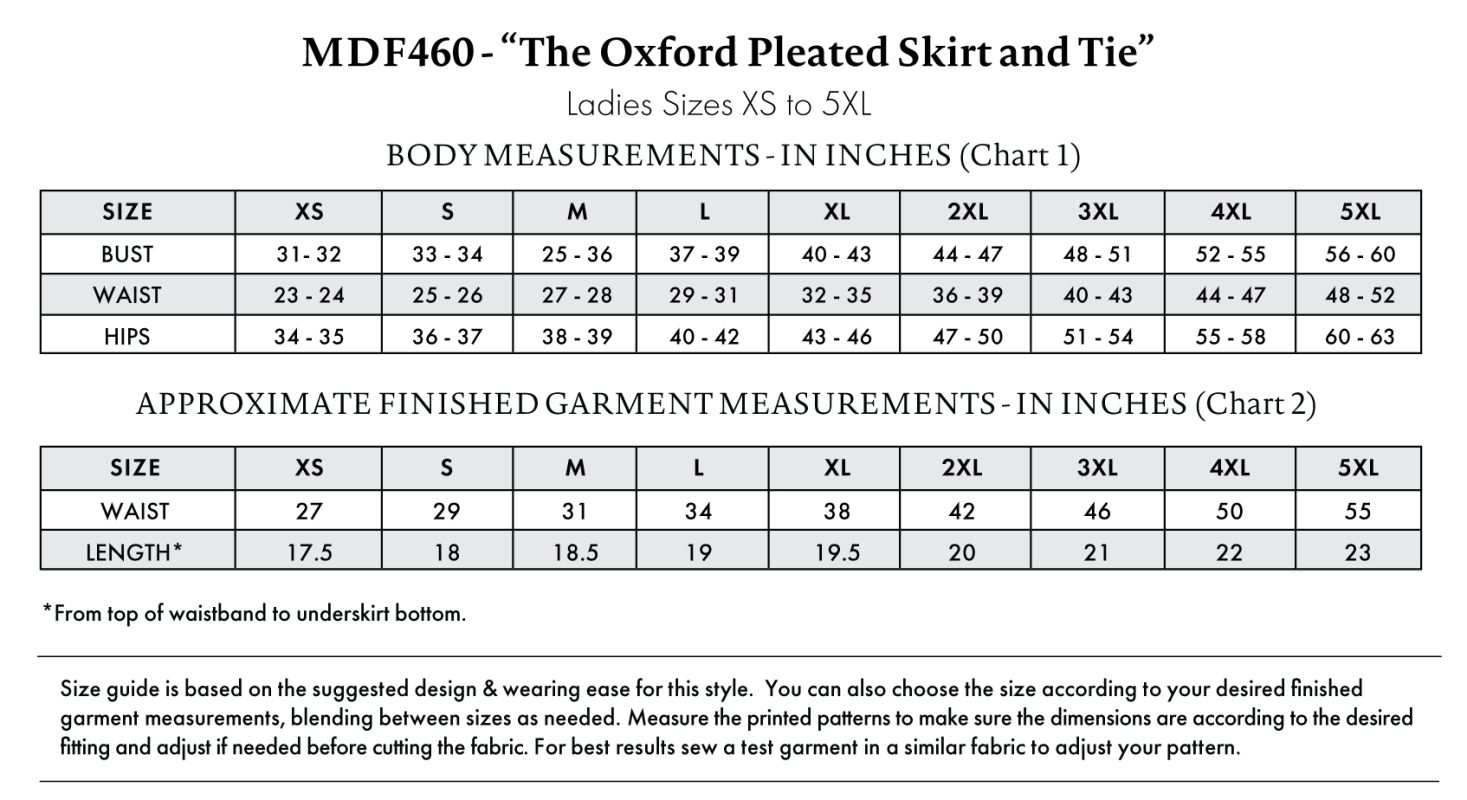
The Oxford Pleated Skirt and Tie Sizing Guide is based on the suggested design & wearing ease for this style. You can also choose the size according to your desired finished garment measurements, blending between sizes as needed. Measure the printed patterns to make sure the dimensions are according to the desired fitting and adjust if needed before cutting the fabric. For best results, sew a test garment in a similar fabric to adjust your pattern.
Measurements may vary after adjustments. Reference the approximate finished garment measurements chart to choose your size.
Note: Always read all the instructions before cutting the fabric!
How to Sew The Oxford Pleated Skirt and Tie
The instructions provided below are designed to guide you through sewing the Oxford Pleated Skirt and Tie from start to finish.


2 Tips for Sewing with Super 130s Wool Twill Suiting
- When ironing the pleats into the wool, either use a medium heat setting on the iron or cover the wool with a thin fabric (like muslin) before putting a hot iron directly on the wool. This will prevent the fabric from burning or warping.
- Woven wool has a tendency to fray easily, potentially leaving loose threads visible in the final garment. Ensure all raw edges are either encased inside of a closed seam or use a serger to finish the raw edges to prevent fraying.


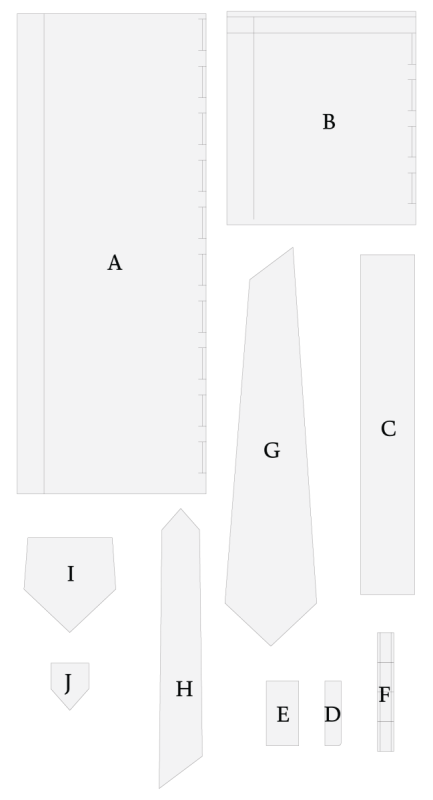
Pattern Pieces & Fabric Cuts Needed
- (A) BACK
- SKIRT – CUT 1
- UNDER SKIRT – CUT 1
- (B) FRONT
- SKIRT – CUT 2 MIRRORED
- UNDER SKIRT – CUT 2 MIRRORED
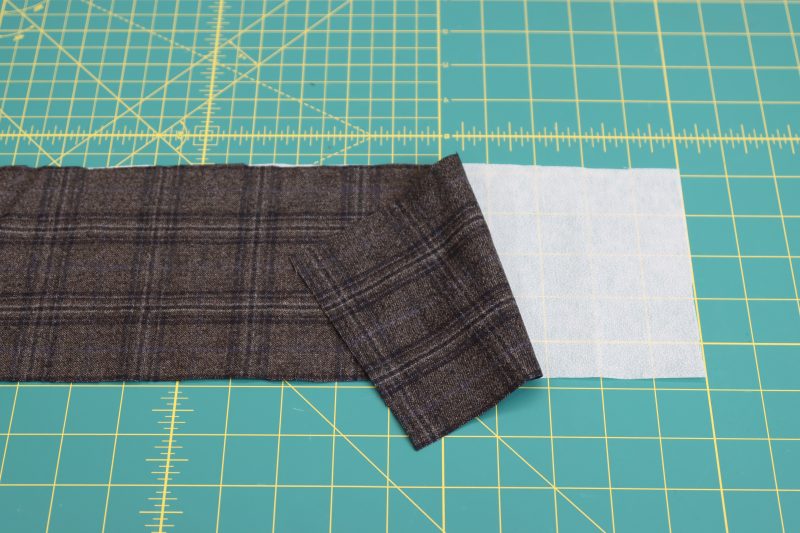
- (C) WAISTBAND
- FABRIC – CUT 1
- (D) FLY
- FABRIC – CUT 2
- (E) FLY SHIELD
- FABRIC – CUT 1
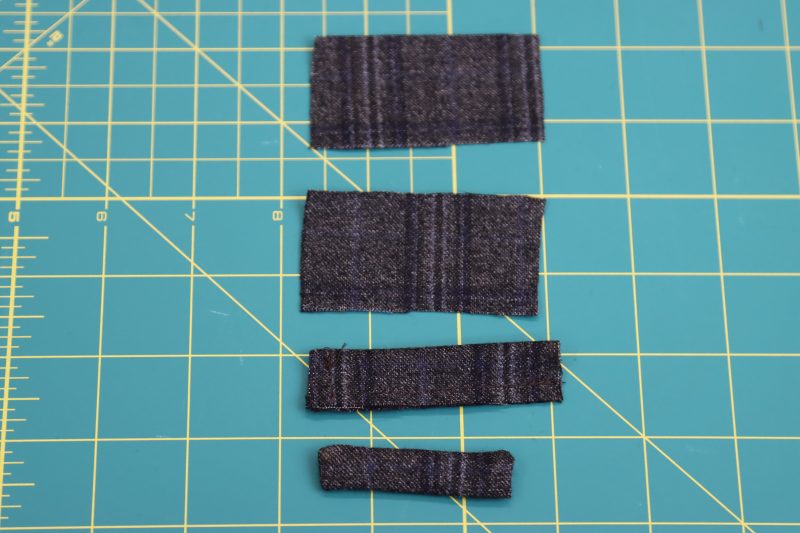
- (F) BELT LOOPS
- FABRIC – CUT 1, THEN DIVIDE INTO 4
- (G) TIE (A)
- FABRIC – CUT 1 ON BIAS
- (H) TIE (B)
- FABRIC – CUT 1 ON BIAS
- (I) TIE (A)
- LINING – CUT 1 ON BIAS
- (J) TIE (B)
- LINING – CUT 1 ON BIAS
Sew with a 1/2″ seam allowance for all seams unless otherwise specified.
Step 1
SIDE SEAMS
- Pin the side seams together for both the inner skirt and shell pattern pieces of the skirt, ensuring that the part of the pattern pieces marked “front center” are placed at the front center opening.
- Sew the side seams together right sides together.
- Iron the side seams open and flat for both the inner skirt and shell pieces.

Step 2
HEM INNER SKIRT
- Fold the inner skirt up ½ inch then iron. Fold it over an additional ½ inch and iron again for a double folded hem.
- Sew along the upper folded edge of the ironed hem to secure it in place.
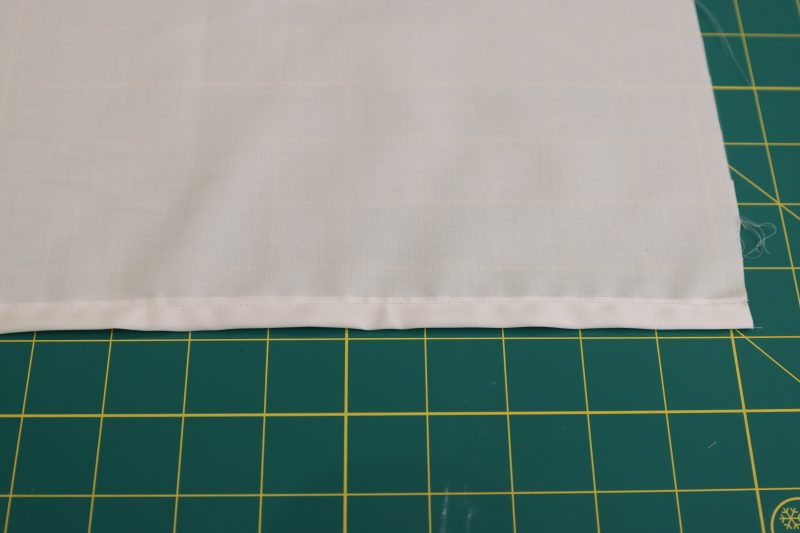
Step 3
HEM SHELL
- To create a blind hem on the main fabric/shell, begin by ironing a 1 inch fold along the bottom of the shell fabric.
- Pin the 1 inch hem in place.
- Fold the fabric right sides together along the pins that were just placed so that the raw hem of the skirt is exposed and the skirt is folded at the location where the blind hem stitches will be placed.
- Place the hem under the presser foot so that the straight stitch catches only the raw hem and the blind hem stitches catch the folded over section of the hem. Select the blind hem stitch on the sewing machine.
- Sew along the entire length of the shell fabric to create the blind hem (Note: A blind hem can always be done by hand if a sewing machine doesn’t have a blind hem stitch).
- Iron the hem flat so that only the tiny blind stitches are visible from the outside.

Step 4
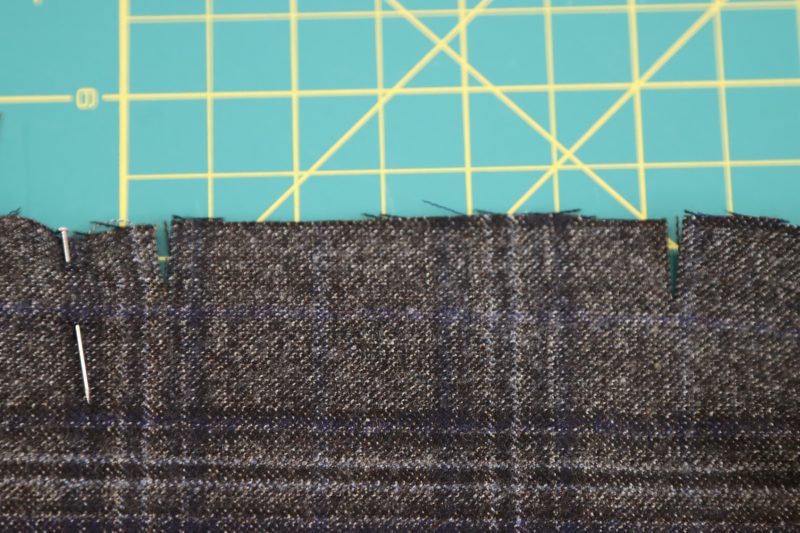
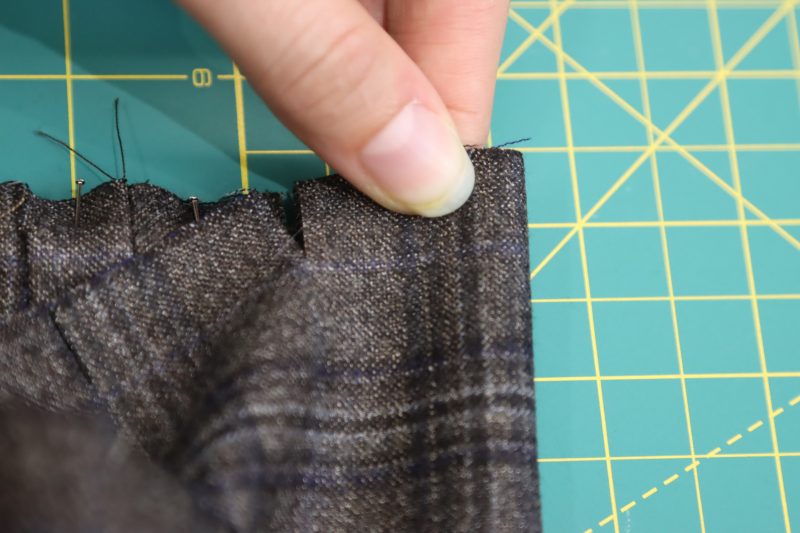
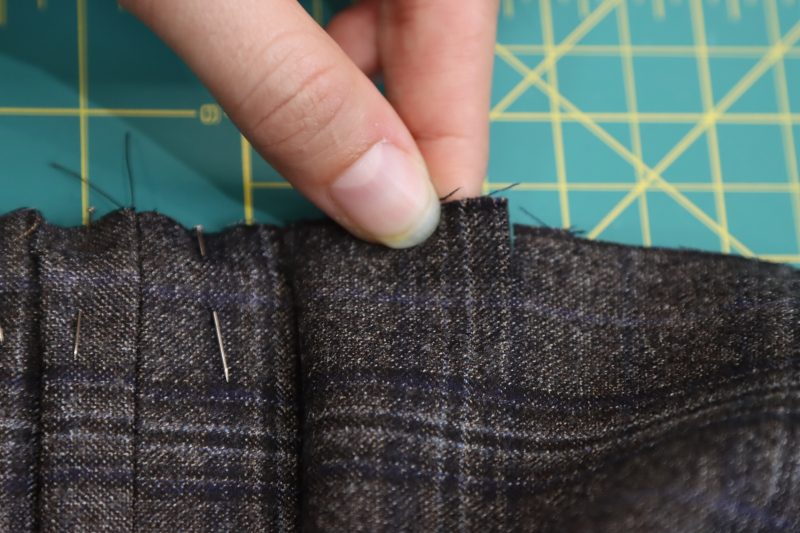
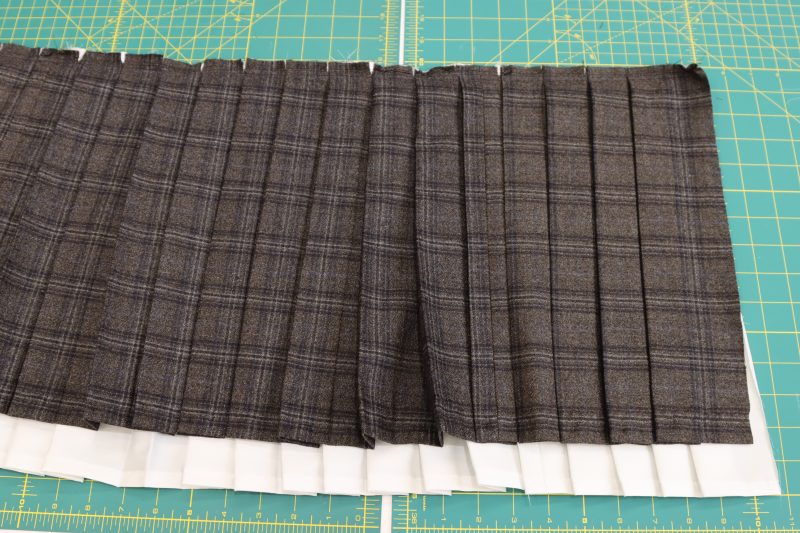
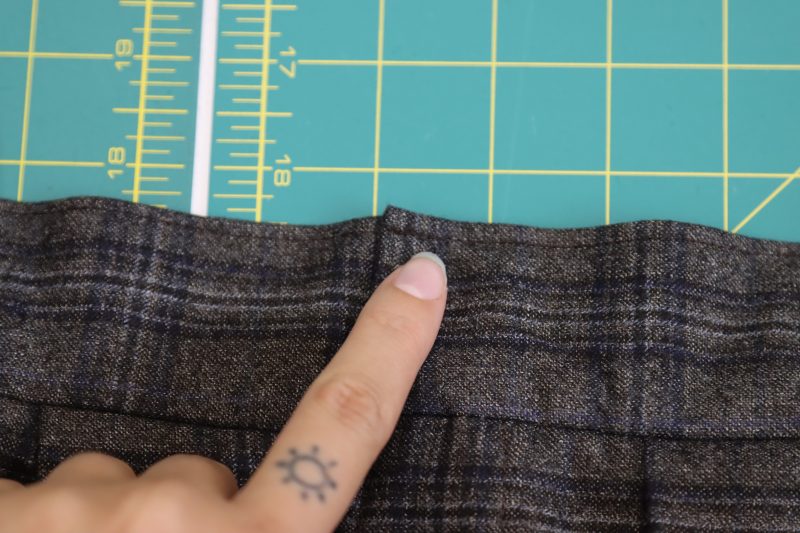
PIN PLEATS
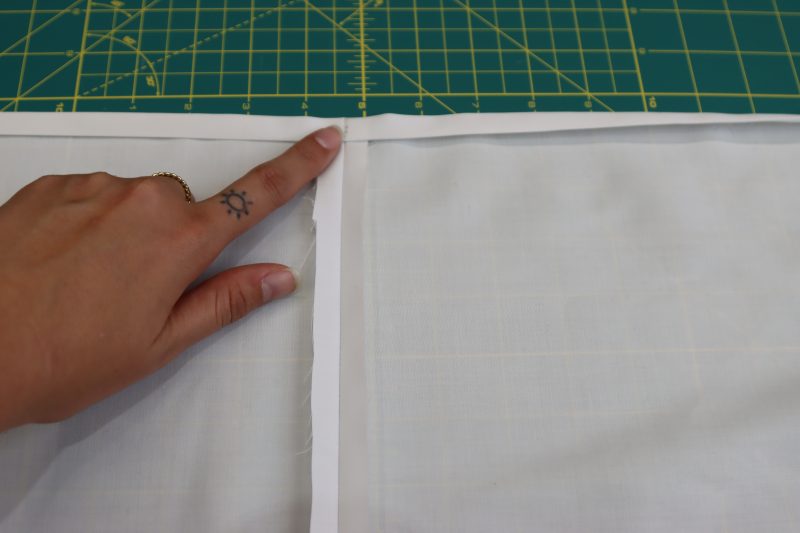
- Match up the notches on either end of the larger spaces on the pattern piece.
- Grab the third notch and match it up with the other two notches, creating an “S” shape that is folded flat on itself.
- Pin the pleats in place next to the notches on both sides of the pleat.
- Repeat steps for both inner skirt and shell pieces.
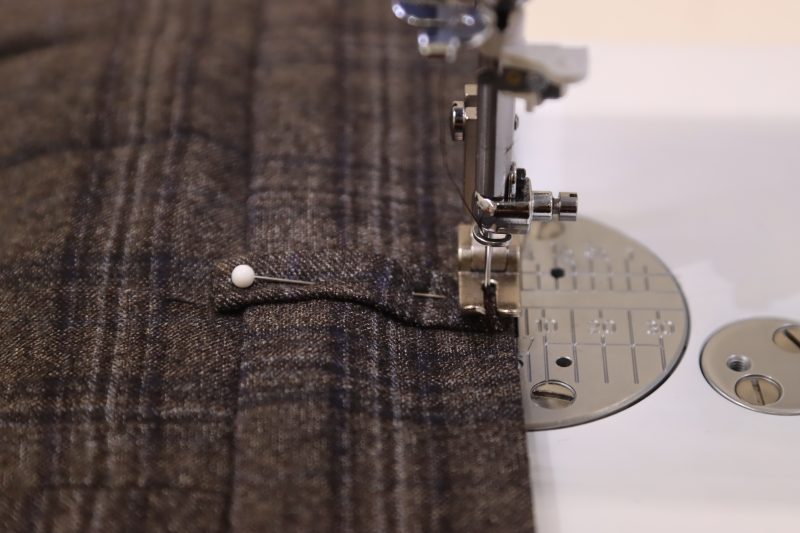
Step 5
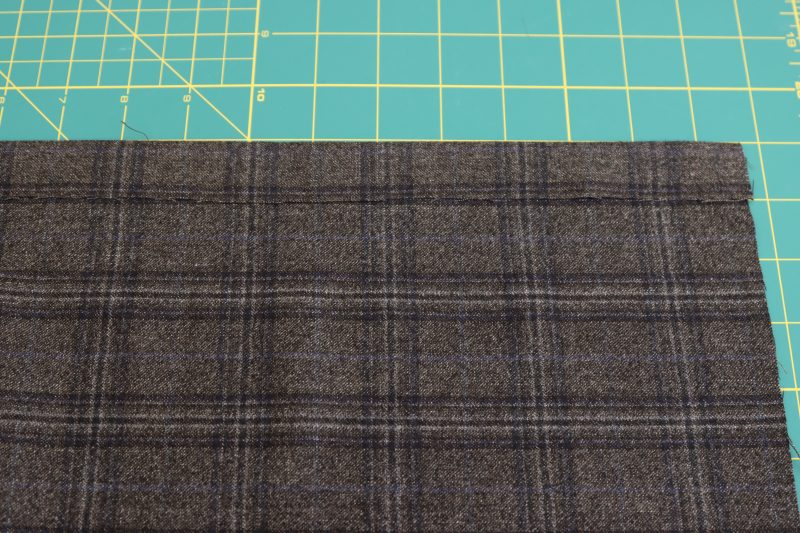
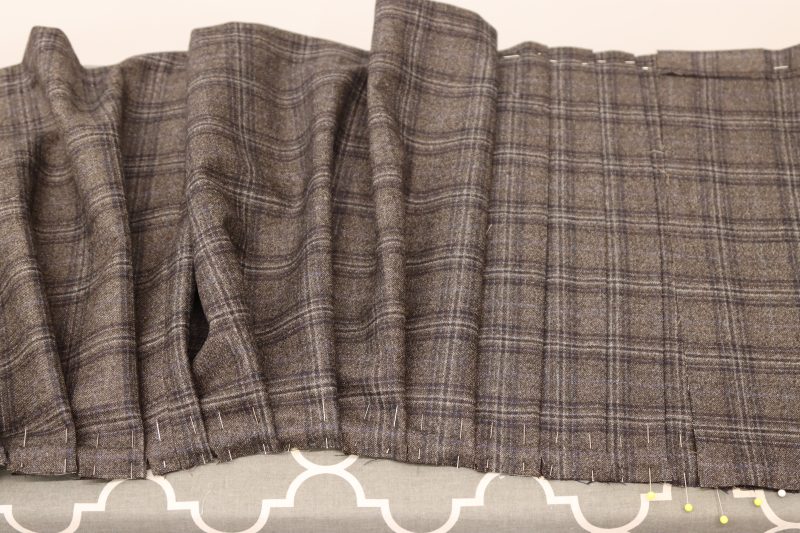
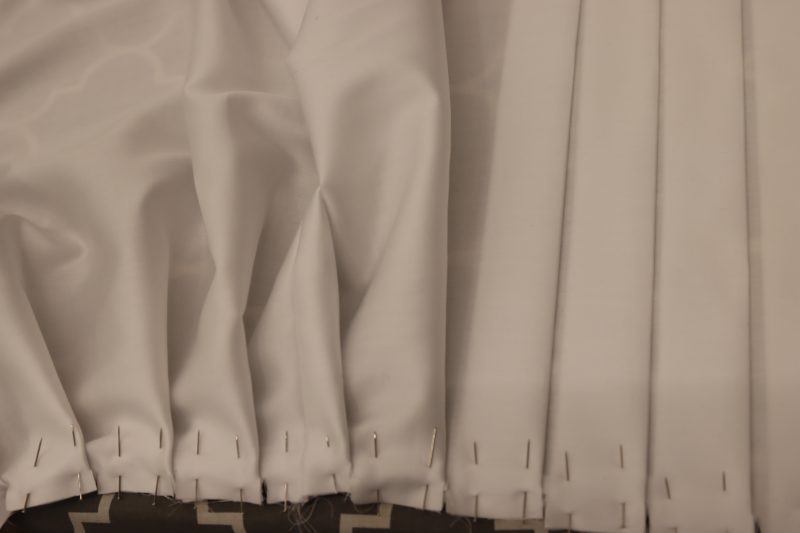
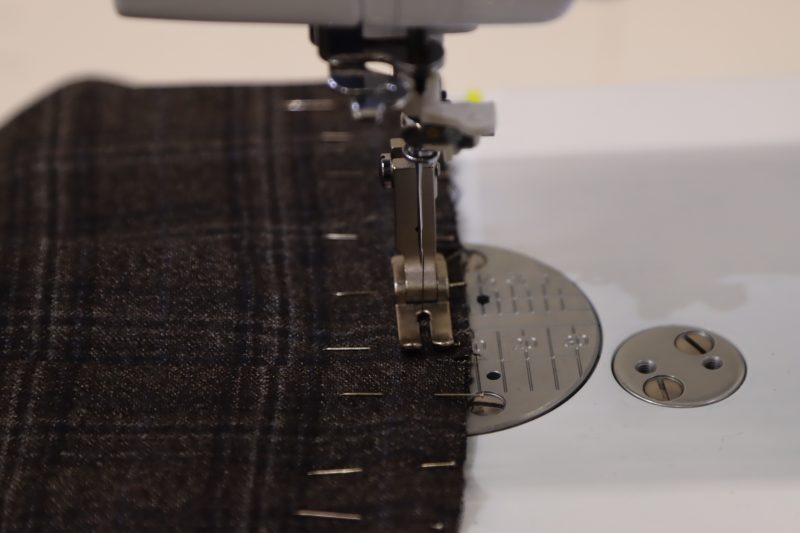
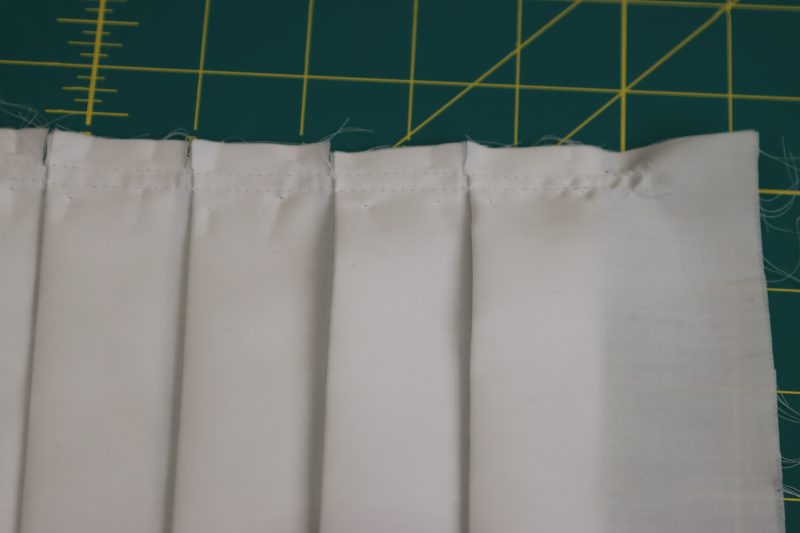
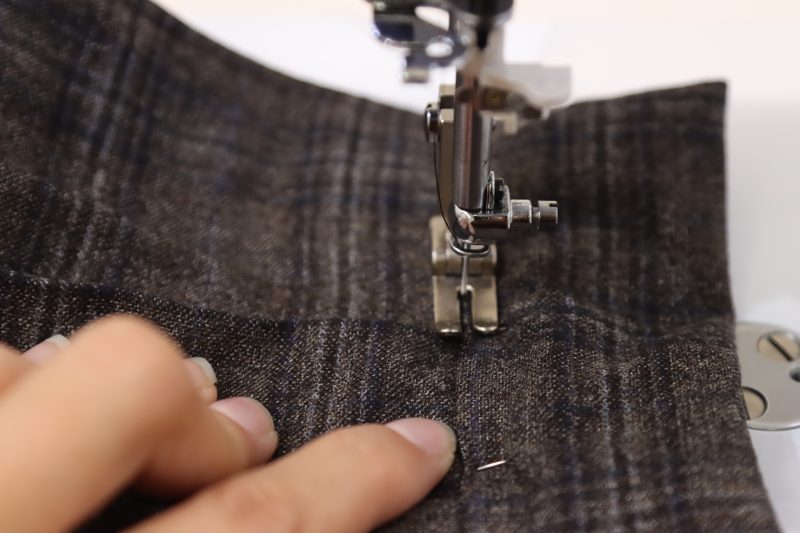
IRON & SEW PLEATS
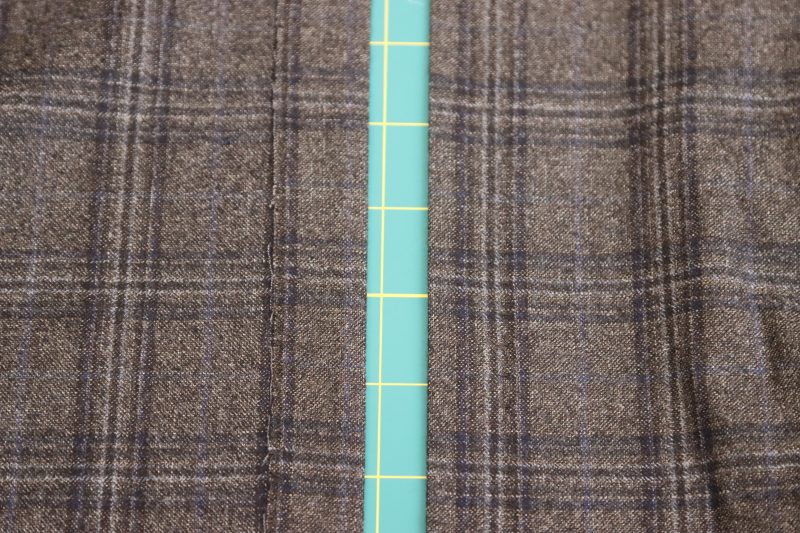
- Once all the pleats are secured with pins, begin ironing them down, maintaining the same pleat width for the entire length of the skirt (Note: Once the pleat is ironed down, it can be helpful to place pins in the bottom of the pleat in addition to the top to keep it secured in place while the rest of the pleats are being ironed).
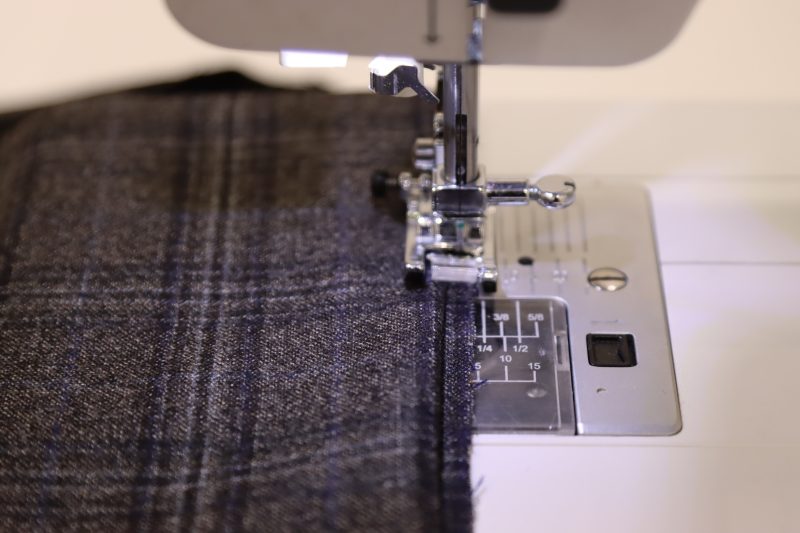
- Once all pleats are ironed in place on both the inner skirt and shell material, sew the pleats down with a straight stitch (or two parallel straight stitches, as shown in the photo below).
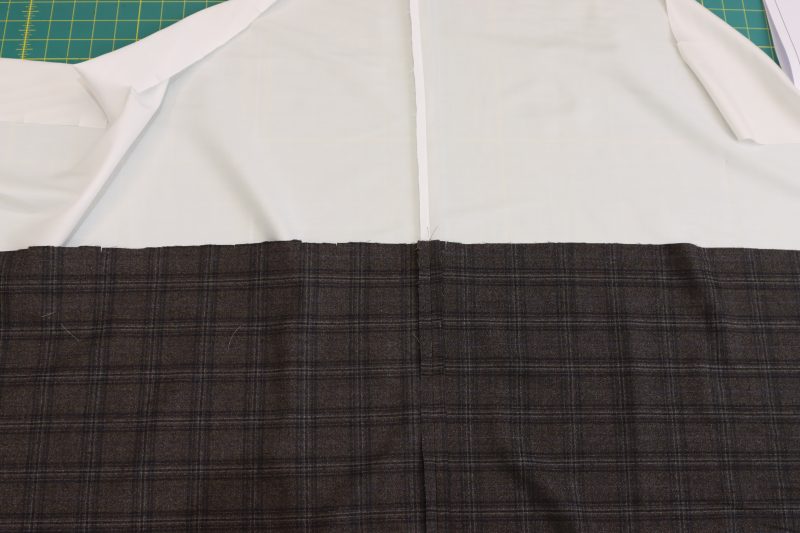
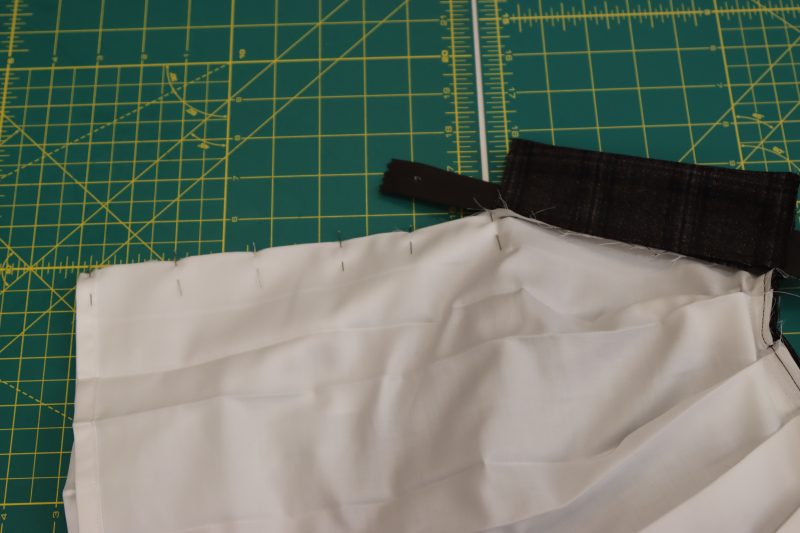
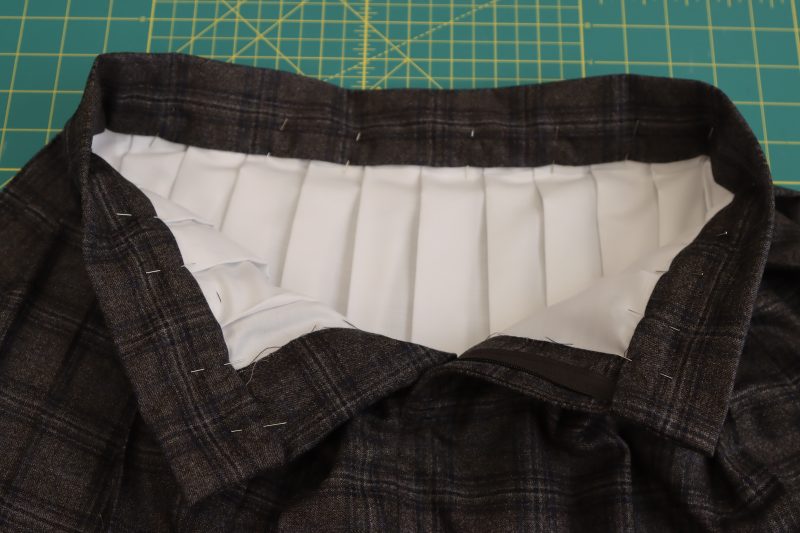
- Line up the inner skirt and the shell piece at their waistline with the right side of the inner skirt touching the wrong side of the shell.
- Sew a straight stitch across the waistline of the skirts to secure the inner skirt and shell together.
Step 6
PREPARE FLY PIECES
- Fold the fly shield in half long ways and pin in place, wrong sides together.
- Pin the two zipper fly pieces wrong sides together.
- Serge or zigzag the raw edges of both the fly shield and zipper fly to prevent fraying.
Step 7
FLY FACING
- Pin the long flat side of the fly facing right sides together to the front left center seam of the skirt.
- Sew with ¼ inch seam allowance.
- Iron the seam attaching the fly facing to the skirt front flat, then fold it back so that it’s tucked towards the inside of the skirt.
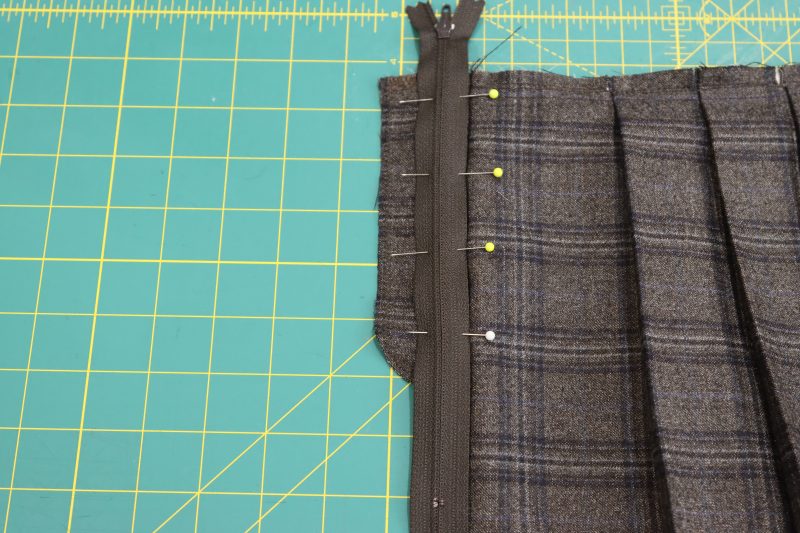
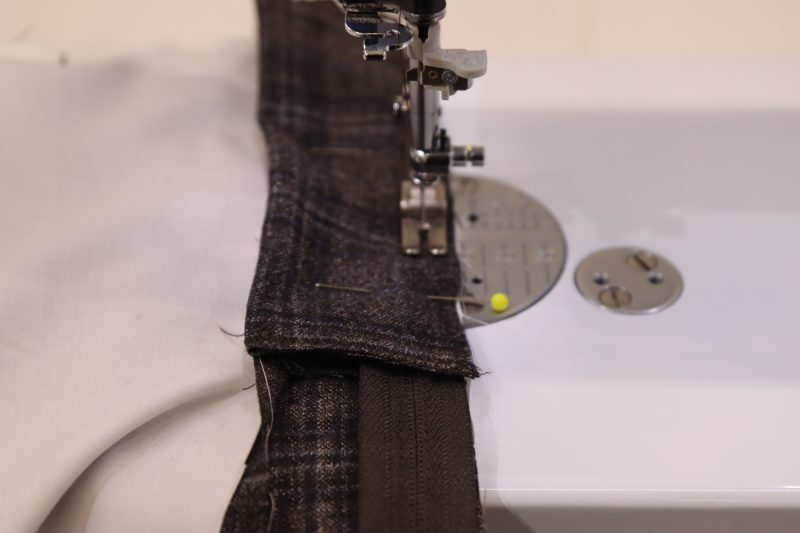
- Pin the zipper right sides down onto the fly facing with the rightmost side of the zipper inner skirt up with the seam that attaches the shield to the skirt front.
- Sew down the middle of the rightmost side of the zipper tape.
Step 8
FLY SHIELD
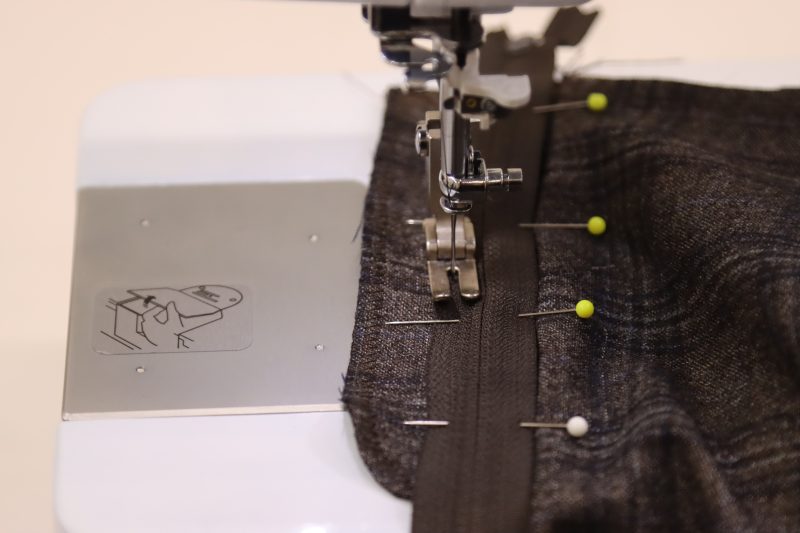
- Make a sandwich starting with the front left crotch seam of the skirt, the unsewn side of the zipper (right sides together with the front left center seam), and the serged edge of the fly shield, as shown in the picture below.
- Pin and sew the zipper and fly shield to the front left side of the skirt with ¼ inch seam allowance, being sure to catch every layer of the sandwich, including the zipper tape.
Step 9
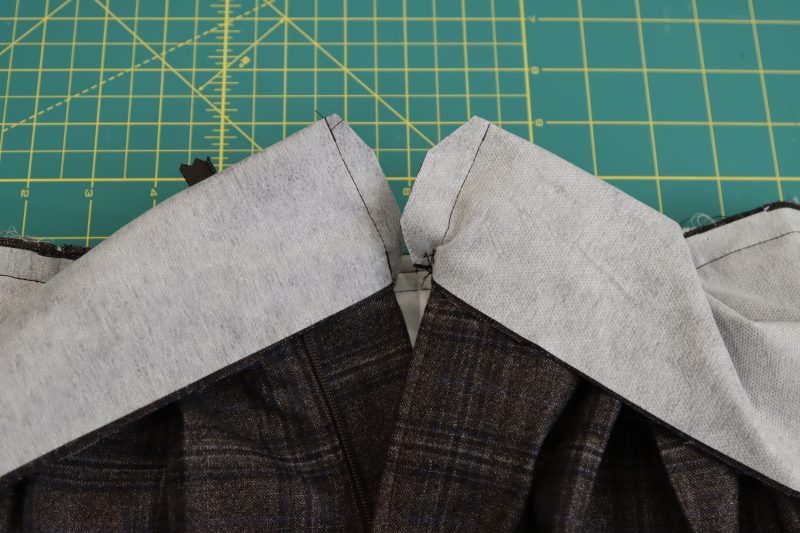
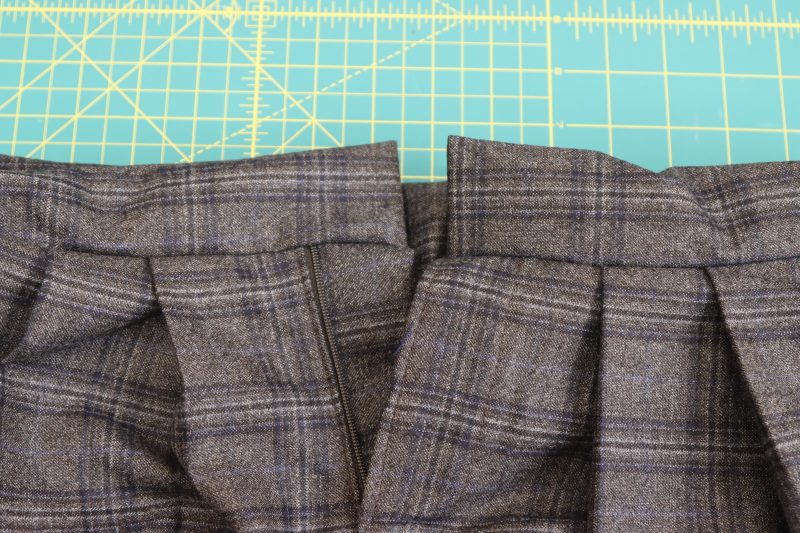
FRONT SEAM CLOSURE
- Pin the left and right sides of the front center seams together for the main fabric. Sew the two pieces together to create the front seam.
- Repeat the above step to the inner skirt fabric separately.
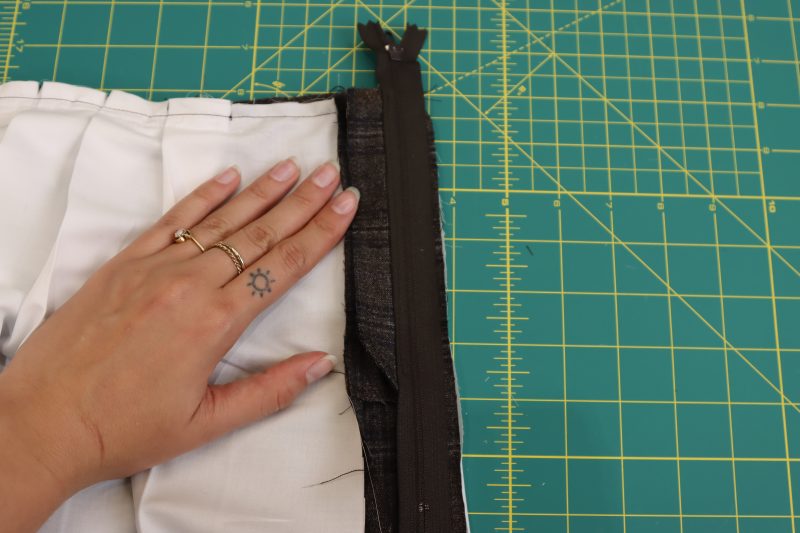
- Iron both seams open and flat.

Step 10
FLY FINISHINGS
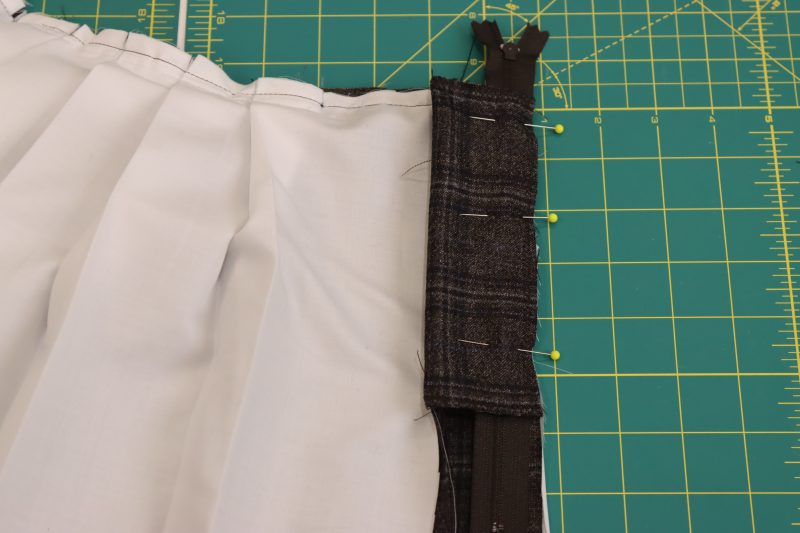
- Pin the fly facing flat against the inside of the front left side of the skirt.
- With a ⅛ inch seam allowance, sew along the serged edge of the fly facing to create a curved top stitch and secure the fly facing to the skirt front.
- At the bottom of that curved stitch, backstitch several times to create a tack at the bottom of the zipper, securing the zipper to the fly facing.
- Sew a top stitch down the front of the skirt over the seam that connects the fly facing to the front of the skirt, as shown in the photo below.


Step 11
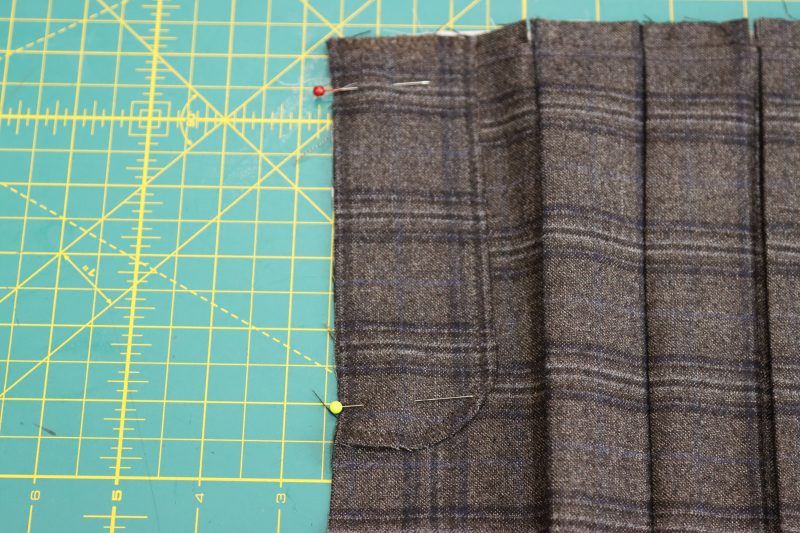
WAISTBAND
- Iron the adhesive side of the interfacing to the wrong side of the waistband.
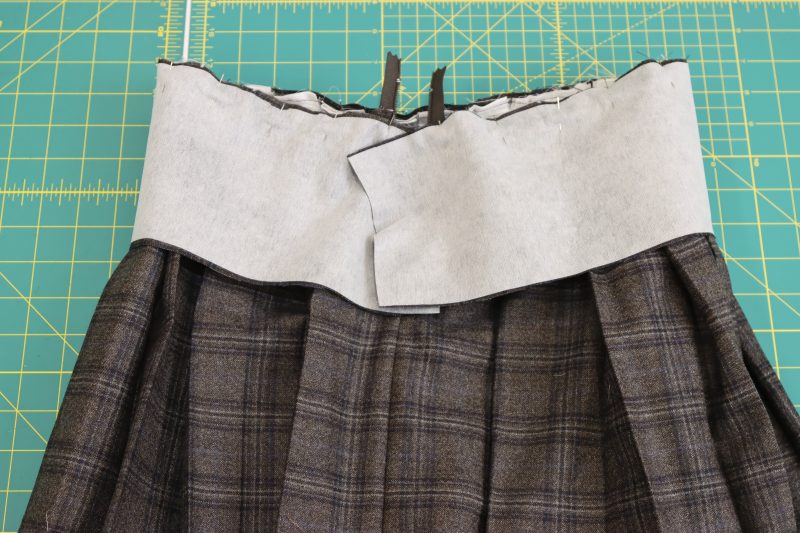
- Pin and sew the waistband to the raw edge of the waist opening of the skirt, right sides together.
- Fold the short ends of the waistband together, right sides together.
- Sew the ends of the waistband shut, clip the corners of the waistband, and flip it right sides out.
- Fold the raw edge of the inside of the waistband in by ½ inch.
- Pin the inside folded edge of the waistband down so that it is hanging down 1/8th inch longer than the seam where the waistband is attached to the outside of the skirt (see photo below).
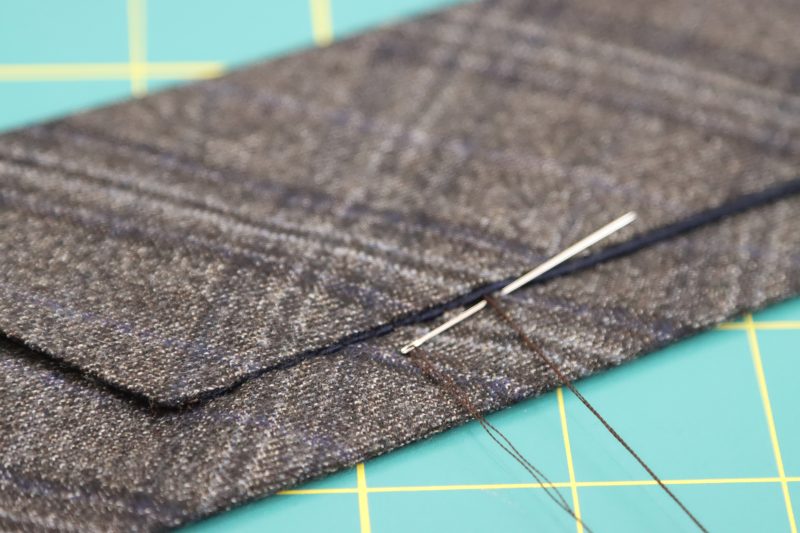
- Sew a stitch in the ditch (stitch inside of the seamline where the front of the waistband is attached to the skirt to attach the back of the waistband to the skirt nearly invisibly from the outside).
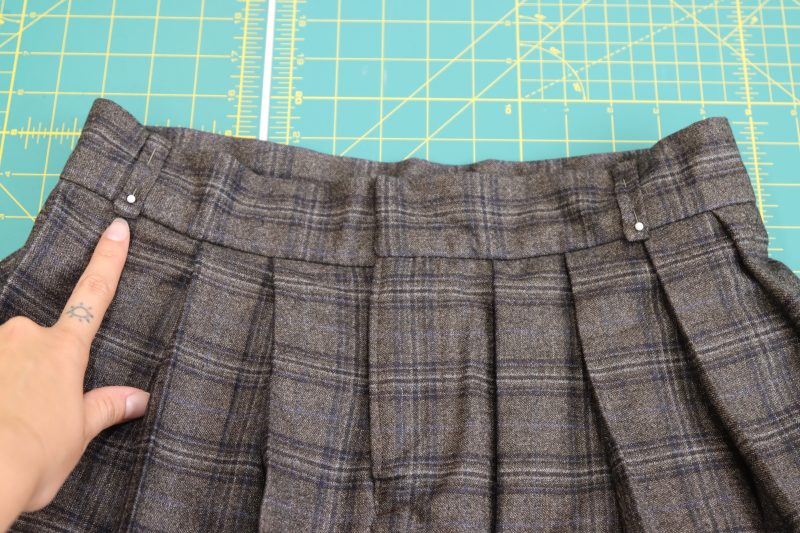
Step 12
BELTLOOPS
- Fold the belt loops in half longways.
- Sew one of the short sides and the long side with the raw edge of the belt loops together, make a tube that is closed on one end.
- Use a tube turner to flip the belt loops inside out through the opening at the end.
- Fold the remaining raw edge at the belt loop opening inward by ¼ inch.
- Iron the belt loops flat.
- Pin and sew the belt loops to the skirt by evenly spacing them around the waistband.
- Sew a topstitch along the entire top edge of the waistband of the skirt with a ⅛ inch seam allowance, passing directly over the seams that were used to attach the belt loops to the skirt.

Step 13
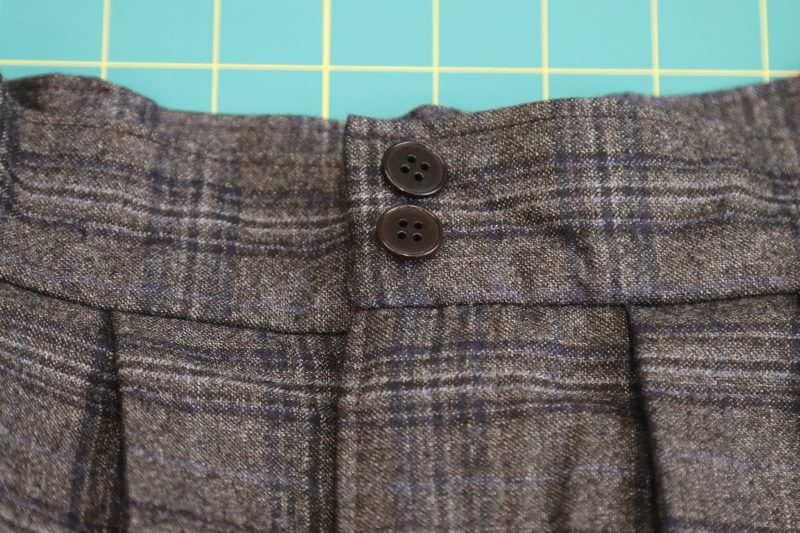
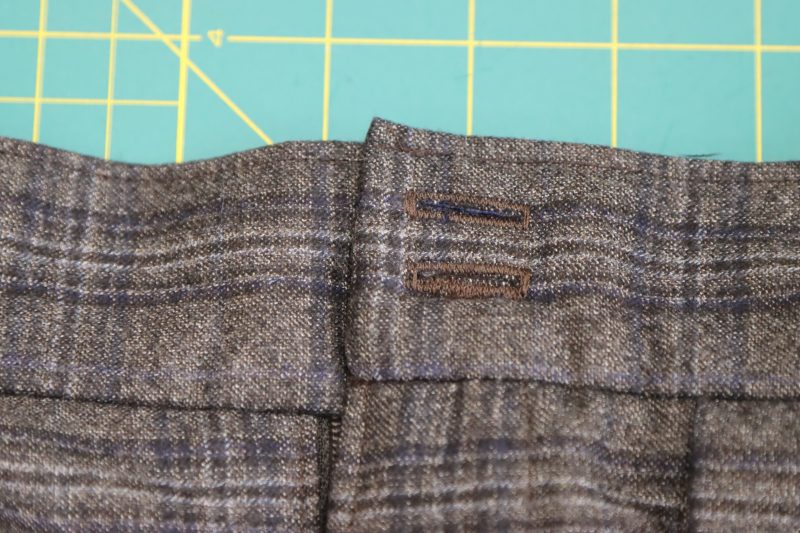
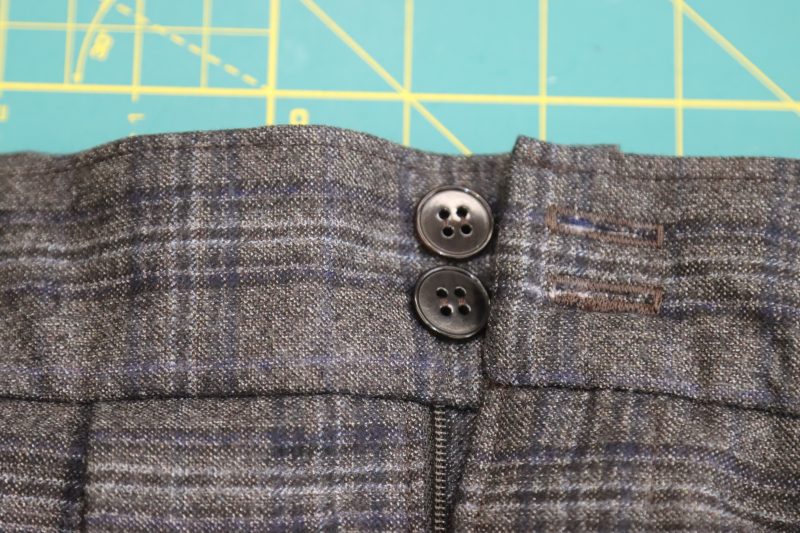
BUTTONS & BUTTONHOLES
- Evenly mark the desired location of the two (or more) buttons and buttonholes on the waistband.
- Use the buttonhole foot attachment of any sewing machine to create two buttonholes on the waistband.
- Hand sew two buttons on the opposite side of the waistband closure to mirror the buttonholes.
Step 14
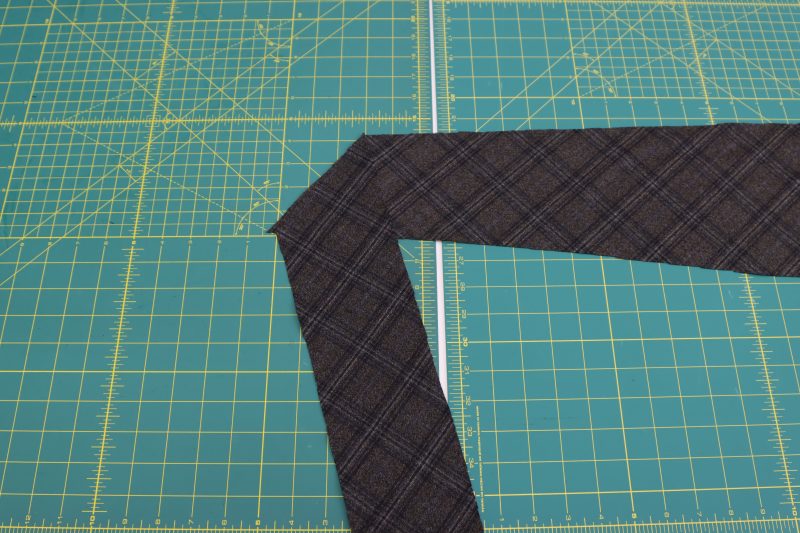
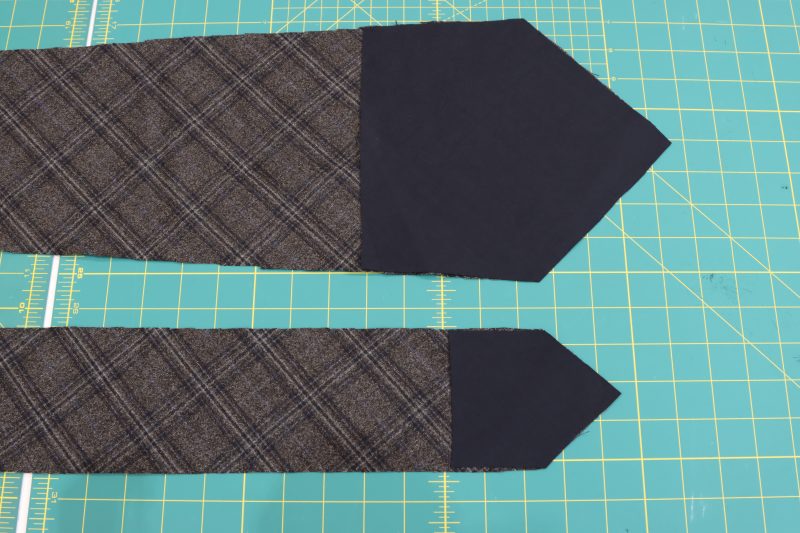
TIE SHELL
- Lay tie piece A on top of tie piece B right sides together with the short diagonal edge of each inner lining up with one another.
- Pin and sew the two tie pieces together.
- Iron the seam open and flat.
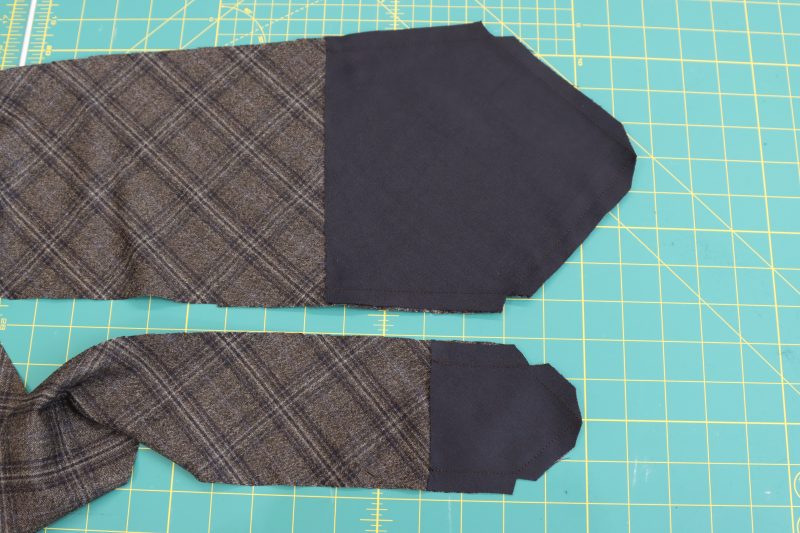
Step 15
ATTACH TIE LINING
- Pin lining A to tie piece A and lining B to tie piece B right sides together, ensuring that the corners of all pieces are lined up together.
- Sew the linings to the tie pieces with ½ inch seam allowance.
- Clip the corners of each side of the tie where the linings are attached.
- Flip each side of the tie right sides out.
- Iron the seam where the lining attaches to the shell as flat as possible.
- Iron a ½ inch hem along both long sides of the tie from one end to the other.
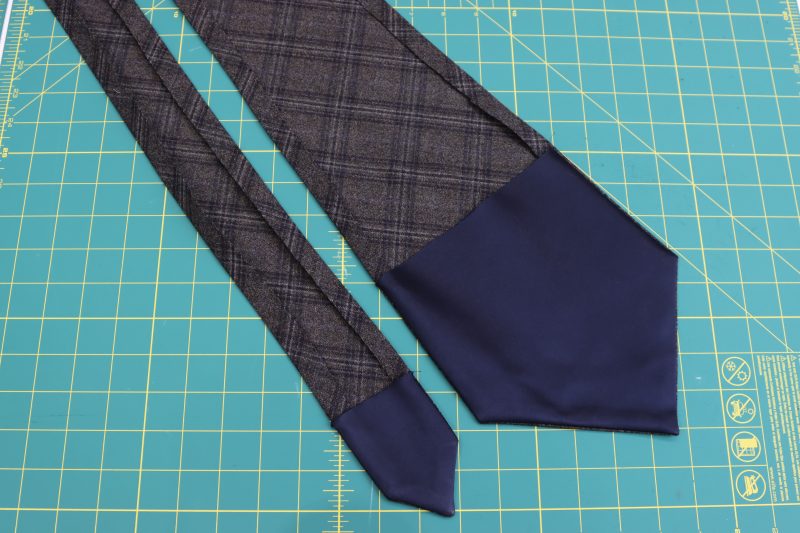
Step 16
FOLD & FINISH TIE
- Fold both long ends of the tie in towards the center, overlapping the two sides and ironing the fold down to keep them in place for the next step.
- There are two options for finishing the tie. The first option is faster but requires Dritz Stitch Witchery hem tape. The second option is more time consuming but only requires a needle and thread.
- If using Dritz Stitch Witchery, place small strips of the hem tape under the ½ inch hem of the folded over portion of the tie.
- Iron the hem tape for 10-20 seconds or until it is firmly secured the both folded layers of the inside of the tie. Continue these steps down the entire length of the tie, working in small strips of hem tape.
- If using a needle and thread create a ladder stitch between the two folded over layers of the tie on the back of the tie. Sew the ladder stitch all the way down the length of the tie from one point to the other.
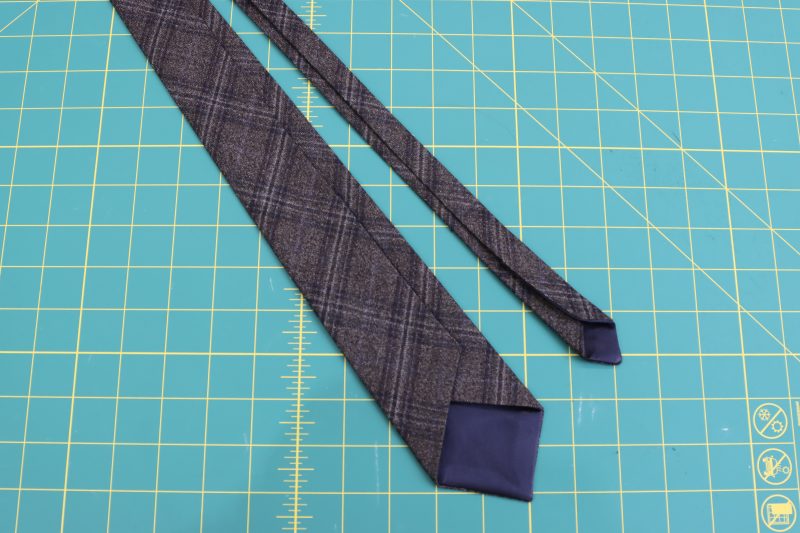

Sewing Success: The Completed Oxford Pleated Skirt and Tie
Share this post with a friend (or two!), download this pleated skirt and tie free sewing pattern, and show us which fabrics and colors you choose, using the hashtags #MoodOxfordPattern & #MadeWithMood—and don’t forget to tag us @MoodFabrics, too.


Free Sewing Pattern Inspiration for Your Next Project
With 450+ free sewing patterns and counting, your opportunities for sewing with Mood are endless!
We hope you had as much fun sewing this pleated skirt and tie pattern as we did! As always, we want to hear from you—share your thoughts and comments below and let us know where you’ll be wearing the Oxford Pleated Skirt and Tie free sewing pattern!
Looking for the perfect crisp button-up shirt to match your Oxford Pleated Skirt and Tie pattern? Well, we made it easy for you! Download the Bristol Button-Up free sewing pattern to continue sewing your fall wardrobe.
I would like this to be four inches longer. How would you do this?
Hi Becky! To extend the length of the skirt, simply add 4 inches to the total length of each skirt piece (there are 4 skirt pieces in total).
Does this also apply if I need it to be a bit more of a high waist?
That’s correct. Since this pattern is just a simple rectangle that is folded into pleats to make the waist smaller, you can make the skirt or waist as long or short as you want by extending the length of the skirt pattern pieces. If you want to wear the skirt higher up on your waist, you can use the size of the pattern that matches your waist measurement and just extend the length of the skirt. If you wanted to wear the skirt lower on your waist, you could always use a larger pattern size that corresponds with your low waist or high hip measurement. I hope this helps!
Thank you very much for this free pattern.
This month has been asked for the complete uniform to my son. The tie is missing. They do not sell it separately. But thanks to you, I can now manufacture a tie for my son (8 years of age). Thanks for this tie pattern.
(Google translate)
super, merci pour ce tutoriel inspirant
CUANDO HACEN EL TUTORIAL DE LA BLUSA
¡Hola! Este es el Bristol Button-Up Pattern.
I have a question. I am making size S of the Oxford pleated skirt. What should be the width of the outer fabric after step 5?
The width of the skirt in size Small after its been pleated should be about 28 inches. Its supposed to sit somewhere between your waist and hips.
I am so excited about this pattern!!
Thank you very much for the tie pattern.