

Longing for an elegant, classic summer dress? The Madison Tea Length Dress free sewing pattern doesn’t just project a charming persona, it also evokes the summer sweetness that your wardrobe craves! Teetering between historic semblance and trendy vibes, imagine yourself immersed in both bountiful gardens and easy city living—the true beauty in the Madison tea length dress is its versatility.
Think you have what it takes to sew this stunning Mood Masterpiece? Roll up your sleeves and follow along with us as we outline the steps we took to create the Madison Tea Length Dress!


Essential Materials & Sizing Guide for the Madison Tea Length Dress
Continue reading for a breakdown of what knowledge and materials you need for creating your very own tea length dress! We’ve got you covered with the recommended materials we used—if you want to follow along exactly—as well as a curated list of alternative fabric type recommendations if you want to customize your own version. The Madison Tea Length Dress free sewing pattern download includes technical drawings for seam and silhouette visibility, plus a size chart to help you find your perfect fit!
Purchase Products Used Below:
Quantities indicated are for sewing a size small tea length dress. Toggle the ‘SHOP THIS LOOK’ box to find quantity estimates for other sizes.
- 6 yards of Organic Cotton Twill – Sun – Stratton Collection
- 4 yards of Polyester Satin – Ivory – Reverie Collection
- 10 yards of Nylon Net Tulle – Maize – Gianna Collection
- 1.5 yards of Maize Single Face Satin Ribbon – 0.5”
- 0.5 yards of Horsehair Hymo Interlining – Beige and Gray Heathered
- 3 yards of White Fabric Covered Boning – 0.25″
- 1 yard of Woven Weft Fusible Interfacing Single-Sided – Lily White
- 1 yard of Soft Off-White Horsehair – 0.5″
- 1 yard of Taupe Foldover Bias Binding Tape – 0.5″
- 1 pair of Nude Basic Bra Cups – Size 06
- 1 each of Invisible Zipper 24″ by YKK – 345 Icy Yellow
- 1 each of Dritz 2-Part Eyelet Kit – Silver Size 0.25″ Eyelets – 15 pc
- 1 each of Dritz Nickel Hook & Eyes Size 1 – 14ct
- 1 each of Gutermann Sew All Thread 250m – 795 Antique White
- 2 each of Gutermann Sew All Thread 250m – 805 Pastel Yellow
- MDF450 – Madison Tea Length Dress Sewing Pattern (Free Download below!)
Additional Products Used:
- 1 each of Dritz Tailor’s Chalk
- 1 each of Schmetz Universal Machine Needles – 80/12
- 1 pair of Gingher Pinking Shears – 7.5″
Alternative Fabric Type Recommendations:
The Madison Tea Length Dress Sewing Pattern is best suited for medium weight fashion fabrics. If you want to explore other fabric types or other colors in the featured collections for sewing your Madison Tea Length Dress check out the links below.
- Brocades & Jacquards
- Denim Fashion Fabrics
- Duchesse Satin Fabrics
- Taffeta Fashion Fabrics
- Velvet Fashion Fabrics
Fabric Collections Used in this Post:
Download Your Free Sewing Pattern
Submit your name and email in the form below to receive the download link for the Madison Tea Length Dress free sewing pattern directly in your inbox. Mood Sewciety Patterns will send your free download link via email with the subject line: ‘Your Free Download from Mood Sewciety – The Madison Tea Length Dress’ (in PDF format for A4 and letter-size printing).
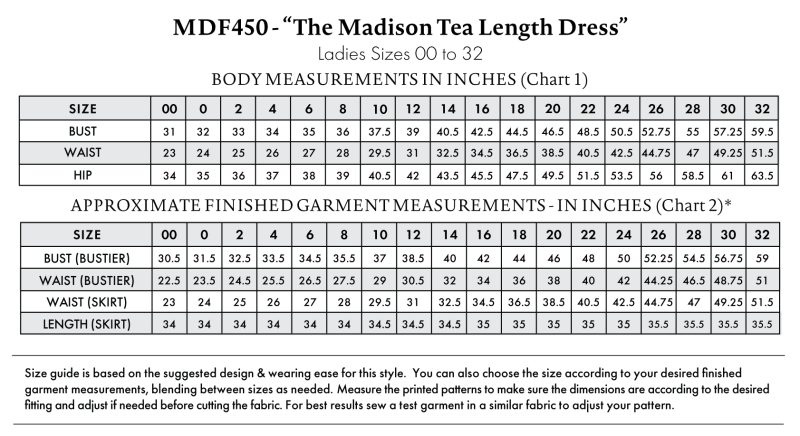
Find Your Perfect Fit
The Madison Tea Length Dress Sizing Guide is based on the suggested design & wearing ease for this style. You can also choose the size according to your desired finished garment measurements, blending between sizes as needed. Measure the printed patterns to make sure the dimensions are according to the desired fitting and adjust if needed before cutting the fabric. For best results, sew a test garment in a similar fabric to adjust your pattern.
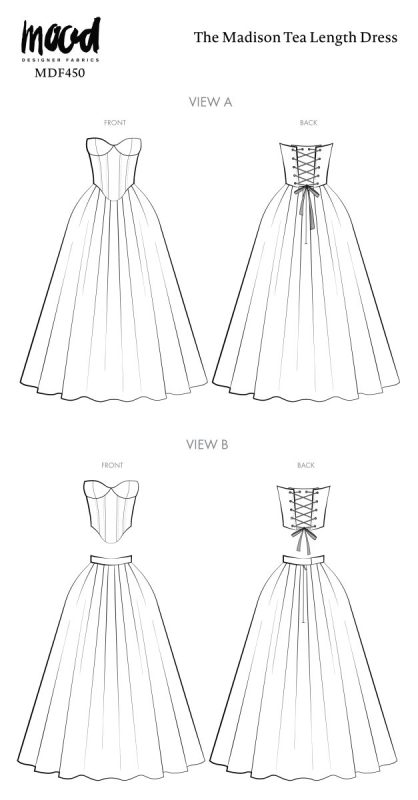
How to Sew The Madison Tea Length Dress
The instructions provided below are designed to guide you through sewing the Madison Tea Length Dress—a two-piece pattern featuring both a corset and skirt for maximum versatility.
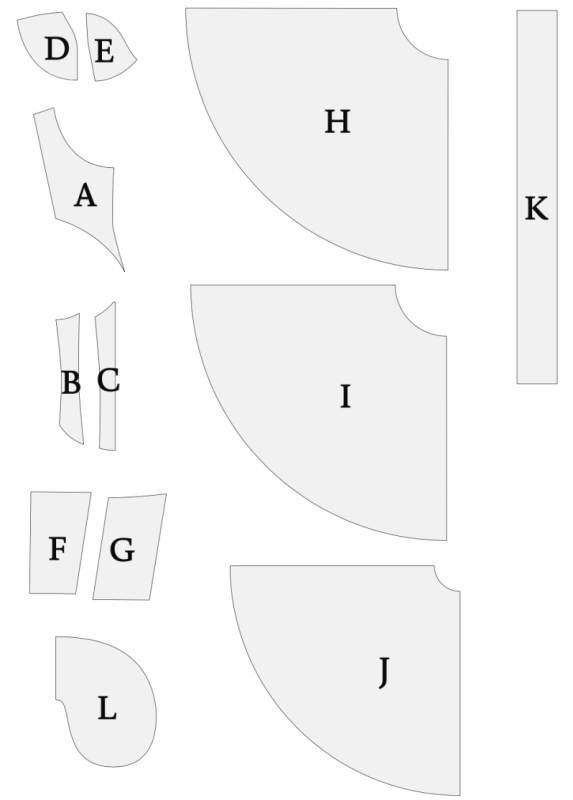
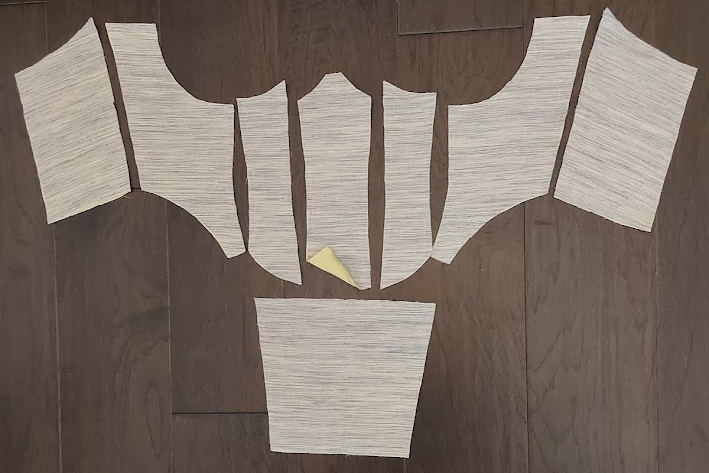
Pattern Pieces & Fabric Cuts Needed
- (A) BUSTIER FRONT SIDE
-
- Fabric – Cut 2 Mirrored
- Lining – Cut 2 Mirrored
- (B) BUSTIER FRONT MIDDLE
- Fabric – Cut 2 Mirrored
- Lining – Cut 2 Mirrored
- (C) BUSTIER FRONT CENTER
- Fabric – Cut 1 on Fold
- Lining – Cut 1 on Fold
- (D) CUP SIDE
- Fabric – Cut 2 Mirrored
- Lining – Cut 2 Mirrored
- (E) CUP CENTER
- Fabric – Cut 2 Mirrored
- Lining – Cut 2 Mirrored
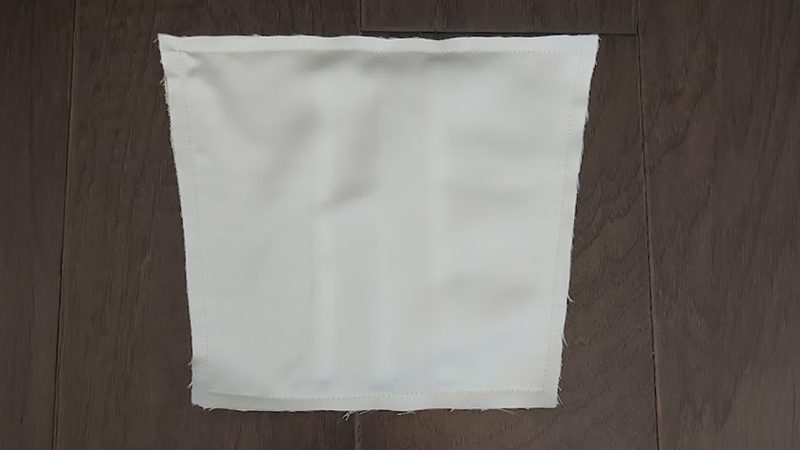
- (F) MODESTY PANEL
-
- Fabric – Cut 1 on Fold
- Lining – Cut 1 on Fold
- (G) BUSTIER BACK
- Fabric – Cut 2 Mirrored
- Lining – Cut 2 Mirrored
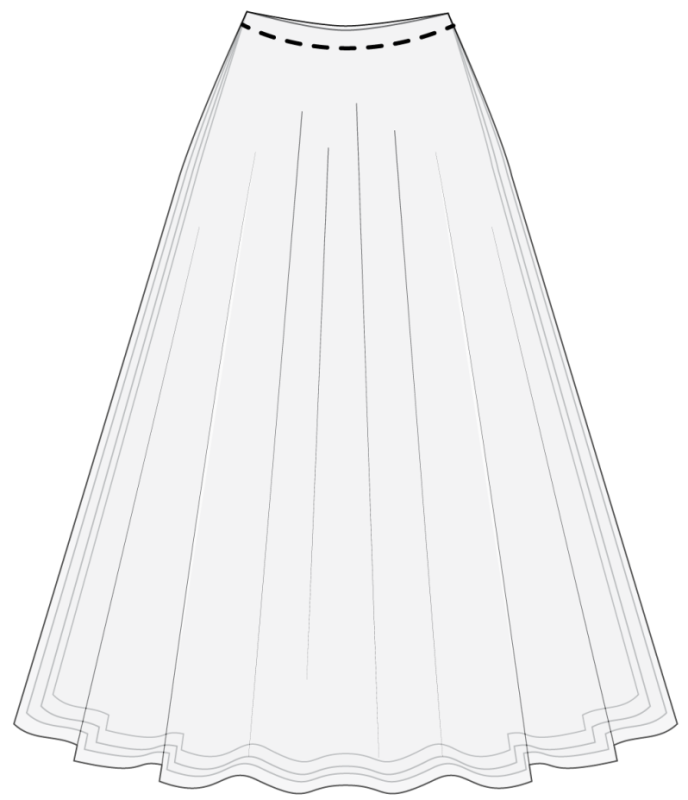
- (H) SKIRT SHELL – Fabric – Cut 2 on Fold
- (I) SKIRT LINING – Lining – Cut 1 on Fold
- (J) TULLE SKIRT LAYER – Tulle – Cut 2 on Fold*
- (K) SKIRT WAISTBAND – Fabric – Cut 2
- (L) POCKETS – Fabric – Cut 2 Mirrored Sets
*Add more layers of tulle as needed to obtain your desired volume; cut two pieces on fold for each layer you want to add.
Pieces H and I are shown in the diagram as separate pieces for illustration purposes, but they are cut from the same pattern piece as indicated by the label.
Find the templates for eyelet placement on pages J3 and J4.
Sew with a 1/2″ seam allowance for all seams unless otherwise specified.
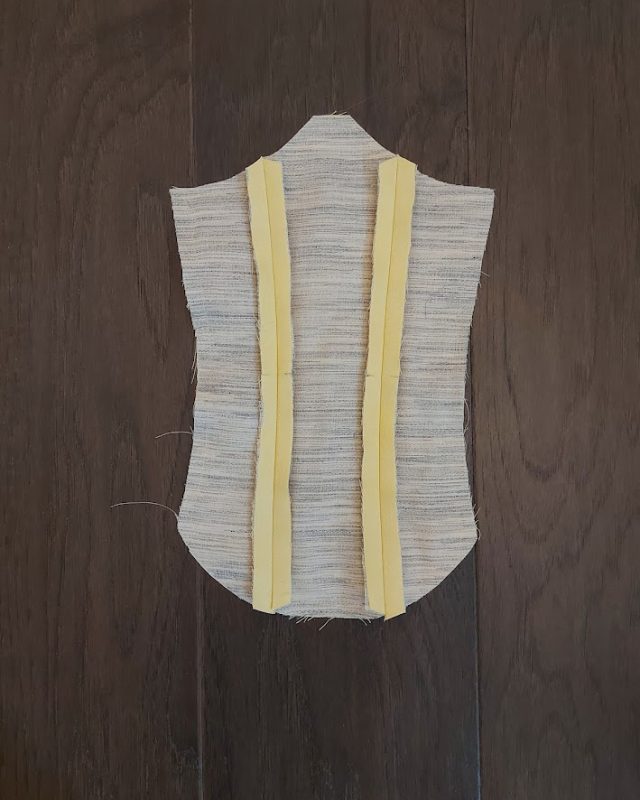
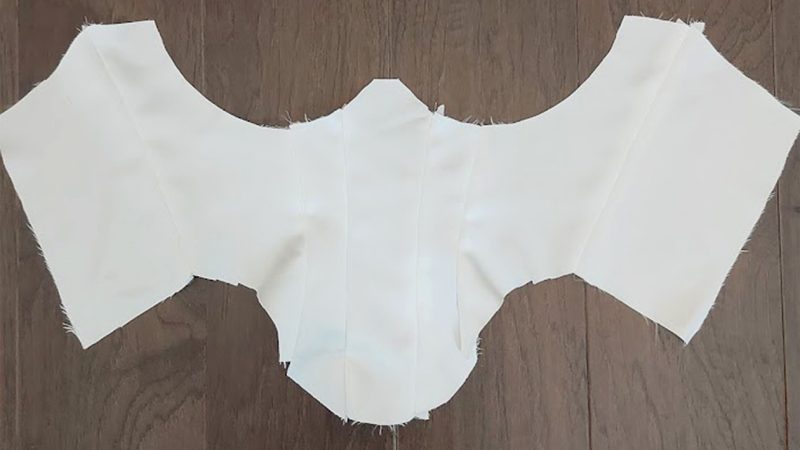
Step 1
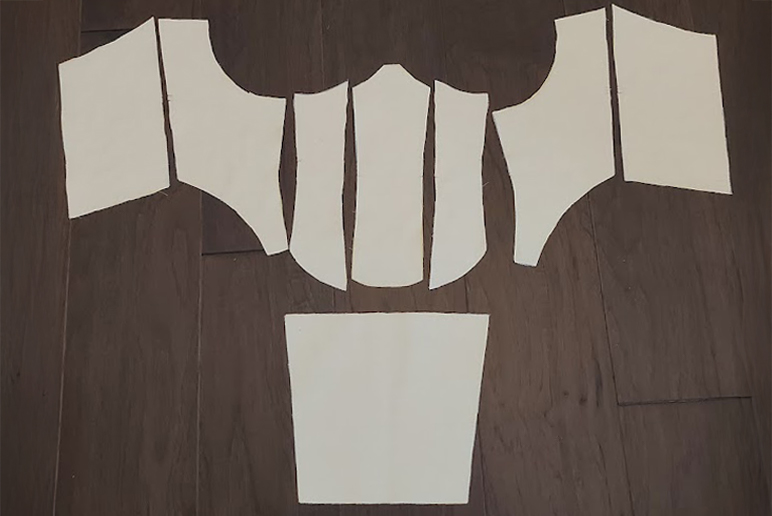
PREP BUSTIER PIECES
(A) BUSTIER FRONT SIDE, (B) BUSTIER FRONT MIDDLE, (C) BUSTIER FRONT CENTER, (F) MODESTY PANEL, (G) BUSTIER BACK
- Place the single-sided fusible interfacing over the wrong side of the self fabric (glue side should be facing down on top of the wrong side of the main fabric) and fuse them together by applying pressure on top of the pieces with a well heated iron.
- Next, place and pin the horsehair hymo interlining on top of the fusing (so that the interfacing is the middle layer) and baste stitch carefully all around the pieces, ⅜” away from the edge. Make sure the layered fabrics are all flat before and during basting.
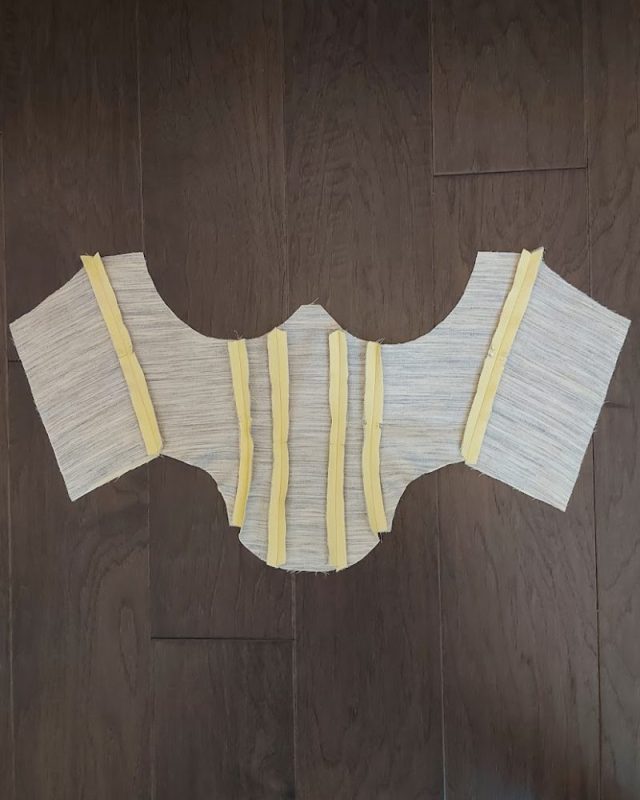
Step 2
SEW BUSTIER PIECES & BONING
- Sew all the pieces together with the provided ½” of seam allowance.
- Press the seams open on the wrong and right side.
- Cut boning with the casing in the length for each seam minus the top and bottom seam allowance.
- Sew boning for the back panel as well (½” and 1 ¼” away from Center Back.)
- The boning on the modesty panel is located on the center and has an audition of two other bonings on each side, 6/8” away from the center one.
- Stitch the boning case down on both sides without the plastic boning inside.
- Insert the plastic boning, making sure it is away from the top and bottom seam allowance.
Step 3
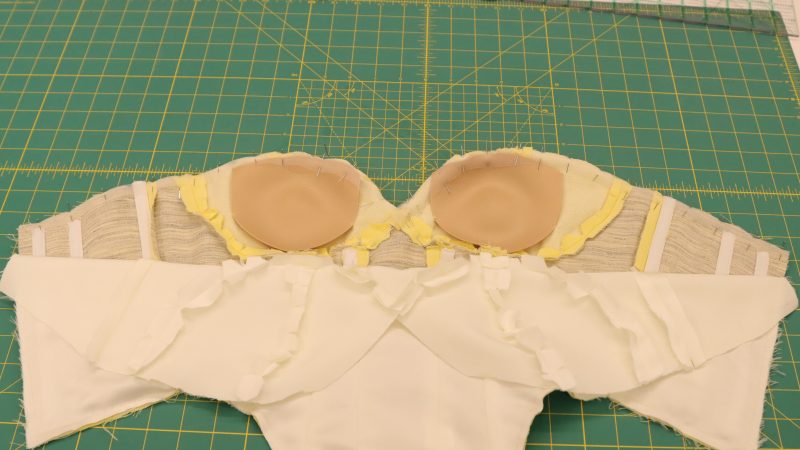
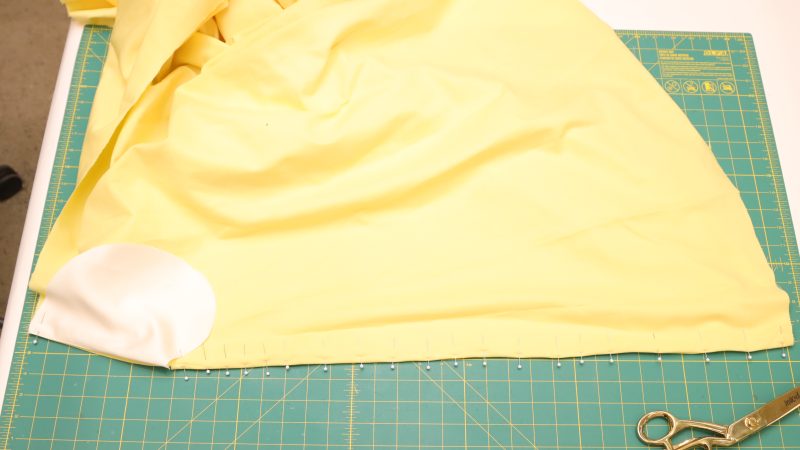
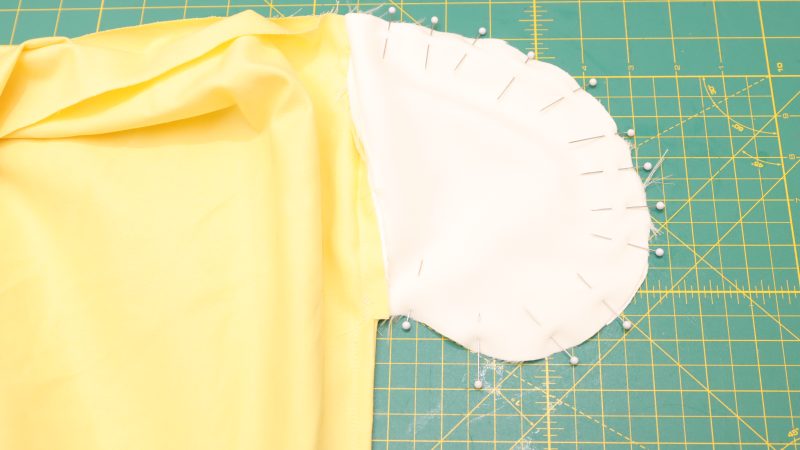
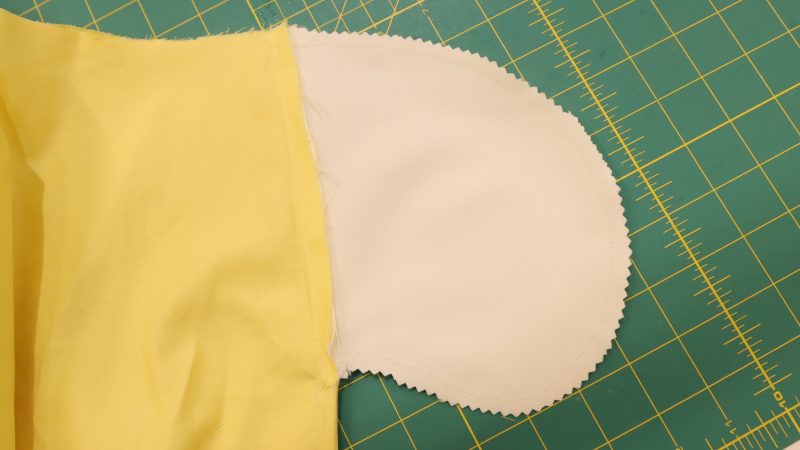
ASSEMBLE BRA CUPS
(D) CUP SIDE, (E) CUP CENTER
- Sew the princess seam on both of the self fabric cups together and press seam allowance open.
- Sew the cup parts to the bustier, matching the seams on the princess seam. Notch the curved line and press the seam open.
- Pin the pair of nude cups inside the bustier and tuck stitch it by hand on the top, bottom and side.
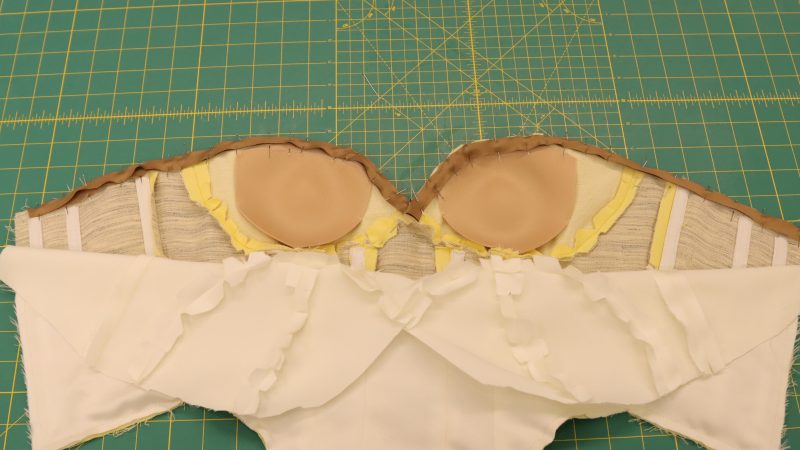
- On the top wrong side pin horse hair and bias tape on top of each other. Baste the in place and make sure to cut them away from the seam allowance (½” away from center back).
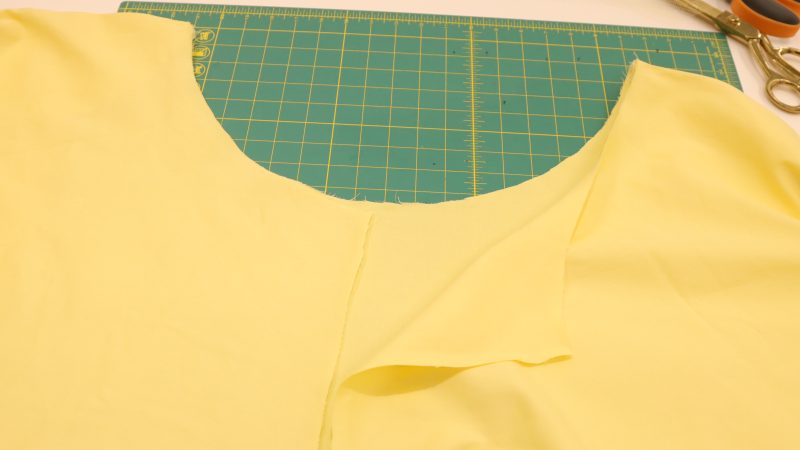
- Sew the lining piece together including the cup pieces. Press seam allowance open.
- Pin the lining wrong side facing the wrong side of self fabric. Stitch around ⅜” away from the edge.
- Attach lining to the modesty panel.

Step 4
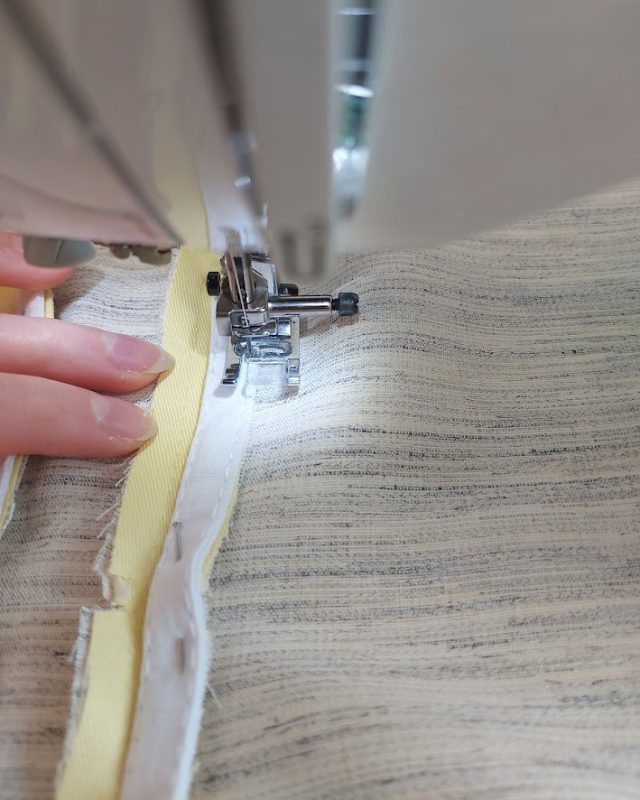
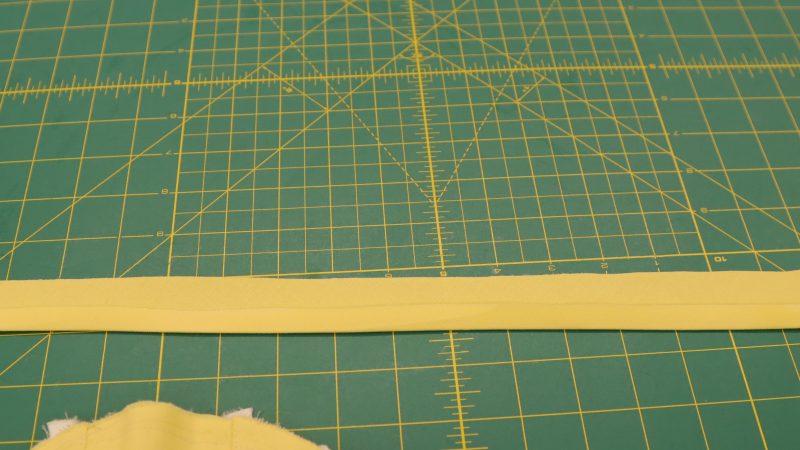
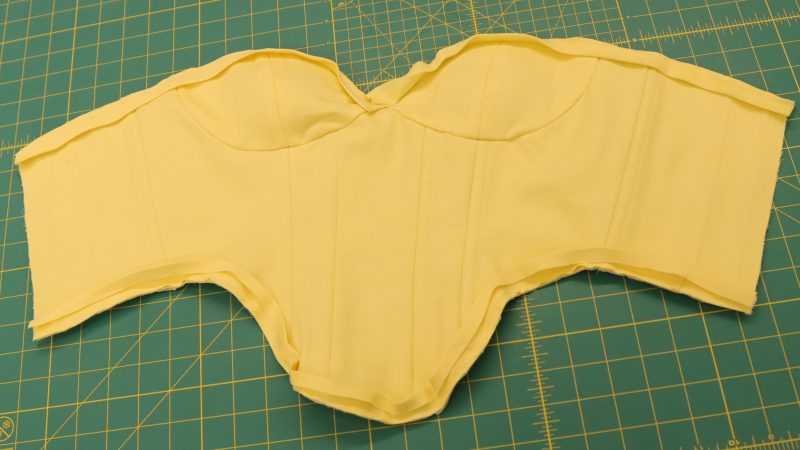
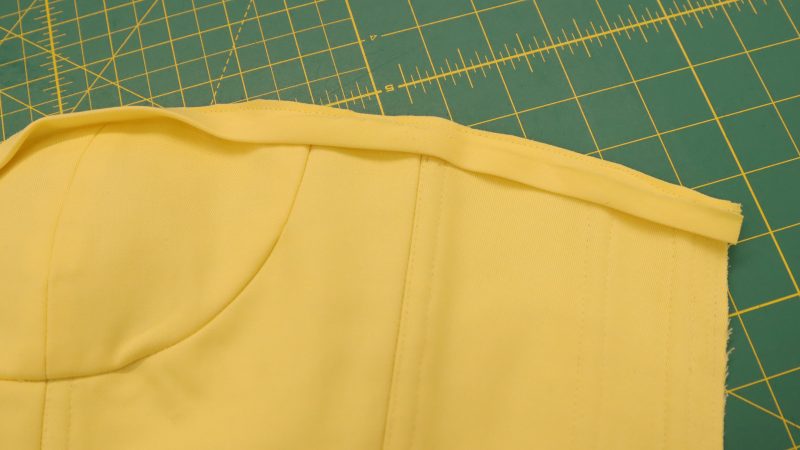
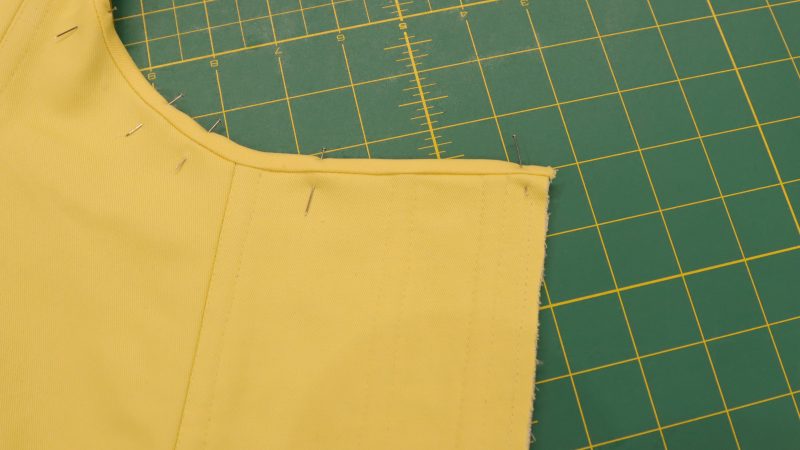
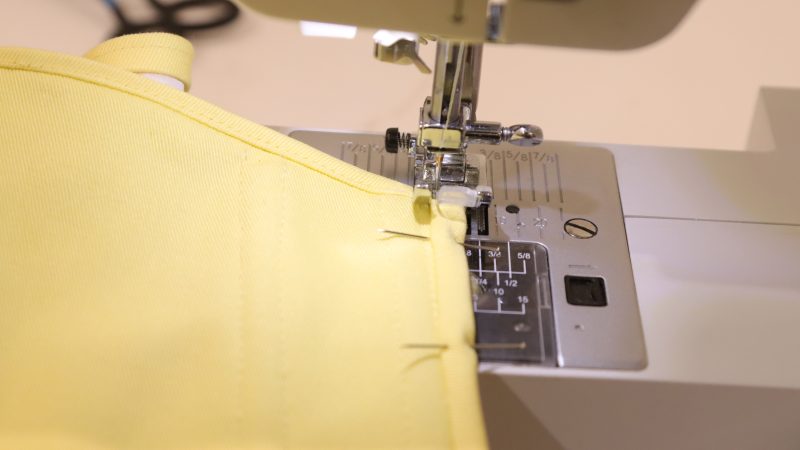
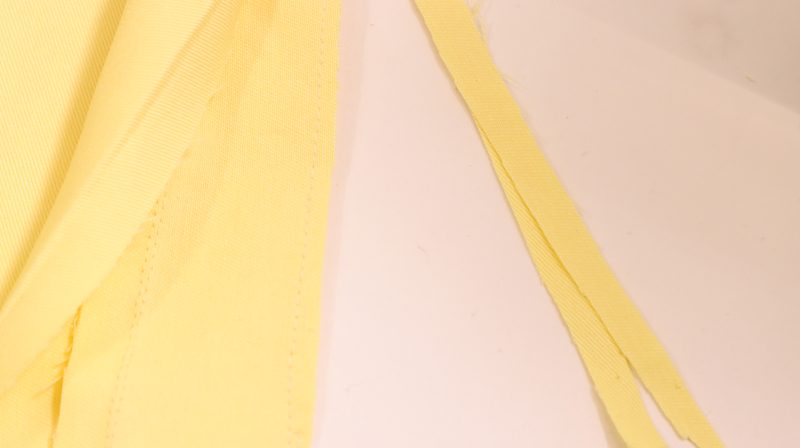
BIAS BINDING
ASSEMBLED PIECES: (A), (B), (C), (G); (F) MODESTY PANEL; 2 YD X 1.5″ CUT PIECE ON BIAS
- Cut 2 yards by 1.5” of bias strips from your self fabric.
- Fold seam allowance on one side to the wrong side. Press.
- Sew the unfolded sides on the bustier facing right side to right side.
- Trim ⅜” of the seam allowence. Fold the bias strip back, match the folded edge ⅛” below the stitch line. Pin, baste in place and top stitch on sewing machine.
- Repeat the same on the center back sides of the bustier and around the modesty panel.
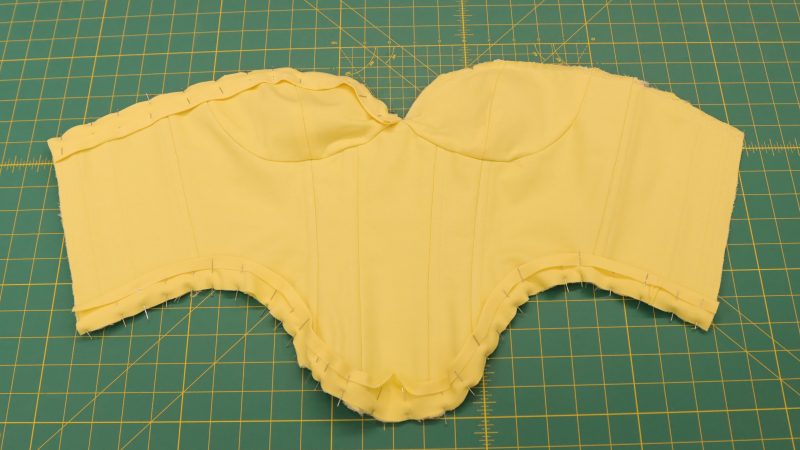

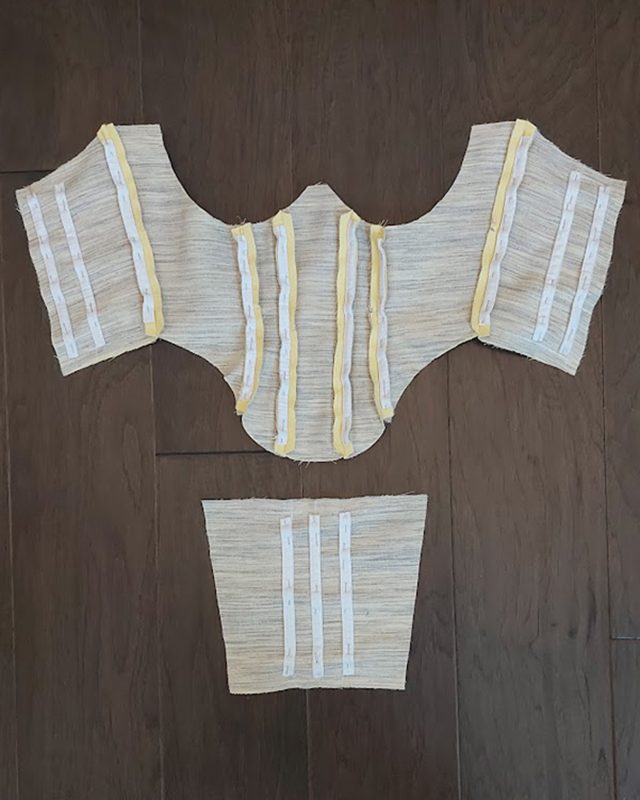
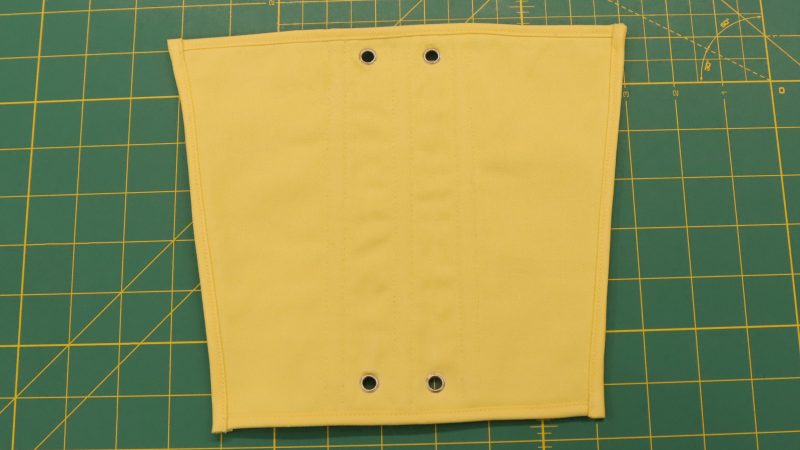
Step 5
EYELETS PLACEMENT & INSTALLATION
(F) MODESTY PANEL, (G) BUSTIER BACK
⇒ Helpful hint: Find the templates for eyelet placement on pages J3 and J4 (78-79).
- Mark your eyelet placement with tailoring chalk. First top eyelet and bottom eyelet are ½” away from the edges.
- The rest are divided into 4 sections between top and bottom eyelets. Note that bigger size might need more eyelets added.
- Make a tiny hole through the fabrics at the designed marking.
- Place the eyelets and hammer them down to the bustier.
- The modesty panel eyelets are located ½” away from top and bottom, in between the center boning.

Step 6
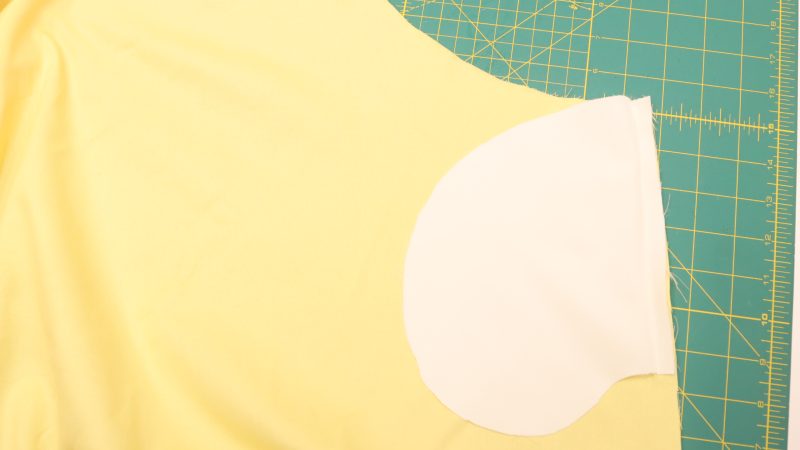
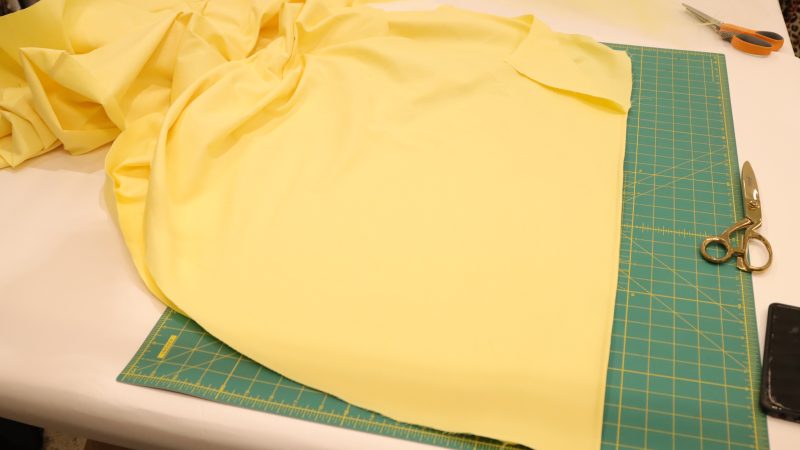
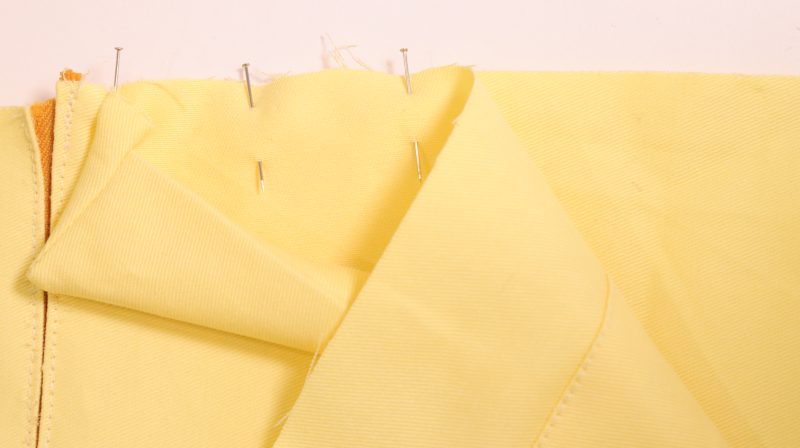
SKIRT SHELL & POCKETS
(H) SKIRT SHELL, (L) POCKETS
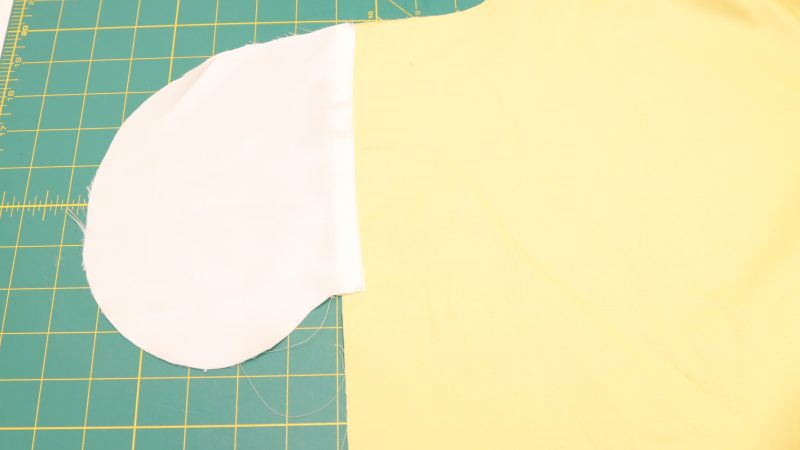
- Sew 4 of the pocket pieces right side to right side on the side seams, starting from the waist. Make a ⅜” notch at the bottom, flip the pockets facing outside, press the seams toward the pocket and understitch the pockets.
- Press the pockets to the wrong side of the skirt.
- Pin wrong sides of the two skirt pieces facing each other from the bottom of the pocket all the way down to hem. Sew using a 5/16” seam allowance and press.
- Cut any fraying edges out and flip the skirt pieces so that the right sides are facing together.
- Sew the seam using a 5/16” seam allowance.
- Pin the pockets with right sides facing together, then stitch with a ½” seam allowance all around. Finish the edges by cutting with pinking shears or with bias binding.

Step 7
CENTER BACK SKIRT
- Cut the center back opening, making sure the pockets are facing forward.
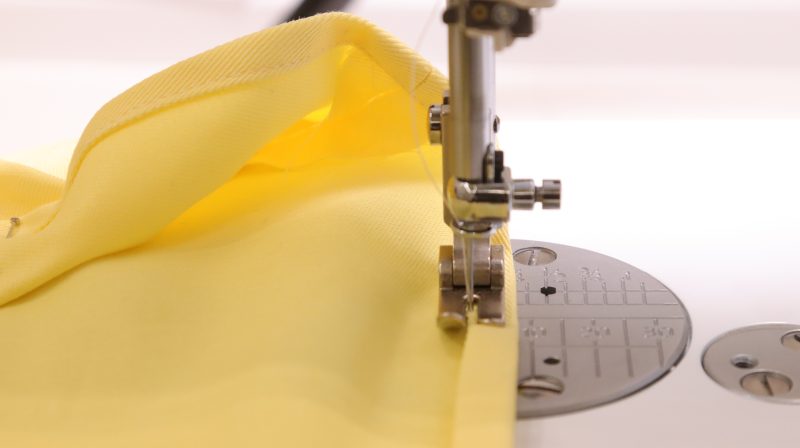
- French seam and make sure to leave a 9” opening at top for the zipper.
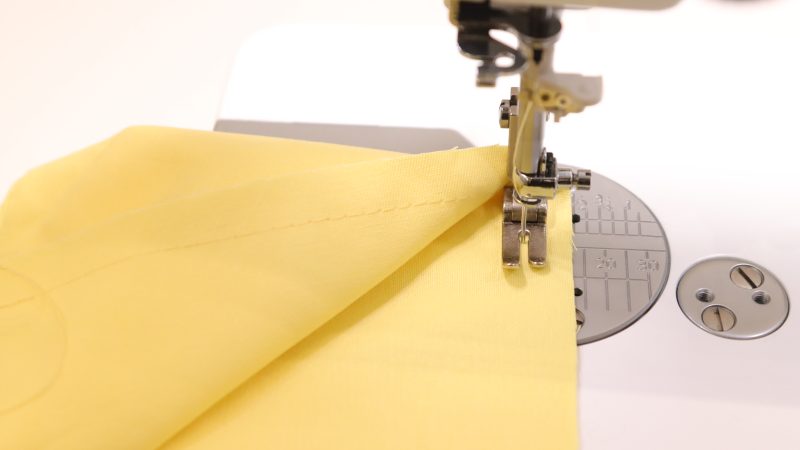
- Finish the hem by rolling it ¼” twice and top stitch.
- Sew a baste stitch around the size of 4-5 length on a sewing machine. Gather to the appropriate size of your lining and tulle waist measurement.
Step 8
TULLE & SKIRT LINING
(I) SKIRT LINING, (J) TULLE SKIRT LAYER
- Sew the side seams of tulle together.
- Slash center back and sew it close. Make sure to leave a 9” opening at the top for the zipper.
- Repeat the same steps for the second layer of tulle.
- Repeat the same steps with the lining but french seam it. Roll the hem ¼” twice and top stitch.
- Baste all four layers together.

Step 9
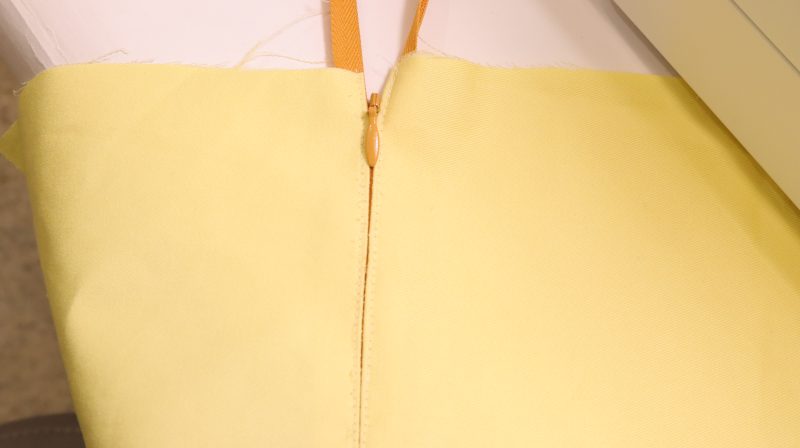
INSERT ZIPPER
- Baste all the layers in center back together closed with the ½” seam allowance.
- Press the seams open
- Lay down the zipper closed, aligning it with the center of the seam. By hand, baste the zipper down catching only the seam allowance and avoiding the actual dress on the right side.
- Open the seam and the zipper.
- Then, sew the zipper on the fabric using an edge stitch with a sewing machine.


Step 10
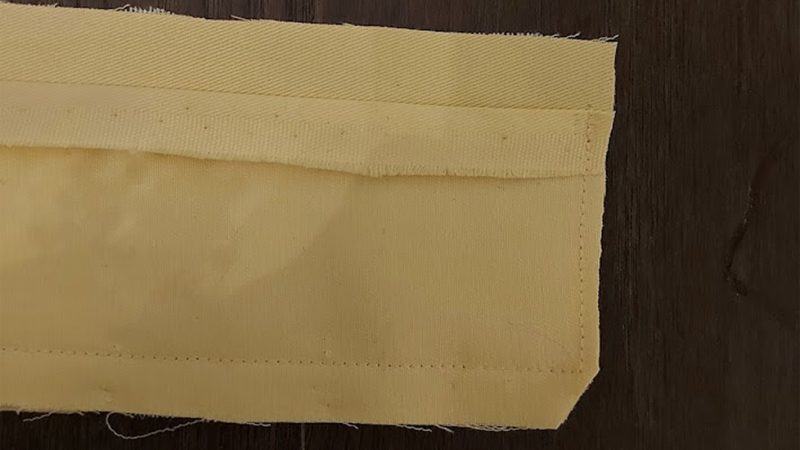
SKIRT WAISTBAND
(K) SKIRT WAISTBAND
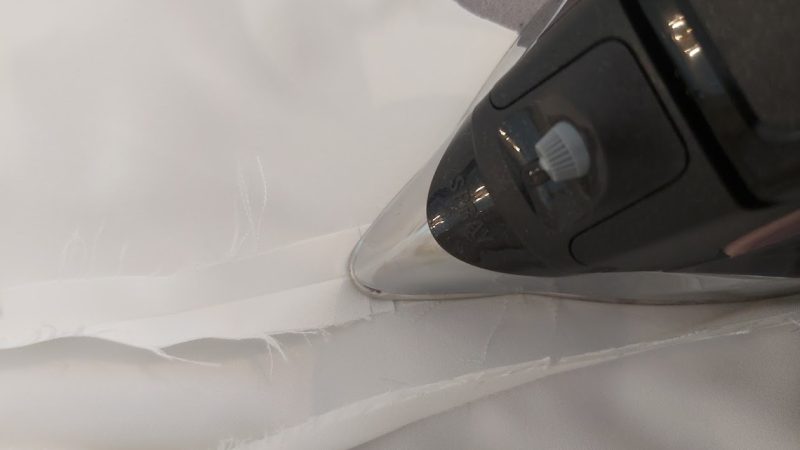
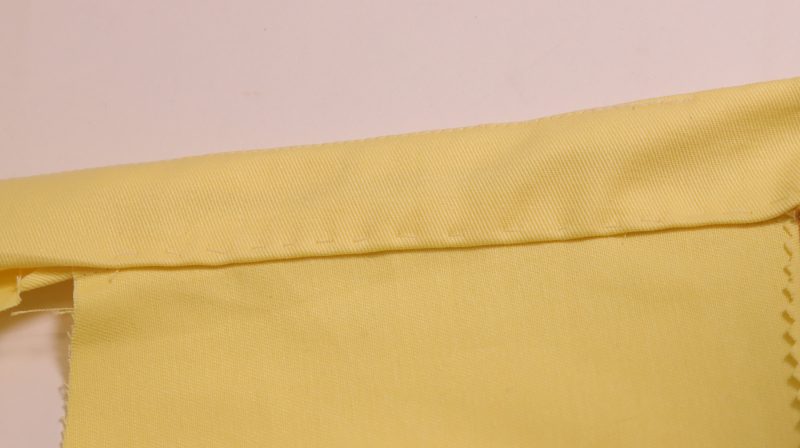
- Interface 1 piece of the waistband. Fold the seam allowance on the bottom edge to the wrong side and press.
- Pin both of the waistband pieces together facing right side to right side. Leave the bottom edge with the folded seam allowance open. Slash the corners and turn the waistband to the right side.
- Press the seam allowance toward the interfaced part and understitch on the right side. This will keep the under band in place.
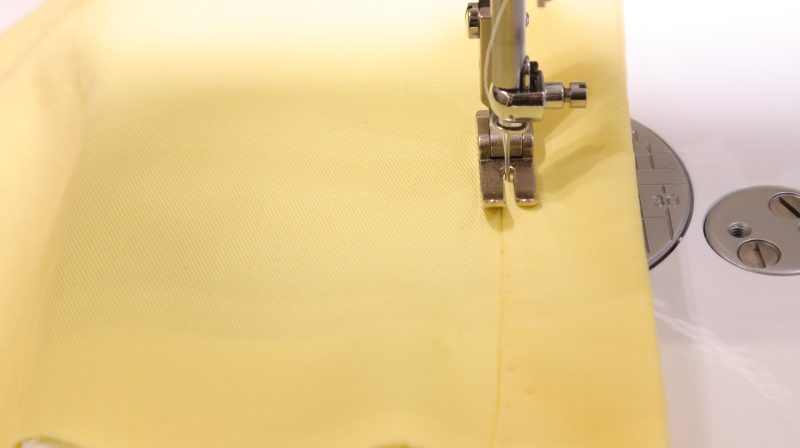
- Attach the waistband to the waist line of the dress with the unfolded seam allowance facing right side to the right side.
- Sew it with a ½” seam allowance. Make sure 1” of an extension is passing through center back.
- Cut seam allowance to ¼” carefully and press it upwards.
- Close the waistband by bringing the folded edge on top of the seam allowance, then baste by hand and top stitch closed.
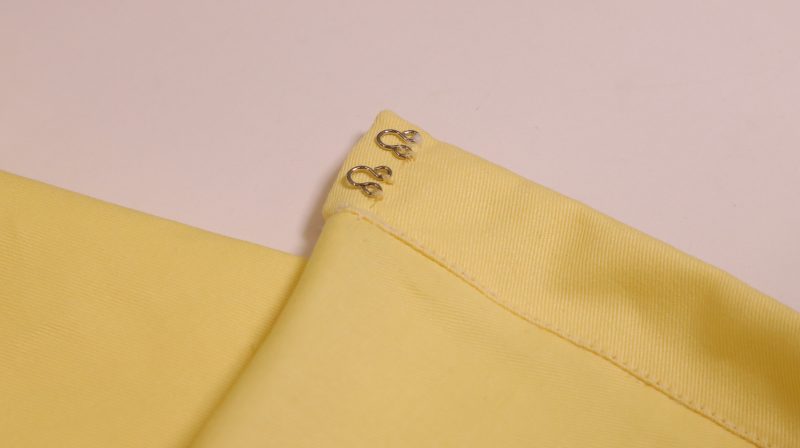
- Add two pairs of hooks and eyes at the back, ½” away from the edge.

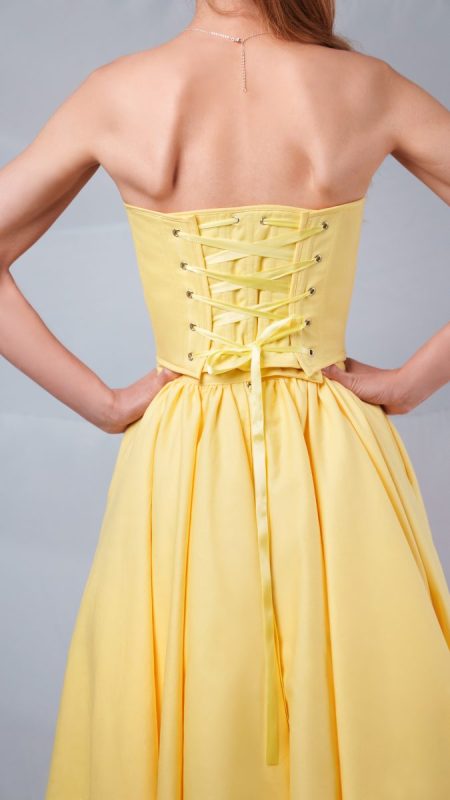
Sewing Success: The Finished Madison Tea Length Dress

Share this post with a friend (or two!), download the Madison Tea Length Dress free sewing pattern, and show us which fabrics and colors you choose, using the hashtags #MoodMadisonPattern & #MadeWithMood—and don’t forget to tag us, too!


Free Sewing Pattern Inspiration for Your Next Project
Now that you’ve completed the Madison Tea Length Dress, may we tempt you with sewing our Biarritz Skort free sewing pattern? If you haven’t sewn it already, pairing our Biarritz skort with the Madison Tea Length Dress’ Corset would offer you another way to wear this look! Opt for cotton denim twill to complement the organic cotton twill corset or consider medium weight linen for a true summer outfit. Likewise, sew up the cropped blouse from our Pirouette Luxe Set free sewing pattern, using lightweight silk satin to create a two-piece special occasion set. With our supreme selection of free sewing patterns, your opportunities for sewing with Mood are endless!
We hope you had as much fun sewing the tea length dress as we did! As always, we want to hear from you—share your thoughts and comments below and let us know where you’ll be wearing the Madison Tea Length Dress free sewing pattern!
I am a bit confused at this pattern? What is this fold under the breast area? is there no channeling used? No underwire?
We used only cups for this bustier but you are defiantly able to use underwire for more support!
This dress is lovely! I enjoy listening to Alexandra explain how to construct this pattern. I cannot wait to attempt it! I already have the fabric that I just ordered from mood. Unfortunately I have two projects locked and loaded. This will be great to attempt in September maybe even November. I may shorten the skirt, because I like to show off some leg. I can see myself making this and wearing it for New Year’s! I sew pretty fast but, I am less than part-time when it comes to sewing.
Wish me sew much luck!
I’m adding this to my sewing planner right now.
Thank you for the lovely comment. Good luck with your sewing projects!
Yes thank you.
Are you able to make this into a one piece dress? I wouldn’t know how to cut the bottom of the corset to attach to the skirt part. It’s a beautiful set though!
Yes, you can make it into one piece
You can make a straight line from side seam to side seam on the front panel. It might shorten the bustier part so we recommend to make it a little bit longer afterwards. By making a mockup you would be able to adjust it however you like.
I’m already in the mailing list that is how I got this email about the dress, but how do I download the pattern?
Hello,
Fill the form again and you will receive a new email with the download link.
What cup size would this pattern be suitable for? The silhouette typically looks really nice on me and I really like the details that this pattern includes, but I have a 36H US cup size. I’m aware that I would need to add boning , internal structure and underwires (and our straps) to this bustier, that’s no problem. I have unfortunately failed every time I’ve tried to do full bust adjustments or to expand cups of a pre-existing pattern. Would this be suitable for someone of my cup size?
Hello Brie,
We recommend to sew a muslin mockup and see if your pattern size matches. if not, you can adjust the cups pattern according to your size. an under wire with channeling is defiantly recommended. you can add adjustable straps/ sleeves to the bustier just to secure it more in place.
I cantquite figure out how to put the pattern pieces together for the skirt alone. I think only the H pieces are for the skirt shell. Is there a tutorial somewhere on how to put the pieces together to make the skirt shell and lay it out on the fabric?
hello, Just match the paper pieces as you usually do, following the page numbers.
If you notice, there are 2 waist lines on the skirt pattern. One is for the shell and the other is for tulle and lining. the shell waist line should be the biggest one since it has to be gathered. the tulle and lining should be in the size of your waist + ease + 1″ extension.
Adding to Alexandra’s comment, piece H is used to cut both the main fabric and the lining. Use the pattern as it is, but place it on the fabric fold. For the lining, cut one piece and reduce the length by one inch. For the main fabric, cut two pieces.
You could also choose to mirror the pattern piece along the fold line onto paper to create a full pattern piece, which you can then place on the fabric without folding it.
the link for subscribing is not responding
Hey there, try again now and see if it works. I just checked it and it worked for me.
This is pattern is being sold by an Etsy vendor.
Thank you for watching out for us Rosalie! We were able to reach out to the etsy seller to get the pattern listing taken down.
Hello Mood Fabrics team,
I’m writing to report an Etsy shop that appears to be copying and reselling your sewing patterns without authorization (or in a way that is highly confusing).
Several listings seem to closely replicate Mood patterns (from Mood Sewciety) in terms of presentation, visuals, and instructions. Since your patterns are intended for personal use unless expressly licensed, I wanted to flag this for your review.
Hi Rami, thank you so much for bringing this to our attention. We reached out to the etsy seller and got them to take it down. Thanks again and happy sewing!
NO PUEDE HABER UNA OPCION PARA SOLO IMPRIMIR EL CORSEL ?
Hello! The sewing pattern includes the entire dress, not just the corset on its own. There isn’t a separate download option for only the corset.
Great dress to wear
Alguien que me ayude soy talla xs y no entiendo mucho lo de las medidas del patrón, Cual debería escoger?
Hola Daisy
Generalmente nuestra talla numerica 16 o 18 es la que correspondería a la XL, pero para una prenda como este vestido te recomiendo que elijas talla de acuerdo a tus medidas de contorno busto y contorno cintura. Como puedes ve en la tabla de tallas, las medidas finales del bustier son media pulgada (1.3 cm) mas chicas que las medidas de cuerpo para que quede ajustado, para que tengas una referencia y consideres esto al elegir tu talla.Tambien te recomiendo que hagas una prenda de prueba en manta o muslin para hacer ajustes a la prenda antes de usar la tela definitiva.
Necesito ayuda por favor, no entiendo mucho lo de las tallas que están en el patrón, soy talla xs cual debería escoger?
Hola Daisy
Elige tu talla en la segunda tabla (Tabla de Medidas aproximadas de la prenda terminada). Elige la talla que tenga medidas un poquito más chicas que tus medidas del cuerpo. Como este vestido lleva corset, debe quedar un poco apretado para que no se mueva. Las medidas estan en pulgadas, si necesitas ayuda para la conversión a centímetros, envíame tus medidas de contorno busto y cintura en un email a sandy@moodfabrics.com y yo te ayudo 🙂
Hi! I was looking for a pattern for the skirt of a dress exactly like this. I couldn’t quite figure out how many cutouts you need of each skirt letter (H, I, J). Also, I since I already have a corset top, is there any way that I can sew the skirt to the top? Does this project need interfacing? I am a beginner, so please make it as simple as you can! I know this might not be the easiest project to start with, but I prefer spending time on something I would actually wear. Thank you!
Hey Elodie! On page 3 of the pattern pdf, there is a chart that says how many of each piece you have to cut out. According to the pattern it says:
(H) Fabric – Cut 2 on fold
(I) Lining – Cut 1 on fold
(J) Tulle – Cut 2 on fold
Cutting something on fold means folding the fabric along one of the edges so that it is a mirror of itself that’s attached in the middle.
I really only think you would need interfacing for the waistband, otherwise the rest of the skirt doesn’t need it.
As far as attaching this skirt to a corset, I would omit that waistband and just sew the gathered skirt directly to the corset you already have. You can do this by placing the waistline of the skirt right sides together with the bottom of the corset. I hope this answers your questions!
Beautiful
Great
Love
Perfect
Oki
Hi! I am interested in only making the skirt. How many yards do i need of fabric for that? And my desired material has a weight of 130gsm will that change the look of the skirt?
Hey Paulina, the dress says it calls for 6 yards for a size Small, but if you’re only making the skirt, you’d only need 5 yards. I would purchase 1 yard fewer that what it recommends for whichever size you make. And the weight of your fabric should be fine.
Can’t wait to try this pattern. Thanks.
Hi everyone
Hi Alessandra!!!