
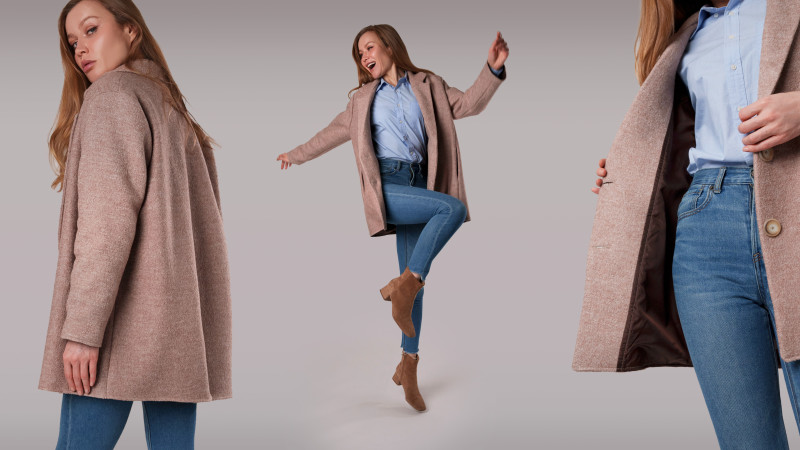
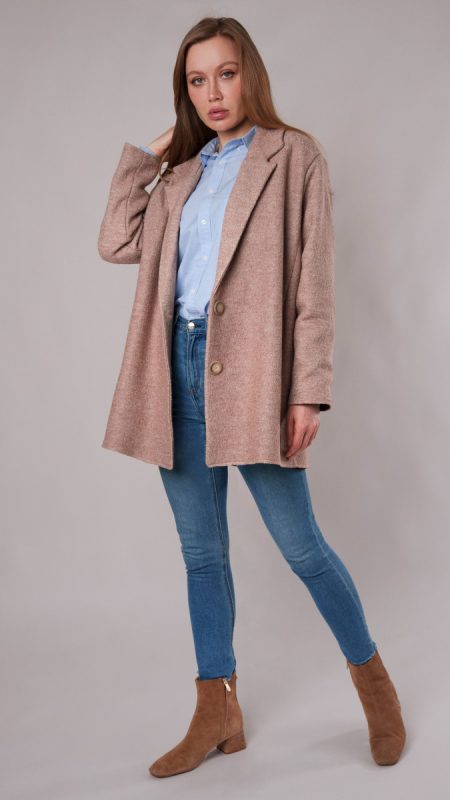
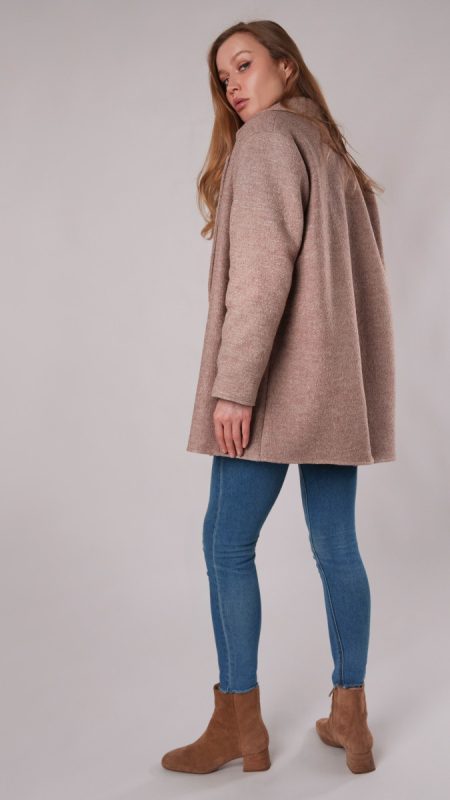
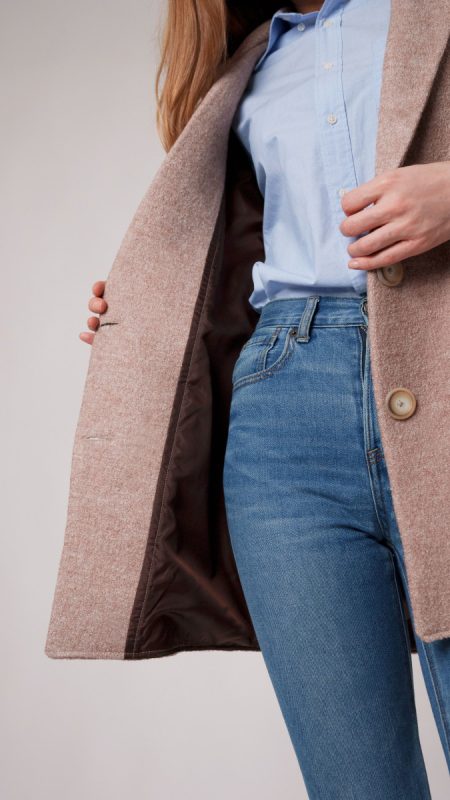
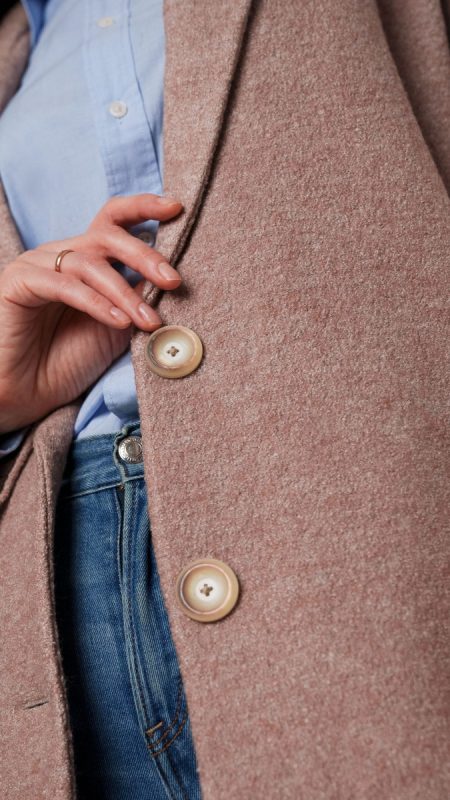
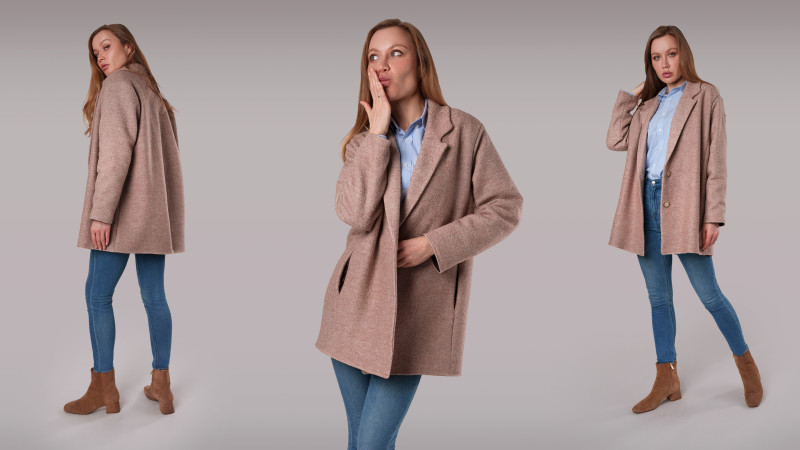
Stay warm and stylish this season with The Bergen Coat, a timeless oversized peacoat that combines comfort and sophistication. This free sewing pattern lets you create a standout outerwear piece using coating fabric paired with a soft lining for added coziness. Featuring classic design elements like a lapel collar, side pockets, a back vent, and a sleek button closure, the Bergen Coat is both functional and effortlessly chic.
Boiled wool takes center stage in this design, providing the perfect balance of structure, warmth, and durability. Its dense texture naturally insulates against the cold, while its slight stretch allows for comfortable movement. Additionally, boiled wool’s non-fraying edges make it ideal for achieving clean finishes with minimal effort. For those looking to explore fabric alternatives, wool blends offer a smooth and polished look, tweed adds texture and character, and cashmere delivers lightweight warmth with a rich touch of flexibility.
Sewing the Bergen Coat is a gratifying experience when approached with the right tools and techniques. Use a universal or ballpoint needle (size 90/14) with polyester thread to ensure strong and smooth seams. Boiled wool’s density may require sharp scissors or a rotary cutter for clean cuts, and a walking foot can help feed the fabric evenly through your machine. The oversized fit is designed to accommodate layering, but the pattern can easily be adjusted to create a more tailored silhouette if desired.
This versatile coat effortlessly complements any outfit, making it a must-have addition to your wardrobe. For casual outings, pair it with jeans, ankle boots, and a chunky scarf for an easy yet stylish look. For more formal occasions, layer it over a sleek dress or tailored trousers with heeled boots to create a polished ensemble. Whether you’re running errands, heading to the office, or attending an evening event, the Bergen Coat ensures you stay cozy, confident, and on-trend while proudly showcasing your sewing skills.
Essentials for Sewing the Bergen Coat
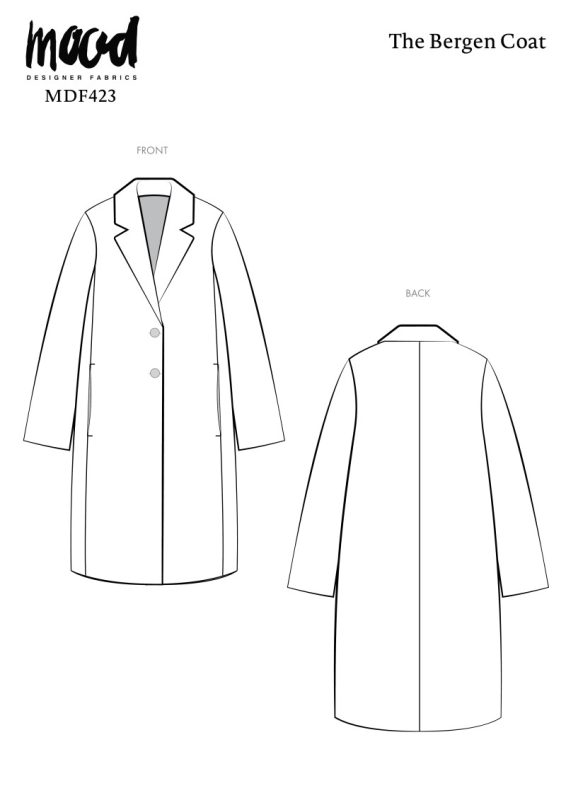
Here is the breakdown of what knowledge and materials you need for creating your very own coat! We’ve got you covered with the recommended materials we used—if you want to follow along exactly—as well as a curated list of alternative fabric recommendations if you want to customize your own version. Technical drawings for simple seam and silhouette visibility plus a size chart accompany the Bergen Coat free sewing pattern download to help you find your perfect fit!
Purchase Products Used Below:
Quantities indicated are for sewing a size small coat. Toggle the ‘SHOP THIS LOOK’ box to find quantities for other sizes.
- 3 yards of Boiled Wool Coating Fabric – Oatmeal Marbled – Ketil Collection (59″ Width)
- 2 yards of Polyester Lining Fabric – Brown – Margot Collection (58″ Width)
- 1 yard of Non-Woven Fusible Interlining, Single Sided by Helmut Lang – Heathered Gray (61″ Width)
- 2 each of Brown Plastic Coat Button – 48L/30.5mm
- 2 each of Gutermann Sew All Thread 100m – 507 Khaki
- 1 each of Dritz Quilting Pins – 175ct
- MDF423 – The Bergen Coat Sewing Pattern (Free download below!)
Alternative Recommended Fabrics:
The Bergen Coat is best suited for medium-to-heavyweight fabrics.
Download Your Free Sewing Pattern
Submit your name and email in the form below to receive the Bergen Coat free sewing pattern directly in your inbox. Mood Sewciety Patterns will send your free download via email with the subject line: ‘Your Free Download from Mood Sewciety’ (in PDF format for A4 and letter-size printing).
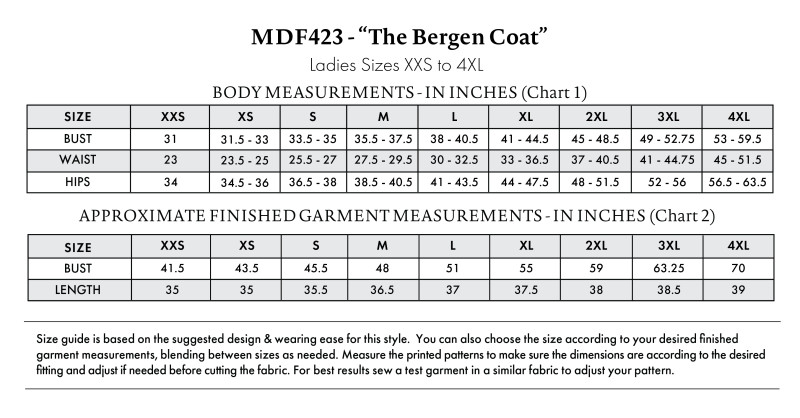
Find Your Perfect Fit
Our Bergen Coat is a loose fitted garment, designed for heavy fabrics; the size guide below is based on the suggested design & wearing ease for this style. You can choose the size according to your desired finished garment measurements, blending between sizes as needed. And/or measure the printed patterns to make sure the dimensions are according to the desired fitting and adjust—if needed—before cutting the fabric. For best results, sew a test garment in a similar fabric to adjust your pattern.
Note: if using non-stretch fabrics, reference the approximate finished garment measurements chart to choose your size.
How To Sew The Bergen Coat
The instructions provided are designed to guide you through sewing the main fabric and the lining fabric for the Bergen Coat simultaneously.
Sew with a 1/2″ seam allowance for all seams unless otherwise specified.
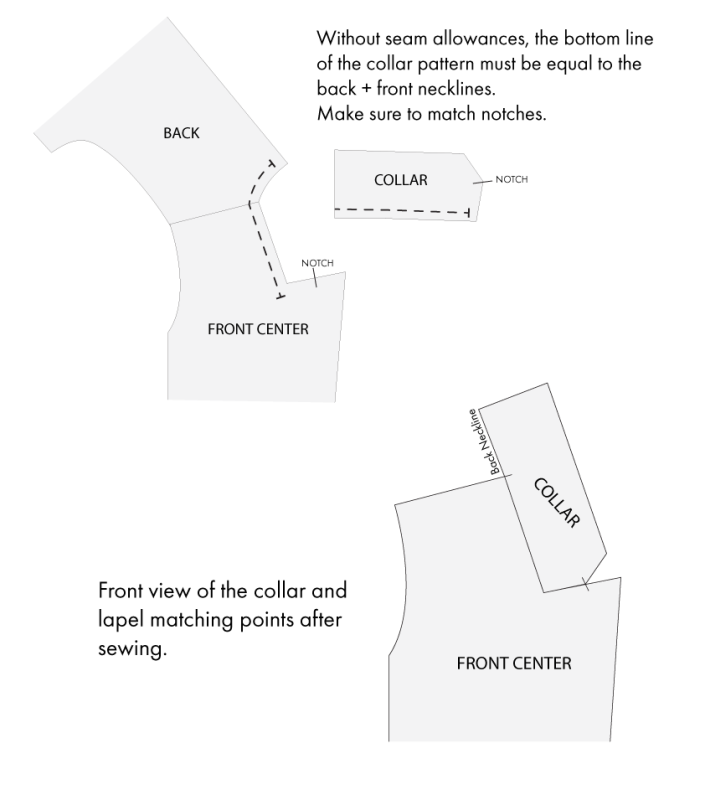
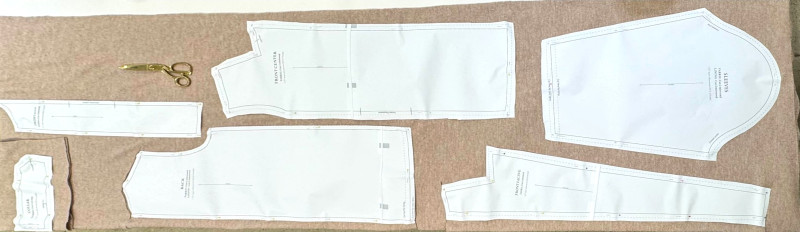
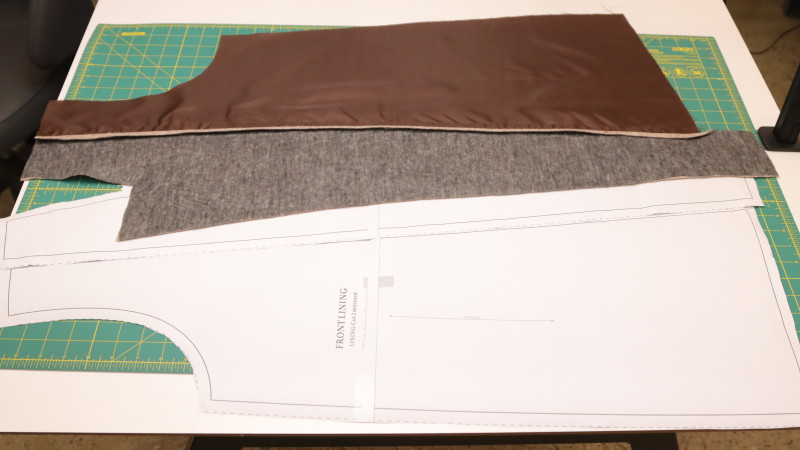
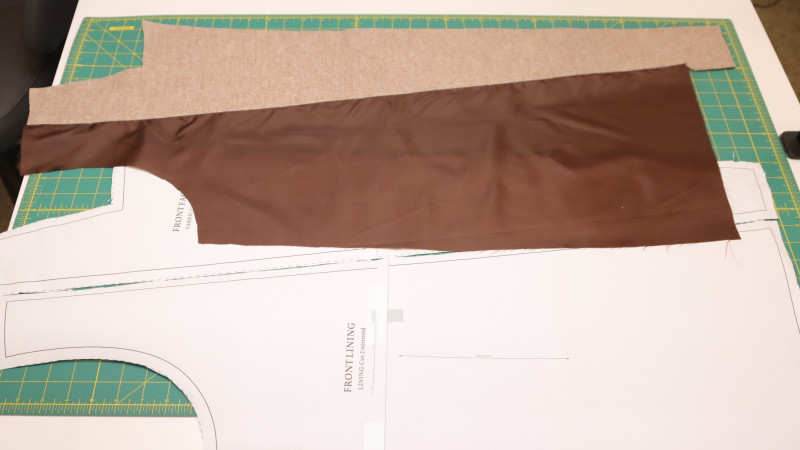
Before cutting your fabric, make sure your collar pattern matches the neckline. Follow this process on your patterns, adjust if needed, and then cut the fabric.
Pattern layout for cutting out the fabric.
Step 1
Interfacing
Interface the lapel and collar pieces for support and structure.
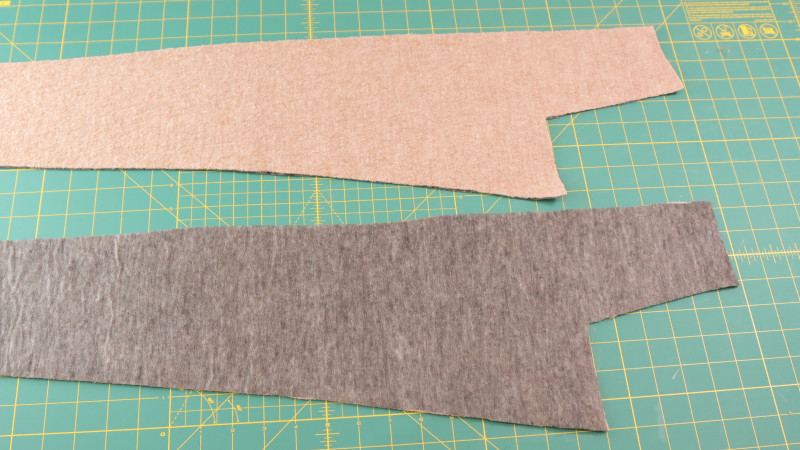
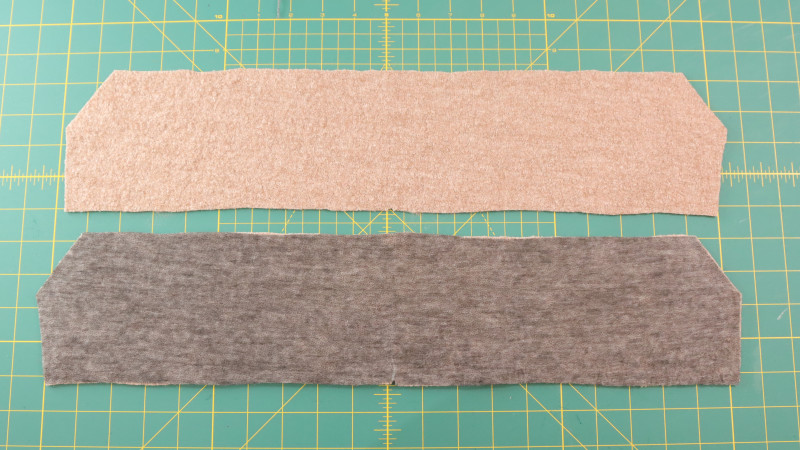
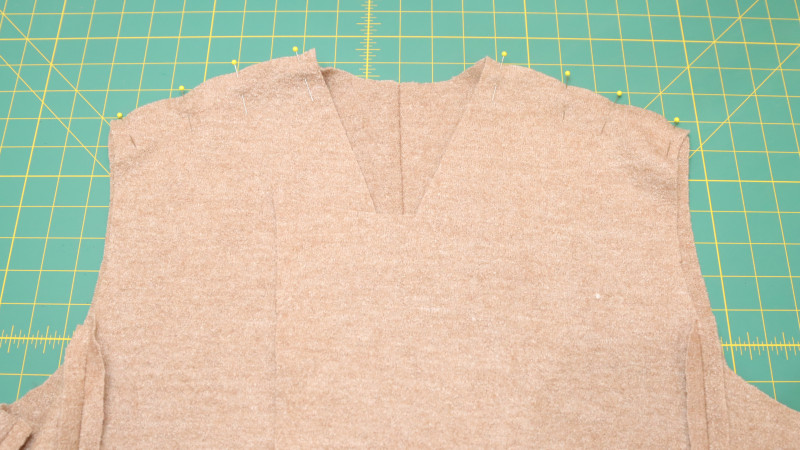
Step 2
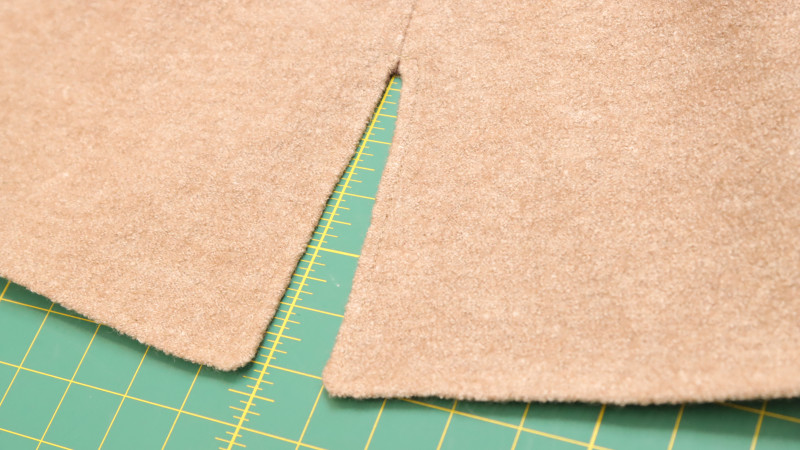
Back Bodice
Sew the back pieces together at center back, leaving between 6-8 inches at the bottom, depending how big of a vent you want.
Repeat this step for the lining.

Step 3
Pockets
Mark the pocket placement on front center and front side of the main fabric. Line up the pocket pieces at the upper notch.
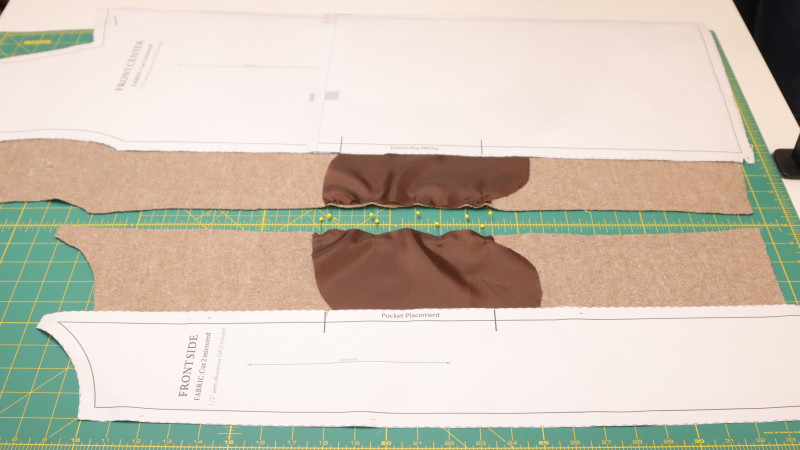
Step 4
Preparing Front Bodice
Sew the front center and front side with the pocket pieces in between.
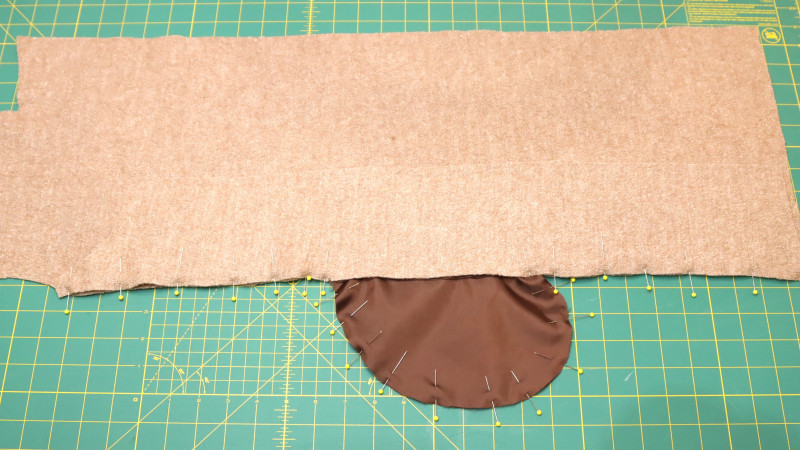
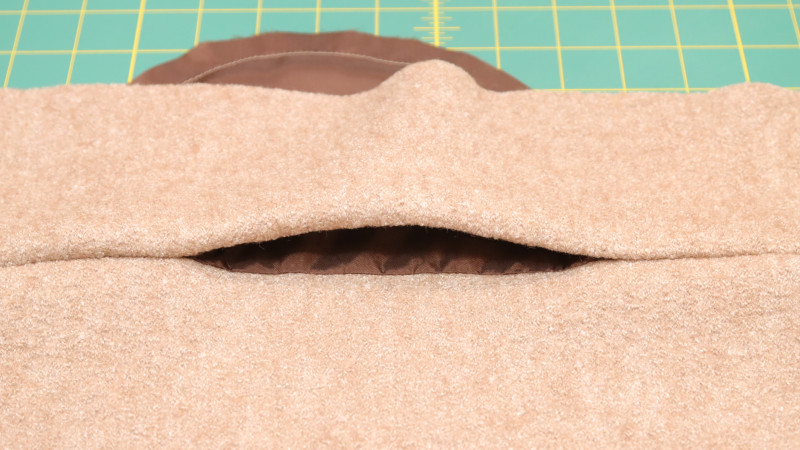
Step 5
Set in the pocket.
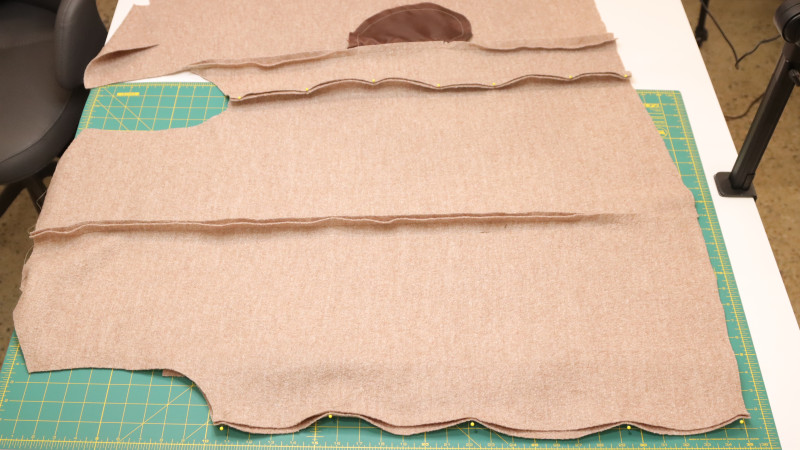
Step 6
Joining Front and Back
Sew front and back of the main fabric at the side seams.
Step 7
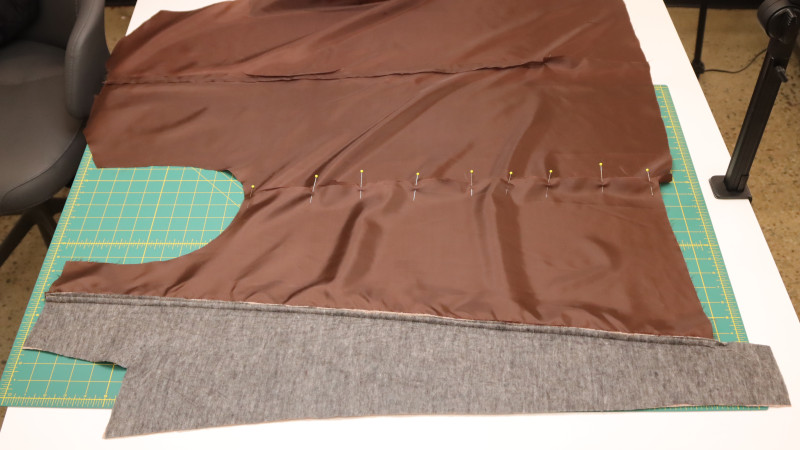
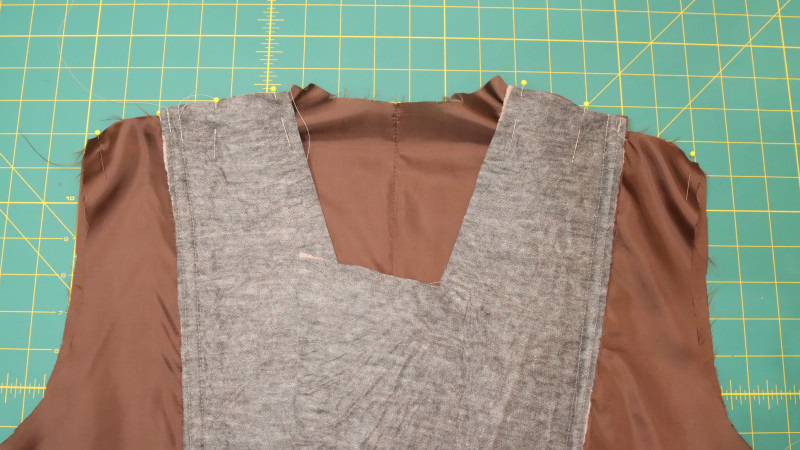
Lining
Sew the front facing to the front lining.
Step 8
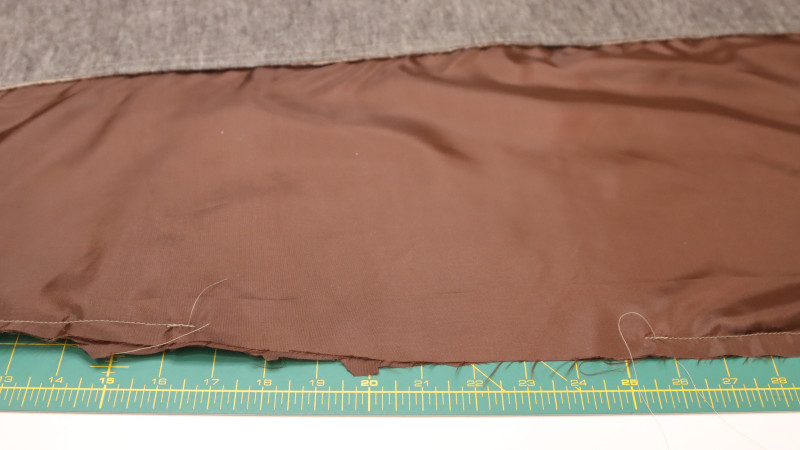
Top Stitching
Top stitch the seam allowance to the lining ¼”.

Step 9
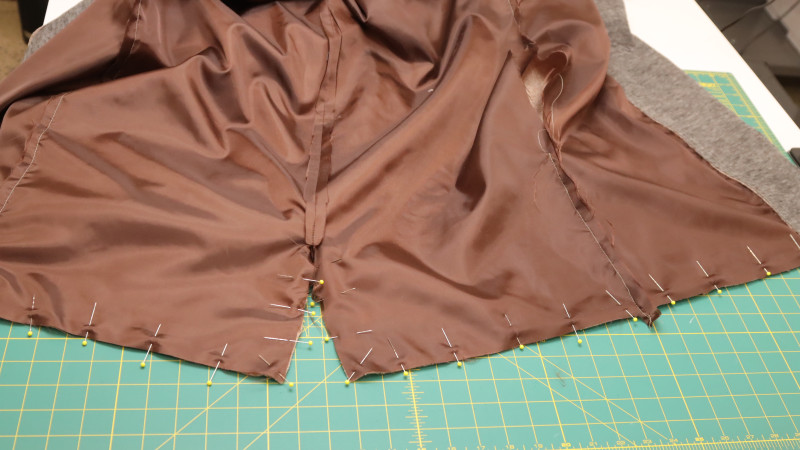
Lining Side Seams
Sew front and back of the lining together fully on one side seam, leave a 10” opening on the other side seam.
This gap will be used to turn the garment right side out.
Step 10
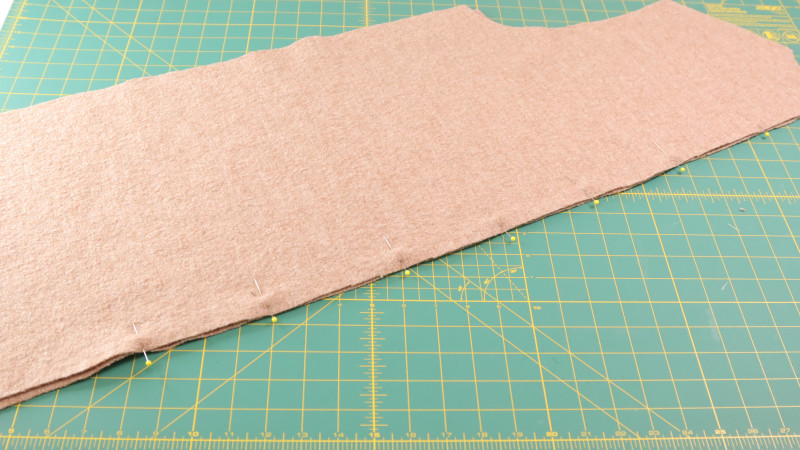
Shoulder Seams
Sew front and back at the shoulder seams of the main fabric and the lining.
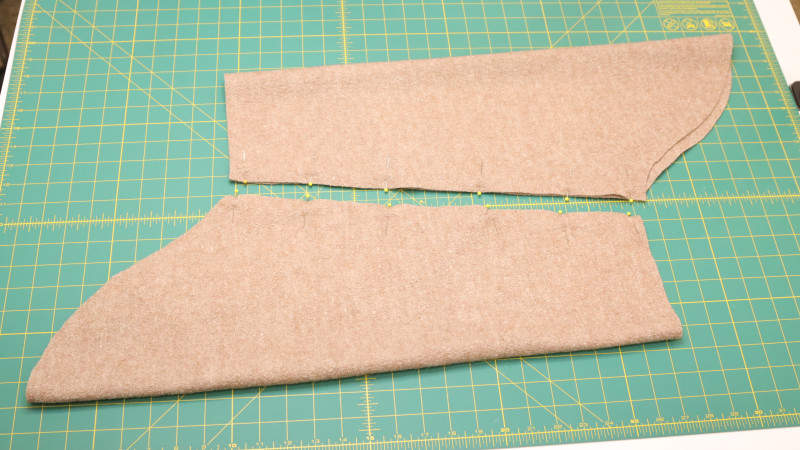
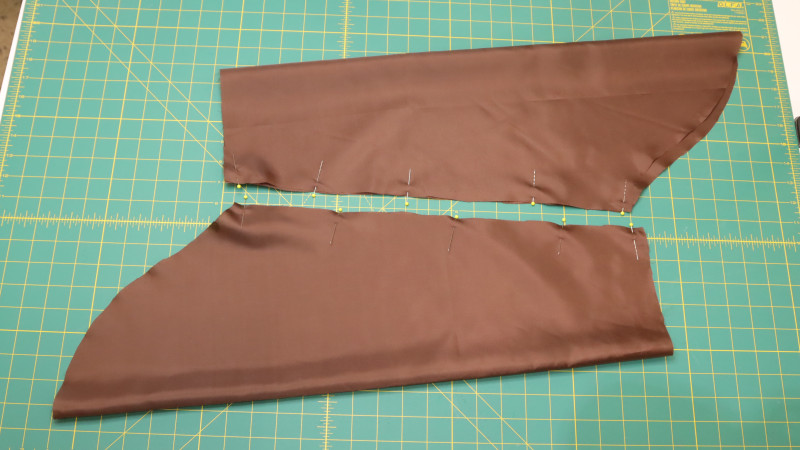
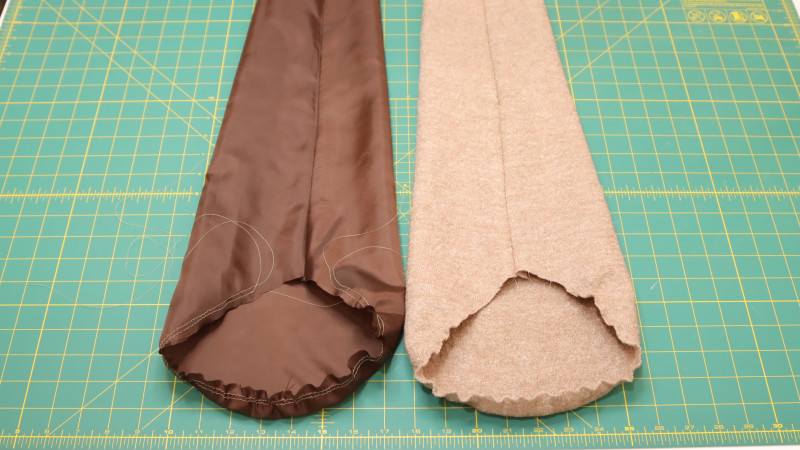
Step 11
Closing the Sleeve
Sew the inseam of the sleeves for the main fabric and the lining.
Step 12
Easing the Sleeve
Sew 2 rows of basting stitches, ¼” & ⅜”, across the top of each sleeve cap.
Repeat this step for the lining.
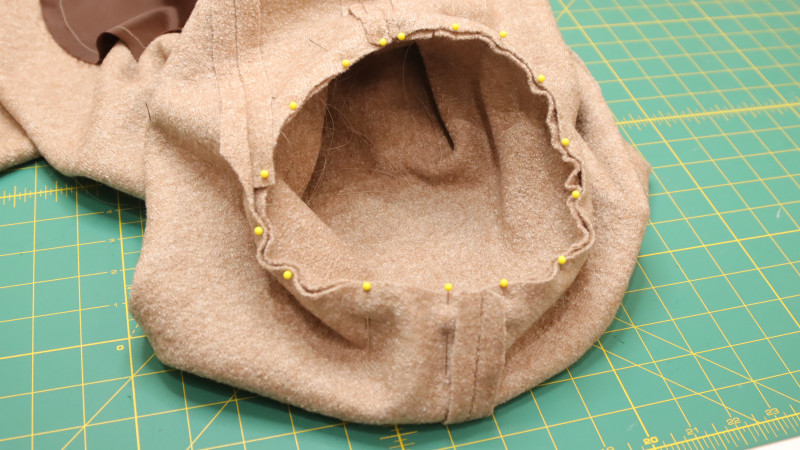
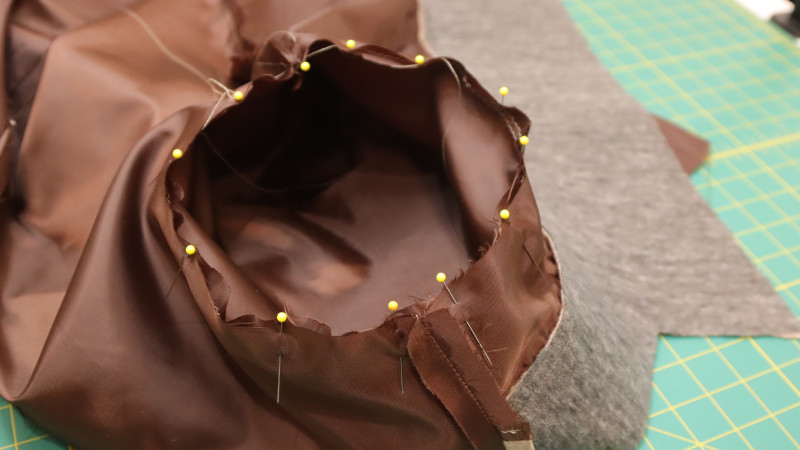
Step 13
Setting in the Sleeve
Set in the sleeve to the armhole for the main fabric and the lining. Be sure to line up the side seam and the inseam of the sleeve together.
Step 14
Sewing the Collar
Pin and sew one collar piece to the main fabric along the outside of the neckline.
Step 15
Pin and sew the other collar piece to the lining fabric along the outside of the neckline.
Step 16
Sew the sides of the collar up to the lapel notch.
Step 17
Joining the Collar
Sew the main fabric and the lining together across the top of the collar pieces.
Step 18
Sewing the Front Opening
Sew the main fabric and the lining together down the lapels at the front opening.
Step 19
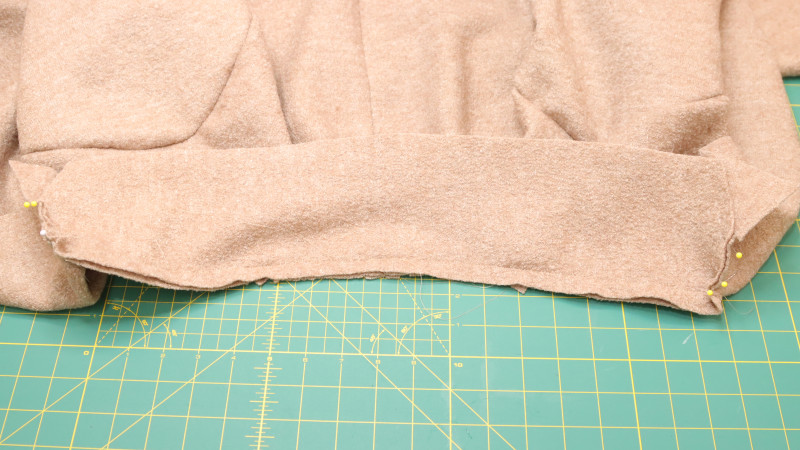
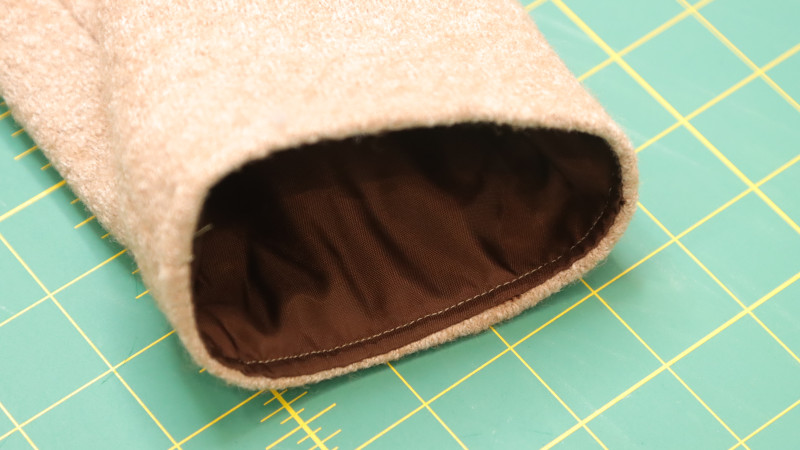
Joining the Sleeves
Join the main fabric and the lining of the sleeves by turning in the seam allowance and sewing with right sides together.
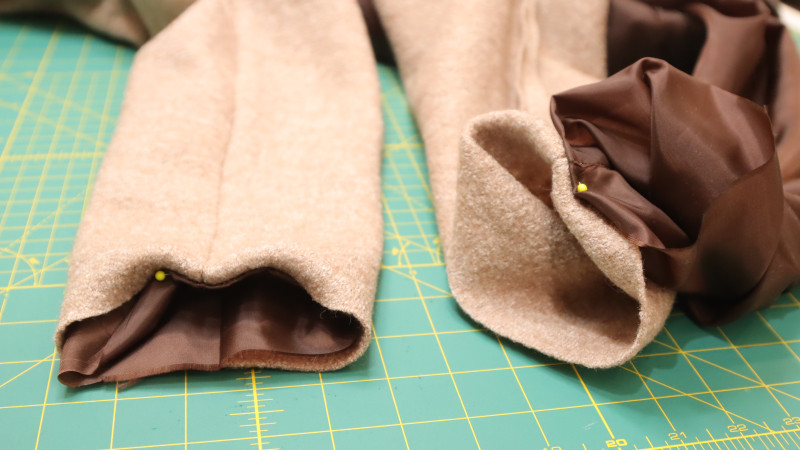
Step 20
Top stitching the Sleeves
Press and sew a row of top stitching ¼” to keep the lining in.
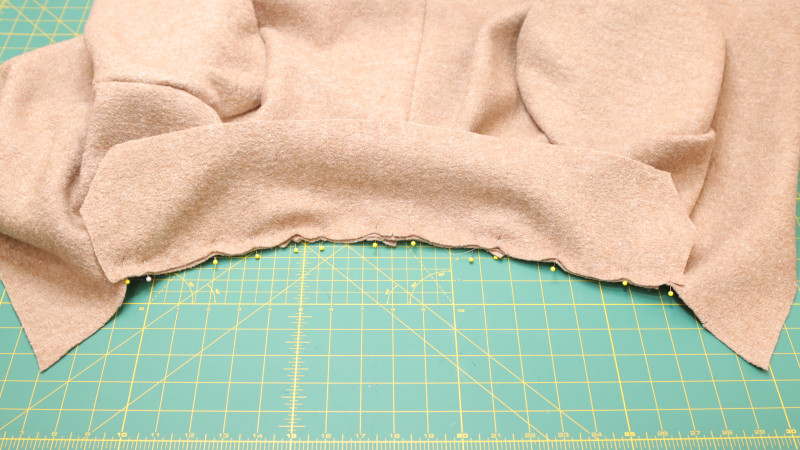
Step 21
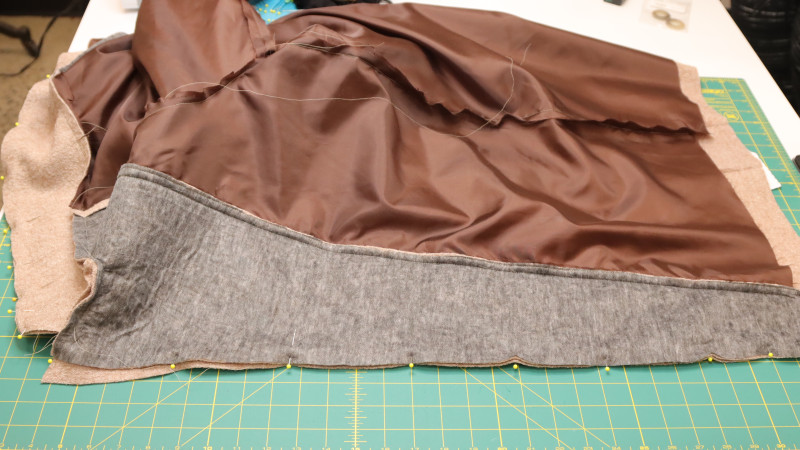
Sewing the Vent
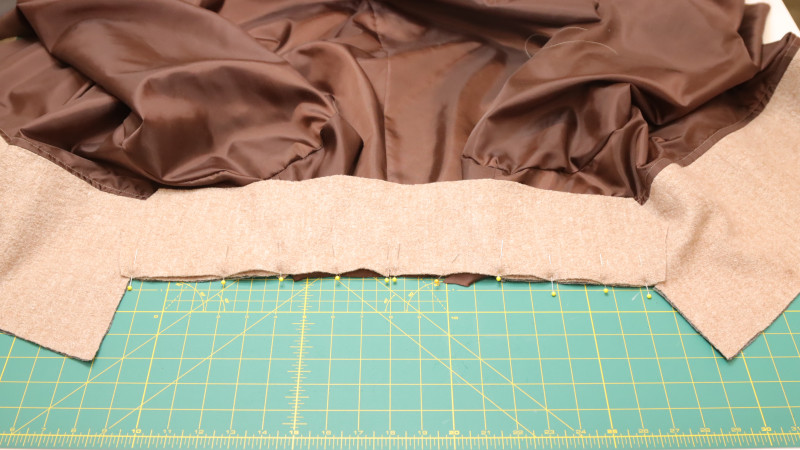
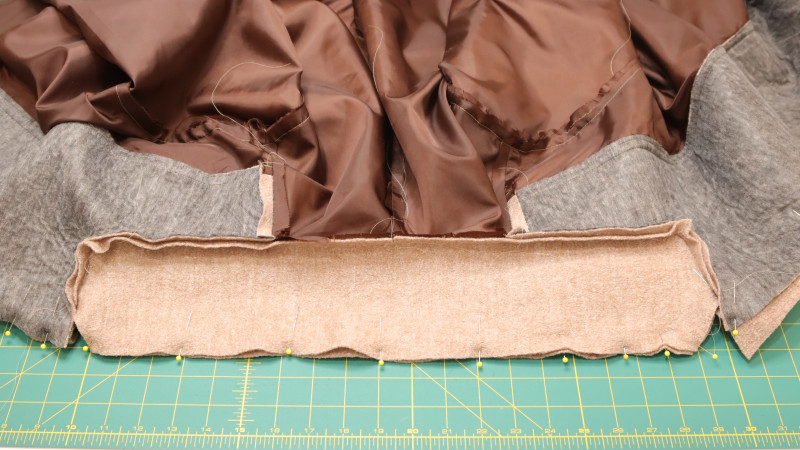
Sew the main fabric and the lining together along the bottom edge, going around the vent.
Step 22
Top Stitching the Vent
Trim the seam allowance and press the bottom edge. Turn the garment right side out, then sew a row of top stitching ¼” across the entire bottom edge to keep the lining in.
Step 23
Sewing the Buttons & Buttonholes
Mark the placement first, then sew the buttons and buttonholes to the front of the coat.

The Completed Bergen Coat Free Sewing Pattern by Mood Fabrics
We can’t wait to see your version of the Bergen Coat! Whether you choose boiled wool, cashmere, or tweed, this pattern is the perfect canvas for your creativity and sewing skills.
Share this post with a friend (or two!), download The Bergen Coat Free Sewing Pattern, and show us which fabrics and colors you choose, using the hashtags #MoodBergenPattern & #MadeWithMood.
Beautiful jacket can’t wait to make it
Thank you, we hope you have an excellent experience sewing it!
Hello, beautiful coat. However, I would like to sew an A-line coat for myself; do you have something nice that is figure-hugging? I somehow haven’t found a pattern. Best regards, Josephine
Hi, maybe you are looking for something like The Drosera Duster Jacket
Do you have a pattern in a medium size that is along the same lines as this coat , but much longer than this one?
Hi Laura! Check out all our outerwear patterns and see if any of those coats are closer to what you wanted.
Can I make this longer? Should I just extend the pattern or do I need to make another adjustments?
Yes, you can make this coat longer by extending the length of the front pattern, the back, the front facing, and the front lining.
The size guide is in letter sizes but the pattern is number sizes, is there a legend/conversion table available? Also, the printed pattern has size lines up to a 32 listed in the legend but each pattern piece only goes to a 14. Per the Shop This Look size chart, a 14 is considered a medium. Can you please provide some clarity on the sizing?
Hello! Great catch! We’ve updated the Bergen Coat free sewing pattern file to reflect the correct alpha sizing XXS to 4XL. Feel free to re-download the file! Happy Sewing 🙂
Hello, is unisex or I have to make changes for a man?
Thanks!
Hello, this pattern can also work for men as well!
This coat looks so cosy! It’s starting to get colder here in Australia – I might whip this one up for the coming winter!
Hello, I am having difficulty locating the size large cutting lines on the collar pattern. Is there an issue with the pattern or should I use size XL?
If you’re having difficulty keeping track of the dotted lines when they blend in with each other, try counting the lines instead to figure out which one to trace and cut. For example, the side Large will be the 5th line from the inside on each pattern piece.
Step 17 says “Sew the main fabric and the lining together across the top of the collar pieces.” but I cannot find instructions for closing the ends of the collar. Please advise.
Hey Melinda, since the angles of the collar pieces are identical on the lining and the main fabric, you basically sew all the way from one side of the front opening, around all the angles in the collar, and down the side of the front opening to bring the lining and main fabric together.
Nice pattern! I’ve registered twice (even though I am already registered) and have yet to recieve a down load link for any thing from Mood including this pattern. How do I download it?
Hi Lynn! Check your spam folder and if you’re still not seeing any mail from mood, shoot us an email at patterns@moodfabrics.com and we’ll help you out there.
Hello, I’m in the process of finishing my version up but am not exactly sure how to sew the hem. The lining hemline is shorter than the coat, with the lining lapel piece being as long as the coat, so there’s this “step” between the overall lining and the inner lapel at the hem. How to deal with that? Thanks, Mel
Hey Mel! So I actually close the bottoms of my coats a little differently than is instructed in this tutorial. Check out the pattern for the Cannes Ensemble and it shows you how to finish the sleeves and the hem of the coat in the way that suit jackets are typically finished. Let me know if this helps!
Can this be made without the lining?
I wouldn’t recommend it. The lapel of the coat requires that there is an outer layer of main fabric AND an inner layer with the same fabric.
I just finished my winter sewing project, an embellished version of the Bergen Coat. A couple of comments: please add the appropriate notches to the sleeve pattern and the corresponding front and back pattern pieces so that the armseye fits correctly. Most of the construction is straightforward, but I recommend finishing the hems using more traditional tailoring techniques. I used the methods in the post, and the lining pulls at both the sleeve and bottom hemlines, causing the outside hems to bunch and look odd instead of hanging smoothly. I am going to check out Marisa’s recommendations and possibly rip the hemstitching out and redo it. 🙁
Hey Maja! Thank you for your comment. I was just about to direct you to the Perugia Peplum Blazer for help finishing the sleeve hems and the hem of the coat. They can both be finished the same way if you’re struggling with the directions for the Bergen coat.