
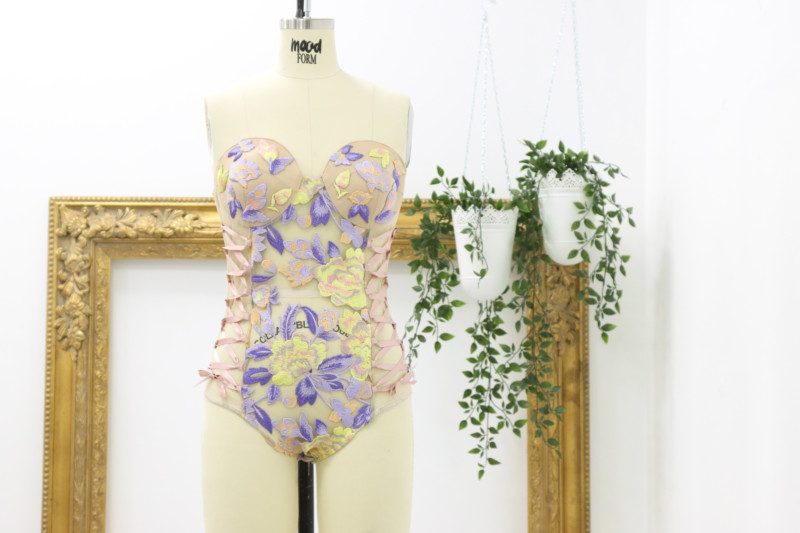
If you’d like to delve into the world of lingerie-making, a bodysuit may just be the perfect place to start! The Adenia Bodysuit features full cups and underwire, with an easy-to-sew elasticized back panel and front princess seams that lace up for the perfect fit. Try yours with an embroidered mesh or stretch lace to make yours exactly to your vision!


Purchase Materials Used Below:
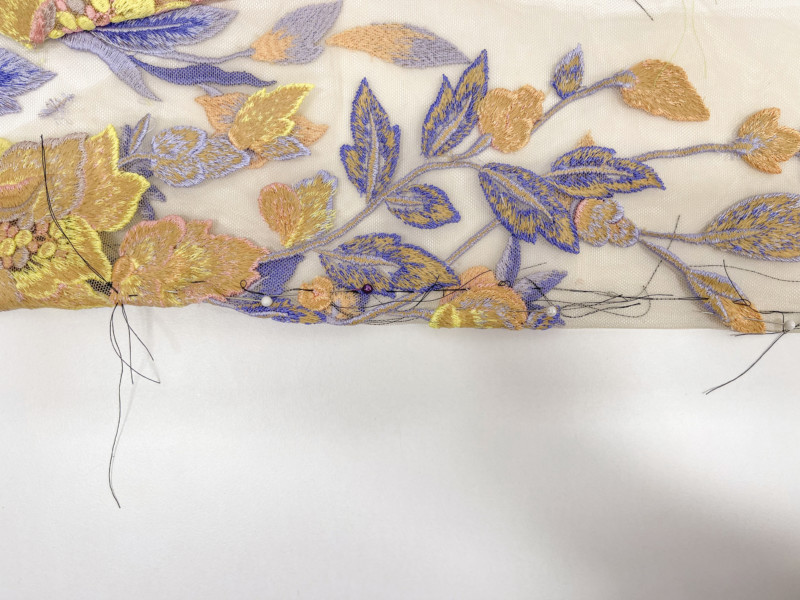
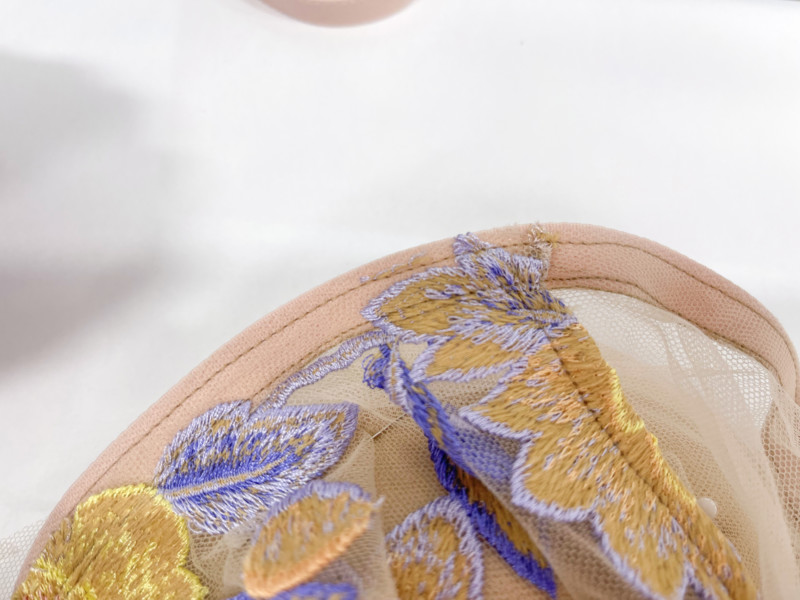
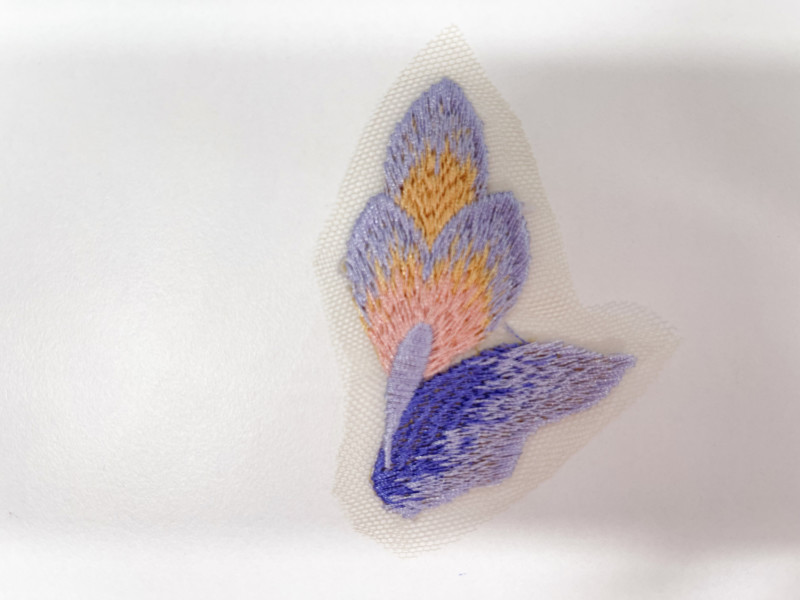
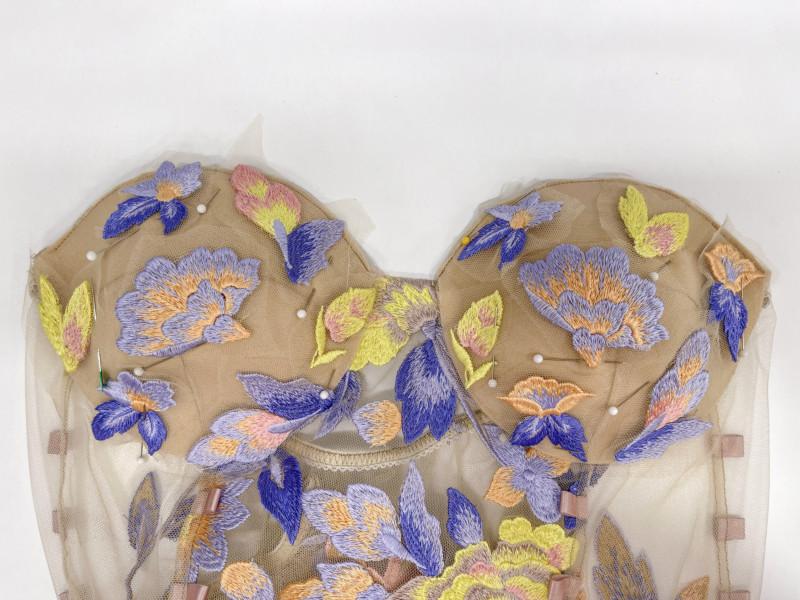
- 1-2 yards Lavender and Yellow Novelty Floral Embroidered Mesh
- 1/2 yard Gilded Beige Leonardo Plus Soft Tulle
- 7-8 yards .25″-.375″ Satin Ribbon
- 4 yards .25″-.375″ Elastic
- 1 set Underwire
- 1 set Bra Cups
- MDF268 – The Adenia Bodysuit Sewing Pattern (free download below!)
Alternative Recommended Fabrics:
Step 1
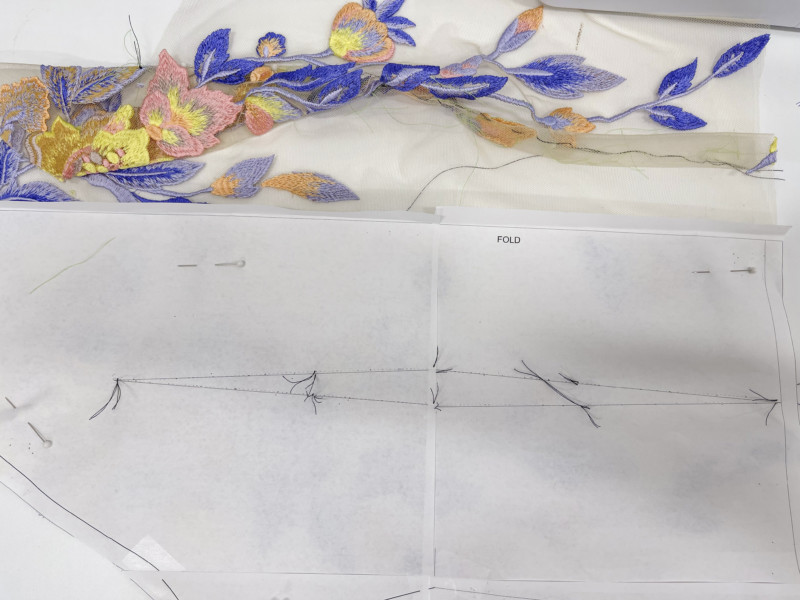
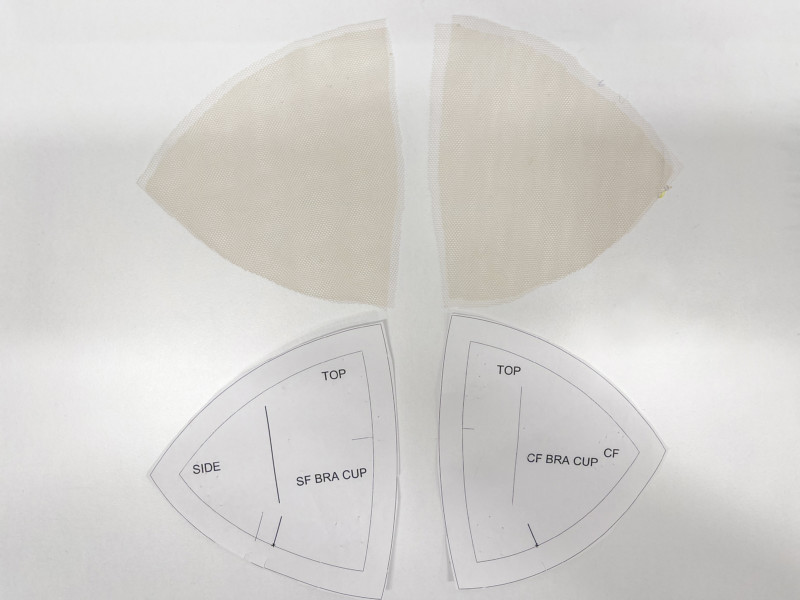
Tape your pattern and cut out the paper pattern pieces to your size.
Step 2
Lay your pattern pieces on your fabric. Make sure you place your center front piece on a prime spot in the print. Pin and cut your pieces out. I recommend cutting the side panel on a non-embroidered section of fabric or a matching solid mesh.
Step 3
Make all your markings on all your pattern pieces.
Step 4
Start with making the darts. Sew tailor tacks at the top, pre middle, and middle. Make sure they’re are extra long so they don’t slip out when removing the pattern paper. Note: do one side at a time and use a good contrasting thread so it can be easily seen.
Step 5
Once the tailor tacks are marked, remove the paper and pin at each prime point.
Step 6
Hand sew the dart to make sure nothing slips around. Note: Hand sewing is an optional step, but will help to make sure the darts look good.
Step 7
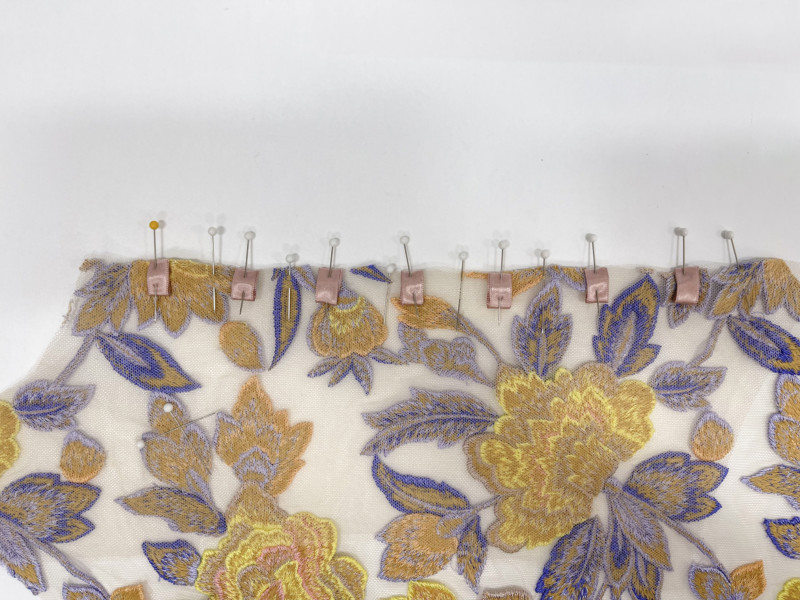
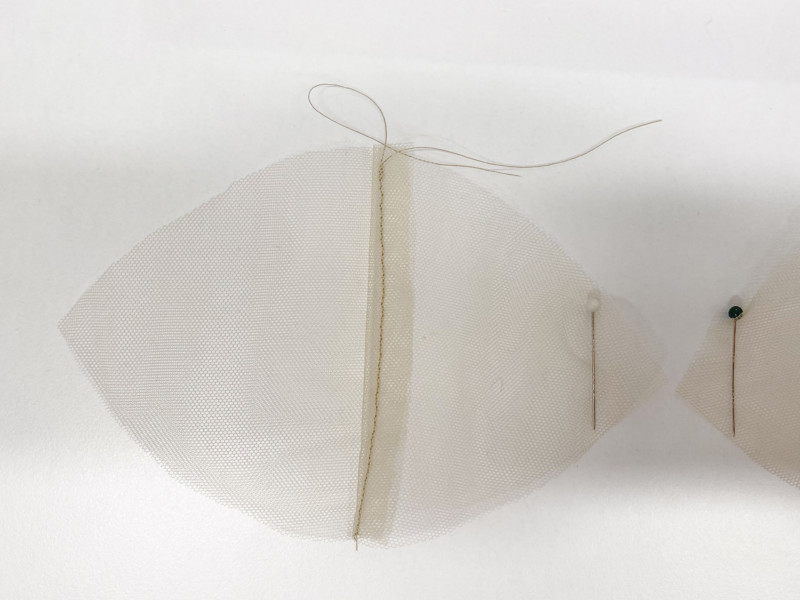
Cut seven 1.5″ pieces out of ribbon.
Step 8
Take your bodice front and side front, pin wrong sides together.
Step 9
Now fold your ribbon piece in half. From the top of the bodice start 1 ½ in down for your first loop and then continue 1 1/2 in down. Now sew your seam at 1/8in. Go slow and make sure you caught everything; the mesh will slip. Repeat this step for the other side.
Note: If you want the loops to be closer use a ribbon with a smaller width. Also, pins are your friend use a lot of pins for this project.
Step 10
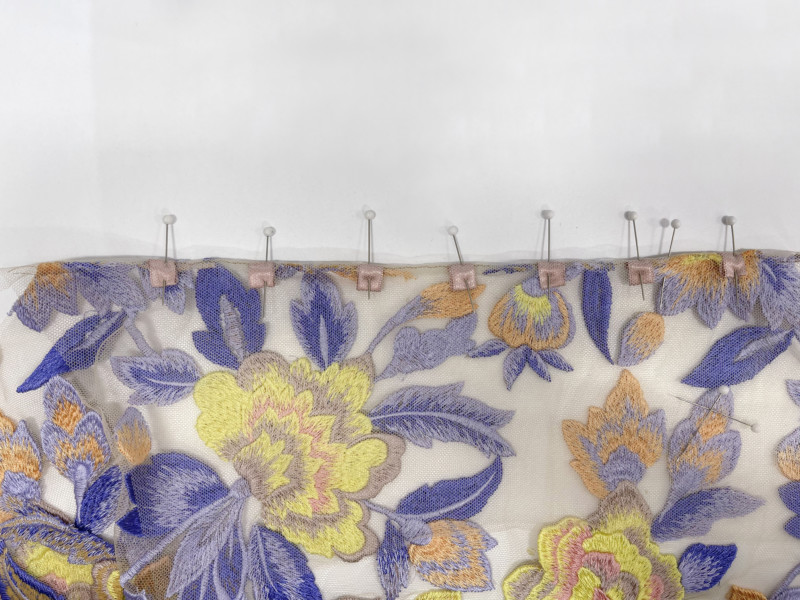
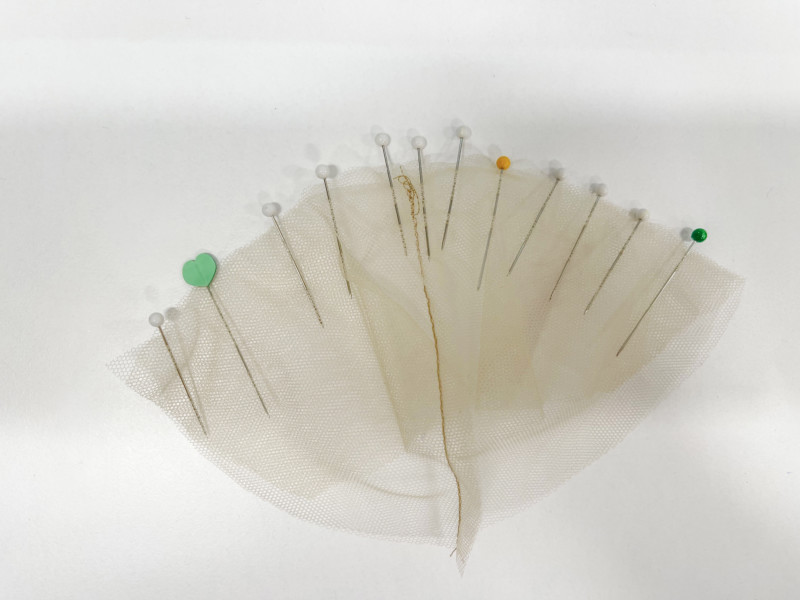
Flip the pattern over and sew the other side. When doing this make sure the loops are pinned straight and not sideways. If they are still sideways, you can adjust how straight they are with a pin when you are sewing with the machine. Repeat this step for the other side.
Step 11
Now sew the back to the side front, following the previous steps. This time you want to go down 3″ and then put the first loop. Note: it’s optional for you to do the 3 in you can adjust to any height you want to.
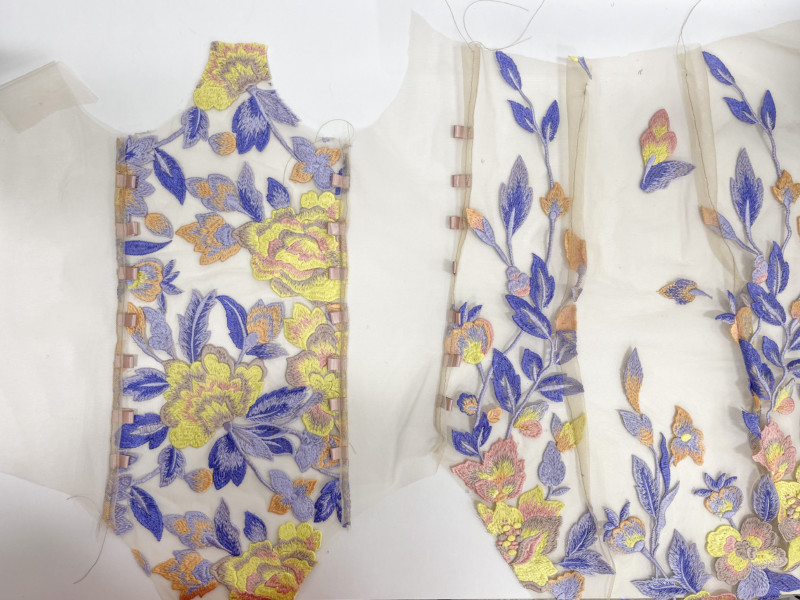
Step 12
This is what your bodysuit should look like at this point.
Step 13
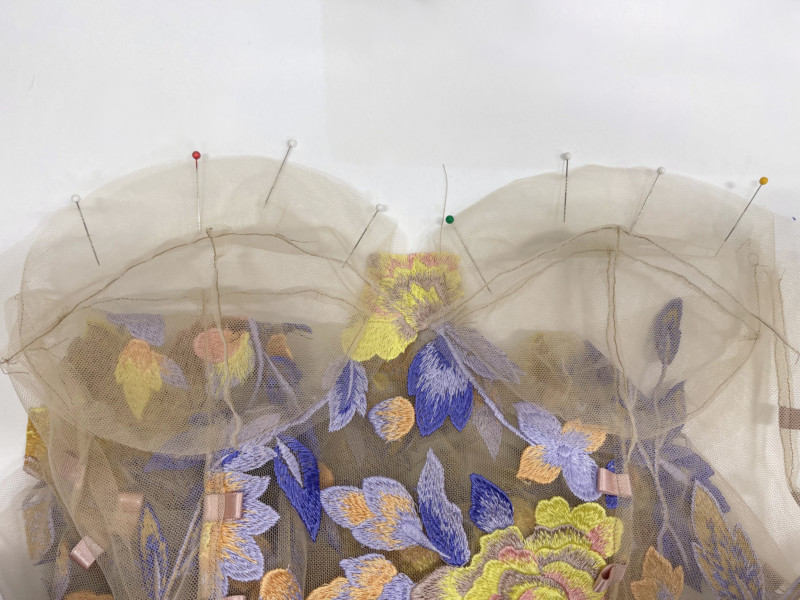
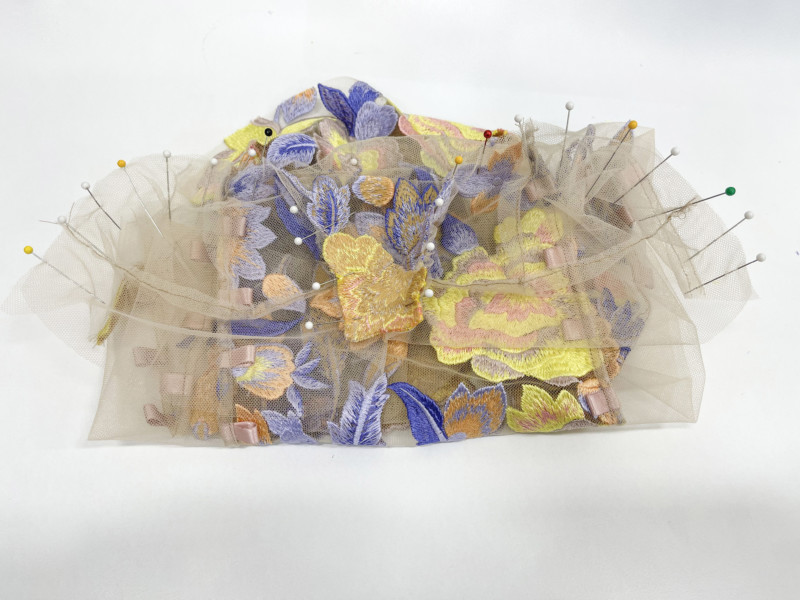
Close up your last side.
Step 14
Sew your crotch seam using a French seam.
Note: there is a slight curve, to keep that in mind when sewing.
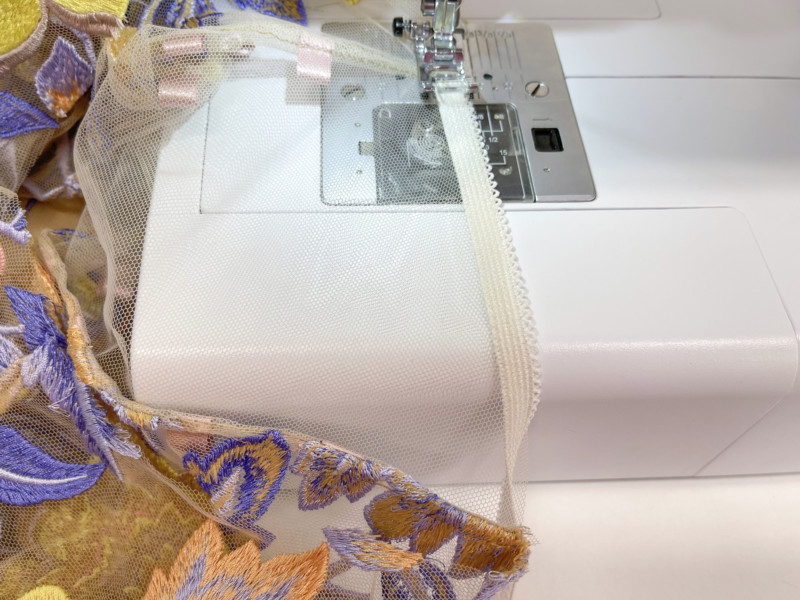
Step 15
Using a stretch stitch place the elastic on the outside of the back stretch and sew. Then fold the elastic under and use a regular long stitch to secure it.
Note: Make sure there is a decent amount of elastic for the back and it’s not too stretched out to the max.
Step 16
Sew the bra cup on the middle seam. Sew the lining as well so you will have two sets of bra cups. Note: Place a pin on the center front, so you don’t get confused later when sewing the next steps.
Step 17
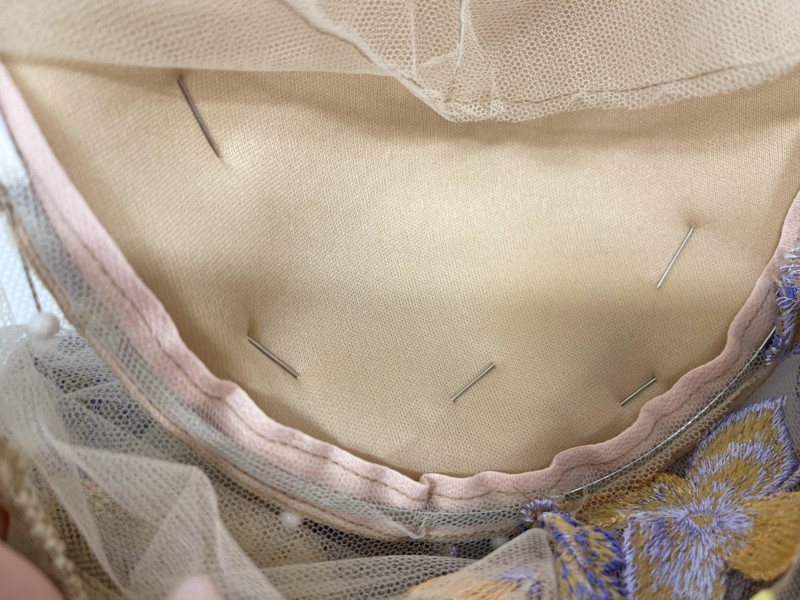
Sew the bra band matching notch in the middle. I would place a pin at the center front as well.
Note: To get the best results, start pinning from the middle and work your way towards the outside. This will help you avoid getting little pleats and tucks.
Step 18
Sew the lining to the top of the cup both bra cups.
Step 19
Now sew the cups to the pain part of the bodysuit. Make sure you start from the middle and then work your way out.
Step 20
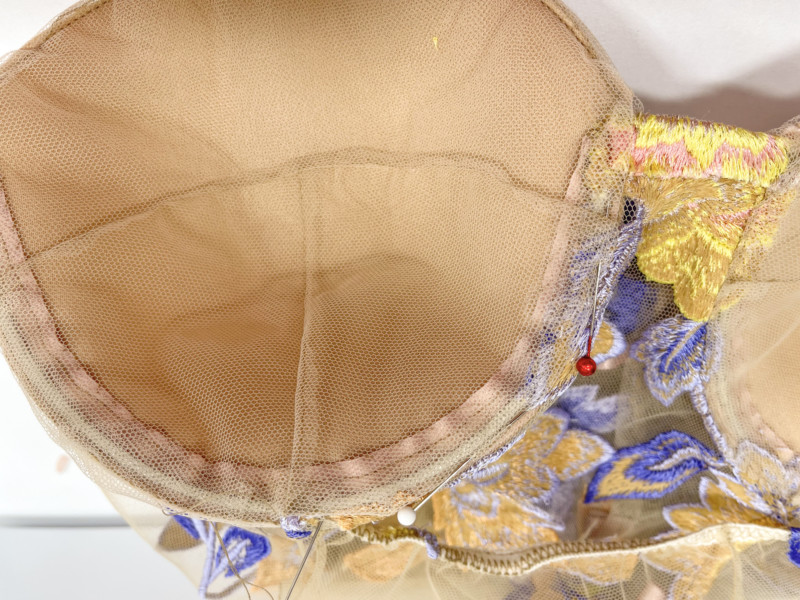
Now place your cups inside the bra and pin around the bottom making sure that the seam is underneath the bra cup.
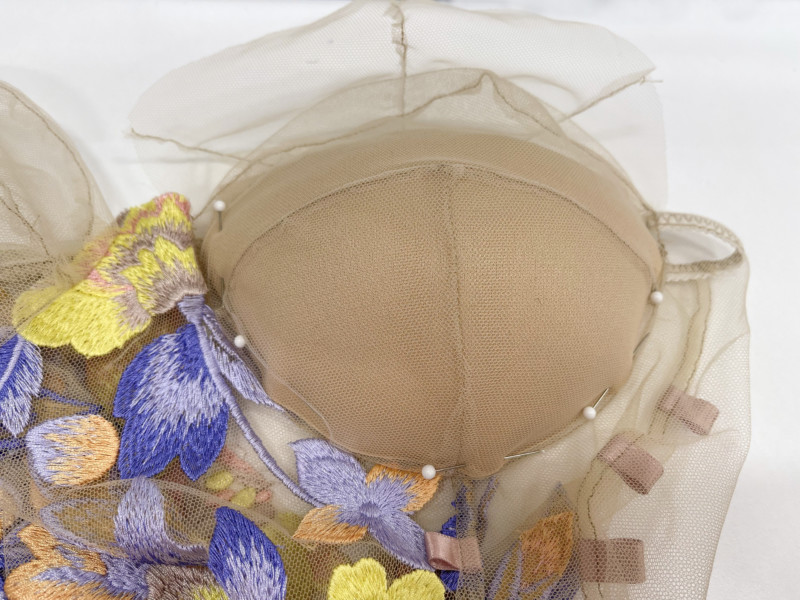
Step 21
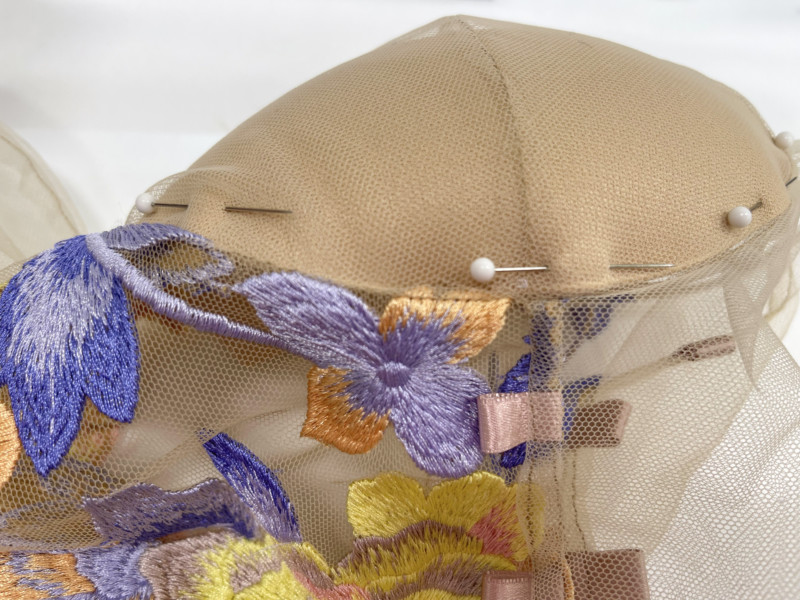
Now fold the lining to the inside of the bra cup, keeping the outside fabric flush to the cup. Place one pin in the center and continue to work towards the outside. You may need to trim a little bit of the cups on both sides to make the cup fit perfectly. Finish pinning and topstitch on the top of the edge.
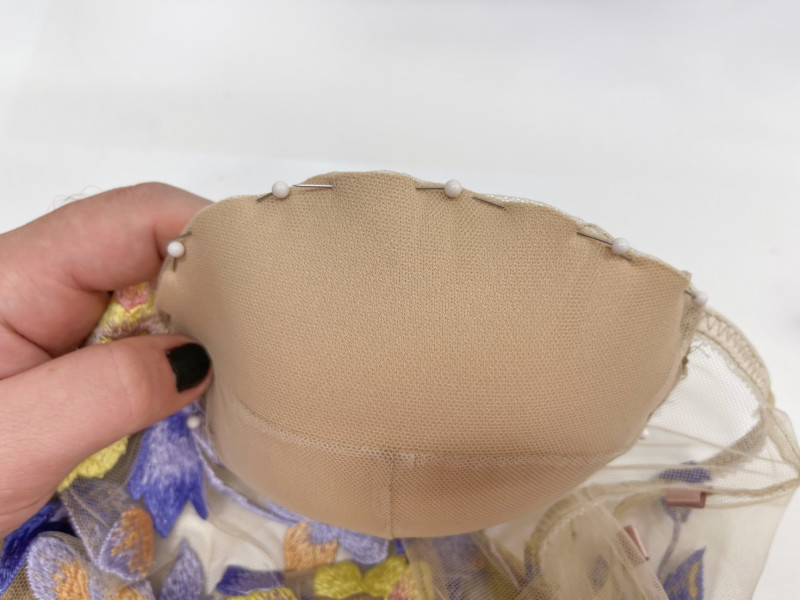
Step 22
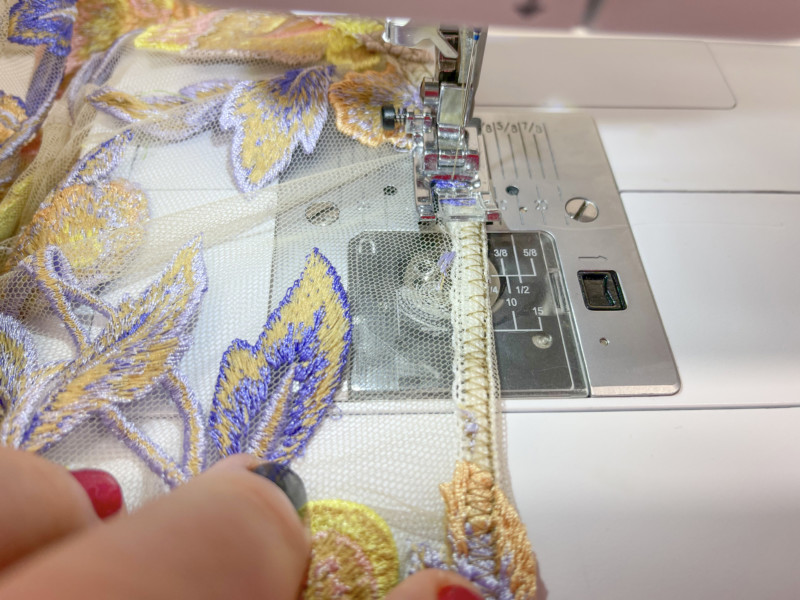
Measure around the bottom of the bra cup. In this case, it was 10″ for a size 4. Cut two strips of ribbon to size. Pin the ribbon to the seam allowance of each bra cup. Note: Leave a little extra ribbon so you can fold some over the underwire.
Step 23
Now sew as close as possible to your original seam, and then sew about 1/4″ on the outside of the ribbon. By doing this you will be creating the casing for the underwire.
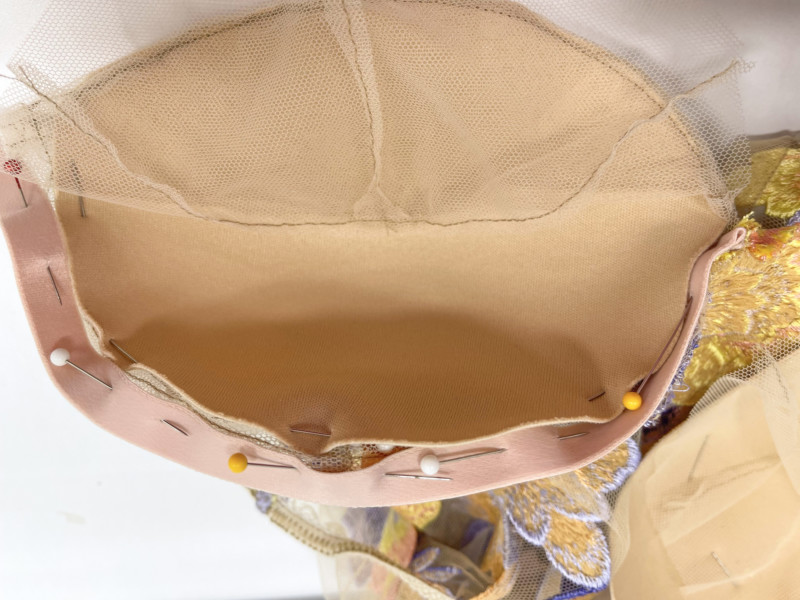
Step 24
Now slip your underwire in the channel. Adjust the bra cup and fabric is needed. Hand sew the ribbon to the bra doing a whipstitch. By doing this, you will keep the ribbon from rolling over to the outside.

Step 25
Once the ribbon is sewn down, pin the lining over it and hand sew the bottom shut.
Step 26
After hand sewing the inside, hand sew the bridge between the cups.
Step 27
Measure the leg hole and cut two strips of elastic. You are going to sew the leg holes exactly like you sewed the back.
Note: If you want the elastic to be tighter, cut less and stretch more as you sew.
Step 28
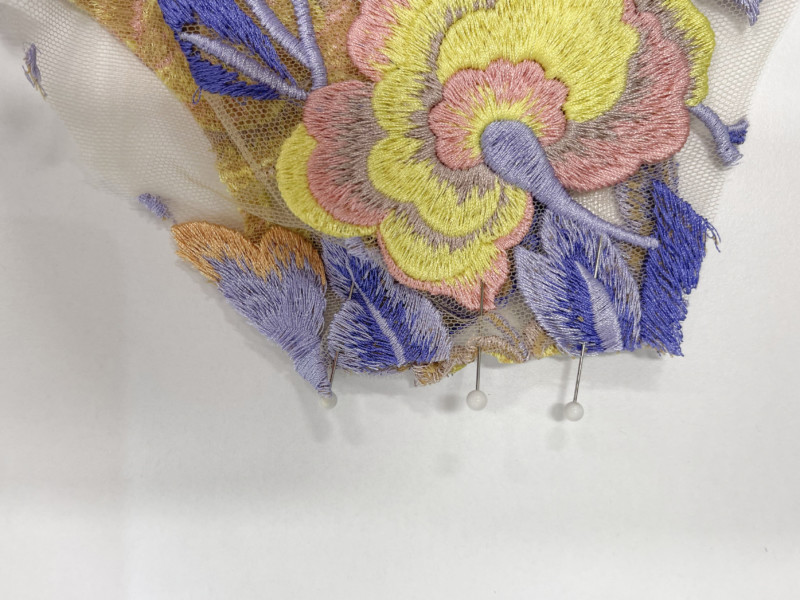
Using the extra fabric leftover, cut flowers out of the lace leaving about 3/8″ of mesh around each flower. I cut 7 for each side because odd numbers look better than even numbers. Pin flowers to the bodice and hand sew folding the mesh under.
Note: When you cut the flowers out and they have sharp corners, cut into the corner of the mesh, allowing you to fold it under.
Awesome
Hello! Does this pattern include a seam allowance? If so, how much? Love this pattern and am SO excited to try it!!
Yes, seam allowances are noted on the first page of the pattern! 🙂
What direction does the stretch have to be? Vertical or horizontal to the grainline?
hello, The garment should stretch in a horizontal direction, Thank you for asking.
I love the fabric you used!!
I’m really looking forward to making this piece! Could this bodysuit, minus the ribbons, be made out of a stretch or spandex material?
Hi, Sophie! Yes, it could 🙂
Love it I’m really looking forward doing it with a detachebale skirt but, even the size 00 is to small so I will need to adjuste de pattern.
The cups are not working. It seems the upper bra cup Part is not lang enough. Or I just messed up
Hi Sandra, make sure your seam allowances are 3/8″ for the bra 🙂
Hi! Why there is two pattern of cups? Is B/C cup for smaller breast and D for bigger or..? 😀
Hello! we’re sorry for the delay in responding to your question! We get dozens of comments and questions each day, and so many questions get buried and, unfortunately, unanswered. We are now focusing user support on patterns 2 years and newer. We hope this will prevent questions on our more current patterns from going unanswered. Although this is late, we wanted to respond in case anyone else has the same question: Yes there are two patterns for the cups. One pattern is for cups B/C and the other cup is for D cups! To ensure you’re proper fit, we recommend making a muslin.
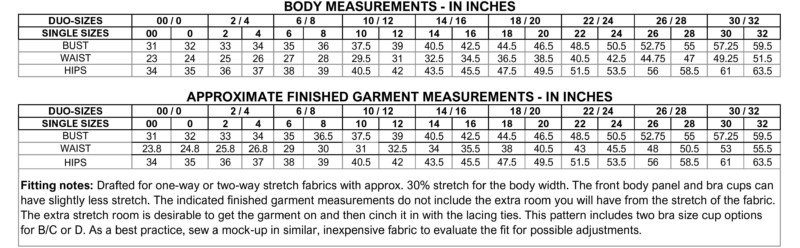
HI, for a model which is the standard model size, bust 86cm waist 66cm and hips 94cm what size should i cut from the pattern pls? as it keeps geting too big on her. thanks i really appreciate it
Hi! We suggest using the finished garment measurement chart to choose the appropriate size. 🙂
beautiful pattern, just i’m not sure i understood where the elastic goes…
Hi Samantha, the elastic goes on the top edge of the bodysuit – at the sides and back, and then also on the legs!
I did not find a way to print instructions for this pattern. My first attempt at download patterns -where did i miss it please?
Hi Carma, the instructions are located on this page, which you can print out if you need. We don’t offer additional instructions, as these patterns are free.
Hello! How would someone edit this pattern to not include space for the bust, for trans women or those with smaller chests?
Hi Charlotte, this would require a full bust adjustment. Here is a great guide for these adjustments.
Hey, to anyone who has already sewn this; how’s the bum coverage? Not too cheeky?
Hello, can I use a zipper in the back and leavr out the ribbon on the side?
Yes, you can leave out the ribbon on the sides as they are not really necessary. To add a zipper at the back, you will need to alter the back pattern by cutting it down the middle and adding the seam allowance for the zipper.