

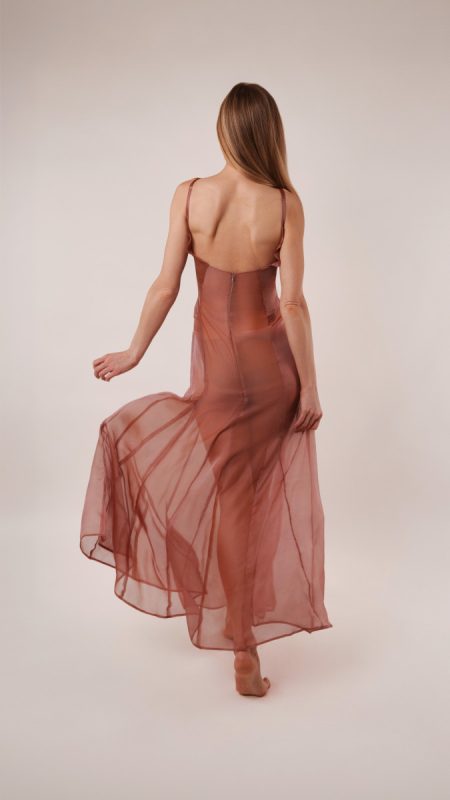
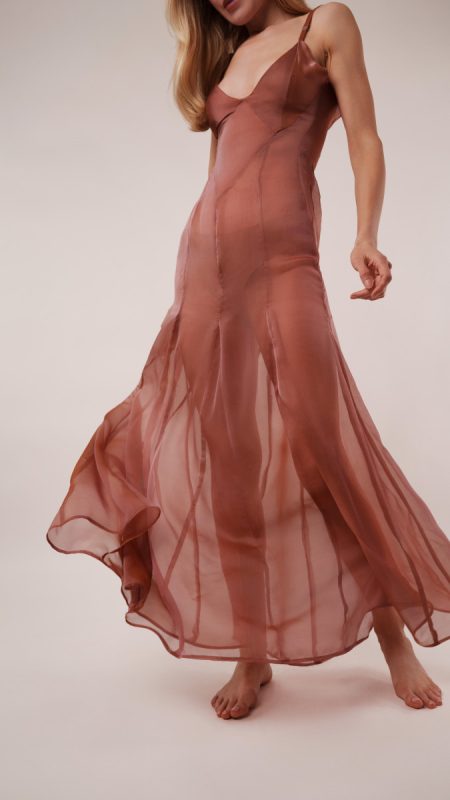
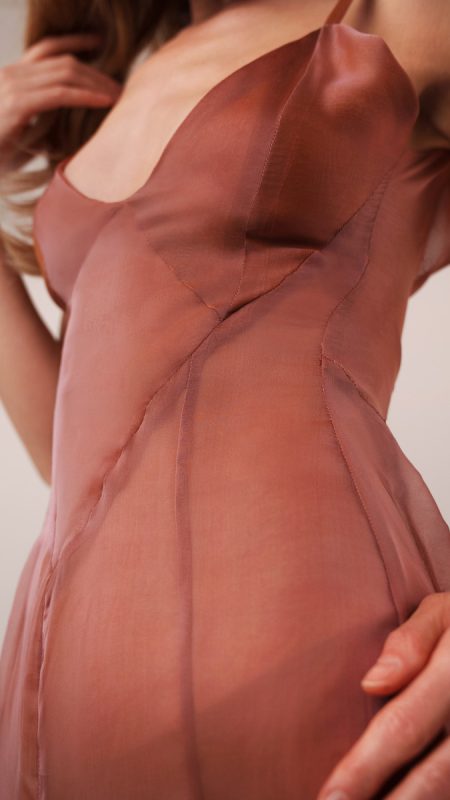
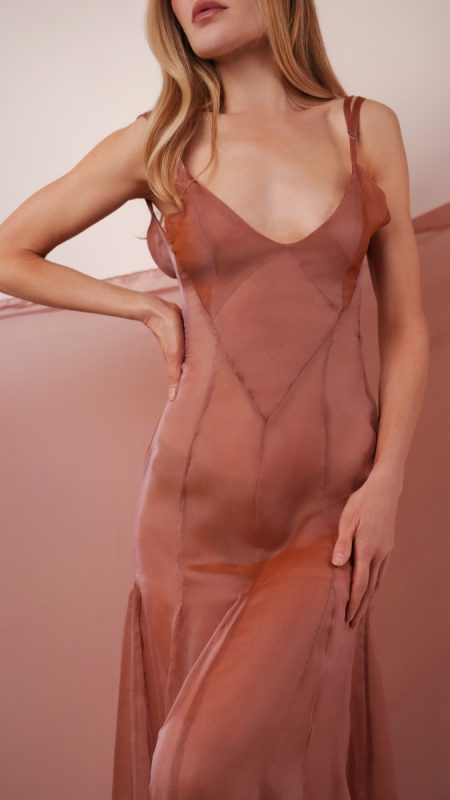
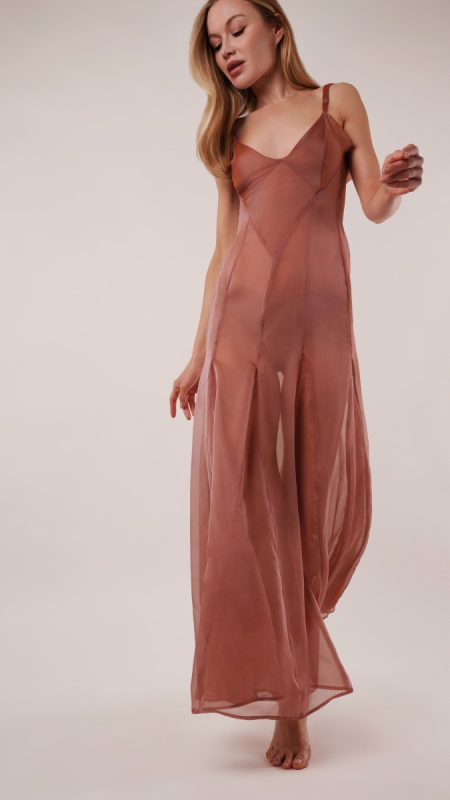
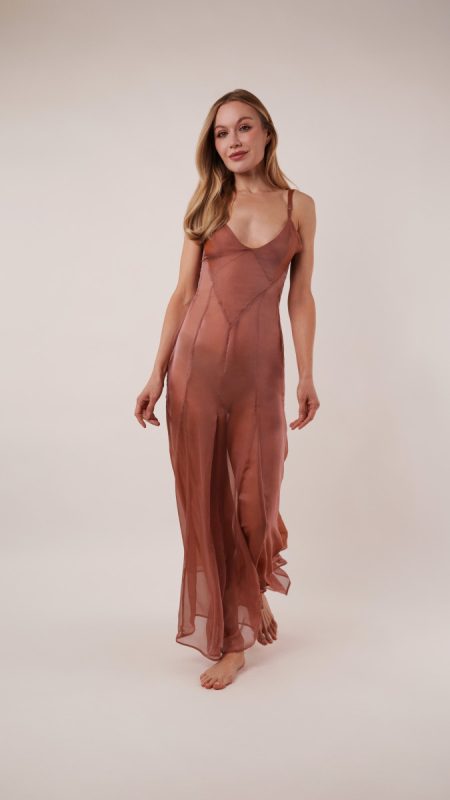
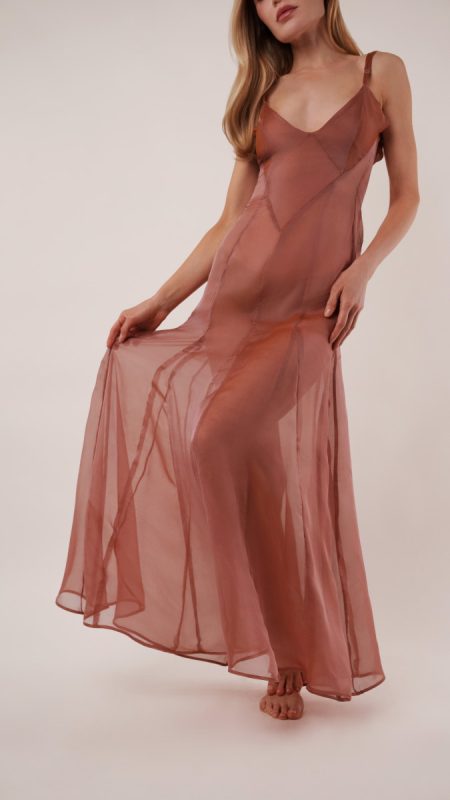
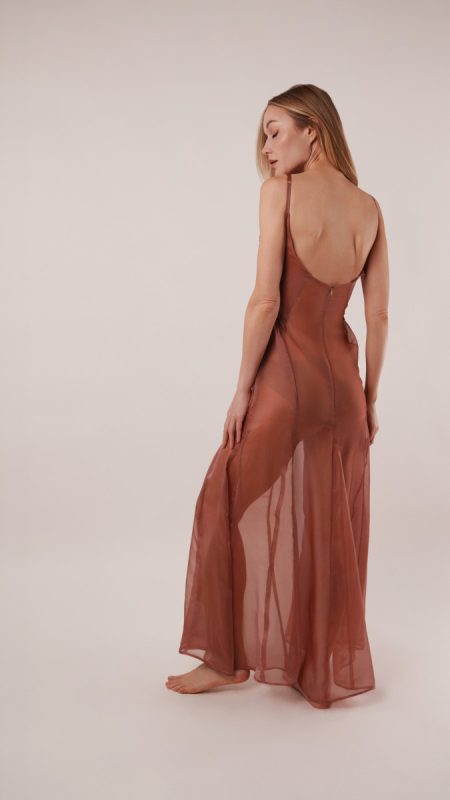
It’s always a good day for godets, especially when they’re part of the Rosolite Négligée Gown. Named after the rare garnet stone, this dreamy design captures the soft glow and delicate translucence of rosy crystal through layers of airy silk voile. Light catches every fold of the fabric, creating effortlessly romantic movement. With its plunging neckline, flowing silhouette, and sheer finish, this gown is made to turn heads.
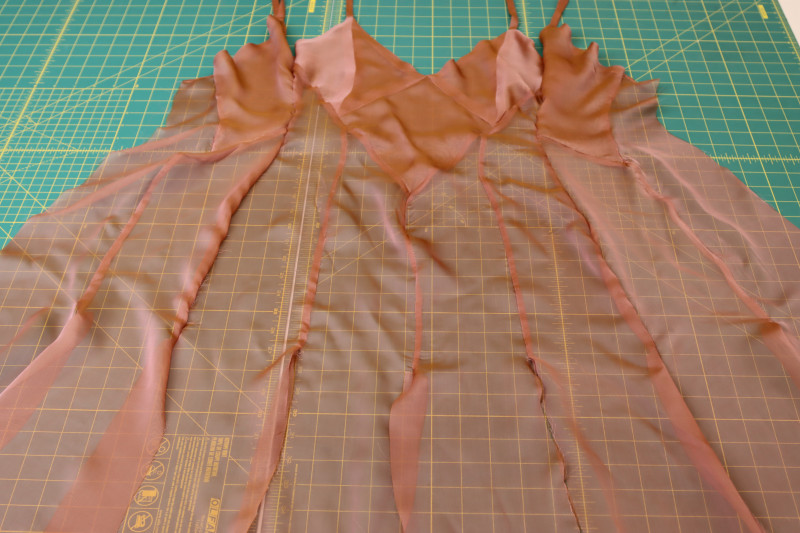
The construction of the Rosolite Négligée Gown is a rewarding challenge for sewists looking to experiment with shape and movement. The skirt is built with eight individual godets that create sweeping volume and a graceful, princess-inspired flare that billows beautifully with every step. Though the geometric assembly requires patience and precision, the final result is truly worth the effort.
Style it as an elegant lingerie dress, a breezy beach coverup layered over swimwear, or a standout music festival look paired with boots, cutoff shorts, and bold accessories. Whether worn lounging seaside at sunset or dancing under concert lights, the Rosolite Négligée Gown was designed for moments that feel like a movie.


Essential Materials & Sizing Guide for the Rosolite Négligée Gown
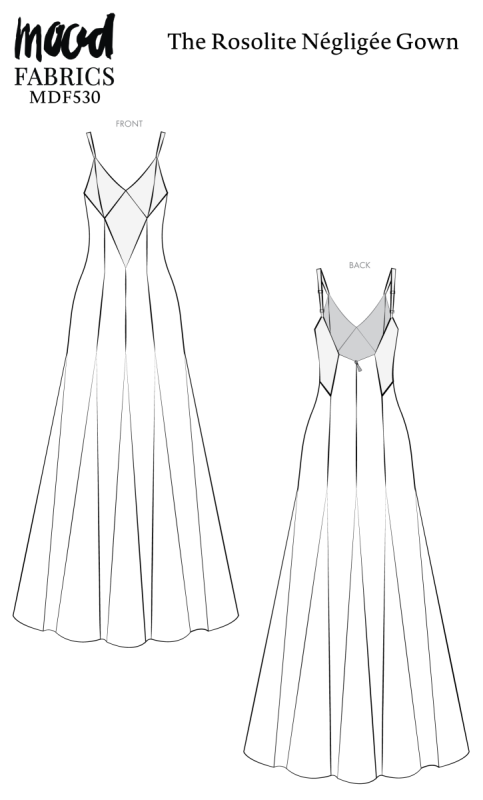
Continue reading for a breakdown of what knowledge and materials you need for creating your very own silhouette! We’ve got you covered with the recommended materials we used—if you want to follow along exactly—as well as a curated list of alternative fabric type recommendations if you want to customize your own version. The Rosolite Négligée Gown free sewing pattern download includes technical drawings for seam and silhouette visibility, plus a size chart to help you find your perfect fit!
Purchase Products Used Below:
Quantities indicated are for sewing a size small* négligée. Toggle the ‘SHOP THIS LOOK’ box to find quantity estimates for other sizes.
- 4.5 yards of Chiffon-Like Silk Voile – Rose and Brown Iridescent – Adelaide Collection
- 1 each of Nickel Metal Slider for 5/16″ Strap – Set of 4
- 1 each of Invisible Zipper 24″ by YKK – 334 Gray 2
- 1 each of Gutermann Sew All Thread 250m – 323 Old Rose
- MDF530 – Rosolite Négligée Gown Sewing Pattern (Free download below!)
Additional Products Used:
*Quick Tip! The ‘SHOP THIS LOOK’ box defaults to full-yard quantities. To order an exact half-yard quantity for any fabric, simply use the decrease quantity button (-) to subtract by the half yard. Then click “ADD TO CART” to add all materials to your cart. (Our system can only display full-yard quantities initially.)
Alternative Fabric Type Recommendations:
The Rosolite Négligée Gown sewing pattern is best suited for feather or light weight fashion fabrics. Explore other fabric types or colors from our featured collections for your silhouette with the links below.

Download Your Free Sewing Pattern
Submit your name and email in the form below to receive the download link for the Rosolite Négligée Gown free sewing pattern directly in your inbox. Mood Sewciety Patterns will send your free download link via email with the subject line: ‘Your Free Download from Mood Sewciety – The Rosolite Négligée Gown’ (in PDF format for A4 and letter-size printing).
© MoodFabrics.com / MoodSewciety.com – Mass production, resale, or distribution of this pattern in any form is strictly prohibited.
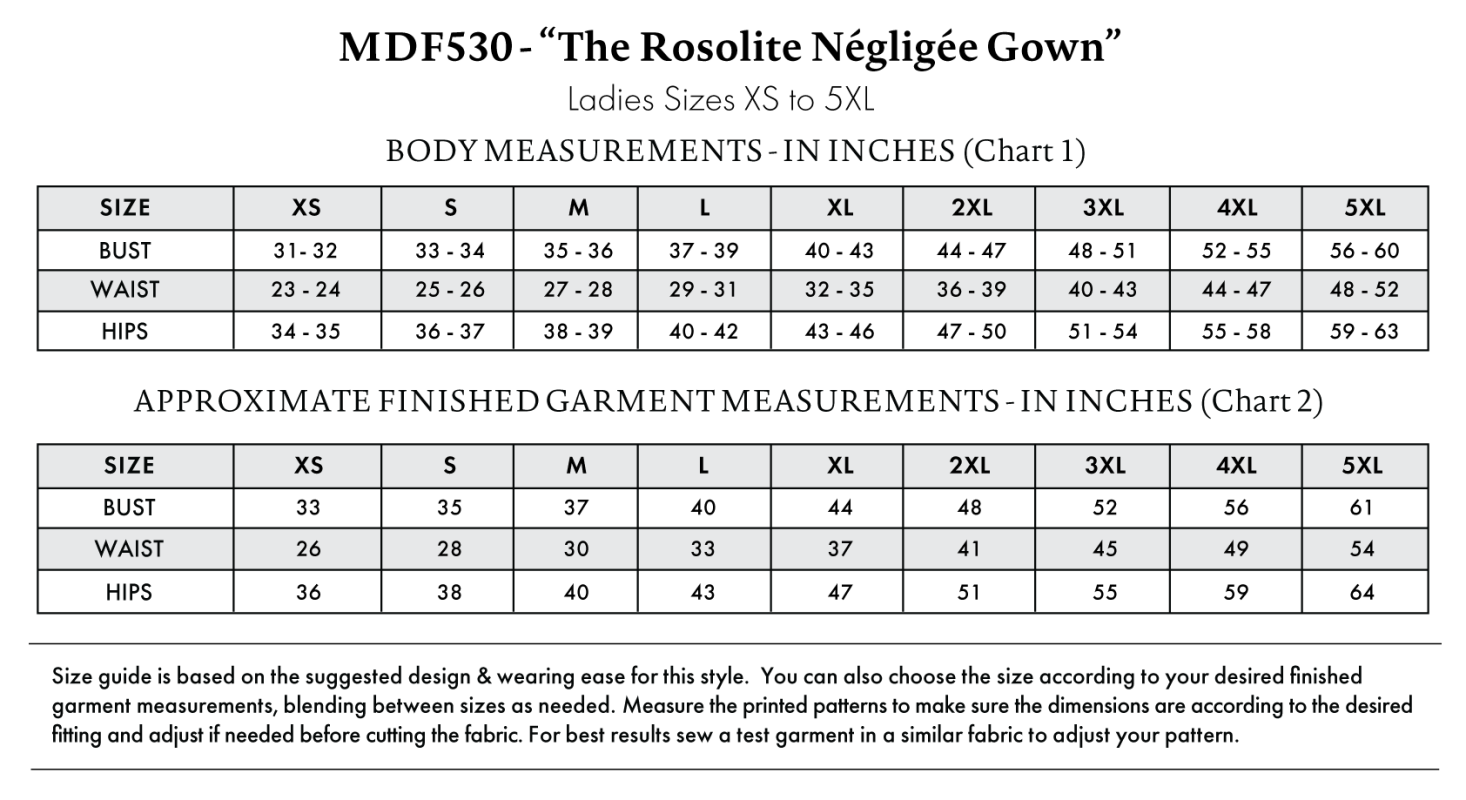
Find Your Perfect Fit
The Rosolite Négligée Gown Sizing Guide is based on the suggested design & wearing ease for this style. You can also choose the size according to your desired finished garment measurements, blending between sizes as needed. Measure the printed patterns to make sure the dimensions are according to the desired fitting and adjust if needed before cutting the fabric. For best results, sew a test garment in a similar fabric to adjust your pattern.
Note: Always read all the instructions before cutting the fabric!


How to Sew The Rosolite Négligée Gown
The instructions provided below are designed to guide you through sewing the Rosolite Négligée Gown from start to finish.
3 Tips for Sewing with Chiffon-Like Silk Voile
⇒ Use super skinny, super sharp microtex needles for your sewing machine to prevent thread pulls in the fine fabric.
⇒ For a super clean, super professional finish, sew French seams on every single seam that you can. This means you have to sew the fabric wrong sides together with a ¼ inch seam allowance, press the seam flat, flip the fabric right sides together, then sew the seam again with another ¼ inch seam allowance.
⇒ Make sure when cutting out your pattern pieces that the fabric is not at all distorted on whatever surface you’re using to cut. This fabric shifts around a lot on the bias, so you want to make sure your grainlines are perfectly perpendicular to each other before cutting out the fabric.
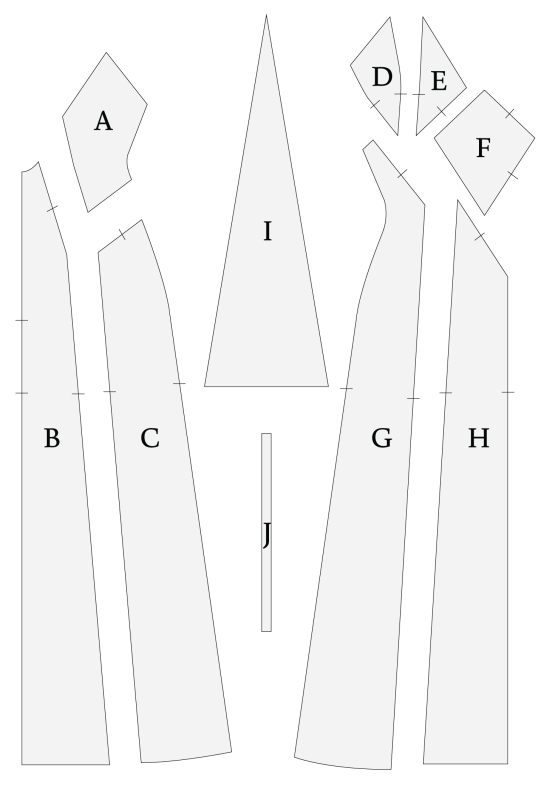
Pattern Pieces & Fabric Cuts Needed
- (A) BACK SIDE UPPER
- Fabric – Cut 2 Mirrored Sets
- (B) BACK CENTER
- Fabric – Cut 2 Mirrored
- (C) BACK SIDE LOWER
- Fabric – Cut 2 Mirrored
- (D) CUPS SIDE
- Fabric – Cut 2 Mirrored Sets
- (E) CUPS CENTER
- Fabric – Cut 2 Mirrored Sets
- (F) FRONT CENTER UPPER
- Fabric – Cut 2
- (G) FRONT SIDE
- Fabric – Cut 2 Mirrored
- (H) FRONT CENTER LOWER
- Fabric – Cut 2 Mirrored
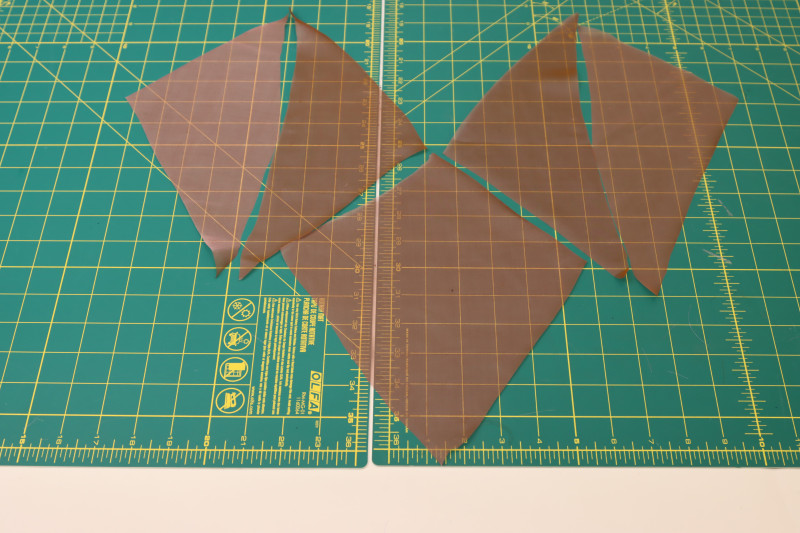
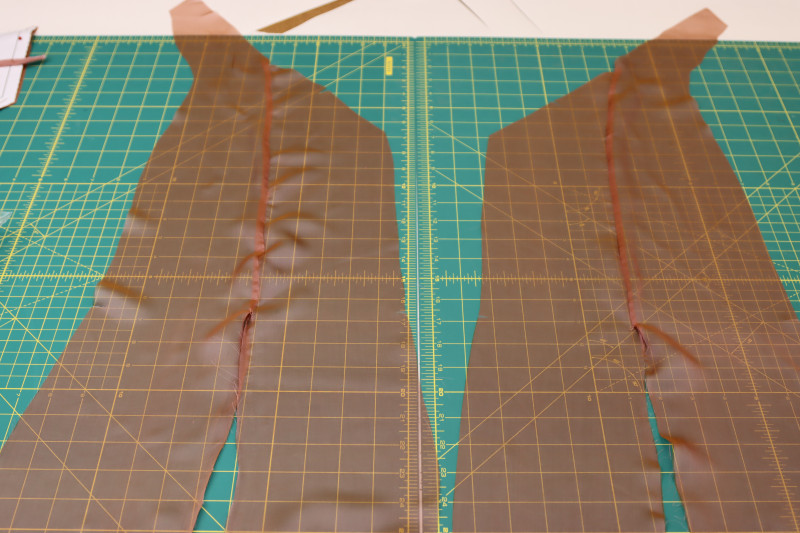
- (I) GODETS
- Fabric – Cut 8
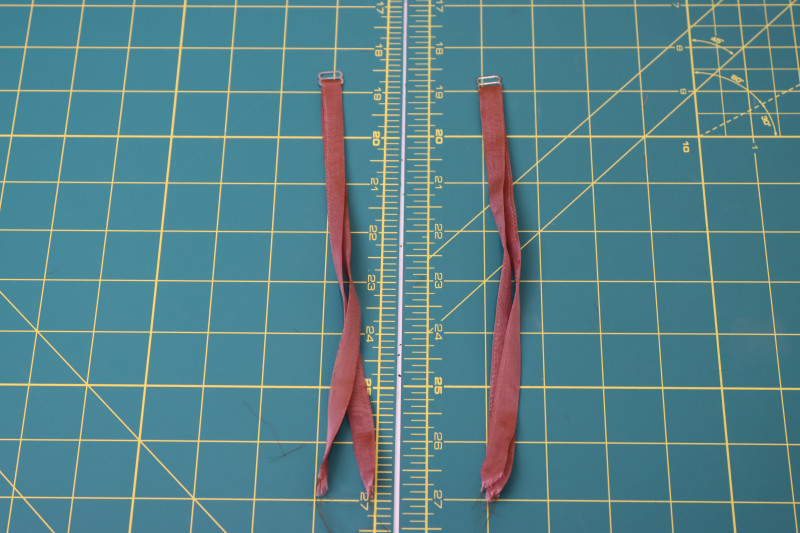
- (J) SHOULDER STRAPS
- Fabric – Cut 2
Sew with a 1/2″ seam allowance for all seams unless otherwise specified.
Step 1
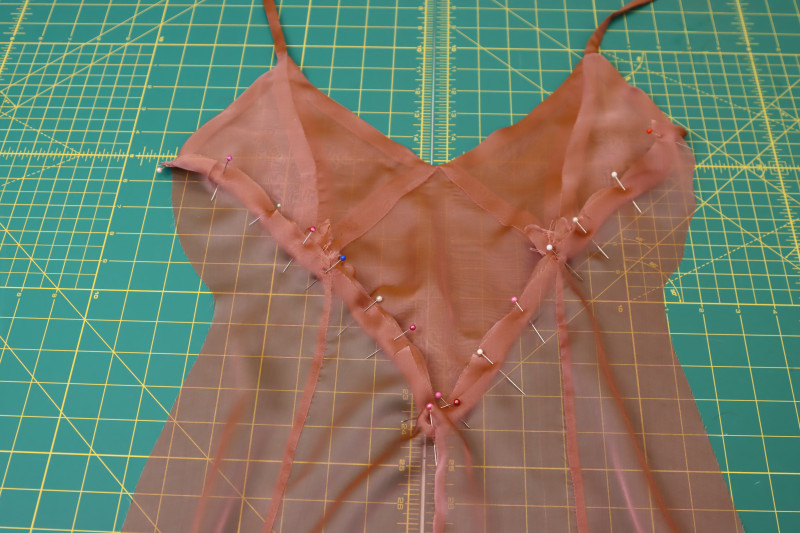
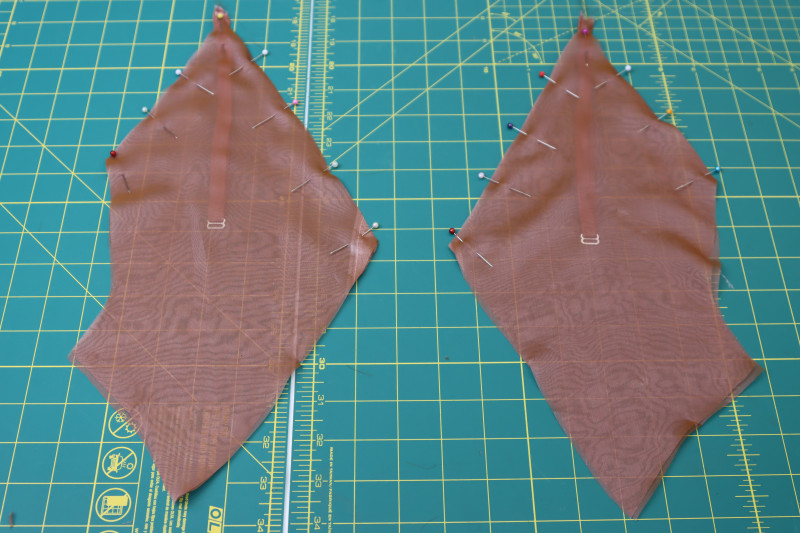
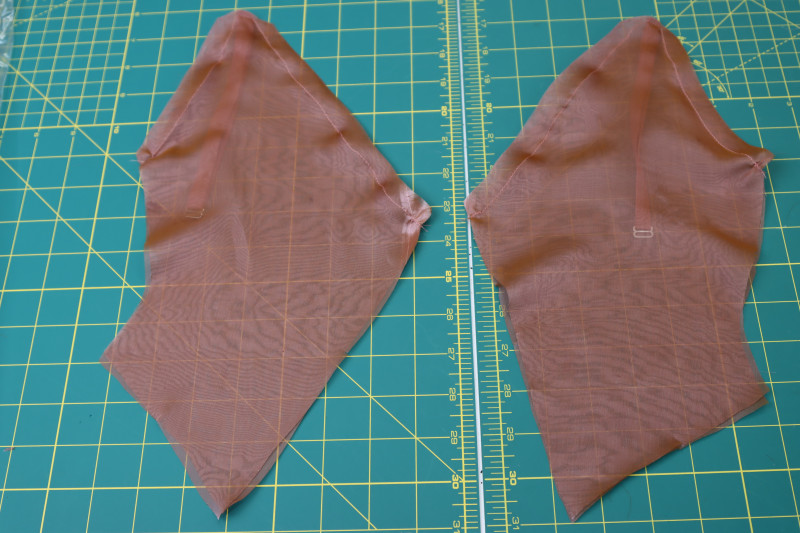
FRONT BODICE
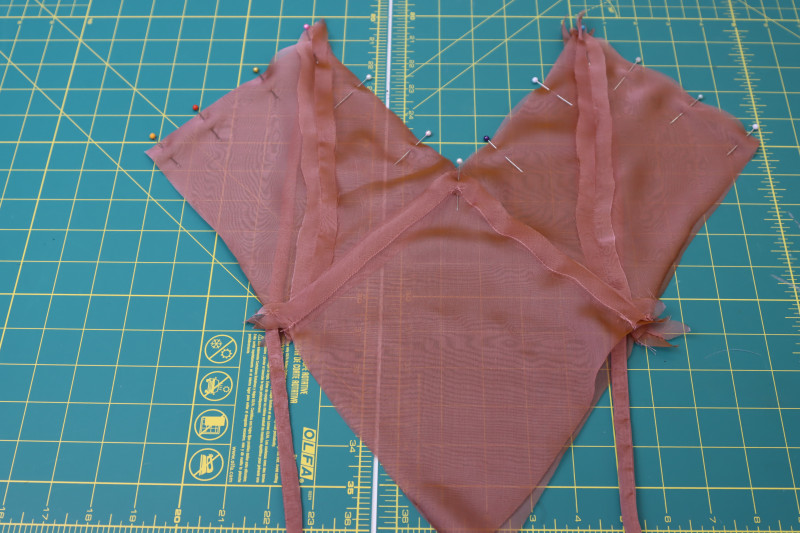
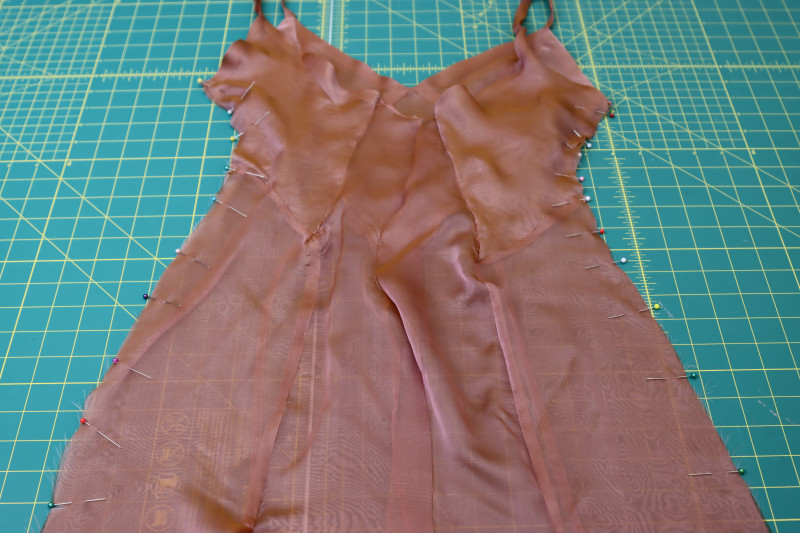
- Layout the front bodice pieces as shown in the photo below.
- Pin and sew the bra cups right sides together.
- Press the bra cup seams open and flat.
- Pin and sew the bra cups one at a time to the center front diamond piece, right sides together.
- Repeat this step twice to get two layers of bodice.
Step 2
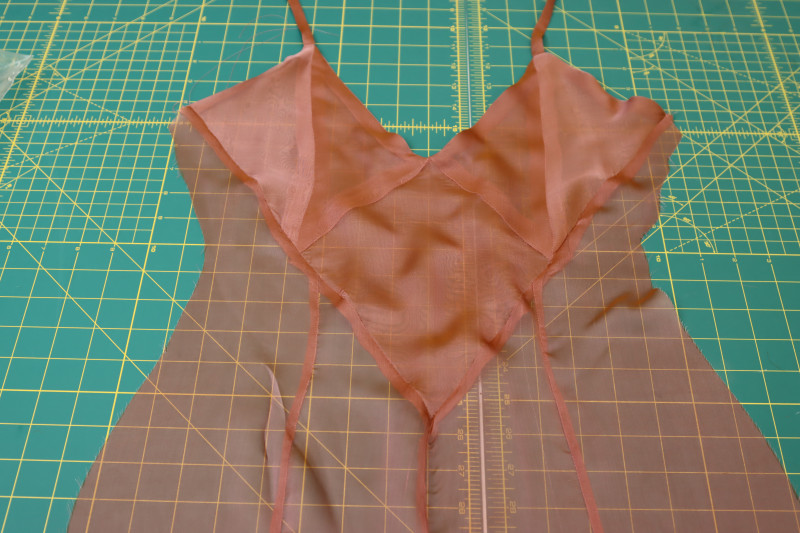
STRAPS
- Fold the straps longways, right sides together.
- Sew the folded straps with a ⅛ inch seam allowance.
- Flip the straps right sides out with a loop turner.
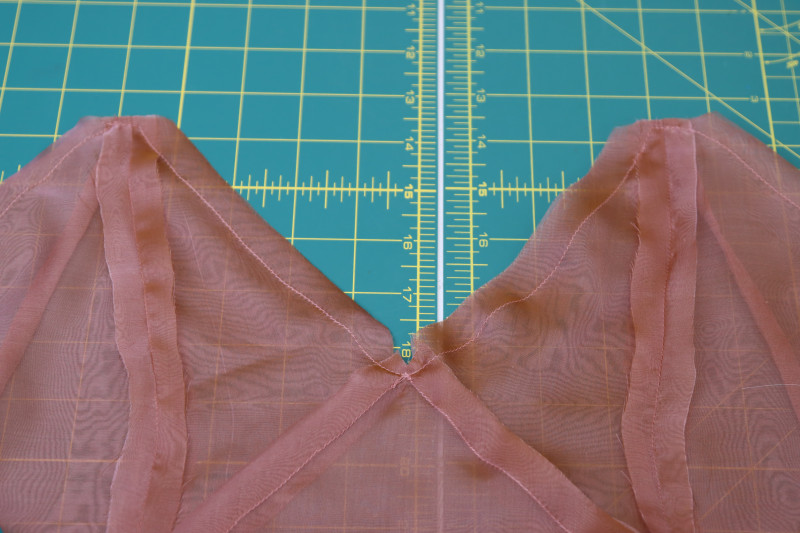
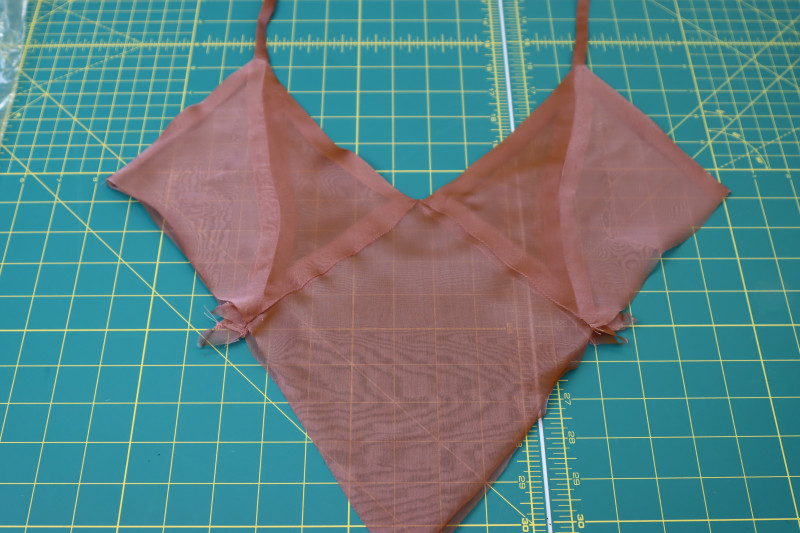
- Place the front bodice pieces right sides together.
- Sandwich two of the straps in between the front bodice layers.
- Pin the top neckline and straps of the front bodice.
- Sew along the pins, securing the straps in place.
- Clip the seam allowance on the top corner of the bra cups.
- Flip the front bodice piece right sides out and press the seams.
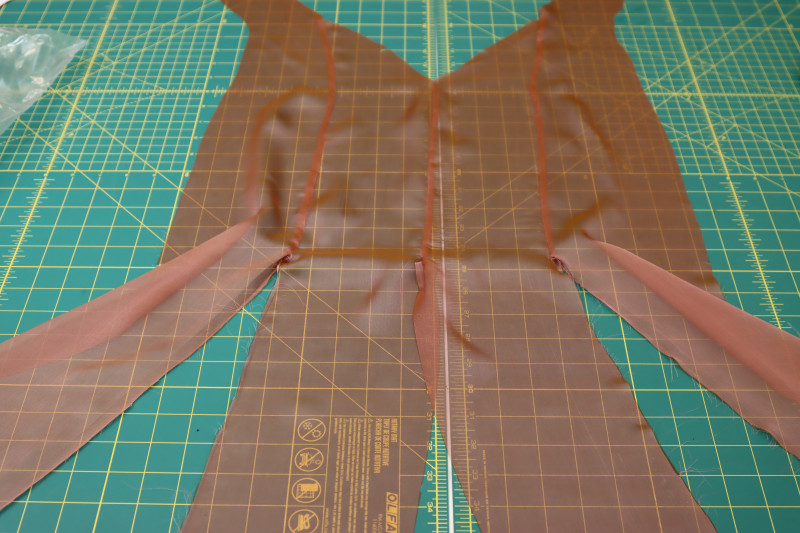
Step 3
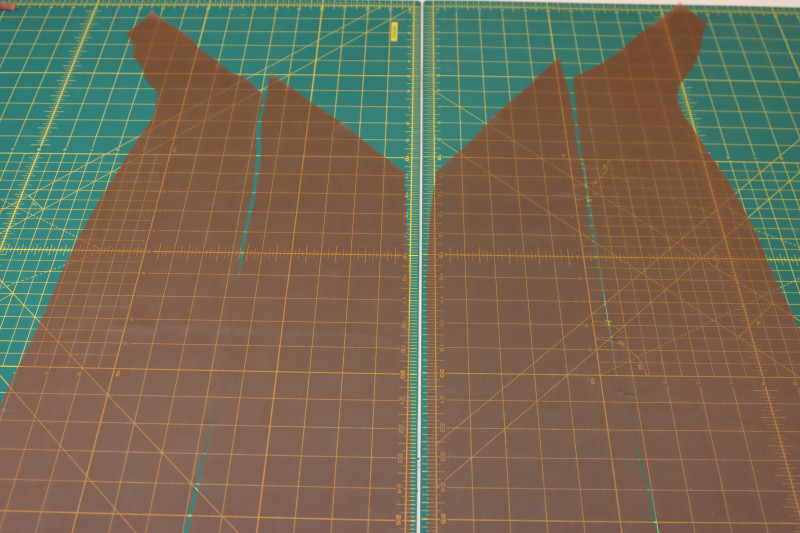
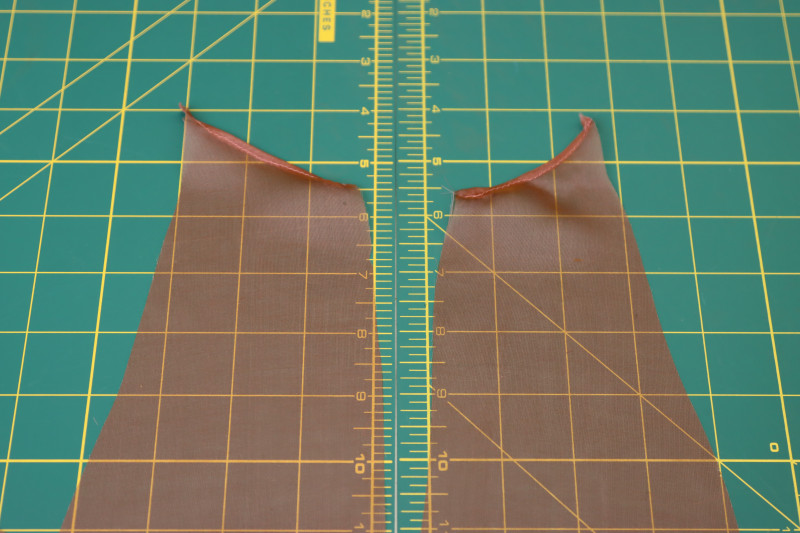
FRONT SKIRT
- Layout the front side and front center skirt pieces as shown in the photo below.
- Use french seams to attach the front side pieces to the front center pieces, only down to the notch where the godets will be inserted later.
- Use french seams again to attach the two front center pieces together.
- Press all the french seams towards the side seams.
Step 4
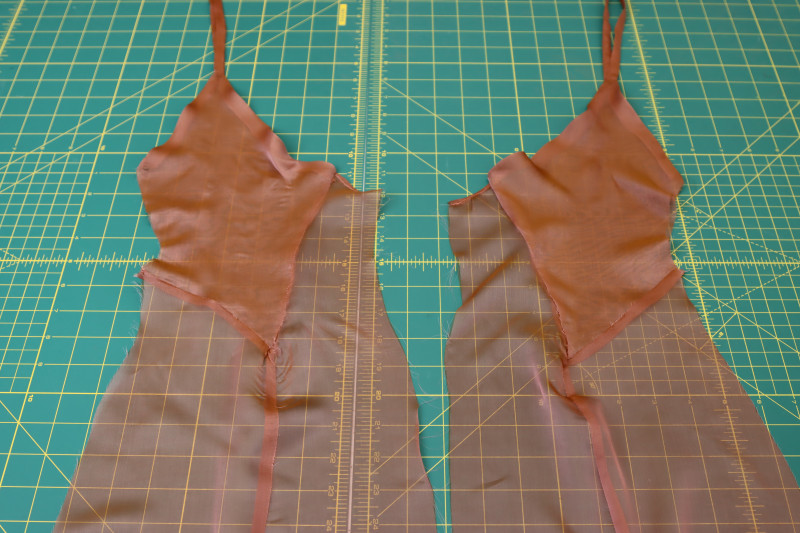
ATTACH FRONT SKIRT
- Use french seams to sew the top of the front skirt to the bottom of the front bodice.

Step 5
BACK BODICE
- Insert the other two straps (back straps) into the bottom hole of the metal bra strap sliders.
- Place the two back bodice pieces right sides together.
- Sandwich the back straps between the back bodice pieces.
- Pin the necklines of the two back bodice together, making sure to also pin the straps in place.
- Sew along the pins.
- Clip the corners of the back bodice.
- Flip the back bodice pieces right sides out and press the seams.

Step 6
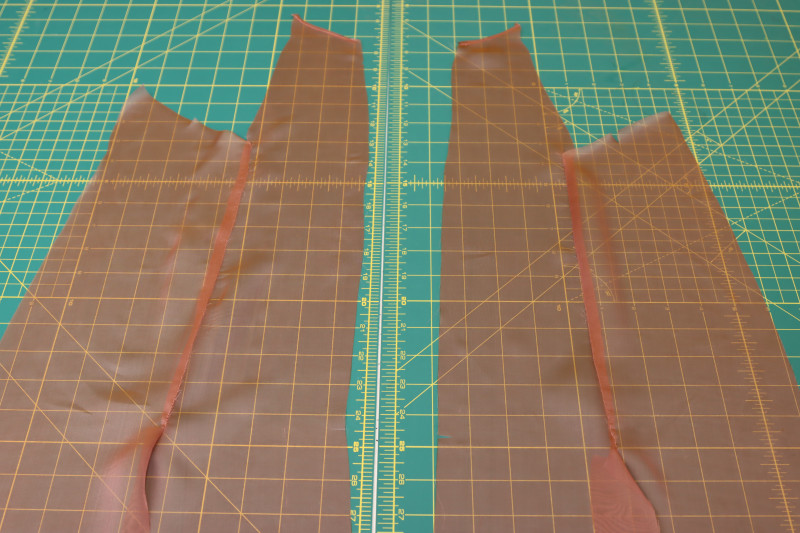
BACK SKIRT
- Hem the top edge of the center back skirt pieces with a double rolled hem.
- Use french seams to attach the center back pieces to the side back pieces as shown in the photo below
Step 7
ATTACH BACK SKIRT
- Use french seams to sew the top of the back skirt to the bottom of the back bodice.

Step 8
SIDE SEAMS
- Use french seams to sew the side seams of the dress together.

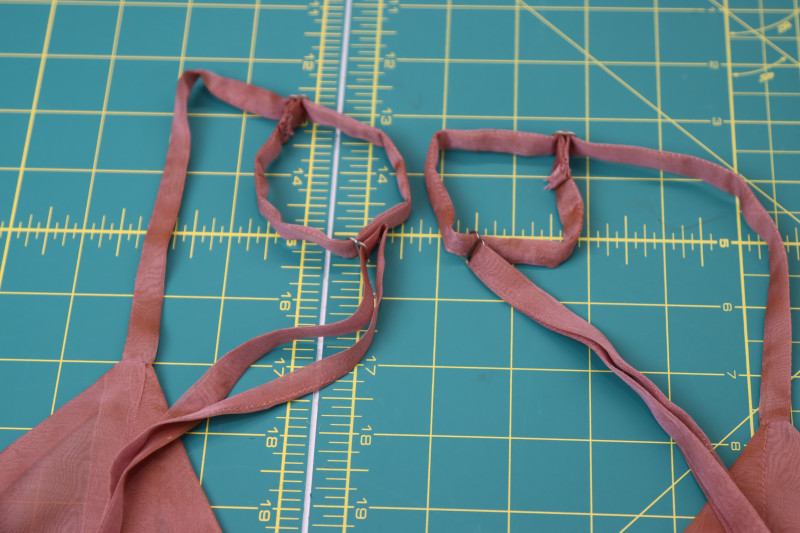
Step 9
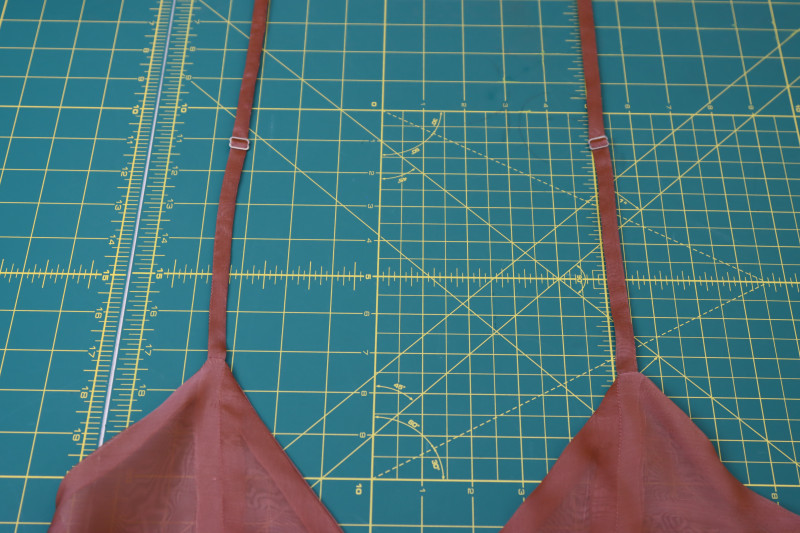
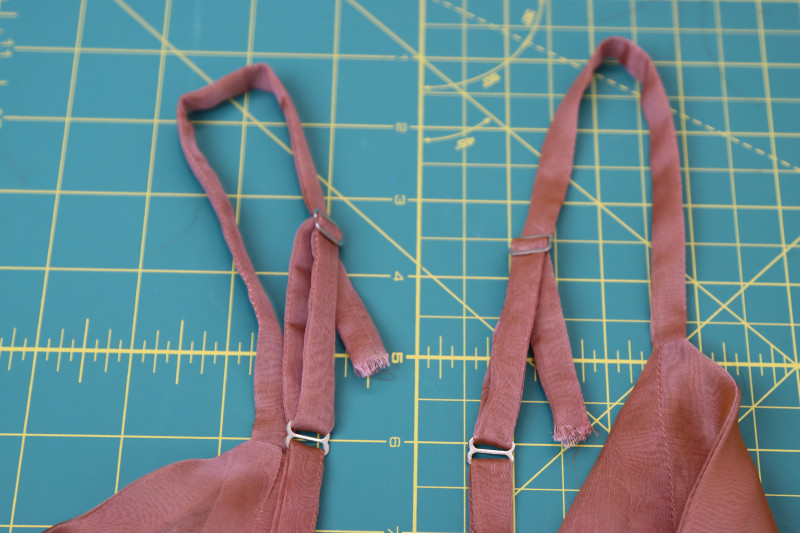
STRAP ADJUSTERS
- Insert the front straps in through one hole and out the other hole of the strap adjusters.
- Insert the front straps through the top hole of the back strap adjusters from outside to inside.
- Put the front straps back through the first adjusters in one hole and out the other.
- Hand stitch the raw edges of the front straps to themselves to secure the strap adjusters.

Step 10
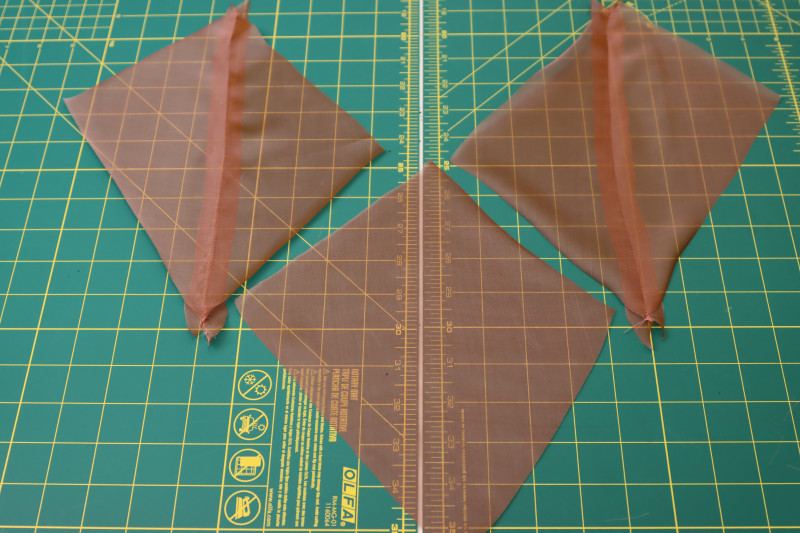
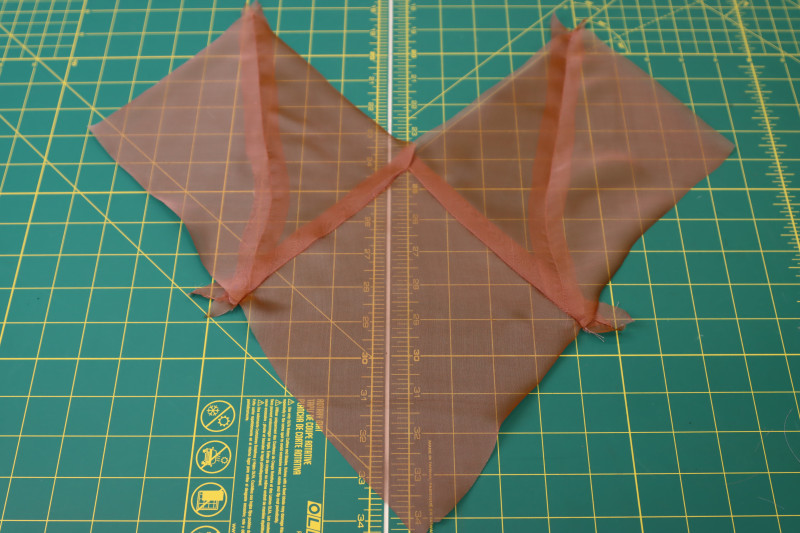
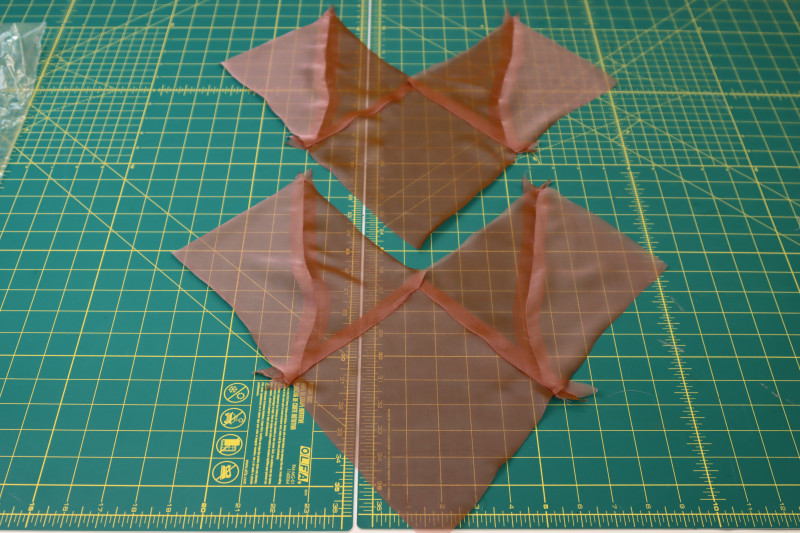
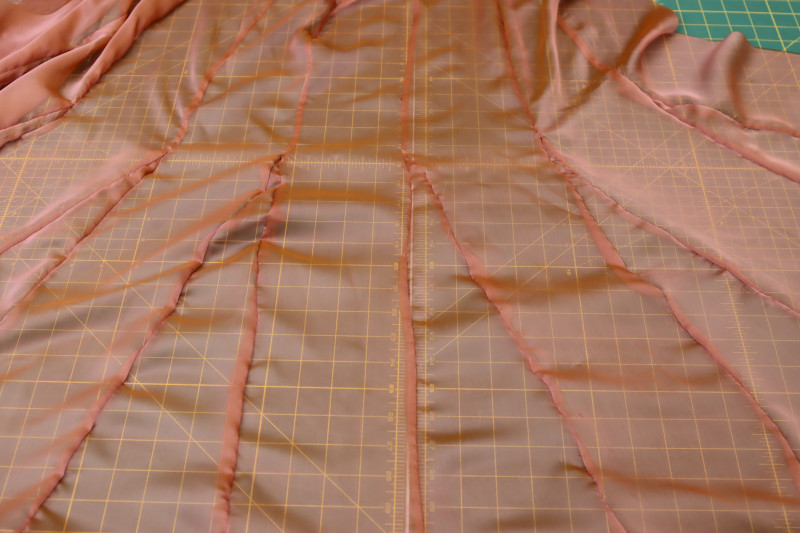
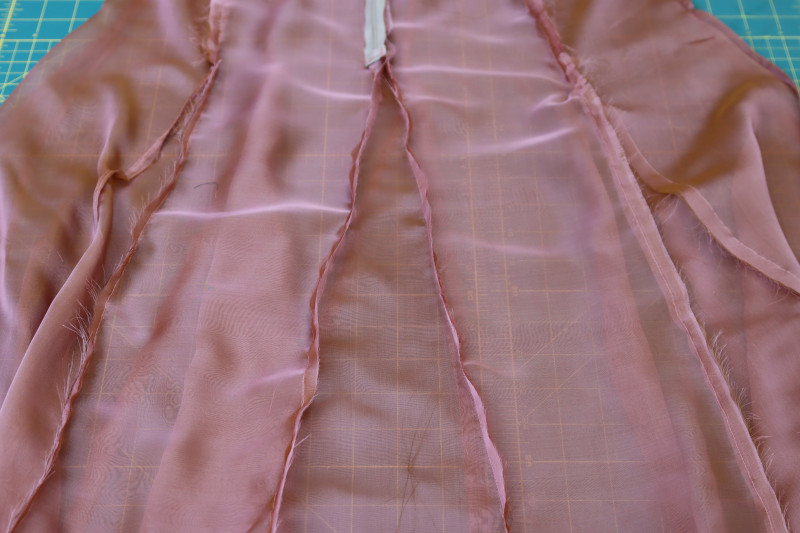
GODETS
- Take one of the godet pieces and start with the side seams of the dress.
- Pin one side of the godet wrong sides together with one of the sides of the godet slit.
- Press the seam open and flat, then sew a french seam on the first side of the godet.
- Sew the other side of the godet to the other side of the slit using a french seam again.
- Press the french seams toward the side seams.
- Repeat these steps until you’ve sewn all the godets except for the one that goes under the zipper in the center back of the dress.
Step 11
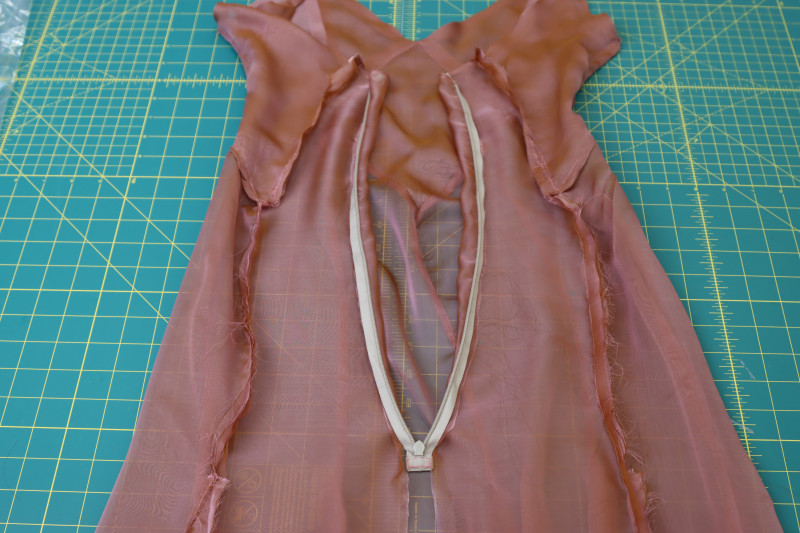
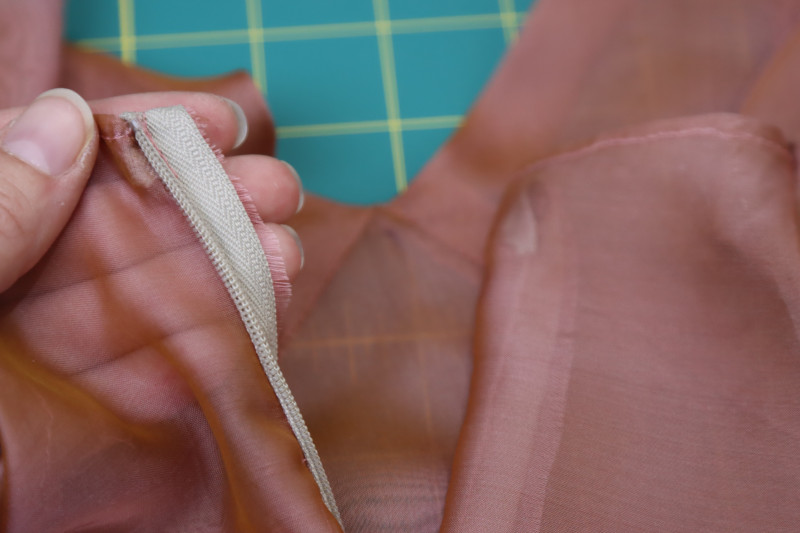
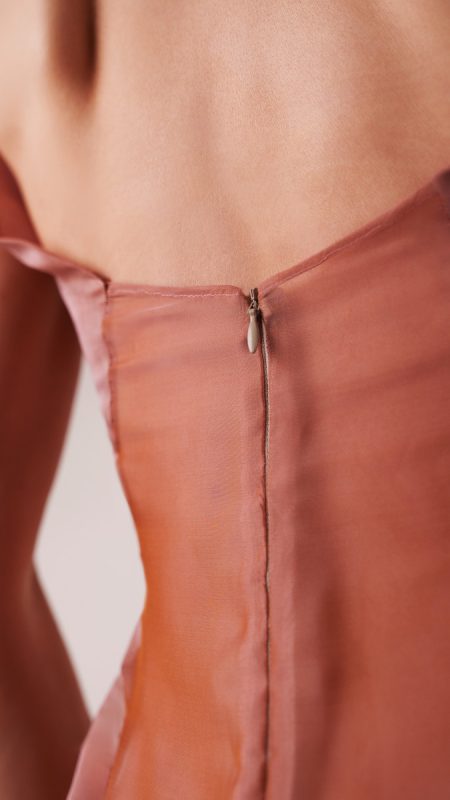
INVISIBLE ZIPPER
- Pin and sew the zipper tape right sides together with the center back seam of the dress.
- Zip the zipper.
- Insert the last godet under the zipper into the center back seam.
Step 12
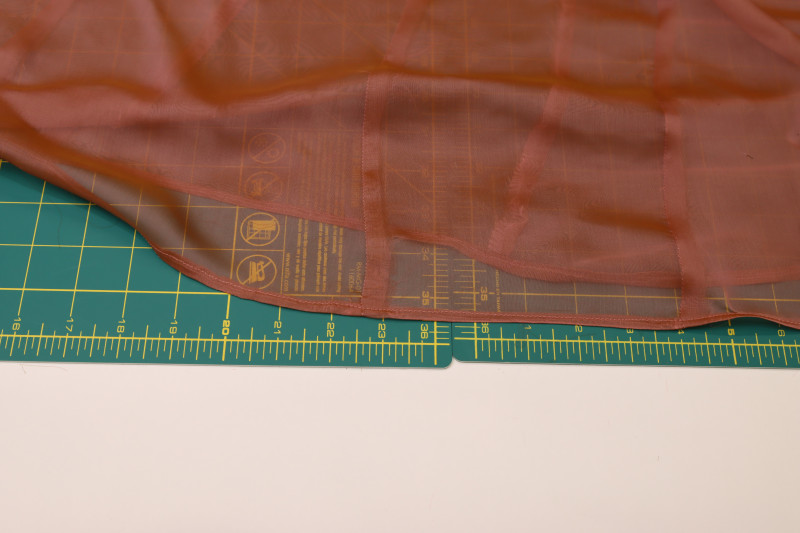
HEM
- Sew a double folded ¼ inch hem into the bottom of the dress.
Sewing Success: The Finished Rosolite Négligée Gown
Share this post with a friend (or two!), download the Rosolite Négligée Gown free sewing pattern, and show us which fabrics and colors you choose, using the hashtags #MoodRosolitePattern & #MadeWithMood—and don’t forget to tag us @MoodFabrics, too.


Free Sewing Pattern Inspiration for Your Next Project
With 525+ free sewing patterns and counting, your opportunities for sewing with Mood are endless!
We hope you had as much fun sewing this négligée pattern as we did! As always, we want to hear from you—share your thoughts and comments below and let us know where you’ll be wearing the Rosolite Négligée Gown free sewing pattern!
Can’t get enough sewing with Mood? Browse your next make with our latest free sewing patterns.
Nearly every image shows the fit under the arms is gaping. Is that the intent?
Hey TJ, the fit will be different on everyone, but if you want to eliminate gaping, you can always take the dress in at the side seams AND at the seam between the back center and back side pieces. This will help eliminate gaping, but you won’t know if it gapes on you until you try it on.
Thank you for your inspiration.
Look forward to seeing again with new patterns
This is so cute. if I wanted to make the godets look fuller, how would I do that? Would I need to add more fabric?
Hey Sharee! You would probably want to get more fabric since the godets will use more. TO make them fuller, you can slash and spread the godet pattern piece to make it a wider triangle.
Would using a lightweight cotton work well for this pattern to make a summer dress?
Hey Annabelle! Yes, I think a lightweight cotton like a voile would be great for this pattern.
Slash as in, cut in half to make it wider?
That’s correct. If you look up a youtube video on how to slash and spread a pattern piece, it is pretty straight forward. You’ll want to cut a few slits from the bottom of the godet to the top, but DON’T cut all the way through the top, leave it attached with like 2cm of paper. Then, spread the slits open and tape the new pattern piece to a new piece of paper to keep it in that shape. Then that will be your new pattern piece. This method can be used for a lot of different pattern pieces and it’s a super easy way to manipulate the pattern without messing with important dimensions.
The bust detail is SO CUTE! It looks like a heart!!
What other fabrics can you use to make this,I’v never sewn with Chiffon -Like Silk ,and don’ want to start .
I don’t blame you, William, silk chiffon is really really hard to sew. Alternately, you can try this dress with cotton voile, which is still thin like chiffon but it’s a bit more stiff and easier to sew.
I’m wondering how this would look with a pleated chiffon…would probably have to get about double the pleated chiffon to make it work….but I kind of want to try it now
That would be SO pretty, I can already picture it. Maybe even a pleated georgette?
If I wanted to omit the zipper and use a stretch material; so maybe go 1 size smaller accounting for stretch, would this be possible. Or is this strictly for a woven material
You can definitely use stretch material instead of woven for this. I would just check the finished garment measurements like you said.
This is such a beautiful dress! Do you think it would work with organza?
Absolutely! This silk voile that was used for the pattern has a very similar feel and weight to chiffon.
I made this in a 4 way stretch mesh without a zipper and it came out great. I sized down (my measurements are M, I made an S) and slightly modified the underarm to avoid the gaping. The stretchy fabric was much more forgiving for getting clean seams. Thanks for the pattern!
Could I make this dress not see-through? I wanna make it for my graduation.
Hi Signe! Yes, you can make this dress in a more opaque fabric and the silhouette will still work. Mood sells a lot of opaque silk fabric, so you can have the same flowy silk look without it being too revealing.