

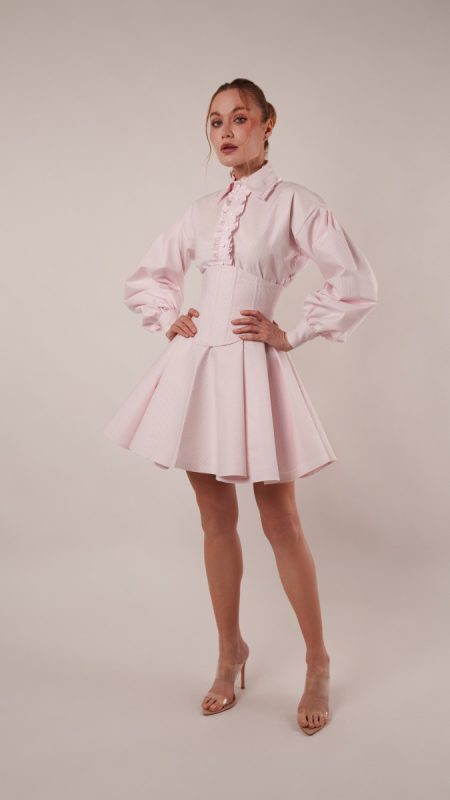
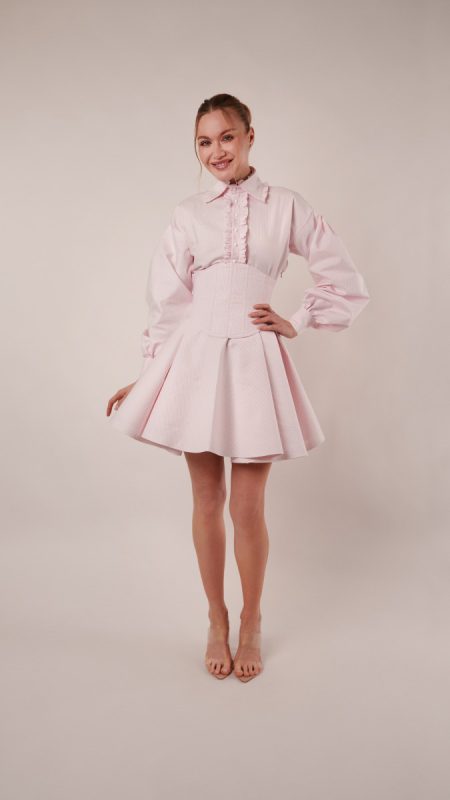
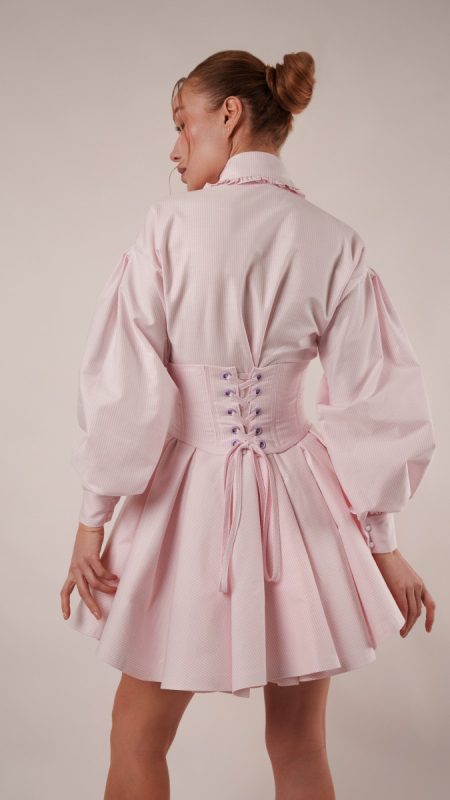
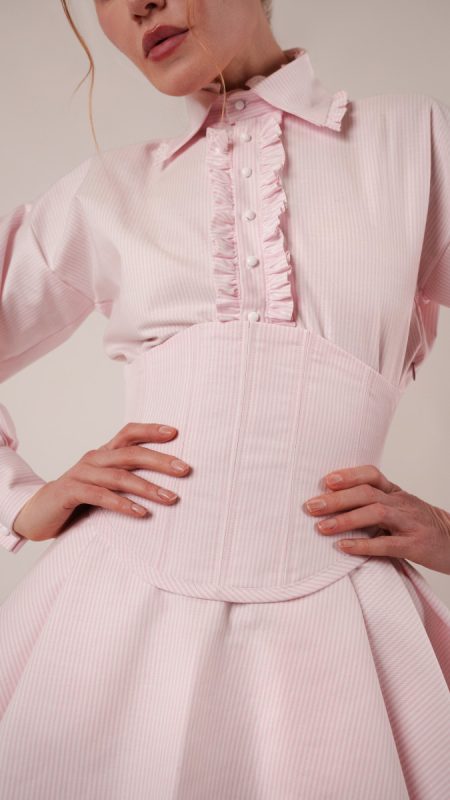
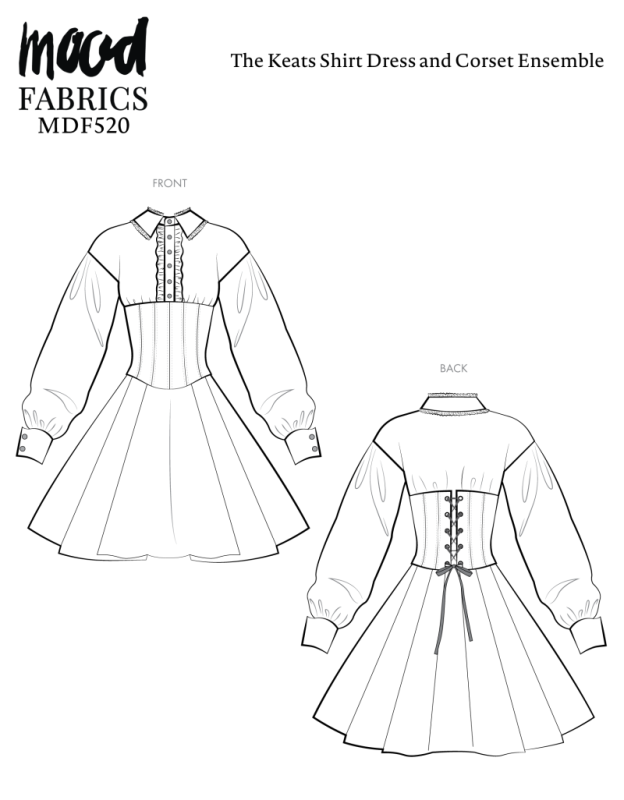
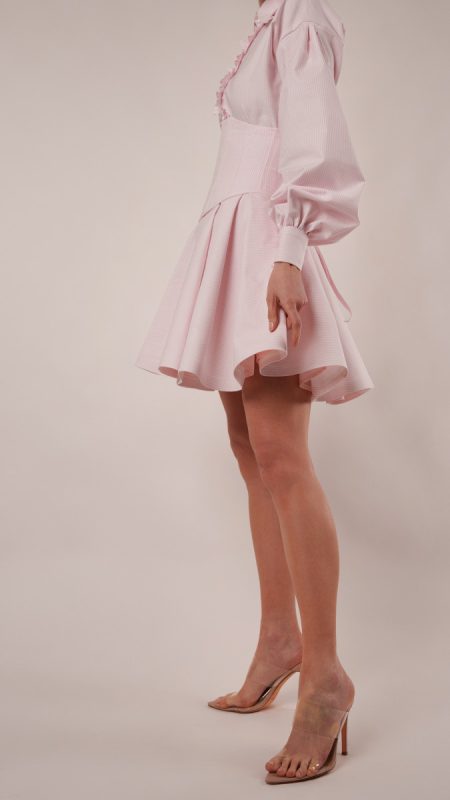
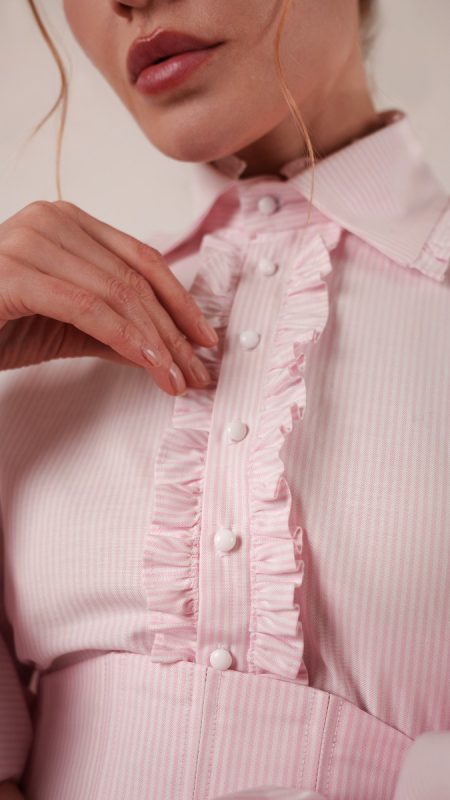
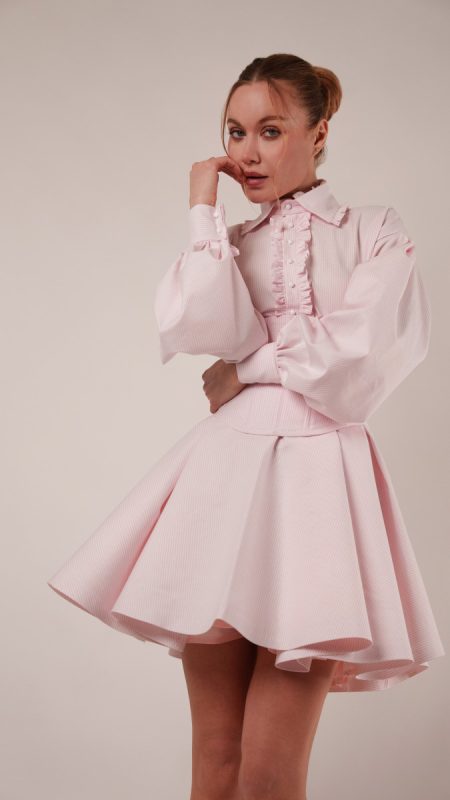
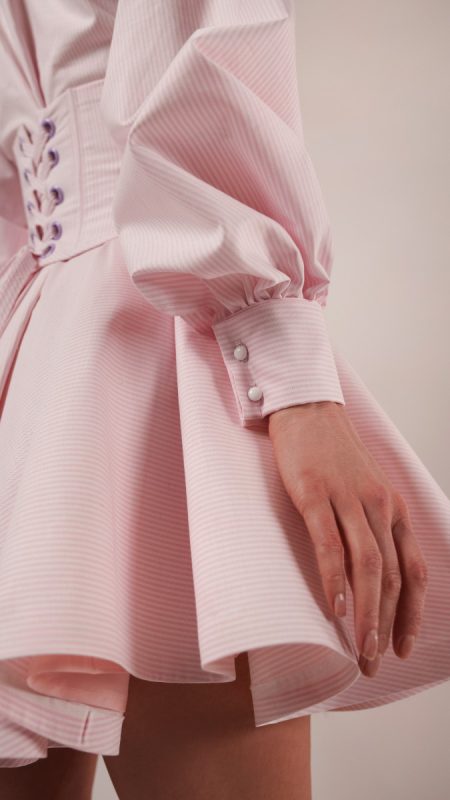
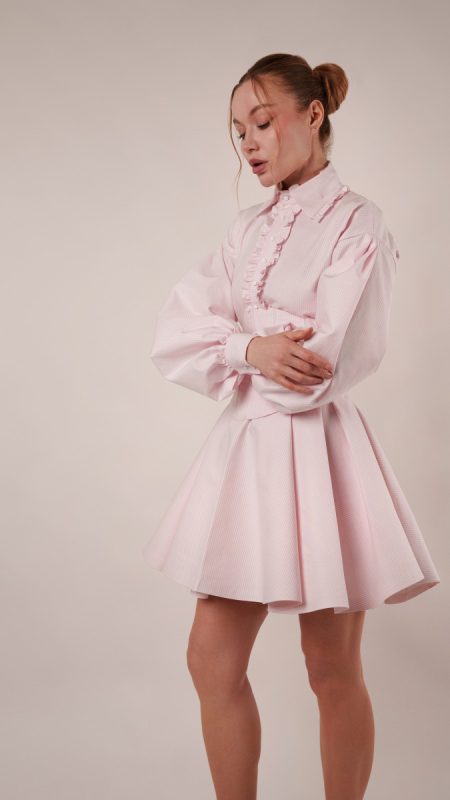
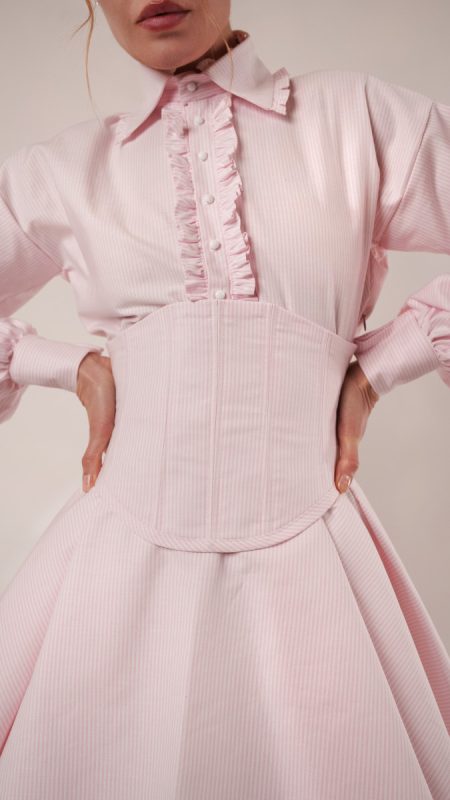
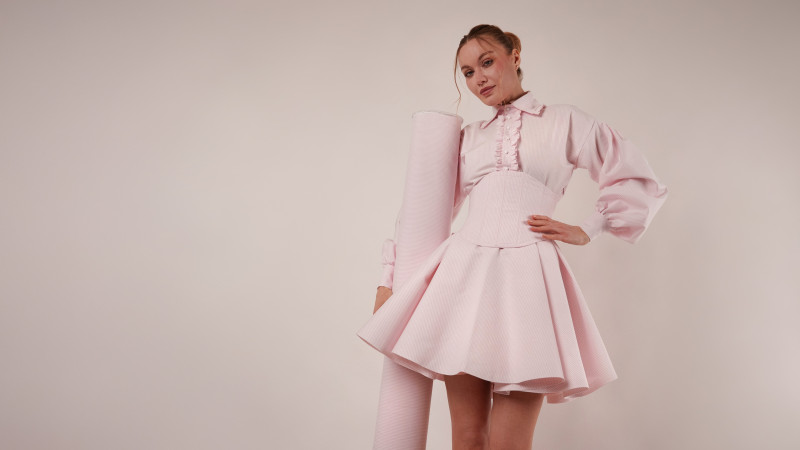
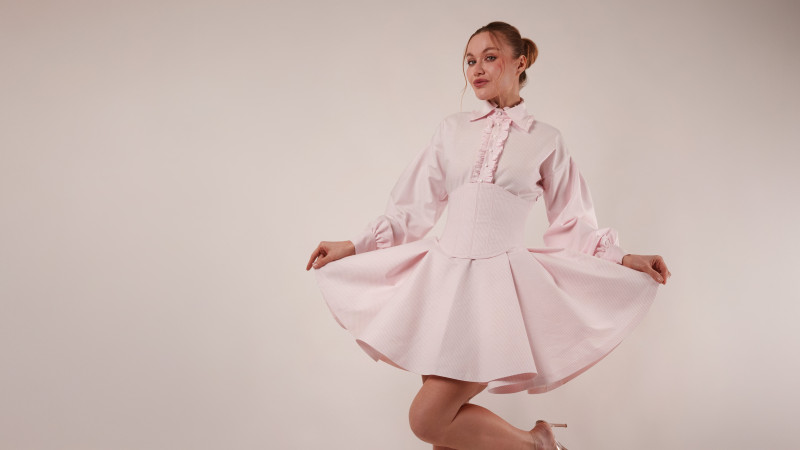
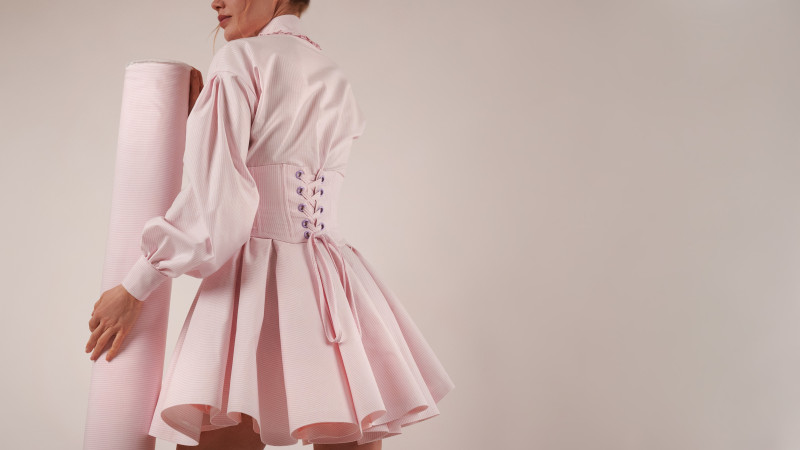
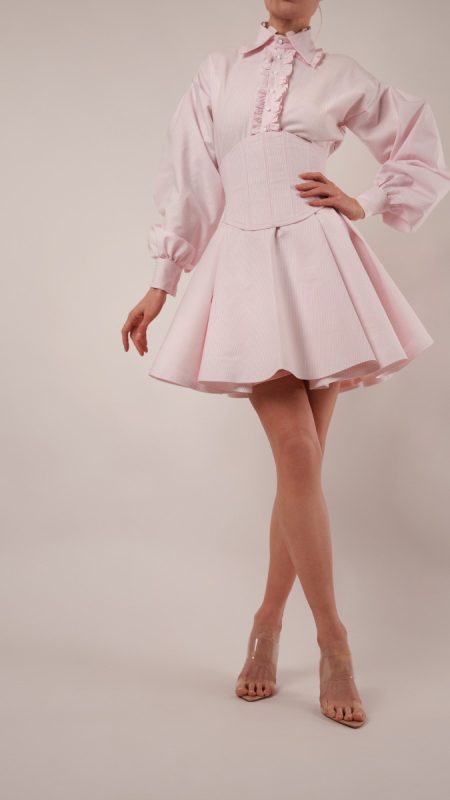
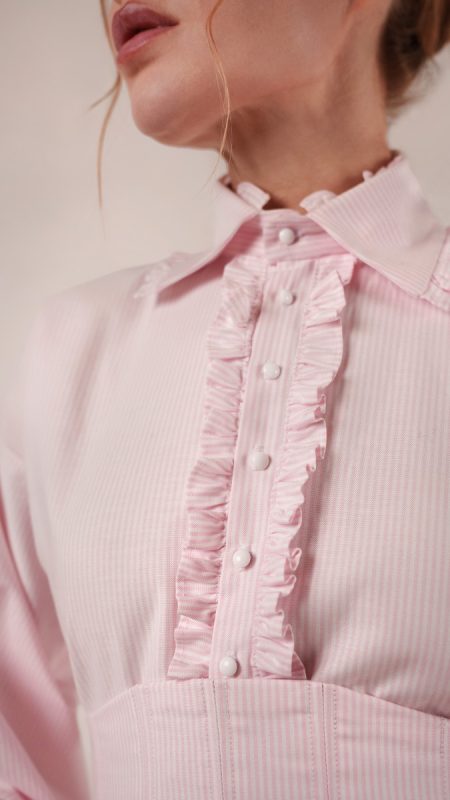
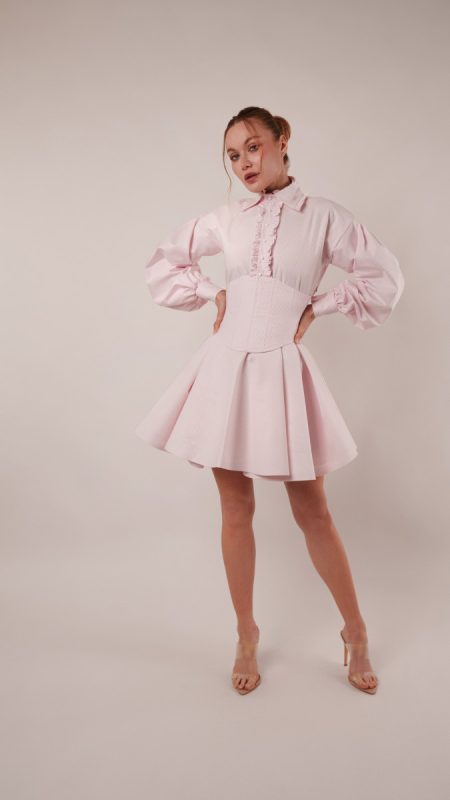
Meet the Keats Shirt Dress & Corset Ensemble, a striking study in tailoring, texture, and feminine drama. Crafted in a deadstock designer candy-striped cotton shirting, this look balances the perfect softness with just enough structure to highlight every sculptural detail. From the delicate ruffles tracing the collar and button placket to the beautifully oversized sleeves finished with elegant double French cuffs, every element feels thoughtfully refined and charming.
The silhouette truly comes to life at the waist, where the separate corset cinches and defines before releasing into a voluminous pleated circle skirt. The result is a showstopping shape that feels equal parts polished shirtdress and statement occasionwear. It is the kind of design that invites a second look, revealing more beautiful details each time.
One of the most exciting things about the Keats ensemble is its versatility. Add side seam pockets for everyday practicality, shorten the sleeves, remove them entirely for a sleeveless variation, or lengthen the hem for a more dramatic finish. The pattern also lends itself beautifully to reinterpretation as suiting-inspired separates, giving you even more styling potential. And if you are looking for a quicker project while still capturing the signature silhouette, the corset alone pairs effortlessly with a classic button-down already in your wardrobe. Designed with endless customization in mind, this ensemble offers a sophisticated way to build a wardrobe that feels entirely your own.
Essential Materials & Sizing Guide for the Keats Shirt Dress and Corset Ensemble
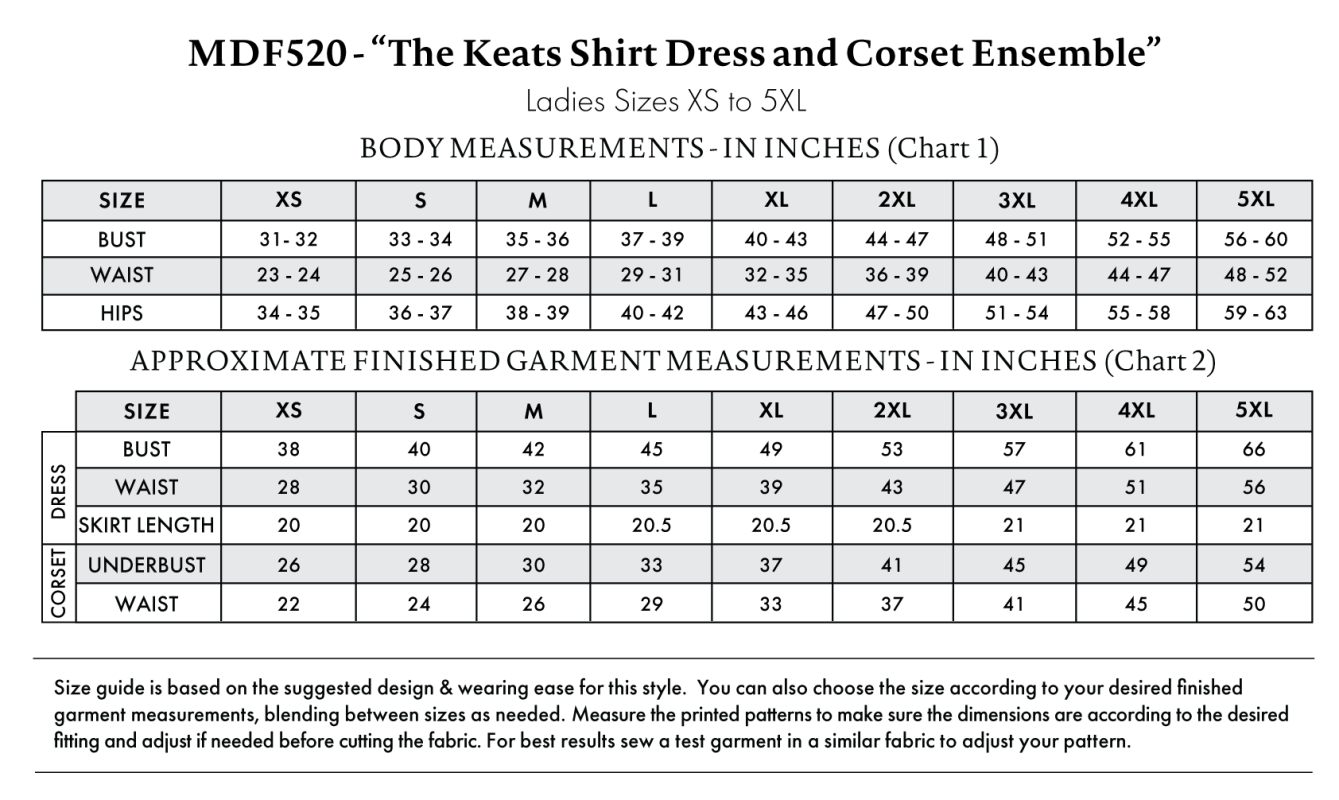
Continue reading for a breakdown of what knowledge and materials you need for creating your very own shirt dress and corset ensemble! We’ve got you covered with the recommended materials we used—if you want to follow along exactly—as well as a curated list of alternative fabric type recommendations if you want to customize your own version. The Keats Shirt Dress and Corset Ensemble free sewing pattern download includes technical drawings for seam and silhouette visibility, plus a size chart to help you find your perfect fit!
Purchase Products Used Below:
Quantities indicated are for sewing a size small* shirt dress and corset ensemble. Toggle the ‘SHOP THIS LOOK’ box to find quantity estimates for other sizes.
- 5 yards of Cotton Shirting – Light Pink and White Candy Stripes – Designer Deadstock
- 3.5 yards of Polyester Lining Fabric – Romantic Pink – Margot Collection
- 6 yards of Super White Hot Rolling Nonwoven Fusible Interfacing
- 6 yards of Clear Rigilene – 6mm/0.25″
- 9 each of European White Self Back Glass Buttons – 14L/9mm
- 4 each of European White Self Back Glass Buttons – 16L/10mm
- 1 each of Prym Eyelets with Washers – Lilac 11mm – 20pc
- 1 each of Invisible Zipper 24″ by YKK – 377 Dull Pink
- 2 each of Gutermann Sew All Thread 100m – 307 Rosebud
- MDF520 – Keats Shirt Dress and Corset Ensemble Sewing Pattern (Free download below!)
*Quick Tip! The ‘SHOP THIS LOOK’ box defaults to full-yard quantities. To order an exact half-yard quantity for any fabric, simply use the decrease quantity button (-) to subtract by the half yard. Then click “ADD TO CART” to add all materials to your cart. (Our system can only display full-yard quantities initially.)
Alternative Fabric Type Recommendations:
The Keats Shirt Dress and Corset Ensemble sewing pattern is best suited for medium to heavyweight fashion fabrics. Explore other fabric types or colors from our featured collections for your shirt dress and corset with the links below.
Fabric Collections Used in this Post:
Download Your Free Sewing Pattern
Submit your name and email in the form below to receive the download link for the Keats Shirt Dress and Corset Ensemble free sewing pattern directly in your inbox. Mood Sewciety Patterns will send your free download link via email with the subject line: ‘Your Free Download from Mood Sewciety – The Keats Shirt Dress and Corset Ensemble’ (in PDF format for A4 and letter-size printing).
© MoodFabrics.com / MoodSewciety.com – Mass production, resale, or distribution of this pattern in any form is strictly prohibited.
alias
Find Your Perfect Fit
The Keats Shirt Dress and Corset Ensemble Sizing Guide is based on the suggested design & wearing ease for this style. You can also choose the size according to your desired finished garment measurements, blending between sizes as needed. Measure the printed patterns to make sure the dimensions are according to the desired fitting and adjust if needed before cutting the fabric. For best results, sew a test garment in a similar fabric to adjust your pattern.
Note: Always read all the instructions before cutting the fabric!
How to Sew The Keats Shirt Dress and Corset Ensemble
The instructions provided below are designed to guide you through sewing the Keats Shirt Dress and Corset Ensemble from start to finish.
3 Tips for Sewing with Cotton Shirting
⇒ I used fusible interfacing in several parts of this ensemble (both the corset and the skirt). This is of course optional, but it’s how I achieved different stiffness with the same cotton shirting material.
⇒ Choose a secure way to finish any exposed raw edges (serged, French Seams, etc.) because this material frays.
⇒ Prewash and dry your fabric BEFORE cutting out your pattern. Cotton shrinks in the wash.

Pattern Pieces & Fabric Cuts Needed
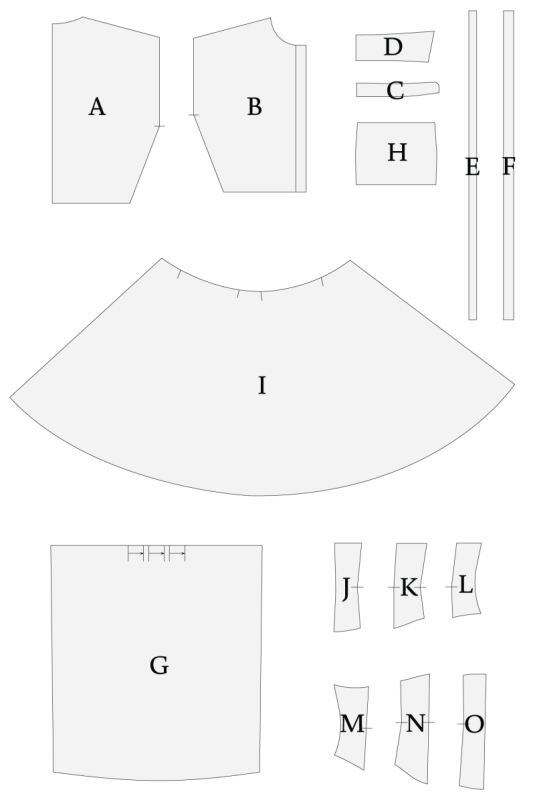
- (A) TOP BACK
- Fabric – Cut 1 on Fold
- (B) TOP FRONT
- Fabric – Cut 2 Mirrored
- (C) COLLAR STAND
- Fabric – Cut 2 on Fold
- (D) COLLAR
- Fabric – Cut 2 on Fold
- (E) COLLAR RUFFLES
- Fabric – Cut 2
- (F) BUTTON PLACKET RUFFLES
- Fabric – Cut 2
- (G) SLEEVES
- Fabric – Cut 2 Mirrored
- (H) CUFFS
- Fabric – Cut 4
- (I) SKIRT
- Back: Fabric – Cut 2 Mirrored
- Front: Fabric – Cut 1 on Fold
- Lining – Same as Main Fabric
- (J) CORSET BACK CENTER
- Fabric – Cut 2 Mirrored
- Lining – Cut 2 Mirrored
- (K) CORSET BACK MIDDLE
- Fabric – Cut 2 Mirrored
- Lining – Cut 2 Mirrored
- (L) CORSET BACK SIDE
- Fabric – Cut 2 Mirrored
- Lining – Cut 2 Mirrored
- (M) CORSET FRONT SIDE
- Fabric – Cut 2 Mirrored
- Lining – Cut 2 Mirrored
- (N) CORSET FRONT MIDDLE
- Fabric – Cut 2 Mirrored
- Lining – Cut 2 Mirrored
- (O) CORSET FRONT CENTER
- Fabric – Cut 2 Mirrored
- Lining – Cut 2 Mirrored
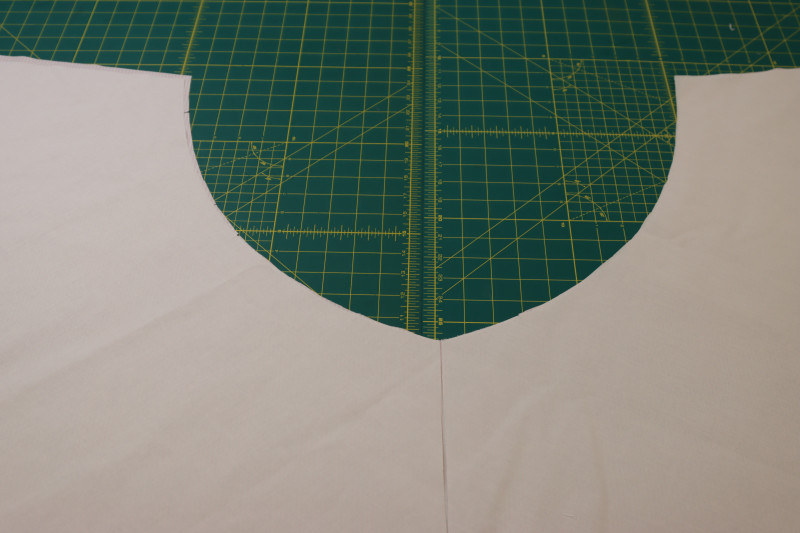
Sew with a 1/2″ seam allowance for all seams unless otherwise specified.
Step 1
INTERFACE SKIRT
- (Optional) Cut a piece of fusible interfacing to the same size as your skirt.
- Press the fusible interfacing to the wrong side of the skirt front.
- Repeat with the back of the skirt.
Step 2
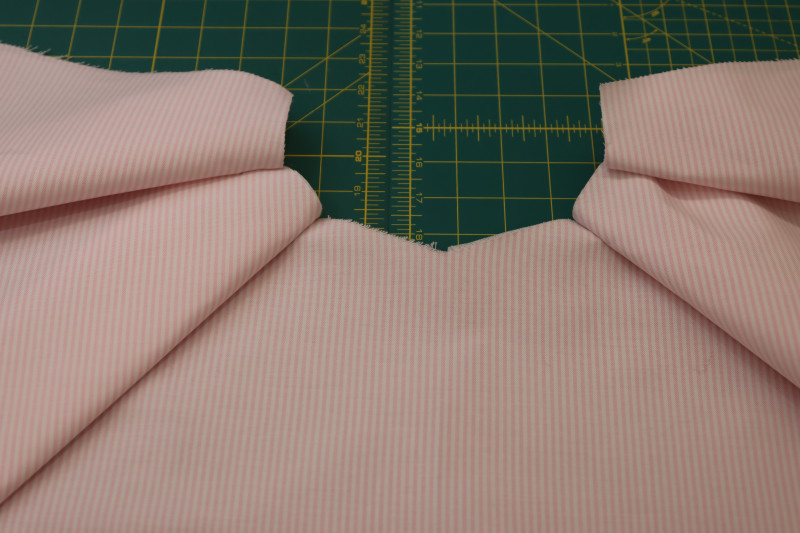
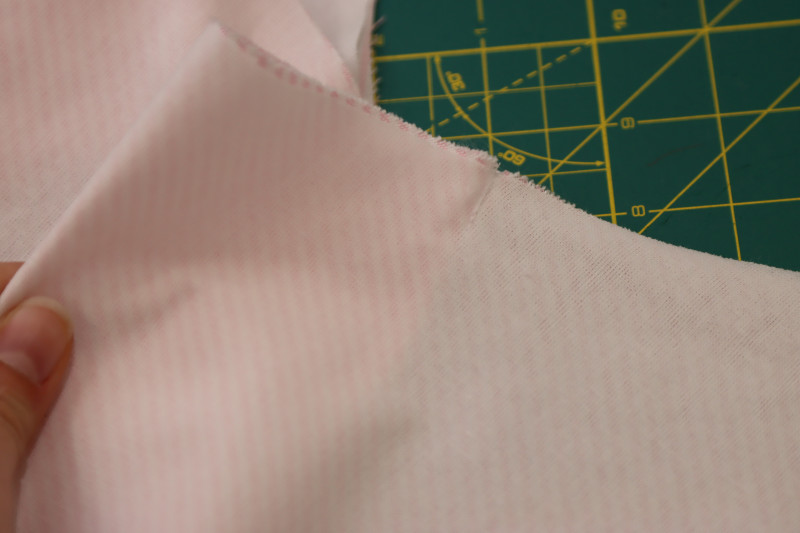
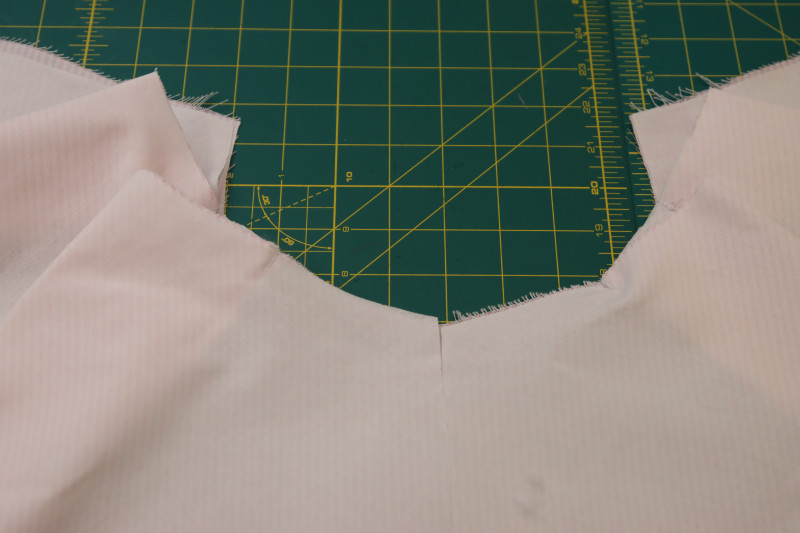
SKIRT PLEATS
- Fold the four front skirt pleats according to the notches in the pattern.
- Pin the ends of the pleats together.
- Sew a ½ inch seam so secure each pleat.
- Repeat with the back of the skirt.
Step 3
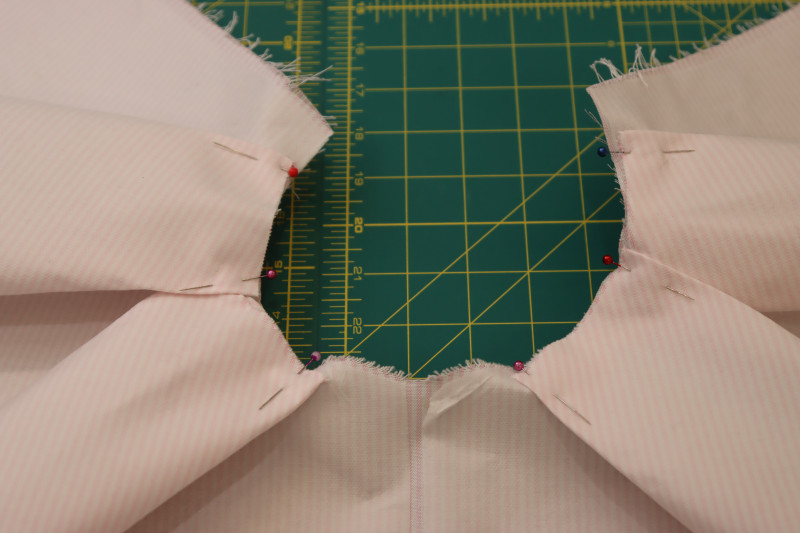
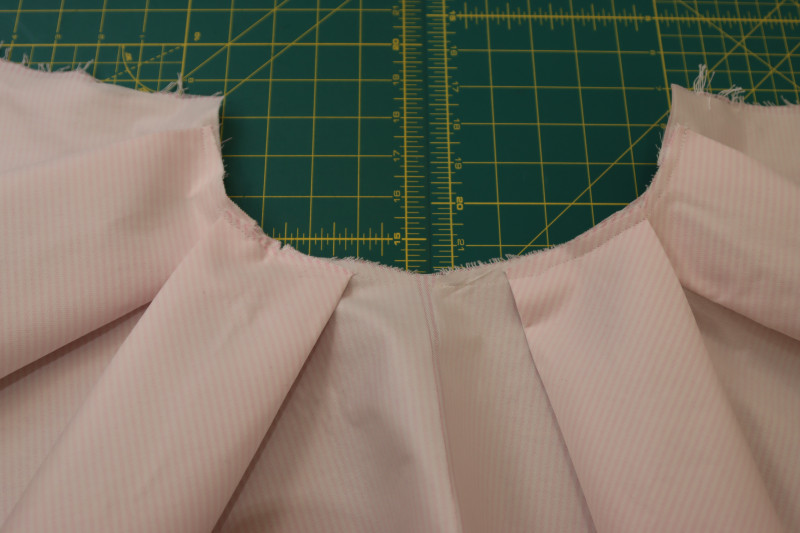
BOX PLEATS
- Fold the pleats evenly in half over the seam and pin the folded ends to the waistline of the skirt,
- Sew a stay stitch around the waistline of the skirt with ¼ inch seam allowance.
- Gently press the folded ends of the pleats around the waistline of the skirt.
- Repeat with the back of the skirt.
Step 4
SKIRT SIDE SEAMS
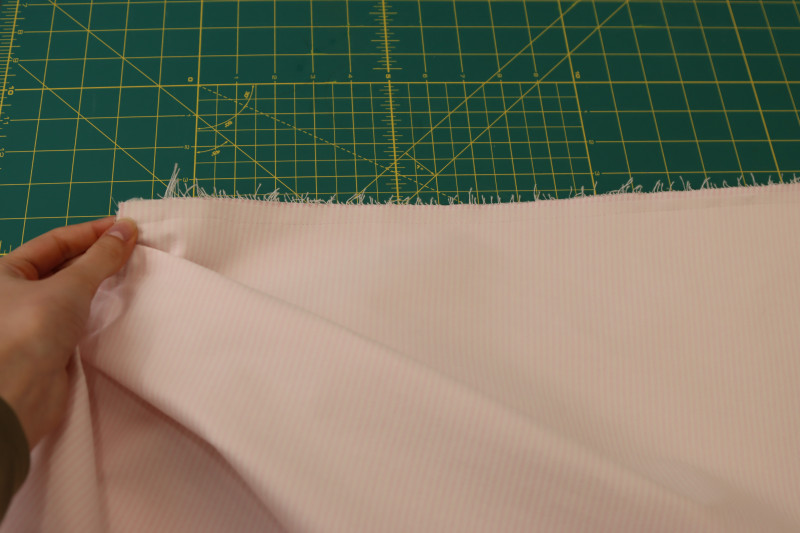
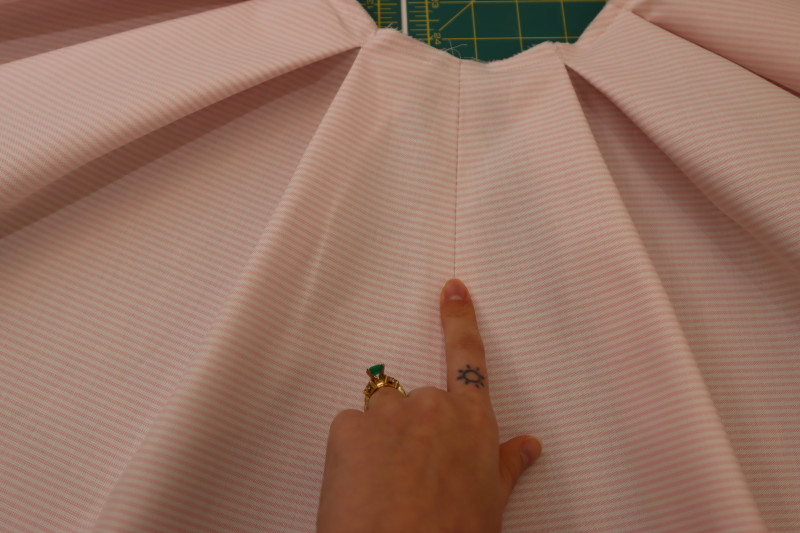
- Place the front skirt and the back skirt right sides together.
- Line up one of the side seams of the front and back skirts.
- Pin and sew one of the skirt side seams.
- Press the side seam open.
Step 5
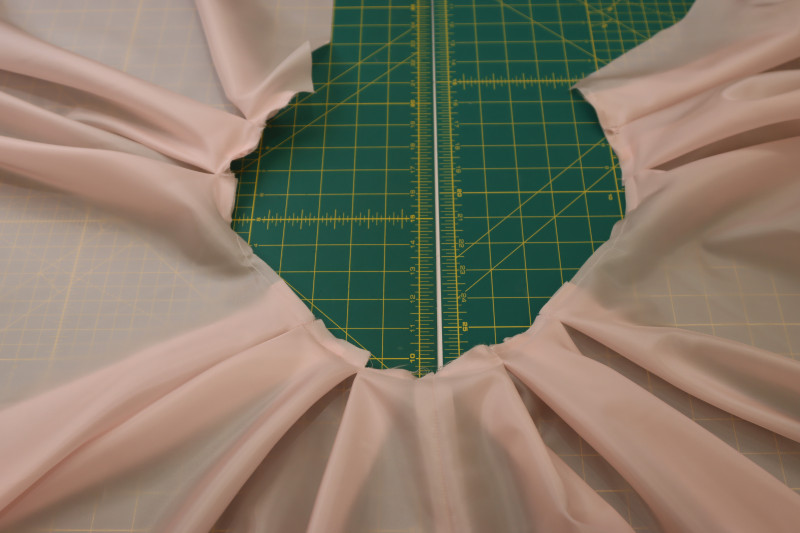
SKIRT LINING
- Repeat steps 1-4 for the skirt lining.
- Set the main skirt and the skirt lining aside.
Step 6
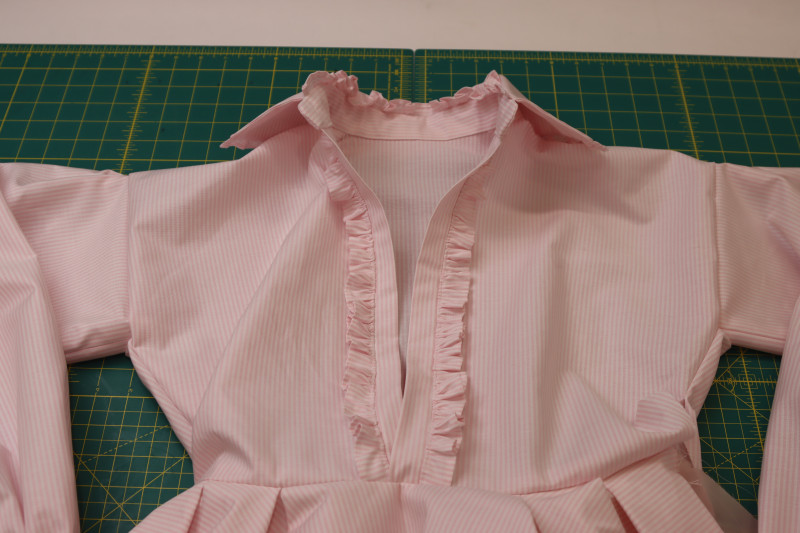
GATHER SHIRT RUFFLES
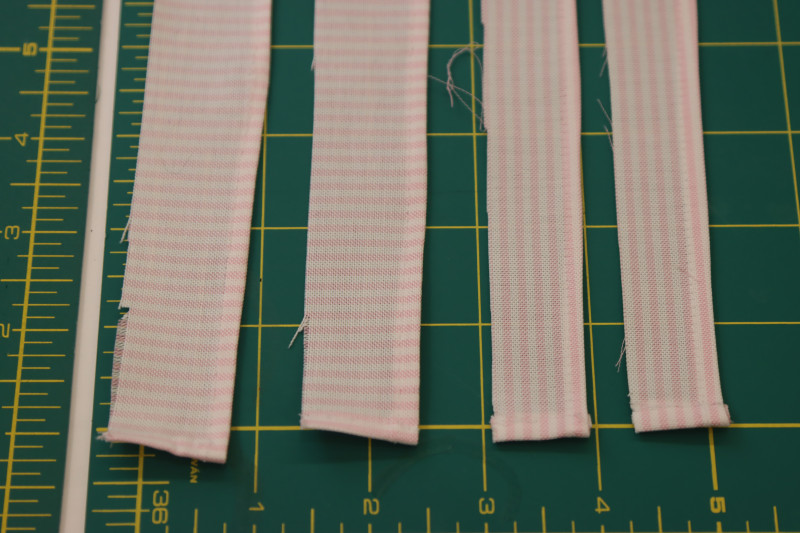
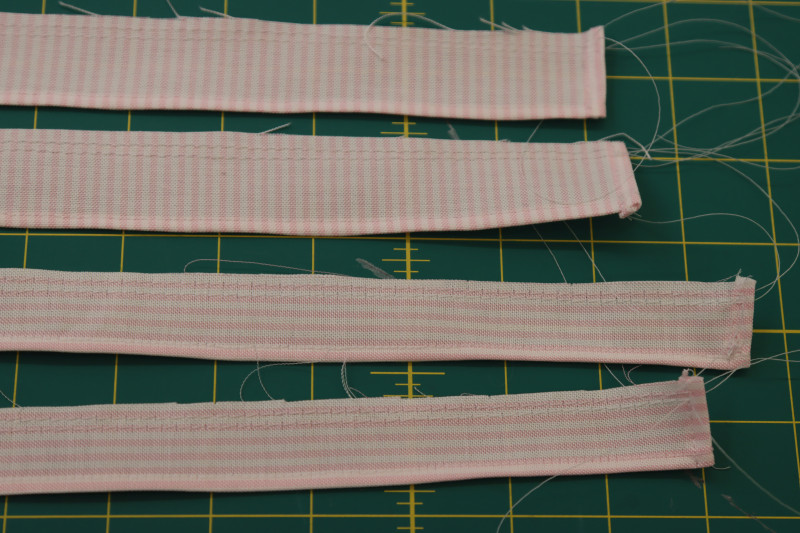
- Hem the two short ends and one of the long ends of each of the ruffle pieces (both the collar ruffles and the button placket ruffles) with a double folded ⅛ inch baby hem (or as tiny of a hem as you can possibly make!).
- Sew two parallel straight stitches with a stitch length of 4 millimeters along the raw edges of the ruffles.
- Begin pulling on the top threads to gather the ruffles.
Step 7
BUTTON PLACKET
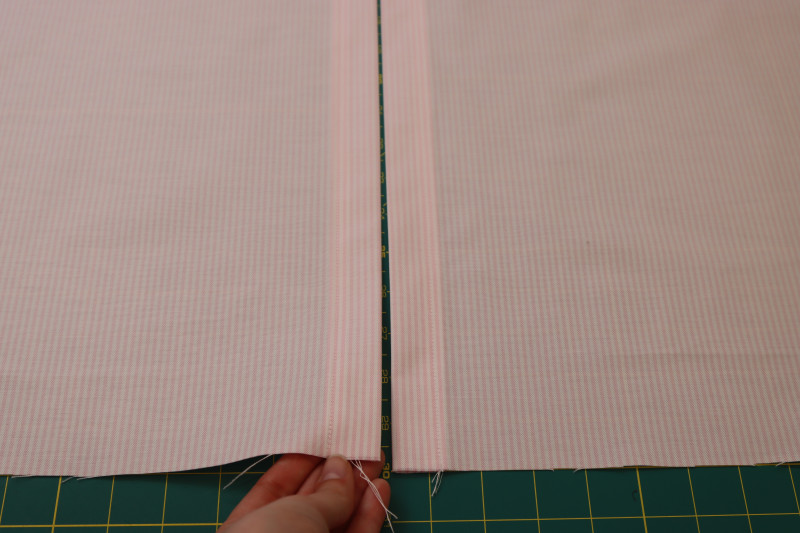
- Fold the center front of the front top pieces along the notches in the pattern. The first fold is to hide the raw edge of the center front, the second fold is to make the button placket.
- Press the folds into place.
- Topstitch over the seam allowance to secure the button placket.
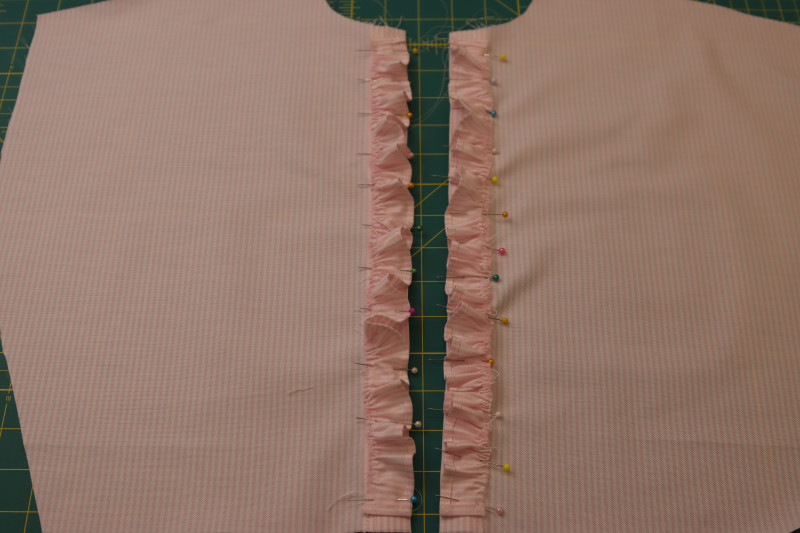
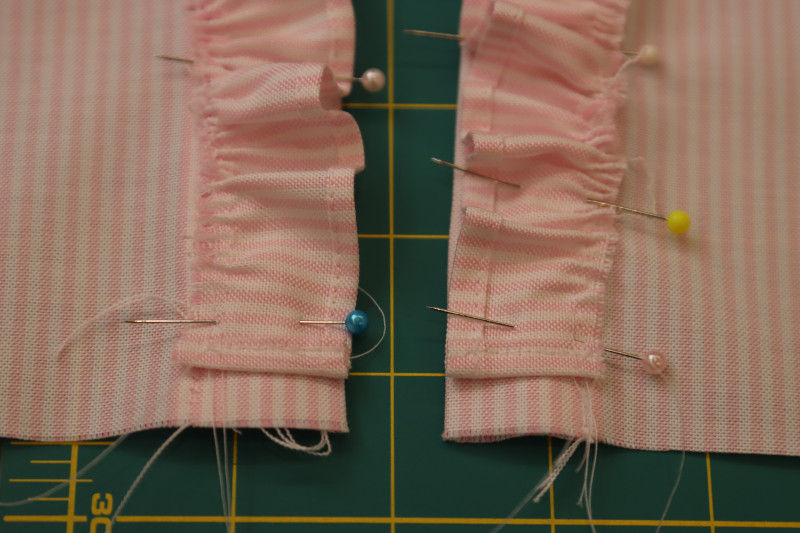
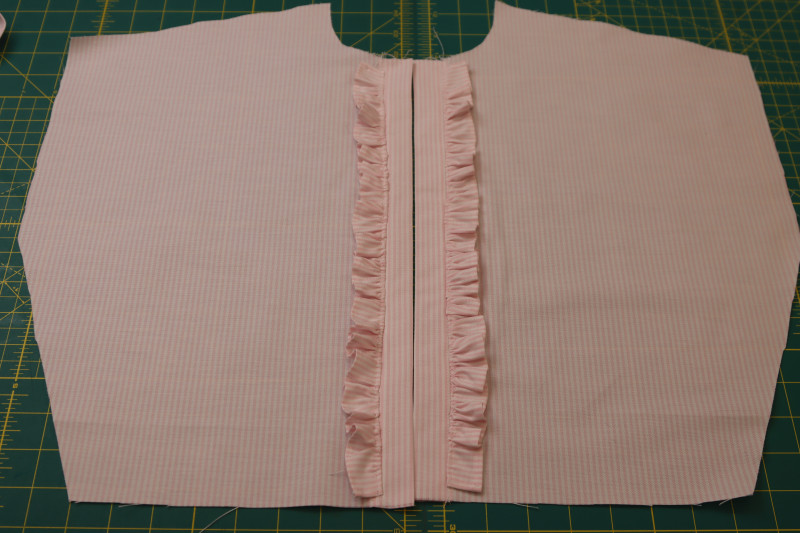
- Line up the raw gathered edges of the button placket ruffles with the seam you just sewed, making sure the ruffle is right sides together with the front of the shirt.
- Sew the ruffle right over the button placket seam with ¼ inch seam allowance.
- Flip the ruffles toward the sides of the blouse and topstitch over the seam you just sewed to secure the ruffle flat on the button placket.

Step 8
SIDE & SHOULDER SEAMS
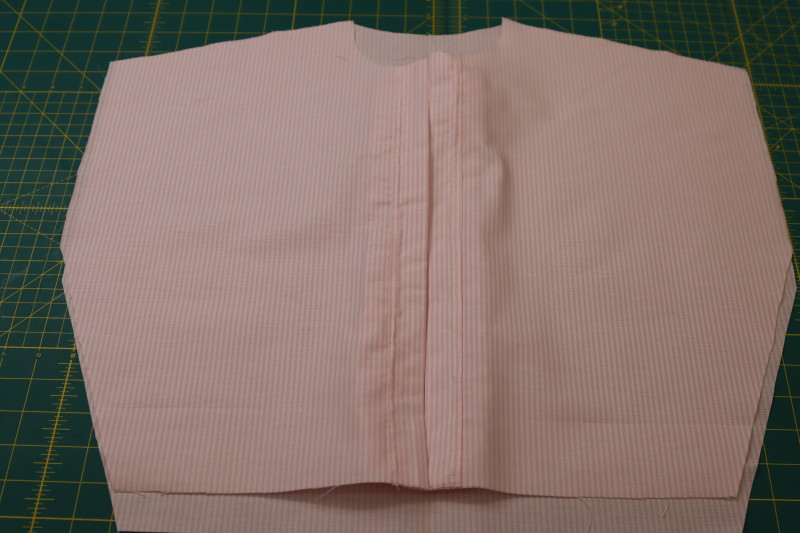
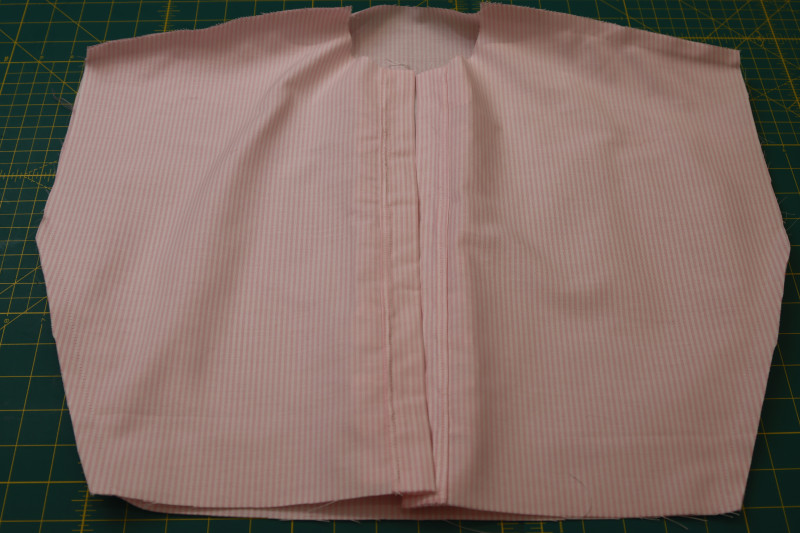
- Place the front blouse pattern pieces right sides together on top of the back blouse pattern piece with the shoulders lined up.
- Pin and sew the front blouse to the back blouse at the shoulders.
- Line up the front and back blouse side seams.
- Pin and sew both side seams, except on the wearer’s left side, leave a 6 inch gap on the bottom of the side seam so that a zipper can be inserted later.

Step 9
ASSEMBLE COLLAR
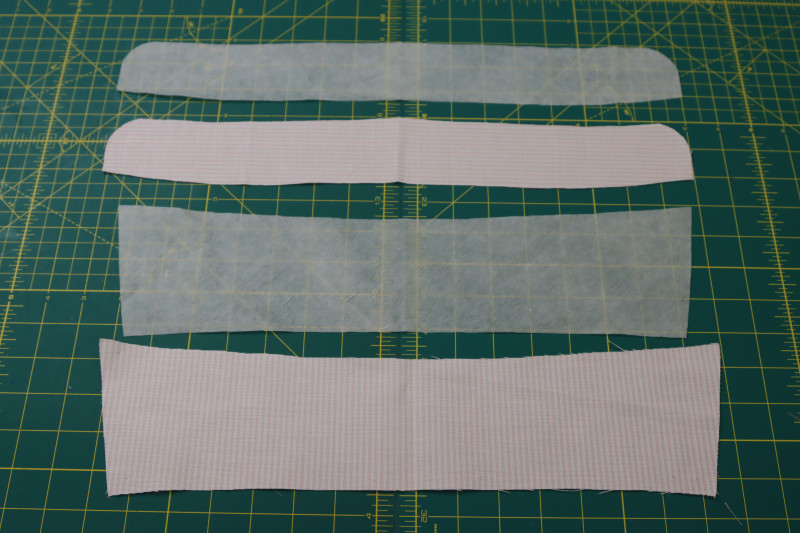
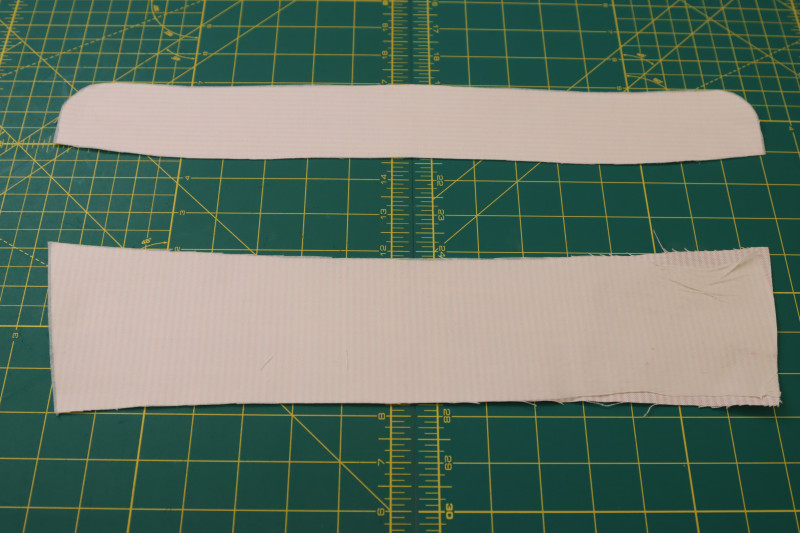
- Cut out one piece of fusible interfacing in the shape of the collar and one in the shape of the collar band.
- Press the fusible interfacing to the wrong sides of one of the collar pieces and one of the collar band pieces.
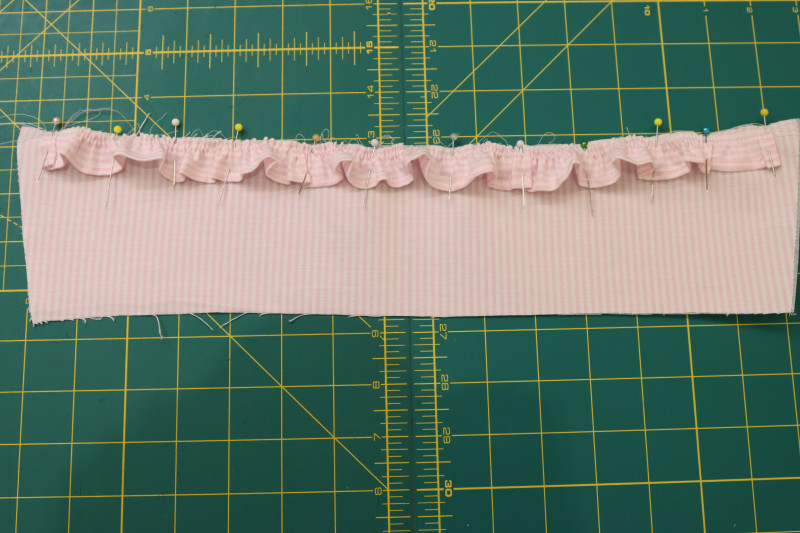
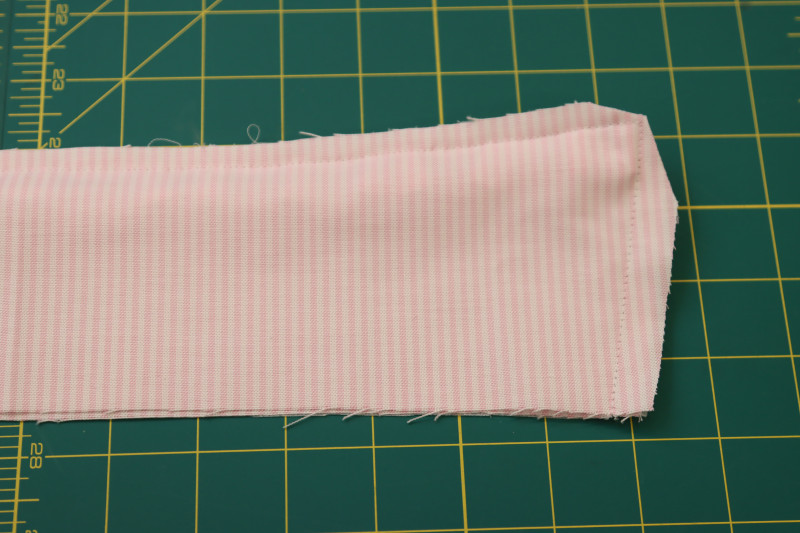
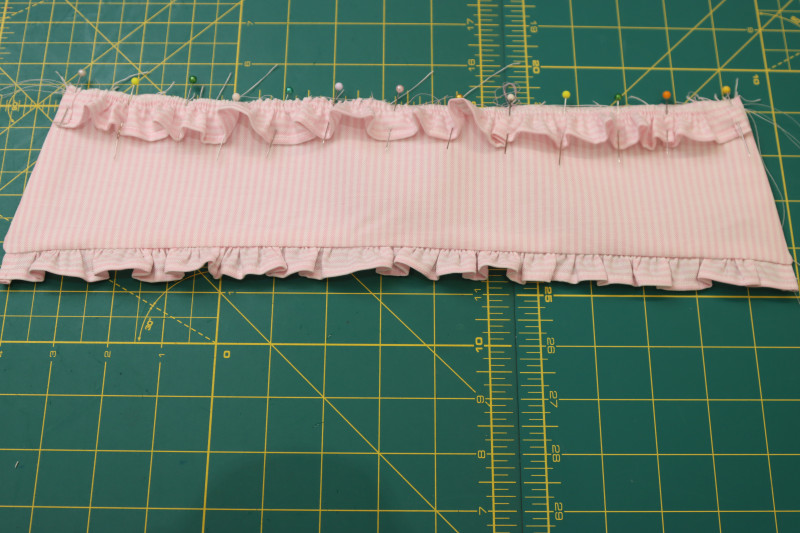
- Pin one of the collar ruffles to the right side of the longer pointed edge of the collar.
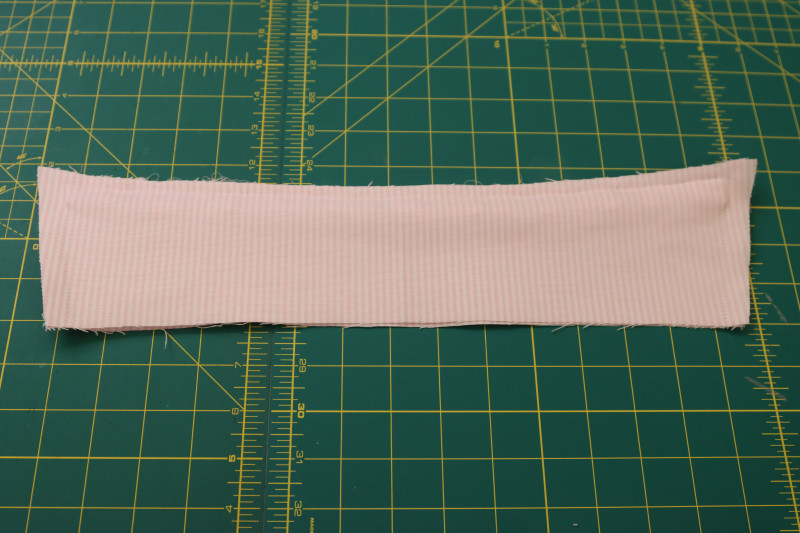
- Sandwich the ruffle between the two collar pieces, right sides together.
- Sew around the two short sides of the collar and the edge with the ruffle, leaving the bottom of the collar open.
- Clip the corners of the collar.
- Pin and sew the other ruffle to the raw edge of the collar (make sure you only sew it through one side of the collar, don’t close the inside of the collar yet.
Step 10
ATTACH COLLAR BAND
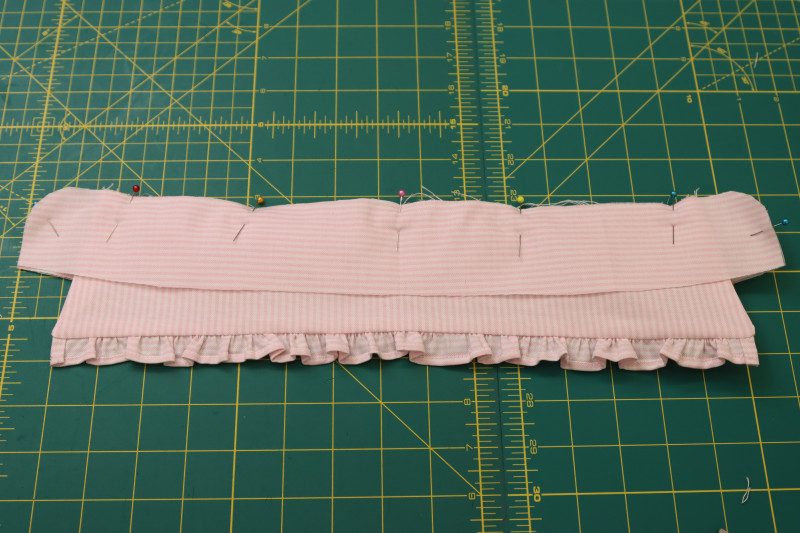
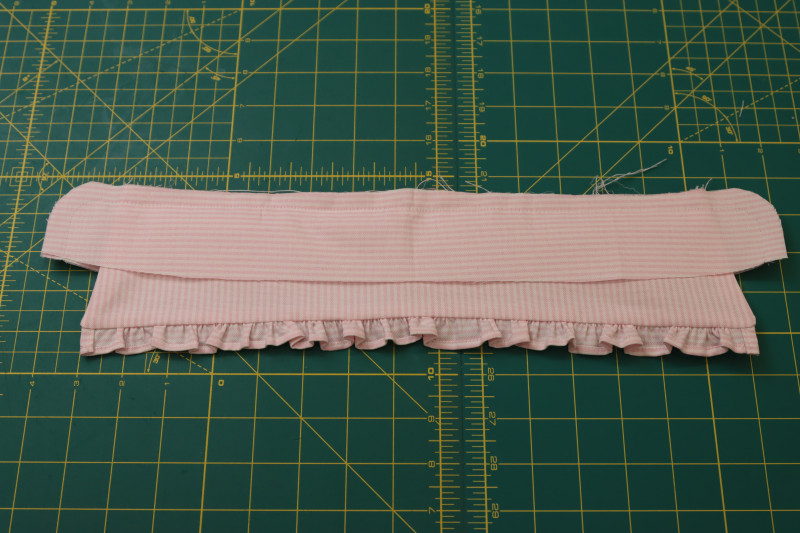
- Sandwich the collar between the two pieces of the collar band, making sure that the interfaced pieces are right sides together and the non interfaced pieces are also right sides together.
- Pin the curved edge of the collar band with the collar in between them.
- Sew along the pins.
- Clip the curved edges of the collar band.
- Flip the collar band right sides out and press.


Step 11
ATTACH COLLAR
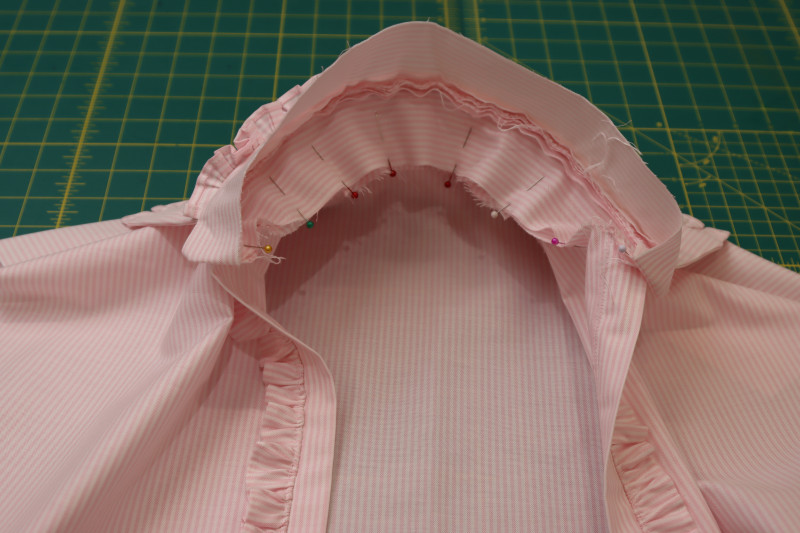
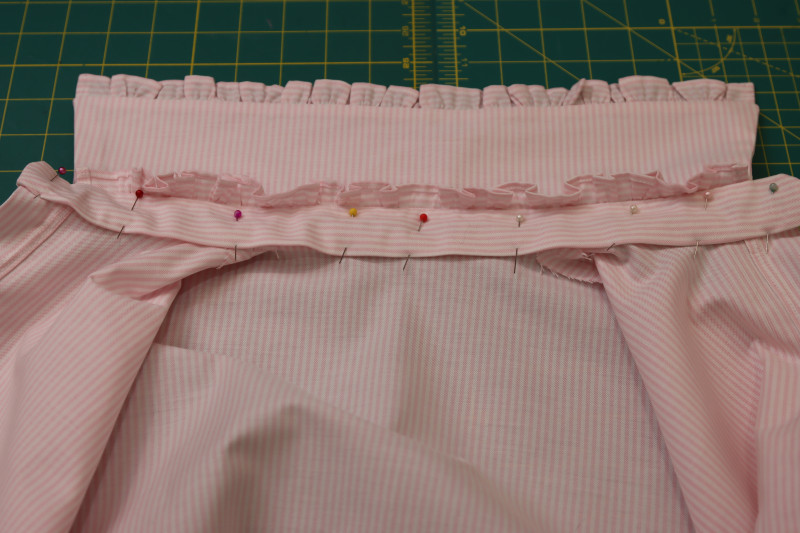
- Pin the non interfaced edge of the collar to the neckline of the blouse, right sides together.
- Sew along the pins.
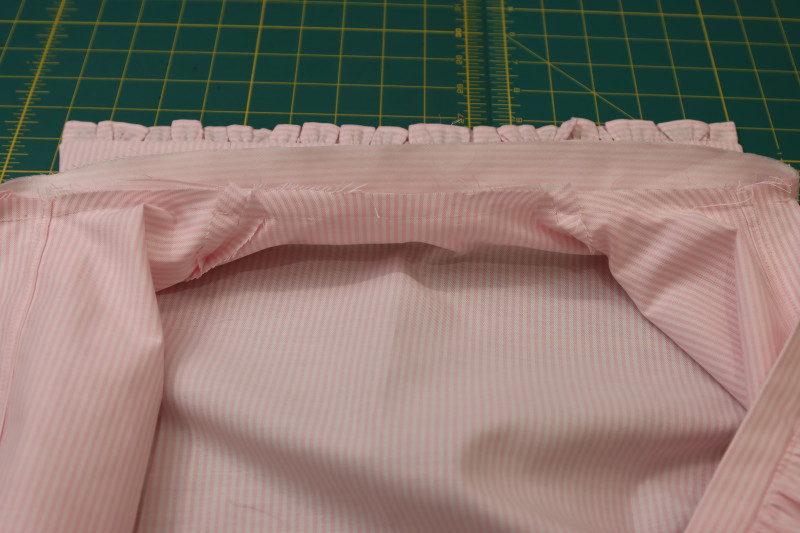
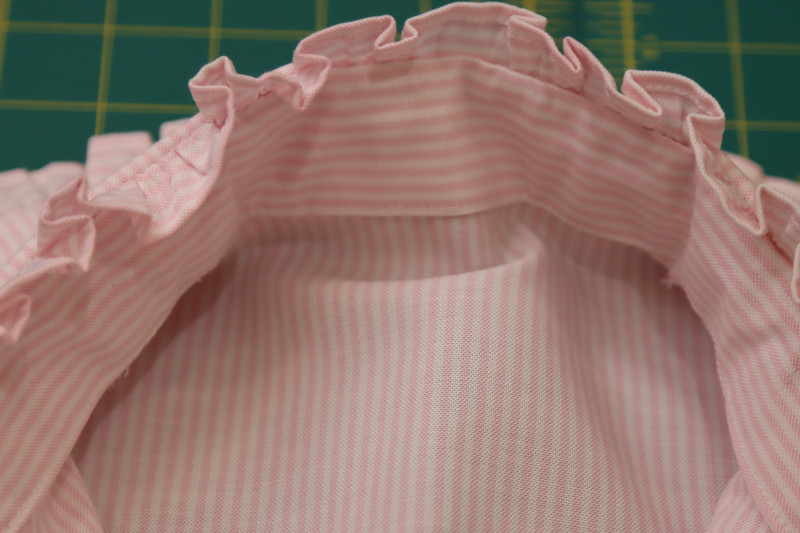
- Press a ½ inch fold into the other raw edge of the collar.
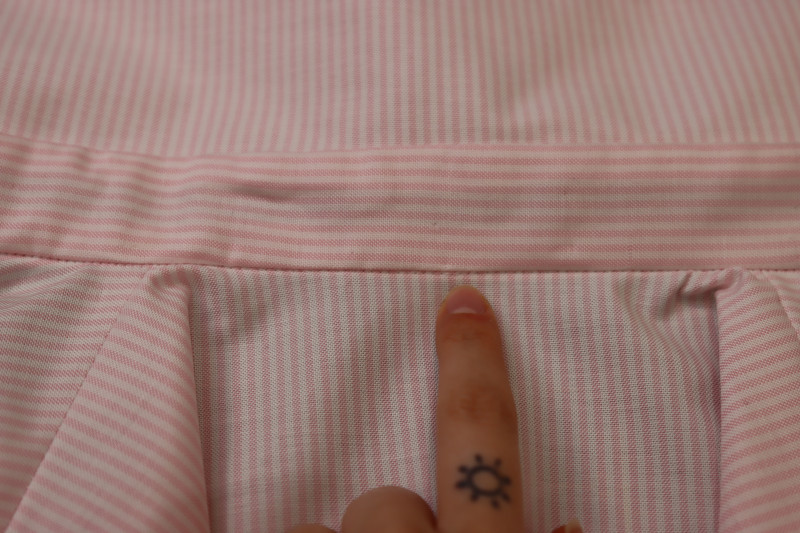
- Pin the folded edge of the collar to the seam you just sewed.
- Topstitch a stitch in the ditch of the collar seam to attach the inside of the collar to the inside of the blouse.
Step 12
SLEEVE PLEATS
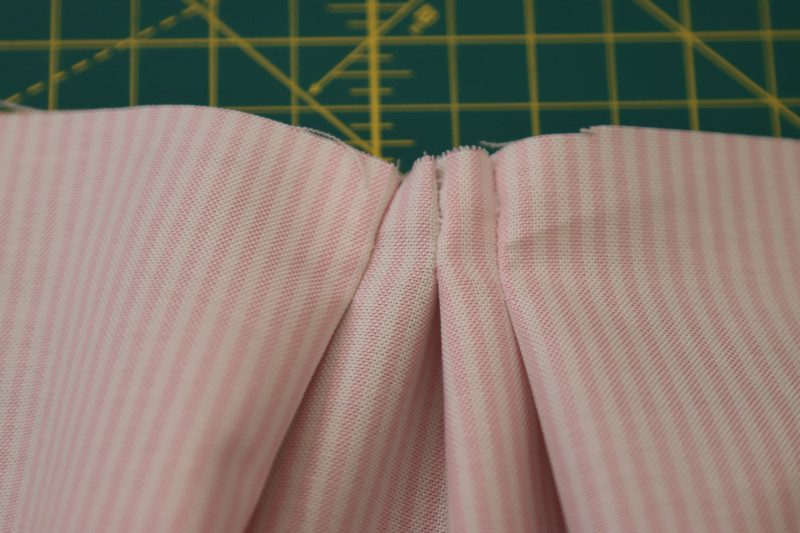
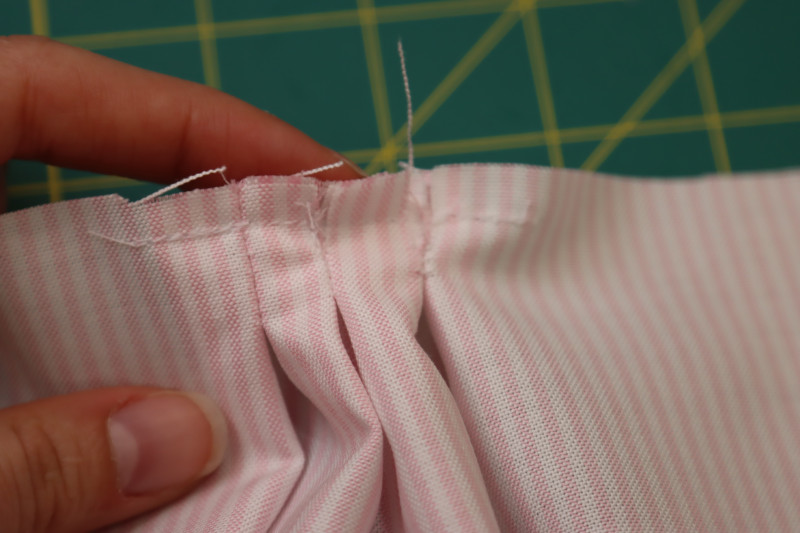
- Pin the pleats at the sleeve caps by folding at the notches from the pattern.
- Sew a ½ inch seam to secure each pleat.
- Press the pleats into box pleats like you did with the skirt.
Step 13
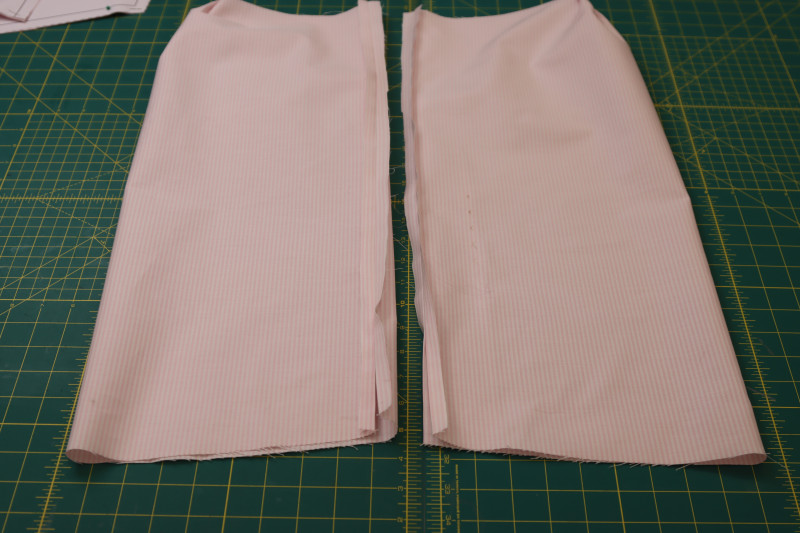
SLEEVE INSEAMS
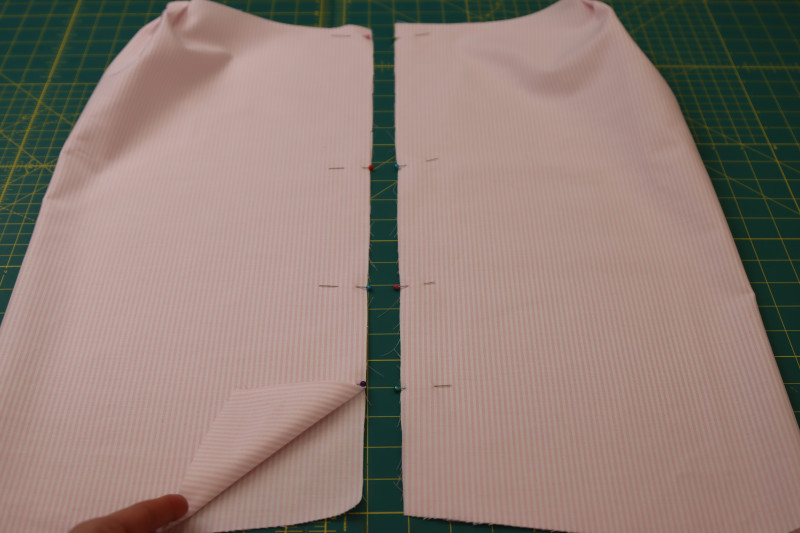
- Fold the sleeves right sides together with their inseams lined up.
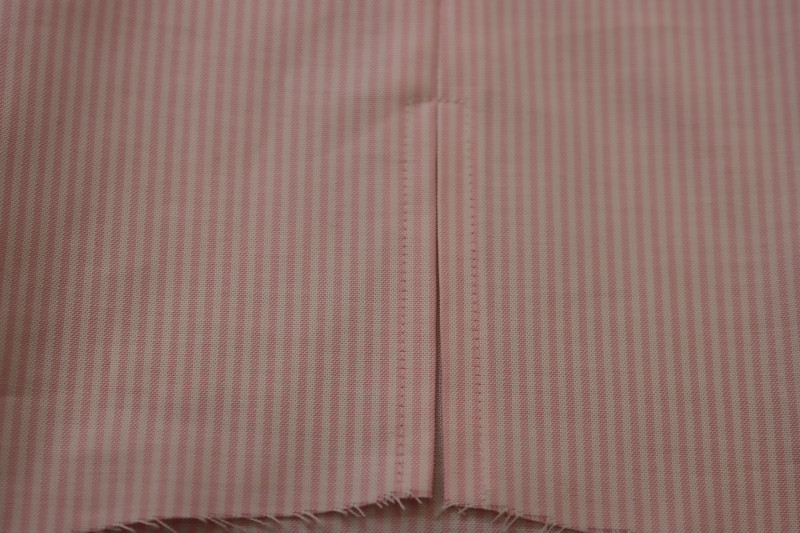
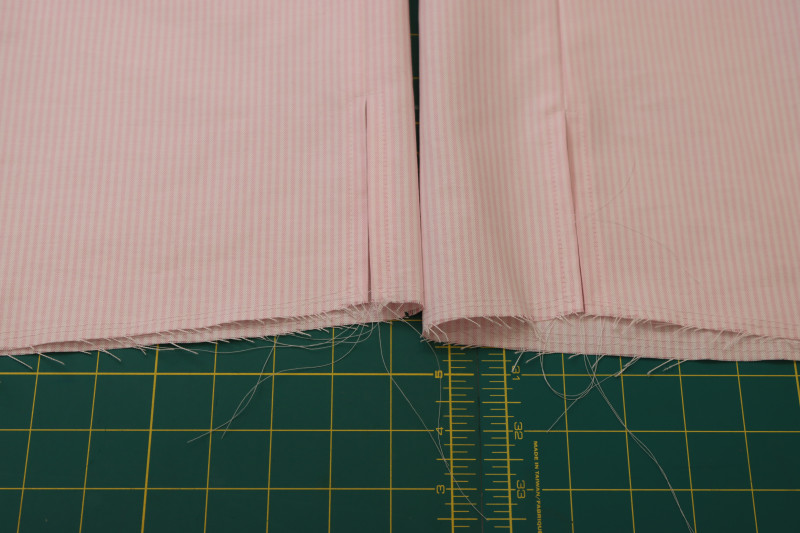
- Pin and sew the inseams of the sleeves except for the bottom 4 inches.
- Press the seam open and flat.
- Topstitch over the seam allowance at the gaps at the ends of the sleeves to finish the raw edges of the sleeve plackets.
- Sew two gathering stitches around the wrist of the sleeves.
Step 14
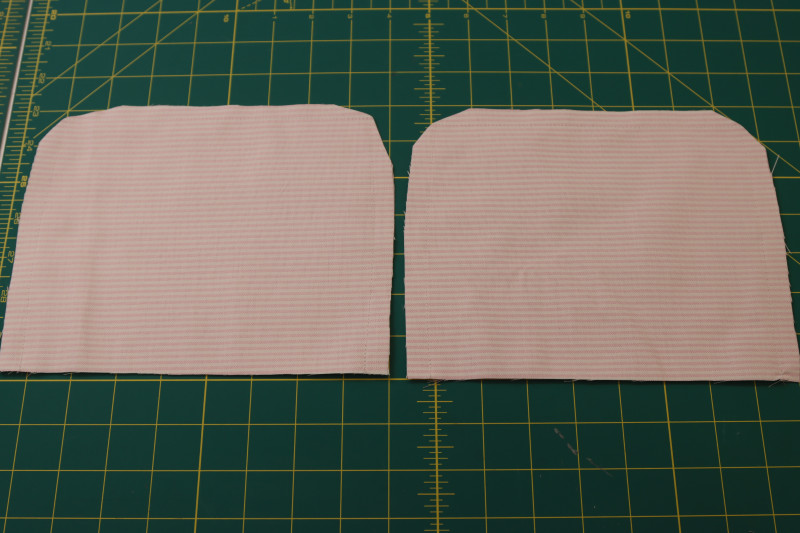
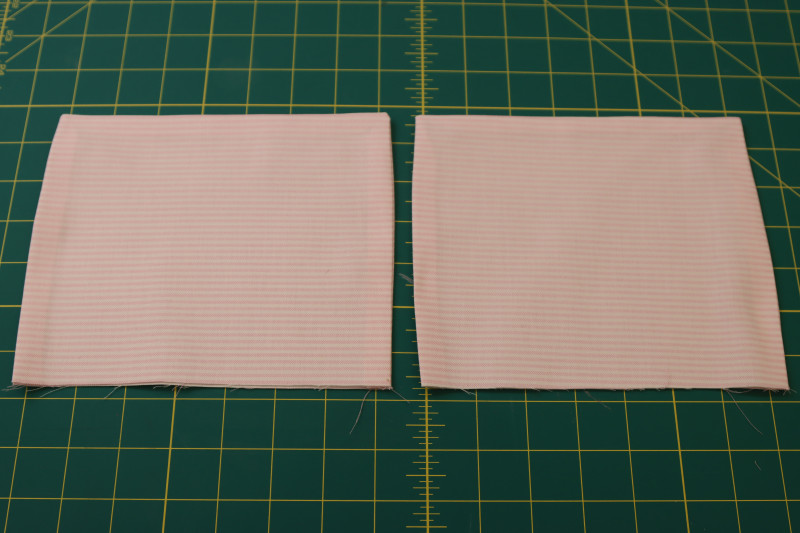
SLEEVE CUFFS
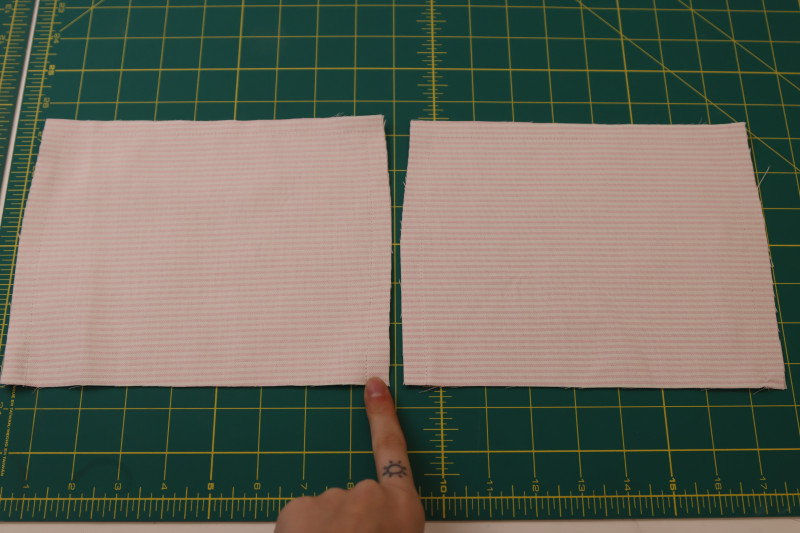
- Make two piles with the sleeve cuffs facing right sides together.
- Pin and sew around the tops and sides of the cuffs, leaving the bottom edge open.
- Clip the corners of the cuffs.
- Flip the cuffs right sides out.
- Press a ½ inch fold into the raw edges of the cuffs.
Step 15
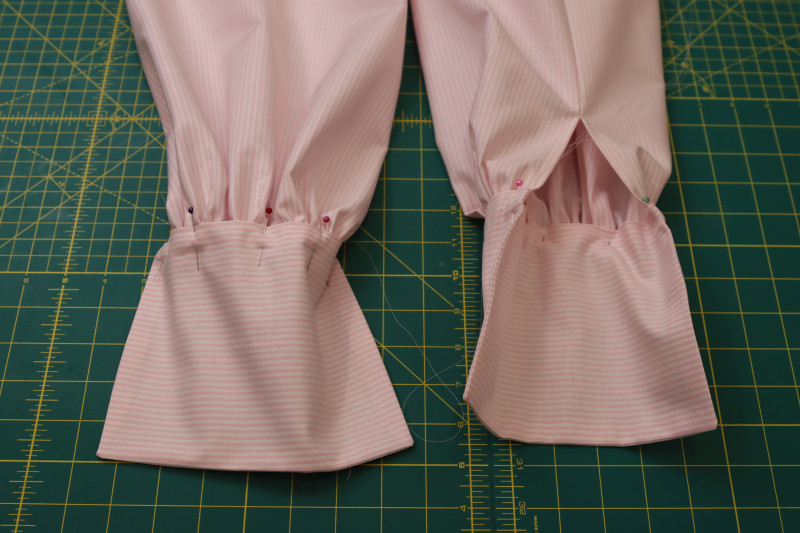
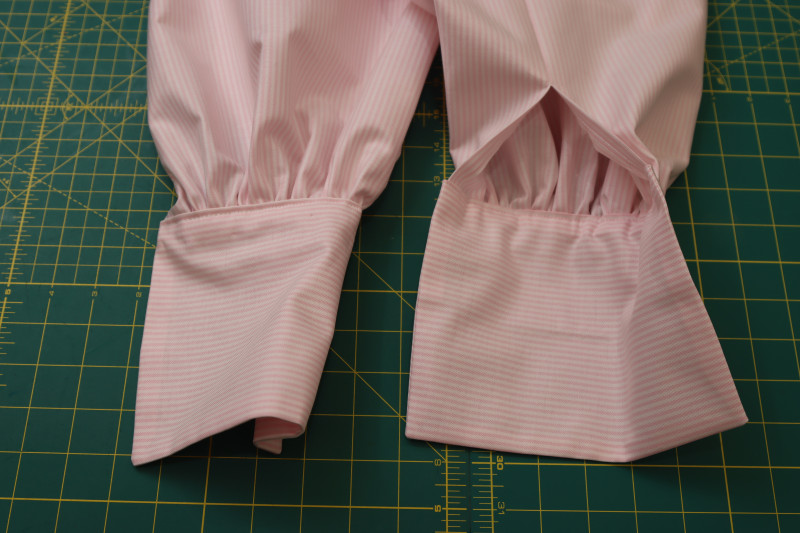
ATTACH SLEEVE CUFFS
- Sandwich the gathered end of the sleeves into the folded edge of the cuffs.
- Pin the gathered sleeves into the cuffs.
- Topstitch over the folded edges of the cuffs to secure the gathered sleeves.
Step 16
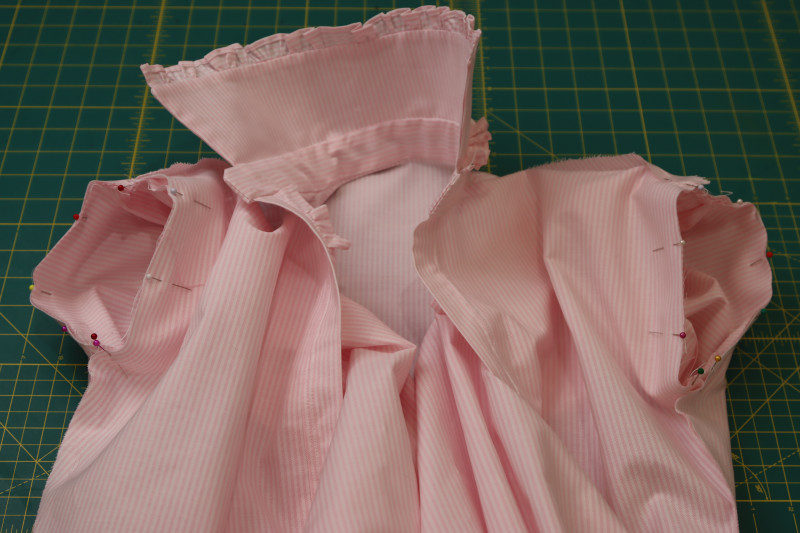
ATTACH SLEEVES
- Pin the pleated sleeve caps into the armscyes.
- Sew the sleeves to the blouse.
Step 17
ATTACH SKIRTS
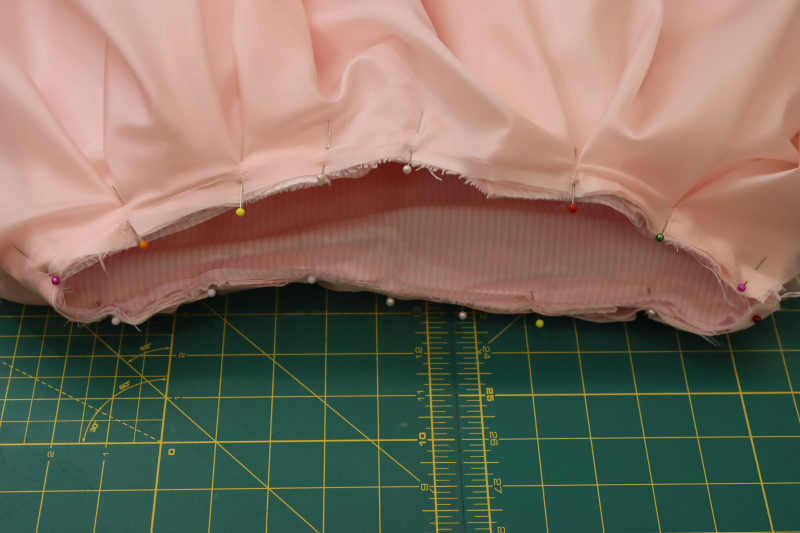
- Pin and sew the lining skirt to the main fabric skirt so that the skirts are wrong sides together.
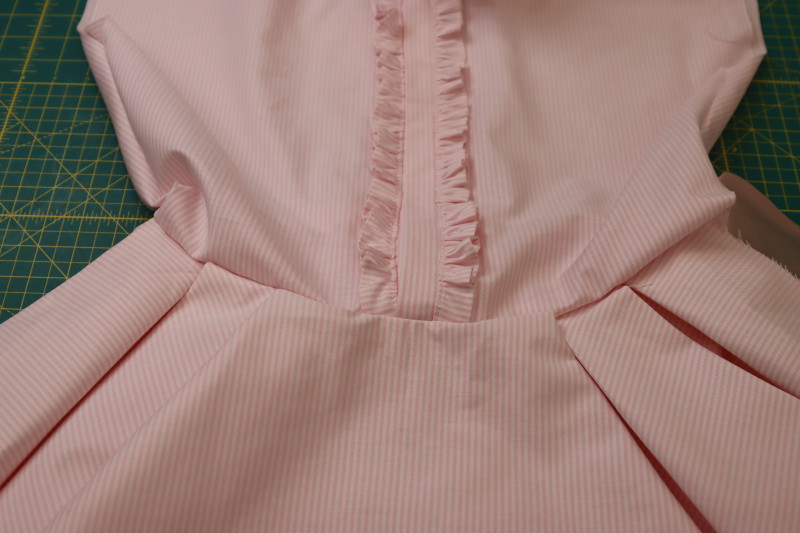
- Place the waistline of the blouse and the waistline of the skirt right sides together.
- Pin and sew the waistlines together.
Step 18
SIDE SEAM ZIPPER
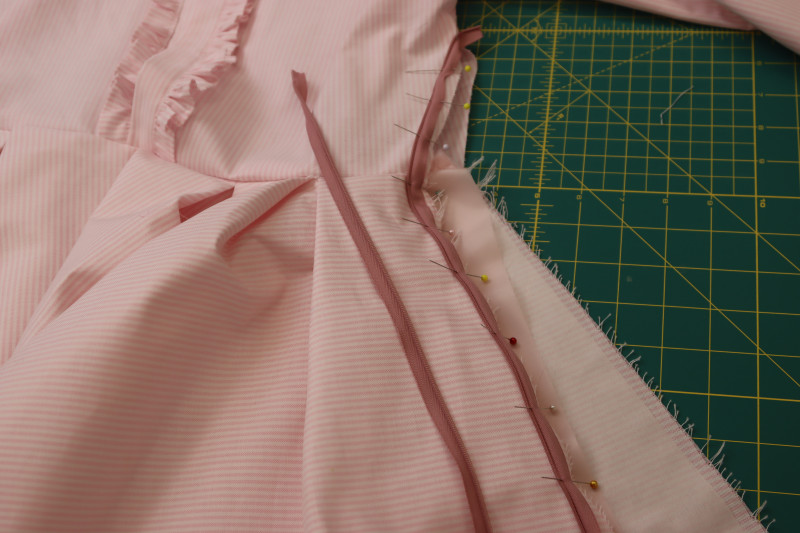
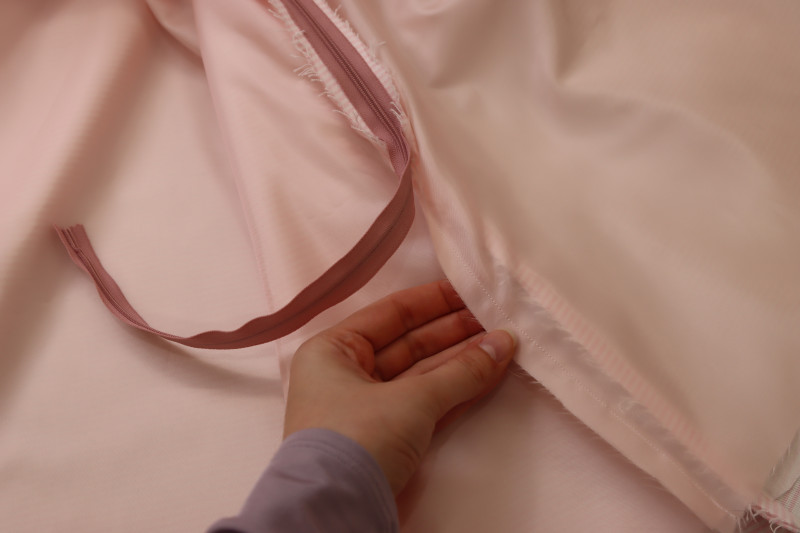
- Place the zipper right sides together on the front half of the side seam opening.
- Pin the zipper tape to the front half of the side seam.
- Unzip the zipper, then sew the zipper tape.
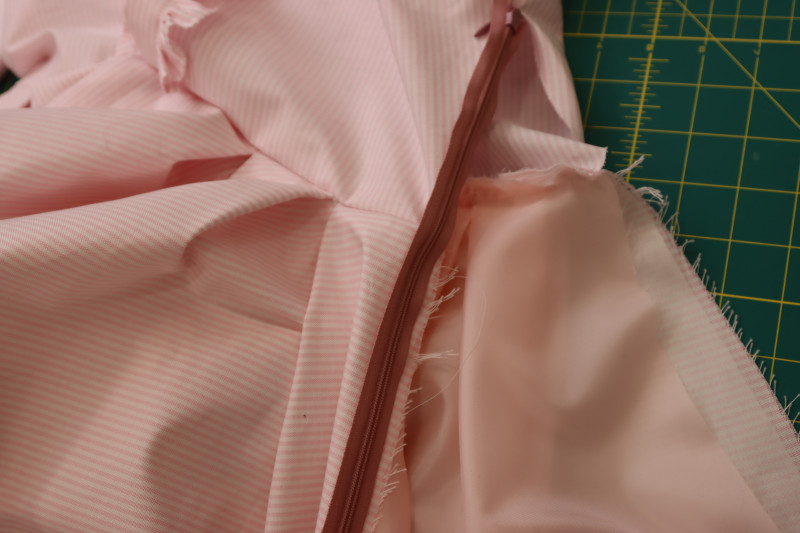
- Zip the zipper back up, then turn the dress inside out.
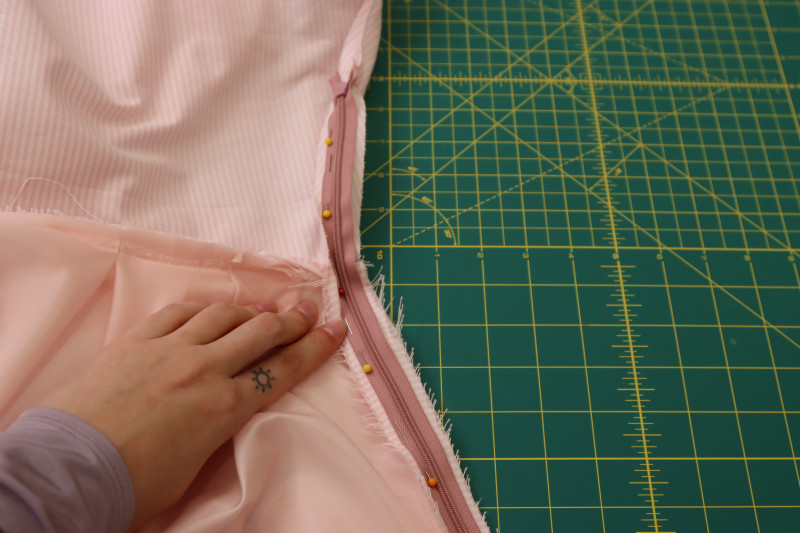
- Pin the opposite side of the zipper tape to the back half of the side seam opening.
- Sew the opposite side of the zipper to the back half of the side seam.
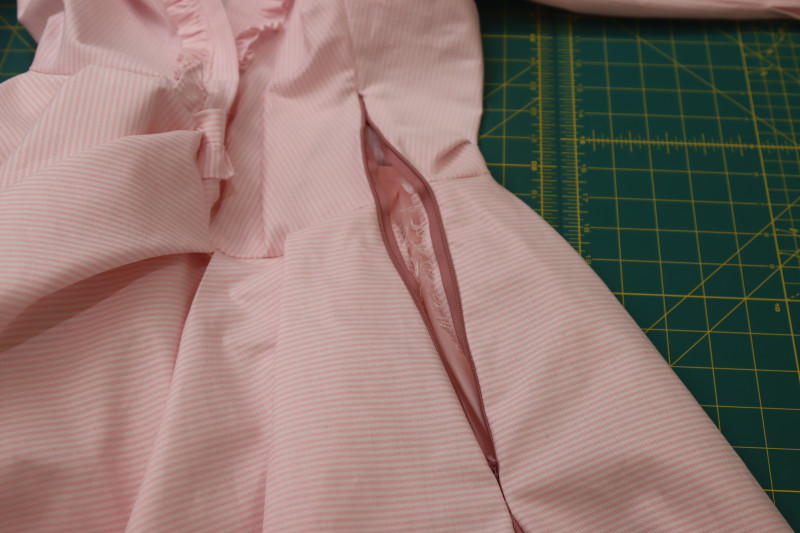
- Close the zipper and press the fabric around it flat.
Step 19
CLOSE SIDE SEAMS
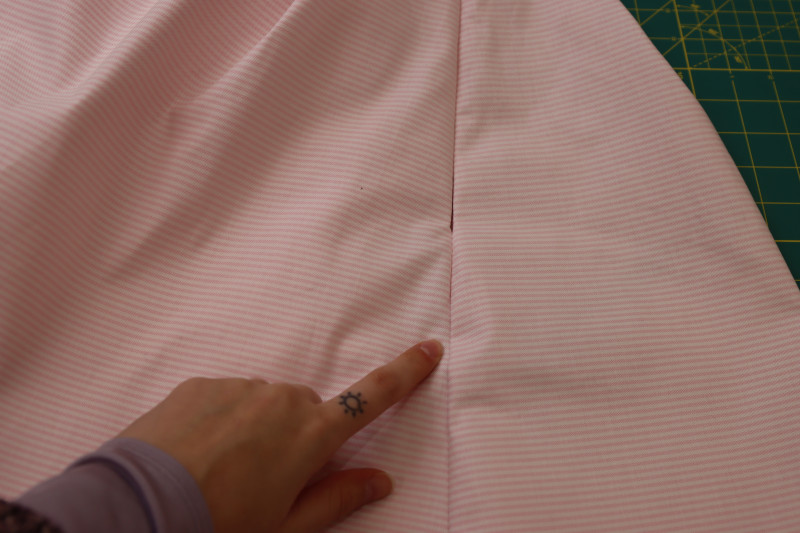
- Sew the rest of the side seam under the zipper.
- Sew the lining side seam under the zipper as well.
- Press both seams open and flat.
Step 20
BUTTON PLACKET CLOSURE
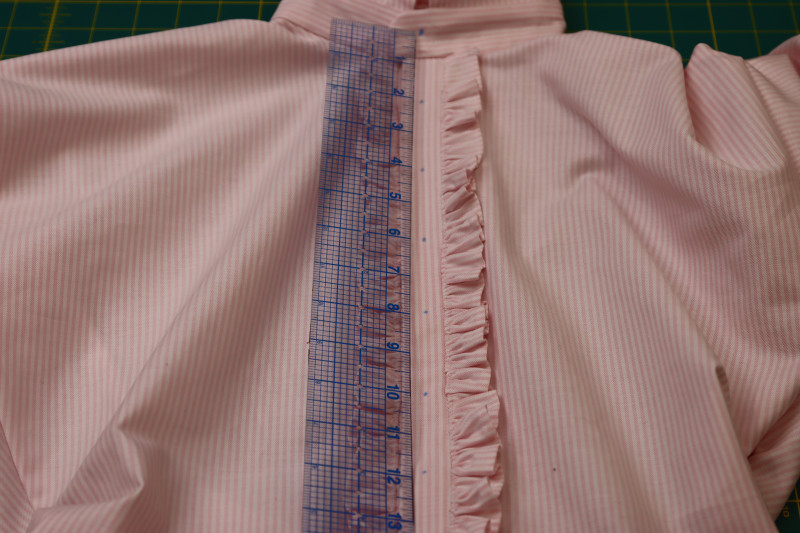
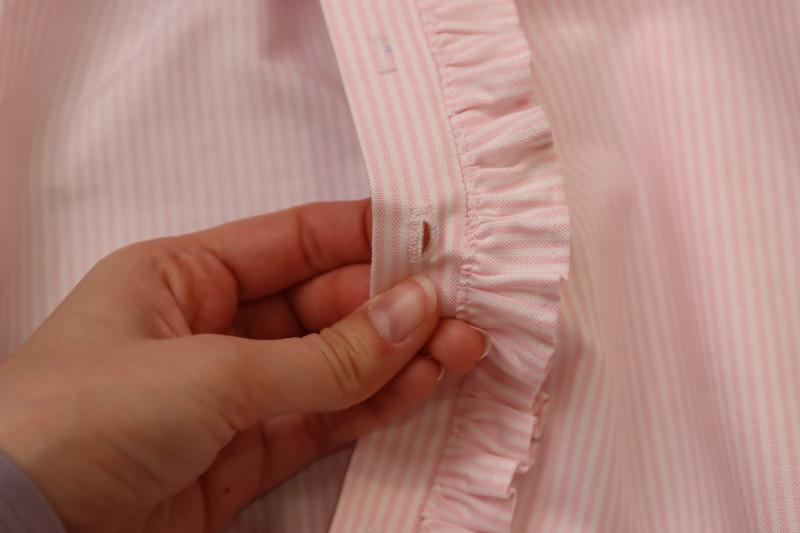
- Draw evenly spaced marks on the button placket for the buttons and button holes. One of the marks should be on the collar band, the rest should be on the button placket. I marked 8 buttons in total.
- Use the buttonhole foot attachment on your sewing machine to sew buttonholes over the chalk marks.
- Open the buttonholes with a seam ripper.
- Sew buttons on the opposite side of the button placket.
Step 21
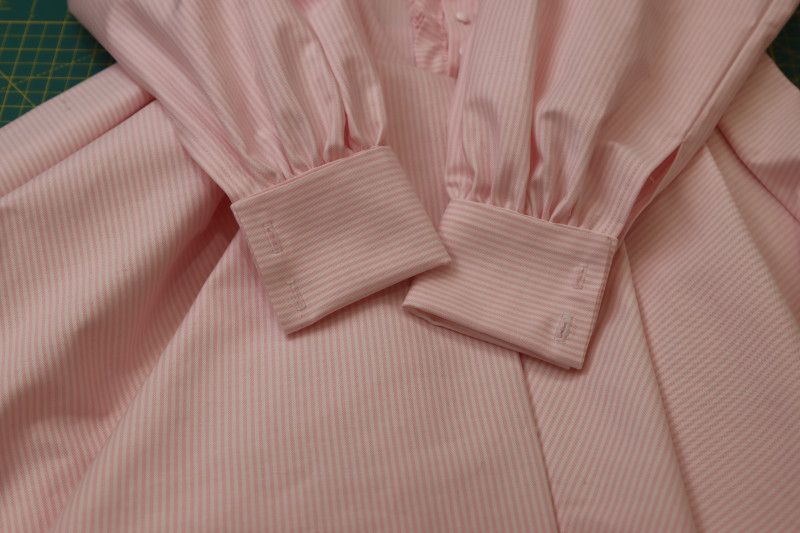
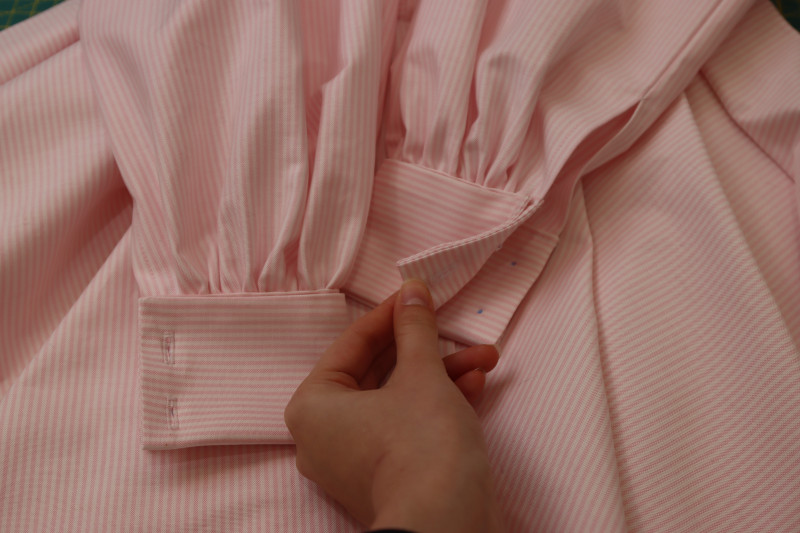
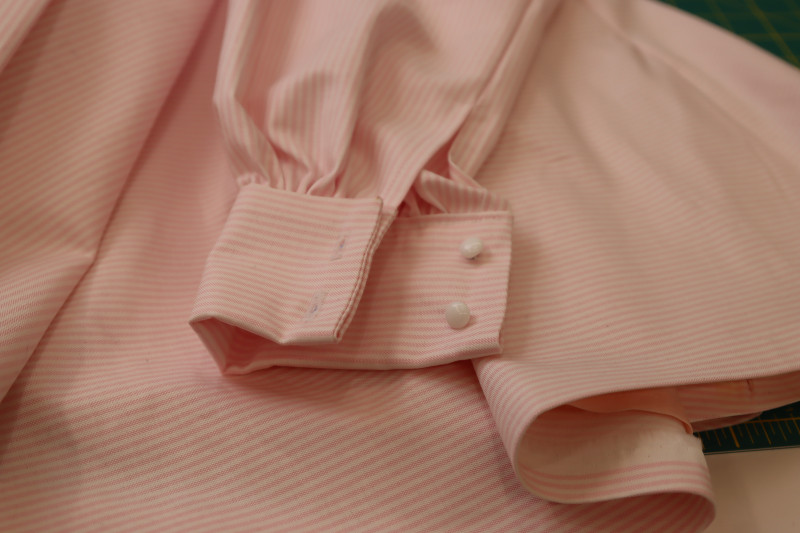
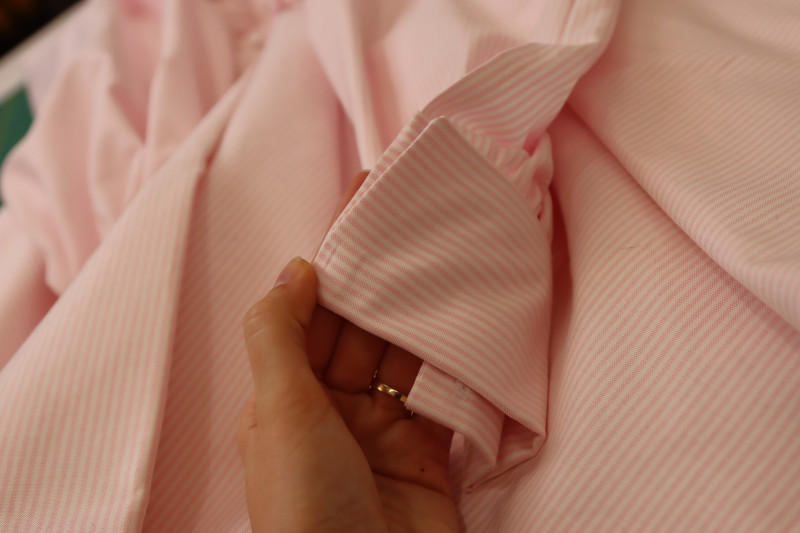
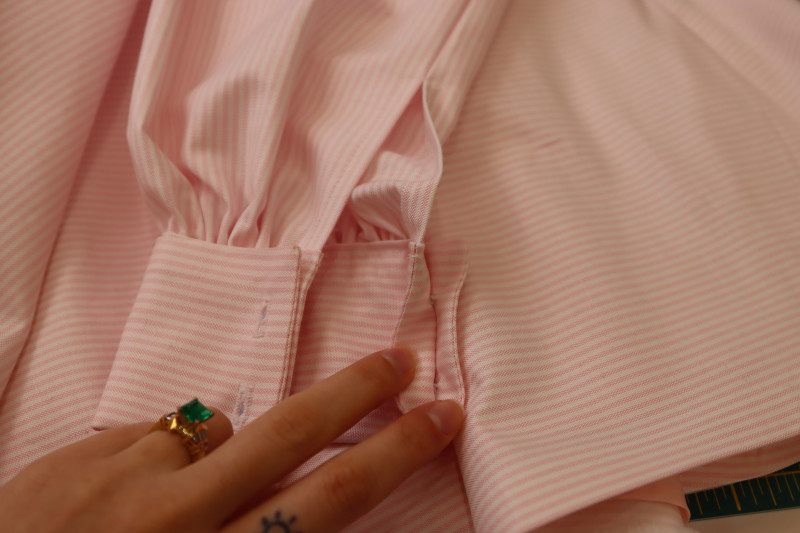
CUFF CLOSURE
- Fold the long cuffs in half so that the end of the cuff is touching the ruffled sleeve.
- Using your buttonhole foot attachment on your sewing machine again, sew 2 buttonholes into the back of each sleeve cuff, making sure you go through both back layers.
- Hand sew buttons opposite to the button holes on the INSIDE of the cuffs, making sure to catch both layers of the cuffs, but not letting the hand sewing stitches show from the outside of the cuff.
Step 20
BUTTON PLACKET CLOSURE
- Draw evenly spaced marks on the button placket for the buttons and button holes. One of the marks should be on the collar band, the rest should be on the button placket. I marked 8 buttons in total.
- Use the buttonhole foot attachment on your sewing machine to sew buttonholes over the chalk marks.
- Open the buttonholes with a seam ripper.
- Sew buttons on the opposite side of the button placket.
Step 22
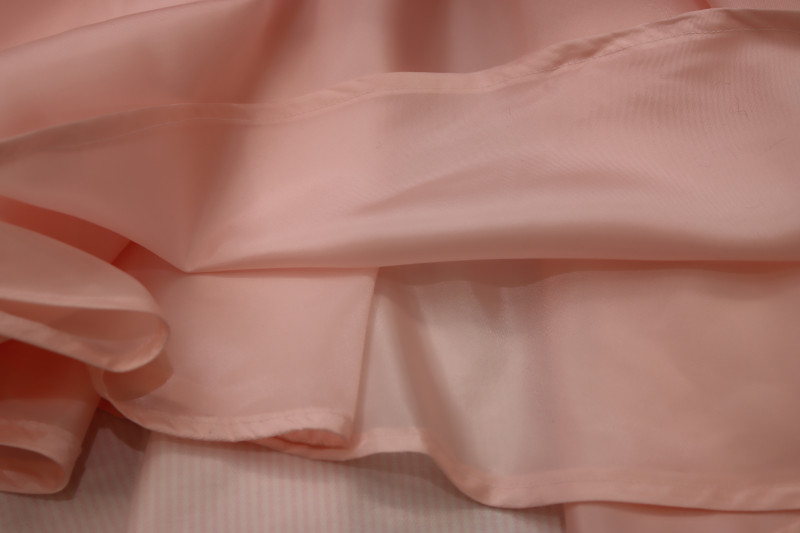
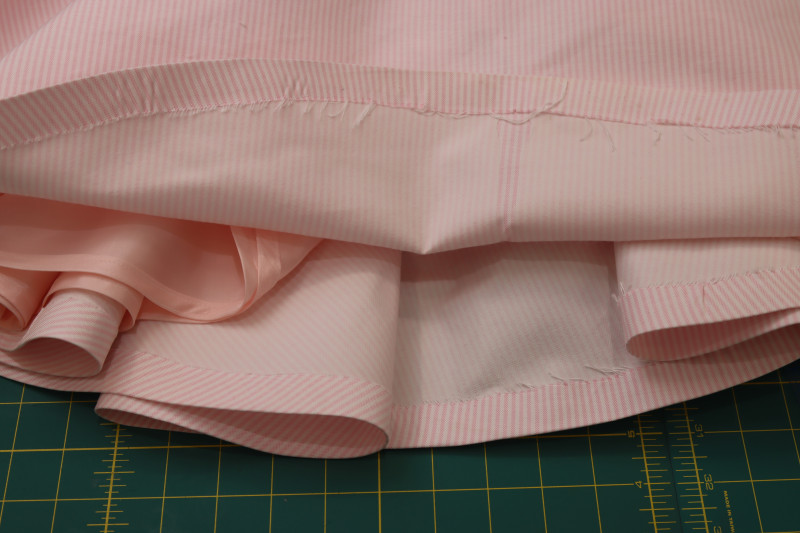
HEM SKIRTS
- Hem the lining skirt with a double folded ½ inch seam allowance.
- Press a 1 inch fold into the hem of the main fabric.
- Press fusible hem tape into the folded at the hem of the skirt for a seamless hem.
HOW TO SEW THE CORSET
Step 23
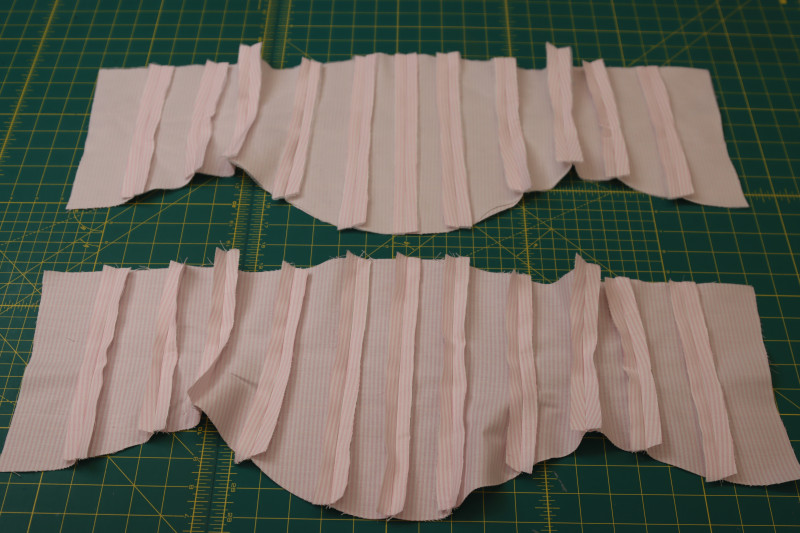
SEW CORSET SEAMS
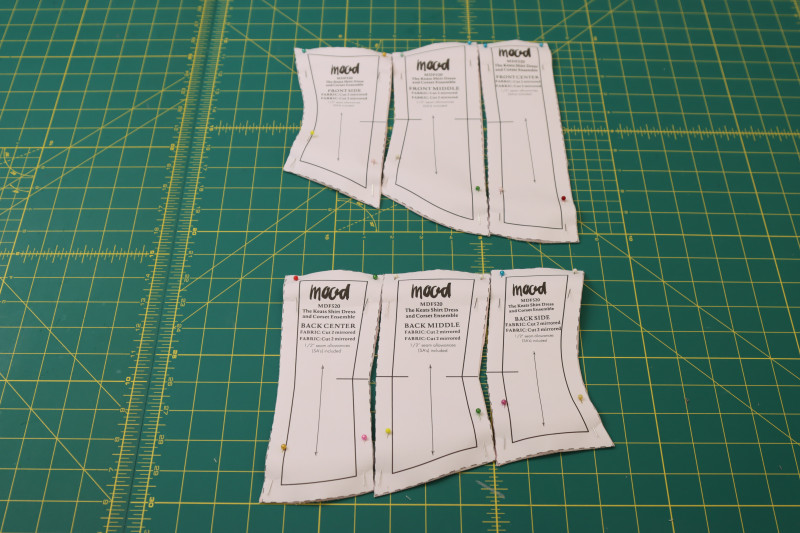
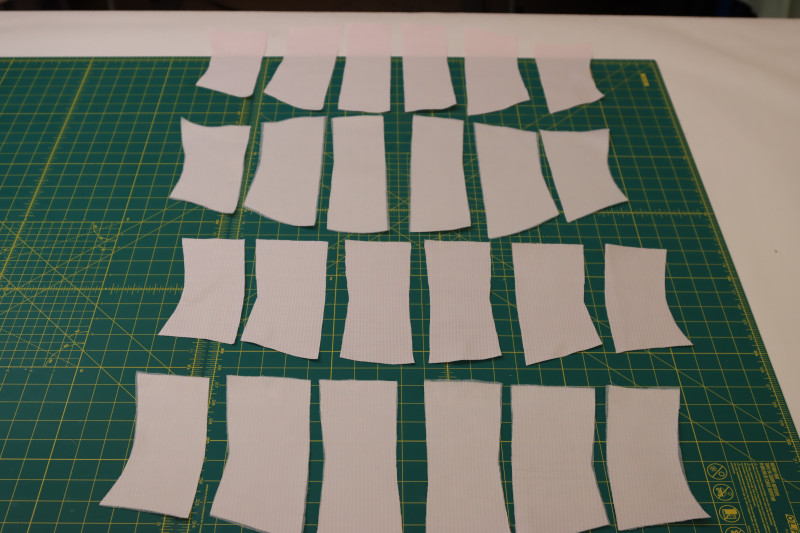
- Layout the corset pieces as shown in the photo below.
- Press fusible interfacing into the pattern pieces for the lining layers (basically, you have 4 of each corset piece right now, two for the outer layer and two for the lining layer. You just want to press the interfacing into the lining pieces).
- Pin and sew the interfaced pieces of the corset together.
- Pin and sew the non interfaced pieces of the corset together.
- Press the seams open and flat.
Step 24
SEW CORSET WAISTLINE
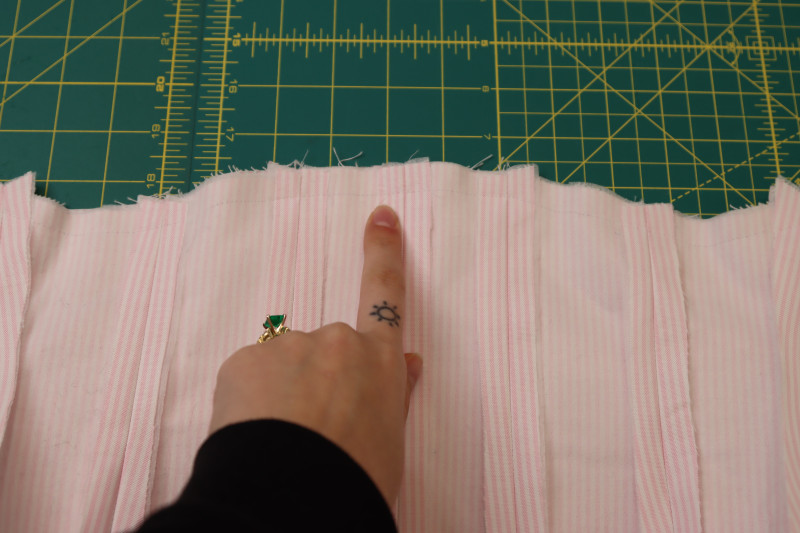
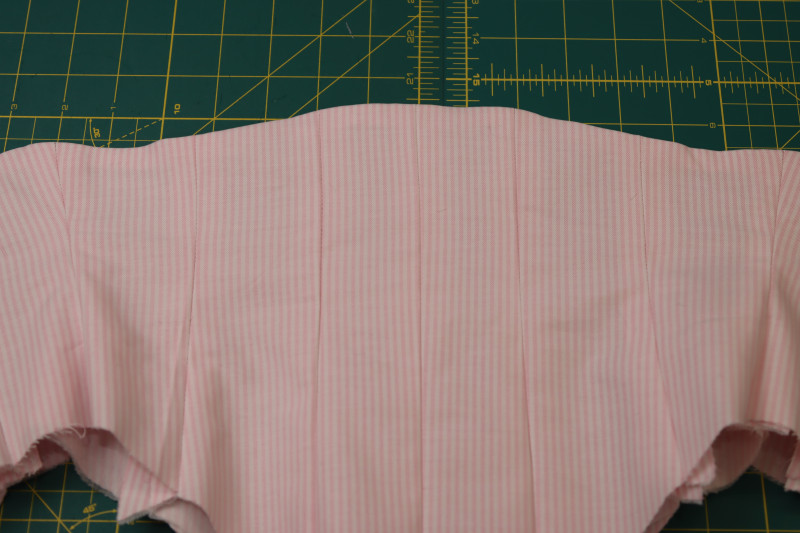
- Place the lining corset and the outer corset right sides together with the waistline lined up.
- Pin and sew the waistlines together.
- Flip the corset right sides out.
Step 25
BONING CHANNELS
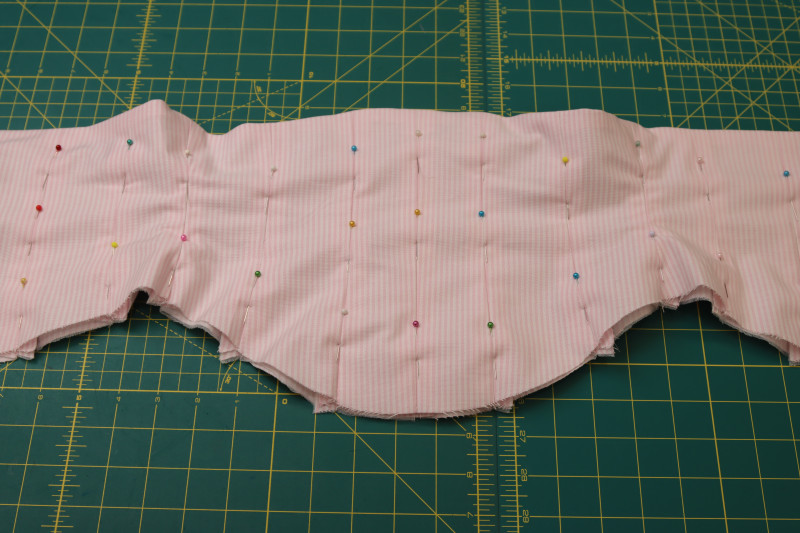
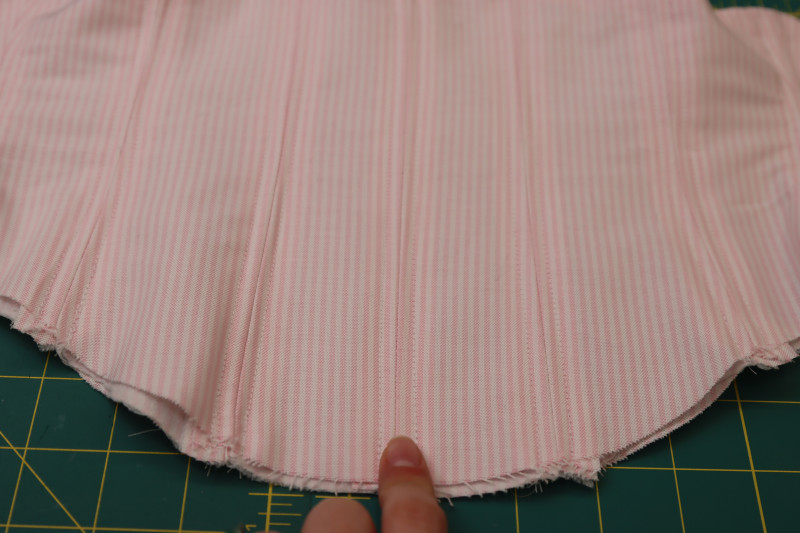
- Pin the lining corset seams to the outer corset seams.
- Sew two parallel straight stitches on either side of each corset seam with ⅛ inch seam allowance.
Step 26
INSERT BONING
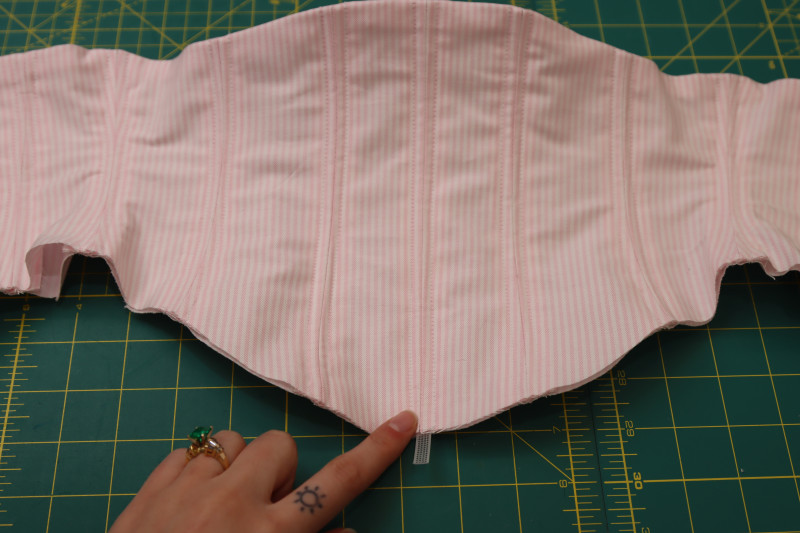
- Insert the rigilene boning into the boning channels you just sewed.
- Cut the boning down to the length of each channel.
Step 27
CENTER BACK SEAM
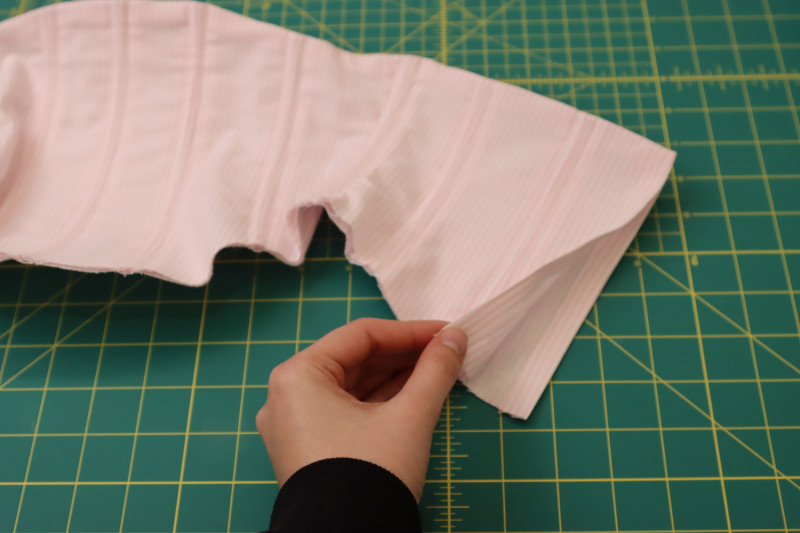
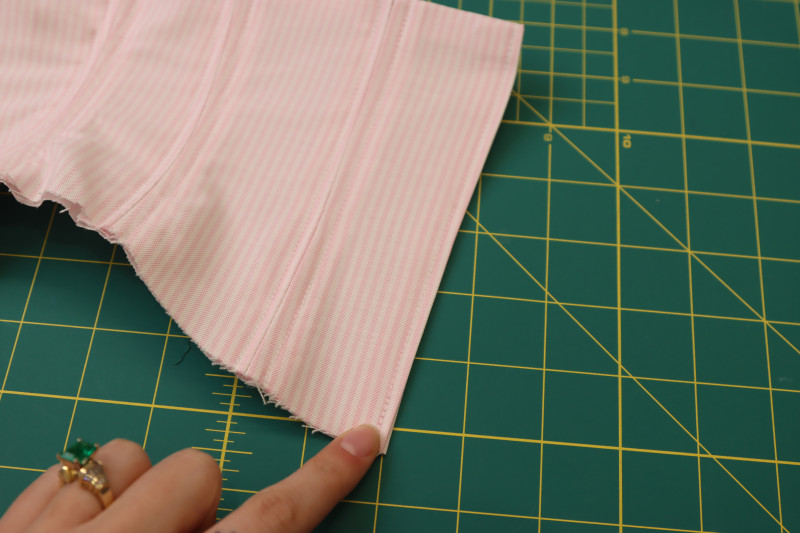
- Press a ½ inch fold into both sides of the back of the corset to hide the raw edges of the fabric.
- Topstitch over the folded edge of the center back of the corset.
Step 28
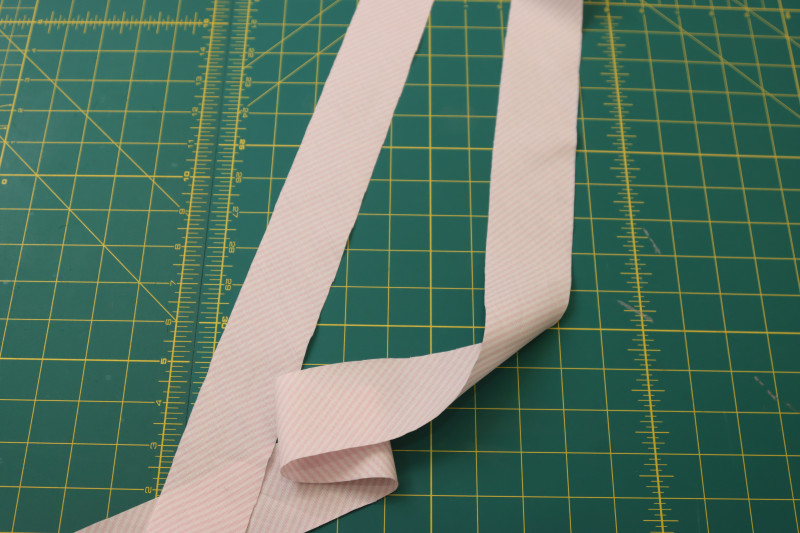
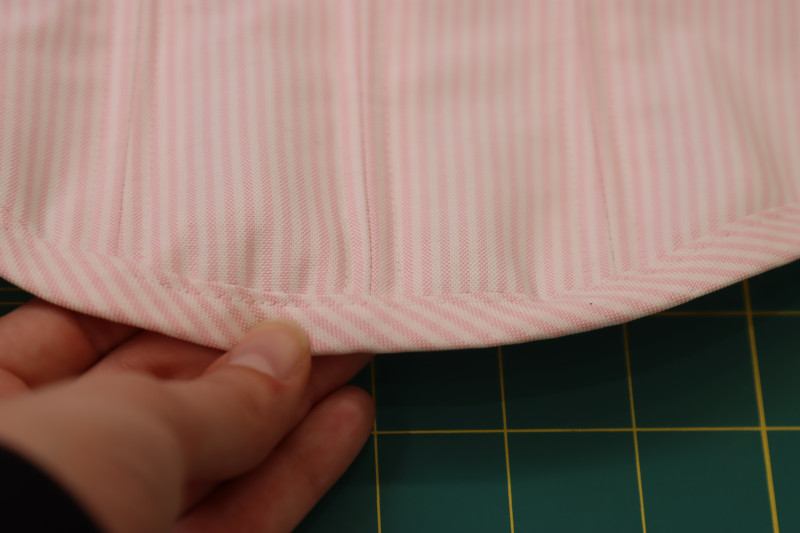
BIAS BINDING
- Cut a piece of bias tape out of the main fabric that is 2 inches wide and at least as long as the bottom edge of your corset plus a few extra inches.
- Cut another piece of bias tape that is the same width but at least twice as long. Set this piece aside for the next step.
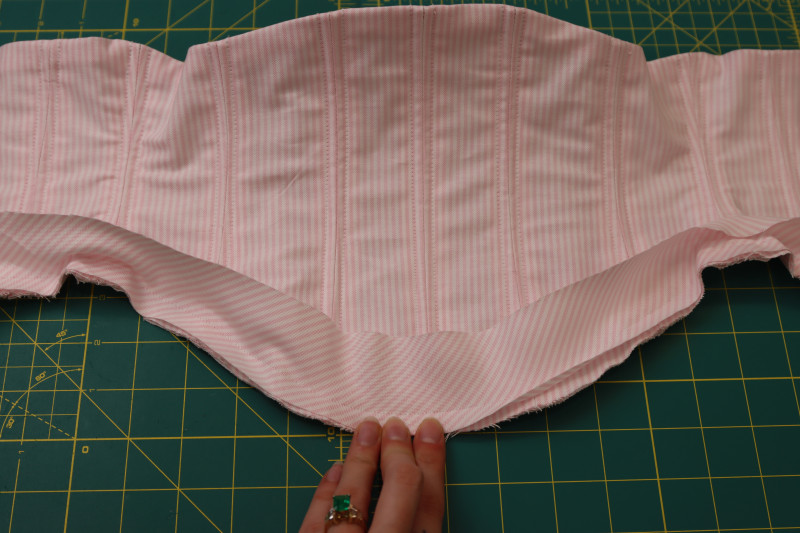
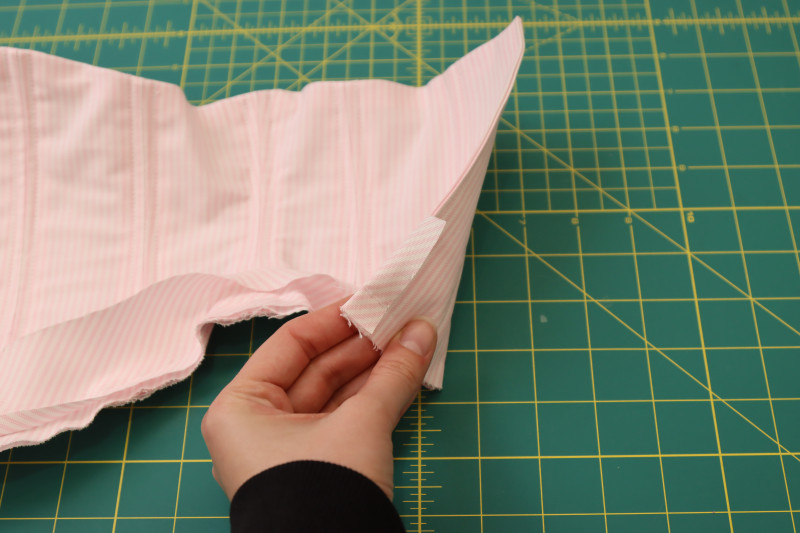
- Sew the bias tape right sides together with the outer layer of the corset. Make sure that at the end of the bias tape (the back of the corset) you wrap the end of the bias tape around the inside of the corset.
- Flip the bias tape towards the lining layer of the corset.
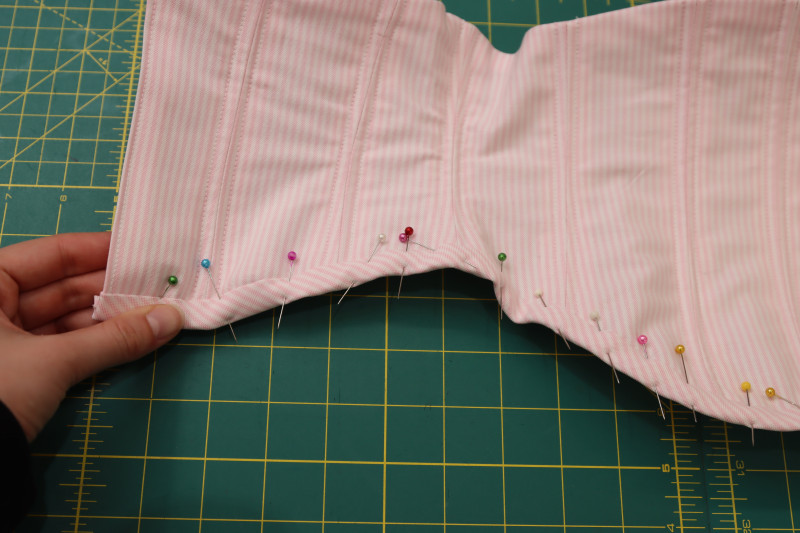
- Fold the bias tape under itself and pin it to the back of the corset.
- Topstitch over the back layer of the bias tape from the front of the corset.
Step 29
BIAS LACING
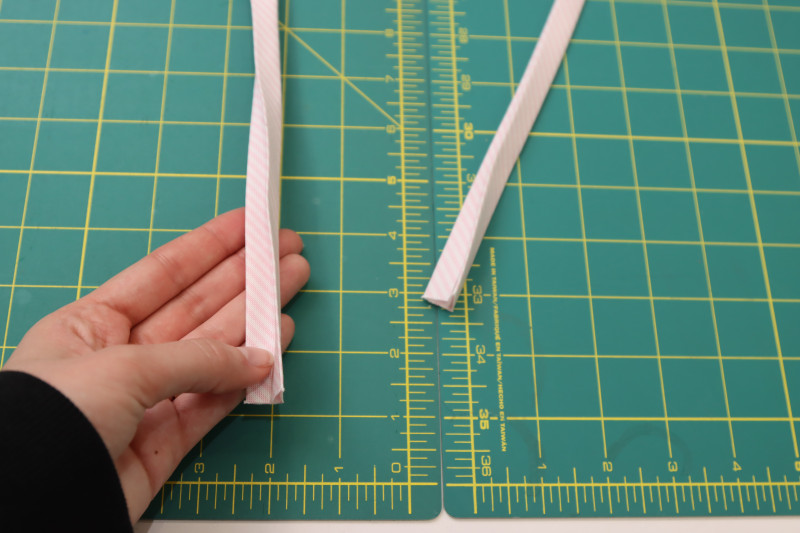
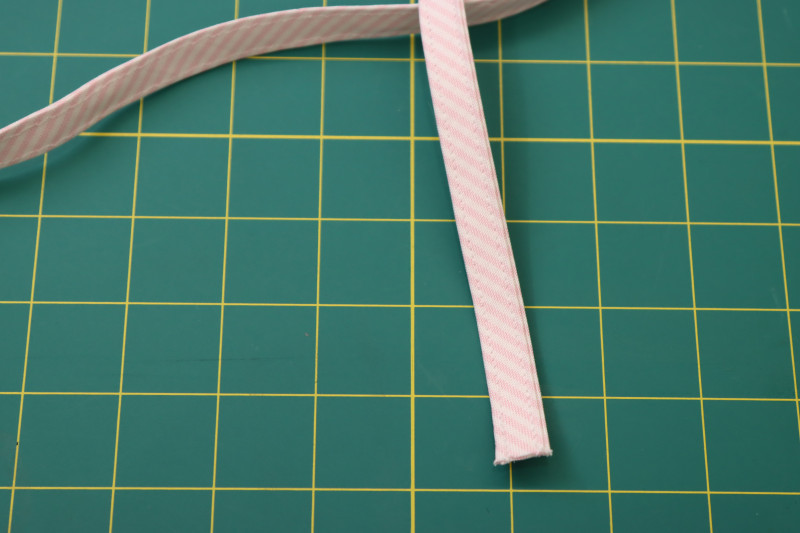
- Take the other piece of bias binding and fold it in half long ways.
- Fold the raw edges of the bias lacing into the folded center.
- Press the folds into place.
- Topstitch two parallel straight stitches on both long ends of the bias lacing.
Step 30
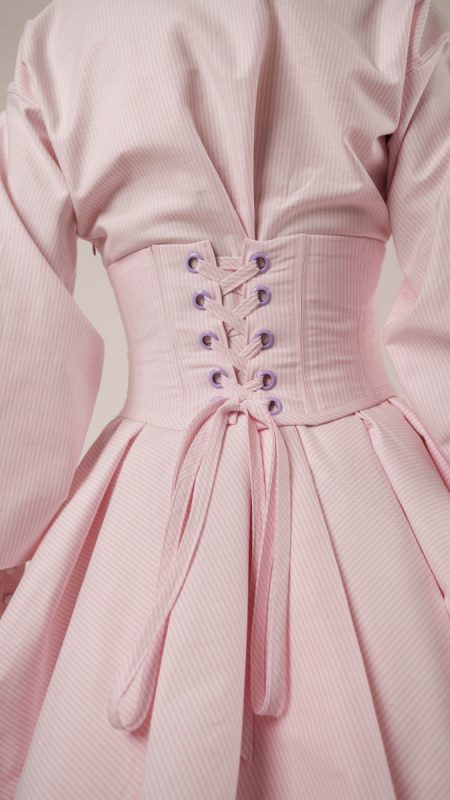
GROMMETS
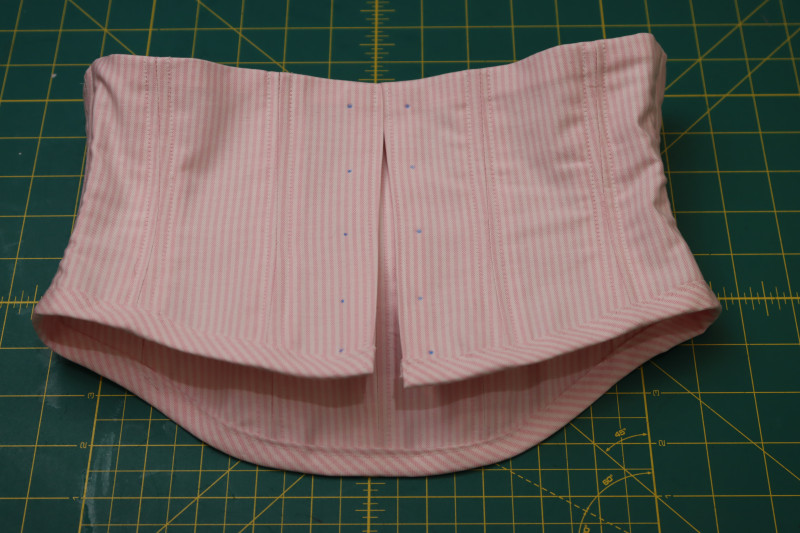
- Mark evenly spaced chalk lines on the center back of the corset for the grommets.
- Cut holes on the chalk marks that are big enough for the grommets to fit into.
- Match the fronts and backs of the grommets on each hole and secure with a mallet.
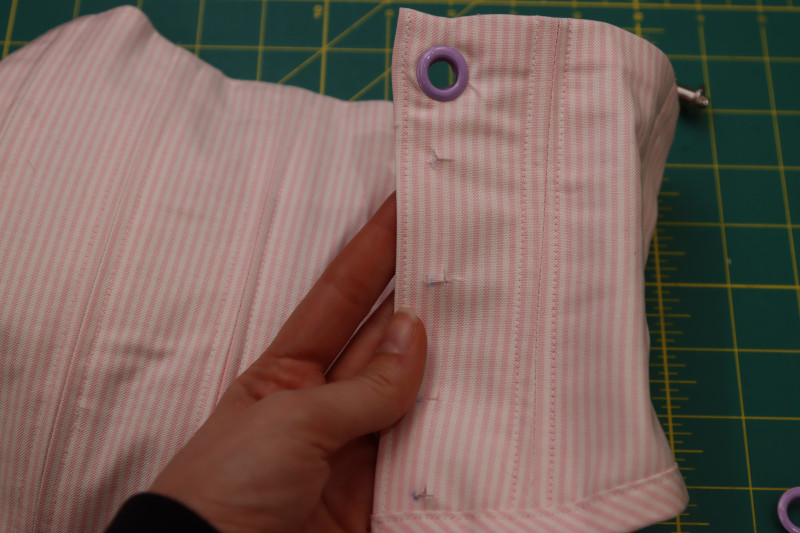
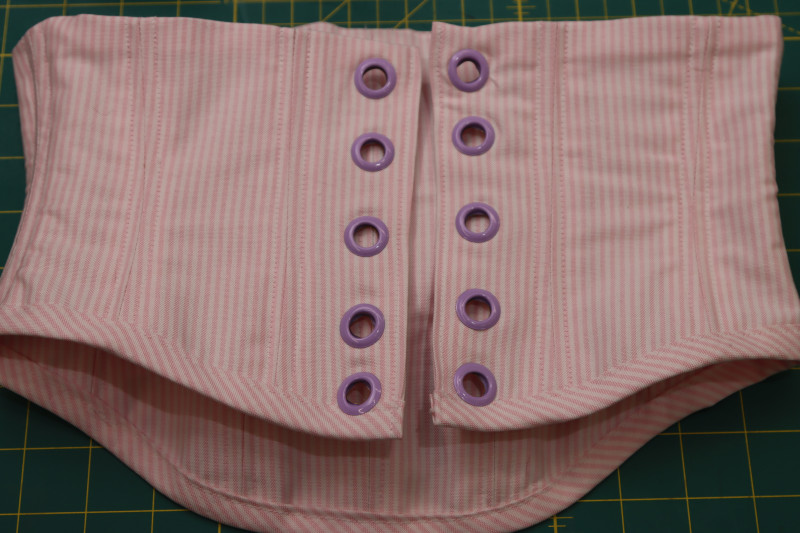
Step 31
INSERT LACES
- Insert the lacing into the grommets as shown in the grommets as shown below.
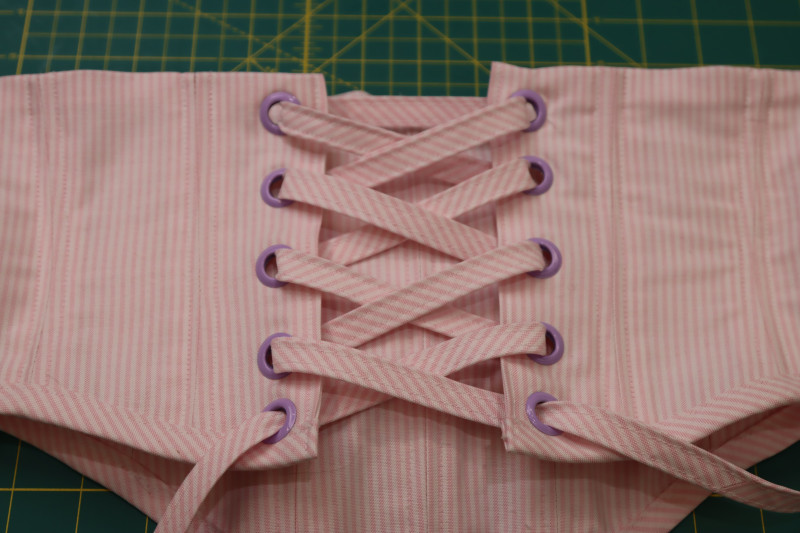
Sewing Success: The Finished Keats Shirt Dress and Corset Ensemble
Share this post with a friend (or two!), download the Keats Shirt Dress and Corset Ensemble free sewing pattern, and show us which fabrics and colors you choose, using the hashtags #MoodKeatsPattern & #MadeWithMood—and don’t forget to tag us @MoodFabrics, too.

Free Sewing Pattern Inspiration for Your Next Project
With 500+ free sewing patterns and counting, your opportunities for sewing with Mood are endless!
We hope you had as much fun sewing this shirt dress and corset pattern as we did! As always, we want to hear from you—share your thoughts and comments below and let us know where you’ll be wearing the Keats Shirt Dress and Corset Ensemble free sewing pattern!
Can’t get enough sewing with Mood? Browse your next make with our latest free sewing patterns.
In-love with poet-core dressing? Try your hand at sewing our Bayport Blouse free sewing pattern paired with our Augusta Trousers free sewing pattern!

Oh, this one is ripe for interpretation:
For a fifties vibe, lengthen the skirt and switch the shirt collar for a peter pan collar.
For a pirate dress, leave out the collar stand and button band and lace the front of the bodice together. Add a dramatic ruffled lace edge to the cuffs.
For a ren fair maiden, draft a drawstring neck and lengthen the skirt. Leave off the cuffs and add a drawstring to the sleeves.
So cute! I love a striped fabric shirt!
Is there a reason for leaving the raw edge on the skirt hem? could the edge be sealed in w.o. changing the look of the skirt?
I just know imma pick at the edge lol
Hey Tarot, I just left it raw because i used the fusible hem tape to hem the skirt, but you can absolutely finish the edge with a serger, zigzag stitch, or rolled hem.
MAGNIFIQUE !
How much fabric would be needed if you only want to make the corset?
Depending on the size, 1.5 to 2 yards.
FINALLY a nice pattern. Not something standard, but still very wearable with a great silhoutte. Way better than most patterns in the last year
very cute
This is gorgeous! Could the dress be worn without the corset?
Surely! The corset is just to cinch the waist but the dress can be worn without it.
Love it
Oh, this is gorgeous! I can’t wait to make it. Thanks so much for this pattern–both pieces are going to be so useful!
How much yardage would I need if I just wanted to make the corset?
Depending on the size, 1.5 to 2 yards.
i’d love to see this without the corset
What a beautiful pattern.
Beautiful dress!
How much yardage would it be if I just wanted tin mane the corset part?
Hi Daisy
Half a yard of main fabric and half a yard of lining are enough to make the corset. For the largest sizes, I recommend using fabric with a width of at least 58″ 🙂
Is there a place on the corset that allows for shortening? The picture on the pattern doesn’t show where to shorten.
Hi Henna
I recommend you to shorten the corset across all panels midway between the bust and waist, avoiding the bust and waist areas to keep the shaping intact.
Fabulous
Is the corset lined with the main fabric or the lining fabric?
It’s lined with the main fabric. Thanks for asking!
Like your Style
I only made the corset, and shortened/pinched an inch from the middle because I am short torso-ed. I almost wish I’d shortened it two and need to try doing so on another. Eventually I want a stiff leather one! 😉 Used firm deadstock cotton twill for both layers and extra firm dress shirt interfacing, 1/4″ industrial zip ties, and satin rat tail cord in hand bound eyelets.
Super pleased with the results.
I found the fit PERFECT as a supportive fashion accessory. Stiff enough to sit up straight without trying and still BREATHE. I also think it is nicely supportive in any orientation. Wearing it backwards and upside down feels more back supportive. This is sized to be a supportive, unrestrictive garment. Tightlacers and body modders size the corset down.
Hi Rosemary
Thank you for your comment! Your material choices sound amazing. I love how versatile it sounds, especially wearing it different ways.
A leather version would be incredible. So glad the fit turned out well. Thank you so much for sharing your experience, it will be really helpful for other sewists. Would love to see your next version!
Happy sewing 🙂
How many yards of fabric is used in the corset? I want to use the color of the lining fabric for the corset and I’m not sure how much extra to buy.
Hey Max, for a size small or medium, you’ll need 1.5 yards for just the corset. If you’re making a bigger size, you might want 2 yards.
I’ve been looking for something like this for a long time thank you