
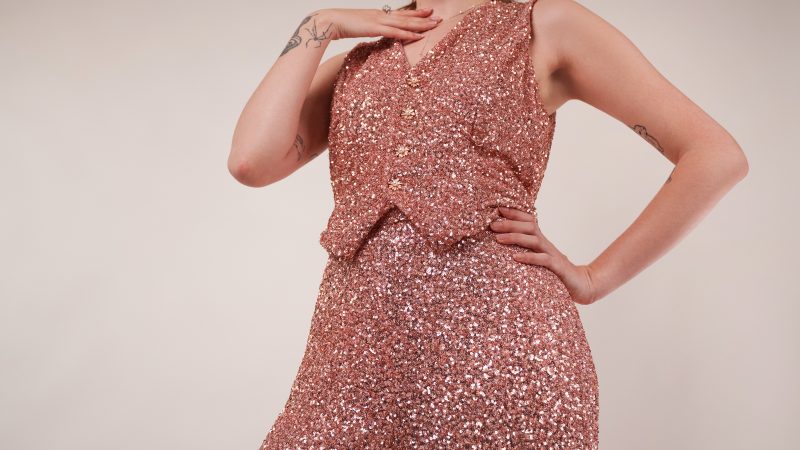
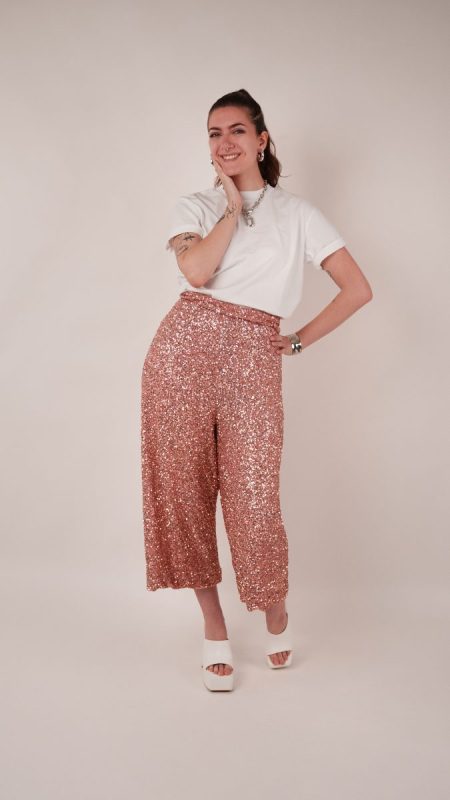
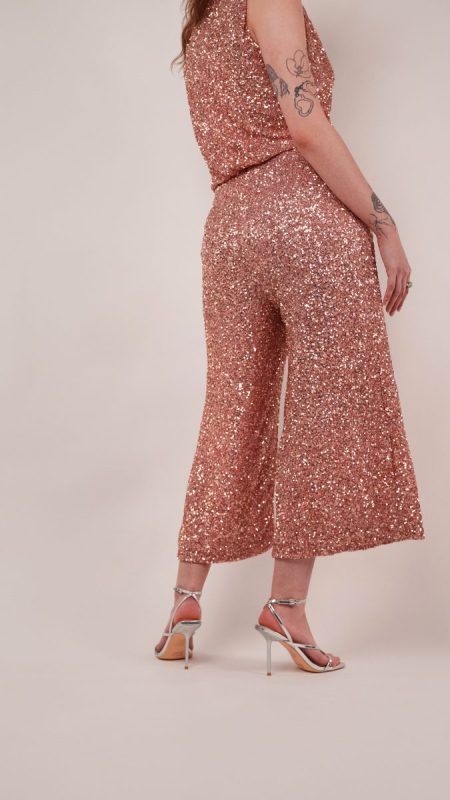
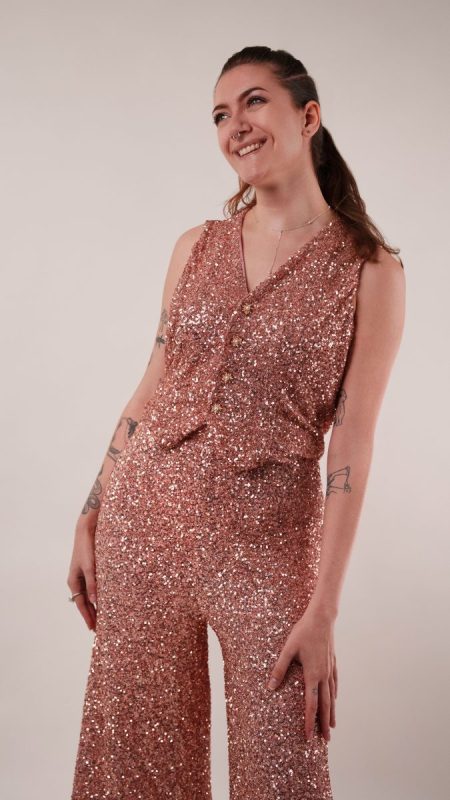
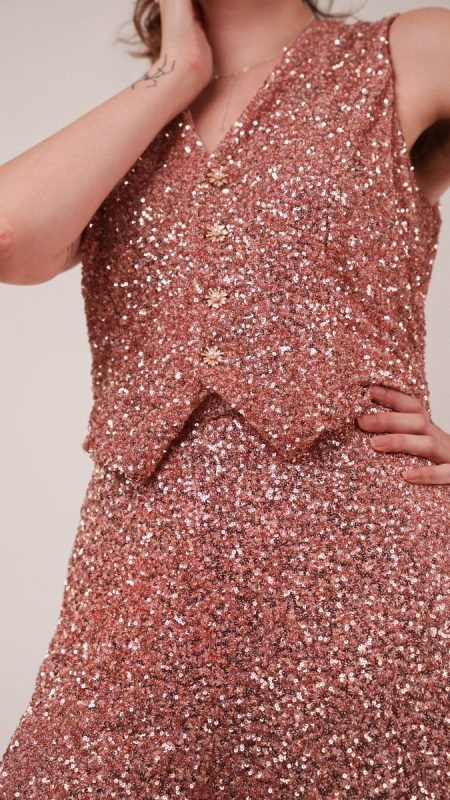
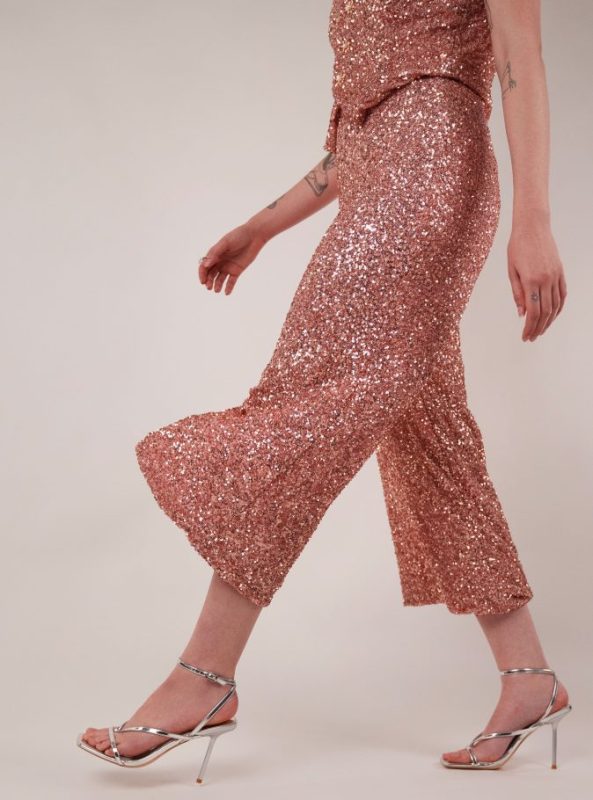
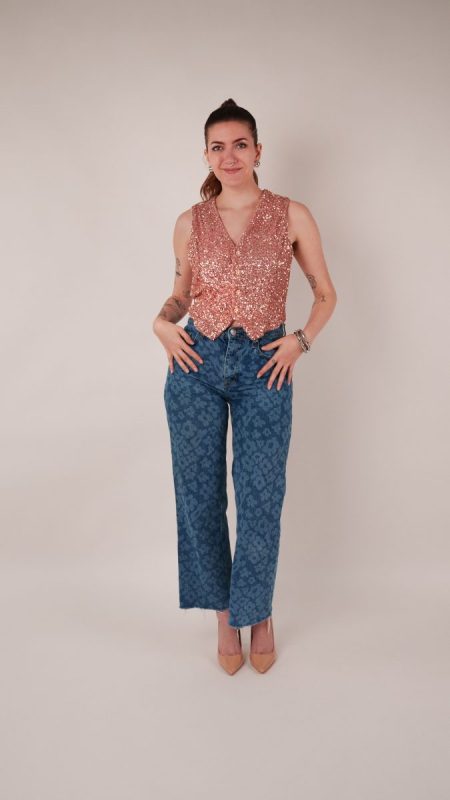
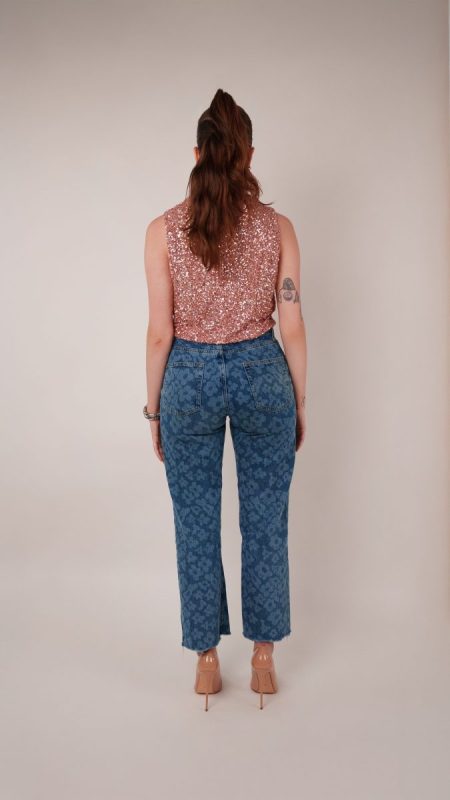
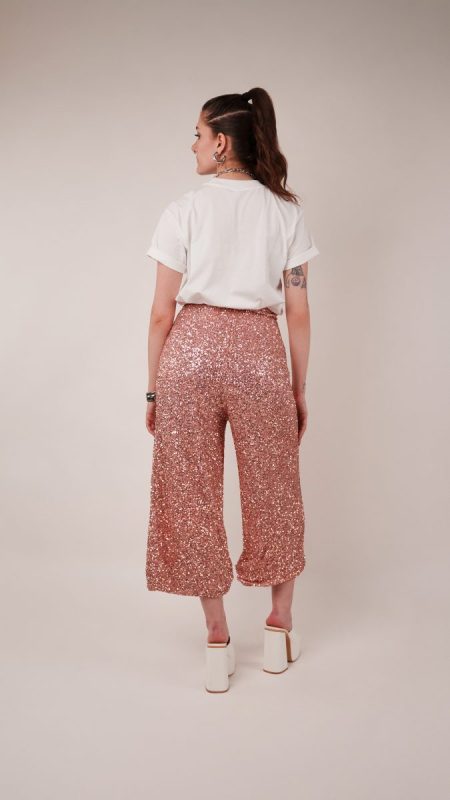
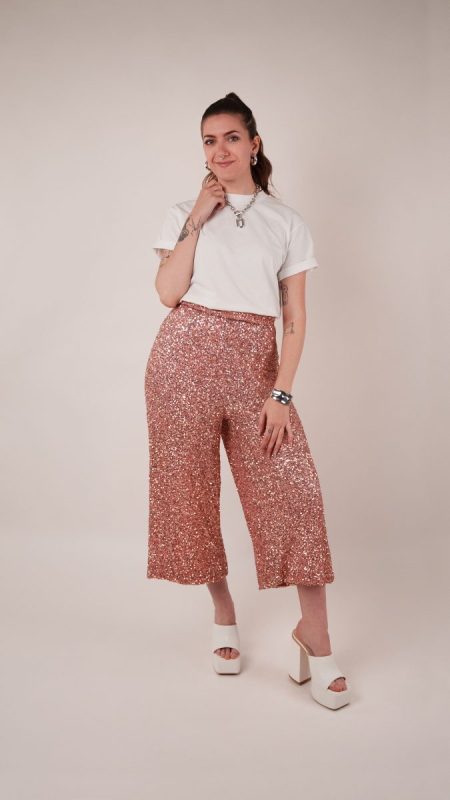
Meet the Morganite Waistcoat Ensemble, a chic two-piece set that brings tailoring and sparkle together in the most wearable way. Featuring a sleek, button-front waistcoat with a flattering pointed hem and a pair of elegant wide-leg culottes, this pattern is designed to feel just as glamorous as it is versatile. Sewn here in an ultra-luxe, recycled sequin mesh with a full lining, the look is party-ready from the very first stitch while ensuring the pants stay perfectly opaque and comfortable to wear.
What makes the Morganite Waistcoat Ensemble especially exciting is how easily it transforms with fabric choice. Reimagine it in silky satin for an elevated evening set, classic suiting for a polished office-to-dinner outfit, or structured denim for a modern everyday statement. The tailored vest and softly draped culottes create a universally flattering silhouette that works beautifully for celebrations, special dinners, creative workwear, and beyond.
This is also a wonderfully approachable project for sewists looking to dip into light tailoring without anything too advanced. The clean lines and simple construction make it a satisfying sew, with plenty of room for customization. Add side seam pockets to the culottes for extra functionality, play with contrasting linings, or experiment with topstitching details to make the ensemble uniquely your own. Whether you’re leaning into full glamour or creating a wardrobe staple in a more understated fabric, the Morganite Waistcoat Ensemble is a style you’ll reach for again and again.
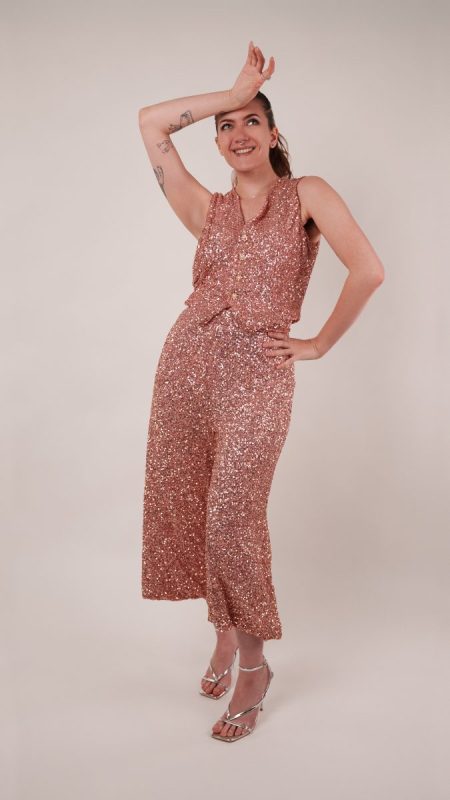
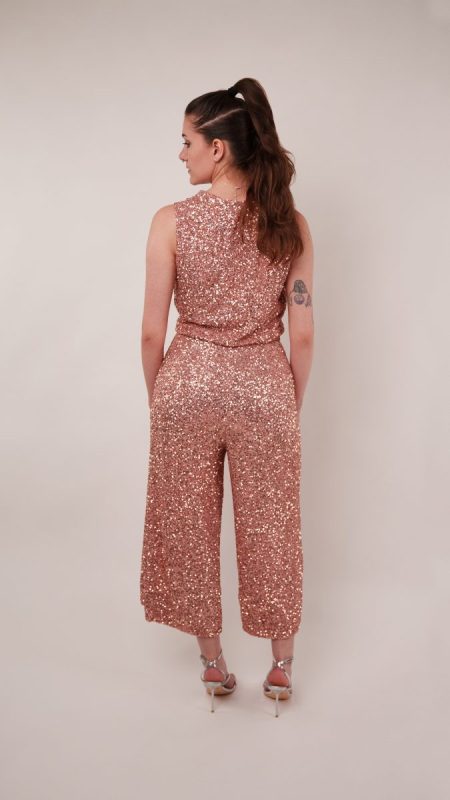
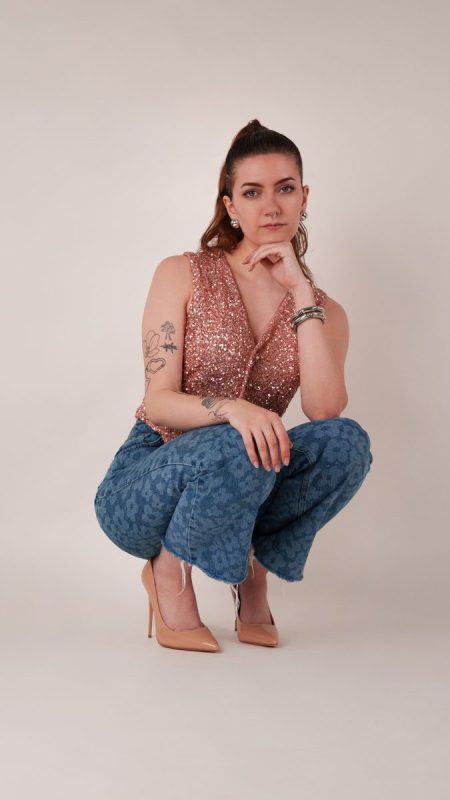
Essential Materials & Sizing Guide for the Morganite Waistcoat Ensemble
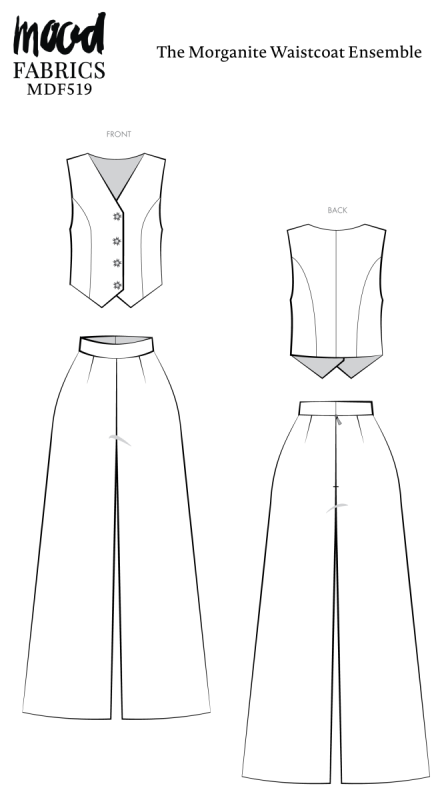
Continue reading for a breakdown of what knowledge and materials you need for creating your very own waistcoat ensemble! We’ve got you covered with the recommended materials we used—if you want to follow along exactly—as well as a curated list of alternative fabric type recommendations if you want to customize your own version. The Morganite Waistcoat Ensemble free sewing pattern download includes technical drawings for seam and silhouette visibility, plus a size chart to help you find your perfect fit!
Purchase Products Used Below:
Quantities indicated are for sewing a size small* waistcoat ensemble. Toggle the ‘SHOP THIS LOOK’ box to find quantity estimates for other sizes.
- 5 yards of Recycled Polyester All-Over Circular Baby Sequins on Stretch Mesh – Pink – Divine Collection
- 4 yards of Twill Bemberg Lining – Bridal Pink – Lustro Collection
- 1 each of Invisible Zipper 9″ by YKK – 513 Bubblegum
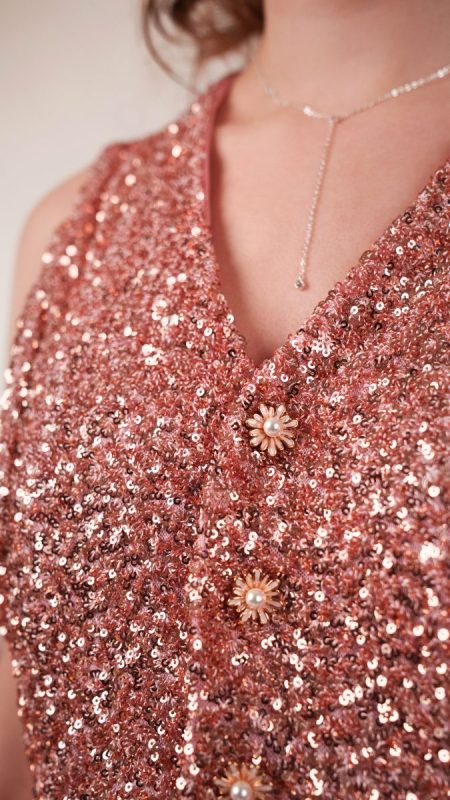
- 4 each of Enameled Metal and Pearl Shank Back Button – 30L/19mm – Pink, Pearl White, and Gold Flower
- 1 each of Prym Hooks & Eyes – Silver Size 2 – 12 Sets
- 2 each of Gutermann Sew All Thread 100m – 321 Bubble Gum
- MDF519 – Morganite Waistcoat Ensemble Sewing Pattern (Free download below!)
Additional Products Used:
*Quick Tip! The ‘SHOP THIS LOOK’ box defaults to full-yard quantities. To order an exact half-yard quantity for any fabric, simply use the decrease quantity button (-) to subtract by the half yard. Then click “ADD TO CART” to add all materials to your cart. (Our system can only display full-yard quantities initially.)
Alternative Fabric Type Recommendations:
The Morganite Waistcoat Ensemble sewing pattern is best suited for medium to heavyweight fashion fabrics. Explore other fabric types or colors from our featured collections for your waistcoat ensemble with the links below.
Fabric Collections Used in this Post:
Download Your Free Sewing Pattern
Submit your name and email in the form below to receive the download link for the Morganite Waistcoat Ensemble free sewing pattern directly in your inbox. Mood Sewciety Patterns will send your free download link via email with the subject line: ‘Your Free Download from Mood Sewciety – The Morganite Waistcoat Ensemble’ (in PDF format for A4 and letter-size printing).
© MoodFabrics.com / MoodSewciety.com – Mass production, resale, or distribution of this pattern in any form is strictly prohibited.
Find Your Perfect Fit
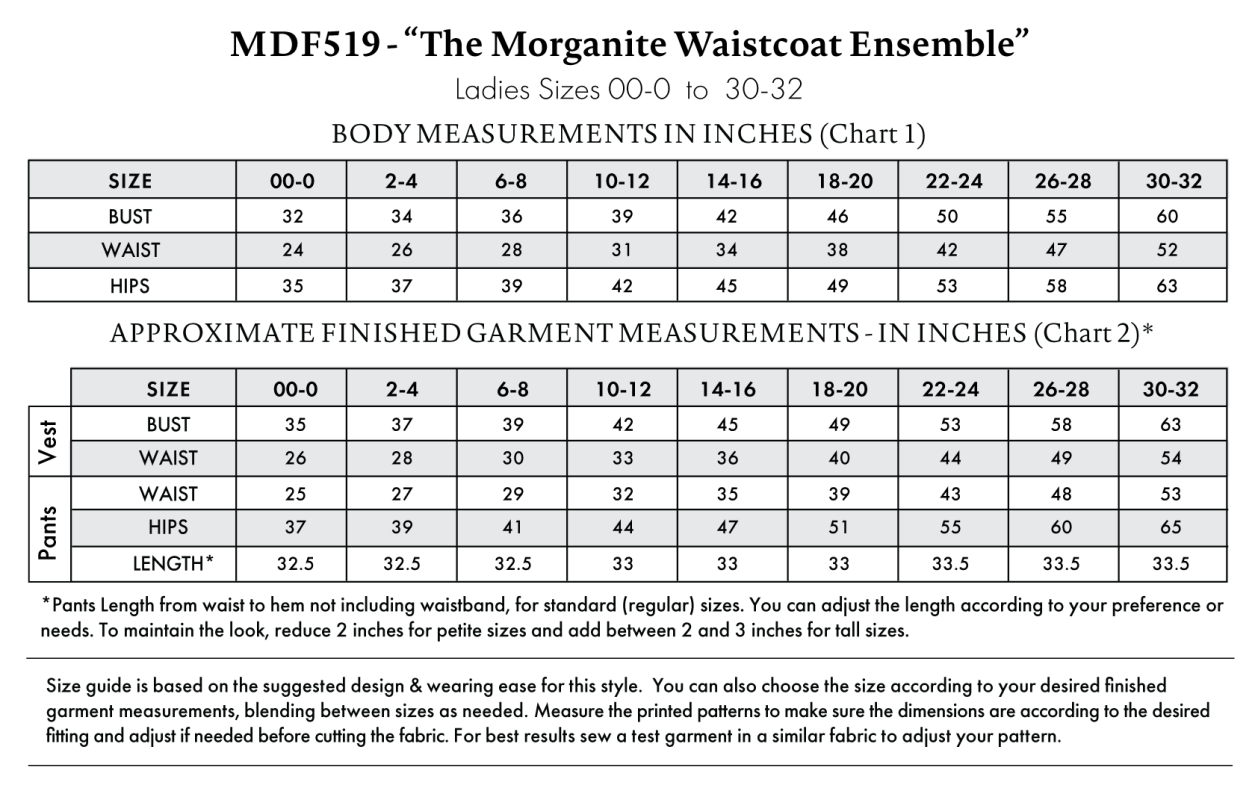
The Morganite Waistcoat Ensemble Sizing Guide is based on the suggested design & wearing ease for this style. You can also choose the size according to your desired finished garment measurements, blending between sizes as needed. Measure the printed patterns to make sure the dimensions are according to the desired fitting and adjust if needed before cutting the fabric. For best results, sew a test garment in a similar fabric to adjust your pattern.
Note: Always read all the instructions before cutting the fabric!
How to Sew The Morganite Waistcoat Ensemble
The instructions provided below are designed to guide you through sewing the Morganite Waistcoat Ensemble from start to finish.
3 Tips for Sewing with Sequin Mesh
⇒ Buy an extra pack of machine needles before you start sewing. You will break at least 1 needle during this project.
⇒ When pressing the seams where the lining is attached to the sequins, make sure your iron is on LOW heat so you don’t melt the sequins.
⇒ As you’re cutting out your pattern pieces, try to only cut through the mesh backing of the sequin fabric and not the sequins themselves so that they don’t end up all over the floor of your sewing room.
Pattern Pieces & Fabric Cuts Needed
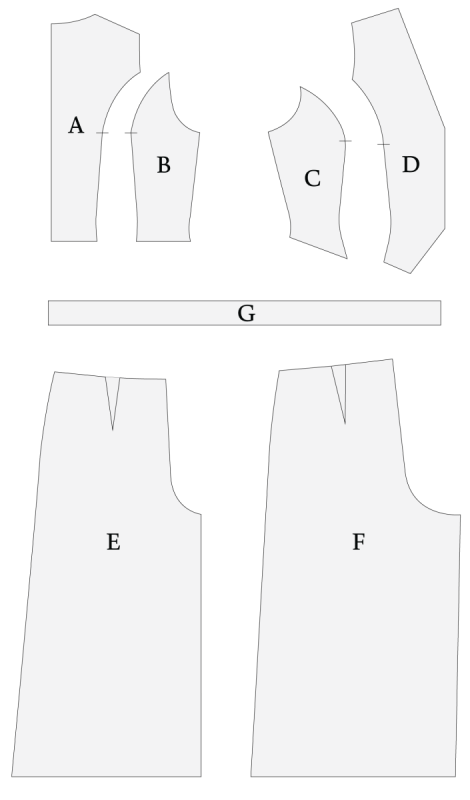
- (A) VEST BACK CENTER
- Fabric – Cut 2 Mirrored
- Lining – Cut 2 Mirrored
- (B) VEST BACK SIDE
- Fabric – Cut 2 Mirrored
- Lining – Cut 2 Mirrored
- (C) VEST FRONT SIDE
- Fabric – Cut 2 Mirrored
- Lining – Cut 2 Mirrored
- (D) VEST FRONT CENTER
- Fabric – Cut 2 Mirrored
- Lining – Cut 2 Mirrored
- (E) PANTS FRONT
- Fabric – Cut 2 Mirrored
- Lining – Cut 2 Mirrored
- (F) PANTS BACK
- Fabric – Cut 2 Mirrored
- Lining – Cut 2 Mirrored
- (G) PANTS WAISTBAND
- Fabric – Cut 1
- Lining – Cut 1
Sew with a 1/2″ seam allowance for all seams unless otherwise specified.
Step 1
PANTS DARTS
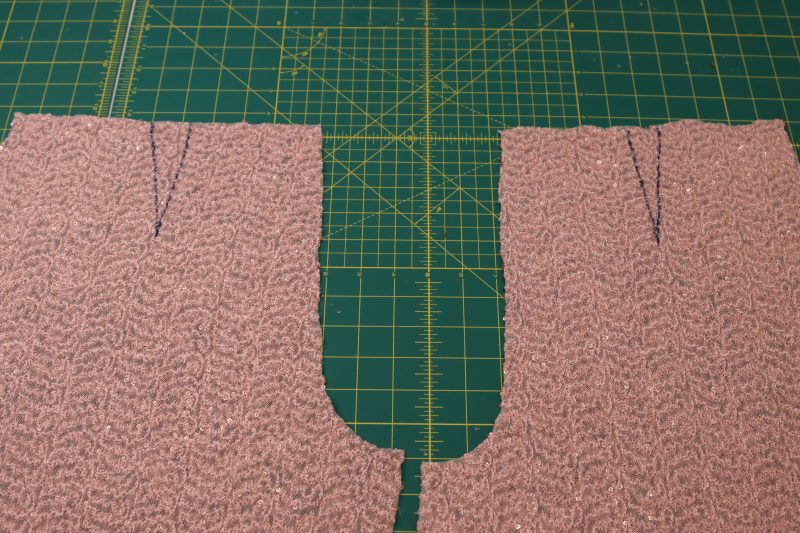
- Mark the darts on the fronts and backs of the pants with a fabric marker.
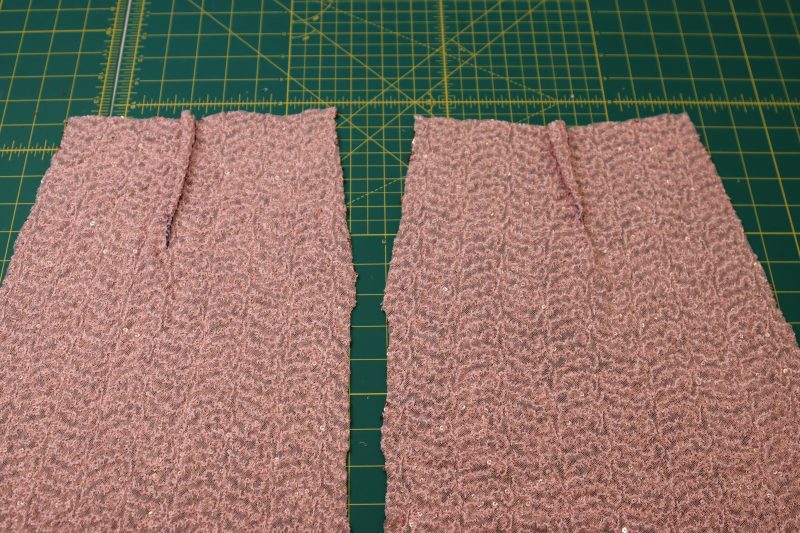
- Pin the darts right sides together.
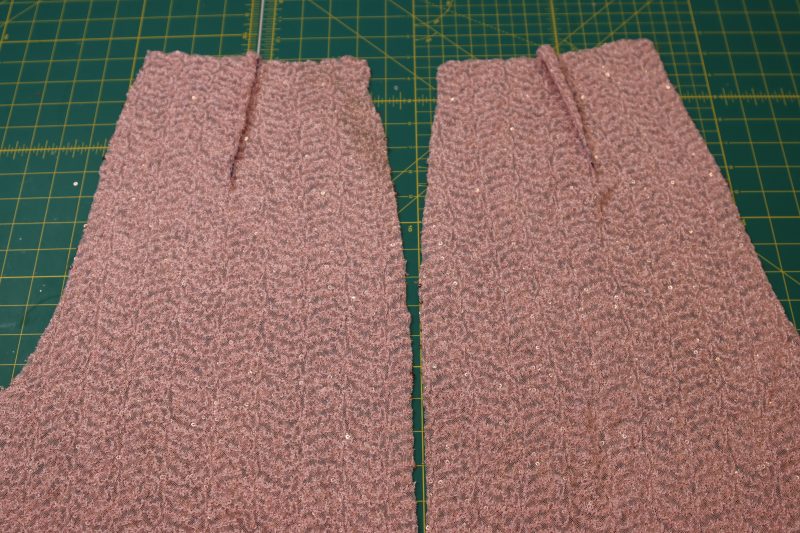
- Sew over the dart lines.
- Repeat for both front and back darts as well as the pant lining darts.
Step 2
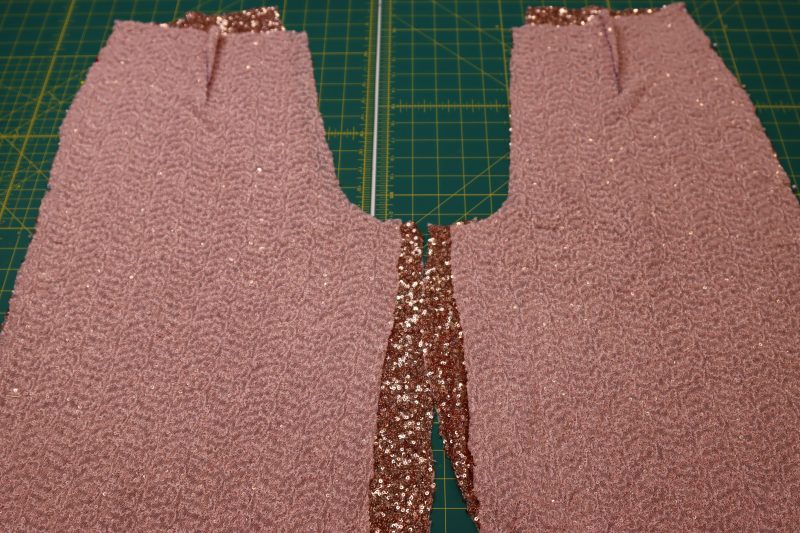
PANTS SIDE SEAMS
- Place the front pants right sides together on top of the back pants.
- Line up the outer side seams of the front and back pants.
- Pin and sew the side seams of the pants.
- Repeat the same steps for the lining.
Step 3
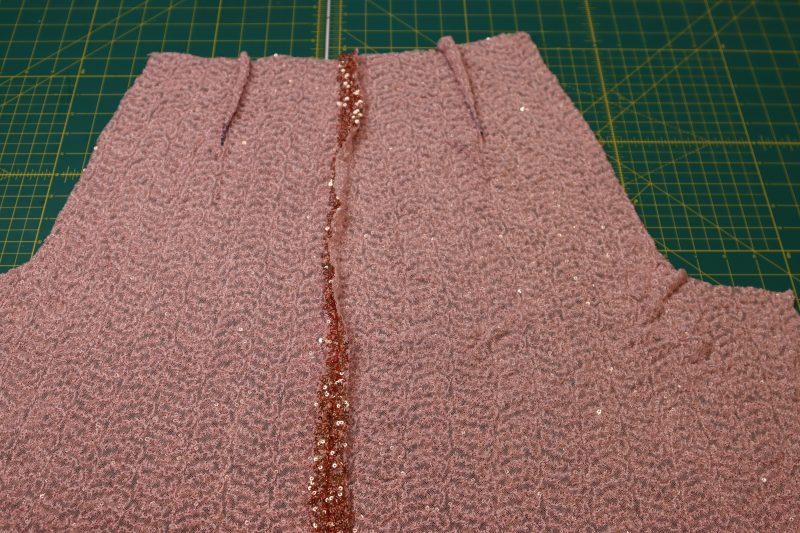
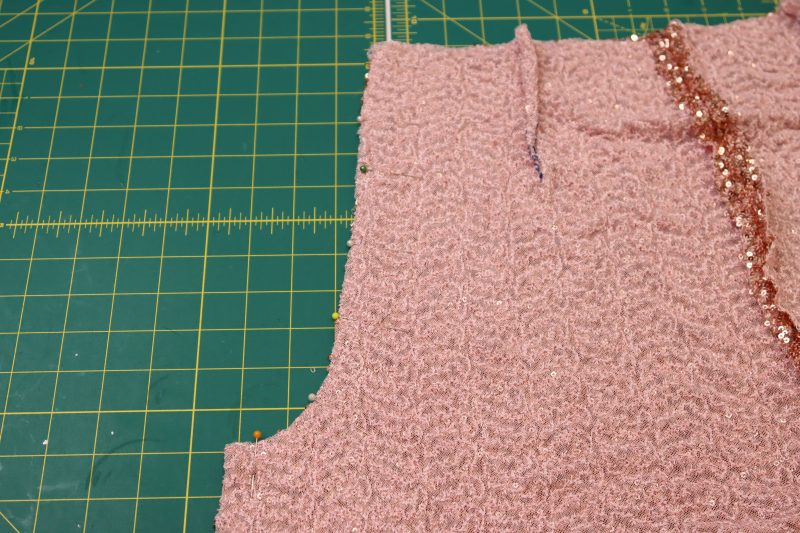
FRONT CROTCH
- Place the two pant pieces right sides together with the front crotch seams lined up.
- Pin and sew the front crotch seam.
- Repeat the same steps for the pant lining.
Step 4
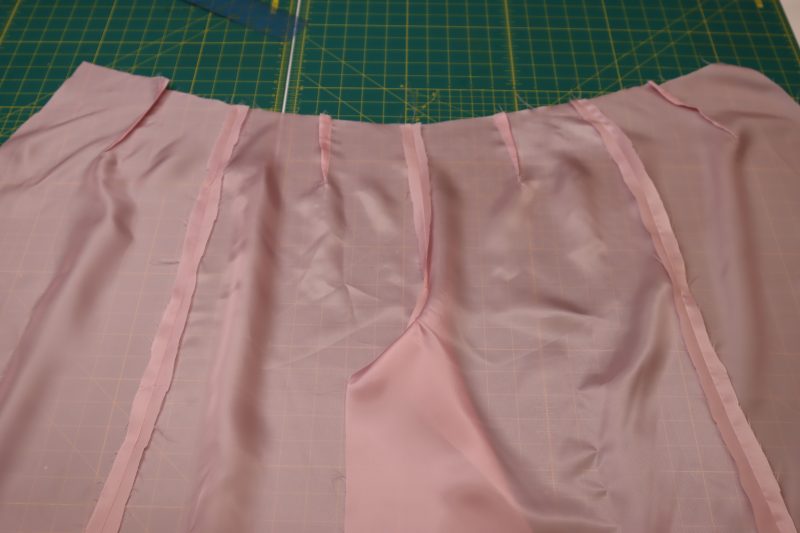
PANTS LINING
- At this point, just make sure that your pants lining is constructed the same way as the main fabric pants.
Step 5
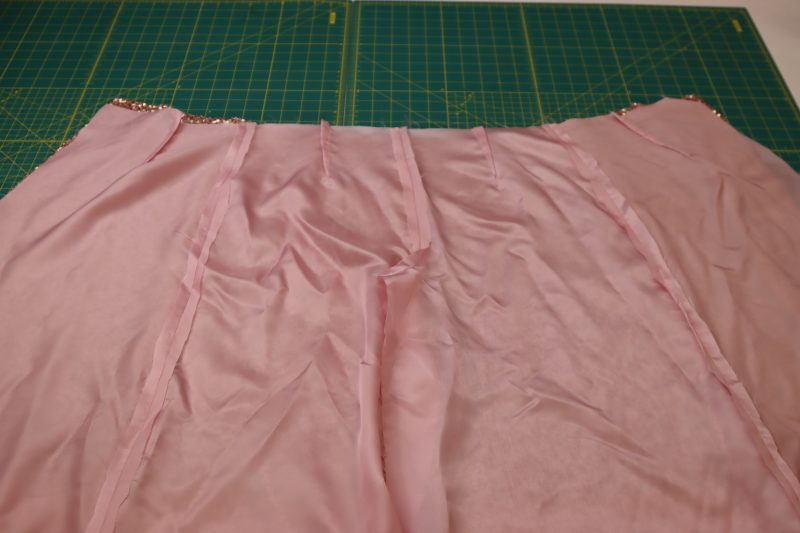
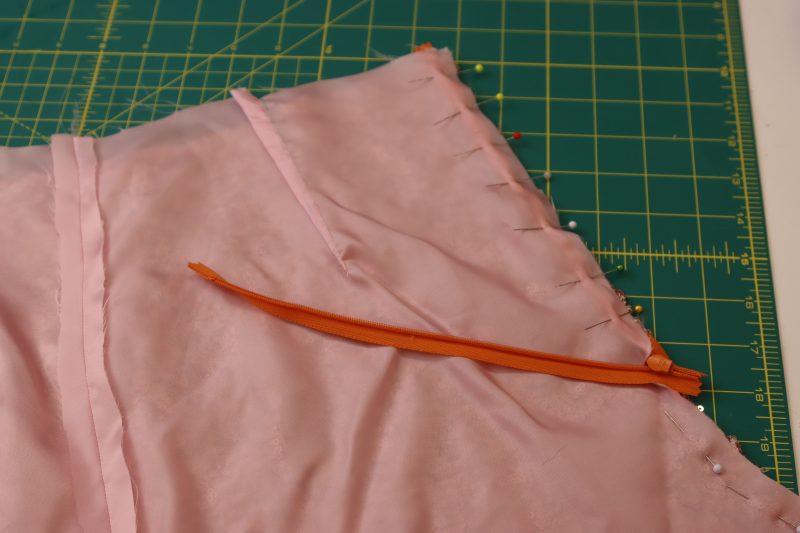
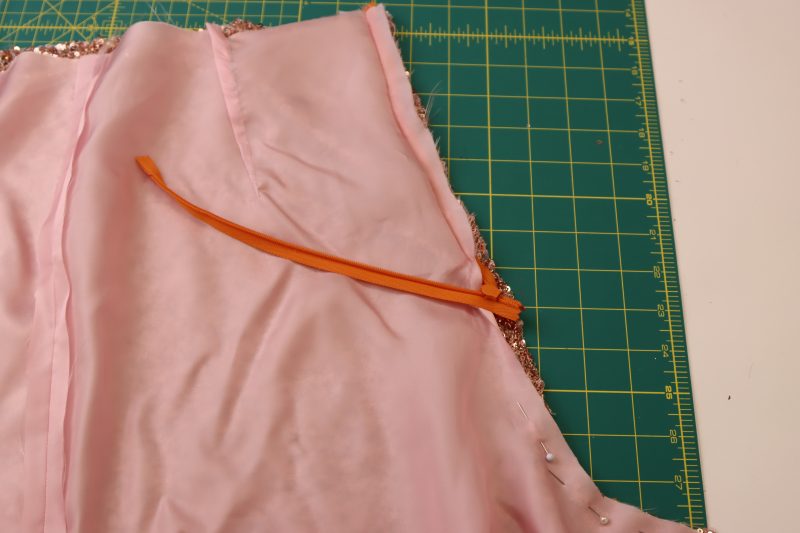
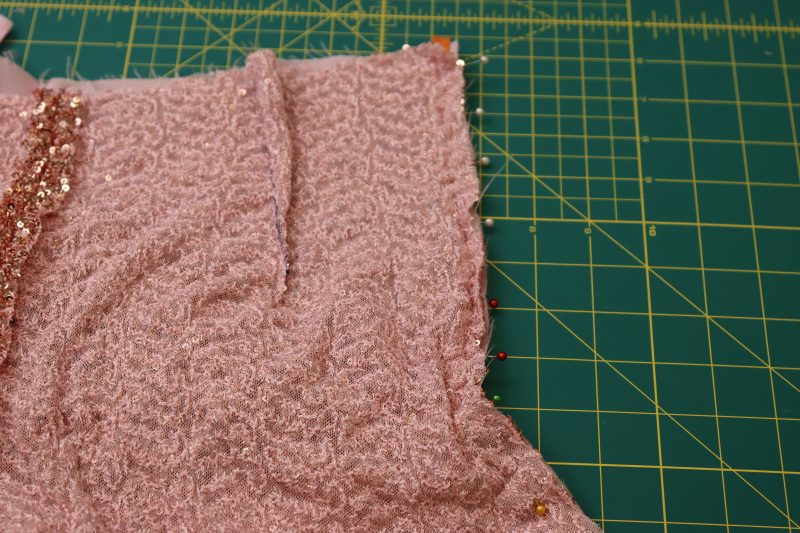
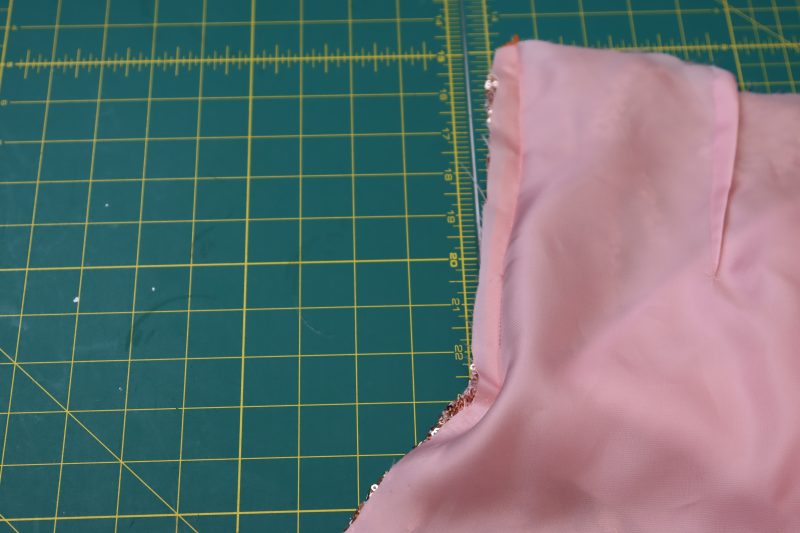
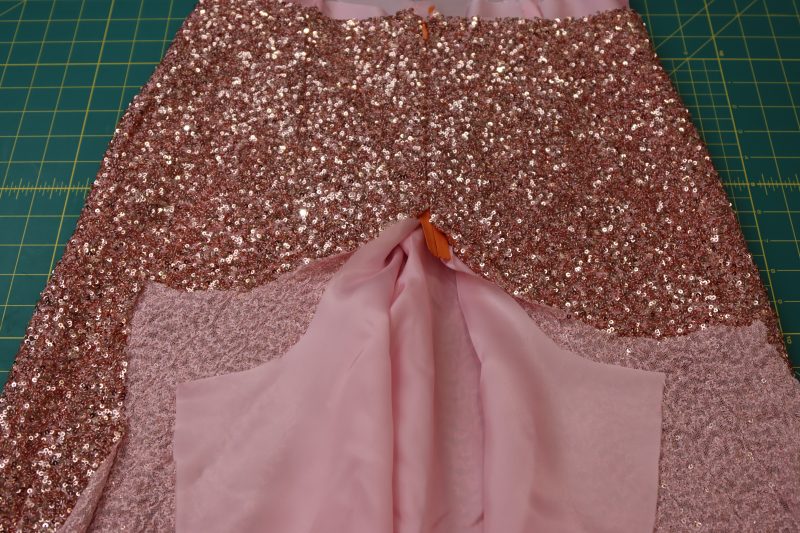
INVISIBLE ZIPPER
- Place the lining pants and the main fabric pants right sides together with the waistlines and the back crotch seams lined up.
- Sandwich the invisible zipper between the lining and the main fabric so that it is right sides together with the sequined fabric.
- Pin the side of the zipper tape closest to the raw edge of the crotch seam to both layers of fabric.
- Sew the zipper tape close to the teeth through both layers of fabric.
- Flip the pants right sides out so that the zipper is facing out.
- Pin the other side of the zipper tape between the other side of the back crotch seam, right sides together with the sequined fabric and sandwiched between the main fabric and the lining.
- Sew the other side of the zipper.
- Flip the pants right sides out and zip the zipper.
Step 6
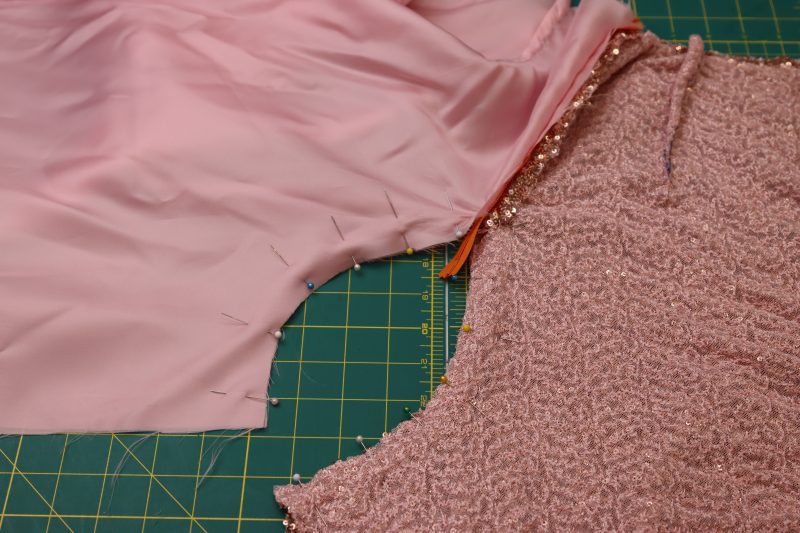
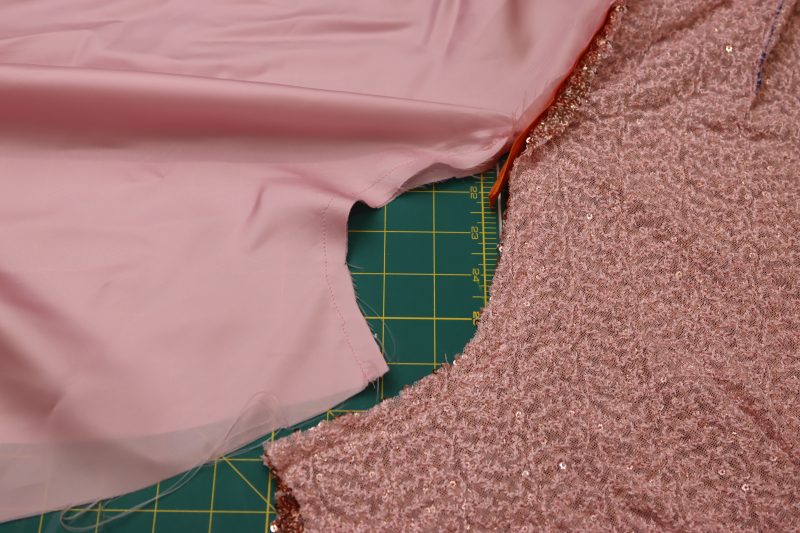
BACK CROTCH
- Fold the lining and the main fabric at the center back seam so that the bottoms of the back crotch seam are lined up.
- Pin and sew the lining crotch seam under the zipper.
- Pin and sew the main fabric crotch seam under the zipper.
Step 7
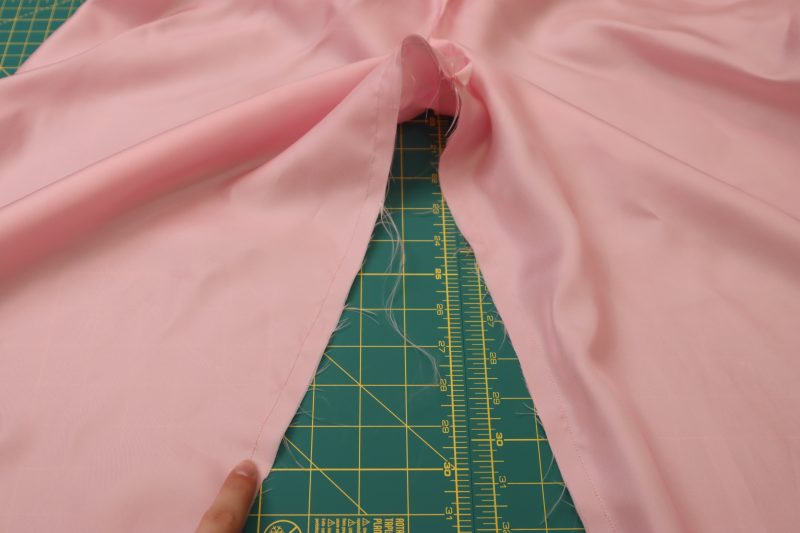
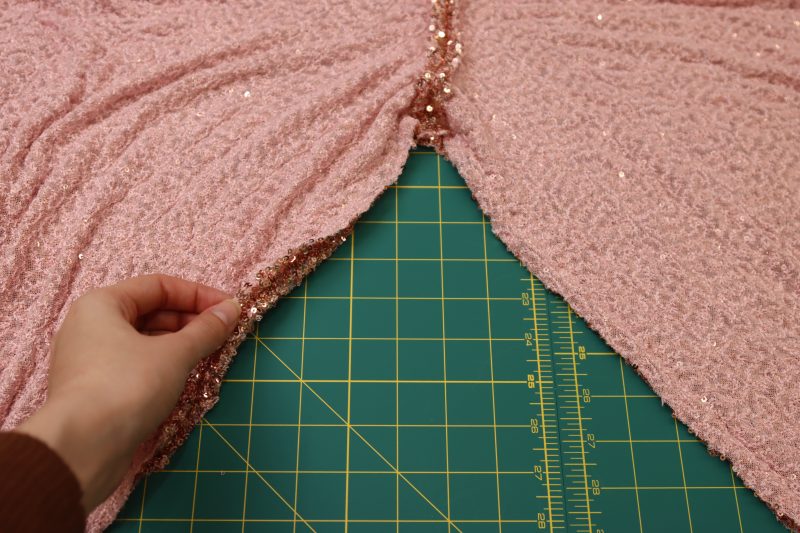
INSEAM
- Separate the lining inseams from the main fabric inseams.
- Place the lining pants right sides together with the inseams lined up.
- Pin and sew the lining inseam.
- Repeat the same steps for the main fabric inseam.
- Orient the pants so that the lining is inside of the main fabric, wrong sides together.
Step 8
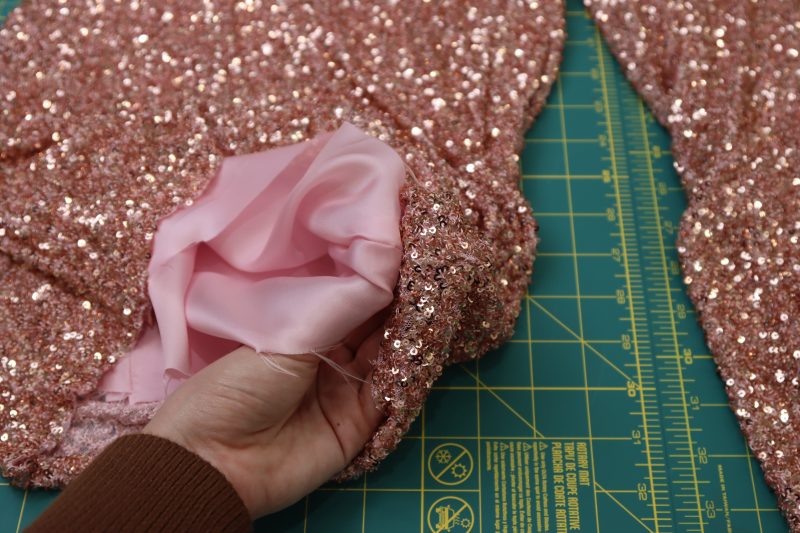
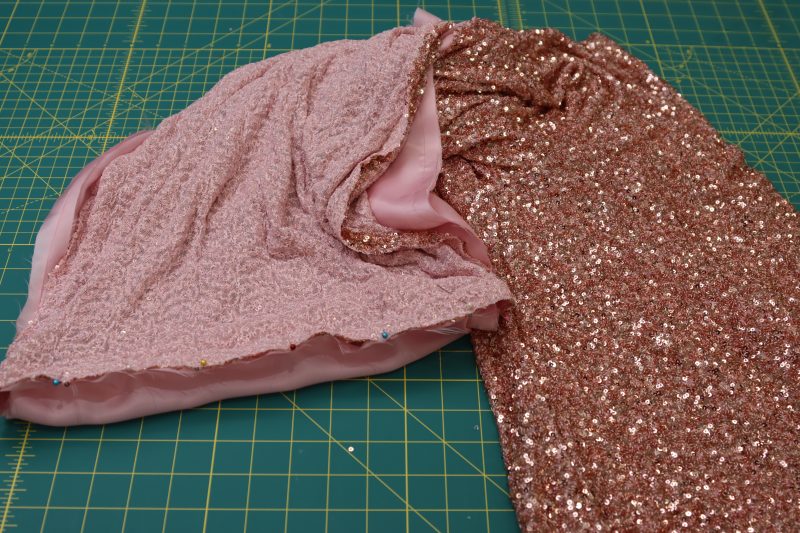
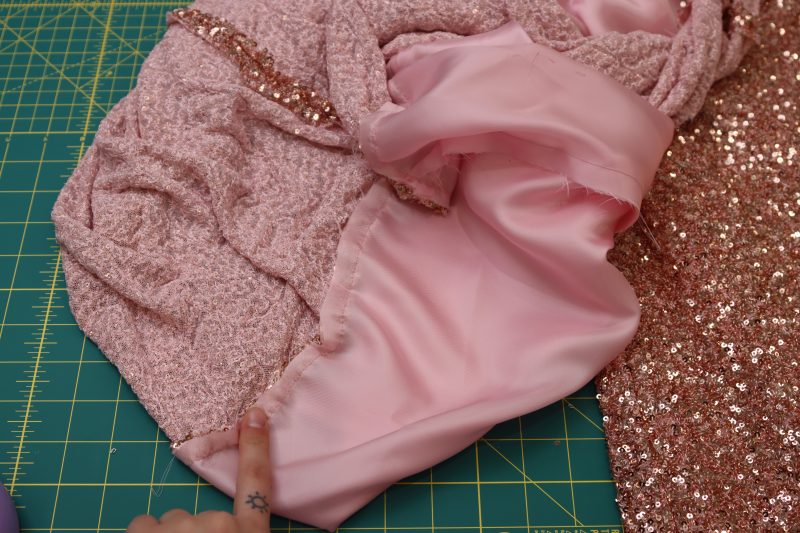
PANTS HEMS
- Reach between the lining and the sequined fabric at the bottom hem of the pants.
- Pinch the lining and the main fabric right sides together at the inseam of the pants.
- Pull the pinched fabric up through the waistline of the pants and place a pin at the inseam where you were holding the fabric.
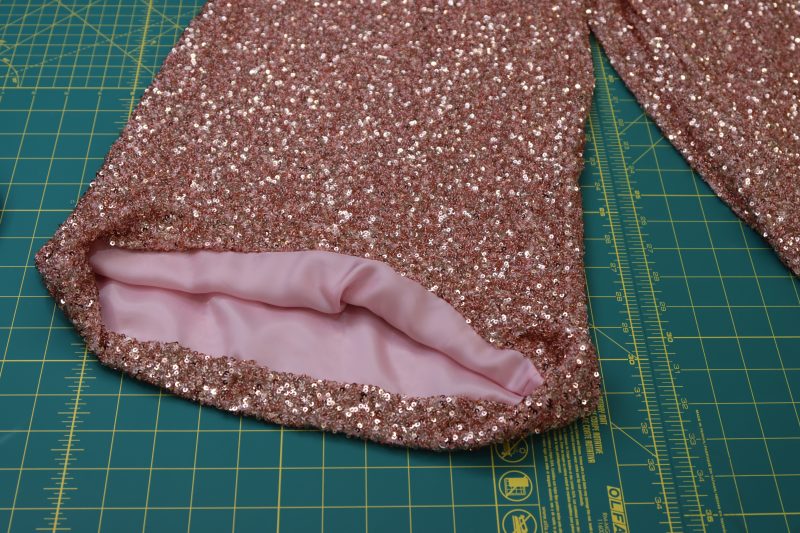
- Pin around the rest of the hem, connecting the lining to the main fabric right sides together.
- Sew the hem right sides together.
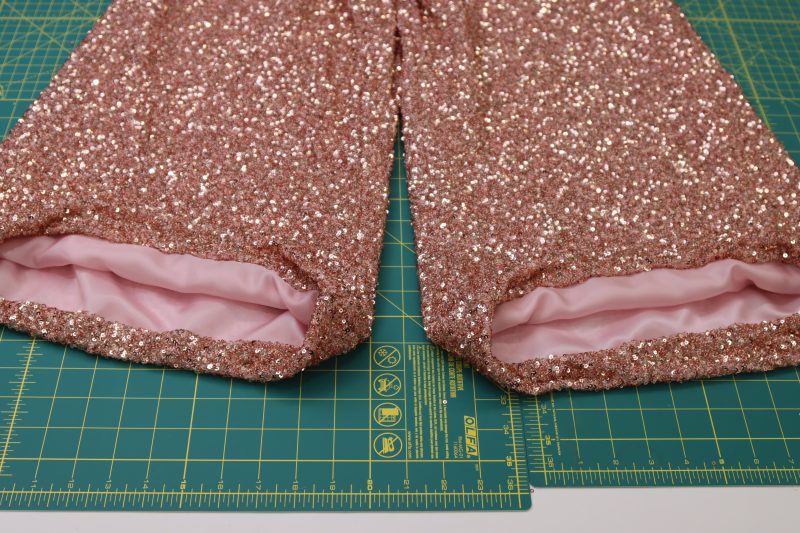
- Flip that pant leg right sides out.
- Repeat for the other pant leg.
- Gently, and on low heat, press the lining at the seam so that it doesn’t stick out of the bottom of the pants.
Step 9
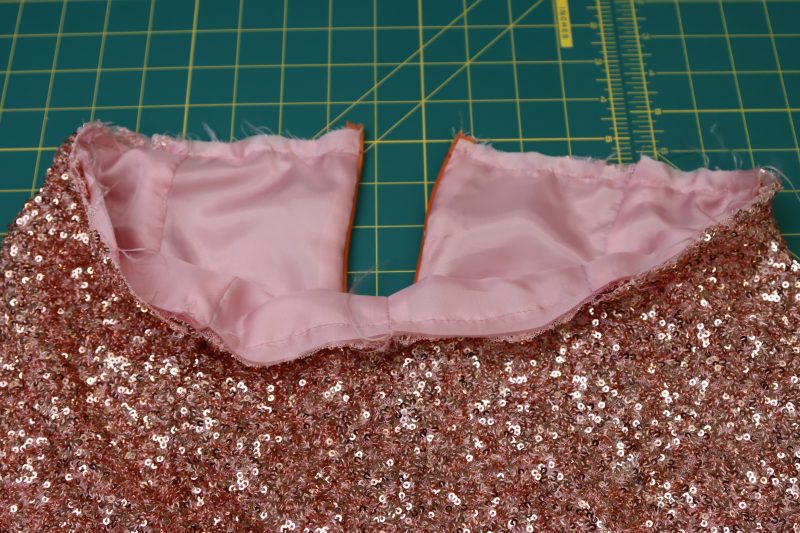
PANTS WAISTLINES
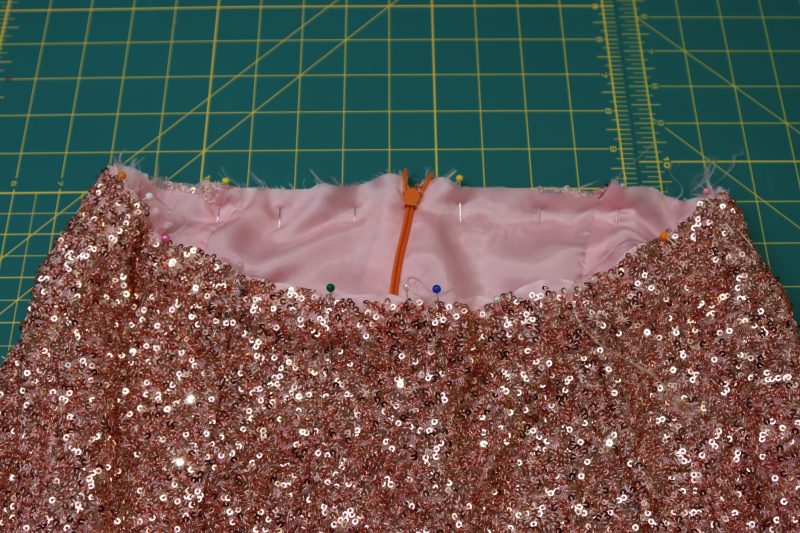
- Line up the waistlines of the lining and the main fabric.
- Pin the waistlines together.
- Sew the waistlines together with a ¼ inch seam allowance.
Step 10
PREPARE WAISTBAND
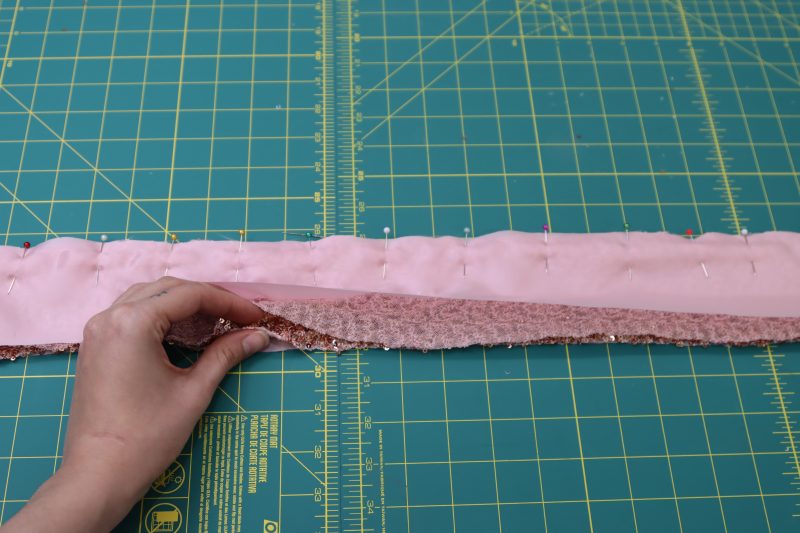
- Place the two sequined waistbands right sides together.
- Sandwich the sequined waistbands between the two lining waistbands.
- Pin one long side and two short sides of the waistband.
- Sew around the 3 sides of the waistband.
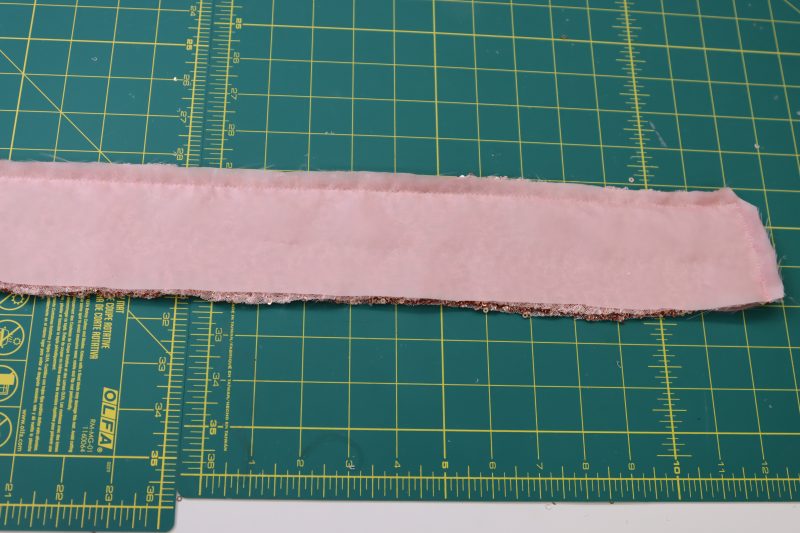
- Clip the corners of the waistband.
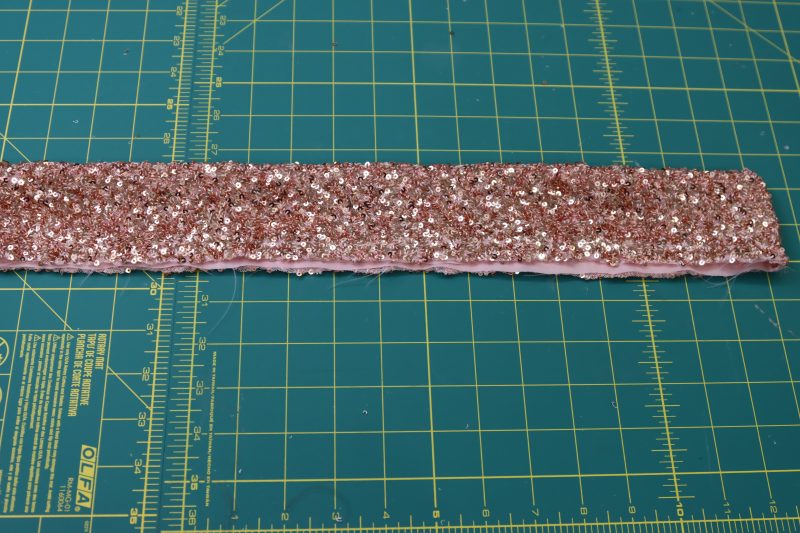
- Flip the waistband right sides out.
- Stay stitch around the raw edges of the waistband, connecting the sequined fabric to the lining while keeping the inside of the waistband open and accessible.
Step 11
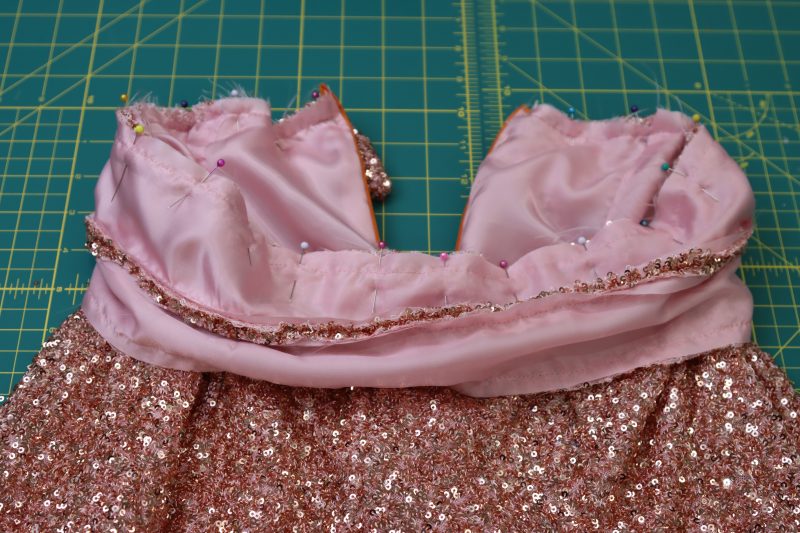
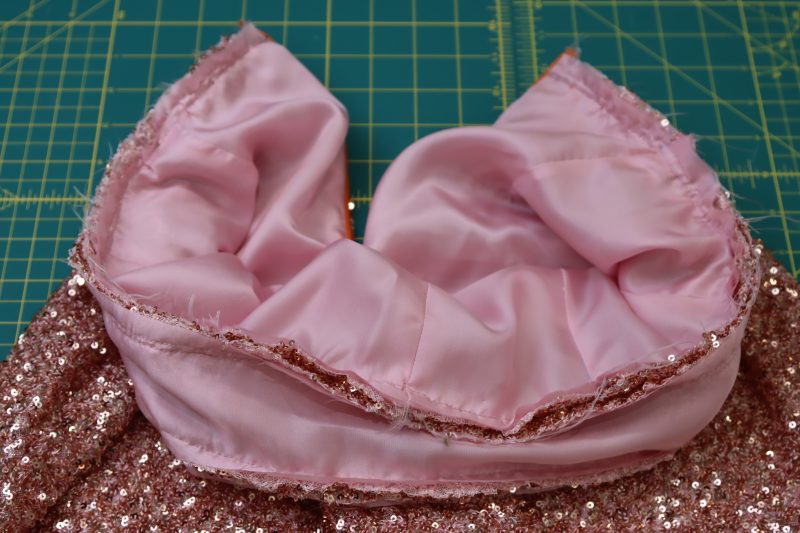
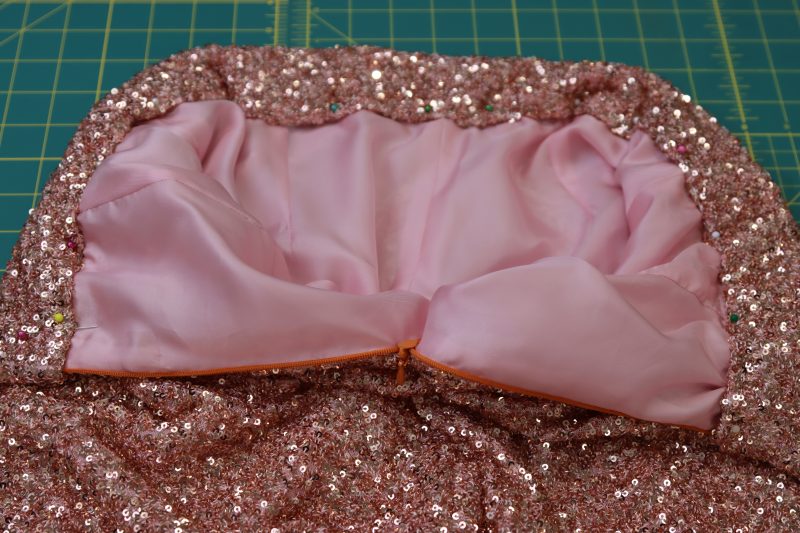
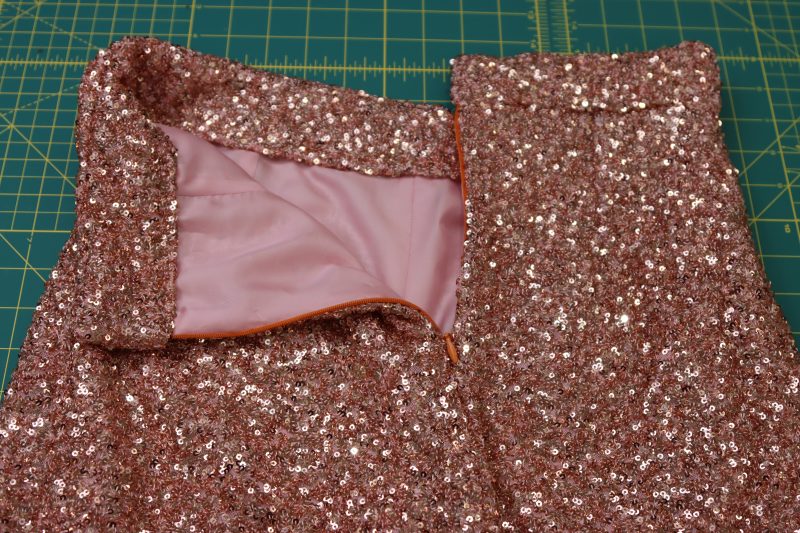
ATTACH WAISTBAND
- Pin one of the sides of the raw edge of the waistband to the waistline of the pants.
- Sew the waistband to the waistline.
- Fold the other raw edge of the waistband over by ½ inch and pin to the inside of the pants right on top of the waistline seam you just sewed.
- Sew a stitch in the ditch from the sequin side of the pants to connect the folded edge of the waistband to the pants.
Step 12
WAISTBAND CLOSURE
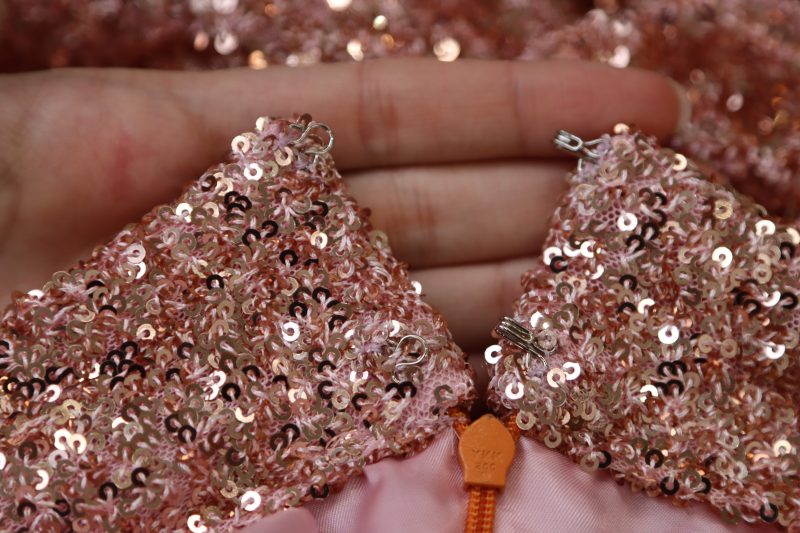
- Hand sew hook and eye closures at the waistband above the zipper.
Step 13
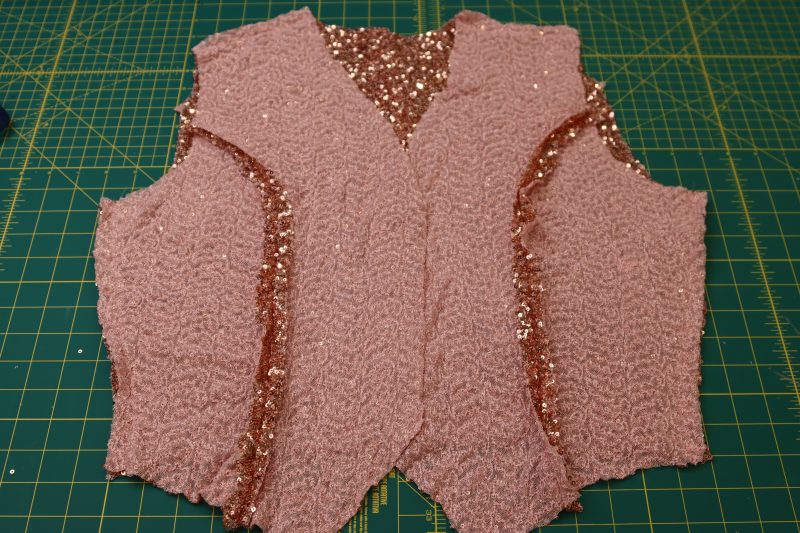
VEST FRONT
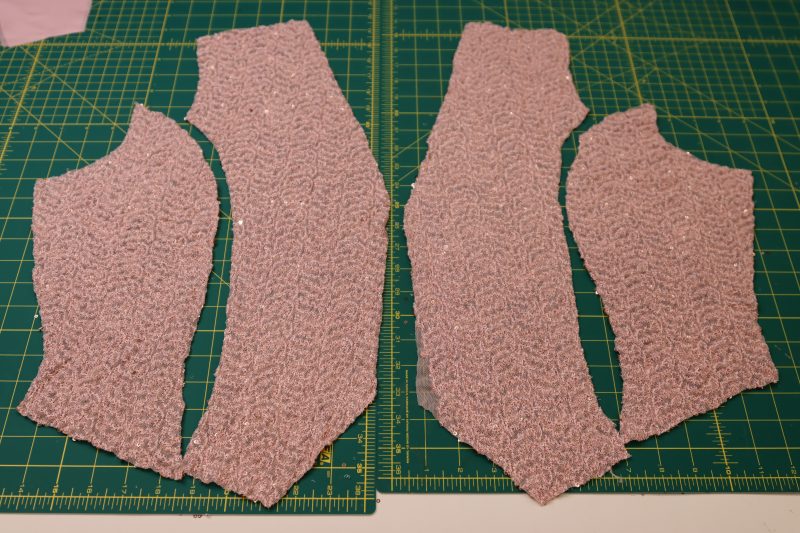
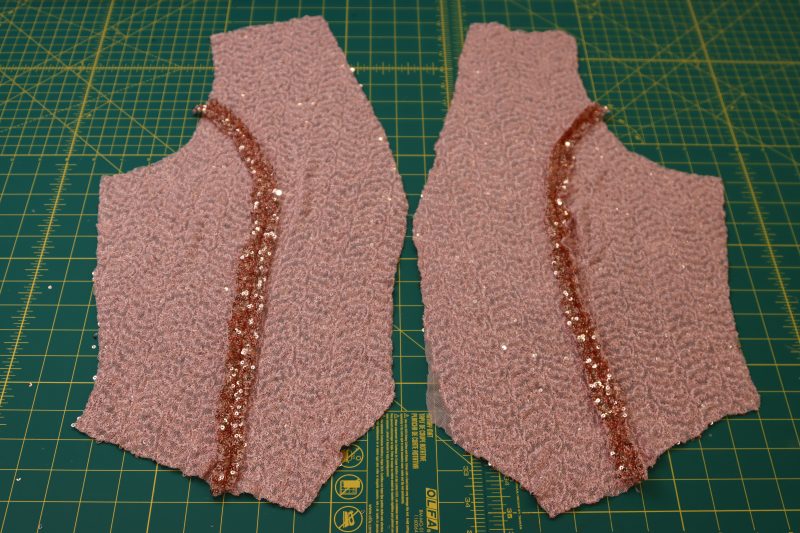
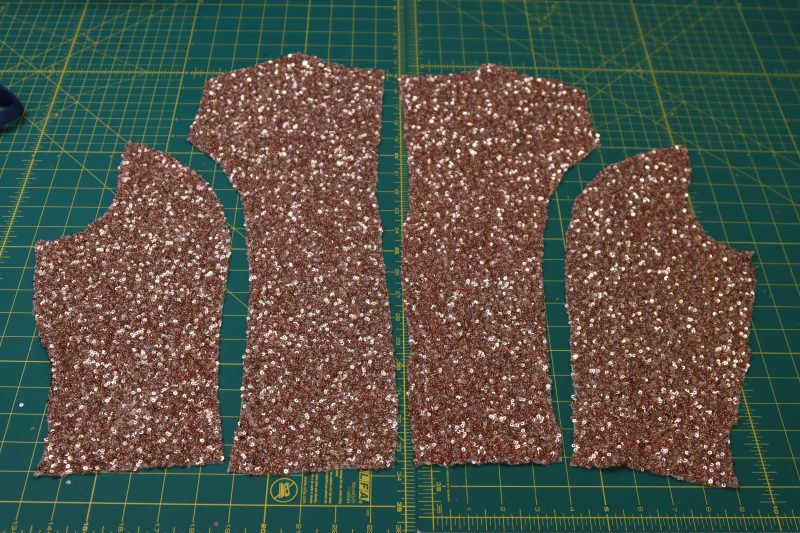
- Layout the front vest pieces as shown in the photo below.
- Pin and sew the front vest sides to the front vest center pieces, right sides together.
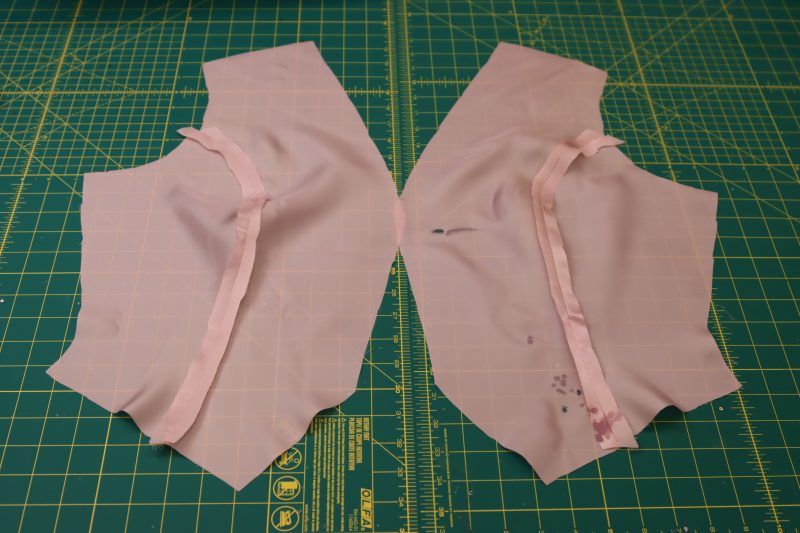
- Repeat the same process for the front vest lining.
Step 14
VEST BACK
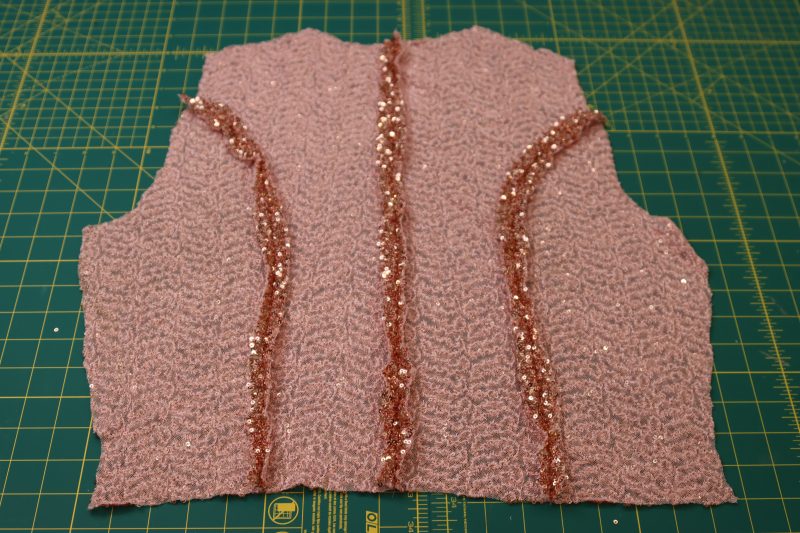
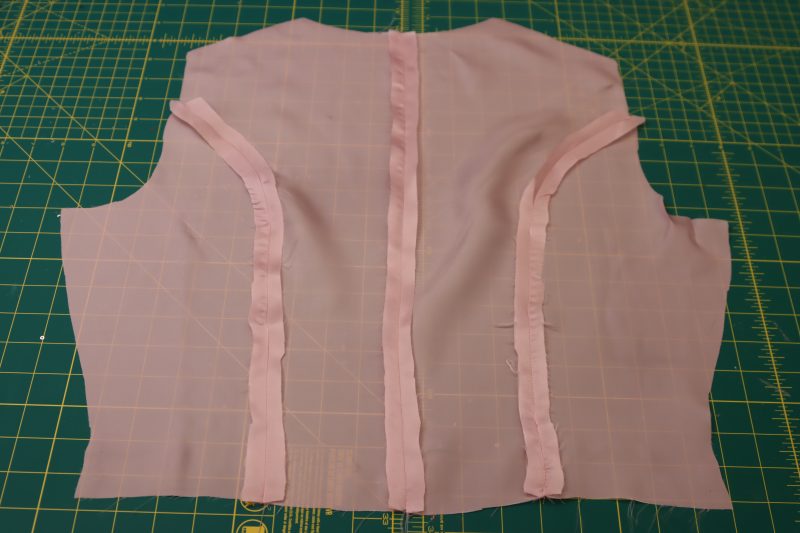
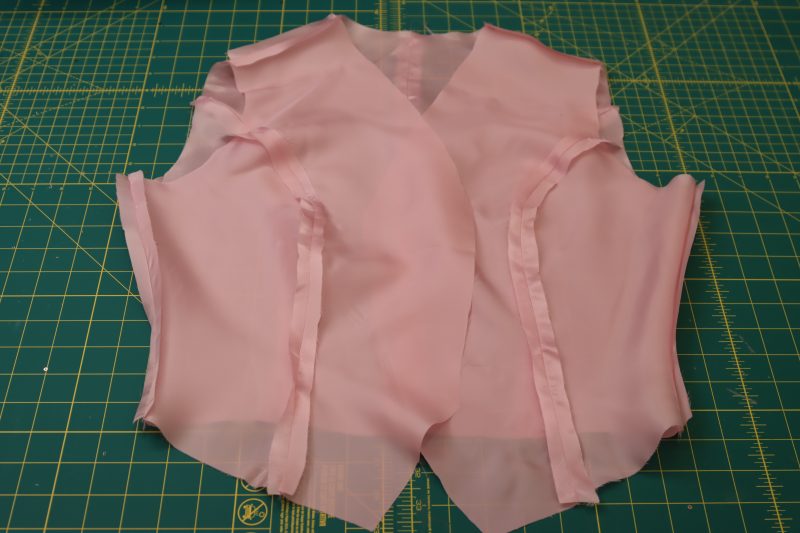
- Layout the back vest pieces as shown in the photo below.
- Pin and sew the center back seam of the vest.
- Pin and sew the vest side back pieces to the vest center back pieces.
- Repeat the same process for the vest back lining.
Step 15
VEST SIDE SEAMS
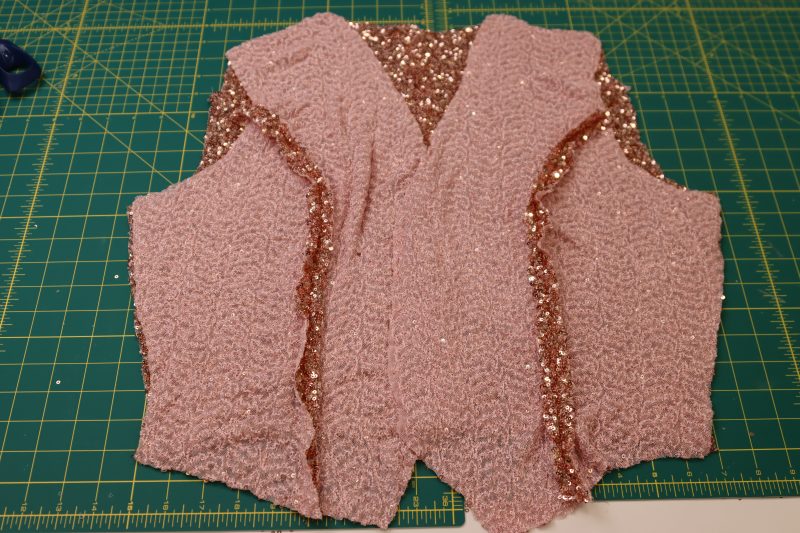
- Place the front vest pieces right sides together on top of the back vest piece.
- Pin and sew the side seams and shoulder seams of the vest.
- Repeat the same process for the lining.
Step 16
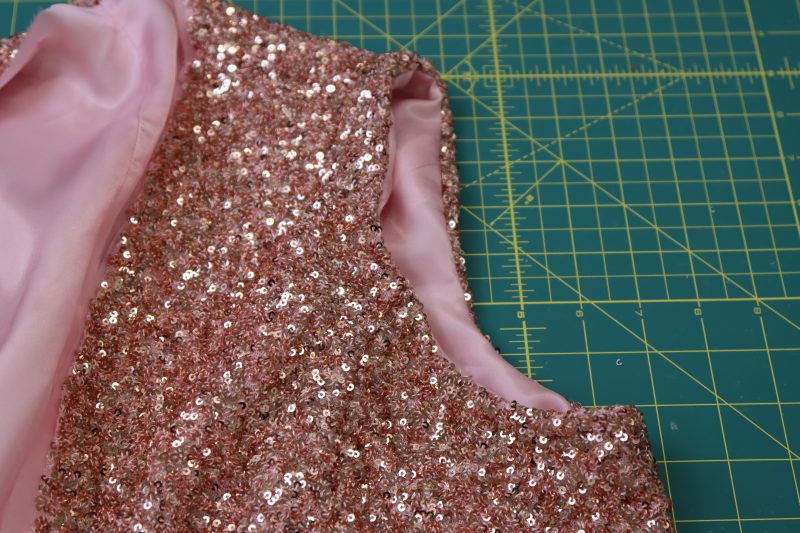
ARMSCYES
- Place the lining vest inside of the main fabric vest right sides together.
- Pin the lining to the main fabric around ONE of the armscyes (do not repeat this step for the other armscye, we’re sewing the other one differently).
- Sew around the armscye.
- Clip the seam allowance of the armscye to let it lay flat one its inverted.
- Flip the vest right sides out and gently press the lining on low heat.
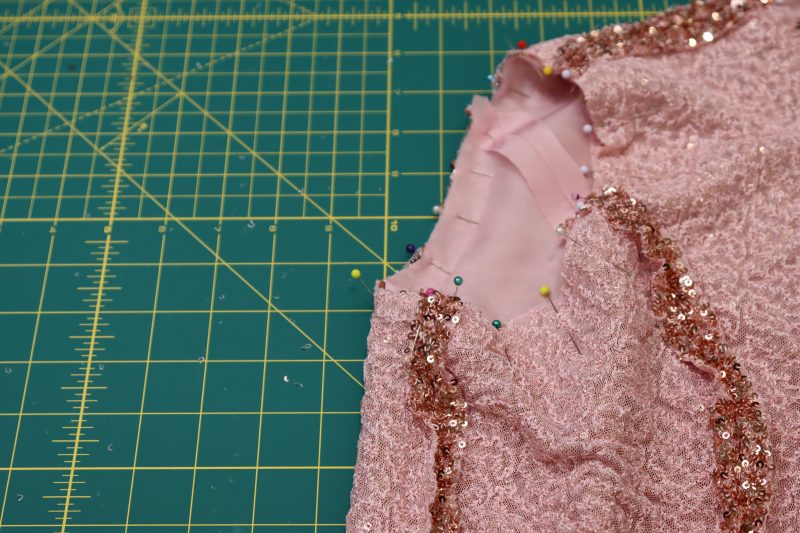
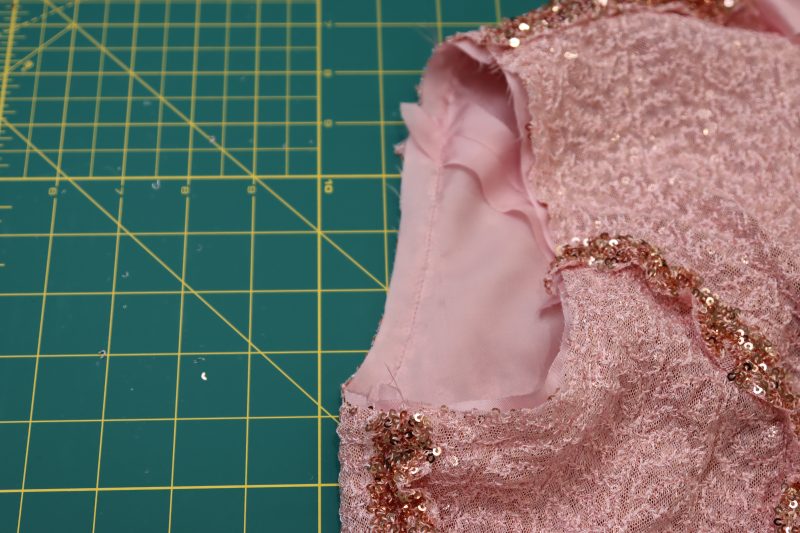
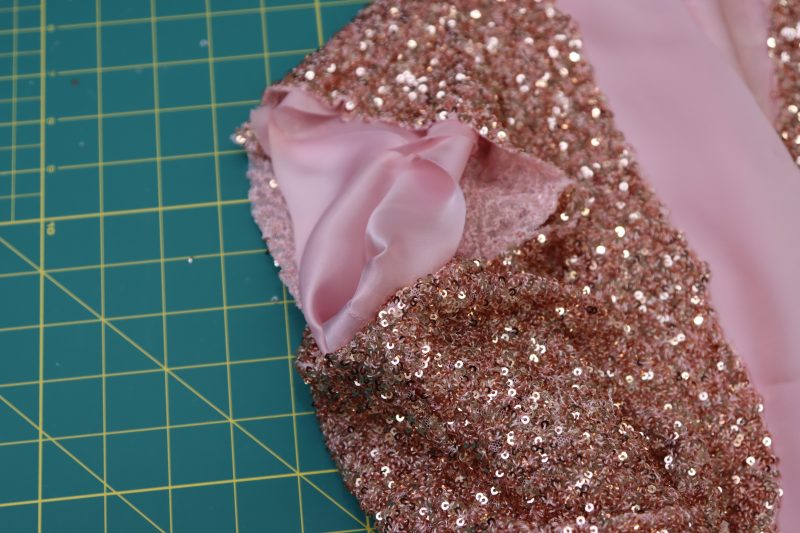
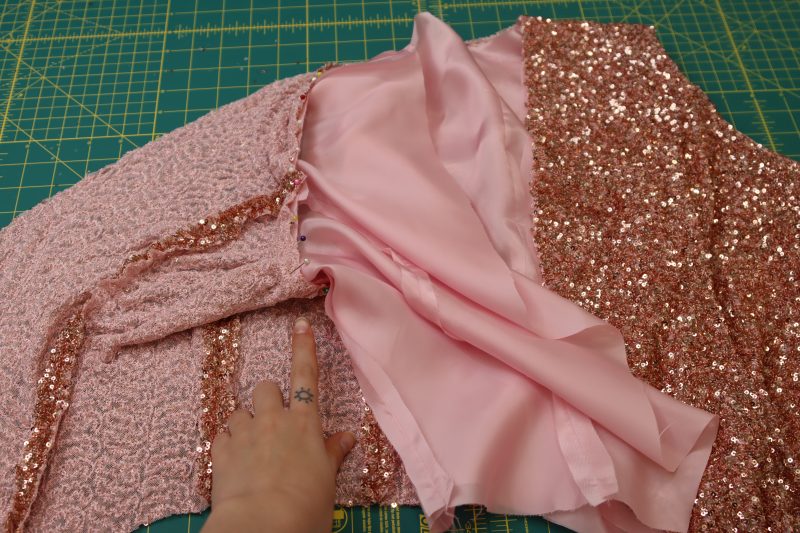
- For the other armscye, we’re going to connect the fabric right sides together using the same method that was used for attaching the lining to the main fabric at the hem of the pants.
- Reach between the lining and the main fabric at the bottom hem of the vest.
- Pinch the lining and the main fabric right sides together at the side seam of the vest.
- Pull the fabric down through the hem of the vest and place a pin where you were holding the fabric.
- Pin all around the armscye.
- Sew the armscye along the pins.
- Clip the raw edges of the armscye.
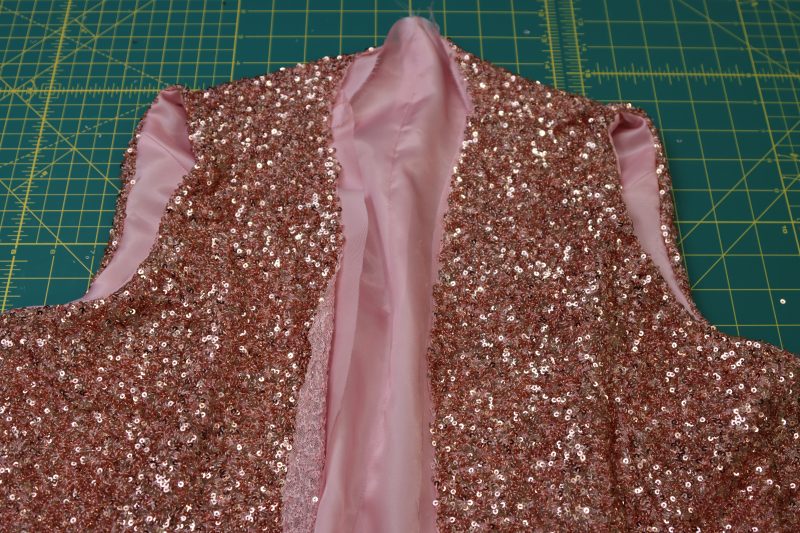
- Flip the vest right sides out and press the other armscye
Step 17
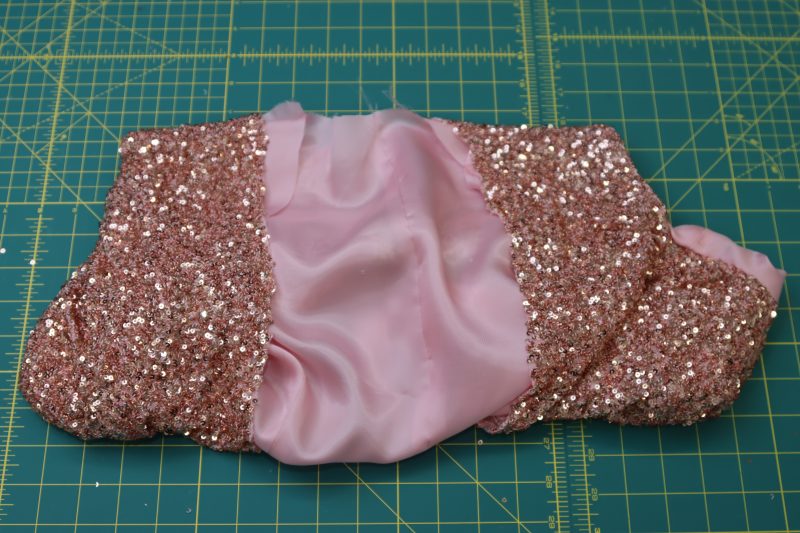
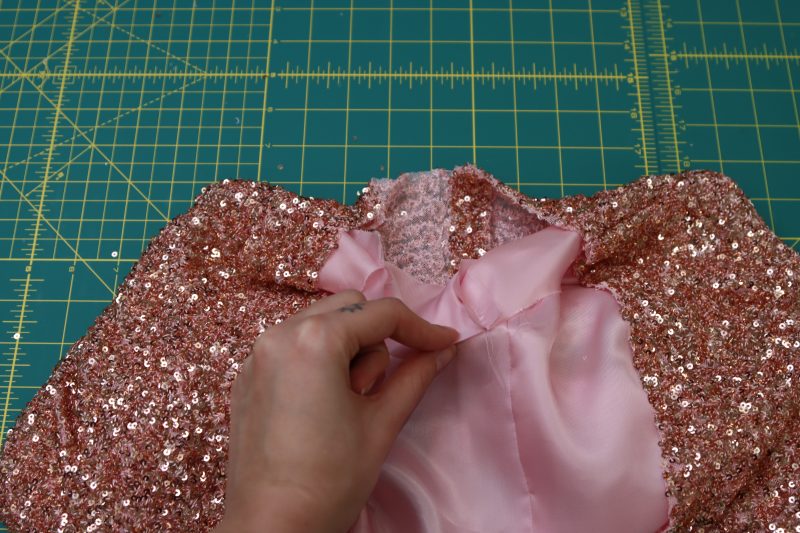
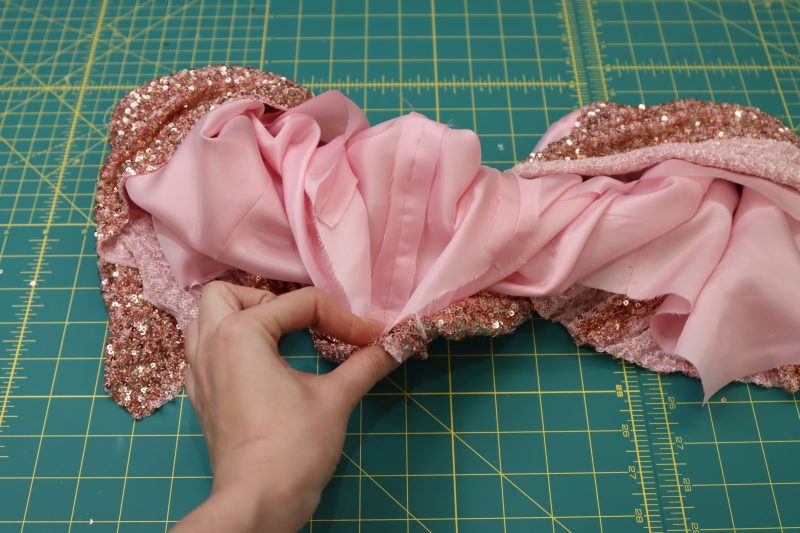
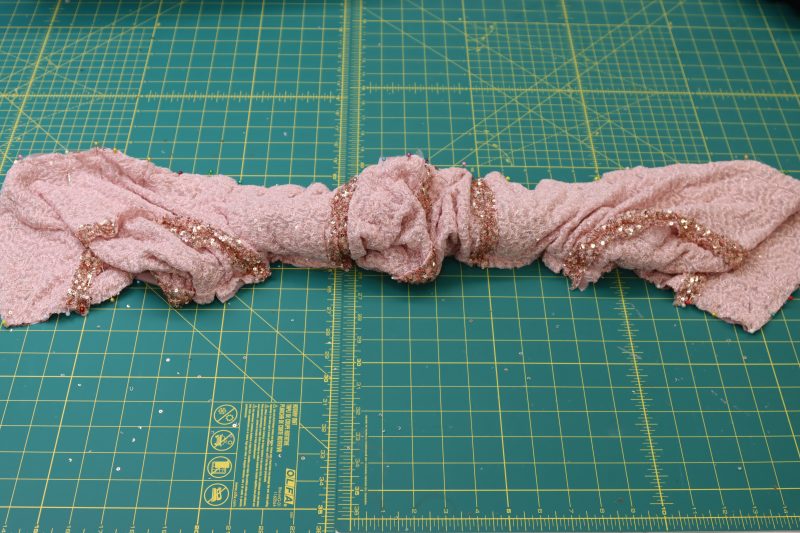
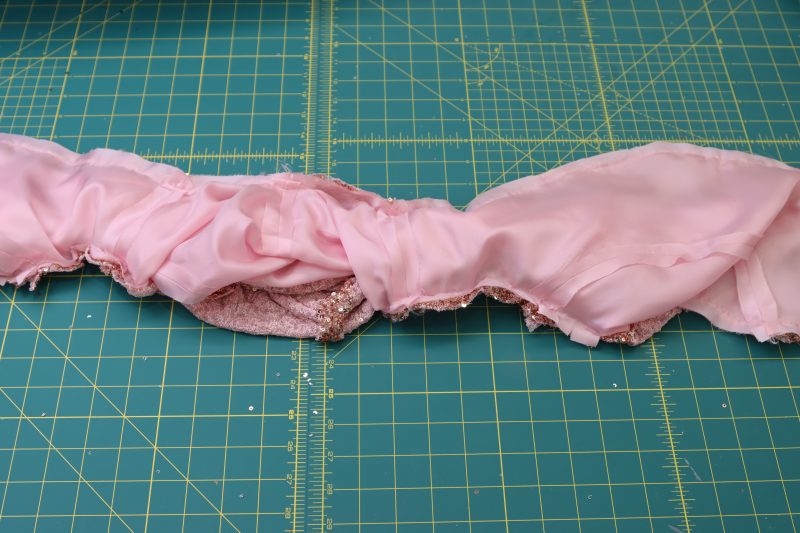
VEST NECKLINE
- Layout the vest right sides out.
- Separate the lining and the main fabric at the center back neckline.
- Wrap the two separate pieces of the vest around the bulk of the vest so that they are meeting right sides together.
- Pin the center back neckline.
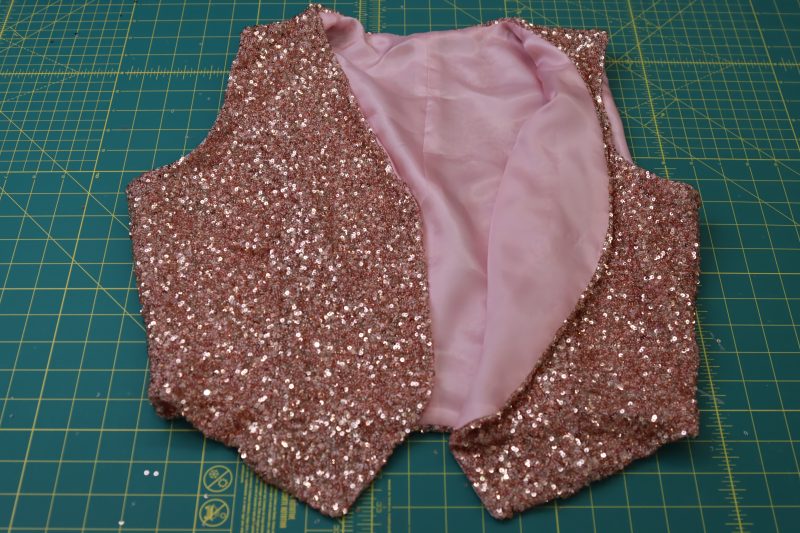
- Pin the entire neckline, front closure, and bottom hem of the vest except for a small gap through which the vest can be flipped right sides out.
- Sew around the hem, front closure, and neckline of the vest while leaving the gap open.
- Flip the vest right sides out through the gap.
Step 18
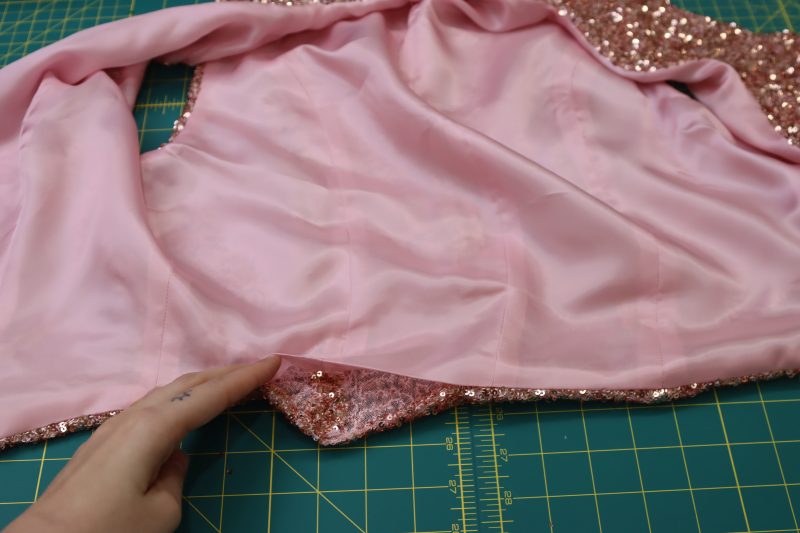
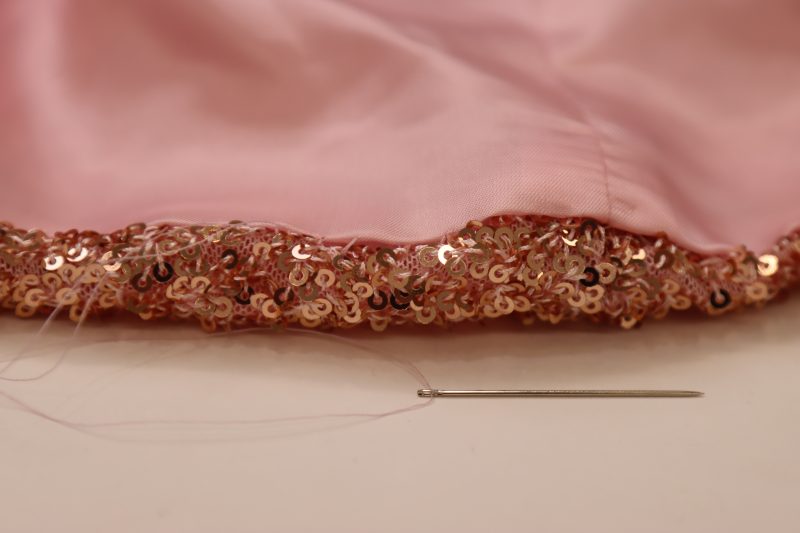
CLOSE HEM
- Gently press the raw edges of the opening at the hem of the vest so that they’re folded towards the inside of the vest.
- Using a needle and thread, hand sew a ladder stitch into the opening at the hem to close the gap.
Step 19
BUTTON CLOSURE
- Place 4 evenly spaced pins along both sides of the front of the vest for the buttons and button holes.
- Using the buttonhole foot attachment on your sewing machine, sew 4 button holes on the wearer’s left side of the vest.
- Hand sew 4 buttons opposite to the button holes.
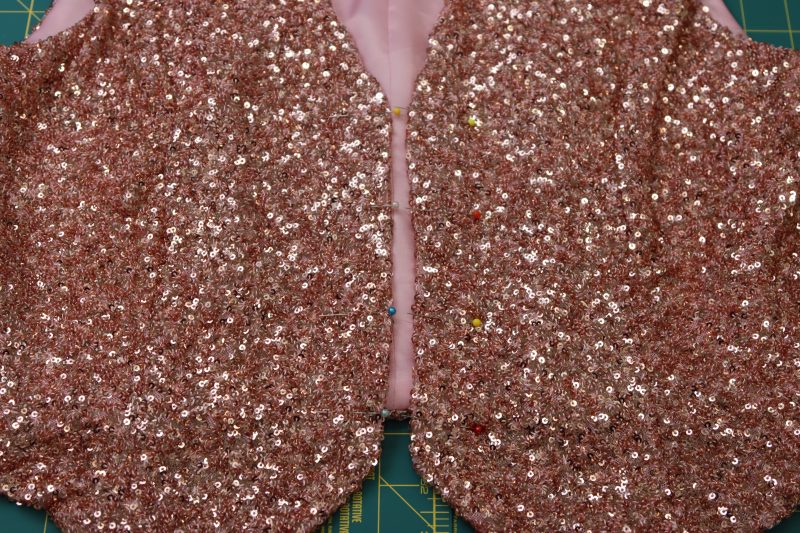
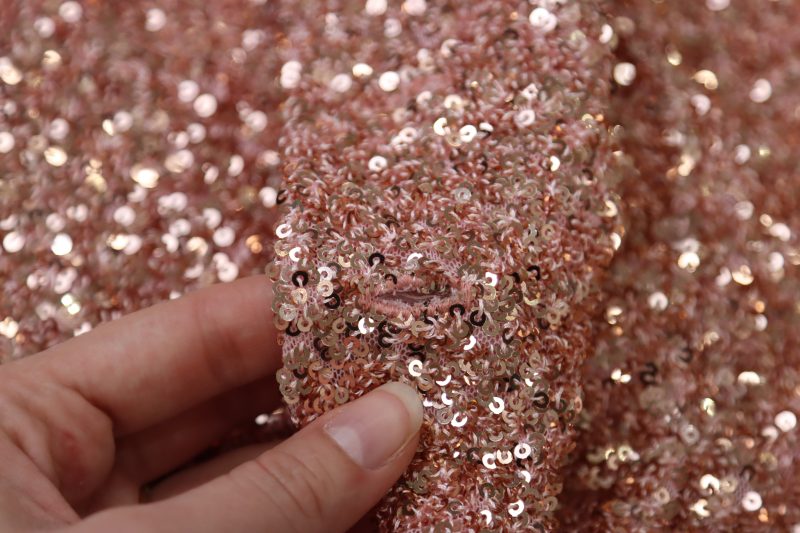
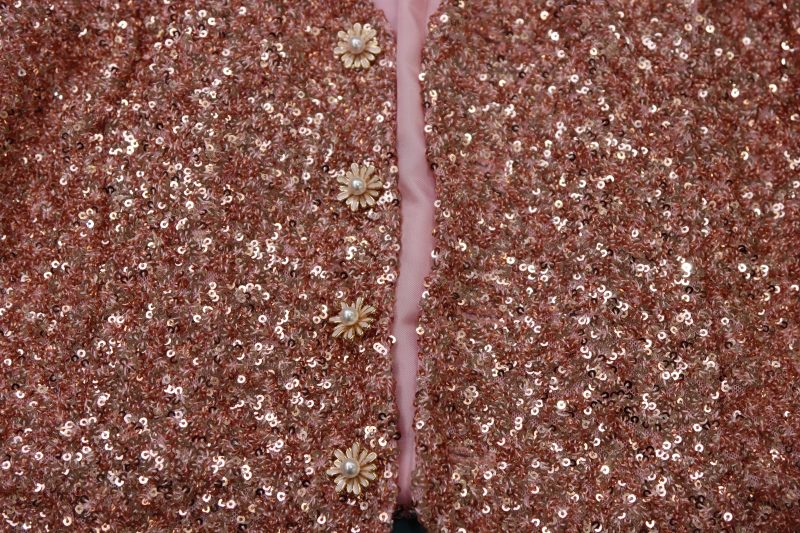
Sewing Success: The Finished Morganite Waistcoat Ensemble
Share this post with a friend (or two!), download the Morganite Waistcoat Ensemble free sewing pattern, and show us which fabrics and colors you choose, using the hashtags #MoodMorganitePattern & #MadeWithMood—and don’t forget to tag us @MoodFabrics, too.
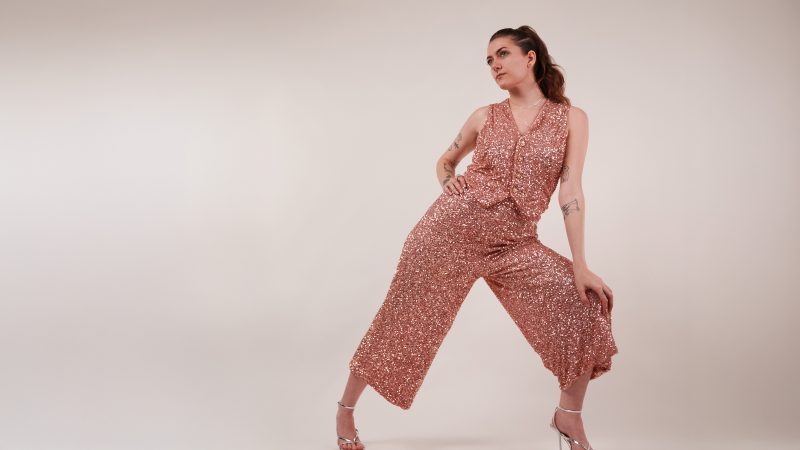
Free Sewing Pattern Inspiration for Your Next Project
With 500+ free sewing patterns and counting, your opportunities for sewing with Mood are endless!
We hope you had as much fun sewing this waistcoat ensemble pattern as we did! As always, we want to hear from you—share your thoughts and comments below and let us know where you’ll be wearing the Morganite Waistcoat Ensemble free sewing pattern!
Can’t get enough sewing with Mood? Browse your next make with our latest free sewing patterns.
Absolutely love this pattern and searching for more like it? Look no further than our ever-popular Anne Waistcoat Ensemble free sewing pattern!

How would I change it to an elastic waist?
Hey Taz, if you want to make these pants with an elastic waistband, sew them the same way, except DO NOT sew the darts. For the waistband, cut it longer than the pattern (so that its as wide as the waistband WITHOUT the darts) and insert elastic into the waistband.
I need it
How do you go about sewing the featured fabric? Is it necessary to cut off sequins to accommodate the seam allowance? Thanks.
Hey Kim, I was able to sew it without removing the sequins, BUT I also broke about 4 needles. If you want to snip the sequins out of the seam allowance you definitely can.
How much fabric would i need if im only making the vest?
Depends on the size you’re making, but 2 yards will be more than sufficient for most sizes. For smaller sizes, only a yard is needed.
Could you move the zipper to the back, or to the side maybe?
The zipper was inserted at the center back of the pants in this pattern, but you could just as easily sew it into the side seam instead.
Would this work as a cosplay set up? Perhaps in a stiffer (wool?) fabric?
Absolutely! I could totally see the vest being used for a cosplay pattern. The pants can also be lengthened if you don’t want the cropped fit. I could totally see this pattern in a bunch of different fabrics.