
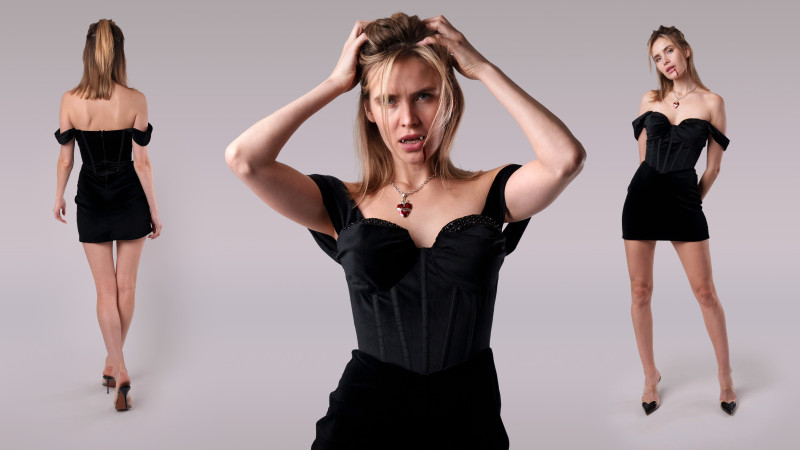
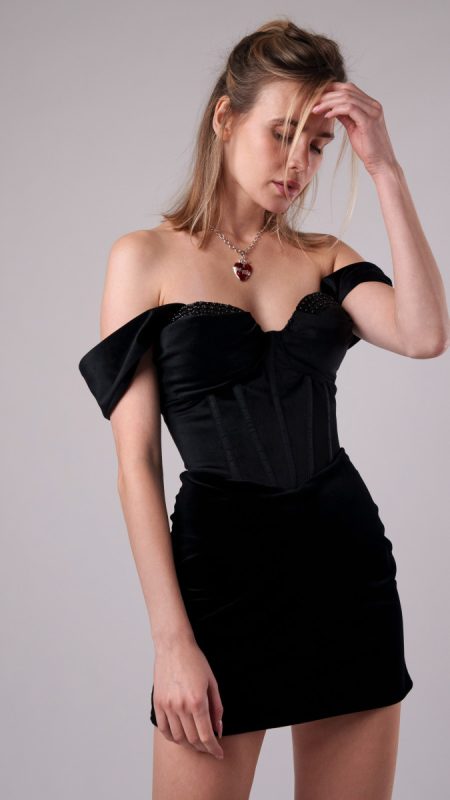
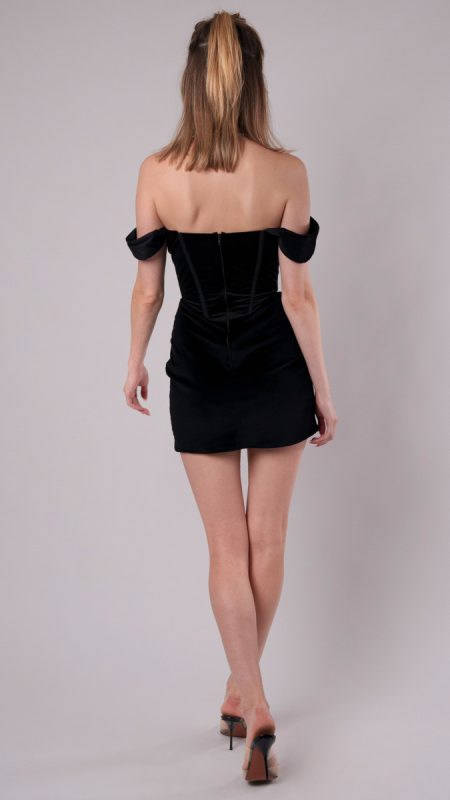
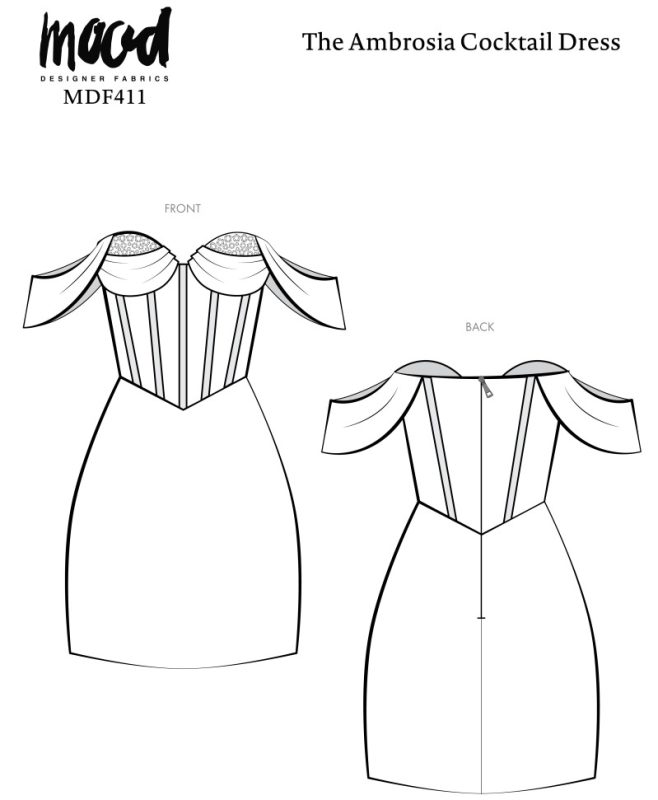
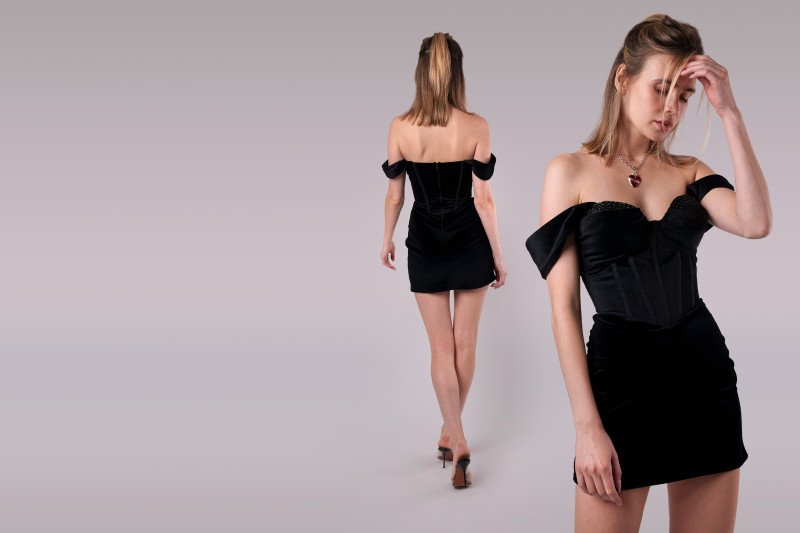
Transform your chic style into a hauntingly gorgeous masterpiece with The Ambrosia Cocktail Dress Free Sewing Pattern!
Perfect for a spellbinding night of tricks and treats, this design boasts a sleek, elegant silhouette infused with dark, mysterious allure. Sewn together with a sumptuous combination of velvet and velour, the Ambrosia Cocktail Dress features standout details like vintage beaded appliqués for a hint of shimmer, boning for flawless structure, and pleated cups that demand attention.
Are you ready to make this spooky season a runway-worthy affair?! Whether you’re attending a costume party, or enjoying a formal night out, this cocktail dress sewing pattern offers the versatility to work with many different fabrics, trims, and even your own alterations. Elevate the drama with a flowing cape, statement gothic jewelry, or gloves to enchant the night with a look that’s as glam as it is ghoulish!


Purchase Products Used Below:
- 1.5 yards of Polyester Velvet – Black – Deadstock *Used for bodice
- 1 yard of Stretch Polyester Velour – Black – Deadstock *Used for skirt
- 0.5 yard of Polyester Lining Fabric – Black – Margot Collection *Used for cups
- 2 yards of Black Fabric Covered Boning – 0.25″
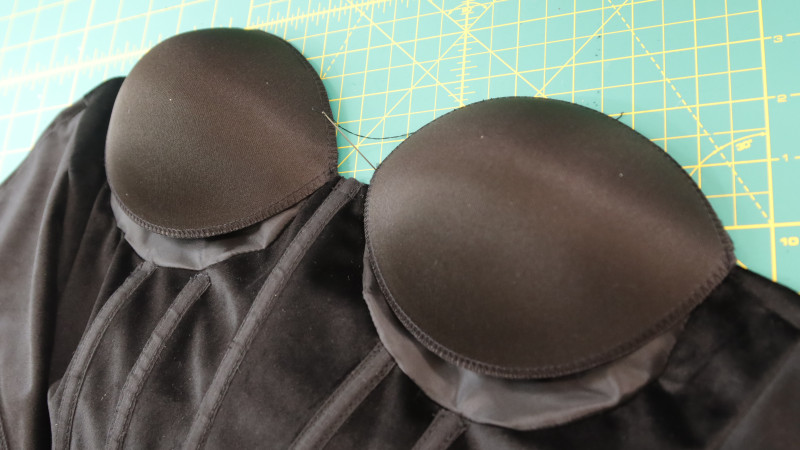
- 1 pair of Black Push Up Bra Cups
- 1 each of Vintage Fancy Black Beaded Neckline Appliqué – 13″ x 7.25″
- 1 each of Invisible Zipper 24″ by YKK – 916 After Dark
- 1 each of Gutermann Sew All Thread 1000m – 10 Black
- MDF411 – The Ambrosia Cocktail Dress Sewing Pattern (Free download below!)
Alternative Recommended Fabrics:
How To Sew The Ambrosia Cocktail Dress Free Sewing Pattern:
Use a 1/2″ seam allowance for all seams unless otherwise specified.
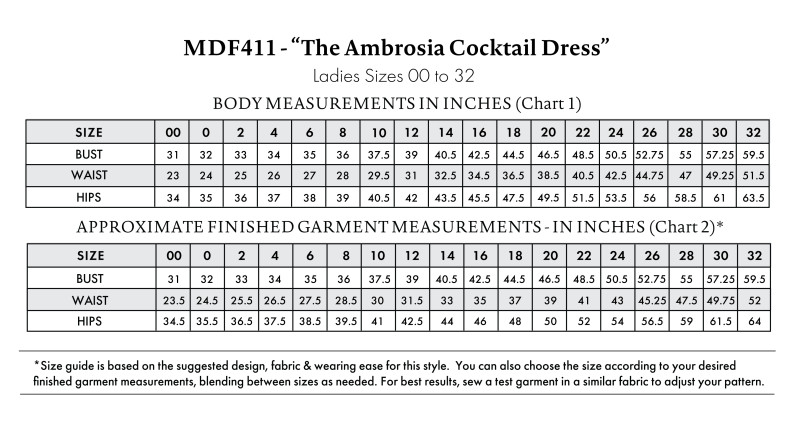
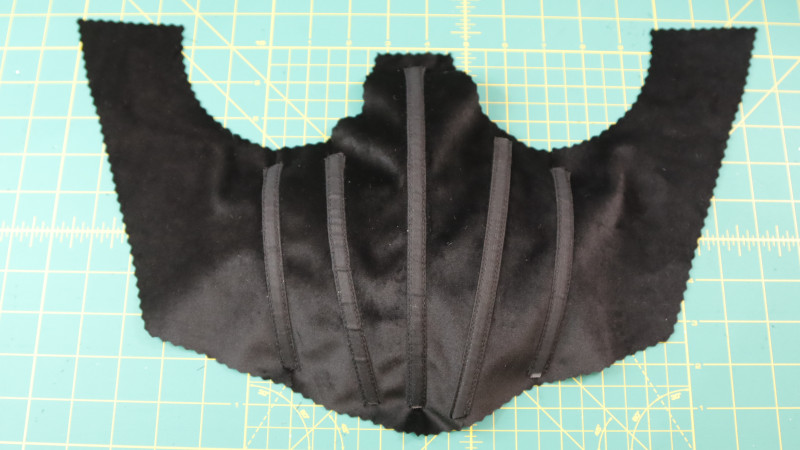
Step 1
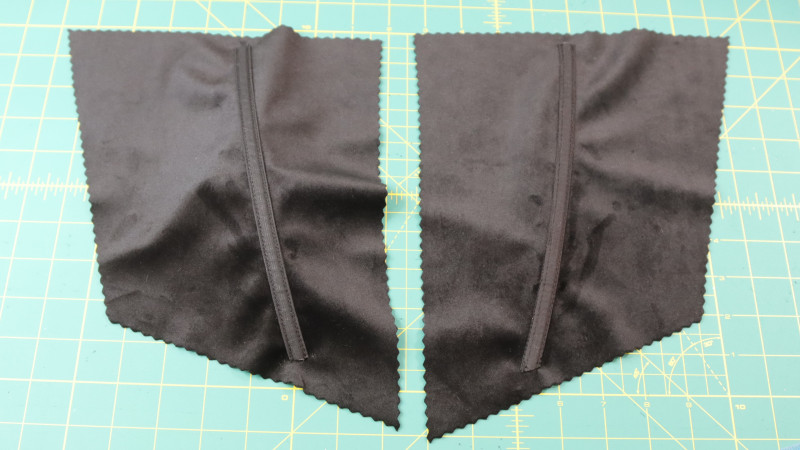
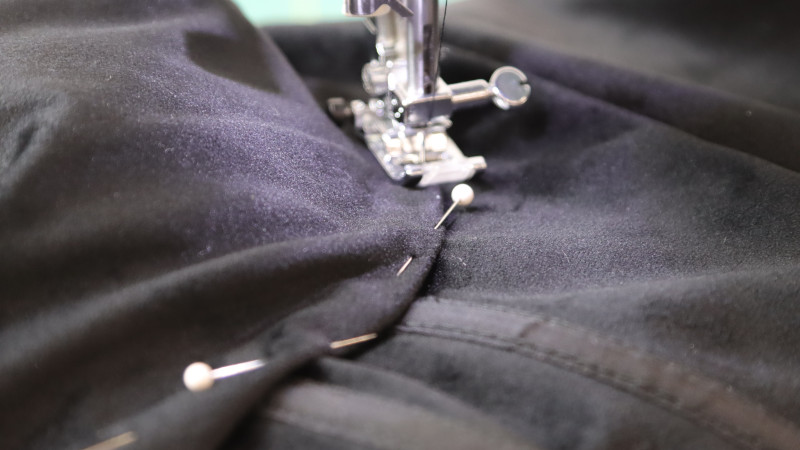
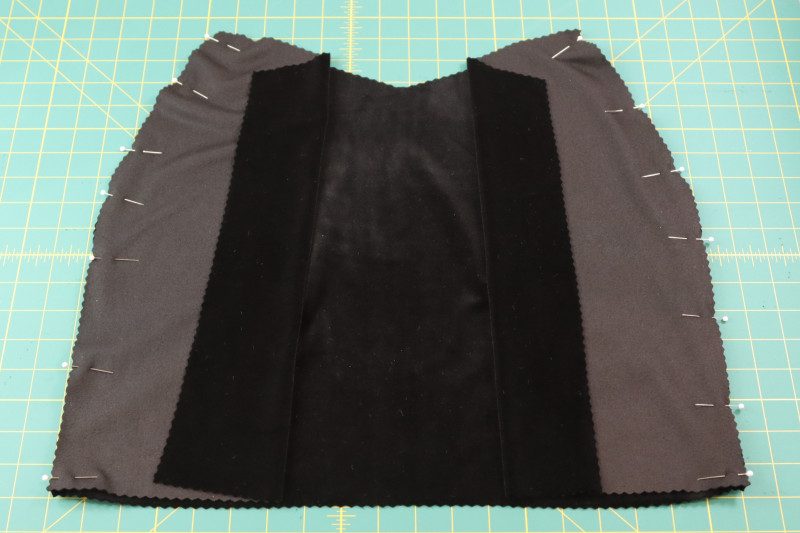
Sew the boning onto the right sides using a straight stitch with your stitch length at 2.0mm. Pin and sew along each side of the boning to secure them onto both the front and back panel pieces (cut from the non-stretch velvet).
- (If using another fabric type, use a stitch length of 2.0 to 2.5mm for lightweight fabrics like cotton and 3.0 to 3.5mm for heavier fabrics like denim.)
Use a denim machine needle or a universal machine needle in the size range of 90/14 to 100/16.
- Ensure that the needle is sharp to avoid snagging the fabric. Using the right needle will help create clean, even stitches while securing the boning effectively.
Pro Tip – As an alternative method for ease of sewing and clean finishing:
- Cut the boning longer than needed for the pattern.
- Push the boning up out of the casing and trim off enough so that the casing is the only thing sewn into the seam.
- The boning should extend right up against both seams.
- Secure the boning ends to avoid sharp edges.
- Reinforce the stitching for durability.
Step 2
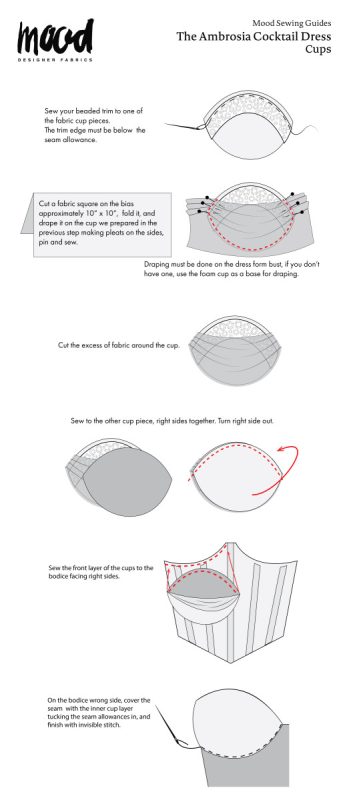
For this step, I cut 2 pieces out of lining fabric for the cups, but you are also able to cut 4 pieces (or 2 pairs) and sew them together along the top edge. Sew the cup darts, then sew both cups of lining to the front bodice.
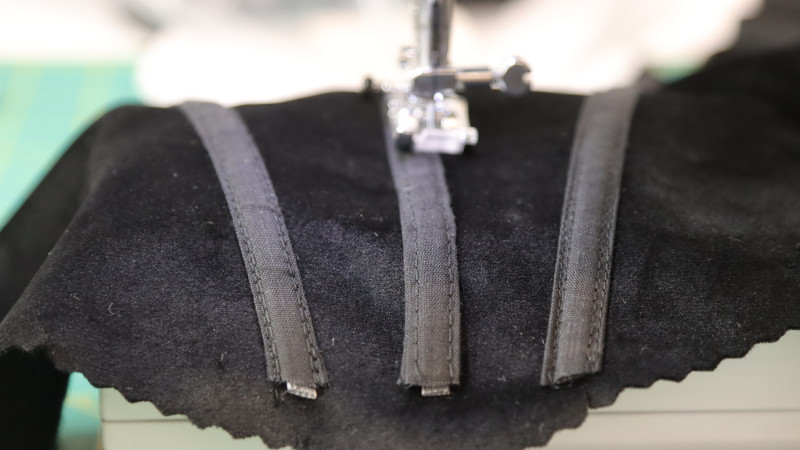
Step 3
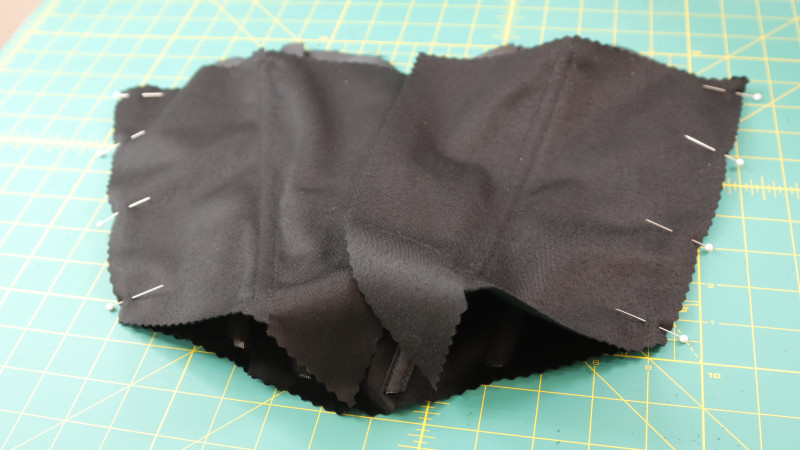
Join front and back together by sewing at the side seams.
Step 4
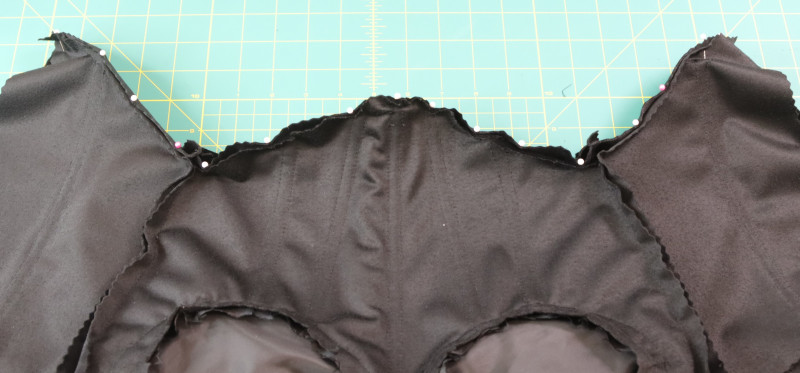
Fold the top edge over and sew the seam allowance for a clean finish.
Beginner-Friendly Method for Sewing Bra Cups
The following method is a beginner-friendly, time efficient way to sew the cups. For a more advanced technique with a lined finish, view the illustration guide below step eight.
Step 5
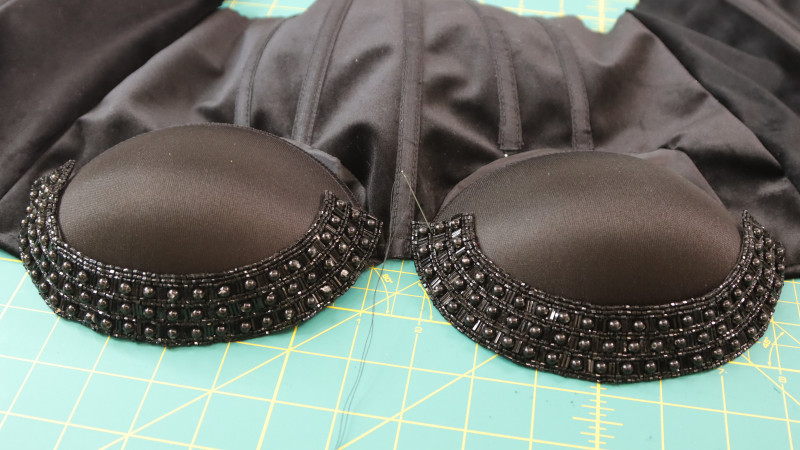
Sew the bra cups to the front of the top using a hand-sewing needle and thread.
Step 6
Hand stitch the beaded appliqué to the top of the bra cup with a hand-sewing needle.
Step 7
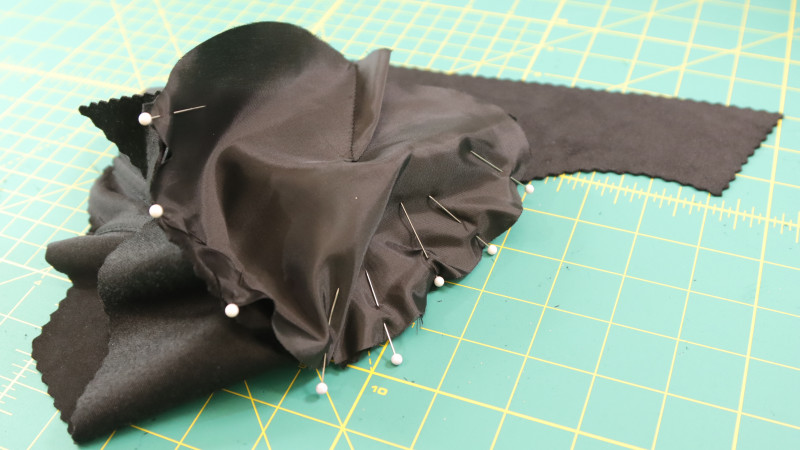
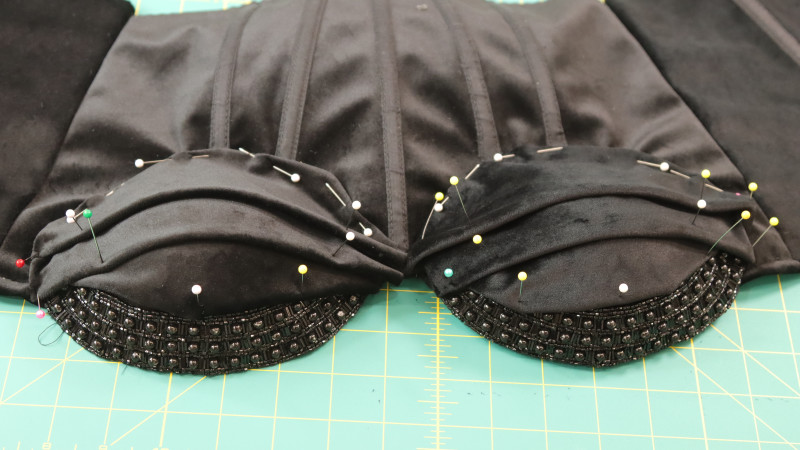
Cut two square pieces on the bias from the non-stretch velvet fabric (approx. 10×10 inches each); then utilize each piece to create a draped look with pleats on the front of the bra cups, covering from underneath the beaded appliqué to the bottom edge.
Be sure to secure your pleats prior to the next step by using a series of simple tack stitches or a basting stitch to close the “darts”—(or outward ends of the pleats).
Step 8
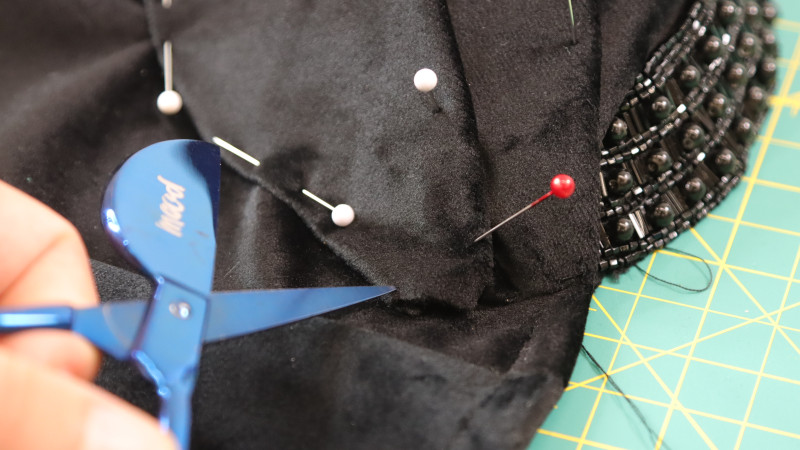
Tuck the seam allowance in and sew the bottom half with the machine. To sew the upper half, sew by hand to get in between the beads.
The method shown above is a faster and more beginner-friendly method for dressing the cups. To avoid raw seams on the inside of the garment (surrounding the cups), follow the alternative sewing method (visual guide below) for a flawless and lined finish.
How to Clean Finish Bra Cups
Please note: The below method requires 4 bra cup lining pieces (or 2 pairs) to be cut from the lining fabric.
Step 9
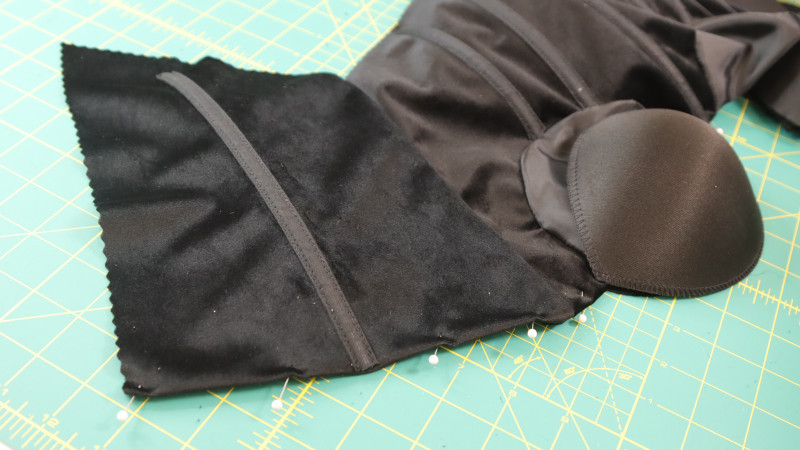
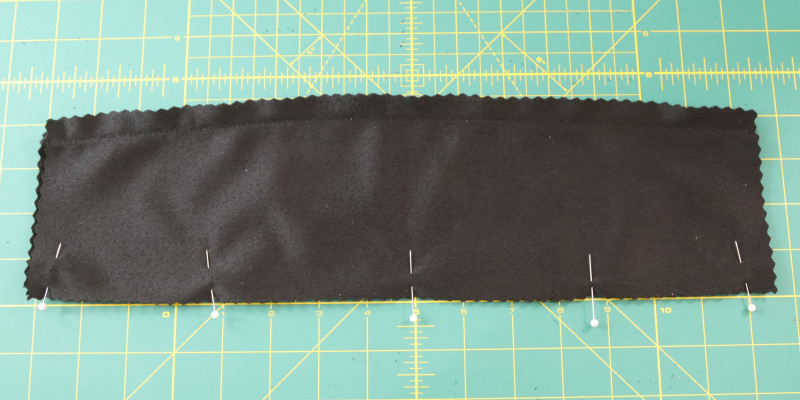
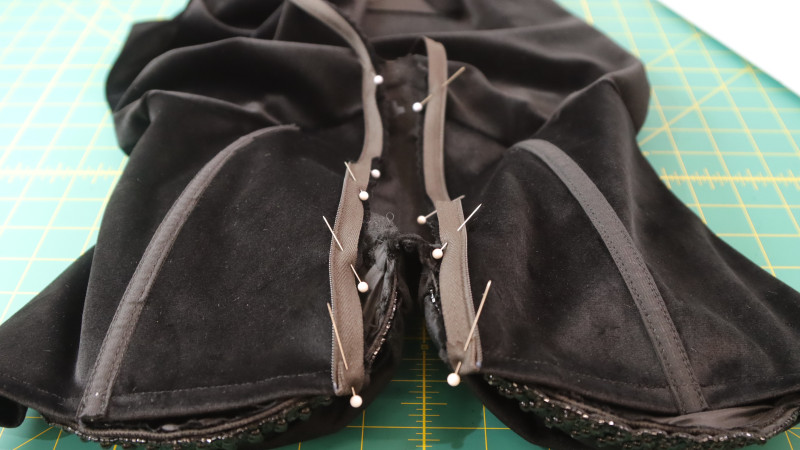
Sew the sleeve strap across the top and bottom edges, then turn outward.
Step 10
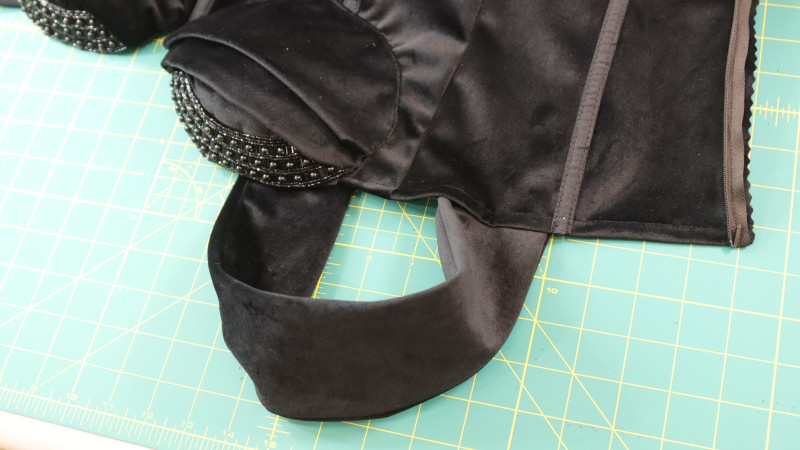
Sew the sleeve strap to the side of the cup and to the back bodice.
Step 11
Join the skirt panels by sewing front and back together at the side seams.
Step 12
Join the skirt and the bodice by sewing around the waistline.
Step 13
Install the zipper up to the notch and sew the rest of the seam at center back.
Step 14
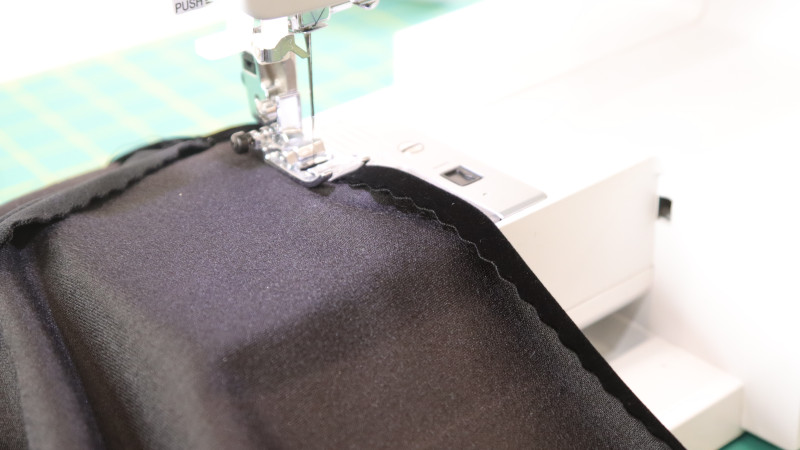
Finish the garment by sewing the hem around the bottom edge.
The Ambrosia Cocktail Dress Free Sewing Pattern by Mood Fabrics
Feel free to share your completed cocktail dress pattern on social media to inspire others and showcase your hard work!
Share this post with a friend (or two!), download The Ambrosia Cocktail Dress Free Sewing Pattern, and show us which fabrics and colors you choose, using the hashtags #MoodAmbrosiaPattern & #MadeWithMood.


El vestido está hermoso, muchas gracias por el patrón ¿Existe algún vídeo de instrucciones?
Gracias!
How would you go about making the bust into a plunge style? Would I need to shorten the front middle boning? I would really love to make this for myself but plunge bra styles work much better for my body. Thank you in advance!
Yes, shorten the front middle and raise the sides a little bit, don’t forget to raise the sides of the back too so they match the front sides.
Think you
Does the cup size change with the increase of pattern size as it should, or are they one size fits all?
Hello, as the pattern size increases, the cup size also increases to accommodate the fit.
How are you supposed to attach the bra cups? Is the dart at the bottom or the top?
Nunca pude descargar los patrones gratis
Hola, ingresa tu nombre y dirección de correo electrónico en el cuadro de descarga cuando te desplazas hacia abajo en la publicación donde dice “Suscribirse para descargar”. Recibirás el patrón de costura gratuito en tu correo electrónico.
Really looking forward to trying this out..
Is there an A0 version available please?
Hello, In order to keep our free sewing patterns free, we are exclusively offering an A4-Letter size version that includes all sizes. We appreciate your request and will keep it in mind for future patterns.
Happy Sewing!
Hi, in the alternative fabrics I see that there is sateen, I have a sateen but it has some stretch. Can I do it even so ? or the fabric must have a certain stiffness ?
Hello, sateen can work well for this pattern as it is made with the support of boning for the bodice. We do recommend using a fabric with some stretch for the skirt portion.
This is so cute! I am going to try making this in white for a bridal reception dress with a few adjustments!
Wow that sounds like it will turn out beautifully! Happy sewing 🙂
So you’re meant to sew the cups together at the top first wrong sides together, turn right side out, then stitch the dart… then set Into the bodice…? Or you stitch the darts into the cups individually; then attach at the tops wrong sides together, flip out right sides and press…?
Hello, you are meant to sew the darts on the cups first before attaching them onto the bodice. After the darts have been sewn individually, sew the cups onto the bodice with right sides together.
The pattern link I got in my email won’t work! Was really looking forward to making this. All of the other pattern links I’ve received work fine ):
We are sorry to hear, please email info@moodfabrics.com for any issues with pattern downloads.
The downloaded file does not open it says you have to enter password to open it.
Hello, our free sewing patterns are only available in PDF format for A4 and letter-size printing.
This dress is SERVING! And specifically it is SERVING Princess Diana revenge dress realness. Now I wish I had an occasion to wear this! I will keep it in my brain for future fabulousness!
Quero muito receber os moldes gratis
Você pode baixar o molde gratuitamente inserindo seu nome e endereço de e-mail no campo abaixo de “Baixe seu molde de costura gratuito”. Em seguida, verifique sua caixa de entrada de e-mail (e a pasta de spam, por precaução) para encontrar um e-mail da Mood Sewciety Patterns com o assunto “Seu download gratuito da Mood Sewciety”. Role a página até encontrar o link azul abaixo do título do e-mail e clique nele. Isso o levará a uma página da web onde você deverá rolar a página para baixo e encontrar o botão laranja que diz “clique aqui para baixar seu molde de costura gratuito”. Esse botão o redirecionará para a página com o arquivo PDF do molde, que pode ser impresso em papel tamanho 8,5×11 polegadas na sua impressora em casa. Avise-me se precisar de ajuda para acessar o molde!
Hey, any tips or tricks for adding puffed sleeves to this and a long skirt? Maybe other patterns on the website that might mesh well? I’m thinking either replacing the skirt entirely for a full one by making this into a bodice or adding on a mermaid style extension to the existing skirt. .
Hey there! Check out this tutorial on how to alter a sleeve pattern on our Instagram page!
I’m using this pattern for a drag costume and can’t wait to share it with the community. Quick question though. Is the dress meant to have lining or just the cups? I got enough fabric to line the whole garment, but only see instructions for the cups.
Hey James! This dress is not lined, but you can absolutely cut out doubles of each pattern piece if you wanted to line it.