

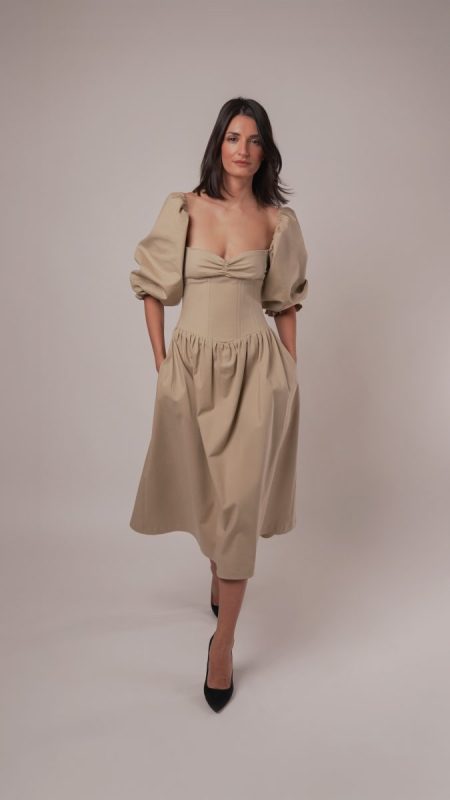
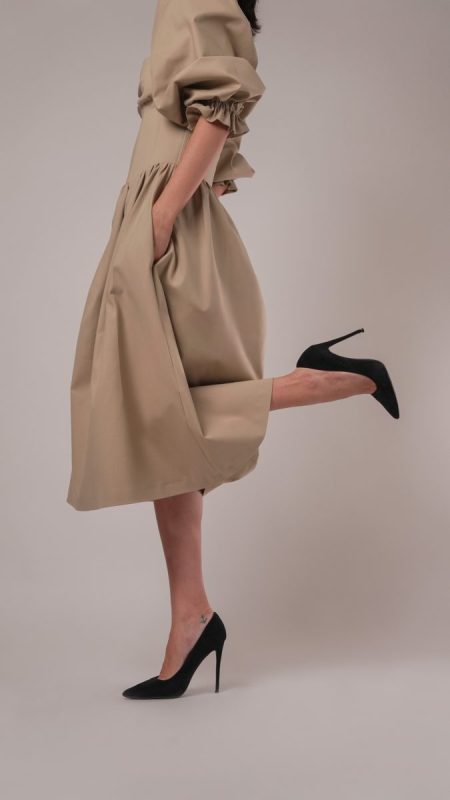
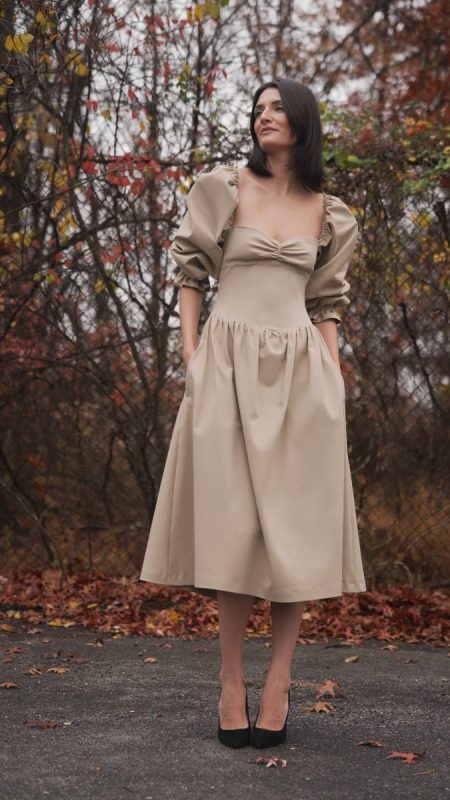
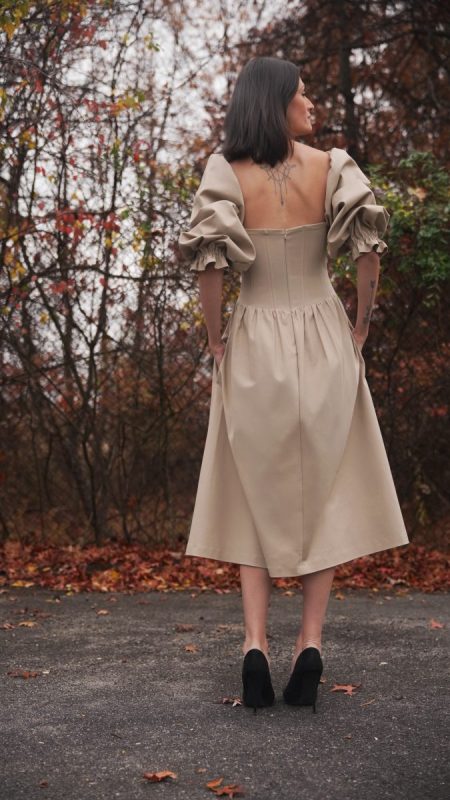
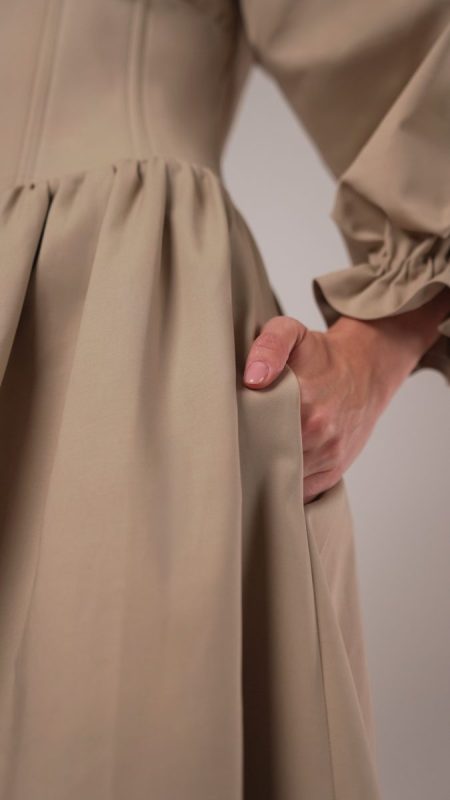
You loved the Valentina V-Waist Dress, so we couldn’t help but wonder: what if it had side pockets and poofy sleeves? The Venice V-Waist Dress answers that question with its universally flattering and timeless silhouette.
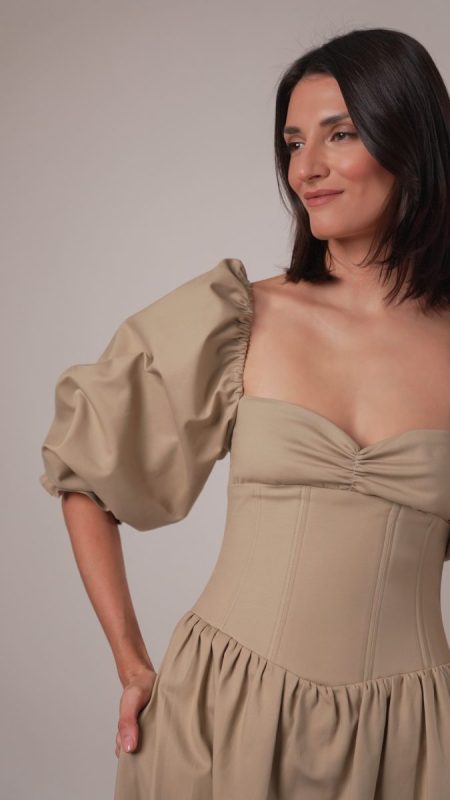
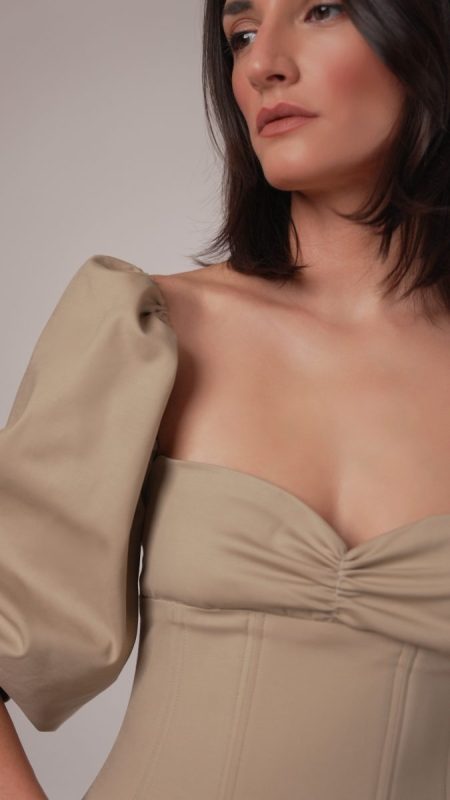
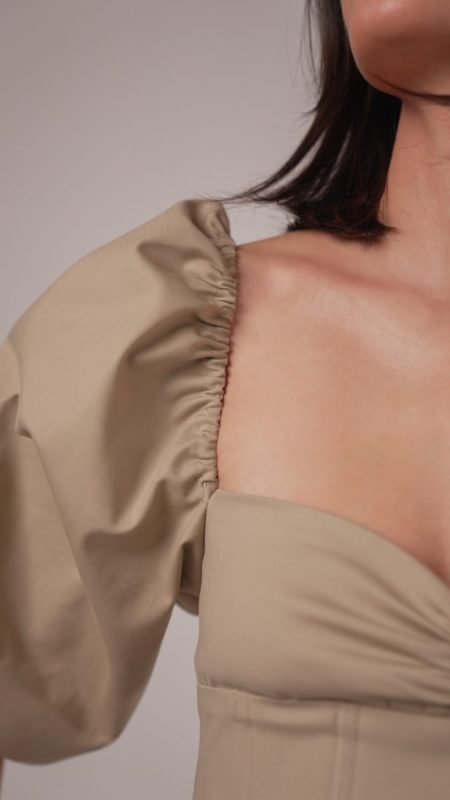
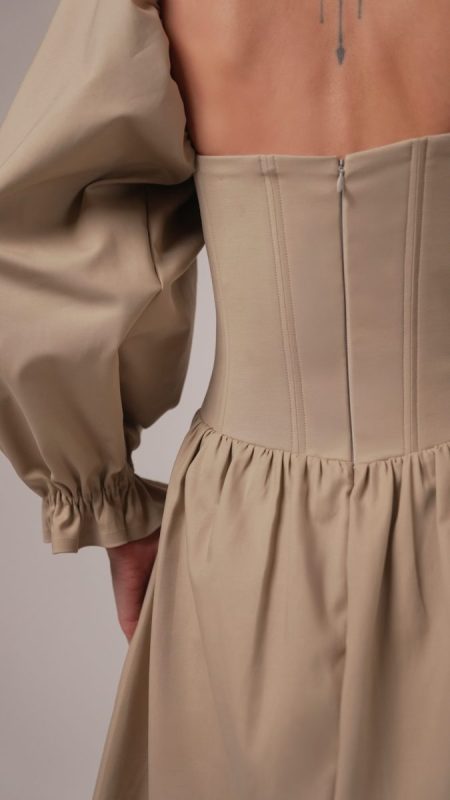
Made from an easy-to-sew cotton poplin with just the right amount of weft-wise stretch, the Venice dress features a structured corset-style bodice that smooths and flatters without sacrificing comfort. The boned bodice, borrowed from the beloved Valentina Dress, gets a fresh update with a softly gathered bust and voluminous billowed sleeves that add a touch of drama in every ruffle.
This sleeve design can also be mixed and matched with nearly any other dress pattern from the Mood Sewciety blog, making this pattern the perfect starting point for your next custom creation. Try a shorter hemline, add a slit, experiment with mini puff sleeves, make the top and skirt separates, or wear the sleeves off the shoulder for a softer, more romantic feel. However you style it, the Venice V-Waist Dress is your invitation to play, design, and customize to your heart’s content.
Essential Materials & Sizing Guide for the Venice V-Waist Dress
Continue reading for a breakdown of what knowledge and materials you need for creating your very own V-waist dress! We’ve got you covered with the recommended materials we used—if you want to follow along exactly—as well as a curated list of alternative fabric type recommendations if you want to customize your own version. The Venice V-Waist Dress free sewing pattern download includes technical drawings for seam and silhouette visibility, plus a size chart to help you find your perfect fit!

Purchase Products Used Below:
Quantities indicated are for sewing a size small V-waist dress. Toggle the ‘SHOP THIS LOOK’ box to find quantity estimates for other sizes.
- 5 yards of Nougat Stretch Cotton Poplin
- 3 yards of Clear Rigilene – 8mm/0.375″
- 2 yards of White Elastic – 0.25″
- 1 each of Invisible Zipper 24″ by YKK – 572 Natural
- 1 each of Gutermann Sew All Thread 250m – 506 Sand
- MDF477 – Venice V-Waist Dress Sewing Pattern (Free download below!)
Alternative Fabric Type Recommendations:
The Venice V-Waist Dress sewing pattern is best suited for light or medium weight fashion fabrics. Explore other fabric types or colors from our featured collections for your silhouette with the links below.
Download Your Free Sewing Pattern
Submit your name and email in the form below to receive the download link for the Venice V-Waist Dress free sewing pattern directly in your inbox. Mood Sewciety Patterns will send your free download link via email with the subject line: ‘Your Free Download from Mood Sewciety – The Venice V-Waist Dress’ (in PDF format for A4 and letter-size printing).
© MoodFabrics.com / MoodSewciety.com – Mass production, resale, or distribution of this pattern in any form is strictly prohibited.
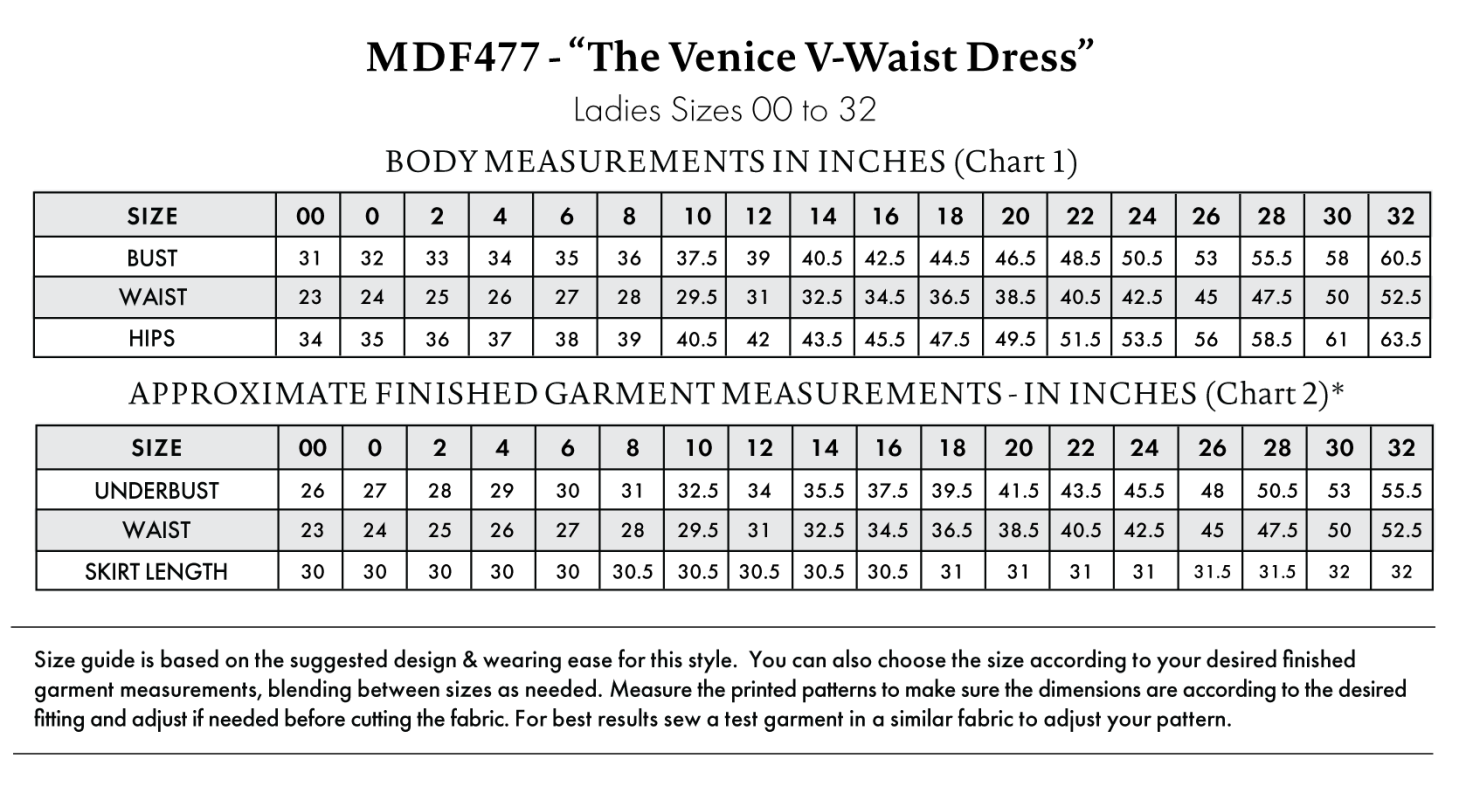
Find Your Perfect Fit
The Venice V-Waist Dress Sizing Guide is based on the suggested design & wearing ease for this style. You can also choose the size according to your desired finished garment measurements, blending between sizes as needed. Measure the printed patterns to make sure the dimensions are according to the desired fitting and adjust if needed before cutting the fabric. For best results, sew a test garment in a similar fabric to adjust your pattern.
Note: Always read all the instructions before cutting the fabric!
How to Sew The Venice V-Waist Dress
The instructions provided below are designed to guide you through sewing the Venice V-Waist Dress from start to finish.
2 Tips for Sewing with Stretch Cotton Poplin
⇒ Make sure when you’re cutting out your pattern pieces that the weftwise stretch of the cotton poplin is oriented horizontally on the pattern pieces, meaning you want the fabric to stretch around your bust and waist, not vertically along your body.
⇒ Consider using a denim needle for this project, especially when doing the bodice. The cotton poplin is pretty thick, and there are parts of the corset when you’re going to be sewing through 6 layers of it (though if you’re using a different material, always choose the correct needle for that material).
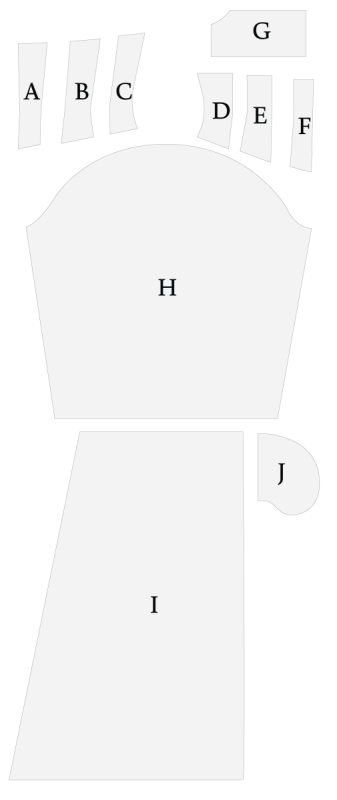
Pattern Pieces & Fabric Cuts Needed
(A) TOP BACK CENTER
- FABRIC – CUT 2 MIRRORED
- LINING – CUT 2 MIRRORED
(B) TOP BACK MIDDLE
- FABRIC – CUT 2 MIRRORED
- LINING – CUT 2 MIRRORED
(C) TOP BACK SIDE
- FABRIC – CUT 2 MIRRORED
- LINING – CUT 2 MIRRORED
(D) TOP FRONT SIDE
- FABRIC – CUT 2 MIRRORED
- LINING – CUT 2 MIRRORED
(E) TOP FRONT MIDDLE
- FABRIC – CUT 2 MIRRORED
- LINING – CUT 2 MIRRORED
(F) TOP FRONT CENTER
- FABRIC – CUT 1 ON FOLD
- LINING – CUT 1 ON FOLD
(G) TOP FRONT UPPER
- FABRIC – CUT 1 ON FOLD
- LINING – CUT 1 ON FOLD
(H) SLEEVES
- FABRIC – CUT 2 MIRRORED
(I) SKIRT
- FRONT: FABRIC – CUT 1 ON FOLD
- BACK: FABRIC – CUT 2 MIRRORED
(J) POCKETS
- FABRIC – CUT 2 MIRRORED PAIRS
Sew with a 1/2″ seam allowance for all seams unless otherwise specified.
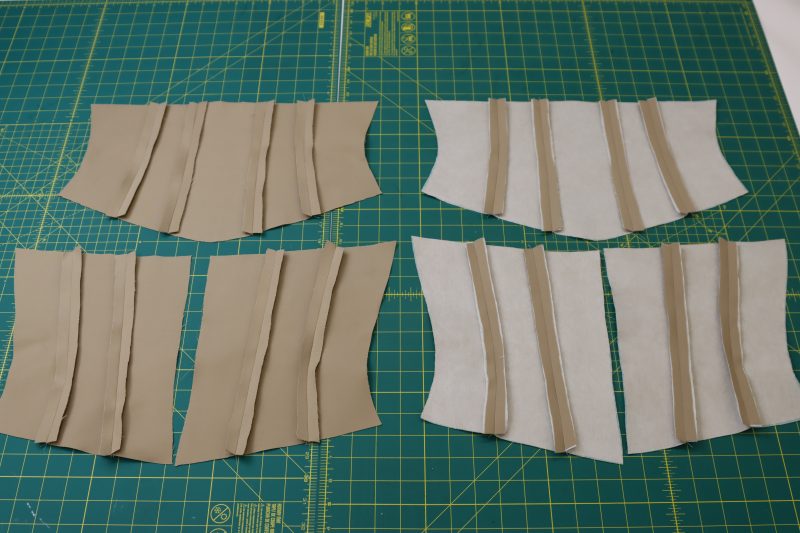
Step 1
BODICE BASE
- Lay all the bodice pieces out in the order that they will be attached to each other.
- The order of the front pieces should be D, E, F, E, D and the order of the back pieces should be C, B, A, A, B, C.
- Cut interfacing for every piece in the inner layer of the bodice.
- Iron the interfacing to the wrong side of the inner layer of the bodice.
- Sew each piece of the bodice to the one next to it, right sides together, making sure that the notches are matched up on each piece.
- Open each seam and iron them all flat.
- Repeat these steps for both the layer with the interfacing and the layer without.

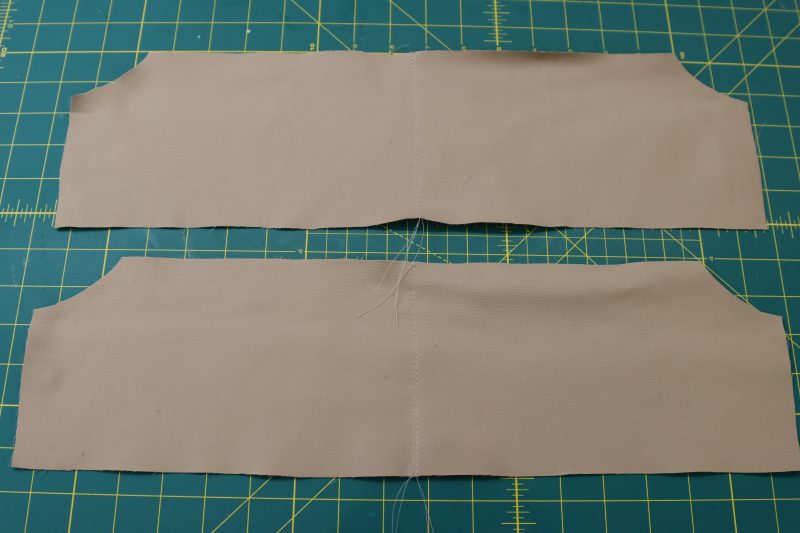
Step 2
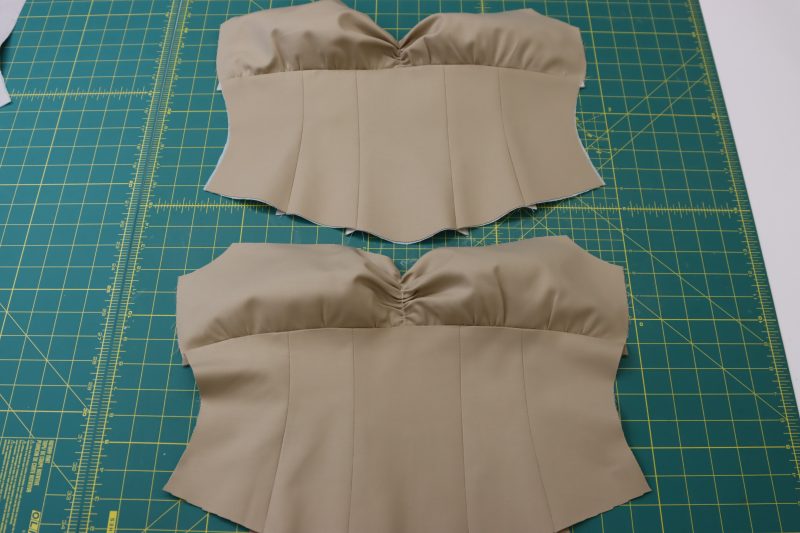
TOP FRONT
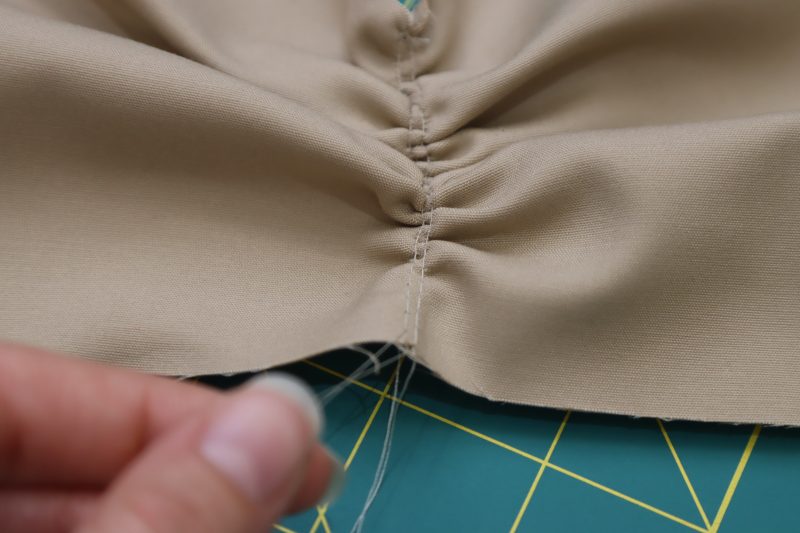
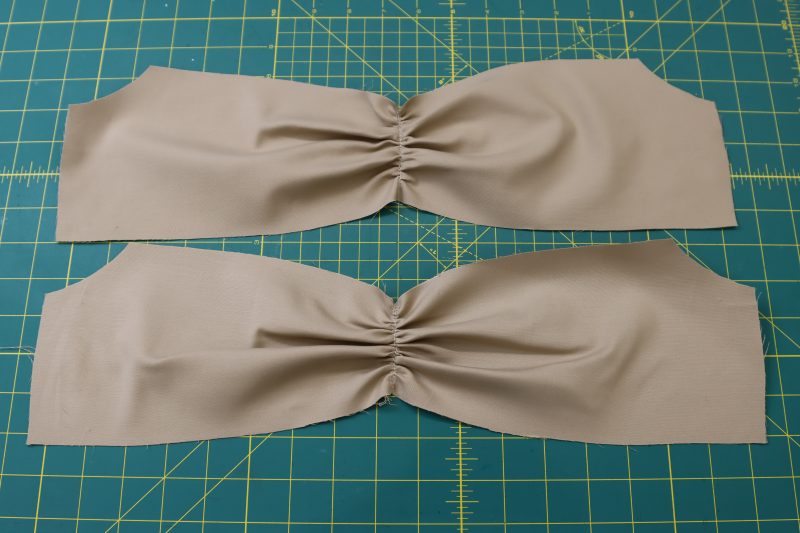
- Sew two parallel straight stitches down the middle of each of the top front upper pieces, ensuring that the stitch length is at least 3 millimeters long and the stitches do not have a backstitch on either end.
- Gather the centers of the top front upper pieces by pulling on the top threads and ruching the fabric. Repeat for both layers of the bust.
- Lower the stitch length on the machine back to 2.5 millimeters and sew a straight stitch on top of the ruched neckline to secure it in place.
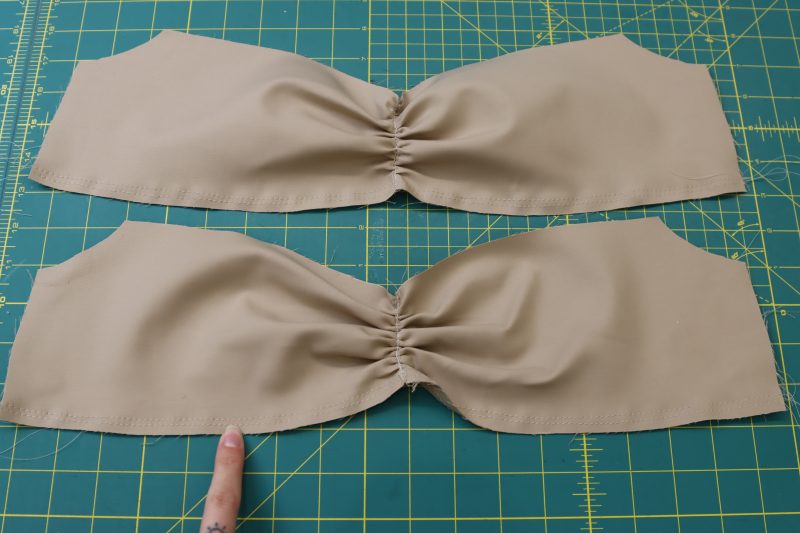
- Sew two parallel straight stitches along the bottom of each top front upper piece and repeat the same rouching method until the top front is the same length as the front corset piece.
Step 3
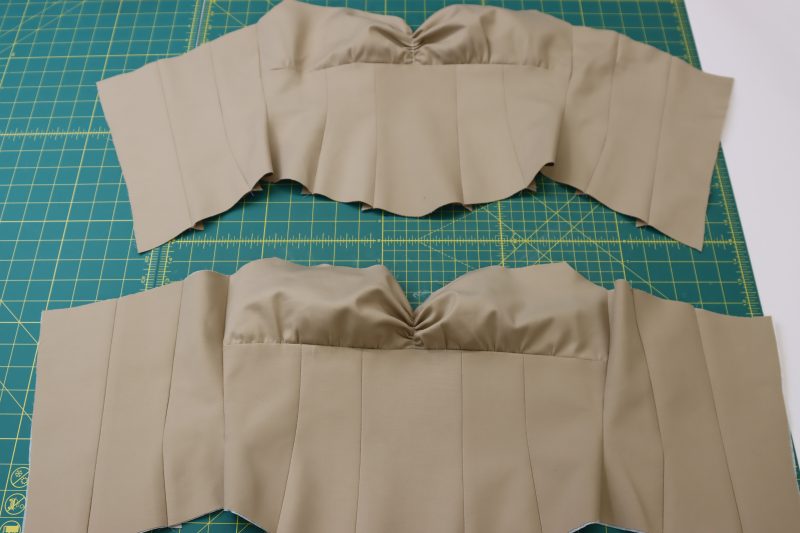
ASSEMBLE BODICE
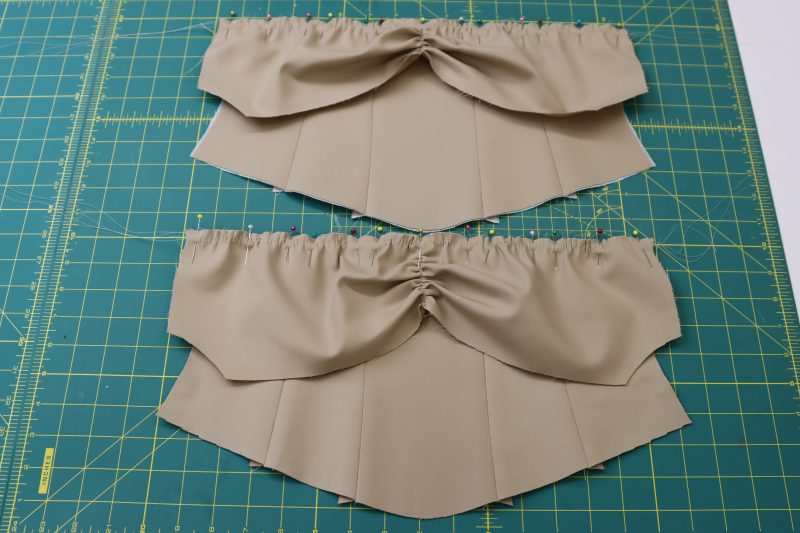
- Place the gathered top front pieces right sides together with the front pieces of the corset (one top front piece will be on the outer layer and one top front piece will be on the inner layer with the interfacing).
- Pin and sew the top front pieces to the fronts of the corset.
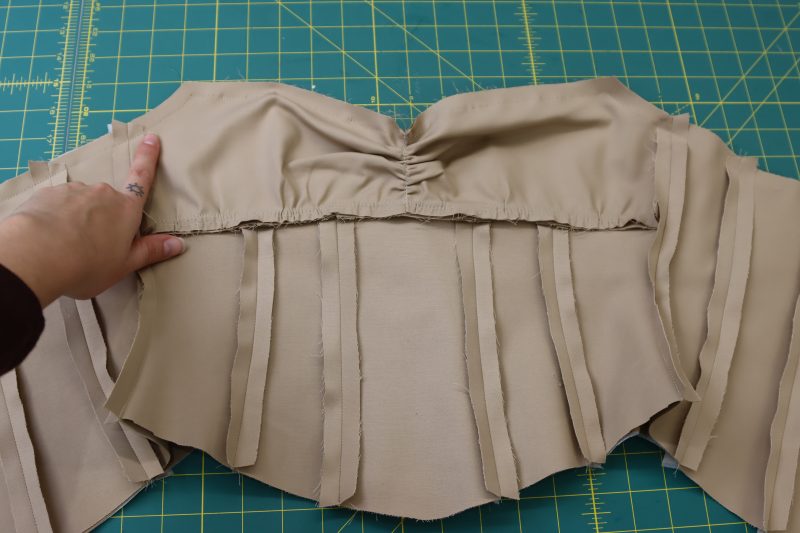
- Flip the top front piece up and iron the seam open and flat.
- Sew the back corset pieces to the front corset pieces at the side seams.
- Place the outer corset piece and the inner corset piece right sides together.
- Sew along the top edge of the two corset pieces to connect them.
- Trim the corners and flip the corset right sides out.
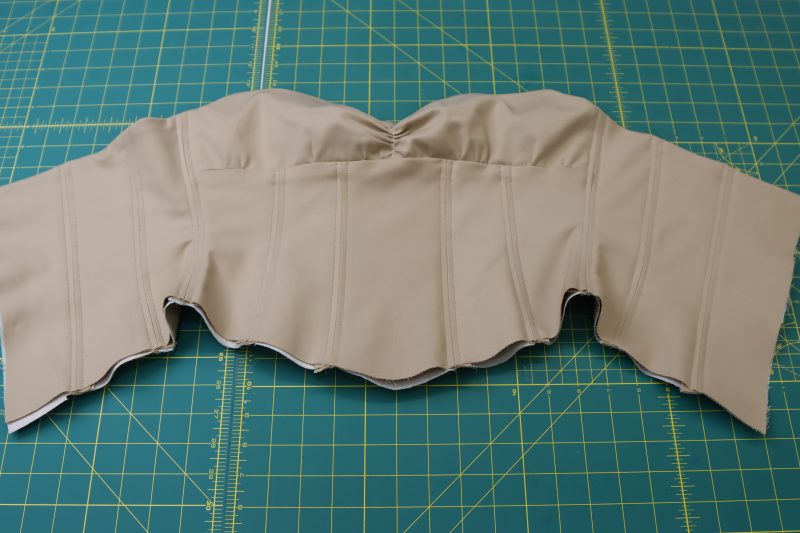
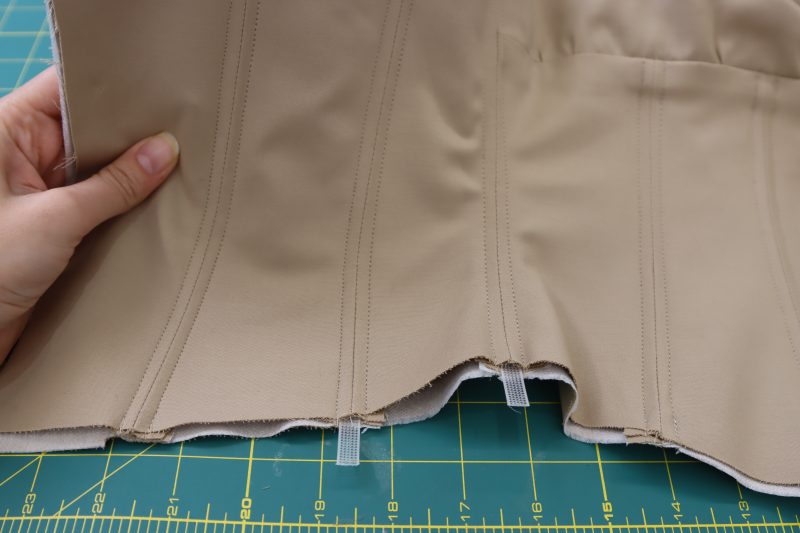
Step 4
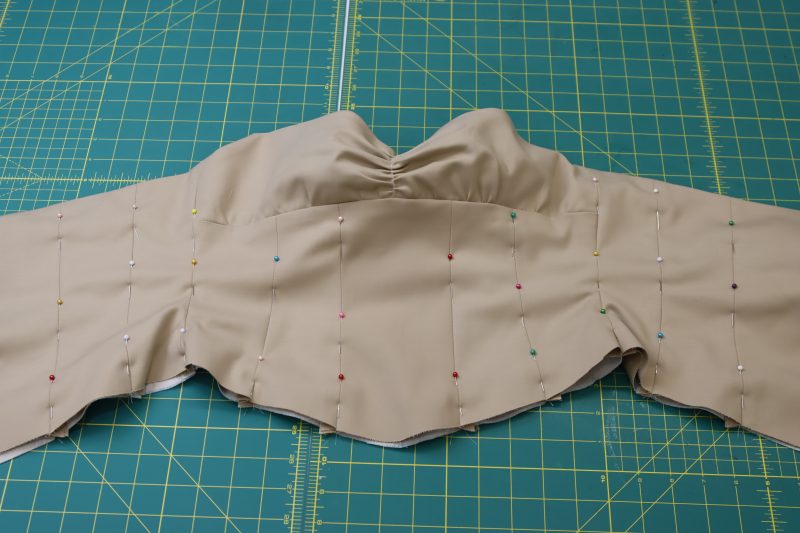
BONING
- Carefully pin the outer layer of the corset to the inner layer of the corset along the seams.
- Sew two parallel straight stitches on either side of each seam with ¼ inch seam allowance.
- Cut pieces of the rigilene boning that are ½ inch shorter than the length of the channels you just sewed.
- Insert the rigilene boning into the channels, making sure they are tucked all the way into the top edge of the corset top.
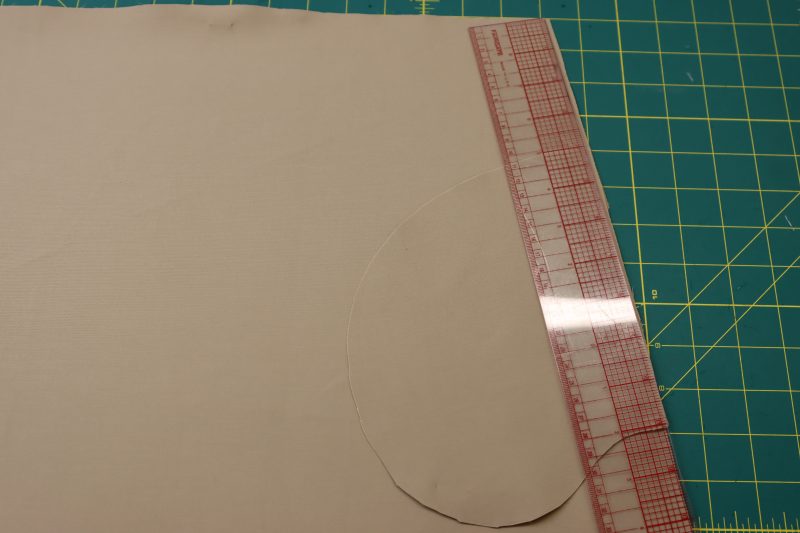
Step 5
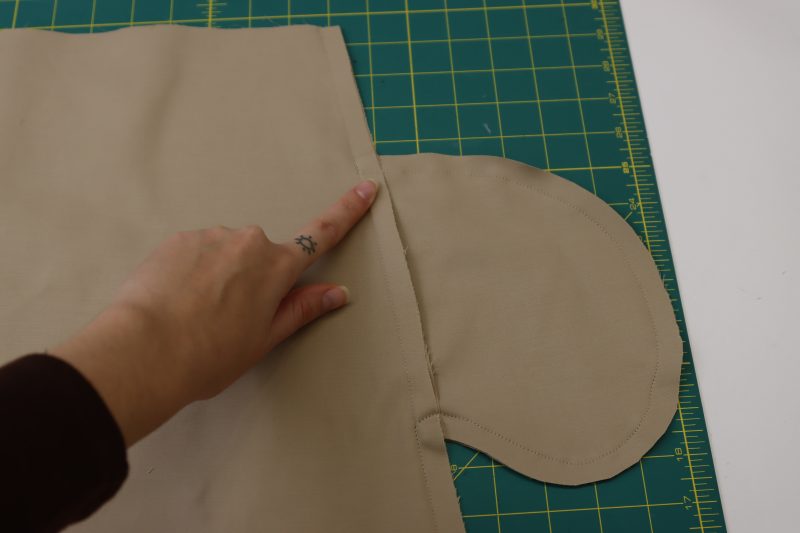
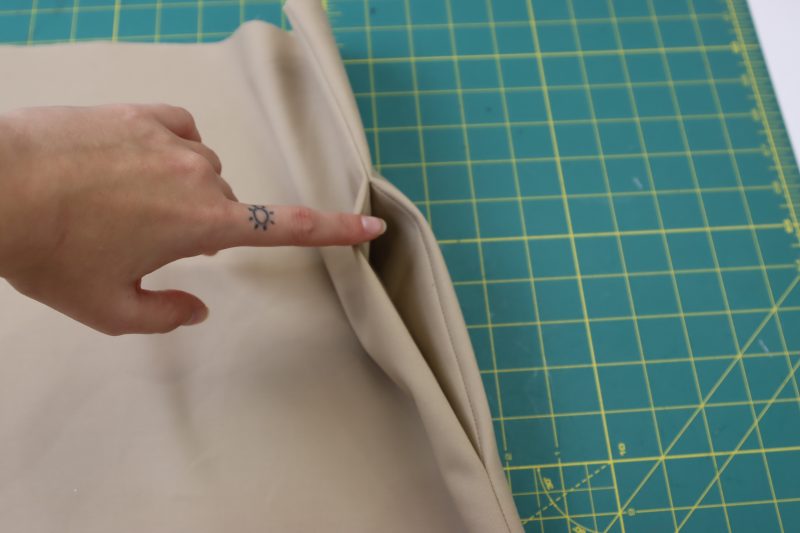
POCKETS
- Place the flat edge of the pocket right sides together with the two side seams of the front skirt piece, making sure that they are 4 inches lower than the top edge of the skirt.
- Pin and sew the flat edge of the pocket to the skirt side seam.
- Repeat the same process for the side seams of the back skirt pieces.
- Iron the seam connecting the pockets to the skirt open and flat.
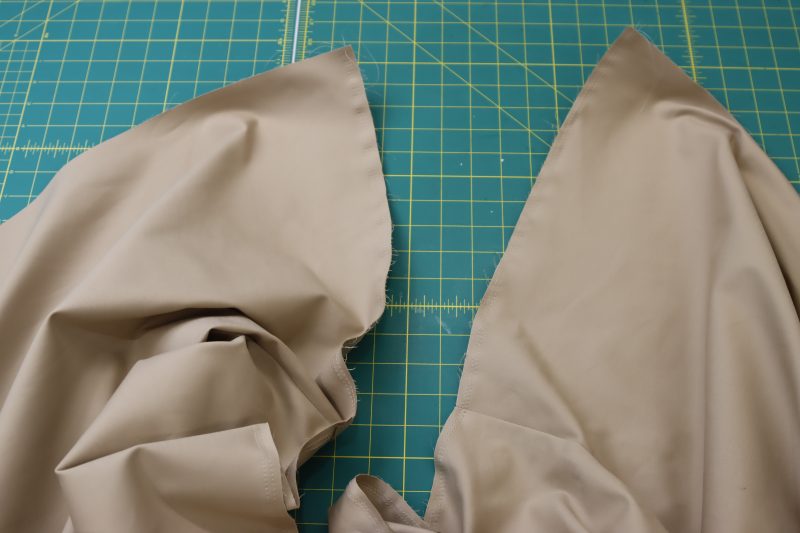
- Place the two back pieces on top of the front piece, right sides together, with the pockets and side seams matching up.
- Pin and sew around the side seam and pocket bags on the side of the skirt.
- Flip the skirt to the right side and iron the pockets toward the front of the skirt.
Step 6
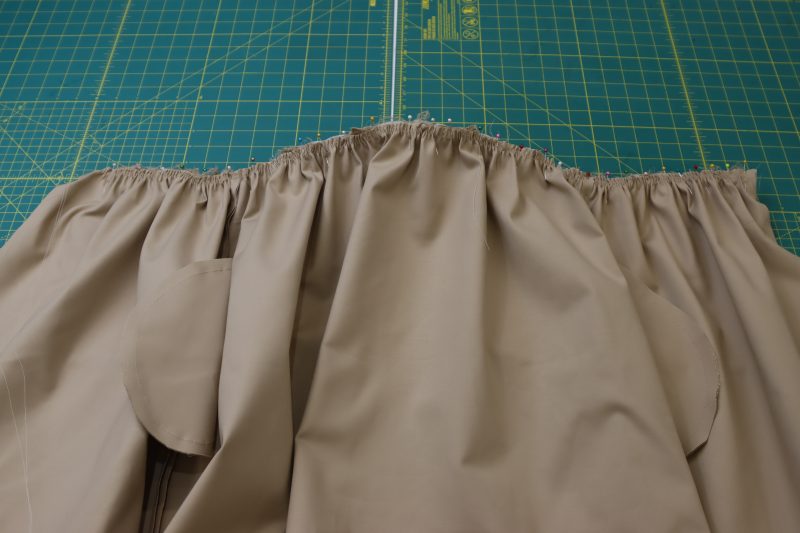
SKIRT
- Sew two parallel straight stitches with 3 millimeter stitch length along the entire top edge of the skirt.
- Use the same method that was used for gathering the top front to gather the skirt (note: to make this as easy as possible, I think it helps to find the center of the skirt waistline and match it with the center of the corset, then start gathering so that you know the two sides of the skirt are evenly gathered).
- Once the skirt is gathered to the same length as the bottom of the corset, pin and sew the gathered edge of the skirt to the bottom of the corset, right sides together.
- Flip the skirt down and iron the gathered edge so that the gathers lay somewhat flat.
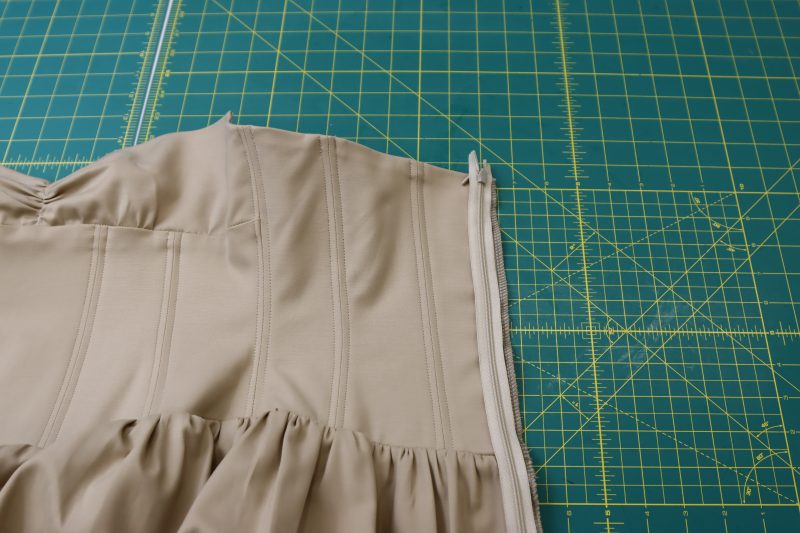
Step 7
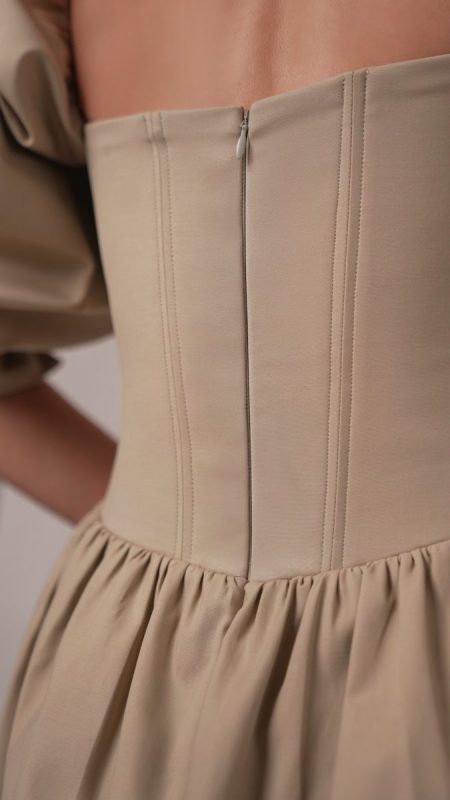
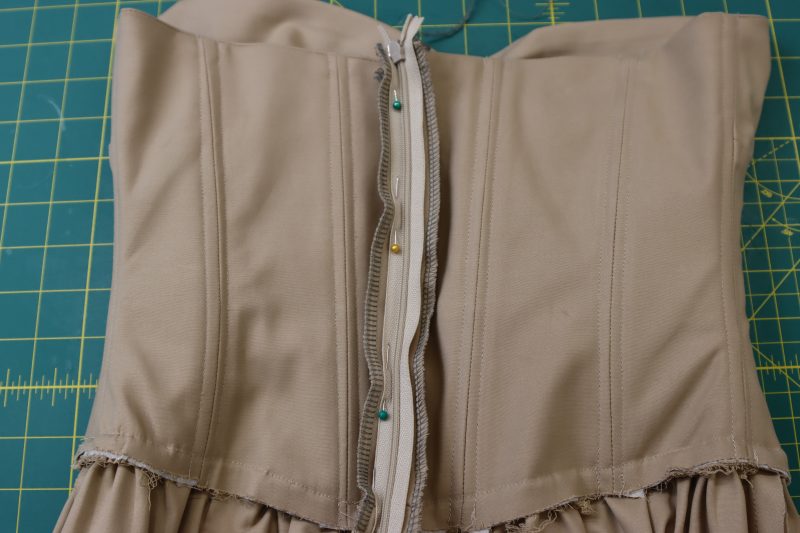
ZIPPER
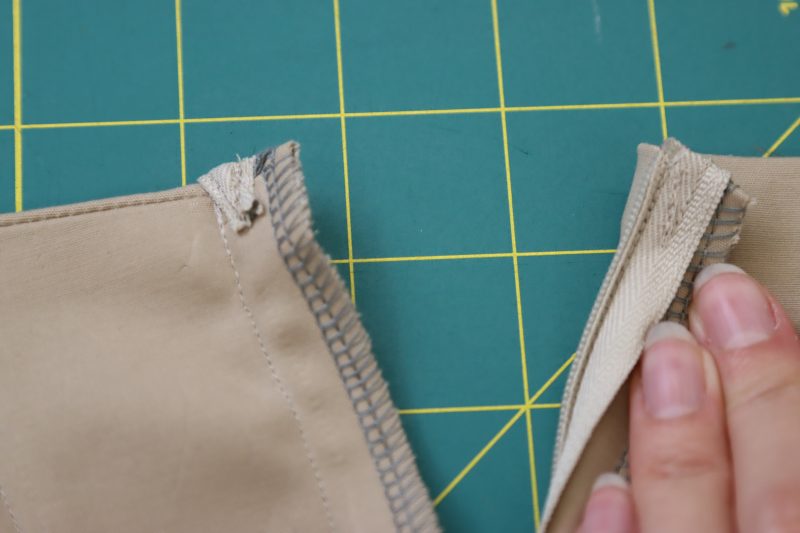
- Place the zipper face down with the edge lined up with one of the sides of the center back seam of the dress.
- Pin and sew the side of the zipper tape closest to the edge of the center back of the dress.
- With the dress flipped inside out, place the other edge of the zipper face down on the other side of the center back seam of the dress, making sure that the tops of the zipper tape are even on both sides.
- Pin and sew that side of the zipper tape to the opposite side of the dress.
- Tuck the tops of the zipper tape into the seam allowance of the center back seam and sew it in place to hide it from the outside of the dress.
Step 8
FINISH SKIRT
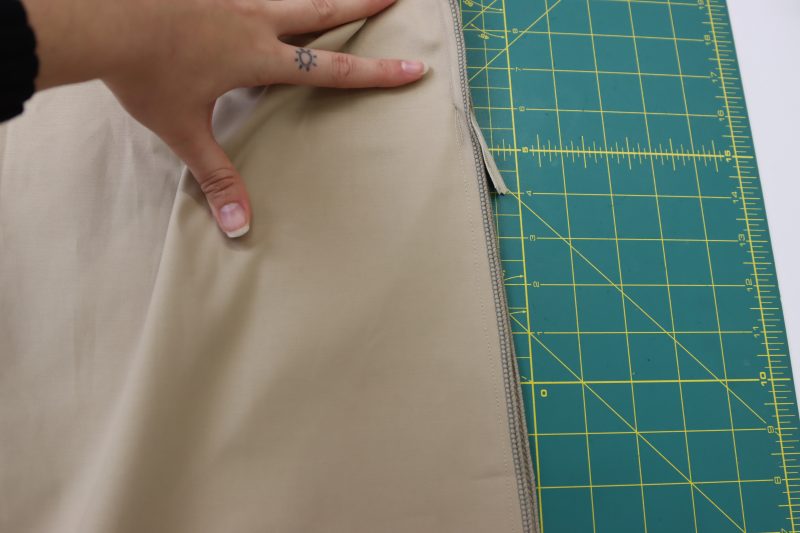
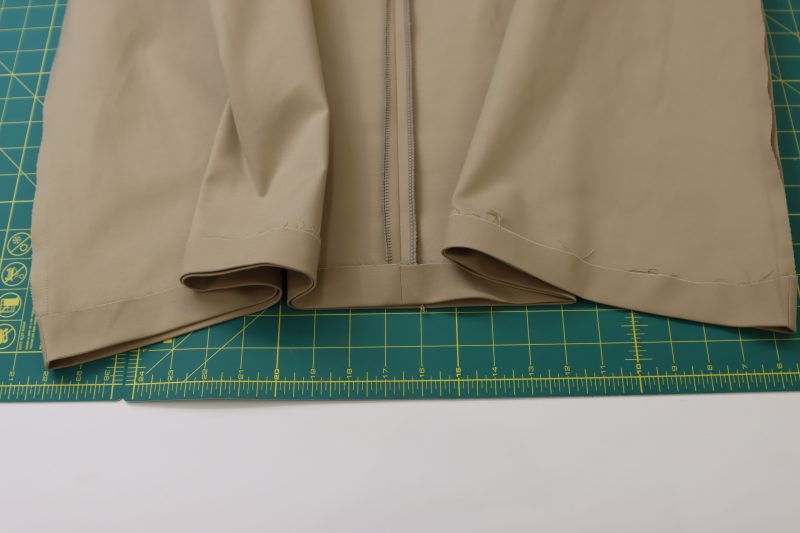
- With the dress still inside out, place the bottom of the center back seam right sides together.
- Pin and sew the bottom of the center back seam together until reaching the bottom of the seam connecting the zipper to the dress.
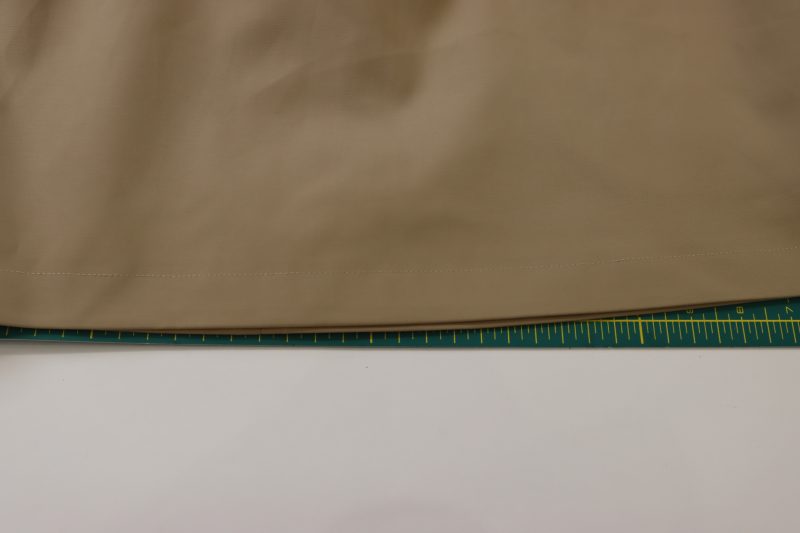
- Iron a wide (2 inch) hem into the bottom of the dress.
- Sew a hem into the bottom of the dress with 1.5 inch seam allowance.
Step 9
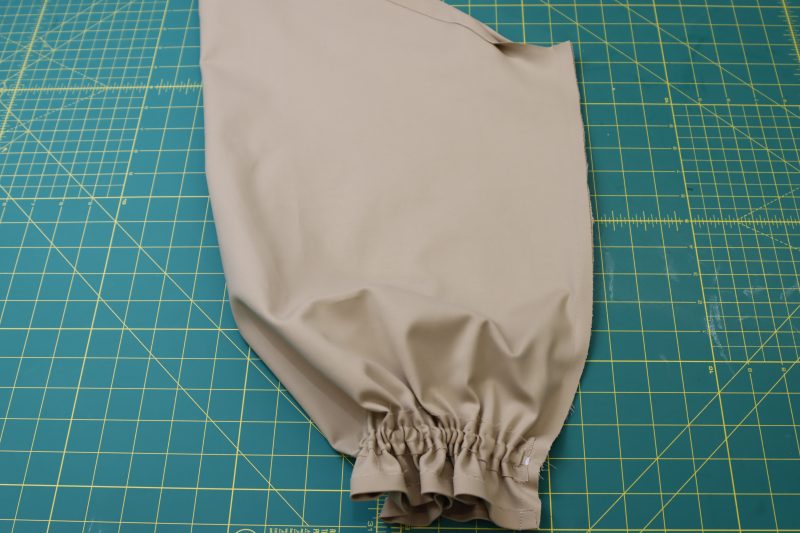
SLEEVES
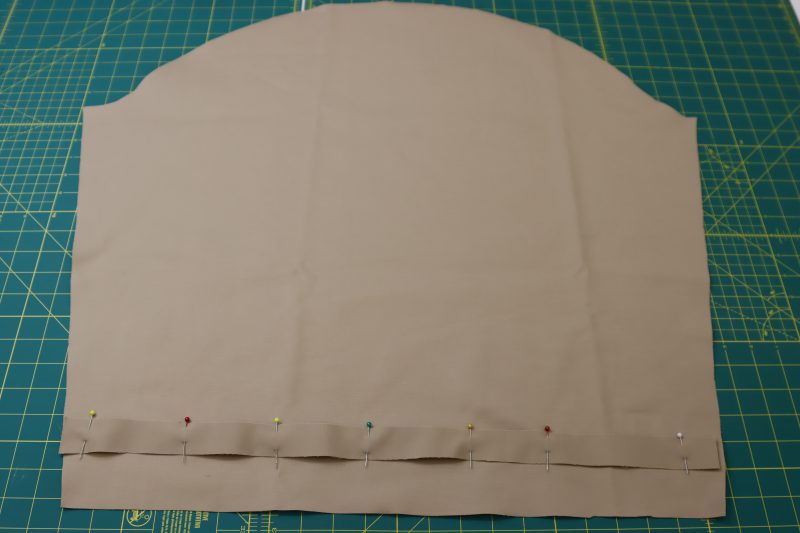
- Cut two identical strips of fabric that are as long as the wrist of the sleeve and 1 inch wide.
- Pin the strips two inches above the bottom edge of the sleeve.
- Sew two parallel straight stitches on either side of the strip with ¼ inch seam allowance from the raw edges of the strip, creating a ½ inch wide channel.
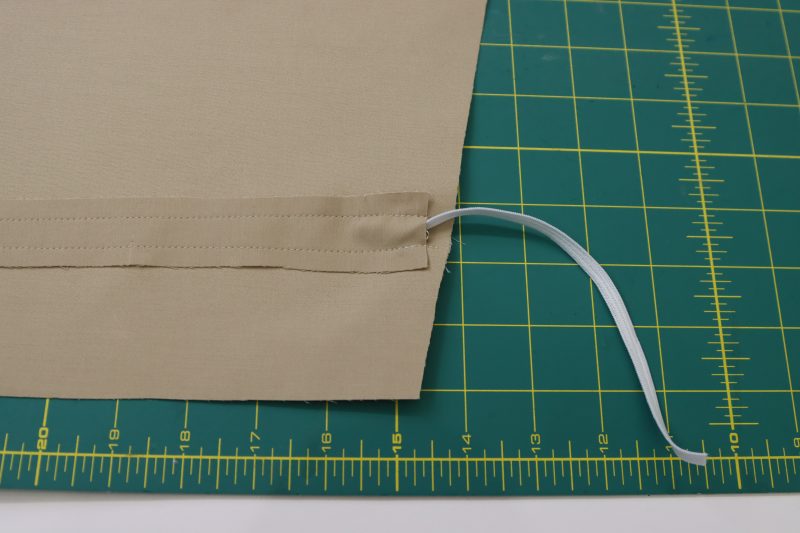
- Insert a piece of elastic that is the same length as the circumference of your wrist (unstretched) using a safety pin attached to the end of the elastic.
- Secure the ends of the elastic on either side of the channel by sewing them into place.
- Hem the bottom edge of the sleeve with ½ inch fold and ⅜ inch seam allowance.
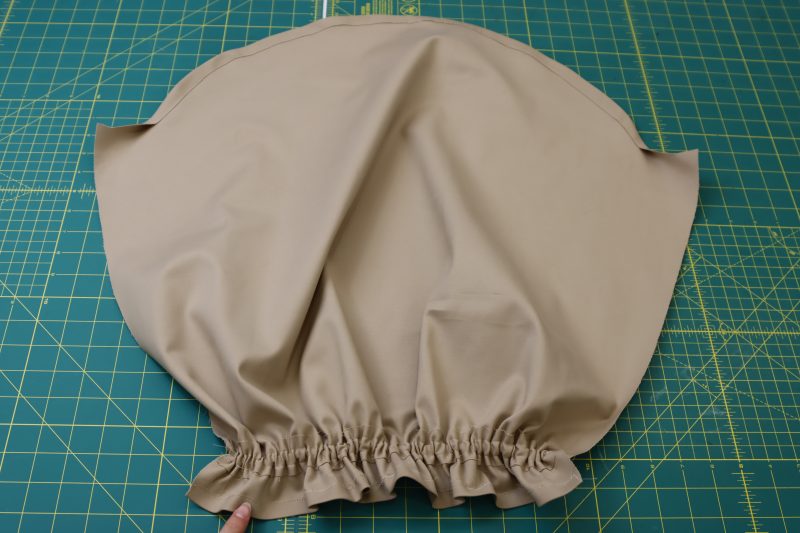
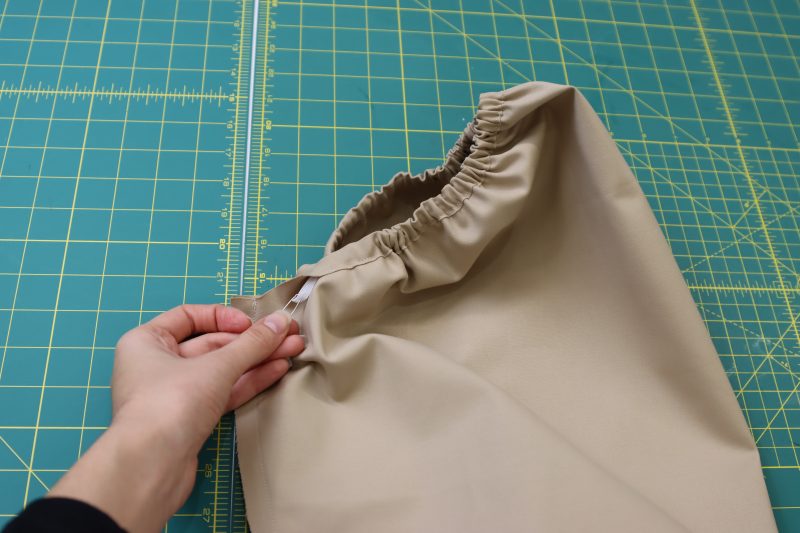
- Fold the curved edge of the of the sleeve cap over by ⅝ inch and iron into place, leaving 3 inches of fabric unfolded on both sides of the sleeve cap.
- Sew the folded edge in place with ¼ inch seam allowance, leaving a ⅜ inch channel for the elastic.
- Insert the elastic into the sleeve cap the same way it was inserted into the wrist, securing the edges of the elastic on either side of the channel.
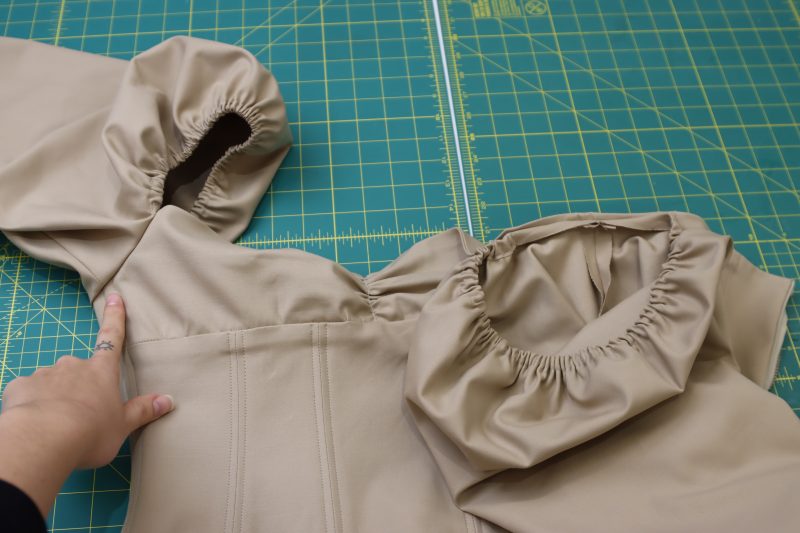
- Fold the sleeve in half right sides together with the side seams lining up.
- Pin and sew the side seam of the sleeve.
- Pin and sew the opening of the sleeve cap that does not have elastic sewn into it to the side of the corset (note: the front of the sleeve should be lined up with the pointed corner of the top front and the back of the sleeve should be lined up with the seam directly behind the side seam of the bodice).
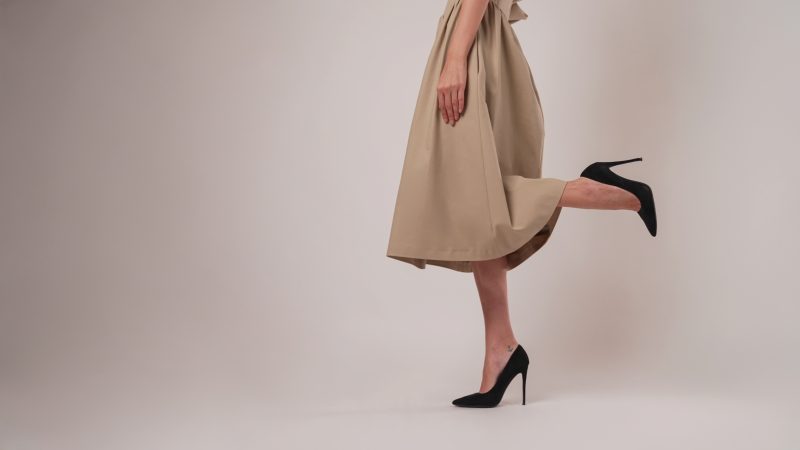
Sewing Success: The Finished Venice V-Waist Dress
Share this post with a friend (or two!), download the Venice V-Waist Dress free sewing pattern, and show us which fabrics and colors you choose, using the hashtags #MoodVenicePattern & #MadeWithMood—and don’t forget to tag us @MoodFabrics, too.

Free Sewing Pattern Inspiration for Your Next Project
With 470+ free sewing patterns and counting, your opportunities for sewing with Mood are endless!
We hope you had as much fun sewing this dress pattern as we did! As always, we want to hear from you—share your thoughts and comments below and let us know where you’ll be wearing the Venice V-Waist Dress free sewing pattern!
J’aimerais recevoir ce patron. Merci beaucoup
Love this dress style how elegant
Hey, how can I possibly lengthen the skirt?
Hey Delia! Just extend the length of the hem on the pattern piece by however much you want to lengthen the dress.
Could this be made in a non-stretch fabric, like a linen?
Yes of course. We used a fabric with only a little bit of stretch to give the corset a bit of ease, but you can absolutely use a non-stretch woven fabric.
Gorgeous sewing and beautiful dress ✨
Love this pattern. Ill probably modify the sleeves. This is for my granddaughter. She is a dress size 3 and very petite so Ill do a sloper before I order the fabric. Im planning to do this in stretch lace for summer. Thank you.
Could this garment be done in linen successfully? Also, the bust design seems to be sagging on the model; is this intended of the design?
This could definitely be done in linen, I think that would drape beautifully. And yeah it might be hard to wear a bra with this dress which I think contributes to the cups sagging a little bit, but you could always size down so that the corset is really tight and supportive and holds everything up a bit better since its technically strapless.
❤️❤️❤️ thanks you
I love it
Bello
Can’t wait to see this
Wonderful design
Wonderful design
great
Thank you so much.
Hey, would i be able to make it as a top/shirt insted of a dress?? 🙂
Surely! Just don’t attach the skirt and finish the bottom of the bodice with a finishing method of your choice.
I love this! Planning on making my prom dress using this pattern. ❤️ How many yards of Interfacing will I need and what type is recommended?
Hey Delia! I recommend just 1 yard of interfacing.