

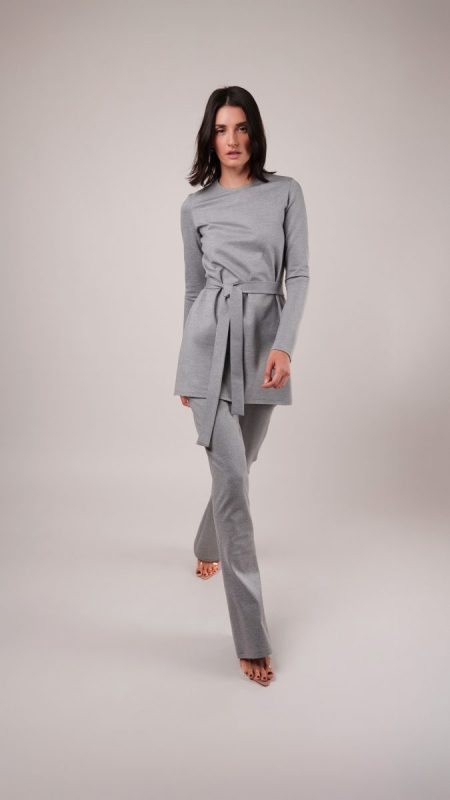
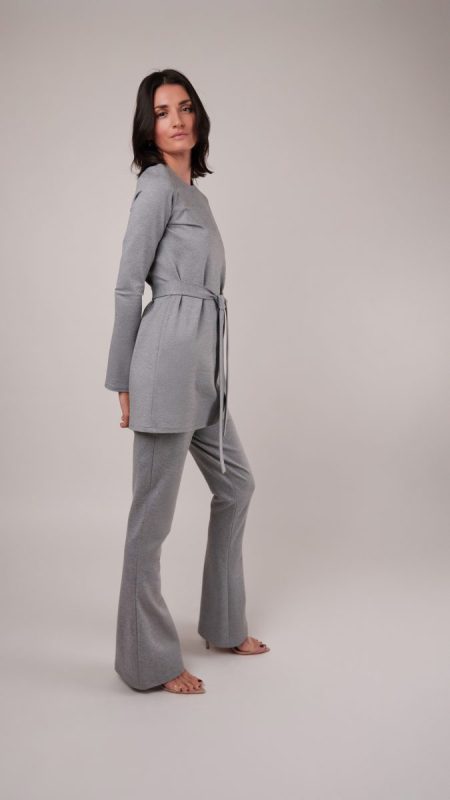
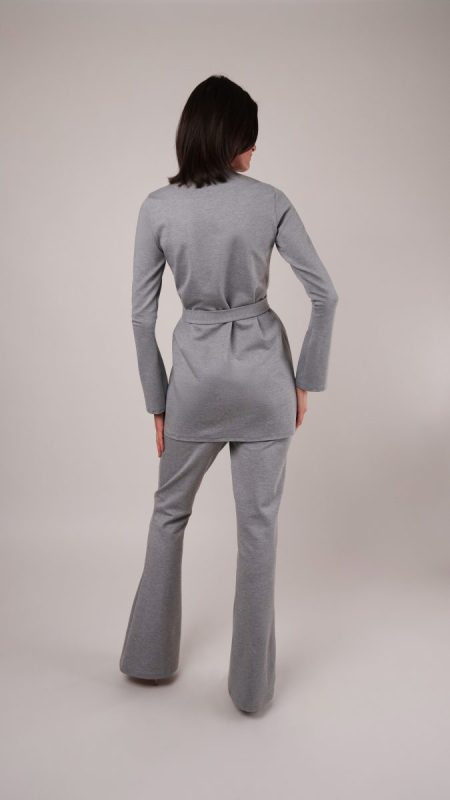
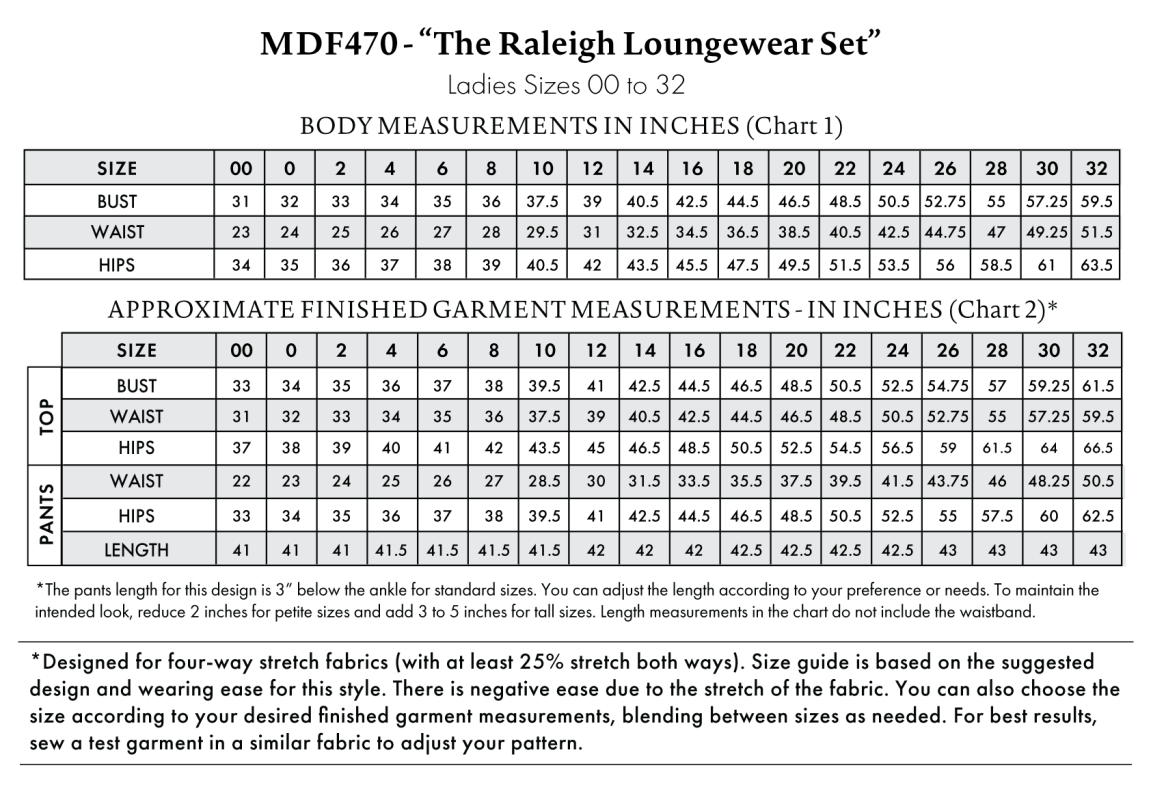
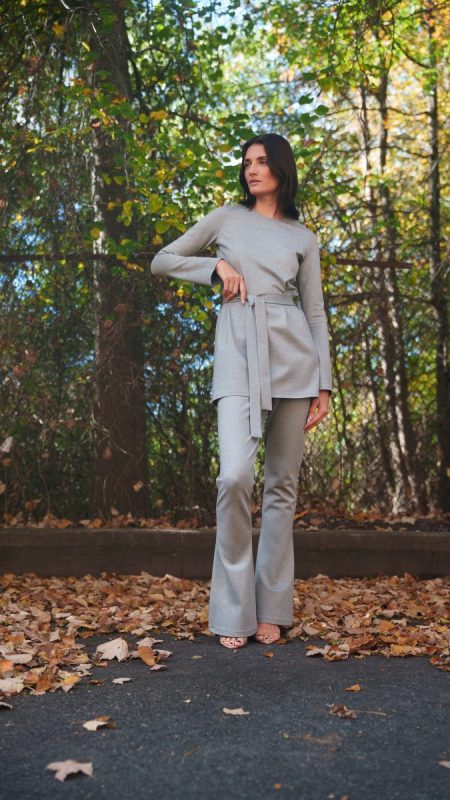
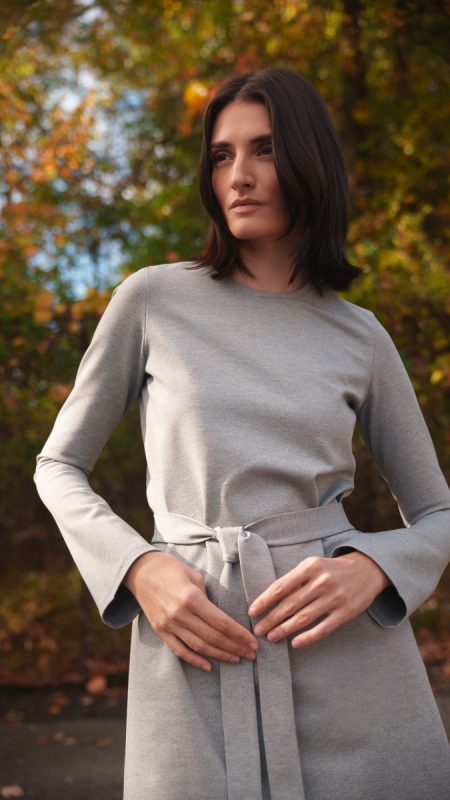
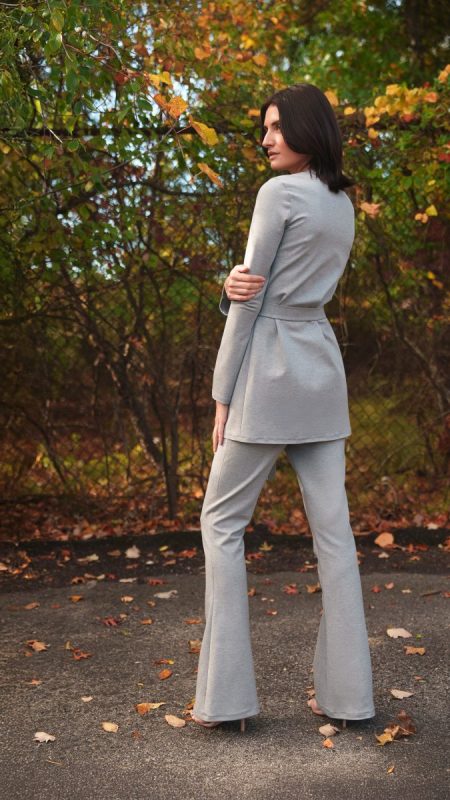
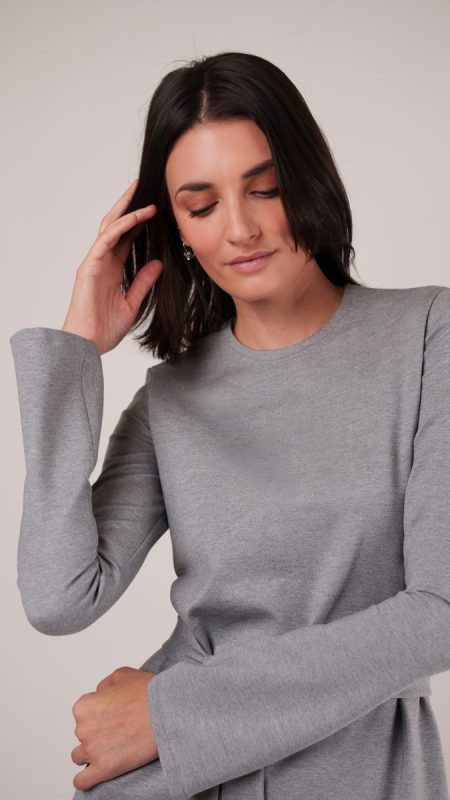
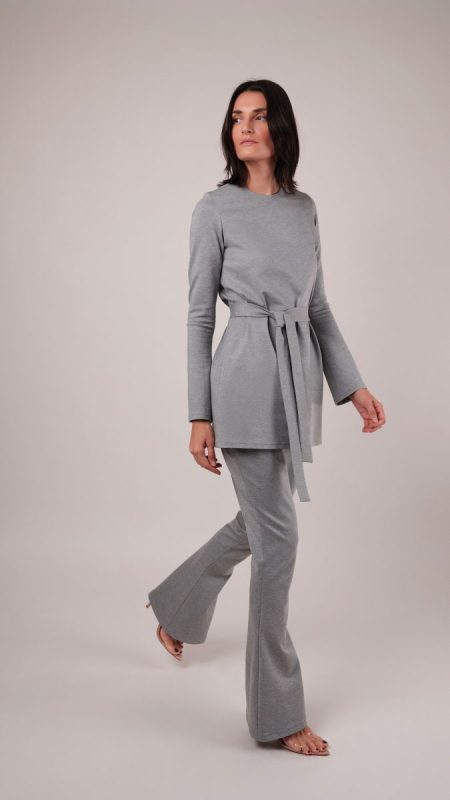
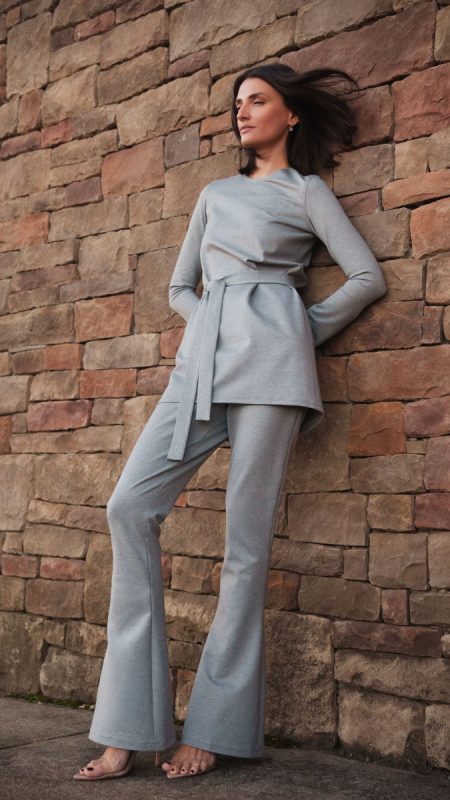
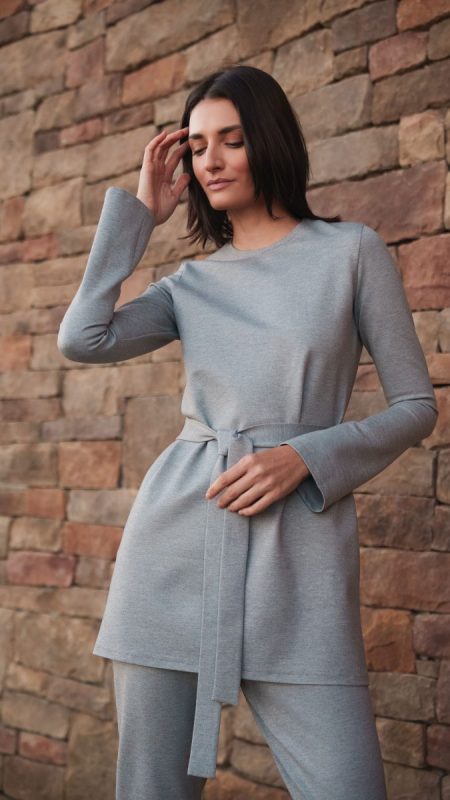
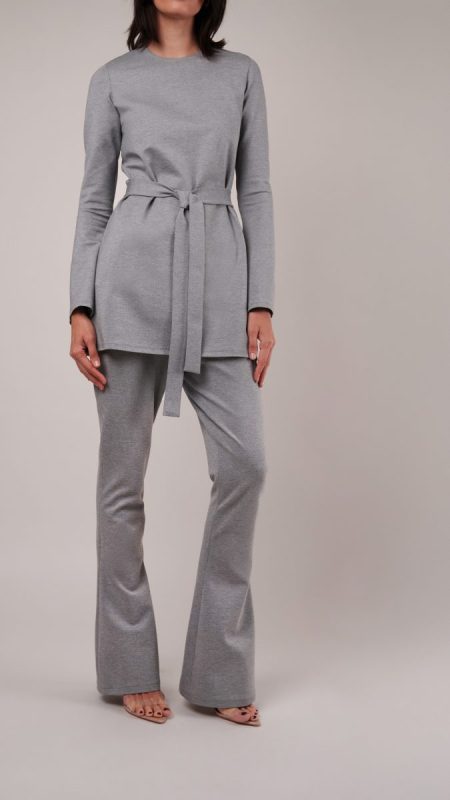
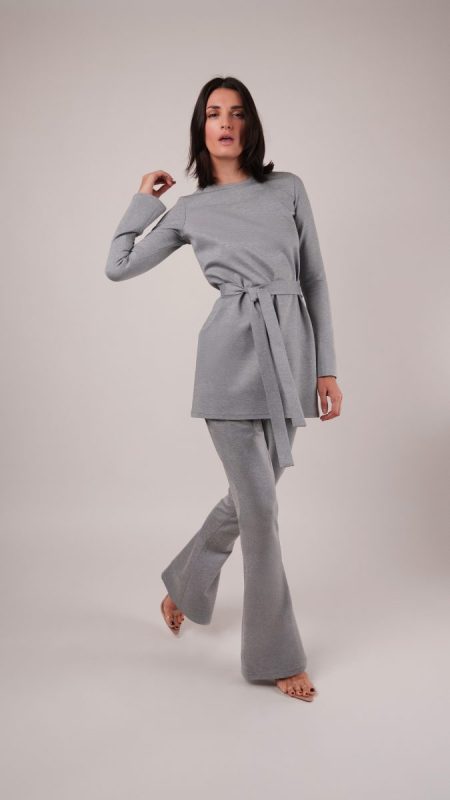
Introducing the Raleigh Loungewear Set free sewing pattern. Made from soft, stretchy Ponte Knit, it is the definition of comfort that looks put together. The long sleeve top features a figure flattering fit with a matching belt, while the slightly flared pants add just the right amount of movement. Together, they strike that balance between cozy and polished that everyone is always searching for.
This loungewear set is designed for simplicity. Even if you are brand new to sewing, the pieces come together quickly and easily, with clean lines that look as if they were made by a professional. It is the kind of project that delivers instant gratification because you can sew it in an afternoon and wear it out the next day.
From lounging at home to stepping out for coffee, the Raleigh Loungewear Set makes getting dressed feel like the easiest part of your day.

Essential Materials & Sizing Guide for the Raleigh Loungewear Set
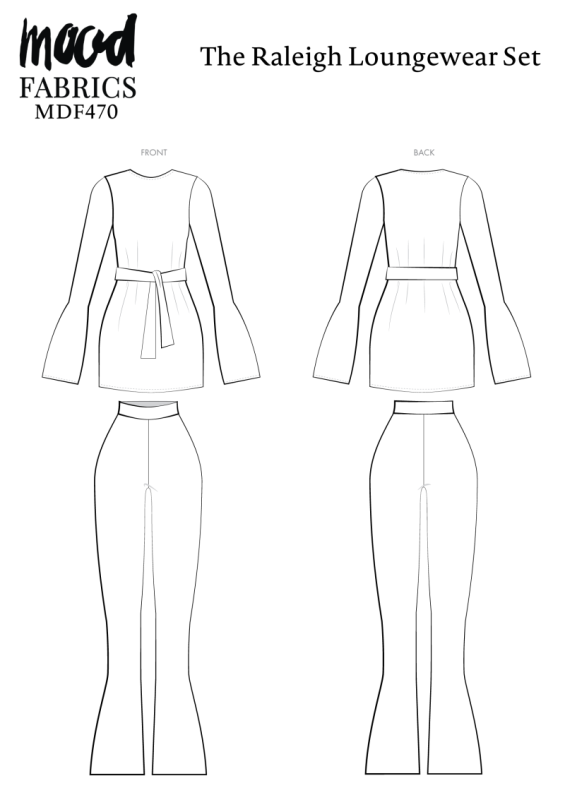
Continue reading for a breakdown of what knowledge and materials you need for creating your very own loungewear! We’ve got you covered with the recommended materials we used—if you want to follow along exactly—as well as a curated list of alternative fabric type recommendations if you want to customize your own version. The Raleigh Loungewear Set free sewing pattern download includes technical drawings for seam and silhouette visibility, plus a size chart to help you find your perfect fit!
Purchase Products Used Below:
Quantities indicated are for sewing a size small loungewear set. Toggle the ‘SHOP THIS LOOK’ box to find quantity estimates for other sizes.
- 4 yards of Stretch Ponte Knit – Light Heathered Gray – Papilio Collection
- 4 each of Maxi-Lock Serger Thread 3000yds – Steel
- 1 each of Gutermann Sew All Thread 100m – 110 Slate
- MDF470 – Raleigh Loungewear Set Sewing Pattern (Free download below!)
Alternative Fabric Type Recommendations:
The Raleigh Loungewear Set sewing pattern is best suited for medium weight stretch knit fashion fabrics. Explore other fabric types or colors from our featured collections for your loungewear set with the links below.
Fabric Collections Used in this Post:
Download Your Free Sewing Pattern
Submit your name and email in the form below to receive the download link for the Raleigh Loungewear Set free sewing pattern directly in your inbox. Mood Sewciety Patterns will send your free download link via email with the subject line: ‘Your Free Download from Mood Sewciety – The Raleigh Loungewear Set’ (in PDF format for A4 and letter-size printing).
© MoodFabrics.com / MoodSewciety.com – Mass production, resale, or distribution of this pattern in any form is strictly prohibited.
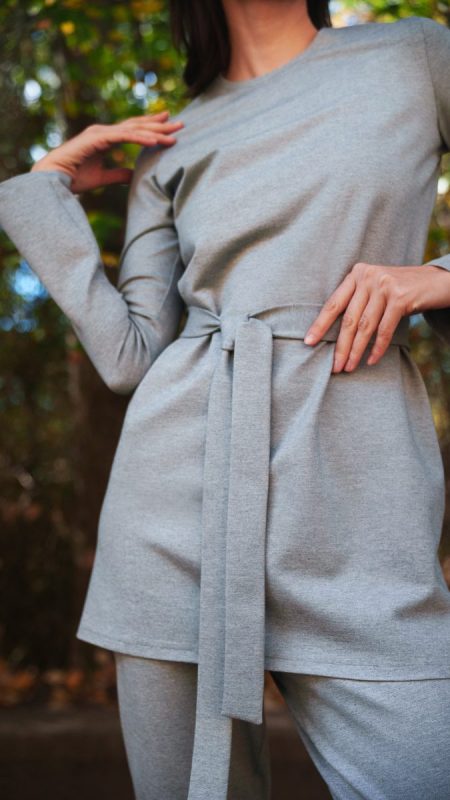
Find Your Perfect Fit
The Raleigh Loungewear Set Sizing Guide is based on the suggested design & wearing ease for this style.* You can also choose the size according to your desired finished garment measurements, blending between sizes as needed.** Measure the printed patterns to make sure the dimensions are according to the desired fitting and adjust if needed before cutting the fabric. For best results, sew a test garment in a similar fabric to adjust your pattern.
Note: Always read all the instructions before cutting the fabric!
*Designed for four-way stretch fabrics (with at least 25% stretch both ways). There is a negative ease due to the stretch of the fabric.
**The pants length for this design is 3″ below the ankle for standard sizes. You can adjust the length according to your preference or needs. To maintain the intended look, reduce 2 inches for petite sizes and add 3 to 5 inches for tall sizes. Length measurements in the chart do not include the waistband.
How to Sew The Raleigh Loungewear Set
The instructions provided below are designed to guide you through sewing the Raleigh Loungewear Set from start to finish.
2 Tips for Sewing with Ponte Knit
⇒ Here’s a secret: you don’t necessarily have to use a stretch stitch when sewing with stretch fabrics. For this set, I used a regular straight stitch with a 1.5 millimeter stitch length and slightly stretched the fabric while I was sewing. This makes it so that the stitches stretch slightly with the fabric.
⇒ When cutting out the pattern, make sure that the direction in which the fabric has the most stretch is oriented horizontally on the body, meaning the pants and shirt shoulder stretch the most from side to side, not from bottom to top.
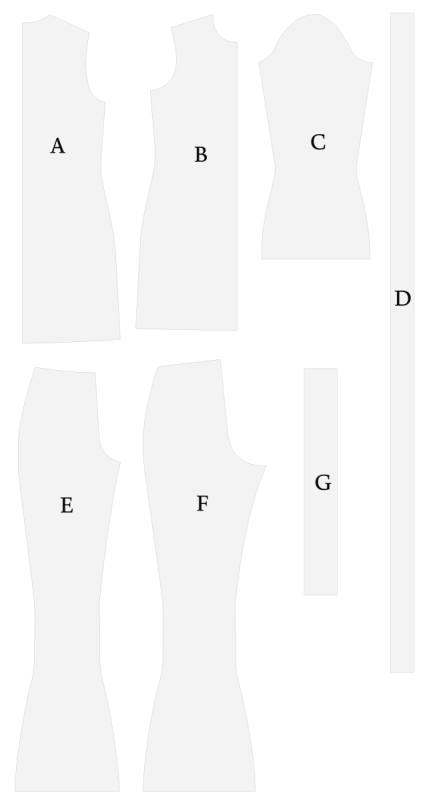
Pattern Pieces & Fabric Cuts Needed
- (A) TOP BACK
- Fabric – Cut 1 on Fold
- (B) TOP FRONT
- Fabric – Cut 1 on Fold
- (C) SLEEVES
- Fabric – Cut 2 Mirrored
- (D) TIE BELT
- Fabric – Cut 2
- (E) PANTS FRONT
- Fabric – Cut 2 Mirrored
- (F) PANTS BACK
- Fabric – Cut 2 Mirrored
- (G) PANTS WAISTBAND
- Fabric – Cut 1
Sew with a 1/2″ seam allowance for all seams unless otherwise specified.
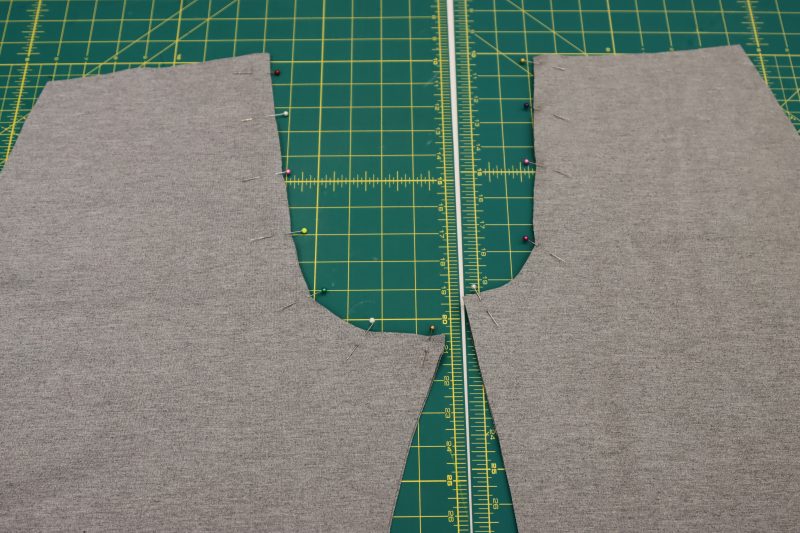
Step 1
CROTCH SEAMS
- Place the front pant pieces right sides together and pin the curved crotch seam.
- Place the back pant pieces right sides together and pin the curved crotch seam.
- Sew both of the curves.
- Open the sewn curve and lay it flat.
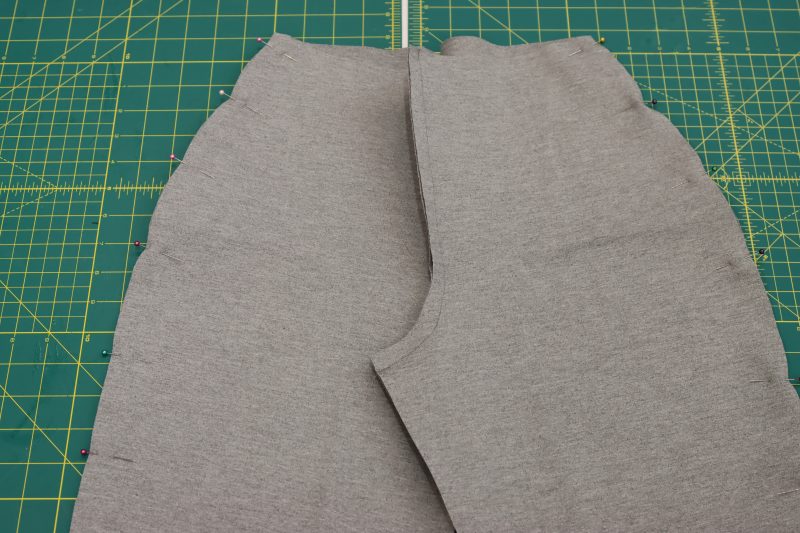
Step 2
SIDE SEAMS
- Line up the side seams of the front and back pant pieces.
- Pin and sew the side seams from the waist to the hem.
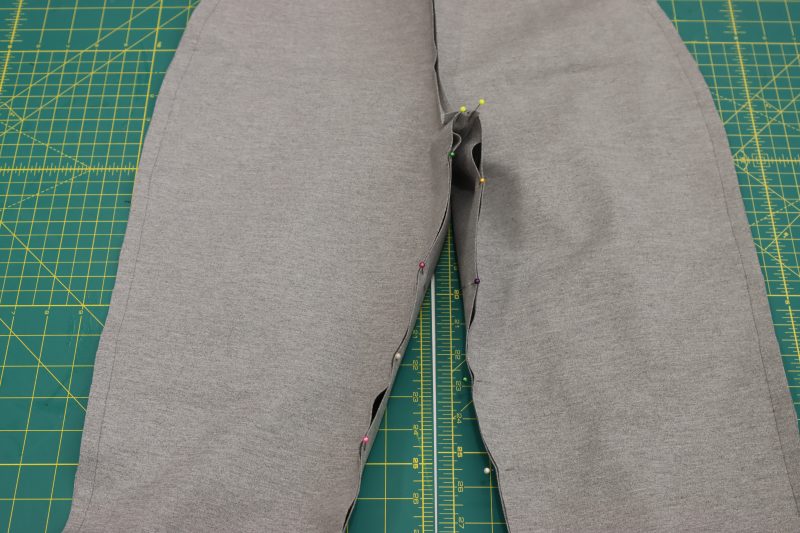
Step 3
INSEAM
- Line up the front and back crotch seams right sides together and place a pin.
- Pin and sew both sides of the inseam.
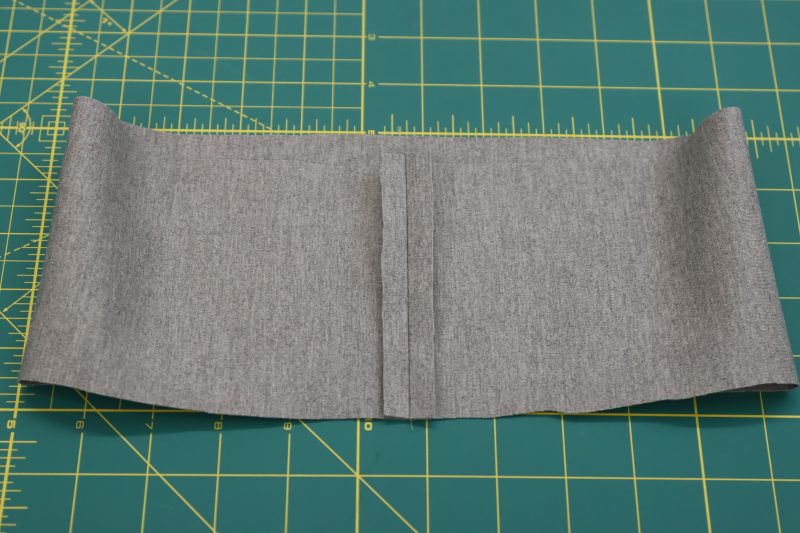
Step 4
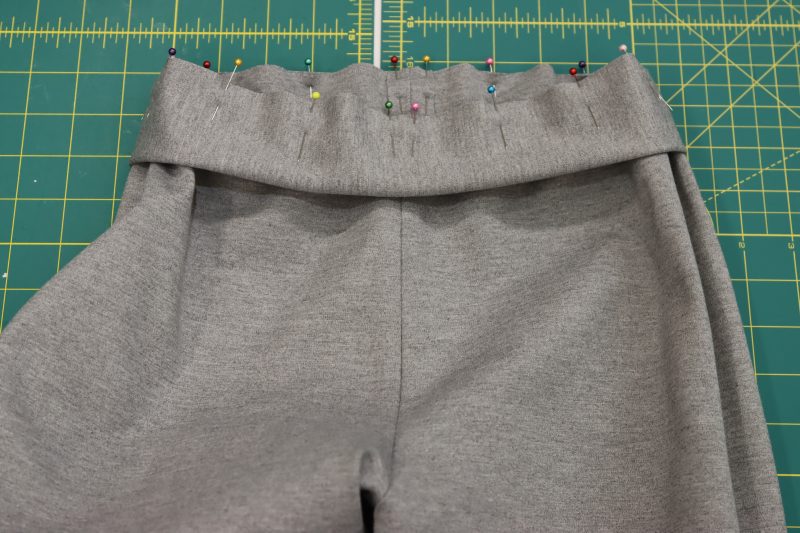
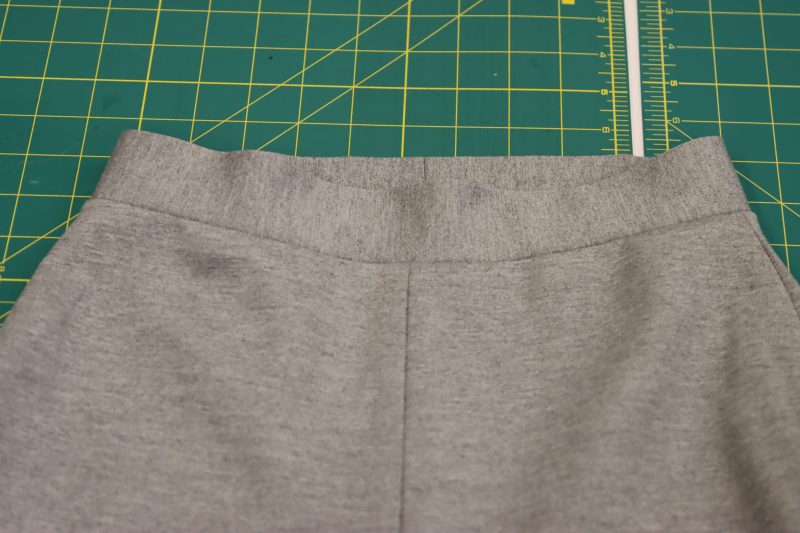
WAISTBAND
- Pin and sew the waistband in half shortways, right sides together.
- Fold the waistband in half longways so that the waistband seam is on the inside.
- Pin the folded waistband evenly around the waistline of the pants, slightly stretching the waistband to be able to fit around the waistline.
- Sew the waistband to the waistline, right sides together, then flip the waistband up so that the folded edge is sticking out on top of the pants.
Step 5
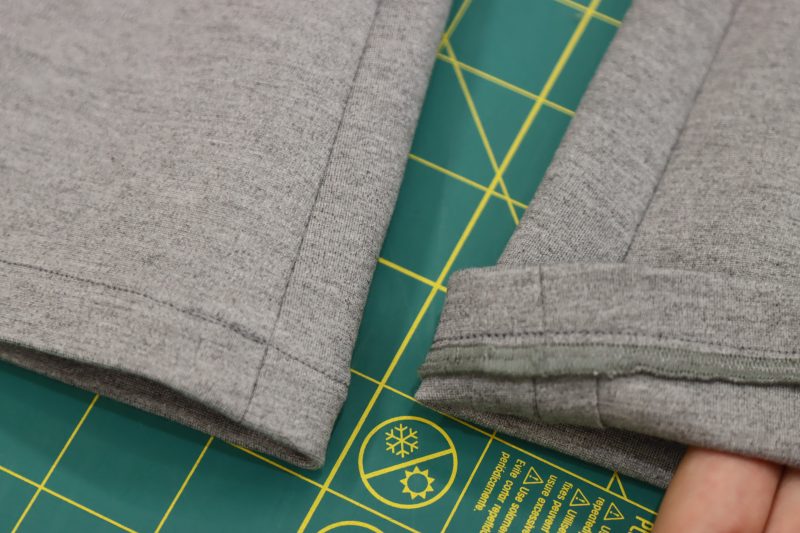
HEM PANTS
- Optionally, you can serge the raw edge of the pant legs before hemming.
- Fold the hem of each pant leg inside of the pants by ½ inch.
- Sew a straight stitch around the folded hem with ⅜ inch seam allowance.
Step 6
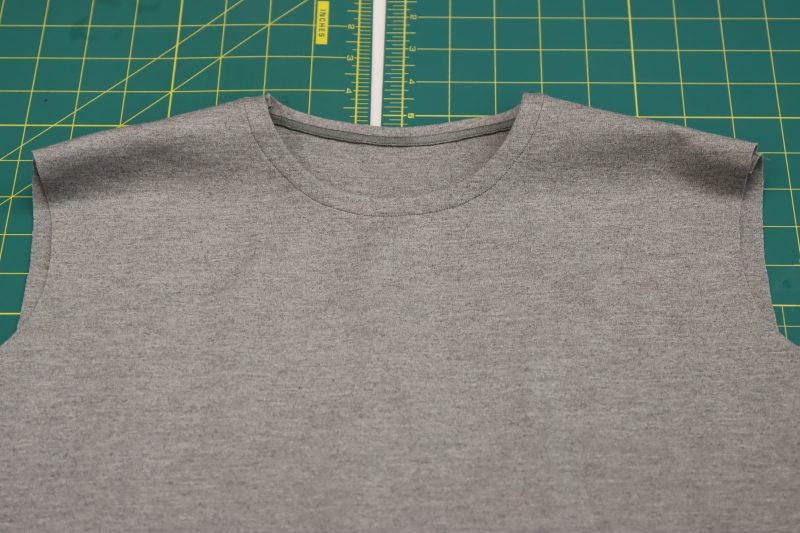
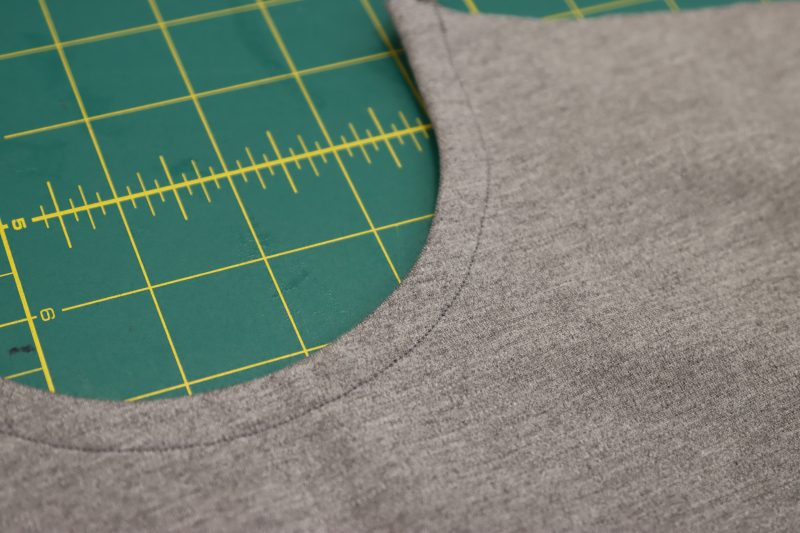
NECKLINE
- Serge the edge of the necklines on the front and back shirt pattern pieces.
- Fold the serged edge in towards the wrong side and pin in place.
- Top stitch the folded neckline down to hide the serged edge.
- Place the front and back shirt pieces right sides together with the shoulders lined up.
- Pin and sew the shoulder seams.

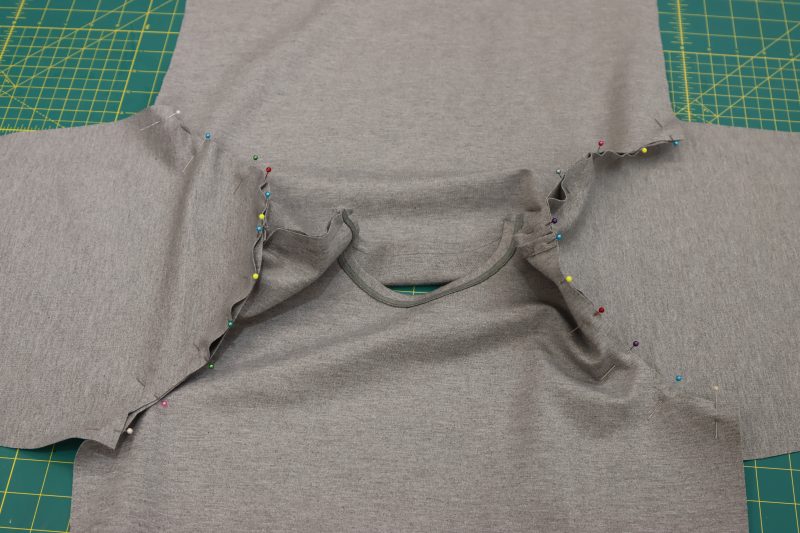
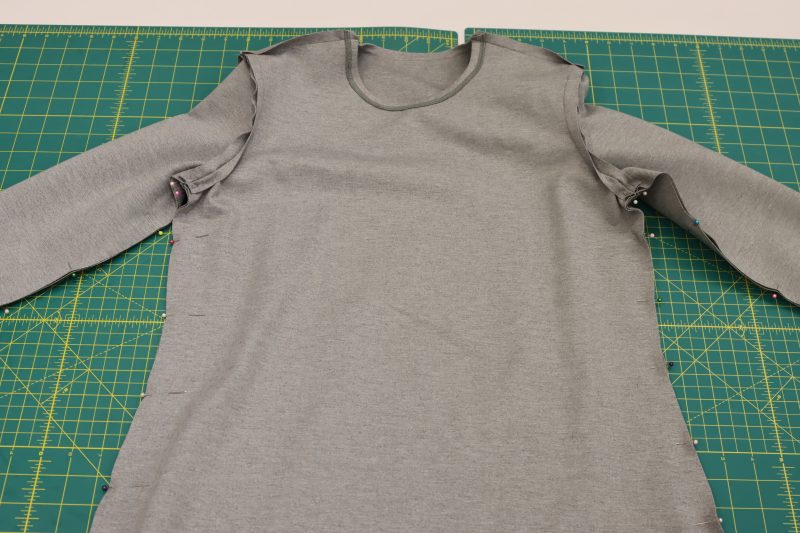
Step 7
SLEEVES
- Open the shoulder seams and lay the shirt piece flat with the right sides of the fabric facing up.
- Pin and sew the sleeve caps to the open armscyes, right sides together, making sure that the part of the sleeve marked “front sleeve” is pinned to the front corner of the armscye.
- Fold the shirt at the shoulder seams again, right sides together.
- Line up the seams under the armpits and place a pin.
- Pin from the wrist to the shirt hem to connect the sleeves and side seams.
- Sew from the wrist to the armpit to the hem of the shirt.
Step 8
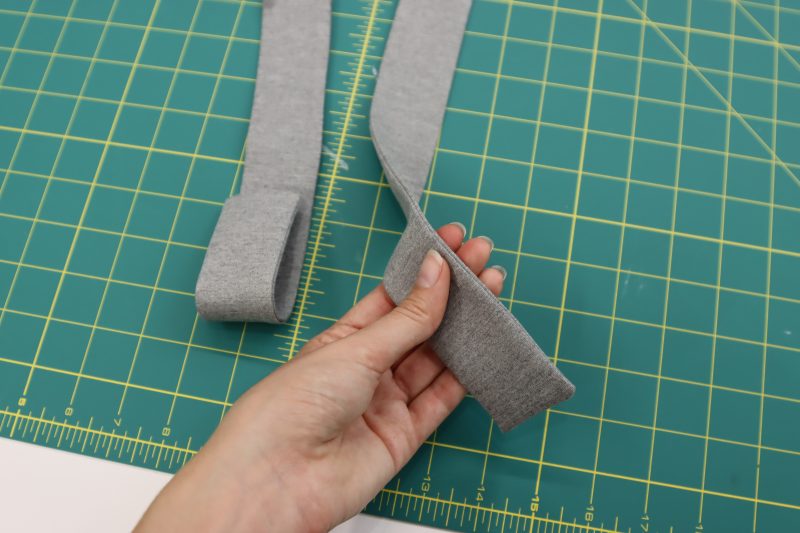
BELT
- Fold the belt piece in half long ways.
- Sew the raw edges of the belt together with ¼ inch seam allowance to create a long tube.
- Turn the tube right sides out and iron the seam flat.
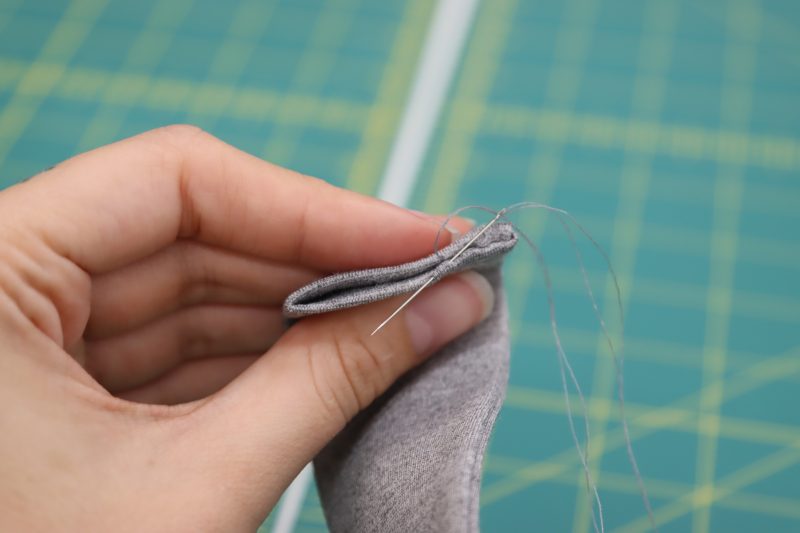
- Fold the open ends of the belt into the inside of the fabric.
- Hand sew the ends of the belt shut with a ladder stitch.
Step 9
HEM TOP
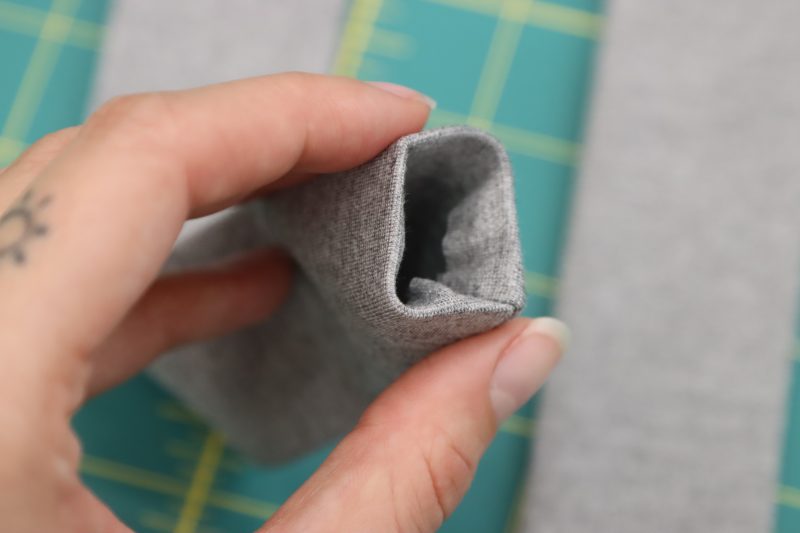
- The same way that the pants were hemmed in step 5, create a ½ inch folded hem on the bottom and sleeves of the shirt.
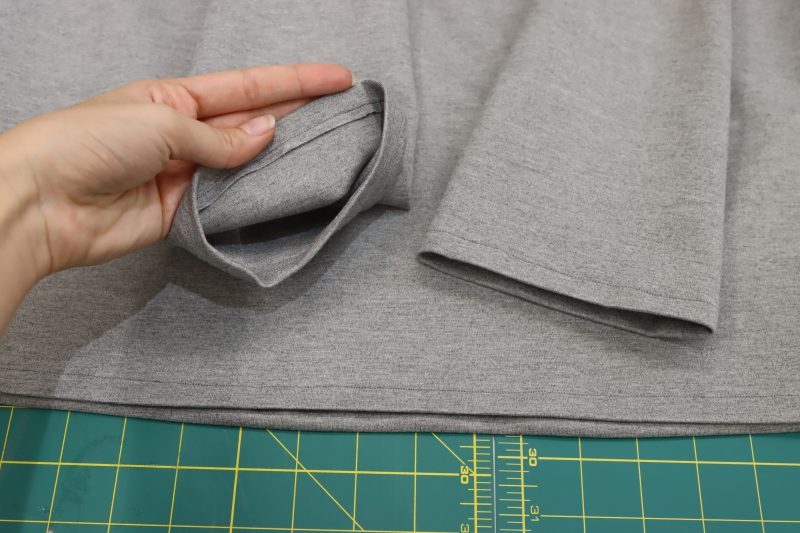
Sewing Success: The Finished Raleigh Loungewear Set
Share this post with a friend (or two!), download the Raleigh Loungewear Set free sewing pattern, and show us which fabrics and colors you choose, using the hashtags #MoodRaleighPattern & #MadeWithMood—and don’t forget to tag us @MoodFabrics, too.

Free Sewing Pattern Inspiration for Your Next Project
With 450+ free sewing patterns and counting, your opportunities for sewing with Mood are endless!
We hope you had as much fun sewing this loungewear set pattern as we did! As always, we want to hear from you—share your thoughts and comments below and let us know where you’ll be wearing the Raleigh Loungewear Set free sewing pattern!
Me encantan todos los patrones, eres una máquina
Wow! I love the lines on this set. Thanks for posting!
Loungewear? Oh no., I’m wearing this to work for sure!
wow beautiful gorgeous