
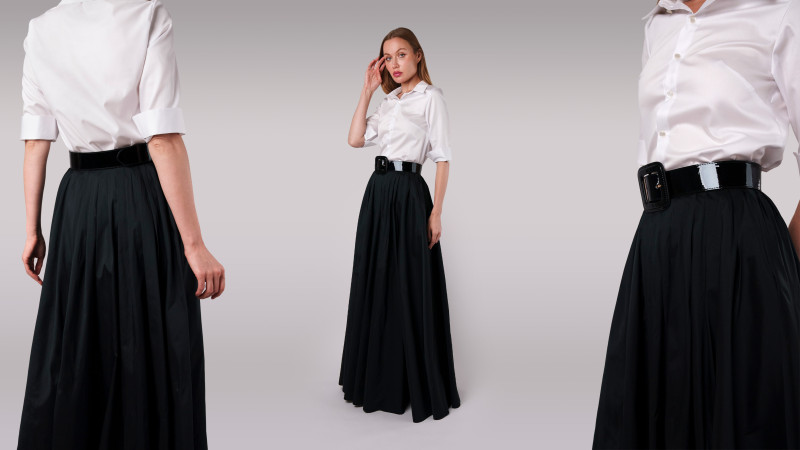
Transform your fabric into fashion with The Bristol Button-Up and The Faye Floor-Grazing Skirt Free Sewing Patterns!
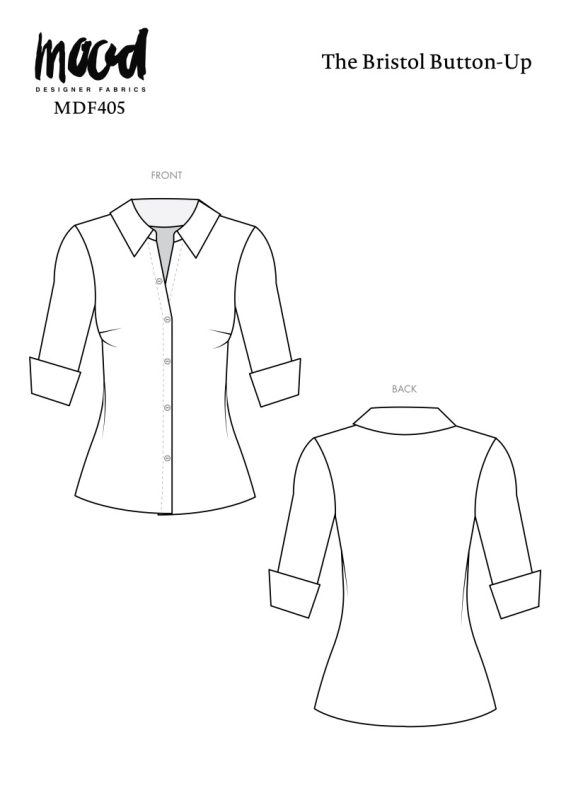
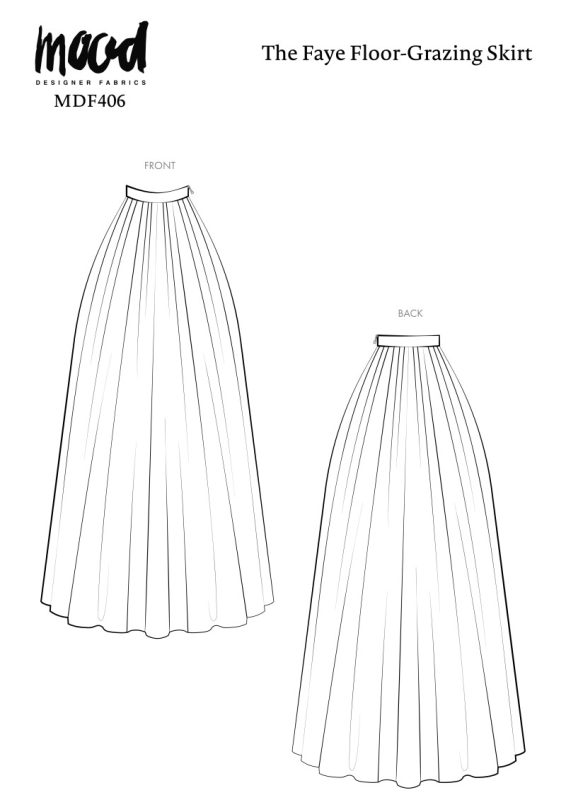
The Bristol Button-Up, made from soft and breathable Egyptian cotton shirting, showcases a tailored fit with a crisp collar and three-quarter sleeves, all brought together with beautiful pearlescent buttons. The Faye Floor-Grazing Skirt, made from a delightful polyester taffeta, is a show-stopper with its fully pleated design, floor length, and side seam invisible zipper.
The world of handmade fashion is vast, and with each new piece, your confidence and creativity will continue to grow. The Bristol-Button Up and The Faye Floor-Grazing Skirt are just the beginning of what you can achieve, so keep exploring, keep sewing, and keep expressing your unique style through every stitch!


Purchase Products Used Below:
- 2 yards of Egyptian Cotton Shirting – Optic White – Giza Collection
- 0.5 yard of Crisp Non-Woven Fusible Interlining, Single Sided by Theory – White
- 7 each of Vintage Ivory Pearlescent Flat Shank Back Plastic Button – 18L/11.5mm
- 6 yards of Polyester Taffeta – Plain Dyed Black – Bellamy Collection
- 0.5 yard of Heavy Soft Woven Fusible Interlining Single Side – Black
- 1 each of 580 Black Invisible Zipper – 9″
- MDF405 & MDF406 – The Bristol Button-up and The Faye Floor-Grazing Skirt Sewing Pattern (Free download below!)
Alternative Recommended Fabrics:
How To Sew The Bristol Button-Up Free Sewing Pattern:
*Use a 1/2″ seam allowance for all seams unless otherwise specified.
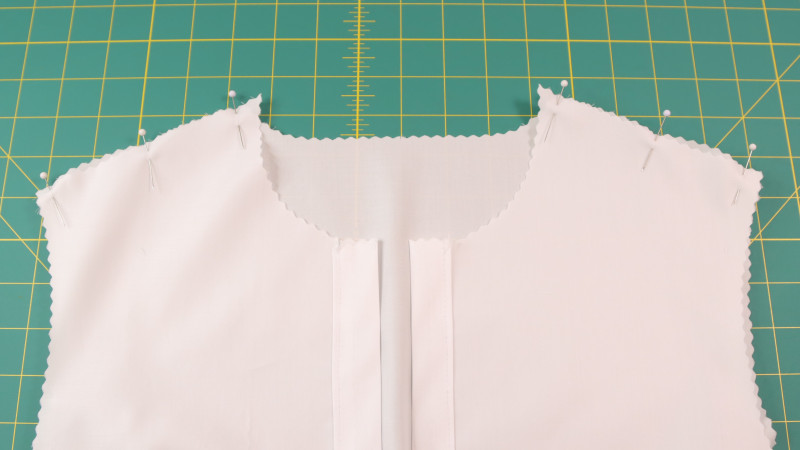
Step 1
Sew the front plackets and the front darts, then sew front and back together at the shoulder seams.
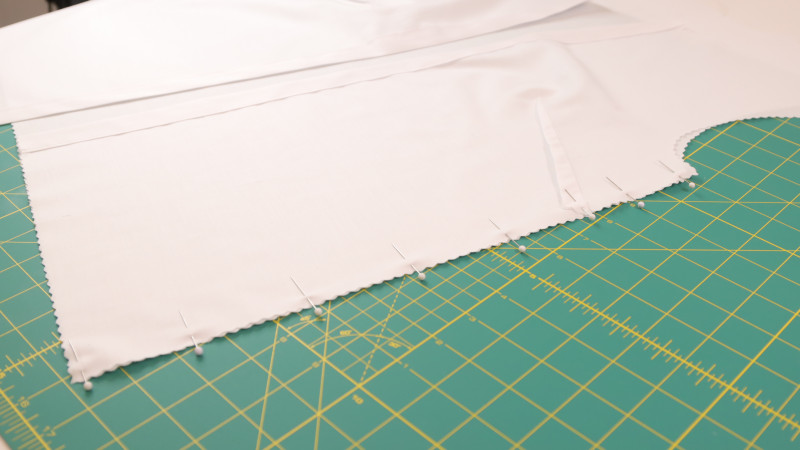
Step 2
Sew front and back at the side seams.
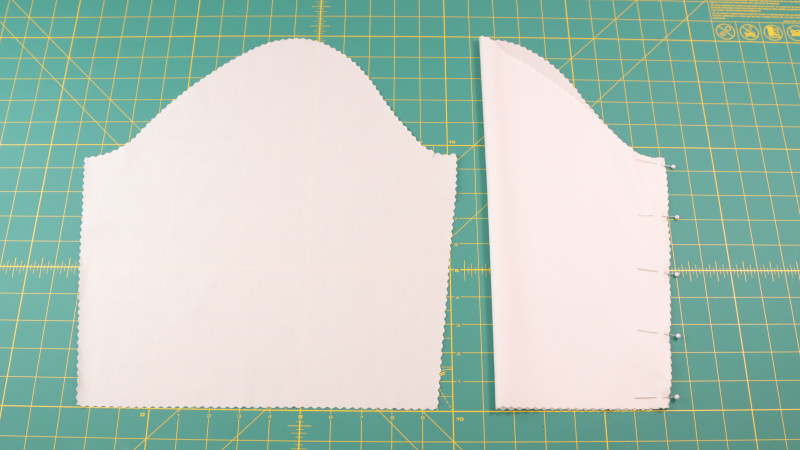
Step 3
Sew a basting stitch along the top of the sleeve cap, then sew the inseam of the sleeve.
Step 4
Slightly gather the sleeve cap to set in the sleeve, then sew around the armhole.
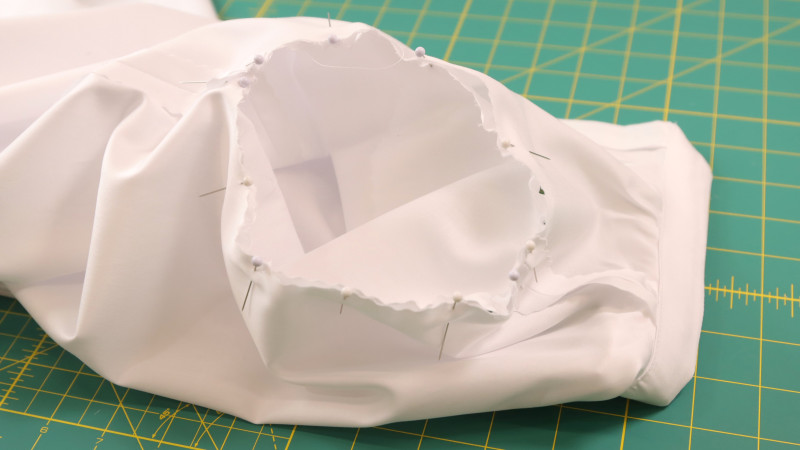
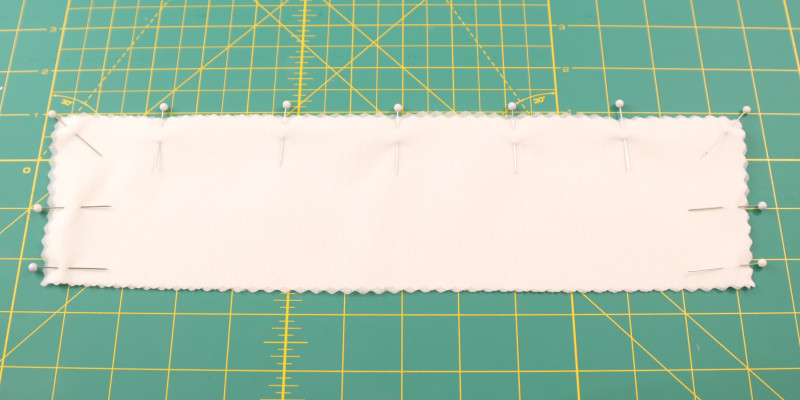
Step 5
Apply fusible interlining to the cuffs, then sew both pieces together around the sides and across the top.
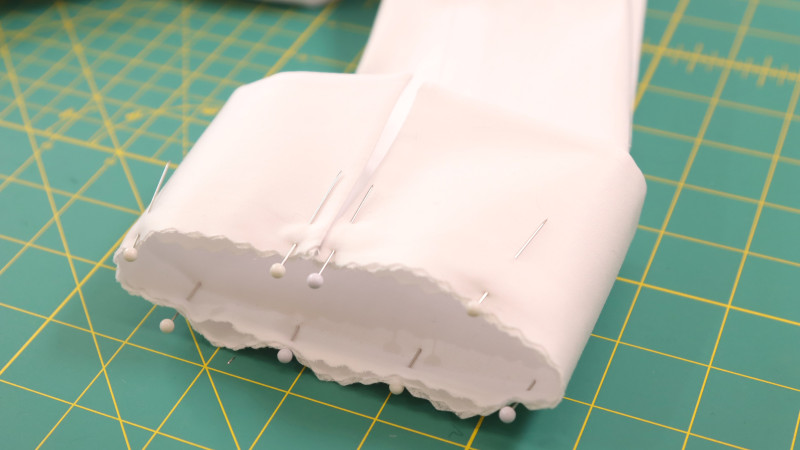
Step 6
Align the slit with the inseam of the sleeve, then sew the cuff around the sleeve.
Step 7
Apply fusible interlining to the collar, then sew both pieces together around the sides and across the top.
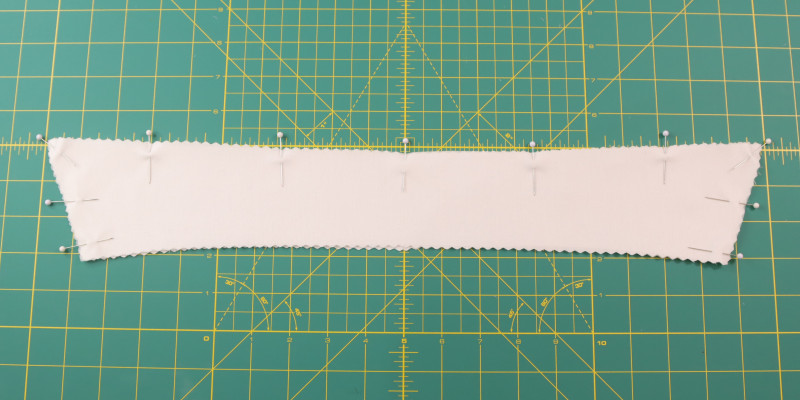
Step 8
Apply fusible interlining to the collar band, then sew the pieces together with the collar sandwiched in between.
Step 9
Sew one side of the collar band to the outside of the neckline.
Step 10
Turn the other side of collar band to the inside of the neckline, then stitch-in-the-ditch from the outside.
Step 11
Sew the buttons and buttonholes to the front plackets.

How To Sew The Faye Floor-Grazing Skirt Free Sewing Pattern:
*Use a 1/2″ seam allowance for all seams unless otherwise specified.
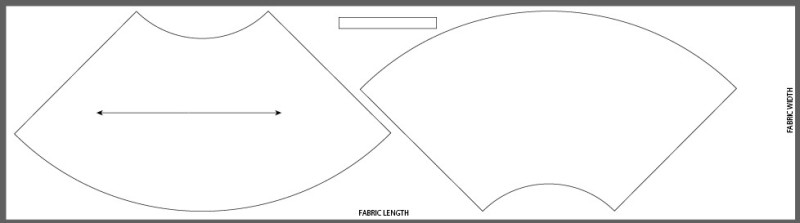
CUTTING LAYOUT
Step 1
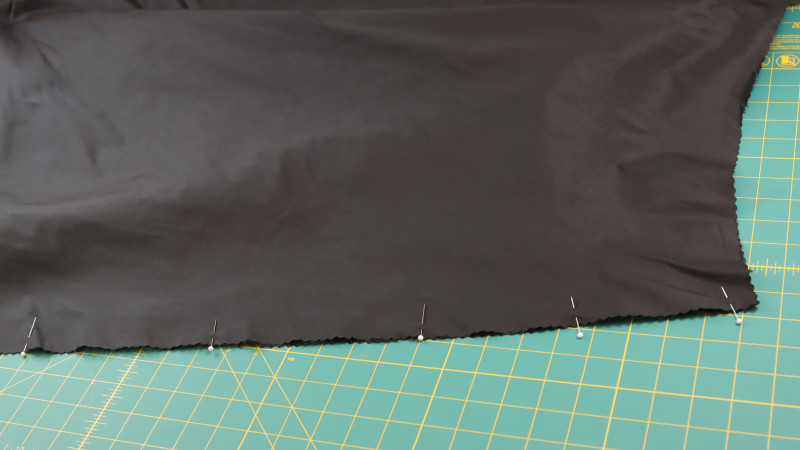
Sew front and back together at one of the side seams, leaving the other side open for the zipper.
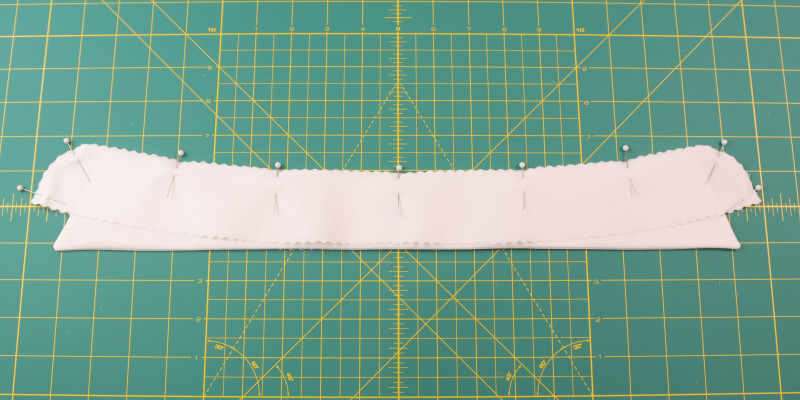
Step 2
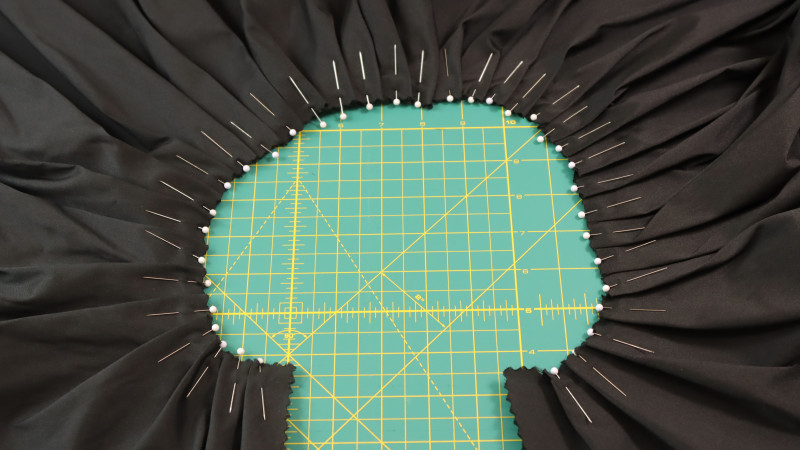
Create continuous pleats around the waistline to match the length of the waistband.
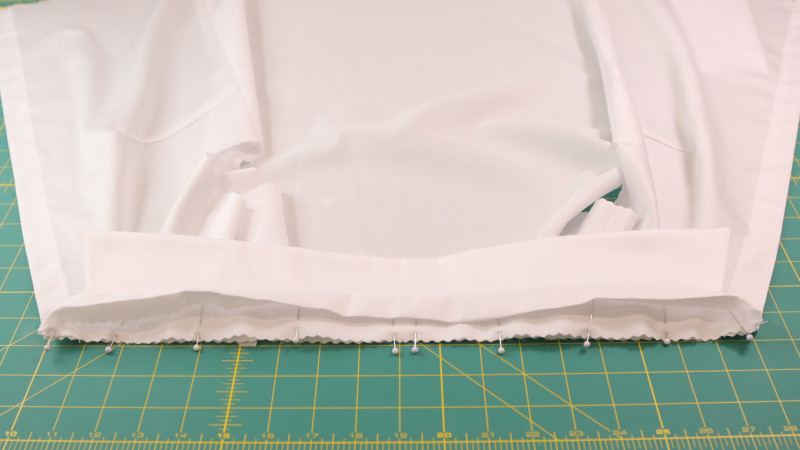
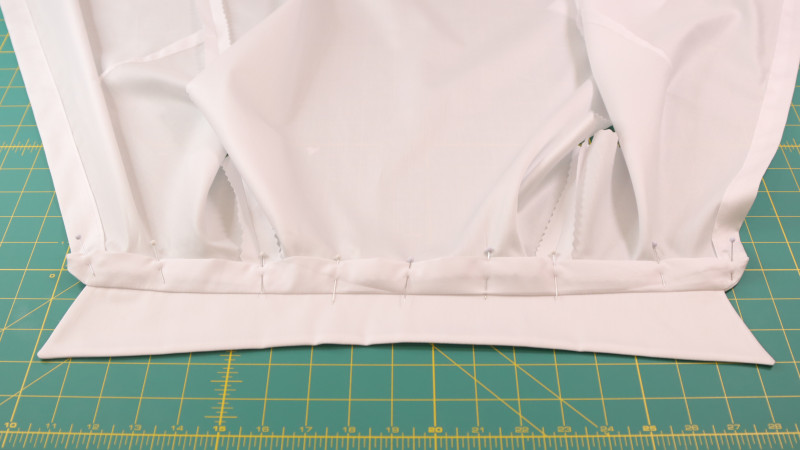
Step 3
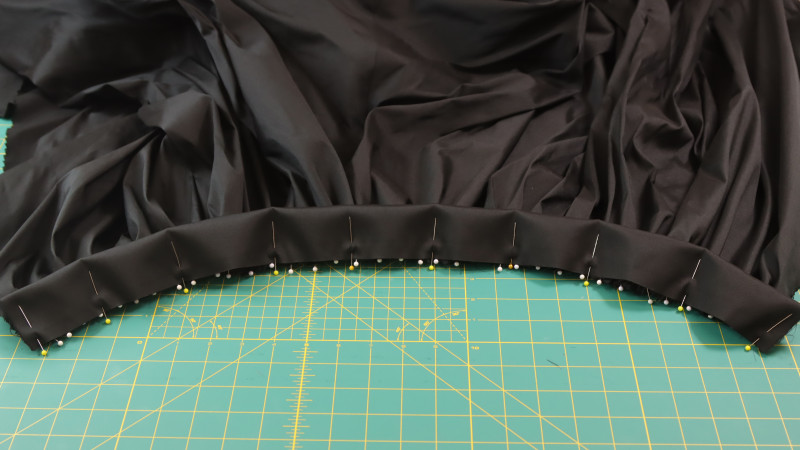
Apply fusible interlining to the waistband, then sew along the waistline with the pleats in place.
Step 4
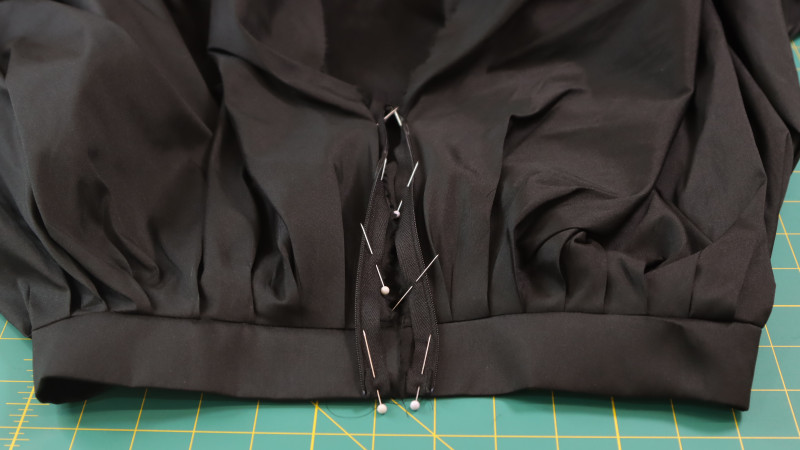
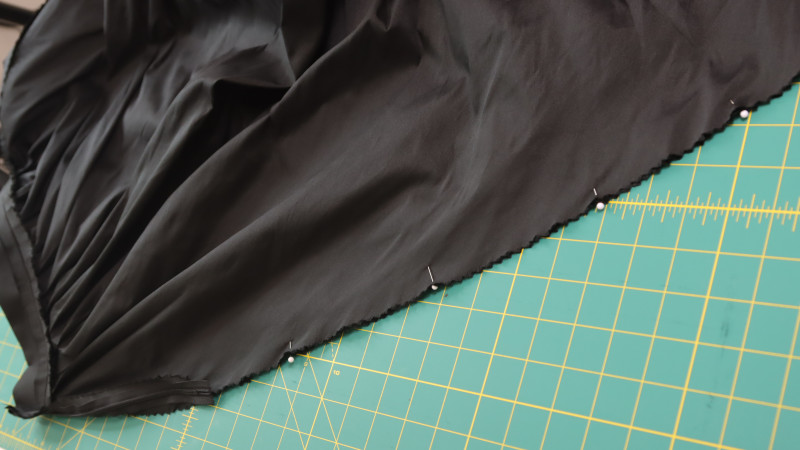
Apply and sew the invisible zipper to the open side seam.
Step 5
Sew the rest of the side seam below the zipper, then hem across the bottom edge.
The Bristol Button-Up and The Faye Floor-Grazing Skirt Free Sewing Patterns by Mood Fabrics

Feel free to share your completed button up and floor-grazing skirt patterns on social media to inspire others and showcase your hard work!
Share this post with a friend (or two!), download The Bristol Button-Up and The Faye Floor-Grazing Skirt Free Sewing Pattern, and show us which fabrics and colors you choose, using the hashtags #MoodBristolPattern, #MoodFayePattern & #MadeWithMood.
Thank you. Love your work. Thanks for the freebie MOOD!
The placement of the bust darts seems odd to me. Did you intend for the darts to go over the top of the breast like that.?
The knife pleats on the skirt are great.
Yes, thank you.
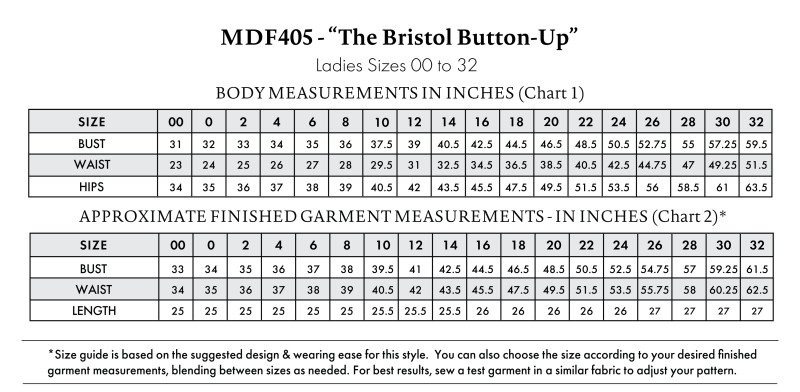
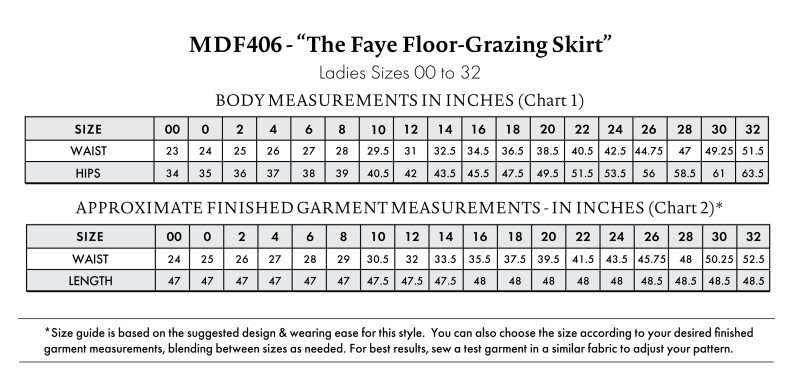
Hi, is there a chart for the fabric requirements/suggested cutting layouts for each size? Can’t find on this post or the pattern download. I am trying to make Bristol shirt in size 14. Thank you!
Hello, a size 14 will require 2 yards of fabric. You can find a chart on this post that says “shop this look” which will calculate the materials needed for every size.
Thank you so much! Excited to make this beautiful outfit!
Qual o tamanho de cada prega para a saia? Não tem isso no molde.
A medida depende do tamanho, você pode calcular a largura das suas placas com a seguinte fórmula:
Largura da prancha = medida da cintura (incluindo SA) / número de pranchas que você deseja.
Exemplo:
Largura da prega para o tamanho 6 = 28/35 (28 é a medida da cintura para o tamanho 6, 35 é o número de pregas que fizemos para o tamanho 4, como referência você pode usar o mesmo número)
= 0,8
Então cada placa já estará 0,8″ dobrada.
Você também pode prender as pontas do cós às pontas da saia e fazer pregas de aproximadamente 2,5 cm e ajustá-las até que a saia plissada fique do mesmo tamanho do cós.
Thank you! Beautiful combination for fall/winter season.
Lovely patterns. Thank you very much!
I’m confused. How do I figure how many yards of fabric I need? I’m a size 26 but I see things saying I need 1 yrad of fabric.
Hello, you can toggle the ‘SHOP THIS LOOK’ box to find quantities for other sizes. As you change the size, the yardage amount also changes accordingly. A size 26 will require 4 yards.
Awesome I love blouses like this with stiff collar and cuffs with a softer body.. very elegant. Thank you
Hi!! Lovely patterns, I am about to delve head-first into sewing this combo 😀
I am wondering though, the “Shop this look”-window is telling me my size skirt requires 4 yds of fabric, but the pattern image says 6 yds (which no size gets at “shop this look”). Will 4 yds be enough for a size 12 or should I go for 6 yds?
Hello, you will be needing 6 yards to make a size 12.
Love this look! Ordered the suggested materials package. This outfit is so sophisticated and just in time for the holidays!
Thank you, Mood for offering free patterns!
Just finished the blouse. Love the style but wish I had gone up a size for a looser fit. It’s been quite a few years since I’ve sewn, so the directions were a bit sparse for me. I used video on You Tube for instructions on the collar and stand. Thanks for the freebie.
Nice day
These designs are just perfect for creating stylish outfits for any occasion. The button-up has that classic vibe, while the floor-grazing skirt adds such elegance and flow. I can’t wait to use some beautiful cotton fabrics, which are so important in the cotton export industry, to make these pieces truly special. I’m excited to try these patterns and mix and match different fabrics. Happy sewing, everyone!
I would like to make this up in gold stretch satin(repurposed from a dress, made, but never worn.) what kind of fusible interlining/interfacing should be used?
Thanks in advance,
Susan
Heavy Woven Fusible Interlining
I am making the Faye skirt and I am having a difficult time cutting the fabric. If I am folding the fabric in half with salvage sides together with the grain running up and down, how do I have enough material to cut the skirt on the fold? Or am I just cutting 2 pieces (front and back) without cutting on the fold?
For circle and circle-based skirts, you can place the patterns perpendicular to the grainline if the fabric is not wide enough to cut them parallel to the grainline. We have now added a diagram of the cutting layout to the post.
Hi! I love this look but prefer natural fibers opposed to synthetic. To help me choose one, could you give more details about the flow and drape of the skirt? Is it silky and light, or more stiff with a crisper feel?
Hello! This skirt was sewn with Polyester Taffeta, which is crisp, thin, and lightweight with a voluminous drape.
Is there anyway to make the sleeves full length?
Hello, you can use pattern paper to extend the length at the bottom of the sleeve pattern. Make sure to add an extra 1/2″ seam allowance to attach the cuff.
This skirt is amazing, I’m just a little sad that it doesn’t have pockets. I’ll add some, I don’t know how yet as a beginner. But it’s worth it.
Thank you very much! Here is a tutorial on how to add pockets to any garment.
I love everything about the top and the skirt. Thank you for making such a beautiful outfit.
Hi! Would you say this skirt is too advanced for a complete sewing beginner? Thanks in advance for your response!
This is a good beginner project! There are some challenging parts like the collar of the shirt and the zipper on the skirt, but I think it’s pretty beginner friendly.
I’m just finishing the skirt and finished the shirt yesterday. and it has been a wonderful two days of sewing. This is such a great project, and I ended up with two pieces of gorgeous clothing. Definitely something to wear on days I need to feel fancy. Thank you for providing such wonderful outlets for creativity.